My wife is the baker in the family. Dad may cook dinner, but Mom does the baking. Grilled pizza is a team effort - we get everyone involved. Mom makes the dough while I make the sauce and dice the toppings, then the kids top the pizzas while I grill them.
My wife is at a conference this week, and the kids are asking for pizza. It's time to face my baking fears and figure out pizza dough.
Of course, I have to tinker with the dough while work on it. Shhh…Don't tell Diane.
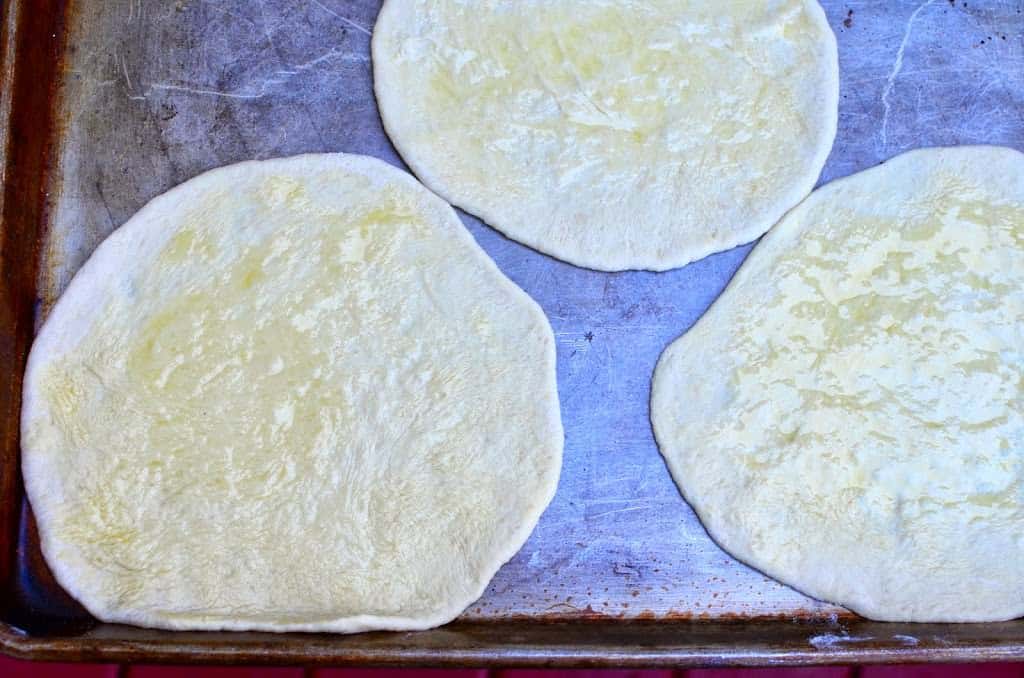
My dough is based on Michael Ruhlman's 5:3 flour/water ratio, kneaded in the food processor. The food processor makes quick work of pizza dough - 30 seconds and the dough is formed into a rough ball. The dough gets a little hand kneading, then rests for an hour. I prefer working with smaller pizzas on the grill - about 8 inches across - so I divide the dough into eight mini pizzas, and roll them out. Or, should I say, try to roll them out. This is where my weakness as a baker shows; I get flour over everything, and the pizzas come out shaped like amoebas. That's OK - they'll taste fine.
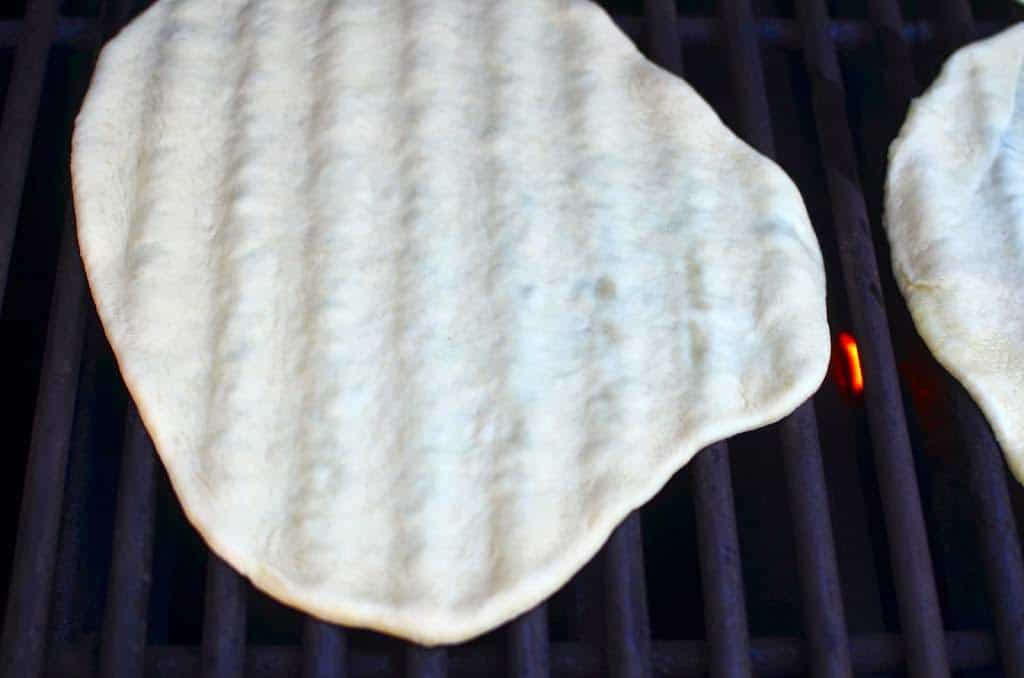
Some of you are saying "Wait, wait, wait. Pizza? On the grill? How? Why?" The trick is to bake one side of the pizza round over direct heat, to firm it up. Then, the pizzas come off the grill, get topped with whatever toppings you like, and go back on the grill over indirect heat to finish cooking and melt the cheese.
Why? The crust comes out crispy and golden, the kids love having their own pizzas, topped the way they want them, and I get to cook on the grill. Everybody wins.
The pizza goes right on the grate?
Yes, the pizzas go straight on the grill grate. You have to lay them on carefully, and they'll probably get (more) amoeba like as you do, but once they bake on the first side they firm up, lift off the grill easily with a spatula, and are easy to work with.
What about (fill in fancy pizza insert here)
I have Weber's pizza stone, but I don't like it - I'd rather work on the bare grill grate. The stone heats up, but the air in the grill cools down whenever you open the lid. And, I can only cook one pizza at a time; I can do two at a time on my kettle grill, or four at a time on my massive Weber Summit. I've read about the fancy add-ons for kettle grills that turn them into wood fired pizza ovens - see this one from Kenji Alt at Serious Eats, and this one from Charlie at the Cooking Animal. These rigs look fabulous, but they are duplicating a pizza oven, not grilled pizza. They are two different styles of pizza, and I like grilled pizza just fine.
Recipe: Grilled Pizza with Egg and Pepperoni
Adapted from:
Mark Bittman: Pizza on the grill
Michael Ruhlman: Pizza dough ratio
Cooking time: 120 minutes, including dough rising and shaping.
Equipment:
- Grill (I love the extra space on my Weber Summit for pizza, but you can cook pizzas on anything Weber Kettle sized or larger.)
- Food Processor (11 cup or larger)
Ingredients
Pizza Dough
- 4 ½ cups ( 20 ounces / 567 grams) bread flour (or all purpose flour), plus extra for sprinkling
- 1 envelope (2 ¼ teaspoons / ¼ ounce / 7 grams) instant yeast
- 1 ½ teaspoons ( ⅓ ounce / 9 grams ) table salt
- 2 tablespoons (1 ounce / 30 ml) olive oil
- 1 ½ cups ( 12 ounces / 340 ml ) water
Pizza Sauce
- 1 tablespoon olive oil
- 1 clove garlic, minced
- 14.5 ounce can tomato sauce
- 1 sprig fresh oregano (or ½ teaspoon dried oregano)
- 1 sprig fresh basil (or ½ teaspoon dried basil)
Toppings
- Olive oil for brushing the dough
- Pepperoni
- 12 ounces shredded mozzarella
- 2 ounces shredded Parmesan
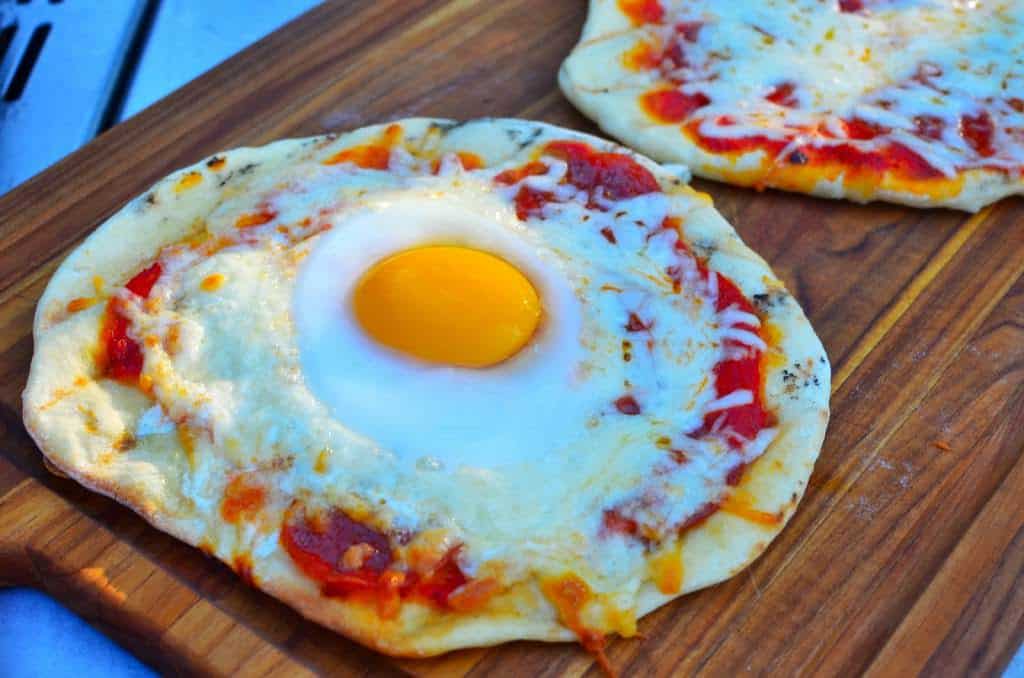
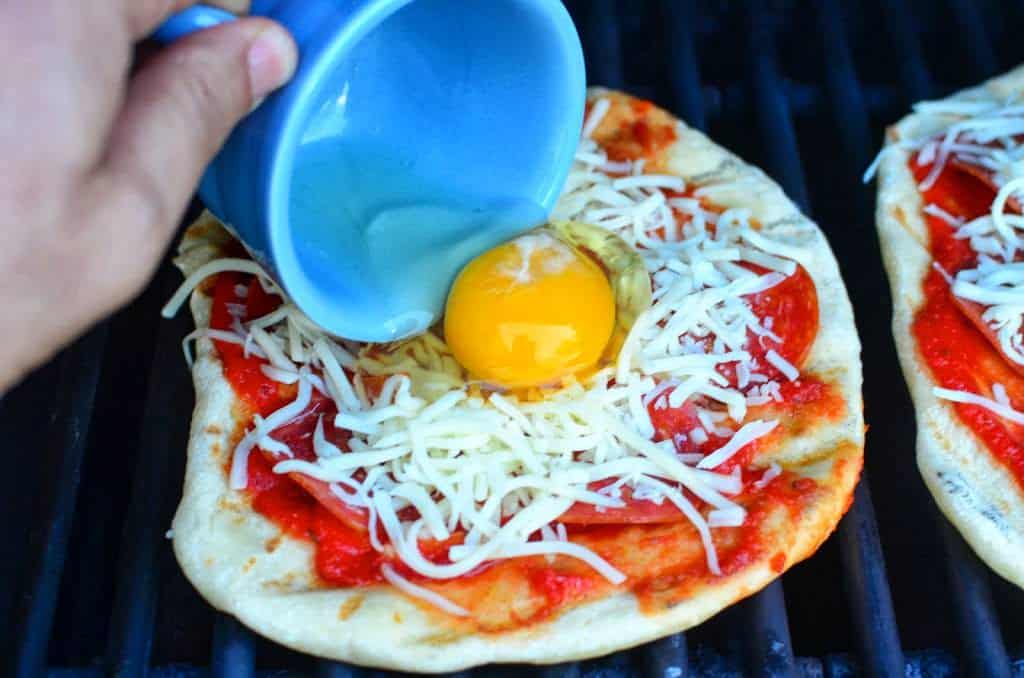
- Eggs (each egg cracked into a teacup - it should go on the pizza after it's on the grill), optional
Directions
1. Knead the pizza dough in the food processor
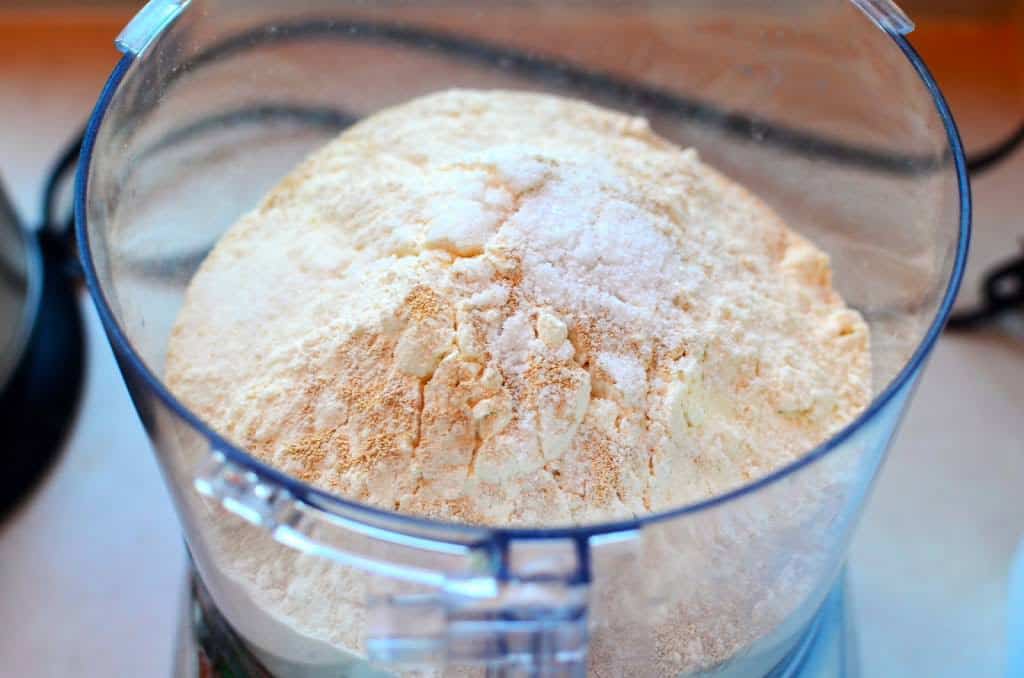
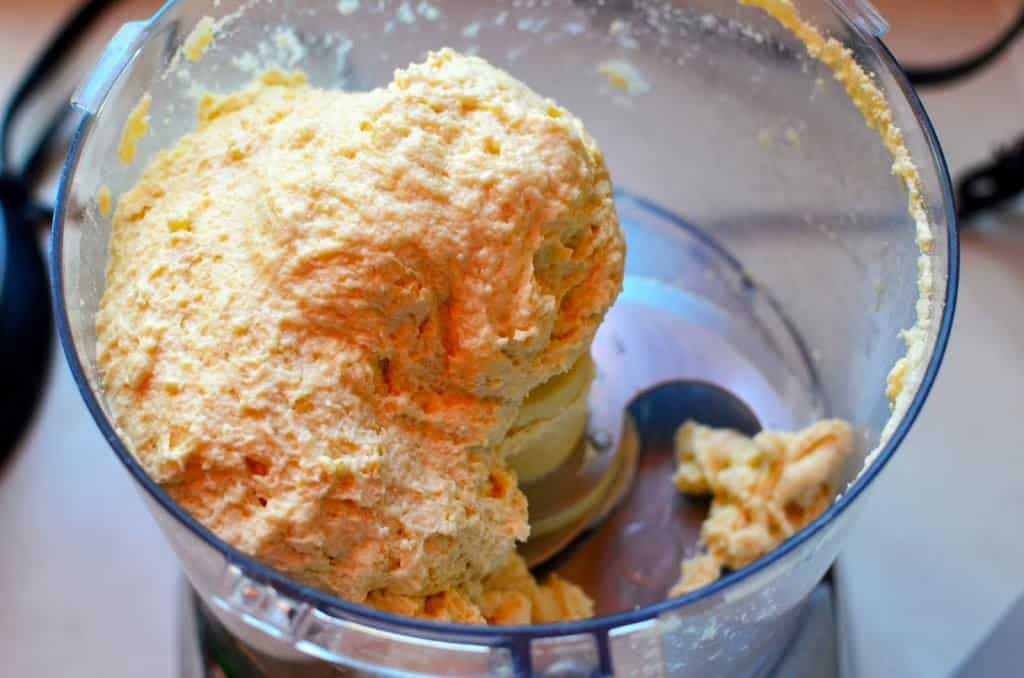
Put the flour, yeast, and salt in the food processor, and pulse a couple of times to mix them. Turn the food processor on, and slowly pour the olive oil and water through the feed tube. Process until the dough forms a wet ball, about 30 seconds.
 |
 |
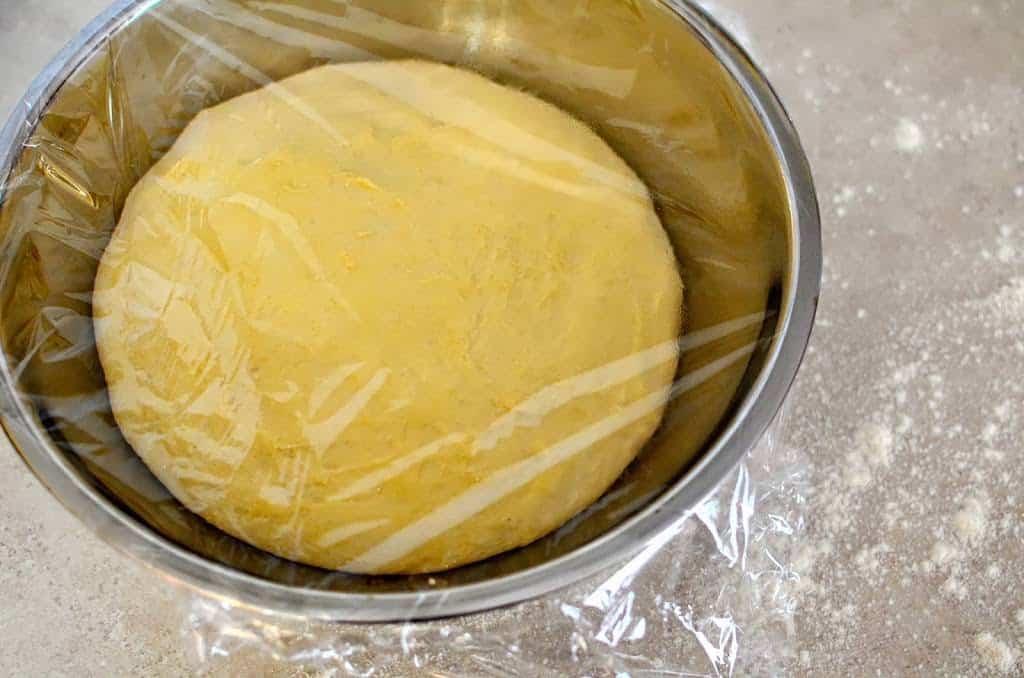
2. Form a dough ball and rest the dough
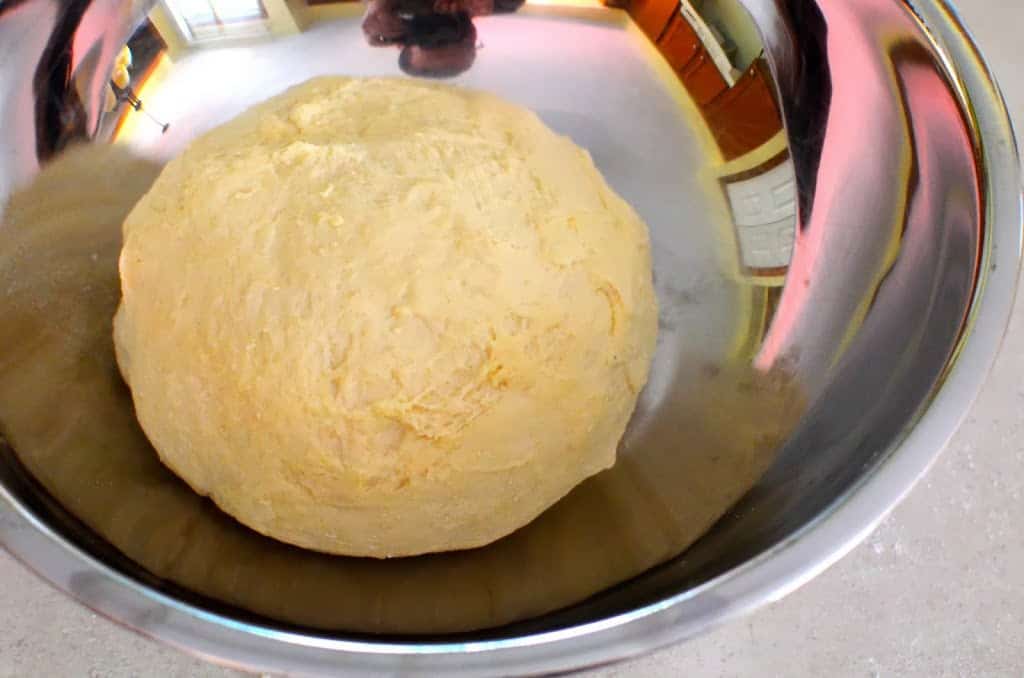
Sprinkle flour on the counter, turn the dough ball on to the counter, and knead until the ball is smooth and stretchy. Put the dough ball in a large bowl and cover with a piece of plastic wrap. Let the ball sit at at room temperature until it doubles in size, about an hour.
|
|
3. Set the grill up for 2 zone cooking on medium heat
Set the grill up so half the grill is set for medium heat, and the other half has no heat. For my gas grill, I preheat with all the burners on high, brush the grate clean, then turn half the burners down to medium and the other half off. For my charcoal grill, I light a ¾ full chimney of charcoal, wait for it to be covered with gray ash, then pour it in a single layer of coals over half the grill.
4. Make the sauce
While the grill is preheating: heat the olive oil over medium heat in a medium sauce pan. Once the oil is shimmering, add the garlic. Let the garlic sizzle for 30 seconds, then add the tomato sauce, oregano, an basil. Bring the sauce to a simmer, then reduce the heat and simmer for ten minutes, or until the sauce thickens. (If you have a splatter guard that fits your pan, now is a good time to use it.) Discard the oregano and basil sprigs.

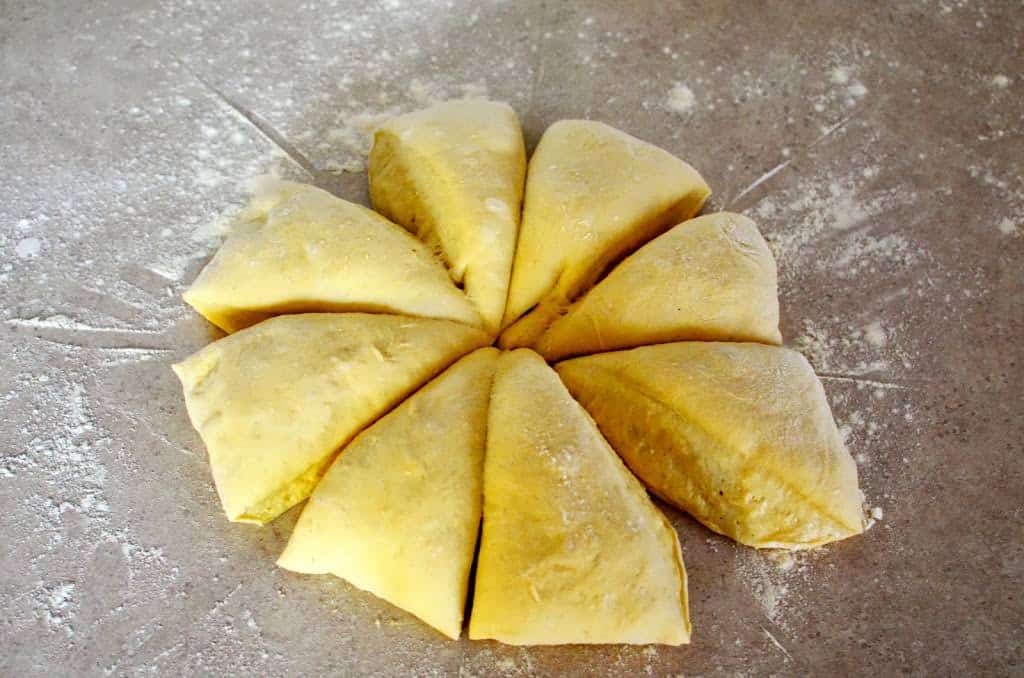
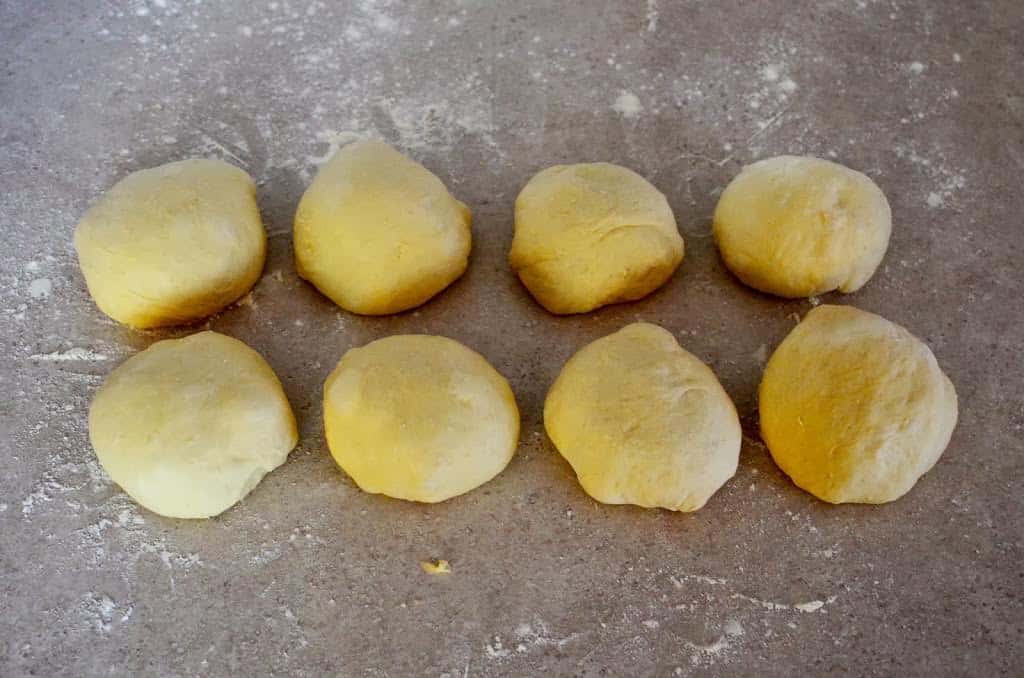
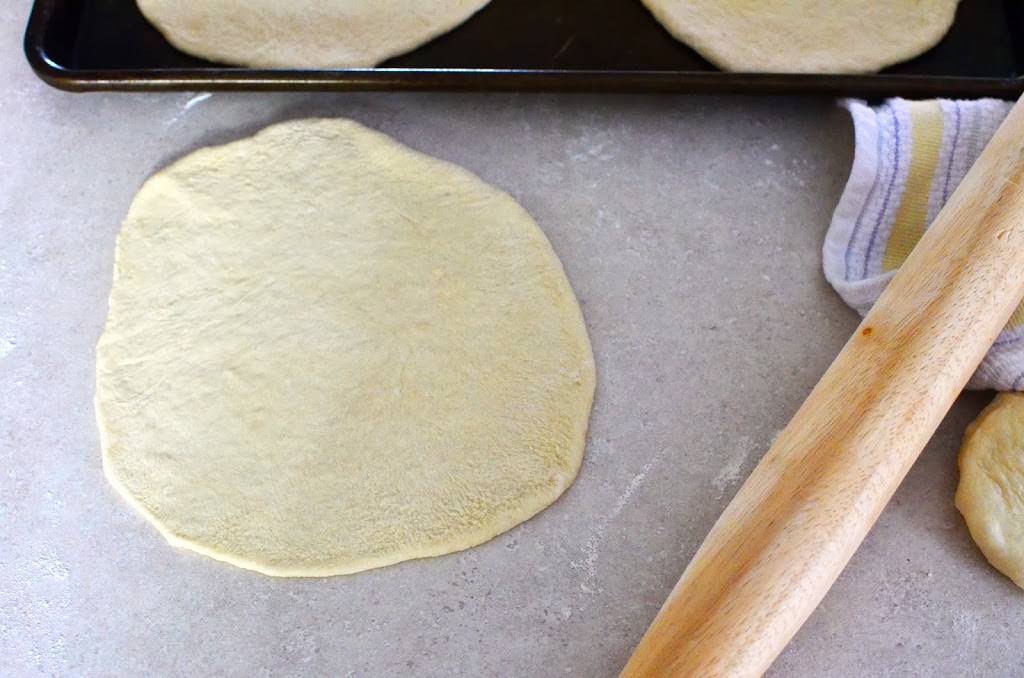
4. Shape the pizzas
Sprinkle more flour on the counter, and then turn the dough ball onto the counter. Divide the ball into eight pieces, and roll each piece into a ball. Roll each ball into a thin 8 inch pizza round, flouring the counter, the dough, and the rolling pin as needed. Transfer the pizzas to cookie sheets as you finish rolling them.
 |
 |
 |
 |
5. Grill one side of the pizzas
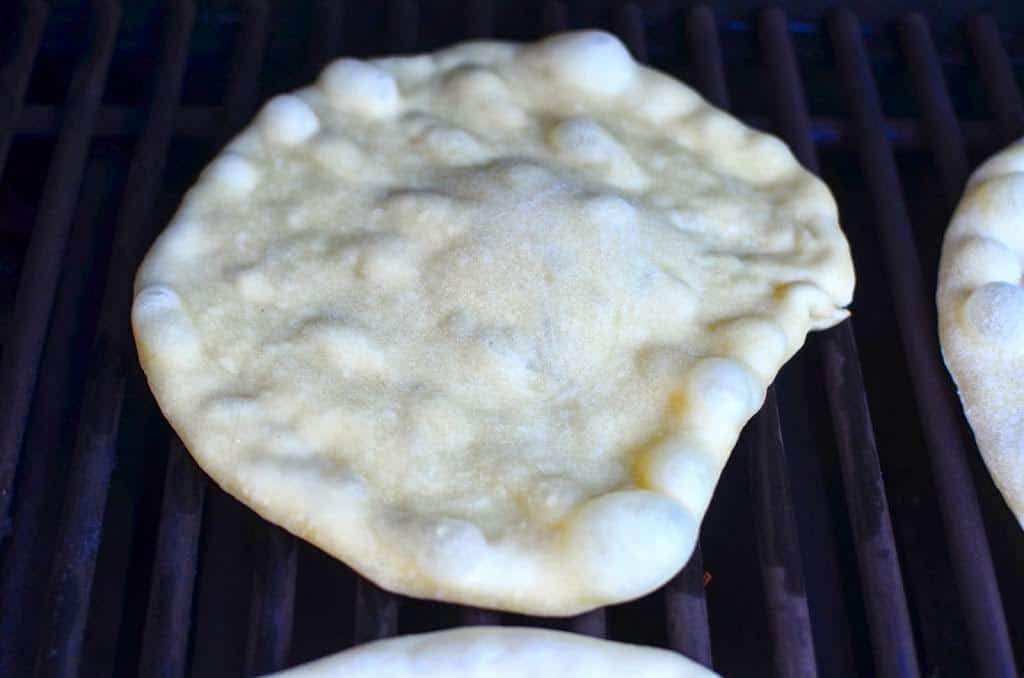
Brush the top side of the pizzas with a little olive oil. Work in batches, 2 to 4 pizzas at a time, depending on the size of the grill. Carefully lay each pizza onto the direct medium heat side of the grill, oiled side down. Grill until bubbles form on the top of the dough, and the bottom is toasted brown, about 2 minutes. If the grill has hot spots, especially with charcoal, rotate the dough halfway through cooking to get the other side facing the fire. Move the rounds back to the cookie sheets, toasted side facing up. Repeat until all the pizzas are grilled on one side.
|
|
 |
| Toasted on the bottom, ready for toppings |
6. Top the pizzas
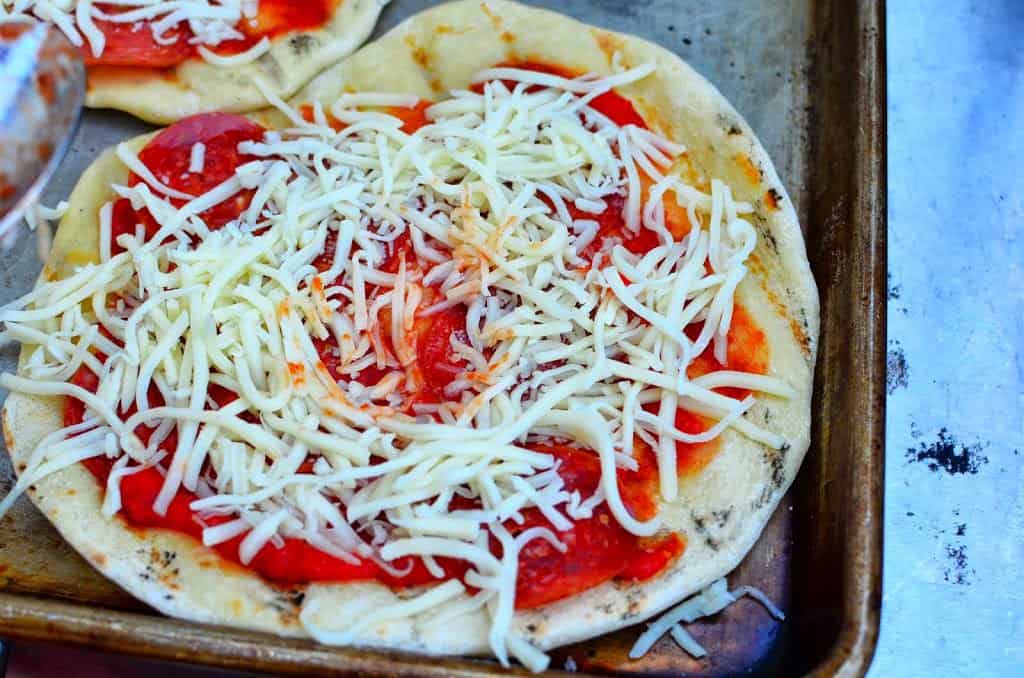
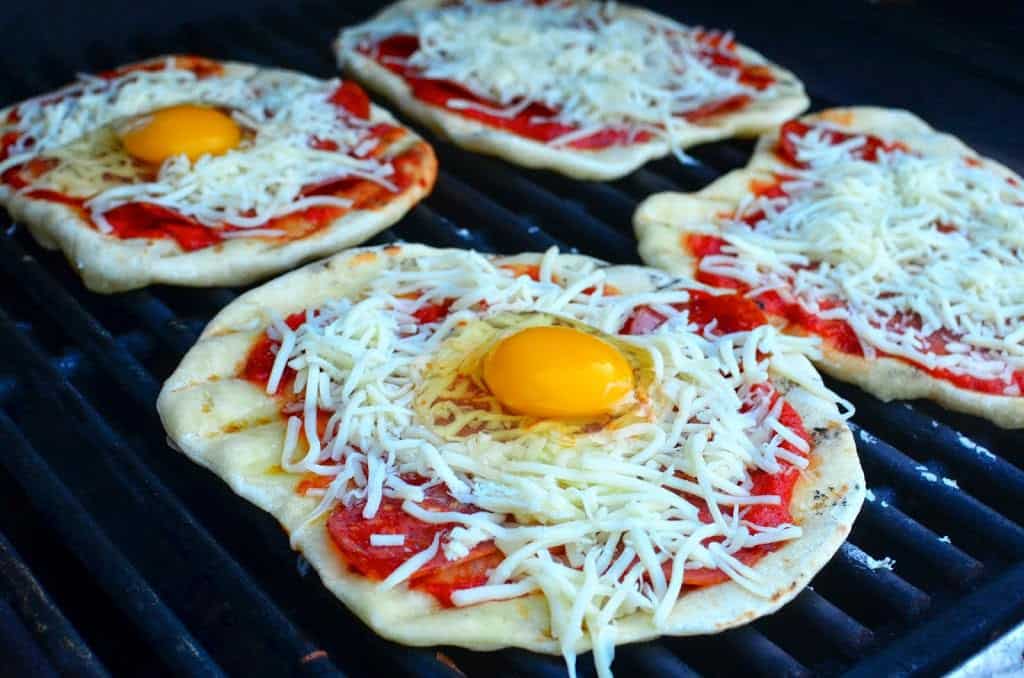
Spread a thin coat of the pizza sauce over each pizza, about 2 tablespoons per pizza. Add the toppings, except for the eggs, then sprinkle with cheese (mostly mozzarella, just a pinch of Parmesan). If you are topping a pizza with an egg, make a divot in the middle of the pizza by pressing down on the cheese and toppings with the back of a tablespoon.
7. Finish grilling the pizzas
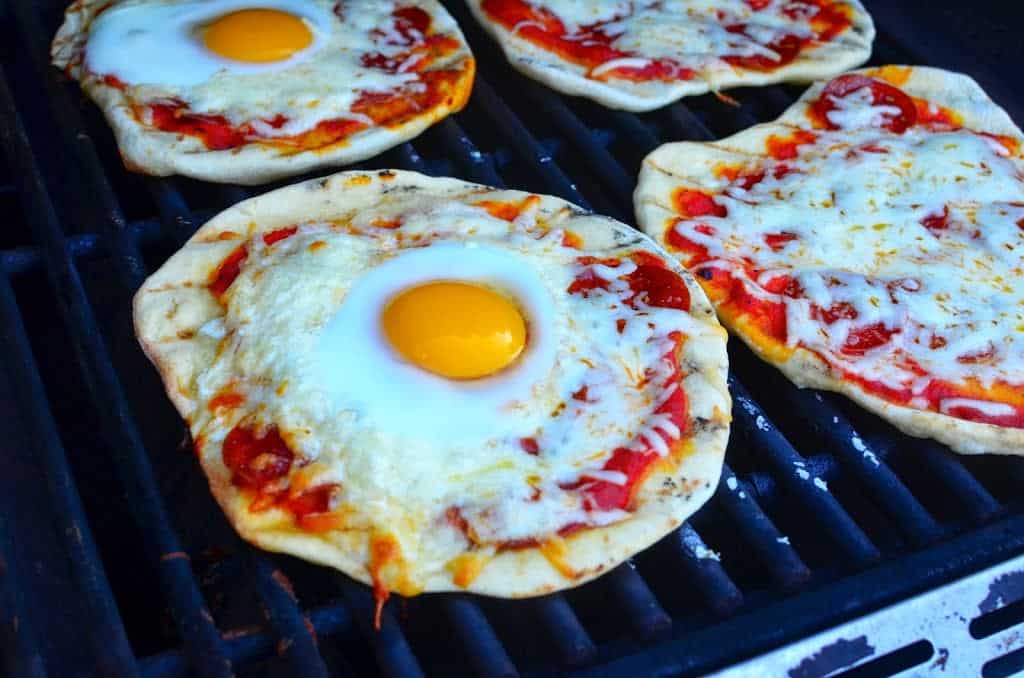
Work in batches, 2 to 4 pizzas at a time, depending on the size of the grill. Gently transfer the pizzas from the cookie sheet to the unlit side of the grill. If you are topping a pizza with an egg, pour the egg into the divot in the middle of the pizza. Close the lid and cook until the cheese melts and the pizzas are toasted around the edges, about 10 minutes, rotating the pizzas every five minutes. (It will take a few extra minutes - about 15 - for the egg to set on an egg pizza. Be patient with them.) Repeat until all the pizzas are cooked.
 |
 |
8. Serve
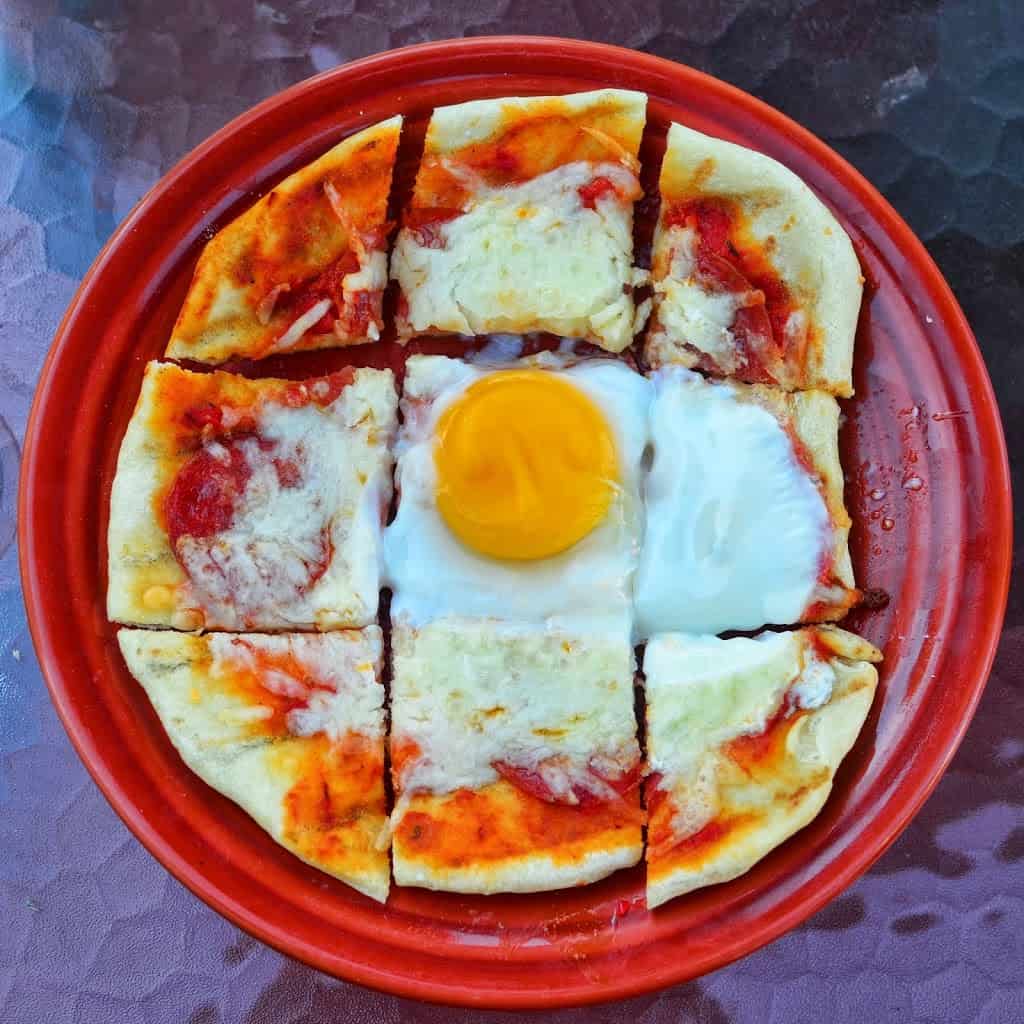
Once the first batch of pizzas has cooled for a few minutes, cut into quarters and serve while you finish cooking the rest of the pizzas. (Or, wait until all the pizzas are cooked - they're OK if they cool down for a while - but I'm not that patient.)
What do you think?
Questions? Other ideas? Favorite pizza toppings? Leave them in the comments section below.
Notes
- Go crazy with the toppings. We've used sausage (pre-cooked), green peppers, pickled banana peppers, onions, slivered asparagus, mushrooms, olives...let your imagination be your guide.
- No food processor? Knead the dough by hand (it will take about 20 minutes), or use a stand mixer.
- I have the best luck rolling the dough out with a rolling pin, always working away from me, and rotating the dough about a quarter turn after every roll.
- Making the dough may seem like too much work, but it's worth it. That said, if you don't have the time, you can buy pre-made pizza dough from the freezer section of your local grocery store. Put the lump of frozen dough in a bowl, and let it thaw overnight in the refrigerator.
- If you have a gas grill, you can cheat in step 5, and set the entire grill up for direct medium heat. Cook the first side of the pizzas, then turn half the burners off and set the grill up for indirect medium heat while topping the pizzas. Finish the pizzas in batches using indirect heat.
- How do you cut an egg pizza? Don't cut right through the middle if you want to pass out slices - the yolk will spill everywhere. Cut in a tic-tac-toe pattern around the edge of the yolk. Dip into the yolk using the outside pieces, and finish with the center piece.
*Enjoyed this post? Want to help out DadCooksDinner? Subscribe to DadCooksDinner using the RSS or Email options on the right, recommend DadCooksDinner to your friends, buy something from Amazon.com![]() through the links on this site, or donate through my tip jar. Thank you.
through the links on this site, or donate through my tip jar. Thank you.
Ken W says
The grilled pizza was invented in Providence, Rhode Island 1980 at the Al Forno restaurant by chef/owners Johanne Killeen and George Germon and were recognized and celebrated by the James Beard Foundation for their creation. In fact what makes their grilled pizza so distinctive is that they use a custom-built restaurant grill filled with Nature’s Own brand Hardwood Lump Charcoal (burns very hot and very clean) that they cook most all the restaurant meals on but when they make the grilled pizza they sprinkle wet dried grapevine to give the dough a European country smoky flavor. Their pizza dough is made with New England johnnycake meal, whole-wheat and unbleached white flour.
Mike V @ DadCooksDinner says
Yes, the dough should freeze fine. Take it out and let it thaw in the refrigerator the morning you want to use it, and continue with the cutting and rolling step.
Terry Hoey says
Looks great! Can you freeze the dough?