BBQ short ribs are taunting me, popping up all over the Internet.
I don't know how I missed barbecued beef short ribs on my last trip to Austin. Maybe because I was so late getting in the line at Franklin's BBQ…but I also went to Rudy's, Sam's, Iron Works, and the Salt Lick at the airport, and I must have been too focused on brisket, because I didn't have short ribs at any of them. Of course, now, no matter where I turn, I see a picture of a rib with a two inch thick slab of meat on top. It's going to be a while before I can get back to Texas, so if I want short ribs, I have to make them myself.
Luckily there are some great BBQ short rib resources on the web; my favorite was this article by Daniel Vaughn at Texas Monthly: You May Love Beef Short Ribs, but Pitmasters Don't.
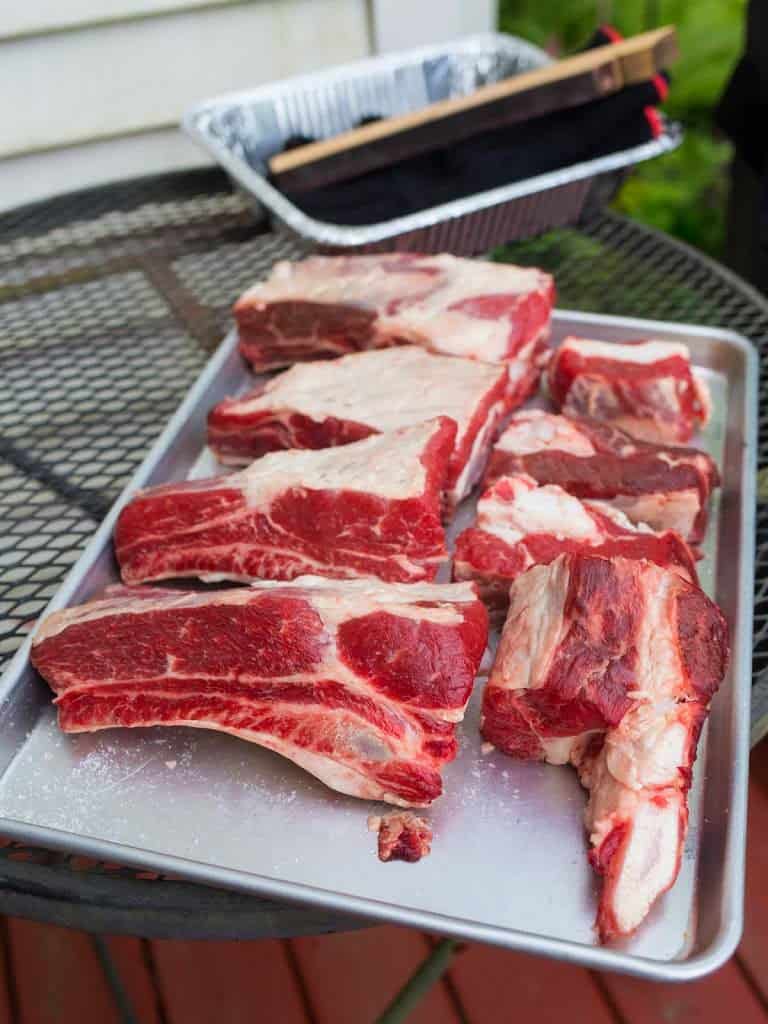
Whole beef short ribs can are tricky to find in Ohio, especially if you want the meaty short ribs from the beef plate, neighbor to the ribeye. Expect them to be a special order. My butcher, Mike at Sherman Provision, got an entire beef plate for me.
And then, don't make the same mistake I did. I was so excited that I grabbed the whole plate and headed to Mauri at the checkout. I didn't think to ask him to trim the rib tips for me; I did that myself, as you'll see in the pictures below. Separating the rib tips from the ribs is a lot of work with a butcher's knife - the bones go every which way. It is much easier for your butcher to do this - he's got a band saw in the back, and can cut across them with no problem.
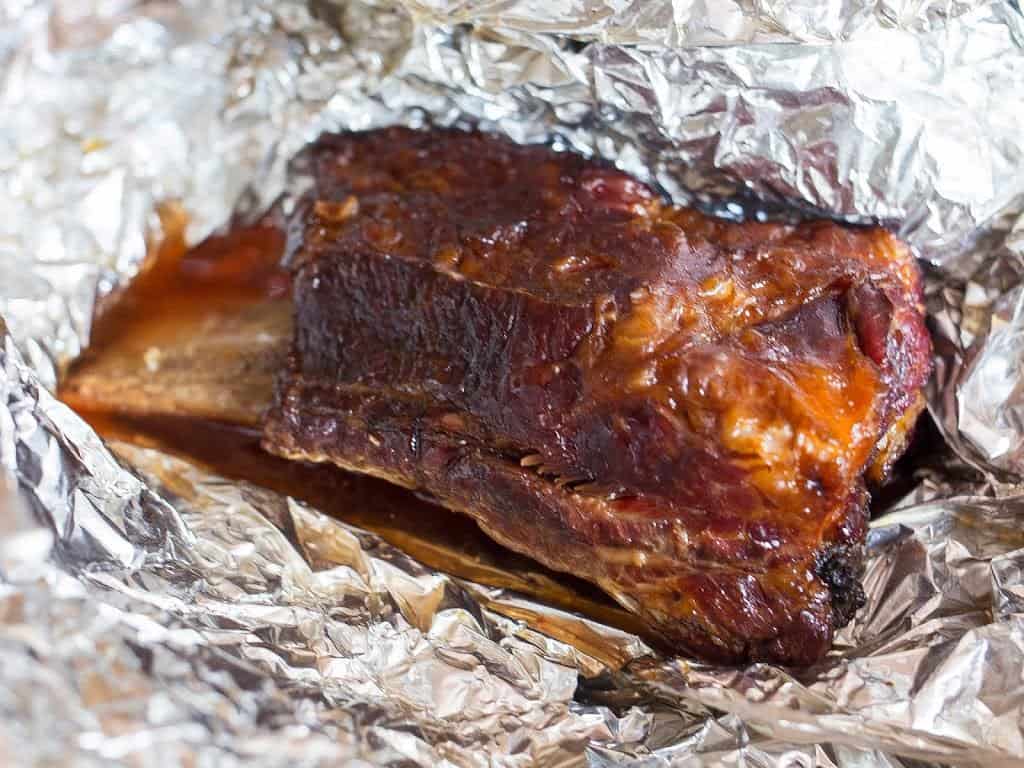
Low and slow is the way to go when cooking a tough piece of meat like short ribs. I use the Minion method to control my fire, adding a handful of lit coals to a pile of unlit coals, then choking off most of the oxygen to keep the heat down. The pile of coals slowly ignites, giving me enough fuel to last through the six to eight hour cooking time. Oak is the traditional Texas smoking wood, and I love the combination of oak and beef. And I cheat, and use the Texas crutch - I foil wrap the ribs after they reach 150°F, to trap moisture and help them get past the dreaded barbecue stall.
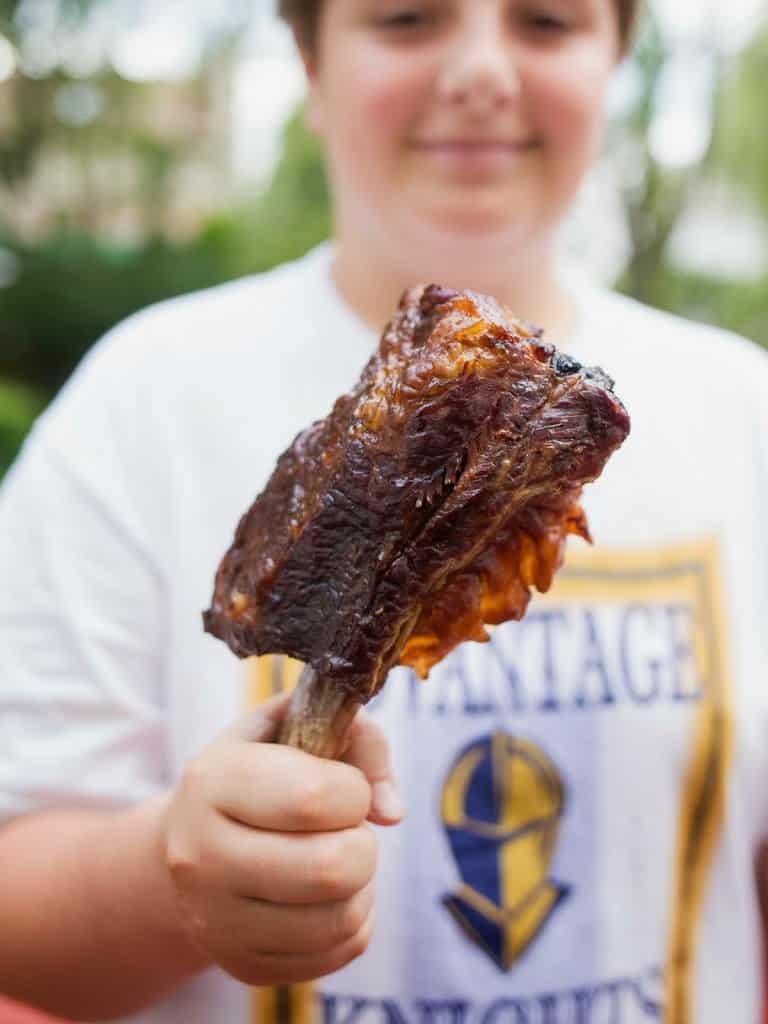
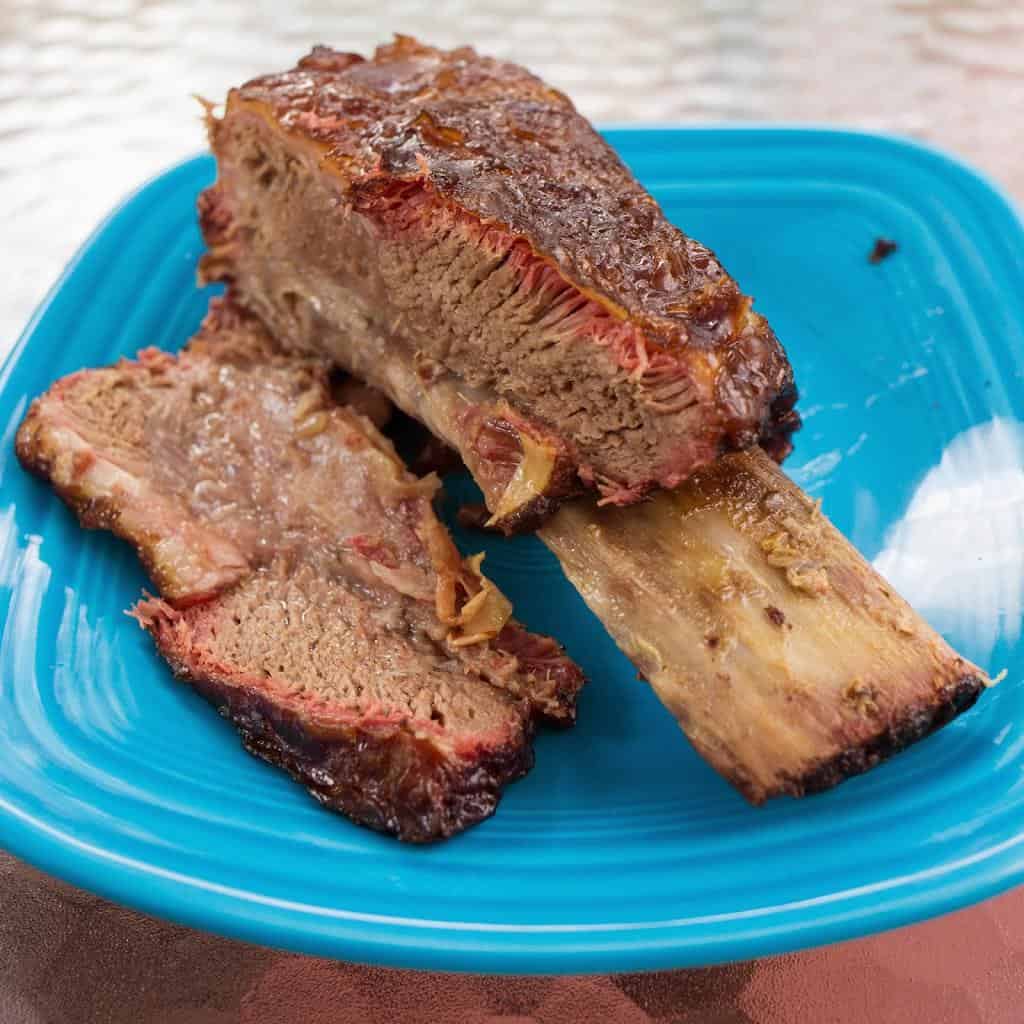
The results are short rib heaven. The connective tissue melts in the long cooking time, and the intramuscular fat bathes the meat as it cooks. Smoky, tender, full of beefy flavor - now I know why barbecued short ribs are so big in Texas.
Recipe: BBQ Beef Short Ribs on a Kettle Grill
Adapted from: Daniel Vaughn at Texas Monthly: You May Love Beef Short Ribs, but Pitmasters Don't.
Prep Time: 30 minutes
Cook Time: 6 hours
Equipment
- Grill (I love my Weber kettle)
- Aluminum foil
- 2 fist sized chunks of smoking wood (preferably oak, but hickory, cherry, apple, or pecan will work.)
Ingredients
- 4 beef plate short ribs - you want the entire bone - and I used the rib tips as well
- 1 tablespoon kosher salt
- 1 tablespoon fresh ground black pepper
Directions
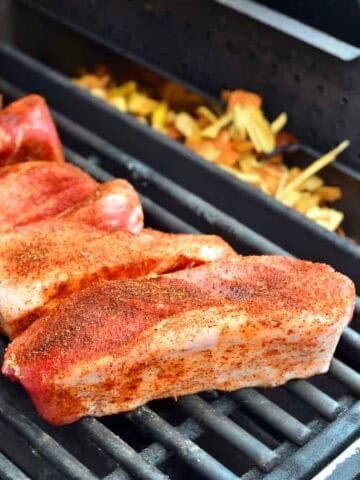
1. Season the short ribs
Sprinkle the ribs evenly with the salt and pepper. (If you have the time, do this the night before cooking and refrigerate the ribs to dry brine the ribs.)
2. Set the grill up for indirect low heat
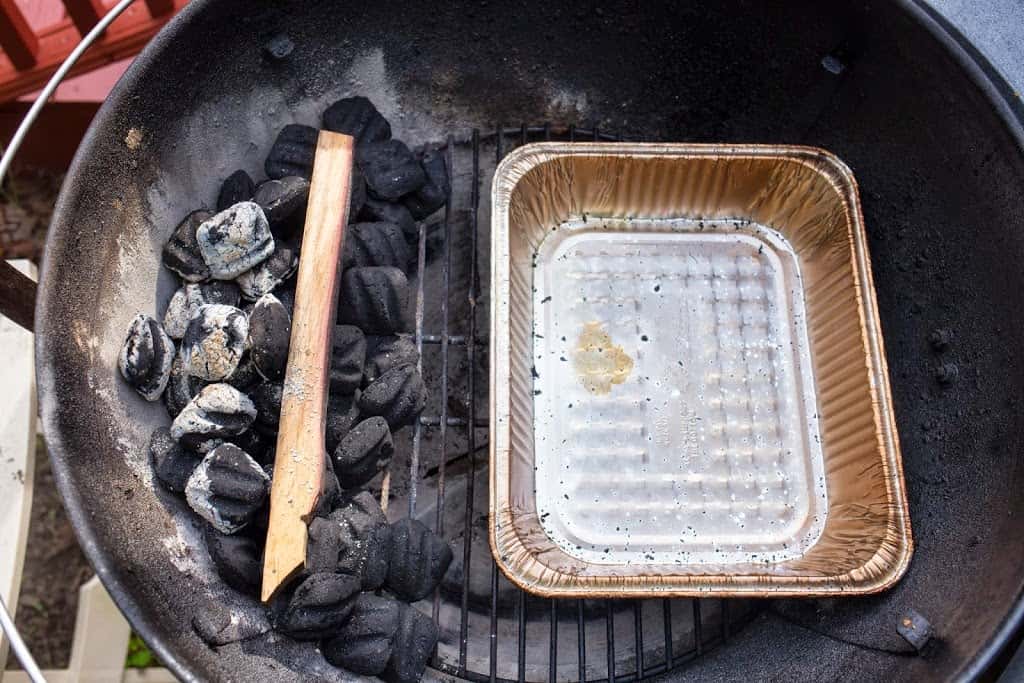
Set your grill up for indirect low heat, 250°F, with a drip pan on one side of the grill and the fire as far over on the other side as you can get it.
|
|
In my kettle grill, I open the bottom vents a crack, with the blades of the ash sweeper covering ¾ of the rectangular holes. I make a tight pile of 80 unlit coals on ⅓rd of the charcoal grate, about three coals deep. (This is about ¾ of a charcoal chimney's worth of coals.) Put the two chunks of smoking wood on top of the unlit coals. Next, I light 10 coals in my chimney starter; when the coals are lit and covered with gray ash, I pour them on top of the unlit coals. Then I set the drip pan on the other side of the charcoal grate, add my grill grate, and brush it clean. I put the lid on the grill immediately, and set the top vent to halfway open.
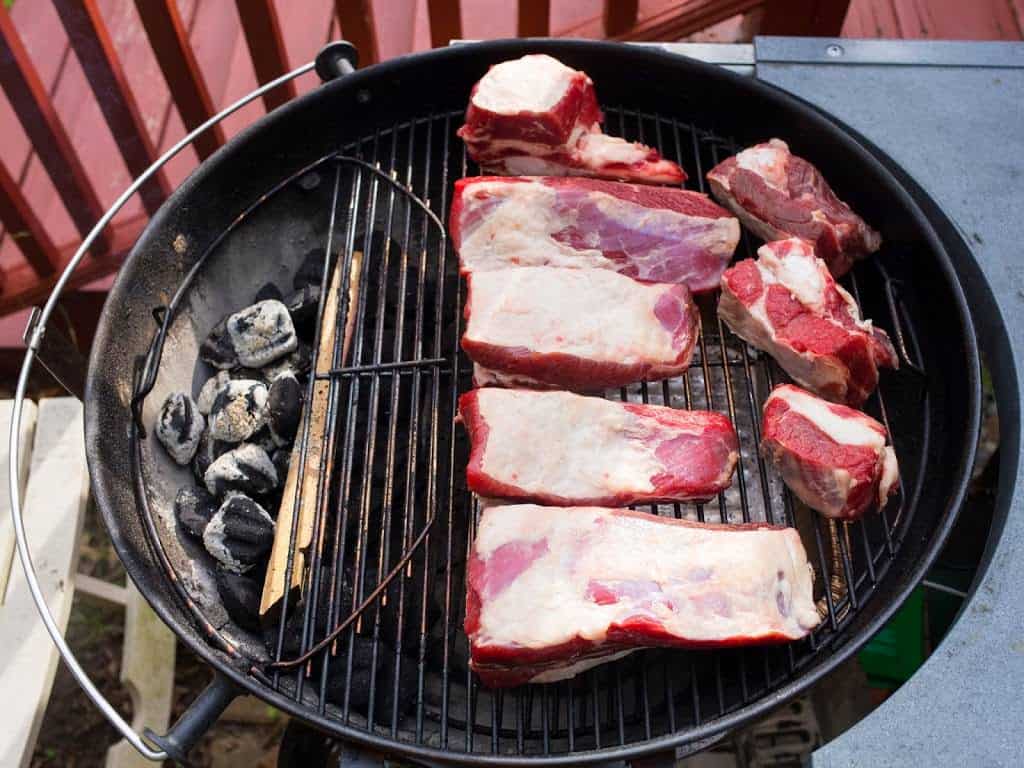
3. Start cooking the short ribs
Put the short ribs on the grill over the drip pan and close the lid. Adjust the top vent to stabilize the temperature at roughly 250°F; let the temperature settle for fifteen minutes between vent adjustments. Once the temperature is stabilized, check the grill every hour to make sure the vents don't need to be tweaked. (It's OK if the temperature fluctuates; I try to keep it at 250°F, but anything between 225°F and 300°F is OK. Keep the lid closed - every time you lift the lid, heat will escape and the air you let in will cause the coals to heat up. I try not to open the lid until it is time to wrap the ribs in the next step.)
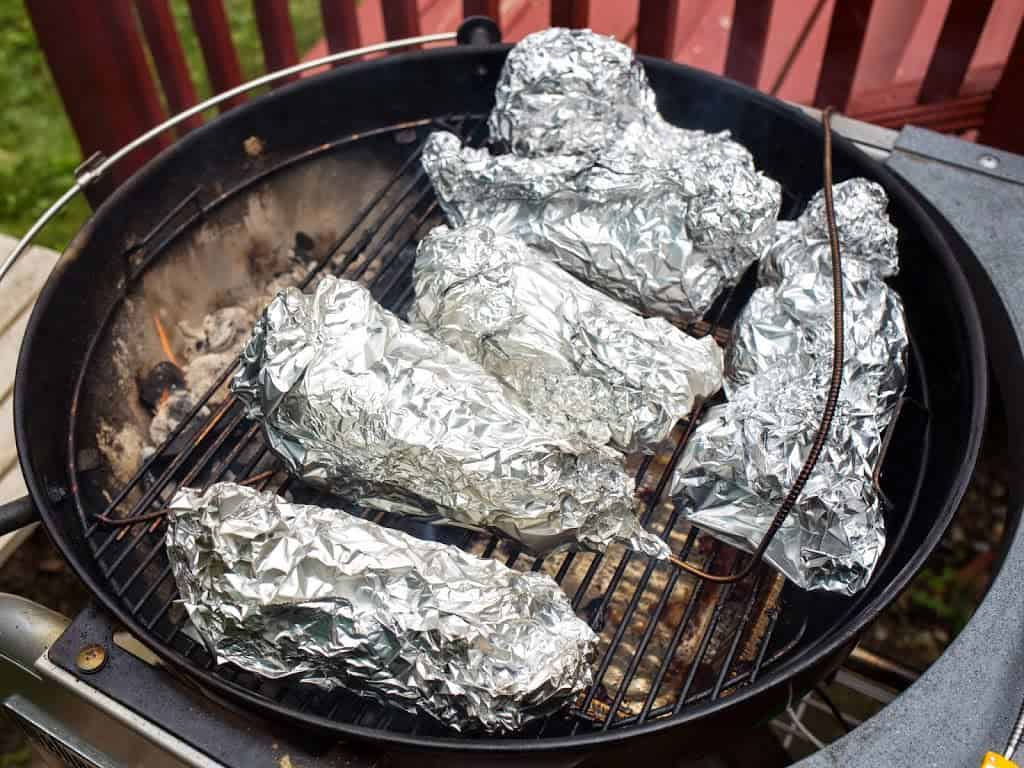
4. Wrap the short ribs and finish cooking
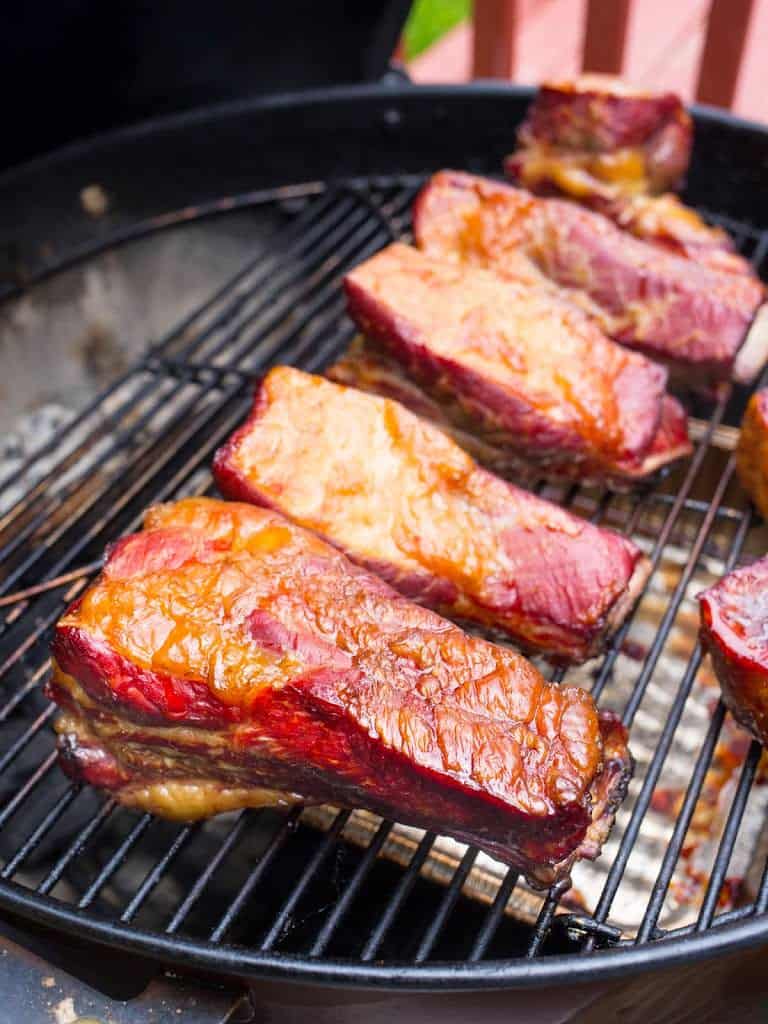
Cook the short ribs until they reach a temperature of 150°F in the thickest part, about three hours. Then, wrap each rib tightly with aluminum foil, put them back in the grill, increase the heat to 300°F by opening the vents more, and cook until they reach an internal temperature of at least 205°F, about three more hours. (Poke the probe thermometer deep into the thickest rib before wrapping it with foil, but don't let the probe touch the bone. Total cooking time is about six hours for these extra meaty short ribs. It is fine if the grill gets hotter once the ribs are foil wrapped - up to 350°F is OK.)
5. Rest and serve
Take the foil wrapped ribs off of the grill, put them snug against each other, and wrap in a single piece of aluminum foil to catch any leaking juices. Wrap a large towel around the foiled ribs to keep them warm. (I use a bath towel from our rag pile.) Let the ribs rest for up to one hour. Then, unwrap the ribs and serve.
Notes
- I like my barbecued beef plain, but my kids demand barbecue sauce. My Chipotle Espresso Barbecue Sauce is a great sauce for these ribs.
- I wrapped some of the ribs in foil, and some in pink butcher's paper, as recommended by Franklin BBQ. The ribs wrapped in foil were tender and falling off the bone; the ones wrapped in butcher paper were still a little bit tough. I should have let them go for a few more hours. The crust on both foiled and papered ribs was similar, so going forward I'm sticking with my foil wrap.
- Reading up on butcher paper wrapping - it looks like it is more useful for holding barbecued meat when you are working in a professional kitchen than it is for home cooks. Again, from Daniel Vaughn at Texas Monthly: The Importance of Wrapping Brisket
- In case you haven't noticed a theme to this post: if you are interested in barbecue, you need to follow Daniel Vaughn at TMBBQ.com, where he is Texas Monthly's barbecue correspondent.
What do you think?
Questions? Other ideas? Leave them in the comments section below.
Related Posts
BBQ Pulled Pork on a Kettle Grill
Grill Smoked Baby Back Ribs
Espresso Chipotle Barbecue Sauce
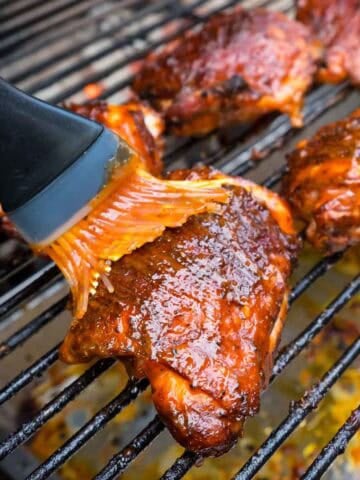
Grilled BBQ Chicken Thighs
Enjoyed this post? Want to help out DadCooksDinner? Subscribe to DadCooksDinner via eMail or RSS reader, recommend DadCooksDinner to your friends, and buy something from Amazon.com through the links on this site. Thank you.
David cranshaw says
Used your technique but with Smokenator simply because I had one and hadn't tried it. Temp reg was greatly simplified.
Took 8-plus hours but ribs were incredible!
Mike V @ DadCooksDinner says
You're welcome - glad it was a hit!
jayduff says
Hey mike. Made this last night and it was delish. Once again, you da man.
Mike V @ DadCooksDinner says
You're welcome - thanks!
Jeff McCormick says
I've used this as a base recipe twice now, it's great! Thanks for posting it. I used some fancy pants balsamic vinaigrette and olive oil from a speciality store (a cool BD gift from my sister-in-law) and it made it great.
As usual for me, I made a huge batch and shared it with the neighbors. What a great way to use up the last of the garden harvest.