
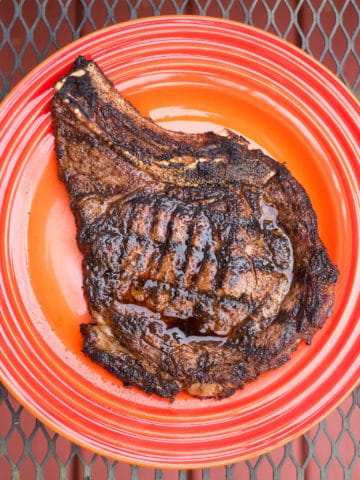
It's time to get back to basics. Let's cook some ribs.
Ribs were my doorway to the world of cooking. I had my brand new Weber kettle, and I wanted to make ribs as good as the ones at my local barbecue joint. I started reading, and trying recipes…and from there I was smitten. I fell into my love of food, and I haven't come up for air since.
It turns out, ribs are a good place to start when you're learning to cook. If you have patience, that is. Low and slow is the way to go. Give the ribs time, have a cold beverage (or two, I won't tell), and you will be rewarded with tender ribs.
And, I swear, they smell fear. If they sense that you're in a hurry, they slow down. Give yourself plenty of time, and they cook right on schedule.
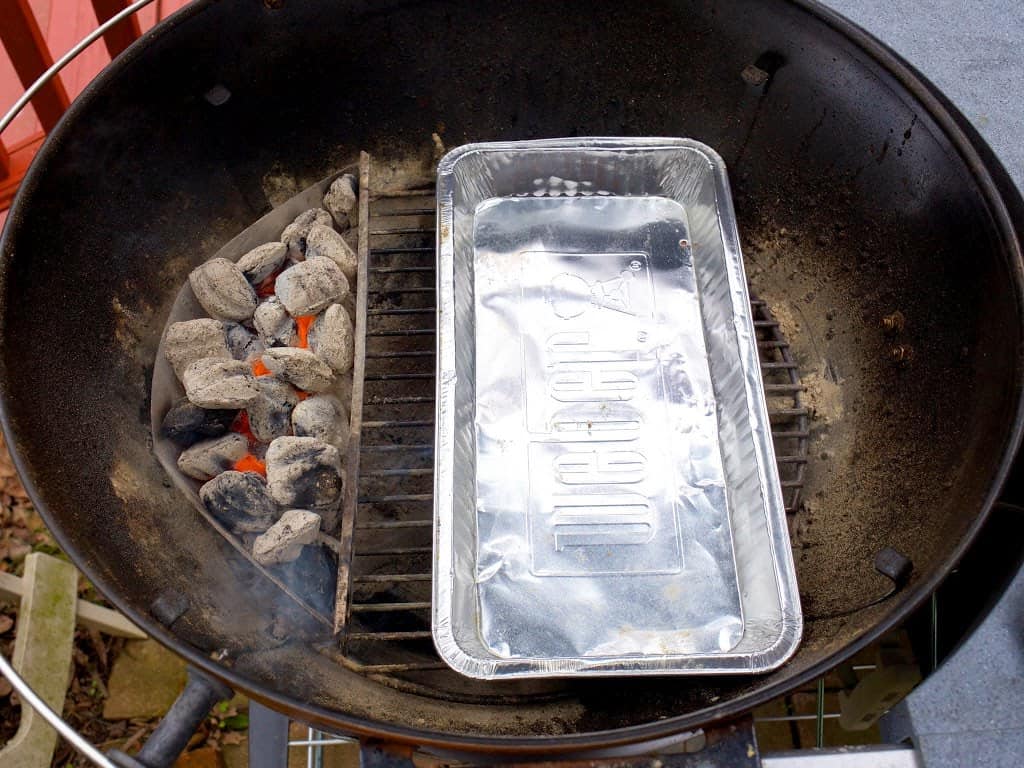
So, how do we do it? We need a low fire - 250°F to 300°F, banked to one side of the grill, with the ribs over a drip pan on the other side of the grill, away from the direct heat. (We don't want the ribs directly over the coals, no matter how low the heat is - they'll burn in the long cooking time if they're over direct heat.)
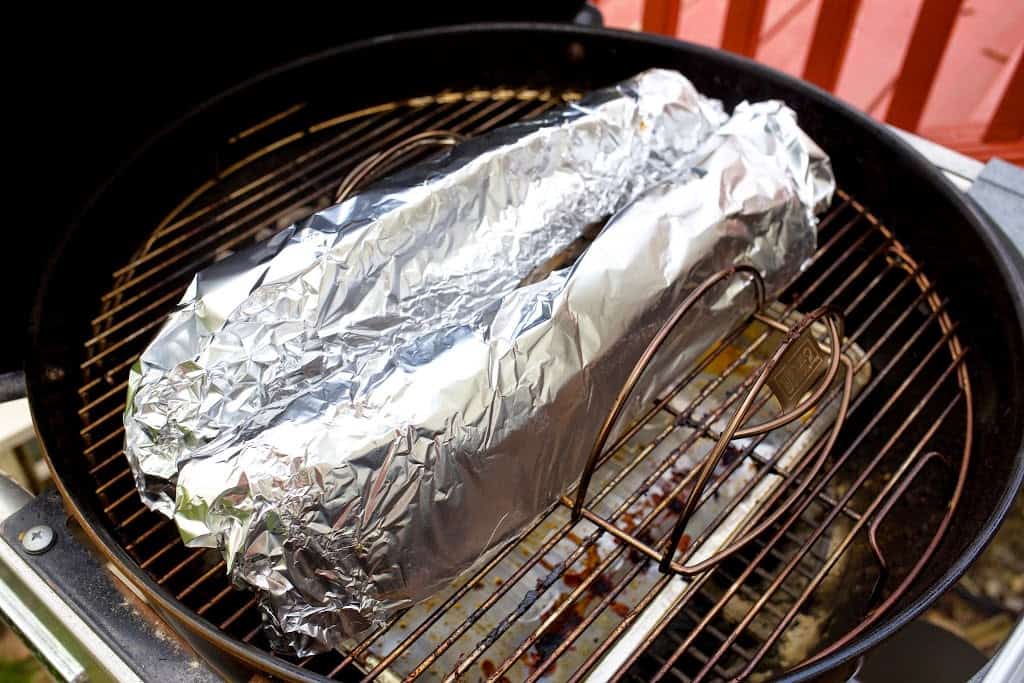
We need meaty ribs, a barbecue rub, and our favorite barbecue sauce. We need smoking wood, because what are barbecued ribs without smoke? And, we need some heavy duty aluminum foil - we're going to guarantee tender ribs by using the "Texas Crutch" and wrap them in foil for the last half hour of cooking.
I think the term "Texas Crutch" came from from Kansas City barbecue fanatics, who don't like the idea of wrapping the ribs in foil. If you want the most tender ribs possible, though, lean on the Texas Crutch.
I'm also brining my ribs. I love the deep seasoned flavor of brined pork. But, that step is optional; the ribs taste great even if they're sprinkled with salt as part of the barbecue rub.
And that's it. Be patient, season properly, and you'll have baby back ribs to put your local rib joint to shame.
Recipe: Grill Smoked Baby Back Ribs (Grilling Basics)
Prep Time: 4 hours
Cook Time: 4 hours
Equipment
- Grill (I love my Weber Kettle)
- Rib rack (helpful, but not essential unless you're cooking more than 2 racks of ribs)
- Heavy duty aluminum foil
Ingredients
Brine
- 4 quarts water
- 1 cup kosher salt
- 2 tablespoons brown sugar
Ribs
- 2 slabs meaty baby back ribs
Smoking wood
- Two fist sized chunks smoking wood (or 2 cups wood chips), soaked for an hour (hickory, apple, cherry, pecan, or oak)
Barbecue Rub (¼ cup of my Homemade Barbecue Rub), or use your favorite store bought rub
- 1 ½ tablespoon paprika
- 1 ½ tablespoon brown sugar
- 1 tablespoon chili powder
- 1 teaspoon ground black pepper
- ½ teaspoon garlic powder
- ½ teaspoon onion powder
- ¼ teaspoon dried thyme
Barbecue sauce (2 cups of my Easy Barbecue Sauce), or use your favorite barbecue sauce
- 1 ½ cups ketchup
- ½ cup honey
- ½ cup cider vinegar
- 2 tablespoons Worcestershire sauce
- 2 tablespoons soy sauce
- 2 tablespoons Franks Red Hot
Directions
1. Brine the ribs
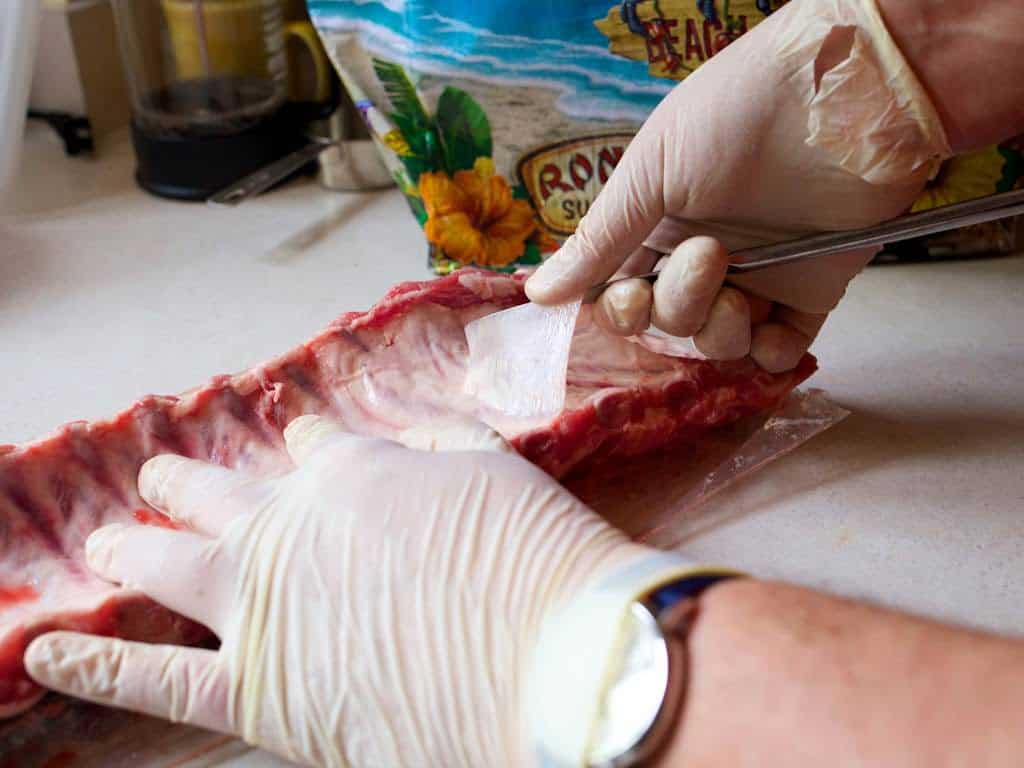
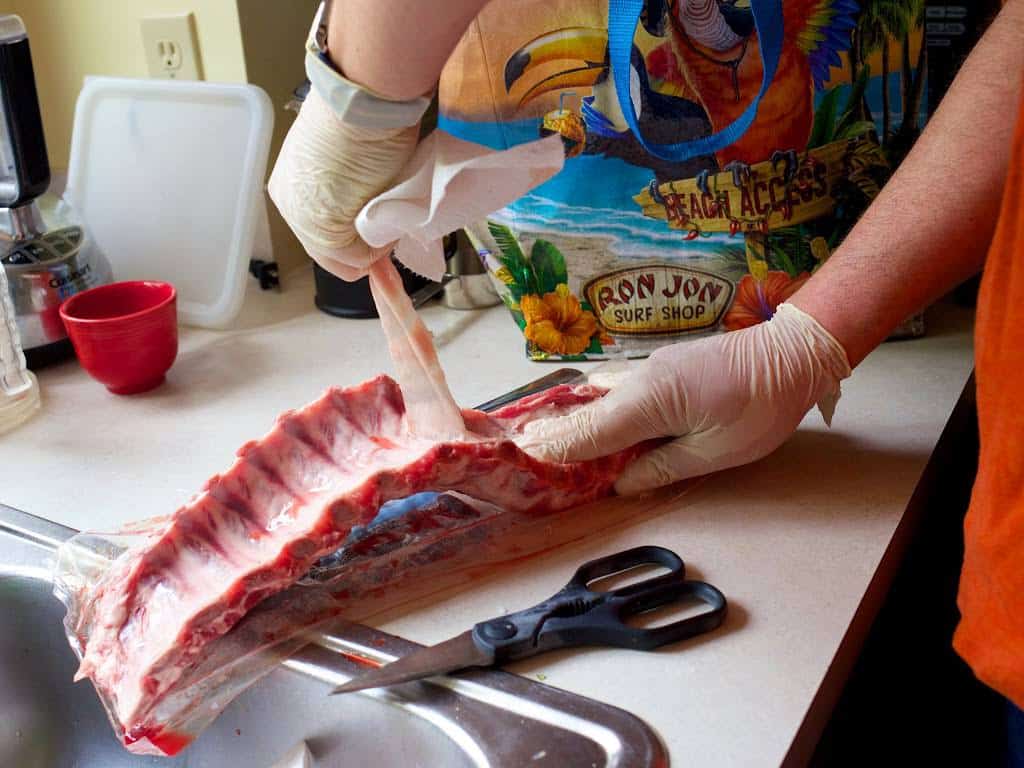
On the bone side of the ribs, work a butter knife between the membrane and the bone, then grab with a paper towel and pull the membrane off of the ribs. (If it tears while you're pulling, work the knife under the remaining pieces and pull them off as well.) In a container that is big enough to hold the ribs, dissolve the salt and sugar in 4 quarts of water. Submerge the ribs and refrigerate for 4 to 8 hours. (If you don't have time to brine, add 1 tablespoon of kosher salt to the rub in the next step.) Submerge the smoking wood in water.
2. Mix up the barbecue rub and barbecue sauce
In a small bowl, stir the barbecue rub ingredients, breaking up any clumps of brown sugar with your fingers. Set aside. In a medium bowl, whisk the barbecue sauce ingredients until smooth. Set aside.
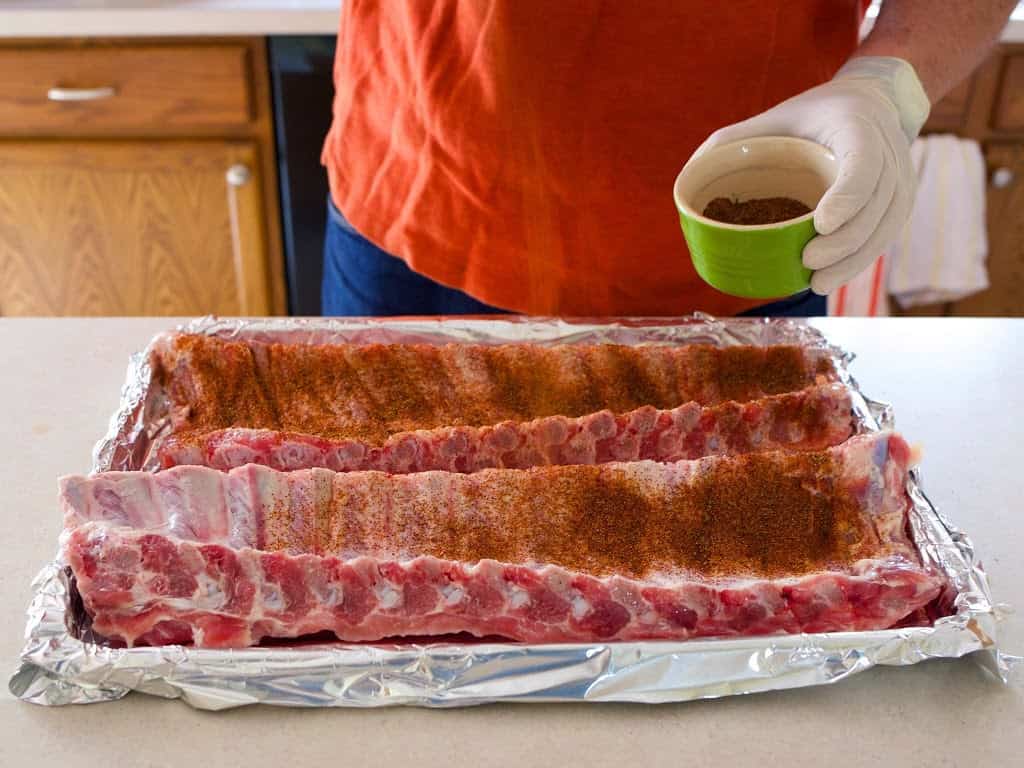
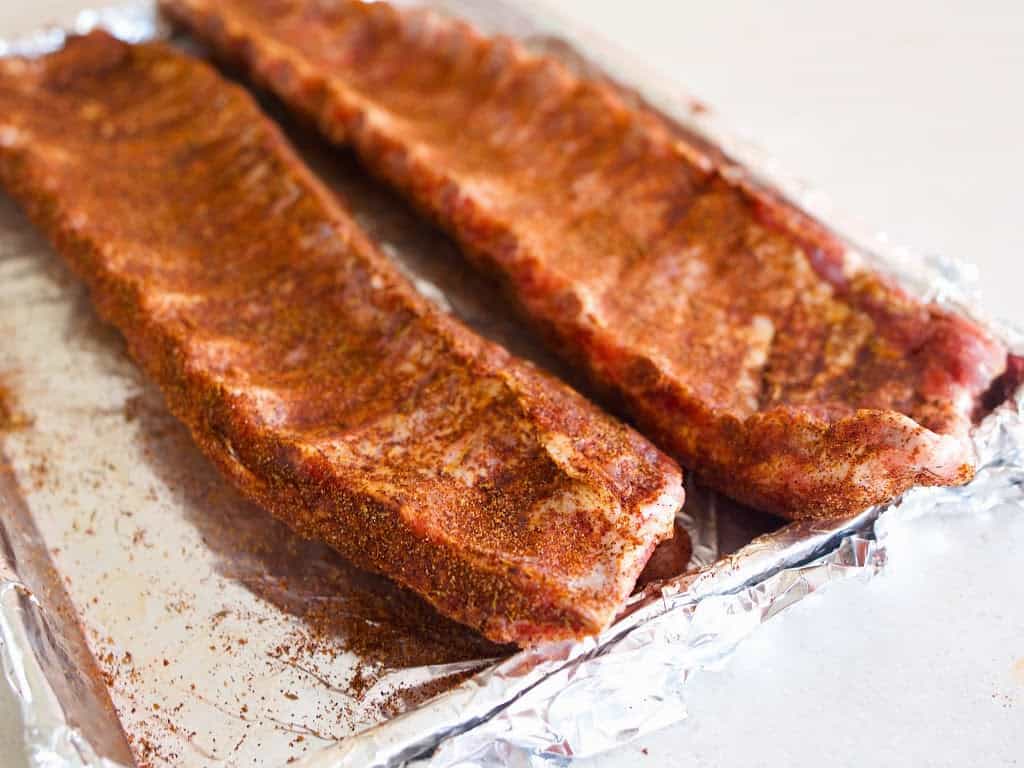
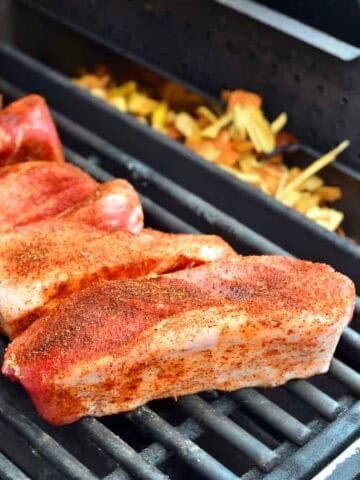
3. Rub the ribs
Remove the ribs from the brine and pat dry with paper towels. Sprinkle both sides of the ribs with rub, concentrating the rub on the meaty side.
4. Set the grill up for indirect low heat (250°F to 300°F)
Set your grill up for indirect low heat, 250°F to 300°F, with the heat on one side of the grill, and a drip pan on the other side. On my Weber kettle I light 40 coals (⅓ of a Weber charcoal chimney, or one full Weber charcoal basket), wait for them to be mostly covered with gray ash, then pile the coals on one side of the charcoal grate. (I do this in the charcoal basket; it holds the coals in a tight pile.) Finally, I put a drip pan on the charcoal grate opposite the coals, then put the grill grate back in the grill.
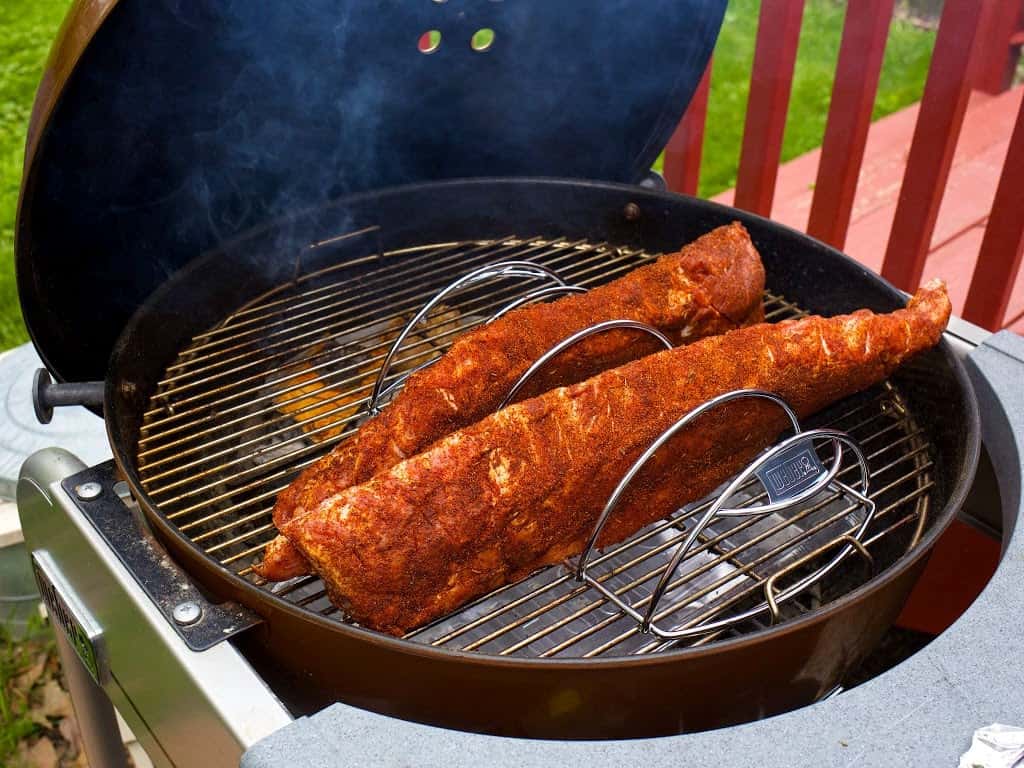
5. Cook the ribs
Add the smoking wood to the coals. Put the ribs on the grate over the drip pan, as far away from the fire as you can get them. Close the lid and cook until the ribs are tender and the meat has pulled down ½ an inch from the end of the bones, about 3 hours. If you are cooking on a charcoal grill, add 12 unlit charcoal briquettes to the coals every hour to keep the fire going.
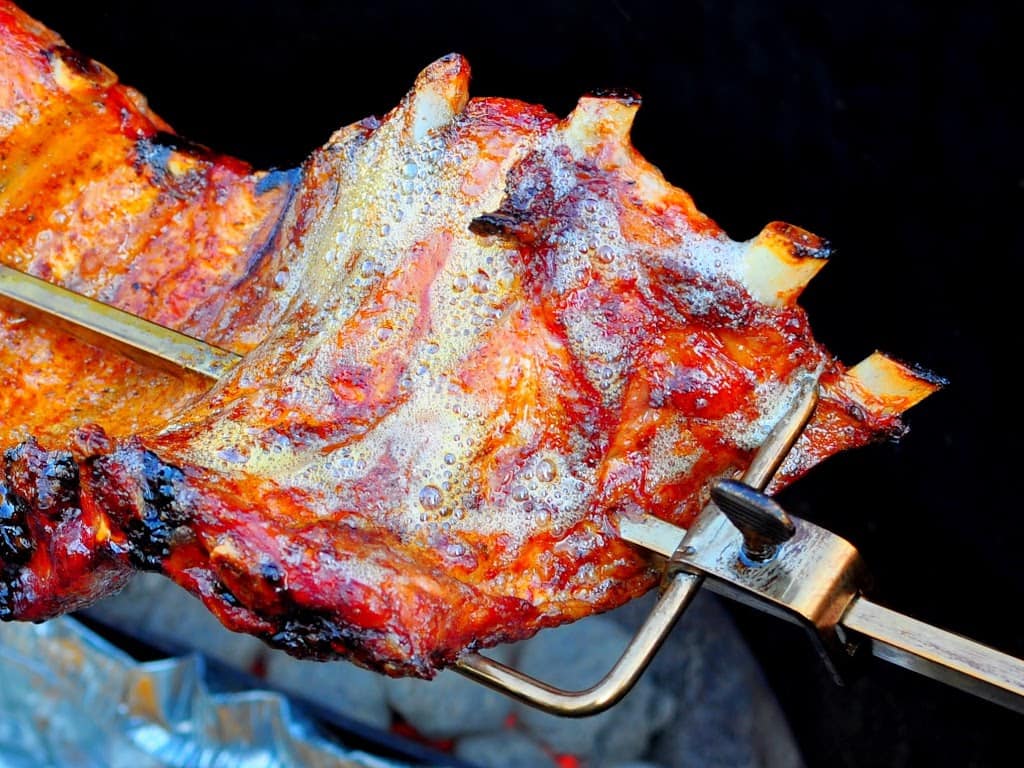 |
| This is what the bones should look like on the ends (Picture borrowed from my rotisserie baby back ribs) |
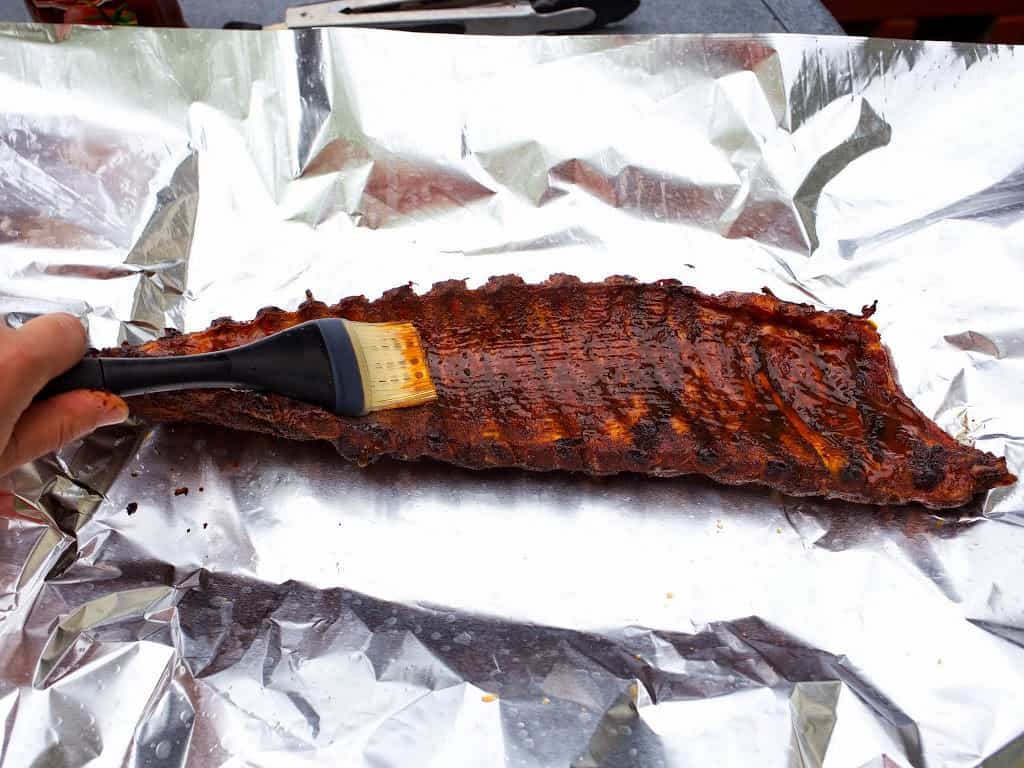

6. Foil wrap the ribs
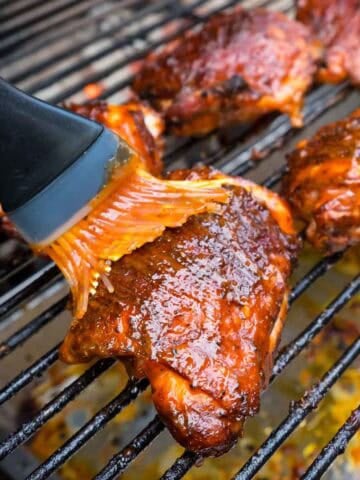
Time for the Texas crutch. Tear off two pieces of heavy duty aluminum foil that are longer than the racks of ribs. Pull a rack of ribs off of the grill and set it on the foil, meaty side up, and brush with barbecue sauce. Flip the ribs, brush the bone side with sauce, then wrap the ribs tightly with the foil, crimping it shut. Put the foil wrapped rack back on the grill, and repeat with the other rack. Close the lid again and cook the foil wrapped ribs for 30 minutes.
If you don't want to use aluminum foil, cook the ribs until you can pull a bone on the end and the meat easily starts to tear, about another hour.
7. Finish the ribs
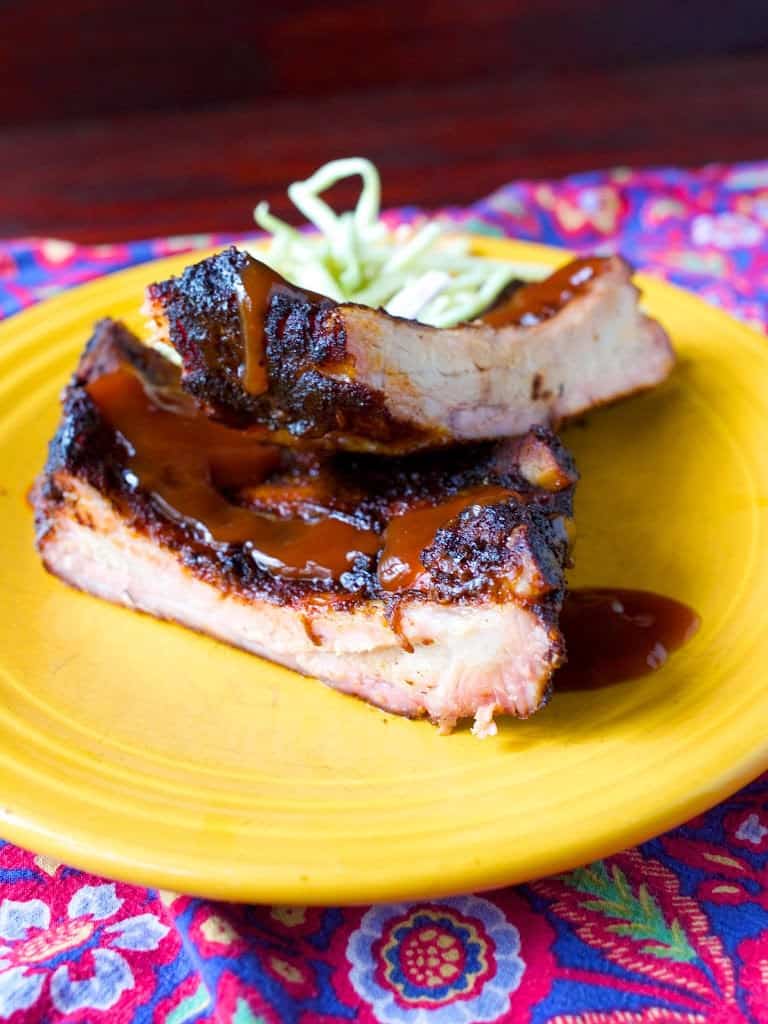
Remove the ribs from the grill and let them rest in the foil for 15 minutes. Unwrap the foil and brush the ribs with another coat of barbecue sauce. Cut the racks between every second rib and serve, passing the rest of the sauce at the table.
Notes
- Watch out for shiners. When you're buying your ribs, take a look at the meat side. You should not see any bone - if you do, the ribs are "shiners" and have been trimmed right up against the bone. There isn't much meat on ribs to begin with - you want them cut generously, with extra pork on top of the ribs. This isn't as big of a problem as it used to be; I can get ribs with "extra meaty" stickers on them at my local grocery store now, which are perfect for this recipe.
- This recipe is easy to double if you have a rib rack; four racks can fit on a kettle grill. Beyond that, you need a bigger grill. (Like Weber's 26.75 inch extra large kettle. Or, my dream grill, the massive Weber Ranch Kettle - 37.75 inches in diameter, large enough to cook…well, I don't know how many racks you could fit on there, but I'll bet you could go into catering if you bought one.
- Can you tell I'm a Weber fanatic?
- Be careful disposing of the brine - it is laced with raw pork juices, which you don't want to splash around your kitchen. Not that I've ever poured a bowl of brine into the sink…and have it rise like a wave, overflow the other side, spread over my counter and drip down my kitchen cabinets…
- How many people will this serve? It depends on how big of a carnivore you're serving. I serve two racks of ribs to my family of five…but then I'm restraining myself. I can eat a half a slab of ribs on my own, easily. If I'm hungry, I could put away an entire slab. So, for lighter eaters, assume about a third of a slab. For big eaters, somewhere between a half a slab and "give me all the ribs."
- Looking for a different style of ribs? Use the technique of this recipe with one of the rub and sauce options from my rotisserie rib recipes in the Related Posts section.
What do you think?
Questions? Other ideas? Leave them in the comments section below.
Related Posts
Rotisserie Baby Back Apple Ribs
Rotisserie Spare Ribs with Garlic and Oregano Rub
Rotisserie Baby Back Ribs Cuban Style
Enjoyed this post? Want to help out DadCooksDinner? Subscribe to DadCooksDinner via eMail or RSS reader, recommend DadCooksDinner to your friends, and buy something from Amazon.com through the links on this site. Thank you.
Mike V @ DadCooksDinner says
Angela,
You're welcome!
You shouldn't rinse the ribs after brining. You may be more salt sensitive than most people (salt sensitivity is a range), so try cutting the salt in the brine back by half next time (and by a quarter if you do brine overnight.)
Angela says
Hi Mike, I made the ribs yesterday. Brined in the morning, so they didn't have to stay overnight. First time grilling ribs, and everyone loved these. The meat fell off the bone, and I want to say thank you for making the directions/pictures easy to follow. Personally, I felt the salt in the brine was too much. I only ate one rib because they were too salty, but everyone else ate them. Since this was my first time, was I supposed to rinse the ribs after removing from the brine? I did not, only pat dried. Either way, I'll definitely make over and over, but with less salt in the brine. Thank you and my family thanks you too 🙂
jmmx says
Haha - Thank you. 'Tis true.
you have a good recipe.
If you will forgive me for saying so... I have 560 good words at link below. Since you have a sense of humor I believe you may enjoy it. (About 3 min read - less than to read a recipe!) I would love to get your comment.
http://50centflash.com/free-story-the-room/
Regards.
Mike V @ DadCooksDinner says
That's a good word.
Mike V @ DadCooksDinner says
If you want to brine overnight, cut the salt in half. That will make sure the ribs don't get oversalted.
Angela says
Hi Mike, would it be a no no if I brine the ribs overnight? Would that be too much? I'd like to brine them, but unsure if I'll have time the day I want to grill them, so just wondering if I brine the night before if that'll be too much.
Mike V @ DadCooksDinner says
You do lose a little bark - but a lot of it has built up during the hours of cooking without the foil, so the ribs still have some bite to the outside. If you're really into bark, skip the foil...or, unwrap the ribs and put them over direct heat on the grill for a minute or two.
Or, try one of my rotisserie ribs recipes...they're all about the bark.
Horatio says
I like a bit of a bark on my ribs. Not as thick and hard as on a brisket or pork butt. By wrapping the ribs in aluminium foil for the last 30 minutes, don't you end up steaming them with the outside having a rather soft texture, losing the "caramelized" finish?