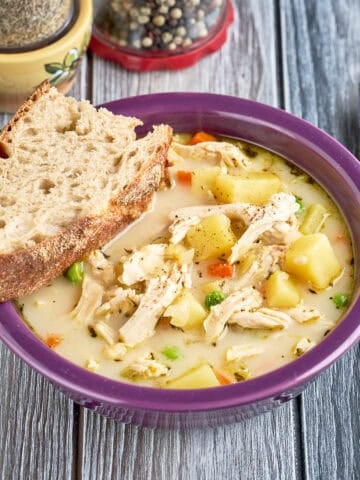
Rotisserie Turkey Dry Brined with Orange and Spices. My go-to Thanksgiving turkey, the one I make every year.
This Thanksgiving, I'm using all the finesse techniques I've learned to cook my Turkey. Here's what I'm going to do.
Would you like to save this recipe?
Jump to:
Why Dry Brine a Turkey?
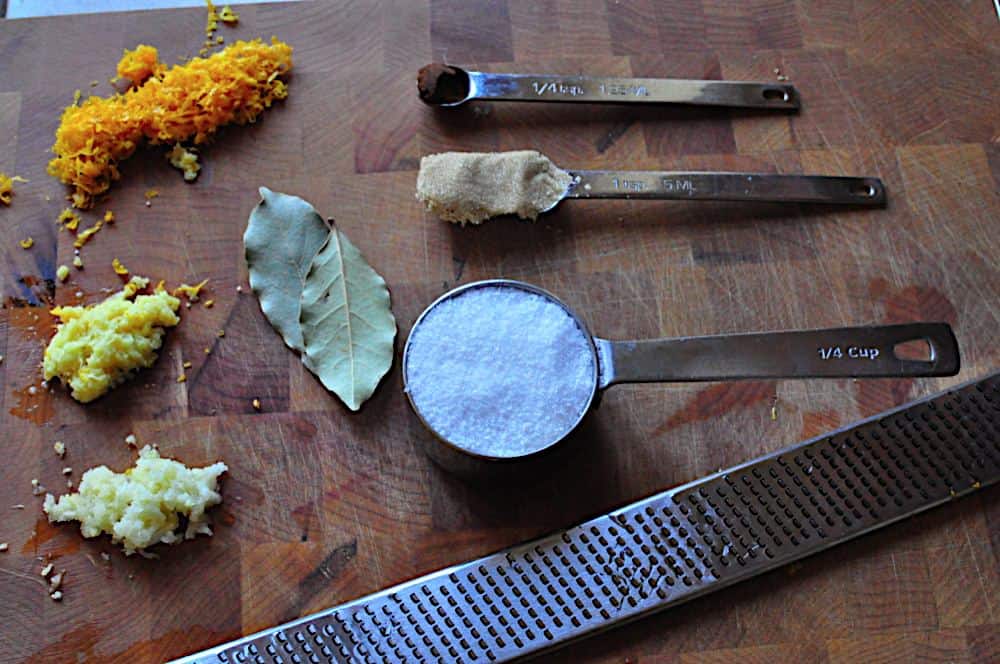
My first trick is to dry brine the turkey. For years, my gold standard for turkey brines was the apple cider brine from Weber's Art of the Grill by Jamie Purviance. I am a complete convert to dry brines now, and I wanted to come up with a dry brine that uses the same flavor profile. I have most of the major ingredients from the Weber brine in my dry rub - salt, a little brown sugar, orange zest, ginger, garlic, and cloves. When combined with a chunk of smoking wood in the grill, you get layers of flavor in the bird - sweet, smoky and salty, with an interesting mix of fruit and spices. This is a turkey that doesn't need gravy to be edible.
*You'll see some bay leaves in the pictures of the dry brine. Ignore them. They're not really there. These are not the bay leaves you're looking for. (Waves hand in dismissive manner.)
**OK, OK, you caught me. I tried to crumble them by hand, and I couldn't break them up small enough to use in my dry brine. I should have used my spice grinder, but I didn't want to get it dirty just for the bay leaves, so I left them out. It tasted great without them.
Don't Overcook the Turkey - Ice the Breast
The next step is cooking the turkey to the appropriate level of doneness. This is tricky. The white meat in the breast should just cook to 160*F so it doesn't dry out. The dark meat in the legs should be cooked above 170*F; it needs extra heat to break down the connective tissue. The problem is - they're both on the same bird, and cooking for the same length of time. I used two techniques to help solve this.
Following the suggestion in Weber's Barbecued Turkey pamphlet I set up the charcoal in a U shape on one half of the grill. This focuses the heat on the turkey's legs, and lessens the heat on the breast.
I also used a trick from Harold McGee. Mr. McGee recommended strapping a couple of ice packs over the breast of the bird after removing it from the refrigerator, so the breasts start out colder than the thighs. His family told him this was "too unappetizing", so he switched to zip-top bags full of ice. Since McGee's On Food and Cooking is the bible of food science, I thought it would be foolish not to take his advice.
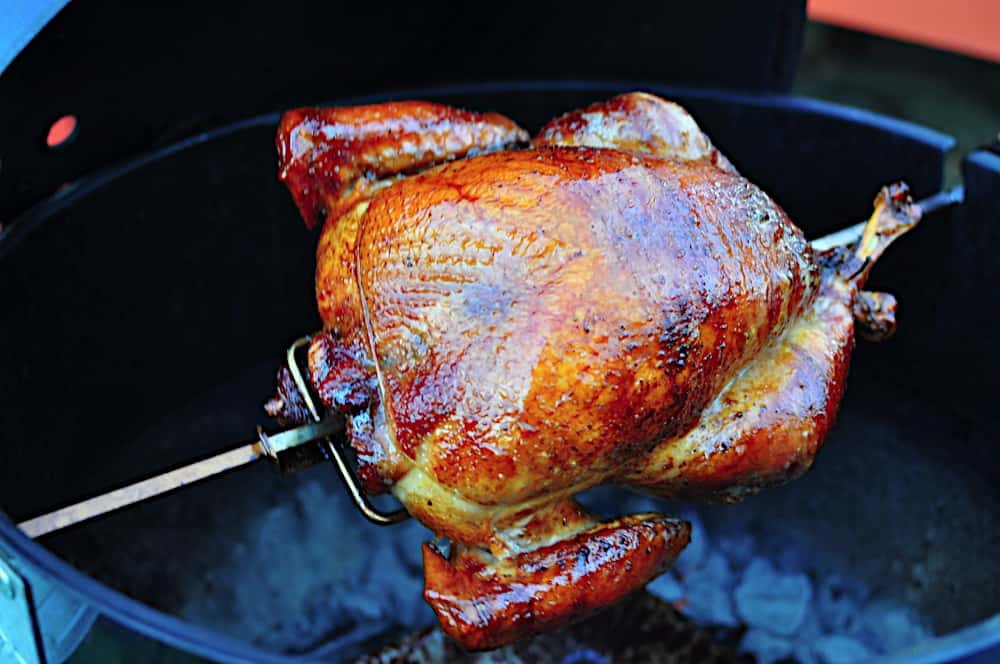
Rotisserie Turkey Is the Best Turkey
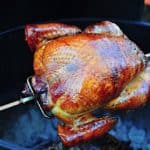
The turkey is cooked on my rotisserie, of course. Nothing comes close to the crisp, crackling skin from the constant convection caused by the circling bird.*
*Sorry, got stuck in a "C" rut there.
The result of all these steps is the best turkey I've ever made. Can you skip all this detail? Sure. Dry brine the turkey with salt, cook it on the rotisserie, and you'll get a great bird. But if you want to take the bird from great to sublime, have I got the recipe for you...
Inspired by: Lots of different sources.
Equipment
- Grill with Rotisserie attachment (I used a Weber kettle with the Rotisserie attachment. Kettle is this Weber Grill,
and rotisserie is this Weber charcoal kettle rotisserie
)
- Aluminum foil drip pan (11"x13", "turkey size", or whatever fits your grill)
- Cotton twine
- Gallon zip-top bag full of ice (optional)
- Instant Read Thermometer
Ingredients
- 12 to 14 lb Turkey
- fist sized chunk of smoking wood (hickory, oak, pecan or a fruit wood; I love oak wine barrel staves
)
Dry Brine Ingredients
- ¼ cup kosher salt (I used Diamond Crystal; reduce to 3 tablespoon if using Mortons, because it is denser).
- Zest of 1 orange (save the orange, cut in half and wrapped in plastic wrap to stuff the turkey)
- 1 teaspoon brown sugar
- 1 teaspoon grated fresh ginger (about a ½ inch piece)
- 1 teaspoon grated fresh garlic (2 cloves)
- ½ teaspoon fresh ground black pepper
- ¼ teaspoon ground cloves
How to grill a Rotisserie Turkey, Dry Brined with Orange and Spices
Note: for an overview of the technique, see my rotisserie poultry post.
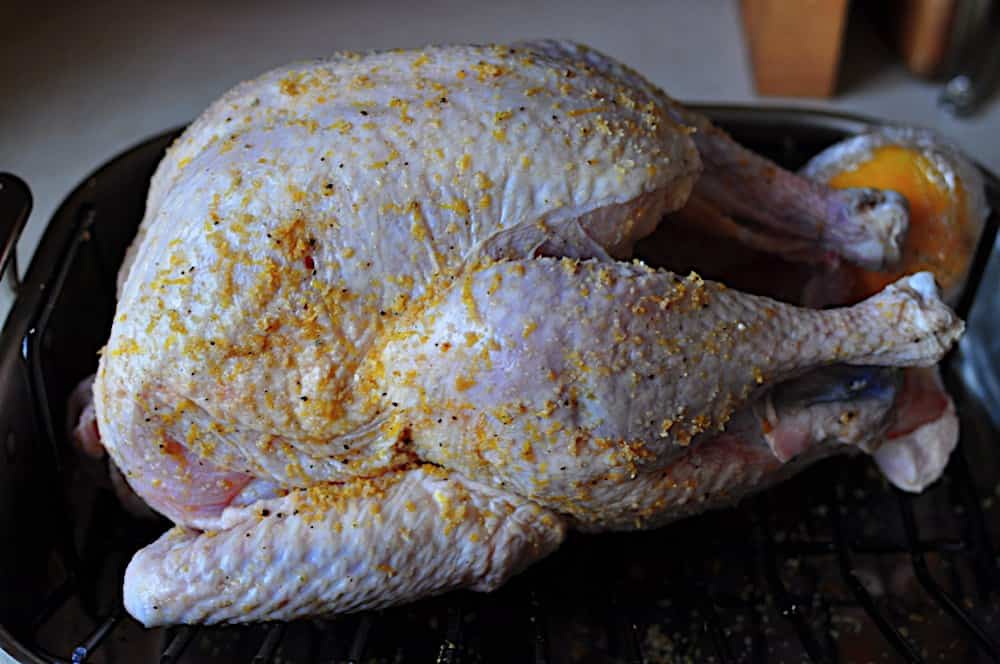
Dry brine the turkey
1 to 3 days before it is time to cook, dry brine the turkey. Mix the dry brine ingredients in a small bowl, then sprinkle and rub evenly over the turkey. Make sure to rub some inside the cavity of the turkey as well. Put the turkey on a rack over a roasting pan or baking sheet, and cover with plastic wrap. Refrigerate, removing the plastic wrap the night before cooking to allow the skin to dry. (If you are only dry brining for 24 hours, skip the plastic wrap.)
Prep the Turkey
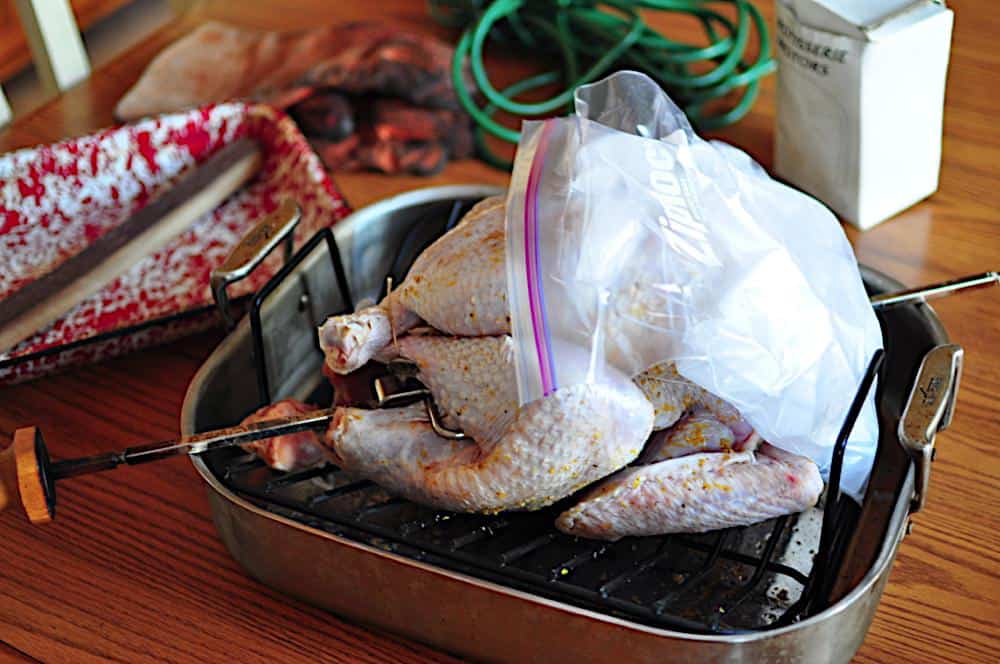
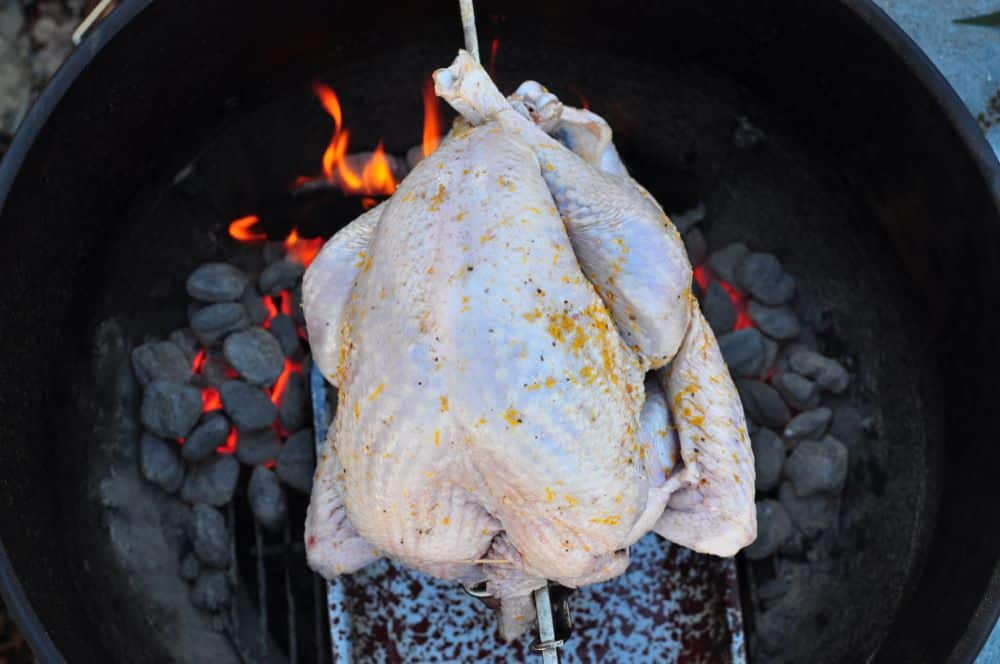
One hour before cooking, remove the turkey from the refrigerator. Stuff the turkey with the halves of the orange, then truss and skewer with the rotisserie spit. Put the zip lock bag full of ice on the breast, not touching the legs or drumsticks, to chill the breast meat until cooking. Put the wood chunk in a bowl of water to soak.
Charcoal Grill Rotisserie Setup
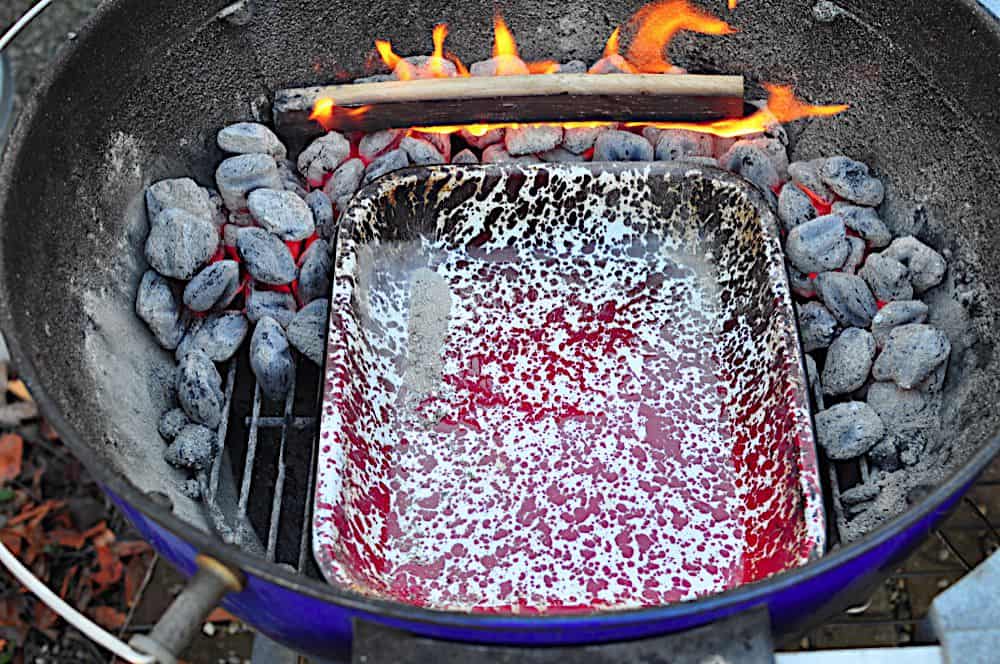
Prepare the grill for rotisserie cooking on indirect medium heat. For my Weber kettle, I light a chimney ¾ full of charcoal and wait for it to be covered with ash. Then, instead of pouring it in my usual two piles on the side of the grill, I pour it in a U shape at one end of the grill (see picture below). I put the drip pan in the middle of the U of charcoal. Finally, put the wood chunk on top of the charcoal, and give it five minutes to start smoking. (More details here: My Rotisserie Basic Technique Post).
OR: Gas Grill Rotisserie Setup
Set the grill up for rotisserie cooking at indirect medium heat (325*F to 350*F). If you can, put all the heat on one side of the grill - instead of two outside burners on medium, set one outside burner on high, and leave the other one off - this concentrates the heat on the legs, which we want to cook more than the breast. For my Weber Summit, I remove the grates, preheat the grill on high for 15 minutes, then turn off all the burners except burner #6, right next to the smoker burner. I leave burner #6 on high, turn the smoker burner on high, and set the infrared rotisserie burner to medium. The drip pan goes in the middle, over the unlit burners.
Cook the turkey
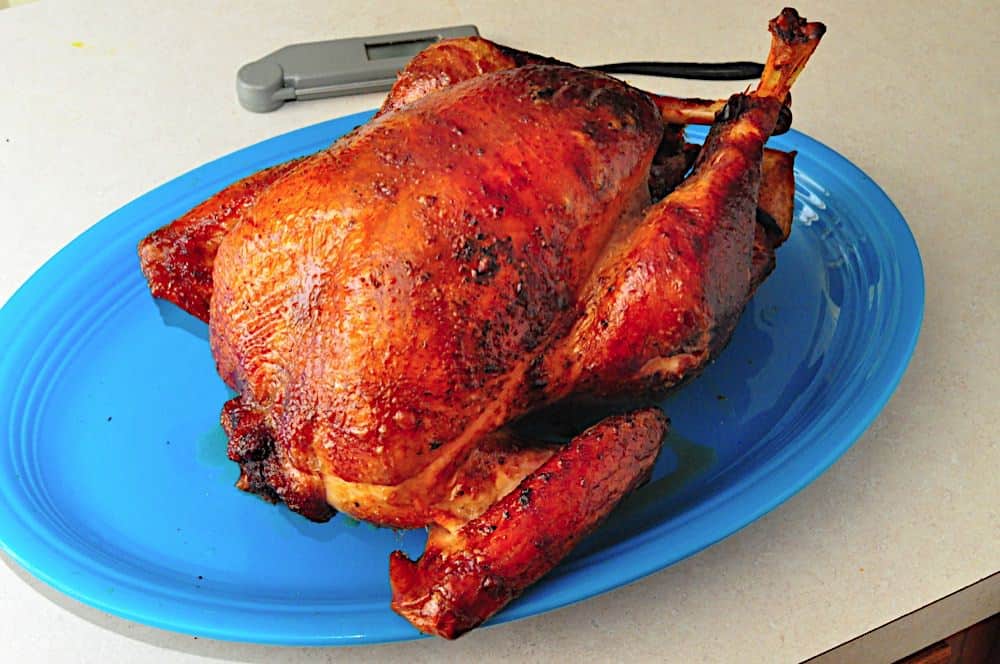
Put the spit on the grill, with the leg side of the bird inside the "U" of coals. Cook the turkey with the lid closed; it will take 2 to 3 hours (usually about 2 ½ hours for a 12 pound turkey). Every hour, add 24 fresh charcoal briquettes to the grill, nestling them into the burning charcoal. Start checking the temperature in the breast with an instant read thermometer at 2 hours. The turkey is done when the breast meat registers 155*F to 160*F in its thickest part. Remove the turkey from the grill, remove the spit from the turkey, and cut the trussing twine loose. Let the turkey rest for 15 to 30 minutes before carving.
Carve the turkey and serve
If you have a favorite way of carving a turkey, go ahead and use it. My preferred method: Cut the legs free from the body of the bird, and cut the drumsticks away from the thighs. I leave the drumsticks whole (my favorite part!) and slice the meat from the thighs in ½" slices for dark meat lovers. Next, I cut the entire breast half from one side of the bird by working my knife down the keel bone from the top down to the wing, following the inside of the ribcage. Once the breast half is free of the bird, it is easy to slice into ½" thick slices on my carving board. I repeat with the other breast half. Finally, I cut each wing away from the carcass, and separate the drumette from the wing, and the wing from the wingtip. I arrange all these pieces on a platter and serve.
Fresh vs Frozen Turkey
- Fresh vs Frozen: There are two advantages to a fresh turkey. The first is they are rarely pre-brined, which is redundant because of the dry brine. (Watch out for the words "enhanced with a X% solution" or "pre-basted") The second advantage to fresh turkey is no thawing is needed! If you have to get a frozen bird, make sure to leave an extra three days or so to thaw it in the refrigerator before staring the dry brine; start thawing it about a week before you'll need it.
Rotisserie Turkey, Dry Brined with Orange and Spices - Recipe
- Total Time: 27 hours
- Yield: 12 servings 1x
Description
Rotisserie Turkey Dry Brined with Orange and Spices. My go-to Thanksgiving turkey, the one I make every year.
Ingredients
- 12 to 14 lb Turkey
- fist sized chunk of smoking wood (hickory, oak, pecan or a fruit wood; I love oak wine barrel staves
Dry Brine Ingredients
- ¼ cup kosher salt (I used Diamond Crystal; reduce to 3 tbsp if using Mortons, because it is denser).
- Zest of 1 orange (save the orange, cut in half and wrapped in plastic wrap to stuff the turkey)
- 1 teaspoon brown sugar
- 1 teaspoon grated fresh ginger (about a ½ inch piece)
- 1 teaspoon grated fresh garlic (2 cloves)
- ½ teaspoon fresh ground black pepper
- ¼ teaspoon ground cloves
Instructions
- Dry Brine the Turkey (For at Least a Day): 1 to 3 days before it is time to cook, dry brine the turkey. Mix the dry brine ingredients in a small bowl, then sprinkle and rub evenly over the turkey. Make sure to rub some inside the cavity of the turkey as well. Put the turkey on a rack over a roasting pan or baking sheet, and cover with plastic wrap. Refrigerate, removing the plastic wrap the night before cooking to allow the skin to dry. (If you are only dry brining for 24 hours, skip the plastic wrap.)
- Prep the Turkey: One hour before cooking, remove the turkey from the refrigerator. Stuff the turkey with the halves of the orange, then truss and skewer with the rotisserie spit. Put the zip lock bag full of ice on the breast, not touching the legs or drumsticks, to chill the breast meat until cooking. Put the wood chunk in a bowl of water to soak.
- Charcoal Grill Rotisserie Setup: Prepare the grill for rotisserie cooking on indirect medium heat. For my Weber kettle, I light a chimney ¾ full of charcoal and wait for it to be covered with ash. Then, instead of pouring it in my usual two piles on the side of the grill, I pour it in a U shape at one end of the grill (see picture below). I put the drip pan in the middle of the U of charcoal. Finally, put the wood chunk on top of the charcoal, and give it five minutes to start smoking.
- OR: Gas Grill Rotisserie Setup: Set the grill up for rotisserie cooking at indirect medium heat (325*F to 350*F). If you can, put all the heat on one side of the grill - instead of two outside burners on medium, set one outside burner on high, and leave the other one off - this concentrates the heat on the legs, which we want to cook more than the breast. For my Weber Summit, I remove the grates, preheat the grill on high for 15 minutes, then turn off all the burners except burner #6, right next to the smoker burner. I leave burner #6 on high, turn the smoker burner on high, and set the infrared rotisserie burner to medium. The drip pan goes in the middle, over the unlit burners.
- Cook the turkey: Put the spit on the grill, with the leg side of the bird inside the "U" of coals. Cook the turkey with the lid closed; it will take 2 to 3 hours (usually about 2 ½ hours for a 12 pound turkey). Every hour, add 24 fresh charcoal briquettes to the grill, nestling them into the burning charcoal. Start checking the temperature in the breast with an instant read thermometer at 2 hours. The turkey is done when the breast meat registers 155*F to 160*F in its thickest part. Remove the turkey from the grill, remove the spit from the turkey, and cut the trussing twine loose. Let the turkey rest for 15 to 30 minutes before carving.
- Carve the turkey and serve: If you have a favorite way of carving a turkey, go ahead and use it. My preferred method: Cut the legs free from the body of the bird, and cut the drumsticks away from the thighs. I leave the drumsticks whole (my favorite part!) and slice the meat from the thighs in ½" slices for dark meat lovers. Next, I cut the entire breast half from one side of the bird by working my knife down the keel bone from the top down to the wing, following the inside of the ribcage. Once the breast half is free of the bird, it is easy to slice into ½" thick slices on my carving board. I repeat with the other breast half. Finally, I cut each wing away from the carcass, and separate the drumette from the wing, and the wing from the wingtip. I arrange all these pieces on a platter and serve.
- Prep Time: 1 day
- Cook Time: 3 hours
- Category: Sunday Dinner
- Method: Rotisserie
- Cuisine: American
Would you like to save this recipe?
Nutrition
- Serving Size: 1 serving of turkey
- Calories: 326
- Sugar: 0.4 g
- Sodium: 1494.2 mg
- Fat: 12.8 g
- Carbohydrates: 0.9 g
- Protein: 49.1 g
- Cholesterol: 163.2 mg
What do you think? Questions? Other ideas? Leave them in the comments section below.
Related Posts
Basic Rotisserie Turkey
Rotisserie Turkey, Dry Brined with Orange and Spices
Rotisserie Turkey - The Big Turkey
Rotisserie Turkey Wrapped With Bacon
Rotisserie Turkey with Cajun Dry Brine
Rotisserie Turkey Breast with Basic Dry Brine
Rotisserie Turkey Breast with Honey Bourbon Glaze
Click here for my other rotisserie recipes.
 Check out my cookbook, Rotisserie Grilling. Check out my cookbook, Rotisserie Grilling. |
Everything you could ask about the rotisserie,
plus 50 (mostly) new recipes to get you cooking.
It's a Kindle e-book, so you can download it and start reading immediately!
*Enjoyed this post? Want to help out DadCooksDinner? Subscribe to DadCooksDinner using the RSS or Email options on the right, link to this post from your blog, recommend DadCooksDinner to your friends, or buy something from Amazon.com through the links on this site. (Like my Rotisserie Grilling cookbook...)

Richard H Marshall says
do you have a time per pound rough idea Mike.I was handed a 20 lb turkey to cook on the rotisserie,any idea what time after midnight on Wednsday I should start cooking for a noon meal on Thursday?
Mike V @ DadCooksDinner says
You want to keep the temperature around 350*F, plus or minus 50*F. There will be some falloff in temperature with charcoal later on in the cook. (This is a good thing - start with a blast of heat, then ease off as you get into the later cooking.)
I live in Northeast Ohio, so the weather on Thanksgiving can be interesting; on cold and windy days, if I can keep the temperature above 250*F I'm happy. The turkey works out fine even if I'm fighting the cold; it's just a matter of when the turkey finishes. I try to leave myself at least an extra half hour, and an extra hour is better; I cover the turkey with aluminum foil when I bring it in to the house to keep it warm.
Luke says
I'm very excited to follow this recipe. Slightly nervous. I am using the Webber with the Rotisserie. What temperature of my grill should I try to maintain?
Mike V @ DadCooksDinner says
Brad,
Thanks for reading through to the end. And yes, you should be fine; my turkey is thawing in the refrigerator as we speak, and I'll be dry-brining it on Monday night.
brad says
Forget my last question. If I had read all the way through your recipe I would have seen you answer that question at the very end. Thanks anyway.
brad says
Hi Mike. I used this recipe last Thanksgiving and my family loved it. A question: this year I'm using a frozen turkey that will take 3 days to thaw in the fridge. Do you think it is safe to thaw it and then dry brine it for another 2 or 3 days before cooking? Got your new book by the way. Looks great.
hfsmm1 hfsmm1 says
Ok, thanks 🙂
Mike V @ DadCooksDinner says
For the Rosemary, Lemon and Garlic dry brine , you need to mince the rosemary and garlic - the spice grinder does that for you.
For the Orange and spices dry brine, everything is already minced (or grated fine), so it is ready to be mixed.
You could mince the ingredients for the Rosemary, Lemon and Garlic dry brine and then mix them if you don't have a spice grinder or mortar and pestle.
Sid says
Hi Mike. I notice in your "Rotisserie Chicken, Dry Brined with Rosemary, Lemon, and Garlic" recipe, you put the dry brine ingredients in a "mortar and pestle or spice grinder, and grind until it is a fine powder". In this recipe you mix the ingredients in a bowl. Is there any reason why you didn't mix them in a mortar or grinder in this recipe? Or does it matter?
Jocelyn says
Great. Thanks.
Mike V @ DadCooksDinner says
The dry brine works great on a gas grill. I do it all the time. Go for it!
Jocelyn says
Can I use your dry brine if I'm using a gas grill? Any thoughts on pros and cons on that? Thanks.
Sid says
Okay. Thanks for the quick reply. 🙂
Mike V @ DadCooksDinner says
I've never tried wrapping the turkey in foil. I'm not sure what that's supposed to do. Steam it, maybe?
It doesn't seem like a good idea to me; I want the turkey skin to brown and crisp, and wrapping it in foil would get in the way.
hfsmm1 hfsmm1 says
Howdy. Thanks for this recipe. I plan to use it for Thanksgiving in a few weeks. I've seen a couple of videos on YouTube where they wrap the turkey in aluminum foil for the first hour or more and then finish without foil. Have you ever tried that technique and if so how did it turn out?
Sid