When I need a quick appetizer, I make hummus. If you have a food processor and some Instant Pot Chickpeas, hummus comes together in minutes.
*If you don't have a food processor, I don't know how you make hummus. I'm sure the recipe has existed for centuries before the creation of food processors.* But doing all that grinding by hand? I need a nap just thinking about it.
**Carl Sontheimer, a french born, MIT trained engineer, invented the Cuisinart in 1973. Why? Because he was bored with retirement. I hope I'm that motivated when I'm retired!
As I said earlier in the week, if you have a pressure cooker, it is worth the effort to make your own chickpeas. Hummus made from homemade chickpeas is sweeter and creamier, and you can use the cooking liquid to add an extra layer of flavor to the recipe. Even with this extra effort, this is still an easy recipe. If you pressure cook the chickpeas, hummus takes under an hour, and it's almost all hands-off time.
*That said, I learned to love this recipe using canned beans. If you're in a hurry, they are an acceptable substitute. And the recipe goes from under an hour to under ten minutes.
Recipe: Pressure Cooker Hummus


Pressure Cooker Hummus
- Total Time: 1 hour 10 minutes
- Yield: 4 cups of hummus 1x
Description
Pressure Cooker Hummus - thanks to my pressure cooker, I can start with dried chickpeas, and have hummus in a little over an hour.
Ingredients
Pressure Cooker Chickpeas
- 1 cup dried chickpeas, sorted and rinsed
- (OR: 4 cups homemade chickpeas, OR: 2 15 oz cans chickpeas, drained)
- 4 cups water (if cooking the chickpeas)
Hummus
- 2 medium cloves garlic, peeled
- ½ tsp kosher salt
- ½ cup chickpea cooking liquid (reserved from cooking the chickpeas, or water if you're using canned)
- Juice of 1 lemon
- ¼ cup tahini (or substitute natural peanut butter, or skip it, see notes)
- ½ cup extra virgin olive oil
- Salt and pepper to taste
- Paprika (for color; smoked spanish paprika, pimenton de la vera, is my favorite)
Instructions
- Pressure Cook the Chickpeas (optional): Put the dried chickpeas and 4 cups water in your pressure cooker, lock the lid, and cook at high pressure for 45 minutes in an electric PC or 40 minutes in a stovetop PC. Let the pressure come down naturally, another 10 to 15 minutes. Drain the beans, saving ½ cup of the cooking liquid for use later in the recipe. (Or, skip this step and substitute make ahead Instant Pot Chickpeas - if they're frozen, thaw them out in the microwave before using them in the recipe. Or, substitute two 15 ounce cans of chickpeas. Rinse them well, and use water instead of the chickpea broth.)
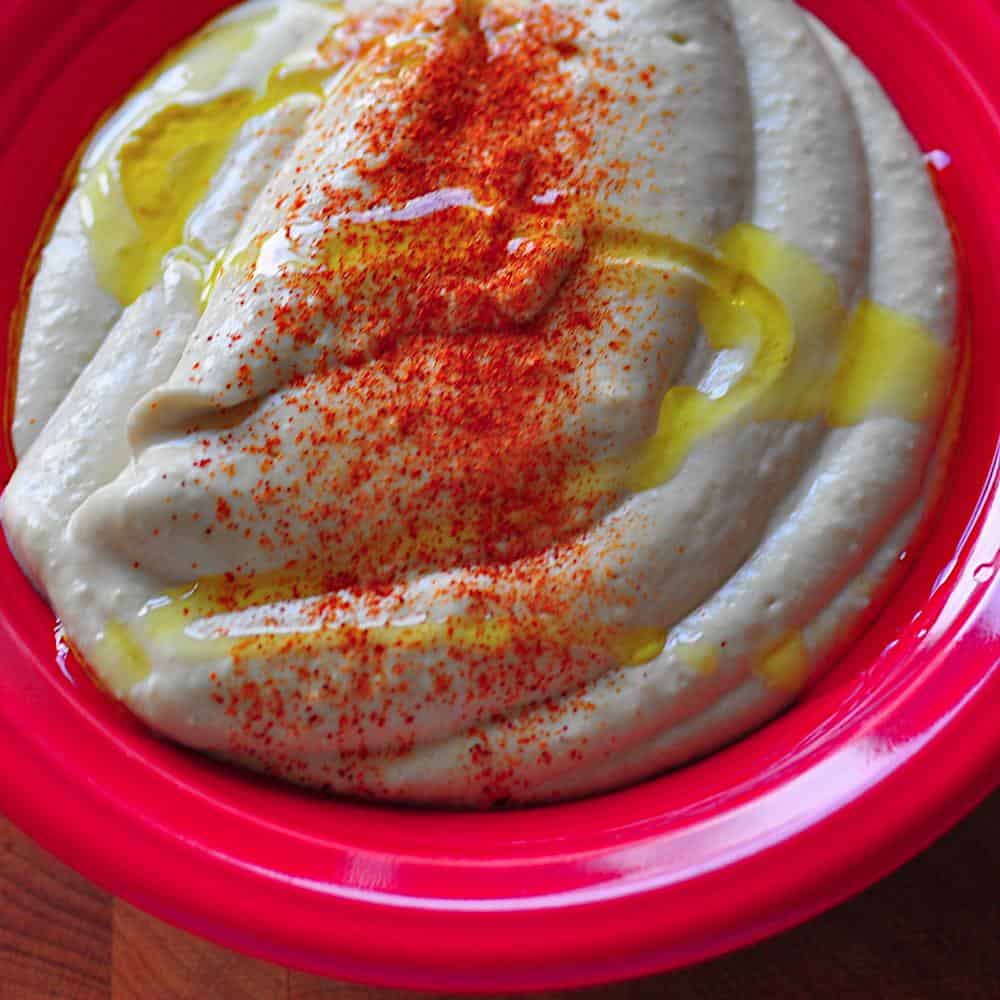
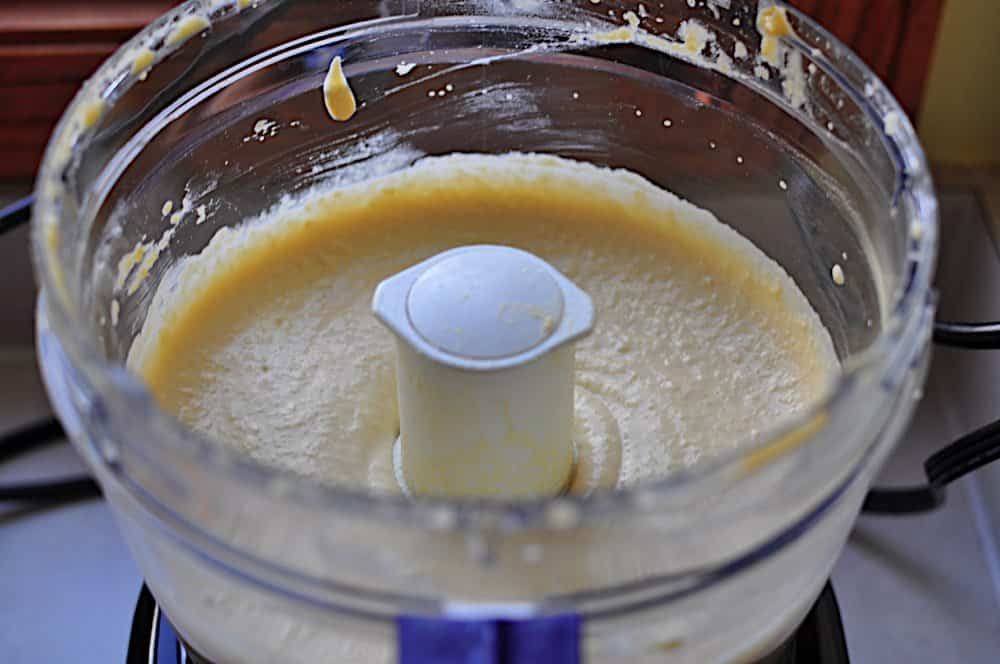
- Make the Hummus: Turn on the food processor, and drop the peeled garlic through the feed tube. Let it process until it is completely chopped, about 30 seconds. Add the chickpeas and ½ teaspoon kosher salt, and process until the chickpeas are ground up, about 5 one second pulses. Add the chickpea cooking liquid, lemon juice, and tahini. Process for 15 seconds, scrape down the sides of the food processor with a spatula, then process another 15 seconds, or until completely combined. The resulting mix will be very thick; scrape down the sides again if it needs it. Turn on the food processor, and drizzle the olive oil in slowly through the feed tube in a thin stream. Let the food processor run for another 30 seconds, or until the hummus looks smooth and a little fluffy. Taste, and add salt and pepper as needed. Remove the hummus to a serving dish, dust with the paprika, drizzle with a little more olive oil, and serve.
Equipment
 Buy Now →
 Notes
This recipe keeps for about a week in the refrigerator, or up to 6 months frozen
My kids' schools have to worry about nut allergies - I made this recipe for Ancient Greek History Day in the classroom and skipped the Tahini. (I know sesame seeds are seeds, not nuts. Unfortunately, they do have some overlap with nut allergies.) The recipe worked without them, so if you have to avoid nuts, you can skip the Tahini.
Tools
Pressure Cooker (I love my Instant Pot electric pressure cooker)
Food Processor (Like my workhorse Cuisinart)
- Prep Time: 10 minutes
- Cook Time: 1 hour
- Category: Pressure Cooker
- Cuisine: Eastern Mediterranean
Would you like to save this recipe?
Notes
- Serve with pita bread cut into triangles (or ripped apart by hand, if you're hungry and/or impatient). Or, serve as a vegetable dip, particularly with carrots.
- This recipe keeps for about a week in the refrigerator, or indefinitely if frozen. But, as I said above, we love to use Hummus as an all purpose vegetable dip, so once it is made I'm lucky if it lasts a day or two.
- I've tweaked my hummus a lot, working in new techniques along the way. I learned to mince garlic by dropping it into a running food processor from Jean Anderson's Process This. I learned how to pressure cook chickpeas from Lorna Sass. And, last but not least, I learned to "add the oil like you're making a vinaigrette" from Cooks Illustrated. In other words, my "Adapted From" section is rather crowded in this recipe...
What do you think?
Questions? Other ideas? Leave them in the comments section below.
Related Posts
Instant Pot Chickpeas
Pressure Cooker Chickpeas with Toasted Bread Crumb Crust
Pressure Cooker Yellow Split Pea Dip (Greek Fava)
My other Pressure Cooker Recipes
*Enjoyed this post? Want to help out DadCooksDinner? Subscribe using your RSS reader or by Email, recommend DadCooksDinner to your friends, or buy something from Amazon.com through the links on this site. Thank you!


Dan says
I love this stuff! I've been making this recipe pretty much every weekend since the summer.
But - I thought the chickpeas were a bit grainy, and peeling them seemed crazy, so I did a little research, and now I soak the chickpeas overnight with about 1/2t of baking soda, and cook them for 60 minutes (after rinsing). It softens the skins.
I also cook the whole garlic cloves with the chickpeas, but fish out the garlic before the chickpeas go into the Cuisinart.
Lastly - I m not sure why this should matter, but I put the chickpeas into the refrigerator for a couple of hours before I process them - it provides a texture that I like better (maybe it's just easier for me to judge how thick/thin the finished product will be).
I agree on the cumin and honey! Thx for the tip.
I also add a splash of vinegar at the end.
Drew says
I made this last night and it was so easy and delicious! The only change I made was I used almond butter instead of tahini or peanut butter. I had no tahini and my son has a peanut allergy. We all loved it especially my 2 year old, once he got a taste of it he wouldn't eat anything else on his plate.
Craige says
Great recipe and lots of interesting additional ideas here in the comments! I will definitely try roasting the garlic. I do prefer my garlic cooked to raw and I'm not a fan of biting down on a chunk (even a tiny one) in the hummus. I love mine pretty lemony, but I will try with lime some time. An idea that you can take or leave would be to indicate for the electric pressure cooker to use the manual setting, not the bean setting. I asked a friend what she thought (as I'm new to the cult of the instant pot, heh) and she figured it was manual. It worked great. I wonder if it still would have on bean setting?
YoavS says
Some Mediteranian tips:
1. After the chickpeas cool down, peel their skin off! That makes ALL the difference between the smooth, fluffy texture of the Arab-style hummus and the lumpy, yellow dish most restaurants make here in the US.
2. When processing the chickpeas in the food processor, ad a couple of ice cubes in it. The Tahini you are about to add into it later on is sensitive to the heat created by the processor's blades. Adding just a little ice will prolong the time you can keep the hummus refrigerator/frozen. It will also be less susceptible to bacteria.
3. The recipe is missing some key ingredients:
3.1. 1/2 tbs Cumin!
3.2. Just a pinch of lemon salt or something as acidic.
I guarantee you won't regret this - Enjoy!
MikeV @ DadCooksDinner says
@justin:
Honey, eh? I never thought of that. I'll have to give it a try next time.
justin says
Hey try drizzling with honey instead of olive oil. The sweetest of the honey pairs so well with the chickpeas oh yeah and sprinkle with some cinnamon instead of paprika
MikeV @ DadCooksDinner says
@dancing kitchen:
That's an interesting idea. I'm enough of a purist that my first thought was "Lime? Really?", but I'll have to give it a try.
dancing kitchen says
Try lime juice instead of lemon...it changes the high note slightly and is a taste I prefer.
MikeV @ DadCooksDinner says
@Tino:
Thanks for the roasted garlic idea - that sounds like a delicous variation. I'll have to try it out.
And... welcome back from your blogging break!
Tino says
I remember as a poor college student finding and buying the "Happy Baby Food Grinder" and attemping to make homemade hummos. Being hand-cranked, it took me quite a while to get through several cans of ceci. Let's just say that you are absolutely right that you need a food processor to get a nice smooth puree. My poor friends choked down a few bites just to be nice, but I could tell by the looks on their faces that they'd rather be eating broken glass.
I've clearly improved since then.
One other suggestion I will make is to use roasted garlic in place of the raw. You can use a lot more of it (for those that are garlic-heads) and you can use the extra virgin olive oil you roasted the garlic in place of the fresh olive oil.