After my trip to Certified Angus Beef, I'm excited about burgers. Ounce for ounce, a good burger has as much beef flavor as a good steak. 3
Now, I'm not going to say burgers are hard - I know they are the first thing everyone throws on the grill - but there are a few tricks to know if you want the best possible burger.
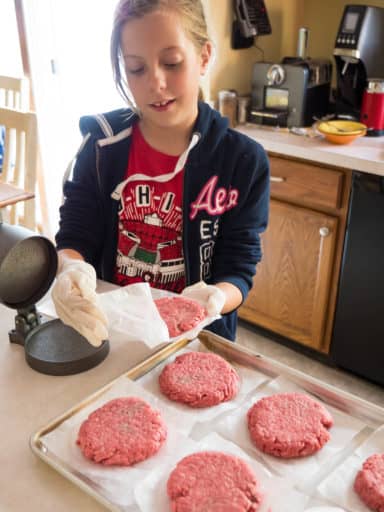
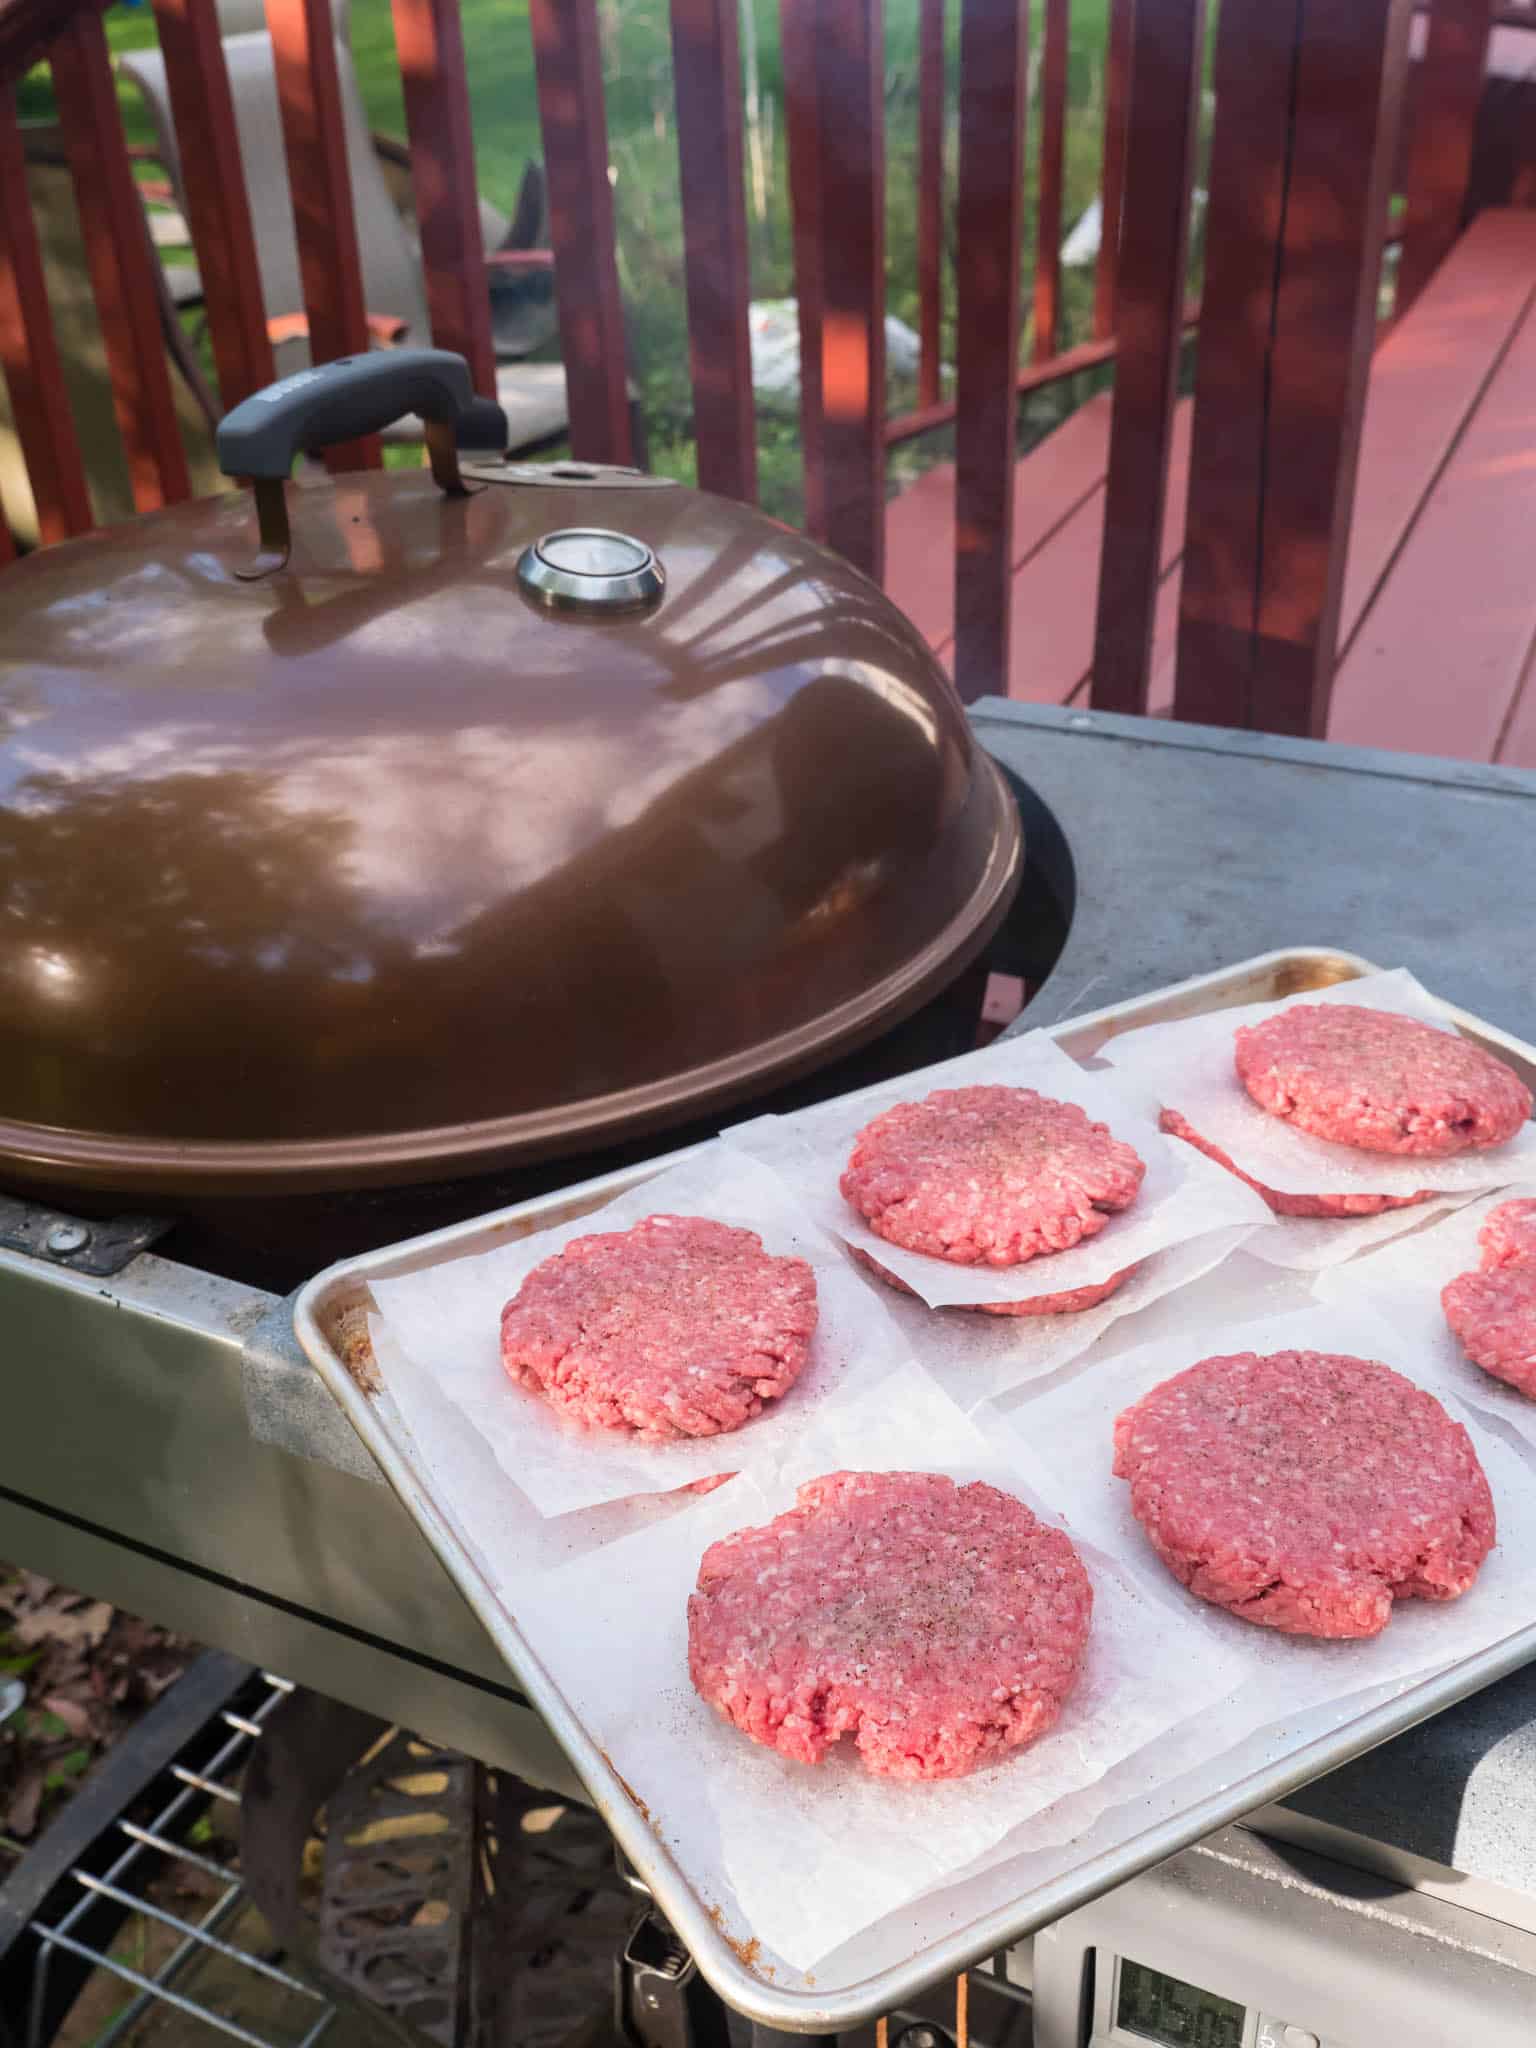
Tip #1: do not to overwork the meat. Use a gentle hand when you're shaping the burger - overworked burgers are dense and tough. I use a burger press - I gently form a handful of meat into a ball, then press it flat and fix any cracks in the edges. That's actually...
Tip #2 - make sure the edge of the burger is structurally sound. If there are any breaks in the edge, they will pull apart in the heat of the grill, and worst case the burger may break into pieces.4
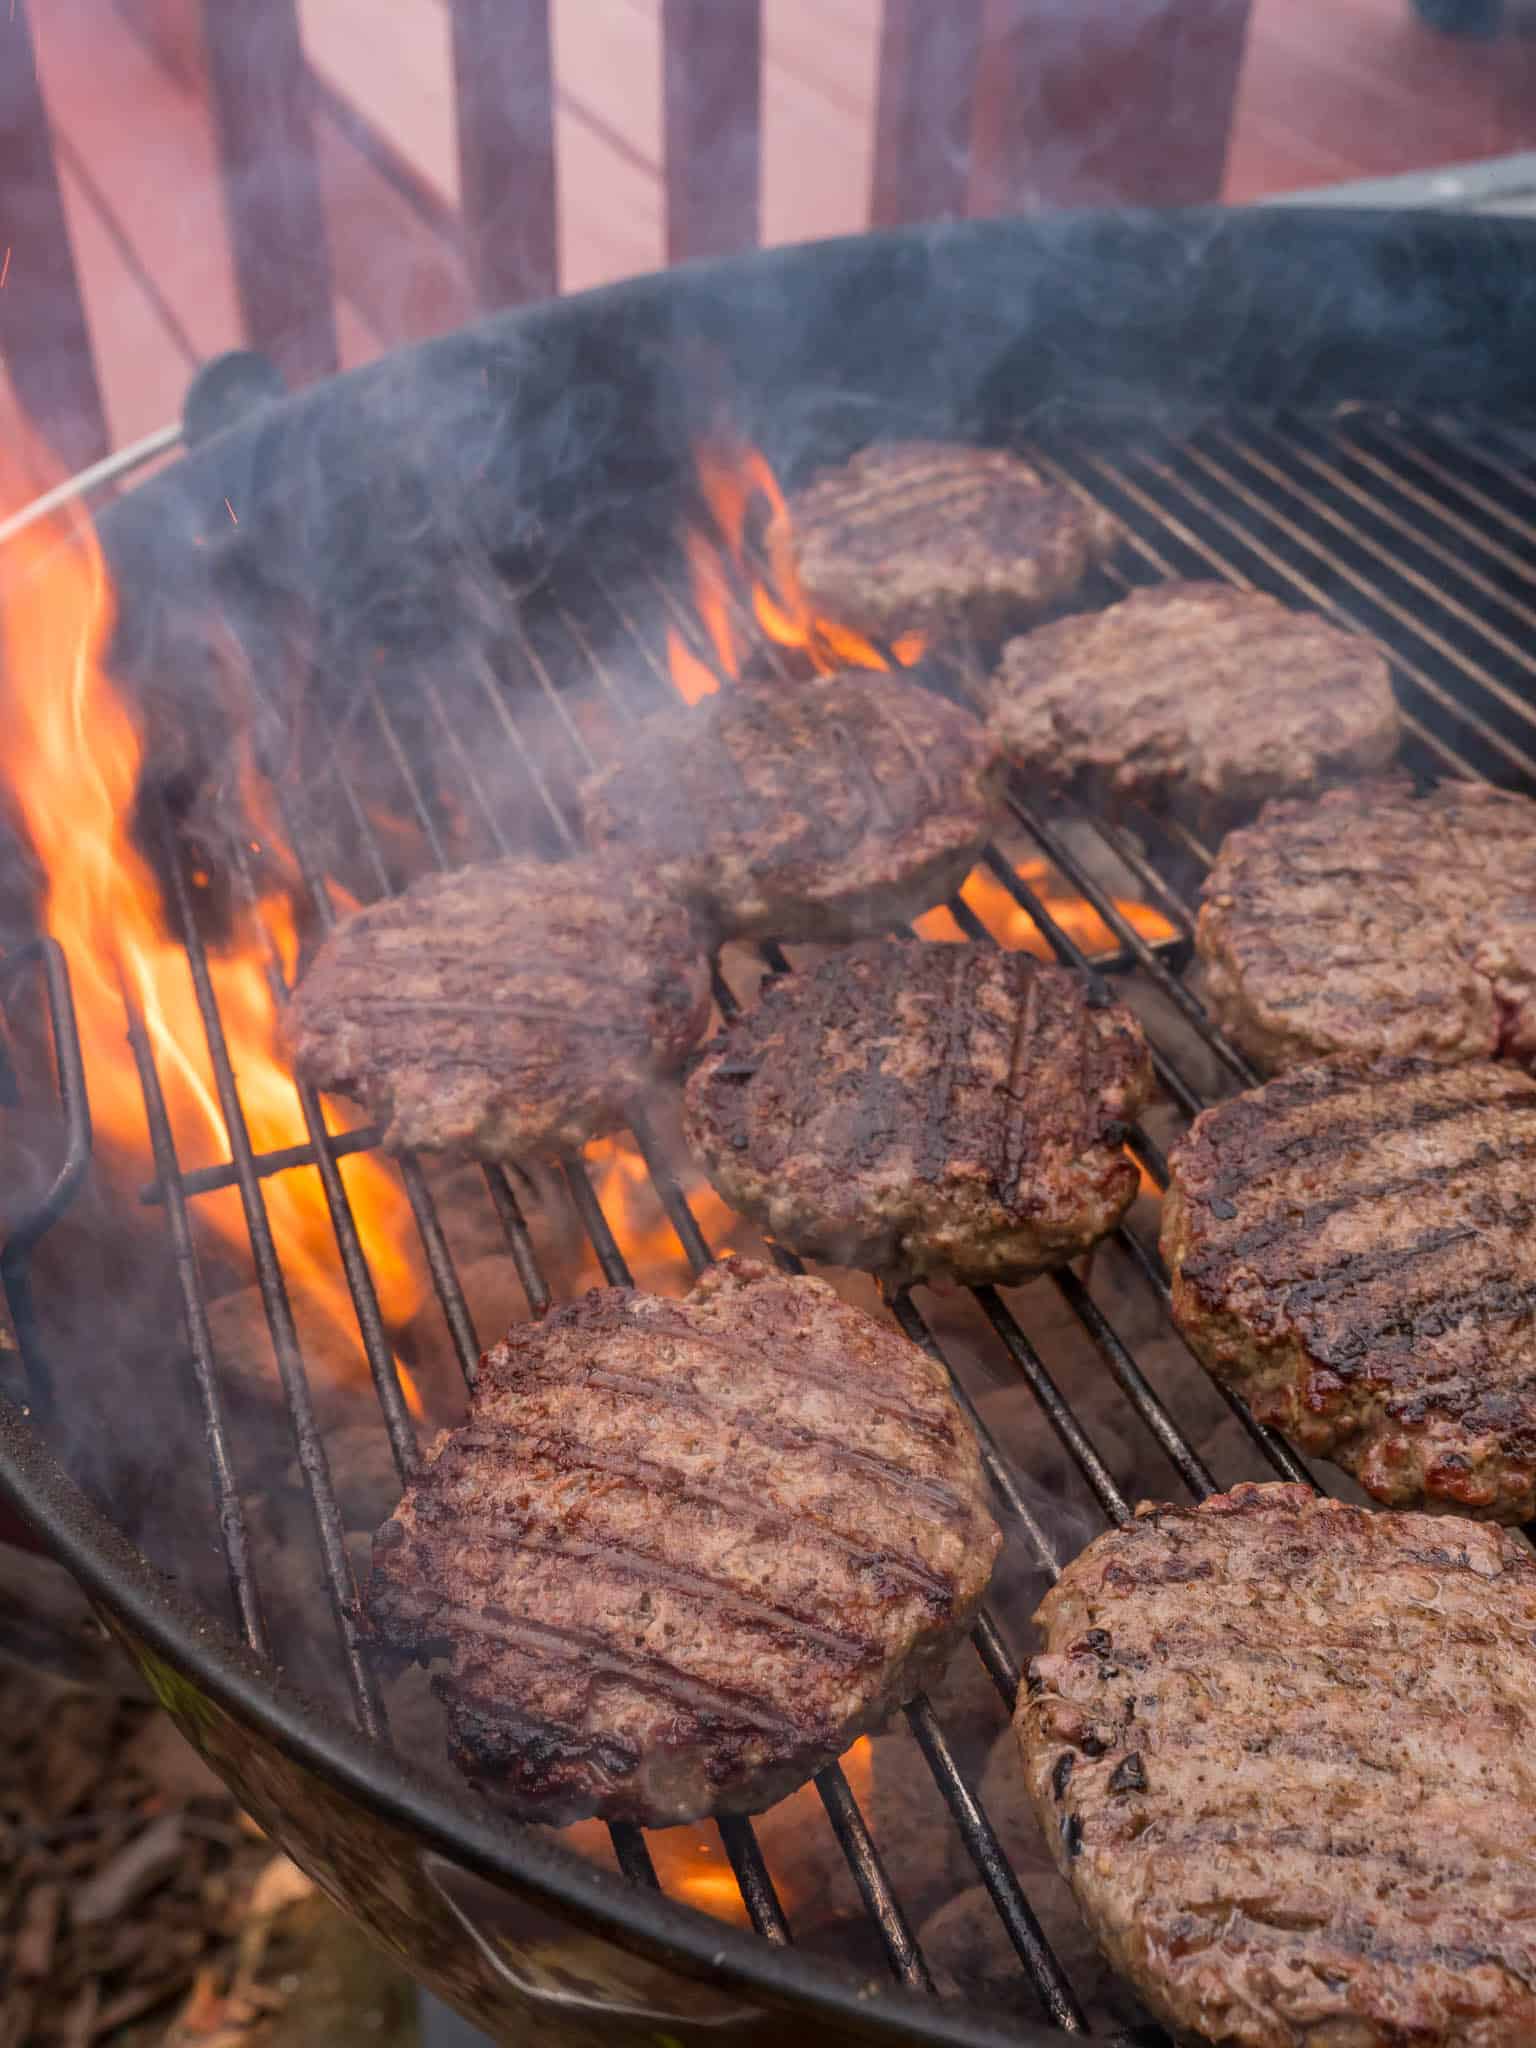
Tip #3 is to leave some of the grill as a cool zone. Burgers drip lots of fat into the grill. The occasional flare-up is fine, but if a raging fire starts under the burgers, move them to the cool zone for a minute to let the flames die down.
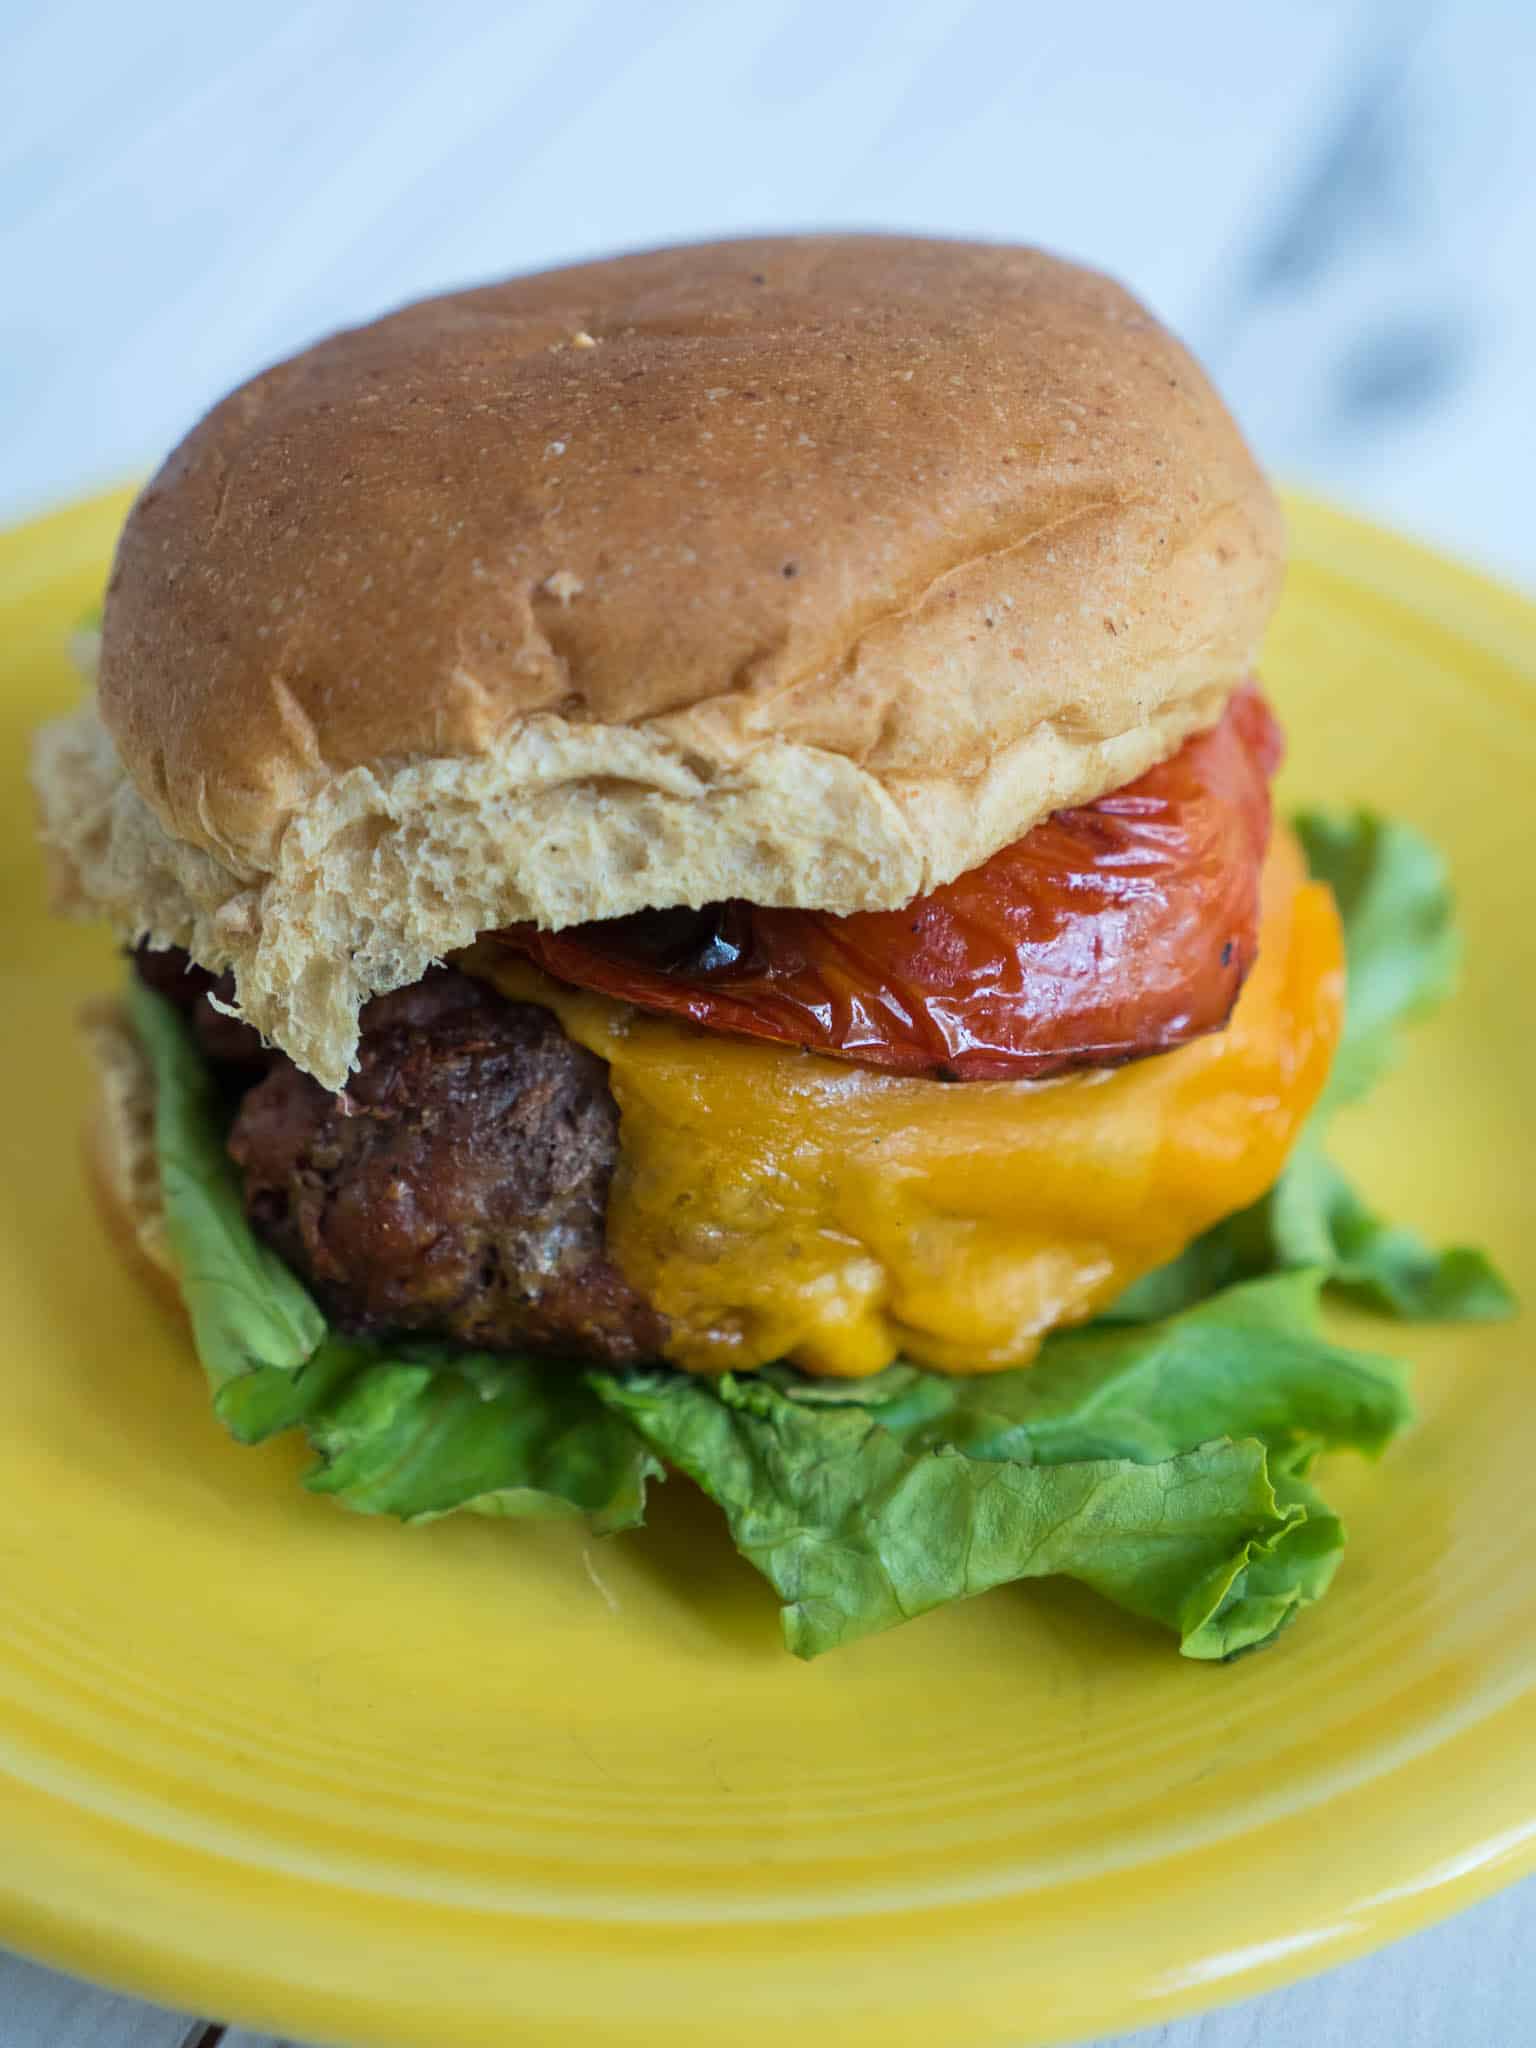
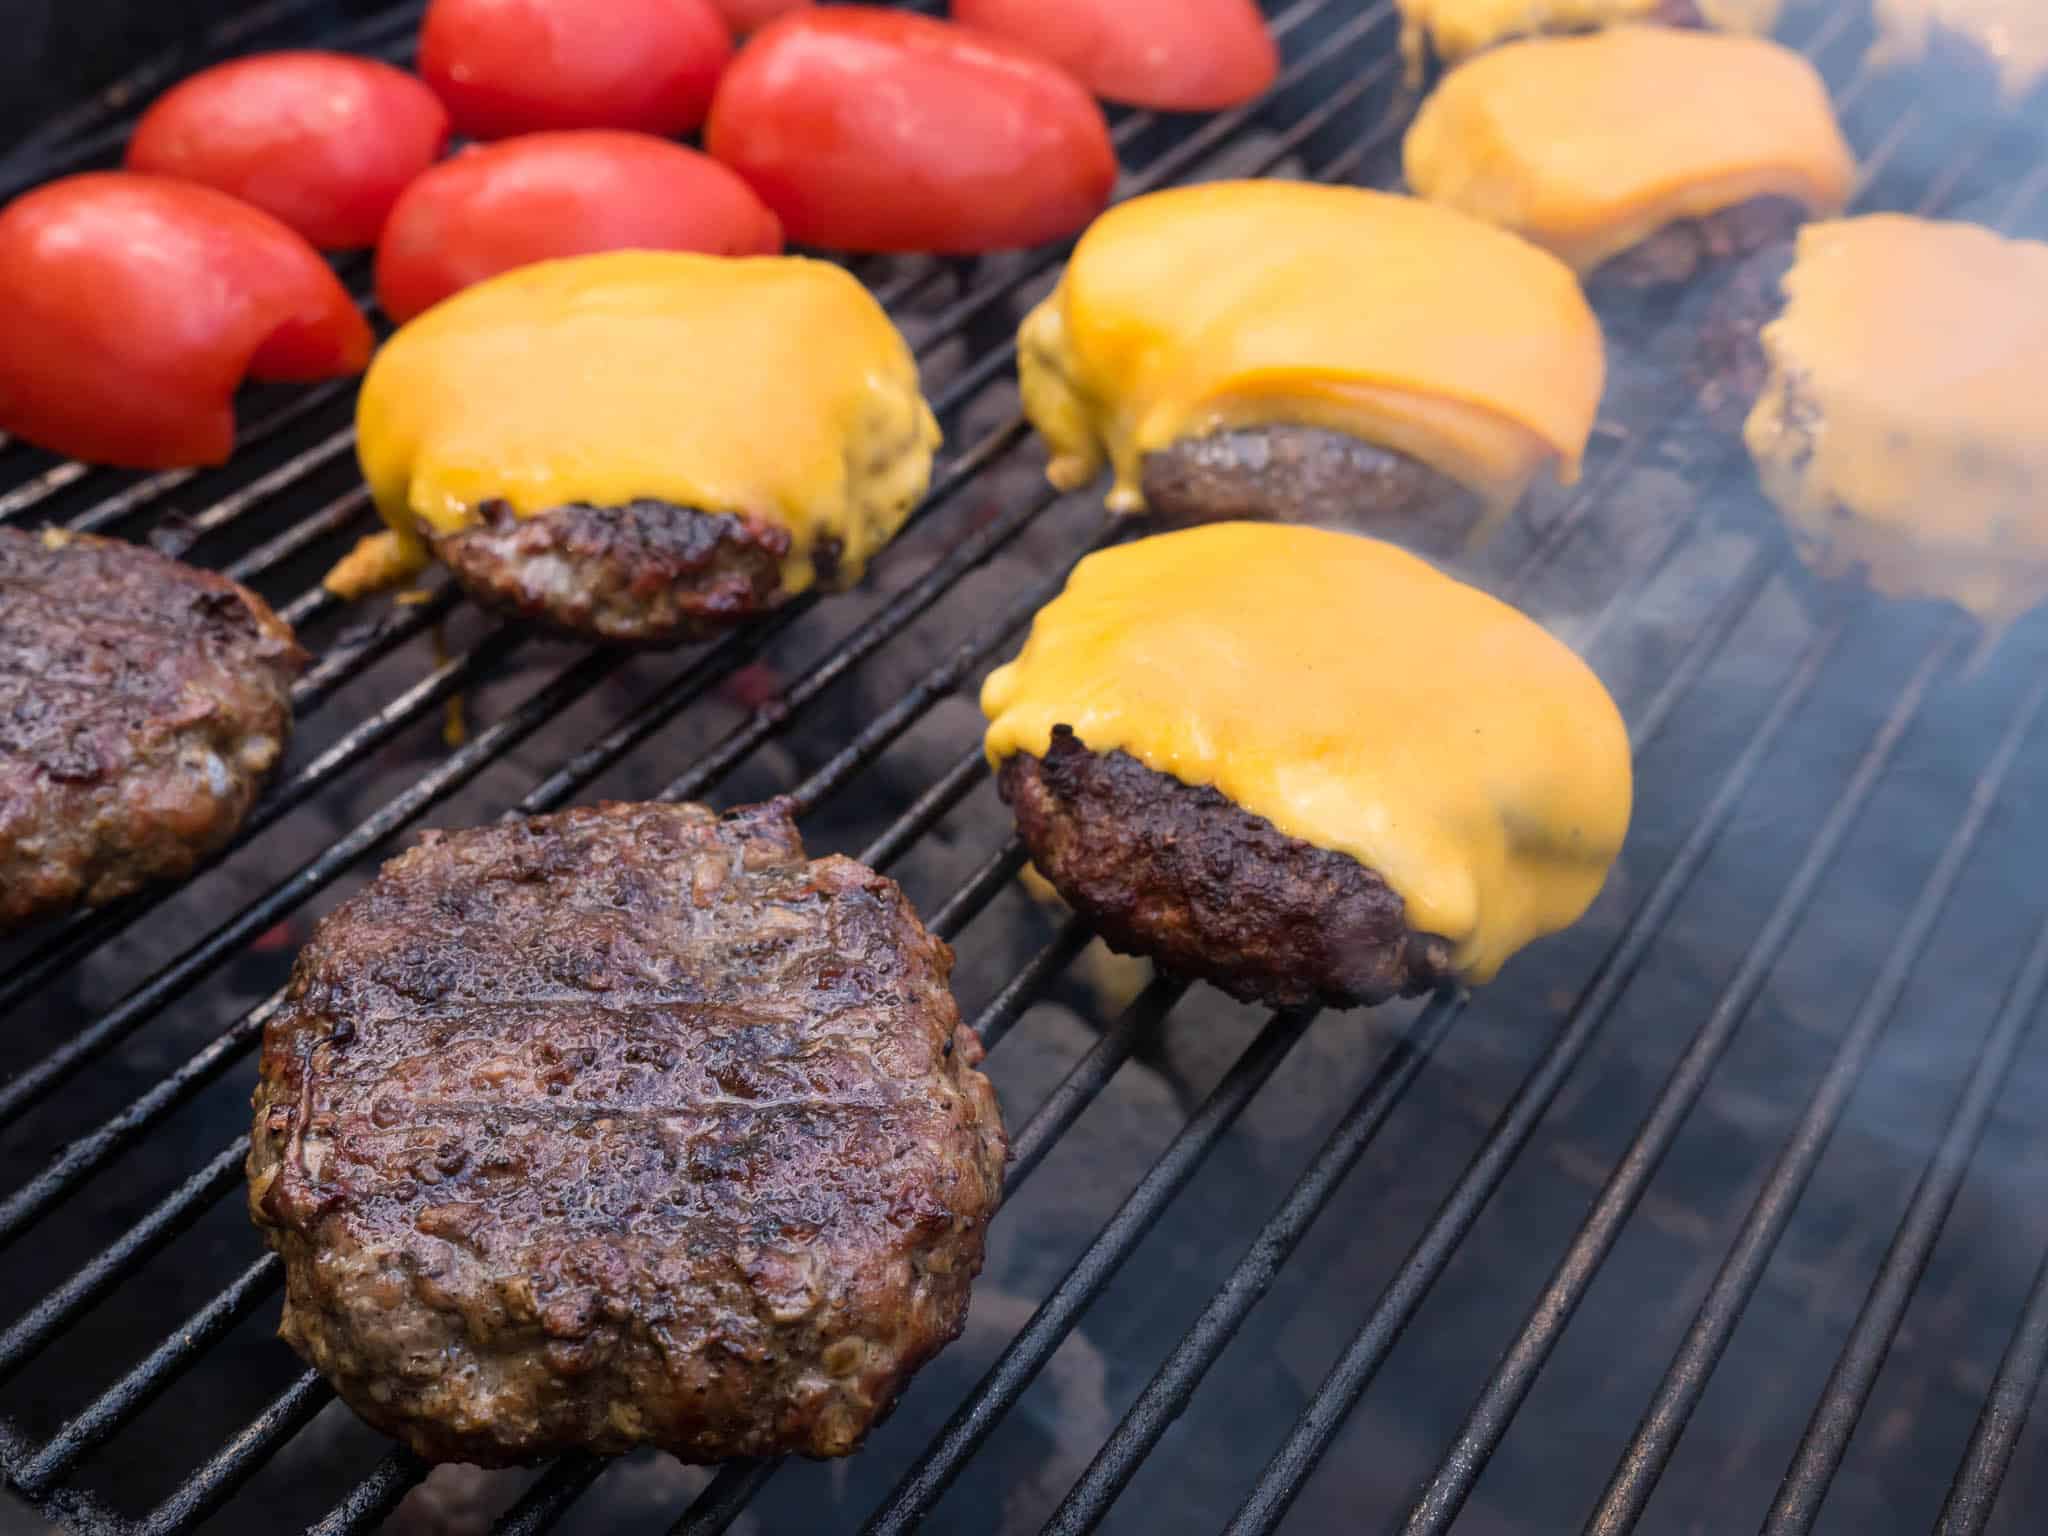
The final Tip, #4, is add the cheese for the last couple of minutes. I like the crispy, lacy edges that come from cheese melting on the grill, and prefer it to a cold slice of cheese on the bun.
So, here it is, my recipe for basic cheeseburgers. Nothing fancy, and nothing better.
Recipe: Grilled Cheeseburgers
Equipment
- Grill (My trusty Weber Kettle.)
- Spatula
- Optional: Burger Press (Mine is massively over-engineered. I love it.)
Grilled Cheeseburgers (Grilling Basics)
- Total Time: 30 minutes
- Yield: 8 burgers 1x
Description
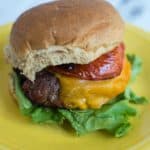
Grilled Cheeseburgers. The one, the only, the classic cheeseburger, grilled to perfection.
Ingredients
- 2.5 pounds ground chuck (aka “80/20 ground beef”)
- 2 teaspoons kosher salt
- 1 teaspoon fresh ground black pepper
- 8 slices American cheese (or cheddar)
- 8 hamburger buns
Accompaniments
- 1 large red onion, peeled and cut into ¼ inch slices
- Green leaf lettuce
- Pickle slices
- Ketchup, mustard and mayonnaise
Instructions
- Shape the burgers: In a large bowl, gently break up the ground beef, then divide the meat into eight equal sized portions, each weighing 5 ounces. Form each portion into a patty, roughly ½ inch thick by 4 inches wide. Be careful not to overwork the meat - handle it as little as possible - but make sure the edges are well formed to hold the burger together on the grill. (This is where the burger press comes in handy.) Repeat until you have eight burgers. Sprinkle the salt and pepper over the burgers.
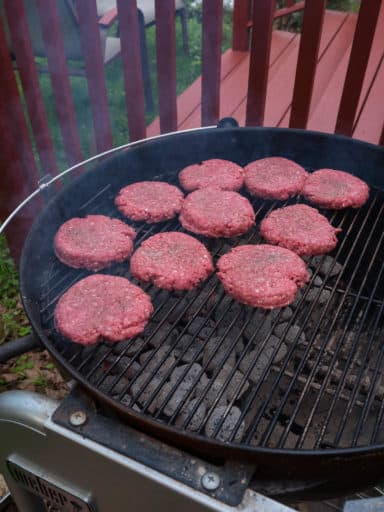
- Set the grill to direct medium: Set up the grill for direct medium heat, with a zone with no heat. On my Weber kettle, I fill my charcoal chimney ¾ full (about 45 coals), light it, and wait for the coals to be covered with gray ash. Then I pour them in a single, loose layer over half of the charcoal grate, put the grill grate in, and brush it clean with my grill brush.
- Cook the burgers: Set the burgers on the grill grate over direct medium heat. (On a gas grill, I keep the lid closed as much as possible while grilling.) Grill the burgers until they are well browned on the bottom, about five minutes. Flip the burgers and grill until the burgers are cooked through and browned on the bottom, about five more minutes. If the burgers cause a large flare up, move them to the no heat side of the grill grate for a few seconds to let the flames die down. During the last two minutes of grilling, top each burger with a slice of cheese, and close the lid to melt the cheese. Move the burgers into the buns.
- Serve: Pass the burgers and the accompaniments at the table, and let everyone add the toppings they want to their burger.
- Prep Time: 20 minutes
- Cook Time: 10 minutes
- Category: Grilling
- Cuisine: American
Would you like to save this recipe?
Nutrition
- Serving Size: 1 burger
Notes
- No burger press? No worries. Gently shape the burger with your hands, giving it a bit of a dimple in the middle so it doesn't puff up on the grill.
- Burgers always shrink on the grill. No matter how I shape them, how wide I make them, they always seem to wind up smaller than the buns. If you want a burger to overflow the bun, make it wider than you think you should - wider than seems safe - and you'll be OK. Me? I think I'm going to attack the problem from the other end and buy slider buns next time.
- Of course you can get fancy - grill the onions, use a better cheese, go crazy with the toppings. Burgers are a foundation to build on. Once you've got your basic burger, go wild! (My current favorite: Fire Roasted Poblano Burgers.)
What do you think?
Questions? Other ideas? Leave them in the comments section below.
Related Posts
For fancier burgers, check out my Fire Roasted Poblano Burgers , or for vegetarians, my Portobello Burgers. If you want a fancy way to serve ground meat on the grill, check out my Kofta Kebabs recipe. And, for a great side dish with burgers, make my Instant Pot Potato Salad.
Enjoyed this post? Want to help out DadCooksDinner? Subscribe to DadCooksDinner via eMail or RSS reader, recommend DadCooksDinner to your friends, and buy something from Amazon.com through the links on this site. Thank you.
Dan Kelleher says
We ask the butcher to ground a chuck roast for the perfect burger (and is usually cheaper than the store ground). I form by hand (4-5" diameter to allow for shrinkage), season both sides with Montreal steak seasoning and cook direct heat for 2-3 min each side and then move to indirect until done. Serve on a toasted Ciabatta roll....Yum
Kevin der Kinderen says
The press seems overkill and also seems to go against the principle of not overworking the meat. I have a set of round cookie cutters. The largest 2 or 3 help shape the perfect sized burger. I select the one that is about the size of my bun or just bigger. It keeps the sides in shape but I don't compact the beef into the cutter to cut down on the handling. I'm thinking of buying a square set of cookie cutters just for the Wendy's-shaped burger at home.
Always look forward to your emails and posts. Thanks!
Chris L says
Fascinating. Most burger recipes I've seen call for cooking the burgers on high heat (especially on a gas grill). What convinced you to turn it down to medium?
Mike V says
On high, the outside burns before the inside is cooked through - I had to turn the heat down.