
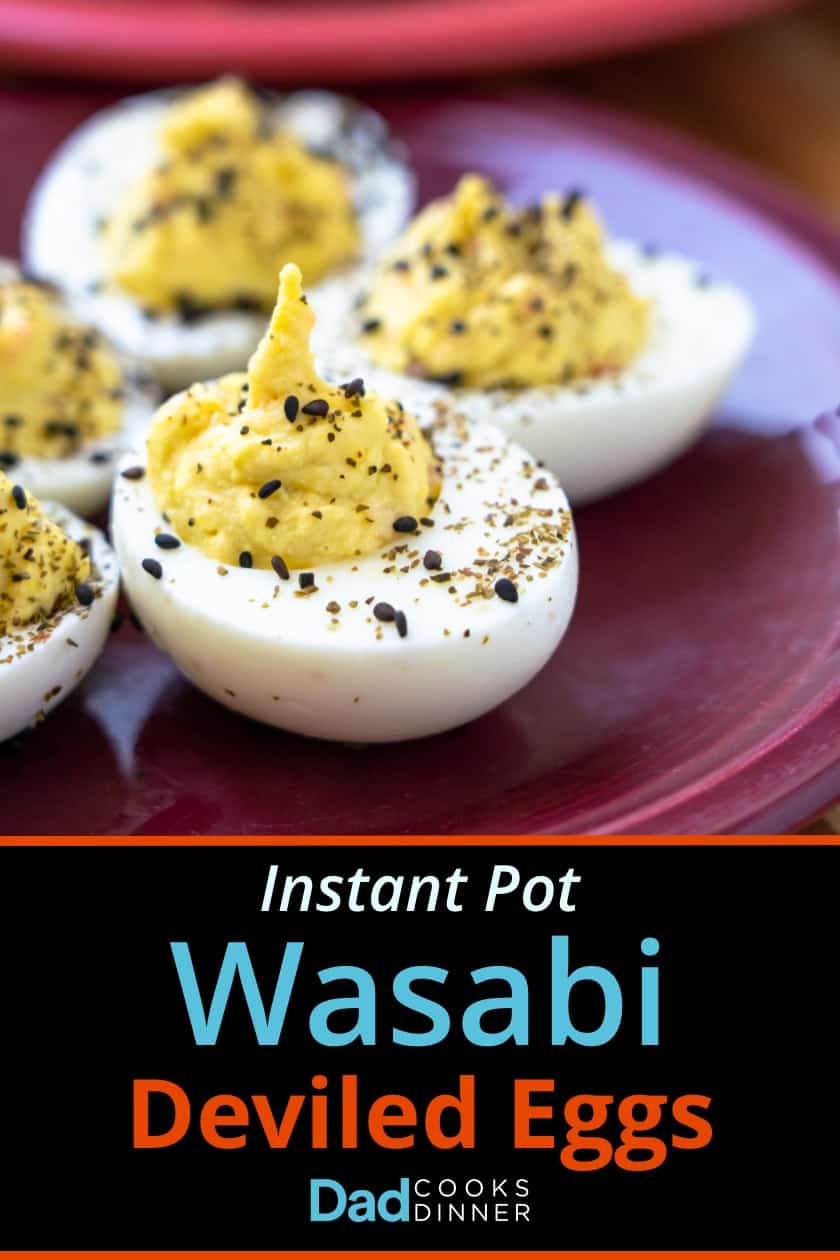
These Instant Pot Wasabi Deviled Eggs went from a change of pace to the star of the show. With my Instant Pot Hard Boiled Egg technique pinned down, deviled eggs were my next target.
Because…I can't resist them. My brother-in-law1 makes fantastic deviled eggs. When he brings them as a holiday appetizer, the temptation is too great. I keep finding myself in the dining room thinking "Just one more" until the platter is empty.
Would you like to save this recipe?
Jump to:
How hard can deviled eggs be? Yolks, mayonnaise, mustard (for deviling), and maybe some pickle relish. Should be easy, right? Well, my traditional deviled egg recipe isn't working out yet. It's not bad…just kind of bland. (I'm consulting with my brother-in-law to find out what my recipe is missing. More news to come soon.)
Luckily, I wanted some other devilish ideas to go with the classics. I'm not a deviled egg purist; there are all sorts of variations, and I love them all. Especially these deviled eggs from Pam Anderson with wasabi and pickled ginger. I made a variation on Pam's recipe as my backup, to compare to my "normal" deviled eggs.
The wasabi eggs were the runaway hit with my kids. I was shocked. The taste test didn't start out well. I was peppered with questions about the ingredients:
- Wasabi: "Is it going to be too spicy?"
- Pickled ginger: "Ew, I don't like pickles."
- Kelp sprinkle: "What are those green flakes?"
- Black sesame seeds: "…and those black things?"
They even wanted to know if the wasabi turned the eggs green. (No. And, darn! I started quoting Green Eggs and Ham...and the yolks came out bright yellow. Sigh.2)
When I passed the platter around, I had to tease and cajole to get them to try the wasabi eggs. But, after trying one, they reached for another. And then another…I had to pull the plate away to have enough for everyone to test.
I know what I'm bringing as an appetizer to my next potluck: these Instant Pot wasabi deviled eggs.
🥫Ingredients
- Eggs
- Wasabi Powder
- Pickled Ginger
- Mayonnaise
- Furikake seasoning
See recipe card for quantities.
🥘 Substitutions
Wasabi powder and Pickled ginger are both found in the international aisle of well-stocked grocery stores.
If your store has wasabi paste instead of wasabi powder, use it instead. Paste is a 1 to 1 substitute for the wasabi powder.
Furikake seasoning adds an extra layer of flavor and crunch to the eggs, but it is optional because it can be hard to find if you don't have a well-stocked Asian market nearby. Substitute sesame seeds (preferably black sesame seeds) if you can't find Furikake seasoning.
🛠 Equipment
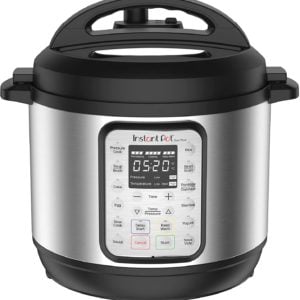
A 6-quart pressure cooker. And, because we're using the pressure cooker as a pressure steamer to cook the eggs, a steamer basket to hold the eggs above the water.
A quart sized zip-top bag to use as a piping bag, and a pair of scissors to snip off the tip of the bag.
📏Scaling
This recipe can be doubled or halved. Keep the 1 cup of water in the pressure cooker the same, and double or halve the rest of the ingredients. When I'm making deviled eggs for a potluck or party, I always double the eggs in the cooker, so I can make two different types. I have gone as high as an 18-pack of eggs in my 6-quart pressure cooker.
💡Tips and Tricks
- The key to Instant Pot eggs is the 5-5-5 timing. Five minutes at high pressure, five minutes of natural pressure release before quick releasing any remaining pressure, and five minutes (at least) in an ice bath. Perfect eggs every time.
- Pressure Cooker eggs are easy to peel if you don't rush the chilling step. The colder the eggs, the easier they are to peel. Peeling under cold running water also helps, but isn't absolutely necessary.
- The tricky part of this recipe is cleanly slicing the eggs in half. I use a sharp, thin paring knife. I clean it after every egg by dunking it in a glass of warm water and then wiping it clean with a paper towel. The other key is to be decisive - make one clean, continuous slice through the egg. He who hesitates is lost…or at least has eggs with zig-zag edges.
- The final trick is using a zip-top bag as a pastry bag. It gives you a lot of control when piping the mashed egg filling into the eggs. A cheap plastic bag with one corner snipped off stands in for the pastry bags used to make fancy frosting decorations on cakes. Or, in this case, fancy towers of egg filling.
Instant Pot Wasabi Deviled Eggs
- Total Time: 28 minute
- Yield: 12 eggs 1x
Description
Instant Pot Wasabi Deviled Eggs, a spicy treat with a mix of sweet pickled ginger and wasabi heat.
Ingredients
- 6 large eggs
- 2 teaspoons wasabi powder or wasabi paste
- 1 tablespoon minced pickled ginger
- 4 tablespoons mayonnaise
Garnish (optional)
- Japanese furikake seasoning (or a mix of nori flakes and black sesame seeds)
Instructions
- Hard boil the eggs (Instant Pot 5-5-5 eggs): Pour 1 cup of water into an Instant Pot or other pressure cooker. Put a vegetable steaming basket in the pot, and set 6 large eggs in the basket. Lock the lid and pressure cook on high pressure for 5 minutes ("Manual" or Pressure Cook mode on the Instant Pot.). Once the pressure cooking time is over, let the pressure come down naturally for 5 minutes to finish cooking, then quick release any remaining pressure. Immediately move the eggs to an ice water bath to chill down for at least 5 minutes. (Detailed instructions here: Instant Pot Hard Boiled Eggs)
- Separate the yolks and mash the filling: Peel the hard-boiled eggs. Slice the peeled eggs in half lengthwise, and gently remove the yolks to a bowl. (Set the whites aside on a plate, cut side up.) Break up the yolks with a fork until they are crumbled, then sprinkle with the wasabi powder. Add the pickled ginger and mayonnaise to the bowl. Stir and mash with the fork until completely combined and most of the lumps of egg are gone. (Or, if you want an ultra-smooth filling, blend with a hand mixer.) At this point, the egg halves and filling can be covered and refrigerated for up to a day.
- Pipe the filling into the eggs, garnish, and serve: Use a quart-sized zip-top bag as a piping bag: scoop the filling into a quart-sized zip-top bag and squeeze the filling down into one corner, then seal. Snip off ¼ inch of that corner of the bag, then squeeze the bag from the top to pipe out the filling. Pipe the filling into the holes in the egg halves. Sprinkle the eggs with nori flakes and black sesame seeds (or furikake shake).

- Prep Time: 20m
- Cook Time: 15m
- Category: Appetizer
- Method: Pressure Cooker
- Cuisine: American
Would you like to save this recipe?
Nutrition
- Serving Size:
- Calories: 70
- Sugar: 0.3 g
- Sodium: 110.9 mg
- Fat: 5.9 g
- Carbohydrates: 0.8 g
- Protein: 3.2 g
- Cholesterol: 94.9 mg
☃️ Storage
Once you have halved the eggs and mashed the filling, you can store them, covered and refrigerated, for up to a day. This is how I take them to a party - I put the eggs in a single layer in a gallon zip-top bag, and the filling in its own quart zip-top bag. Then, I keep everything chilled until it is time to serve, and pipe the filling into the eggs at the party.
Deviled eggs will last for up to 4 days in the refrigerator, [according to the USDA]. Yolks don't freeze well, so eat those eggs. (This is not a problem in my house.)
🤝 Related Posts
Enjoyed this post? Want to help out DadCooksDinner? Subscribe to DadCooksDinner via email and share this post with your friends. Want to contribute directly? Donate to my Tip Jar, or buy something from Amazon.com through the links on this site. Thank you.


Spencer Pearse says
Here in the Southwestt, I usually add a 4 oz can of diced green chile ! And maybe diced ham! YUM YUM
bob says
Try putting white vinegar in with the yolks.
Mike Vrobel says
I found it sour enough with just the pickled ginger - but if you want to give it a try, go for it.