At my farmers market grilling demo, I heard:
This chicken is great! What kind of barbecue sauce did you use on it?
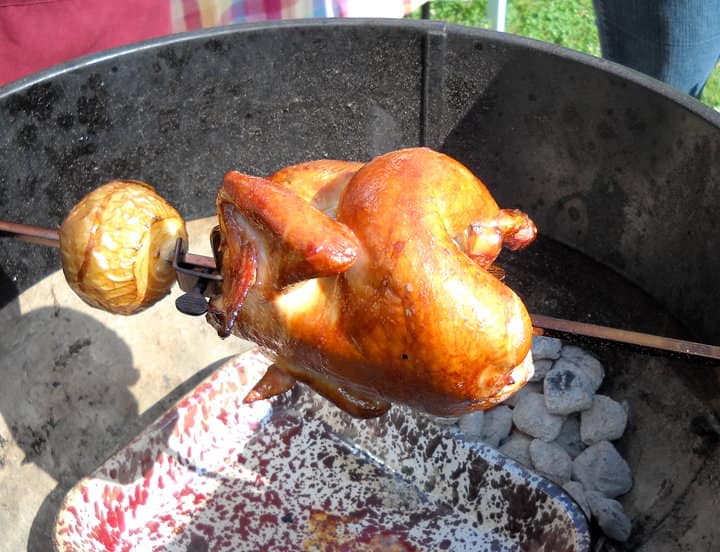
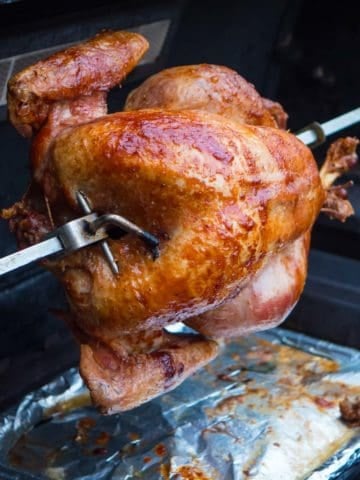
The answer: no barbecue sauce. The chicken was salted a day ahead of time, I put a sprig of thyme under the skin of the breast, and I cooked it on my rotisserie with a chunk of smoking wood. That's it!
*This recipe was my hook at the market; it reeled people in. When a group of people walked by, I'd lift the grill lid and show the browned chicken rotating over the coals. Every time I did that, I had the attention of the crowd - they'd stop what they were doing and listen to me. Behold: the power of rotisserie chicken!
This recipe is all about the art of simple grilling. The salt and smoke enhance the flavor of the chicken, and the rotisserie crisps up the skin. There's nothing between you and the taste of the bird, so make sure to get a bird with a lot of flavor. I had the advantage of a pasture raised chicken from Brunty Farms, so I had a great chicken to show off my cooking.
*Difeo's Poultry is another place in Akron for quality poultry. If you don't have access to a local farmer selling fresh chicken, get the best bird you can. My local grocery carries Gerber poultry, which is a good option. I've had good results with Bell and Evans chickens as well.
Recipe: Rotisserie Chicken, Dry Brined
Adapted from: Judy Rodgers, Zuni Cafe Cookbook
Cook time: 60 minutes
Equipment:
- Grill with Rotisserie attachment (I used a Weber kettle
with the Rotisserie attachment
)
- Aluminum foil drip pan (9"x11", or whatever fits your grill)
- Butcher's twine for trussing the chicken
Ingredients:
- Two whole chickens, 3.5lbs to 4.5 lbs
- ½ teaspoon kosher salt per pound of chicken (2 teaspoons per chicken)
- 4 thyme sprigs (2 per chicken)
- 1 chunk smoking wood, fist sized (oak, hickory, or a fruit wood like apple or cherry)
Instructions:
See my Basic Technique: Rotisserie Poultry for more details. And, sorry for the lack of pictures - I got caught up in talking with people at the market. See the basic technique, and the other rotisserie recipes at the bottom of the post for pictures on how to set up a rotisserie chicken.
1. Dry brine the chicken: Salt and refrigerate the chicken at least the night before cooking, and up to 3 days ahead of time. Sprinkle the salt evenly over the entire chicken. I start by sprinkling salt in the cavity of the bird. Then I salt and rotate: first the breast, then one side (with the leg and wing facing up), then flip and do the other leg and wing side. Finally, I salt the bottom (backbone) side of the chicken. I use about ½ teaspoon of salt per "side", using a little less in the cavity and on the backbone. Next, I loosen the skin from the breast meat by gently running a finger under the skin of each breast. Then I put a sprig of thyme under the skin, on top of each breast - two per chicken. Refrigerate the chicken in a roasting pan. If you are salting more than a day in advance, cover the chicken with plastic wrap, and remove the plastic the night before cooking to let the chicken dry.
2. Truss and skewer the chicken: One hour before cooking, remove the chicken from the refrigerator. Fold the wingtips back under the chicken, then truss the chicken tightly. (Again, see the basic technique for trussing details). Skewer the chicken on the spit - get it on there tight! I like to put one set of prongs under the breast of the first chicken, then the other skewer through the thighs. Then, I put the second bird on upside down compared to the first bird. This makes the whole spit more balanced, which eases the load on the rotisserie motor. Also, it looks cool that way.*
*Yes, I'm a cooking nerd.
3. Prepare the grill: Prepare your rotisserie for cooking on indirect high heat. For my Weber kettle, I light a chimney starter* full of charcoal, wait for it to be covered with ash, then pour it in two equal piles on the sides of the grill, and put the drip pan in the middle, between the piles. I put the chunk of smoking wood on one of the piles of charcoal, and I'm ready to cook.
*I highly recommend the Weber Chimney Starter. It is larger than most chimney starters. It holds 5 quarts of charcoal, which exactly the right size for cooking this recipe.
4. Cook the chicken: Put the spit on the grill, turn on the rotisserie motor, and cook with the lid closed. The cooking time will be from 45 minutes to 1 hour 15 minutes, depending on the size of the bird. A 4 lb bird will be done in about an hour. The chicken is done cooking when the temperature in the thickest part of the breast meat is 160*F to 165*F; start checking about 15 minutes before you think the bird will be done.
*It is better to determine doneness with an instant read thermometer, but the dry brine does give you some room for error. I overcooked the chicken I was serving at the market, because I was too busy chatting with people. Even though the breast showed 174*F when I took it off, the chicken was juicy and delicious.
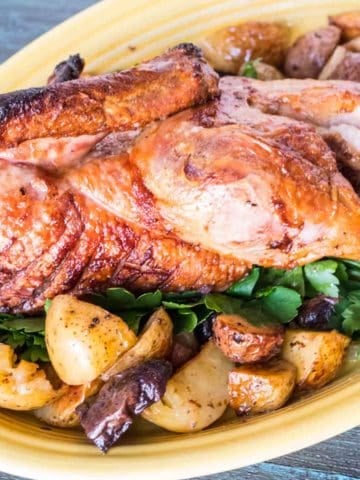
5. Serve: Remove the spit from the grill, remove the chicken from the spit, and remove the trussing string from the chicken. Let the chicken rest for at least 15 minutes, then carve and serve.
 |
| Stopping traffic with a rotisserie chicken |
Variations:
I prefer to keep things simple when I have a good chicken, fresh from the farmers market. For a change of pace, I like to try these variations:
*Put half a lemon and herbs in the cavity before trussing the bird. Any herbs will do; use whatever you have on hand. I like the "Simon and Garfunkel" herbs - parsley, sage, rosemary and thyme, in whatever combination is available.
*BBQ rub - Skip the thyme sprigs. Sprinkle barbecue rub all over the chicken with the salt (or instead of the salt, depending on how much salt your barbecue rub has). Work some of the rub under the skin, on the breast meat, as described for the thyme.
Related Recipes:
Don't have a rotisserie? Try my butterflied chicken recipe instead.
Rotisserie Chicken, brined and cooked on a gas grill
Rotisserie Chicken, Red Chile Marinated
Click here for my other rotisserie recipes.
Special Thanks:
Thank you to Jeff and Melanie at Brunty Farms for the chicken.
Tami Mitchell at DineInDiva.com and GardenGroceryGadgetGirl.blogspot.com for the pictures in this post.
Inspired by:
Judy Rodgers: Zuni Cafe Cookbook
 Check out my cookbook, Rotisserie Grilling. Check out my cookbook, Rotisserie Grilling.
Everything you could ask about the rotisserie, It's a Kindle e-book, so you can download it and start reading immediately! |
*Enjoyed this post? Want to help out DadCooksDinner? Subscribe to DadCooksDinner using the RSS or Email options on the right, link to this post from your blog, recommend DadCooksDinner to your friends, or buy something from Amazon.com through the links on this site. (Like my Rotisserie Grilling cookbook...)

Dennis
Mike ... You do use less salt than the technique I mentioned. I looked at Jamie's recipe and he uses a 1/4 cup of kosher salt and says to cover the chicken "like a light blanket of snow."
MikeV @ DadCooksDinner
@Dennis:
I learned the technique from Judy Rodgers, and she does not rinse the bird before cooking, so I never have. I'm not using that much more salt than I would if I was salting the bird normally, and it's never tasted "too salty".
Dennis
Great blog!
I've used the dry brining technique as presented by Jamie Purviance in Weber's Charcoal Grilling and he recommends that the bird be rinsed after brining.
After dry brining, do you rinse the bird prior to cooking?
Thinking about it, but without the cookbook in front of me, I believe Jamie uses more salt than you for the brining.
I also noticed your relatively light use of seasonings in your rotisserie recipes. I've always leaned towards using rubs, but will give it a go!
Again, great blog. Thanks for sharing your passion.
MikeV @ DadCooksDinner
@Pat:
I've moved from wet brining to dry brining almost all the time now. The only time I use a wet brine is when I don't have the time for the overnight rest in the refrigerator. When I buy a chicken the day I'm going to cook it, for example.
Try it, you'll like it!
Pat
I've never tried a dry brine. I think I've been missing out! I'll give it a go on the next bird.