DadCooksDinner

  • Home
  • Rotisserie
  • Recipes
  • Tools
  • Books
  • Merch
menu icon
go to homepage
  • Recipes
  • Books
  • Tools
  • Merch
  • About
    • Facebook
    • Instagram
    • Pinterest
    • RSS
    • Twitter
  • subscribe
    search icon
    Homepage link
    • Recipes
    • Books
    • Tools
    • Merch
    • About
    • Facebook
    • Instagram
    • Pinterest
    • RSS
    • Twitter
  • ×
    Home » Recipes » Ramblings

    Why Cut a Beef Tenderloin in Half for the Rotisserie?

    Published: Dec 17, 2015 · Modified: Apr 26, 2017 by Mike Vrobel · This post may contain affiliate links · 6 Comments

    Why fold a beef tenderloin for the rotisserie?
    Why fold a beef tenderloin for the rotisserie?

    Commenter Cary had a question about Tuesday's Rotisserie Beef Tenderloin with Horseradish Mustard Crust recipe:

    In direction #2 you say to “Cut the roast in half, truss the two pieces together, then skewer on the rotisserie spit,” Why are you cutting it in half?

    I explain that in the video that goes with the recipe...which I thought I would have done by today. I always underestimate how long editing video takes, especially when you’re a noob with a brand new Adobe Premiere license, like me.

    So, because I need to stall for time the question deserves an answer - why do I cut it in half? And, what does that actually mean?

    There are two problems to solve with Rotisserie Beef Tenderloin, both about even cooking.

    Thick head on the left, thin tail on the right.
    Thick head on the left, thin tail on the right.

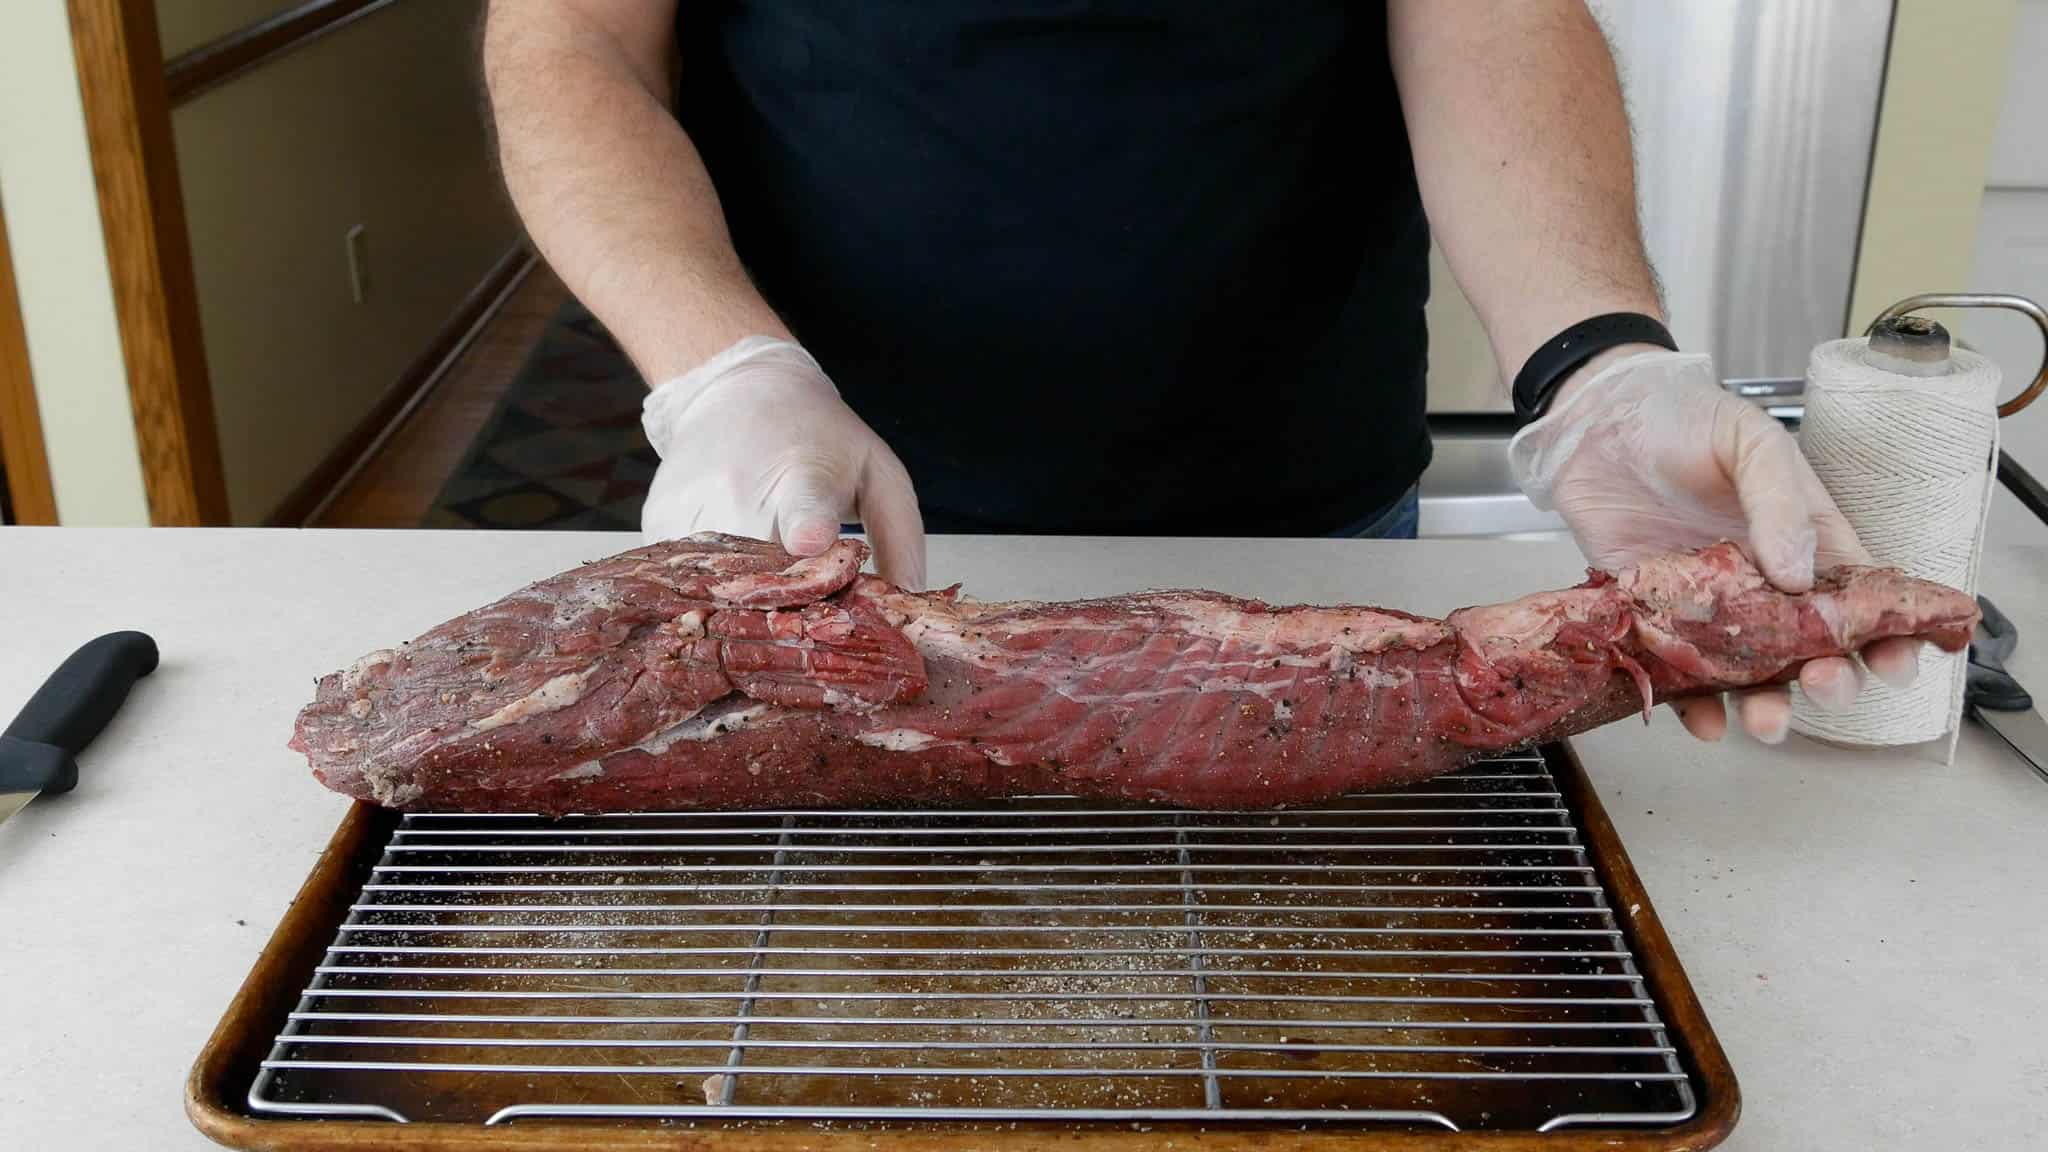
    Problem 1: The roast is not even. The tail end is thin, barely an inch thick; the head end is a good four inches across. If I cook it as-is, by the time the head end is medium-rare, the tail end will be past well done.

    Problem 2: The roast is not very thick. Rotisserie grilling needs time to brown the outside of the roast. My general rule of thumb is you have to cook for 45 minutes to get enough browning. But, the tenderloin is not that thick of a roast to begin with. If I cook it as-is, by the time the outside is starting to sear, the roast will be overcooked - medium-well or worse.

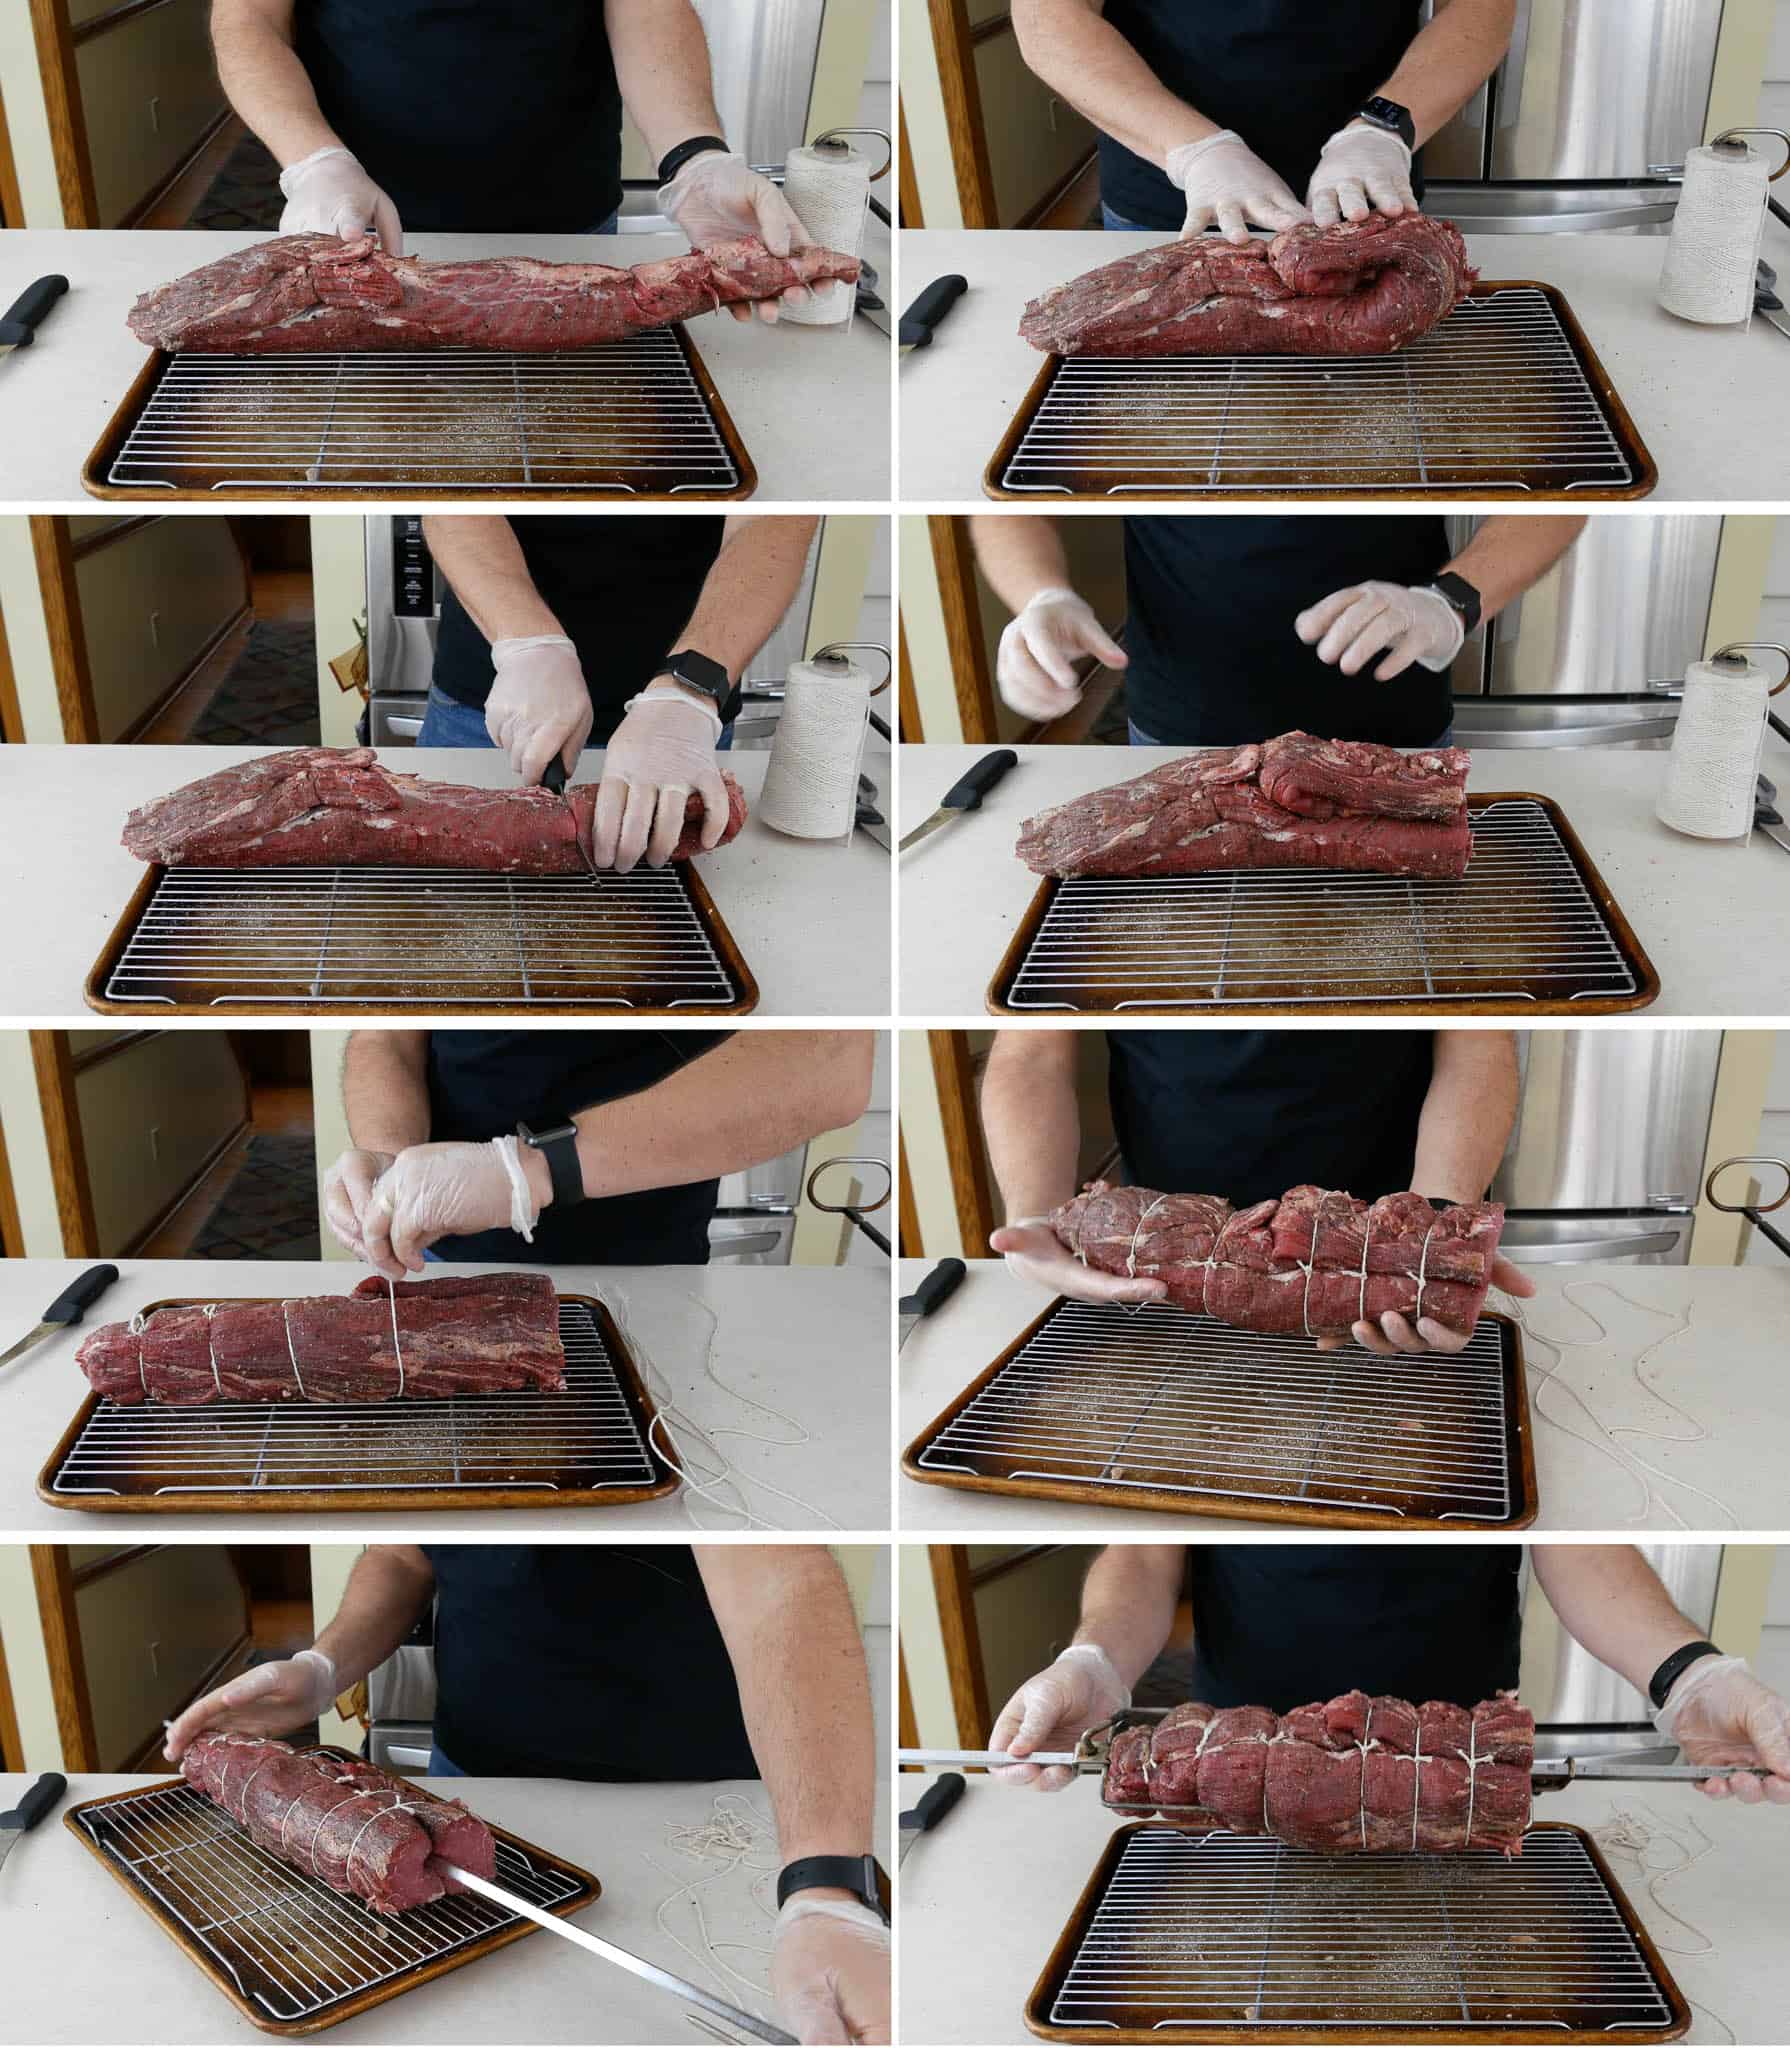
    How do I solve these problems? By cutting the roast in half, and tying the two halves together to make one thick roast. Here it is, step by step, with pictures from the upcoming video.1And, that's also an advantage to the horseradish mustard crust - it browns quickly.

    Folding the roast to see where to cut it
    Folding the roast to see where to cut it

    Step 1: Fold the last couple of inches of the tail over on itself, then fold the tail to reach the part of the head that sticks out, and note where the end of the roast is.

    Cut the roast in half
    Cut the roast in half

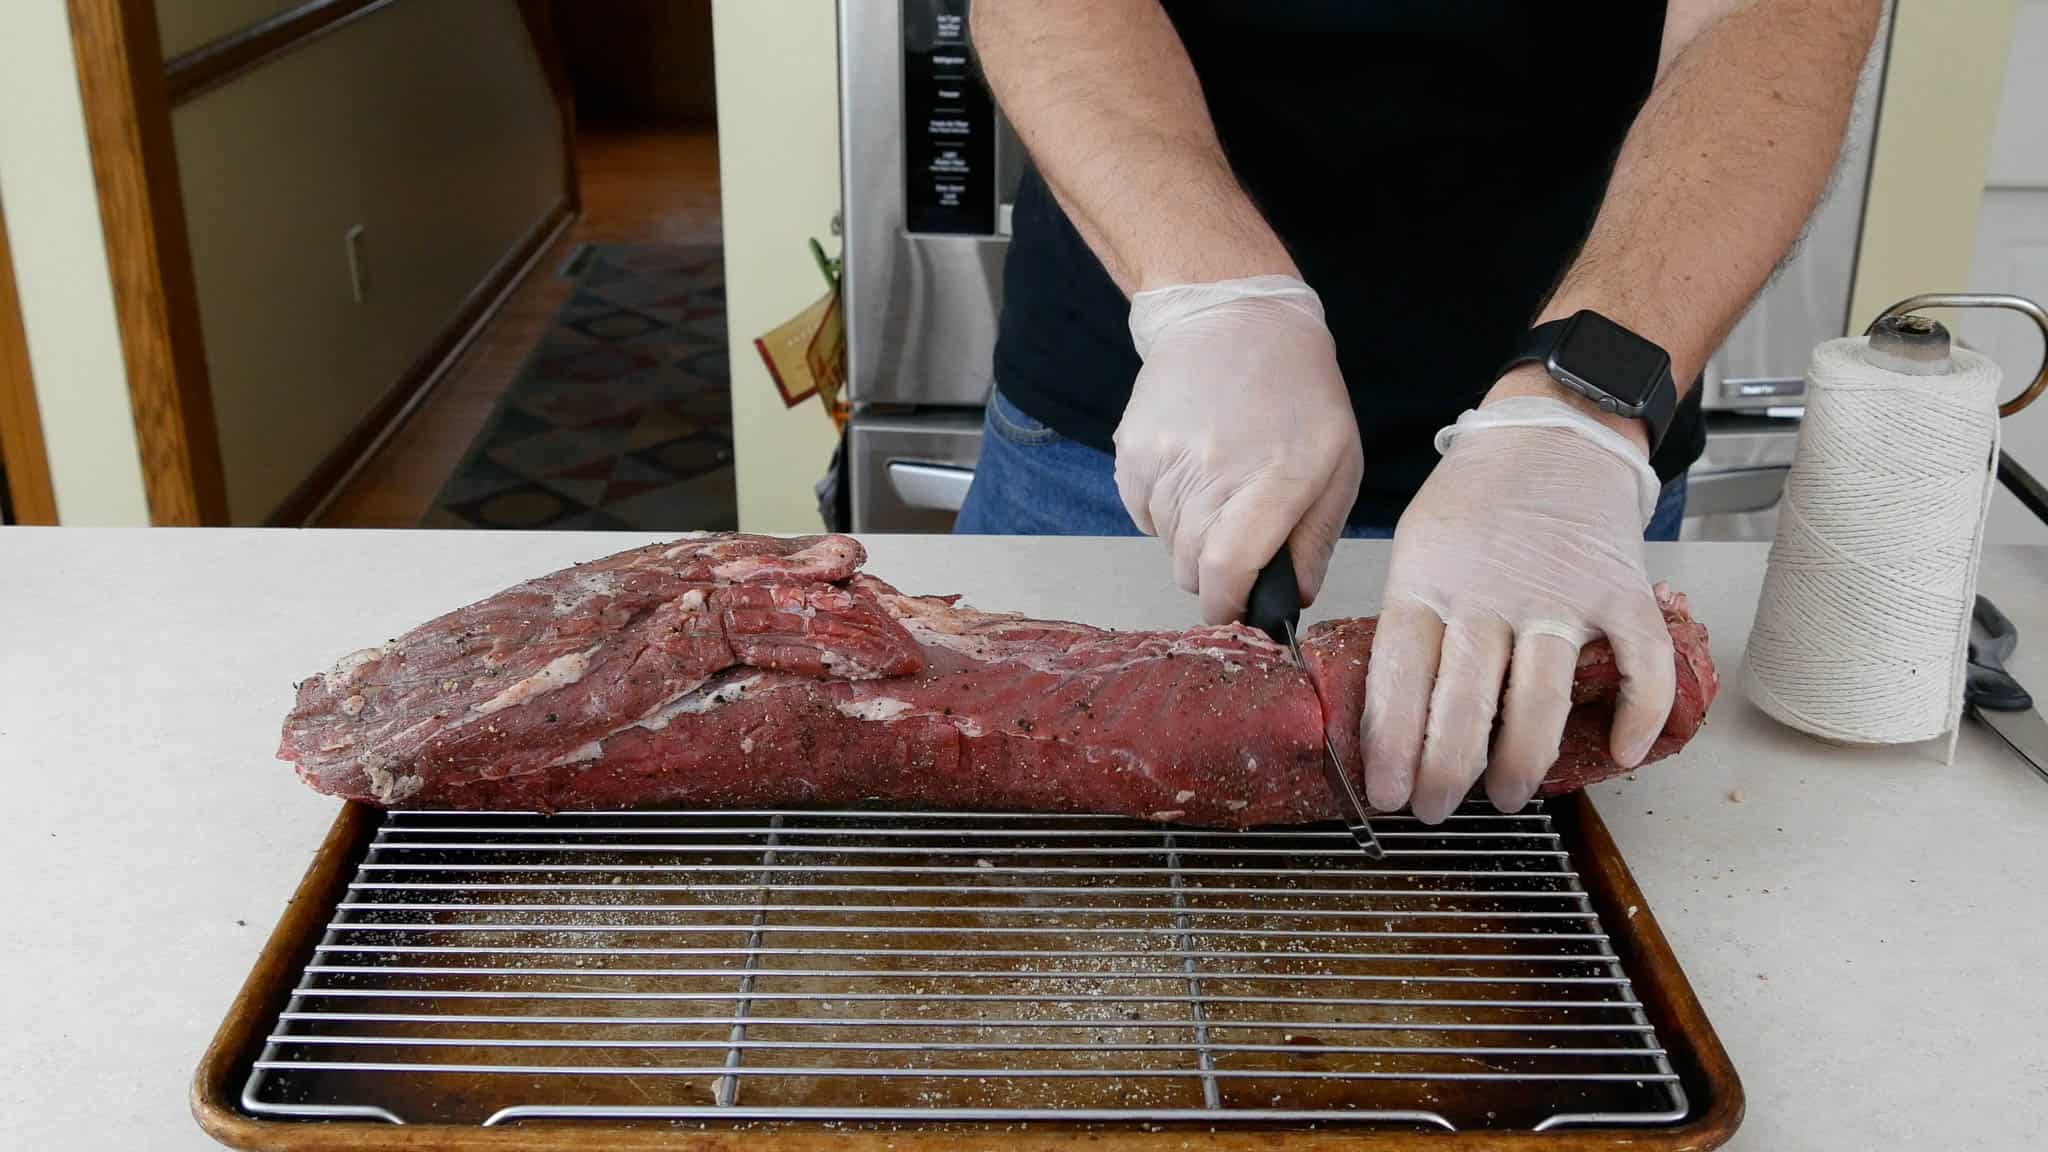
    Step 2: Cut the roast in half at that fold

    Two pieces, one thicker roast.
    Two pieces, one thicker roast.

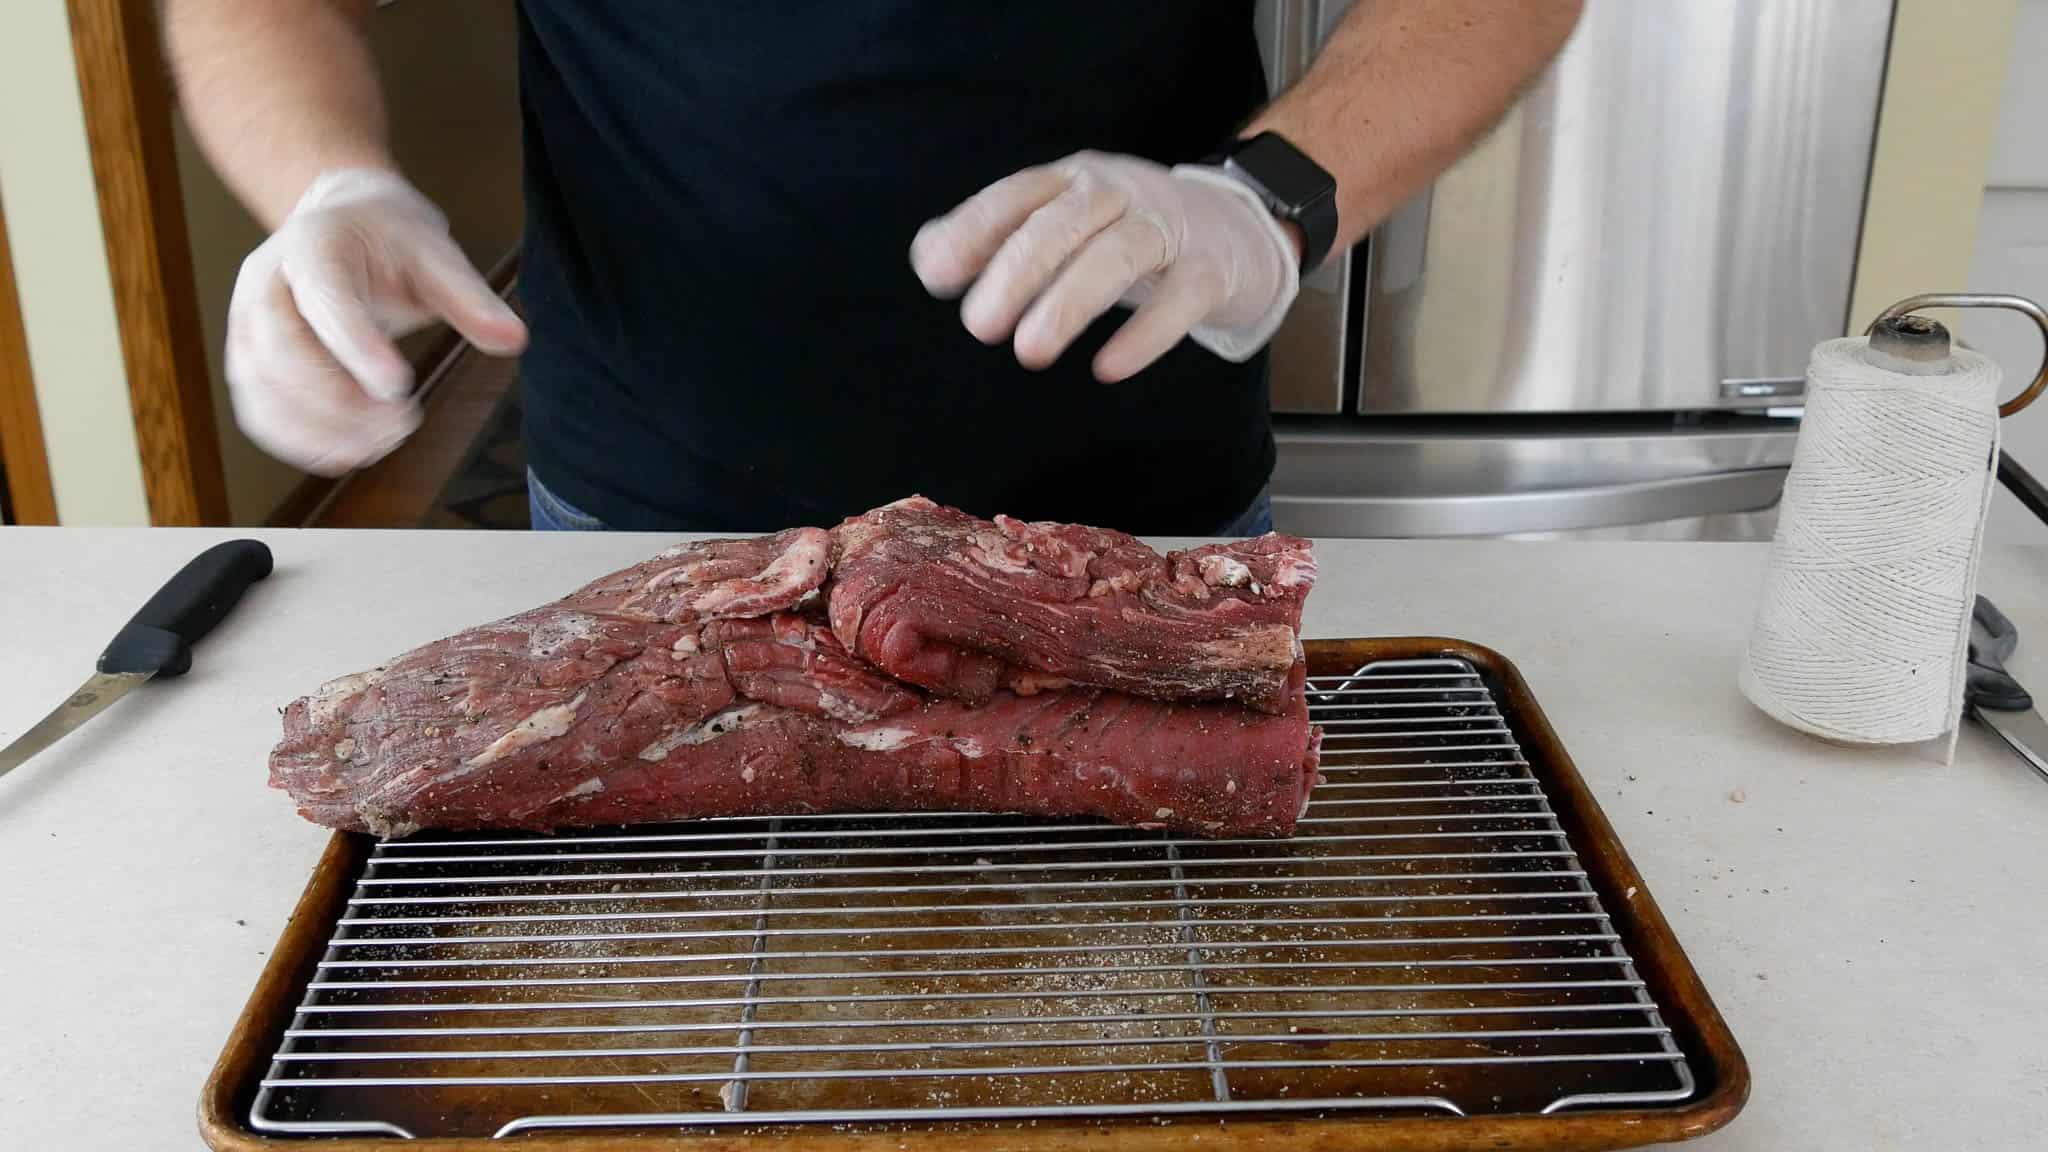
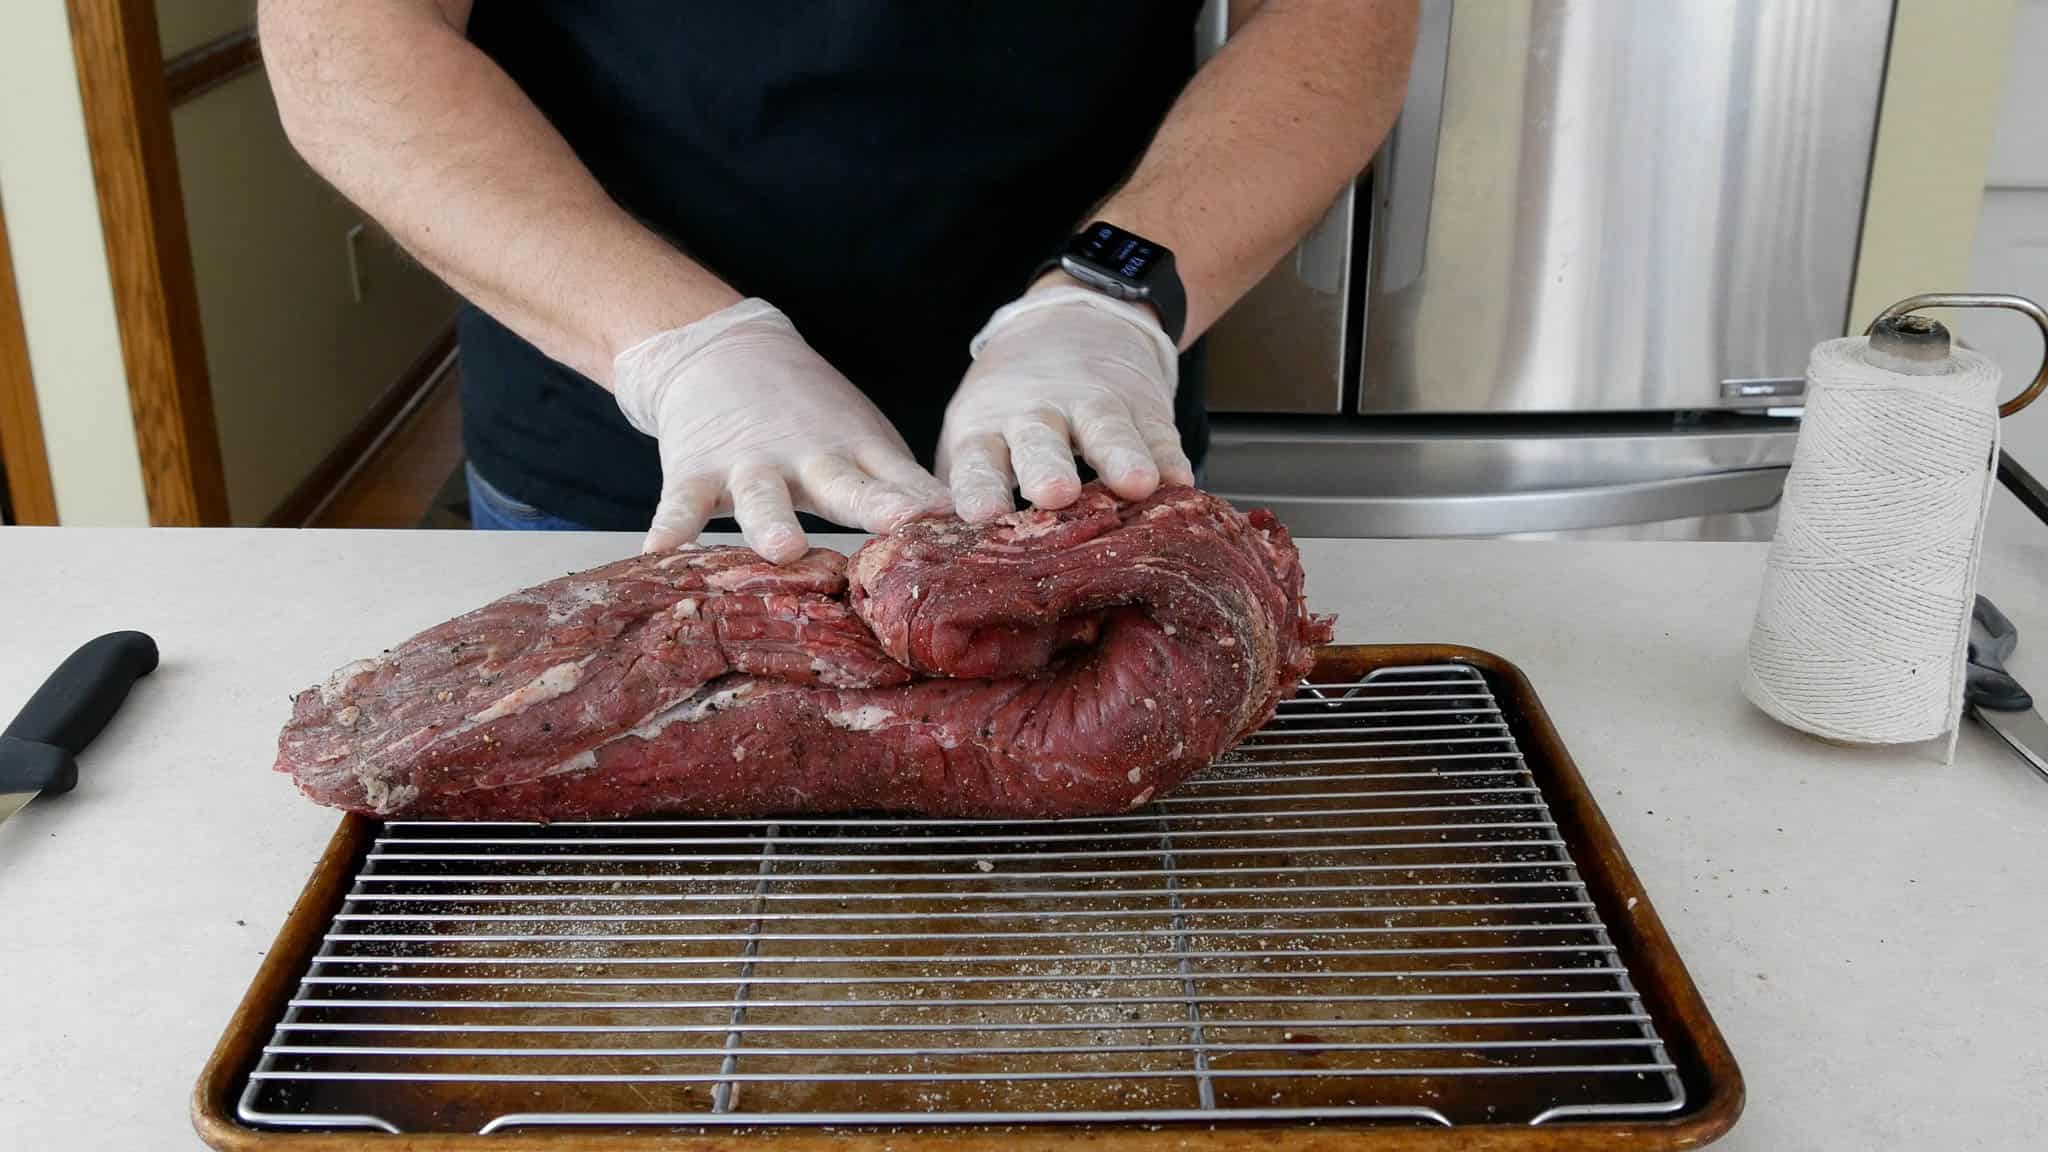
    Step 3: Put the cut end of the roast on top , shaping it into one thick piece of beef.

    Truss the roast
    Truss the roast

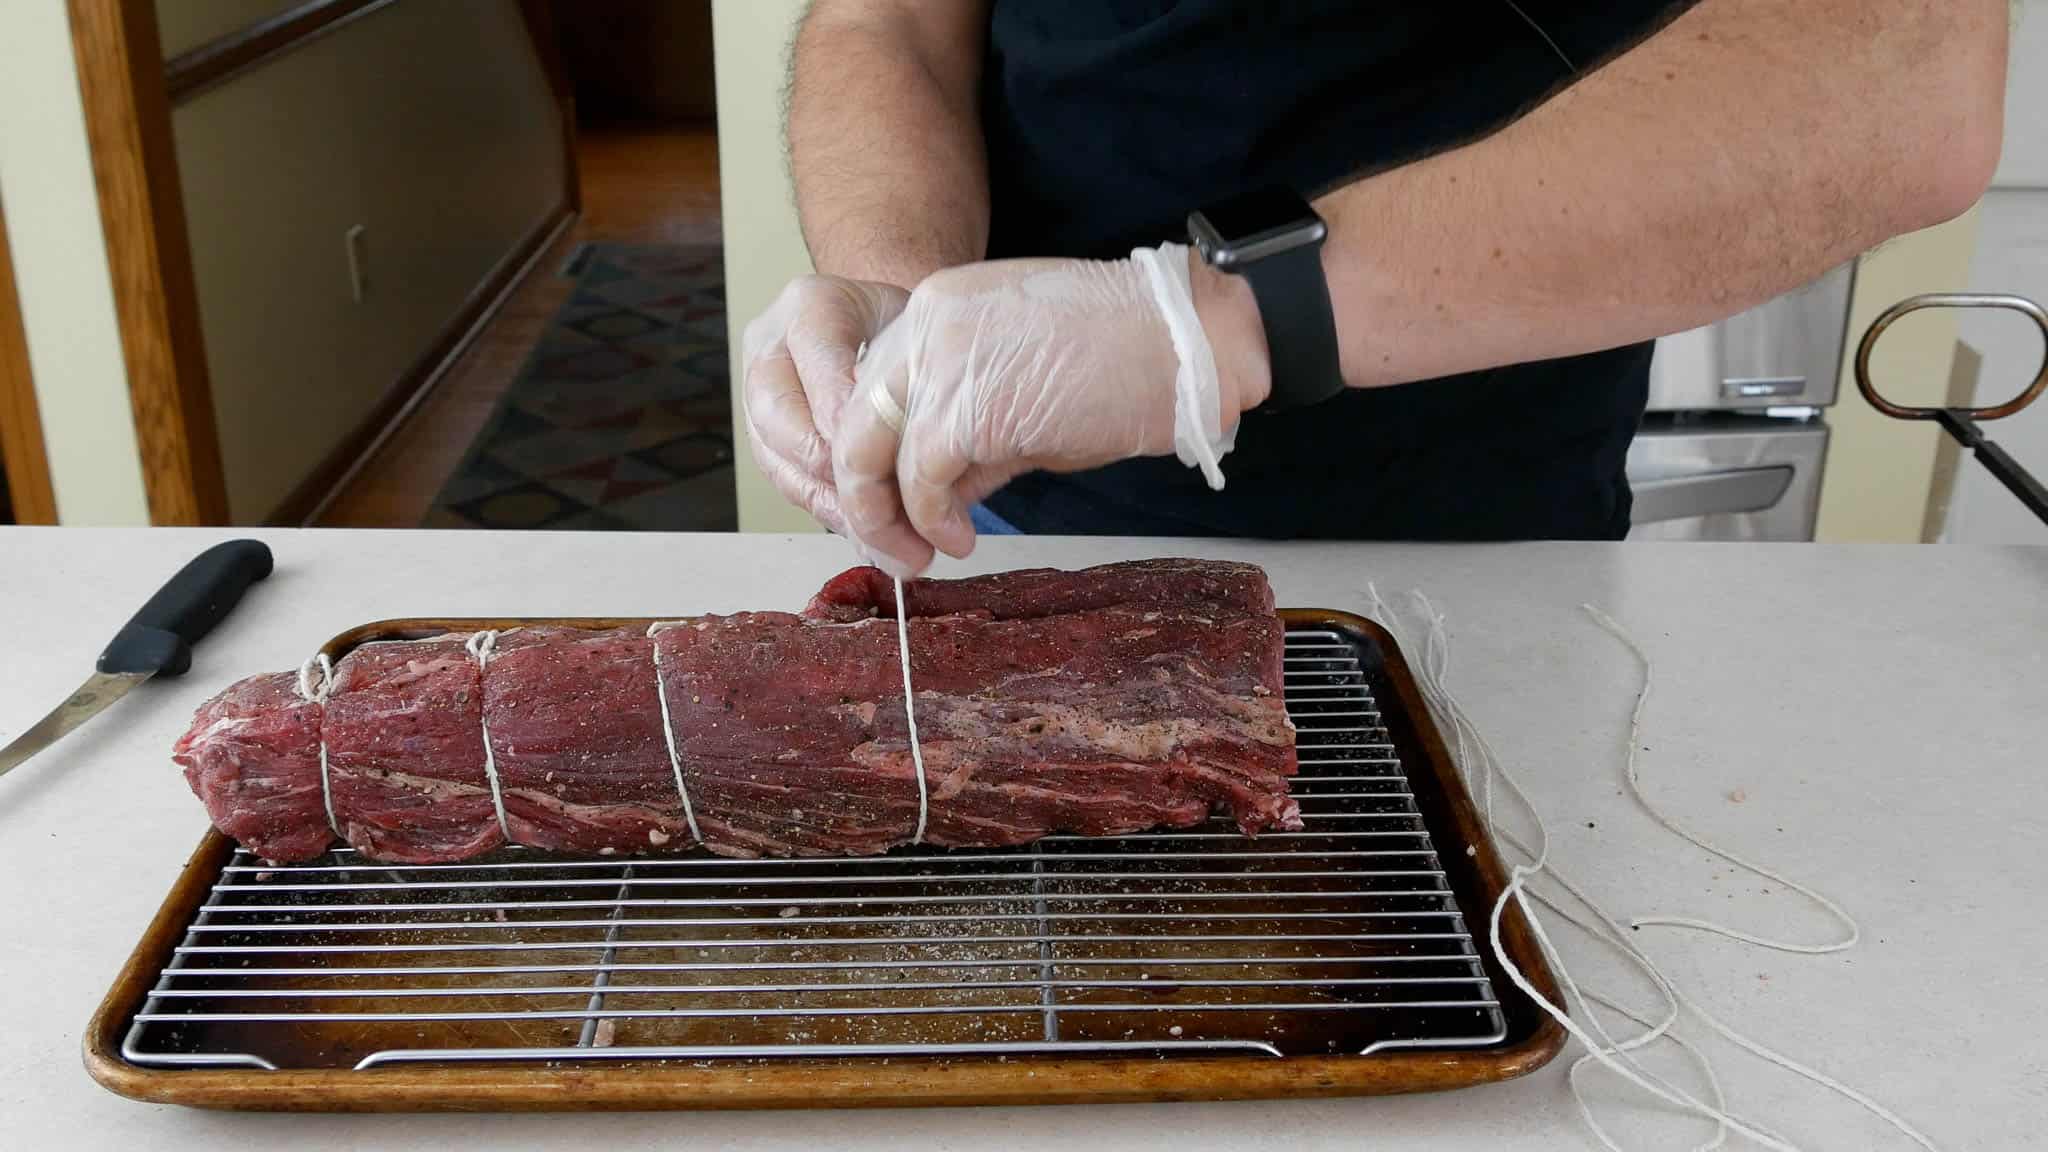
    Step 4: Truss the roast every 2 inches, making sure to get both ends of the cut piece tied down.

    Roast, trussed.
    Roast, trussed.

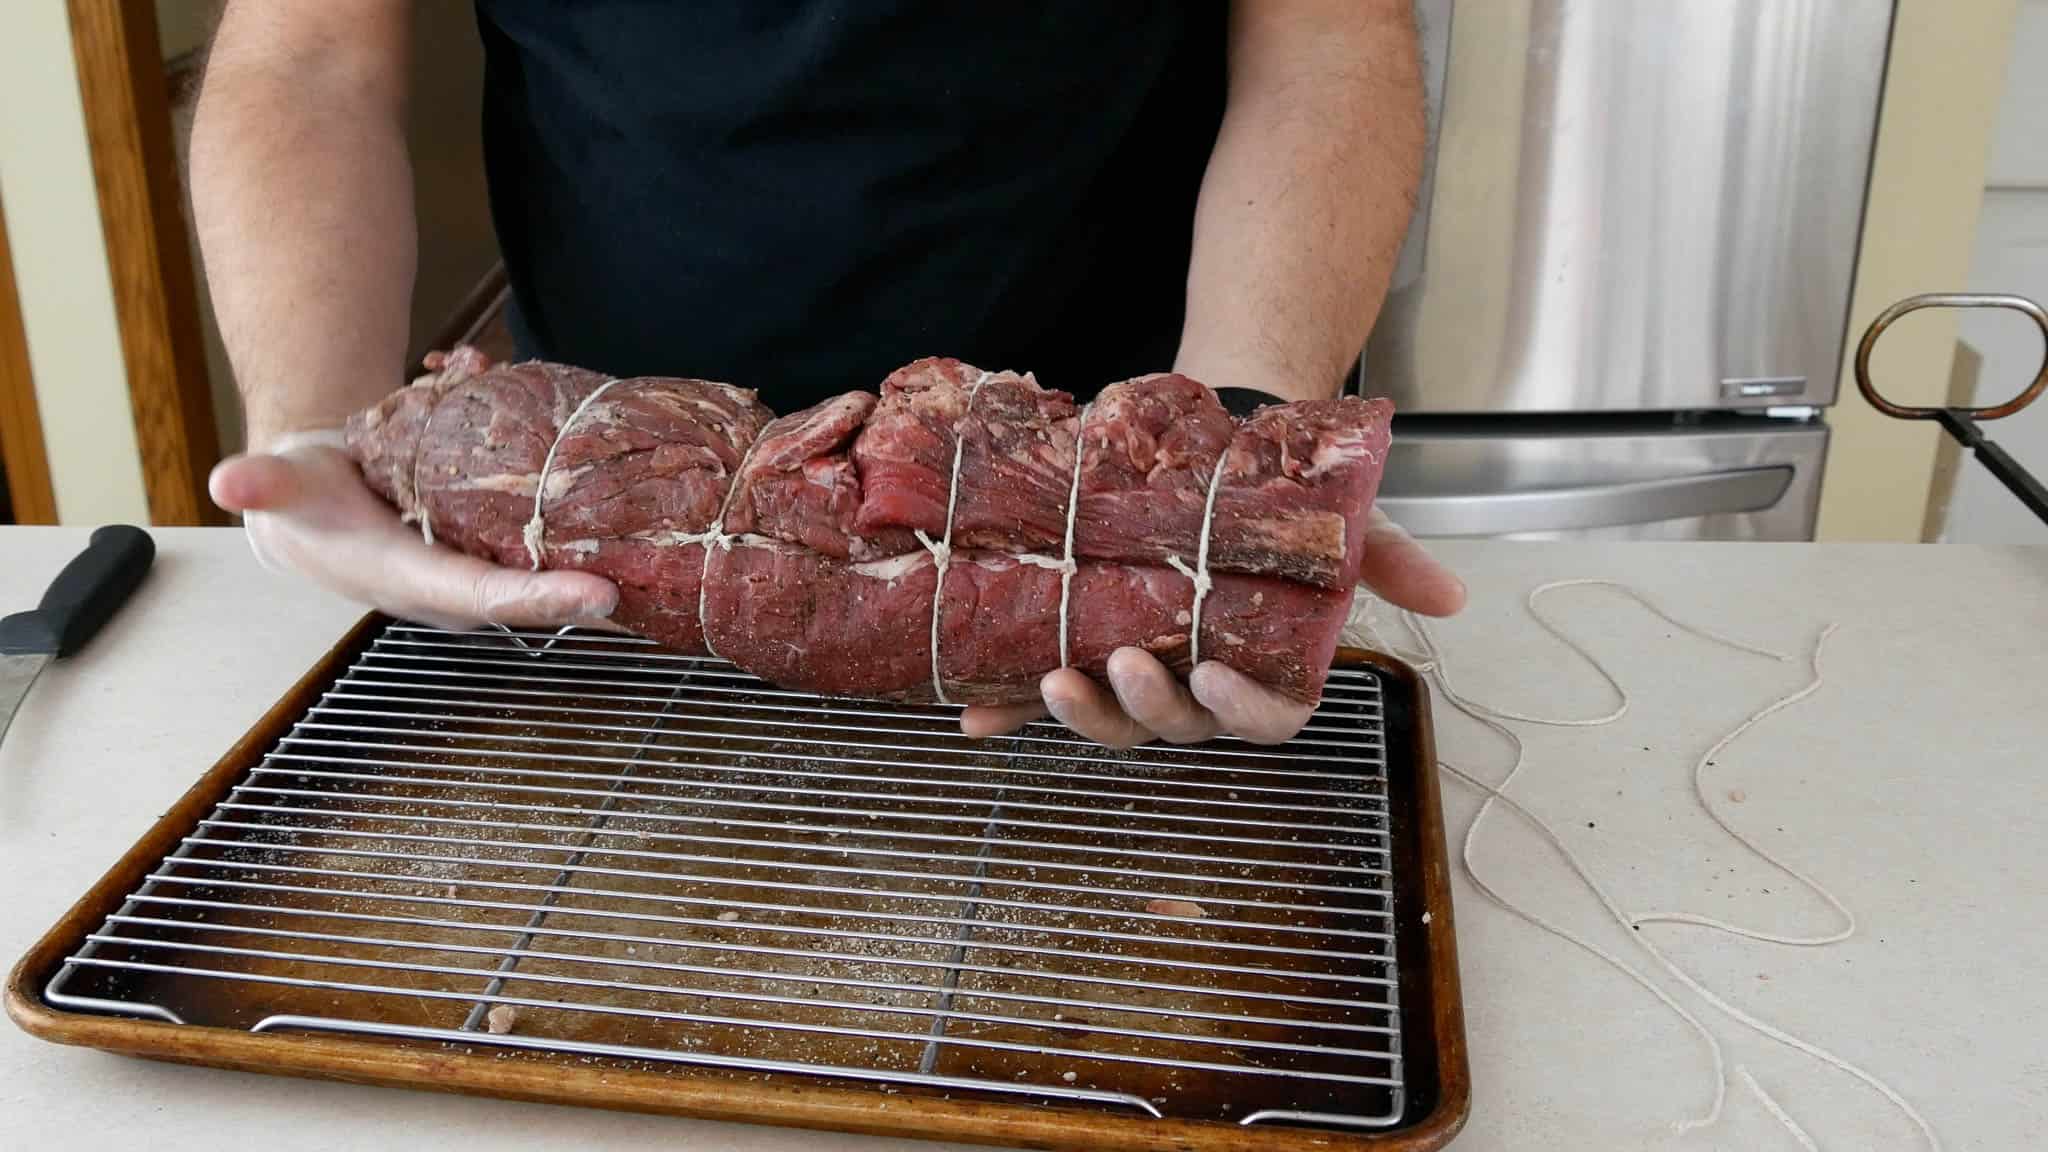
    Step 5: Inspect your work. See how much more even the thickness is, all the way across?

    Spitting the roast
    Spitting the roast

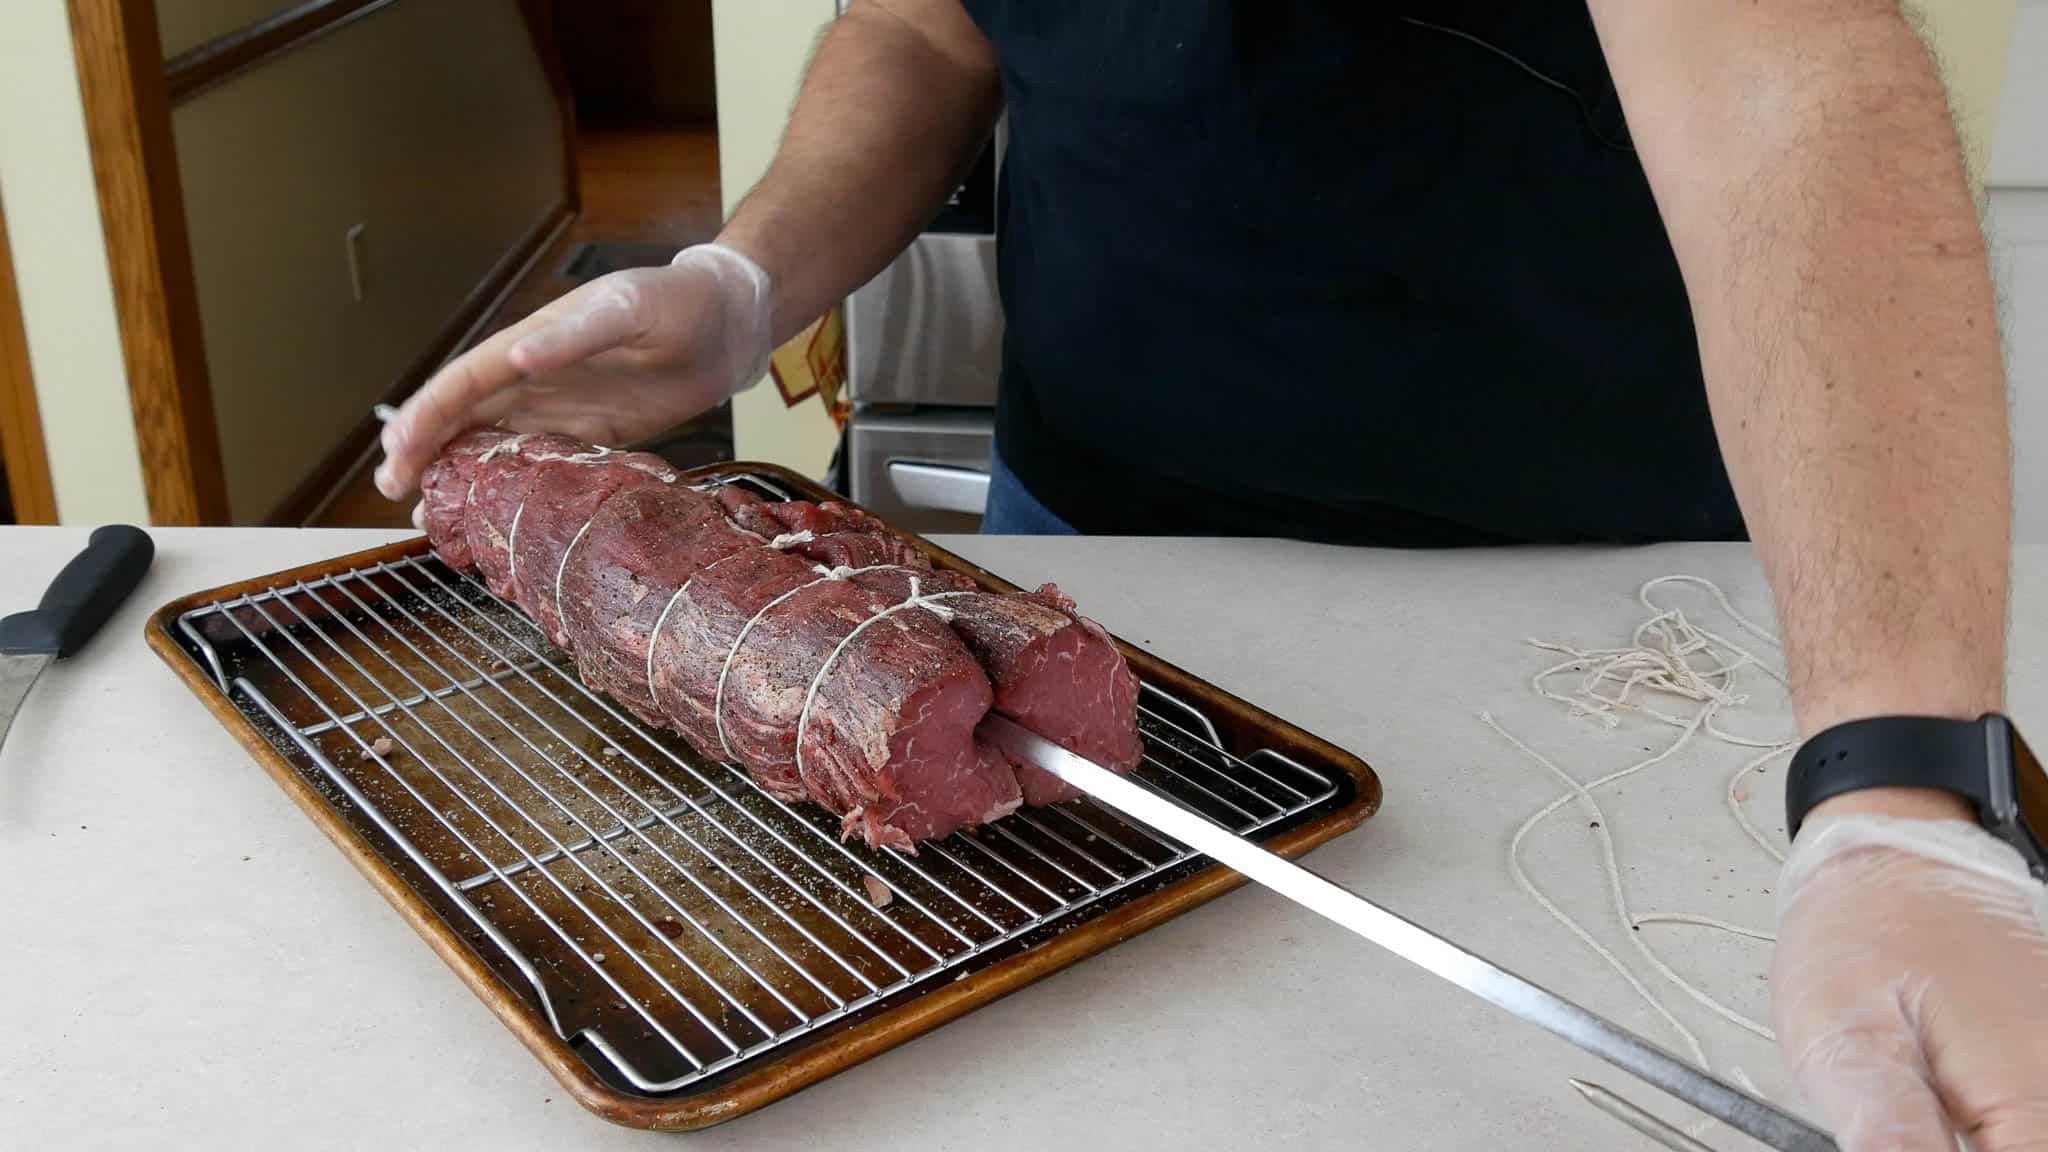
    Step 6: Run the spit between the two halves - it will slide through until it hits the thick head piece, then you have to use force to get it through the rest of the roast. Tighten down the spit forks and…
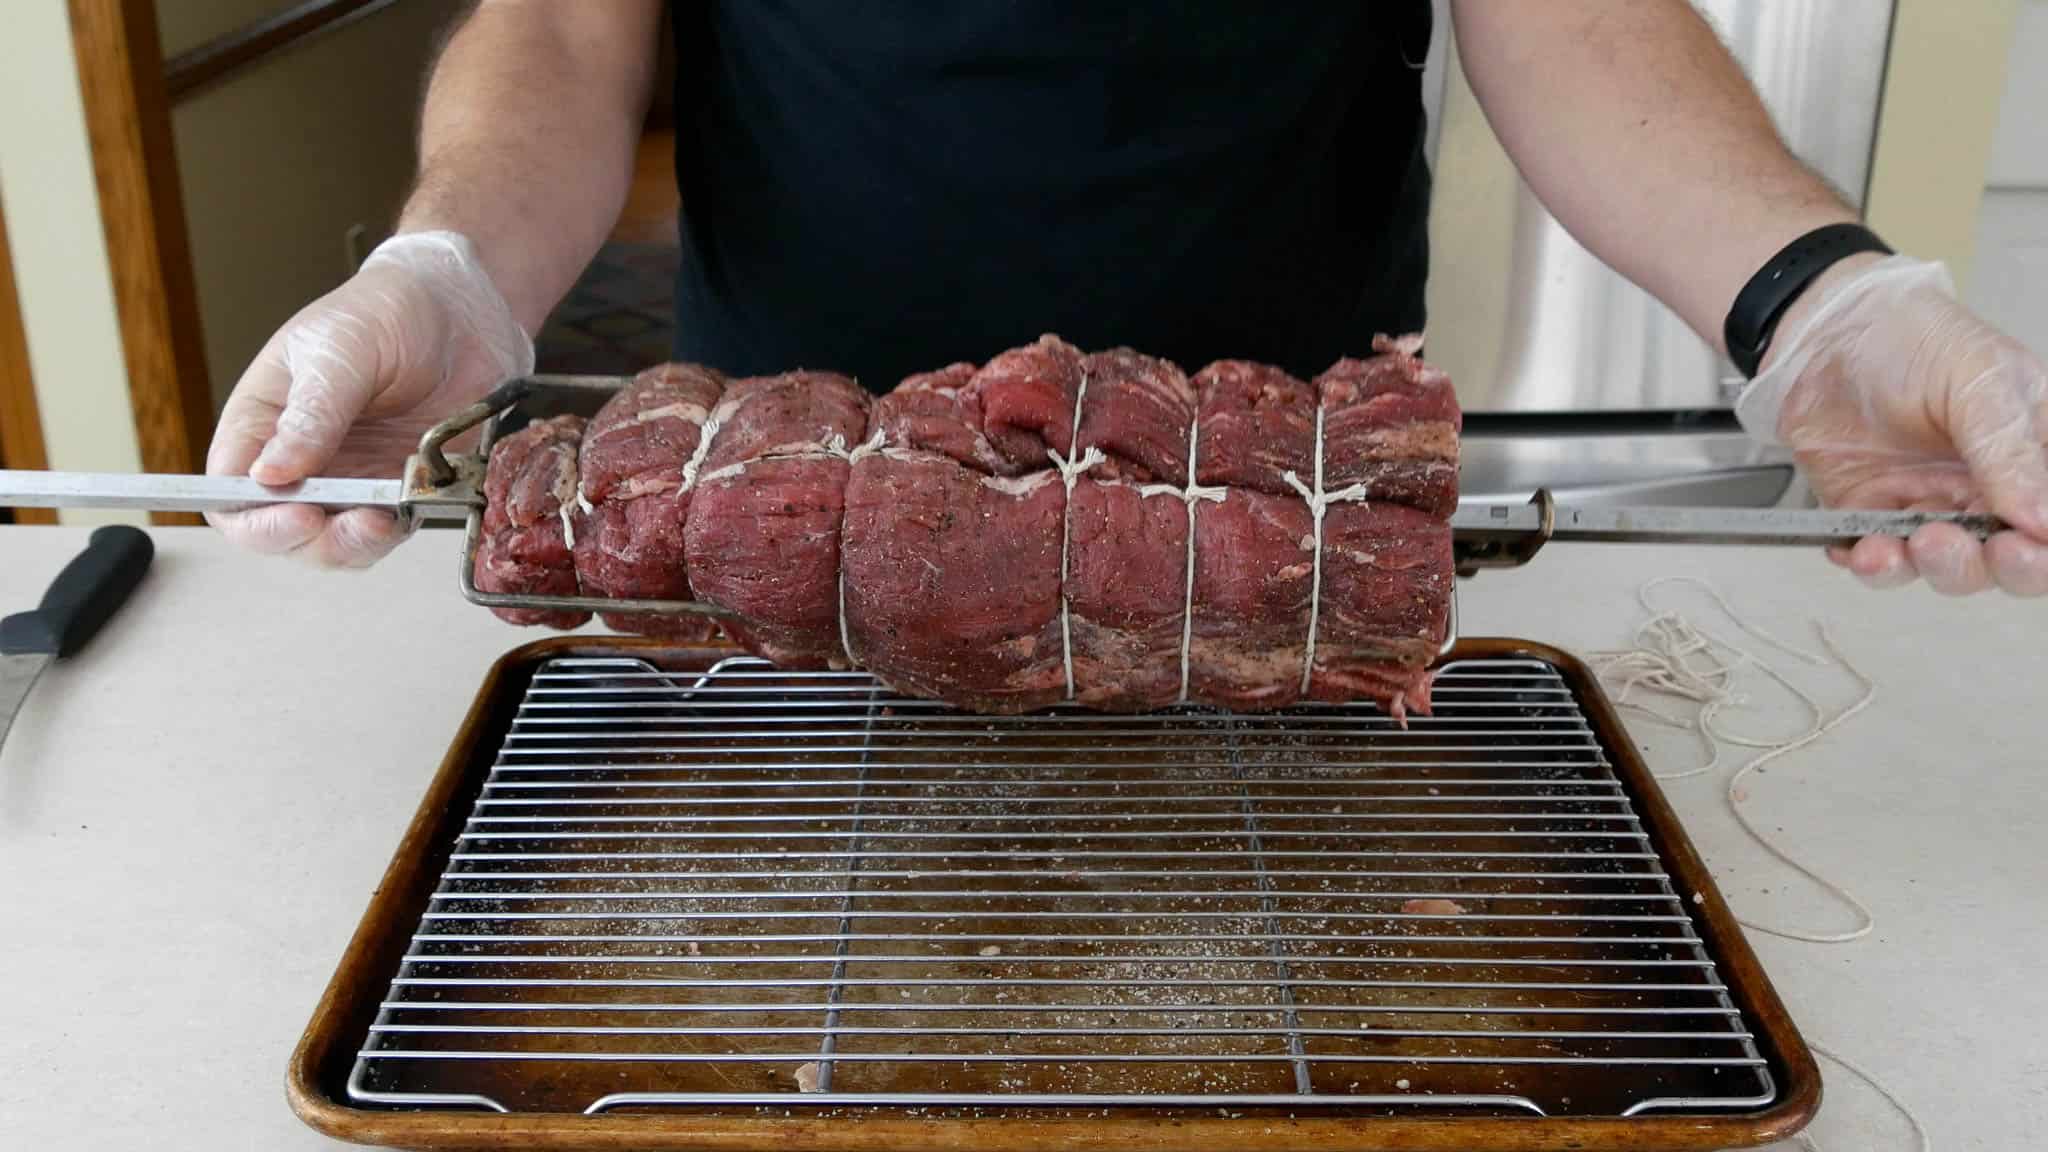
    Trussed and on the spit
    Trussed and on the spit

    Step 7: You’re done, one trussed roast.

    And, the video will be done soon. I promise!

    Subscribe
    BirdSend Email Marketing Tool

    More Ramblings

    • Summer Vacation 2022
    • Rancho Gordo Bean Club Box | DadCooksDinner.com
      The Rancho Gordo Bean Club Is Open to New Members
    • Lit up "Happy" sign at the Cleveland Metroparks Zoo Wild Winter Lights festival
      Happy New Year 2022
    • Lit up star with a woman standing inside, with the Fulton Road Bridge in the background, lit up with holiday colors
      Merry Christmas 2021

    Sharing is caring!

    Comments

    1. Fred G says

      March 26, 2022 at 9:13 am

      Would you recommend this method with a pork tenderloin as well ?

      Reply
      • Mike Vrobel says

        March 27, 2022 at 10:53 am

        No, pork tenderloins are too small for the rotisserie. I just grill them: https://www.dadcooksdinner.com/grilled-teriyaki-pork-tenderloin/

        Reply
        • Fred G says

          March 27, 2022 at 1:23 pm

          Thank you !

          Reply
    2. Tres Bradshaw says

      December 18, 2015 at 3:50 pm

      Wonderful! Never cooked a whole beef tenderloin (on the bucket list...LOL), but this makes total sense. In fact, I cook a lot of pork tenderloins......this is an interesting idea. Perhaps I can cut the pork in half, tie together then cook....or just fold back and tie up.....hmmmm. Certainly on a smaller scale, so may not really be a big deal....but even with the difference in scale, you still get the dry tail end and the perfect other end/middle.

      Good post Mike....as last year will use your dry brining technique with my turkey and cook in my "Big Easy Cooker". Does an AWESOME job.....if you do not have one, I think you should invest and maybe branch out with it as you did with the sous vide deal.....just an idea as that thing is pretty darn versatile.

      By the way....still trying to locate that pic of my Dad in the hip waders about 35 years ago in a foot of snow grilling....LOL!

      Reply
    3. Mike Ross says

      December 17, 2015 at 8:25 am

      The unintended benefit of all this is that you have more surface area for the crust to occupy and get 4 end pieces instead of just 2 🙂

      Reply
      • Mike V says

        December 17, 2015 at 9:06 am

        My wife, who loves the end pieces, agrees with you.

        Reply

    Questions? Made the Recipe? Leave a Comment Cancel reply

    Your email address will not be published. Required fields are marked *

    This site uses Akismet to reduce spam. Learn how your comment data is processed.

    Welcome to Dad Cooks Dinner!

    I'm Mike Vrobel, a dad who cooks dinner every night. I'm an enthusiastic home cook, and I write about pressure cooking, rotisserie grilling, and other food topics that grab my attention.

    More About Me →

    Popular

    • Three bowls of cooked Pinto Beans on a wood table
      Instant Pot Pinto Beans (No Soaking)
    • Pressure Cooker Beef Shank (Osso Bucco)
    • Pressure Cooker 7 Hour Leg of Lamb (in 90 minutes)
      Pressure Cooker 7 Hour Leg of Lamb (in 90 minutes)
    • Pressure Cooker Brown Jasmine Rice
    • Grilled Tomahawk Steak (Long Bone Ribeye, Reverse Seared)
      Grilled Tomahawk Steak (Long Bone Ribeye, Reverse Seared)
    • A green bowl full of chicken noodle soup
      Instant Pot Rotisserie Chicken Noodle Soup

    Seasonal

    • A bowl of asparagus risotto
      Instant Pot Asparagus Risotto (Pressure Cooker Recipe)
    • Grilled Butterflied Chicken with Garlic Butter
    • Sous Vide Rack of Lamb with Dijon Bread Crumb Crust
    • A bowl of beef stew with asparagus, carrots, and radishes.
      Instant Pot Spring Vegetable Beef Stew
    • A Rotisserie Chicken (Pollo Asado)on a platter of shredded cabbage
      Rotisserie Chicken Pollo Asado
    • Rotisserie Pork Shoulder Roast with Carolina Mustard BBQ Sauce
      Rotisserie Pork Shoulder with South Carolina Mustard Barbecue Sauce

    Footer

    ↑ back to top

    About

    • Privacy Policy

    Newsletter

    • Sign Up! for emails and updates

    Contact

    • Contact

    Copyright © 2025 Dad Cooks Dinner

    19 shares