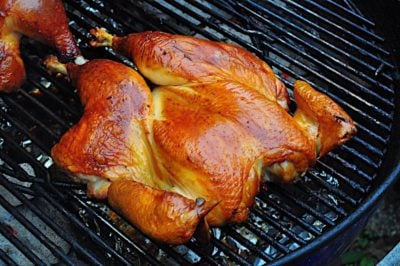
Why butterfly? Two reasons.
First, a butterflied chicken is a quick(er) chicken. A four pound chicken grills in about 45 minutes; left whole, they take an hour or longer.
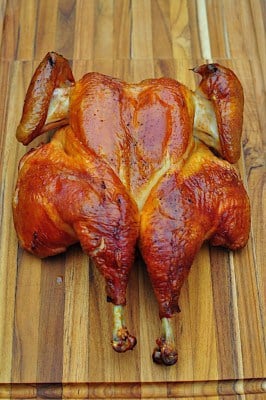
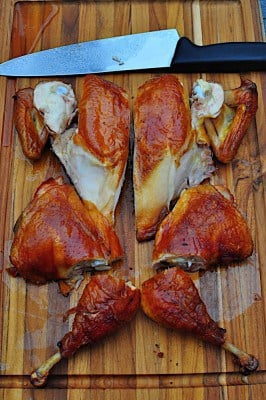
Second, a butterflied chicken is simple to carve. Seven slices and you're ready for the dinner table.
Nine if you cut the breast pieces in half like I do.
This is my favorite seasoning for chicken - an overnight dry brine with salt and pepper, then some smoking wood in the grill. Simple and delicious. Good chicken will shine with this recipe; cheap chicken will be bland. In other words, don't use the $0.69/lb store chicken with this recipe. Make the effort to get a good bird, and you will be rewarded.
If you have a good local chicken store, like my local Brunty Farms or Difeo's Poultry, great! If not, check the grocery store for a Bell and Evans bird. Or, get a Kosher bird, and skip the dry brine; kosher birds are pre-brined.
Recipe: Grilled Butterflied Chicken with Dry Brine
Equipment:
- Grill (I use a Weber kettle, like this one.
)
- Kitchen shears (optional, but recommended)
- Aluminum foil drip pan (9"x12", or whatever fits your grill)
Grilled Butterflied Chicken with Dry Brine
- Total Time: 8 hours 45 minutes
- Yield: 4-6 1x
Description
Grilled Butterflied Chicken with Dry Brine recipe - butterfly the chicken to speed up cooking, dry brine it to season it all the way through.
Ingredients
- 2 (4-pound) chickens
- 2 tablespoons Diamond Crystal kosher salt (1 tablespoon per bird)
- 2 teaspoons fresh ground black pepper (1 teaspoon per bird)
- 1 fist sized chunk smoking wood (I used an oak wine barrel stave, but hickory, cherry, and apple are good alternatives)
Instructions
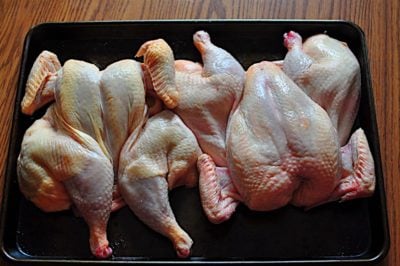
- Butterfly and Dry brine the chickens: Butterfly the chickens: cut out the backbone, then flatten the breastbone by pressing down hard with the back of your hand. Fold the wing tips back under the wing. Sprinkle each chicken evenly with 1 tablespoon kosher salt and 1 teaspoon fresh ground black pepper, concentrating a little extra on the breasts and thighs. Refrigerate for 4 to 24 hours.
- Prepare the grill: Prepare your grill for cooking on indirect high heat, and add the wood chunk to the coals. For my Weber kettle, I light a chimney starter full of charcoal, wait for it to be covered with ash, then pour it in two equal piles on the sides of the grill, and put the drip pan in the middle, between the piles. Finally, I put the wood chunk on one of the piles.
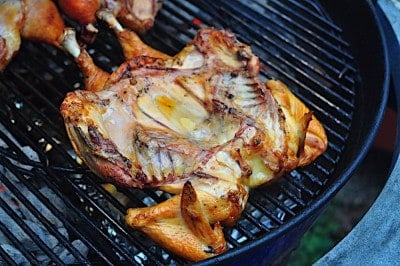
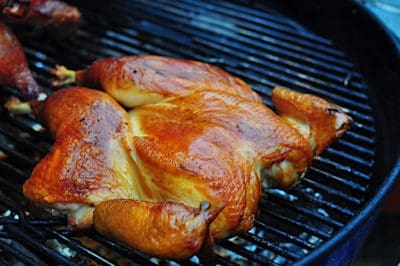
- Grill the chicken: Put the chicken on the grill over the drip pan, skin side down. Cook, covered, for 30 minutes. Flip the chicken skin side up and cook, covered, until the chicken is done, about another 15 minutes. The chicken should be 160°F in the thickest part of the breast and 170°F or more in the deepest part of the thigh.
- Crisp up the chicken (optional): At this point, you should have nice, crispy skin. If you don't, put the chicken skin side down over the coals and sear until the skin is crisped up, about 3 minutes. Watch out - dripping chicken fat causes flare-ups. You don't want to burn the chicken at the last minute.
- Serve: Let the chicken rest for 15 minutes, then carve into serving pieces. Cut the legs from the body, then cut the drumsticks from the thighs. Cut the wings from the breasts, then split the breast right down the middle.
Notes
For more butterflying details, see my How to Butterfly A Chicken Video
I recommend the Weber Chimney Starter, because it holds 5 quarts of charcoal, exactly the right amount for this recipe.
- Prep Time: 8 hours
- Cook Time: 45 minutes
- Category: Grilling
- Cuisine: American
Would you like to save this recipe?
Notes
- My kids demolished this chicken. It's amazing what a little wood smoke does for flavor. "Dad! This smells like bacon!" No picky eating this time - everyone came back for seconds and thirds.
What do you think? Questions? Other ideas? Leave them in the comments section below.
Related Posts:
Grilled Butterflied Chicken with Thai Brinerade
Enjoyed this post? Want to help out DadCooksDinner? Subscribe using your RSS reader or by Email, recommend DadCooksDinner to your friends, or buy something from Amazon.com through the links on this site. Thank you!

Vinyljunkee says
Delicious chicken preparation and I love the butterflied preparation. Curious about the amount of salt for the brine. Can you validate that you actually use 4 tsp per chicken? The ingredients indicate 1 Tbsp of kosher salt per chicken. I have generally used a rule of thumb, 3/4 tsp per lb (per the Zuni Cafe method by Judy Rodgers). Also, I followed your process on the Big Green Egg, indirect and fairly high heat (450 F) and it turned out great.
Mike Vrobel says
Thanks! 1 Tablespoon is 3 teaspoons, not 4, so I’m using the same amount Judy used - 3 teaspoons on a 4 pound chicken.
Vinyljunkee says
Thank you Mike! There is a comment in the directions indicating 4 tsp per chicken, which raised my question. Regardless, I think I am splitting hairs here. It’s a great process.
Mike Vrobel says
Aha! I missed it there - thank you for the heads up.
Soltan m. says
Great recipe and great tips ,thank you so much Mike.
MikeV @ DadCooksDinner says
@Roy G:
Thank you for following up. Yes, you did everything the same way I would have. I'm guessing 375*F is not hot enough. If you try the recipe again, add in an extra burner or two set to high (instead of low) to see if that helps.
I'm going to try this again myself, to see how it turns out, but I haven't had a chance to do it yet. Thanks again for letting me know what you were seeing!
Roy G says
@ MikeV:
I would have thought two on high would have been fine as well -- That is generally how I do the rotisserie and it keeps good and hot. Answers:
1) About 4 lbs. Not huge. I just made one.
2) It was dark 🙂 but in the 375 range I think.
3) Preheated with all burners for about 15 mins. The chicken was out of the refrigerator for about the same amount of time before I plopped it on.
MikeV @ DadCooksDinner says
@Roy G:
Wow - four burners on high seems like a lot of firepower. I would have guessed two on high would be enough to duplicate my charcoal grill results, and that two on high plus two on low would have been plenty.
My charcoal grill starts at about 500*F on high, and cools down from there. I am pretty sure that two burners on high keep my gas grill at 450*F to 500*F.
I'll try this myself on my 6 burner Weber, but out of curiosity:
1. How big were the chickens?
2. What temp was your lid thermometer reporting?
3. Did you pre-heat the grill before adding the chicken?
Thanks!
Roy G says
I cooked this tonight on my Webber 6-burner grill. With the 2 outside burners to high, and 2 more on low, this took almost an hour and a half to cook to 160. Maybe for gas grills it needs to be 4 burners to high to get this right?
Otherwise -- tastes fantastic. My wife is extremely surprised to find that I can butterfly a chicken!
MikeV @ DadCooksDinner says
@Dave_in_TN:
You're welcome. Glad you liked it!
Dave_in_TN says
I made this today (used cherry wood), pretty quick for a delicious bird! Thanks D-C-D.
MikeV @ DadCooksDinner says
@jt:
Thanks! I know that I can always use another link to grilled chicken
@YL:
Thank you!
I don't bother taking out the breast bone. I have a harder time getting it out than I do carving the chicken with the the bone in.
If it works for you, though, keep right on doing it - that's one of those personal preference kind of things that make the world go 'round.
YL says
the only thing i can add is that i recommend to take out the breast bone. Once the chicken is spread open you can literally take is out with your fingers and it makes carving and eating much easier later on.
Great post as always.
jt says
An excellent post on butterflying and carving chicken. Hard to imagine that I need *another* link to grilled chicken, but you managed to do it. Thanks for the great, short and instructive post.