When I have the time to do it right, I reverse sear my steaks.
What is reverse searing? Set the grill up for indirect high heat, and put the steak over the indirect side - away from the heat - and let it slowly come up to temperature. Then move it over the high heat side of the grill for a quick sear to finish the steak.
Why reverse sear? I covered this in my Reverse Sear vs Sear and Move post earlier this week, but here are the highlights:
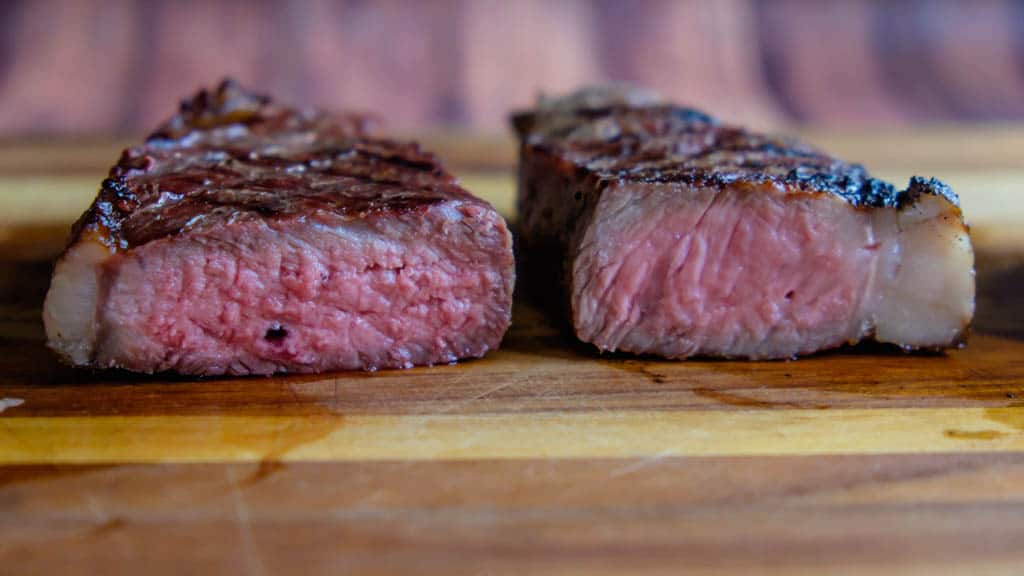
- Edge to edge pink - indirect heat cooks the steak evenly, and the quick sear at the end doesn't have time to overcook the middle. Goodbye to the bullseye of doneness - from well done at the edges through to medium-rare in the middle; reverse sear steaks are mostly medium-rare, with a thin layer of seared crust on the outside.2
- Tender meat - the longer the steak is between 100°F and 120°F, the more tender it is. (Enzymes work on the steak in that temperature range, tenderizing the meat.) Starting the steak with indirect heat moves it slowly through that zone, resulting in a tender steak with a buttery taste.
- More juices in the meat - testing has shown that the steaks hang on to more of their juices when the searing is delayed until the end of the cooking time.
Now, reverse searing does take more time - about a half an hour to cook the steaks. That's the reason I don't reverse sear all the time; sometimes dinner needs to be on the table right away. But, like I said, when I can do it right, this is the cooking method I use. Take the time, and your patience will be rewarded.
Recipe: Grilled Thick Cut New York Strip Steaks, Reverse Seared
Equipment
- Grill (My trusty Weber Kettle)
- Thermometer (A probe thermometer is almost required for this - if you have to keep opening the grill to use an instant read thermometer, it will take longer for the steak to come up to temperature.)

Grilled Thick Cut New York Strip Steaks, Reverse Seared
- Total Time: 1 hour 30 minutes
- Yield: 2 1x
Description
Grilled Thick Cut New York Strip Steak recipe, using the reverse sear method to get pefect edge to edge medium-rare.
Ingredients
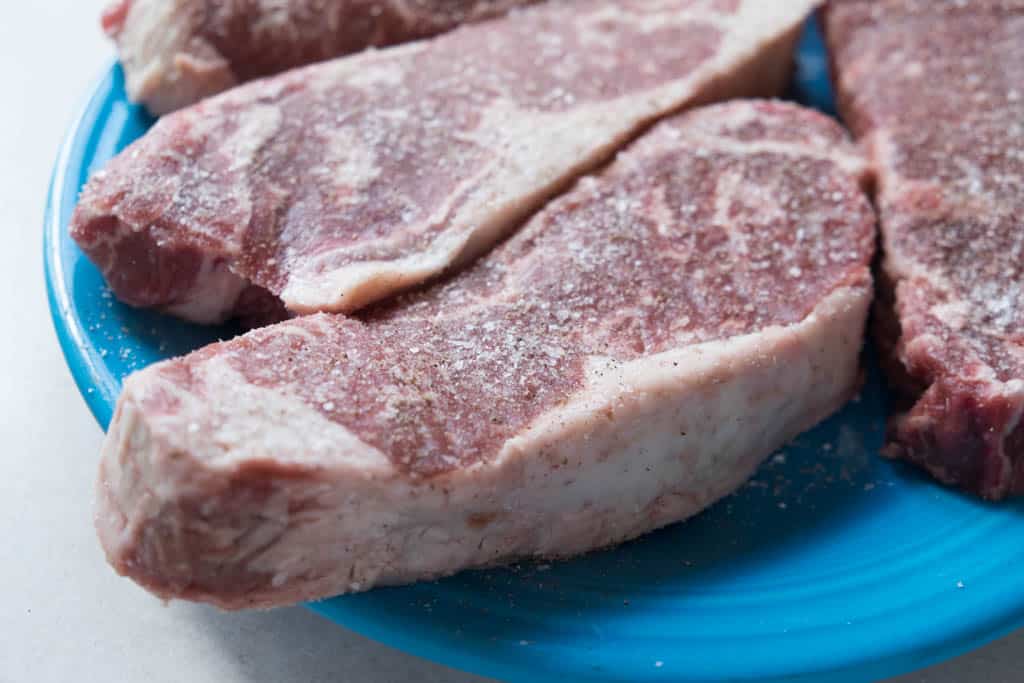
- 2 Thick Cut New York Strip Steaks (2 inches thick, about 12 ounces per steak)
- 2 teaspoons kosher salt
- 1 teaspoon fresh ground black pepper
Instructions
- Season the steaks: One hour before cooking, generously sprinkle the steaks with salt and pepper. Let the steaks rest at room temperature until cooking. (If you don’t have the time to salt ahead, that’s OK - salt them right before putting them on the grill.)
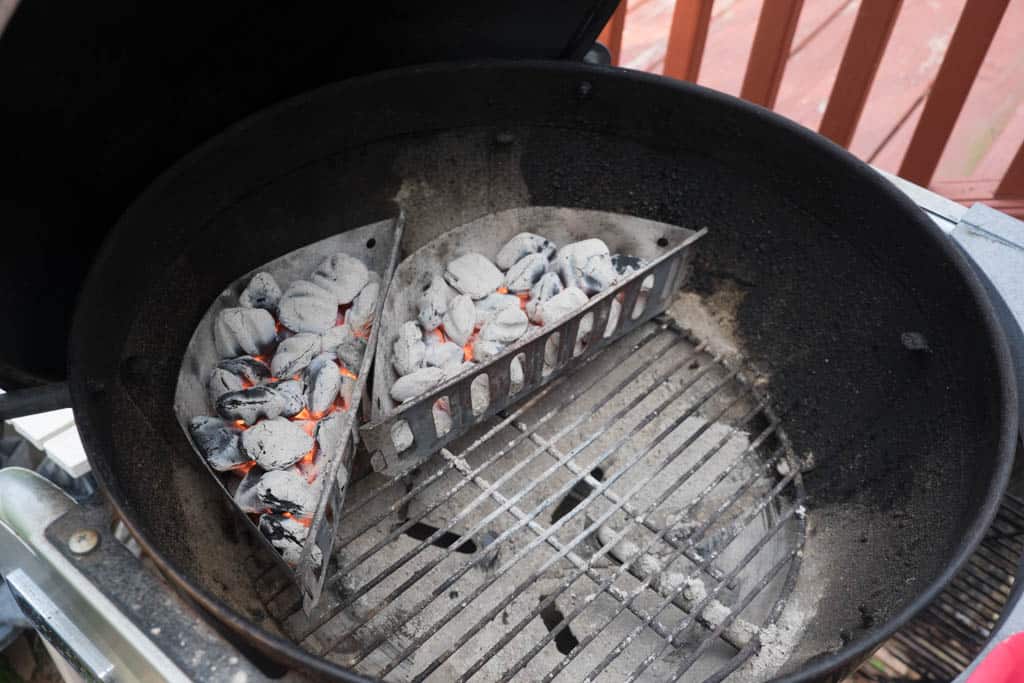
- Set the grill for indirect high heat: Set the grill up for indirect high heat; half the grill with direct high heat, and the other half with no heat. On my Weber kettle I light a full chimney starter of charcoal, wait for it to be mostly covered with gray ash, then pour it in a tight pile over half the grill, two to three coals deep. (Or, I pour it into my charcoal baskets and arrange them as shown in the picture.) Then I put the grate on the grill and brush it clean.
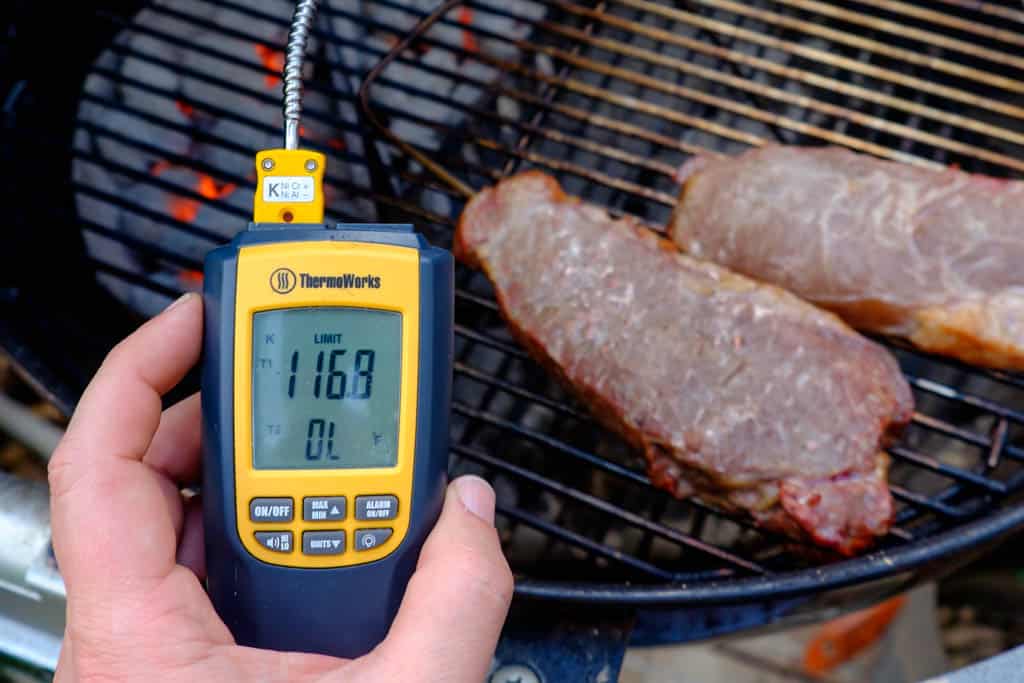
- Slowly cook the steaks over indirect heat: Insert the probe thermometer through the side of the thickest steak, aiming for center mass. Start the steaks on the indirect heat side of the grill, away from the fire. Close the lid and cook the steaks until they reach an internal temperature of 115°F for medium-rare, about 20 minutes. (For Rare, cook to 105°F internal, about 17 minutes; for Medium, cook to 125°F, about 24 minutes.)
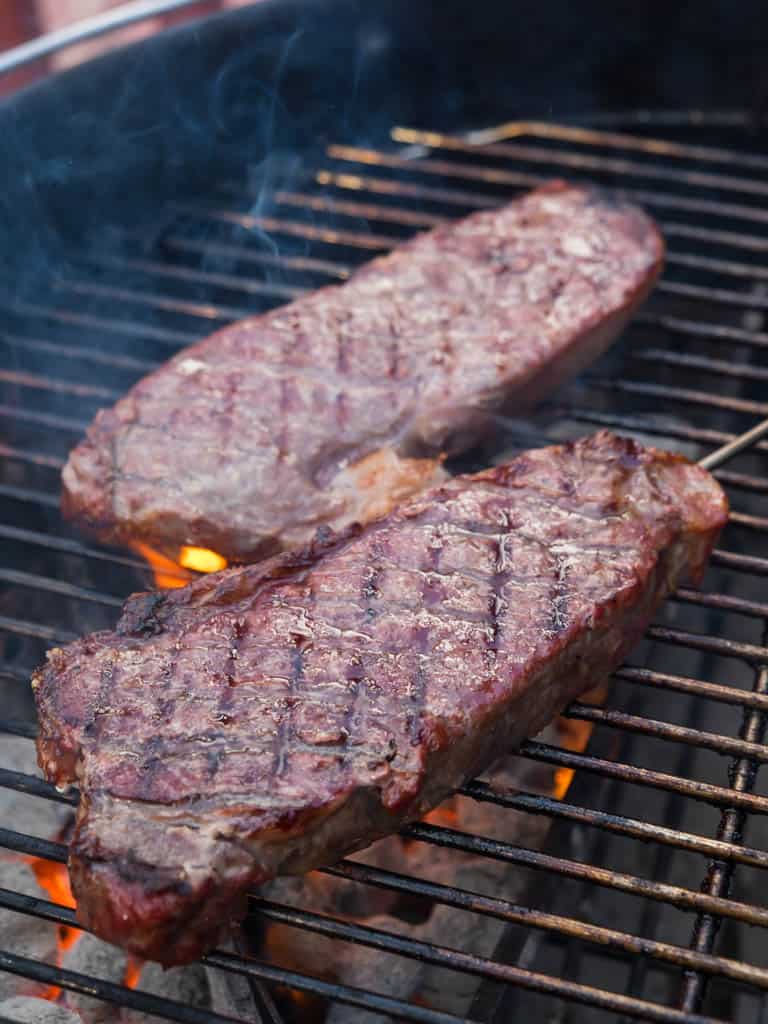
- Sear the steaks, flipping often: Move the steaks to the direct heat side of the grill and sear the steaks, flipping every minute, until they are browned and crusty on both sides, about 4 minutes. (If you are cooking on a gas grill, rotate the steaks 90 degrees after the second flip to get a diamond crosshatch pattern on the steaks. This doesn’t matter as much with a charcoal grill - charcoal will brown the steaks regardless of the grate direction.)
- Prep Time: 1 hour
- Cook Time: 30 minutes
- Category: Grilling
- Cuisine: American
Would you like to save this recipe?
Notes
- Reverse searing needs a thick steak - at least an inch and a half, and two inches is better. Thin steaks are going to cook through as you sear them, so this technique is best reserved for the thick cuts. A thick cut New York Strip is a lot of beef; unless I'm serving the heartiest of eaters, I cut the steak crosswise into two serving pieces.
- Don't worry about the steak sticking to the grill when you try to flip it. The surface is already cooked most of the way from the indirect heat cooking, so it won't stick. Flip often - it's the key to keeping the steak cooked evenly.
- Thank you to Certified Angus Beef for the gorgeous New York Strip steaks that inspired this post.
What do you think?
Questions? Other ideas? Leave them in the comments section below.
Related Posts
Grilled Thick Cut New York Strip Steaks, Sear and Move Style
The Best Grilled Steak: Reverse Sear or Sear and Move?
Grilled Cowboy Chop - Double Cut Ribeye, Reverse Seared
Enjoyed this post? Want to help out DadCooksDinner? Subscribe to DadCooksDinner via eMail or RSS reader, recommend DadCooksDinner to your friends, and buy something from Amazon.com through the links on this site. Thank you.


Andrew says
I always always always slow cook my steaks. There is no comparison. Restaurants need to get orders out asap in order to run a business, which has led to the false belief that this is the best practice. So wrong. I always chuckle when men brag about that searing methods and timings. Truly good meat is never rushed!! The fact that you sear at all at the end is completely unnecessary, for texture only. I would emphasize that it is the least important step and the one most likely to ruin the meat.
Tom says
Thanks, we followed your instructions this evening and it worked perfectly! Very tasty and perfectly done!
Mike V says
You're welcome!
Chris L says
I just gave this a whirl on my gas Genesis and it came out a little overdone with a considerable band of gray around. I think I had my temp too high. I preheated with the left and center burners on high and the right side off and the hood temp was around 500. I turned the center down to medium and it cooled to a little under 475, so next time I think I'll aim a little lower.
Jim W. says
Thanks. by the way, because of the advance salting and the non-sear part,we still inhaled the steaks. They still were moist and very tender.
Jim W. says
I tried this with 1 ½" fillets. The non-sear part went great. But I think I messed up searing them for 4 minutes. They came out way too done. I think I forgot to account for the relative lack of fat in the fillets. Next time I'm going for 2 minutes searing time. Does that sound right?
Mike V says
Yes - use your best judgement on the searing step, because it depends on the heat of your grill. A minute a side sounds right for you.
Chris L says
Wow this looks good! Two questions: 1)Do you oil the grates or the steaks at any point during cooking? 2) It looks like you're using the armored temperature probe from Thermoworks. Do you have any trouble closing the lid on your kettle or gas grill with that coming out? They have a new grill probe (quick, hide the wallet!) and they have an options between a standard probe that can handle 470* and the armored probe.
Mike V says
I don't oil the grate - just brush it clean and set the steaks on it. The armored Thermoworks probe fits under the lid - it is thick enough that I have to carefully set the lid on the grill, to make sure it's not off center (which has happened a couple of times). Once I set it on the grill right, there is the tiniest of gaps around the armored thermometer cable - not so much that I've ever worried about it.
Mike V says
PS: Thank you for asking about sticking to the grates, it inspired the Note section. Don't worry about sticking with these steaks - they're on the grill for so long on the indirect stage that they release from the grill easily.
Chris L says
Thanks! Also, do you know what the grate-level temperature is in the indirect zone?
Mike V says
When I checked at the very start, the grill lid thermometer was a little below 450°F. Didn't check after that, but it usually drops, so I would guess 400 to 425°F by the time it was done. In a kettle grill, don't worry about that; go with high heat and the probe thermometer.
Chris L says
No kettle for me just yet, just my gas Genesis (EP-330 with 3 mains and a sear booster on the left).
Mike V says
Let me know how it goes - aim for 450°F internal grill temp.