")
When I saw the picture of the cowboy chop, I fell out of my chair. I was on the phone to my butcher immediately. I had to grill one. Had to!
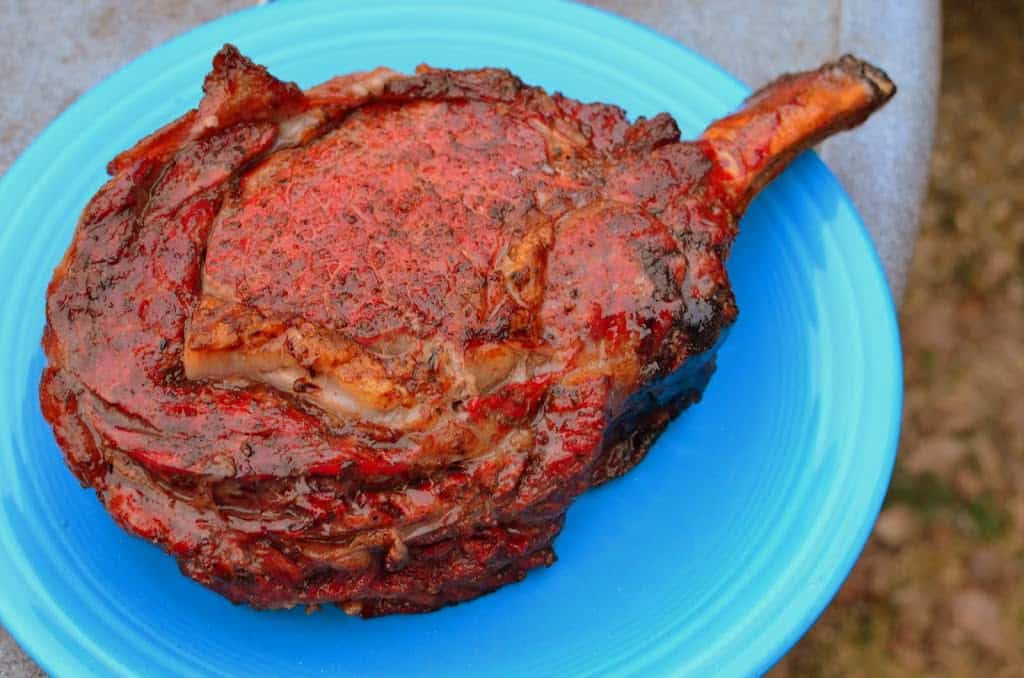
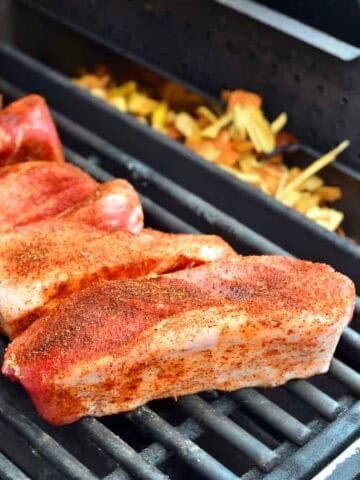
The cowboy chop is a monster ribeye steak. 2 ½ inches of beef, trimmed, with the bone cleaned off so it looks like a large comma. This one steak fed my family of five, with leftovers for a steak sandwich during the week. Because, really, this isn't a steak. It's a small rib roast. I mean, look at that thing.
Now, how to cook this gigantic piece of meat? I've always been a sear and move guy. Sear the steak first, then slide it over to the cool side of the grill and let the temperature come up slowly.
The problem is, all my food science heroes say I'm doing it backwards. Reverse sear is the way to go - start over low heat, gently bring the meat up to temperature, then finish it with a blast of heat to brown it. Alton Brown, Shirley Corriher, Nathan Myhrvold, Kenji Alt, and Meathead Goldwyn all recommend this approach.
Of course, their "low and slow" method varies, from a low oven in Alton's case, to freezing the steak in Modernist Cuisine at Home. I'm sticking with a grill-only method, recommended by Kenji Alt, even though bubba sous vide was a tempting alternative.
Why does the reverse sear work better? Two reasons:
- The slower cooking means the muscle fibers in the beef don't squeeze out quite as much liquid. Saving the sear to the end means juicier meat.
- The beef spends more time at temperatures between 40°F and 122°F. At those temperatures, enzymes in the meat are tenderizing the protein as it cooks. The higher the temperature, the more the enzymes tenderize…until the temperature reaches 122°F and the enzymes stop working. Keeping the beef below 122°F for as long as possible results in more tender meat.
In spite of knowing all this, the reverse sear scared me. It's different from the cooking method I've always trusted, and I didn't want to mess up this gorgeous piece of beef.
Special thanks to Sherman Provision, my local butcher. This was a special order, and Michael let me come back and pester him about how to cut it.
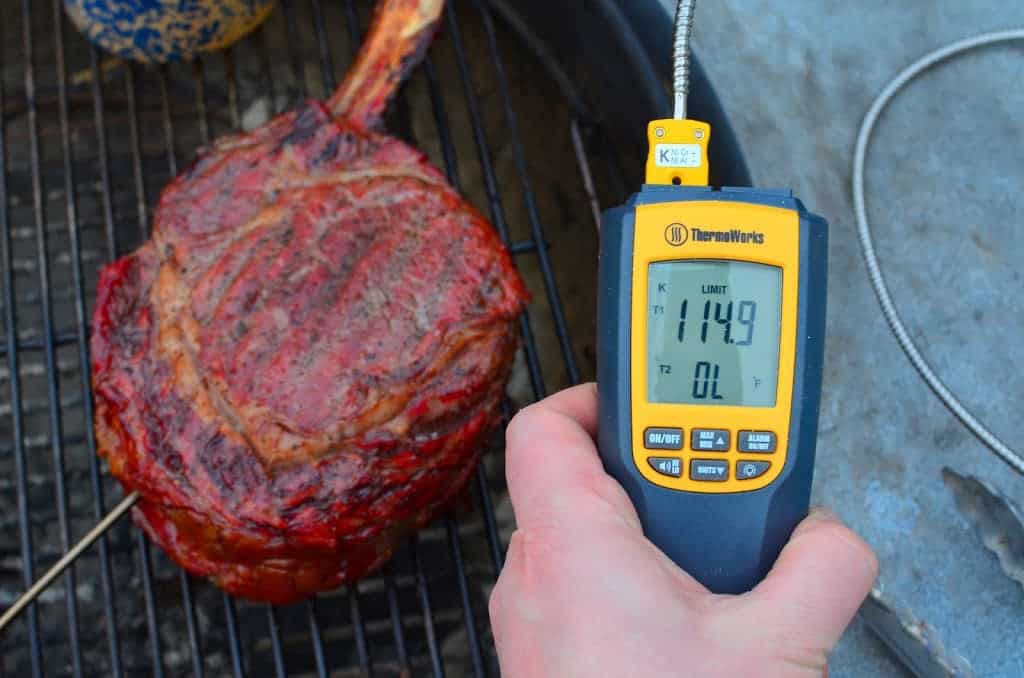
The reverse sear instructions are easy - bank the coals to one side and start the steak on the other side away from the heat. Cook the steak with the lid closed, flipping often, until the temperature is ten degrees lower than the final temperature. (115°F for medium rare). Then, move the steak directly over the lit coals to give it a final sear.
I did have to display adaptability as I was cooking. I had a couple of problems during my reverse sear:
- The heat drops as the coals burn down. I started out with a half a chimney of charcoal and a grill temperature of 300°F; by the time the steak was ready to sear, about an hour later, the grill was down to about 250°F, and the coals were just about spent. I poured in an extra half chimney of coals that I lit about fifteen minutes into the cooking time to build the fire back up.
- Low and slow was lower and slower than I expected. I thought it would take a half an hour to get the steak up to 115°F, so I could start the sear; it took a little over an hour for that huge hunk of meat to warm up. This was a problem, because my wife expected dinner a half an hour earlier. She gets a little peckish when dinner is late. The keys are patience and a instant read thermometer. This is perfect for probe thermometers, with a wire leading to the main unit; leave the probe in the steak, and it will tell you exactly when to continue cooking.
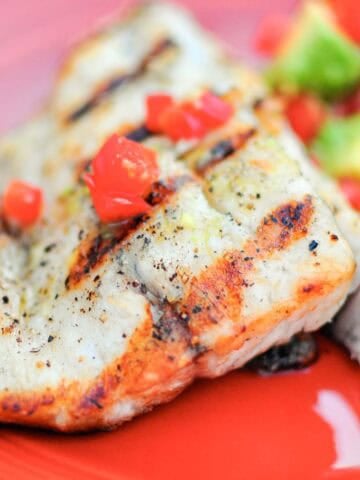
Even with those problems, I'm going to use this technique again. The beef was pink from edge to edge. No gray ring of overcooked beef between the crust and the core, just medium-rare deliciousness. And the low and slow cooking results in extra tender meat; this ribeye chewed like beef tenderloin.
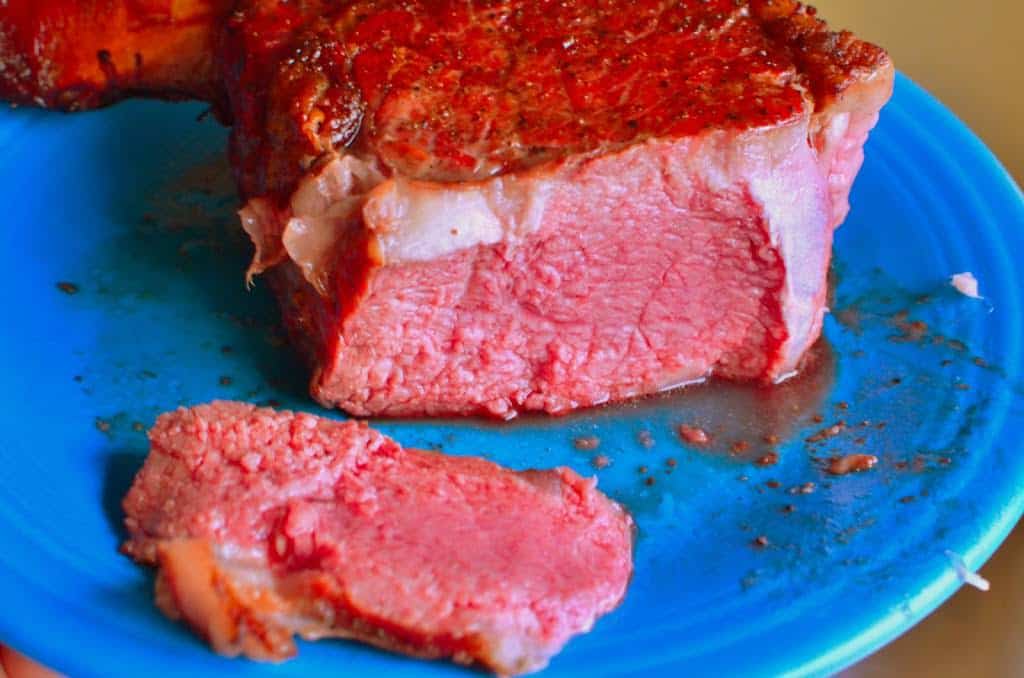 |
| I mean, look at that - that's perfectly pink. |
I'm going to play around with this technique some more; it should work great with thick cut steaks, even if they aren't as cartoonishly thick as the cowboy cut.
If you have carnivores in your life, call your butcher and special order a cowboy chop. They'll love you for it.
That is - your butcher and your carnivores will love you.
Recipe: Grilled Cowboy Chop (Double Cut Ribeye, Reverse Seared)
Adapted from The Food Lab's Perfect Grilled Ribeye Steaks | Serious Eats : Recipes
Cooking time: 65 minutes
Equipment:
- Grill (I use my trusty Weber kettle
 )
) - Charcoal chimney (for the extra batch of coals)
- Probe thermometer and/or an instant read thermometer
Ingredients
- 1 "Cowboy Chop" - a double cut bone-in ribeye steak, 2 ½ inches thick, about 2 pounds
- 2 teaspoons kosher salt
- 1 teaspoon fresh ground black pepper
- 2 fist sized chunks smoking wood (or 1 oak wine barrel stave)
Butter baste
- 4 tablespoons butter
- 1 small shallot, minced
- leaves from 1 sprig of thyme
Directions
1. Season the steak
Two hours before grilling, remove the steak from the refrigerator. Season it liberally with the salt and pepper. Let it rest at room temperature until it is time to grill.

2. Set up the grill
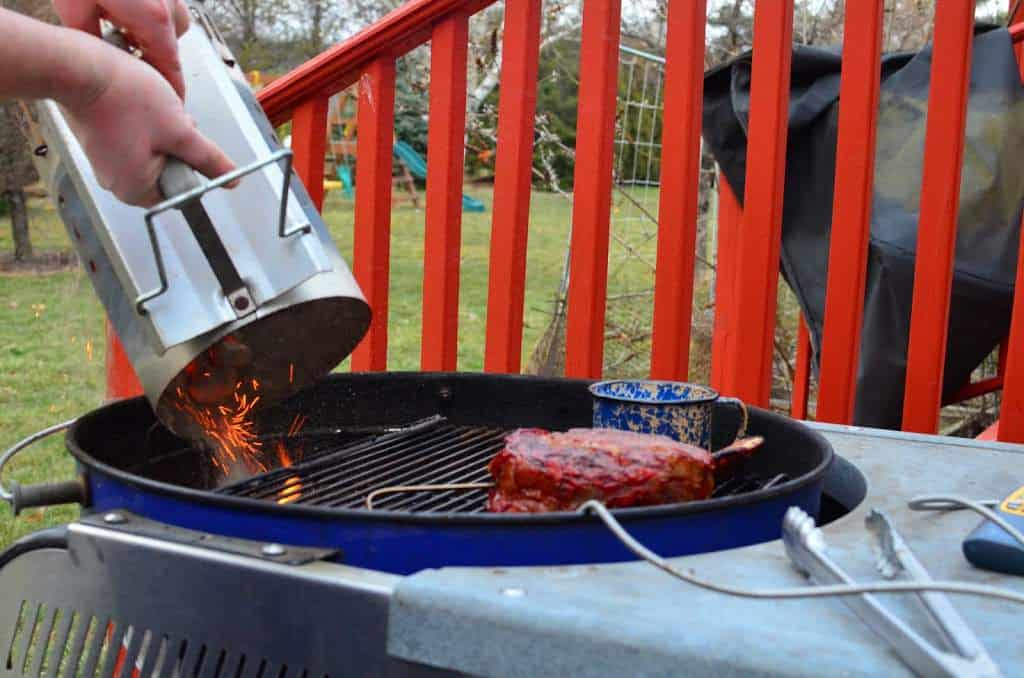
Set the grill up for indirect medium-low heat, 300°F. On a charcoal grill, light half a chimney of charcoal (50 coals), wait for the coals to be mostly covered with gray ash, then pour them on one side of the grill. Add the smoking wood to the pile of coals.
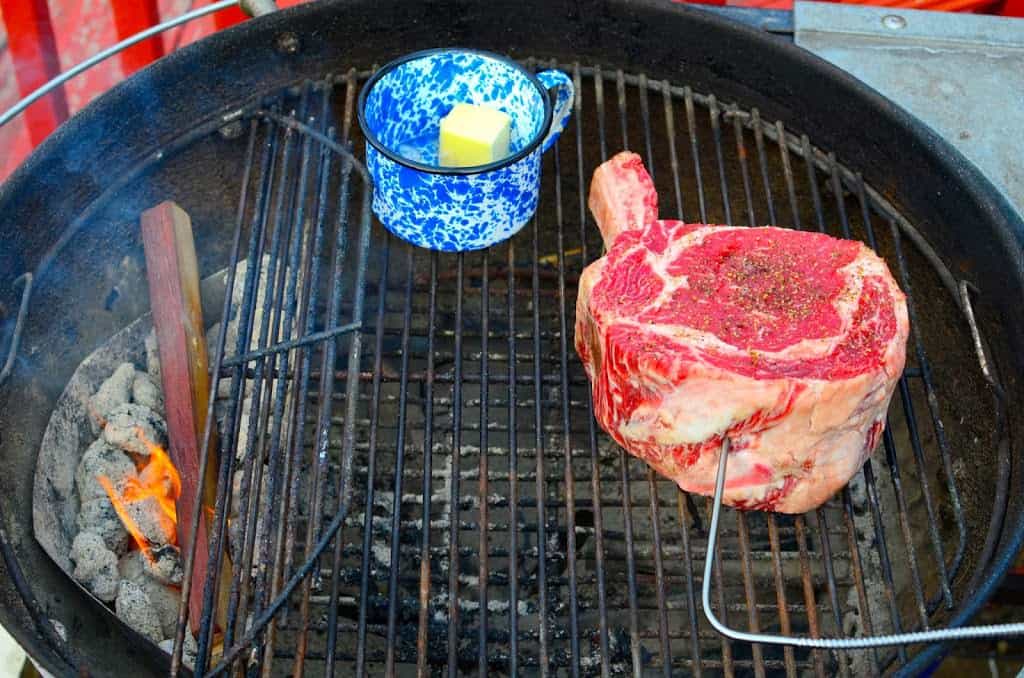
3. Start the steak on indirect medium-low
Put the steak on the grill over indirect heat, away from the lit coals. Close the lid, and position the air holes directly over the steak to pull the smoke towards it. Cook the steak, flipping every five minutes, keeping the lid closed as much as possible. The steak is ready for searing when it reaches 115°F internal in the thickest part, somewhere between 30 minutes and 1 hour. (115°F is medium rare. Cook to 105°F to 110°F for rare, 125°F for medium. Beyond that…buy a thinner steak.)
Start another half a chimney of charcoal (another 50 coals) for the searing step after the steak has been cooking for 15 minutes, or when it reaches an internal temperature of 80°F. (Do this on a heat safe surface. I used my other charcoal grill - doesn't everyone have two kettles?)
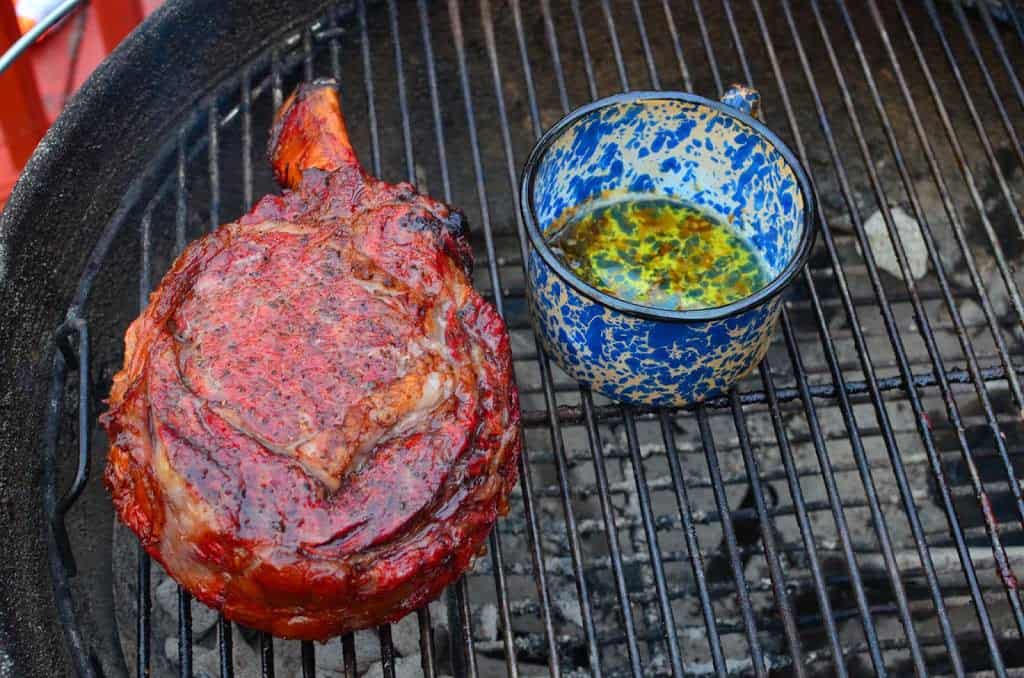
4. Melt the butter baste
While the steak is cooking slow and low: Put the butter, shallot, and thyme in a small, grill safe pot. (I use an enameled steel drinking cup.) Put the pot over the coals when you start the steak in step 3. Check the butter every time you flip the steak - once the butter is melted and the shallots are sizzling, slide the pot to the indirect side of the grill to keep warm.
(If you don't have a grill safe pot, heat the butter baste on the stove over medium heat, or put everything in a Pyrex measuring cup and microwave. Heat the baste until the butter melts and the shallots sizzle.)
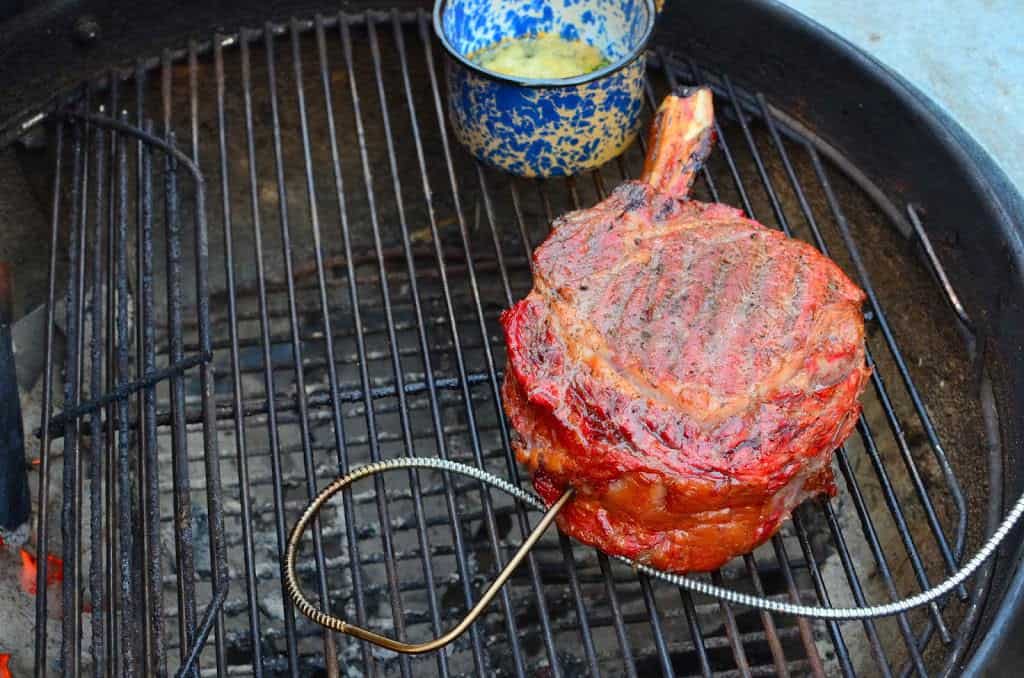
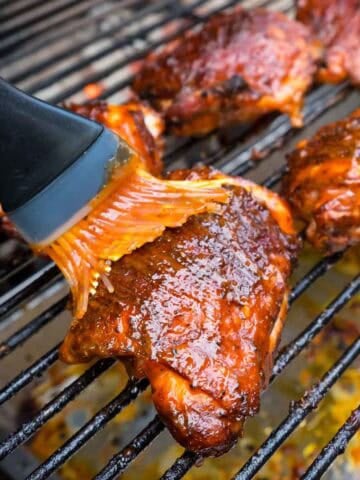
5. Sear the steak
By now, the second chimney of charcoal should be covered with gray ash. Add it to the coals already in the grill, pouring carefully so the steak doesn't get covered with ashes. Brush the steak with a thin coat of butter, then slide it directly over the lit coals. Sear the steak with the lid open, flipping and basting with the butter every minute or two, until there is a gorgeous brown crust on the steak. This should take about five minutes, at which point the steak should measure 125°F internal for medium rare, 115°F for rare, or 135°F for medium.
 |
 |
6. Rest and serve
Remove the steak to a platter and baste it one last time with the butter. Let the steak rest for fifteen minutes, then slice and serve.
Notes
- This recipe was invented for probe thermometers. I wouldn't cook without one, though you could get away with an instant read thermometer, and a check every time you flip the steak.
- I'm still working out the timing on this recipe - it took a really long time for that thick hunk of beef to come up to temperature. It seemed to be stuck at 53°F for the first twenty minutes of cooking time. Then it started to ramp up, and it moved quickly after that. But it didn't seem like it - I had to go in the house and say "I told you dinner was at 6:30, but the steak's only at 80 degrees. Have another glass of wine…"
- If you have a gas grill, this is easier to cook, but you don't get as good of a sear at the end. Set the grill up for indirect medium-low heat by setting one burner to high, and leaving the others off. Cook with the lid closed as much as possible, and adjust that one burner to keep the temperature at 300°F. When the steak is ready, crank up all the burners to high, and put the steak over the burner that's been lit the whole time. Oh, and replace the wood chunks with a cup of wood chips, soaked for 1 hour, then wrapped in a foil envelope and placed on the burner cover over the lit burner.
- The "flip every five minutes" seemed excessive, but it sure worked in evening out the temperature. This steak was as evenly cooked as my bubba sous vide steaks. I didn't think I could do that entirely on a charcoal grill. I mean, look at that pink center one more time:
References
The Food Lab's Perfect Grilled Ribeye Steaks | Serious Eats : Recipes
How To Grill a Gigantic Rib-Eye Steak | Serious Eats
Cooking Temps: When To Cook Hot & Fast, When To Cook Low & Slow, And When To Do Both (Reverse Sear)
What do you think? Questions? Other ideas? Leave them in the comments section below.
Related Posts:
My award winning Grilled Ribeye with Mediterranean Herb Butter
Beer Cooler Sous Vide Grilled New York Strip Steaks
*Enjoyed this post? Want to help out DadCooksDinner? Subscribe to DadCooksDinner using the RSS or Email options on the right, link to this post from your blog, recommend DadCooksDinner to your friends, or buy something from Amazon.com![]() through the links on this site. Thank you.
through the links on this site. Thank you.
Gary m. says
I'm on my third cowboy!!!!! This reverse method is not traditional but they all came out awesome!!! Thanks for the tip I am doing another one tonight. (well done one the process not the steak) thanks again for the tip.
Mark lenix says
Great my first time, like you saw one in the butcher shop and had to have one thanks I had great results
Mike V says
You're welcome!
geardoc says
Hi Mike.
I've been enjoying your website for about 1 year now.
I tried the reverse sear on a nearly identical piece of meat, although I cut it into 2 steaks.
I cooked it on my gas grill. I used a remote temp probe that monitors grill temp as well.
Cooking time at 300 degrees was about an hour to reach an internal of 115 degrees even with the roast cut into 2 ,1 1/2" thick steaks. My grill has an infrared searing side burner. I finished them there on high. This only took 90 seconds or so for each steak. The results were outstanding. Just like your photos, they were perfectly pink throughout with the great sear on the outside.
Keep up the good work. I really love the rotisserie recipes.
Mike V says
Thank you! I'm glad it worked so well for you.
Mike V @ DadCooksDinner says
You're welcome. Thank you for sharing your story!
Kay. W says
Thanks so much for this recipe, I've been eyeing the cowboy steaks at my butcher's for months and finally broke down and bought one with no idea how to cook it. Somehow slapping a nearly $50 slab of beef on the grill seemed a bit haphazard and I didn't want to risk having a charred and raw result. Yes it was a tad labor intensive but everyone agreed it was the best steak we've ever had. My butcher shop had a bone marrow butter that I used to finish it off and let me tell you there was not a scrap of meat left and my husband did a Fred Flintstone number on the bone after dinner. this will be my go to method for grilling thicker cuts. Thnaks again.
Mike V @ DadCooksDinner says
You're welcome, I'm glad it worked for you. Out of curiosity - what kind of grill, how hot was it, and how long to finish the low and slow part?
QKSLVR says
This is a great way to cook a 2.5 - 3 inch thick Cowboy. I had total control nd our steaks turned out perfectly cooked. Thanx Mike
Mike V @ DadCooksDinner says
Even the 'regular" weber grates have a hole on the sides, under the handles. If you're careful, you can dump all the coals through that hole. You might have to pick a couple up off the surface of the grill grate, though, and it is easier with the hinged grate.
Mike V @ DadCooksDinner says
That's a Thermoworks dual channel alarm thermometer:
http://www.thermoworks.com/products/handheld/TW8060.html
It's a professional grade "polder" probe thermometer. I just got it with my tax refund, and this was its maiden voyage. It worked like a champ. Be warned, though - It is really expensive.
Richard H Marshall says
Mike, just wondering what that thermometer in the photo is.have a maverick remote model that lasted 2 cooks max.remote had a range of 7 feet line of sight.thought 50 bucks was enough for a good thermometrr but died after 2 uses.need something else.
Mike V @ DadCooksDinner says
Thanks for sharing your experience.
ArDaddy says
Mike I have been lurking on your blog for about a month and had to say great site. As for the reverse sear method it is awesome, I have been doing this for a few years now with consistent results. It works great for thin steaks as well as any pork chop or even a hamburger. When I throw a party I will fire up the smoker and cook whatever it may be that night and slow cook then food until just under rare pull them off to rest and sear the meat to everyone's liking. It kind of works like sous vide in that aspect and it makes it hard to mess up. You will love the reverse sear, trust me.
autumn says
Only question I have is how do you add the extra charcoal at the end? My weber has a single grate so do I take the whole thing off and try not to drop it or is there a better way?