
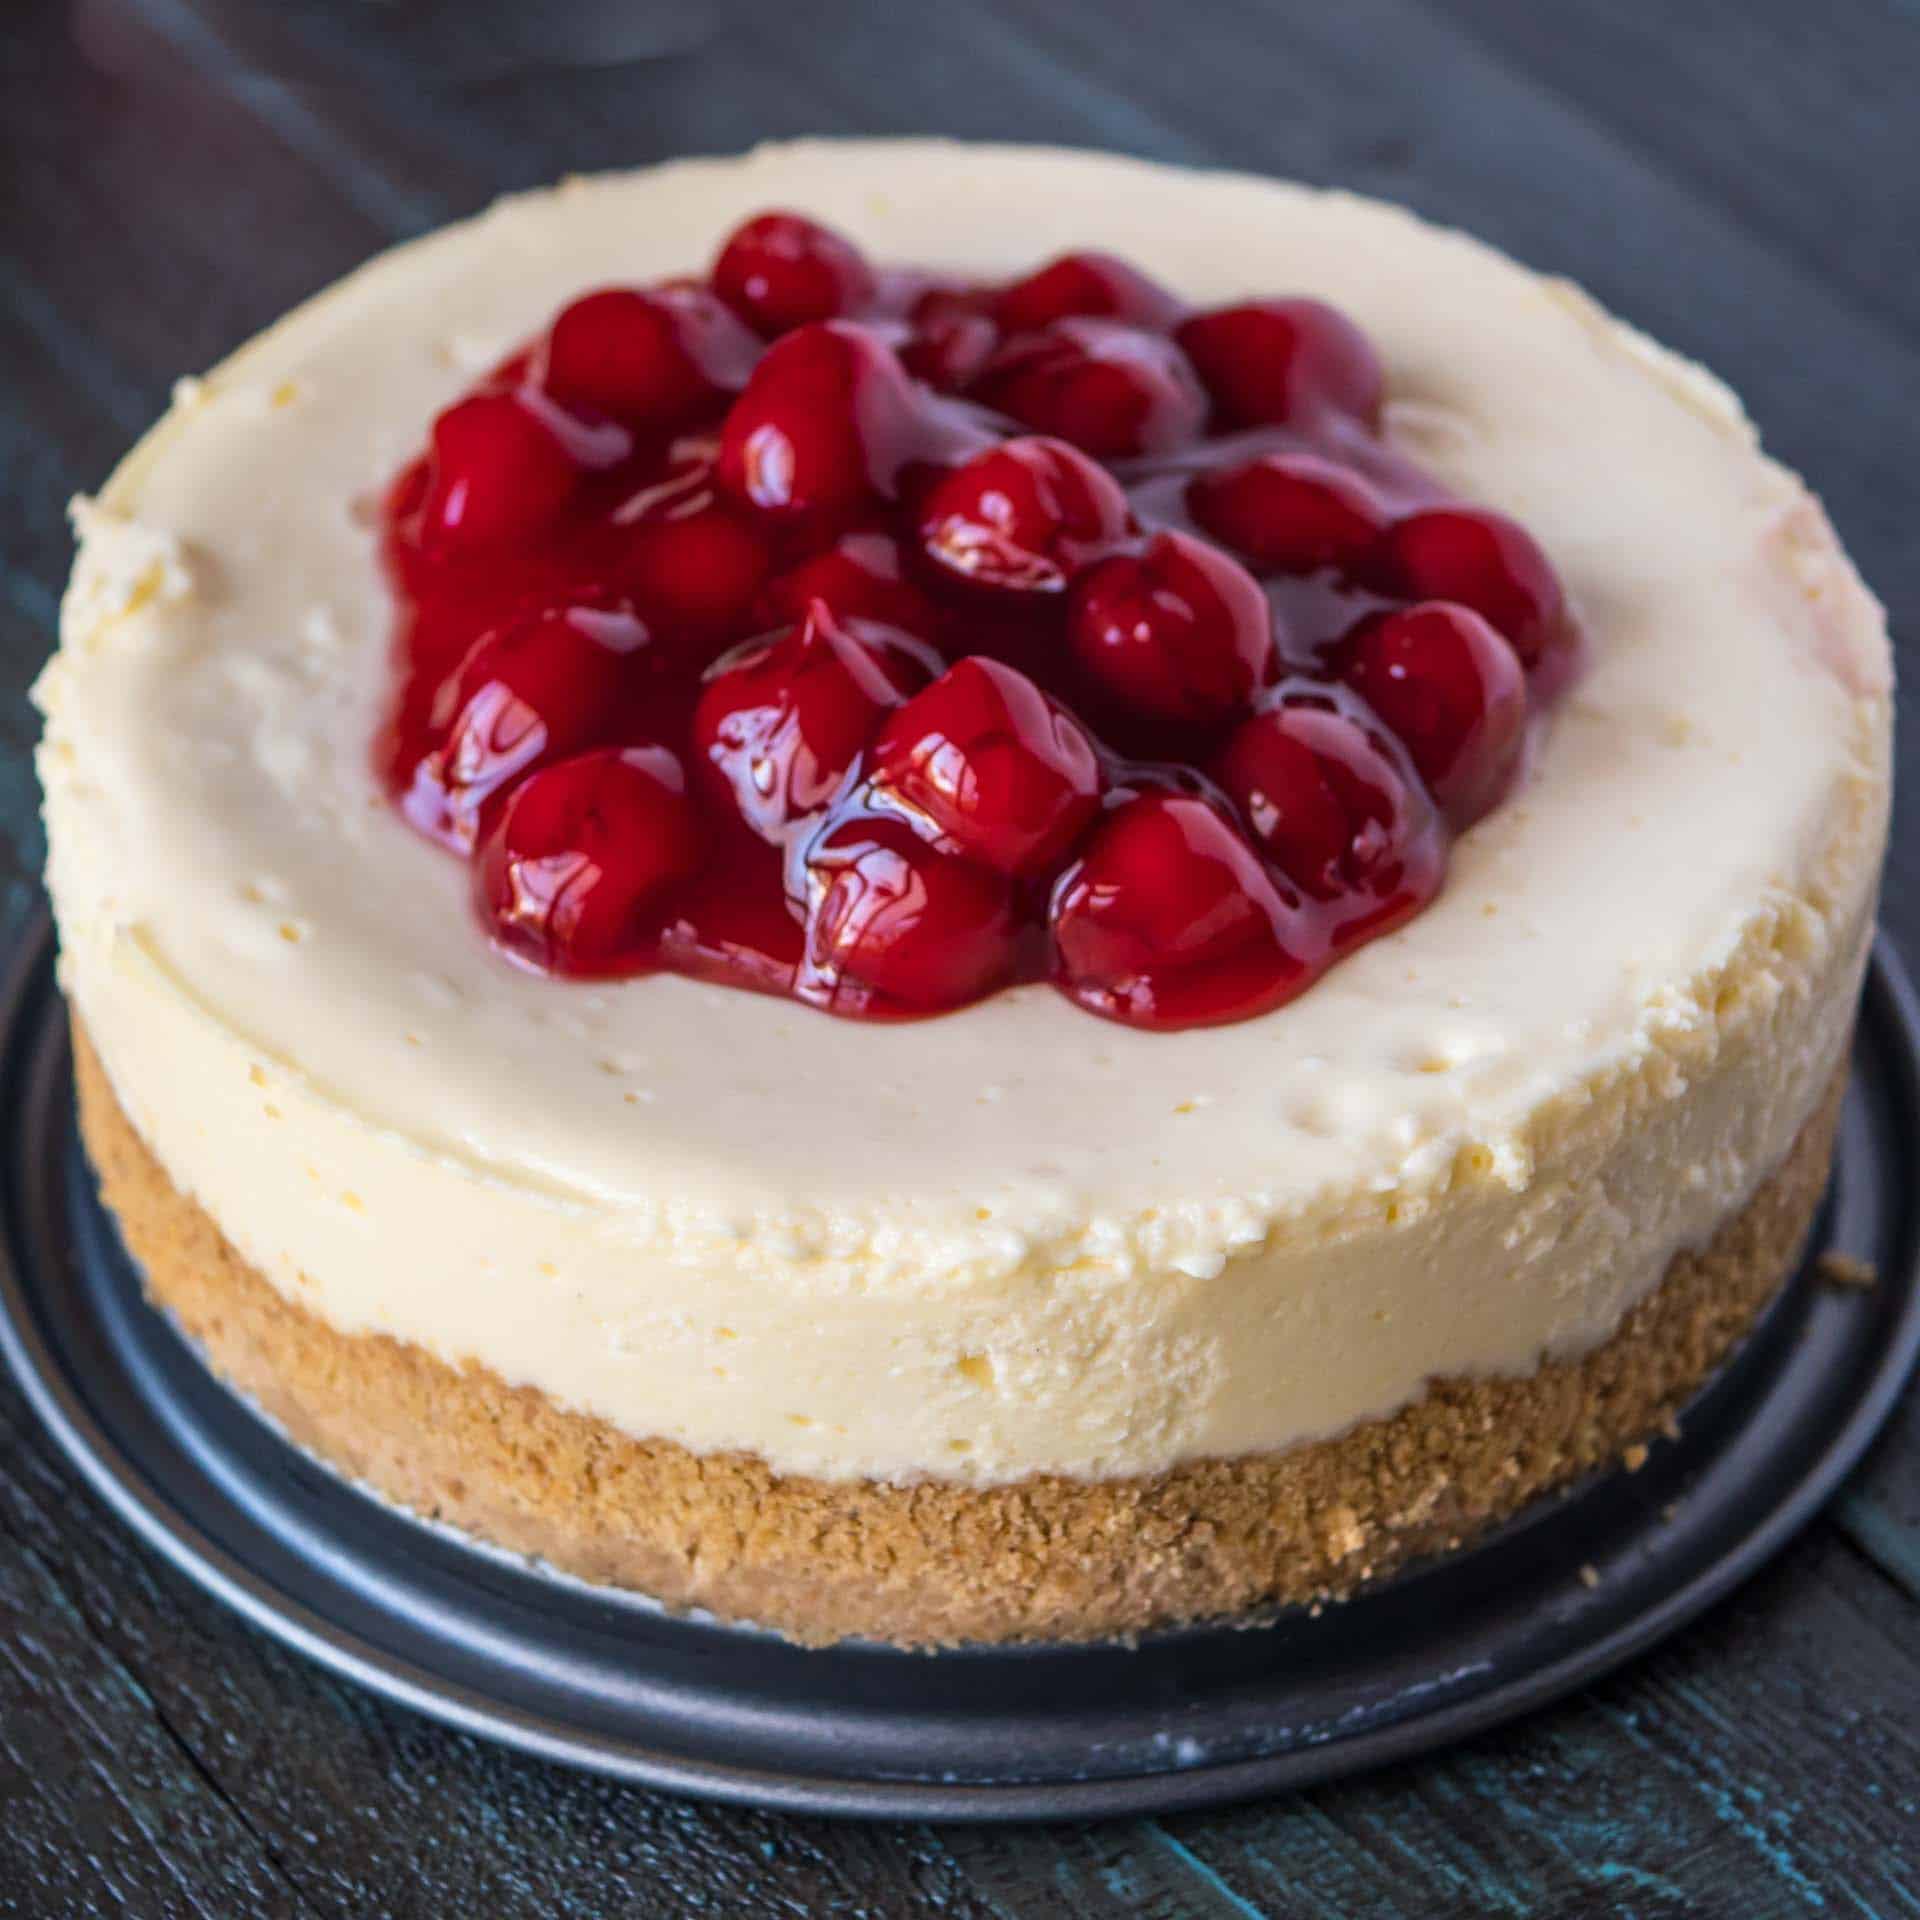
Instant Pot New York Cheesecake. Yes, you can make cheesecake in the Instant Pot. Yes, it's fantastic.
Pressure cooker cheesecake was a bridge too far. I mean…who in their right mind would bother to make a cheesecake in a pressure cooker?
(Looks embarrassed, hesitates, then slowly raises hand)
Would you like to save this recipe?
Jump to:
- Ingredients
- How to Make Instant Pot New York Cheesecake
- Serving Suggestions
- Storing Leftovers
- Can I freeze a New York cheesecake made in the Instant Pot?
- Equipment
- Should You Use a Push Pan or a Springform Pan?
- Tips and Tricks
- Instant Pot New York Cheesecake - Recipe
- What do you think?
- Related Posts
- 💬 Comments
I resisted this idea for a long time, but the pressure cooker does a fantastic job with cheesecake. You know how you're supposed to cook a cheesecake in a water bath? The pressure cooker does the same thing, pressure steaming the cheesecake, resulting in evenly cooked cheesecake. No cracks, no overdone edges - perfectly creamy cheesecake. The best cheesecakes I've ever made.
Pressure cooker cheesecake is hard to mess up. (And, even when I messed up, everyone gobbled down the "failures".) Pressure cooking steams the cheesecake at 240°F to 250°F, a much lower temperature than you get in an oven, so it is difficult to overcook. My most consistent results were at 35 minutes under pressure; they never overcooked, and came out creamy and smooth all the way through.
Want to impress your guests with something completely out of left field from the pressure cooker? Make a cheesecake.
Ingredients
Crust
- ¾ cup graham cracker crumbs (4 whole graham crackers, crushed)
- 2 tablespoons melted butter
Cheesecake
- 1 pound regular cream cheese, softened (2 8-ounce packages)
- ⅔ cup sugar
- 2 teaspoons corn starch
- 2 large eggs
- ½ teaspoon vanilla extract
- ¼ cup sour cream
Topping
- Cherry Pie Filling (optional)
How to Make Instant Pot New York Cheesecake
Prep the pan
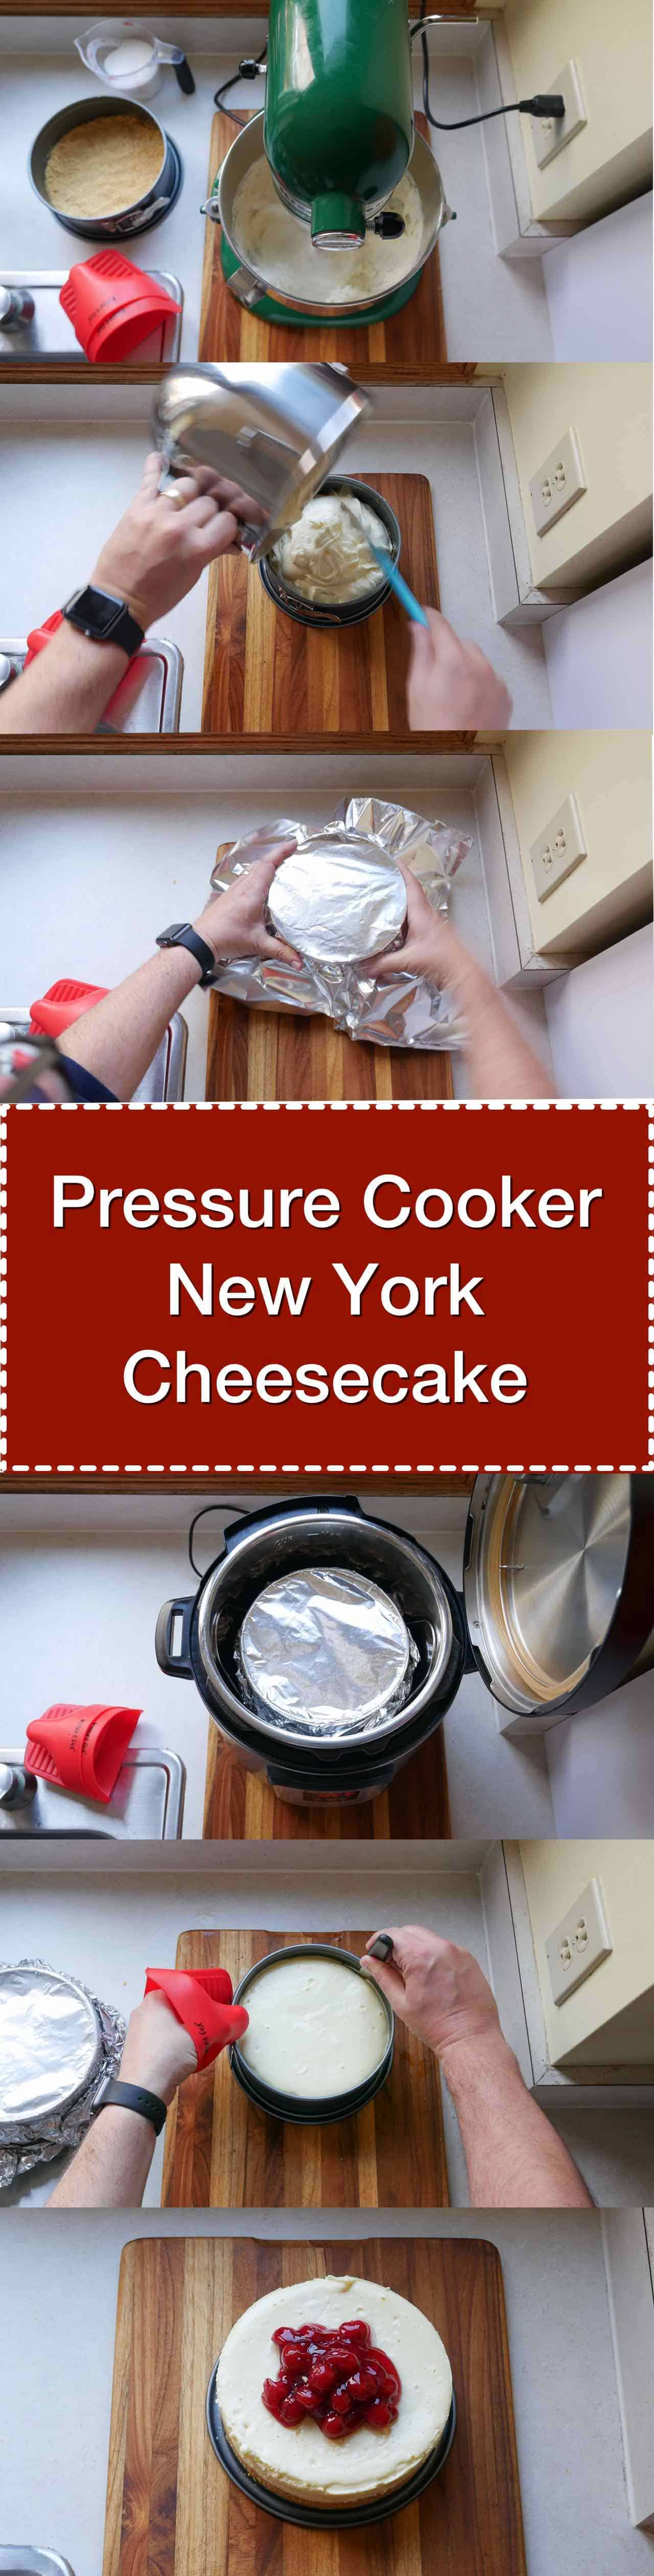
Spray the 7-inch cheesecake pan with nonstick cooking spray. Mix the graham cracker crumbs and melted butter, then spread the crust mixture evenly across the bottom of the pan. Pack the graham cracker crust down, pushing it up the sides of the pan a little.
Make the cheesecake filling
Soften the cream cheese by leaving it out at room temperature for at least 1 hour (or heat it in the microwave for 20 to 30 seconds, until it is softened). Beat the cream cheese in an electric mixer on medium speed until smooth, about 1 minute. Mix the sugar and corn starch together, then slowly add to the mixing bowl, beating on medium speed until the sugar is completely blended, about 3 minutes. Add the eggs one at a time, beating on low speed until just blended. Stir in the vanilla and sour cream by hand. Pour the cream cheese mixture into the cheesecake pan, then tap the pan on the countertop for about 30 seconds to get rid of air bubbles.
Pressure cook the cheesecake for 20 minutes with a Natural Release
Put the cooking rack or baking sling in an Instant Pot or other pressure cooker, then pour in 1 cup of water. If your rack does not have handles, make an aluminum foil sling to lift the cheesecake: fold a 2-foot long piece of aluminum foil over a few times, until it is a long strip about 4 inches wide. Center the cheesecake pan on the sling and carefully lower it into the pot, setting it on the rack. Lock the lid on the cooker and pressure cook on high for 20 minutes in an Instant Pot or other electric PC ("Manual" or "Pressure Cook" mode in an Instant Pot), or for 16 minutes in a stovetop PC. Then let the pressure come down naturally, about 20 more minutes. (If you're in a hurry, you can quick release any pressure left in the pot after 20 minutes.)
Cool the cheesecake, then serve
Lift the cheesecake out of the pressure cooker. Immediately run a knife around the rim of the cheesecake pan to loosen the cheesecake from the sides. Cool the pan at room temperature for an hour, then refrigerate for at least 4 hours, preferably overnight. Top with the cherry pie filling and serve.
Serving Suggestions
For small dessert servings, I slice the cheesecake into 8 pieces, top with the cherries, and serve. If you have hearty eaters, you can cut the cheesecake into 6 slices. Or, make another cheesecake so people can mix and match different flavors. (See my other cheesecake recipes here: Instant Pot Cheesecake Roundup.
I love cherry on cheesecake, but you can choose your own favorite fruit filling to top your cheesecake. Strawberry an blueberry filling are two of my other favorites.
Storing Leftovers
Cheesecake keeps well in the refrigerator. According to the USDA, cheesecake will keep in the refrigerator for 5 to 7 days. [Source: USDA FMA Data Spreadsheet]
Can I freeze a New York cheesecake made in the Instant Pot?
Absolutely! Wrap the whole cheesecake in plastic wrap and freeze it, then take it out and let it thaw overnight for serving. Or, store individual pieces in air-tight containers or plastic wrapped, and they will thaw out quicker. Cheesecake will last for up to 6 months in the freezer, and it's a great way to have a cheesecake snack whenever you want one!
Equipment
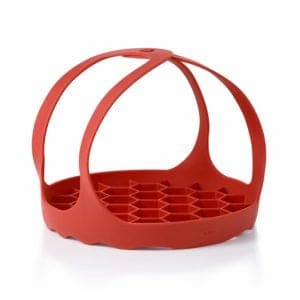
- 6 quart or larger pressure cooker (I love my 6 quart Instant Pot)
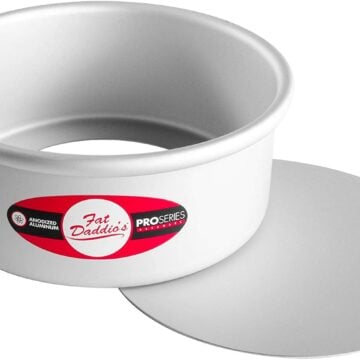
- 7-inch x 3-inch cheesecake pan, to fit my Instant Pot 6 quart (My favorites are by NordicWare and Fat Daddio)
- Rack for pressure cooker
Should You Use a Push Pan or a Springform Pan?
You can use whichever you like. Springform pans are a little easier to use - you can lift the sides away, where a push pan requires you to lift the center out from the edge, leaving me wearing the outer ring like an armband. But, I find the thick aluminum of the push pans helps the cheesecake cook a little more evenly. I use push pans, but I've made cheesecakes in both and the difference between them is small.
Tips and Tricks
- Soft cream cheese prevents lumps - if the cheesecake is cold, it doesn't smooth out in the mixer.
- After cooking, the cheesecake can be refrigerated for up to 6 days…if it lasts that long.
- The original version of this recipe had you cover the pan with aluminum foil. I removed that instruction; I found the cheesecake cooks more quickly and evenly if the pan is not covered with foil.
Adapted from Philadelphia Classic Cheesecake [Kraft.com]
Print
Instant Pot New York Cheesecake - Recipe
- Total Time: 1 hour 45 minutes
- Yield: 8 pieces of cheesecake 1x
Description
Pressure Cooker New York Cheesecake recipe. Pressure cooker cheesecake? Yes, you want to try it. Perfectly cooked cheesecake in about an hour from your pressure cooker.
Ingredients
Crust
- ¾ cup graham cracker crumbs (4 whole graham crackers, crushed)
- 2 tablespoons melted butter
Cheesecake
- 1 pound regular cream cheese, softened (2 8-ounce packages)
- ⅔ cup sugar
- 2 teaspoons corn starch
- 2 large eggs
- ½ teaspoon vanilla extract
- ¼ cup sour cream
Topping
- Cherry Pie Filling
Instructions
- Prep the pan: Spray the 7-inch cheesecake pan with nonstick cooking spray. Mix the graham cracker crumbs and melted butter, then spread evenly across the bottom of the pan and pack down, pushing the graham crackers up the sides a little.
- Make the cheesecake filling: Soften the cream cheese by leaving it out at room temperature for at least 1 hour (or heat it in the microwave for 20 to 30 seconds, until it is softened). Beat the cream cheese in an electric mixer on medium speed until smooth, about 1 minute. Mix the sugar and corn starch together, then slowly add to the mixing bowl, beating on medium speed until the sugar is completely blended, about 3 minutes. Add the eggs one at a time, beating on low speed until just blended. Stir in the vanilla and sour cream by hand. Pour into the cheesecake pan, then tap the pan on the countertop for about 30 seconds to get rid of air bubbles.
- Pressure cook the cheesecake for 20 minutes with a 20 minute Natural Release: Put the cooking rack or baking sling in an Instant Pot or other pressure cooker, then pour in 1 cup of water. If your rack does not have handles, make an aluminum foil sling to lift the cheesecake: fold a 2-foot long piece of aluminum foil over a few times, until it is a long strip about 4 inches wide. Center the cheesecake pan on the sling and carefully lower it into the pot, setting it on the rack. Lock the lid on the cooker and pressure cook on high for 20 minutes in an Instant Pot or other electric PC ("Manual" or "Pressure Cook" mode in an Instant Pot), or for 16 minutes in a stovetop PC. Then let the pressure come down naturally, for 20 minutes. If there is any pressure left in the pot after 20 minutes, quick release the remaining pressure.
- Cool the cheesecake, then serve: Lift the cheesecake out of the pressure cooker. Immediately run a knife around the rim of the cheesecake pan to loosen the cheesecake from the sides. Cool the pan at room temperature for an hour, then refrigerate for at least 4 hours, preferably overnight. Top with the cherry pie filling and serve.
- Prep Time: 1 hour
- Cook Time: 45 minutes
- Category: Desserts
- Method: Pressure Cooker
- Cuisine: American
Would you like to save this recipe?
Nutrition
- Serving Size: 1 slice
- Calories: 433
- Sugar: 22.9 g
- Sodium: 318.2 mg
- Fat: 25.6 g
- Carbohydrates: 45 g
- Protein: 6.7 g
- Cholesterol: 113.9 mg
What do you think?
Questions? Other ideas? Leave them in the comments section below.
Related Posts
Pressure Cooker Beef Shank Osso Bucco
Pressure Cooker Day-After-Thanksgiving Turkey Carcass Soup
Pressure Cooker Macaroni and Cheese
Instant Pot Mint Chocolate Chip Cheesecake
Instant Pot Cheesecake with Sour Cream Topping
Instant Pot Carrot Cake
My other Pressure Cooker Recipes
Enjoyed this post? Want to help out DadCooksDinner? Subscribe to DadCooksDinner via email and share this post with your friends. Want to contribute directly? Donate to my Tip Jar, or buy something from Amazon.com through the links on this site. Thank you.

Lisa M says
I can't wait to try this! I like to make it gluten free so I plan to make it crustless. Do you think that will affect the overall cooking time? Thanks so much!
Mike Vrobel says
I don't think it will affect the cooking time...but I've never tried it. Let me know how it goes!
Lisa M says
It came out fantastic even without the crust! It was a big hit at Thanksgiving and I'm definitely going to make it again. I don't know why I waited so long to try it! Thanks so much Mike!
Katie Deakins says
@Lisa M. and any other gluten free folks—I used gf vanilla wafers that I crushed in place of graham cracker crumbs. Delish! Awesome recipe.
vanessa says
I only found a 6" springform pan. Would I have to adjust time?
Kara Leeper says
Mike, have you tried this with fat free cream cheese?
Mike Vrobel says
No, I haven't. If you try it, let me know how it goes!
Linda says
Do you cool completely (4 hours) before removing it from the pan?
Mike Vrobel says
Yes - after running the knife around to loosen it, I pop it in the fridge. I'm not sure it matters; I leave it in the pan because the pan protects the cheesecake while I move it to the fridge.
Martha says
Do you cook the cheesecake on the cake setting?
Mike Vrobel says
No - manual mode (for high pressure)
Juliana C. Brown says
This recipe looks awesome. Any suggestions on adapting your recipe to a 10" springform pan? I have an old Presto PC that can definitely accommodate a 9 or 10" springeform. My family LOVES cheesecake and a 7" cake is gone in a day
Tanya Johnston says
Hello,
I am living in Spain and I have not found the block type cream cheese, only the softer plastic containers- but the regular Philadelphia cream cheese brand- will this work?
Thank you.
Mike Vrobel says
As long as it is regular cream cheese, not “whipped” cream cheese, it will work.
Wyguy says
I cooked as per recipe and the taste is great. The cheesecake was a bit soft, could my being at 6000 feet mean that I should adjust cooking time?
Mike Vrobel says
Yes, altitude matters. The rule of thumb is: For every 1000 ft above 2000 ft elevation, increase cooking time by 5%. In other words, at 3000 feet increase by 5%, at 4000 feet increase by 10%, at 5000 feet increase by 15%, and so on. For your 6000 feet, increase the cooking time by 20%, or to 42 minutes.
Eileen Spahl says
Hi Mike, I have an 8 qt Instant Pot. How would I adjust the cheesecake recipe? Thanks, Eileen
Mike V says
You don't need to change anything - it works fine in a 8 quart Instant Pot.
Dan says
I've now made three of these cheesecakes - they are really good. I actually like the 7" size better..it's perfect for 6 adequate slices.
I thought the crust might not turn out as well, but I was pleasantly surprised to find the crust was perfect (altho I do add another couple graham crackers because I like my crust a bit thicker.
I also mix up a little sour cream with some sugar, and pour it over the top - I miss the taste of the sour cream topping otherwise.
Mary says
I just served this for Christmas dinner. It was delicious, the best cheesecake I've ever made! Thanks Mike!
Debby L. says
Believe it or not, I can't find a 3" deep 7" dia. springform. Check out Amazon...#62.71 for the Nordic Ware, plus shipping. Good grief! They don't have the 7" Fat Daddio, either. Would a 2 and a quarter inch deep one work? How much clearance do you need at the top, if I have to waste some filling? TIA
Mike V says
Debby, I'm sorry about that - those sizes are very popular now, thanks to the Instant Pot's success. You don't need much clearance - about a quarter of an inch. I've cooked them in a 2 inch pan, pouring most of the way up, but I did have to waste some of the filling.
Debby L. says
Thanks Mike...Merry Christmas!
Tonya Weninger says
This was wonderful!! I've made cheesecake the old fashioned way, but this was faster and creamier. That being said, I did two substitutions; honey instead of vanilla extract. Apparently I was out of extract and didn't know it! The second was Greek yogurt instead of sour cream.
Mike Vrobel says
Thank you, I'm glad you enjoyed it!
Jason says
Looks delicious Mike, I can't wait to try it. I usually make my cheesecake with a sugar cookie crust, so I'll follow your timing after prebaking and cooling the crust.
MaryLou says
Does the timing start from the time the pressure cooker reaches pressure, or from the time you place it on the burner to start the process?
Mike V says
Timing starts when the cooker reaches pressure.
RN says
I have the Fat Dadio "push up from the bottom" pan. Should I add time to this recipe?
Mike V says
No! It works just fine. If anything, it cooks more evenly. I just had better luck with the Nordicware springform pan.
Allen says
Define "better luck". I just ordered the Fat Daddio pan, and am looking forward to getting it tomorrow. So far, the only thing I've used my Instant Pot for is hard boiled (actually steamed, of course) eggs, which come out GREAT.
Mike Vrobel says
I'm sorry - I don't understand the "better luck" question?
Mike Vrobel says
Never mind - I see it. The springform pan is easier to get the cheesecake out.
Emily says
Do you think this would work in the instant pot or do you need a real-deal pressure cooker? Have you tried making cheesecake sous vide?
Mike V says
I made mine in the Instant Pot, so, yes, I think it will work. 🙂
I have not tried cheesecake sous vide. I did creme brûlée sous vide last year, which worked well.