I'm not a baker…but Instant Pot cheesecake makes me look like one. With a springform pan, a mixer, and my trusty Instant Pot, I can whip out cheesecakes whenever I'm asked to bring a dessert. And, I know this Instant Pot Oreo cheesecake recipe is a winner. A friend asked for this specific cheesecake for a dinner party, because "it's my favorite!"
Would you like to save this recipe?
Jump to:
I freeze when I'm asked to bring dessert to a holiday party. Everyone assumes that, because I'm a good cook, I'm also a good baker. Um…not so much. Dad may cook dinner, but Mom's the baker in the family. I'm too seat-of-my-pants to be a baker. I can fumble my way through it, but the results are hit or miss. My wife (the Chemistry teacher) is a fantastic baker - she's precise and careful when she's cooking.
That said, pressure cooker cheesecake is resilient enough that even I can't screw it up too much. (And, even if it's not perfect, everyone wants to eat the results.)
I even planned my Christmas cheesecake ahead of time: Oreo cheesecake! I love Oreos, knew they'd make for a great filling, and…I thought I saw Oreo crumbs at my local grocery store, which would make an easy crust. Shopping the day before Christmas, I learned two things:
- My grocery does not carry Oreo crumbs - they sell pre-made pie crusts made of ground up chocolate cookies - not going to work with my cheesecake.
- I can make Oreo crumbs and work out post-shopping stress at the same time. "Bambambam…mutter, mutter…bambambam…blocking the aisle…bambambam….not looking where they're going… bambamBANG…oops." Pounding Oreos into powder is great therapy.
Ingredients
- Cream cheese: Regular or lowfat cream cheese both work fine in this recipe.
- Oreos: I use regular Oreos in this recipe; double stuff Oreos have a little too much filling, especially for the crust and the crumbled cookies mixed into the cheesecake. Chocolate covered Oreos for the top of the cheesecake would be interesting, but definitely don't use them in the crust.
- Whipped cream: If you really want to be fancy, put a ring of whipped cream around the outside of the cheesecake before adding the oreos.
Video: Pressure Cooker Oreo Cheesecake (3:25)
Pressure Cooker Oreo Cheesecake [YouTube.com]
Print
Instant Pot Oreo Cheesecake Recipe
- Total Time: 55 minutes
- Yield: 8 slices 1x
Description
Instant Pot Oreo Cheesecake - that's right, cheesecake from a pressure cooker. With Oreos!
Ingredients
Crust
- about ¾ cup Oreo cookie crumbs (12 cookies, crushed fine)
Cheesecake
- 1 pound regular cream cheese, softened (2 (8-ounce) packages)
- ⅔ cup sugar
- ½ teaspoon vanilla extract
- ¼ cup sour cream
- 2 large eggs
- 5 Oreo cookies, rough chopped
Topping
- 4 Oreo cookies, cut in half
Instructions
- Prepare the pan: Spray the 7-inch cheesecake pan with nonstick cooking spray. Crush the Oreos - I put them in a gallon zip-top bag and pound them with a rolling pin. Spread the Oreo crumbs evenly across the bottom of the pan and pack down, pushing the crumbs up the sides a little.
- Make the cheesecake filling: Soften the cream cheese by leaving it out at room temperature for at least 1 hour. (Or soften the cream cheese in the microwave, 30 seconds to 1 minute). Beat the cream cheese in an electric mixer on medium speed until smooth, about 1 minute. Slowly add the sugar and beat on medium speed until the sugar is completely blended, about 3 minutes. Stop the mixer and scrape down the sides. Add the vanilla and sour cream and beat on low speed until completely blended, about 1 minute. Stop the mixer again and scrape down the sides. Add the eggs one at a time, beating each on low speed until just blended. (Don't over-beat the eggs.) Stir in the 5 rough-chopped Oreos by hand. Pour into the cheesecake pan.
- Pressure cook the cheesecake for 20 minutes with a natural pressure release: Put 2 cups of water and the cooking rack in the pressure cooker pot. If you don't have a rack with handles, make an aluminum foil sling to lift the cheesecake: fold a 2-foot long piece of aluminum foil over a few times, until it is a long strip about 4 inches wide. Center the cheesecake pan on the sling and carefully lower it into the pot, setting it on the rack. (Bend the edges of the foil sling over so they fit under the lid.) Lock the lid on the cooker and pressure cook on high pressure for 20 minutes in an electric PC (use Manual, Pressure Cook, or Pressure Cook - Custom mode in an Instant Pot), or for 16 minutes in a stovetop PC. Let the pressure come down naturally, about 20 more minutes. (If you're in a hurry, you can quick release any pressure left in the pot after 15 minutes.)
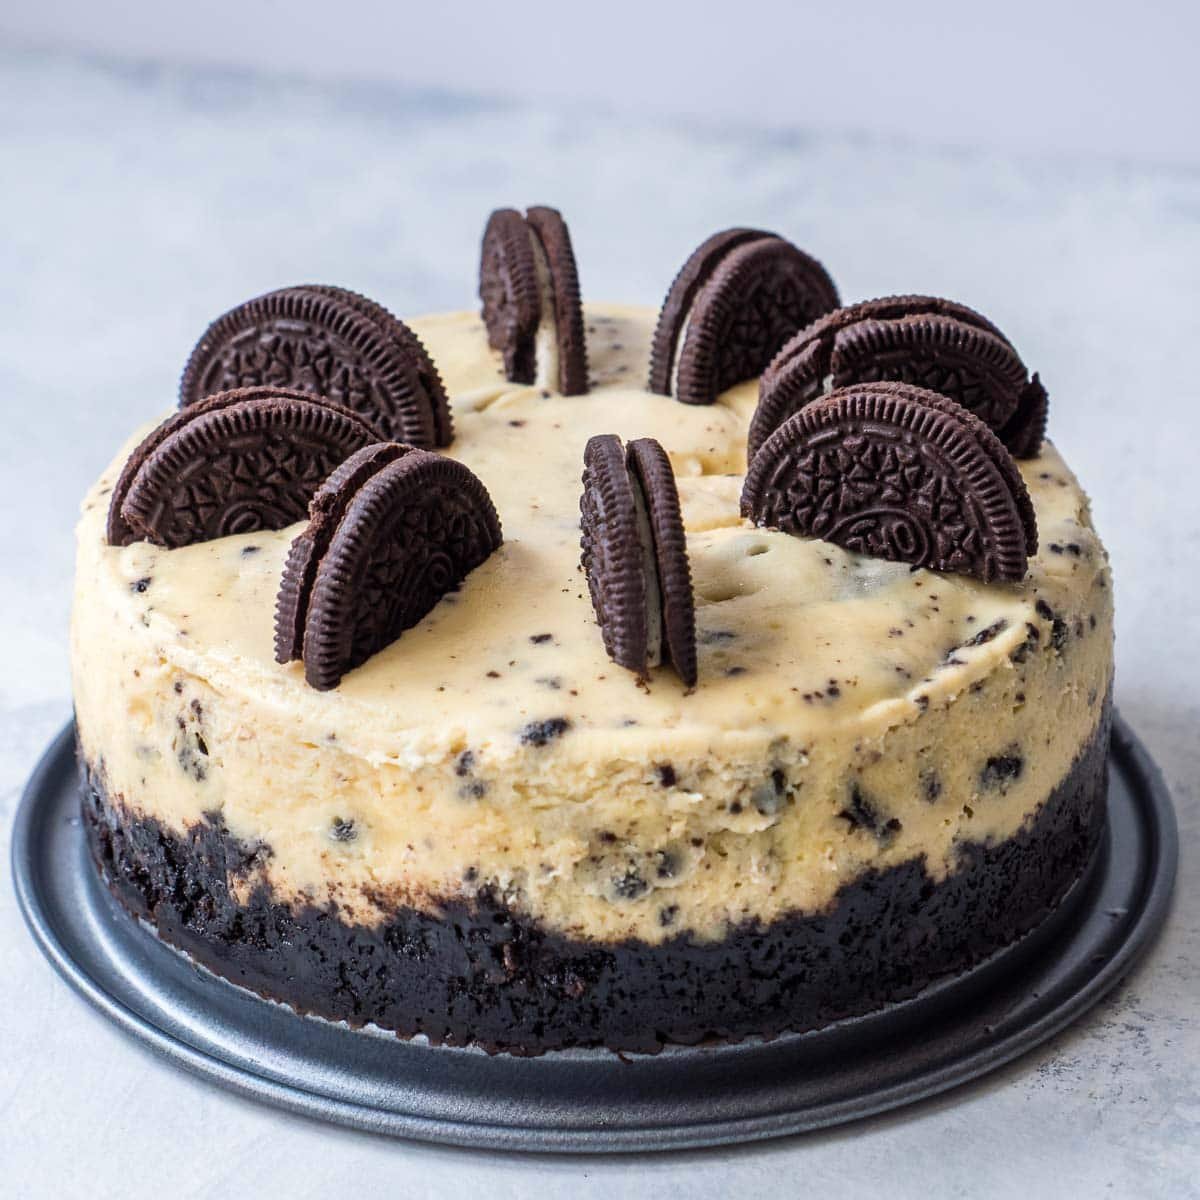
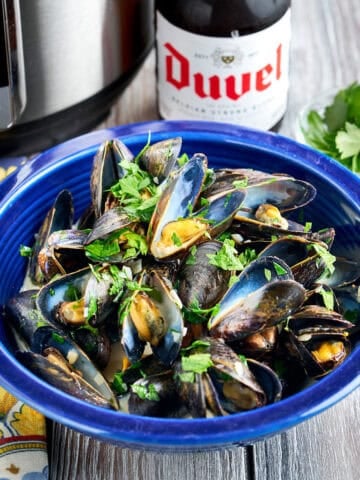
- Cool the cheesecake, then serve: Lift the cheesecake out of the pressure cooker. Loosen the cheesecake from the sides by running a paring knife around the edge of the pan. Cool the pan at room temperature for an hour, then refrigerate for at least 4 hours, preferably overnight. Just before serving, set the 8 half-cookies in a ring around the outside edge of the cheesecake, cut side down, pointing towards the center. (See the picture at the top of this post. This gives you one cookie per piece of cheesecake.) Slice the cheesecake into 8 pieces and serve.
- Prep Time: 20 minutes
- Cook Time: 35 minutes
- Category: Appetizers and Drinks
- Method: Pressure Cooker
- Cuisine: American
Would you like to save this recipe?
Nutrition
- Serving Size: 1 slice
- Calories: 314
- Sugar: 20.6 g
- Sodium: 217.1 mg
- Fat: 22.5 g
- Carbohydrates: 23.4 g
- Fiber: 0 g
- Protein: 5.7 g
- Cholesterol: 106.3 mg
Tips and Tricks
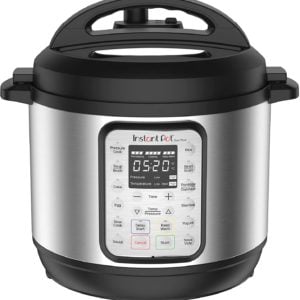
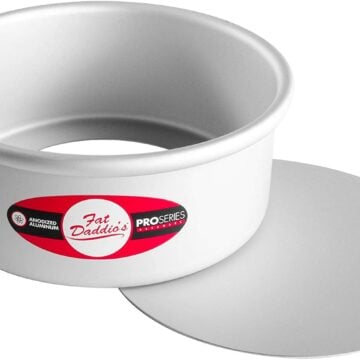
- The trick to this recipe, if there is one, is the 7-inch diameter cheesecake pan. It's the perfect size to fit in a 6 quart electric pressure cooker, like my beloved Instant Pot, and sit just above the boiling water on the steaming rack.
- Don't cover the pan with foil: If you've been following my blog, you'll notice a change to my pressure cooker cheesecake technique. I don't cover the pan with foil any more. It got in the way of the rising cheesecake, and the center of the cheesecake would not set sometimes.
- Cutting Oreos in half for the rounds on top is not an exact science - they want to crumble, not cut. Use a long, sharp chef's knife, and have a few spare cookies on hand. Then, console yourself by eating the mistakes. The next time I make this recipe, I'm going to try chocolate dipped Oreos to see if they hold together better. (Not because I want them for the cook. Oh, no, not me.)
- I get questions about changing this recipe for different sized cookers and pans; I haven't had time to test them yet. I've heard from readers that a 6-inch wide, 3-inch high cheesecake pan will work…but it might take a little extra cooking.
- Using an 8 Quart pressure cooker? I use this recipe as-is, with my 7-inch cheesecake pan in my 8-quart pressure cooker. It works great. Will it work with a larger pan in the larger cooker? In theory, yes, it should work if you increase the cooking time under pressure. But I have not tried it, so I don't know how much longer it should take.
Equipment
- 6 Quart Pressure Cooker (I love my Instant Pot electric pressure cooker)
- 7-inch Cheesecake Pan (I like this one from Fat Daddio's)
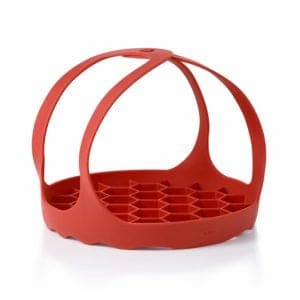
- Pressure Cooker cooking rack. One came with your pressure cooker - check your junk drawer. Or, get this handy silicone rack with easy-to-grab handles, and you won't need the aluminum foil sling.
- Aluminum foil to make a sling (if you don't have a rack with handles)
Storage
This cheesecake is best made a day ahead, and rested in the refrigerator overnight. It will last up to a week in the refrigerator, or up to 6 months if frozen. (I slice it into serving-sized pieces and freeze them individually, so I can have cheesecake as a snack whenever I want it.)
What do you think?
Questions? Other ideas? Leave them in the comments section below.
Related Posts
Looking for more Instant Pot Cheesecake recipes? Try my Instant Pot Chocolate Cheesecake, Pressure Cooker New York Cheesecake, or Pressure Cooker Salted Caramel Cheesecake. Or, check out my list of Instant Pot Cheesecake recipes.
My other Pressure Cooker Recipes
My other Pressure Cooker Time Lapse Videos
Enjoyed this post? Want to help out DadCooksDinner? Subscribe to DadCooksDinner via eMail and share this post with your friends. Want to contribute directly? Donate to my Tip Jar, or buy something from Amazon.com through the links on this site. Thank you.
MW says
So easy and came out perfectly. Only change I made was using coconut sugar which gave it that "secret ingredient" taste.
Karen Tolbert says
O M G!!! This dessert is so yummy - makes me think twice about sharing the recipe because it’s so good.. I too am not a baker - I don’t have the patience. This worked perfectly. I followed the recipe exactly with the exception of adding chocolate syrup and crushed Oreos on the top. My husband is a chocolate fiend - I am not, That being said, this recipe worked for both of us. The joke at our house if it’s pretty and I cooked it you might not want to eat it. It was beautiful, I cook it and it taste as good as it looked! Thank you so much!
Stephen says
From another dad that does a lot of the cooking this was a hit!
Thanks for the detailed great receipe. 5 stars all the way.
Mike Vrobel says
You’re welcome!
Kathleen says
Hi,
I’d love to hear your tips on the freezing process. How you wrap it etc.
Chris says
I made it in a 6x4 inch springform for 25 minutes and it came out perfect! Great recipe, super easy to make! Thank you so much for sharing the recipe!
van says
Hi - I want to try this in my 4" springform pans. Can you tell me if the cook time is the same? Thanks.
Mike Vrobel says
No, it’s not the same. I haven’t tried cheesecake in smaller pans, so I don’t have a cooking time for you. Sorry!
Sharon says
WOW!! I just made this today and it turned out perfect!! Thank You!!
Barb says
This was great! Used mint oreos and it had a great minty taste that everyone loved.
Kristi Walls says
Just curious why you don't have any butter in your crust like most of the recipes I have looked at? Does it still stay together OK without any butter in it?? Looks really good and was trying to pick out a recipe to try for my first ever IP cheesecake but wondered about the lack of butter in the crust.
Mike Vrobel says
The Oreo filling adds enough fat to the crust that it doesn't need butter.
Samantha says
Thank you for another easy to follow recipe. This was a huge hit! I'm going to try the Key Lime cheesecake next! I made my cheesecake in a 6 qt InstantPot Ultra using the InstantPot brand silicone trivet and InstantPot brand silicone springform pan with glass bottom. I was concerned I would need additional cooking time with the glass bottom. I followed your instructions to a T, and my cheesecake was perfection (no additional cooking time required)!
K, Goodwin says
Hi, did you scrape the inside of the Oreo cookie before you crushed them?
Mike Vrobel says
Nope. Crushed them whole.
Mike Vrobel says
20 minutes if you do not cover the pan with foil. 35 minutes if you do cover it with foil. I am getting better results without foil, so I switched for this recipe.
Dave says
Such an easy recipe and it worked quite well. We used our new Cosori 8-qt pressure cooker with a 6" wide by 3" pan. Our children helped crush the Oreos and gather ingredients for us. You mentioned to increase the time, so we set it to 25 minutes and it was perfect. We had it for desert after a 7 hour chill in the refrigerator. The only downside was when I was putting it back into the fridge, the bottom fell out of the pan and it wound up upside down on our kitchen floor. The good thing is we have enough ingredients to make it again and using the pressure cooker makes it an easy undertaking. Thank you for a great family experience!