
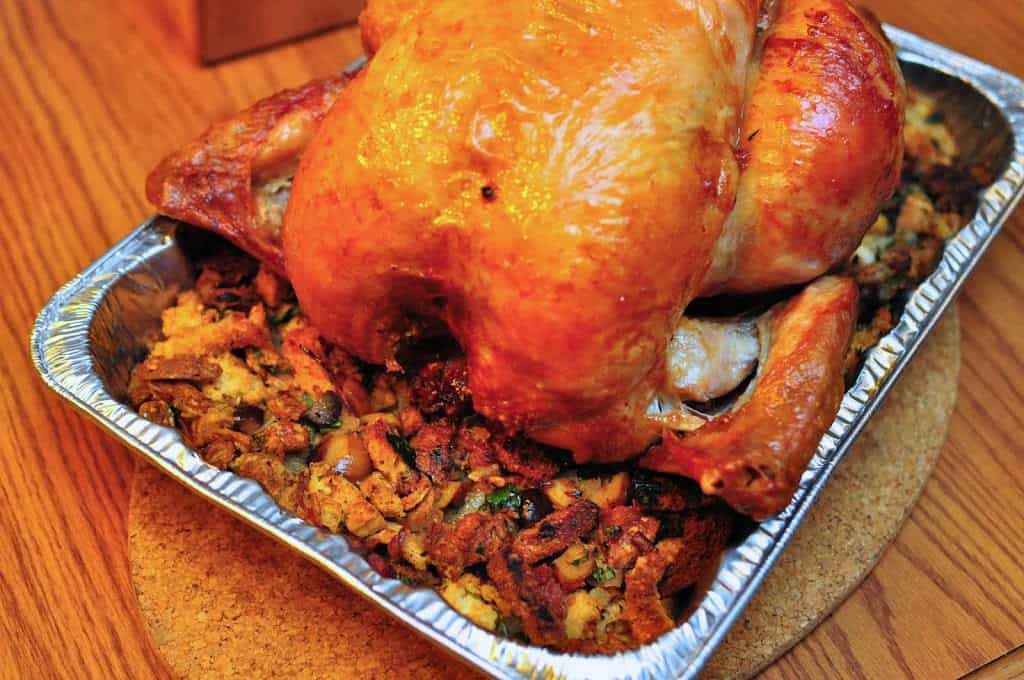
Rotisserie capons with chestnut stuffing. It just sounds like Christmas, doesn't it? When I saw it mentioned in Canal House Cooking, I knew what I was making for the holidays this year.
Now, I've never cooked a capon before. Capons are roosters that are…um…fixed, as a veterinarian would say. The result is a big, lazy bird that grows nice and plump - the average size of a capon is eight pounds. It's the right size bird if you need something larger than a chicken, but smaller than a turkey.
Now, for the stuffing. My hero, Alton Brown, said that stuffing a bird is evil. By the time the stuffing is cooked to a safe temperature, the bird around the stuffing is wildly overcooked. I solved this with a trick from Cooks Illustrated - preheat the stuffing in the microwave. The stuffing is hot when it goes into the bird, and the meat doesn't overcook.
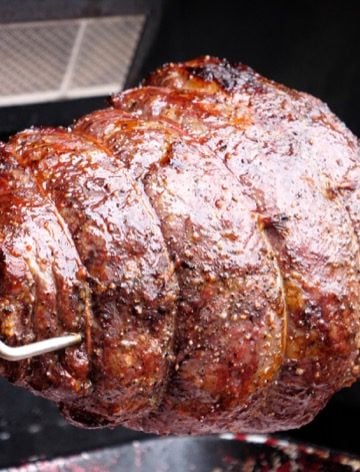
Then came my next problem. Rotisseries and stuffing are not a good combination. I stuffed the bird, trussed it tight, and turned on the rotisserie. As the bird rotated, the stuffing worked its way out of the cavity and fell into the drip pan. The result was an empty bird and a pan full of burned stuffing.
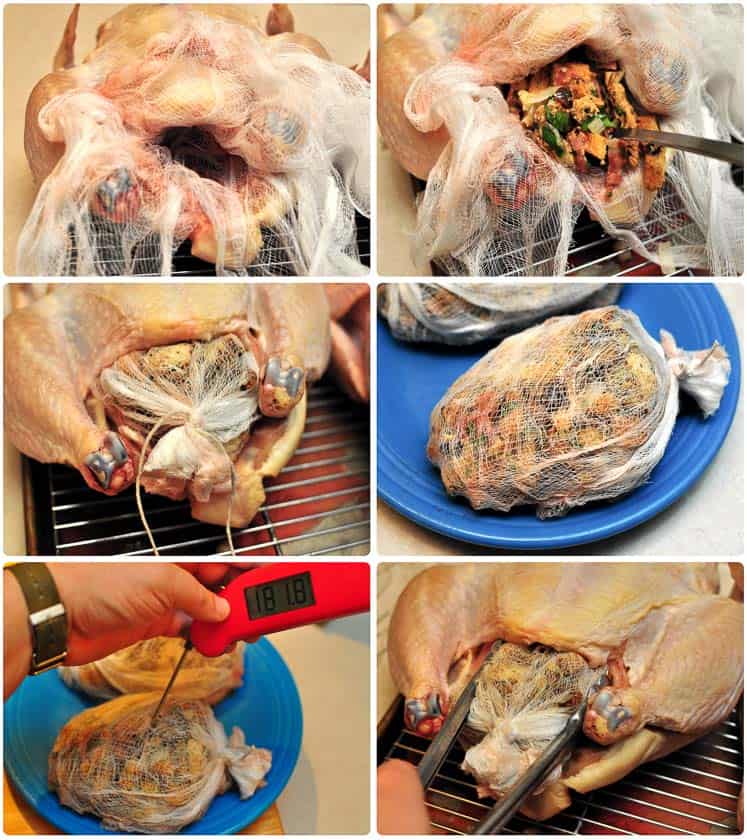
I thought of trying a stuffing bag, but I didn't think I'd be able to get the rotisserie spit through the tough cotton. Then I saw Kenji Alt's idea of using cheesecloth to make a stuffing bag. Perfect! Cheesecloth has a very loose weave, leaving gaps for the point of the rotisserie spit to push through. As a bonus, the bag of stuffing is easy to pull out of the bird and pop in the microwave for pre-heating.
Now, a stuffed bird doesn't hold enough for a crowd. I could only get a few cups of stuffing in the cavity. No worries - I made a batch of stuffing, filled the bird with as much as I could, and put the rest in a spare drip pan. I cover the pan with foil so the stuffing steams as it cooks; I cut slits in the foil so the drippings can flavor the stuffing. When everything is done cooking, I mix the stuffing that was absorbing the capon juices from the cavity with the stuffing in the pan, so everyone gets a taste.
Recipe: Rotisserie Capon with Chestnut Stuffing
Adapted From: Canal House Cooking Vol 7, La Dolce Vita
Print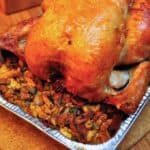
Rotisserie Capon with Chestnut Stuffing
- Total Time: 0 hours
- Yield: 8-10 servings 1x
Description
Rotisserie Capon with Chestnut Stuffing. A big bird with stuffing on the rotisserie, using the "preheat the stuffing in the microwave" trick.
Ingredients
- 1 (8-pound) capon
- 2 tablespoons kosher salt
Stuffing
- 4 tablespoons butter (½ stick)
- 1 medium onion, diced
- 1 stalk celery, diced
- 4 ounces diced pancetta (or prosciutto or bacon)
- ½ cup raisins
- 1 clove garlic, crushed
- 1 teaspoons kosher salt
- 10 ounces vacuum-packed peeled chestnuts, chopped into large chunks
- 1 teaspoon minced rosemary
- 1 pound dried bread cubes (look for the bags in the bakery of your local grocery store)
- ½ cup minced parsley
- 2 cups chicken stock
- 1 teaspoon kosher salt
- 1 teaspoon fresh ground black pepper
Instructions
- Dry brine the capon: Season the capon with the kosher salt, inside and out. (Optionally, Gently work your fingers under the skin on the breast, then rub some of the salt directly onto the breast meat.) Refrigerate for at least two hours, preferably overnight. One hour before cooking, remove the capon from the refrigerator, and let it rest at room temperature.
- Saute the aromatics for the stuffing:
Melt the butter in a large frypan over medium-high heat. Add the onion, celery, pancetta, raisins, and garlic, then sprinkle with 1 teaspoon of kosher salt. Saute until the onions are soft, about five minutes. Stir in the chestnuts and rosemary, and cook for one more minute. - Mix the stuffing: Put the bread and parsley in a large mixing bowl. Scrape the chestnut mix from the frypan into the bowl, then stir until evenly mixed. Pour in the chicken stock, add the salt and pepper, and stir until all the bread is damp.
- Make a cheesecloth bundle of stuffing, and put the rest in a pan: Line the cavity of the capon with the cheesecloth, then spoon in the stuffing, packing it in as tight as you can. Tie off the end of the cheesecloth and trim any extra cheesecloth or twine. Pull the cheesecloth bundle of stuffing out of the capon, and set it on a microwave-safe plate. Pour the rest of the stuffing into one of the foil pans. Cover the pan with a sheet of aluminum foil, crimp it around the edges to seal, then make 8 narrow cuts (2 rows of 4 cuts, evenly spaced) in the foil cover so that capon juices can drip through into the stuffing.
- Set up the grill for indirect medium heat (350°F): Set the grill up for indirect medium heat (350°F) with grates removed and the second (empty) drip pan in the middle of the grill. On my Weber Summit, I remove the grates, then preheat with all the burners set to high for 15 minutes. Then turn burners 1 and 6 down to medium, turn off all the other burners, and put the drip pan in the middle of the grill. Finally, I turn on the infrared rotisserie burner and set it to medium.
- Heat the stuffing, Re-stuff, truss, and spit the capon:
While the grill is preheating, put the plate with the pouch of stuffing in the microwave and cook until it measures 180°F in its thickest part (about 5 minutes in my 1000 watt microwave). Use kitchen tongs to re-insert the bag of stuffing in the capon. Fold the wingtips underneath the wings, then truss the capon. (Click here for trussing instructions.) Skewer the capon on the rotisserie spit, forcing the point through the cheesecloth at the center of the bag of stuffing, by aiming the spit just below where you tied the cheesecloth together. Secure the capon to the rotisserie spit with the spit forks. - Rotisserie the stuffed capon, about 105 minutes: Put the spit on the grill, start the motor spinning, and center the drip pan beneath the capon. Cook with the lid closed for 1 hour. Replace the drip pan with the pan full of stuffing, pouring any drippings in the pan onto the sheet of aluminum foil covering the stuffing. (The drippings will drip through the holes cut in the foil lid and down into the stuffing. Close the lid and cook for another 30 minutes. At that point, remove the foil from the top of the pan of stuffing and check the capon. The capon is done when it measures 160°F in the thickest part of the breast; the stuffing in the pan is done when it is browned and crispy on top and measures 150°F in its thickest part. Both should take 15 to 30 more minutes, for a total cooking time around 2 hours.
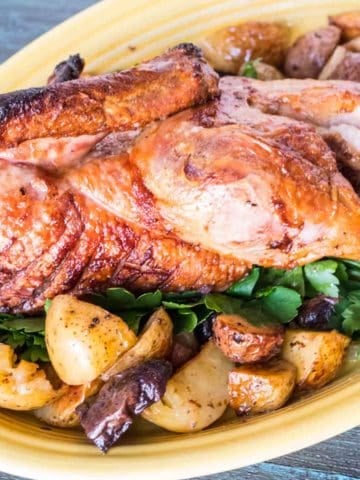
- Rest, prep the stuffing, carve, and serve: Bring the capon, spit and all, into the house, and set it on a carving board. Set the cooked capon on a carving board. (Wear heat resistant gloves or oven mitts - the spit and forks are blazing hot.) Remove the first spit fork, then slide the rotisserie spit and second fork out of the bird. Remove the trussing twine from the capon, and pull the bundle of stuffing out of the bird. Let the capon rest for 15 minutes before carving. While we wait for the bird to rest, bring in the pan of stuffing from the grill. Cut the bundle of stuffing open, pour it into the pan with the rest of the stuffing, and stir. After the resting time, carve the capon, scoop the stuffing into a platter, and serve.
Notes
- Be careful bringing the foil pan of stuffing in and out of the house - foil pans are flexible, and when they’re full, they like to twist. I don’t want to dump a pan of hot stuffing on the way back to the house…
- A trick I use to help the white and dark meat cook more evenly: fill a gallon zip-top bag with ice and set it on the breast of the capon when it comes out of the refrigerator 1 hour before cooking. (Set the ice so it does not touch the legs). This will give the dark meat a head start on cooking - always a good thing.
Tools
- Grill with rotisserie attachment (I love my jumbo Weber Summit with its infrared rotisserie burner)
- 2 (9- by 13-inch) aluminum foil drip pans
- Instant Read Thermometer (I love my Thermapen, and the ThermoPop is a good, less expensive model)
- Grilling gloves to protect your hands (I use welding gloves)
- 1 foot by 1 foot square of cheesecloth to wrap the stuffing
- Butchers Twine to tie the roast
- Prep Time: 2h
- Cook Time: 2h
- Category: Sunday Dinner
- Method: Rotisserie
- Cuisine: American
Would you like to save this recipe?
What do you think? Questions? Other ideas? Leave them in the comments section below.
Related Posts:
Rotisserie Pan Bread Stuffing with Cranberries and Apples
Rotisserie Chicken, Dry Brined with Rosemary and Lemon
Click here for my other rotisserie recipes.
*Enjoyed this post? Want to help out DadCooksDinner? Subscribe to DadCooksDinner using the RSS or Email options on the right, link to this post from your blog, recommend DadCooksDinner to your friends, or buy something from Amazon.com![]() through the links on this site. Thank you.
through the links on this site. Thank you.

Goober says
I've never gotten the fascination with stuffing birds. I just cook them and make dressing or other sides separately. The stuffing seems to introduce so many problems to the process.
Chris Lukowski says
So the key to getting the Best of Both Worlds is assimilation? Where have I heard that before? 😀
Mike V @ DadCooksDinner says
The stuffing from inside the bird was soaked with juices from the bird. The stuffing from the pan was nice and browned on the top. I'm torn as to which I liked better, so that's why I stirred them together - getting the best of both worlds.
Chris Lukowski says
The question I have always had about stuffing was whether or not there is a noticeable difference in taste between stuffing that actually cooked inside the bird and "dressing" that was cooked to the side but mixed with the drippings post-roast. Since you had it both ways, what's your take?