I'm working on my next cookbook.
Whoops. That's supposed to be a secret. But I'm getting so close!
Rotisserie Chicken Grilling is coming soon - I'll let you know the details as it gets closer to release. This means I'm cooking a LOT of rotisserie chicken. I tested this Tex-Mex Rub, loved it, but had to make the hard choice to take it out of the book. (I have too many rubs, and it's similar to another recipe.) But, I didn't want to give up on it, so I'm sharing it here. I hope this fulfills your rotisserie chicken cravings until the book is published.
I fought through a lot more procrastination than usual with this book. I've got to get it done, ship it, and move on. It tasks me. It tasks me, and I shall finish it!
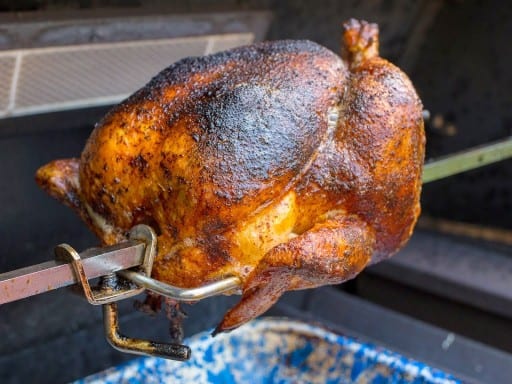
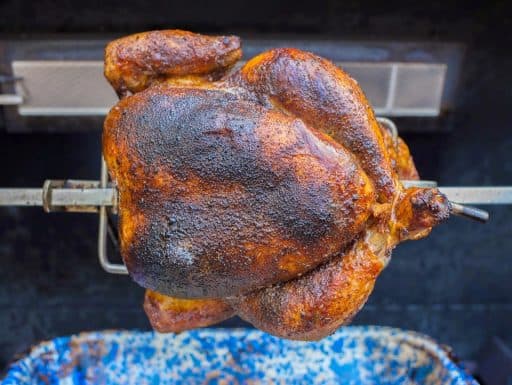
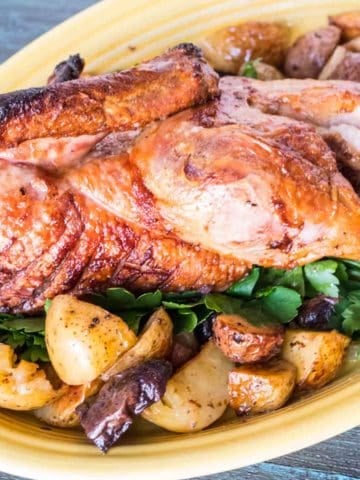
I used a bigger chicken than usual - there was a sale on roasters at the store - so I had to adjust my technique. My usual recipe calls for a four pound chicken, cooked high and fast to crisp up the skin. But this was a monster bird, close to six pounds. (I think it descended from T-Rex, not from one of those tiny velociraptors). I used the infrared rotisserie burner until the chicken was starting to brown, about 30 minutes, then turned the IR burner off and let the heat settle to indirect medium-low, about 300°F, and let the chicken coast to doneness, for a total cooking time of an hour and a half.
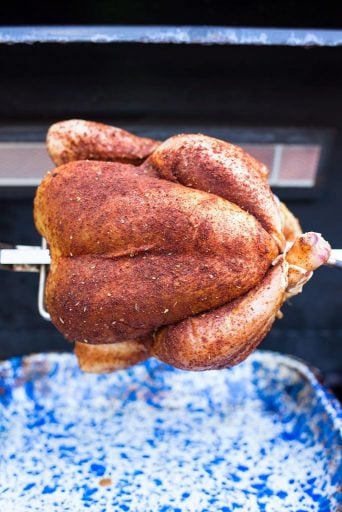
I can't argue with the results. The big bird had crackling skin, tender meat, and enough spice rub kick to make my lips tingle. I can't ask for anything more.
Recipe: Rotisserie Chicken with Tex-Mex Rub
Equipment
- Grill with Rotisserie attachment (I use a Weber Summit with an infrared rotisserie burner. Here is the current version of my grill.)
- Aluminum foil drip pan (9“x13”, or whatever fits your grill. I use an enameled steel roasting pan.)
- Butchers twine
- Instant Read Thermometer
Rotisserie Chicken with Tex-Mex Rub
- Total Time: 1 hour 40 minutes
- Yield: 4-6 servings 1x
Description
Rotisserie Chicken with Tex-Mex Rub recipe. A jumbo roasting chicken with a southwestern spice rub, spun on the rotisserie until browned and delicious.
Ingredients
- 6-pound roasting chicken
Tex-Mex Rub
- 1 tablespoon kosher salt (or 1 ½ teaspoons table salt)
- 1 tablespoon Ancho chile powder
- 1 teaspoon granulated garlic (or garlic powder)
- ½ teaspoon cumin
- ½ teaspoon fresh ground black pepper
- ½ teaspoon Chipotle chile powder (optional)
Instructions
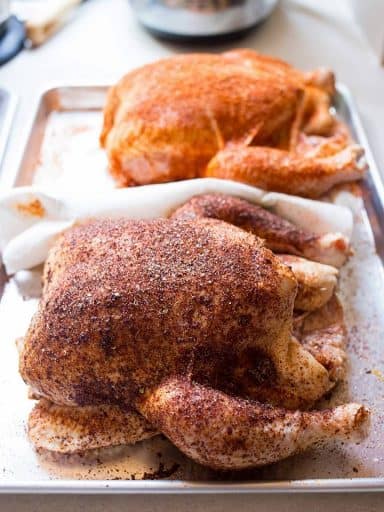
- Rub the chicken: Mix the Tex-Mex Rub ingredients in a small bowl. Sprinkle the chicken with the rub, inside and out, patting it onto the chicken to help it stick. Gently work your fingers under the skin on the breast, then rub some of the spices directly onto the breast meat. Fold the wingtips under the wings and truss the chicken. Skewer the chicken on the rotisserie spit, securing it with the spit forks. Let the chicken rest at room temperature until it is time to grill.
- Set up the grill for indirect medium heat (350°F): Set the grill up for indirect medium heat with the drip pan in the middle of the grill. On my Weber Summit, I preheat the grill with all burners on high, then turn off all but the outer burners, leaving them on high. Then I light the infrared rotisserie burner, and put the drip pan in the center of the grill, over the unlit burners.
- Rotisserie grill the chicken: Put the spit on the grill, start the motor spinning, and make sure the drip pan is centered beneath the chicken. Close the lid and cook with the lid closed as much as possible. I check the chicken after 30 minutes, and if it is browning well, I turn off the infrared rotisserie burner. Let the chicken cook until it reaches 160°F in the thickest part of the breast, about 1 hour and 20 minutes.
- Serve: Remove the chicken from the rotisserie spit and remove the twine trussing the chicken. Be careful - the spit and forks are blazing hot. Let the chicken rest for 15 minutes, then carve and serve.
Notes
Need trussing and spitting instructions? They're in my: How To Rotisserie Two Chickens video.
If you’re planning ahead, use the rub as a dry brine. The night before cooking, rub the chicken, put it in a baking dish, and let it rest in the refrigerator. One hour before cooking, remove it from the refrigerator to let it warm up a bit, then continue with trussing.
- Prep Time: 20 minutes
- Cook Time: 1 hour 20 minutes
- Category: Rotisserie
- Cuisine: Tex-Mex
Would you like to save this recipe?
Notes
- No rotisserie? No worries. Your best option is grilling a butterflied chicken - use the instructions in my grilled butterflied chicken recipe, but substitute the Tex-Mex rub for the dry brine, and expect the total cooking time to be an hour for the larger chicken.
- Grill-Roast Chicken: Don’t feel like butterflying the chicken? Set the grill up for indirect medium heat as described in step 2, then put the grill grate in the grill, and put the chicken, breast side down, on the grate over the drip pan. Close the lid and cook for 30 minutes, then flip the chicken breast side up (using wads of paper towels to protect your hands), and grill until the chicken measures 160°F in the breast, about 1 hour.
What do you think?
Questions? Other ideas? Leave them in the comments section below.
Related Posts
Rotisserie Chicken Zatar
Rotisserie Chicken with Knob Creek Maple Glaze and Drip Pan Potatoes
Grilled Butterflied Chicken with Dry Brine
My other rotisserie recipes
 Check out my cookbook, Rotisserie Grilling. Check out my cookbook, Rotisserie Grilling.
Everything you could ask about the rotisserie, It's a Kindle e-book, so you can download it and start reading immediately! |
Enjoyed this post? Want to help out DadCooksDinner? Subscribe to DadCooksDinner using the RSS or Email options on the right, recommend DadCooksDinner to your friends, buy something from Amazon.com through the links on this site, or donate through my tip jar. Thank you.

Chris L says
How would you adjust this recipe for a gas grill that does not have an infrared burner? Can you still get crispy skin using other means?
Mike V says
As long as you can get 400°F or higher internal temp on the grill, you can get crispy skin on the chicken.
Mike V @ DadCooksDinner says
Right - that's why Pam Anderson, who taught me this technique, calls it a steam-saute. There's just enough water to make sure the vegetable is cooked, and then it starts to saute in the fat when the water has boiled away.
Good luck! (Not that you'll need it. I use this technique for all sorts of vegetables.)
Michael Redbourn says
Thanks.
I'm not used to browning things in water but only when sautéeing.
There is no end to learning about cooking!
Mike V @ DadCooksDinner says
1/3 of a cup isn't much water. It boils away, and once the water is gone the leeks start to brown. (And, if not, that's why the next step is to remove the lid, to help the steam escape and the leeks to brown.)ß