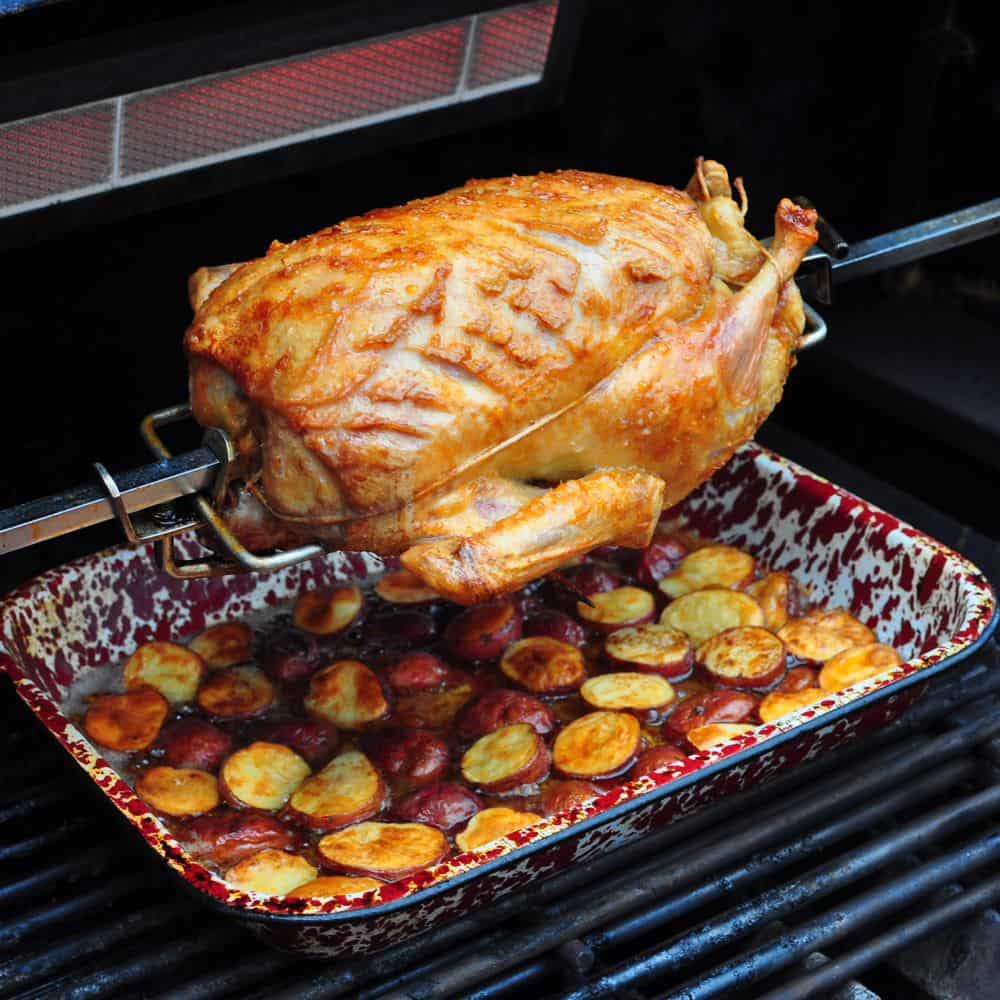
Rotisserie Duck with Honey Glaze and Drip Pan New Potatoes. Crisp skinned roast duck with duck fat potatoes. Doesn't that sound decadent? Oh, it is. This is a great recipe to show off your rotisserie grilling skills.
Would you like to save this recipe?
Jump to:
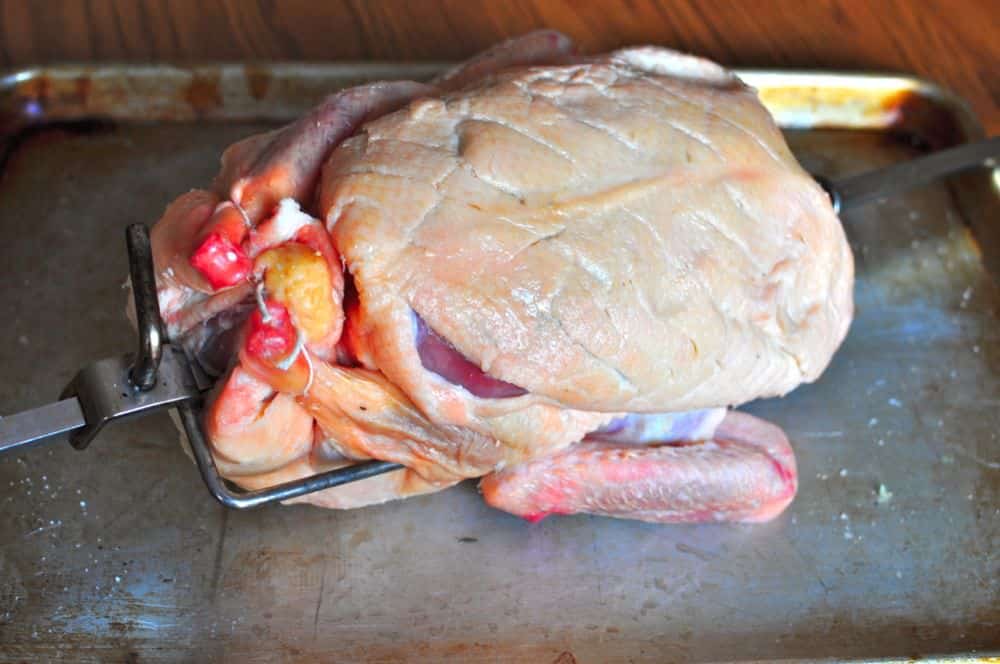
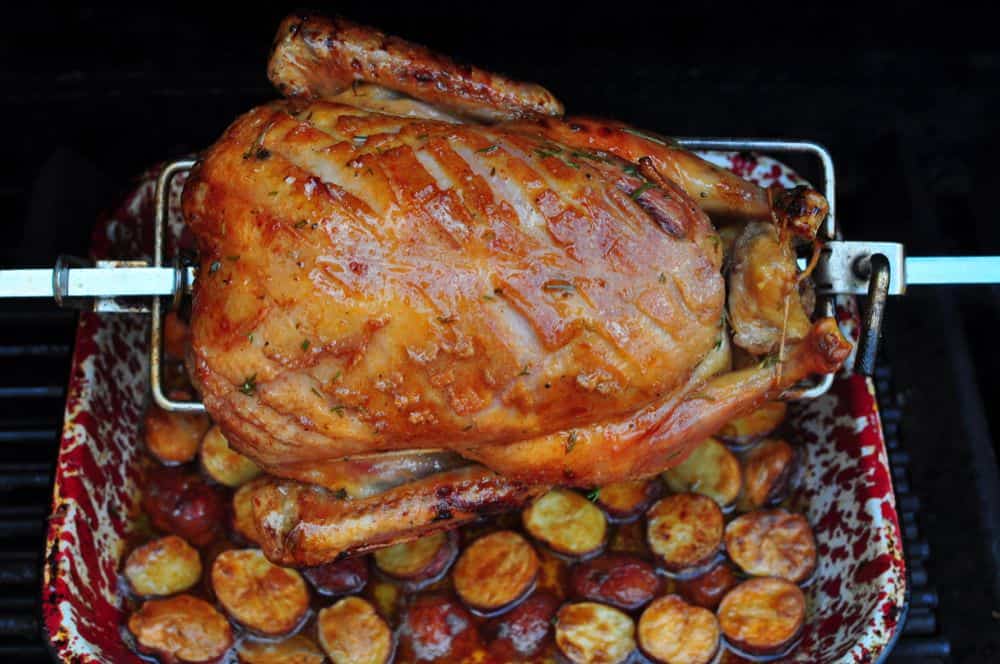
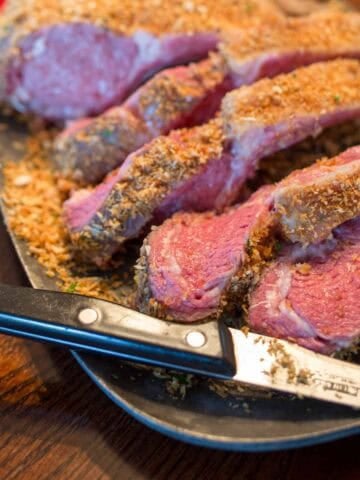
I tried a slightly different approach to my duck. Instead of poking the skin all over with a knife, I went with the slashed skin that I use when I'm searing individual duck breasts. Why? Two reasons. First, I hoped more duck fat would escape through the larger slashes. Second, diamond patterns look prettier in photos.
*Yes, I use some cooking techniques because they look good in pictures. I'm…I'm…food styling. I feel like I should be ashamed. But then I see the duck and potatoes picture, and I get over it.
Did slashing the skin help? Yes, but not as much as I expected. There was a slight improvement over poked-skin duck, a little less fat under the crispy skin. And the diamond pattern sure looks nice in the pictures. (Whoops, there I go again.) I'm going to use the slashed skin approach in the future, but if you are more comfortable poking your duck, keep doing it. Frankly, I think dry brining for 24 hours in the refrigerator crisps the skin more than slashing vs poking.
Special thanks to Jeff and Melanie at Brunty Farms for the wonderful duck I used for this recipe.
Equipment
- Grill with Rotisserie attachment (I use a Weber Summit with an infrared rotisserie burner. Here is the current version of my grill.)
- Aluminum foil drip pan (9"x13", or whatever fits your grill. I use an enameled steel roasting pan.)
- Butchers twine
- Instant Read Thermometer
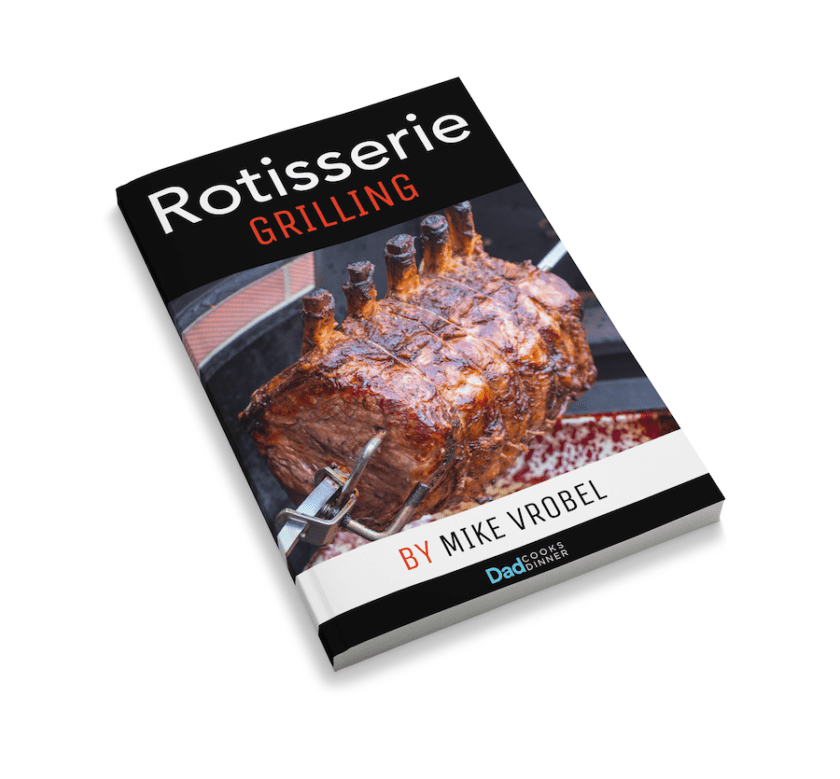
I wrote a cookbook!
Rotisserie Grilling Cookbook
New to your rotisserie and need help with the basics? Love your rotisserie and looking for new ideas? Grab a copy of Rotisserie Grilling! You'll get 50 of my favorite rotisserie recipes and expert tips on how to set up and use your rotisserie.
Rotisserie Duck with Honey Glaze and Drip Pan New Potatoes
- Total Time: 13 hours 30 minutes
- Yield: 2-4 1x
Description
Rotisserie duck, glazed with honey and lime, and served with potatoes cooked in the duck drippings.
Ingredients
- 6-pound duck
- 1 ½ tablespoons Diamond Crystal kosher salt
- A few thyme and rosemary sprigs, for stuffing the bird
Potatoes
- 1 ½ pounds new potatoes, halved
- 2 teaspoons Kosher salt
Glaze
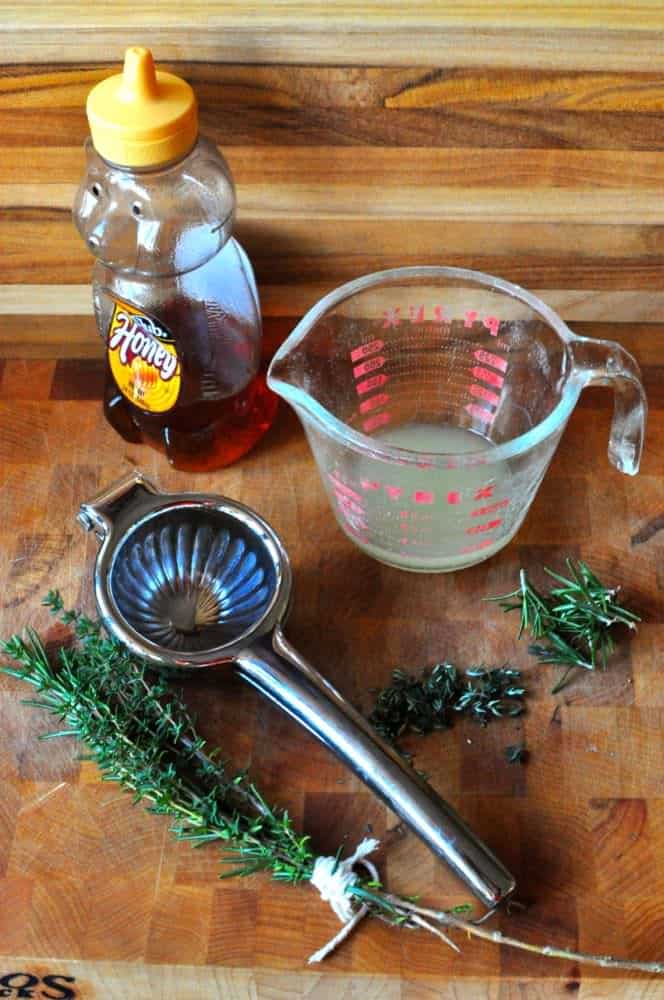
- Juice of 1 lime (rind saved to stuff the bird)
- 3 tablespoons honey
- 1 teaspoon minced fresh thyme
- ½ teaspoon minced fresh rosemary
- A few thyme and rosemary sprigs, tied together to make a brush
Instructions
- Dry Brine the Duck: Slash the skin and fat all over the duck in a one inch diamond pattern, being careful not to cut into the flesh. Season the duck with the salt, inside and out, and rub the salt into the slashes in the skin. Put the duck on a rack over a roasting pan or baking sheet. Store in the refrigerator, uncovered, at least overnight, or up to 48 hours before cooking. This lets the skin dry, and gives the salt time to dry brine the duck.
- Stuff, truss, and skewer the duck: Remove the duck from the refrigerator 2 hours before cooking to let it come to room temperature. Juice the lime and reserve the lime juice for the glaze, then put the lime halves and a handful of thyme and rosemary inside the duck cavity. Fold the wingtips back underneath the wings, then truss the duck. Skewer the duck on the rotisserie spit, securing it with the spit forks.
- Prepare the grill: Set the grill up for rotisserie cooking at medium-high heat (400°F). For my Weber Summit, I remove the grill grates, turn the two outer burners (burners 1 and 6) to high, and turn the infrared burner to high. Then I put my drip pan in the middle, over the unlit burners, and let the grill preheat for ten to fifteen minutes. After preheating, I turn the lit burners down to medium-high.
- Prep the potatoes: While the grill is pre-heating, halve the new potatoes, toss with 2 teaspoons kosher salt, put them in a microwave safe bowl, and seal the top of the bowl with plastic wrap. Microwave for 5 minutes to par-cook, and reserve for later
- Prep the glaze: Put the reserved lime juice, honey, minced thyme, and rosemary in a microwave safe bowl and microwave for 1 minute. Stir until the honey and lime juice are evenly mixed.
- Cook the duck and the potatoes: Put the spit on the grill, and cook the duck with the lid closed. After 45 minutes, pour the potatoes into the drip pan underneath the duck, and turn off the infrared rotisserie burner if the duck is browning well. The duck is fully cooked when the temperature in the thickest part of the thigh is 180°F; total cooking time is about an hour and a half. Once the duck is cooked through, brush it with an even layer of the glaze using the herb brush. Close the lid and cook for five more minutes to thicken the glaze, then brush the duck with another layer of glaze and remove from the grill.
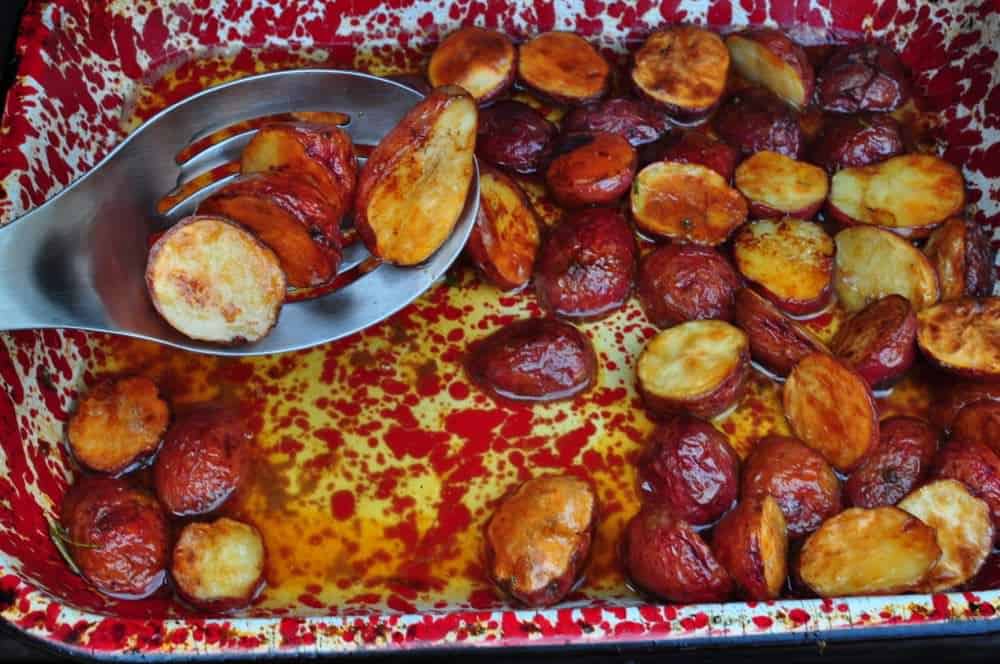
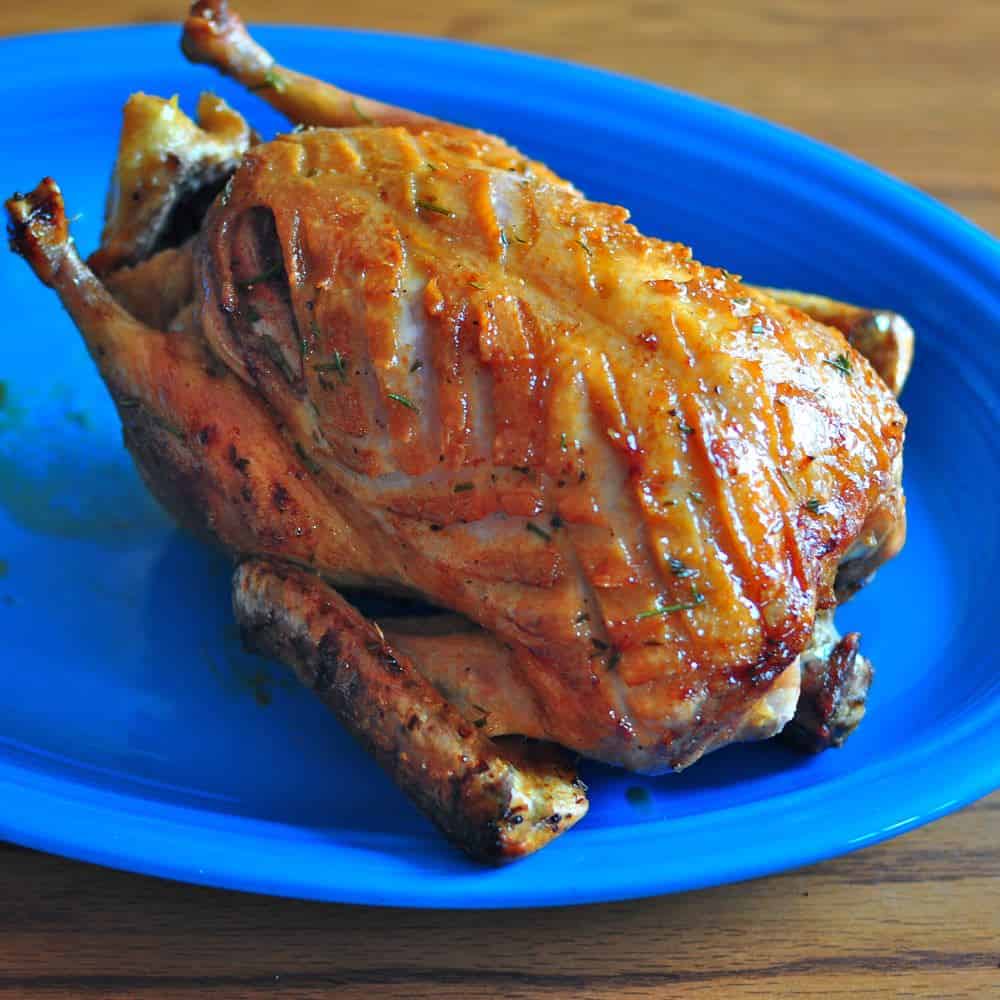
- Finish the duck and potatoes: Remove the duck from the spit, and transfer to a platter. Be careful - the spit is blazing hot. Remove the twine from the duck, then brush the duck once more with the glaze. Remove the potatoes from the drip pan with a slotted spoon, then taste and sprinkle with a little more salt if necessary. Let the duck rest for 10 minutes before carving.
- Prep Time: 12 hours
- Cook Time: 1 hour 30 minutes
- Category: Rotisserie
- Cuisine: American
Would you like to save this recipe?
Notes
- One duck will feed 4 people, with the potatoes and another side dish. I slice the duck breast and the thighs, and serve the drumsticks and wings as crunchy snacks. If you have hearty eaters, assume they'll want half a duck - a breast and a leg. I think I can squeeze two ducks on the spit for my jumbo Weber Summit grill. What I'm trying to say is: this is a recipe for an intimate gathering, not for a crowd.
- If you like your duck breast cooked pink - medium rare to medium - this is not the recipe for you. To cook the legs through and render enough fat to crisp the skin, you have to cook the breast to well done. I like well done duck breast; the crisp skin and fat keep it juicy. But if you really want medium-rare duck breast, it needs to cook separately from the rest of the duck.
What do you think? Questions? Other ideas? Leave them in the comments section below.
Related Posts
Rotisserie Duck Peking Style
Rotisserie Duck with Pomegranate Glaze
Basic Rotisserie Duck
Smoked Duck Recipe
Click here for my other rotisserie recipes.

Everything you could ask about the rotisserie, It's available as a Kindle e-book, so you can download it and start reading immediately! |

*Enjoyed this post? Want to help out DadCooksDinner? Subscribe to DadCooksDinner using the RSS or Email options on the right, link to this post from your blog, recommend DadCooksDinner to your friends, or buy something from Amazon.com through the links on this site. (Like my Rotisserie Grilling cookbook...)


Jennifer says
I made this recipe tonight and it was absolutely delicious! I had never cooked a duck before, so I was a bit nervous but the detailed cooking instructions and YouTube video gave me confidence to give it a try. Everything came out perfect! I am still so excited about how tasty this meal was to eat. We loved the glaze, too .... a beautiful, subtle flavor on the duck. Thank you so much!
Mike Vrobel says
You're welcome!
Darryl Hill says
I don’t have an infrared burner on my grill , should I follow your same recipe. I hVe 5 burner& is the temperature Gauguin the front of my grill ok to go by. Or should I put an oven thermometer in the grill.
Mike Vrobel says
About 300°F, give or take 50°F.
Darryl Hill says
I have a 5 burner Nextgrill , the 5 th burner is the infrared burner. Do I understand you that keep it at 400 degrees for 45 mins then turn off the infared burner, what temperature should the grill remain at. ?
Mike Vrobel says
About 300°F, give or take 50°F.
Darryl Hill says
After the first 45 minutes of cooking the duck, and you put the potatoes in the grill, you said turn off the infrared burner. Do you turn up the other 2 burners to keep the temperature at 400.
Mike Vrobel says
No, I don't turn up the other burners - I let the temperature go and finish the duck gently.
Jody says
We love this recipe. We've had duck a few times at different resturants and never really liked it. I made a duck following your recipe and everyone loved it. Even my picky eater. We are going to have 2 ducks along with the turkey for Thanksgiving . I bet we have left over turkey but won't have left over duck. Thanks so much!
Aaron says
Do you have any idea what temperature the grill is when cooking? We have an oven rotisserie, and I'd love to use it to replicate this recipe for Thanksgiving. Thanks!
Mike V says
Start it at 400°F, then turn down to 325°F after the duck starts browning, about 30 minutes.
Aaron says
Thanks Mike! I'll let you know how it goes!
Tanya says
We love this recipe so much we are having a Duck dinner party this Saturday. 10 guest 3 Ducks.
THANK YOU
Mike V says
Excellent! You're welcome!
specialktoday says
This sounds fantastic, I'm going to give it a try tonight to test out the rotisserie in my new oven. Does it spit a lot?