
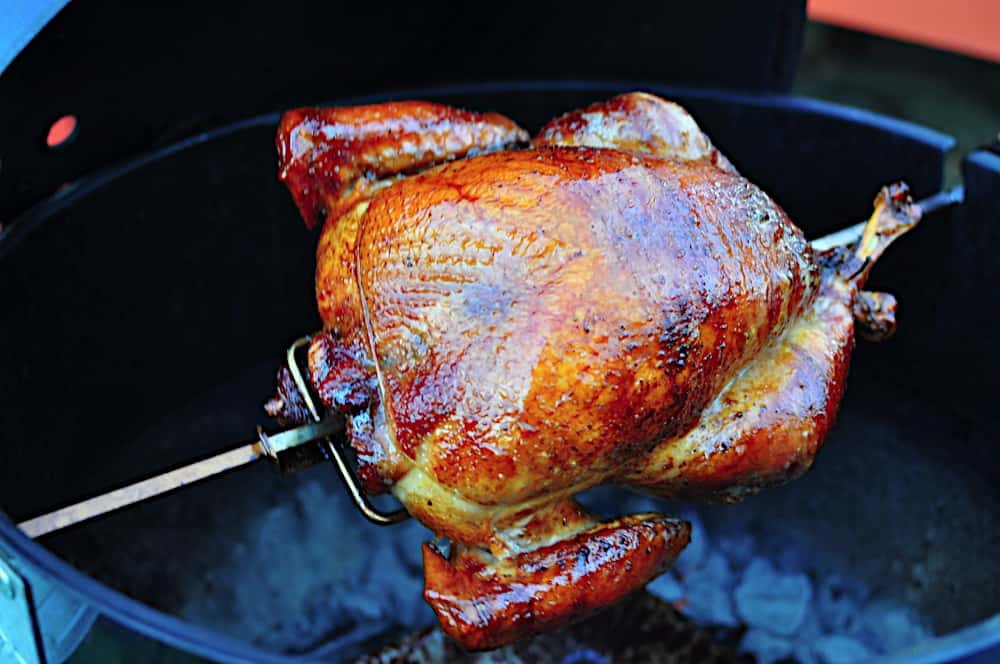
Rotisserie Turkey Dry Brined with Orange and Spices. My go-to Thanksgiving turkey, the one I make every year.
This Thanksgiving, I'm using all the finesse techniques I've learned to cook my Turkey. Here's what I'm going to do.
Would you like to save this recipe?
Jump to:
Why Dry Brine a Turkey?
My first trick is to dry brine the turkey. For years, my gold standard for turkey brines was the apple cider brine from Weber's Art of the Grill
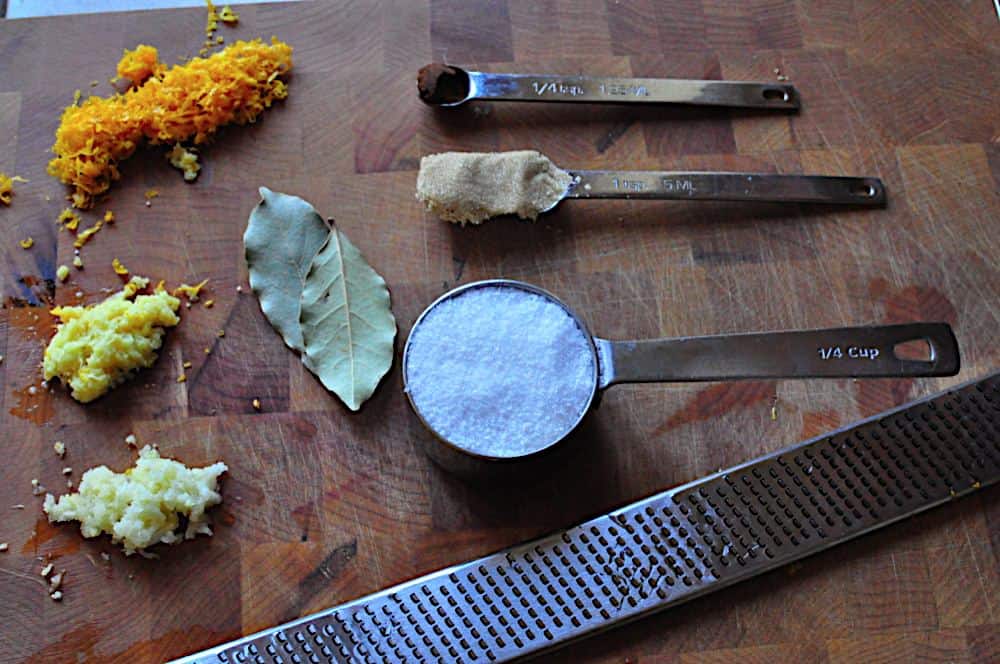
*You'll see some bay leaves in the pictures of the dry brine. Ignore them. They're not really there. These are not the bay leaves you're looking for. (Waves hand in dismissive manner.)
**OK, OK, you caught me. I tried to crumble them by hand, and I couldn't break them up small enough to use in my dry brine. I should have used my spice grinder, but I didn't want to get it dirty just for the bay leaves, so I left them out. It tasted great without them.
Don't Overcook the Turkey - Ice the Breast
The next step is cooking the turkey to the appropriate level of doneness. This is tricky. The white meat in the breast should just cook to 160*F so it doesn't dry out. The dark meat in the legs should be cooked above 170*F; it needs extra heat to break down the connective tissue. The problem is - they're both on the same bird, and cooking for the same length of time. I used two techniques to help solve this.
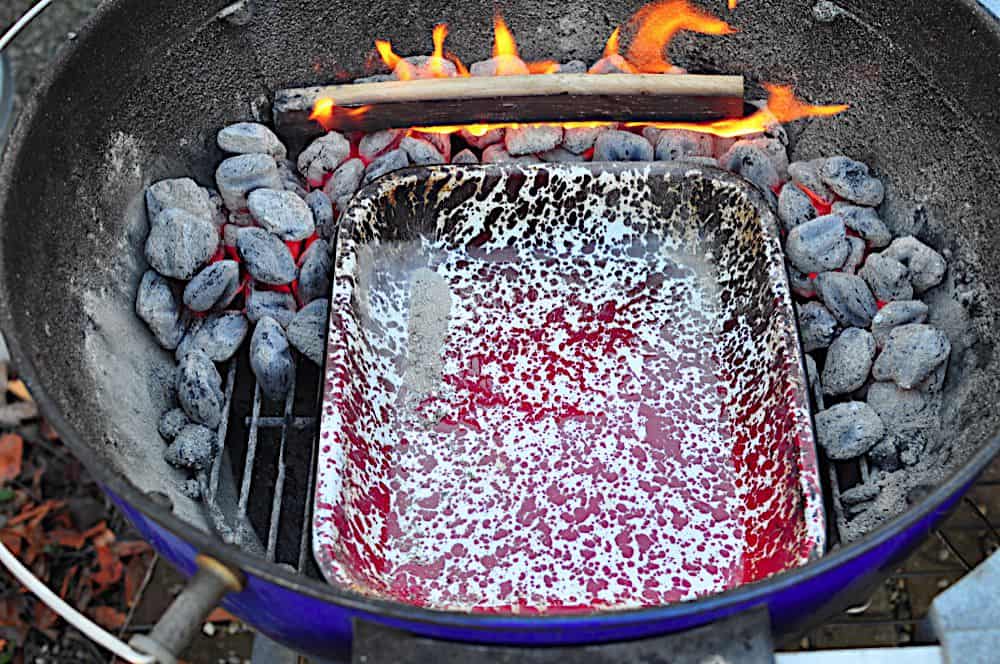
Following the suggestion in Weber's Barbecued Turkey pamphlet I set up the charcoal in a U shape on one half of the grill. This focuses the heat on the turkey's legs, and lessens the heat on the breast.
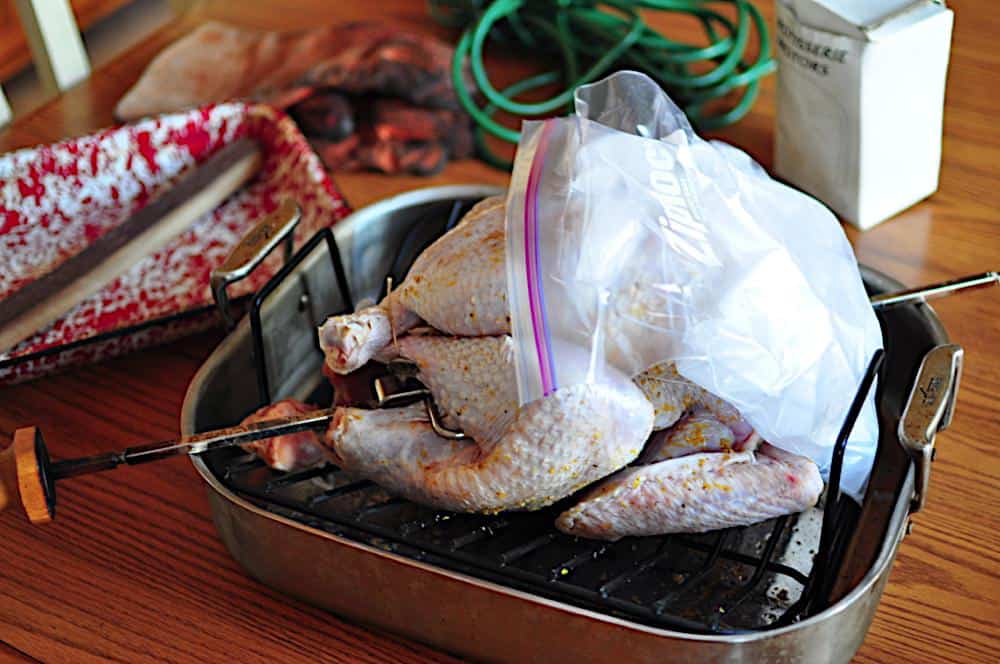
I also used a trick from Harold McGee. Mr. McGee recommended strapping a couple of ice packs over the breast of the bird after removing it from the refrigerator, so the breasts start out colder than the thighs. His family told him this was "too unappetizing", so he switched to zip-top bags full of ice. Since McGee's On Food and Cooking
Rotisserie Turkey Is the Best Turkey
The turkey is cooked on my rotisserie, of course. Nothing comes close to the crisp, crackling skin from the constant convection caused by the circling bird.*
*Sorry, got stuck in a "C" rut there.
The result of all these steps is the best turkey I've ever made. Can you skip all this detail? Sure. Dry brine the turkey with salt, cook it on the rotisserie, and you'll get a great bird. But if you want to take the bird from great to sublime, have I got the recipe for you...
Inspired by: Lots of different sources.
Equipment
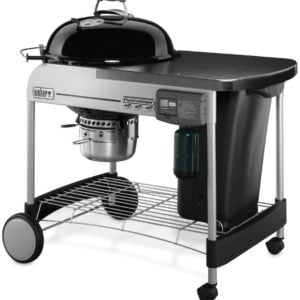
- Grill with Rotisserie attachment (I used a Weber kettle with the Rotisserie attachment. Kettle is this Weber Grill,
and rotisserie is this Weber charcoal kettle rotisserie
)
- Aluminum foil drip pan (11"x13", "turkey size", or whatever fits your grill)
- Cotton twine
- Gallon zip-top bag full of ice (optional)
- Instant Read Thermometer
Ingredients
- 12 to 14 lb Turkey
- fist sized chunk of smoking wood (hickory, oak, pecan or a fruit wood; I love oak wine barrel staves
)
Dry Brine Ingredients
- ¼ cup kosher salt (I used Diamond Crystal; reduce to 3 tablespoon if using Mortons, because it is denser).
- Zest of 1 orange (save the orange, cut in half and wrapped in plastic wrap to stuff the turkey)
- 1 teaspoon brown sugar
- 1 teaspoon grated fresh ginger (about a ½ inch piece)
- 1 teaspoon grated fresh garlic (2 cloves)
- ½ teaspoon fresh ground black pepper
- ¼ teaspoon ground cloves
How to grill a Rotisserie Turkey, Dry Brined with Orange and Spices
Note: for an overview of the technique, see my rotisserie poultry post.
Dry brine the turkey
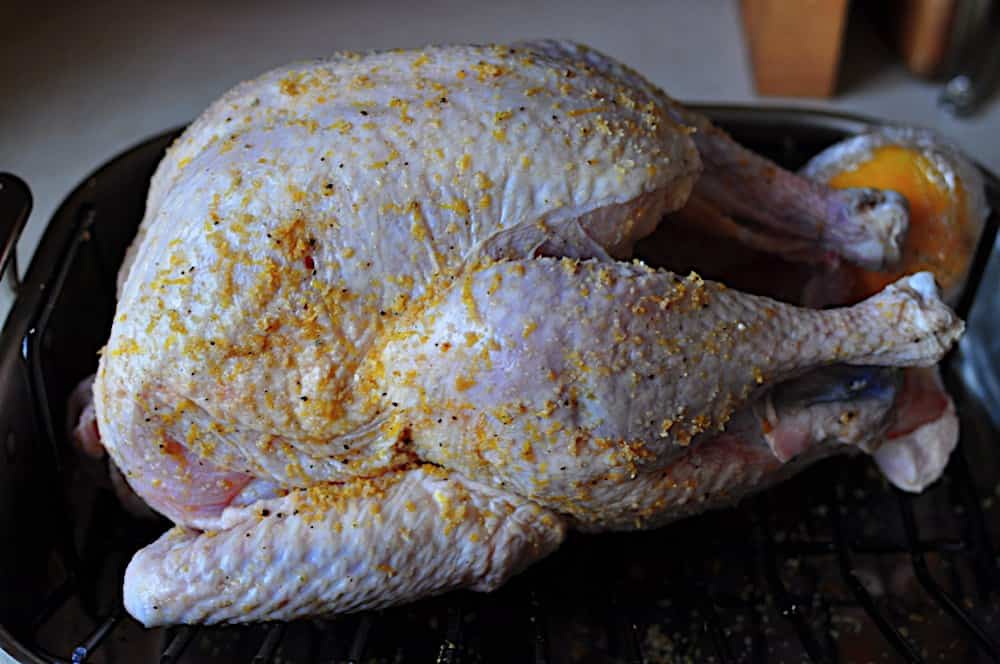
1 to 3 days before it is time to cook, dry brine the turkey. Mix the dry brine ingredients in a small bowl, then sprinkle and rub evenly over the turkey. Make sure to rub some inside the cavity of the turkey as well. Put the turkey on a rack over a roasting pan or baking sheet, and cover with plastic wrap. Refrigerate, removing the plastic wrap the night before cooking to allow the skin to dry. (If you are only dry brining for 24 hours, skip the plastic wrap.)
Prep the Turkey
One hour before cooking, remove the turkey from the refrigerator. Stuff the turkey with the halves of the orange, then truss and skewer with the rotisserie spit. Put the zip lock bag full of ice on the breast, not touching the legs or drumsticks, to chill the breast meat until cooking. Put the wood chunk in a bowl of water to soak.
Charcoal Grill Rotisserie Setup
Prepare the grill for rotisserie cooking on indirect medium heat. For my Weber kettle, I light a chimney ¾ full of charcoal and wait for it to be covered with ash. Then, instead of pouring it in my usual two piles on the side of the grill, I pour it in a U shape at one end of the grill (see picture below). I put the drip pan in the middle of the U of charcoal. Finally, put the wood chunk on top of the charcoal, and give it five minutes to start smoking. (More details here: My Rotisserie Basic Technique Post).
OR: Gas Grill Rotisserie Setup
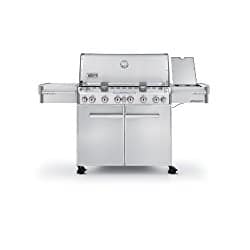
Set the grill up for rotisserie cooking at indirect medium heat (325*F to 350*F). If you can, put all the heat on one side of the grill - instead of two outside burners on medium, set one outside burner on high, and leave the other one off - this concentrates the heat on the legs, which we want to cook more than the breast. For my Weber Summit, I remove the grates, preheat the grill on high for 15 minutes, then turn off all the burners except burner #6, right next to the smoker burner. I leave burner #6 on high, turn the smoker burner on high, and set the infrared rotisserie burner to medium. The drip pan goes in the middle, over the unlit burners.
Cook the turkey
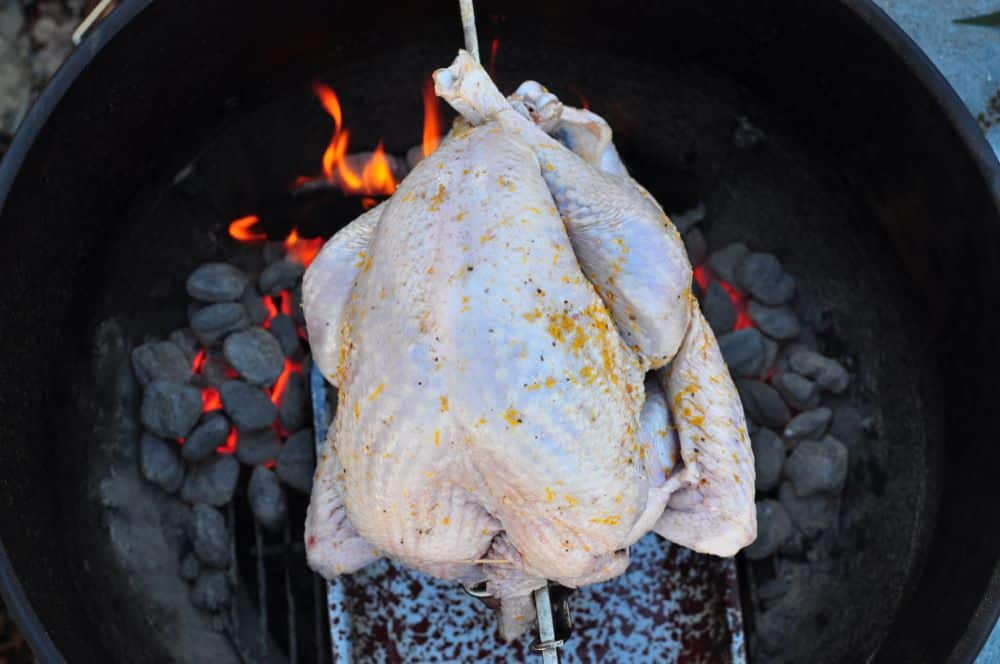
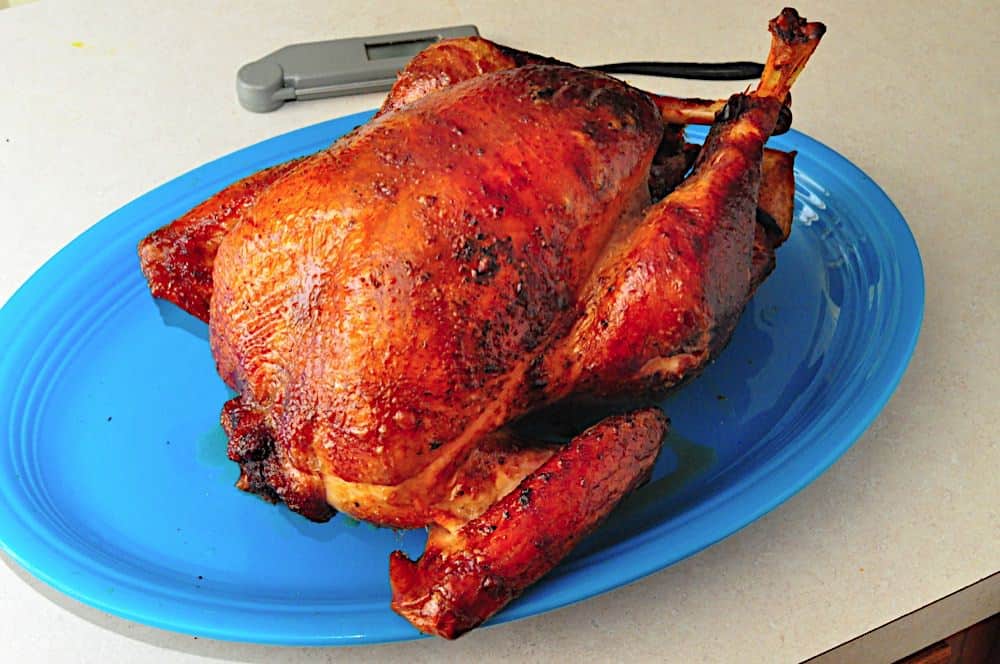
Put the spit on the grill, with the leg side of the bird inside the "U" of coals. Cook the turkey with the lid closed; it will take 2 to 3 hours (usually about 2 ½ hours for a 12 pound turkey). Every hour, add 24 fresh charcoal briquettes to the grill, nestling them into the burning charcoal. Start checking the temperature in the breast with an instant read thermometer at 2 hours. The turkey is done when the breast meat registers 155*F to 160*F in its thickest part. Remove the turkey from the grill, remove the spit from the turkey, and cut the trussing twine loose. Let the turkey rest for 15 to 30 minutes before carving.
Carve the turkey and serve
If you have a favorite way of carving a turkey, go ahead and use it. My preferred method: Cut the legs free from the body of the bird, and cut the drumsticks away from the thighs. I leave the drumsticks whole (my favorite part!) and slice the meat from the thighs in ½" slices for dark meat lovers. Next, I cut the entire breast half from one side of the bird by working my knife down the keel bone from the top down to the wing, following the inside of the ribcage. Once the breast half is free of the bird, it is easy to slice into ½" thick slices on my carving board. I repeat with the other breast half. Finally, I cut each wing away from the carcass, and separate the drumette from the wing, and the wing from the wingtip. I arrange all these pieces on a platter and serve.
Fresh vs Frozen Turkey
- Fresh vs Frozen: There are two advantages to a fresh turkey. The first is they are rarely pre-brined, which is redundant because of the dry brine. (Watch out for the words "enhanced with a X% solution" or "pre-basted") The second advantage to fresh turkey is no thawing is needed! If you have to get a frozen bird, make sure to leave an extra three days or so to thaw it in the refrigerator before staring the dry brine; start thawing it about a week before you'll need it.
📖 Recipe Card
Rotisserie Turkey, Dry Brined with Orange and Spices - Recipe
- Total Time: 27 hours
- Yield: 12 servings 1x
Description
Rotisserie Turkey Dry Brined with Orange and Spices. My go-to Thanksgiving turkey, the one I make every year.
Ingredients
- 12 to 14 lb Turkey
- fist sized chunk of smoking wood (hickory, oak, pecan or a fruit wood; I love oak wine barrel staves
Dry Brine Ingredients
- ¼ cup kosher salt (I used Diamond Crystal; reduce to 3 tbsp if using Mortons, because it is denser).
- Zest of 1 orange (save the orange, cut in half and wrapped in plastic wrap to stuff the turkey)
- 1 teaspoon brown sugar
- 1 teaspoon grated fresh ginger (about a ½ inch piece)
- 1 teaspoon grated fresh garlic (2 cloves)
- ½ teaspoon fresh ground black pepper
- ¼ teaspoon ground cloves
Instructions
- Dry Brine the Turkey (For at Least a Day): 1 to 3 days before it is time to cook, dry brine the turkey. Mix the dry brine ingredients in a small bowl, then sprinkle and rub evenly over the turkey. Make sure to rub some inside the cavity of the turkey as well. Put the turkey on a rack over a roasting pan or baking sheet, and cover with plastic wrap. Refrigerate, removing the plastic wrap the night before cooking to allow the skin to dry. (If you are only dry brining for 24 hours, skip the plastic wrap.)
- Prep the Turkey: One hour before cooking, remove the turkey from the refrigerator. Stuff the turkey with the halves of the orange, then truss and skewer with the rotisserie spit. Put the zip lock bag full of ice on the breast, not touching the legs or drumsticks, to chill the breast meat until cooking. Put the wood chunk in a bowl of water to soak.
- Charcoal Grill Rotisserie Setup: Prepare the grill for rotisserie cooking on indirect medium heat. For my Weber kettle, I light a chimney ¾ full of charcoal and wait for it to be covered with ash. Then, instead of pouring it in my usual two piles on the side of the grill, I pour it in a U shape at one end of the grill (see picture below). I put the drip pan in the middle of the U of charcoal. Finally, put the wood chunk on top of the charcoal, and give it five minutes to start smoking.
- OR: Gas Grill Rotisserie Setup: Set the grill up for rotisserie cooking at indirect medium heat (325*F to 350*F). If you can, put all the heat on one side of the grill - instead of two outside burners on medium, set one outside burner on high, and leave the other one off - this concentrates the heat on the legs, which we want to cook more than the breast. For my Weber Summit, I remove the grates, preheat the grill on high for 15 minutes, then turn off all the burners except burner #6, right next to the smoker burner. I leave burner #6 on high, turn the smoker burner on high, and set the infrared rotisserie burner to medium. The drip pan goes in the middle, over the unlit burners.
- Cook the turkey: Put the spit on the grill, with the leg side of the bird inside the "U" of coals. Cook the turkey with the lid closed; it will take 2 to 3 hours (usually about 2 ½ hours for a 12 pound turkey). Every hour, add 24 fresh charcoal briquettes to the grill, nestling them into the burning charcoal. Start checking the temperature in the breast with an instant read thermometer at 2 hours. The turkey is done when the breast meat registers 155*F to 160*F in its thickest part. Remove the turkey from the grill, remove the spit from the turkey, and cut the trussing twine loose. Let the turkey rest for 15 to 30 minutes before carving.
- Carve the turkey and serve: If you have a favorite way of carving a turkey, go ahead and use it. My preferred method: Cut the legs free from the body of the bird, and cut the drumsticks away from the thighs. I leave the drumsticks whole (my favorite part!) and slice the meat from the thighs in ½" slices for dark meat lovers. Next, I cut the entire breast half from one side of the bird by working my knife down the keel bone from the top down to the wing, following the inside of the ribcage. Once the breast half is free of the bird, it is easy to slice into ½" thick slices on my carving board. I repeat with the other breast half. Finally, I cut each wing away from the carcass, and separate the drumette from the wing, and the wing from the wingtip. I arrange all these pieces on a platter and serve.
- Prep Time: 1 day
- Cook Time: 3 hours
- Category: Sunday Dinner
- Method: Rotisserie
- Cuisine: American
Nutrition
- Serving Size: 1 serving of turkey
- Calories: 326
- Sugar: 0.4 g
- Sodium: 1494.2 mg
- Fat: 12.8 g
- Carbohydrates: 0.9 g
- Protein: 49.1 g
- Cholesterol: 163.2 mg
What do you think? Questions? Other ideas? Leave them in the comments section below.
Related Posts
Basic Rotisserie Turkey
Rotisserie Turkey, Dry Brined with Orange and Spices
Rotisserie Turkey - The Big Turkey
Rotisserie Turkey Wrapped With Bacon
Rotisserie Turkey with Cajun Dry Brine
Rotisserie Turkey Breast with Basic Dry Brine
Rotisserie Turkey Breast with Honey Bourbon Glaze
Click here for my other rotisserie recipes.
 Check out my cookbook, Rotisserie Grilling. Check out my cookbook, Rotisserie Grilling. |
Everything you could ask about the rotisserie,
plus 50 (mostly) new recipes to get you cooking.
It's a Kindle e-book, so you can download it and start reading immediately!
*Enjoyed this post? Want to help out DadCooksDinner? Subscribe to DadCooksDinner using the RSS or Email options on the right, link to this post from your blog, recommend DadCooksDinner to your friends, or buy something from Amazon.com

Mike Vrobel says
My favorite turkey. Every year. EVERY. YEAR.
Tim says
Hi Mike,
I did a 20 lbs turkey this Thanksgiving. I just couldn't resist testing the max capacity of the Weber Genesis rotisserie.
Easily fit (top and bottom). I can't seem to attach a picture here, otherwise I would have added one
Mike Vrobel says
Thanks! And, see my other big turkey sizing: https://www.dadcooksdinner.com/rotisserie-grilling-the-big-turkey/
Dan Smith says
Thank you Mike! Your excellent web site told me much of what I needed to know to successfully cook my first rotisserie turkey. It turned out great!
I did have some tribulations though. One was that my rotisserie forks have four tines instead of the two shown in your videos, and I suspect they might be shorter than yours (they're about 2.75" long). This meant that it simply wasn't possible to pierce the drumstick with the fork, in the way that you describe. It also experienced a problem in that about a half hour after the bird started cooking, it slid off center, went off balance, and my rotisserie motor started reversing, meaning that it was only cooking one side of the bird. I had to shut down the grill, readjust the forks, and for good measure, I also used pliers to turn down the screws that hold the forks in place.
I kind of think that two tines might be better than four, especially if they are longer. There might also be something in the pinch screws that makes a difference about whether they can be only finger tight or need to be plier tight (perhaps the better screws are hollow ground and dig into the skewer better?). Wondering if you have any thoughts on this topic, or on where to buy rotisserie forks (almost all of the offerings I see on Amazon have four tines instead of two).
On a completely unrelated note, I hope you will someday post a recipe for rotisserie shawarma. My first introduction to that dish was lamb shawarma, cooked on a vertical rotisserie under heat lamps, and it was incredible. I'm sure that the vertical rotisserie is important, in that it allows the fats to drizzle down the length of the rotisserie. But I want to believe that there's some way to come close to the same delectable result with a horizontal rotisserie on my grill.
Thanks again, I very much appreciate your web site.
Mike Vrobel says
You’re welcome, and sorry to hear about the four-time issues!
Mike says
Thanks Mike.
Great info on your website.
Mike says
Should I use this dry brine for a turkey that has been pre brined?
Mike Vrobel says
Probably not...but it depends. From my comments on this post:
https://www.dadcooksdinner.com/grilled-turkey-dry-brined-grilling-basics/
Watch out for enhanced turkeys – look for the words “enhanced with a x% solution”. That means the turkey was brined at the factory. If the turkey is “Enhanced with a natural solution” of more than 6 percent, it already has enough salt inside of it. Cut the salt in the dry brine down to 1 tablespoon. If at all possible, get a natural turkey. Sure, that turkey going for fifty-nine cents a pound at the grocery store is a deal. (And one that I will take advantage of myself, from time to time.) But, most of the time, I’d rather pay extra for the natural turkey and do my own brining.
Cathy says
Loved Loved Loved this rub! I am very thankful that when I realized my rotisserie motor was dead this morning my next door neighbor let me borrow theirs! Everyone said this recipe is a keeper!
Mike V says
Great! Glad you enjoyed it.
David L says
Have you ever stuffed the cavity with stuffing?
Mike V says
I don't stuff my turkeys, because the breast meat will be wildly overcooked by the time the stuffing is heated enough to be safe to eat. If you HAVE to have stuffing, follow the technique in this post to pre-heat the stuffing before cooking:
https://www.dadcooksdinner.com/rotisserie-capon-with-chestnut-stuffing/
...but again, with a turkey, I don't recommend it.
John B says
Going to do a test turkey this weekend. Suggestions for altering this rub on a grocery store turkey (the "enhanced" kind)?
Mike V says
Cut the salt in half.
Mike V says
Sorry, meant to say to a quarter, not a half. Use 1 tablespoon Diamond Crystal kosher salt in the rub.
Mike V @ DadCooksDinner says
Set the grill up like I show in this post: https://www.dadcooksdinner.com/rotisserie-turkey-wrapped-with-bacon/ Summary: Indirect medium heat (325 to 350*F), burners all on the leg side of the bird; about 3 hours, no infrared burner unless you need to brown the bird for the last half hour. Good luck!
zews39 says
I brined my 14.75 lbs bird this morning. I will also do the bag with ice about an hour before putting in on my Genesis S-310. It seems that I have plenty of clearance without having to remove the middle three flavorizer bars. Hoever, if I have to, I have a disposable aluminum cookie sheet that I can wedge into the grill. If you want me to, I can take a photo and send it to you.
How long do you think it will take to grill this bird with my rotisserie if I keep the temperature at around 350 degrees?
I am also thinking about adding the strips of bacon over the breast as you suggest in one of your other recipes. Do you think that this would be too much added flavor or is it worth doing? I like the idea that the bacon may slow down the cooking of the breast, but the added flavor may interfere with the many different flavors of the dry brine. What are your thoughts on this?
Cabot says
Hi Mike,
I'm using this recipe for our Thanksgiving turkey. I put the dry brine on last night. The turkey is 20 pounds. Any suggestions for a turkey that size ie: cooking time, temperature, when and how long to use the IR burner. I'm using a Summit 670.
Can't wait to taste it. All of your recipes I've tried have been great!
Thanks,
Cabot