
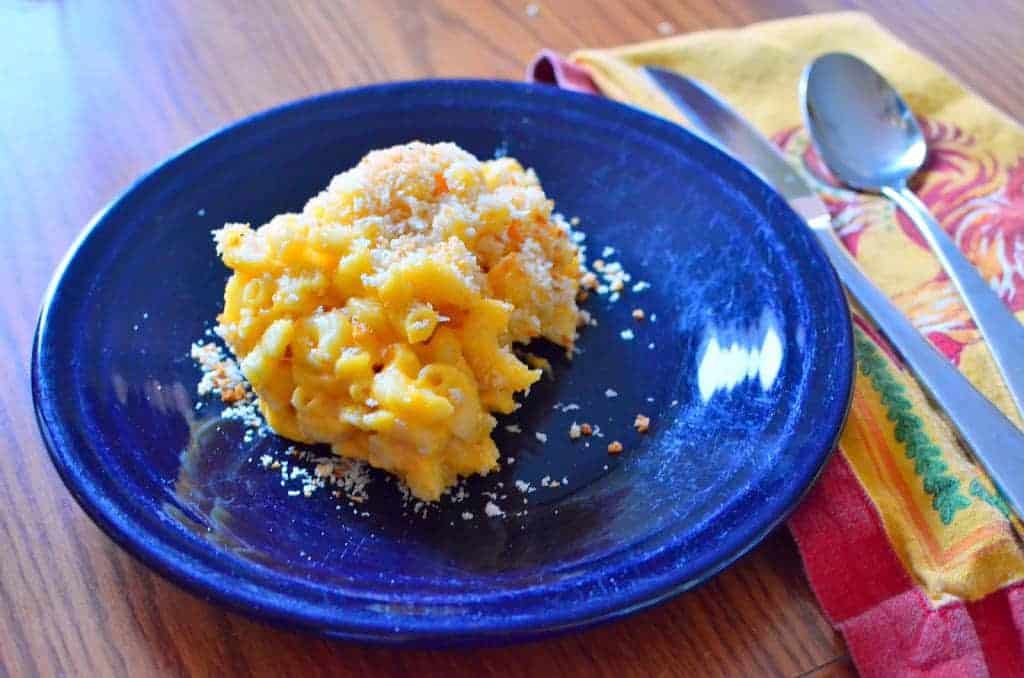
Pressure Cooer Mac and Cheese is my go-to Macaroni and Cheese technique. I make it in my Instant pot for weeknight dinners, and as a side dish for potlucks. 4 minutes at high pressure cooks the noodles, then it's time to stir in the cheese. That's right, homemade mac and cheese that didn't come from a packet in a blue box, ready in about a half an hour.
Would you like to save this recipe?
Jump to:
For years I made the mac and cheese from Pam Anderson's The Perfect Recipe. Then I read Ideas in Food; their recipe was similar to Pam's, stripped down to the basics.
Both recipes use evaporated milk as their secret weapon. Evaporated milk replaces the flour and milk béchamel sauce, and all the whisking that entails. I mashed the two recipes together, and that's what I've been using ever since.
Now, even with the evaporated milk shortcut, this was a stretch to make on a weeknight. Especially if I want a toasted bread crumb topping. And if I'm making macaroni and cheese, it must have a bread crumb topping.
That's why I jumped when I saw the pressure cooker macaroni and cheese in Pressure Cooker Perfection. They pressure cook the pasta and spices in a small amount of water, treating it like a risotto. This trick really speeds up the recipe - no waiting for a pot of water to boil, no draining, and one (pressure cooker) pot to clean. Weeknight macaroni and cheese is now within my reach. 1
Ingredients
- 1 pound dried elbow macaroni
- 2 tablespoons butter
- 1 tablespoon yellow mustard
- 1 teaspoon hot pepper sauce
- 1 tablespoon Diamond Crystal kosher salt or 2 teaspoons table salt
- 4 cups water
- 1 (12 ounce) can evaporated milk
- 16 ounces shredded extra-sharp cheddar cheese
- 6 ounces shredded parmesan cheese
Bread Crumb Topping (optional)
- 1 cup panko bread crumbs
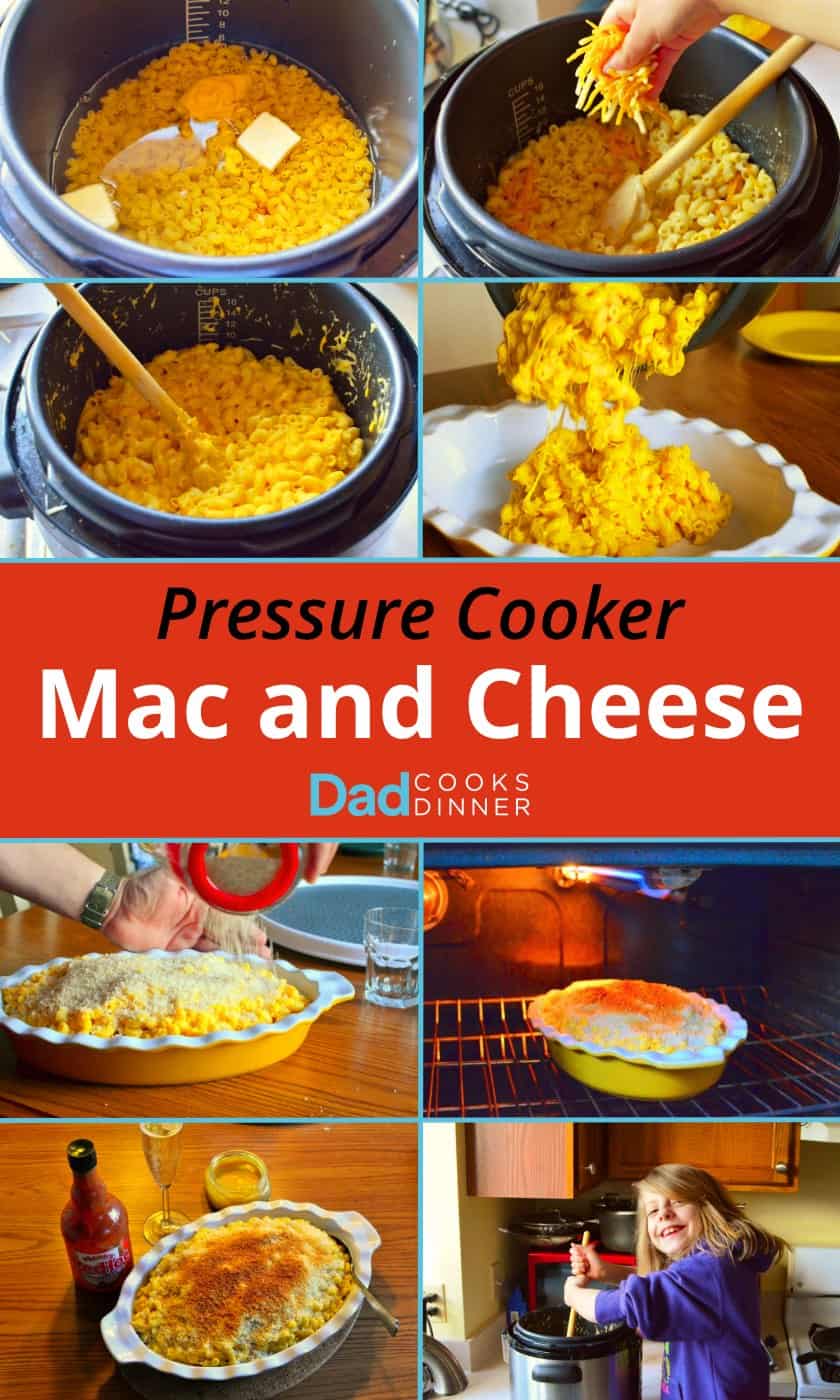
How to Make Pressure Cooker Mac and Cheese
Pressure cook the pasta for 4 minutes with a quick release
Stir the macaroni, butter, mustard, hot pepper sauce, salt, and 4 cups water in the pressure cooker pot. Lock the lid on the pressure cooker and cook on high pressure for 4 minutes in an electric PC or stovetop PC. (For an Instant Pot, use Manual or Pressure Cook mode, and set the time to 4 minutes.) When the cooking time is done, quick release the pressure and remove the lid.
Stir in the evaporated milk and cheese
Turn the heat under the pot down to low (or turn the electric pressure cooker to sauté-low or keep warm mode), and stir in the evaporated milk. Test a piece of pasta by taking a bite - it should be al dente, but cooked through. If the pasta is still tough in the middle, simmer it for a few minutes, until it is tender. Stir in the cheese one handful at a time, stirring constantly and waiting for the current handful to melt before adding the next handful.
Top with breadcrumbs and broil
Optional step, if you like a toasted bread crumb topping: Pour the macaroni into a 3 quart broiler-safe dish, patting it down to level out the surface. Sprinkle the panko over the macaroni and cheese in an even layer. Broil the macaroni and cheese on high until the bread crumbs are toasted, about 5 minutes. Check the bread crumbs often - they go from pale brown to burnt in a flash.
Quick Tips
Ratio of 1 cup of water to 4 ounces of pasta
4 cups of water is just enough to cook 1 pound (16 ounces) of pasta. No draining is necessary; the water will be absorbed by the pasta. If you have a smaller box of pasta - 12 ounces and 13.25 ounces are common sizes of whole wheat pasta - cut the water back to 3 cups. (Everything else can stay the same.)
Serve with a bottle of hot sauce at the table.
I like Frank's Red Hot, or the smoky flavor of chipotle hot sauce.
Watch the bread crumbs under the broiler
I have burned a lot of bread crumbs in my day. I set a timer for 1 minute intervals while I'm broiling, in case I get distracted. (By a homework meltdown…just to pick a hypothetical example). I have the timer to remind me - "Oh no! The breadcrumbs!"
Storage & Reheating
I save leftover mac and cheese in 2-cup containers. It will last in the refrigerator for a few days, or in the freezer for months. (Mac and cheese freezes well). I reheat 2-cup containers of mac and cheese in the microwave - it takes about 2 minutes to reheat from the refrigerator, or 6 minutes from frozen. (Your microwaving time may be different, depending on how powerful your microwave is.)
Print
Pressure Cooker Macaroni and Cheese
- Total Time: 25 minutes
- Yield: 8 servings 1x
Description
Pressure Cooker mac and cheese - quick, easy, and better than the dreaded blue box.
Adapted from: America's Test Kitchen Pressure Cooker Perfection
Ingredients
- 1 pound dried elbow macaroni
- 2 tablespoons butter
- 1 tablespoon yellow mustard
- 1 teaspoon hot pepper sauce
- 1 tablespoon Diamond Crystal kosher salt or 2 teaspoons table salt
- 4 cups water
- 1 (12 ounce) can evaporated milk
- 16 ounces shredded extra-sharp cheddar cheese
- 6 ounces shredded Parmigiano cheese
Bread Crumb Topping (optional)
- 1 cup panko bread crumbs
Instructions
- Pressure cook the pasta for 4 minutes with a quick release: Stir the macaroni, butter, mustard, hot pepper sauce, salt, and 4 cups water in the pressure cooker pot. Lock the lid on the pressure cooker and cook on high pressure for 4 minutes in an electric PC or stovetop PC. (For an Instant Pot, use Manual or Pressure Cook mode, and set the time to 4 minutes.) When the cooking time is done, quick release the pressure and remove the lid.
- Stir in the evaporated milk and cheese: Turn the heat under the pot down to low (or turn the electric pressure cooker to sauté-low or keep warm mode), and stir in the evaporated milk. Test a piece of pasta by taking a bite - it should be al dente, but cooked through. If the pasta is still tough in the middle, simmer it for a few minutes, until it is tender. Stir in the cheese one handful at a time, stirring constantly and waiting for the current handful to melt before adding the next handful.
- Top with breadcrumbs and broil: Optional step, if you like a toasted bread crumb topping: Pour the macaroni into a 3 quart broiler-safe dish, patting it down to level out the surface. Sprinkle the panko over the macaroni and cheese in an even layer. Broil the macaroni and cheese on high until the bread crumbs are toasted, about 5 minutes. Check the bread crumbs often - they go from pale brown to burnt in a flash.
Equipment
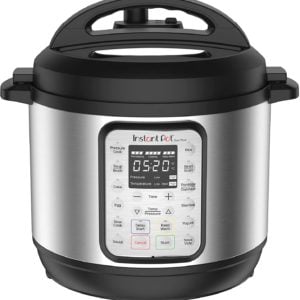 Buy Now →
 - Prep Time: 5 minutes
- Cook Time: 20 minutes
- Category: Weeknight Dinner
- Method: Pressure Cooker
- Cuisine: American
Would you like to save this recipe?
Nutrition
- Serving Size: 1.5 Cups of Mac and Cheese
- Calories: 660
- Sugar: 6 g
- Sodium: 1499.1 mg
- Fat: 30.2 g
- Carbohydrates: 62.3 g
- Protein: 33.5 g
- Cholesterol: 79.2 mg
Video: How to make Pressure Cooker Macaroni and Cheese (5:13)
Video: Pressure Cooker Macaroni and Cheese [YouTube.com]
What do you think? Questions? Other ideas? Leave them in the comments section below.
Related Posts
Instant Pot Chili Mac
Instant Pot Fettuccine Alfredo
Instant Pot Buffalo Chicken Mac and Cheese
Pressure Cooker Beef Shank Osso Bucco
Pressure Cooker Corned Beef and Cabbage
Instant Pot Rotisserie Chicken Noodle Soup
Instant Pot Collard Greens
Instant Pot Baked Ziti
Click here for my other Instant Pot and Pressure Cooker recipes
Enjoyed this post? Want to help out DadCooksDinner? Subscribe to DadCooksDinner via email and share this post with your friends. Want to contribute directly? Donate to my Tip Jar, or buy something from Amazon.com through the links on this site. Thank you.


Eliza says
Hi Mike, this mac and cheese is the best! Do you think I could double it safely in my 6 qt? Wanting to make it as a side dish for about 40 people for my daughter's first birthday. Thanks!
Mike Vrobel says
Yes, you can double it in the 6 quart - it is a tight fit, but it works. Double all the ingredients but leave the timing the same.
Eliza says
Great, thank you!!
Stef says
Hi! Can I use spicy brown mustard instead of yellow?
Mike Vrobel says
Sure!
Lucie H. says
LOVED it! I melted 1/2 a TBSP on butter in the microwave on the panko crumbs then stirred for buttered bread crumbs. Very good. Thanks for the recipe!
Trish F. says
I made this last night as a side for my dinner. I used 4 cups of boiling water to help the IP come to pressure more quickly. I 16 oz of sharp white cheddar but skipped the parmesan because I didn't have any. I also added 1 tsp. of ground yellow mustard to the noodles before cooking and used evaporated milk because I had it on hand. It turned out great! I really enjoyed it. I found that the longer it "sat" the grainier the cheese got. That's not a deal breaker for me though. 😉
Janette says
Tonight's original plan was to grill hamburgers. Alas the propane was out and we had no more coal. Thanks to your recipe I was able to come up with a rescue meal that everyone loved! It will even go into our regularly planned meals now l, not just a rescue meal!
Rita says
We are 2 retired folks. How much water for 2/3 cup small elbow macaroni?
Rich says
ANOTHER new family favorite that my kids will actually eat. They had gotten used to grandma's mac and cheese made with processed cheese (not a fan), so I tried this and they really liked it. My only issue is that I make this with the wings and I have to time it so I can make one and then the other using only 1 instant pot.
Emily says
Also,i used Barilla elbows. It has a slightly different texture than the store brand and help up beautifully.
Emily says
I have a big PC- 10qt and i doubled this. I used 1 &1/2 can of evaporated milk. I left out the hot sauce. i wish i had not, but it was kids and i was not sure how it would be for them. It seemed to take only about 10 mins to get to pressure and cooked perfect in 4 mins. I am so pleased and this is a huge hit. I used to make a from-scratch white sauce and had at least 2 pots and water boiling for 15 mins,steaming up the kitchen. This is fabulous. Thank you.
Rita says
We are a retired couple. I usually fix 2/3 C small elbow macaroni.
The recipe looks like a 2:1 ratio of water to pasta. 2/3 C weighs 3.25 oz.
Sooooo 6.7 oz water to be safe? Is this too small volume to use for the IP?
Have never tried freezing it. Would timing still be 4 min manual? Hubby likes just velveeta.....no "gourmet" stuff. Thinking grandchildren when we visit, but want to test for us first. Thanks.
Mike Vrobel says
That should work fine. Use the same timings; even if you cut back on the amount, it takes 4 minutes to cook pasta through.
Dana says
Can I just tell you...I love this recipe. Just the way it is. I work from home, and kids are not home today, but I just made this for myself and it was AWESOME. Thank you for this great recipe!!
Kids will get in an hour. I couldn't wait 🙂
Meghan says
This is an older post, so I apologize, but has anyone tried freezing leftovers from this recipe? I would think the evap milk would freeze better than a recipe made with regular milk, but has anyone tried it? I'd like to freeze single portions for emergency meals and snacks for the kiddos.
Jamie says
I freeze it all the time. I add a splash of milk to make it creamy again. Freezes beautifully.
Brett B. says
Love this recipe as it has become one of our most popular go to Instantpot recipes we do. I do add cooked crumbled bacon to mine (bacon makes everything better. ) I also add some cheese to the pan topping along with a little seasoning. (Came from my old Emeril recipe) the canned milk is the ingenious part of this recipe making it possible to skip the bechemel sauce.
Lauren says
This is probably a very silly question, but do you ever shred your own cheese? I know this says 16oz of shredded cheese (I'm assuming pre-shredded), but I shred my own 8oz blocks and I would have to think that one would be enough, right? Do I need to use two blocks of cheese that I've shredded?
Mike Vrobel says
Yes, use 16 ounces of cheese.
Kathy says
Thanks for this recipe! I purchased my electric pressure cooker between Thanksgiving and Christmas 2016. I've been using it almost daily since the beginning of the year and now that I have my feet "wet," I'm on the hunt for more tasty recipes and yours certainly fits the bill for me! I don't know why I didn't think of it before but adding the mustard (we like dry mustard powder) and hot pepper sauce (Louisiana Hot Sauce is the favorite in our house) really made a difference for me. Other recipes I've tried were kind of blah and needed some zing in the recipe and not just hot sauce on top after. After saying all this, we have a grandchild visiting who LOVES macaroni & cheese but not spice so I need to tame things down again *sigh*. Also, would you recommend subbing out both cheeses for the Velveeta or maybe half and half mild cheddar and Velveeta for extra meltiness? Thank you, thank you, thank you!!!