Looking for a pressure cooker Texas Red chili? You've come to the right place. Even if I'm not from Texas.
I know this will get me in trouble with the Texas chili purists. First, because I'm from Ohio. Second, because they believe chili should ALWAYS be cooked cowboy style, in a cast iron dutch oven, over a post oak fire.

Would you like to save this recipe?
Jump to:
My best argument for pressure cooker chili: it helps me make chili the day before I want to eat it. This is a great chili hot out of the pot, but chili is always better the next day; that overnight rest and reheating does something good."It lets the flavors marry", is the traditional explanation. (I have no idea what that actually means, but it describes the results perfectly.) If you have the time - and the pressure cooker buys me the time - make this chili a day ahead. Your patience will be rewarded.
What is red chili made of?
Beef and spices, crushed tomato, and some masa harina (corn flour) to thicken. Save the beans, if you want them, to pass on the side.
Ingredients
- 1 tablespoon vegetable oil
- 5 pounds beef chuck roast, cut into 2-inch cubes
- 2 teaspoons fine sea salt
- 2 medium onions, diced
- 4 cloves garlic, minced
- 2 minced chipotles en adobo, with sauce
- ½ teaspoon fine sea salt
- ½ cup chili powder
- 2 tablespoons cumin
- 2 teaspoons oregano (preferably Mexican oregano)
- 1 cup coffee (or water, or beer)
- 14.5 ounce can crushed tomatoes (preferably fire roasted crushed tomatoes)
- ¼ cup masa harina (optional)
- Juice of 2 limes
- 1 teaspoon fine sea salt
- 1 teaspoon fresh ground black pepper
How to make Chili
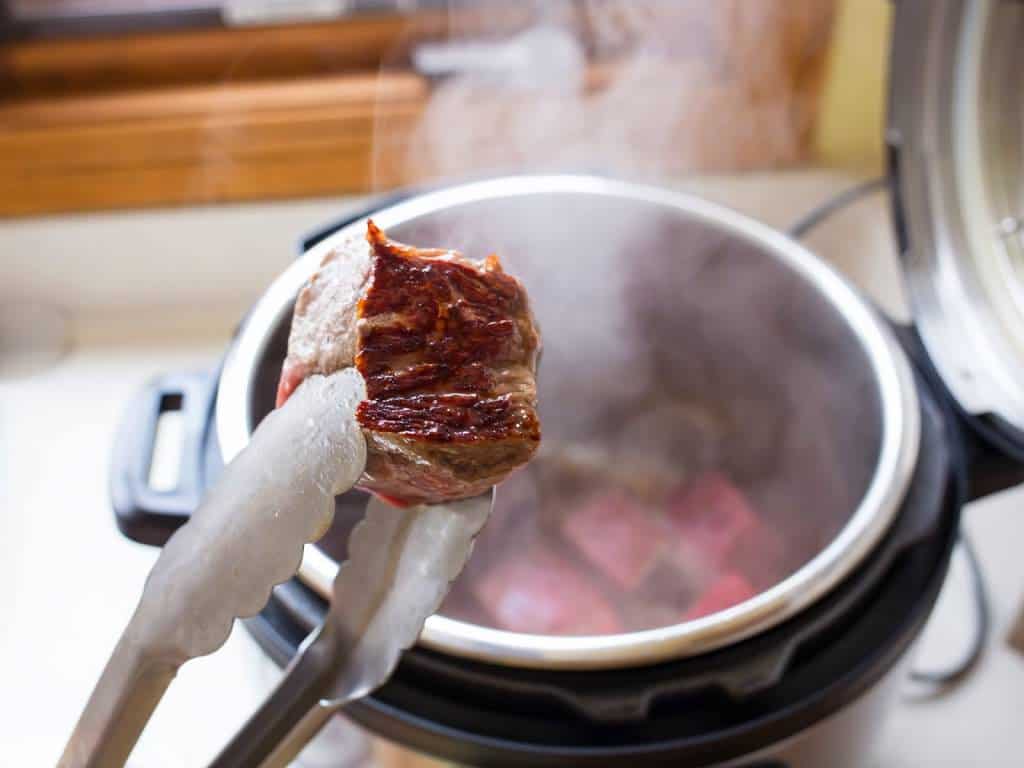
Brown the beef (on one side, working in batches - 3 batches for my instant pot.)
Heat the oil in an Instant Pot set to sauté mode - high until the oil starts to shimmer (use medium-high heat in a stovetop PC). Sprinkle the beef with 2 teaspoons fine sea salt. Brown the beef in two to three batches, depending on the size of your pressure cooker - you don't want to crowd the pot, or the beef will steam instead of browning. (I brown in 3 batches in my Instant Pot.) Brown each batch on one side, about five minutes, then remove to a bowl with a slotted spoon, leaving as much fat behind as possible.
Saute the aromatics, toast the spices, deglaze the pan with coffee
Add the onions and ½ teaspoon kosher salt to the pot. Saute until the onions soften, about 5 minutes, occasionally scraping the bottom of the pot with a flat edged with a wooden spoon to loosen the stuck bits of browned beef. Add the garlic cloves and chipotle en adobo, and saute for one minute. Make a hole in the middle of the aromatics, and add the chili powder, cumin, and oregano. Cook for one minute, or until fragrant, then stir the spices into the onions. Pour in the cup of coffee and scrape the bottom of the pot again to release any browned onions or spices.
Stir everything into the pot
Pour the beef (and any juices in the bowl) into the pot, and then the crushed tomatoes. Stir until the beef is coated in tomatoes and spices, then scrape the bottom of the pot one last time to make sure nothing is sticking.
Pressure cook the chili for 30 minutes with a natural release
Lock the lid on the pressure cooker and pressure cook on high pressure for 30 minutes in an Instant Pot or other electric pressure cooker, or for 25 minutes in a stovetop PC. (Use Manual, Pressure Cook, or Pressure Cook-Custom mode set to 30 minutes in an Instant Pot.) Let the pressure come down naturally, about 20 minutes. (If you're in a hurry, you can quick release any remaining pressure after 15 minutes). Remove the lid, tilting it away from you to avoid the hot steam.
Overnight Rest (Optional, but a good idea)
If you have the time: Let the chili cool to room temperature, cover, and refrigerate overnight. The next day, scrape the fat from the surface of the chili, and bring the chili back to a simmer over medium heat, scraping the bottom occasionally.
Thicken with masa harina (Optional)
Ladle 2 cups of liquid from the pot into a bowl and whisk the masa harina into the liquid to make a slurry. Stir the masa slurry into the pot of chili.
Season and serve
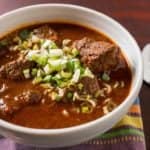
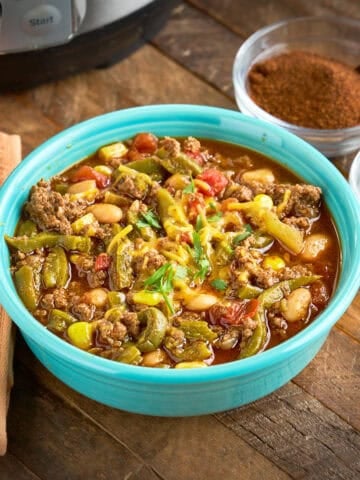
Stir in the lime juice, 1 teaspoon of salt, and fresh ground black pepper. Serve the chili straight up, or with green onions (pictured), diced onions, sour cream, shredded cheese, minced cilantro, hot sauce, tortilla chips, pickled jalapenos…whatever you like as toppings for your chili. Enjoy!
Scaling the recipe
Scaling up Cooking for a crowd? If you have an 8 quart (or, even better, a massive 10 or 12 quart pressure cooker), you can double this recipe.
What to serve with Texas Red Chili
If you're from Texas, this is where beans come in. It's heresy to put beans in your chili while you're cooking, but common courtesy to serve chili with a side of beans. (I like to make a batch of my Instant Pot pinto beans or Instant Pot small red beans on the side.)
I also like to serve my chili with a variety of toppings: green onions, diced onions, sour cream, shredded cheese, minced cilantro, hot sauce, tortilla chips, or pickled jalapeños. I usually don't serve all of these at once; I'll use what I have available from this list. Unless it's a party, when I'll go all-out with the sides.
How to store chili
Chili is a great make-ahead meal. Make a pot the day before, refrigerate the inner pot (covered), and reheat it to serve. Or, store it in 2-cup containers for a convenient lunch-sized serving. Chili will keep in the refrigerator for a couple of days, or in the freezer for up to six months.
Tips and Tricks
- Only brown the beef on one side. I learned this trick from Kenji Alt. Browning the beef on one side gives chili the extra flavor from the caramelized pieces of beef in the shortest amount of time. Can you brown the beef on all sides? Yes, of course. But you get most of the flavor in much less time if you only brown one side of the beef cubes.
- Brown in a second pan at the same time.To speed up browning the beef, do one batch in the pressure cooker, and another in a skillet on the stove. Deglaze the skillet with the coffee, scraping the browned bits of beef into the liquid, then pour from the skillet into the pot when the onions are done.
- Thicken the chili with masa harina. The sealed pressure cooker environment is good for trapping flavor and cooking quickly, but it doesn't allow any evaporation. That means the liquid in the pot tends towards soupy instead of a thick chili. To thicken after cooking, I whisk a quarter cup of masa harina - Mexican corn tortilla flour - into some of the cooking liquid, then stir the masa slurry back into the pot, and let it simmer for a few more minutes to thicken up.
- Masa harina substitute - tortilla chips.Can't find Masa Harina? Substitute two cups of tortilla chips, crushed to a powder in a blender or food processor.
- Chipotle en adobo for smoky heat.Two chipotles en adobo add quite a burn to the chili. Cut back to one chipotle to reduce the heat, or no chipotles for a mild chili. Can't find chipotles en adobo? Substitute two fresh jalapeno peppers, minced.
- No pressure cooker? No worries. See "related recipes", at the bottom of the recipe for stove top and slow cooker versions of this recipe.
Adapted from: International Chili Society winning recipes, 1989 to 1993
Print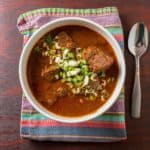
Pressure Cooker Texas Red Chili Recipe
- Total Time: 1 hour 50 minutes
- Yield: 6-8 1x
Description
Pressure Cooker Texas Red Chili. A bowl of Texas red, pressure cooker style.
Ingredients
- 1 tablespoon vegetable oil
- 5 pounds beef chuck roast, cut into 2- inch cubes
- 2 teaspoons fine sea salt
- 2 medium onions, diced
- 4 cloves garlic, minced
- 2 minced chipotles en adobo, with sauce
- ½ teaspoon fine sea salt
- ½ cup chili powder
- 2 tablespoons cumin
- 2 teaspoons oregano (preferably Mexican oregano)
- 1 cup coffee (or water, or beer)
- 14.5 ounce can crushed tomatoes (preferably fire roasted crushed tomatoes)
- ¼ cup masa harina (optional)
- Juice of 2 limes
- 1 teaspoon fine sea salt
- 1 teaspoon fresh ground black pepper
Instructions
- Brown the beef (on one side, working in batches - 3 batches for my instant pot.): Heat the oil in an Instant Pot set to sauté mode - high until the oil starts to shimmer (use medium-high heat in a stovetop PC). Sprinkle the beef with 2 teaspoons fine sea salt. Brown the beef in two to three batches, depending on the size of your pressure cooker - you don't want to crowd the pot, or the beef will steam instead of browning. (I brown in 3 batches in my Instant Pot.) Brown each batch on one side, about five minutes, then remove to a bowl with a slotted spoon, leaving as much fat behind as possible.
- Saute the aromatics, toast the spices, deglaze the pan with coffee: Add the onions and ½ teaspoon kosher salt to the pot. Saute until the onions soften, about 5 minutes, occasionally scraping the bottom of the pot with a flat edged with a wooden spoon to loosen the stuck bits of browned beef. Add the garlic cloves and chipotle en adobo, and saute for one minute. Make a hole in the middle of the aromatics, and add the chili powder, cumin, and oregano. Cook for one minute, or until fragrant, then stir the spices into the onions. Pour in the cup of coffee and scrape the bottom of the pot again to release any browned onions or spices.
- Stir everything into the pot: Pour the beef (and any juices in the bowl) into the pot, and then the crushed tomatoes. Stir until the beef is coated in tomatoes and spices, then scrape the bottom of the pot one last time to make sure nothing is sticking.
- Pressure cook the chili for 30 minutes with a natural pressure release: Lock the lid on the pressure cooker. Pressure cook on high pressure for 30 minutes in an Instant Pot or other electric pressure cooker, or for 25 minutes in a stovetop PC. (Use Manual, Pressure Cook, or Pressure Cook-Custom mode set to 30 minutes in an Instant Pot.) Let the pressure come down naturally, about 20 minutes. (If you're in a hurry, you can quick release any remaining pressure after 15 minutes). Remove the lid, tilting it away from you to avoid the hot steam.
- Overnight Rest (Optional, but a good idea): If you have the time: Let the chili cool to room temperature, cover, and refrigerate overnight. The next day, scrape the fat from the surface of the chili, and bring the chili back to a simmer over medium heat, scraping the bottom occasionally to make sure the chili is not sticking.
- Thicken with masa harina (Optional): Ladle 2 cups of liquid from the pot into a bowl and whisk the masa harina into the liquid to make a slurry. Stir the masa slurry into the pot of chili.
- Season and serve: Stir in the lime juice, 1 teaspoon of salt, and fresh ground black pepper. Serve the chili straight up, or with green onions (pictured), diced onions, sour cream, shredded cheese, minced cilantro, hot sauce, tortilla chips, pickled jalapenos…whatever you like as toppings for your chili. Enjoy!
- Prep Time: 20 minutes
- Cook Time: 1 hour 30 minutes
- Category: Sunday Dinner
- Method: Pressure Cooker
- Cuisine: Tex-Mex
Would you like to save this recipe?
Nutrition
- Serving Size: 1.5 cup
- Calories: 314
- Sugar: 2.7 g
- Sodium: 738.5 mg
- Fat: 13.2 g
- Carbohydrates: 10.3 g
- Protein: 40.7 g
- Cholesterol: 139.8 mg

What do you think?
Questions? Other ideas? Leave them in the comments section below.
Related Posts
Texas Red Chili (In a regular dutch oven)
Slow Cooker Texas Red Chili
Pressure Cooker Beef Stew
Pressure Cooker Pork Chili with Beans
Cincinnati Chili (Instant Pot) Recipe
Enjoyed this post? Want to help out DadCooksDinner? Subscribe to DadCooksDinner via eMail or RSS reader, recommend DadCooksDinner to your friends, and buy something from Amazon.com through the links on this site. Thank you.

Todd Bissell says
So I gave this a try on my Instant Pot this afternoon. My initial tastes after it was finished have been pretty positive. A good deep smoked chipotle flavor in the sauce (not too brutally hot, but tasty), and the meat is just shy of falling apart. A bit too "wet" for my personal tastes, but I know several old tricks that I can use to thicken it up some. Tasty tonight, and like all good chilis, better tomorrow. 🙂
Becky Sledge says
You said you chilled your chili overnight to let the flavors marry. Did you put the stainless steel inner pot in the fridge or did you pour the chili into another container? If you left it in the inner pot, then did you put it in the Instant Pot base to re-heat it? The reason I'm asking is that I sent a question to the Instant Pot company about doing this and they said NOT to do that since condensation from the pot could damage the heating mechanism in the base, therefore voiding the warranty.
Mike Vrobel says
I did refrigerate and reheat in the inner pot. I had no idea it might void my warranty...but I’m also not going to stop. I guess I’m just a risk-taker. (If I was thinking about it, I would transfer to a second inner pot that I have.)
Candace Graham says
1/2 cup chili powder? Just want to clarify- I've never used more than a few tablespoons. Thanks!
Mike V says
Yes, 1/2 cup is correct.
Joe says
Hi Mike,
This might sound like a very dumb question, but how much do I reduce the spices by if I'm only doing 2 1/2 pounds?
Mike V says
Cut the spices in half - 1/4 cup chili powder, etc...
Drake D Shattuck says
I just purchased an Instant Pot. You're tips are helpful, especially about adding the liquid for pressure cooking. I love that you use masa instead of flour, keeping with Mexican tradition.
May I suggest that adding one Nopal(Cactus) will help to thicken the sauce and adds a wonderful rustic flavor. You can find these cheap at Mexican markets. Buy them fresh and you simply scrape them with a knife to remove the thorns and internodes. I don't try to remove them from the edges, I just trim the edges. If you don't get all of the internodes off by scraping, you can remove any left over with your fingernail while rinsing because the thorns will be removed. You can either sear it off in a pan or in the oven using broil. Just sear long enough so that the green color goes from bright to a more dark military green. Cut them into 3/4" squares and add them to the pot. Nopal is gelatinous and therefore thickens the sauce. It is wonderful with beef and chiles and could not be more Mexican Authentic. Super healthy! I think you could cut your masa by half by using one nopal. Personally, I would make a dark roue with the masa using bacon fat or Ghee as my fat and add that at the end to thicken. I never add raw flour or masa without cooking it off as a roue. Thanks for the one sided browning idea, I'll give that a shot. I love how you deglaze and I never thought about coffee before, I'm going to try that as well.
Ashley @ Big Flavors from a Tiny Kitchen says
This looks fantastic! I just got an Instant Pot and am looking forward to breaking it in with recipes like this!
JoJo says
I won my workplace chili cookoff with this recipe! Thanks so much. I followed it exactly, but added some ground chipotle seasoning at the end because I wanted it a little bit spicier.
Mike V says
Excellent! I'm glad it worked so well for you!
Bob says
If I wanted to add beans to the chili, what beans would you recommend?
Mike V says
Pinto, kidney, or black beans would all work well with this chili: https://www.dadcooksdinner.com/instant-pot-pinto-beans/
James Livingston says
Made this for our workplace Chili Cook off. Came in 3rd place first time I ever entered a cook off. Thanks for the recipe.
Mike V says
You're welcome!
MXC says
We decided to test some instant pot chili recipes for an upcoming cook-off at my husband's office (simmering for hours on the stove top just seems like a strange thing to do since the instant pot came into our lives). Anyway, we started with this one and I think our search is over! Really delicious - rich flavor, incredibly tender meat, and good spice. May try the pork green chili just for the heck of it, but this is a winner! Thanks!
Mike V says
You're welcome. Good luck!
Kate says
This looks awesome for Super Bowl 2016 (Oops I mean "Big Game")...so what if I wanted to add some beans to the mix? Would I just throw them in or do I need to add more liquid?
Mike V says
Add canned or cooked beans at the end, and simmer for 10 minutes to hear them up and for the flavors to mingle. ( like I do here: https://www.dadcooksdinner.com/pressure-cooker-pork-chili-with-beans/ ). Or, make a big pot of beans and serve them on the side for people to stir in as they like: https://www.dadcooksdinner.com/instant-pot-pinto-beans/
Kate says
Excellent, thank you!
Aperture says
Hey Daddio, thanks for the recipe - I just finished putting it all into the pot and I have a few questions:
2-inch cubes are really big. I did 2x2x1 inch chunks and that seemed really big. What is the rationale for such big chunks of steak?
Also, I am wondering why your recipe calls for browning on one side only? I look forward to hearing more. Thanks, Aperture
Mike V says
1. I like big chunks of beef in my chili. 2. See "trick 1" in the recipe.
Aperture says
Man - that is some good chili. I am sold on big chunks of meat in the chili. That meat just melts apart on the fork. I did not go shy on the chili powder, but used the full 1/2 cup your recipe calls for. My wife could eat the chili with sour cream and cheese, but the kids have not dared put it near their mouths yet. Probably because they know I like things HOT. We will make this recipe again, but probably with just a 1/4 cup of chili powder next time and some red beans so the kids can enjoy and just to make the recipe go a little further. Thanks so much.
Robyne says
So far, this has been a fun adventure with our new instapot, though step#4 was a bit confusing. After three of us reread it many times aloud, we came to the conclusion that it's cooking for 30 mins on high and then we lower the heat and cook for another 30 mins on low. Total cook time says 1.5 hrs, though I took about an hour to brown meat & sauté onions. Now, I'm worried we're going to over cook it. I suppose we'll find out shortly! Thanks for what smells like a great recipe!!
Mike V says
Pressure cook for 30 minutes on high (manual, 30 minutes on the instant pot). The pressure cooker will build pressure, then switch into cooking mode and start counting down the 30 minutes. When it reaches zero, it will beep, and switch to warming mode. Press the cancel button to stop warming, and wait for the pressure valve to drop - it will take about 20 minutes, but you can quick release the rest of the pressure after 20 minutes if you are impatient.
To try to help the recipe - why did you think 30 minutes on high then 30 minutes on low? (Total cooking time includes the browning, sautéing the onions, bringing the cooker to pressure, 30 minutes at high pressure, and then the natural pressure release.)
Jeff Smith says
Really happy with you recipes and insight
One of my best chilies ever!
Used a good jar of salsa in there in addition to your tomato
Really quite fine
Thank you
Mike V says
Thank you!
Becci Wells says
Great recipe and I just got my Elite pressure cooker. I am a born n bred texaican so I know my chili and don't let anyone fool you, down here we DO eat our chili with Pinto beans, both cooked in the pressure cooker. My Mom raised us on it. Although hers was on the gas stove, mine is electric...so much better! I cut my meat a little smaller, no bigger than an inch, but never...and I do mean never, ground beef! If you use a roast for your chili, you can have the butcher cut it for you at the market. And you got the secret of good chili and most every other food known to man....2nd day is better!!! That's why we eat so many left overs. Stew and all mingle dishes taste better later. Thanks for another good one...Texas gal
Robyne says
Just curious if your pinto beans are dry or canned?
We're in Texas as well, but we use black beans. ????
Brian Atwood says
I've always used canned, dark, red kidney beans drained.