When I put a jar of hot giardiniera on the table, my wife digs in, pushing aside the cauliflower, jalapeños, and other vegetables so she can get at the carrots. Pretty soon all the carrots are gone, and it's up to me to finish the rest of the jar.
Unfortunately, I can ignore things that are right in front of my nose. I spent weeks looking for a hot giardiniera recipe that was canning compatible. I didn't find one with the same mix of vegetables we get in the grocery store version. I told Diane this, and she said "can you make pickled carrots? That's my favorite part."
Well, Duh. I knew she only ate the carrots. Why didn't I start there?
This is another recipe that I'm revisiting. My pickled carrot technique has changed, and I wanted to share the new, simplified version of the recipe.
Recipe: Pickled Dill Carrots
Adapted from: Judi Kingry and Lauren Devine, Ball Complete Book of Home Preserving
Cooking time: 10 minutes (more at altitude)
Equipment
- 6 pint canning jars and lids
- Giant pot for water bath, with a rack to keep the jars off the bottom
- Large sauce pot for vinegar brine
- Canning tongs
- (Other canning equipment, like lid lifters and canning funnels are helpful, but you can work around not having them)
Ingredients
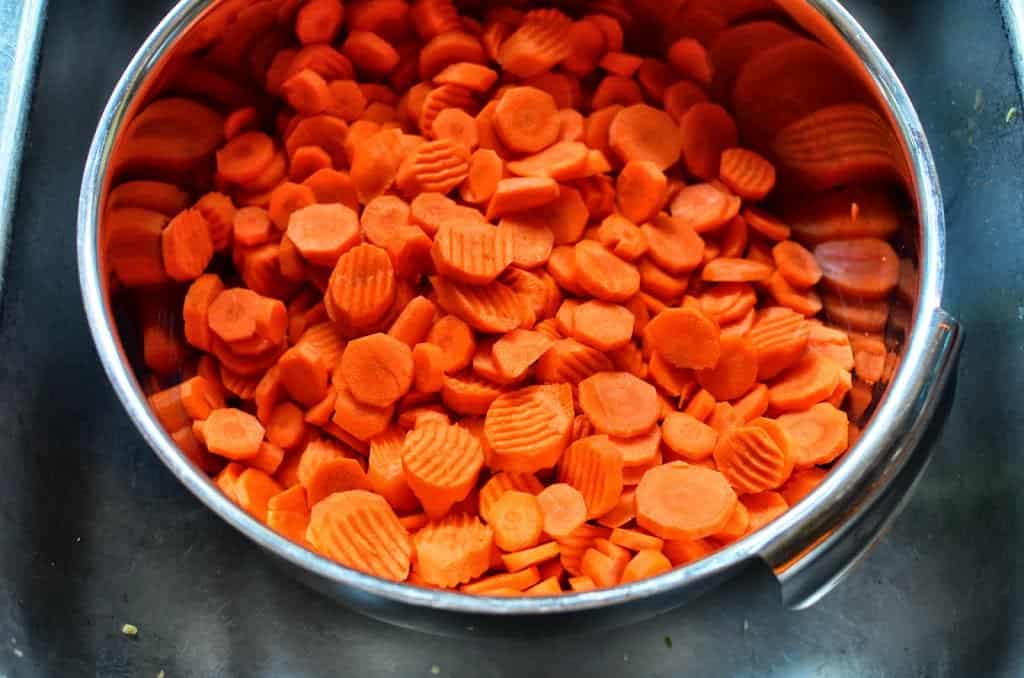
- 5 pounds carrots, ends trimmed, peeled, and sliced into ¼ inch rings
- 3 large jalapeño peppers, stem trimmed and sliced into ¼ inch rings
Vinegar brine
- 6 cups white vinegar
- 2 cups water
- ½ cup canning salt
Spices
- 6 cloves garlic, peeled
- 3 teaspoons dill seed (½ teaspoon per jar)
Directions
1. Prep the carrots and jalapenos
Peel the carrots, the slice into ¼ inch thick slices. (A mandoline makes quick work of the slicing, but be careful. Carrots are tough, and take some force to slice - watch your fingers.). Slice the jalapeños into ¼ inch thick slices.
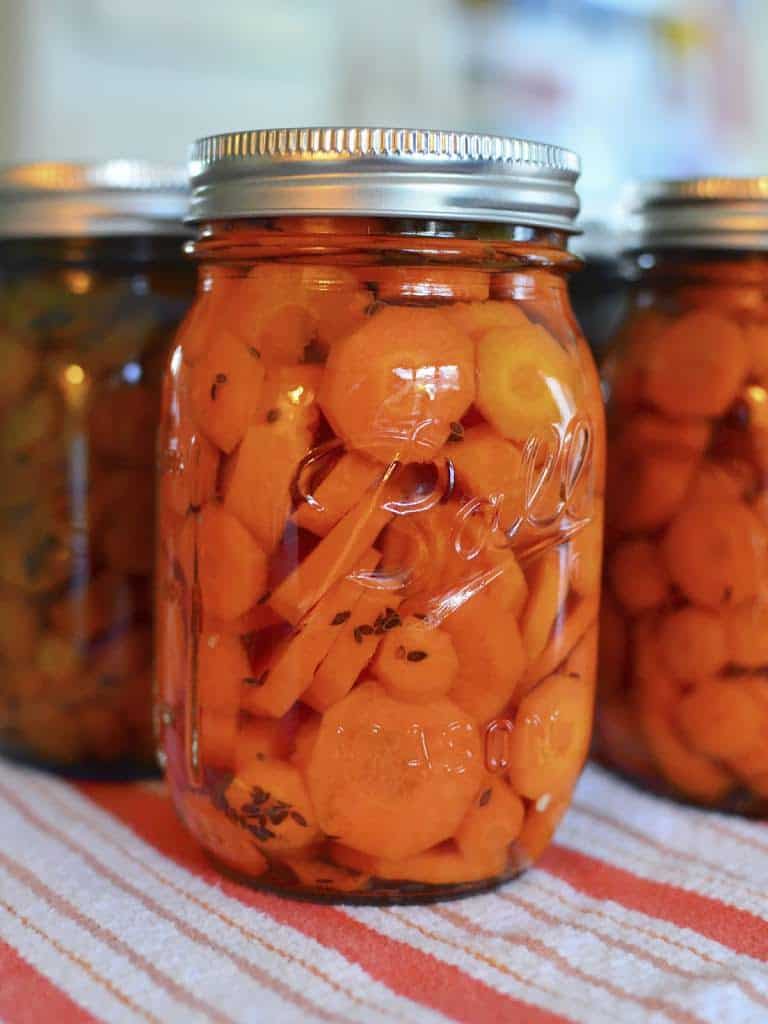
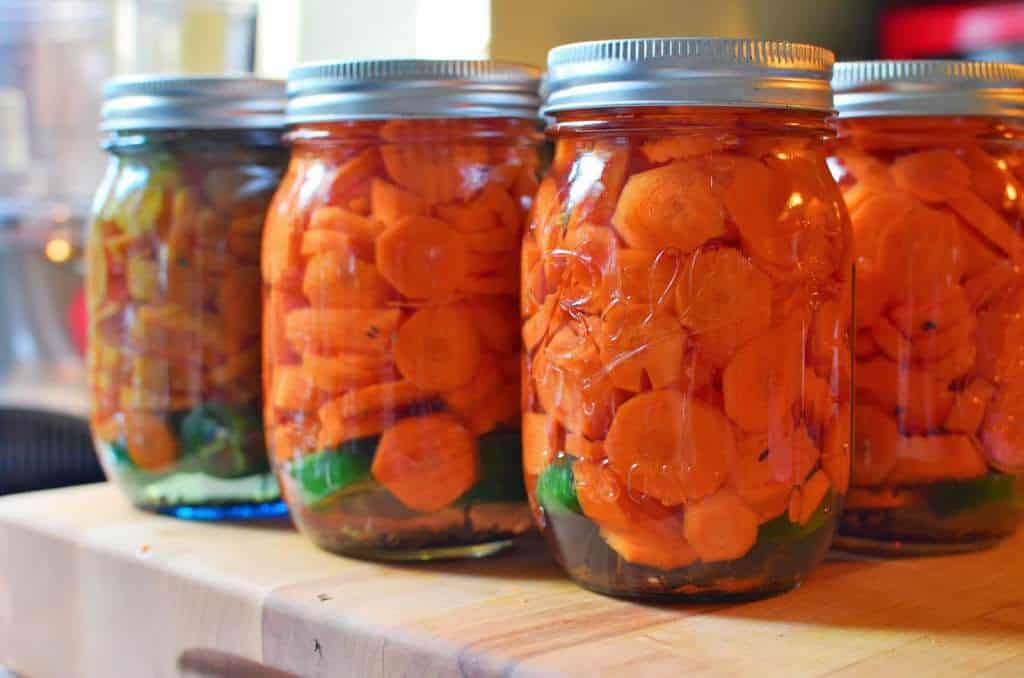
2. Pack the jars
Sterilize the pint jars in a pot full of boiling water (or running through the dishwasher). Into each jar put 1 clove of garlic, ½ teaspoon of dill seed, and three jalapeño slices (about half a jalapeño pepper per jar). Tightly pack the jar with carrots. In a large saucepan, bring the vinegar, water, and pickling salt to a boil to make the brine. Carefully ladle the hot brine over the beans, leaving at least ¼ inch of headroom in each jar.

3. Process the jars
For an overview of canning, see Using Boiling Water Canners and Principles of Home Canning [pdf][uga.edu/nchfp]Wipe the edge of the jars clean with a damp cloth, then put the lids and rings on the jars. Process the pickles in a boiling water bath for 10 minutes (more at higher altitudes). Let the pickles cool overnight, then remove the rings and test the seal on the lids. Wait 2 days before opening to let the beans pickle; a week would be better.
Notes
- Want to take the easy way out, and skip all the peeling and slicing? Use baby carrots from the grocery store.
- Intimidated by the boiling water bath part of canning? No worries. Do everything through step 2, then refrigerate the pickles. They'll be ready to eat in two days, and they'll last for about a month in the refrigerator.
- Six jars is an approximation - if you wind up with extra, that's a bonus. If you wind up with one more jar than will fit in your canning pot, treat it as a jar of refrigerator pickles, and eat it first.
- If any of the jars don't seal, don't worry - they just became refrigerator pickles. Refrigerate them and eat them within a month.
- I try to be careful when changing canning recipes. They recipes must have specific levels of acidity and salinity to preserve the food. Pickles are pretty safe; the acidity in vinegar lets me play around with the spices and a little with the ingredients, but I am careful to follow the brine and vegetable proportions from tested recipes. (That is, recipes tested by a state extension office to be safe for canning.)
- Unlike green beans, Ball's heritage blue canning jars do NOT make carrot pickles look good. The blue tint makes the carrots look green. Stick with clear jars for these pickles.
What do you think?
Questions? Other ideas? Leave them in the comments section below.
Related posts
Spicy Pickled Carrots
Pickled Asparagus with Hot Peppers and Garlic
Things I Love: Canning Jars
*Enjoyed this post? Want to help out DadCooksDinner? Subscribe to DadCooksDinner using the RSS or Email options on the right, recommend DadCooksDinner to your friends, buy something from Amazon.com![]() through the links on this site, or donate through my tip jar. Thank you.
through the links on this site, or donate through my tip jar. Thank you.
Mrs. D says
TY for sharing this recipe. I love all the veggies, but do tend to pick at the carrots first 😀