My second most popular post is my rotisserie pork shoulder recipe.
*I love that recipe, because it was one of the first recipes I created exclusively for this blog. I was trying to come up with a new rotisserie idea, and it worked out better than I could have hoped. It has become a standard in my recipe rotation.
**Get it? Recipe "rotation"? On the rotisserie? OK, I'll try again later.
I was looking for a follow up, because pork shoulder (aka pork butt) is one of my favorite cuts of meat. I wanted another way to cook it on the rotisserie. When I was researching my Peking duck recipe, the idea came to me. Could I adapt char siu, Chinese barbecued pork, to the rotisserie?
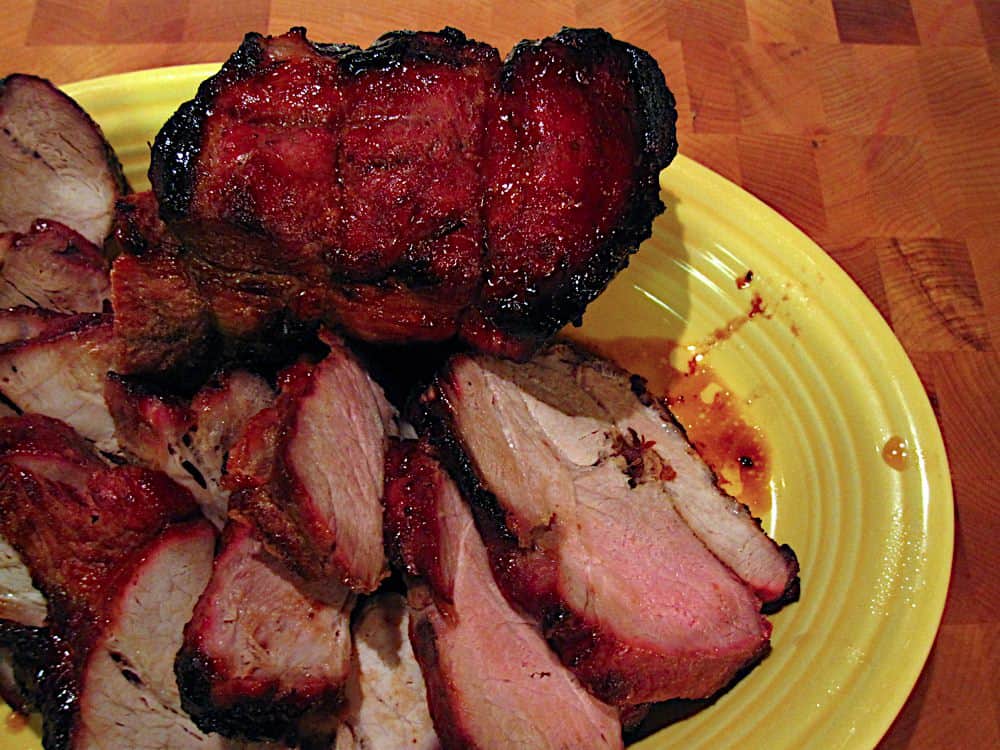
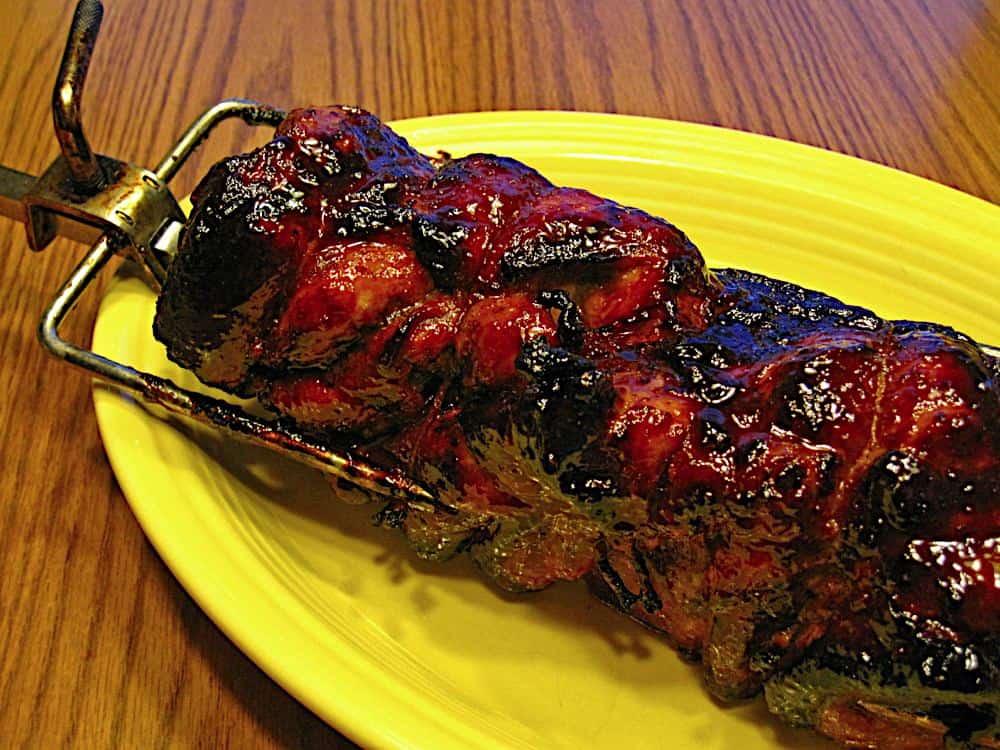
The rotisserie turned out* to be a great way to make char siu. You get the sweet, glazed, crispy exterior that says "Chinese barbecue" with the juicy, tender interior that only long cooked pork shoulder can give you. The only trick to the recipe is…sugar burns easily, so you have to be careful with the glaze. I use the brinerate technique, a salty marinade based mainly on soy sauce, to flavor the roast. I save the sugary, sticky glaze for the very end, when I brush it on for the last ten minutes of cooking time.
*Get it? "Turned" out? Rotisserie? Thank you, thank you, I'll be here all week….wait, where are you going?
**Oh, and don't forget the leftovers! This recipe is worth making, just to have the leftovers for fried rice.
***Finally: Don't have a rotisserie? Don't worry - use the brinerade and honey glaze from this recipe with the regular grill technique in my Barbecued Chinese Boneless Ribs recipe.
Recipe: Rotisserie Char Siu (Chinese Barbecued Pork Shoulder)
Cook time: 90 minutes
Equipment:
- Grill with Rotisserie attachment (I used a Weber Summit 650 with an infrared rotisserie burner. Here it is.
)
- aluminum foil drip pan (9"x12", or whatever fits your grill)
- butcher's twine
- Basting brush (Preferably a silicon brush, like my Oxo basting brush
. Or, to be fancy, make a brush out of scallions. Trim the root end of about three scallions and tie them together. Split the green ends lengthwise, twice per scallion, about two inches from the end to turn it into a brush.)
Ingredients:
- 3 ½ to 4 lb Boneless Pork Shoulder Roast, aka "Boston Butt" or "Pork Butt", trimmed of any excess fat
Brinerade
- 1 cup soy sauce
- 2 tablespoon hoisin sauce
- 4 cloves garlic, minced or pressed through a garlic press (or 1 tablespoon garlic powder)
- 2 inch piece of ginger, peeled and grated (or 2 teaspoon dried ginger)
- 2 tablespoon rice wine vinegar (or dry sherry)
- 1 tablespoon sesame oil
Glaze
- 2 tablespoon reserved brinerade (or 2 tablespoon soy sauce)
- ¼ cup honey
- ¼ cup hoisin sauce
Directions:
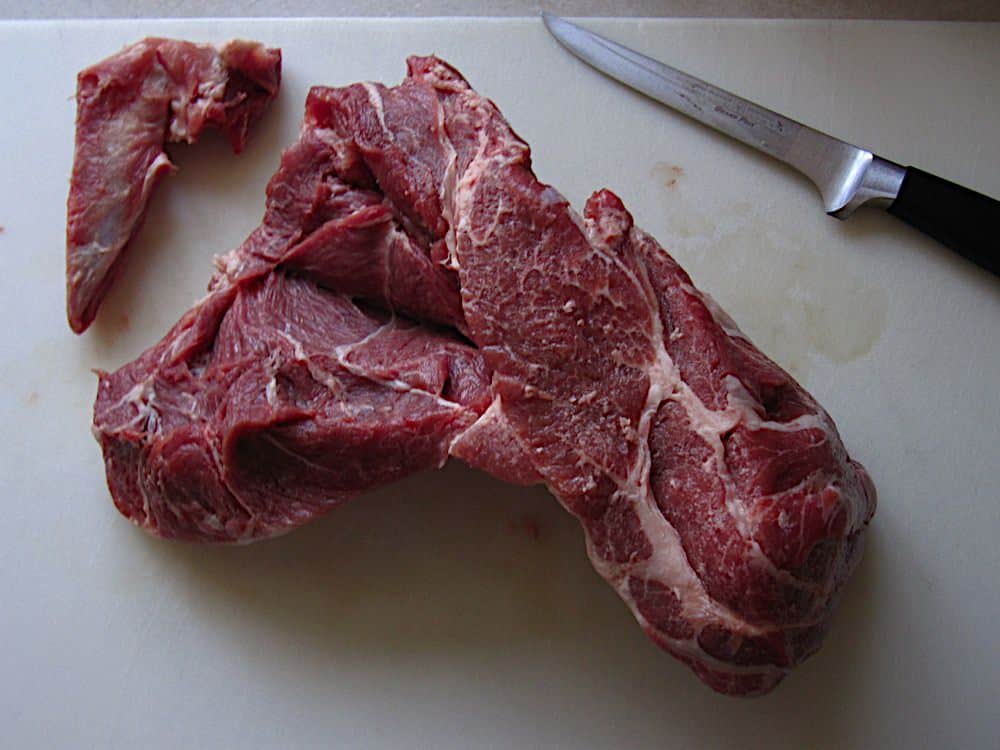
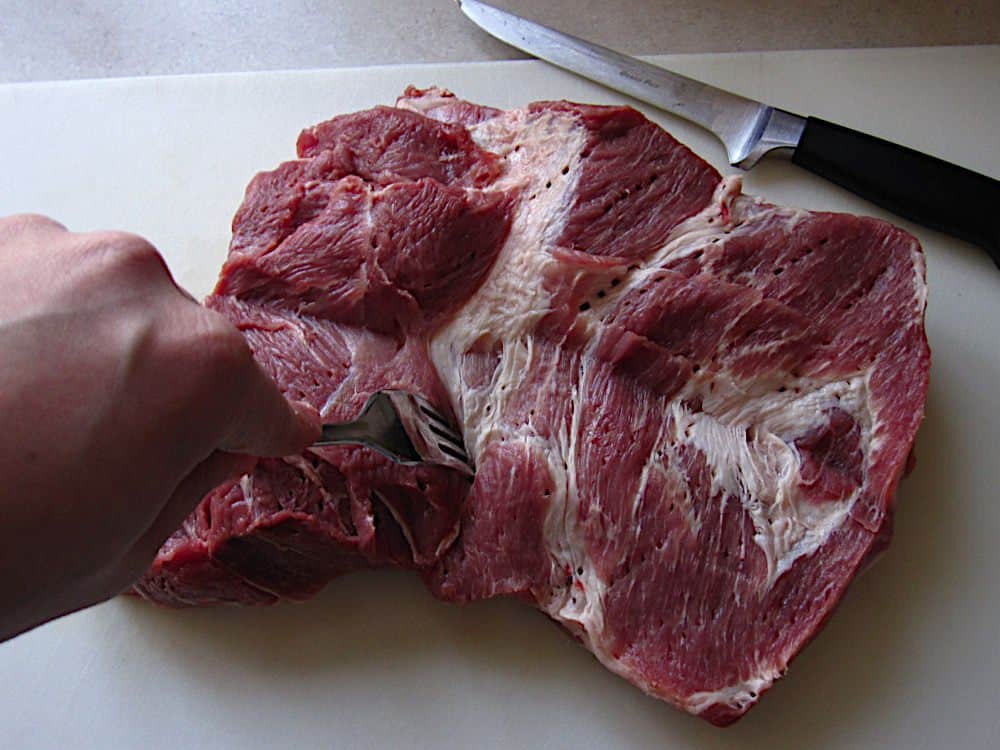
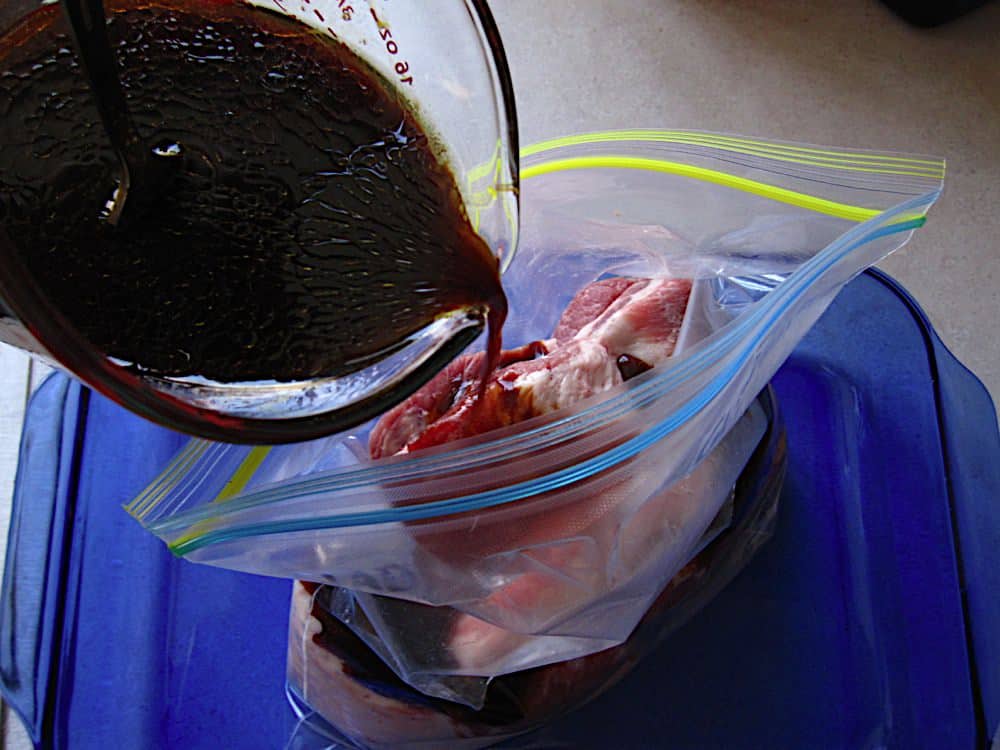
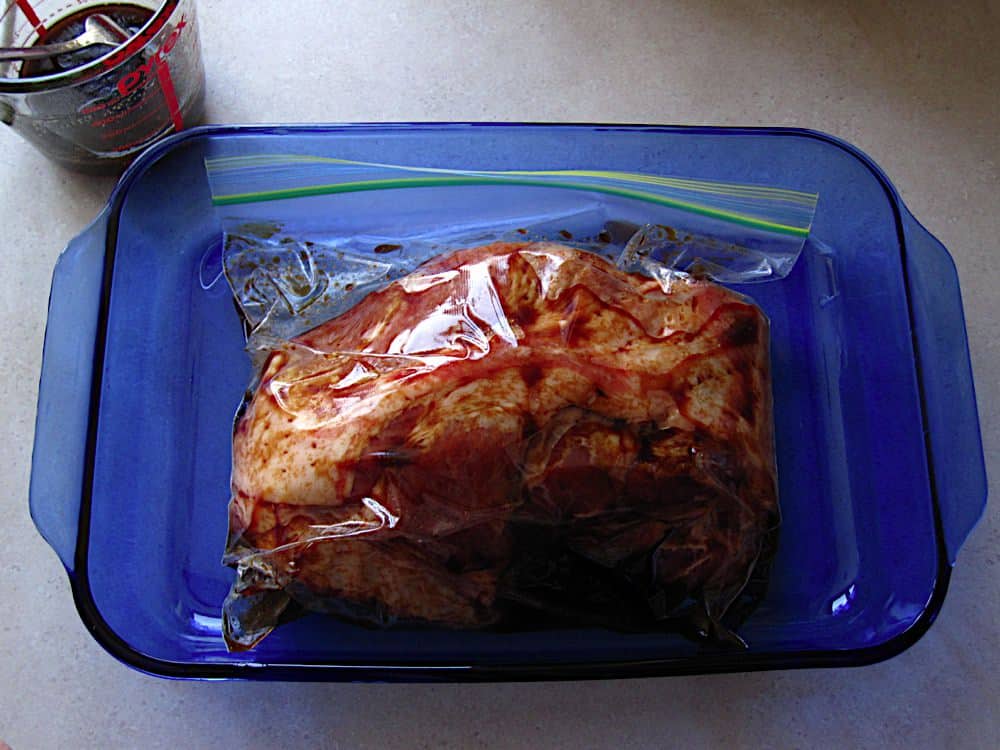
1. Brinerate the pork roast: Whisk the brinerade ingredients in a small bowl. Remove any bones from the pork shoulder, then split the pork shoulder almost all the way through, but not quite - you want to open it up like a book, so the brinerade has less thickness to penetrate. See the picture below; I started by removing the bone, then continued that cut the length of the pork loin. Poke the shoulder all over with a fork, at least once every half inch, again to give the brinerade a way into the pork.* Put the pork shoulder in a gallon ziploc bag, then pour in the brinerade. Brinerate for at least two hours, preferably four hours to overnight.
*This is a chance to really work out your aggression - I pretend I'm the villain in a bad horror movie while I'm doing it.
 |
 |
 |
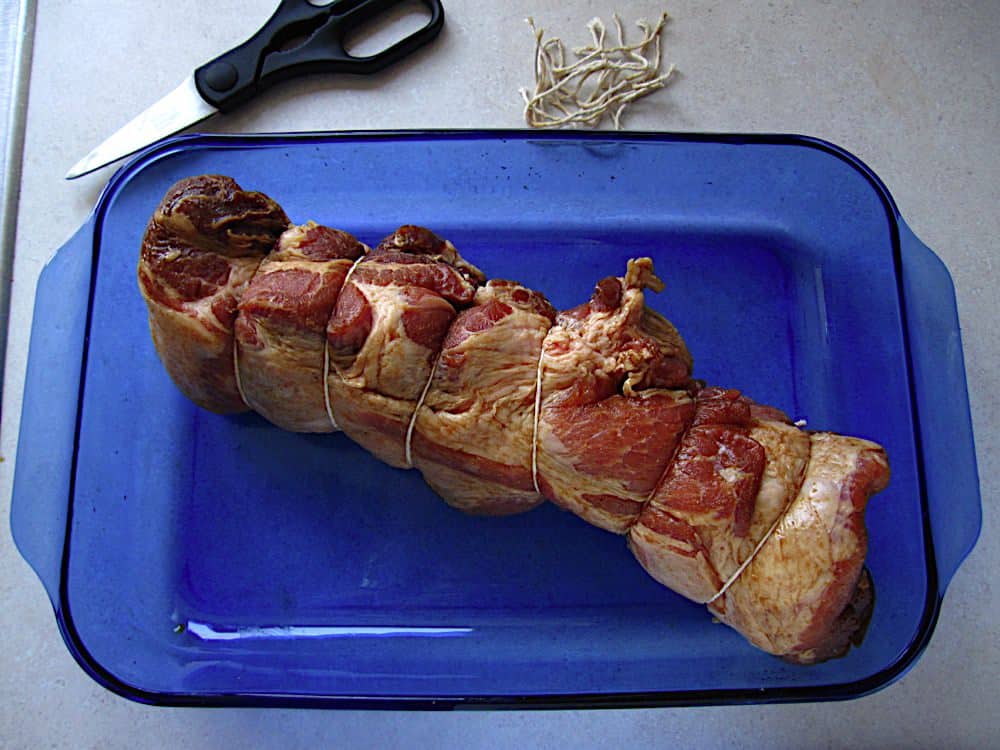
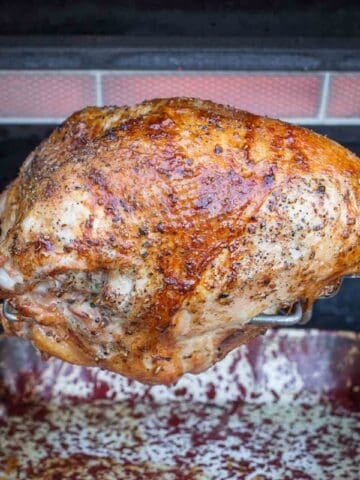
2. Prepare and rest the roast: One hour before cooking, remove the pork from the brine, and pat dry with paper towels. Fold it closed over the cut you made, then tie it tightly with butcher's twine every 1 ½ inches.* Skewer the roast on the spit through the center of the roast, then let it rest at room temperature.
*When trussing, you're trying to get a nice cylinder shape. The pork shoulder cut may not cooperate, so do the best you can. See the picture on the far right.
 |
 |
 |
3. Prepare the grill: Set your grill up for rotisserie cooking at high heat. For my Weber Summit, this means removing the grates, turning the two outer burners (burners 1 and 6) to high, and turning the infrared burner to high. Then I put my drip pan in the middle, over the unlit burners, and let the grill preheat for ten to fifteen minutes. (See My Rotisserie Basic Technique Post for more rotisserie setup details.)
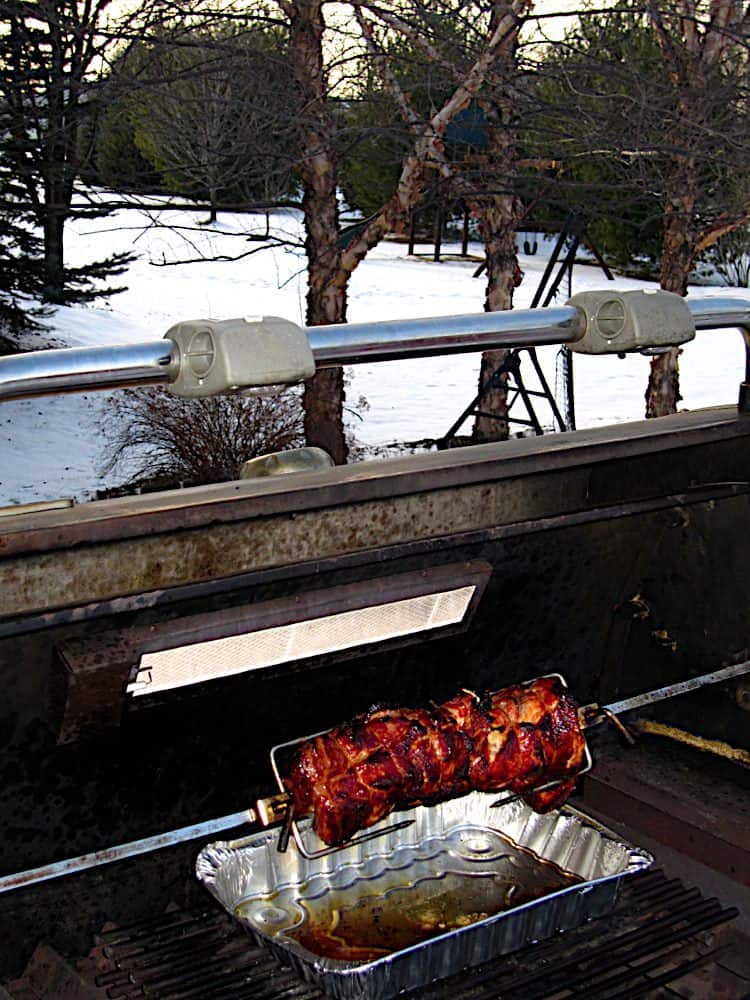
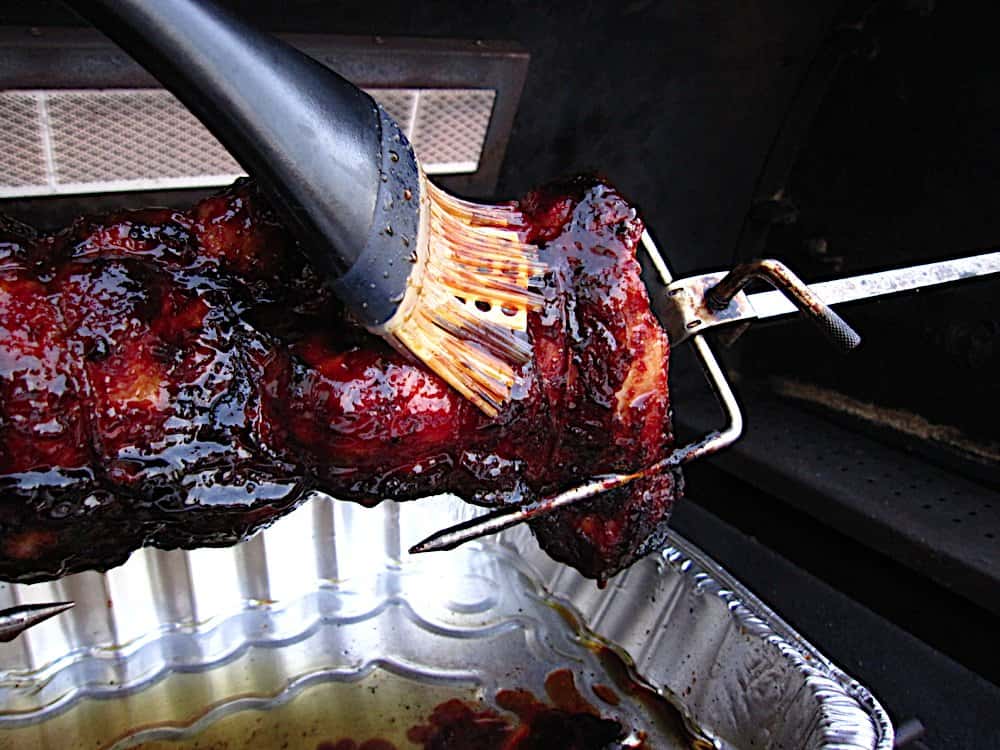
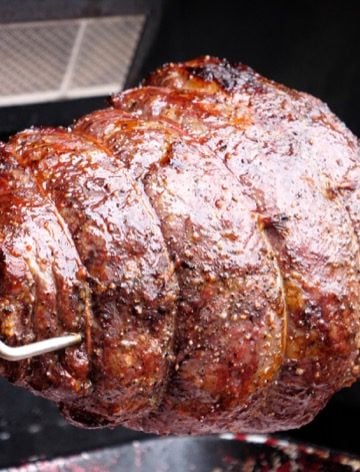
4. Cook the roast Put the spit on the rotisserie, start it spinning, and cook with the lid closed for a half an hour. At that point, turn off the rotisserie burner if the roast is well browned. (You have to watch out for burning because of the sugar in the brinerade. On grills without a rotisserie burner, I would turn the heat down to medium at this point.) While the roast is cooking, put the glaze ingredients in a small bowl, and whisk until the honey is dissolved in the rest of the glaze. Cook the pork roast until it reaches 175*F to 180*F in the thickest part of the meat. This should take 1 to 1.5 hours; assume about 20 minutes per pound of meat. At that point, you should only have ten minutes of cooking time left. Brush the roast all over with the glaze, cook for another ten minutes, brush again with the glaze, then remove from the grill.
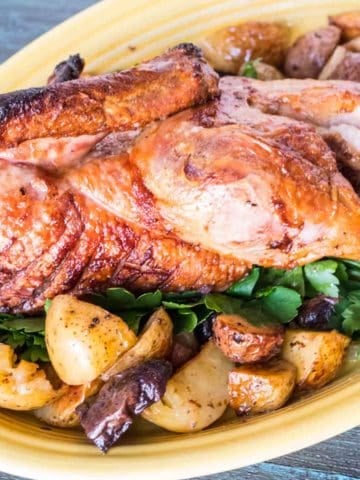
5. Rest, carve and serve.
Serving options:I love this as the protein in a Chinese dinner. I serve it with a couple of stir-fried vegetables and white rice. I pass any leftover glaze, and a bottle of hoisin sauce, at the table to use as sauce on the pork.
Variations:
*Easy pantry version: Buy a boneless pork shoulder roast, brinerate with whatever ingredients you have in the brinerate list. The only one that is absolutely necessary is the soy sauce, and I always have the garlic powder and ginger in my spice rack in the pantry.
Likewise, for the glaze, the only ingredient you have to have is the honey. The other ingredients give the glaze more flavor, but aren't absolutely necessary.
Notes:
*I love leftovers from this roast. Aside from eating the leftovers straight up as a lunch later in the week. It also makes a great base for sandwiches - I use it, sliced thin, in bahn mi style sandwiches. If I have enough, I freeze a ziploc bag or two of the pork and use it later, chopped up in fried rice or an Asian soup (recipes coming soon, I promise!).
*To quote from my Rotisserie Pork Shoulder Roast recipe: Make sure you trim the fat cap off the top of the roast - there's plenty of fat throughout this roast, so that big hunk of fat on top will just make it greasy. And, this is not the time to go for medium-rare, slightly pink pork. The connective tissue in the shoulder will make it jaw-achingly tough. Cook it to well done and beyond. In fact, you'd have a hard time overcooking this roast. If you have any questions about "is it done?" you should err on the side of cooking it more.
*Sugar burns easily, and you have to be careful when you're cooking something for as long as this pork roast. I try to avoid burning the roast by keeping most of the sugar out of the brinerade, and adding it at the end in the glaze. That's why I turn my rotisserie burner off after a half an hour - my roast is starting to blacken at the edges by then.
*The red band on the outside of char siu made at your local Chinese restaurant? It comes from food coloring. It doesn't add any flavor, but if you really want it, add a few drops of red food coloring to the brinerade.
What do you think? Questions? Other ideas? Leave them in the comments section below.
Related posts:
Rotisserie Pork Shoulder Roast
Rotisserie Boneless Pork Loin Roasts, Brined, Rubbed and Maple Syrup Glazed
Rotisserie Duck, Peking Style
Click here for my other rotisserie recipes.
Don't have a rotisserie? Use my Barbecued Chinese Boneless Ribs recipe instead.
Inspired by:
Everyone who found my Rotisserie Pork Shoulder Roast recipe through Google. Thank you!
 Check out my cookbook, Rotisserie Grilling. Check out my cookbook, Rotisserie Grilling.
Everything you could ask about the rotisserie, It's a Kindle e-book, so you can download it and start reading immediately! |
*Enjoyed this post? Want to help out DadCooksDinner? Subscribe to DadCooksDinner using the RSS or Email options on the right, link to this post from your blog, recommend DadCooksDinner to your friends, or buy something from Amazon.com through the links on this site. (Like my Rotisserie Grilling cookbook...)

Debbie says
We are about to dig into this puppy. Looks outstanding. I’ve been cooking a lot of your recipes lately. 7 people eating here including teenagers.
Mike Vrobel says
Enjoy!
Bob says
Can you slow cook indirect heat on the green egg?
Mike Vrobel says
Yes
Beth L DeSarlo says
This is the second time I'm making this in my electric rotisserie. I made it a few days ago and my family and I love it so much I'm making it again. Sooo tasty! I'm using a pork loin tho. My family can't get enough of it!
Thank you for sharing!
Doug says
cheers for the recipe the pork turned out amazing. used coals instead of gas and kept it a a low heat (4 second hand trick). Also used pork neck. marinaded the pork overnight and basted the pork whilst cooking continuously and used double the brinerade mixture in the glaze. ended up with an amazing glaze on the meat.
wish I could post photos!
Mike V @ DadCooksDinner says
450°F, higher if you can get it. https://www.dadcooksdinner.com/survey-indirect-high-heat-on-your-grill/
Horatio says
When you "turn the two outer burners (burners 1 and 6) to high, and [turn] the infrared burner to high" what temperature do you get in your Weber Summit? I have a Genesis and want to target the same temperature with a clearly different configuration. Thanks!