DadCooksDinner

  • Home
  • Rotisserie
  • Recipes
  • Tools
  • Books
  • Merch
menu icon
go to homepage
  • Recipes
  • Books
  • Tools
  • Merch
  • About
subscribe
search icon
Homepage link
  • Recipes
  • Books
  • Tools
  • Merch
  • About
×
Home » Recipes

Stir Fried Chicken with Peppers and Onions

January 3, 2009 by Mike Vrobel 2 Comments

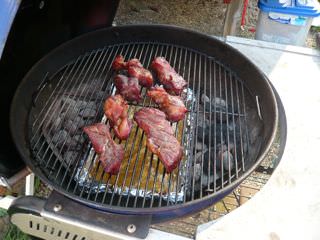
This recipe is one of my go to weeknight meals. Stir-fried chicken, plus a stir fried vegetable side and white rice - I can have dinner on the table in about 45 minutes. The key to this recipe is the stir fry technique; once you have the stir fry technique internalized, this recipe comes together quickly.

Recipe: Stir Fried Chicken with Peppers and Onions

Veg prepped.  Note the bok choy, for my veg side, is also ready to go
Ingredients:

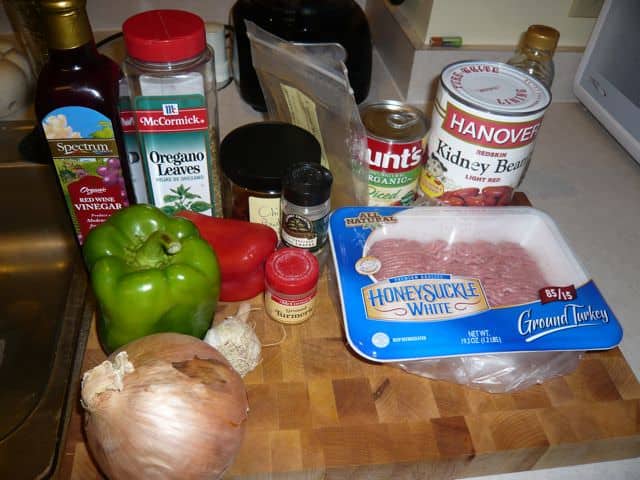
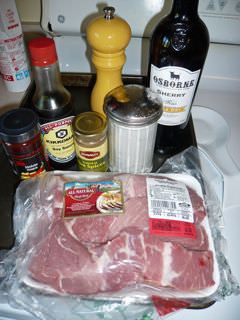
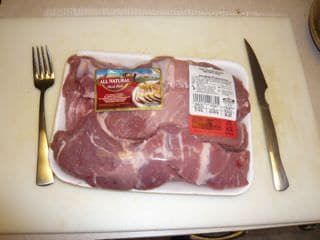
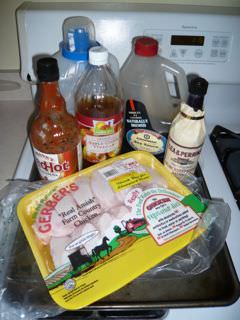
  • 1.5 lb boneless, skinless chicken (thigh or breast)

Marinade:

  • 1 tablespoon soy sauce
  • 1 tablespoon dry sherry

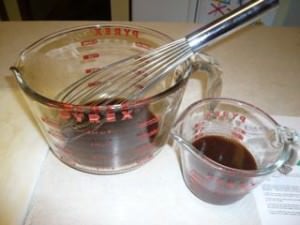
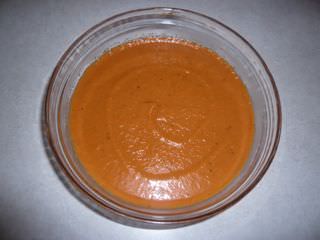
Sauce: (Soy/Sesame sauce)

  • ¼ cup soy sauce
  • 2 tablespoon dry sherry or rice wine vinegar
  • 1 teaspoon sugar
  • 1 teaspoon toasted sesame oil
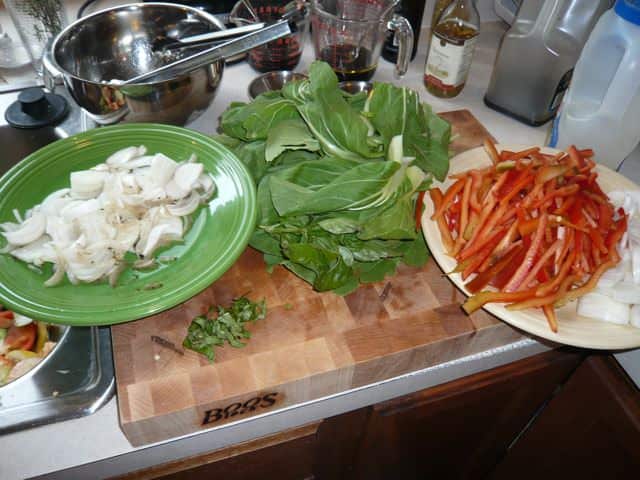
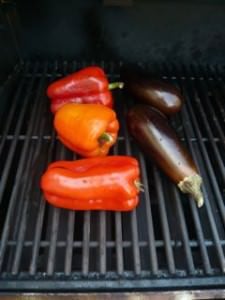
  • 1 large onion
  • 1 large red pepper
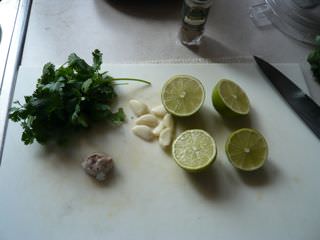
  • 2 large cloves garlic
  • 1 teaspoon vegetable oil
  • 1 tablespoon vegetable oil (For meat stir fry)
  • 2 tablespoon vegetable oil (For veg stir fry)

Instructions: (Again, see the stir fry technique for an overview)
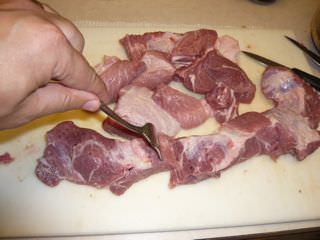
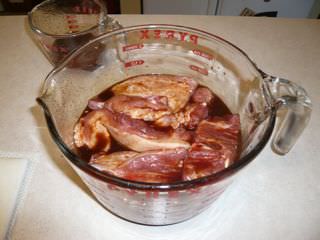
1. Prep protein: Slice the chicken into ½" thick strips, then toss in a large bowl with 1 tablespoon soy and 1 tablespoon sherry.

2. Prep sauce: Combine sauce ingredients in a small bowl, and whisk to combine. (I use my liquid measuring cup for this)

3. Prep vegetables: Trim the onion and peppers, and cut into ½" thick strips.
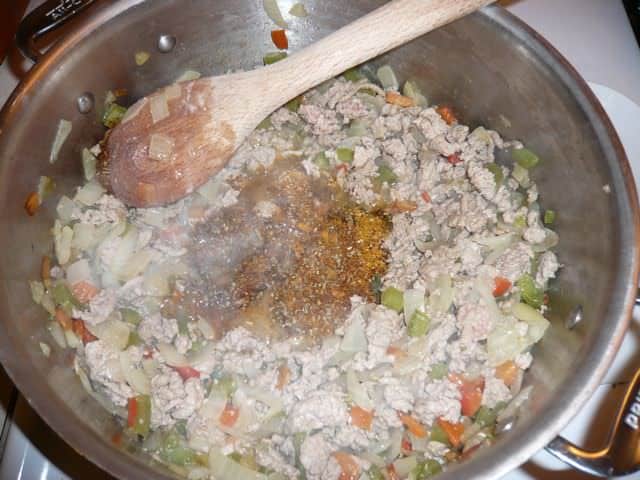
4. Prep garlic: Mince garlic, and mix in small bowl with 1 teaspoon vegetable oil.
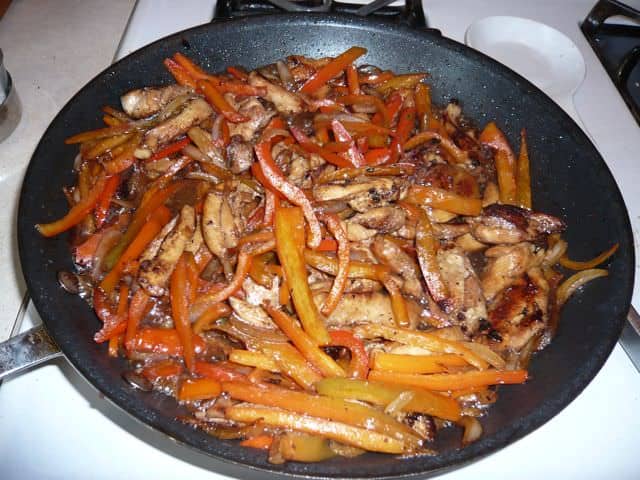
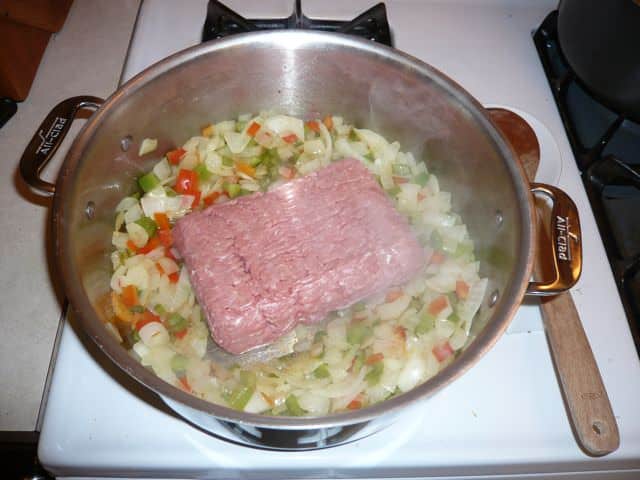
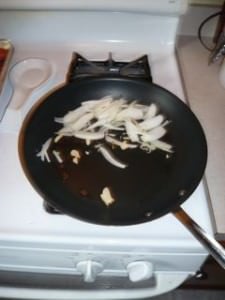
5. Cook the chicken: Put 1 tablespoon oil in a large (12" to 14")nonstick skillet, and heat on high until the oil is just smoking.  Addhalf the chicken, let it sit for 1 minute, or until well browned, then flip and brown the other side, about another minute.  Remove to a plate, then cook the second half of the chicken, and remove to the same plate.  Wipe the pan clean with a wad of paper towels.  (If you have a 14" skillet, youmay be able to do this in one batch - just don't crowd the pan.)

Well-browned chicken
 

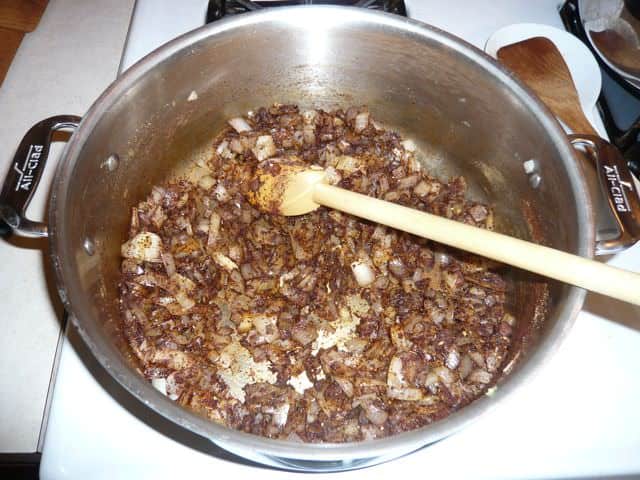
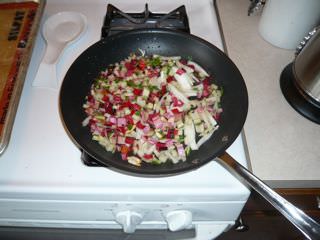
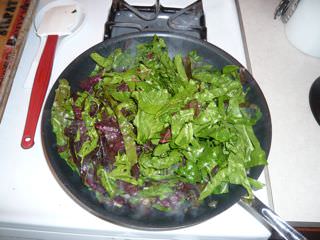
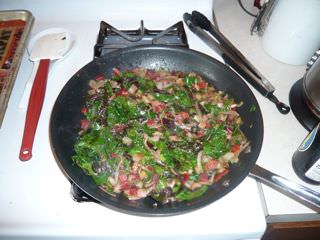
6. Cook the vegetables: Add the 2 tablespoon oil to the pan, and let heat on high for 1 minute, or until the oil is shimmering. Add the onions, let sit for 1 minute (or until well browned on one side), then push to the edge of the pan. Add the peppers to the middle of the pan, and let sit for another minute, or until well browned. Stir the onions and peppers together, then cook, stirring occasionally, until they are crisp-tender, usually about another minute.
7. Cook the garlic: Make a hole in the center of the pan, and add the garlic-oil mixture. Let sit for 30 seconds, or until you start to smell the garlic cooking. Mix into the rest of the vegetables.
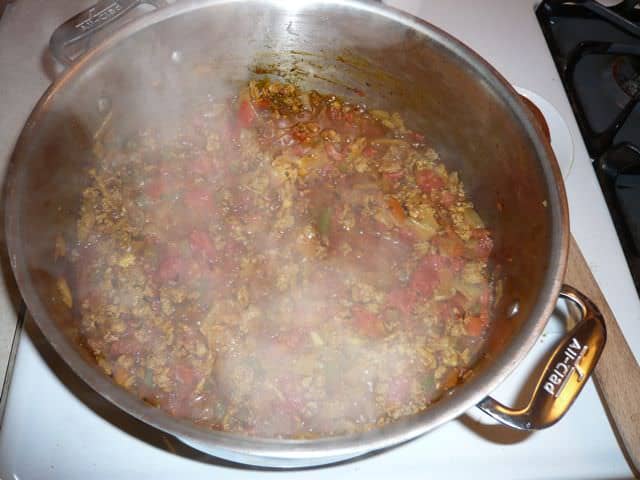
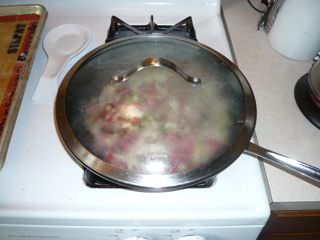
8. Sauce: Add the reserved chicken with its juices into the pan, stir to combine, then pour the sauce into the pan, stir to combine, and let cook for another minute or two, until the sauce is bubbling.
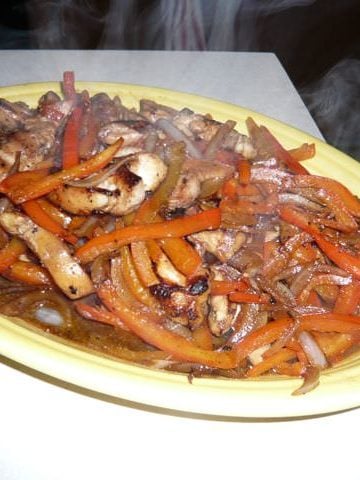
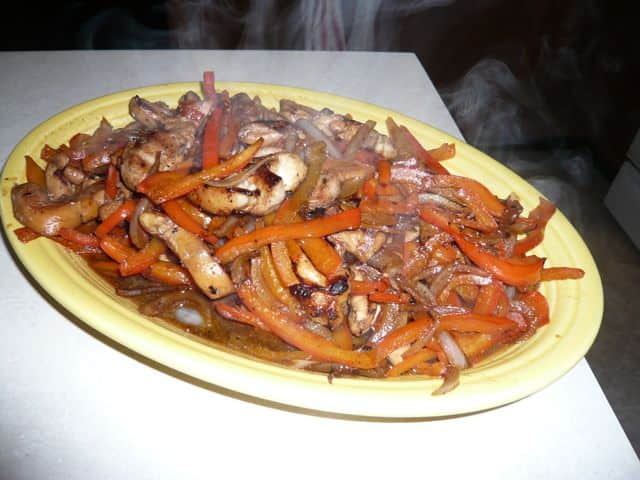
9. Serve!

Ready to serve!

Serving Suggestions:
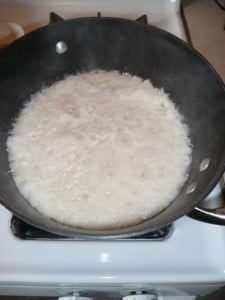
White Rice
Vegetable side

Variations:
*Extra quick sauce: skip the sauce above, and use 2 tablespoon hoisin sauce and 2 tablespoon soy sauce, whisked together. (Or, just use all hoisin sauce).

*In fact, for the ultra-quick version: Buy pre-cut meat. Buy only ¾lb chicken, so you don't have to cook two batches. Skip marinating the meat. Use the "extra quick sauce" from above. Mince your garlic with a garlic press (Don't use the pre-chopped stuff, it's awful). Buy your peppers and onions pre-sliced from the salad bar at your grocery store.
*Extra flavor aromatics: To the garlic/oil mix add 1" ginger root, peeled and grated or minced, and 2 scallions, sliced thin. (I do this when I have them, but I didn't when I was making this recipe).
*I prefer chicken thighs for this recipe, but chicken breast is fine.  So is pork loin or pork tenderloin.  You can use lean beef as well, but I think the sauce works better with chicken or pork.

Notes:
*Cook in a nonstick skillet instead of a wok. American stoves don't produce enough heat to brown anything in the small, flat bottom of a real wok. If you have a real wok burner, and a carbon steel wok from China, then go for it!*
*But - if you have all that, why are you reading THIS recipe? You already know what you're doing!
*Nonstick cookware safety: Don't heat your nonstick cookware to temperatures over 500*F - it may start to break down, and release harmful gases at that point. That's why we add oil to the pan - it starts to smoke between 350*F and 450*F, giving you a visual guide to when the pan is hot enough to use.

*I make this recipe so often that I went out and bought an All-Clad 13" nonstick french skillet to cook it in, so I don't have to do the chicken in two batches.  The extra space in the pan is great, but the angle on the handle makes this large pan really hard to hold.  I had to carefully adjust it* to make it work for me.
*I put the handle on my kitchen island, and leaned on the pan until it bent down to the right angle.  I can't believe I had to do this to something this expensive...but it worked!
*If your kids are really picky, skip the onions and peppers, but I think they add a lot of flavor to the dish. My kids are usually OK with picking the chicken out of the yucky vegetables.
Other recipes:
Velveted Chicken Stir Fry

Inspired by various sources.   See my stir fry post for the list.  That being said, when I do a weeknight stir-fry, I give a quick thanks to Pam Anderson for introducing me to the technique.

Rotisserie Turkey

December 27, 2008 by Mike Vrobel 10 Comments

Rotisserie Turkey, off the grill and on a platter
Rotisserie Turkey
Rotisserie Turkey

This recipe was inspired by Dan at work. (Hi, Dan!) I make Rotisserie Chicken all the time, but I've only done rotisserie turkey once, years ago. Dan asked me how to do it for his Thanksgiving dinner, and I gave him the outlines of my basic poultry rotisserie technique. Then, my local Acme grocery* had a $0.69/lb sale on turkey, and I knew where my next blog post was coming from!
1I always think I'm Wile E. Coyotoe when I shop there. Go here for the link to the Original Acme mail order catalog. [UPDATE: That link seems to be dead. Try this substitute instead.]

As usual, I had to deal with the weather for this blog. Today's forecast is for a high of 12*F, with wind gusts between 30 and 50 miles per hour. I almost didn't do the turkey on the rotisserie because of this!2But...I'm either too stubborn, or not smart enough to know when to quit.

Recipe: Rotisserie Turkey

Equipment

  • Grill with Rotisserie attachment (I use a Weber Summit with an infrared rotisserie burner. Here is the current version of my grill.)
  • Aluminum foil drip pan (9"x13", or whatever fits your grill. I use an enameled steel roasting pan.)
  • Butchers twine
  • Instant Read Thermometer
My original photo for this post. Yikes, did I need better lighting...

Notes

  • Remember to check the basic technique: Rotisserie Poultry. Total cooking time was 2 hours 30 minutes, but I should have stopped at 2:15 - it was at 155*F at 2:15, but at 170*F at 2:30 when I took it off the grill. It still tasted great, though - the wet brine gives me a little cushion on the temperature.
  • The Weather. Arrgh. My grill can handle 20MPH winds, but it looks like gusts of 30 to 50 is too much. My grill blew out somewhere in the first hour of cooking. Luckily, I was checking it every half hour - I restarted the grill (after leaving it open for a couple of minutes to let it air out.) After that, I checked it every 15 minutes. I had to relight my infrared burner 3 times during the cooking, but it did a great job in spite of that.
  • And...the outdoor temperature STARTED at 12*F, it was 5*F when the cooking was done.
  • As I keep saying - be very careful when handling the spit and skewers after cooking - it's a branding iron at that point. Do NOT touch it without gloves or oven mitts
  • Save the drippings for gravy, especially if you used a gas grill. I scraped the drippings into a small pot, added one cup of homemade turkey stock, then I simmered it until it was reduced by a half. It made a great sauce to spoon over the turkey.

Related Posts:
Rotisserie Turkey with Cajun Dry Brine
Rotisserie Turkey, Dry Brined with Orange and Spices
Rotisserie Turkey Breast with Spice Rub

Inspired by:
Weber's Big Book of Grilling


Check out my cookbook, Rotisserie Grilling.Everything you could ask about the rotisserie,
plus 50 (mostly) new recipes to get you cooking.

It's a Kindle e-book, so you can download it and start reading immediately!


*Enjoyed this post? Want to help out DadCooksDinner? Subscribe to DadCooksDinner using the RSS or Email options on the right, link to this post from your blog, recommend DadCooksDinner to your friends, or buy something from Amazon.com through the links on this site. (Like my Rotisserie Grilling cookbook...)

Rotisserie Chicken

December 26, 2008 by Mike Vrobel 11 Comments

Rotisserie Chicken, Dry Brined with Rosemary, Lemon, and Garlic | DadCooksDinner.com
Rotisserie Chicken
Rotisserie Chicken

Roast chicken is my comfort meal, the first thing I want to cook if I've been away from home for a long time. I use many different methods, but Rotisserie Chicken is my favorite. 3Diane LOVES the chicken wings that this recipe gives you. I usually cook two chickens, just so I might get one of the wings. Rotisserie cooking gives you the crispiest skin (my favorite part!), while leaving the meat tender and juicy.
The only problem with this recipe is that it's even more weather dependent than grilling usually is - you need a dry day, so you don't short out the rotisserie motor. Or electrocute yourself. I was having my usual luck with the weather when it comes to this blog - the forecast was for a high 40*F, intermittent rain, and a wind advisory of 20 to 30 MPH.*
*I was sitting in front of my computer, playing amatuer meteorologist, and using my fingers as a high-tech measuring device to estimate the duration of rain bands. "If I wait until this band of rain passes, I've got (uses fingers on weather channel radar animation) about a two hour window. Now as long as the wind doesn't get above 20mph, I should be OK."

Recipe: Rotisserie Chicken

Inspired by: Russ Parsons: It's Roasting Outside, LA Times

Equipment

  • Grill with Rotisserie attachment (I use a Weber Summit with an infrared rotisserie burner. Here is the current version of my grill.)
  • Aluminum foil drip pan (9"x13", or whatever fits your grill. I use an enameled steel roasting pan.)
  • Butchers twine
  • Instant Read Thermometer
  • Pot or other container that can hold two chickens. I use a Rubbermaid 8 quart food service container that I bought at Sam's club, but a large stockpot will work as well.

Brine chicken:

Truss the chicken.

Skewer chicken:

Cook the chicken:

Notes:
Variations on this recipe. The recipe above is the essentials of the dish, which is how I prefer to make it. You can change things up a bit by doing any of the following:

  • Put half a lemon and herbs (a bunch of the "Simon & Garfunkel" herbs -whatever you've got of parsley, sage, rosemary and thyme) in the cavity before trussing the bird
  • Cut a sprig of Thyme in half, and put each half under the skin of the breast. (Work your finger under the skin carefully, to make sure you don't tear it, then slide the thyme sprig in.)
  • BBQ rub - Sprinkle barbecue rub all over, including in the cavity, and rub some under the skin of the breast as described above.
  • Weather: My Weber Summit 650 worked just fine in 20 MPH winds, with a light rain through some of the cooking. I had to use a mixing bowl as a rain hat to keep the rotisserie motor dry.

Related posts:
Rotisserie recipes on DadCooksDinner
Rotisserie poultry basic technique


Check out my cookbook, Rotisserie Grilling.

Everything you could ask about the rotisserie,
plus 50 (mostly) new recipes to get you cooking.

It's a Kindle e-book, so you can download it and start reading immediately!


*Enjoyed this post? Want to help out DadCooksDinner? Subscribe to DadCooksDinner using the RSS or Email options on the right, link to this post from your blog, recommend DadCooksDinner to your friends, or buy something from Amazon.com through the links on this site. (Like my Rotisserie Grilling cookbook...)

Basic Technique: Rotisserie Poultry

December 26, 2008 by Mike Vrobel 23 Comments

This is my basic technique for rotisserie cooking poultry. It produces the best whole birds I've ever cooked. They look gorgeous, and have the best crispy skin I have been able to make. The meat turns out juicy and tender, due to the brining. I've used this technique on chicken, turkey and duck*, and I am going to try it with cornish game hens in the near future.
*Rabbit season! Sorry, had to shout out to Daffy.

Basic Technique: Rotisserie Poultry

[Update 2013-01-24: Here's a video overview of the entire process.]

Video link: Rotisserie Grilling Two Chickens - [YouTube.com]

Equipment:

  • Gas or charcoal grill with rotisserie attachment (I'm a Weber fan; my jumbo Weber S-650 gas grill with infrared rotisserie burner is here, and my Weber Kettle with rotisserie attachment is this Weber charcoal kettle rotisserie).
  • 9x13 aluminum foil drip pan
  • Butcher's twine

Directions:

1. Brine - Brining works wonders on poultry, by using osmosis to pull salt and water into the meat of the bird. (What? Click here for an explanation.) I use two strengths of brine, depending on how much time I have, and the size of bird being cooked.

*Fast brine, for smaller birds (say, up to 5 lb chickens). Dissolve ¼ cup table salt + 2 tablespoon sugar per quart of water in a container large enough to hold your birds. Brine in the refrigerator, covered, for 1-8 hours, about 1 hour per pound of bird. I usually make two quarts of brine for two four pound chickens, and brine them for 4 hours.

*Slow brine, for larger birds (turkey). Dissolve ½ cup table salt + 2 tablespoon sugar per gallon of water. Brine for 8 to 14 hours, about 1 hour per pound of turkey. I usually make two gallons for a 14 pound turkey, and brine for 12 hours. (I use my 12-Quart stock pot as the container when I brine a turkey; a 14lb bird will just fit in it.)


*Dry brine, [added 5/29/2009]. Use ½ teaspoon kosher salt per pound of bird. Sprinkle evenly over the entire bird. Make sure you get salt on the entire inside of the cavity, and work some under the breast skin by loosening it gently with a finger, then rubbing it in there. (for a 4lb bird, I sprinkle ½ teaspoon on the top, ½ teaspoon on the bottom, ½ teaspoon in the cavity, and then loosen the breast skin and work some salt on the breast. I sprinkle any left over on the top again.) Put the bird on a sheet pan or in a roasting pan, and let it rest in the refrigerator at least overnight. For a chicken, you can do this as early as 6 hours before cooking, and up to 2 days.  For a turkey, 1-3 days ahead of time is best.
*The dry brine works like the wet brine; first the salt pulls the juices out of the bird, but then osmosis takes over and the juices are re-absorbed, pulling the salt with them into the bird. The disadvantages are that you don't get the extra juiciness in the meat that the absorbed water gives you, and that it takes longer. The advantage is that the skin dries out, so it will crisp up better, and (if you start with a high quality bird) it will taste "chickenier". If that's a word.

2. Truss the bird. Drain the poultry, pat dry, stuff the cavity with any aromatics (optional), then truss tightly.  See my video, below, for how to truss a bird.  This technique works on all birds, not just turkeys.  I use a turkey in the video because it is easier to see the technique on a larger bird.  (And because it was Thanksgiving.)  Trussing is important - if anything is loose and flopping around on the rotisserie, it may wind up in the fire.
*Everyone seems to have their own way of trussing.  If you don't like mine, try these: Alton Brown's video is here, and here is one from Chow.com.)

3. Skewer the bird. Put the first fork on the spit, and tighten securely. Then put the poultry on, skewering through the legs first. Spear the legs with the prongs of the fork - you want them to conduct heat into the legs and thighs of the bird. Then, put on the second fork, with the prongs "under" the bird - you want the prongs to be spearing the backbone side of the bird, not in the breast - you want the breast to cook slower. If I'm doing two or more birds, I try to alternate them, like in the picture below - it seems to keep them more balanced. I changed my mind on this - it seems to work better when both birds are facing the same way, nose to butt. If you're cooking two birds with one pair of forks, it holds them together better.

4. Set up your grill. Remove the grates, and attach the rotisserie motor to its bracket, and set the grill up for indirect grilling on high heat.

*For a charcoal grill (like a Weber kettle with a Weber Charcoal Kettle Rotisserie): light a full chimney of charcoal, wait until it is just covered with ash, and then set up for "indirect" cooking by putting the aluminum drip pan in the middle of the charcoalgrate, and pouring the charcoal in even piles on both sides of the pan. (A fist sized, soaked chunk of smoking wood on the charcoal is good as well.)

*For a gas grill with 3 or more burners (like a Weber genesis with the Weber Gas Grill Rotisserie attachment): Set up for indirect cooking by turning the outside burners on the grill to high, and leaving the inner ones off. Put the aluminum drip pan over the middle of the grill, over the unlit burners. My Weber Genesis had 3 burners, so I would turn burners 1 & 3 to high, and leave burner 2 off. If you had 4 burners, you'd have 1&4 on, 2&3 off. And so on.
*For a gas grill with an infrared rotisserie burner (like my Weber Summit 650): Light the infrared burner by turning knob to "light", and once it catches, hold down the knob for 20 seconds, to let the burner get glowing hot. Leave the infrared burner on high. Then, set up the regular burners for indirect heat like you would with a regular gas grill. On my Weber summit 650, that means turning burners 1 and 6 to high.
For any grill, your goal is high indirect heat, with temperatures in the grill between 400*F to 500*F. If your grill can't at least get to 350*F doing indirect heat, it's not powerful enough for rotisserie cooking. On a gas grill, if you need to, adjust the burners that are on to get in that temperature range. On a charcoal grill, that's where you should be with a full chimney of charcoal.

Don't forget the aluminum foil pan in the "indirect" part of the grill; you will get a lot of dripping fat and you need something to catch it. Remember -no grates on the grill for this method - you need the space for the spinning birds.*Special note about setting up a grill for turkey: Because a turkey is so large, you can use directional heat to cook the legs faster than the breast. (This is a good thing, as you'll see below - you want the legs cooked more than the breast.) Try to concentrate the heat around the drumstick end of the turkey. In my charcoal grill, I make a "U" of charcoal on one side of the grill, put the drip pan inside the U, and point the breast towards the open end of the U. For my Weber Summit, I turn my smoker burner and burner 1 to high, leave the infrared rotisserie burner on medium, and leave the rest of the burners off. Then I spit the turkey so the breast is facing burner 6, and the legs are facing the lit burners. (If you don't have the smoker burner, go with burners 1 and 2. If you have a Weber Genesis, with burners that run the length of the grill, you'll have to live with even heat.5. Start cooking: Put the skewer in the mounting bracket, seating the point end in the motor, and turn on the motor. Make sure the bird is spinning freely, then adjust your drip pan to make sure it is under the bird(s). Close the lid - you want to trap the heat in the grill, so it roasts from the trapped heat as well as browns from the direct heat of the flames.

6. Cook the bird. It takes 45 minutes to an hour for a 4 lb chicken, and 2 to 2.5 hours for a 12 pound turkey - adjust the times up or down based on the weight of your bird. Rotisserie cooking tends to be faster than "regular" grill roasting, so start checking if the bird is done at the early end of time frame. I use an instant read thermometer to check for doneness. I'm looking for 155*F to 160*F in the breast, measured at the thickest part of the meat. At that point, the thickest part of the leg should be about 170*F to 180*F, and we're done cooking.

7. Remove and serve. Remove the spit from the grill. Make absolutely sure you are wearing gloves or use oven mitts - the spit will be a branding iron at this point. I get the birds off the skewer as soon as I can, so the hot skewer doesn't keep cooking them. Remember, the knobs on the forks are going to be hot as well! Don't try to turn them without your gloves on, or use pliers or a fork. Let the poultry rest for 15 minutes (at least - 30 would be better), then carve and serve!

Equipment:
I'm a Weber loyalist, so I think these are the best options:

  • For best results - use a charcoal grill: Weber Performer 22.5" Kettle with work table with Weber 22.5" Charcoal Kettle Rotisserie
  • If you insist on gas, or insist on grilling through a Cleveland winter: Weber Genesis Propane Gas Grill with the Weber Gas Grill Rotisserie
  • If you need to intimidate your neighborhood: Weber Summit S-650 Propane Tuck-Away Rotisserie Grill

I've owned all three of these, and #1 and #3 are what I currently own and use. I really prefer to use charcoal for rotisserie cooking. There's something about the results over a live fire that I can't seem to duplicate on a gas grill.

When I had the Weber Genesis, I would use the rotisserie with it, but the results were never as good as the charcoal grill. Once I upgraded to the infrared rotisserie burner on the Weber Summit*, I found an acceptable substitute for charcoal. It's not quite as good, but it's pretty darn close. And, since it's December right now, you're going to see a lot of pictures of #3 for the next few months.
*The Summit 650 is also a monster - it's huge! I've cooked 3 chickens simultaneously, and it felt like I could have squeezed on another one if I needed to.Notes:
*Brining. As I say above, I use the fast brine for everything up to the size of a chicken, and the slow brine for turkey. That being said, you can slow brine chicken (buy 4lbs+ chickens and brine them for 8 hours), and fast brine turkey (12lbs turkey, no more than 8 hours - the concentrated brine might make the bird too salty if you wait longer than that). I've brined chicken for as little as an hour with the fast brine, and had good results, but I prefer the results with 4 hours in the brine. I would brine cornish hens for 1-2 hours, and duck for 1-4 hours.
*Brine ingredients - Usually, I use table salt (non-iodized) and brown sugar. Kosher salt and regular, granulated sugar work as well. If you use Kosher salt in the brine, double the quantity - kosher salt is less dense when measured by volume, so you need to use twice as much.
*Hot spit. Be careful! Please, learn from my mistake on this one - I think I burned the fingerprints off my left pointer finger and thumb. I could have been a two-fingered cat burglar, and no policeman could have figured out it was me!
*Other than by the smell of roasted poultry at the crime scene.Related Posts:
Click here for my other rotisserie recipes.Inspired by:
Russ Parsons: It's Roasting Outside [LA Times]

Jeffrey Steingarten: It Must've Been Something I Ate: The Return of the Man Who Ate EverythingSteven Raichlen: How to Grill: The Complete Illustrated Book of Barbecue TechniquesCook's Illustrated: The Best Chicken Recipes, among countless others


Check out my cookbook, Rotisserie Grilling.Everything you could ask about the rotisserie,
plus 50 (mostly) new recipes to get you cooking.It's available in paperback and Kindle editions.(You can download the Kindle edition and start reading immediately!)

*Enjoyed this post? Want to help out DadCooksDinner? Subscribe to DadCooksDinner using the RSS or Email options on the right, link to this post from your blog, recommend DadCooksDinner to your friends, or buy something from Amazon.com through the links on this site. Thank you.

Tomatillo Salsa

December 13, 2008 by Mike Vrobel Leave a Comment


This recipe is overdue.  The pictures for this recipe are left over from last summer - our CSA gave us 7 pounds of tomatoes or tomatillos, our choice. So, I picked out 4.5 pounds of tomatillos, and got to work!
*2009 Update - It's been a bad year for tomatoes.  We're only getting 5.5 pounds a week.  "Only" 5.5 pounds.  The folks over at the Crown Point CSA are too good to us.

Recipe: Tomatillo Salsa

Equipment:

  • Food processor


Ingredients:

  • 2 pounds fresh tomatillos, husked and rinsed
  • 3 cloves garlic, peeled
  • Leaves from ¼ bunch of fresh cilantro (Just grab a hunk of cilantro leaves, and rip them off the bunch)
  • 1 tablespoon Chipotle en adobo paste (Or 3 jalapeno peppers, minced)
  • ½ medium red onion, diced
  • Juice of 1 lime
  • 1 teaspoon sugar (optional)
  • Salt to taste

Directions:
1. Cook the tomatillos: Husk and rinse the tomatillos. Place on a sheet pan (you need a lip to catch any juices) and broil them on high, about 6 inches from your broiler, until they turn olive green, and start to brown in spots (About 10 minutes total, for my broiler). Remove from the oven and let stand while you prep the rest of the salsa.

Tomatillos, browned on one side

2. Build the tomatillo salsa in your food processor: Mince garlic by putting it in the food processor, and running it until it is completely chopped.  Add the chipotle paste and cilantro leaves, and pulse again until chopped.*  Add the red onion, and pulse a couple of times to combine.  Pour the tomatillos and any juices on the sheet pan into the food processor, then process for about 30 seconds or until well blended.
*Do not inhale when you open the food processor, after you've pulsed the chipotle. Trust me on this one!


Chopped onions and peppers...or a chemical weapon?


3. Season to taste: Add the lime juice, and pulse to stir. Then, taste for seasonings. I add salt at this point, and usually some sugar if the tomatillos are really tart. Pulse to stir.


4.5 lbs tomatillos yields 2 quarts of salsa

Variations:
*Make this recipe with fresh peppers instead of chipotle en adobo.  While I like the smoky taste that the chipotle adds, if your CSA gave you hot peppers with your tomatillos, use them!  Put them on the pan with the tomatillos so they get nice and browned, then trim the stems off and put them in the food processor when you would add the chipotle paste.  Pulse until they're well chopped.

Notes:
*When I made this recipe, I doubled it to use up all the tomatillos. My food processor could only handle this batch size - I wound up making it in two batches.

*Really, trust me - do NOT take a deep breath right when you open the food processor full of chopped onions and chipotle. To quote Alton Brown (my hero): "You'll mace yourself! And that's not good eats!"

*You can substitute 32 ounces of canned whole tomatillos for the fresh ones, and I usually do in the winter. Instead of step 1, just drain the tomatillos; they're ready to go straight from the can. This subsitution, and using the food processor to do most of the work, makes this recipe very fast to put together - 15 minutes end to end, maybe less.

*I like the smoky taste of chipotle peppers in this recipe, but you can substitute a fresh jalapeno or serrano chile instead. I'd brown it with the tomatillos, stem it, then mince it in the processor when you would have added the chipotle.

*Leftover salsa (or extra, if you've got 4.5 pounds of tomatillos) can be saved in the refrigerator for about 4 days, or frozen for a few months. I have one last quart bag in the freezer that I'm going to use this week.

*If you don't have a food processor, you can do all the mincing by hand, but the tomatillos are going to be a mess - they spread liquid everywhere.

*My favorite time to have this recipe is with Chorizo Y Papas, but it goes well with many different Mexican or Tex-Mex meals. It goes really well with pork; I use it when I make slow cooker shredded pork, with carnitas, and with roasted pork loin. Also, I love it with refried black beans. Darn, I just realized that I have a lot of recipes I need to put up here!

Questions?  Comments?  Better ideas?  Add them in the comments, below.

Related posts:
Quick Red Salsa recipe
Pickled Chile Peppers recipe
Grilled Corn recipe

Inspired by: 

Meredith Deeds - The Take-out Menu Cookbook and her cooking class at WRSOC
Rick Bayless - Salsas That Cook

Turkey Stock Shootout

December 7, 2008 by Mike Vrobel 2 Comments

Pressure cooker on the left, stock pot on the right


I've been a fan of making my own turkey stock since...well, since my dad would throw the turkey carcass in a big granitware pot the day after thanksgiving, for the makings of turkey soup.

I've come to agree with Michael Ruhlman's comments about canned chicken broth.  To sum up: Don't do that to your food! Make real stock, or use water instead! For a while now, I have been making my own chicken stock.  I roast a couple of chickens once a month or so, and make stock in my pressure cooker.  It's really good, and much better than Swanson's low sodium broth.

But, recently, Ruhlman threw down the gauntlet:

"Because I've made a fuss about making your own stock...I figured rather than trying to convince people how easy it is, I should encourage everyone who likes to cook, to make it more difficult and time consuming, and therefore more satisfying and enriching.  Perfect your stock: clarify it." [ruhlman.com]

What?  My pressure cooker stock isn't good enough?  I know it comes out kind of muddy looking, because it's boiling away at 250*F in there, but...it's good!  It's so much better than canned chicken broth, that I refuse to use Swanson's any more.  And, I have eaten the chicken noodle soup (and tortilla soup, and thai coconut soup) to prove how good it is.  I'm on the side of the good and the pure with this, right?  Um...

 I held out for a while, but then I found myself wondering - what if he's right? Then, Thanksgiving conspired against me.*
*Really, it's all Thanksgiving's fault. Not my OCD personality. That has nothing to do with it.

On Thanksgiving, I wound up not cooking my own turkey!  We were eating at my brother-in-law's house.  I was freaked out - no turkey soup?  It's my favorite part of the leftovers.  And I wouldn't get to make any?

I wound up in the kitchen at my brother-in-law's, helping with the turkey.  Big surprise, huh? Onward...I asked my sister-in-law, Rena, if I could have the carcass "if they were just going to throw it out after dinner."  She said "well, I won't use it, but I'll have to ask my mom."  It took me a few seconds to figure out that she was messing with me - her parents are from India, and are vegetarians.*  I had my carcass!
*The fact that she was laughing may have had something to do with my figuring it out.

Having eaten one thanksgiving dinner that couldn't be beat, we stopped by my parent's house, just in time for me to wind up helping cook their turkeys.  (Again - big surprise, huh?)  Multiple birds were being cooked - one in the oven, one on the grill, one in a electric roaster in the garage, and another "breast only" in the oven.*  I was in charge of the carving station, and was putting the carcasses in a big pot for my Dad to make his soup later.  When I was done carving all four birds, my dad asked me "do you want the bones?"  My eyes gleamed as I took the big pot full of turkey bones to our van.
*My mom ran out of turkey last year. She gets a little twitchy when she doesn't have enough food to feed everyone, and then give them something to take home with them.  So she may have gone overboard this year.

The next day dawned, and I realized - I have FOUR AND A HALF turkey carcasses!  Now what am I going to do?  And then, while surfing the web...Ruhlman!   He had a blog entry on how to make Turkey stock, his way.  Now I knew what to do.  Is my pressure cooker stock good enough?  Is Ruhlman's really worth the extra time?  Stay tuned, and find out.

(This seemed like a good idea at the time, but it resulted in a HUGE blog post.  I had to break it up into component parts.  Please link through to the sections you care about.  OK, humor me, pretend that you care about some of them.)


Pressure cooker turkey stock

Ruhlman's turkey stock

Turkey stock for the non-obsesssed

Straining stock

Turkey soup - putting all that stock to work


The end result, after being chilled overnight, and having the fat cap scraped off. Look at the gelatin in the pressure cooker stock on the left. But the taste...read on.


And the winner is...
I went into this thinking - Ruhlman's stock is good, but it's not that much better, is it?  I know he dedicated a whole chapter in his book to the importance of properly made stock, but is it really that much better?  

I had two taste tests.  Test one was coffee mugs with straight stock, warmed, with a pinch of salt. The second with the turkey noodle soup recipe, above. And...the pressure cooker stock was good. Really good. I was reminded why I've stopped buying the cartons of Swanson's chicken broth - the difference is amazing.  And the gelatin -  the stock really looks like jell-o.  I chortle whenever I use it to deglaze a pan, thinking of how good it will be.
But Ruhlman's stock blew me away.  It was so much...lighter, brighter, fresher tasting.  I went back for seconds on the soup.  Then thirds. Then fourths. Then I ate the bowl that Ben didn't want. I think I've been converted.  While I'll still make my pressure cooker stock, since it's a quick and easy preparation after Sunday dinner, I will definitely be making stock the Ruhlman way more often.  I'll just have to freeze my carcasses until the next weekend, to have the time.
I can't believe it; I've become...a culinary perfectionist! But he'll never convert me to clarifying my stock into a Consommé. Or veal stock. That's just too much work.*
*Isn't it? Oh, lord, I'm weakening already.


[Update 11/2010: Haven't read enough about turkey stock and pressure cooking yet?  Check out this post for why I should re-run this test: Review: Kuhn Rikon 12 Quart Family Stockpot Pressure Cooker]

Ruhlman's book:
The Elements of Cooking: Translating the Chef's Craft for Every Kitchen

My pressure cooker:
Fagor Duo 10-Quart Pressure Cooker/Canner

My stock pot:
All-Clad Stainless 12-Quart Multi Cooker with Steamer Basket

Turkey Noodle Soup

December 7, 2008 by Mike Vrobel 6 Comments


Recipe: Turkey Noodle Soup (aka turkey stock shootout - the proving grounds)


Ingredients:

  • 1 tablespoon vegetable oil
  • 1 medium onion, diced
  • 1 medium carrot, peeled and diced
  • 1 celery rib, trimmed and diced
  • 1 sprig fresh thyme, or 1 teaspoon dried thyme
  • 2 quarts Turkey stock
  • 2 cups dried egg noodles (I like the "large" size, but I'll use whatever I've got on hand)
  • Leftover turkey, shredded into bite size pieces (optional; I prefer the dark meat, and add about a cup)
  • salt and pepper to taste
  • dash or two of hot sauce (optional, to taste)

Directions:
1. Heat the oil in a 6qt or larger dutch oven over medium-high heat, until shimmering. Add the onion, carrot, celery, and thyme, and saute until just starting to brown - about five minutes.

2. Add the stock, raise the heat to high, and bring the pot to a simmer.

3. Add the noodles and turkey, return the pot to a simmer, and cook for ten minutes (or for the length of time specified on the bag of noodles)

4. Salt and pepper to taste - this is CRITICAL! Soup without salt tastes watery, and there isn't much in the stock we made, so don't be surprised if you add what seems like a lot of salt to make it taste good.

5. (optional) Add a few dashes of hot sauce, and taste it again. The vinegar and slight spiciness of the hot sauce picks up the flavors for me. If you really don't want to add heat, just add a splash of cider vinegar or red wine vinegar instead.

Notes:
*The tasting part of the recipe is the key piece. Does it seem bland? Add salt. Need a little "something" - add some hot sauce or a splash of vinegar, or maybe some fresh lemon - a touch of acidity and sour flavor often helps. Soup will usually need some last minute adjusting - don't forget this step!

*Don't add too many noodles! They absorb a large amount of stock, and if you add half a package of dried noodles, you'll wind up with noodle stew. All the stock will be absorbed! Which tastes good, but it's not turkey noodle soup.

*Turkey Rice soup is another good variation - replace the noodles with an equal amount of leftover rice. (Did I mention that we always seem to have some lying around?)

*Replace the word "Turkey" with "Chicken" in the recipe, and you have chicken noodle soup.

Questions?  Comments?  Other ideas?  Leave them in the comments, below.

Related posts:
Click here for my Turkey Stock Shootout.  This post is a part of that series.
Click here for Pressure Cooker Turkey Stock, if you want your turkey stock fast.
Click here for Turkey Stock Done Right, if you want the best turkey stock (or don't have a pressure cooker).

Adapted from:
Cook's Illustrated: The Best Soups and Stews (Best Recipe) cookbook.

Straining stock

December 7, 2008 by Mike Vrobel 4 Comments


Straining the stock (Adapted from Alton Brown)

This is the quick and easy way to strain stock that I learned from my hero, Alton Brown. It makes straining your stock a one-step operation - you are filtering out the big stuff and the little stuff all at once, resulting in a pot full of strained stock.


Equipment:

  • Collapsible metal steamer (like This)
  • fine mesh strainer
  • cheesecloth, damp
  • 2 - 3 clothespins (or other clip)
  • 12" tongs
  • Trivet (or large oven mitt)
  • Oven mitts (or something to keep your hands protected with the hot pot of stock)
  • Ladle (optional, but useful for a very large pot)
  • Largest pot (or pots) you have that aren't full of stock

Ingredients:

  • Pot full of just finished stock

See the picture for the setup: Put the pot you're going to pour into in your sink. Clip the damp cheesecloth into the fine mesh strainer, and put it over the target pot. (Or, if you have one, use a chinoise instead).
Put the pot full of stock on the trivet, on the counter right next to the sink with the pot. (You're going to be pouring, so they should be close.) Then (and if there's a trick to this, this is it), take the collapsible steamer and drop it, upside down, into the stock pot, spreading it out so it meets the edge of the pot.

Put on the mitts, grab your tongs, and grab your pot. Use the tongs to hold the steamer in place while you pour your stock through the cheesecloth/strainer into your target pot. Voila! You're done. And, if you don't have a big enough pot for all the stock, you can easily stop, switch out the pot, and put a new one in there.

Now, if you live in Northeastern Ohio, and it's November, you can usually do what I did - just put the stock outside, on the table on your deck, and leave it there overnight. Otherwise, I cool it down as much as I can by taking the pot of stock out of the sink, dumping my icemaker's tray in the sink, adding water, and then putting the pot back in. I let it sit there until it's cold, or until I want to go to bed, whichever comes first; then I put it in the fridge for its overnight rest.
Notes:
If this doesn't make sense, watch Good Eats, Episode: True Brew IV, Taking Stock - you'll get to see it in action.

Questions?  Comments?  Other ideas?  Leave them in the comments, below.

Related posts:
Click here for my Turkey Stock Shootout.  This post is a part of that series.
Click here for Pressure Cooker Turkey Stock, if you want your turkey stock fast.
Click here for Turkey Stock Done Right, if you want the best turkey stock (or don't have a pressure cooker).

Turkey Stock done right

December 7, 2008 by Mike Vrobel 6 Comments


Recipe: Ruhlman's Turkey Stock Done Right


(via: Ruhlman.com)

Equipment:

  • 12 quart stock pot (or the largest pot you have that you can fit in your oven.)

I have this: All-Clad Stainless 12-Quart Multi Cooker
And I want this: All-Clad Stainless-Steel Stockpot - 16 quart

Aromatics!

Ingredients:

  • Carcass from one turkey, broken into pieces that will fit in your pot
  • 6 quarts cold water (or more to cover)
  • 1 large onion, peeled, trimmed and halved
  • 1 celery rib, cut in half (optional)
  • 1 large carrot, peeled and cut in half (optional)
  • 3 cloves garlic, skin on, crushed (optional)
  • 1 teaspoon salt
  • 1 teaspoon whole black peppercorns
  • 1 bay leaf
  • 1 sprig fresh thyme
  • 1 half a bunch of parsley stems (optional - skipped, since I didn't have them)

Turkey!

Directions:
1. Turn oven to 180*F (or as close as you can get it, if your oven doesn't go that low).

2. Put carcass in pot, and add the cold water - you want to cover the carcass by 1"

3. Put pot on high heat, bring to a bare simmer, and "Skim off anything that rises to the top that you wouldn't want to eat in a soup". You do not want the stock to boil!

4. Put the pot in the 180*F oven for five hours (4 to 6 hours is OK).
[Update 11/30/09]: Ruhlman now says 8 to 16 hours; five has been working well for me, but I'll try the longer time and update the recipe with my results.]

5. 1 hour before cooking is done, add the aromatics (all the other ingredients). Continue cooking in the oven for another hour.

6. Strain stock into large pot, let rest until room temperature, cover, refrigerate overnight. The next day, remove the fat cap from the stock, and use, refrigerate for up to 4 days, or freeze.
*See my stock straining setup here.


...180*F for 4 hours....


Notes:
*Recipe took 6.5 hours, end to end. About 5 minutes to break up the turkey, fill the pot with water, and get it on the stove. 1 hour to come to a simmer, and skim. 5 hours of cooking in the oven. Then, say about 15 to 20 minutes to strain broth.

*You can cook this on the stovetop instead of in the oven, but it's easier to maintain that low of a temperature in the oven. If your pot will fit, do it in the oven.

*Speaking of which...make sure your pot will fit in the oven! I had to remove all the racks except one, and put it on the lowest level.

*If your pot is big enough, you can scale this recipe up - just maintain the ratio of one turkey carcass plus aromatics to 4 quarts of water. I was able to fit one whole carcass, plus the "breast only" carcass in my 12 quart All-Clad stock pot. If I *only* had the 24 quart, I could have made more stock. (He says with an acquisitive gleam in his eye...) But, see the previous note. I brought the carcasses home in a large, aluminum stock pot, but it was too tall to fit in the oven.

*This is a very easy, hands off recipe....especially if you have a Polder Style Probe Thermometer, for step 2. Set it to go off at 180*F, and then you don't have to watch the pot boil. I had close to 12 quarts of stuff that had to be heated up, so it took nearly an hour for it to come to a simmer. (Which was OK - I made the pressure cooker stock while I was waiting.) Then, I skimmed it, popped it in the oven, and went away for four hours. Come back, add aromatics, do something else for another hour, and you're done! Or, at least, ready for the straining part. See my follow up post for my straining method.

*Oh, and the results are GREAT!  I have a new turkey stock method.

Related posts:
Click here for my Turkey Stock Shootout.  This post is a part of that series.
Click here for Pressure Cooker Turkey Stock, if you want your turkey stock faster.
What do you do with Turkey Stock? Click here for my Turkey Noodle Soup recipe.

Questions?  Comments?  Other ideas?  Leave them in the comments, below.

Inspired by:
Thanksgiving: THE best time to make stock.  [ruhlman.com]  Thanks, Mr. Ruhlman!
[Update 11/30/09] - and Turkey Stock: Oven Method [ruhlman.com]

Pressure Cooker Turkey Stock

December 7, 2008 by Mike Vrobel 5 Comments


Recipe: Pressure Cooker Turkey Stock

(Inspired by The America's Test Kitchen Family Cookbook: Pressure Cooker Chicken Stock)

Cook time: 60 minutes

Equipment: 
8 to 10 quart Pressure Cooker (I use this one:Fagor Duo 10-Quart Pressure Cooker/Canner)

Aromatics!

Ingredients:

  • Carcass from one turkey, broken into pieces that will fit in your pressure cooker
  • 1 large onion, trimmed and halved
  • 1 celery rib, cut in half (optional)
  • 1 large carrot, peeled and cut in half (optional)
  • 3 cloves garlic, skin on, crushed (optional)
  • 1 teaspoon salt
  • 1 teaspoon whole black peppercorns
  • 1 bay leaf
  • 1 sprig fresh thyme
  • 1 half a bunch of parsley stems (optional - skipped, since I didn't have them)
  • 3 quarts cold water (or more to cover)

Carcass, broken into pieces

Don't fill your cooker over it's "max fill line" - I'm probably a little over it here...

Directions:
1. Put all ingredients in pressure cooker, and add the cold water - you want to cover the ingredients by 1"

2. Put on the lid, clamp it shut, and bring the PC up to high pressure, following your cooker's instructions. Cook at high pressure for 45 minutes.

3. Remove from the heat, and let rest until pressure releases naturally. (Or, let rest 15 minutes, then quick release pressure according to your PC's instructions)

4. Strain stock* into large pot, let rest until room temperature, cover, refrigerate overnight. The next day, remove the fat cap from the stock. The stock can be used immediately, refrigerated up to 4 days, or frozen for up to 6 months.
*See my stock straining setup here.

Notes:
* This recipe took about 2 hours, end to end. Five minutes to break up the carcass, five minutes to peel and chop the aromatics, fill the pot with water, and get it on the stove. 30 minutes to come up to pressure, 45 minutes under pressure, about 20 minutes natural pressure release, then about another 15 straining the broth. (See my follow-up post on the broth straining system).

*It produces a really, REALLY gel filled stock. I'm always amazed when I peel the fat cap off - it's like I have a pot full of Jell-o. Compare the two pictures below - the pressure cooker is on the left.


The end result, after being chilled overnight, and having the fat cap scraped off.

Look at the gelatin in the pressure cooker stock on the left.

*I was able to make two batches while I waited on the Ruhlman method - I could have fit three in if I was trying to be efficient about it. This is the strength of this method - the pressure cooker cuts the long simmering time out. I can start it with the remains of a couple of roasted chickens, and as long as I start it while we clean up the kitchen after dinner, I'll have it strained and ready for the fridge before I go to bed.

*The recipe won't scale much beyond this. The only larger pressure cooker than my Fagor is the (deep breath now):Kuhn Rikon Duromatic Family Style Pressure Cooker Stockpot 12 Quart. Kuhn Rikon is the BMW of pressure cookers, and I'm sure it's wonderful...but. It would give you only two more quarts, and it costs $400 (!). I lust after that pot, but I really, really can't justify the price.*
*And trust me, when I want to justify a purchase, I can go a loooong way.

What do you think? Questions? Other ideas? Leave them in the comments section below.

Related posts:
Click here for my Pressure Cooker Turkey Stock, Revisited recipe
Click here for my Pressure Cooker Chicken Stock recipe
Click here for my Turkey Stock Shootout.  This post is a part of that series.
Click here for Turkey Stock Done Right, if you don't have a pressure cooker.
What do you do with Turkey Stock? Click here for my Turkey Noodle Soup recipe.

Inspired by:
Fagor Duo 10-Quart Pressure Cooker/Canner
Cooking Under Pressure (20th Anniversary Edition)

*Enjoyed this post?  Want to help out DadCooksDinner?  Subscribe using your RSS reader or by Email, recommend DadCooksDinner to your friends, or buy something from Amazon.com through the links on this site.  Thank you!

Turkey Stock for people who aren't obsessed

December 6, 2008 by Mike Vrobel Leave a Comment

Recipe: Turkey Stock for people who aren't obsessed (AKA, like my Dad used to make*)

*Still does, actually...
Makes about 6 quarts of stock, but this will vary depending on width your pot, and how much you break up your carcass

Equipment:
12 Quart or larger pot (my dad has always used one like this: Granite Ware Stock Pots)

Ingredients:
Carcass from one turkey, broken into pieces that will fit in your pot (or not broken up at all, if your pot is big enough)
1 large onion, trimmed and halved
1 celery rib, cut in half (optional)
1 large carrot, peeled and cut in half (optional)
1 teaspoon salt
1 teaspoon whole black peppercorns (optional)
1 bay leaf
1 sprig fresh thyme, or 1 tablespoon dried thyme (optional)
1 half a bunch of parsley stems (optional)
Cold water to cover other ingredients

Directions:
1. Put all ingredients in granitware pot, and add the cold water - you want to cover the ingredients by one inch.
2. Put pot on high heat, bring to a bare simmer, and skim off anything that rises to the top that you wouldn't want to eat in a soup. You do not want the stock to boil!
3. Reduce heat to keep pot at a simmer, and simmer uncovered for four hours (five or six is OK as well.)
4. Strain stock into large pot, let rest until room temperature, cover, refrigerate overnight. The next day, remove the fat cap from the stock, and use, refrigerate for up to 4 days, or freeze.

Notes:
*See my stock straining setup here.

This public service announcement brought to you by...

November 19, 2008 by Mike Vrobel Leave a Comment

...my hero, Alton Brown!

Don't let holiday disorganization get you down. Be prepared!*
*Particularly with the request for the case of '57 Burgundy.

On a more serious note*, here's Alton's great video about knives. Kershaw Shun knives in particular, but there's a lot of good general info in there.**
*OK, slightly more serious.
**If you're a geek like me. It's probably Too Much Information for everyone else.

Unfortunately, I can't embed the video, so you'll have to go to Alton's website to see it.

Proud to be American - Obama family Chili

November 8, 2008 by Mike Vrobel 3 Comments


Tuesday night I was reminded of what makes our country so great*. As our president elect said in his election speech:

"Tonight we proved once more that the true strength of our nation comes not from our the might of our arms or the scale of our wealth, but from the enduring power of our ideals: democracy, liberty, opportunity, and unyielding hope."

We just made one of our nation's key mythologies true - that you can tell any child in America "If you work hard, you could grow up to be president!" I'm cynical enough that in the back of my mind, when I've told that to my own kids, I've always had the rest of the thought be "...as long as you're white, rich, and male." Now, I believe it - and more than believe it, it's actually happened. I can say without hesitation, that any American child really CAN grow up to be president, with hard work, dedication, and some luck.

*When I went on my trip to France earlier in the year, once they heard I was American, I was asked by almost everyone - who are you voting for? I was there during the Ohio primary, so I was able to answer "I'm voting for Obama, but my wife's voting for Clinton." This usually got me a laugh.  

In celebration, I'm making "Obama Family Chili".  I've talked before about the power of Chili to bring people together, and right now I'm hopeful that we really can stop all this "real america" vs "fake america" stuff and move towards being the United States of America again.  For the first time in a long time.

Recipe: Obama Family Chili


Ingredients:

  • 1 large onion, chopped
  • 1 green bell pepper, chopped
  • 1 red bell pepper, chopped
  • 5 cloves of garlic, chopped
  • 1 tablespoon olive oil
  • 1 pound ground turkey or beef
  • 1 teaspoon ground cumin
  • 1 teaspoon ground oregano
  • 1 teaspoon ground turmeric
  • 1 teaspoon ground basil
  • 3 tablespoon chili powder
  • 2 tablespoons red wine vinegar
  • 1 15oz can diced tomatoes (with juices)
  • 1 40oz can red kidney beans (or 3 -15oz can)
  • 3 cups cooked white or brown rice
  • Grated Cheddar cheese, chopped onions, pickled jalapenos and sour cream, for garnish

Directions:
1. Heat oil in a large dutch oven over medium heat. Saute onion and peppers until soft.

2. Add ground turkey or beef; cook until no longer pink.

3. Make a hole in the middle of the pot, and add the garlic and spices; cook for 1 minute, or until fragrant. Stir into the rest of the ingredients.

4. Add red wine vinegar, and stir.
5. Add tomatoes, stir, bring to a boil, then reduce heat and let simmer for five minutes

6. Add kidney beans and simmer for 15 more minutes.

7. Serve over white or brown rice. Garnish with grated Cheddar cheese, onions and sour cream.

Notes:
*I upped the amount of spices - the original recipe looked a little bland. I'm sorry, Mr. President.
*I cut back on the vinegar, too - I like to add Frank's Red Hot to my chili at the table, since I can't make it too hot for the kids, and I was worried it would be too vinegary.  I also added the pickled jalapenos to the toppings as well, to up the heat at the table.
*I added more beans - I like a lot of beans in my chili.
*Please do serve it on rice - it was a really good combination. 

*The spice mix is a good one - very flavorful.  Two out of three kids loved it, which was a good result for something as "icky" as chili.
*If you're horribly offended by my politics, try this recipe instead: McCain family ribs.

via: Chicago Sun Times: Obama family Chili

Slow-Cooker Weeknight Turkey Chili

October 26, 2008 by Mike Vrobel 1 Comment

Sorry for the lack of pictures; I'm leaving for a business trip later today. Unfortunately, that means I'm going to miss trick or treating tonight with the kids.*
*This will be the first time since Ben was 2, and we didn't realize that Copley does their trick or treating the Sunday before Halloween - even if Halloween falls on the next Saturday. We were at my parents for dinner that night, so we didn't see the trick or treaters. We were ready on Halloween, with our candy, and were wondering where everyone was? Luckily, Ben was young enough not to know the difference. We put his costume on, took some pictures, gave him a chocolate bar, and he was happy.

My mom would always make a big pot of chili on Halloween, and buy a pack of Halloween themed donuts*. I think this was her attempt to get us to eat some real food before our annual attempt to put ourselves into a diabetic coma. As a result, when the leaves start to fall, I get hungry for some "sissy chili" - ground beef, chili powder, and tomatoes**. Trying to be healthy, I've switched the recipe to ground turkey, and lots of beans.
*Mmmm. Doughnuts.
**Mom would be appalled - she doesn't like beans in her chili. But - it's my recipe now! Bwahahahahah! (Insert sound of sinister organ music playing here, preferably
Bach's tocatta and fugue in D Minor.)

Recipe: Slow-Cooker Weeknight Turkey Chili

Serves 10 to 12

Ingredients:
1 tablespoon vegetable oil
2 onions, chopped medium
1 red bell pepper, chopped medium
¼ cup chili powder
1 tablespoon ground cumin
2 teaspoons ground coriander
1 teaspoon dried oregano
6 cloves garlic , minced
2 pounds 85 percent lean ground turkey (or a 20oz package)
Table salt and ground black pepper
1 can (28 ounces) tomato puree
1 (28-ounce) can diced tomatoes
4 (15.5-ounce) cans dark red kidney beans , drained and rinsed

Directions:
1. Heat oil in a large Dutch oven over medium heat until just starting to shimmer. Add onions and bell pepper, and 1 teaspoon salt, and cook until softened, about 5 minutes. Stir in spices and garlic and cook until fragrant, about 1 minute.

2. Add turkey, 2 teaspoons salt, and 1 teaspoon pepper. Increase heat to medium-high and cook, using wooden spoon to break up turkey into ½-inch pieces, and scraping up any browned bits from the bottom of pot, until just slightly pink, about 5 minutes.

3. Add tomato puree and diced tomatoes to empty pot and bring to simmer over medium-high heat, scraping up any browned bits from bottom of pot. Transfer contents to slow-cooker insert.

4. Set slow cooker to low, cover, and cook until tender, 6 to 8 hours, stirring in beans during last hour of cooking. (Alternately, cook on high for 3 to 4 hours.) Adjust seasonings and serve. (Leftovers can be refrigerated for several days or frozen for several months.)

Notes:
*Hotter Chili: add ½ teaspoon cayenne pepper and ½ teaspoon red pepper flakes with the other spices. Or, add 1tsp chipotle en adobo puree for a nice smoky heat.

*Make Ahead: Do through step 3 the night before. Transfer the chili to an airtight container and refrigerate overnight. In the morning, transfer it to your slow cooker and proceed with step 4.

*No Slow Cooker: Replace step 4 with: Add beans, return to a simmer, and simmer chili for 1 hour. Adjust seasonings and serve.

*Serve with sour cream and cheese to cool the burn. Or, with pickled jalapenos to increase the burn.

*Substitutions: I like doing half black beans and half kidney beans, to add some bean variety. Also, I doubled the beans from the original recipe - if you prefer a meatier chili, only use 2 cans. Also, I don't always have tomato puree on hand, so I just use more diced tomatoes.

*Don't cook for more than 8 hours - the meat will dry out.

Adapted from Cook's Country magazine, June 2006.


Ranch Hand Chili

October 17, 2008 by Mike Vrobel 1 Comment


Chili is another one of my specialties. This post is dedicated to the ChiliFest I host as a potluck lunch at work every year. We've been doing it for 8 years now, and it gets more popular every year.

Why a ChiliFest? When I've tried to do other potluck lunches at work, people don't volunteer to bring anywhere near as much food, and I'm not just talking about the chili. For some reason, saying "If you've got a good chili, bring it!" works. People come out of the woodwork to volunteer - we get more of everything.
I think it's because Chili is something that everyone thinks they make well - no, not just "well", they get passionate about it. Heck yeah, I have a good chili! Of course I can bring some!

There are a bunch of different types of chili that I make regularly, but this is my current favorite. It is based on a recipe from the first issue of Cook's Country magazine. It's built with chunks of pork, and kidney beans.*
*I know - I'm bordering on the sacrilegious - I've heard that in Texas, the "beans or no beans" question can lead to feuds lasting generations. "All you should have is meat and chili powder - anything else isn't really chili!" As Alton Brown said on his blog after he got mounds of hate mail about his chili show - "If you don't like it, get your own show!" er...blog.

Recipe: Ranch Hand Chili


Searing the pork
Sauteing the aromatics
Simmering the chili

Notes

  • You can skip the beans if you really have to.
  • If you want it less spicy, reduce the chipotle (I wouldn't go below 1 tablespoon, but that's just me), if you want to kick the heat up, add more. Or, add a couple of minced jalapenos with the onions.
  • I recommend buying chili powder (or any other spice you use in large quantities) in bulk - I can get Horizon bulk spices at my local health food store, Mustard Seed Market. The price is much, much better than buying McCormick's spices in the spice aisle of your grocery store. Or, mail order your spices from Penzeys. I make Chili a lot, so paying $4 for the little jar just isn't cost effective for me.
  • You can substitute cubes of Beef Chuck for the pork, skip the beans and sugar, and you have Texas Style all beef chili. But that's a recipe for another time. Or, as Alton Brown recommends, you can go with ⅓ pork, ⅓ beef chuck, and ⅓ lamb. But...one reason I keep coming back to this recipe is because pork shoulder is cheaper than the other two by far!
  • For a final porky/smoky touch, use bacon fat instead of the vegetable oil. If you really want to do it right, start the recipe by cooking 8 pieces of bacon. Reserve the fat, use it for the cooking, and mince the bacon and sprinkle it on as a garnish when you serve. (I think I feel my arteries hardening just suggesting this. But it's also making me drool.)
  • I usually make this recipe for a crowd - if you want to scale it back (serving 6-8), cut back to 3 pounds of pork, 2 onions, and 1 can each of tomatoes and beans.

Inspired by a recipe in Cook's Country magazine.

*Enjoyed this post?  Want to help out DadCooksDinner?  Subscribe to DadCooksDinner using the RSS or Email options on the right, link to this post from your blog, recommend DadCooksDinner to your friends, or buy something from Amazon.com through the links on this site.  Thank you!

Stir Fried Swiss Chard

September 18, 2008 by Mike Vrobel Leave a Comment


Stir fried swiss chard was an improvisation - I had a big bunch of Swiss Chard in my CSA box, along with some garlic, and I had a chinese themed meal planned.  Voila!  Since I have my stir fry technique internalized, this was a quick side dish that I put together while I was making my chinese barbecued pork.

*I wish planning dinner was always this easy.  Sometimes, it feels like I'm sweating blood, trying to come up with enough meals for the week:  
"Tortillas and chicken - no, we did that last week.  Shoot, I still need a quick meal for Thursday, when Ben has soccer.  Oh, and a starch and a veg side for the hamburgers..."
Recipe: Stir Fried Swiss Chard

Ingredients:
  • 1 tablespoon vegetable oil
  • 1 onion
  • 1 bunch Swiss Chard, leaves trimmed from stems
  • ⅓ cup water
  • 1tbsp garlic
  • 1tbsp toasted sesame oil
  • 2 tablespoon hoisin sauce
  • 2 tablespoon soy sauce

Directions:

*We'll be following the stir fry basic technique for this.
1. Prep the sauce: Combine the hoisin sauce and soy sauce in a small bowl (or pyrex measuring cup).
2.  Prep the vegetables:  Peel an onion, cut it in half, then cut each half into about 8 wedges, pole to pole.  Trim the stems from the chard, separate, and cut the stems into ¼" slices and the leaves into ¼" strips.  Mince the garlic, and combine in a small bowl with the toasted sesame oil.  Measure out the water.

Trimming the chard
Slicing the stems ¼ inch thick

Prepped stems, onions, and garlic/sesame oil
3. Start with the onions: Add the vegetable oil to a 12" nonstick skillet, and heat over high heat until oil is just starting to smoke, 3-5 minutes. Add the onions, and stir fry for 2-3 minutes, until browned and crisp-tender.
Stir Frying the onions
 
4.  Stir fry the chard stems: Add the chard stems, toss to coat with oil, then add the ⅓ cup water and cover.  Steam, covered, for 3-4 minutes.  Remove cover, and stir-fry until stems are crisp-tender, 1-2 more minutes.
Added stems

Covered and steaming
5. Add the aromatics: Make a hole in the center of the vegetables in the pan, and add the garlic/sesame mix.  Let sit for 30 seconds (or until you can smell the garlic), then stir it into the rest of the vegetables.


Adding the garlic and sesame oil
6. Add the leaves: Add the chard leaves, stir fry for 2-3 minutes or until just wilted.

Chard leaf slices

Adding to pan
7. Sauce and serve: Pour the sauce over the contents of the pan, and stir for 1-2 minutes or until vegetables are coated with sauce.  Serve.

Wilted chard, sauce added.
Notes:

*"Stir fry 2-3 minutes" - When you first add something to the pan, toss it to get it coated with the oil, then let it sit for 30sec to 1 min, or until it starts to brown on the underside. Then, keep it moving, flipping and stirring until it is crisp-tender.

*A lemon-based sauce would go great with this - chard, garlic and lemon are a great combination.  Replace the hoisin in the sauce with the juice from ½ lemon, and 1 teaspoon of corn starch
*This is also how I cook Bok Choy - the stems are thicker, the leaves are smaller, but the technique is almost exactly the same.  (See the related posts, below...)
*This is an example of how I use the basic stir fry technique for a vegetable side dish.  By its numbers:
Skipped step 1 - no meat
2. Prepped sauce
3. Prepped veg
4. Heat oil in skillet
Skipped step 5,6a - no meat
6b - Onion is the first batch veg
6c - garlic/sesame oil (actually added after next step)
6d - Chard stems are the second batch veg
6e - Chard leaves are the third batch veg
Skip 6f - no fourth batch veg
7 - Add sauceQuestions?  Comments?  Other ideas?  Leave them in the comments, below.

Related posts:
Click here for my Stir-Fried Bok Choy recipe, or check out my Brussels Sprouts recipe.
Click here for my Basic Technique: Stir Fry

Grand Unified Stir Fry Theory (aka: Stir Fry, basic technique)

September 15, 2008 by Mike Vrobel 2 Comments

This is the basic technique I use for weeknight stir frying - meat, vegetables, or (preferably) both together as a one skillet meal.*  As I've mentioned before - anything that goes well with basic white rice is a recipe I use a lot.

*Right now, the kids make me cook the meat and the vegetables separately; I can't let the vegetables contaminate the meat. Or vice versa.  I accidentally added a red pepper to the chicken stir fry this week - you should have heard the whining.

 
However, stir fry is another one of my culinary pathways.  "American" Chinese food was the first non-american cuisine I ate*, and the one that started to open my eyes to the fact that there was a wide world of taste out there.  Specifically, the little hole in the wall Hunan restaurant on Chardon Rd in Wickliffe (just past E 260th) that served the best Hot and Sour soup I've ever had.  Their Governor's chicken was great, too.  The combination of sweet, spicy, sour and hot was a revelation to me.  Especially in that soup - I would buy it in the "bathtub" size.

*I don't count American Italian - it's been integrated into american home cooking too much.  Or at least my family's American home cooking.  Spaghetti night, with Ragu and store-bought garlic bread.  Ah, memories.  Or, more specifically, Pixifood.  (h/t - Joe Posnaski, one of my favorite sports writers.  And not just because he's from Cleveland.)

Basic Technique: Stir-Fry


Equipment:

  • 12" or 14" nonstick skillet w/ lid
*My favorite (the one I own), but expensive: All-Clad Stainless Nonstick Fry Pan, 12"
*My best value: Calphalon One Nonstick 12-Inch Covered Fry Pan
*My 14" best buy - at the local kitchen supply store: A Best Kitchen

Ingredients:

  • Peanut oil or Vegetable oil
  • ¾ lbs to 1.5 lbs protien
  • 1 large onion + 1 lb vegetables
  • 1 recipe sauce (usually ¼ to ½c)
  • 1 tablespoon minced garlic
  • 1 tablespoon minced ginger

Directions:
1. Prep protein:  Cut it into ½" to ¾" chunks and marinate in 1 tablespoon soy plus 1 tablespoon sherry.  Let it marinate while you do the rest of the prep

2. Prep Sauce: Mix sauce ingredients until well combined.

3. Prep vegetables: Cut into ¼" strips or ½" by ½" pieces.

3a. Prep garlic/ginger/oil mix: Mince or press garlic and ginger through a garlic press, then stir with 1 teaspoon of the oil.  Set aside for later.

4. Preheat Pan: Heat 1 tablespoon oil in a 12" to 14" skillet over high heat

5. Cook the Protein: Stir fry meat until browned and cooked, 1-3 min (do this in 2 batches, if more than ¾lb of protien), remove to bowl

6. Cook the vegetables: This step has some parts to it, depending on the type of vegetables you are cooking.  For all of them, start with:
6a. Add 2tbsp oil, reheat pan 1 minute (or until oil smokes)

6b. First batch veg: stir-fry 2-3 min
*Onions, peppers (carrots, cauliflower)

6c. Garlic/Ginger/Oil - make hole in center, add, cook until fragrant (10 sec?), stir into veg

6d. Second batch veg (steam): add, stir, add ⅓ cup water, cover and steam 2-3 min, then (if necessary) stir fry another 1-3 min until tender-crisp
*Broccoli, green beans, asparagus, butternut squash, bok choy stems or baby bok choy, swiss chard stems

6e. Third batch veg: add, stir-fry 2-3 minutes until tender-crisp
*Sliced cabbage, celery, mushrooms, haricort verts (really thin green beans), peas, sugar snap peas, summer squash or zucchini

6f. Fourth batch veg (wilt): add, stir-fry 1 min or until wilted
*Scallions, fresh herbs(basil), tender greens (baby spinach), tomatoes

7. Add Sauce and Protein: Re-add the protein to the pan, then add the sauce.  Stir until glazed and bubbling, about another 1 minute

8. Serve: Serve with basic white rice, noodles, or lettuce leaves for wrapping.

Notes:
Protein choices:
Chicken - boneless, skinless breasts or thighs, cut into ¾" thick strips
Pork - loin or tenderloin, cut into ¾" thick strips
Beef - Ribeye, strip, sirloin, tenderloin (expensive), flank steak, skirt steak - cut into ¾" strips, against the grain for the flank and skirt steaks
Seafood - shrimp (peeled), scallops (whole)
Tofu - cut into ¾" chunksVegetables and their batches:
6b. First batch veg:
Onions - halved, each half cut into about 8 wedges
*Note: I almost always use an onion in the stir fry as a flavor base
Peppers - cored, cut into ¼" strips
Carrots - grated
Cauliflower - cut into 1" florets6d. Second batch veg (steam):
Broccoli - cut into 1" florets
Green beans - trimmed, optionally cut into 2" segments on the diagonal
Asparagus - trimmed, cut into 2" segments on the diagonal
Butternut squash, cut into 1" cubes
Bok choy stems - leaves trimmed and reserved for 3rd batch; stems sliced ¼" thick
Chard stems - leaves trimmed and reserved for 3rd batch; stems sliced ¼" thick6e. Third batch veg:
Cabbage - shredded ¼" thick (easy way out - bag "cole slaw" mix)
Celery - sliced ¼" thick on the bias
Mushrooms - sliced thin (easy way out - prepackaged sliced)
Haricort verts (really thin green beans) - trimmed
Bean sprouts
Peas - Frozen, thawed
Sugar snap peas - stringed
Summer squash or zucchini - cut into ¼" thick rounds
Eggplant - peeled, cut into ¾" cubes
Baby bok choy - stem end trimmed, separated into individual leaves

6f. Fourth batch veg (wilt very quickly):
Scallions - sliced
Fresh herbs - (basil is a very "thai" flavor)
Tender greens (baby spinach)
Tomatoes, diced

Sauces:
Mark Bittman's simple hoisin sauce: (combine)

  • 2tbsp hoisin sauce
  • 2tbsp water

Pam Anderson's Soy-Sesame sauce: (combine all, stir until sugar dissolves)

  • 2 tablespoon water
  • ¼ c soy sauce
  • 2 tablespoon rice wine vinegar
  • 2 tablespoon toasted sesame oil
  • 1 teaspoon sugar

Cook's Illustrated ginger sauce: (combine all, stir until sugar dissolves)

  • 3 tablespoon soy sauce
  • ½ teaspoon sugar
  • 1 tablespoon dry sherry
  • ¼ cup minced ginger
  • 2 scallions, minced
  • 2 tablespoon water

Mike's simple sauce: (combine)

  • 2 tablespoon soy sauce
  • 2 tablespoon hoisin sauce
  • 1 tablespoon sweetened rice wine vinegar
Notes:
I have three major inspirations for this technique. First came Pam Anderson, and "How to cook without a book." Her weeknight stir fry is the basis of this technique as I have learned it. However, her technique leaves out a lot of vegetables that I like, and that I think of as essential sides for stir fries. Broccoli, in particular, comes to mind. That's where I turned to Cook's Illustrated. Pam worked at CI for years, and you can tell if you compare their techniques - they are obviously siblings. Cooks (in their usual, methodical way) had just advanced the technique and refined it a bitto be more flexible. I'm using their "four batch" idea. However, their basic stir fry changed to include the "steam-stir fry" combo technique, and I prefer the way some vegetables (broccoli, green beans) come out with the stir-fry added to help soften them up a bit. Finally, there's MarkBittman's 10 minute stir fry - it's this technique stripped down to bare metal. He doesn't fuss with making sauces (just addhoisin sauce and water), aromatics (garlic), ormarinating the meat. Or with lots of different vegetables - just onions and peppers. All the variables helpthe end result come out better, in my opinion, but if you really want the "Minimalist" approach, he's got the heart of the recipe.Differences in my inspirations - interesting, to see how they approach the same problem, of making a quick stir-fry:
Pam Anderson: Always do onions as 1st batch veg. Don't do any 2nd batch veg- takes too long.
Cooks Illustrated: Use ¾ lb meat so you only have to cook 1 batch of meat. Add garlic and ginger at last minute (just before protein is re-added). "Second batch steam" is adapted from some of their other stir-fry recipes. You have to pay a subscription to get to their recipes, located here.
Mark Bittman: Basically, he just does Step 3, 4, 5, 6a and 7, oh, and add 1 cup of nuts (cashew pieces) with the sauce. Skip Garlic/ginger, skip protien marinade, only do 1st batch veg mix of onions/peppers, sauce is 2tbsp hoisin mixed w/2tbsp water, mixed in the pan.Pam Anderson rightly mentions that this recipe can be very easy if you use a "quick snip" approach - you can buy pre-shredded carrots or cabbage, pre-sliced mushrooms, "stir-fry" cut chicken, etc. Cooks Illustrated's sister magazine, Cooks Country (which I also love) had another great idea to skip the prep work - just buy all the vegetables, pre-cut, at the "salad bar" of your local grocery store.

They ALL also say the same things about the cooking technique: Don't overcrowd the pan, especially on the protien; give it high heat, and a few minutes after adding each vegetable to make sure the pan gets hot again. And...do NOT use a wok! For American stoves (which don't have a wok burner or ring), a 12" to 14", nonstick or cast iron pan is the best thing to use - you need the high heat spread over a large area. (For an aside from Alton Brown on the piece of equipment you may actually have that could be used as a wok burner, see here.*)
*Of course, it's much more fun to watch it: try to catch his "Squid Pro Quo" episode - I can't find it in his video sets.

The key things to remember are:
1. Prep first, then cook. You can pre-heat your pan while you prep the vegetables, but once you start, it goes quickly, so have everything ready to go.

2. You don't need to do all four vegetable batches! If you do, you're probably putting too much in the recipe. My standards are: Chicken, Onion, Red Peppers (batches 1 and 3), Beef, Onions, Red Peppers, Broccoli (batches 1, 2, and 3) As Bittman shows, you can do this with, basically, one batch of protien and one batch of vegetables for the most stripped down version.

3. You don't need to do the protein! Or the vegetables! For Protein only, skip the vegetable batches - do steps 1,2,3,3a, 4, 5,6c, 7. For Veg only, skip step 5. I do this a lot, actually - as I mentioned before, the kidsare grossed out, so I prep everything, cook theprotien, clean out the pan, then cook the veg. (This is also useful if I'm cooking for someone who's vegetarian.)So, that's the technique. Any other vegetables I need to add to the list? Any questions? Please! Leave them in the comments. Thanks!

Resources/Adapted From:
Pam Anderson
  • Recipe link: Super Easy Stir Fry
  • Book: How to Cook Without a Book [Amazon.com]
  • Book: The Perfect Recipe [Amazon.com]

Cooks Illustrated Magazine

  • Throw out your wok (pay for access - sorry). No longer available online. Sorry.

Cooks Country Magazine

  • Salad Bar Stir Fry (paywall for access - sorry).

Mark Bittman

  • 10 minute stir fry

Chinese BBQ Boneless Ribs

September 10, 2008 by Mike Vrobel 1 Comment

Pork shoulder (aka Boston Butt, or Pork Butt**) is one of my favorite cuts of meat. I'm particularly fond of using it as "ribs" - which are sold in my local grocery store as "western ribs", but are really just 2" thick slices of pork shoulder roast. They cost a LOT less than real ribs do around here - as low as $1.29/lb, where spare ribs never seem to go below $2.19 a pound. When you consider all the extra meat you get out of the western ribs as compared to the spare ribs, it is quite the deal.*

*That's not to say I don't like real ribs - just not often. At those prices, when so much of what you're paying for is bone, I can only bring myself to buy them a couple of times a summer. Where did we go wrong? The ribs are supposed to be the cheap cut, the throwaway part that you can get cheap. I guess they got too popular. Sniffle. I'll be OK, I just need a moment alone...
**You got me. I just like saying "Pork Butt". I get to channel my inner 9-year old. Not that he's ever that far from the surface to begin with.
Recipe: Chinese barbecued pork boneless ribs (Char siu)
Ingredients:
  • 4lbs "western ribs", or a boneless pork butt roast cut lengthwise into 2" strips

Marinade ingredients:

  • ½ cup sugar
  • ½ cup soy sauce
  • ¼ cup Hoisin sauce
  • ¼ cup 2 tablespoon dry sherry
  • 1 tablespoon toasted sesame oil
  • 1 teaspoon Chinese five-spice powder
  • 1" piece of ginger, grated
  • 3 garlic cloves, minced

Sauce ingredients:

  • ¼ cup marinade, reserved
  • ¼ cup hoisin sauce
  • ½ cup ketchup
Directions:
1. Marinate the pork for 4 hours:
Prepare the pork by poking each piece with a fork - I do it on both sides, roughly every half inch. Put the pork in a non-reactive bowl, pyrex dish, or gallon zip-lock bag. Whisk the marinade ingredients together until the sugar dissolves, reserve ¼ cup for use in the sauce, and pour the rest over the pork. Refrigerate the marinating pork for up to 4 hours, turning it occasionally to make sure it's marinating evenly.
Make the sauce by whisking together the reserved marinade, hoisin sauce, and ketchup. Store, refrigerated, for later.

Pork Butt

Forking my pork...OK, I'll stop.

Marinade (½ cup reserved)

Marinating pork
2. Cook the pork: Set your grill up for indirect low heat, and cook for 4 hours, wrapped in foil for the last hour.
Fill a charcoal chimney half full with charcoal (roughly 50 charcoal briquettes), light it, and wait for it to light completely (covered with gray ashes). Divide the charcoal into two piles on opposite sides of the grill, and put an aluminum foil pan (13x9") between the piles. Pour 1 quart hot tap water into the foil pan.
Put the grate on the grill, then the pork on the grate, over the foil pan. Cover the grill, and close the top vent ⅓ closed to slow down the charcoal. (The water in the foil pan and the partially closed vent will even out the temperature.) You are trying to maintain a temperature between 250*F and 300*F.

Cook for 3 hours. After every hour of cooking, quickly remove the lid and add 12 coals (6 to each side).
After cooking for 3 hours, it should look like this:
At this point, add another 12 coals, then transfer the pork to a sheet of aluminum foil, pour ½ cup of the sauce we made earlier over the pork, then wrap in foil and put the foil pork packet back on the grill, still over indirect heat. Open the top vent all the way at this point.

Cook for 1 more hour in the foil, then remove from the grill. Let rest for at least 15 minutes before opening the foil pack. Serve with the remaining sauce for dipping.

Notes:
*Hoisin Sauce is sometimes called plum sauce, or chinese barbecue sauce. I've "sold" it to the kids that way, when they insist on having "barbecue sauce" with a dinner like this. I prefer to mix in some ketchup and soy sauce to thin it out if I'm using it as a barbecue sauce - it can be too thick if served straight up. You'll be able to find it in the asian section of any good-sized grocery store nowadays, but I try to get mine from the local asian market - it's sold in larger bottles, for less money.
*Serve with white rice (of course), and a couple of stir-fried vegetables.
*Leftovers are perfect for using in Fried Rice (as is any leftover white rice from the meal). Just dice the pork into ½" to ¼" inch cubes.
*Leftovers are also good re-heated, as I found later in the week. I went looking for the leftover pork and rice I had saved, which was going to become pork fried rice for our dinner. Diane and the kids ate it all for lunch the day before. At least it didn't go to waste!
*Another variation, if you'd like to cook this quicker, is to cut the pork into ½" to 1" strips instead of the 2" strips - when my grocery store has boneless western ribs, I cut them in half. This allows you to reduce the cooking time from 3 hours to 1.5 hours, before you wrap them in foil. (I did this tonight, and it came out great!)

Questions?  Comments?  Other Ideas?  Leave them in the comments, below.


Related posts:
Click here for my other grilling recipes.
Click here for my Grilled Korean Short Ribs recipe
Adapted from Chinese Barbecued Pork from Cook's Illustrated.

*Enjoyed this post?  Want to help out DadCooksDinner?  Subscribe to DadCooksDinner using the RSS or Email options on the right, link to this post from your blog, recommend DadCooksDinner to your friends, or buy something from Amazon.com through the links on this site.  Thank you!

Roasted Red Pepper Dip

September 6, 2008 by Mike Vrobel Leave a Comment


When I am asked to bring an appetizer, this is usually the first thing I think of.* Other than roasting the peppers, it's "dump and process". I like that when I'm rushing around, getting ready to go to someone's house!

*OK, the second thing. The first thing is a cheese plate with some good blue cheese, hard cheese, and goat cheese, and a sliced baguette on the side. Mmm. Cheese.
Recipe: Grill Roasted Red Pepper Dip


Equipment:

  • Grill (I used a Weber Summit 650. Here it is.)
  • Food Processor (I used my KitchenAid Food Processor)
Ingredients:
  • 3 red peppers
  • 2 cloves garlic
  • 1 can (15oz) chickpeas
  • ⅓ c extra virgin olive oil
  • juice of 1 lemon
  • ½ teaspoon fresh ground black pepper
  • Salt to taste (depends on how salty the chickpeas are - I usually add ½tsp kosher)
Directions:
1. Roasting the peppers: Preheat your grill to medium - direct heat. Cook the peppers until blackened on all sides (usually about 5 minutes a side). You want to get them good and burned - it's OK! Let the peppers sit until cool enough to handle. Pull out the stem, core and seeds and discard. Peel the blackened skin off (I just use my fingers, and it's OK if you have a few blackened bits left).

This is how they should look coming off the grill.
One peeled pepper
2. Preparing the dip: Drop the garlic through the feed tube into a running food processor, and wait for the garlic to be completely minced, usually about 10 seconds. Put chickpeas, roasted red peppers, lemon juice and black pepper in the processor, and pulse a couple of times to mince. Turn on processor and drizzle olive oil through feed tube, adding just enough for the other ingredients to come together into a dip-like consistency. Taste for salt - add salt and pulse to combine.
Notes:
*I usually serve this with pita bread, cut into triangles and vegetable crudites (baby carrots and celery go particularly well). It is also good with tortilla chips or crackers.
*If you don't want to roast the peppers, you can substitute 16oz of canned or jarred roasted red peppers, drained. Roasting your own peppers gives you a much better tasting dip, in my opinion.
*This is also the recipe for Hummus - just replace the red peppers with roughly ¼ cup of tahini (sesame paste).
*Roasting extra red peppers is a good thing to do - you can always find a use for them in a salad or a sandwich. When I have some extra red peppers on hand, and I'm preheating my (gas) grill for something else, I put the peppers on right after I've lit it. I turn them every five minutes (or so), and they're nice and black right when the grill is ready for my "real" cooking.
(Adapted from BBQ USA: 425 Fiery Recipes from All Across America by Steven Raichlen)

Basic White Rice

September 4, 2008 by Mike Vrobel 1 Comment


This is, by far, the side dish I make most often.  Why?  Because The Kids will eat it.  Always.  I think they'd be happy if this was all I ever made for them.  "White rice?  Just plain white rice this time, right, Dad?"*

*Translation: No funny stuff, right?  You're not getting fancy on us again, right?
It's the perfect side dish for Asian meals - I usually make it with a stir fry of some sort, but it also goes well with grilled chicken, barbecued pork, and many other meals.*
*Red beans and rice, of course, how could I forget red beans and rice...
Recipe: Basic White Rice

Cook time: 30 minutes

Ingredients:

  • 2 cups rice (my preferences are: jasmine rice, CalRose rice, or Carolina long grain rice)
  • 3 cups water
  • ½ teaspoon fine sea salt (or table salt)
  • 1 tablespoon butter (optional)

Directions:

Put ingredients in a 3 quart or larger saucepan with a tight fitting lid.  Cover, and bring to a boil over high heat.  Remove the cover once the water is boiling, reduce the heat to medium, and continue to boil until the water boils away to just below the level of the rice.*  Cover, reduce heat to low, and cook for 10 minutes.  Remove from heat, and let the pot stand, covered, for another 10 minutes.  Fluff with a fork and serve.

 *Tom Johnson of the WRSOC referred to this as "Fish Eyes" - the boiling water coming from just below the surface of the rice creates holes in the surfaced of the rice, and you will see bubbles forming in the holes of the rice.

Fish Eyes
Notes:
*You need a pot with a tight fitting lid for this recipe - I use this one from Calphalon, which you can usually get a good deal on at Bed Bath and Beyond.  It doesn't have to be nonstick, but it helps the cleanup.

*Don't skip the salt!  The rice is pretty plain to begin with, but without the salt, it's plain AND bland.  The butter, however, I will only add if I'm cooking rice for a western-influenced meal.  The rice just tastes better without the butter if I'm having it with, say, a stir fry.

*To halve this recipe, go with 1 cup rice,  and 1.5 cups water.  I usually wind up cooking 3 cups rice and 4.5 cups water - The Kids will eat it all if I only cook 2 cups worth of rice, and usually I want some leftover rice to go with the leftover meal.

*Leftovers - I store the rice in a Gladware container, and reheat it directly in the microwave - the liquid in the rice gives you enough steam to help reheat it.  The Kids eat the reheated, leftover rice just about as willingly as they eat it freshly cooked.
Adapted from Tom Johnson, WRSOC.

On the importance of basic techniques

September 2, 2008 by Mike Vrobel 1 Comment

How did I get here?

In 1999, I decided I was going to cook dinner every night.  I don't exactly remember what prompted this; it was a gradual thing, my interest in cooking.
It started with wine.  Diane came back from a trip to Europe with her sister, Jackie, and said "you know, they have a glass of wine with dinner every night...".  I can't exactly say why, but that struck a chord in me, and I was off and running.
Then, to go with the wine, I wanted to learn how to cook.  NPR had an intervew with Barbara Kafka, about her book Roasting-A Simple Art.  In it, she describes how to make a great Thanksgiving turkey in about two hours - roast it in your oven, with the oven set as high as you can.  Then, remove the turkey, and make a sauce with the pan drippings and some water.  I tried it, and it was great!  So I went out and bought the book, which is based on this premise - roast everything at 500*F.  And...it didn't work so well for me.  It's great for the turkey; chicken, too.  You get nice, crispy skin, even if the breast meat is a bit dry - but the pan sauce covers up for that.  Unfortunately, this method of cooking is guaranteed to set off your fire alarm every time you use it.  And most things (other than turkey) come out dry and overcooked.*
*Ask Diane about the "Chrismas Goose" I cooked the one time.   Or anyone else in the family I cooked for - I became famous for getting the batteries out of the fire alarm in under 15 seconds.
Not willing to let a little thing like fire alarms stop me, I kept cooking.  I bought a few more cookbooks, I got a bit better, I started to think I could cook.  Of course, Diane had to keep asking me - "Shouldn't a meal include vegetables?  Meat and potatoes are okay, but I could use something green in my diet."  A few years later, I was cooking fairly often; I even got past the vegetable side dish hurdle on occasion.  But I didn't feel like I could just "whip something up" based on what was in the refrigerator.
And then, then... I saw this cartoon in the New Yorker, with the punch line:"Actually, he's not bad, considering that he's recipe dependent."
I was laughing, and cringing at the same time.  That struck a nerve - I wasn't learning how to cook; I was learning how to follow recipes.
THAT is when I decided to become a cook - to cook dinner every night, and to learn how to cook based on the ingredients I have on hand.
The key was Pam Anderson's How to Cook Without a Book.  In it, she explains many of the basic techniques in cooking, and then how to vary the ingredients and flavors of that technique in many, many different ways.
I started with "the saute".  12" skillet (NOT non-stick), heated over medium-high with a thin coating of vegetable oil in it.  Cook four chicken breasts, salted, peppered, and coated with flour, for 4 minutes per side.  Remove breasts; put ½ cup chicken broth in the pan, and bring to a boil, scraping up the browned bits in the pan to make the sauce.
What Pam Anderson makes sure you know in her book is: this isn't just about chicken breasts, and it isn't just about a chicken broth based sauce - this is "a saute" and "a pan sauce".  This is how you cook any tender meat that's 1" thick (or less) - and this is how you use the browned bits that the saute creates as the base of an almost infinite number of sauces.
Those sauces are pretty similar in preparation, but very different in taste: ½ cup of liquid, with some variations in the seasoning.  French style chicken breasts?  Add shallots, chicken broth, lemon, capers.  Voila!  Lemon-caper chicken.  (Or veal.  Or pork).  Want Italian?  Make your sauce with garlic, a can of diced tomatoes, and some basil.  Sprinkle some parmesan on the chicken breasts, serve on pasta, and you have Chicken Parmesan.
What this opened up to me was that the basis of all cooking is three things: ingredients, base techniques, and flavor profiles.  What are the right cooking techniques for the main ingredients you have, and what flavor profiles do you want to use with them?  If you know the variations on those three things, and you can cook almost anything in the western repertoire of food.  Know how make chili, texas style, with cubes of beef chuck?  You know how to make a braise - a perfect technique for tough meats.  Brown the meat, brown some aromatics (onion, garlic), add liquid to just cover the meat (tomatoes, beef broth) and some seasonings (chili powder).  Put this in a pot with a lid, and simmer on low heat for a few hours, until the beef is fork tender.  Now, with a little variation, you know how to make everything from Beef Stew to Beef Bourginon, to Beef Paprikash, or even to Coq Au Van - it's just a braise!  When I see a sale on chuck roast, chicken thighs, pork shoulder - I now have a wide range of options - what do I have in the house?  What flavors do I want to do with this?
Later on, I read Michael Ruhlman's The Making of a Chef, where he describes what you are taught at a real culinary school.  It explained what I had learned*: training is about the basic techniques for specific ingredients, and the flavor combinations that go with different cuisines.  Put those together, and you have a professional chef!**
*Only, he describes it with style - I'm fumbling around with how to describe how amazing it felt when this concept fell into place for me.  And, Alton Brown - my hero! - also had a hand in my learning this - can't forget to give him a shout-out.
**Well, this idea, and a willingness to work 12 hour days, 6 days a week, for minimal pay, and have your busiest days be weekends and holidays.   Also, "I'm dead" is the only good excuse for not coming in to work.
Oh, and Barbra Kafka, Roasting at 500*F, and the smoke detector?  She was right - it's just high heat roasting, followed by deglazing the pan.  As long as you use the technique with the right ingredients, it works great!  But I think you should turn the oven down to 450*F - it gives me a few more minutes before I have to pull the batteries out of the smoke detector.
Reading list:

Grill Roasted Chicken Wings

September 2, 2008 by Mike Vrobel 1 Comment


Here's my recipe for grill-roasted chicken wings.  It's healthier than deep-fried*, and I think the crispy/smoky taste of these wings is better than deep fried.  Diane is a chicken wing fiend.  Whenever I roast a chicken, she goes straight for the wings.  Needless to say, she gets excited when she finds out this recipe is on our menu.

*I said heathier, not healthy.  I think the reason chicken wings are so good is that they're all skin, and there's nothing that tastes better than crispy chicken skin.


Recipe: Grill Roasted Chicken Wings, Buffalo Style


Equipment:

  • Grill (I used a Weber kettle, this Weber Grill)
  • aluminum foil drip pan (9"x11", or whatever fits your grill)

Ingredients:

  • 3 lbs chicken wings
  • 1 fist-sized chunk of hickory, soaked for 1 hour (or 1 cup hickory chips, soaked for ½ hour and drained)

Marinade:

  • ½ cup Frank's Red Hot
  • ¼ cup soy sauce
  • ¼ cup vegetable oil
  • 2 tablespoon worcestershire sauce
  • juice of ½ lemon (I substituted 1 tablespoon cider vinegar)

Hot Wing Sauce:

  • ½ cup Frank's Red Hot
  • ¼ cup melted butter
Directions:

1. Prepare the wings: Separate the wings into "drumette" and "wing" and "wingtip" sections by cutting through the joints of the wing .  Throw away the wingtip (or save them in a bag in your freezer for when you make chicken stock).

Sectioning the wings
2. Marinate the wings: Mix the ingredients for the marinade in a bowl, then add the wings.  Marinate, refrigerated for up to 4 hours, stirring occasionally.  (Now is a good time to start soaking your wood chunk.)


3. Prepare the grill: Prepare your grill for cooking on indirect high heat. For my Weber kettle, I light a chimney starter* full of charcoal, wait for it to be covered with ash, then pour it in two equal piles on the sides of the grill, and put the drip pan in the middle, between the piles.  Put your wood chunk/chips on the coals, then put the grate on the grill.  Cover the grill, and wait five minutes for the wood chunk to start smoking.  Brush the grill grate to clean, then you're ready to cook.
*I highly recommend the Weber Chimney Starter, because it is larger than most chimney starters. It holds 5 quarts of charcoal, which exactly the right size for cooking this recipe.

4. Cook the wings: Put the chicken wings on the grate, over the foil pan.  Put the cover on the grill and cook for 20 minutes.  Turn the wings over, re-cover the grill, and cook for another 10 to 20 minutes, or until the skin is nice and crispy.  While the wings are cooking, prepare your hot sauce - whisk the hot sauce and melted butter together.

Looking good...
5. Glaze the wings: Brush the wings with your sauce, remove to a platter, and serve.
Variations:
*Replace the hot wing sauce with:

Teriyaki sauce recipe
Ingredients:

  • ½ cup sugar
  • ½ cup soy sauce
  • ¼ cup mirin

Directions: Simmer in a small saucepan (or in a pot on the grill) until the sugar melts.

Notes:

*I usually make a couple of different types of wings by using different sauces.  My favorite is the hot wing sauce, above, but that's too much for the kids, so I usually brush half the batch with barbecue sauce.  Or, I make some quick Teriyaki sauce (½ cup sugar, ½ cup soy sauce, ¼ cup mirin, simmered in a small saucepan until the sugar melts).
*Frank's Red Hot is the key to good chicken wing sauce - it's got the right balance of pepper taste and heat.  I love Tabasco sauce, but it is way to hot for this recipe.
*To vary the heat of the "hot sauce", vary the proportion of butter to Frank's red hot:
  • Super-hot: All Frank's
  • Hot: ½ cup Frank's, ¼ cup melted butter
  • Medium: ½ cup Frank's, ½ cup melted butter
  • Mild: ¼ cup Frank's, ½ cup melted butter
*I mention hickory because I usually have it available, and it's easy to find.  I have also had good results with apple wood, cherry wood, and even oak wine barrel staves.  I wouldn't use mesquite - it has a very distinctive taste that I don't think goes well with this recipe.
*Any recipe involving smoking wood works better on a charcoal grill - if you've got one, this is the time to use it.  Unfortunately, you can't make more than about 3-4 pounds of chicken wings  on a weber kettle - you need to leave a little space between the wings to help them crisp up.  Don't worry if they're just barely touching when they start - they'll shrink a little - but don't pile them on top of each other.
(3 lbs of wings came to 24 pieces, once sectioned)
*That being said, this recipe works fine without the smoking wood, and when I've wanted to cook a lot of wings, I've used my super-huge gas grill to get the necessary space...

Questions? Comments?  Other ideas? Leave them in the comments section below.

Related Posts:
Click here for my Backyard Barbecued Chicken Recipe
Click here for my Basic Technique for Grill Roasted Chicken
Click here for my Grilled Chicken Wings, Spicy Asian Glazed recipe

Adapted from:
Steven Raichlen's Buffa-q wings.  And if you like grilling, you really need a copy of the cookbook it came from: BBQ USA.

Thai Style Grill Roasted Chicken Breasts

August 30, 2008 by Mike Vrobel Leave a Comment


This is an example of how to use the basic technique of grill roasting chicken parts as the base for a more complex recipe. I love the combination of tastes in this recipe - The garlicy-herby chicken, with its crispy skin, together with the Thai dipping sauce. The dipping sauce seems simple, but it is the key to the recipe. It has a wonderful balance of the four key Thai flavors-Hot, Sour, Salty, Sweet.*

*When I was writing this, I wanted to use...well, what's the equavlient of a trilogy, but for four things?
Recipe: Grill Roasted Chicken Breasts, Thai Style
Ingredients:
Chicken and brine:
  • 4lbs chicken breasts, skin on and bone in
  • ½ c table salt or fine sea salt
  • 2 Quarts water
Thai wet rub:
  • 12 medium cloves garlic , peeled
  • 1 inch fresh ginger peeled
  • 2 tablespoons ground black pepper
  • 2 tablespoons ground coriander
  • Leaves from about ⅓ of a bunch of cilantro
  • juice from 2 limes
Thai dipping sauce:
  • 1 teaspoon red pepper flakes
  • ¼ cup distilled white vinegar
  • ¼ cup lime juice from 2 to 3 limes
  • ¼ cup granulated sugar
  • 3 small cloves garlic , minced
  • 1 tablespoon fish sauce
Instructions: (Remember: check out the base technique for the overview of the method)
1. Brine the Chicken: 1 hour before cooking, brine the chicken: dissolve the salt in the water, then submerge the chicken.

2. Preheat the grill, rub the chicken: 15 to 30 minutes before cooking, preheat your grill. While the grill is heating, prepare the wet rub. Combine all the ingredients in the bowl of a food processor except for the lime juice, and pulse until finely minced. Then, add the lime juice, and pulse to combine. Remove the chicken from the brine, pat it dry with paper towels, and rub the chicken all over with the wet rub. Make sure you get some under the skin on the breast - slide a finger carefully under the skin - don't tear it! - and get some of the rub under there. Let the chicken sit at room temperature until the grill is preheated.

3. Grill your chicken: Cook the chicken over the unheated part of the grill, 40 to 50 minutes, or until 160* in the deepest part of the largest breast. Remove from the grill, and let rest 10 to 15 minutes before serving.

4. Make the dipping sauce: While the chicken is grilling, put all the ingredients in a bowl, and whisk until the sugar is dissolved. Divide the dipping sauce into individual bowls, one per person that you are serving. I usually use my ramekins for this.

Notes:
*There is a LOT of garlic in this recipe. I'm good at peeling garlic cloves, but peeling 15 cloves tries even my patience. If your grocer store sells fresh peeled garlic (not the awful stuff in oil in jars -fresh pre-peeled garlic), either in a plastic canister, or vacuum wrapped, this is a great time to get it. Just make sure you inspect it carefully before you buy it. It goes bad very quickly. Check the expiration date, and watch out for water, brown spots, or (worst) mold.
Adapted from a recipe from Cooks Illustrated. Inspired by Hot, Sour, Salty, Sweet.
 

Grill Roasted Chicken Pieces: Basic Technique

August 30, 2008 by Mike Vrobel 4 Comments

This is the basic technique for grill roasted chicken. It's my favorite way to cook chicken breast on the grill - bone in, skin on, indirect heat for 40 to 45 minutes. It comes out much juicier than boneless, skinless chicken breasts.

Personally, I prefer dark meat, and this technique also gives you great chicken legs, or thighs and drumsticks.

The basic technique gives you a delicious, basic "grilled chicken" with nice crisp skin. But this technique is the base for cooking any bone-in chicken pieces on the grill. In the technique, I show you where you should add a rub, like a barbecue rub or spice paste (before the chicken goes on the grill), or where you should add a glaze, like barbecue sauce or teriyaki sauce (at the end of the grilling time, because glazes tend to have a lot of sugar, and they will burn if you put them on too soon.)

Basic Technique: Grill Roasted Chicken Pieces

Ingredients

  • Chicken: 4 lbs assorted chicken pieces, bone in and skin on

Brine (optional, but helps a lot, especially with breasts)

  • Brine: ¼ cup table salt (½ cup Kosher salt), dissolved in 1 quart water
  • Brine for 1 hour


Instructions:
1. If you have the time, brine the chicken pieces: Submerge them in the brine solution, and refrigerate for 1 hour (no more than 4 hours).

2. Preheat grill, and set to indirect/high.
On a charcoal grill, light a chimney full of charcoal, wait for it to be covered with ash, then spead the charcoal in two piles on opposite sides of the grill, leaving a space in the middle for a drip pan.
On a gas grill, preheat with all burners on for 15 minutes. Leave the ones on the outside on, and turn off the burners in the middle. On a 3 burner grill, you'd have On-off-On. On a 4 burner - On-off-off-On. And so on...

3. Season chicken with ground pepper. Salt it as well, if you didn't brine the chicken. I use about ¼ teaspoon of kosher salt per piece. *Also - if you're using a rub, season the chicken with the rub now as well.

4. Put chicken on indirect part of grill grate, skin side down, and cook with the lid closed. Turn skin side up after 20 minutes, or when the skin is browned. The chicken is fully cooked when the chicken breasts until they reach 160*F at their thickest part, and the legs/thighs until they reach 170*F. This will probably take 40 minutes for the breasts/wings, and 50 minutes for the legs/thighs.

5. If using a glaze (like barbecue sauce), when the chicken is almost cooked, brush the skin side with glaze, then flip the chicken, skin (and glazed) side down, over the direct heat part of the grill grate. Cook for about three minutes, or until the glaze is nicely browned; while it's cooking, brush glaze on the other side. Flip again (skin side up), and cook over direct heat until the glaze browns, roughly another 3 minutes; while it's cooking, brush the skin side with some more glaze. Remove to a platter, and serve.

In summary:
Cook indirect/high, skin side down, covered, for 20 minutes, or until skin is lightly browned. Turn skin side up, and cook indirect/high until fully cooked, an internal temp of 160*F for breasts/wings, 170*F for thighs/drumsticks; this should be 40 to 50 minutes of cooking time.

Then, if glazing: brush skin side with glaze, then cook skin side down on direct/medium for 3 minutes. Brush non-skin side with glaze, then cook skin side up on direct/medium for another 3 minutes. Brush skin side with glaze, and remove to a platter for serving.

Questions?  Comments?  Better ideas?  Leave them in the Comments section, below.

Related posts:
Click here for my Thai Grill Roasted Chicken Breasts
Click here for my Backyard Barbecue Chicken

Grilled Mixed Summer Vegetables, Provence style

August 30, 2008 by Mike Vrobel Leave a Comment

Garrison Keillor once said that, in Lake Woebegone, the only time you had to lock your car doors was in August - or else you'd find that someone had "generously" filled your back seat with zucchini.  It's that time of year in Northeastern Ohio - I get three pounds of squash every week from my CSA.  And this week, we got two pounds of eggplant, and some heirloom tomatoes, some garlic, cipollini onions, and a big bunch of basil.
In the past, I would have been stumped.  What do I do with all this stuff?  The only thing that I could make with zucchini that I actually liked to eat was zucchini bread.  But now, thanks to Patrick Payet, I have a go-to zucchini recipe that I've been looking forward to making once summer came around.*
*Did I mention that I was in a cooking class...in Provence?
My new answer: Tian Provencal.  The recipe I learned from Patrick is roasted in the oven, but it's too hot for that yet, so I adapted it to the grill.*
*And since Tian is named after the pot it's cooked in (Tian is "clay pot" in French), I can't really call it that any more.  So, we'll go with mixed summer vegetables.

Recipe: Grilled Mixed Summer Vegetables, Provence style

Ingredients:
  • 3 lbs summer squash, ends trimmed, stripe peeled*, cut lengthwise into ½" thick planks
  • 1 lbs Eggplant, ends trimmed, stripe peeled, cut lengthwise into ½" thick planks
  • 4 cippolini onions, trimmed (or, 1 medium onion, peeled and cut into ½" thick planks
  • 2 tablespoon extra virgin olive oil
  • 1 teaspoon Herbes de provence
  • ½ teaspoon kosher salt
  • ½ teaspoon fresh ground pepper
  • 3 cloves garlic, minced (or pressed through a press)
  • 1 large tomato, cored and diced
  • 4-6 basil leaves, cut into a chiffonade
Directions:
1. Prep the vegetables: Prep the squash, eggplant and onions as described above.
*By "stripe peeling", I mean peel long strips of skin off the squash (and eggplant), leaving it looking zebra striped - see the eggplant in the picture below; you can see the effect I'm looking for.

2. Season the vegetables: Toss the squash, eggplant, onions, olive oil, herbes de provence, salt and pepper in a large bowl, until everything has an even, thin coat of olive oil, herbs and salt and pepper on it.
3. Grill the vegetables: Preheat grill to medium. Grill the squash, eggplant and onions until browned and soft,  4 to 8 minutes per side.
4. Dice and season the grilled vegetables: Remove from the grill.  As soon as you can handle them (I use tongs, so I can do this immediately) cut the squash and eggplant crosswise into 1-2" chunks, and dice the onion.  While still hot, put in a bowl and add the minced garlic, then toss.  The heat from the grilled vegetables will release the flavor of the garlic, so you want to do this part as soon as possible.
5. Finish the dish: Add the diced tomato, and the basil chiffonade into the bowl, and toss again.  Taste for seasoning; add salt, pepper if it needs it.
The result:
Notes:
*This recipe can be halved or doubled easily, depending on the amount of squash you have.  Though, I'm not sure about doubling it - I have a very large grill, and as you can see I barely had enough room for the squash I had.
*You can use whatever summer squash you can find, and skip the eggplant if you want to
*If you have fresh herbs (thyme, rosemary, sage), you substitute them for the herbes de provence.
*When you taste for seasoning, along with the salt and pepper, you can add:
-balsamic vinegar if it needs a little sweet and sour kick
-hot pepper sauce if it needs a little hot and sour kick
-more olive oil if it needs more

Questions? Comments? Better ideas? Leave them in the comments, below.

Related posts:
Click here for my Grilled Monster Zucchini recipe.
Click here for my Grilled Asparagus recipe.

Grill Roasted or Rotisserie Potatoes and root vegetables

August 28, 2008 by Mike Vrobel 5 Comments

Mixed root vegetables in a foil pan
Grill (Or Rotisserie Grill) Roasted Root Vegetables

This recipe was inspired by the vendors I saw at the market in L'Isle Sur la Sourge, during my cooking classes in Provence.

(I feel like such a snob when I say that. "Ahem...when I was in Provence...". And you know what? I like sounding like a snob when it means I can say "I went to Provence!")
There, the rotisserie chicken vendors would have their rotisserie chicken cooking over a pile of sliced potatoes - when you ordered a chicken, the potatoes, flavored by the chicken drippings, were the side dish you could order.
This can be cooked on any grill where you can get indirect heat, but it's a great side dish when you're roasting a large cut of meat, and you can put the pan underneath that meat to catch the drippings and flavor the potatoes and vegetables. As an example, when you have a large cut of beef on the rotisserie.


What do you think?

Questions? Comments?  Other ideas? Leave them in the comments section below.
Related Posts:
My Rotisserie beef rib roast recipe, which you see in the pictures above.
My rotisserie pan potatoes recipe, where I improved the rotisserie pan technique.
Click here for my other rotisserie recipes.
Recipe inspired by my visit to Provence, France...and Steven Raichlen's Barbecue Bible cookbook.

Check out my cookbook, Rotisserie Grilling.Everything you could ask about the rotisserie,
plus 50 (mostly) new recipes to get you cooking.It's a Kindle e-book, so you can download it and start reading immediately!

*Enjoyed this post? Want to help out DadCooksDinner? Subscribe to DadCooksDinner using the RSS or Email options on the right, link to this post from your blog, recommend DadCooksDinner to your friends, or buy something from Amazon.com through the links on this site. (Like my Rotisserie Grilling cookbook...)

Rotisserie Beef Rib Roast with a herb crust

August 26, 2008 by Mike Vrobel 12 Comments

Rib-roast-off-grill1


This is one of my first recipes, and is appropriate for a small roast - no bigger than 4 pounds. For a larger roast, see my Rotiserie Beef Prime Rib Roast recipe; for a boneless roast, see my Rotisserie Boneless Ribeye Roast with Garlic Crust recipe.


I'm a big fan of my rotisserie. My favorite recipe is using it to roast whole chickens - nothing else I've done gets the skin as crispy, and cooks the chicken as quickly, as my rotisserie on my Weber kettle grill.When I saw Steven Raichlen cook an herbed beef rib roast using a rotisserie on his show, Barbecue U, I knew I had to try it.

What I didn't know is I'd spend the afternoon on Weather.com, trying to tell when the rain was going to stop.*
*"Hmm...the storm has moved (measuring on monitor with fingers) this much in the last hour, so that means it should move (measuring with fingers again) to about here...it's going to be close."

Recipe: Rotisserie Beef Rib Roast with a herb crust
Equipment:
  • Grill with Rotisserie attachment (I used a Weber Summit 650 with an infrared rotisserie burner. Here it is.)*
  • Aluminum foil drip pan (9"x11", or whatever fits your grill)
  • Butcher's twine for trussing the roasts


Pre-salt the beef:
Making the herb paste:


Rub the roast:

Skewer and Cook the roast:

Carve and serve:
Notes:
*The herb crust on this roast was amazing. The end pieces were almost as good as the bones, which you won't hear too often from me. Next time, I'm going to use a trick I read in Cook's Illustrated: I'm going to cut the ribs off before I cook the roast, rub the paste on the roast an the ribs, then tie the ribs back on with some butcher's twine. That way, the paste gets onto an extra surface on the meat.
*You can cook this recipe with a bigger roast; I was only serving the five of us, and we had a lot of leftovers.  That being said, I would consider getting two 2-3 bone roasts instead of one big one.  The browned herb crust you get from the rotisserie is why you want to cook a beef roast this way, and you get more surface area with two roasts then you would get with one big one.
*I'm going to check the temperature more often. Meduim. I can't believe I overcooked it.
*The spit conducts heat into the middle of the roast, which results in it cooking quicker than it would if you were just roasting it.  If you like your meat rare, or medium-rare, keep checking it, and make sure you get it off the spit as soon as the roast is off the grill.
*If you're worried about food safety, keep the roast in the refrigerator while it rests with the salt, and with the paste. I kept it out of the refrigerator after I salted it, since I've read that two hours is safe. Also, it's a big roast - it needed the two hours to come up to room temperature.
*The rib roast will cook more evenly if it's at room temperature before you start cooking it. By evenly, I mean that the inside of the meat will all be the same doneness - you won't have a little "medium rare" ring in the middle, with gradations to well done before you get to the edge - it will have a much larger medium rare section in the middle, with just a little ring at the edge going to well done.
*This is obviously a "sunday dinner" type meal - it takes a while to prepare. We're having leftover roast beef sandwiches later in the week, though. Mmmm...beef with horseradish sauce...I'm drooling again.
*You don't need the food processor for the paste, but it makes it easier. If you don't have one, or don't want to use it, mince the garlic, herbs, and lemon zest, add the salt and pepper, then mix with the olive oil.

*The herbs are variable - just try to get the total volume right. Use whatever you've got available-thyme, rosemary, chives, scallions, parsley... The only one I wouldn't use too much of is the rosemary - it has a very strong taste.

*Rib roast is "prime rib", but if it's not Prime meat, then it's not Prime Rib.
(That didn't come out right. Let me try again.)
*Rib roast is the cut of beef that ribeyes come from, and that Prime Rib comes from. But it should only be called Prime Rib if the meat is USDA Prime grade meat. If not Prime grade, it should be called a rib roast. And since choice grade is pretty good, and doesn't cost its weight in gold (or oil?), that's usually what I buy for roasts.
*Due to the weather, I went with my gas grill with its infrared rotisserie burner. I prefer the taste of the charcoal grill, but this worked well with the gas grill, so I won't complain.
**OK, maybe a little. Curse you!  Curse you, "30 percent chance of afternoon thunderstorms!" Why do you always have to rain between 4 and 6PM, and then clear up so I can see how nice it is after I can't grill any more?!?!
Questions? Comments?  Other ideas? Leave them in the comments section below.
Related Posts:
Click here for my Rotisserie Beef Prime Rib recipe.
Click here for my Rotisserie Beef Tenderloin recipe.
Click here for my rotisserie pan root vegetables recipe.  (You see them under the roast in the pictures above.)
Click here for my other rotisserie recipes.
Recipe inspired by Steven Raichlen's: Primal Grill: One Good Turn. [primalgrill.org]


Check out my cookbook, Rotisserie Grilling.

Everything you could ask about the rotisserie,
plus 50 (mostly) new recipes to get you cooking.

It's a Kindle e-book, so you can download it and start reading immediately!

*Enjoyed this post? Want to help out DadCooksDinner? Subscribe to DadCooksDinner using the RSS or Email options on the right, link to this post from your blog, recommend DadCooksDinner to your friends, or buy something from Amazon.com through the links on this site. (Like my Rotisserie Grilling cookbook...)

Quick Red Salsa

August 24, 2008 by Mike Vrobel 2 Comments

This is one of the recipes I know by heart. We have tortillas for dinner about once a week, and this salsa is always on the side. It tastes better than anything you get out of a jar, and it takes less time to make than to read the recipe.

Recipe: Quick Red Salsa (From the Food Processor)

Equipment

  • Food Processor (I like an old-school Cuisinart)
Minced garlic
Minced cilantro
About to mince onions
Everything in, ready to puree
Done!

Notes:

  • Though I prefer the salsa if it is made with Muir Glen Fire Roasted Diced tomatoes, any canned diced tomato would work. I've had good results with Muir Glen (regular) diced, Ro*Tel, and Hunts fire roasted diced.
  • About the only way to mess up this recipe is to add too much onion, or to over-process the onion. Too much onion will overpower the rest of the ingredients - you want some bite from the onion, but don't over do it. If you over-process the onion, you get onion water, which doesn't taste that good. Make sure you chop the onion with one second pulses, and not by just running the processor!
  • You can make this recipe without the food processor - just chop everything fine, and mix it together in a bowl - but the food processor makes it so easy...
  • Salsa tastes best if it rests for a half an hour for the flavors to mingle. It will keep for about a 4 days in the refrigerator.
Recipe inspired by Meredith Deeds' Mexican cooking class at the Western Reserve School of Cooking, and by Rick Bayless' Salsas That Cook

Related Recipes

I use this salsa every week on Taco night. Grilled Steak Fajitas, Grilled Skirt Steak Tacos, Instant Pot Quick Chicken Tacos, Instant Pot Quick Pork Tacos...the list goes on.

Chipotle in Adobo Puree

August 23, 2008 by Mike Vrobel 3 Comments

Chipotles en Adobo are canned chipotle peppers - smoke-dried jalapenos - in a thick vinegary, red sauce.  When I started using them years ago, you had to go to mexican groceries, or specialty cooking shops.  Now you can find them in any grocery store, in the "international" aisle.

They are a great ingredient if you need heat and some smoky flavor.  I use them all the time in salsa and chili, and occasionally in a vinaigrette with fish or shrimp.  Be careful though - they pack a punch!

This recipe is a quick tip I picked up from Bobby Flay. Instead of using "one chipotle pepper, choppped, with adobo sauce", puree the entire can ahead of time and store it in the refrigerator.

Chipotle Puree

Ingredients:

  • 1 can Chipotle Peppers

Directions

  1. Open can, pour into food processor or blender.  Process for 30 seconds, or until smooth.  (Note: the mini-bowl that comes with a KitchenAid food processor is perfect size for this, and I don't have to clean up the processor afterward.  Well, except for the lid.)

  2. Scrape puree into a covered container.  Store in the refrigerator.

One heaping teaspoon of chipotle puree is equal to one chipotle en adobo with adobo sauce. Stored this way, they keep forever. I've kept them for up to three months. Normally, I use a batch in about two months, but one time I found a really large can at the local Mexican grocery...

Speaking of the Mexican grocery, Here's the brand I usually buy: La Costena Chipotle in Adobo

But I've bought lots of different brands, and they all seem to be about the same. The big advantage to buying them at the Mexican grocery is cost - they're a lot cheaper, and often available in larger cans. (Yes, I use a lot of chipotle.)

Hello, World!

August 21, 2008 by Mike Vrobel 8 Comments

This is Mike. I've cooked dinner for my family every night* since 1999. When I started, it was just me and Diane (my lovely wife); now I'm cooking for Ben (age 7), Natalie (5) and Tim (3) as well. Home cooking is my hobby, my way of relaxing, and my obsession**.

*OK, maybe not EVERY night. You know what I mean. We only go out to eat about once every two weeks, and Diane cooks dinner every now and again. But, I plan all our meals, do all the grocery shopping, and cook dinner 9 nights out of 10, if not more often.

**...OK, OK, you got me. Not my only obsession. But it's the big one.

We live in the Akron, Ohio area - that's just south of Cleveland, if you didn't know. I try to cook locally, seasonally, and ethnically (if that's a word.) But, that's a goal, not a hard and fast rule for me. The kids are picky eaters, but we've managed to make them picky eaters across multiple cultures - Mexican (corn tortillas, plain), Italian (pasta, plain), Asian (White/Jasmine/Basmati rice, plain) and American (Chicken Nuggets, Fries, hamburgers, hot dogs)*.
*Chicken Nuggets...shudder.

Also, you should know - I'm a geek. (Try to act surprised.) To paraphrase my hero, Alton Brown -

"Teach a geek to cook, and you get a blog."

I've learned a few things over the last nine years, and I'm constantly trying to give tips and advice to my friends and family about how to cook*. I've been reading other food blogs, and I wanted to start sharing MY obsessions about food with the world.

*It's to the point that they all come to me with questions about cooking. Or try to avoid me, so I don't start telling them how to "do it right". Either way, I figured I better start sharing, or they'll all stop talking to me.

So, World, are you ready?*
(*Gulp. Am I ready?)
[Update 8/25/2009]
Ben, Natalie and Tim are 8,6 and 4 now, and I've had a great year with the blog. Read about it here:
Year One of DadCooksDinner
  • « Previous Page
  • 1
  • …
  • 35
  • 36
  • 37

Welcome to Dad Cooks Dinner!

I'm Mike Vrobel, a dad who cooks dinner every night. I'm an enthusiastic home cook, and I write about pressure cooking, rotisserie grilling, and other food topics that grab my attention.

More About Me →

Popular

  • Three bowls of cooked Pinto Beans on a wood table
    Instant Pot Pinto Beans (No Soaking)
  • Pressure Cooker Beef Shank (Osso Bucco)
  • Pressure Cooker 7 Hour Leg of Lamb (in 90 minutes)
    Pressure Cooker 7 Hour Leg of Lamb (in 90 minutes)
  • Pressure Cooker Brown Jasmine Rice
  • Grilled Tomahawk Steak (Long Bone Ribeye, Reverse Seared)
    Grilled Tomahawk Steak (Long Bone Ribeye, Reverse Seared)
  • A green bowl full of chicken noodle soup
    Instant Pot Rotisserie Chicken Noodle Soup

Seasonal

  • A bowl of asparagus risotto
    Instant Pot Asparagus Risotto (Pressure Cooker Recipe)
  • Grilled Butterflied Chicken with Garlic Butter
  • Sous Vide rack of lamb sliced into chops
    Sous Vide Rack of Lamb with Dijon Bread Crumb Crust
  • A bowl of beef stew with asparagus, carrots, and radishes.
    Instant Pot Spring Vegetable Beef Stew
  • A Rotisserie Chicken (Pollo Asado)on a platter of shredded cabbage
    Rotisserie Chicken Pollo Asado
  • Rotisserie Pork Shoulder Roast with Carolina Mustard BBQ Sauce
    Rotisserie Pork Shoulder with South Carolina Mustard Barbecue Sauce

Footer

↑ back to top

About

  • Privacy Policy

Newsletter

  • Sign Up! for emails and updates

Contact

  • Contact

Copyright © 2025 Dad Cooks Dinner