DadCooksDinner

  • Home
  • Rotisserie
  • Recipes
  • Tools
  • Books
  • Merch
menu icon
go to homepage
  • Recipes
  • Books
  • Tools
  • Merch
  • About
subscribe
search icon
Homepage link
  • Recipes
  • Books
  • Tools
  • Merch
  • About
×
Home » Recipes

Rotisserie Pineapple

May 14, 2009 by Mike Vrobel 12 Comments

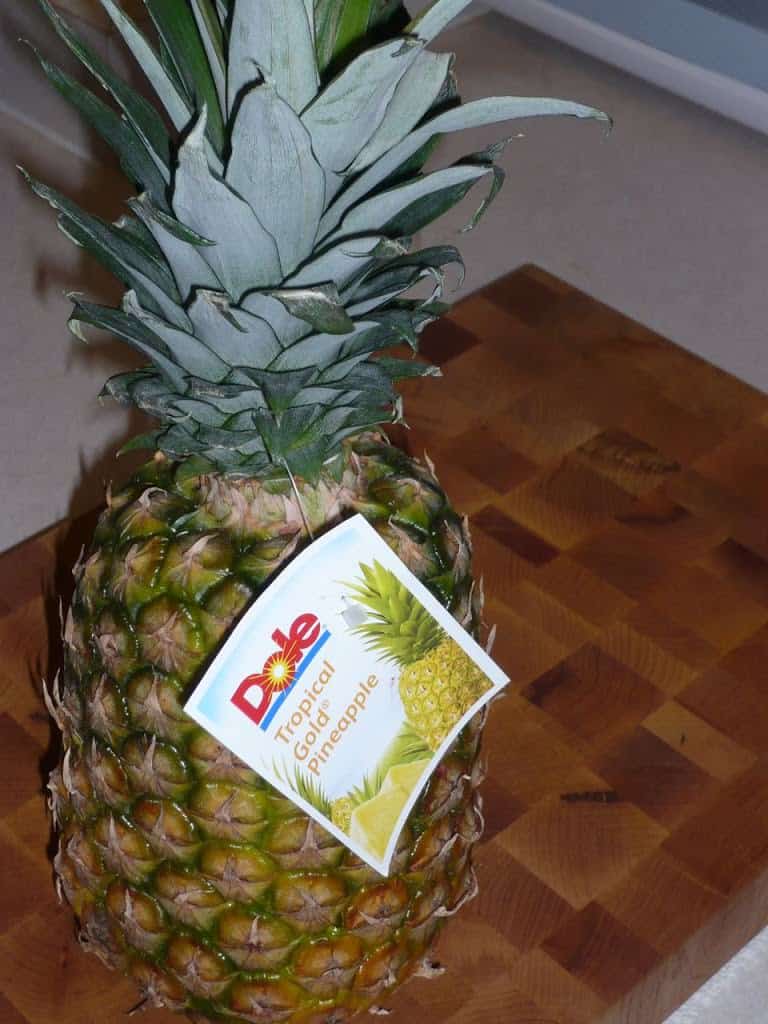
Homemade Rotisserie Pineapple seems exotic, but it is easy - the only hard part is driving the spit through the core of the pineapple.

Rotisserie Pineapple
[feast_advanced_jump_to]

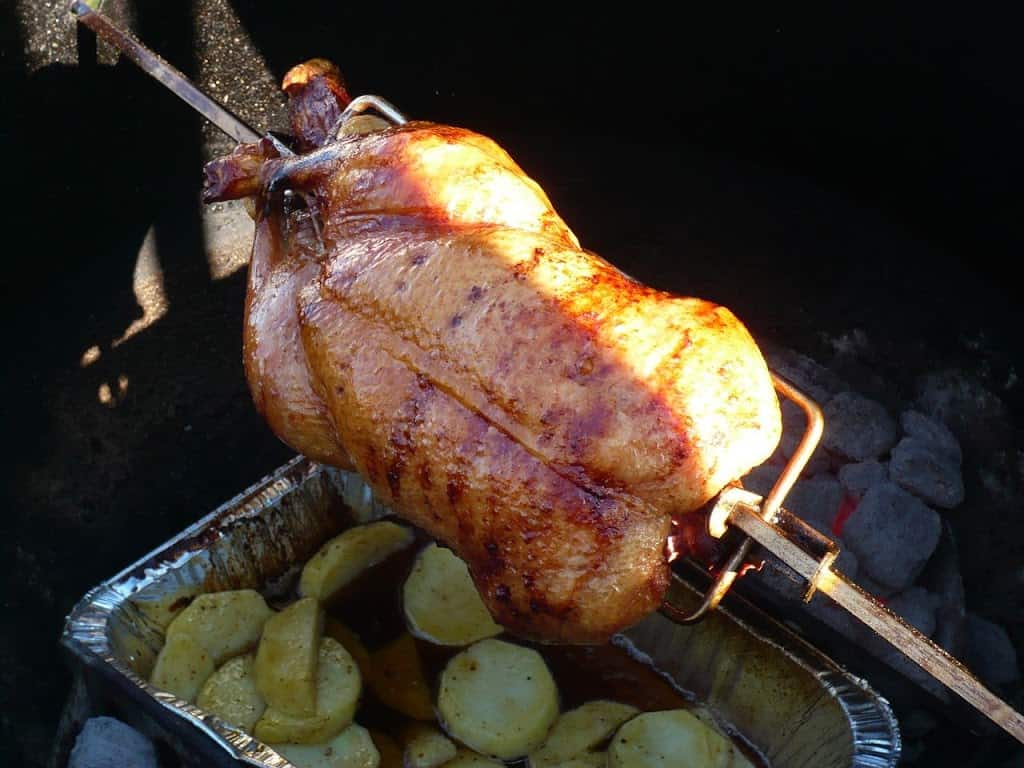
Now, most people aren't as rotisserie crazy as I am, with an extra spit lying around. That's OK - cook it on the same spit as the main course. It will take about an hour to rotisserie a pineapple, at indirect high heat; the same time it takes for a 4 pound chicken, a beef rib roast, or a pork loin. That way, you'll have a sweet side dish to serve with dinner. Or, save the pineapple for dessert and serve it with a scoop of vanilla ice cream.

What You'll Need

  • A pineapple
  • Grill with Rotisserie attachment (I used a Weber Summit 650 with an infrared rotisserie burner. Here is the current version of this grill.)
  • aluminum foil drip pan (9"x11", or whatever fits your grill)
Trimming a pineapple and skewering it on a rotisserie spit

How to Rotisserie a Pineapple

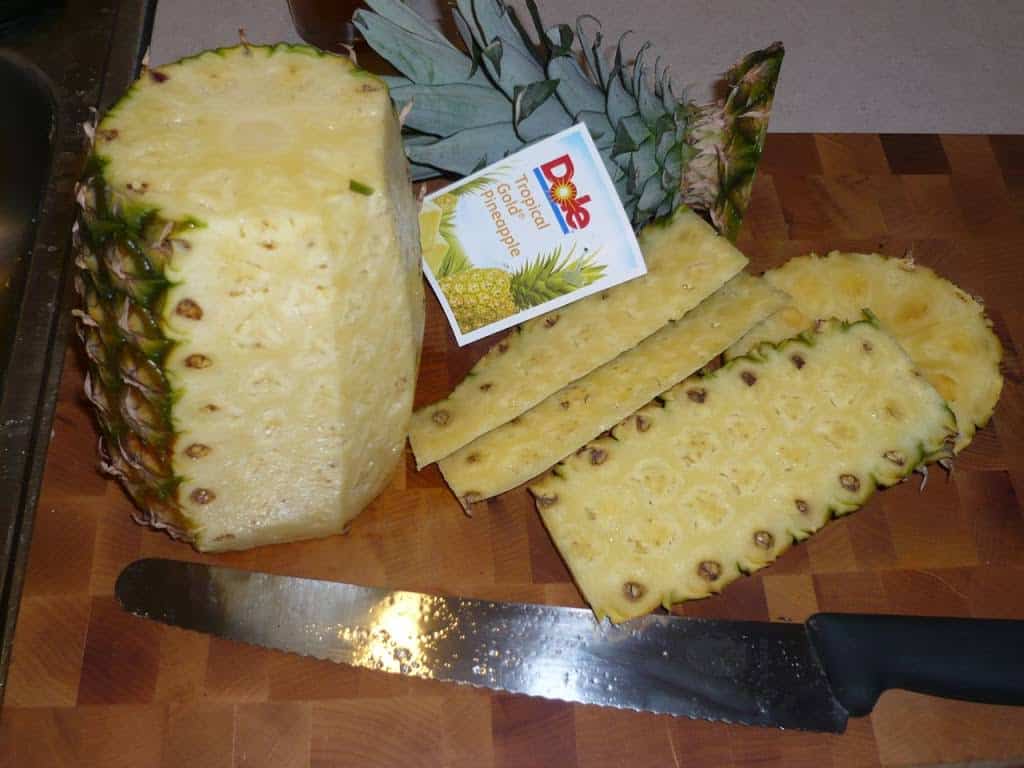
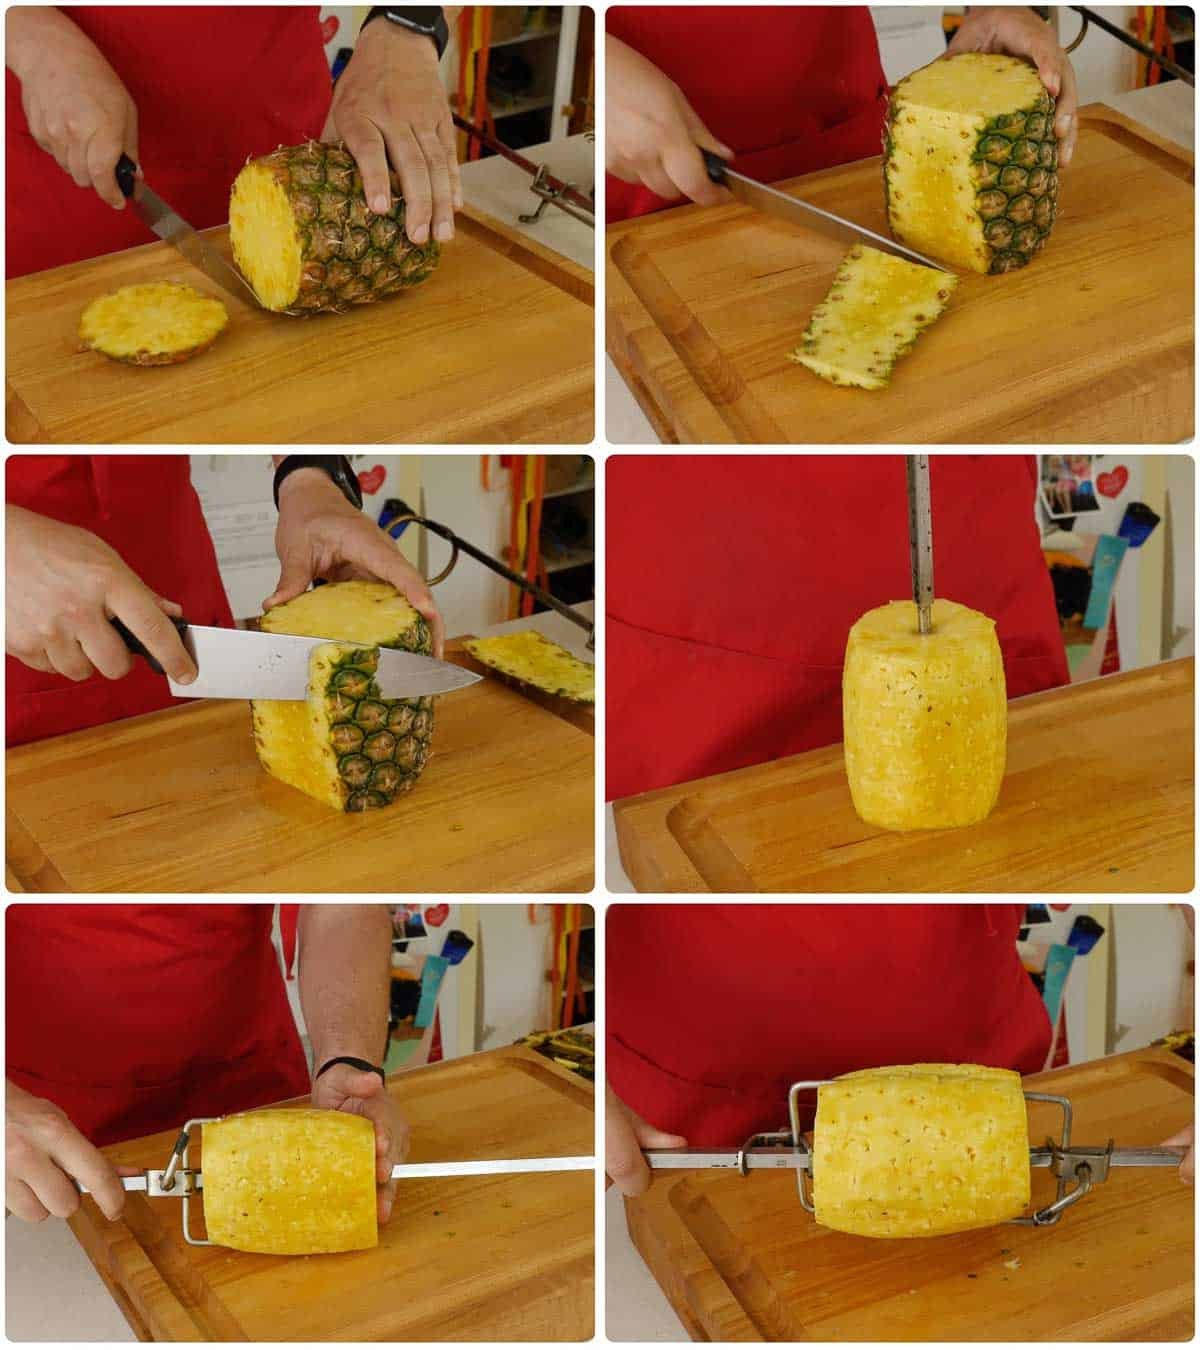
Trim, peel, and spit the pineapple

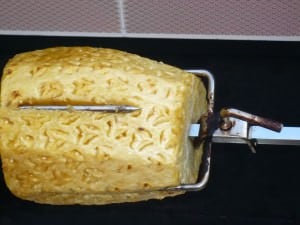
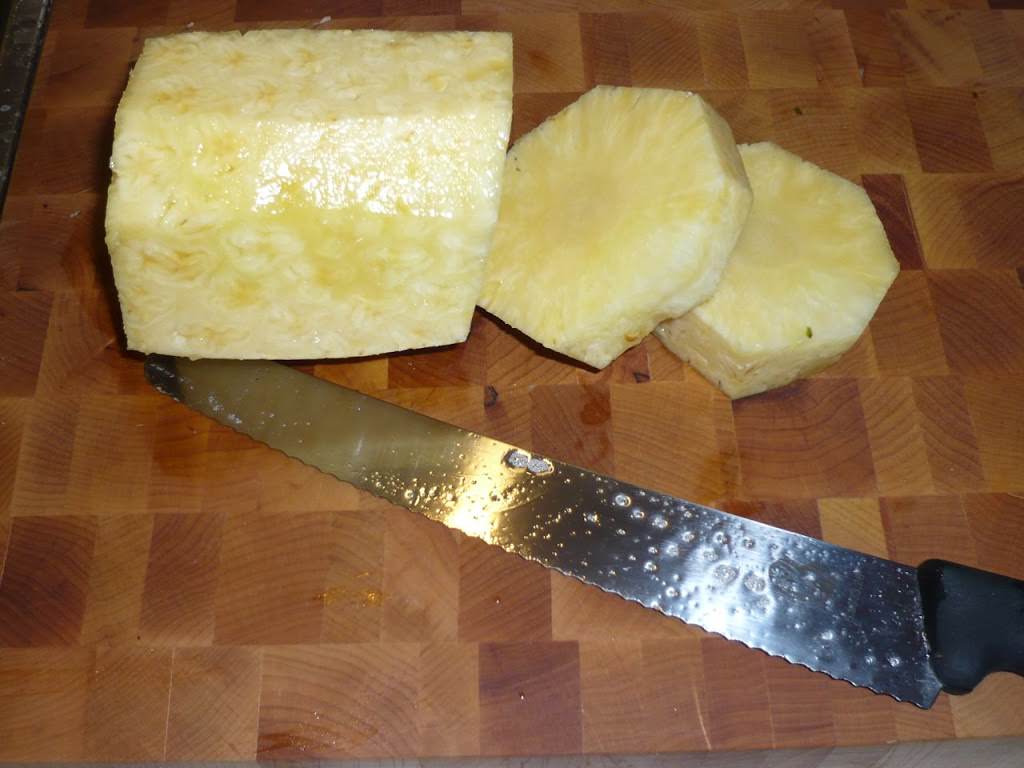
Cut the top and bottom off the pineapple. Working around the outside of the pineapple, cut the rind off in 1 inch strips, making sure you cut deep enough to remove the eyes. Once the first strip of rind is removed, you can see the eyes in the pineapple; use them as a guide for how deep to cut the rest of the way. Drive the spit through the center of the pineapple, and secure the pineapple to the spit with the spit forks.

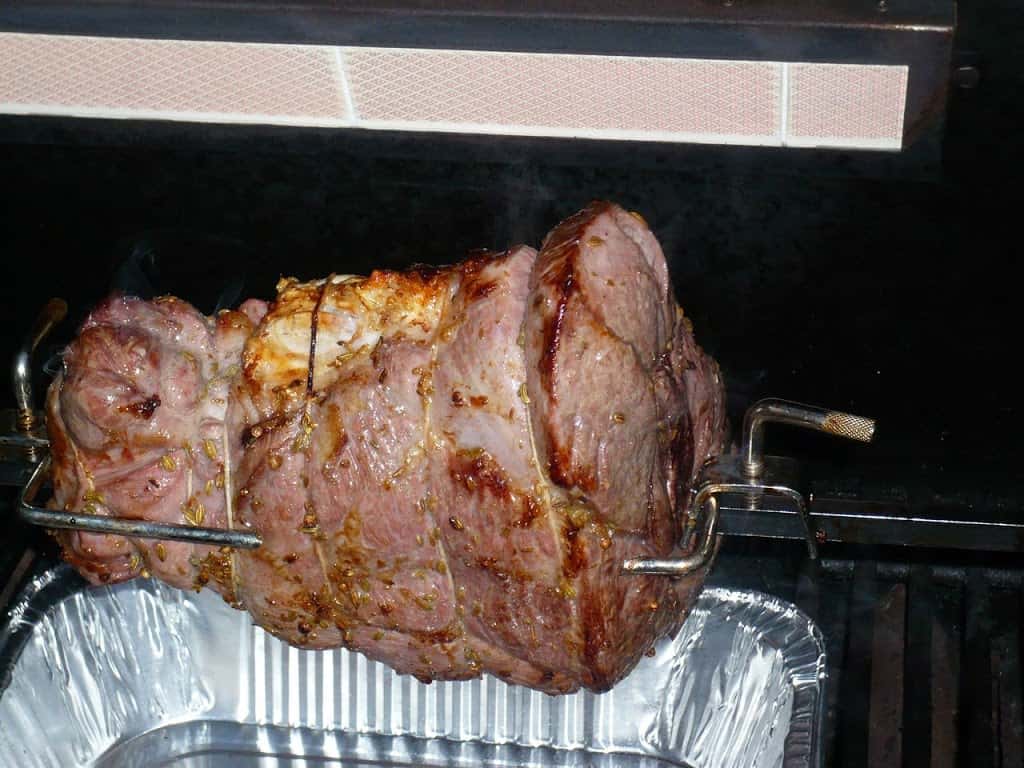
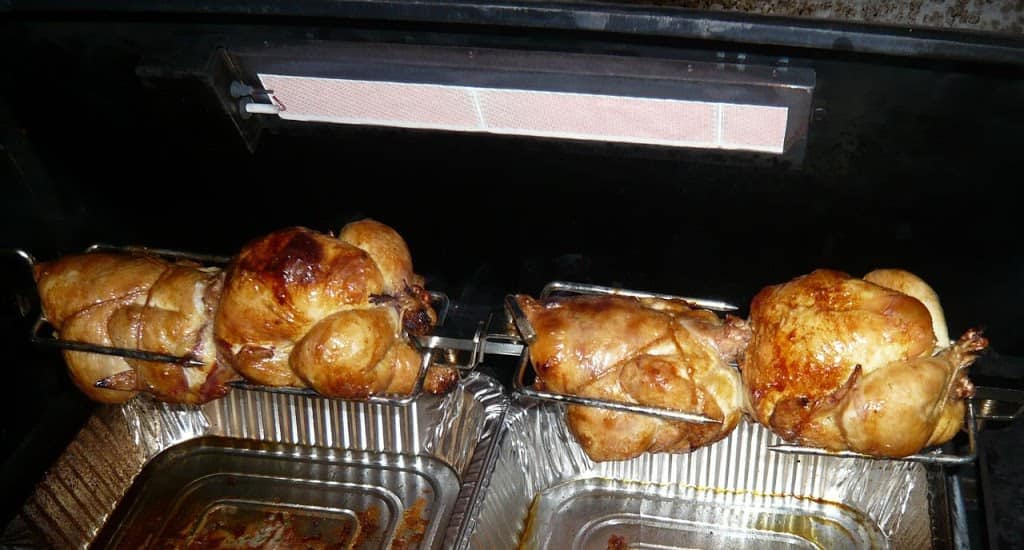
Set up the grill for indirect high heat (450°F)

Set the grill up for indirect high heat with a drip pan in the middle of the grill. (On my 6 burner Weber Summit, I turn on burners 1 and 6, and the infrared rotisserie burner.)

Rotisserie the pineapple

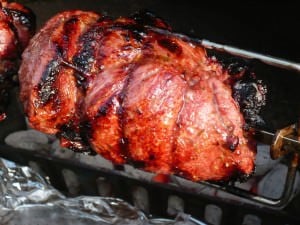
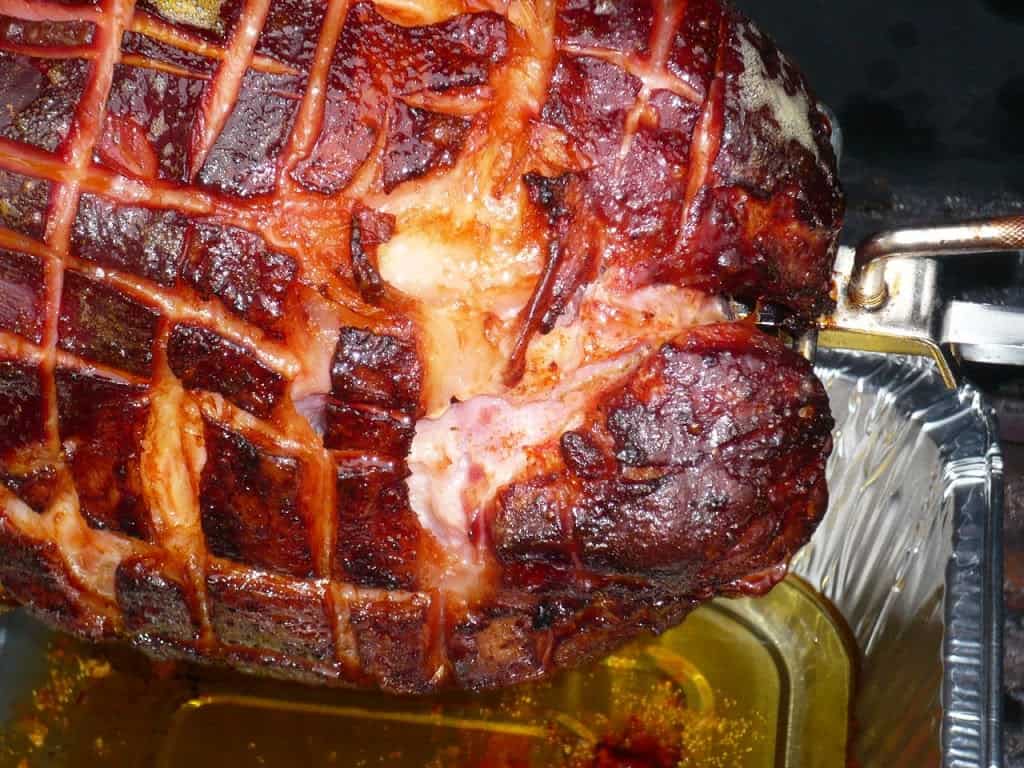
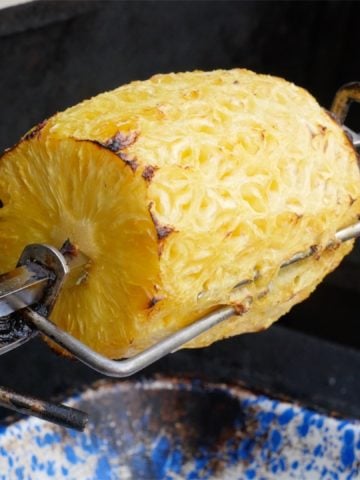
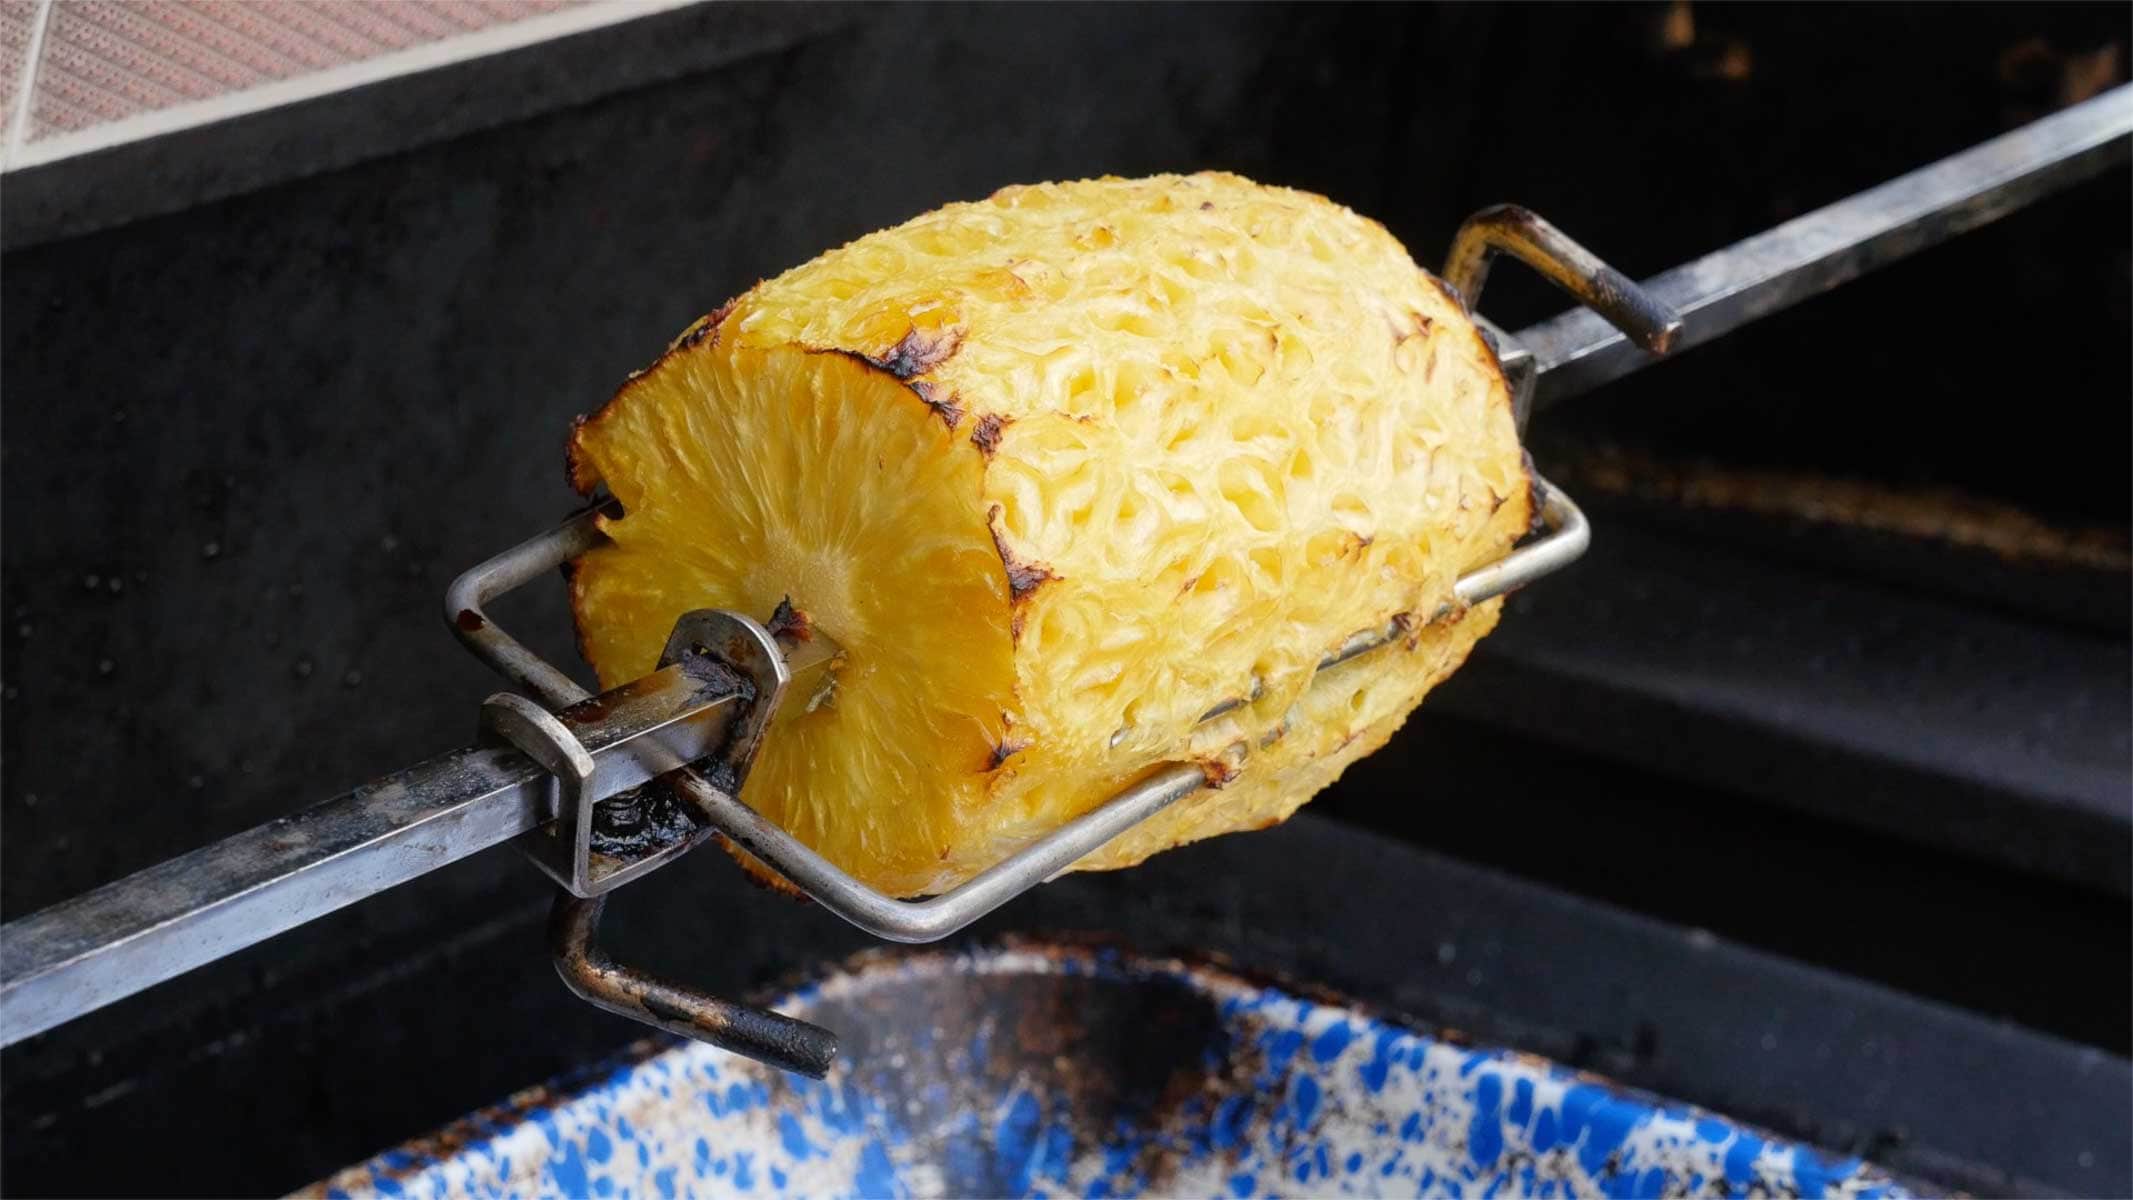
Put the spit on the grill, start the motor spinning, and make sure the drip pan is centered beneath the pineapple. Close the lid and cook until the pineapple is softened and browned around the edges, about 1 hour. (On my Weber Summit, I check the pineapple after a half an hour, and turn off the infrared rotisserie burner if the pineapple is browning at the edges.)

Serve

Remove the pineapple from the rotisserie spit. Be careful - the spit and forks are blazing hot. Let the pineapple rest until it is cool enough to handle, then slice the pineapple and serve.

What do you think?

Questions?  Other ideas?  Leave them in the comments section below.

Related Posts

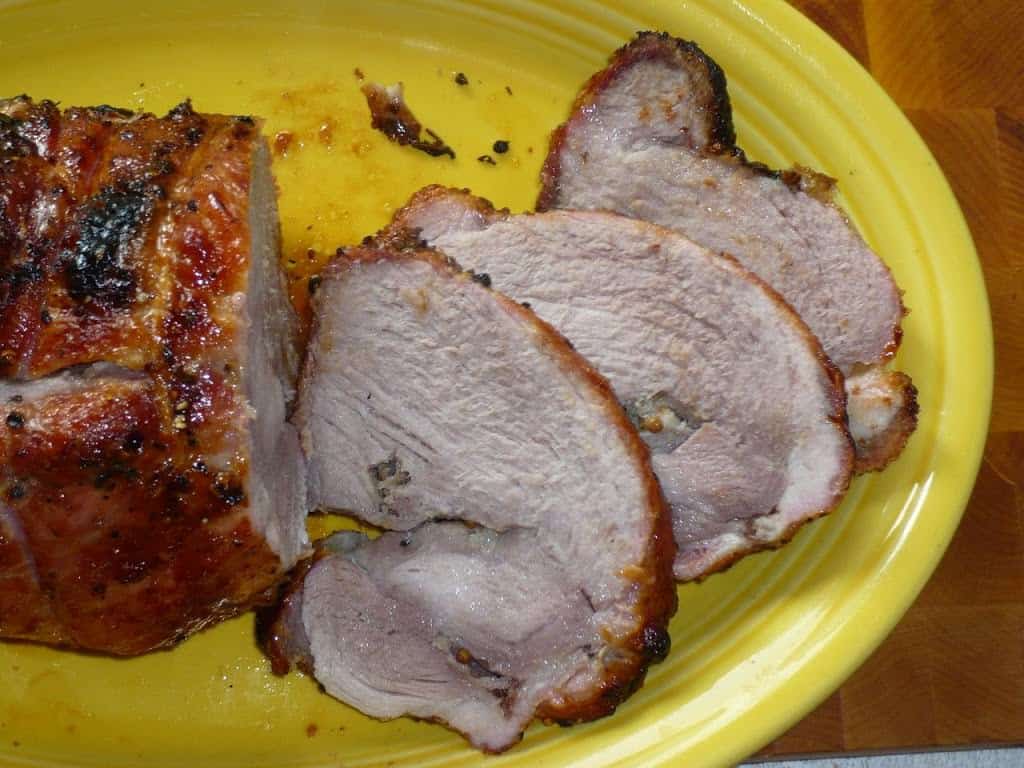
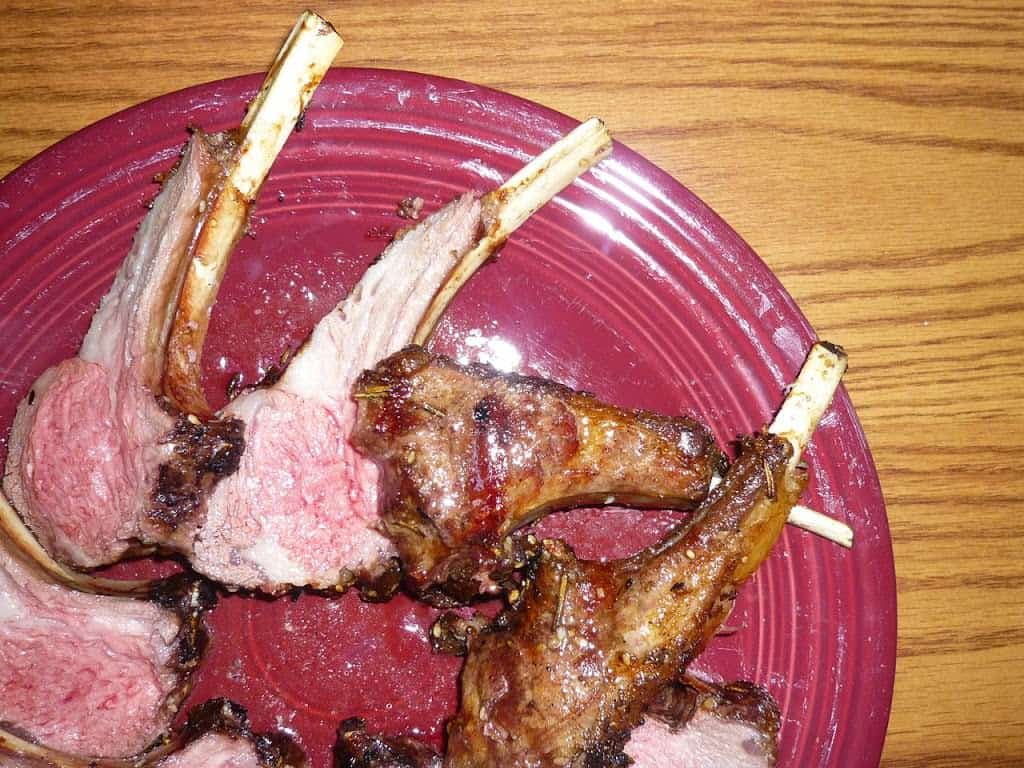
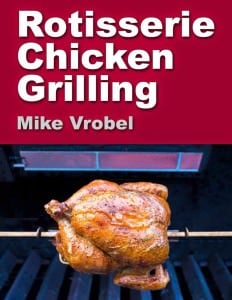
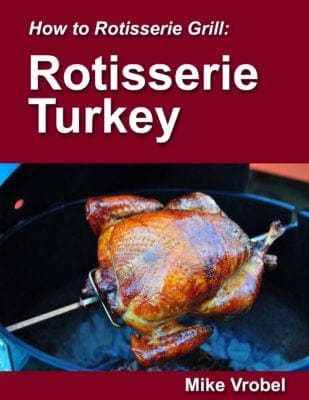
Check out my other rotisserie recipes.

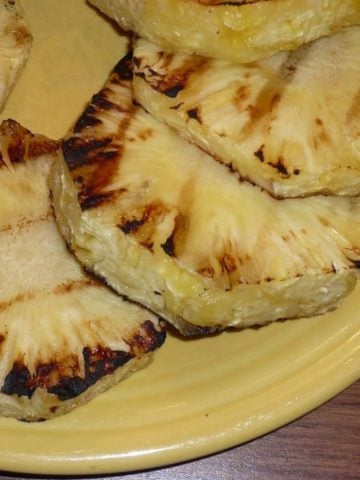
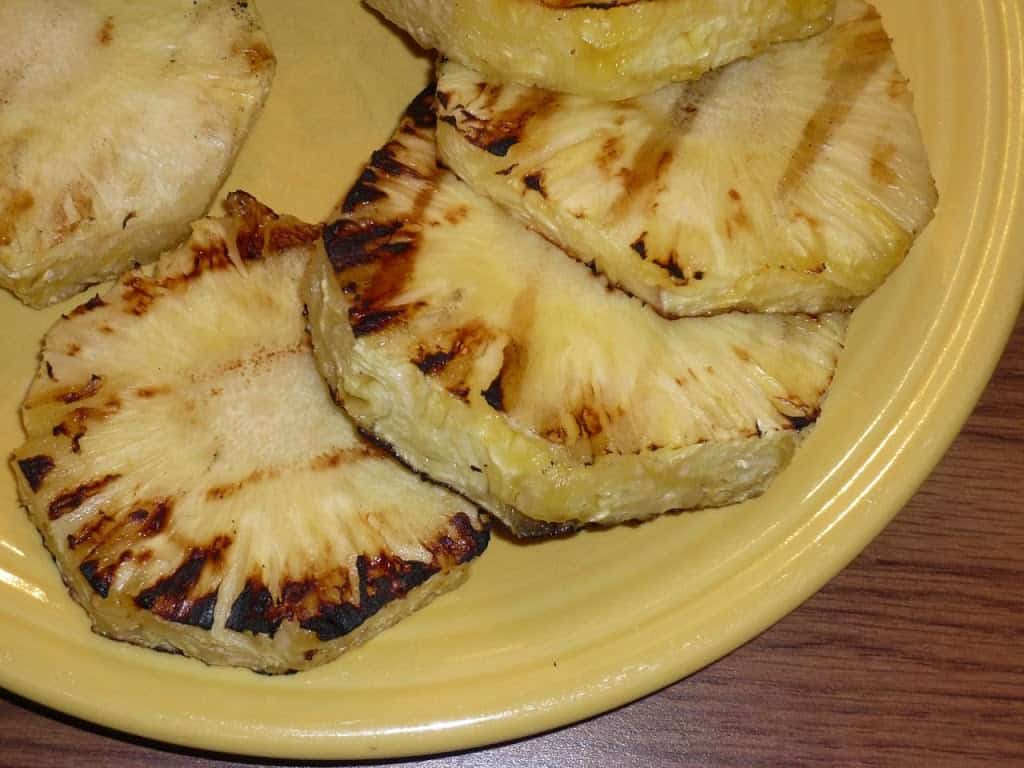
No rotisserie?  Try grilled pineapple.

Inspired by:
Steven Raichlen's TV show, Barbecue U.
Steven Raichlen's blog.


Check out my cookbook, Rotisserie Grilling.

Everything you could ask about the rotisserie,
plus 50 (mostly) new recipes to get you cooking.

It's a Kindle e-book, so you can download it and start reading immediately!


Enjoyed this post? Want to help out DadCooksDinner? Subscribe to DadCooksDinner using the RSS or Email options on the right, or buy something from Amazon.com through the links on this site. Thank you!

Ethnic and Gourmet Markets in Akron

May 7, 2009 by Mike Vrobel 11 Comments

Here is my list of Akron area stores that a home cook should know about. They include ethnic and gourmet grocery stores, and high end cookware suppliers. I've shopped at every one of these stores, most of them many times, because of the quality of the ingredients you can get at them.

I also have a list of shops that are a short drive from Akron, and are worth the trip.If you know of any other ethnic or gourmet markets in the Akron area, let me know in the comments and I'll add them to the list. Thanks!

Akron area

Sherman Provision (map)
Full service butcher. (Tell Mike and Mauri that I said "Hi!")
(Here are my road trip notes: Sherman Provision)
4002 Johnson Road
Norton, OH 44203
(330) 825-2711
ShermanProvision.com‎


DeViti's Italian Market (map)
Italian grocery, great meat and deli counter
(Here are my road trip notes)
560 E Tallmadge Ave
Akron, OH 44310
(330) 535-2626
DeVitis.com‎


Asian Food Market (map)
Multi-asian grocery, specializes in Korean and Japanese
(Here are my road trip notes)
2419 State Road
Cuyahoga Falls, OH 44223-1503
(330) 928-4710


Difeo and Sons Poultry (map)
Butcher, specializing in poultry
(Here are my road trip notes)
1073 Grant St
Akron, OH 44311
(330) 773-7881
facebook.com/difeoandsons


La Chiquita Latinos Market (was: La Michoacana Market) (map)
Mexican grocery
(Here are my road trip notes)
1448 Copley Rd
Akron, OH 44320
(330) 864-0565


West Point Market: CLOSED (map)
Gourmet grocery, full service meat and fish
Best wine selection in town
(Here are my road trip notes)
1711 W Market St
Akron, OH 44313
(330) 864-2151
westpointmarket.com
West Point Market is back! They're in a new, smaller location:
33 Shiawassee Ave.
Fairlawn, OH 44333
Phone: 330.864.2151
westpointmarket.com


Mustard Seed Market (map)
Health food and organic grocery
3885 Medina Rd
Akron, OH 44333
(330) 666-7333
mustardseedmarket.com


Kirbies Meats and Catering (map)
Full-service butcher
4062 Fishcreek Rd
Stow, OH 44224
(330) 688-4333
Kirbies.com


The Cookery (Western Reserve School of Cooking store) (map)
High-end cookware and cutlery
140 N Main St
Hudson, OH 44236
(330) 650-1665
wrsoc.com


A Best Fixture/A Best Kitchen (map)
Restaurant supply store with low priced (but good) cookware. Open to the public
(Here are my road trip notes)
424 W Exchange St
Akron, OH 44302
(330) 535-2811
akitchen.com

Hana Asian Market: CLOSED (map)
Asian market
Here are my road trip notes)
1390 N. Portage Path
Akron, OH 44313
(330) 836-2700
(h/t Lisa Abrahams, ohio.com)

Szalay's Sweet Corn Farm (map)
Farmer's market, open daily in season, specializes in fresh sweet corn.
(Here are my road trip notes)
4563 Riverview Road
Peninsula, OH 44264
(330) 657-2727
SzalaysFarm.com


The Spice Corner (map)
Indian market
319 E. Market St
Akron, OH 44304
(330) 535-1033‎
(Photos from the owner in Google Maps)


La Loma Supermarket (map)
Mexican supermarket, with a full service butcher shop specializing in Mexican cuts
Now part of La Loma Taqueria - will have the butcher again soon?
(Here are my notes: La Loma Supermarket)
459 Darrow Rd
Akron, OH‎ 44305
(330) 784-9300‎
(h/t Tom at ExploringFoodMyWay.blogspot.com)


Al's Quality Market (map)
Eastern European butcher, specializing in sausage
(Here are my notes: Al's Quality Market)
155 2nd Street NW
Barberton, OH 44203
(330) 753-7216‎
AlsQualityMeatMarket.com
(h/t Lisa Abrahams at ohio.com)


CLOSED: BayLobsters Fish Market (map)
High quality fish market in NE Akron area
(Here are my notes: BayLobsters Fish Market)
9224 Darrow Rd
Twinsburg, OH 44087
(330) 486-0713
baylobsters.com‎


Klein Seafood (map)
High quality fish market in downtown Akron area
1072 Grant St
Akron, OH 44311-2418
(330) 773-1551
kleinseafood.com‎


Duma Meats and Farm Market (map)
Full service butcher
(Here are my road trip notes: Duma Meats and Farm Market)
857 Randolph Road
Mogadore, OH 44260
(330) 628-3438
dumameatsfarmmarket.com


Duma's Hartville Marketplace (map)
Duma Meats second location - see entry above for details
1289 Edison Street (Stands #2 to #8 in the Hartville Marketplace)
Hartville, Oh 44632
(330) 587-0032


Near East Market (map)
Eastern Mediterranean, Middle East and Indian market
(Here are my road trip notes: Near East Market)
3461 Hudson Drive
Cuyahoga Falls, OH 44221
(330) 475-0538


Indian Grocery (map)
Indian market
2619 Bailey Rd.
Cuyahoga Falls, OH
(330) 928-7060

CLOSED: Frank Cianciola and Son (map)
Italian specialty, mainly supplies restaurants, but open to public
(Here are my road trip notes: Frank Cianciola and Sons)
180 Cuyahoga St
Akron, OH 44304
Phone: 330–253–0454
Cianciolas.com

Cuyahoga Valley Countryside Farmer's Market (in the Cuyahoga Valley National Park)
(Here are my notes: Winter Farmer's Market in the Cuyahoga Valley)
Summer markets:
Late May through October, 9AM-12PM Saturday at Howe Meadow in the Cuyahoga Valley National Park (map)
June through September, 4PM-7PM Thursday at Highland Square (map)
Winter market:
Two Saturdays a month, November through April, 9AM - 12PM at Old Trail School (map)
See cvcountryside.org for schedule details and more information [cvcountryside.org]


Nearby in Northeastern Ohio

CAM Cleveland Asian Market (map)
Chinese and Multi-Asian; large and well stocked, with signs in English
Full service butcher and fish counter
(Here are my road trip notes)
21200 Miles Rd
Cleveland, OH 44128
(216) 518-1600
huaxin.us


The Olive Tap (map)
Olive oil specialty store
(Here are my road trip notes)
1031 N Court St
Medina, OH 44256
(330) 721-6500
theolivetap.com


Penzey's Spices (map)
Dried herbs and spices
28699 Chagrin Blvd #200
Woodmere, OH 44122
(216) 839-0777
penzeys.com


Vitamix Factory Store (map)
The best blender available anywhere, locally made in Northeastern Ohio
(Here are my road trip notes)
4720 Great Northern Blvd
North Olmsted, OH
(440) 235-4840
vitamix.com

Vitamix Factory Store Solon (map)
6134 Kruse Drive
Solon, OH 44139
(440) 782.2002
vitamix.com/solon
Hours:
M, T, W, F 10AM-6PM EST
Thurs 10AM-9PM ET
Sat 10AM-6PM ET
Sun 12PM-5PM ET


Lehman's Old Time Hardware
Non-electric tools for the Amish market. Huge selection of kitchen gadgets, cast iron cookware, and canning supplies, among other things.
(Here are my road trip notes)
4779 Kidron Road
Dalton, OH 44636
Phone: (330) 828-8828
Web: Lehmans.com‎

Other good sources for finding Akron area markets and groceries

RubberBuzz
A stale list - hasn't been updated since 2006
rubberbuzz.com

Jane Snow's newsletter, "See Jane Cook"
Jane was the former food editor of the Akron Beacon Journal (see below) and is the one who introduced me to most of the stores on this list
janesnowtoday.com

Akron Beacon Journal food section
ohio.com/lifestyle/food

Cleveland Ethnic Eats
As you can see from the title, most locations in this are farther north, but it does include a good selection of Akron area markets. Unfortunately, it is no longer updated. the 8th (and last?) edition came out in April 2009.

*Enjoyed this post?  Want to help out DadCooksDinner?  Subscribe to DadCooksDinner using the RSS or Email options on the right, link to this post from your blog, recommend DadCooksDinner to your friends, or buy something from Amazon.com through the links on this site.  Thank you!

Rotisserie Pork Shoulder Roast

May 5, 2009 by Mike Vrobel 69 Comments

Rotisserie Pork Shoulder Roast

This recipe is a happy accident; I meant to bring you a pork loin roast today, but I confused my wife* by asking for a "blade end" pork loin roast; she brought home a blade shoulder roast instead.
1Normally, I do the shopping, but I'm coaching my son's soccer team, and we had a game. OK, I'm a control freak; I really WANT to do the shopping. It pains me to let someone else do it. They're going to get it wrong! But that was a good thing in this case.

*If you're looking for a rotisserie pork loin recipe, click here.


Pork shoulder (often called "boston butt", or in this case " blade shoulder") is my favorite cut from the pig, so I wasn't very upset about this mistake. Pork shoulder, unlike the very lean pork loin, has a lot of fat in it. This helps it cook up nice and juicy, even when you cook it well done. And you must cook it to well done - there's a lot of connective tissue in there with the fat. If you don't cook it enough, that connective tissue makes this a very tough cut of meat. But...if you get the connective tissue to melt (by cooking to AT LEAST 180*F), the result is tender, melt in your mouth porky goodness.

The rotisserie adds a crispiness to the outside of the roast that...well, Diane put it best while we were eating:

"Oh, my. This is soooooo good. It's like bacon on the outside, and juicy on the inside."

Recipe: Rotisserie Pork Shoulder Roast

Equipment

  • Grill with Rotisserie attachment (I use a Weber Summit with an infrared rotisserie burner. Here is the current version of my grill.)
  • Aluminum foil drip pan (9"x13", or whatever fits your grill. I use an enameled steel roasting pan.)
  • Butchers twine
  • Instant Read Thermometer

Notes

  • Sometimes, boneless pork shoulder roasts are hard to find at my local grocery. That's no big deal; I cut the bone out before cooking. It gives me more nooks and crannies to get the rub into before I truss it up.
  • Again, this is not the time to go for medium-rare, slightly pink pork. The connective tissue in the shoulder will make it jaw-achingly tough. Cook it to well done and beyond. In fact, you'd have a hard time overcooking this roast. If you have any questions about "is it done?" you should err on the side of cooking it more.

Questions? Comments?  Other ideas? Leave them in the comments section below.

Related posts

Rotisserie Pork Shoulder, Char Siu style
Rotisserie Boneless Pork Loin Roasts, Brined, Rubbed and Maple Syrup Glazed
My other rotisserie recipes. 

Inspired by

Steven Raichlen's The Barbecue! Bible


Check out my cookbook, Rotisserie Grilling.

Everything you could ask about the rotisserie,
plus 50 (mostly) new recipes to get you cooking.

It's a Kindle e-book, so you can download it and start reading immediately!


*Enjoyed this post? Want to help out DadCooksDinner? Subscribe to DadCooksDinner using the RSS or Email options on the right, link to this post from your blog, recommend DadCooksDinner to your friends, or buy something from Amazon.com through the links on this site. (Like my Rotisserie Grilling cookbook...)

Donate to a worthy cause

April 29, 2009 by Mike Vrobel Leave a Comment

Things are tough out there right now.

*Layoffs! Global economic meltdown! Swine Flu! North Korea launching missiles! Pirates on the high seas!
Instead of going back to bed, and hiding under the covers, why don't we do something useful? If you're reading this blog, you're probably better off than 99% of the world's population. Here are suggestions from two of my culinary heroes on how to help people who have less than we do:

Michael Ruhlman: Donate to Share Our Strength, an organization dedicated to feeding hungry children in America. Michael's giving three copies of his new book, Ratio (which I love, and talk about a bit Vinaigrette Basic Technique), along with his favorite kitchen scale, to people who donate through this link.

[Added 4/29:] I just realized that Michael's contest only runs through 4/30/2009. It's a good cause, and they deserve your donation, so go ahead and donate anyhow.

Alton Brown: Donate to Heifer International, an organization dedicated to helping the world's poor through the donation of...a goat. The family that receives the goat gets wool, milk, and passes some of the goat's offspring on to their neighbors...I'm not explaining this well, so I'll turn things over to the man himself:

Click this link to donate.

Thank you!

Road Trip: The Olive Tap

April 29, 2009 by Mike Vrobel Leave a Comment

otmedinaOne of the things I enjoyed the most on my trip to France was tasting olive oil in Provence.
I mentioned I took a cooking class in Provence, right? Right.

In Provence, there were a couple of stores that specialized in olive oil. They were set up to allow tasting of all their oils, and the flavor differences between them was just amazing. I brought three liters of olive oil back with me. I had more olive oil in my suitcase than anything else, including clothes!

Sadly, those wonderful oils ran out last summer. I've bought some high-quality oil since then, but it's always been hit ormiss- I wanted tohave the chance to taste the oil, just like I did in Provence.And then, right after I finished my Vinaigrette Week recipes, I got the latest edition of Jane Snow's newsletter. Lo and behold, she was talking about a store that specialized in olive oil, that was only a 20 minute drive from my house: The Olive Tap. It was fate! I had to stop in.And...I found what I've been looking for. They had ten different "plain" olive oils from all over the world. They are stored in large jugs with spigots; you can taste them, pick the one(s) you want, and then pour them into a waiting bottle. They also had flavored olive oils - hot pepper, basil, blood orange, chipotle, meyer lemon, and many others. (I particularly liked the chipotle and the lemon.)

They also had a bunch of balsamic vinegars, both plain and flavored. I tasted, sampled, and this is what I bought:

The Olive Tap (website here)
1031 N. Court St.
Medina, OH 44256 (Map Below)

My Five choices:
1. Arbequina extra virgin olive oil from Spain - buttery, fruity olive oil
2. Athenolia extra virgin olive oil from Greece - peppery, spicy olive oil
3. 18 year aged Balsamic vinegar - sweet and thick
4. Fig Balsamic vinegar - fruity and perfect for a Fig Balsamic Vinaigrette
5. Myer Lemon olive oil - flavored with lemon; I can't wait to use it on some grilled vegetables

Notes:
Good olive oil should only be used when you're NOT cooking with it. The high heat cooks out some of the complex flavors that make it taste so good. That's my excuse for having the big jug of Trader Joe's spanish olive oil on hand; I use it with a lot of my cooking.
I keep the good olive oil for use as a drizzling sauce, or in plain vinaigrettes, where you can taste the complexity.
*Oh, and the 18 year Balsamic drizzled on fresh strawberries is an Italian classic. I can't wait to get some fresh strawberries this summer to try it out.

The Olive Tap:

View Larger Map

Inspired by:
Jane Snow's newsletter, See Jane Cook

Grilled Rack of Lamb

April 23, 2009 by Mike Vrobel 3 Comments

I like to gnaw on bones. This shouldn't come as a surprise to you, if you've been reading this blog for a while. (Say, Grill Roasted Chicken Wings, here or here.) I think rack of lamb is the perfect meal for that - you get a little lamb popsicle, with the bone as the handle.*
*If you're a vegetarian who has stumbled on to my site, you have my sympathy. This is not the post for you. Try this one instead.

Recipe: Grilled Rack of Lamb
Equipment:

  • Grill (I used a Weber Summit 650. Here it is.)


Ingredients:

  • 1 Rack of Lamb (I bought Trader Joe's frozen, pre-seasoned rack of lamb, and thawed it in the refrigerator)
  • ½ teaspoon Kosher Salt
  • ½ teaspoon Pepper, freshly ground

Directions:
1. Prep lamb: One hour before cooking, remove lamb from packaging, and pat dry. Sprinkle evenly with salt and pepper, and let rest at room temperature.

2. Prep grill: Preheat grill, and set up for indirect-high heat cooking. (See step 2 here for instructions for different grills.) For my grill, this means preheat with all burners on high for 15 minutes, then turn off all burners except for 1,2 and 6.

Well browned

3. Sear outside of lamb: Over the direct, high heat part of your grill, sear the lamb until well browned on all sides, about 1-2 minutes a side. (I think of the lamb roast as having 5 "sides" - bone down, bone up, edge without bones, and the two side edges. I use the warming rack on my grill to help prop up the roast for the last three sides - see picture below.)

Leaning on the warming rack so I can brown the "bottom"

4. Indirect roast lamb: Move the lamb to the indirect part of the grill (the part without direct flame underneath), and cook for roughly 15 minutes with the lid closed, turning halfway. You want an internal temperature of 125*F in the thickest part of the roast for medium-rare, and that temperature is more important than the time - I take the temperature after 10 minutes when I turn the lamb, at the 15 minute mark, and every 5 minutes after that.


Indirect- you can just see the flames on the two lit burners, to the right of the lamb

5. Rest, carve and serve: Put the lamb on a plate, and cover with foil. Let rest for 10-15 minutes, then carve into chops between the bones to make lamb "popsicles". Serve!

Variations:
*Trim the fat: For ease of preparation, I didn't trim off the extra fat on the rack of lamb. If you want to have the best looking rack, (and especially if you're buying from a butcher), have your rack of lamb "Frenched" so all the fat is removed from the bones.

If you don't buy a frozen, pre-seasoned rack of lamb, try one or both of the following:

*Overnight salt: Instead of salting just before cooking, salt the lamb 24 hours before cooking, then store it in the refrigerator until an hour before cooking time. Continue with step 1, skipping the salt (obviously).

*Garlic and Herb rub: Combine 2 tablespoon extra virgin olive oil, 2 minced cloves garlic, 2 tablespoon chopped thyme, and 1 tablespoon chopped rosemary in a small bowl. Rub this on the lamb after salting it in step 1.

Notes:
*Lamb: I love the Trader Joe's seasoned rack lamb (you can find it in their freezer section). It's (relatively) cheap for a rack of lamb, and the quality is high. Fresh, local lamb is even better, if you can find it; it's also more expensive. New Zealand rack of lamb is OK; it's my last choice. But, I usually don't have a choice; I have to take what's available. Any rack of lamb will taste great with this recipe.

*Quantity: One rack of lamb is good for two people, or one hearty eater.

*Cooking Temperatures: I like my rack of lamb medium-rare. The other temperatures to pull the lamb at are: Rare, 120*F, Medium, 130*F,
Ruined
Well done, 140*F or higher.

*Timings: It was windy the day I cooked this, and it took longer than the 15 minutes I recommend in the directions. That's something you have to remember when cooking on a grill - timings vary based on the heat of your fire, how well insulated your grill is, and the weather conditions. In this case it took about 20 to 25 minutes of indirect heat to cook the lamb to medium-rare. I left the timing the way it is in the recipe, because I'd rather you started checking the temperature early than you overcook your rack of lamb.

*Thermometer: Because internal temperature is so important to cooking, I was willing to spend a lot to get the best cooking thermometer available. That is the Thermapen Instant Read Thermometer. You don't have to spend $80 on your thermometer; any thermometer will work as long as it's properly calibrated.

Questions? Comments? Other ideas? Leave them in the comments section below.
Related Posts:
Click here for my award winning Grilled Ribeye with Mediterranean Herb Butter recipe
Click here for my Grilled Flank Steak with Chimichurri recipe

Inspired by:
Trader Joe's
David Rosengarten's newsletter, "The Rosengarten Report", that turned me on to TJ's lamb

Rotisserie on the web: Greek Easter Dinner in Akron, OH

April 22, 2009 by Mike Vrobel Leave a Comment


I just read this in my local paper, the Akron Beacon Journal, and I'm impressed. These guys make me look like the dilettante that I am. They cooked Easter dinner for a few friends. 150 of them.

"The joy on Larry's face was obvious. He was surrounded by meat.

At this party, the men come early and cook the meat. Larry stood center stage on his patio, alternately frying batches of chicken livers, sausages and fish.

Behind him, a whole lamb and a whole pig turned on a spit, carefully supervised by John Stathopoulos, who built the steel structure about 10 years ago.

Next to him, Jack Manos, grandson of Tom, watched over six legs of lamb as they, too, turned slowly over burning embers. Jack's father, George Manos, beamed with pride that the celebration his father helped to start is still going strong.

A third spit held 16 chickens, each stuffed with lemons and feta cheese, which family friend Dominic Fallucco guarded, while the Pouloses' son George deep-fried a turkey. There was tuna and walleye, fried calamari and even tripe."

The joy of being surrounded by meat! Now that's my kind of guy.

My favorite quote is from his wife:

But Karen loves to watch how much her husband enjoys the day. ''It keeps him from buying a restaurant,'' she said.

Lisa Abraham: My Big Fat Greek Easter Dinner Affair [Akron Beacon Journal]

Related Posts:
Rotisserie Bone-In Leg of Lamb, Moroccan Style recipe
Rotisserie Boneless Leg of Lamb, Greek Brinerated recipe
Rotisserie Leg of Lamb Provencal recipe

*Enjoyed this post?  Want to help out DadCooksDinner?  Subscribe using your RSS reader or by Email, recommend DadCooksDinner to your friends, or buy something from Amazon.com through the links on this site.  Thank you!

Blue Cheese Dressing

April 21, 2009 by Mike Vrobel 2 Comments

Vinaigrette week* wraps up on DadCooksDinner with another favorite of mine, Blue Cheese Dressing. A salad with blue cheese dressing goes wonderfully with a nice, juicy steak. And, of course, it's the traditional accompaniment with Chicken Wings (recipe Grill Roasted Chicken Wings).
*And yes, I know it's not Vinaigrette week any more. I made the classic Fencepost Error. I was thinking I needed five dressing recipes, one for each day of the week, but I forgot that the basic technique would take up one day. What really bothers me is that I'm a computer programmer, so I really should know better. I mean, I'm the kind of person who knows what you call that kind of mistake - you'd think I could remember not to make it!
Oh, well, you get a bonus dressing out of the deal, so I guess it's not all bad.

Recipe: Blue Cheese Dressing


See the Vinaigrette Basic Technique (Vinaigrette Basic Technique) for an overview
Ingredients:
*For a 10 oz bag romaine lettuce (about 3 quarts)
  • 2 tablespoon White Wine Vinegar
  • pinch of salt
  • pinch of freshly ground black pepper
  • 2 tablespoon Extra Virgin Olive Oil
  • ¼ cup mayonnaise
  • ½ cup crumbled blue cheese


Directions: Easy Way
1. Whisk to blend: Whisk all the ingredients in a small bowl until creamy.

OR:

Directions: With Finesse
1. Dissolve the salt in the vinegar: Whisk the salt, pepper and vinegar in a small bowl until the salt dissolves, usually about 10 seconds.

2. Add the oil: Add the olive oil and whisk until combined.

3. Add the mayonnaise: Add the mayonnaise and whisk until creamy.

4. Add the cheese: Add the crumbled blue cheese, and whisk to combine.

5. Serve: Just before serving, whisk the dressing again to combine. Toss the lettuce with the dressing, and serve.

Variations:
*Less Cheese. This is a very chunky blue cheese dressing, because that's how I prefer it. You could cut back to ¼ cup of crumbled blue cheese and it would still taste great.Notes:
*Unlike some of the other vinaigrettes, this one is pretty forgiving in its ingredients. As long as you use decent vinegar and oil, and real mayonnaise (again, no miracle whip, please!), you'll be fine.
*For the blue cheese - use Danish Blue cheese in the dressing. It's less expensive, and gives you the blue cheese flavor you need. Please don't use the good stuff, or I'll cry. And, you'll spend a lot of money.
*While I'm talking about ingredients, my favorite White Wine Vinegar is this one from Alessi. It also goes well in the balsamic vinaigrette (recipe) from last week, if you want a lighter dressing.

Inspired by:
Too many chicken wings to count. My recipe (Grill Roasted Chicken Wings) was inspired by Steven Raichlen's BBQ USA

Caesar Salad Dressing

April 17, 2009 by Mike Vrobel 2 Comments

A plate of caesar salad

I was working on variations on my balsamic vinaigrette. I wanted to do something different. I vaguely remembered the Caesar Salad dressing I had made, carefully following the directions in Cooks Illustrated, a few weeks before. As I was trying to reconstruct the recipe in my mind, it dawned on me - it's the same formula! Just substitute lemon juice for the vinegar, and mayonnaise for the oil, and you're ready to go. My vinaigrettes have been unstoppable ever since.

See the Vinaigrette Basic Technique (Vinaigrette Basic Technique) for an overview

Ingredients

  • Juice of 1 lemon (2 to 3 tablespoons)
  • pinch of sugar (⅛ teaspoon), optional
  • pinch of salt (⅛ teaspoon)
  • pinch of freshly ground black pepper (⅛ teaspoon)
  • 1 medium garlic clove, minced
  • 2 tablespoon Extra Virgin Olive Oil
  • ¼ cup mayonnaise
  • ¼ cup grated parmesan cheese (optional), plus some extra for the salad

How to make Caesar Salad Dressing

Easy Way

Whisk to blend: 

Whisk all the ingredients in a small bowl until creamy.

OR: With Finesse

  1. Dissolve the salt and sugar: Whisk the lemon juice, sugar, salt, black pepper, and minced garlic in a small bowl until the salt and sugar dissolve, about 10 seconds.
  2. Add the oil: Add the oil and whisk until combined.
  3. Add the mayonnaise: Add the mayonnaise and whisk until creamy.
  4. Add the cheese: Add the grated parmesan, and stir to combine.
  5. Serve: Just before serving, whisk the dressing again to bring it back together. Toss the lettuce with the dressing. Sprinkle the extra parmesan on top of the bowl of salad (family style), or on the salad when serving (individual plates).

Notes

  • This is what I think of as the base recipe for creamy salad dressings - vinaigrette where mayonnaise is substituted for most of the olive oil.
  • If you would like more of a tart flavor to your dressing, skip the sugar, only juice half the lemon, and substitute 1 tablespoon white wine vinegar for the other half
  • You can leave the parmesan out of the dressing; I just like having it in there - it gets spread throughout the salad and goes farther.
  • They're not absolutely necessary, but to make your Caesar salad complete, you should have garlic croutons. This is another thing I hate to buy at the store - just get a loaf of good French bread or Italian bread from the store, and toast it yourself. Make some extra dressing, cut the toasted bread into cubes, and toss them with a little of the extra dressing. Let them sit and soak up the dressing, then add them to the salad when serving. Or, make garlic crostini and cube it - but that's a recipe for another day.
  • To turn this into meal, grill or saute some boneless, skinless chicken breasts, slice them, and serve them on top; you've got Chicken Caesar Salad! Or, serve this as a side with roasted chicken. Say, a rotisserie chicken (recipe here).
  • There's a lot going on in this dressing, so the quality of the ingredients aren't quite as important as in the simpler dressings (like the balsamic vinaigrette). Just make sure you use freshly squeezed lemon juice (not from the green bottle), real mayonnaise (no miracle whip), and real parmesan (not from the green can. Please!)

Inspired by

Cooks Illustrated - The Best Light Recipe

Red Wine Vinaigrette

April 16, 2009 by Mike Vrobel Leave a Comment

For Vinaigrette Week: This is a classic French vinaigrette*, made with red wine and Dijon mustard.
*Did I mention I took some cooking classes in Provence? And one in Paris? Stop me if I told you this one already...

This is my what I make for a quick weeknight salad when I have mild lettuce. Romaine, greenleaf, bibb, or iceberg go well with this. The mustard and vinegar give this dressing some kick, to liven up the neutral flavor of the lettuce.

Recipe: Red Wine Mustard Vinaigrette

See the Vinaigrette Basic Technique (Vinaigrette Basic Technique) for an overview


Showing off my Vinaigrette skills


Ingredients:
*For a 7oz bag of Romaine Lettuce

  • 1 tablespoon red wine vinegar
  • pinch of salt
  • pinch of freshly ground black pepper
  • 1 teaspoon Dijon mustard
  • 3-4 tablespoon (scant ¼ cup) Extra Virgin Olive Oil
  • 1 teaspoon finely minced shallot (optional)

Directions: Easy Way
1. Whisk to blend: Whisk all the ingredients in a small bowl until creamy.

OR:

Directions: With Finesse
1. Dissolve the salt: Whisk the salt, pepper and vinegar in a small bowl until the salt dissolves, usually about 10 seconds.
2. Mustard: Whisk the mustard into the vinegar
3. Add the oil slowly: Add the oil in a slow stream, whisking until creamy and emulsified.
4. Add shallot: (Optional) Whisk in the shallot.
5. Serve: Just before serving, toss the lettuce with the vinaigrette, and serve.

Variations:
*add 1 teaspoon finely minced tarragon. This is the big one - add about 1 teaspoon of finely minced shallot (or grate it on a Microplane Zester). Shallot is standard with this recipe; I skipped it because I was in a hurry, and this is the dressing I make when I'm in a hurry.
*Use white wine vinegar instead of red wine. I won't tell.

Notes:
*Again - think mild lettuce for this one.
*This also goes well with steamed vegetables. Cook's Country had a steamed Broccoli tossed with Red Wine Vinaigrette recipe that I often make, using this recipe for the vinaigrette.

Inspired by:
Lots of places, but when I think of the details I learned in the technique, I tend to think of Cook's Illustrated.

Lemon Herb Dressing

April 15, 2009 by Mike Vrobel 1 Comment


This is my new favorite vinaigrette. I love the mediterranean combination of lemon and olive oil. I think it's the most verstaile dressing I make - it goes well with a wide range of vegetables, from salads, to potatoes, to shredded carrots, to green beans. It's the dressing for Salad Nicoise, Greek Salad, and Carottes Rapees; all you do is vary the herbs you use.

Recipe: Lemon Herb Dressing


See the Vinaigrette Basic Technique (Vinaigrette Basic Technique) for an overview

Ingredients:
*For a pound each of boiled new potatoes and green beans, or a 10 oz bag romaine lettuce (about 3 quarts)

  • Juice of 1 lemon (should be about 2 to 3 tbsp)
  • 1 teaspoon lemon zest (from the lemon you just juiced)
  • 1 teaspoon sugar
  • pinch of salt
  • pinch of freshly ground black pepper
  • 1 medium garlic clove, minced
  • 6 tablespoon (⅓ cup plus a little) Extra Virgin Olive Oil

Herbs: 1 tbsp, minced, of any combination of the following:

  • Parsley
  • Thyme
  • Basil
  • Oregano


Directions: Easy Way
1. Whisk to blend: Whisk all the ingredients in a small bowl until creamy.*
*Note: Because you don't have the mustard to act as a binder, you need to whisk hard for this to emulsify. Don't worry if it doesn't; it still tastes great. If you're the kind of person who worries, go with the finesse recipe, below.

OR:

Directions: With Finesse
1. Dissolve the salt and sugar: Whisk the salt, sugar, pepper, garlic and lemon juice in a small bowl until the salt and sugar dissolve, usually about 10 seconds.

2. Add the oil slowly: Add the oil in a slow stream, whisking until creamy and emulsified.

3. Add the herbs: Add the minced herbs, and whisk to combine.


Variations:
*Herbs - Any herb would go well here. In addition to the list above, I've made this with tarragon and mint.
*Dried Herbs - fresh are preferable, but if all you have are dried, use half the quantity listed above (total 1 ½ tsp), and let them sit in the lemon juice for a few minutes to rehydrate before adding the olive oil. I do this a lot when I'm making Greek salad; I've never had luck with growing fresh oregano, so I usually wind up using dried oregano.

Notes:
*This vinaigrette is the based on the one for Nicoise Salad - toss some romaine lettuce, boiled green beans and boiled new potatoes in this dressing, and serve with Excellent Canned Tuna, nicoise olives and hard boiled eggs.
*Or, it's Greek salad dressing - use oregano as the only herb. (That's a recipe I'll share another day.)
*I also love this with Carrottes Rapees, a French grated carrot salad (see here for David Lebovitz' great post on this recipe)
*This dressing is hard to emulsify - as you can see in the picture with the whisk, it's already starting to separate. You can (as usual) add a little dijon mustard, but for this dressing I prefer to just live with it separating. I make the dressing, set it aside, then give it an extra whisking right before tossing the salad with it.
*I like the sweet/sour combination of the lemon with a little sugar. Depending on what you're using it with, a little extra sugar (as much as 2tsp) goes well.

Inspired by:
Cook's Illustrated - Nicoise Salad recipe

*Enjoyed this post?  Want to help out DadCooksDinner?  Subscribe to DadCooksDinner using the RSS or Email options on the right, link to this post from your blog, recommend DadCooksDinner to your friends, or buy something from Amazon.com through the links on this site.  Thank you!

Balsamic Vinaigrette

April 14, 2009 by Mike Vrobel Leave a Comment


For Vinaigrette Week: here is the first vinaigrette I learned as a technique as opposed to a recipe. It's still my favorite - the balsamic vinegar gives it a hint of sweetness that I really like.

I was at a cooking class given by Fat Cats, a local restaurant. The chef did the recipes, while one of the owners kept up a running commentary. They had a good act - It was very entertaining. But, more importantly, I learned two things. The first is, this is just a technique - as long as you know the basics, you can do endless variations. They used Fig Balsamic vinegar, but it was fine if you couldn't find it; just get good balsamic vinegar. The second is that exact measuring doesn't matter - close enough is good enough, as long as you taste afterwards to adjust if you need it.
I remember something like "Add a half a cup of olive oil. (Glug-glug sound as he pours from the bottle.) OK, that's close enough. (Whisks madly, then dips his finger in and tastes.) A little more vinegar. (More whisking). That's it! Perfect!"

This is the first vinaigrette I teach other people when I'm trying to convert them to my Anti-Bottled Salad Dressing crusade.
¡VIVA LA REVOLUCION!

It's quick, and has only two ingredients (well, four if you count salt and pepper). The results are better than anything you can buy pre-bottled. A key point is that you need good ingredients - a decent balsamic vinegar, and extra virgin olive oil. Because there are only four ingredients, the quality of the ingredients matter. Splurge on your balsamic vinegar - don't by the bottle for $2.95; expect to pay $8 or more for it. (Cooks Illustrated recommends Lucini Balsamic). If you can find a good quality flavored balsamic vinegar (I love Restaraunt Lulu Fig Balsamic), try it.

Recipe: Balsamic Vinaigrette


See the Vinaigrette Basic Technique (Vinaigrette Basic Technique) for an overview

Ingredients:
For a 5oz bag of Spring Mix, or 2 quarts of mesclun mix

  • 1 tablespoon balsamic vinegar
  • pinch of salt
  • pinch of freshly ground black pepper
  • 3-4 tablespoon (scant ¼ cup) Extra Virgin Olive Oil

Directions: Easy Way
1. Whisk to blend: Whisk all the ingredients in a small bowl until creamy.
Note: Because you don't have the mustard to act as a binder, you need to whisk hard for this to emulsify. Don't worry if it doesn't; it still tastes great. If you're the kind of person who worries, go with the finesse recipe, below.

OR:

Directions: With Finesse
1. Dissolve the salt: Whisk the salt, pepper and vinegar in a small bowl until the salt dissolves, usually about 30 seconds.
2. Add the oil slowly: Add the oil in a slow stream, whisking until creamy and emulsified.
3. Serve: Just before serving, toss the lettuce and vinaigrette in a large bowl until the lettuce is well coated. Give the lettuce a couple more grinds of pepper, toss again, and serve.

Variations:
Add 1 teaspoon of dijon mustard - helps to bind the vinegar and oil, and adds a little heat. I keep flip-flopping on wether or not I prefer this dressing with or without the mustard.
Flavored balsamic - normally, I'm a traditionalist when it comes to recipes. But this recipe works so well with flavored balsamic, I recommend you go find some. Try Fig, Black Currant, Lemon, Cherry - whatever you can find that sounds good to you.

Notes:
I like this vinaigrette with bitter greens - spring mix or mesclun mix are my favorites.
I also use it as a general purpose grilled vegetable marinade - the sweet overtones of the balsamic go well with the charred tastes from the veggies. I've used it with grilled asparagus, peppers, onions, green beans, and especially portobello mushrooms. If I want to get fancy, I put a little aside, marinate with the rest, grill the veggies, then toss them with the reserved vinaigrette.

Inspired by:
Fig Balsamic Vinegar

Rotisserie Recipes on DadCooksDinner

April 13, 2009 by Mike Vrobel 46 Comments

This is my master list of rotisserie recipes.

My Cookbooks


Check out my cookbook, Rotisserie Grilling.

Everything you could ask about the rotisserie,
plus 50 (mostly) new recipes to get you cooking.

It's available as a paperback, or a Kindle e-book, so you can download it and start reading immediately!

Rotisserie Chicken Grilling has more than 50 rotisserie chicken recipes, with flavors from around the country and around the world.
Rotisserie Turkey has 29 recipes for rotisserie turkey, rotisserie turkey breast, drip pan stuffing, and side dishes. Are you ready to talk turkey?

Rotisserie Recipes on DadCooksDinner

How To Videos

Video: How to Rotisserie a Rib Roast
Video: Rotisserie Grilling: Two Chickens
Video: How To Rotisserie a Pork Shoulder
Video: How To Rotisserie a Pineapple
Video: How To Rotisserie a Beef Tenderloin with Horseradish Mustard Crust
Video: How to Truss and Spit a Turkey for the Rotisserie
Video: Rotisserie Grilling Two Turkeys?
Video: How to Truss and Spit a Beef Tenderloin for the Rotisserie
Video: Rotisserie Turkey Legs, Brined and Honey Garlic Butter Basted
Video: Rotisserie Grilling: How to Truss Poultry
Video: Rotisserie Grilling: How to Truss a Roast

Basic Technique

Ten Steps to Rotisserie Grilling
How To Rotisserie Poultry
Video: How to Truss and Spit a Turkey for the Rotisserie
Video: How to Truss and Spit a Beef Tenderloin for the Rotisserie
Video: Rotisserie Grilling: Two Chickens
Rotisserie How To - Two Chickens, One Set of Spit Forks
Rotisserie Grilling - The Big Turkey

Poultry recipes

Brined Rotisserie Chicken
Rotisserie Chicken with Red Chile Marinade (Pollo Adobado) - picture at the top of the page
Rotisserie Chicken, Dry Brined
Rotisserie Chicken, Dry Brined with Rosemary, Lemon and Garlic
Rotisserie Chicken with Teriyaki Sauce
Rotisserie Chicken and Pineapple Hawaii Style
Rotisserie Barbecued Chicken
Rotisserie Chicken Zatar
Rotisserie Chicken With Fennel, Coriander, and Red Pepper Spice Rub
Rotisserie Peruvian Chicken (Pollo a la Brasa) With Drip Pan Purple Potatoes
Rotisserie Chicken With Chinese Oyster Sauce Glaze
Rotisserie Chicken with Knob Creek Maple Glaze and Drip Pan Potatoes
Rotisserie Chicken with Spanish Smoked Paprika Rub
Rotisserie Chicken with Italian Black and Red Pepper Dry Brine
Rotisserie Chicken Pollo Asado
Rotisserie Chicken with Tex-Mex Rub
Rotisserie Chicken Legs, Churrascaria Style

Rotisserie Cornish Game Hens
Rotisserie Cornish Game Hens, Brined and Herbed - picture above
Rotisserie Cornish Game Hens with Lime and Herbs
Rotisserie Cornish Game Hens with Port and Currant Jelly Glaze

Rotisserie Turkey
Rotisserie Turkey, Dry Brined with Orange and Spices
Rotisserie Turkey, Dry Brined with Cajun Dry Brine
Rotisserie Turkey Wrapped with Bacon
Rotisserie Turkey, Injection Brined

Rotisserie Turkey Breast, Dry Brined
Rotisserie Turkey Breast with Spice Rub
Rotisserie Turkey Breast, Dry Brined with Italian Spices
Rotisserie Turkey Legs, Brined and Honey Garlic Butter Basted

Rotisserie Duck
Rotisserie Duck, Peking Style
Rotisserie Duck with Pomegranate Glaze

Rotisserie Capon with Chestnut Stuffing

Pork recipes

Rotisserie Pork Shoulder Roast
Rotisserie Pork Shoulder Roast, Char Siu style
Rotisserie Boneless Pork Loin Roasts, Brined, Rubbed and Maple Syrup Glazed - picture above
Rotisserie Boneless Pork Loin with Apricot Glaze
Rotisserie Stuffed Pork Loin with Pepperoni, Provolone and Capicola
Rotisserie Rack of Pork, Apple Cider Brined
Rotisserie Ham, barbecue style
Rotisserie Baby Back Ribs
Rotisserie BBQ Baby Back Ribs
Rotisserie Spareribs, Dry Rubbed
Rotisserie Spareribs with Garlic, Oregano and Paprika Rub
Rotisserie Pork Belly
Rotisserie Barbecued Pork Belly
Rotisserie Pork Shoulder with South Carolina Mustard Barbecue Sauce
Rotisserie Fresh Ham with Injection Brine
Rotisserie Leg of Pork Roast with Injection Brine and Herb Rub
Rotisserie Pork Shoulder with Basic Wet Brine
Rotisserie Wild Boar Shoulder Roast (That's pork, right?)

Beef recipes

Rotisserie Beef Prime Rib
Rotisserie Beef Prime Rib, Reverse Seared on a Gas Grill
Rotisserie Herb Crusted Beef Rib Roast
Rotisserie Boneless Ribeye Roast with Garlic Crust
Rotisserie Boneless Ribeye Roast, Stuffed with Beef Sticks, Cheese and Peppers
Rotisserie Beef Chuck Roast Barbacoa
Rotisserie Beef Tenderloin with Shallot-Herb butter and Horseradish Sauce
Rotisserie Beef Ribs - picture above
Picanha - Rotisserie Top Sirloin Steaks, Churrascaria Style
Rotisserie Tri-Tip
Rotisserie Flank Steak, Churrascaria Style (Fraldinha)
Rotisserie Strip Loin Roast

Lamb recipes

Rotisserie Bone in Leg of Lamb, Moroccan style
Rotisserie Boneless Leg of Lamb, Greek Brinerated - picture above
Rotisserie Leg of Lamb Provencal
Rotisserie Lamb Shoulder
Rotisserie Whole Leg of Lamb with Orange and Fennel Dry Brine

Other

Rotisserie Pineapple - picture above

Drip pan side dishes

Rotisserie Pan Potatoes - picture above
Rotisserie Pan Potatoes and Root Vegetables
Rotisserie Pan Soup, Barbacoa Style
Rotisserie Pan Sweet Potatoes
Rotisserie Pan Smashed Potatoes
Rotisserie Pan Bread Stuffing with Cranberries and Apples

Any other rotisserie recipes that you would like to see?

Let me know in the comments!


*Enjoyed this post? Want to help out DadCooksDinner? Subscribe to DadCooksDinner using the RSS or Email options on the right, link to this post from your blog, recommend DadCooksDinner to your friends, or buy something from Amazon.com through the links on this site. Thank you!

Basic Technique: Vinaigrette

April 13, 2009 by Mike Vrobel 1 Comment

This was probably the technique that made me a food snob. Once I learned it, I was ruined. Why anyone spends money on store-bought salad dressing, which tastes of nothing but the stabilizers they put in it, is beyond me.
*Death to store-bought salad dressing! Who's with me! Chaaaaarge!

All you need is some good vinegar, some oil, and a pinch of salt and a grind of pepper. Whisk these together, and you've got vinaigrette! Michael Ruhlman's new book, Ratio: The Simple Codes Behind the Craft of Everyday Cooking, has the perfect recipe:

3 parts oil: 1 part vinegar

That's it! See? You never need to buy salad dressing again.
No, really, I mean it. Put down the bottle of "Lite Italian". Have you read the ingredients list on that thing? It should say: Oil. Vinegar. Spices. What is xanthan gum, and why is it in my salad dressing?

I've got the recipes to prove it; you'll be getting them for the rest of the week. The important part is the ratio, and the following technique.
And, as you'll see, the technique might not be that important, either.

Basic Technique: Vinaigrette
Ingredients:
*For a 6oz to 8oz bag of lettuce, "1 part" is about a tablespoon - 3tbsp oil, 1 tablespoon vinegar...

  • 1 part vinegar
  • pinch of salt
  • pinch of freshly ground black pepper
  • 3 parts oil

Optional ingredients:

  • ½ part dijon mustard (to help emulsify the vinaigrette)
  • ½ part aromatics - garlic, shallot
  • ½ part herbs - parsley, thyme, tarragon, chives...
  • 1 pinch sugar
  • Directions: Easy Way
    1. Whisk to blend: Whisk all the ingredients in a small bowl until creamy.

    OR:

    Directions: With Finesse
    1. Dissolve the salt: Whisk the salt, pepper and vinegar in a small bowl until the salt dissolves, usually about 10 seconds.


    2. Optional Mustard: Whisk the mustard into the vinegar


    3. Add the oil slowly: Add the oil in a slow stream, whisking until creamy and emulsified.


    4. Other optional ingredients: Whisk any other optional ingredients.

    Variations:
    *I'm going to do a bunch of specific variations on this basic technique this week:
    1. Balsamic Vinaigrette (link here)
    2. Lemon Herb Dressing (link here)
    3. Red Wine and Mustard Vinaigrette (link here)
    4. Caesar Salad Dressing (link here)
    5. Creamy Blue Cheese Dressing (link here)
    *The main variations are:
    *Oil: I'd say 90% of my vinaigrettes use Olive oil. Good alternatives are nut oils, like hazelnut and walnut oil. You can use a neutral oil, like canola, if you want a milder dressing. I often use it when I'm looking for an asian profile; straight toasted sesame oil is overpowering, but a little bit of it in a mainly canola oil dressing works great.
    *Creamy dressing: For a creamy dressing, use 2 parts mayonnaise and 1 part oil.
    *Vinegar: Let your imagination run - this is where most of the flavor in the dressing comes from. The better your vinegar, the better your dressing. Red wine or balsamic are my two standby vinegars; I've also liked dressings with sherry vinegar, and rice wine vinegar (asian profile again). And, if you have access to fruit flavored vinegar, this is where to use it. Fig vinegar is one I've used often, when I want a fruity/sweet overtone.
    *Optional ingredients: Think herbs, spices, and aromatics.


    Low Fat Variations:
    [Added 8/13/09]
    *Generally, I think that if you're going to have vegetables, they taste better with a little fat on them. But, if you are really serious about trying to lose weight, every calorie counts. Here is what I do when I am cutting as many calories as possible.

    *Low-fat variation: Substitute 2 parts water for 2 parts oil. So the ratio becomes: 2 parts water, 1 part oil, 1 part vinegar. Yes, that's it. The dressing comes out thinner, but you'll be surprised at how good it tastes.*
    *I picked this trick up from Jaques Pepin, but he recommends using chicken broth, not water. I can't bring myself to use canned broth after Michael Ruhlman's rant. From what I can tell, the only difference in taste is because the canned broth has more salt in it. Just add a little extra salt to the vinaigrette if you think it needs it.

    *For low-fat creamy dressings: Replace most of the mayonnaise with low-fat yogurt. Use low-fat greek yogurt if you can find it; it's thicker. I would go with 2 parts low-fat yogurt, 1 part mayonnaise, 1 part vinegar. [Inspired by Somewhat Low-Fat and Really Low-Fat Salad Dressings, epicurious.com]

    Notes:
    *I'm being finicky in the "finesse" directions. If you're in a hurry, just go with the "easy" directions. They works best if you use the dijon mustard option - it helps keep the vinegar and oil in suspension. "Oil and water don't mix" and all that.
    *The easy method is how I used to always do this, actually. It was only recently that I learned that you get better results with the "dissolve salt in vinegar/slowly drizzle oil while whisking" approach. The easy results were so good, I was already in my revolutionary zeal, pour the bottled dressing in the harbor mode. It just goes to show you, there's always a way to improve your technique, even if things are working well now.
    *If you want the really, REALLY easy, "I don't own a whisk" version: Toss the (dry) lettuce with the salt and pepper first, then the oil. Finally, toss with the vinegar. That's old school.

    *This is a great way to learn to eyeball quantities. I never measure, I just do it by time - I do a three count pour of vinegar, then a nine count pour of oil. I taste it when I'm done, and adjust the vinegar or oil, depending.
    *I usually make just enough dressing for the salad I'm about to serve, but this will keep in the fridge for up to a week, or longer if you don't put any aromatics (garlic) in the dressing. If you do store vinaigrette with olive oil in the fridge, it will get...sludgy, if that's a word. It's just the olive oil thickening in the cold; let it sit at room temperature for a few minutes and it will go back to normal.
    *Garlic in oil creates an oxygen free environment that can cause botulism (details here). That's Real Bad News. Don't keep garlic in oil for over a week.
    *What dressing do you want to know how to make? Leave me a note in the comments, and I'll do a post on the recipe.

    Update 4/17/09: I was asked by a reader* if you can use a blender for your vinaigrette.
    *OK, it was my aunt Lois. She counts as a reader, right?

    Yes, of course! A blender makes a great vinaigrette; it's really just a matter of personal preference.

    I prefer a whisk and a bowl, because it's easier to clean up - I toss them in the dishwasher when I'm done. And you "lose" less dressing to the container. I have an easier time getting the dressing onto the salad when I don't have to work around the blades of the blender. But a blender will do a much better job of emulsifying the oil and vinegar, and it's certainly easier to use. No elbow grease required.

    In the "Easy" version of the directions, just toss in the blender and whiz it up until it's creamy. In the "finesse" version, do the individual steps in the blender. Wherever I say "whisk", use your blender's pulse function a few times. When you get to the "add the oil" step, just run the blender until processed. Also - I would increase the quantities a bit if you're using the blender for a small amount (like in these recipes) - you'll leave a some dressing stuck to the blade and walls of the blender.

    The other option I've seen used is a jar with a tight fitting screw-on lid.* Use the easy instructions, put everything in the jar, screw on the lid, and shake until creamy.
    *Make sure it's a screw on lid. I tried this I used a rubbermaid type container, with a press-on lid, and the lid popped loose after shaking a few times...oil and vinegar everywhere.

    Inspired by:
    Michael Ruhlman: Ratio

    Rotisserie Ham, barbecue style

    April 9, 2009 by Mike Vrobel 29 Comments

    Rotisserie Ham, Barbecue Style
    Rotisserie Ham, Barbecue Style

    I was looking for another rotisserie recipe idea. And what should appear in my mailbox? Cooks Country magazine, and my weekly Acme Grocery flyer. In the former was a recipe for grill-roasted ham, in which they recommend you use two skewers to turn the ham like a rotisserie while it cooks. In the latter was a sale for ham, $0.89 a pound as their Easter special.* It was fate!
    *I know that ham is the traditional Easter meal for a lot of people. Growing up, we always had ham sandwiches on rye at Grandma's house. Now that I'm a food snob, I'd rather cook Lamb for my Easter dinner.**But for $0.89 a pound, I wasn't going to turn down the ham!

    Recipe: Rotisserie Ham, Barbecue Style

    Equipment

    • Grill with Rotisserie attachment (I used a Weber Summit 650 with an infrared rotisserie burner. Here it is.)
    • Aluminum foil drip pan (9"x11", or whatever fits your grill)


    Notes

    • Serve with cheap white buns and barbecue sauce (goes well with the barbecue rub). I also had applesauce, dill pickles, various mustards and some cabbage slaw on the side. I think it would have been fine with my usual rye bread, swiss cheese, lettuce and mustard. Or with some sauerkraut and grainy mustard.
    • Why does mustard go so well with ham? My theory is: Ham gives you salty and sweet; mustard gives you sour and hot. It's a yin and yang kind of thing.
    • Leftovers: be ready! 12 pounds of ham has meant, so far: ham sandwiches, denver omelets (diced ham and peppers), and...more ham sandwiches. I have the ham bone waiting in the freezer for split pea and ham soup. And I've still got ham left over. Ham salad, maybe? Anyone have any other ideas? Leave them in the comments.
    • Why the variation in finished temperatures? Ham is pre-cooked, so you don't have to cook it as long as you would, say, pork. In theory, if it's been processed correctly, it doesn't have to be cooked at all; it's just like the cold cuts you get at your local deli. Your choices are to live dangerously, cook it until just warm on the inside (100*F), and save yourself an hour or so of cooking time. Or, follow the USDA guidelines (here), and cook it to 140*F, which will kill any bacteria that might have got into the ham, but takes an extra hour or more in cooking time. I had the time, so I went with the 140*F, but Cook's Country recommends only cooking it to 100*F. It's up to you.
    • What kind of ham? Don't get a country ham for this - that's more like prosciutto, which wouldn't work in this recipe. Stay away from spiral sliced hams as well - they will dry out on the rotisserie. You want a bone in ham, and the more it looks like it once came from a pig's leg, and the less it looks like a large aspirin tablet, the better. I let frugality get the best of me for this one (did I mention it was $0.89 a pound?), and the results were still great.
    • Want to know a lot about ham? Watch Alton Brown's "Ham I Am" episode of Good Eats.
    • And, of course, this makes me think of the greatest book on sales technique ever written: Green Eggs and Ham by Dr. Seuss. 2Would you like it in a boat? Would you like it with a goat?
    Questions? Comments? Other ideas? Leave them in the comments section below.
    Related Posts:
    Homemade Barbecue Rub
    Click here for my other rotisserie recipes.
    Inspired by:
    Cook's Country Magazine, April/May 2009 - Grill Roasted Ham (recipe here, subscription required)


    Check out my cookbook, Rotisserie Grilling.

    Everything you could ask about the rotisserie,
    plus 50 (mostly) new recipes to get you cooking.

    It's a Kindle e-book, so you can download it and start reading immediately!


    *Enjoyed this post? Want to help out DadCooksDinner? Subscribe to DadCooksDinner using the RSS or Email options on the right, link to this post from your blog, recommend DadCooksDinner to your friends, or buy something from Amazon.com through the links on this site. (Like my Rotisserie Grilling cookbook...)

    Privacy Policy

    April 8, 2009 by Mike Vrobel Leave a Comment

    Effective Date October 13, 2025

    As the owner of this website, DadCooksDinner.com, we understand that your privacy is of critical importance. This Privacy Policy describes what information we collect from you via the Site and how we use and disclose such information.

    Advertising Privacy Statement

    Interest-Based Advertising

    Advertising.

    CMI Marketing, Inc., d/b/a Raptive ("Raptive") is a service provider of this Site for the purposes of placing advertising on the Site, and Raptive will collect and use certain data for advertising purposes. To learn more about Raptive's data usage, click here: https://raptive.com/creator-advertising-privacy-statement

    Our Use of Cookies

    A cookie is a file containing an identifier (a string of letters and numbers) that is sent by a web server to a web browser and is stored by the browser. The identifier is then sent back to the server each time the browser requests a page from the server. Cookies may be either "persistent" cookies or "session" cookies: a persistent cookie will be stored by a web browser and will remain valid until its set expiry date, unless deleted by the user before the expiry date; a session cookie, on the other hand, will expire at the end of the user session, when the web browser is closed. Cookies do not typically contain any information that personally identifies a user, but personal information that we store about you may be linked to the information stored in and obtained from cookies.

    We use cookies for the following purposes:

    (a) authentication - we use cookies to identify you when you visit our website and as you navigate our website;

    (b) security - we use cookies as an element of the security measures used to protect user accounts, including preventing fraudulent use of login credentials, and to protect our website and services generally;

    (c) advertising - we use cookies to help us to display advertisements that will be relevant to you; and

    (d) analysis - we use cookies to help us to analyze the use and performance of our website and services;

    We use Google Analytics to analyze the use of our website. Google Analytics gathers information about website use by means of cookies. The information gathered relating to our website is used to create reports about the use of our website. Google's privacy policy is available at: https://www.google.com/policies/privacy/

    Most browsers allow you to refuse to accept cookies and to delete cookies. The methods for doing so vary from browser to browser, and from version to version. You can however obtain up-to-date information about blocking and deleting cookies via these links:

    (a) https://support.google.com/chrome/answer/95647?hl=en (Chrome);

    (b) https://support.mozilla.org/en-US/kb/enable-and-disable-cookies-website-preferences (Firefox);

    (c) http://www.opera.com/help/tutorials/security/cookies/ (Opera);

    (d) https://support.microsoft.com/en-gb/help/17442/windows-internet-explorer-delete-manage-cookies (Internet Explorer);

    (e) https://support.apple.com/en-us/105082 (Safari); and

    (f) https://privacy.microsoft.com/en-us/windows-10-microsoft-edge-and-privacy (Edge).

    Please note that blocking cookies may have a negative impact on the functions of many websites, including our Site. Some features of the Site may cease to be available to you.

    Email Addresses

    We may collect your email address, but only if you voluntarily provide it to us. This may occur, for example, if you sign up to receive an email newsletter, or enter a promotion. if you have provided your email address to us, we promise to use it only for the purposes for which it is provided. We will not use your email address to contact you for unrelated reasons.

    Additional Rights of EEA (European Economic Area) Residents

    If you are a resident of a country in the EEA, you have the rights, among others, to:

    (i)  access your personal data

    (ii)  ensure the accuracy of your personal data

    (iii) the right to have us delete your personal data 

    (iv)  the right to restrict further processing of your personal data, and

    (v)  the right to complain to a supervisory authority in your country of residence in the event that data is misused

    If you believe that our processing of your personal information infringes data protection laws, you have a legal right to lodge a complaint with a supervisory authority responsible for data protection. You may do so in the EU member state of your residence, your place of work or the place of the alleged infringement.

    You may exercise any of your rights in relation to your personal data by written notice to us addressed to the following: 

    Mike Vrobel
    DadCooksDinner.com
    PO Box 4234
    Copley, OH 44321
    United States of America

    Email: MikeV@dadcooksdinner.com
    Tel: +1 (216) 626-5120

    Sale of Business or Assets

    In the event that the Site or substantially all of its assets is sold or disposed of as a going concern, whether by merger, sale of assets or otherwise, or in the event of an insolvency, bankruptcy or receivership, the information we have collected about you may be one of the assets sold or merged in connection with that transaction.

    Changes to the Privacy Policy

    We may change this Privacy Policy from time to time. The most recent version of the Privacy Policy will always be posted on the Site, with the "Effective Date" posted at the top of the Policy. We may revise and update this Privacy Policy if our practices change, as technology changes, or as we add new services or change existing ones. If we make any material changes to our Privacy Policy or how we handle your personal information, or we are going to use any personal information in a manner that is materially different from that stated in our Privacy Policy at the time we collected such information, we will give you a reasonable opportunity to consent to the change. If you do not consent, your personal information will be used as agreed to under the terms of the privacy policy in effect at the time we obtained that information. By using our Site or services after the Effective Date, you are deemed to consent to our then-current privacy policy. We will use information previously obtained in accordance with the Privacy Policy in effect when the information was obtained from you.

    Contacting Us

    If you have any questions about this Privacy Policy, or the practices of this Site, please contact us at MikeV@dadcooksdinner.com

    Or write to us at:

    Mike Vrobel
    DadCooksDinner.com
    PO Box 4234
    Copley, OH 44321
    United States of America

    Slow Cooker Beef Barbacoa

    March 31, 2009 by Mike Vrobel 8 Comments


    Diane is my tortilla maker; we buy masa harina from our local mexican grocery, and she turns it into great tortillas. She's even got the kids helping! They love "mommy tortillas" so much, that we've had to go from one batch, to a double batch, to a triple.
    *Of course, you could just buy your tortillas at the grocery store. If you have that local mexican market, then you can probably get acceptable to good corn tortillas. Just don't buy them at your local grocery store. Ugh. If you have to get your tortillas from your local grocery store, get flour tortillas.
    **Oh, and if you're going to use this in crunchy taco shells, I won't judge you.
    Back to today's recipe - this is one of the things we make to fill those tortillas that the kids love so much. There aren't many recipes that involve less effort. There is about 10 minutes worth of hands on time. Sprinkle the seasonings on the meat, plop it in the slow cooker, wait 6-8 hours, and shred. If your slow cooker has a "keep warm" function this is perfect for making in the morning before you leave for work; you'll get home and have a wonderful meal ready to go.

    Even better, use the time you save to make yourself some fresh tortillas. There's nothing better than a warm corn tortilla, a little shredded beef, some onion, and cilantro. Mmmmm.

    Recipe: Slow Cooker Beef Barbacoa

    Cook time: 10 hours

    Equipment:

    • Slow cooker (I used an All-Clad 6 quart slow cooker; see it here)


    Ingredients:

    • 3 lb boneless beef chuck roast
    • 1 teaspoon kosher salt
    • 1 teaspoon chile powder
    • ½ teaspoon garlic powder
    • 1 teaspoon cider vinegar
    • water (enough to come halfway up the meat)

    Directions:
    1. Prep the meat: Sprinkle the salt, chili powder and garlic powder evenly over the chuck roast, and place in the crock pot. Sprinkle the cider vinegar over the meat, then add water to the crock pot to come halfway up the side of the roast.

    2. Cook the meat: Cook on high for 6 hours (or low for 8-10 hours).

    3. Defat and reduce the sauce: (Optional, but worth the time if you have it) Remove the roast to a platter, then defat the sauce (I pour it into a gravy separator and let it sit for a few minutes). Put the defatted sauce in a saucepan, bring to a boil, then reduce the heat and simmer until thickened, about 10 minutes. Set aside.
    *If you don't have the time, just use some of the liquid from the crock pot as the sauce. It'll be a little fatty, but I've done it many a time when I'm in a hurry.


    4. Shred the meat: Let the meat rest for a few minutes to cool (while you're making the sauce, say), then shred with your fingers, removing any fat or gristle you come across. Moisten the shredded meat with the sauce. Serve, passing the extra sauce at the table.

    Variations:
    *Use a different cut of meat: The one I often do is to use a Boston Butt roast instead of the chuck roast - then you call it Pork Deshebrada. (Add a tablespoon of brown sugar to the spices you sprinkle on in this case). Lamb shoulder would be traditional as well. You could also use chicken thighs or legs; just cook them for less time (4 hours on high, 6-8 on low) and discard the skin when you're shredding the chicken.
    *Liven up the sauce: Slice an onion and sprinkle it over the top of the meat, and add a 14.5oz can of diced tomatoes with the water. It will make defatting the sauce a little more difficult, but the extra flavor is worth it.

    Notes:
    *Serve with corn tortillas, sliced onion, cilantro and salsa(recipe here).
    *And...your choice of lime wedges, sliced avocado, sliced fresh or pickled jalapeno, hot sauce, and a side of slow cooker beans (recipe here) or refried beans.
    *Oh, and margaritas, of course.
    *Leftovers freeze well - I usually put aside half in a rubbermaid container, pour the leftover reduced sauce over it, and freeze it for an even quicker second meal. Just add tortillas and salsa.

    Inspired by:
    Mexican Everyday by Rick Bayless

    Road Trip: Cleveland CAM Asia Market

    March 26, 2009 by Mike Vrobel Leave a Comment

    It's Technology Free week, where we try to get the kids to detox from the TV, Wii and iPhone.*
    *Yes, I'm cheating. Shhh.

    **[Note 4/30/2009]...and I got busted while I was posting this. Ben caught me, and said "Dad! You're using the computer!"

    I love going to Cleveland Asia Market. (website here) It has the best part of going to an ethnic store - you get to feel like you're a world traveller, without needing a passport. And! It has good lighting, wide aisles, and signs in English and Chinese.*
    *At least I think they're Chinese. I feel very provincial by not knowing what language they're in. Which reminds me of a joke:

    Q: What do you call someone who speaks two languages?
    A: Bilingual
    Q: What do you call someone who speaks one language?
    A: American

    I'll be here all week - drive safely, and don't forget to tip your waitress.

    [Added 4/30/09]: Joking aside, having the price tags under every item in English helps out a lot. A common problem I have in Asian grocery stores is identifying things - is that fish sauce, or soy sauce, or black vinegar? Since most of the ingredients were intended for sale in their original country, the packaging is all in Chinese (or Japanese, Korean, Thai, etc...).

    As I said in my previous Ethnic Market post (here) - you can get these ingredients in American megamarts nowadays, but not as cheap, or in such depth. If you're in the Cleveland/Akron area, it's worth the trip!

    Cleveland CAM Asia Supermarket, at 21200 Miles Rd, Cleveland, Ohio (see map below)
    My top ten list of favorites are, in no particular order:

    1. Kikkoman Soy Sauce- In large jugs! I can get 12oz from my grocery store for about $3.50, or a 2 quart jug for $6 here.
    2. Hoisin Sauce - the barbecue sauce of china. Or, at least, that's what my kids consider it. Essential for quick stir fries.
    3. Big bags of rice - As I've mentioned before, my kids eat a lot of rice. I buy 25lb pound bags of Calrose rice (for medium-grained sticky rice, great with stir fries) and Jasmine rice (because I love the flavor).
    4. Asian Noodles - You think the Italians love noodles? Where did Marco Polo get the recipe?* There are more shapes, styles and sizes than you can shake a chopstick at.
    *Might not be true. But it makes a good story, so I'm going with it.
    5. Shriracha sauce - Thailand's version of tabasco sauce. Great for giving food a bit of a kick and an asian flavor at the same time.
    6. Rabbit - Or duck, or chicken feet...if you want an offbeat animal, or animal part, (and you don't want to pay exorbitant Gourmet Market prices) get to your local Asian market.
    7. Thin sliced beef short ribs - I'm still working on my recipe for grilled Korean short ribs, but don't let that stop you - google "Korean Ribs" and try a recipe.
    8. Dried mushrooms - Again, don't pay Gourmet Market prices for dried portobellos; I've heard that most of the "portobellos" are shipped from China.* Go to the source, and you can get dried mushrooms for a couple of dollars a pound.
    *May not be true. But the mushrooms sure are cheap, and I can't tell the difference?
    9. Candy - A great tip I learned from a friend* was that one of the most interesting souveniers you can bring back from a trip is...the local candy. Green Tea Kit-Kats, anyone? Also worth a look is the freezer section, just for the "freezer dim sum" options.
    *Hi Brian!
    10. The fish department - Like the "offbeat animal" and "candy" section, I just love looking. To paraphrase Tony Bourdain, the asian definition of "fresh fish" is "it entered the kitchen, alive, after I placed my order."

    That's just the first ten I could think of* - every time I go there, I see something else I should try.
    *Fish Sauce! And rice vinegar. Mirin. Miso paste. Oh, and the housewares aisle - if you need a wok, or chopsticks, a spider, or a fuzzy logic rice cooker. And...

    [Added 4/30/09]: I got a question from Pam, and I could hear the disgust in her voice (even though I was reading an email):

    "Why would you buy spiders from a Chinese grocery?"

    It's not an exotic cooking ingredient - I'm not making a spider stir fry. A spider is a common name for a Chinese bamboo skimmer, that's very useful when deep frying. It's one of these:

    Here's the map:

    View Larger Map

    *Enjoyed this post?  Want to help out DadCooksDinner?  Subscribe to DadCooksDinner using the RSS or Email options on the right, link to this post from your blog, recommend DadCooksDinner to your friends, or buy something from Amazon.com through the links on this site.  Thank you!

    Lentil stew, Dal style

    March 20, 2009 by Mike Vrobel Leave a Comment


    Mark Bittman's How to Cook Everything was the first general purpose cookbook I bought.2The Betty Crocker cookbook we got as a wedding present doesn't count. He says, shaking in horror from the memory.

    Unfortunately...I didn't like it. The recipes are very stripped down, and I could tell. Some were simplified to the point of missing out on some of the flavors in the dish. That, and I'm obsessive. And since I'm obsessive, once I found Cooks Illustrated, I felt right at home.

    Years passed, and I stumbled across Bittman's Minimalist column in the New York Times. It's become one of my favorite food resources. Maybe it's because I've learned enough about cooking to appreciate a recipe stripped down to its bare bones? Or where to fill in the blanks? Either way, I get my daily fix from his blog, Bitten. Once a week I find myself flagging a recipe for future use.

    This particular recipe has quickly become one of my favorites. It's a weeknight meal that has an Indian flavor profile I really love. It's a soupy, stewy mix of lentils (dal) and aromatic vegetables, with a hit of curry to give it a surprisingly big flavor.

    Recipe: Lentil Stew, Dal Style


    Ingredients:

    • 2 tablespoon olive oil
    • 1 onion, diced
    • 2 stalks celery, diced
    • 2 carrots, diced
    • 1 teaspoon kosher salt
    • 3 cloves garlic, minced
    • 1 tablespoon curry powder or garam masala
    • 1 lb lentils, picked over and rinsed
    • 8 cups water
    • salt and pepper to taste
    • ½ teaspoon Frank's red hot (or other hot sauce, optional)

    Directions:
    1. Sort and rinse the lentils: Spread the lentils on a sheet pan, and sort through them, removing any stones or twigs you find. Pour the lentils into a colander, and rinse them with cold water.
    2. Saute the aromatics: Heat the oil over medium-high heat in a dutch oven or large saucepan. Add the vegetables and the kosher salt, and saute, stirring occasionally, until softened, 3-5 minutes.
    3. Add the spices: Make a hole in the middle of the vegetables and add the garlic and spices. Let cook until fragrant, 30 seconds to 1 minute, then stir into the vegetables.
    4. Cook the lentils: Add the lentils to the pan and stir to combine with the vegetables. Add the water, stir, and bring to a boil over high heat. Reduce the heat to low and simmer for 20 to 30 minutes, until the lentils are tender. Add salt, pepper and hot sauce to taste.

    Variations:
    *Use split peas instead of the lentils - cook for 30 to 40 minutes (particularly good with yellow split peas)
    *Add sliced mushrooms with the aromatics, and cook for another 3-5 minutes (the mushrooms will release a lot of liquid)
    *Replace some or all of the water with chicken or vegetable stock

    Notes:
    *Serve with basic white rice for a quick meal.

    *I know this isn't "real" Indian food (which I love), but it gives me a taste of what it would be like, and it's fast.

    *My kids will eat this! My daughter loves it, and the younger boy will have it about 50% of the time. (The other one just eats the rice. Oh, well.)

    *Bittman's new book, Food Matters (see link below), has changed the way I view my eating habits. If you read Michael Pollan's recent books (Omnivore's Dilemma and In Defense of Food, here and here), Bittman's book is the applied course on them. And, as much as Pollan's books inspired me, Bittman's down to earth style brought the subject matter home. But...that's another blog that I'll be writing soon.

    Inspired by:
    Mark Bittman's Soupy Dal, American Style (recipe here)

    Questions? Comments? Other ideas? Leave them in the comments section below.

    *Enjoyed this post?  Want to help out DadCooksDinner?  Subscribe to DadCooksDinner using the RSS or Email options on the right, link to this post from your blog, recommend DadCooksDinner to your friends, or buy something from Amazon.com through the links on this site.  Thank you!

    Rotisserie Duck

    March 16, 2009 by Mike Vrobel 21 Comments

    Spring! Finally!

    OK, I know I'm deluding myself. I live in Northeastern Ohio. It's going to snow the first week of April. It always does. But...when you have one of these gorgeous, 59*F, not a cloud in the sky spring days in early March, it always lifts my spirits. And after this winter, which has been particularly brutal, I'm willing to deny years of cold reality and start believing that spring is here.* And how do you think I celebrate spring? I bring out the charcoal, because it's time to grill!

    *In fact, I'm ready to skip straight to summer. When I was at the mall, I started looking at the Tommy Bahama hawaiian shirts. I had to talk myself down:

    Me: Put it back, you won't be able to wear it for another four months.


    Myself: But...but...I want it to be summer right now! And that color! It reminds me of the ocean! I want to go to the beach!


    Me: Will you listen to yourself? Put that shirt down right now! Down! Besides, it's got flowers on it. What will people think?


    Myself: So you're saying I should get the burnt orange one instead?


    Me: Wow! That is a cool color. We'd look great at the beach...What am I saying? Stop! Put it down!

    **And yes, the voices in my head are telling me to grill again.

    Recipe: Rotisserie Smoked Duck

    Cook time: 90 minutes

    Equipment:

    • Grill with Rotisserie attachment (I used a Weber kettle with the Rotisserie attachment this Weber Grill and this Weber charcoal kettle rotisserie)
    • Aluminum foil drip pan (9"x12", or whatever fits your grill)
    • Butcher's twine


    Ingredients:

    • 1 whole duck, 5-6 pounds
    • 2 teaspoon kosher salt
    • ½ orange (optional)
    • smoking wood chunk (hickory or a fruit wood, half the size of your fist. Only do this if you're using charcoal)
    • fresh ground pepper


    Directions:
    Note: for an overview of the technique, see my rotisserie poultry post.

    1. Pre-Salt the duck:24 to 48 hours before you cook the duck, salt the duck evenly - about ½ teaspoon on the breast, ½ teaspoon on the legs, ½ teaspoon on the back, ½ teaspoon in the cavity, and ½ teaspoon in the neck. Put the duck on a rack over a roasting pan or baking sheet, and store in the refrigerator, uncovered.  This lets the skin dry, and gives the salt time to dry brine the duck.

    2. Prep the duck: One hour before cooking, stuff the duck with the half an orange, truss the duck, and skewer the duck.  Let it rest at room temperature.  Put the wood chunk in a bowl of water to soak.
    [Update 12/5/09]: This is also a good time to pierce the skin of the duck all over with a paring knife.  This  helps the fat escape from under the skin; just be careful that you don't pierce the duck flesh while you're doing it.  I do this by coming at the duck from a very low angle, almost parallel to the skin.

    3. Prep the rotisserie: Prepare your rotisserie for cooking on indirect high heat (see details My Rotisserie Basic Technique Post). For my Weber kettle, I light a chimney full of charcoal, wait for it to be covered with ash, then pour it in two equal piles on the sides of the grill.  I put the drip pan in the middle, between the piles. Then I put the wood chunk on top of the charcoal, and give it five minutes to start smoking.

    4. Cook the duck: Put the spit on the grill, and cook the duck with the lid closed for 1 ½ to 2 hours. After an hour, add 10 charcoal briquettes to each pile of charcoal, to kick the heat back up. Start checking the temperature in the thigh after about 1 hour 15 minutes. You want the thigh to be 180*F to 190*F. It should take an hour and a half to two hours to finish cooking.  Remove from the grill and let rest for 10-15 minutes before carving.

    5. Carve the duck: Cut off the wings and legs, and serve them bone in; carve the breasts off the carcass, and slice them into ½" thick slices. Serve one wing, thigh and breast per person.

    Notes:
    *This is not the recipe you want if the only way you'll eat a duck breast is medium rare.  The legs will be so tough as to be inedible if you don't cook them to well done, and you won't get the wonderful crispy duck skin that is the high point of this recipe.

    To cook the legs to where they need to be, and to render enough fat to make the skin crisp up, you need to cook the whole duck to well done. The breasts are a little dry this way, but as long as you get some of that wonderful duck skin with it, you'll enjoy it.

    *Also, this is not a recipe for big eaters, unless you're eating alone.  There isn't a whole lot of meat on a duck, and it's also very long. I can fit two of them across on my jumbo gas grill, but it looks like I can only fit one on my kettle grill skewer.

    *Rotisserie potatoes as a side dish.  Potatoes + duck fat = heaven.  Trust me - cook some potatoes in the duck fat and drippings!
    *Duck has a LOT of fat on it, so don't do this if you have any fat phobias. I want to try to rig up a drain rack next time - I'm going to nest two pans, and punch holes in the top one so the fat can drip onto the potatoes, then drain into the lower pan.

    *Charcoal notes: A full chimney of charcoal gave me a starting temp of 450*F; after an hour the temp was down to 375*F, and after an hour and a half it was down to 275*F. This is one of the advantages of charcoal. You get quick, high heat at the start, and the temperature moderates as your cooking time progresses. This makes it hard to overcook the duck.

    Questions? Suggestions?  Ideas?  Leave them in the comments.

    Related Posts:
    Rotisserie Duck, Peking Style recipe
    Try Rotisserie pan potatoes with the duck.  Duck fat potatoes are amazing!
    Brined Rotisserie Chicken recipe.
    My other rotisserie recipes.

    Inspired by:
    Steven Raichlen's Rotisserie episode of "Primal Grill"


    Check out my cookbook, Rotisserie Grilling.

    Everything you could ask about the rotisserie,
    plus 50 (mostly) new recipes to get you cooking.

    It's a Kindle e-book, so you can download it and start reading immediately!


    *Enjoyed this post? Want to help out DadCooksDinner? Subscribe to DadCooksDinner using the RSS or Email options on the right, link to this post from your blog, recommend DadCooksDinner to your friends, or buy something from Amazon.com through the links on this site. (Like my Rotisserie Grilling cookbook...)

    Rotisserie pan potatoes

    March 13, 2009 by Mike Vrobel 19 Comments


    A year ago, my wonderful wife gave me a surprise present for my 40th birthday - a two week vacation, alone in France. The first week I took cooking classes in Provence, and the second week I wandered around Paris.*

    *Yes, life was tough. My wife loves me very much.

    Rousillon, Vaucluse, France

    My week in Provence was the highlight of my trip. It was very early in the season, and due to a last minute scheduling change, I wound up being the only person in the class! I got to be a temporary local*. If you ever get a chance, visit Patrick Payet and Famous Provence here - you won't be disappointed.
    *The picture on the left, the one of me smiling, with my hands covered in Cognac and lady fingers. was taken during this class.

    One day, I got to spend the morning wandering around the market at L'Isle sur la Sorgue

    One of the things I saw there was a rotisserie chicken stall - they had a wall of chickens turning in front of a wall of propane - picture your local Boston Market's chicken cooker, but with a trailer hitch, being run by a man of middle-eastern heritage. It smelled heavenly. The interesting part to me was the potatoes - under all the spinning chicken was a sheet of foil, covered with sliced potatoes. They were browning from the heat of the fire, and soaking up the dripping juices from the chicken above. Being the rotisserie fanatic that I am, I knew I had to try this at home.

    It turned out to be a lot harder than I thought it would - I couldn't get the potatoes to cook all the way through; they'd be nicely browned on the outside, but hard and undercooked inside. It wasn't until I saw a grilled potato recipe in Cook's Illustrated that involved pre-cooking the potatoes. The light bulb went on. Pre-cook the potatoes! Of course!
    *Or, I think, you could slice them a lot thinner. Now that I think back to the rotisserie set up in the market, that may have been how they did it. I like the thick chunks of potato you get with the following method, though, so I haven't tried thin-slicing yet.

    Recipe: Rotisserie side dish potatoes


    Equipment:

    • Grill with Rotisserie attachment (I used a Weber Summit 650 with an infrared rotisserie burner. Here it is.)


    Pre-cooked potatoes

    Ingredients:

    • 2 lbs yukon gold potatoes, peeled (optional) and sliced ½" thick
    • 1 teaspoon kosher salt
    • ½ teaspoon black pepper
    • 2 teaspoon olive oil

    Directions:
    1. Prep the potatoes: Put the sliced potatoes in a medium, microwave safe bowl. Toss the sliced potatoes with the salt, pepper and oil until evenly coated. Cover the bowl with plastic wrap, and microwave on high for 5 minutes. (You want the potatoes to be just starting to cook through - too soft and they'll disintegrate).
    2. Start the rotisserie main course: Pick a rotisserie recipe, and get it started. (Some suggestions are here, here and here.) The key piece is the foil pan that catches the drippings under your main course - that's where the potatoes are going.

    Potatoes under my rotisserie ribs

    3. Cook the potatoes: Once you have the main course started, put the potatoes in the pan underneath it. You don't want to crowd the pan - the potatoes will steam instead of cooking. Cook with the grill lid closed, tossing the potatoes in the pan every 15 minutes or so until they're well browned, usually 30 to 45 minutes. (I shake the pan with my grill tongs, then rearrange the really brown pieces and the undercooked pieces as necessary. Be careful - don't puncture the pan, or you'll have dripping fat everywhere in your grill!)

    4. Serve:Remove the potatoes to a platter, and serve with the main course.

    Notes:
    *This recipe should work with a mix of root vegetables, though I haven't tried it yet. Carrots and parsnips would go well with the potatoes, or as their own dish.

    *Don't ask the calorie count on these potatoes. They're cooking in dripping fat. They taste great, but they're not exactly a good option if you're on a diet. Unless you have the willpower to eat only one...

    Inspired by:

    Patrick Payet and Famous Provence


    Check out my cookbook, Rotisserie Grilling.

    Everything you could ask about the rotisserie,
    plus 50 (mostly) new recipes to get you cooking.

    It's a Kindle e-book, so you can download it and start reading immediately!


    *Enjoyed this post? Want to help out DadCooksDinner? Subscribe to DadCooksDinner using the RSS or Email options on the right, link to this post from your blog, recommend DadCooksDinner to your friends, or buy something from Amazon.com through the links on this site. (Like my Rotisserie Grilling cookbook...)

    Rotisserie Baby Back Ribs

    March 10, 2009 by Mike Vrobel 21 Comments


    The following statement is going to be blasphemy to some of you. The best way to cook baby back ribs is on a rotisserie*.

    It does wonders for giving you ribs that have a crispy crust on the outside, and tender, juicy meat on the inside. I like to think of it as pork candy. Mmmm.

    You can commence stoning me for culinary heresy any time you'd like - as long as I get you to try these ribs first.***
    *Yes, I'm doing a lot of rotisserie recipes. I'm finding that those recipes actually get me some readers through Google search**. But that's not the reason for this recipe. It really does give you better baby back ribs than low and slow does.

    **OK, you got me. I also get to play with my grill more. "The difference between a man and a boy is the cost of his toys."

    ***I also love barbecued ribs, cooked low and slow. That is, when they're spare ribs. I think baby backs come out better on the rotisserie - they're a little too lean to cook low and slow; the higher heat on the rotisserie crisps them up before the meat dries out.

    Recipe: Rotisserie Baby Back Ribs

    Cook time: 60 minutes

    Equipment:

    • Grill with Rotisserie attachment (I used a Weber Summit 650 with an infrared rotisserie burner. Here it is.)
    • Aluminum foil drip pan (9"x11", or whatever fits your grill)

    Ingredients:

    • 1 slab baby back ribs
    • 2 teaspoon kosher salt

    Rub:

    • 1 teaspoon herbes de provence
    • 1 teaspoon smoked Spanish paprika (or sweet paprika)


    Directions:
    1. Prep the ribs: Remove the membrane on the bone side of the rib. Loosen it by running a butter knife between it and one of the bones on the end of the rib, then pull it off. Sprinkle each side of each rack with 1 teaspoon kosher salt, ½ teaspoon of herbes de provence, and ½ teaspoon Spanish paprika. Let rest at least one hour, and up to 48 hours (keep in the refrigerator if resting for over a couple of hours).

    2. Skewer the ribs:Every three bones, poke a hole in the middle of the meat (between the bones) with a paring knife. Then, weave the ribs onto the skewer through the holes.

    Ribs on rotisserie spit

    3. Prepare the grill: Set your grill up for rotisserie cooking at indirect medium heat. For my Weber Summit, this means turning the two outer burners (burners 1 and 6) to medium, and turning the infrared burner to medium. I want an internal grill temperature of 325*F to 350*F. Then I put my drip pan in the middle, over the unlit burners. (See My Rotisserie Basic Technique Post for more rotisserie setup details.)
    *Note: If you have any sugar in your rub, you should set the grill up for medium-low heat, about 300*F.   Sugar will burn quickly under the high heat of the grill.

    4. Cook the ribs: Put the skewer of ribs on the rotisserie, and start it spinning. Cook with the lid closed for about an hour and a half, depending on the heat of your rotisserie (mine took about an hour and 15 minutes). You're done when the ribs are nicely browned, and the meat has pulled back from the bones on the end by ½".

    5. Serve: Remove the ribs from the spit, and let rest for 10-15 minutes. Cut the ribs into serving size portions (I cut between every second bone), and serve.

    Variations:
    *Memphis style dry ribs: Substitute barbecue rub for the herbes de provence and paprika, and reduce the heat to medium, and increase the cooking time to 1 to 1.5 hours.

    *Wet ribs: Use the Memphis style variation, above, then: once ribs are cooked, brush them with your favorite barbecue sauce and cook for another five minutes, or until the sauce is starting to brown into a nice, sticky glaze. (Watch the ribs on this step - there's a lot of sugar in barbecue sauce, and if your rotisserie is hot, you can go from glazed to burnt very quickly!) Remove from the rotisserie, brush with another coating of sauce, then let rest before cutting to serve
    (Or, check out my Rotisserie BBQ Baby Back Ribs post)

    *Provencal ribs: Skip the smoked paprika. After salting the ribs, rub them with about 1tsp of Dijon mustard. (You want a very thin coating of mustard on the ribs), then sprinkle on the herbes de provence.

    Notes:
    *You can cook 1 or 2 slabs of ribs at a time, depending on the size of your rotisserie skewer. In the pictures I only cooked one slab, because I was just feeding me and the kids. I can fit two easily on the big skewer for my Weber summit grill, and could probably squeeze three on if I tried.

    *The weaving is the hard part; the thicker your skewer, the harder it is to fit it between the bones. But, really, it's not THAT hard, and the results are worth it. Give it a try!

    Questions? Comments?  Other ideas? Leave them in the comments section below.

    Related Posts:
    Click here for my Rotisserie Spare Ribs with Dry Rub recipe.
    Click here for my other rotisserie recipes.

    Inspired by:
    Steven Raichlen How To Grill


    Check out my cookbook, Rotisserie Grilling.

    Everything you could ask about the rotisserie,
    plus 50 (mostly) new recipes to get you cooking.

    It's a Kindle e-book, so you can download it and start reading immediately!


    *Enjoyed this post? Want to help out DadCooksDinner? Subscribe to DadCooksDinner using the RSS or Email options on the right, link to this post from your blog, recommend DadCooksDinner to your friends, or buy something from Amazon.com through the links on this site. (Like my Rotisserie Grilling cookbook...)

    Road Trip: La Michoacana mexican grocery store

    March 6, 2009 by Mike Vrobel 1 Comment

    View Larger Map

    [Update 9/15/2012 - La Michoacana is now La Chiquita Latinos Market. It's in the same location, with a new paint job, but has added a butcher counter in the back. Otherwise, everything I say below still applies.]
    This is the first of a series of posts I'm going to do on food shopping in my neck of the woods, the Akron, Ohio area.

    When I started cooking ten years ago,* you had to find your ethnic grocery to get ingredients if your cooking was the least bit adventurous. Nowadays, your typical American megamart has a pretty good international section, and you can get by pretty well if that's all you have access to.
    *Wow - it's been that long?

    Still, you should search out your local ethnic stores. I'm a big fan of ethnic grocery stores. You get to travel to another culture, without leaving your city. Ingredients will be cheaper, and better quality. Their customers are usually recent immigrants, who know what's good and what's not. And, they don't want to pay top dollar for what were cheap staples in the old country. Ingredients will be fresher, because they'll turn over their stock of, say, chipotles en adobo much more often. And, finally, they will have a depth of stock that a megamart won't. If you are cooking from a good cookbook, you'll appreciate knowing where you can get pre-trimmed nopales when you need them.

    Tienda La Michoacana, at 1448 Copley Rd in Akron, Ohio‎ (see map below) is my local mexican grocery. My top ten list of favorites are, in no particular order:

    1. Masa Harina - Cornmeal flour for making homemade corn tortillas. Store bought corn tortillas are awful.
    2. Canned Tomatillos - yes, fresh are better, but for a quick green salsa on a weeknight, they can't be beat.
    3. Chipotles en Adobo - I use a lot of them, so I appreciate being able to buy a larger can for less.
    4. Tostadas - I love tortilla chips as much as the next guy, but whole, fried corn tortillas? I'm in heaven.
    5. Fresh tortillas - Not as fresh as homemade, but miles ahead of the ones I can get at my local megamart. If your store has them in a cardboard box near the cash register, and the ones in the middle of the box are still warm, you've hit the jackpot.
    6. Real mexican cheeses - Queso blanco, queso fresco, queso anejo. I love cheese.
    7. Mexican chorizo - Chorizo y Papas is my current favorite tortilla filling
    8. Mexcian hot sauces - I love the El Yucateco brand, in all their varieties
    9. Dried chiles - You can buy a pound bag of dried chiles for the price of a 2 ounces package at your megamart. And oh, the variety!
    10. Mexcian spices - I use a lot of ground ancho powder, and mexican oregano, and it's much cheaper here

    That's just the first ten I could think of* - every time I go there, I see something else I should try.
    *Mexican chocolate! For Mexican hot chocolate, how could I forget that!

    Here's the map:

    View Larger Map

    Slow Cooker Red Beans and Rice

    February 27, 2009 by Mike Vrobel 2 Comments

    A bowl of red beans and rice with tabasco

    In (belated) celebration of Fat Tuesday, here's my slow cooker red beans and rice recipe. It is very similar to the Caribbean black beans and rice I described yesterday. This is an example of minor changes to the flavor profile of a recipe giving very different results.

    A bowl of red beans and rice with tabasco
    [feast_advanced_jump_to]

    (Note: I found out about slow cookers and red kidney bean poisoning after I originally posted this recipe. That's why I added the "bring to a boil" step before putting the beans in the slow cooker; it makes the beans safe to cook in a slow cooker. Nowadays I use my Instant Pot for red beans and rice: Instant Pot Red Beans and Rice, so I don't have to worry about slow cookers and beans.)

    Ingredients for Red beans and rice

    Ingredients

    Slow Cooker Dry Red Kidney Beans

    • 1 pound dry red kidney beans, sorted and rinsed
    • 1 onion, peeled and halved
    • 2 cloves garlic, peeled and crushed
    • 1 bay leaf
    • 8 cups water

    Red Beans and Rice

    • 1 tablespoon olive oil
    • 16oz Andouille sausage, diced (optional, substitute Kielbasa if you can't find Andouille)
    • 1 onion, diced
    • 1 green pepper, diced
    • 1 stalk celery, diced
    • 1 teaspoon salt
    • 3 cloves garlic, minced
    • 1 tablespoon Cajun seasonings
    • 1 teaspoon dried thyme (or 1 sprig fresh thyme)
    • 1 teaspoon hot sauce (optional, Frank's Red hot for mild, Tabasco is hotter, and traditional)
    • salt and pepper to taste

    Serve with

    • Basic White Rice
    • Tabasco
    Red beans cooking in the slow cooker

    How to make Slow Cooker Red Beans and Rice

    Slow Cook the Beans

    (Basic Slow Cooker Beans technique here) Put the beans in a pot, cover with 2 inches of water, and bring to a boil. Boil for ten minutes, then drain. Transfer the beans to your slow cooker, and add the rest of the beans ingredient list.  Cook on low for 8 hours. Remove the onion and bay leaf.

    Sauté the aromatics

    After the beans are cooked, Heat the olive oil over medium-high heat in a large non-stick skillet. Add the andouille, and cook until just starting to brown, 1-2 minutes. Add the onions, pepper and celery, and cook until semi-translucent and just starting to brown, 3-5 minutes. Make a hole in the center of the onion mix and add the garlic and cajun spices. Cook for 1 minute, or until you start to smell the garlic cooking, then stir into the rest of the mix.

    Final cooking

    Add the aromatics to the crock pot with the beans, and let simmer for 15-30 minutes. Stir in the hot sauce, and salt and pepper to taste. Mash some of the beans with a potato masher to thicken the broth*. (Or whiz them for a few one second pulses with a stick blender - don't over blend. You don't want Cream of Red Bean soup!) Serve over the white rice, with Tabasco on the side.

    Smashing the beans to thicken the red beans and rice

    Variations

    • Easy slow cooker version: Don't cook the beans separately from the rest of the ingredients. Do the Sauté the aromatics step first, then move all the sautéed aromatics from the fry pan into a crock pot. Add all the ingredients (except for the onion) from step 1 (slow cook the beans) into the crock pot, and continue with cooking on low for 8 hours. Finally, move on to step 3, adding the hot sauce and salt and pepper to taste.
    • Make the beans a day ahead, best version: This recipe tastes best if the beans are made the day before, and allowed to rest in the refrigerator overnight. In the final cooking stage, bring them to a boil before simmering.
    • Vegetarian version: Just skip the sausage.
    • A little lemon: Add a squeeze of lemon juice, or some lemon zest at the very end, for some acid and citrus flavor.
    • Ham hock: For extra flavor in the beans, add a a smoked ham hock to the slow cooker with the beans. When the beans are done, either discard the ham hock, or pull off all the meat you can, shredding it with your fingers, then stir it back into the beans.

    Tools

    6 quart or larger slow cooker (Crock pot brand is fine; the pictures show my fancy All-Clad slow cooker that I got at their annual sale.)

    Notes

    • Use a Louisiana style hot sauce, like Tabasco or Crystal. If you can't take that much heat, you can substitute Frank's Red Hot sauce. The flavors don't exactly match a Louisiana style hot sauce, but it is close enough, and Franks has lots of pepper flavor.

    Inspired By

    • Justin Wilson - "I gar-on-tee!"
    • Emeril Lagasse - Louisiana, Real and Rustic cookbook

    Slow Cooker Caribbean Black Beans and Rice

    February 26, 2009 by Mike Vrobel 4 Comments


    I have three young, picky eaters at home. The book that helped us get through this tragedy is "Child of Mine" by Ellyn Satter. Her theory is a division of responsibility at the dinner table - a parent's job is to put a healthy meal on the table; the kid's job is to figure out if they're going to eat or not.* And have good table manners while they do it. No whining!
    Hint - always serve bread and milk, and they won't starve.

    This has worked for us, sort of - we usually don't get into life or death power struggles with a 7 year old over dinner. But, two of my three kids won't eat ANY vegetables, and one of them won't even eat fruit. I keep hoping that they'll come around, like Ellyn says they will, but I haven't seen any evidence of it after five years. So, I've started to try to push "just a taste" of things I think they might actually eat. Of course, this results in the aforementioned life or death power struggles with a 7 year old.
    Aargh. I still can't believe it. I was a fruititarian as a kid. My parents made the mistake of leaving me near the box of grapes for a company picnic once; I ate them all. And loved it!

    When you combine my multi-cultural cooking style, my picky kids, and this approach, you get...picky eaters across many cultures. They LOVE corn tortillas, white rice, plain spaghetti, and bread. Beyond that, for two of the three...not much else other than cheese and chicken nuggets will pass their lips, unless they can douse it in barbecue sauce.

    I mention all this because the idea of black beans and rice came from a recipe in one of Ellyn's follow up books, Secrets of Feeding a Healthy Family. She mentions it as an example of a kid freindly meal in a different culture. She says that this is what kids all over the caribbean eat as their comfort meal, and that if you can get your kids to try it, they might make it one of their favorite meals. It hasn't worked out that well; only my daughter, the non-picky one, is willing to try it. I think it's the black color - it looks "yucky", or so I've been told.
    *Aargh. Again.

    It's a good example of how to spruce up the slow cooker bean recipe on a weeknight. Start the beans before you leave for work, then, for dinner, saute some aromatics and sausage, mix in the beans, and you've got a meal!

    If you're looking for some of my other bean recipes, try my Instant Pot Pinto Beans or Instant Pot Brazilian Black Bean Stew - Feijoada.

    Recipe: Slow Cooker Caribbean Black Beans and Rice

    Equipment:

    • 6 quart or larger slow cooker (Crock pot brand is fine, but I like my fancy ones from All-Clad and KitchenAid)

    Spanish Chorizo

    Ingredients:
    Beans:

    • 1 lb black beans, sorted and rinsed
    • 1 onion, peeled and halved
    • 2 cloves garlic, peeled and crushed
    • 1 bay leaf
    • 8 cups water

    Aromatics:

    • 1 tablespoon olive oil
    • 8oz Spanish dried chorizo, diced (optional)
    • 1 onion, diced
    • 1 red pepper, diced
    • 1 stalk celery, diced
    • 1 teaspoon salt
    • 3 cloves garlic, minced
    • 1 teaspoon paprika (preferably Smoked Paprika, aka Pimenton)
    • 1 teaspoon sherry vinegar
    • zest from 1 lime or 1 orange (optional)
    • salt and pepper to taste

    Starch to serve with:

    • Basic White Rice

    Directions:
    1. Cook the beans: (Basic Slow Cooker Beans technique here ) Put the beans in a pot, cover with 2 inches of water, and bring to a boil. Boil for ten minutes, then drain. Transfer the beans to your slow cooker, and add the rest of the beans ingredient list. Cook on low for 8 hours. Remove the onion and bay leaf.

    2. Saute the aromatics: After the beans are cooked, Heat the olive oil over medium-high heat in a large dutch oven (6 quarts or larger). Add the chorizo, and cook until just starting to brown, 1-2 minutes. Add the onions, pepper and celery, and cook until semi-translucent and just starting to brown, 3-5 minutes. Make a hole in the center of the onion mix and add the garlic and paprika. Cook 30 sec to 1 minute, or until just fragrant, then stir into the rest of the mix.

    3. Final cooking: Add the beans (and all the bean cooking liquid) to the dutch oven, bring to a simmer, and let simmer for 15-30 minutes. Add the sherry vinegar, citrus zest, and salt and pepper to taste. Serve over the white rice.

    Variations:
    *Make ahead, easy slow cooker version: Combine steps 1 and 2. Skip the uncooked onion in the beans section; you're using the sauteed onion in step 2 instead. Do step 2 first, and add all the sauteed aromatics to the crock pot with the beans. Cook on low for 8 hours, then move on to step 3, the sherry vinegar and salt and pepper to taste.

    *Make ahead, best taste: This recipe tastes best if the beans are made the day before, and allowed to rest in the refrigerator overnight. In the final cooking stage, bring them to a boil before simmering.

    *Chicken stock: For a richer taste, drain the beans after they're done cooking, reserving the bean broth. In step 3, pour the beans into the dutch oven, then add 2 cups homemade chicken stock. Then, add the reserved bean broth to just bring the liquid up to the level of the beans. Continue with the rest of the recipe as written.

    Notes:
    *Add a little fresh orange juice and/or lime juice to the beans with the zest.

    *Substitute a smoked ham hock for the chorizo - put it in the slow cooker with the beans when you start cooking them. When the beans are done, remove the ham hock and pull off all the meat you can, shredding it with your fingers, then stir it back into the beans.

    Inspired by:
    Ellyn Satter - Secrets of Feeding a Healthy Family

    Basic Technique: Slow Cooker Dried Beans

    February 24, 2009 by Mike Vrobel 3 Comments

    [Updated 9/10/2010:] Warning: kidney beans have a natural toxin in them that is only destroyed by heating them to boiling temperatures (212F, 100C) for ten minutes.  I've updated this technique to boil any beans for 10 minutes before putting them in the slow cooker; make sure you don't skip this new step, particularly with red or white kidney beans.  More details available here:Slow Cookers and Red Kidney Bean Poisoning.

    I'm a big fan of beans; this is the technique that introduced me to the joys of a simple pot of beans.*

    *Beans, beans, the magic fruit. The more you eat, the more you...yes, I'm really an 8 year old, why do you ask?

    With this recipe, you can have beans that are cheaper and taste much better than canned beans. And, it's remarkably easy. It will take you less time to have the beans going than it will for you to read this blog post.** The recipe freezes well, so you can make a big batch and always have homemade beans ready for you.
    **OK, I admit it. I tend to ramble. If I was more succinct, you'd be making beans by now. 

    Basic Technique: Slow Cooker Dried Beans


    Equipment:

    • 6 quart or larger slow cooker (Crock pot brand is fine, but I like my fancy ones from All-Clad and KitchenAid)

    Ingredients:

    • 1 lb beans (black, pinto, kidney, great northern), sorted and rinsed
    • 1 onion, peeled and halved
    • 2 cloves garlic, peeled and crushed
    • 1 bay leaf
    • 2 tablespoon lard (optional)
    • 8 cups water
    • salt to taste

    Directions:
    1. Sort the beans: Pour the beans onto the far side of a sheet pan, then rake them over to the near side of the sheet, picking out anything that looks wrong.* Watch for stones, small twigs, or beans that look bad. Then, pour into your colander, and rinse with cold water.
    *It's kind of a zen thing. If you think you saw something that didn't look right, you probably did - look closer and you'll find it.

    Sorting beans

    2. Cook the beans: Put the beans in a pot, cover with 2 inches of water, and bring to a boil. Boil for ten minutes, then drain.  Put the drained beans, the 8 cups of water, and the rest of the ingredients except the salt into the crock pot. Cook on low for 8 hours.

    Variations:
    *Double the recipe, like I did in all the pictures: Use 2 lb beans, and 12 cups water (Note: this just barely fits in my 6.5 quart crock pot). Leave the rest of the ingredients as they are.  You'll need to check the water level after about 6 hours of cooking, and stir to make sure everything is submerged.  (Or, if you have a really big crock pot, just add another couple of cups of water to start.)

    *Beans: I've also used this recipe with navy beans and Pink Beans from Goya. It will work with just about any bean of this size; just don't try it with something like lima beans, which are much larger.

    *Vegetarian (vegan?) crock pot beans: Skip the lard.

    *Pork products, because every thing tastes better with pork: For a more interesting taste, replace the lard with a couple pieces of cooked bacon, or a smoked ham hock, or a ham bone - any leftover smoked pork product works well.

    *Flavor profiles: the above beans are pretty general, and can go with almost any cuisine, but two variations I use a lot are:
    Mexican beans: Add a dried chili pepper (I usually use an Ancho, aka dried poblano), and replace the bay with a couple of sprigs of cilantro, or epazote, or dried avocado leaves.
    Italian beans: Use great northern beans, and add a 2" piece of fresh rosemary.

    Notes:
    *This recipe freezes really well - to the point that I rarely buy canned beans any more. I make a doubled batch of beans almost ever week, and freeze the leftovers in Gladware 3 qt containers. They make a great substitute for 2 cans of beans in recipes, and taste much better.
    *Salt.  Normally, I add salt early in the cooking, but many people say that you shouldn't add salt until after beans are cooked, or they'll come out tough.  I don't know if this is an old wife's tale or not, but since I don't have an old wife*, I figured I wouldn't take any chances.
    *Hi honey!
    Make it a meal: I'll have some recipes coming in the near future, but a couple quick ways to turn this into a meal are:
    *Ham and beans: instead of the lard, add a ham steak. When the beans are done, pull the steak out, cut into a small dice, stir it back into the beans, and serve.
    *Beans and greens: After cooking, and removing the spent aromatics, add a couple of large handfuls of chopped greens. For quick cooking greens (like spinach or chard), just stir them in, and the beans are ready to go. For tougher greens (kale, collard), let them cook in the crock pot for another half hour or so, until tender.  Add greens to some Great Northern or Cannellini beans with the Italian flavor profile listed above, and you have Tuscan White beans, just ready for a drizzle of olive oil, and some crusty bread.  Mmmm...beans.

    Related Posts:
    Slow Cooker Caribbean Black Beans
    Slow Cooker Red Beans and Rice
    Slow Cooker White Beans with Greens and Sausage

    Inspired by:
    Robb Walsh - Legends of Texas Barbecue cookbook
    Rick Bayless - Mexican Everyday

    Rotisserie Bone In Leg of Lamb (Moroccan style)

    February 19, 2009 by Mike Vrobel 2 Comments

    P1020072
    Ever since I saw My Big Fat Greek Wedding, I've wanted to cook a bone in leg of lamb on my rotisserie.*

    *The scene where Toula's in-laws are visiting for the first time, pull up, and see the whole lamb on the rotisserie in the front yard.

    **Yes, it's true. When I'm watching a movie, what I'm thinking is "Hmm. When can I cook that?"

    Unfortunately, I don't have a big enough grill for an entire lamb, so I had to make do with just a bone-in lamb leg.

    P1020053

    Recipe: Rotisserie bone in leg of lamb, Moroccan style

    • Grill with Rotisserie attachment (I used a Weber Summit 650 with an infrared rotisserie burner. Here it is.)
    • Aluminum foil drip pan (9"x11", or whatever fits your grill)

    P1020058

    Notes:

    • Serve with couscous and a tomato and onion salad with a lemony vinaigrette.
    • Leftovers make great Gyros. Cut the lamb into thin slices, slice some red onion, make some tzatziki sauce, and buy a pack of pita bread. I've already got this on our meal plan for later in the week.
    • My butcher removed the shank bone from the leg of lamb for me. This made it easer to skewer, because there was just the leg bone running in one direction. This did leave me with a floppy piece of meat at the end of the roast that I had to carefully tie when I was trussing, to make sure it didn't flop around while the rotisserie was running.
    • If you don't remove the shank bone, it results in a "dog-leg" turn in the bone. Here's a link to carving a lamb leg if the shank is not removed.
    • How to skewer a bone in leg of lamb, in pictures:

    The bone runs where the skewer is in this picture


    Run the skewer through just next to the bone, on the thicker side of the meat, trying to hit center mass


    Voila! Skewered right through the middle.

    Pull it off sooner than you usually would, because the carry-over heat from the skewer will help finish it. Here's the Time and Temp chart for my 4 pound roast -
    20 min - 61
    F
    30 min - 75F
    40 min - 95
    F
    50 min - 115F (Pulled it at 55 min, assuming I'd be about 120F. The thin end was well done; thick end was medium; see picture at top.)

    *If at all possible, do the early salting! This was the most flavorful leg of lamb I've ever cooked, and I think the early salting had a lot to do with it.

    What do you think? Questions? Other ideas? Leave them in the comments section below.

    Related Posts:
    Rotisserie Boneless Leg of Lamb with Greek Brinerade
    Rotisserie Leg of Lamb Provencal
    Instant Pot Moroccan Lamb Shanks
    Click here for my other rotisserie recipes.

    Inspired by:
    My Big Fat Greek Wedding

    How to Grill by Steven Raichlen

    The Zuni Cafe Cookbook by Judy Rodgers (pre-salting works wonders!)

    Weber Summit w/ Infrared Rotisserie Burner


    Check out my cookbook, Rotisserie Grilling.

    Everything you could ask about the rotisserie,
    plus 50 (mostly) new recipes to get you cooking.

    It's a Kindle e-book, so you can download it and start reading immediately!


    *Enjoyed this post? Want to help out DadCooksDinner? Subscribe to DadCooksDinner using the RSS or Email options on the right, link to this post from your blog, recommend DadCooksDinner to your friends, or buy something from Amazon.com through the links on this site. (Like my Rotisserie Grilling cookbook...)

    Quick Couscous

    February 17, 2009 by Mike Vrobel Leave a Comment


    Here's another quick weeknight recipe. Couscous will give you a starchy side dish in almost no time at all, especially if you have an eletcric kettle to boil your water in.  Also, because it's fairly bland, the kids will eat it!
    OK, two out of three of my kids. I can't get THAT lucky.

    Recipe: Quick Couscous

    Ingredients:

    • 1.5 cups instant couscous
    • 1 tablespoon butter (optional)
    • 2 teaspoon kosher salt (or 1 teaspoon table salt)
    • 2 cups boiling water

    Directions:
    1. Cooking: Combine the couscous, butter and salt in a medium bowl. Pour the boiling water into the bowl, stir to combine, and cover.  (I use a dinner plate).  Let sit 5 minutes, then fluff with a fork, and serve.


    Ready for the boiling water


    Variations:
    Replace the butter with olive oil

    Replace the boiling water with boiling chicken stock for some extra flavor.

    *Add ¼ cup raisins (or even better, the tiny raisins called Currants) with the other ingredients before adding the boiling water

    *Sprinkle some chopped parsley over the top as a garnish.  (I can't do this - the kids won't eat it if it's touched something green.)

    Notes:
    *This is a good side dish for any middle-eastern themed meal. It's bland, but that's good - if you have a bunch of flavorful dishes, this makes a nice, plain counterpoint.  I think of it as I would mashed potatoes, pasta, or plain white rice.  It's a side dish to go with something that has a sauce or juices that the couscous can absorb.  A Tagine is the traditional recipe with this, but it goes well with any stew-like dish.  Oh, and lentils and couscous are another wonderful combination.

    *Stews aside, what I usually eat with couscous is grilled food.  It's particularly good with shish kebab, which is its traditional accompaniment.  Just remove everything from the skewer right onto a bed of couscous, and let the juices from the grilled foods mix with the couscous.

    *It's also a good side dish if you're really in a hurry. It's done in 15 minutes, end to end, and you don't need a pot on the stove to cook it in!

    *I prefer whole wheat couscous, which I can buy at my local health food store in their bulk section.
    *Couscous is actually a pasta even though it looks like some kind of grain.  It's what happens if you take pasta flour, moisten it, then rub it between your fingers until it makes little grains.

    Inspired by:
    The Take Out Menu Cookbook - Carla Synder and Meredith Deeds

    The Rustic Table: Constance Snow

    White Chicken Chili the easy way

    February 11, 2009 by Mike Vrobel 2 Comments

    This is my quick, weeknight recipe for white chicken chili.  I make it when we need dinner in a hurry, and/or we've got some leftover chicken that I want to use up.  It's a lot less finicky than the full fledged version, and takes advantage of store bought ingredients like canned beans and canned green chiles.  It's also a lot less spicy, since my kids won't touch anything that might be a little hot.*
    *Because of this, I now own a wide range of hot sauces, so I can bump the heat up at the table.

    Recipe: White Chicken Chili the easy way


    Ingredients:

    • 2 tablespoon vegetable oil
    • 1 large onion, diced
    • 1 lb ground turkey or chicken (or leftover chicken, shredded)
    • 3 cloves garlic, minced
    • 1 tablespoon ground cumin
    • 1 teaspoon ground coriander
    • 1 teaspoon oregano (preferably mexican oregano)
    • 3 - 4oz cans diced green chiles
    • 4 cans great northern beans, drained
    • 1.5 cups homemade chicken stock or water or (ugh) a 15oz can low sodium chicken broth (just don't tell me)
    • 1 tablespoon brown sugar
    • juice of 1 lime
    • salt and pepper


    Directions:
    1. Saute the aromatics: In a 6 quart or larger dutch oven, heat the oil over medium-high heat until shimmering. Add the diced onions and a pinch of salt, and cook until softened and slightly browned.

    2. Cook the meat: Add the ground turkey and cook, stirring and breaking up the turkey, until it just loses its pink color, another 3-5 minutes. (Just stir in the chicken if it's leftover, pre-cooked chicken).

    3. Add the spices: Make a hole in the center of the turkey in the pan, and add the garlic, coriander and cumin. Let sit for about 30 seconds, or until you start to smell the garlic and spices. Stir into the turkey. Add the cans of diced green peppers, and cook until heated through, about 1 more minute.

    *Whoops - I added the spices before the turkey in this picture!
    4. Cook the chili: Add the beans and the chicken stock. There should be enough liquid to just come up to the top of the beans; if there isn't, add more chicken stock or water. Bring to a boil over high heat, then reduce heat to a simmer for at least 10 minutes. (30 minutes would be better, to help the flavors combine.)
     
    5. Seasonings: Add the brown sugar and lime juice, then salt and pepper to taste.

    Variations:
    *Cook the chili in a crock pot: Follow the recipe through step 3; for step 4 ("cook the chili"), put everything in a crock pot, and set to low for 3-4 hours.

    *I do this once a year for my chili fest at work.  I finish step 1 to step 3 the night before, refrigerate it, then toss everything in the crock pot before I leave for work in the morning.  I plug the crock pot in when I get to work, and by lunchtime it's ready to eat!


    *Skip the ground turkey (and the 3-5 minutes of cooking), and substitute leftover cooked chicken, shredded, at the start of step 2. I use this variation often to use up leftovers after I've roasted a couple of chickens.

    *Grill about 4 boneless, skinless chicken breasts or thighs, cut them into cubes, and substitute for the ground turkey as above. Before I discovered the joy of homemade beans, this is how I would cook the recipe.

    *Substitue lemon juice (½ lemon) or cidervingegar (1 tsp) for the lime juice.  (Which I often do when I don't have a lime on hand.)Notes:
    *You can spice things up by adding a diced fresh Jalapeno, a teaspoon of chipotle puree, or some pickledJalapenos to the onions in the saute the aromatics step.*I usually cook this for my kids, though, so I skip the heat in the recipe, and add pickled jalapenos, some hot sauce, or some REALLY hot sauce
    at the table.

    *Good side dishes for this meal are barbecued frozen corn, corn bread, tortilla chips or Fritos, or oyster crackers. Good condiments are the hot sauces listed above, lime wedges, and sour cream. Oh, and shredded cheese - "mexican blend" is what my kids prefer, but cheddar or pepper jack work just as well.

    Related posts:
    Want a fancy version of this recipe?  Check out: White Chicken Chili Done Right
    Ranch Hand Chili
    Texas Red Chili

    Inspired by:
    White chicken chili recipe from Viking

    Really Hot Sauce: El Yucateco Extra Hot Habanero Sauce

    *Enjoyed this post?  Want to help out DadCooksDinner?  Subscribe using your RSS reader or by Email, recommend DadCooksDinner to your friends, or buy something from Amazon.com through the links on this site.  Thank you!

    White Chicken Chili done right

    February 9, 2009 by Mike Vrobel 8 Comments


    This is the most unique chili recipe I cook on a regular basis. White chili generally means that the chili doesn't have any chili powder or tomatoes in it. Now "white" may translate into "bland" for you, but this chili is anything but bland.*
    *I made the mistake of using more peppers than I have in the recipe below for my parents' super bowl party. Bland...no. Hellfire...yes. Everyone would say how good it tasted, then stop talking, then start gasping for oxygen. So, I cut back on the heat.

    Recipe: White Chicken Chili done right

    Ingredients
    Beans

    • 1 lb great northern beans, sorted and rinsed
    • 8 cups water
    • 1 large onion, peeled and quartered
    • 1 tablespoon lard (or 2 pieces bacon) (optional)
    • 2 teaspoon kosher salt

    Chicken

    • 3-4 lbs bone in chicken pieces (Thighs and/or breasts)
    • salt and pepper

    Chili

    • 2 tablespoon reserved chicken fat (or vegetable oil)
    • 1 large onion, diced
    • 2 jalapenos, diced (or other hot pepper)
    • 3 cloves garlic, minced
    • 1 tablespoon ground cumin
    • 1 teaspoon ground coriander
    • 1 teaspoon oregano (preferably mexican oregano)
    • 3 - 4oz cans diced green chiles
    • 2 cups homemade chicken stock
    • 2 cups reserved bean broth (or water)
    • 1 tablespoon brown sugar
    • juice of 1 lime
    • salt and pepper

    Directions:


    1. Cook the beans: Put the beans, 8 cups water, onion, and lard or bacon in a large dutch oven (at least 6 quarts), and bring to a boil. Reduce heat, and simmer, partially covered, for 2 to 2.5 hours, or until the beans are tender. Add the salt after 1 hour of cooking. Drain the beans, reserving the liquid they were cooking in (it should be about 2-3 cups), and put the beans back in the dutch oven.

    2. Cook the chicken: (Here's a link to the basic process). After you've started the beans, liberally salt and pepper the chicken pieces. Preheat oven to 375*F. Preheat a large skillet over medium-high heat, then add the chicken pieces skin side down, and cook until the skin is well browned, about 5-8 minutes. Turn and cook the other side until lightly browned, about 2-3 minutes. Drain the excess fat out of the pan (reserve for use with the aromatics in the next step), then put the pan in the preheated oven and cook until the chicken is 160*F in breasts, or 170*F in thighs, about 10-20 minutes depending on the size of the pieces. Remove the chicken to a plate, and allow to cool for a few minutes. (Keep any juices and browned bits in the pan for the next step.) Then, remove the skin, pull the chicken off the bones, and shred it.

    3. Saute the aromatics: Put the large skillet you cooked the chicken in back over medium heat, and add enough of the reserved chicken fat to give yourself 2 tablespoon of fat in the pan. Allow the pan to heat up until the fond in the pan is starting to sizzle, then add the onion, fresh chili pepper, and a pinch of salt, and cook until softened and slightly browned. Add the garlic, coriander and cumin, stir into the onions, and cook, stirring often, until you can smell the garlic, about 1 minute. Add the cans of diced green peppers, and cook until heated through, 2-3 more minutes.

    4. Cook the chili: Put the dutch oven with the beans over medium heat, and add the skillet of aromatics, chicken stock, and reserved bean broth. There should be enough liquid to just come up to the top of the beans; if there isn't, add more chicken stock or bean broth (or water). Bring to a boil, then reduce heat to a simmer for 20 minutes. Add the shredded chicken and brown sugar, and simmer for another 10 minutes. Add the lime juice, and salt and pepper to taste.

    Notes:
    *The beans and the chicken can both be made ahead of time. The beans are actually improved by resting overnight. If you have the time, cook them, let them come to room temperature, and refrigerate overnight.
    *I often use leftover chicken in this recipe; if you have extra chicken, this is a good way to use it up.
    *Also, you can saute or grill boneless, skinless chicken pieces instead of roasting bone-in pieces, but the flavor of the bone-in pieces is better.
    *That being said, grilled boneless, skinless chicken breasts do give a nice, smoky flavor; they're just a little bland compared to the bone-in pieces.
    *You can also substitute canned beans for the dried beans, and ground turkey if you need a quick recipe. In fact, I'll be posting the quick weeknight version of this recipe later in the week.

    Related posts:
    Need a weeknight dinner version of this recipe?  Check out: White Chicken Chili the Easy Way
    Ranch Hand Chili
    Texas Red Chili

    Inspired by:
    White chicken chili recipe from Viking

    David Tanis, white beans recipe in A Platter of Figs and Other Recipes

    Sear-Roasted Chicken Pieces with Quick Lemon Pan Sauce

    February 6, 2009 by Mike Vrobel 2 Comments


    As you can probably tell, I love roast chicken. I've already posted a couple of different ways to roast chicken pieces on the grill. But, when I was working on my White Chicken Chili recipe* I realized that I hadn't posted this method, which is the one I use when I don't feel like grilling.
    *The white chicken chili recipe is coming, I promise.

    The searing step gives this chicken recipe the crispiest skin I can make - except maybe for rotisserie chicken on a charcoal grill. As a bonus, if you use all thighs, or cut chicken breast pieces in half, you can be done in about 45 minutes, which qualifies as an ambitious weeknight dinner for me.

    Recipe: Sear-Roasted Chicken Pieces with Quick Lemon Pan Sauce 

    Ingredients:

    • 3 to 4 lbs chicken pieces (Breasts, Thighs, Legs, Drumsticks all work)
    • 1 teaspoon vegetable oil
    • salt and pepper
    • 1 garlic clove, minced
    • 1 cup chicken stock or water
    • Zest and Juice of ½ of a lemon

    Directions:
    1. Prep the chicken: Liberally salt and pepper the chicken pieces. Preheat oven to 375F. Heat the oil a 12" skillet (NOT nonstick) over medium-high heat, until shimmering and just starting to show wisps of smoke.


    2. Cook the chicken: Put the chicken pieces in the skillet, skin side down, and cook until the skin is well browned, about 5-8 minutes. Flip the chicken, and cook the other side until lightly browned, about 2-3 minutes. Drain any excess fat out of the pan, then put the pan in the preheated oven and cook until the chicken is 160
    F in breasts, or 170F in thighs, about 10 minutes (thighs, halved breasts) to 20 minutes (whole breasts), depending on the size of the pieces. Remove the chicken to a plate.


    3. Make a pan sauce from the drippings: If there's more than a teaspoon or two of fat left in the pan, pour it out (try to save any chicken juices if they're still there.)  Put the pan back over medium heat (be careful with the handle- it will be rocket hot).  Wait until the drippings start to sizzle, then add the garlic and saute until just fragrant, about 30 seconds. Add the chicken stock, bring to a boil, and boil, scraping the pan to loosen the browned chicken drippings into the sauce. Boil until reduced by half, 3-5 minutes. Add any juices on the plate with the chicken, then remove from the heat, and add the lemon zest and juice to the pan. Stir to combine, taste for seasoning (it should be highly seasoned - add salt and pepper if necessary), and serve on the side with the chicken.

    Variations:
    For the sauce: replace the garlic with some diced shallot

    *For the sauce: add some drained capers with the garlic, or some red pepper flakes to give it some kick
    *For the sauce: add a splash of alcohol (white wine, sherry, vermouth, madiera, port, etc...) to the pan, and let reduce, before adding the stock
    *For the sauce: add a sprig of fresh herbs (I prefer thyme, or a small piece of rosemary) with the stock; remove before serving. Or, strip the herbs off their stems, and add them to the stock with the juices from the chicken plate
    *For the sauce: to add richness to the sauce, after adding the lemon, whisk in one tablespoon of butterNotes:
    *This is a quick weeknight meal - about 30 to 45 minutes end to end, depending on how long it takes to cook the chicken.

    *If you have a little extra time, brine the chicken for an hour, or pre-salt at least 6 hours (but not more than 24) ahead of time, then skip the salting step in the prep.
    *If cooking a mix of breasts and thighs, cut the breasts in half to speed their cooking - they'll be finished at about the same time that way.
    *I love dark meat (and it's cheap), so I often cook this recipe with all thighs.  That's what I was doing in the pictures shown above.  You will get a LOT of fat out of thighs in the skin-side down searing phase; make sure you pour it out before putting the pan in the oven for roasting.  I usually use my pan lid to hold the pieces in place while I pour.
    *The sauce isn't a recipe, it's the starting point for an infinite variety of sauces.  This is a great use for homemade chicken or turkey stock, but even a sauce made out of a cup of water and some salt tastes good, if you use it to deglaze the fond in the pan*.  And...you're going to have to clean the pan out somehow; why not make a sauce out of the tasty drippings that get left behind by roasting?
    *Look at me, bringing out the big gun cooking terms!  Don't make me drop some cooking French on you!


    Inspiration:
    Cook's Illustrated Pan Roasted Chicken recipe
    Pam Anderson's How to Cook Without a Book

    Shun Chef's Knife

    February 3, 2009 by Mike Vrobel 2 Comments


    Things I love:
    My new Kershaw Shun 8-Inch Chef's Knife

    Sharp. Sharp. Sharp!

    A chef's knife is the key kitchen tool.  (Well, that and a cutting board).* You really can get by with a Chef's knife and a paring knife - every other knife in the block is optional (and some are close to useless. Utility knife? Just use your chef's knife!)
    *See Michael Ruhlman's "The Elements of Cooking" for his essay on how you could outfit a kitchen with only five tools**, and cook most meals.
    **Chef's knife, cutting board, 3qt saute pan w/lid, flat edged spoon, oven safe bowl

    I've been using my Forschner Victorinox 8-Inch Chef's Knife for a while. It's a good knife, especially for the price, and it has served me well. But...

    I just finished Chad Ward's "An Edge in the Kitchen", and decided that it was time to go from a good knife to a great one. I've lusted after this Shun knife ever since I had a chance to use it while assisting at cooking classes at Sur La Table. It is so sharp, and so quick, I feel like a samurai whenever I'm using it.*
    *And as an added bonus, I can imagine that I'm re-enacting the fight scenes in Hero when all I'm really doing is chopping an onion.

    Why is it so sharp? There are two main reasons: Blade angle, and the quality of the steel used in the knife.

    Most western chef's knives are sharpened to a 22 degree angle - meaning that the "V" of the knife is 44 degrees. Japanese knives, like the shun, are beveled to a much steeper 16 degree angle, or a "V" of 32 degrees. This is the difference between a razor and a chisel.

    How can the Japanese knives have such a steep angle? The quality of their steel. The VG-10 steel used in the Shun knives is much harder than the steel used in western knives, so it can keep that steeper angle longer, without folding over and becoming dull. That's why the western knives have the wider "V" - they don't use as hard of steel, and if they used the steeper "V" they'd dull much quicker.

    If you're interested, or would like a clearer explanation of what I'm talking about, see Alton Brown explaining the details of Shun knives.
    http://www.kershawknives.com/video/shun/index.html

    If you're obsessed, and REALLY into the details, then read An Edge in the Kitchen

    Grilled Pineapple

    January 30, 2009 by Mike Vrobel Leave a Comment


    This is another recipe that's so simple, it's barely a recipe. When it's grilling season*, I always pick up a pineapple at the grocery store so I can make this as a quick side disk.

    *Yes, I know it's not grilling season.  I apologize if you've been puzzled by my choice of January recipes.  I always get the urge to grill at this time of the year.  I think it's how I cope with seasonal affective disorder.  Or it's cabin fever.  Either way, I have fun!Natalie, my daughter, loves this dish. She's a small five year old, and will seemingly eat her body weight in pineapple.


    Recipe:Grilled Pineapple


    Ingredients:

    • 1 Pineapple

    Trimming the skin off the pineapple

    Directions:
    1. Clean and cut the pineapple: First, trim the top and bottom off the pineapple. Then, stand it up on its end and, using the "eyes" you can see on the top as a guide, cut a strip of the pineapple's skin off from top to bottom. Now you should be able to see the depth of the eyes in the pineapple; cut another strip of skin off, and keep turning and cutting off the eyes until you have removed all of the skin. Then, put the pineapple on its side and slice into 1" thick slices.

    2. Grill the pineapple: Preheat your grill to direct medium. Put the pineapple slices on the grill, and cook for 5 minutes, or until slightly browned. Flip and brown the other side, another 5 minutes or so.

    3. Serve!

    Variations:
    *Mix a 15oz can coconut milk with 2 tablespoon sugar, and whisk until the sugar is dissolved in the cocounut milk. Baste the pineapple as you grill it with the coconut/sugar mix.

    Notes:
    *The pineapple has a very woody core, which is inedible. If you have a 1.5" to 2" pastry ring, you can core the pineapple before grilling.  Use the pastry ring to punch out the woody core.  If not, either cut the core out of the pineapple before serving (I use a tic-tac-toe pattern to give me 8 chunks, leaving the center core), or just leave the slices whole and let your guests trim the core out themselves.

    *It's not a requirement, but I usually carve the pineapple with a bread knife; the long blade with a serrated edge works well with the tough pineapple skin.

    Questions?  Comments?  Other Ideas?  Leave them in the comments, below.

    Related posts:

    Want to do a showy version of this recipe? Check out my Rotisserie Pineapple. Click here for my other grilling recipes.

    Inspired by:
    Steven Raichlen's How To Grill

    Now, why didn't I think of this recipe?

    January 29, 2009 by Mike Vrobel Leave a Comment

    Epicurious: Salted Water for Boiling

    Trust me on this - read the reviews on this recipe.  You won't be disappointed.
    Via:
    Cheap Healthy Good

    Barbecued Frozen Corn

    January 28, 2009 by Mike Vrobel 2 Comments


    This recipe is so simple, I hesitate to call it a recipe. I use it about once a week, when I need a quick vegetable side.

    If corn is not in season, frozen corn is the way to go; this recipe comes out better than any grocery-store bought corn you can get, until it's the heart of summer.  Then, please go get the real thing from your local farmer's market!Recipe: Barbecued Frozen Corn


    Equipment:

    • 12" skillet with lid

    Ingredients:

    • 2 tablespoon oil - any combination of olive oil, vegetable oil, or butter (I usually use 1 tablespoon olive oil & 1 tablespoon butter)
    • 1 lb frozen corn
    • ½ teaspoon kosher salt
    • ½ teaspoon pepper
    • 1 tablespoon barbecue rub (optional)

    Directions:
    1. Preheat oil: Heat the oil and butter in a 12" skillet over medium heat, until the butter has stopped foaming.

    2. Cook corn: Add the frozen corn, and sprinkle with salt, pepper, and barbecue rub. Stir or toss to evenly coat the corn with the oil and spices. Put a lid on the pan, and cook until the corn is hot, about 10 minutes, checking if the corn is cooked through and stirring occasionally.

    3. "Barbecue" corn: (Optional) Remove the lid, and cook, stirring occasionally, until all the liquid in the pan has boiled away and the corn is nicely browned - usually another 3-5 minutes.

    4. Serve!

    Variations:
    *To add some kick to this, sprinkle ½ teaspoon red pepper flakes into the oil/butter about 30 seconds before adding the frozen corn

    *For Cajun Corn, replace the barbecue rub with cajun rub or spices - these tend to have salt in them, so skip the salt.
    *For Italian style: replace the barbecue rub with 1 teaspoon fennel seeds and 1 teaspoon coriander seeds and 1 teaspoon paprika.
    *For Mexican style: add 1 minced garlic clove to the oil/butter about 30 seconds before adding the frozen corn, then replace the barbecue rub with 2 teaspoon ancho chile powder and 1 teaspoon ground cumin.
    *For "extra Mexican" style: To the above, add a drained can of diced green peppers with the corn.  Or diced jalapenos, if you want some kick.
    *For a more substantial side dish, add a drained, 15oz can of kidney, black, or pinto beans with the frozen corn. (Especially black beans and the "extra Mexican" style.Notes:
    *I check if the corn is hot enough in step 2 by sticking my finger in the middle of the corn - if it's hot, then the corn is done.  See the picture above.*

    *Make sure you wash your hands!
    *The browning step is optional - I like the roasted flavor it gives the corn, but you can skip it if you're in a hurry, or want a different flavor profile
    *For the browning step, the cooking cue is how it sounds - if you listen, it goes from a "boiling" sound to a "sizzling" sound.   That's what you're looking for, and that's when you need to start stirring every couple of minutes or so.
    *Of course, you could use fresh corn - strip the corn from about 6 ears of corn for this.  But, as I said above, only do that if it's in-season, locally grown corn.  Otherwise, it's not worth the effort.
    *If you're paying attention, you can see in the pictures that I'm cooking a double batch. I'm using my 13 inch skillet, and 2lbs of corn.
    Related recipes
    Sauteed green beans
    Steam-Sauteed Broccoli

    Backyard Barbecue Chicken

    January 26, 2009 by Mike Vrobel 2 Comments

    Barbecue chicken is one of my comfort meals. More importantly, it's one of the few meals that I love that my kids like even more than I do. It's a combination of a few techniques I've discussed before:
    1. Barbecue Rub
    2. Barbecue Sauce
    3. Grill-Roast Chicken Pieces basic technique

    Now, I know this isn't REAL barbecue - it's not "low and slow" enough to qualify.* Technically, it should be called grilled chicken with barbecue sauce. But oh, is it good...
    *Which reminds me of one of my favorite barbecue quotes, from Alton Brown, which goes something like:

    "To make a french chef's head explode, tell him you're going to barbecue some barbecue with barbecue sauce on your barbecue for a barbecue. Then stand back."

    Recipe: Backyard Barbecue Chicken


    Ingredients:

    • 3-4 lbs bone in chicken pieces (about 1 cut up chicken) - breasts, wings, thighs, drumsticks, with breasts halved.
    • 2 teaspoon kosher salt
    • 2 teaspoon barbecue rub
    • 2 cups barbecue sauce

    Directions: (See Grill Roast Chicken Pieces for an overview of the technique)
    1. Salt and rub the chicken: Up to 24 hours before cooking, rub the salt and barbecue rub all over the chicken pieces. If more than an hour before cooking, refrigerate the pieces until ready to cook.

    2. Preheat the grill: Set your grill up to cook at indirect/high, and preheat for 15 minutes if it's a gas grill.


    Cooking indirect - the lit burners are on the far right and left of the picture, and the chicken is over the unlit part of the grill

    3. Cook the chicken: Once the grill is preheated, put the chicken over the "indirect" part, away from the flames, skin down.  (Try to put the thighs, drumsticks and wings closer to the fire than the breast pieces, of you can.)  Close the lid, and let the chicken cook for 20 minutes, then flip skin side up, and cook for another 10 minutes. (Or until the chicken registers 150*F in the thickest part of the chicken breast pieces, and 160*F in the thickest part of the thighs).

    4. First layer of barbecue sauce: Brush the chicken all over with 1 cup of the barbecue sauce. Cook it for another 5-10 minutes; at that point, the chicken should be 160*F in the breast, and 170*F in the thighs and drumsticks - if not, let it continue to cook, indirect, until it gets to those temperatures.

    5. Second layer of barbecue sauce: (Optional) Brush the chicken with the last cup of barbecue sauce, then move over the direct part of the fire (that is, directly over the flames) and cook for 2-3 minutes a side to crisp up the glaze. Pull the chicken off the grill to a platter the moment it's done; crisp can become burnt in a heartbeat.
    6. Serve: ...with any extra barbecue sauce on the side.

    Notes:
    *Barbecue sauce will burn, because of all the sugar in it. If you put it on when you started, it would be charred by the time the chicken was cooked through. That's why we only have it on for the last 15 minutes of cooking (or so).

    *Burnt barbecue sauce is also why step 5 is optional - the line between crisp and burnt is a very fine one. Err on the side of caution with this step, or skip it, if you're not into dramatics with your cooking. It adds an extra layer of flavor, but it's not required to have good chicken.

    *Salting ahead of time: Ideally, salting 24 hours ahead of time gives it time to dry brine the chicken, which will season the chicken more thoroughly. Even an hour ahead of time will help. If you don't have the time then rub the chicken right before starting the grill; that's what I do on weeknights when I'm in a hurry to get dinner on the table.

    *If you prefer, you can brine the chicken instead of early salting. I describe the brine in the Grill-Roast Chicken Pieces basic technique, but I'm starting to prefer the results from early salting over a brine. The brine's advantage is it really only needs an hour to work its magic on the chicken; the early salting is best if it can go overnight, or at least 6 hours.

    *You really need a silicon basting brush for this recipe. I've had to throw out every natural bristled brush I've ever used with barbecue sauce because I could never get it clean again. My current favorites are from Oxo - they've added a little tongue with holes on the inside of the brush to help it carry the sauce, and spread it more evenly. Without that piece, the sauce slides right off the silicon bristles.

    Inspired by:
    Cook's Country magazine
    Steven Raichlen

    Homemade Barbecue Rub

    January 24, 2009 by Mike Vrobel 32 Comments

    Homemade BBQ Rub
    Homemade BBQ Rub

    I use this homemade barbecue rub on anything I want to have a barbecue flavor. Sure, barbecue sauce is nice, but the rub is where the flavor is. Now, If I was a real barbecue pitmaster, I would have to guard this recipe with my life.*
    *You know - the old Keyser Soze routine: "If I told you, I'd have to kill you. And your family. And everone who's ever met you. By the time I'm done, they'll have to post signs off the coastline, warning people away from the continent you live on for the next thousand years."

    But I'm not a real pitmaster. And, as you can probably tell, I can't keep my mouth shut when it comes to food. I gave away containers of this rub as christmas presents to friends and family, so if they want to refill they'll need the recipe.

    Recipe: Homemade Barbecue Rub

    Notes

    • This rub is best on chicken, pork or fish. I use about 1-2 teaspoon per pound, but I usually just sprinkle it on until it looks right.
    • It's a little sweet for beef; If I know I'm going to barbecue beef, that's OK, but I wouldn't use this as a rub on a steak. That being said, I'm usually a purist when it comes to steak - salt and pepper is all I really want on it.
    • There is NO salt in this rub. I usually salt my food separately, either by brining it or pre-salting it, so I don't put any salt in the rub. Make sure you salt the food before you add the rub, or it's going to be very bland. If you would rather have a "one can covers all" rub, add 1-2 tablespoon salt to the recipe.
    • If your brown sugar is wet or clumpy2*Clumpy? That's a word, right? then it won't mix well with the other ingredients. In my experience, that's how it always is, and it will never mix well with the other ingredients. To fix this, I put the brown sugar in my food processor and run it until it is finely powdered, usually about 30 seconds. Then I add the other ingredients, and pulse it a few times until they are well mixed.
    • Buy your spices in bulk. It's much cheaper that way. I get them from Penzeys Spices, or from the Frontier Spices bulk section at my local grocery store.
    • This recipe makes more than enough for one use. I usually quadruple the recipe - 16 tablespoon equals 1 cup of paprika and brown sugar, 8 tablespoon chili powder equals ½ cup, etc... I have a big container of it in the back of my spice cabinet, and I keep a small Shaker Jar where I can get at it quickly, that I refill whenever necessary. I make a new batch every 3 to 6 months.
    • Now I know that I said that "this is where the flavor is", and I stand by that - lots of times I make barbecued chicken with just this rub. But a little barbecue sauce never hurts as well.
    Questions? Comments? Other Ideas? Leave them in the comments, below.
    Related posts:
    Here's my recipe for an easy homemade barbecue sauce.
    Use homemade barbecue rub and sauce on some barbecued chicken.
    For a little New Orleans flavor, try my Cajun Rub.
    Inspired by:
    Virtual Weber BulletPaul Kirk's Championship Barbecue Sauces: 175 Make-Your-Own Sauces, Marinades, Dry Rubs, Wet Rubs, Mops, and Salsas

    Rotisserie Cornish Game Hens

    January 21, 2009 by Mike Vrobel 2 Comments

    When my Grandpa would make his annual visit to my parent's house, Cornish game hens were always on the menu.  Grandpa and my dad would work on their yearly home improvement project, and he would always want "little chickens" with rice pilaf stuffing when the project was over. But, before that, I'd get to help, and watch my Dad and Grandpa interact.*
    *"No, no, no, not that way, you're doing it all wrong!"
    **"But we measured it twice - it will fit...ok, it should fit...hmm. Back to the hardware store."
    ***"What do you mean, we're taking a break? It's only 90 degrees." "But we're sticking to the roof because the tar shingles are melting!"

    This is how I learned to talk with the other men in my family.  We only communicate while working on a project, or watching sports.
    *My wife thinks this is a tragedy. I think it's just how most men communicate. Tomato, tomahto.

    Recipe: Rotisserie Cornish Game Hens

    Overview:
    See my rotisserie poultry overview, for a discussion of the general techniques used with this recipe.

    Equipment:

    • Grill with Rotisserie attachment (I used a Weber Summit 650 with an infrared rotisserie burner. Here it is.)
    • 2 Aluminum foil drip pans (9"x11", or whatever fits your grill)

    Ingredients:

    • 4 cornish hens, 1-2 lbs apiece (mine were roughly 1.5lbs each)
    • Kosher salt (Diamond Crystal) - 1 ½ teaspoon per hen

    Directions:
    1. Pre-salting the hens. One day before cooking, rinse and dry the hens. Carefully run your finger under the skin on the breast to loosen it. Sprinkle each bird all over with 1 ½ teaspoons of salt - I get some inside the cavity, some under the loosened skin on the breast, and then coat the outside with the rest, concentrating on the thick part of the breasts and the legs. Put the chickens in a pan where they have a little space around them, wrap in plastic wrap, and let rest in the refrigerator for up to 24 hours.

    2. Truss and spit the hens. One hour before cooking, take the tray with the hens out of the refrigerator. Truss the hens (see rotisserie poultry overview for details) and put them on the spit. It helps if you have four sets of forks for your spit for this. Put the hens on in two sets of two - first bird on the spit feet first, then the second bird breast first, so the neck part of the backbone of the two hens are touching. (see the picture, below.) Then use a fork to secure the first pair of hens. Repeat for the second set of hens. Let sit at room temperature while you prepare your grill.

    3. Prepare the grill: Set your grill up for rotisserie cooking at high heat. For my Weber Summit, this means turning the two outer burners (burners 1 and 6) to high, and turning the infrared burner to high. Then I put my drip pans in the middle, over the unlit burners. (See My Rotisserie Basic Technique Post for more rotisserie setup details.)


    4. Cook the hens. Put the spit on the grill, put your foil pans under the hens, and start the spit spinning. Cook with the lid closed. It will take for 30-45 minutes, depending on the size of the hens. (It took 35 minutes for my 1.5lb hens). Check the internal temp on the hens after 20 minutes, and every 10 minutes thereafter - you want 160*F to 165*F in the breast, and 170*F to 180*F in the thigh. Remove the spit from the grill (while wearing gloves!), and remove the hens from the spit. Cover the hens with foil, and let rest for 15 minutes before serving.

    5. Make a sauce from the drippings. (Optional) If the drippings aren't burnt, remove the drip pans from the grill. Skim off the fat, then scrape the rest of the drippings into a small saucepan. Add one cup of homemade chicken stock, and bring to a simmer. Add any juices that come out of the chicken during the resting and carving to the saucepan. Simmer until slightly thickened, then add salt and pepper to taste. (Note: watch out for burnt or sooty drippings, especially if you cooked on a charcoal grill. Either skip the drippings, or just make a sauce by reducing some homemade stock, and adding the juices from carving.)


    6. Final prep and serve. Cut the hens in half - I find a half a hen to be a good serving for an adult, with one hen per person if they're a big eater.* On a cutting board, run a chef's knife through the cavity and split the chicken along the backbone, then turn it over and split through the breast.
    *Of course, I could eat more. I could always eat more when it tastes as good as these hens do.

    Variations:
    *Brine instead of overnight salting - if you don't have the time for the overnight salting, use a wet brine instead - check my Brined and Herb Rubbed Cornish Game Hens recipe.

    *Herbs under the skin, or in the cavity - I got the idea for the overnight salting from the Zuni Cafe Cookbook. In that recipe, they also have you put a small piece of thyme under the skin of the breast.

    *Spice rub instead of just salt - use your favorite spice rub on the hens, making sure you get it under the skin of the breast and in the cavity of the hen.

    *Marinate the hens instead- Skip the salting, and use your favorite marinade. Steven Raichlen recommends a herb/mustard/lemon marinade. (From Steven Raichlen's How to Grill)

    Notes:
    *Watch your hands with the hot spit! Use oven mitts or (preferably) welding gloves.

    *If you can find them, use fresh hens (I got mine at Difeos Poultry in downtown Akron), but frozen hens will work if they're all you can find. Just thaw them out in the refrigerator before the salting step.

    *Are cornish game hens really a game bird? No, they're just a young chicken. So they really are just the "little chickens" of my youth!


    Questions? Comments?  Other ideas? Leave them in the comments section below.
    Related Posts:
    Click here for my Brined and Herb Rubbed Cornish Game Hens recipe.
    Click here for my other rotisserie recipes.

    References and inspirations:
    Judy Rodgers' Zuni Cafe Cookbook
    Steven Raichlen's How to Grill


    Check out my cookbook, Rotisserie Grilling.

    Everything you could ask about the rotisserie,
    plus 50 (mostly) new recipes to get you cooking.

    It's a Kindle e-book, so you can download it and start reading immediately!


    *Enjoyed this post? Want to help out DadCooksDinner? Subscribe to DadCooksDinner using the RSS or Email options on the right, link to this post from your blog, recommend DadCooksDinner to your friends, or buy something from Amazon.com through the links on this site. (Like my Rotisserie Grilling cookbook...)

    Choucroute Garnie - Sauerkraut with pork and sausage

    January 17, 2009 by Mike Vrobel Leave a Comment


    Choucroute Garnie is a specialty of the Alsace region of France. It's a collection of different types of pork - smoked, cured, sausage...but Choucroute Garnie is really all about the sauerkraut. You see all that wonderful pork, and think that it's the important part. But it's not. Now, don't get me wrong, the pork is good. Really good. But it's real purpose is to give the sauerkraut its wonderful flavor.

    I learned that at Brasserie Flo; this was the best meal I had in Paris. And that's saying something! They bring a platter with a huge pile of choucroute, and various types of pork to your table, along with a selection of mustards to dip with*. I started with the different cuts of pork, but by the time I was finished I was ignoring the pork, and trying to figure out how to fit a little more of the sauerkraut into my poor, stuffed stomach.
    *And with a carafe of dry Alsatian Riesling...I have to go back to Paris, if just for this meal!I've been a fan of sauerkraut since I was in high school, buying Polish Boys from the hot dog carts in downtown Cleveland - knockwurst loaded up with onions and sauerkraut. Heaven in a bun! But this, this is sauerkraut perfection.

    Diane's memory of sauerkraut is a little different*.
    *She calls my beloved Polish Boys "smelly dogs". And she's part Polish!

    Her family's tradition is to have pork and sauerkraut on New Year's day*, because it will bring good luck for the new year. Diane is still scarred from this experience - she tells stories about her siblings forcing down their one strand of sauerkraut a year, just to make grandma happy. She gives this recipe her highest praise for something with sauerkraut in it - she'll eat it, willingly.
    *Of course, I made the mistake of saying "New Year's eve" when I was talking with the salesperson at Sur La Table about this meal, and I got a lecture about how it works. Pork and sauerkraut has to be eaten on New Year's DAY, not New Year's Eve, or it doesn't count. No good luck for you!

    Recipe: Choucroute Garnie - Sauerkraut with pork and sausage
    Ingredients:
    Meat:

    • 2 tablespoon lard (Yes, lard. You can use use vegetable oil, but lard is better.)
    • ¼ lb Thick sliced bacon
    • 1 lb Cured Pork Side, rind removed
    • 1 19oz package Johnsonville uncooked Bratwurst, each link cut in half
    • 2 lb kielbasa, cut into 3" pieces (or other fully cooked, garlicy sausage)

    Aromatics:

    • 2 large onions, chopped
    • 1 teaspoon juniper berries
    • 1 teaspoon black peppercorns (whole)
    • 5 whole cloves
    • 3 bay leaves
    • 1 sprig fresh thyme

    Sauerkraut:

    • 2 lbs fresh sauerkraut, rinsed & drained
    • 1 cup dry Riesling (or other, non-oaky white wine)
    • 1 cup homemade chicken stock, or water

    Sides for serving:

    • Assorted mustards (Maille Dijon, and Maille horseradish Dijon are particularly good)
    • Prepared white horseradish
    • Cornichons, French style gherkin pickles.

    Equipment:
    Large (6 qt or larger) heavy dutch oven, with a lid (enameled cast iron is perfect).

    Directions:
    1. Preheat oven to 350*F.
    2. Heat lard in heavy dutch oven over medium heat, until melted, then add bacon, pork side, and bratwurst. Saute, turning occasionally, until bacon is crisp and brats are browned, about 8 minutes. Remove meat to a plate, leaving as much fat as possible.

    The pork is browning nicely...

    Aromatics, ready to go.

    3. Reduce heat to medium, and add onions, juniper, peppercorns, cloves, bay leaves, and thyme. Saute until onions are softened and semi-translucent, and just starting to brown, about 6 minutes.


    4. Stir the sauerkraut into the onion mixture, then add the browned meats, and the kielbasa, pushing into the sauerkraut to submerge. Add the wine and chicken stock, then add water to just cover the rest of the ingredients. Raise the heat to high, and bring to a boil.
    5. Cover the pot, and transfer to the oven. Bake for 1 ½ hours. The liquid should have been mostly absorbed by the sauerkraut, and everything on the top of the pot should be starting to brown just a little. See the picture below for what it should look like.
    6. Remove pot from oven, and let it rest for up to ½ an hour to cool.
    7. Pile the sauerkraut in the middle of a platter, and arrange the meats around it. Serve with the mustards, horseradish and cornichons on the side.

    Notes:
    *For a little sweetness, or to make the recipe a little more German, peel and core 3 apples, cut them into 1" pieces, and add them after the onions have been sauteing for a few minutes.

    *The meats are variable - you want some that are smoky, and some that are garlicy. I usually try to make sure I use the bacon and the bratwurst; I've skipped the cured pork side, and/or replaced it with a ham steak or piece of smoked pork loin. For the kielbasa, I've substituted smoked sausage and hungarian sausage, and in some cases I've just skipped it and added more brats.
    *If that's too much meat for you, I've stripped this down to the bacon and the brats, with a lot of sauerkraut. It's still great.
    *This is a one-pot meal for us, unless it's a holiday like New Year's. Then, I'll make the traditional side dish of boiled new potatoes with parsley.
    *This meal goes over well with the kids...if I don't let them see the brats touching the sauerkraut. That would be yucky. So, before I take it to the table, I put some of the brats in hot dog buns just for them.
    *Oh, and as I said - make sure you have some dry Riesling to go with it. Preferably from Alsace, of course. But any good, dry riesling will do.
    Inspired by:
    *The Man Who Ate Everything: JeffreySteingarten for his "TrueChoucroute" article. Now there's a man who makes my food obsessions look normal.*Epicurious.com recipe for Choucroute Garnie.

    *Brasserie Flo. I will return!

    Stir Fried Bok Choy with Basil-Lemon Sauce

    January 4, 2009 by Mike Vrobel Leave a Comment


    Here is a recipe I use often, for a quick stir-fry side dish. I usually make it after I've made the protein stir fry - I wipe the pan out and move on to the vegetable side. I put this one together from vegetables we got from our CSA share this summer.
    My apologies to Pam, who split the CSA share with me. I've had these pictures waiting for me to write up the recipe for quite a while now, and she kept asking me "what are you doing with all these vegetables?!?". I'm embarrassed that it took me this long to get around to the answer to that question.
    As I've said before, the key to a stir-fry is the stir fry technique. Organization is key - you need to have all the vegetables prepped before you start. When I do a stir-fry with a main dish and a side, I prep both at the same time - You'll see the vegetables I used in my weeknight chicken stir fry recipe in some of the pictures that accompany this recipe.


    Recipe: Stir Fried Bok Choy with Basil-Lemon Sauce


    Equipment:
    Large nonstick skillet with a lid. (See stir fry technique for recommendations.)

    Ingredients:
    Sauce: (Basil Lemon sauce)

    • ¼ cup soy sauce
    • Juice from ½ lemon
    • 2 large heads bok choy
    • 1 large onion
    • 1 sprig of basil
    • 2 large cloves garlic
    • 1 teaspoon vegetable oil
    • 2 tablespoon vegetable oil (For veg stir fry)
    Veg prepped. Note the red peppers, for my chicken, are also ready to go

    Instructions: (Again, see the stir fry technique for an overview)
    1. Prep sauce: Put sauce ingredients in a small bowl, and whisk to combine. (I use my liquid measuring cup for this)
    2. Prep vegetables: Trim and peel the onion, and cut into ½" thick strips. Trim the root end and most of the white off the bok choy, and clean in a salad spinner if it's dirty. (Note - if you have baby bok choy, the white parts aren't as tough, and you can just trim off the very root end.) Pick the basil leaves from their stems, stack them, roll into a cigar shape, and slice thinly crosswise.
    3. Prep garlic: Mince garlic, and mix in small bowl with 1 teaspoon vegetable oil.
    4. Cook the onions: Add the 2 tablespoon oil to the pan, and let heat on high until the oil is shimmering. Add the onions, let sit for 1 minute (or until well browned on one side), then stir the onions and cook, stirring occasionally, until they are crisp-tender, usually about another 2 minutes.

    5. Cook the garlic: Make a hole in the center of the pan, and add the garlic-oil mixture. Let sit for 30 seconds, or until you start to smell the garlic cooking. Stir the garlic into the onions.

    6. Cook the bok choy: Add the bok choy to the pan, stir to combine with the vegetables, then add ½ cup of water to the pan and cover with a lid. Reduce heat to medium, and let steam for 5-10 minutes, stirring occasionally, until the bok choy is just tender. Remove the lid, and if there is a lot of liquid in the pan, let it cook for let cook for another minute or two to evaporate some of the water.

    7. Sauce: Pour the sauce into the pan, stir to combine, and let cook for another minute or two, until the sauce is bubbling. Turn off the heat, and stir the basil into the pan.
    8. Serve!

    Variations:
    *Extra quick sauce: skip the sauce above, and use 2 tablespoon oyster sauce and 2 tablespoon soy sauce, whisked together. (Or, just use all oyster sauce).

    *Extra flavor aromatics: To the garlic/oil mix add 1" ginger root, peeled and grated or minced, and 2 scallions, sliced thin. (I do this when I have them, but I didn't when I was making this recipe).

    Notes:
    As I keep saying, stir fry in a nonstick skillet instead of a wok.
    I usually add the white bok choy stems to the recipe - cut the root end off, then slice them ½" thick and put them in right after the onions are browned. But, when I was making this recipe, the bunches I had were so large that I just discarded them, because I didn't think I'd have room.
    *When I'm buying from the grocery store, I try to buy baby bok choy - they're much smaller, and the stems are more tender. You just have to trim off the root end, and they're ready to cook.

    Questions?  Comments?  Other ideas?  Leave them in the comments, below.
    Related posts:
    Click here for my Stir-Fried Swiss Chard recipe. If you want a different vegetable, try my sautéed Brussels sprouts.
    Click here for my Basic Technique: Stir Fry

    Inspired by various sources. See my stir fry post for the list. This recipe is primarily based on a version done by Cook's Illustrated.

    • « Previous Page
    • 1
    • …
    • 34
    • 35
    • 36
    • 37
    • Next Page »

    Welcome to Dad Cooks Dinner!

    I'm Mike Vrobel, a dad who cooks dinner every night. I'm an enthusiastic home cook, and I write about pressure cooking, rotisserie grilling, and other food topics that grab my attention.

    More About Me →

    Popular

    • Three bowls of cooked Pinto Beans on a wood table
      Instant Pot Pinto Beans (No Soaking)
    • Pressure Cooker Beef Shank (Osso Bucco)
    • Pressure Cooker 7 Hour Leg of Lamb (in 90 minutes)
      Pressure Cooker 7 Hour Leg of Lamb (in 90 minutes)
    • Pressure Cooker Brown Jasmine Rice
    • Grilled Tomahawk Steak (Long Bone Ribeye, Reverse Seared)
      Grilled Tomahawk Steak (Long Bone Ribeye, Reverse Seared)
    • A green bowl full of chicken noodle soup
      Instant Pot Rotisserie Chicken Noodle Soup

    Seasonal

    • A bowl of asparagus risotto
      Instant Pot Asparagus Risotto (Pressure Cooker Recipe)
    • Grilled Butterflied Chicken with Garlic Butter
    • Sous Vide rack of lamb sliced into chops
      Sous Vide Rack of Lamb with Dijon Bread Crumb Crust
    • A bowl of beef stew with asparagus, carrots, and radishes.
      Instant Pot Spring Vegetable Beef Stew
    • A Rotisserie Chicken (Pollo Asado)on a platter of shredded cabbage
      Rotisserie Chicken Pollo Asado
    • Rotisserie Pork Shoulder Roast with Carolina Mustard BBQ Sauce
      Rotisserie Pork Shoulder with South Carolina Mustard Barbecue Sauce

    Footer

    ↑ back to top

    About

    • Privacy Policy

    Newsletter

    • Sign Up! for emails and updates

    Contact

    • Contact

    Copyright © 2025 Dad Cooks Dinner