DadCooksDinner

  • Home
  • Rotisserie
  • Recipes
  • Tools
  • Books
  • Merch
menu icon
go to homepage
  • Recipes
  • Books
  • Tools
  • Merch
  • About
subscribe
search icon
Homepage link
  • Recipes
  • Books
  • Tools
  • Merch
  • About
×
Home » Recipes

Review: All-Clad Stainless Cookware with d5 Technology

December 28, 2009 by Mike Vrobel 12 Comments

Remember my post about how much I love All-Clad Stainless cookware? Someone at All-Clad read it, too. They got in touch with me, and asked if they could send a sample of their new line of cookware to test out.
"Of course!" I said. "What is it?" That's when they told me they were updating their Stainless cookware line with new technology.

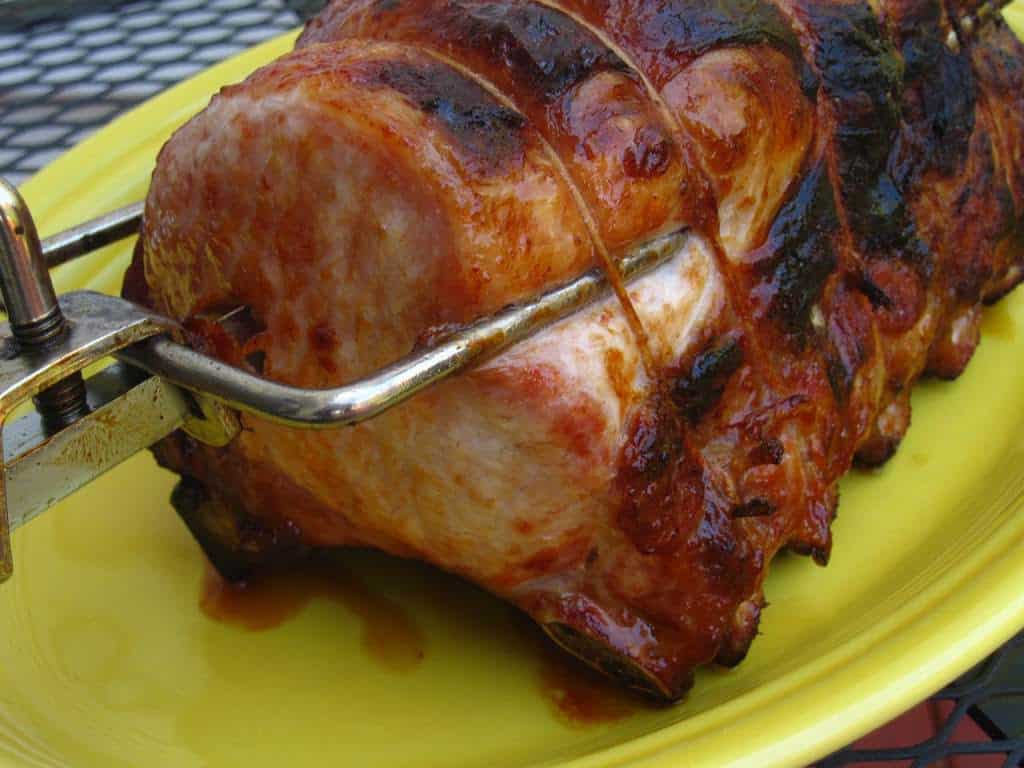
I could not believe it.  I love their Stainless cookware, and thought they would have a hard time improving it.  I asked for a 12 inch fry pan for the review.  It's my workhorse pan, and I thought it would be the best way to test their changes.
*Remember the FTC disclosure policy I wrote a while back?  Here's my first chance to disclose anything: All-Clad sent me a free pan to try out.

What are the changes?
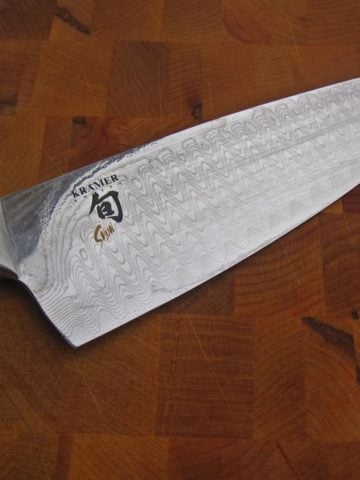
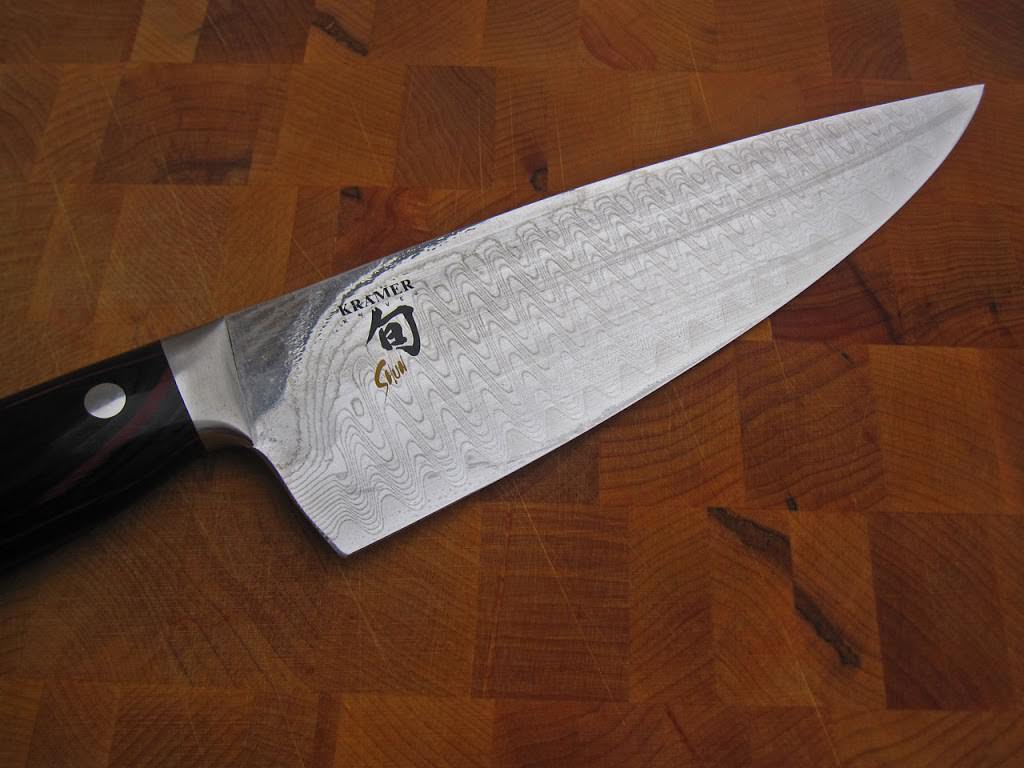
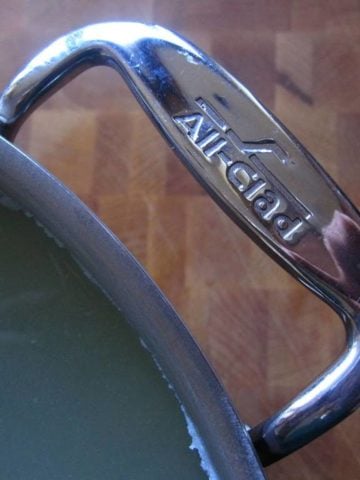
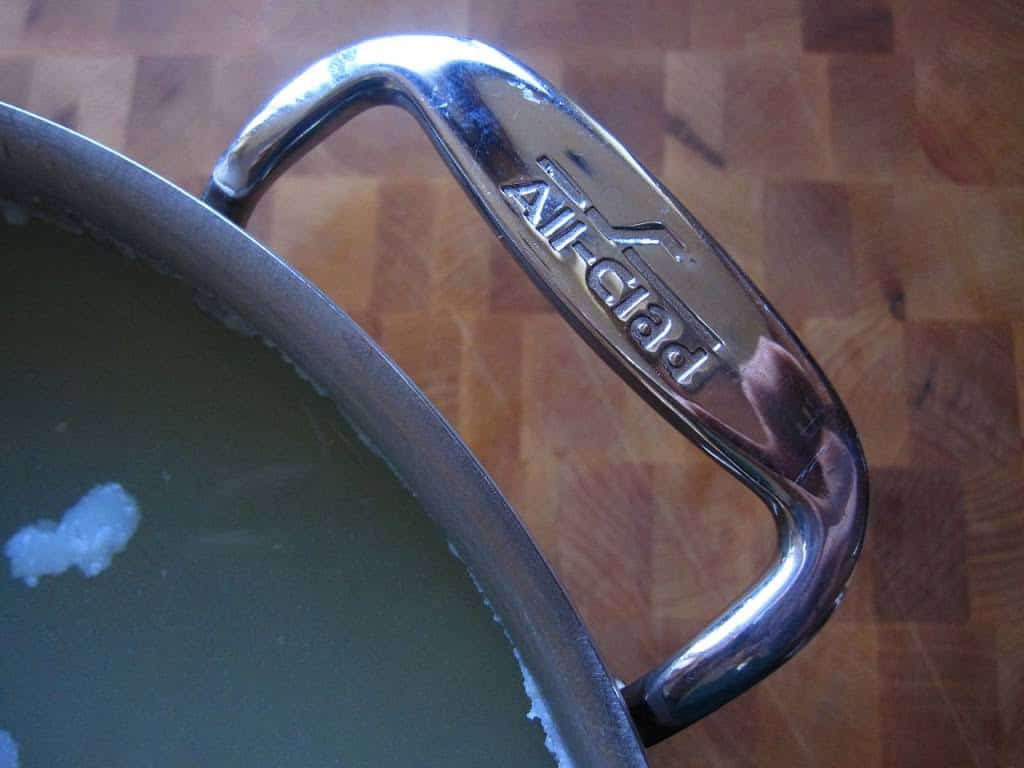
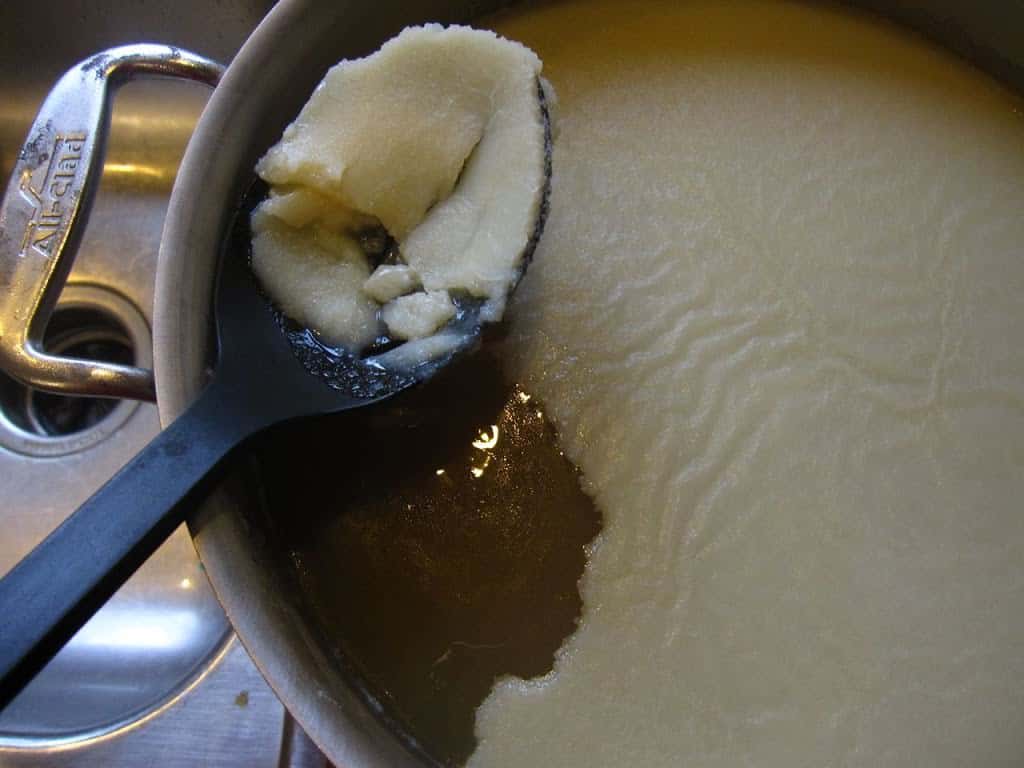
The new "d5" Stainless pans have an extra layer of stainless steel in the middle of the cladding, resulting in five layers of metal in the pan: (picture below):

Stainless with d5 technology, cross section

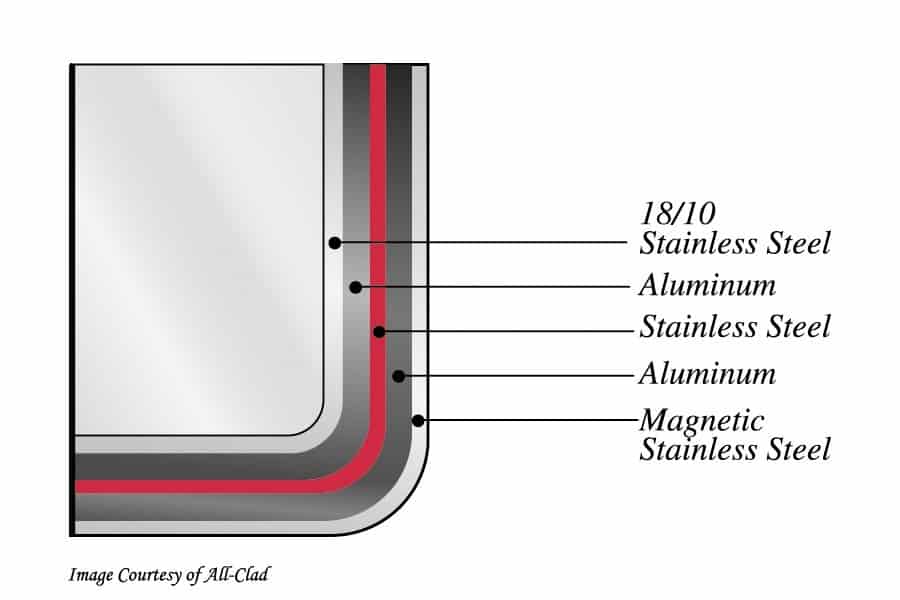
All-Clad says this makes the pan heat 20% more evenly, makes it more energy efficient, and makes it more durable.

The d5 handles have also been redesigned to make them more comfortable.  And their saucepans have been given pouring lips.
*Finally! If there was one thing I would have changed in their pans, adding a pouring lip to the saucepans would have been it.

Are the d5 pans better?
I have to admit that I was skeptical.  Did they really improve the pans?  The regular All-Clad Stainless pans are the best pans I've ever used.  They heat evenly, and hold on to the heat; you get better, more even browning from them.  They perform head and shoulders above any other pan I've owned, including aluminum clad pans from other manufacturers.  That's why I wrote my post on how much I love them.
*Well, that, and it was an excuse to tell you about their factory sale.
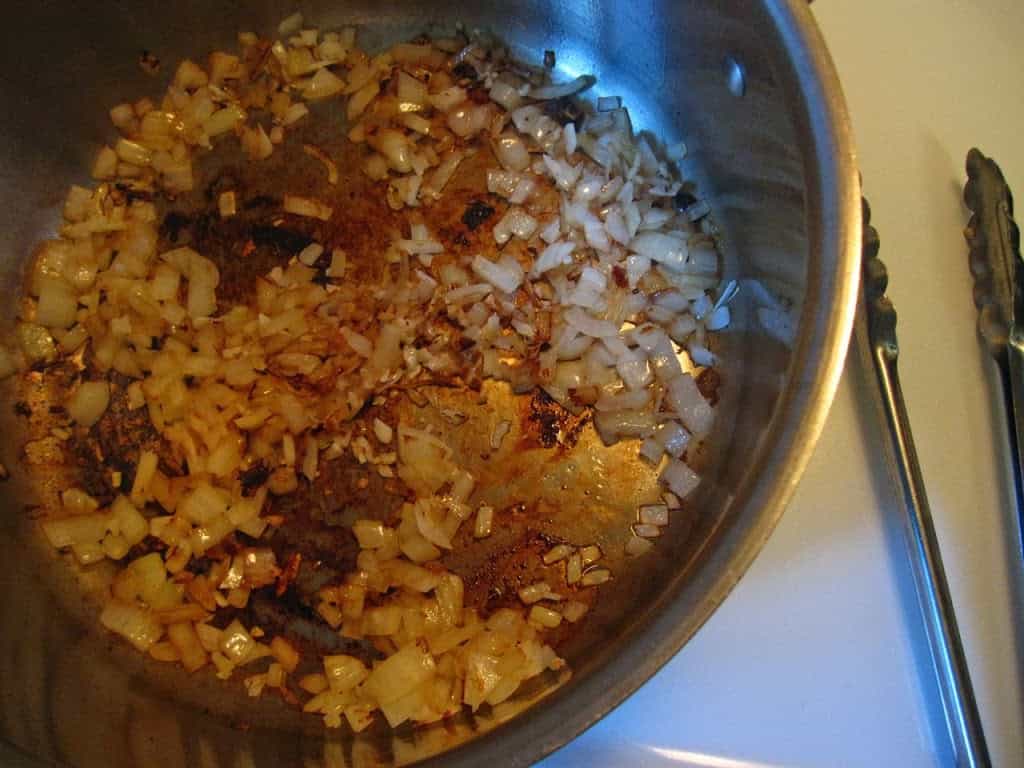
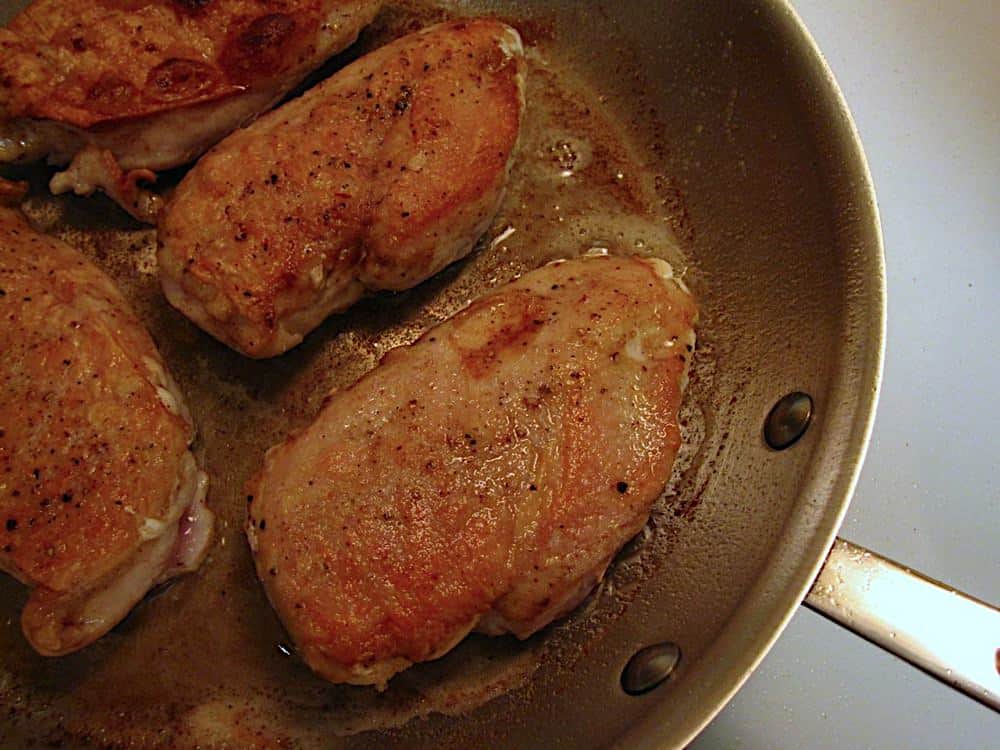
Better searing:
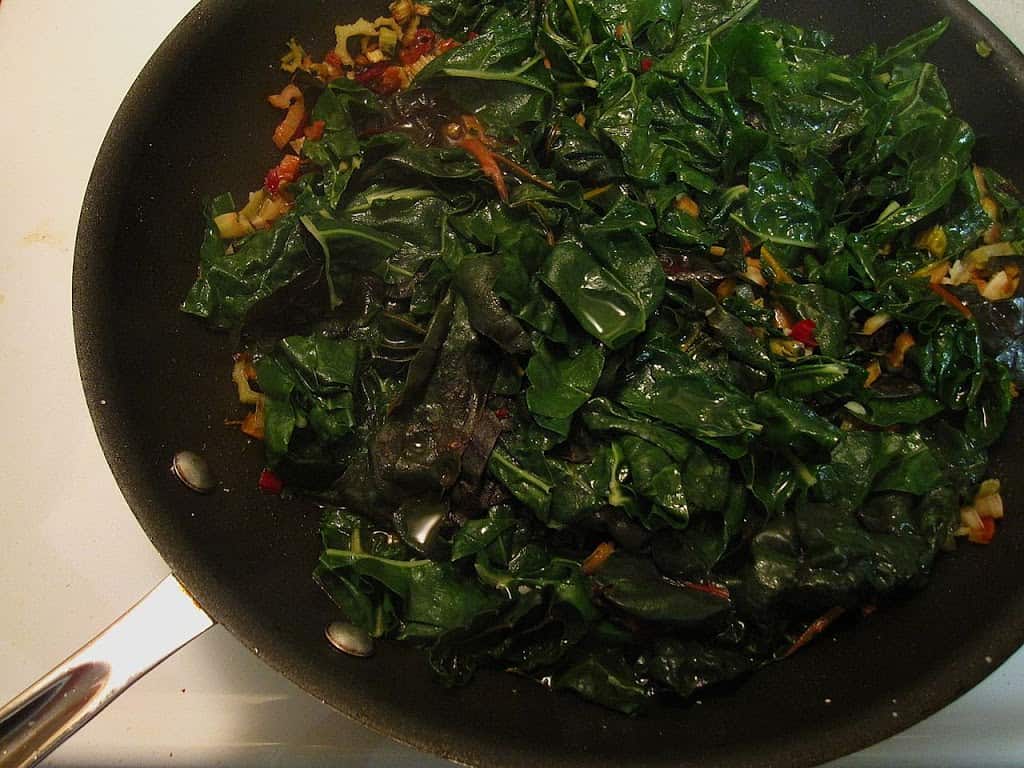
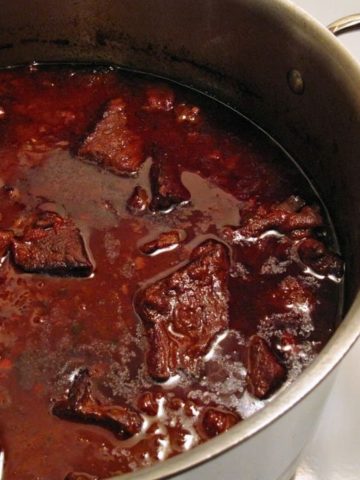
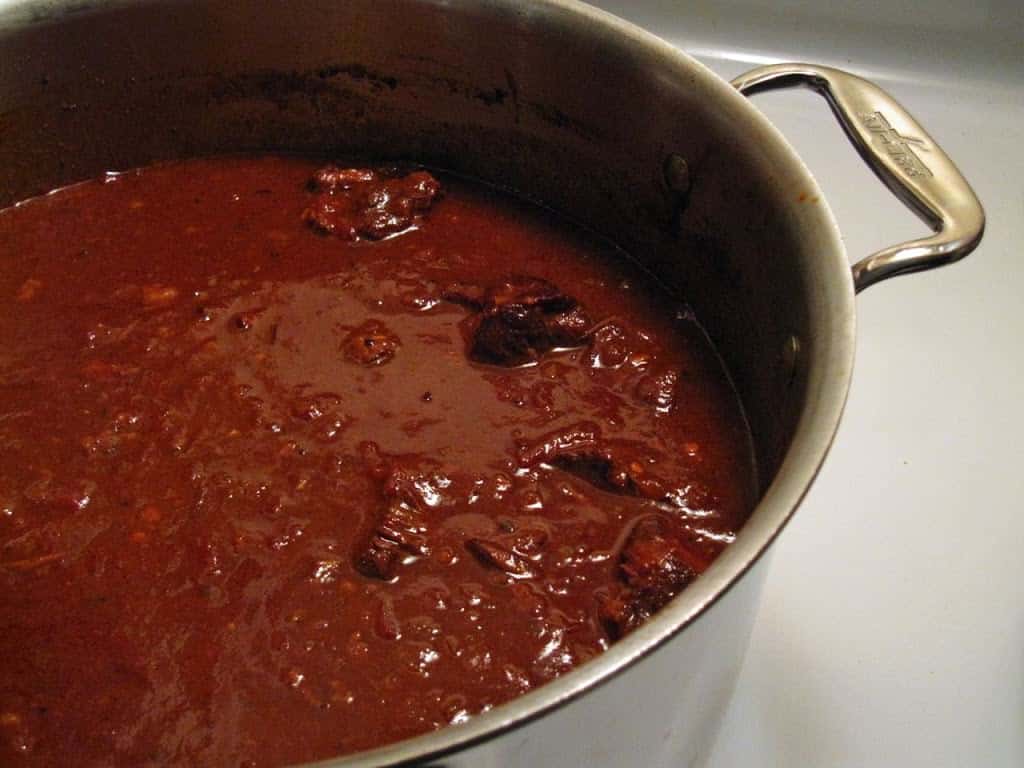
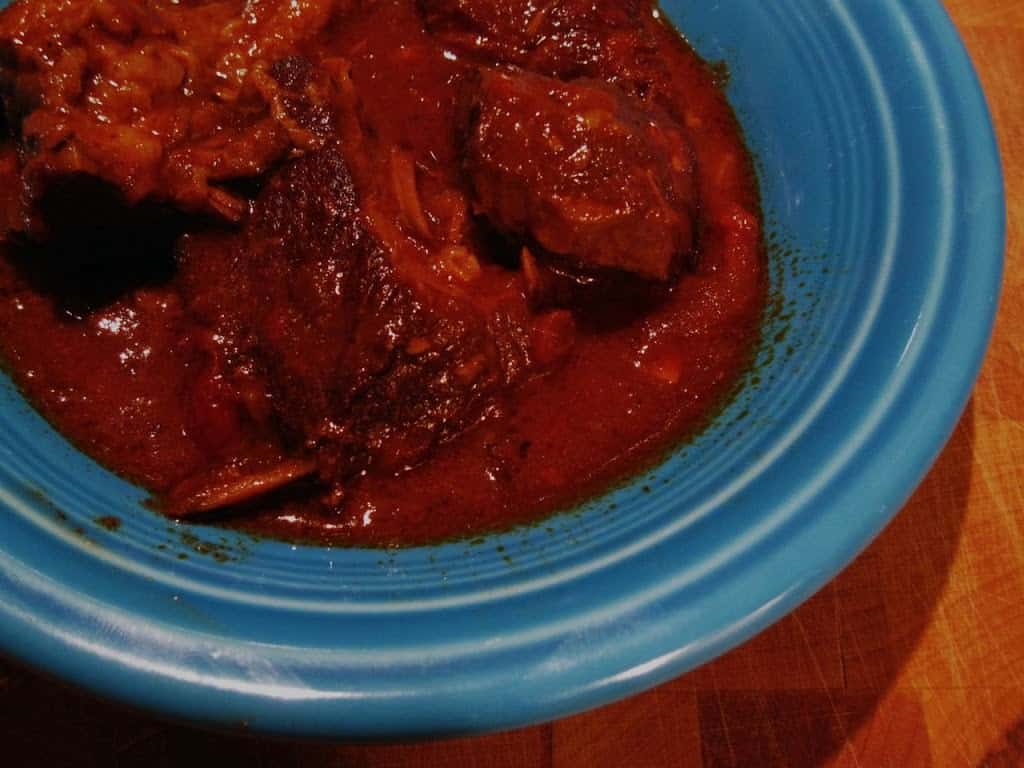
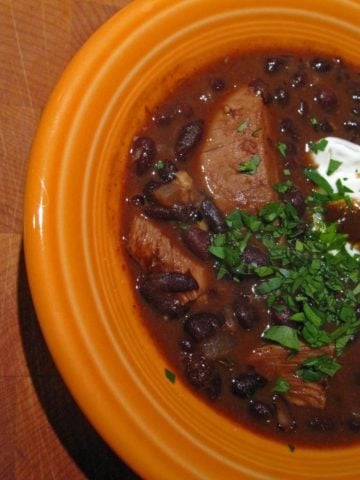
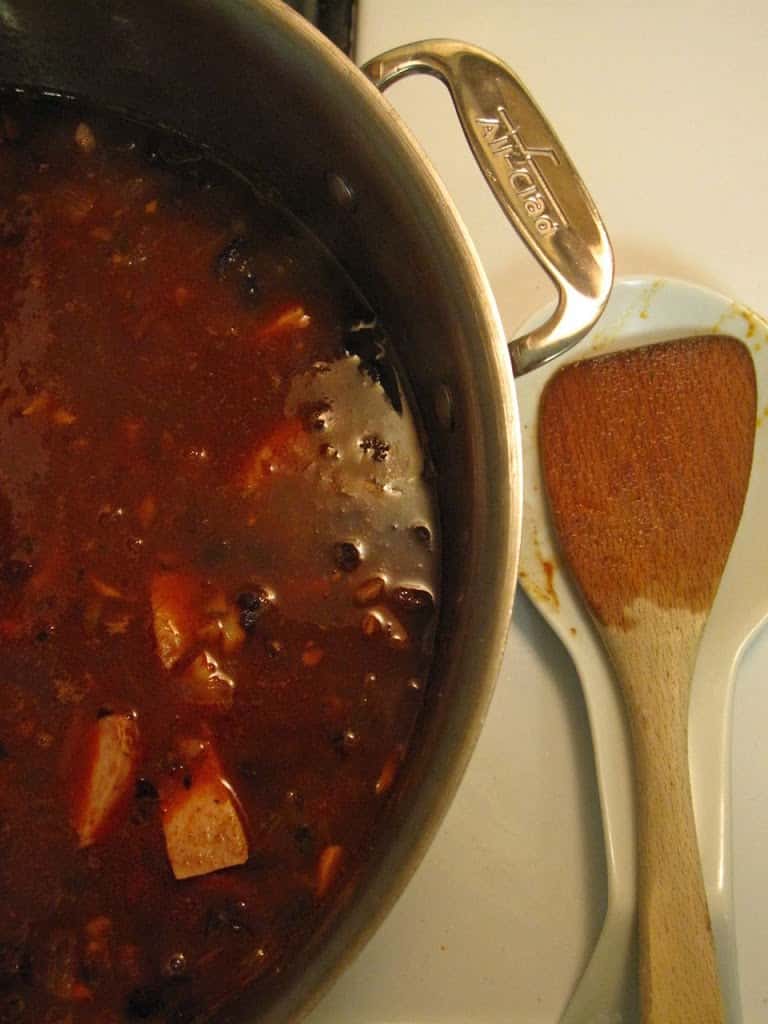
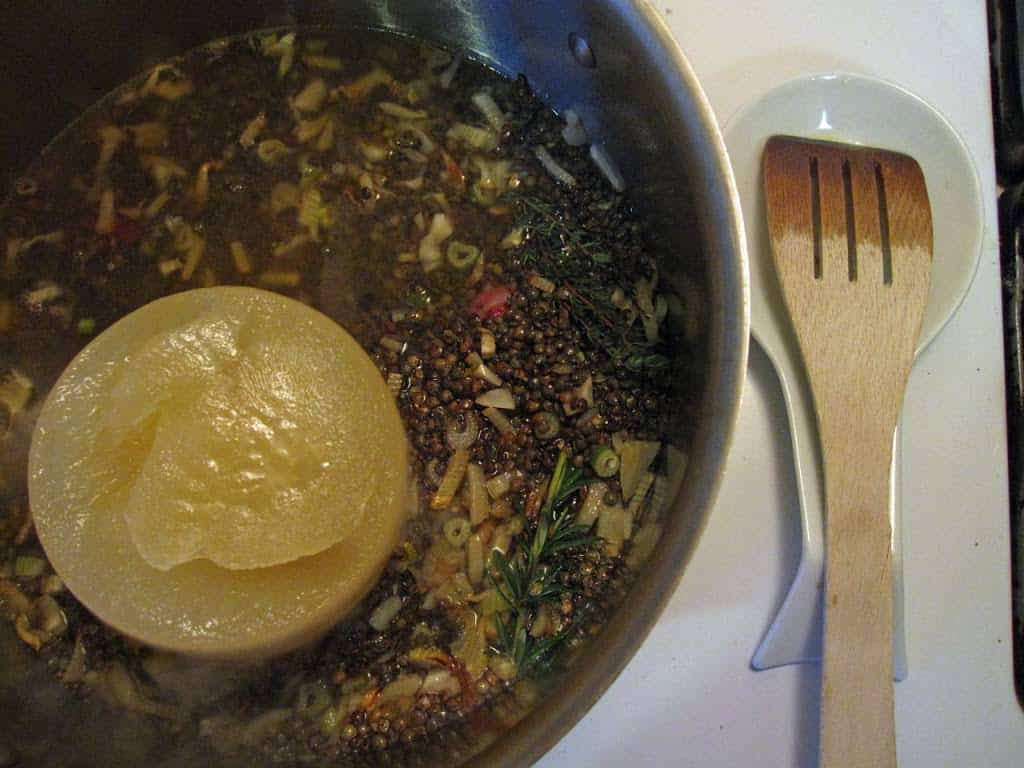
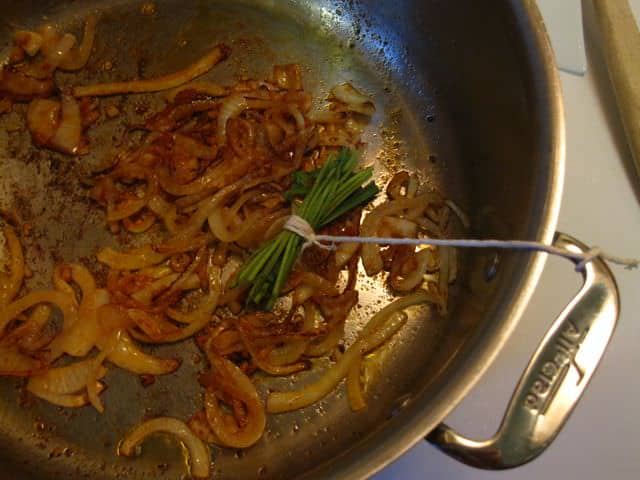
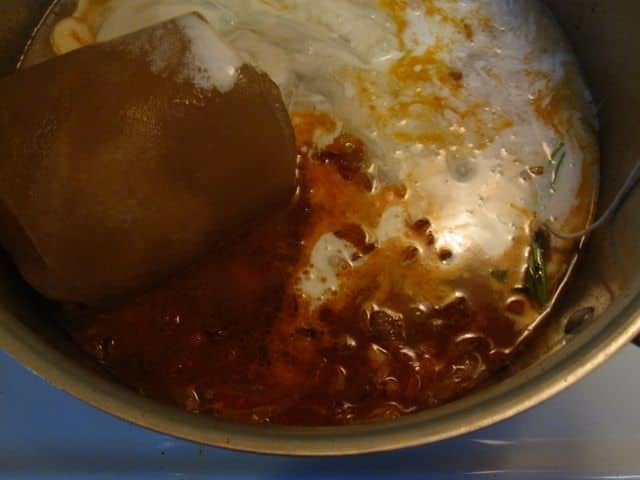
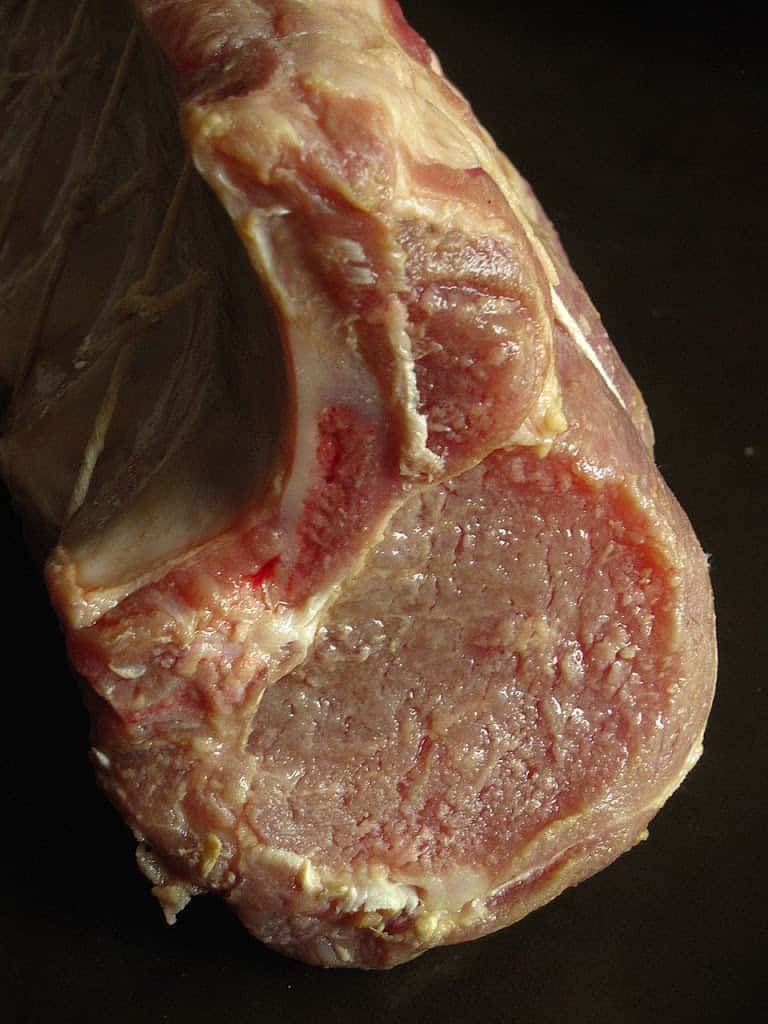
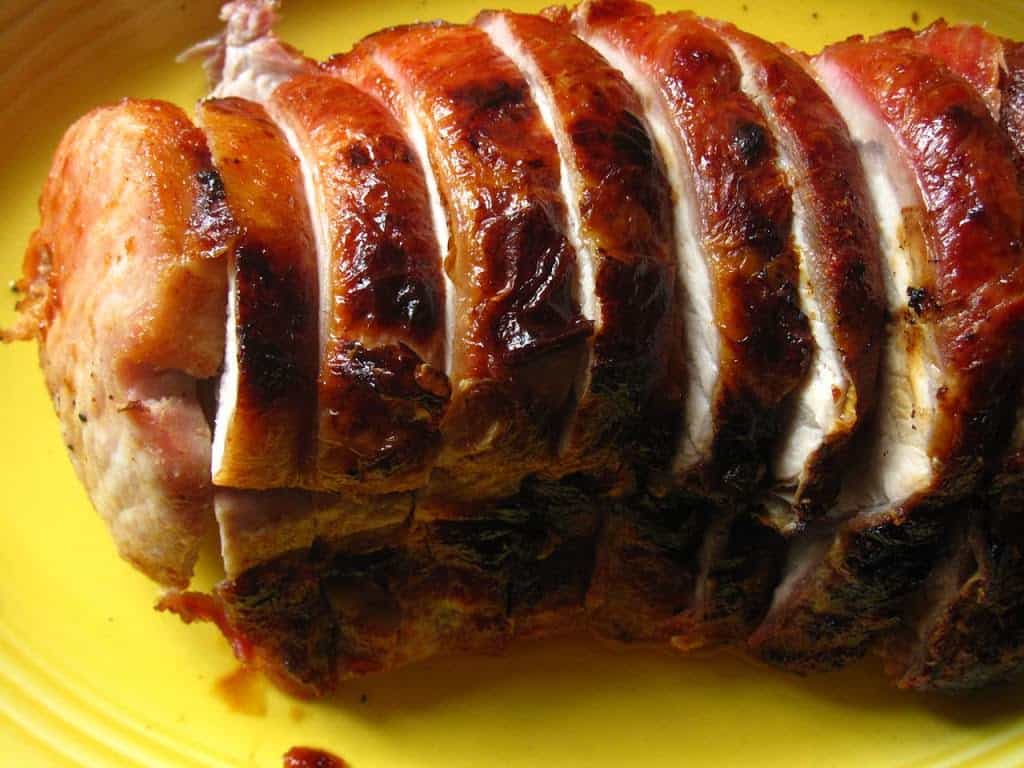
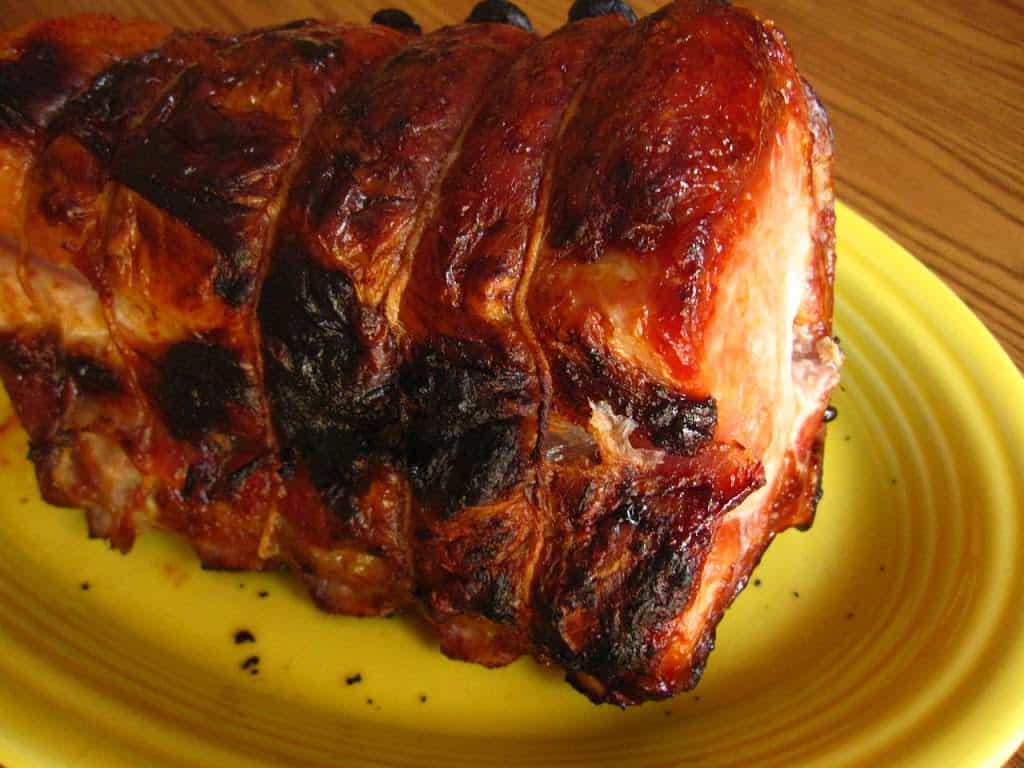
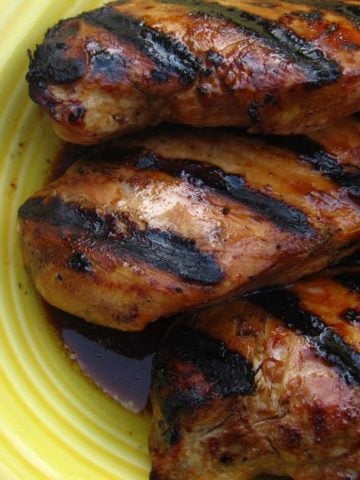
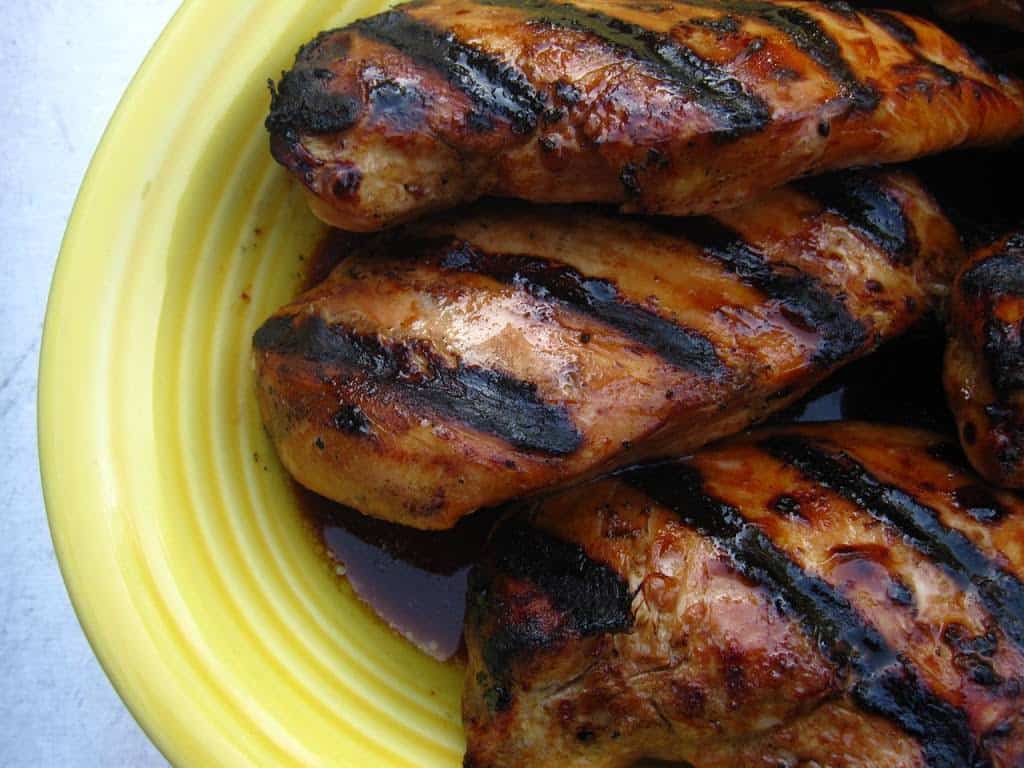
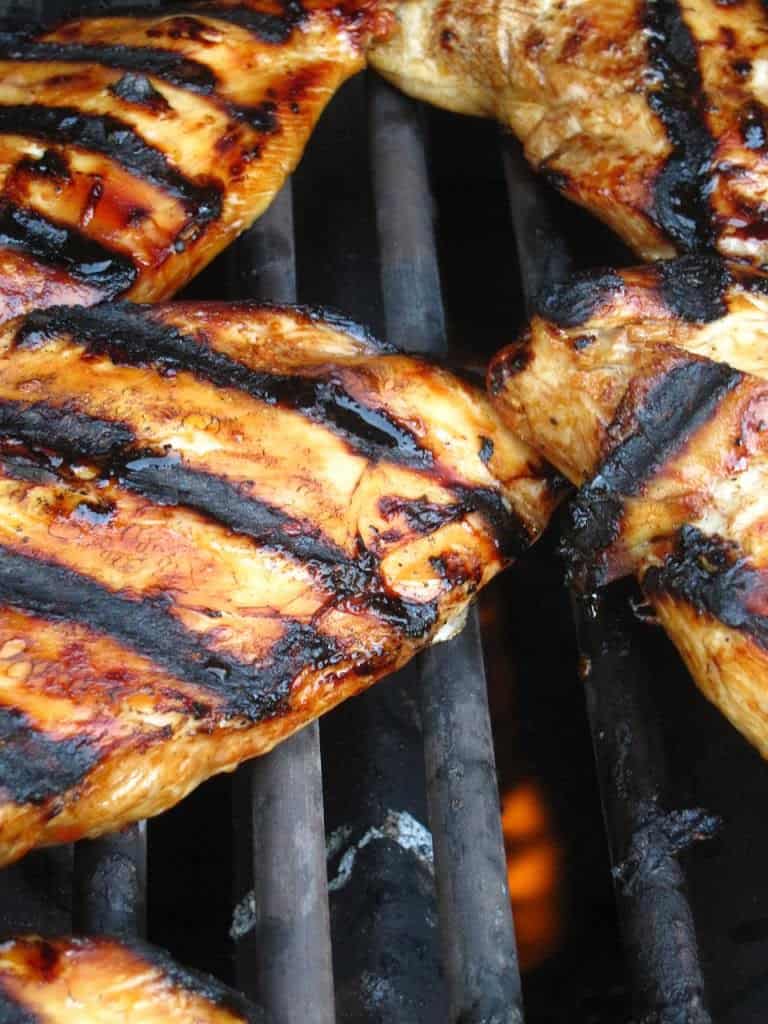
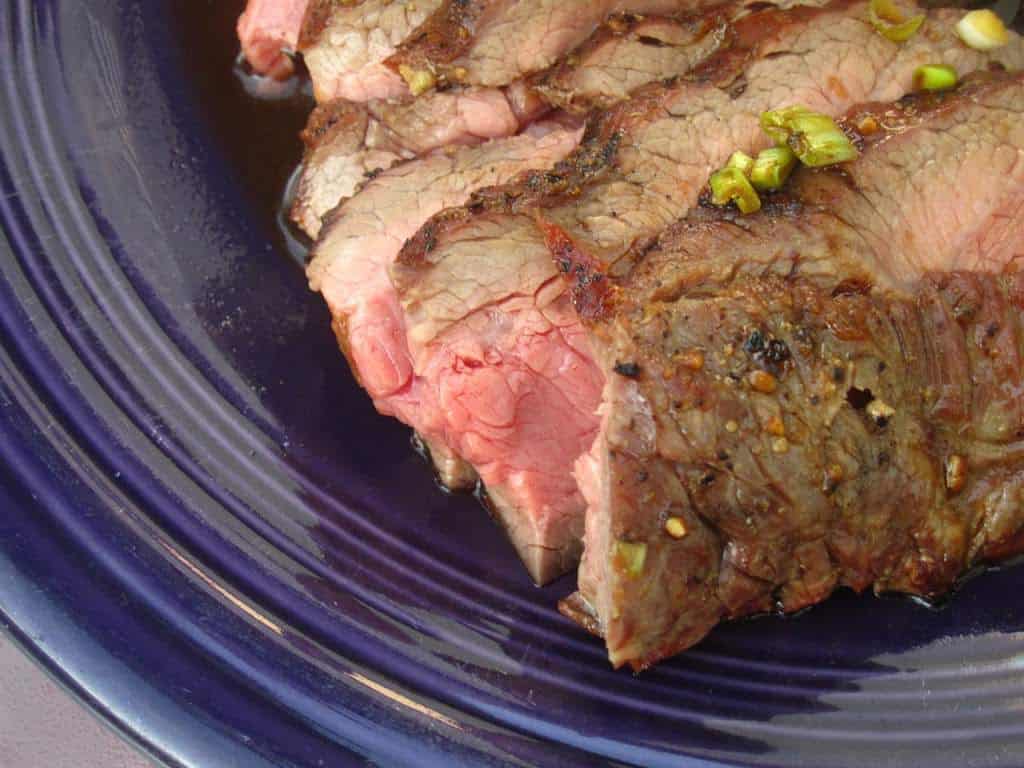
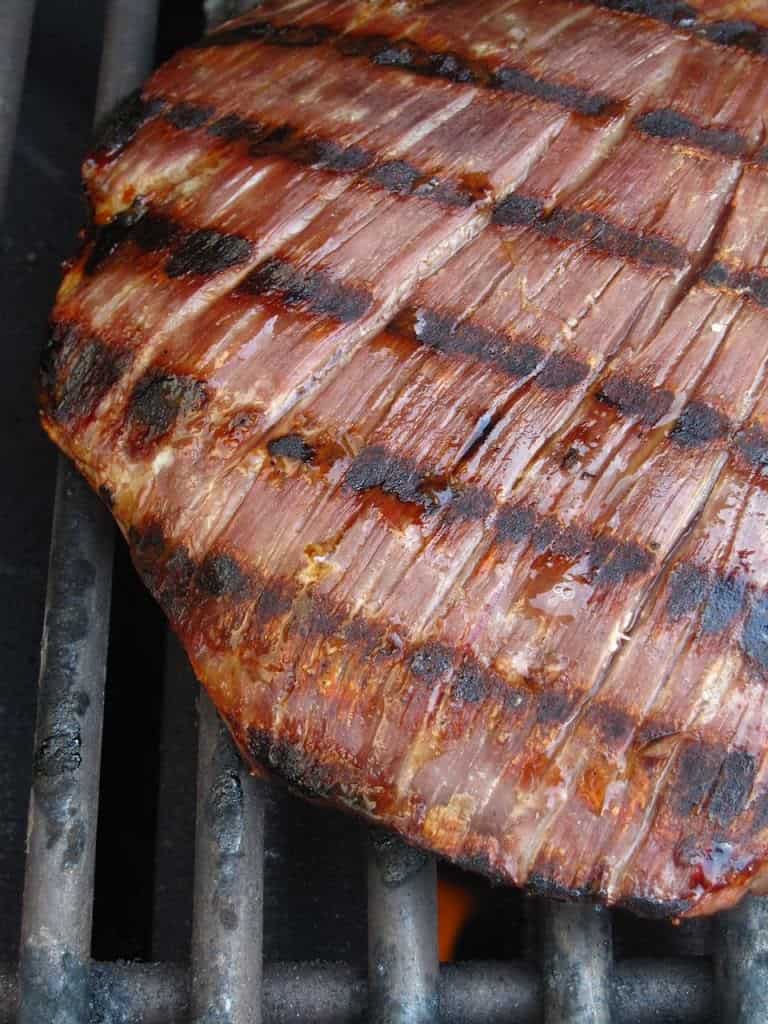
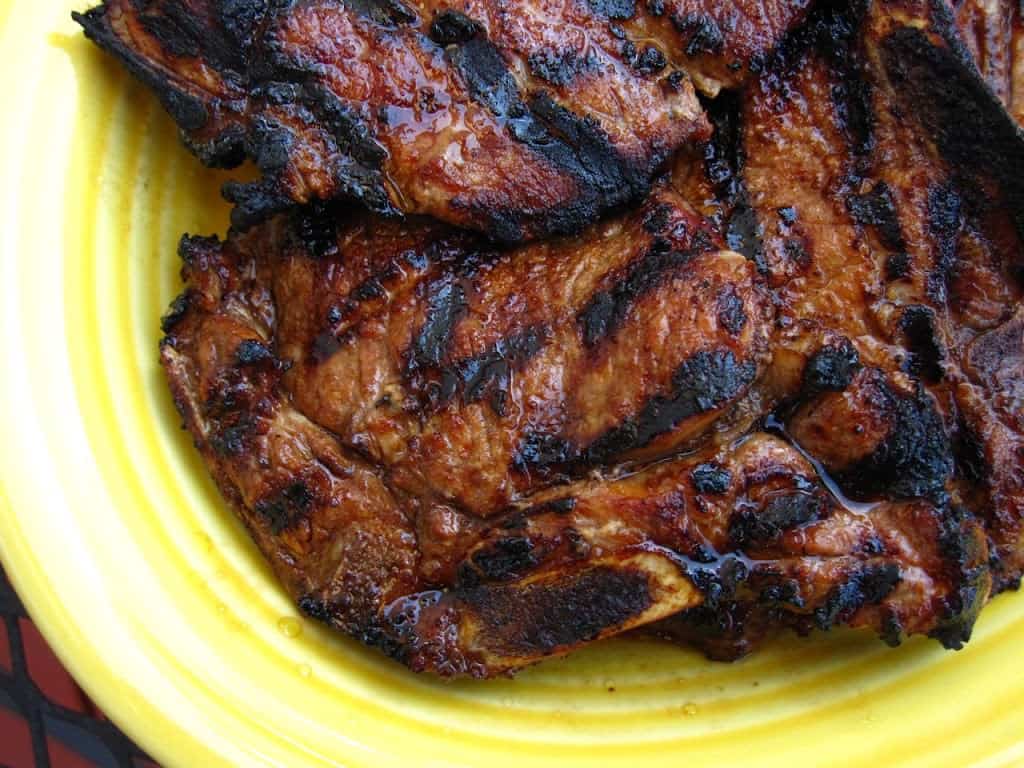
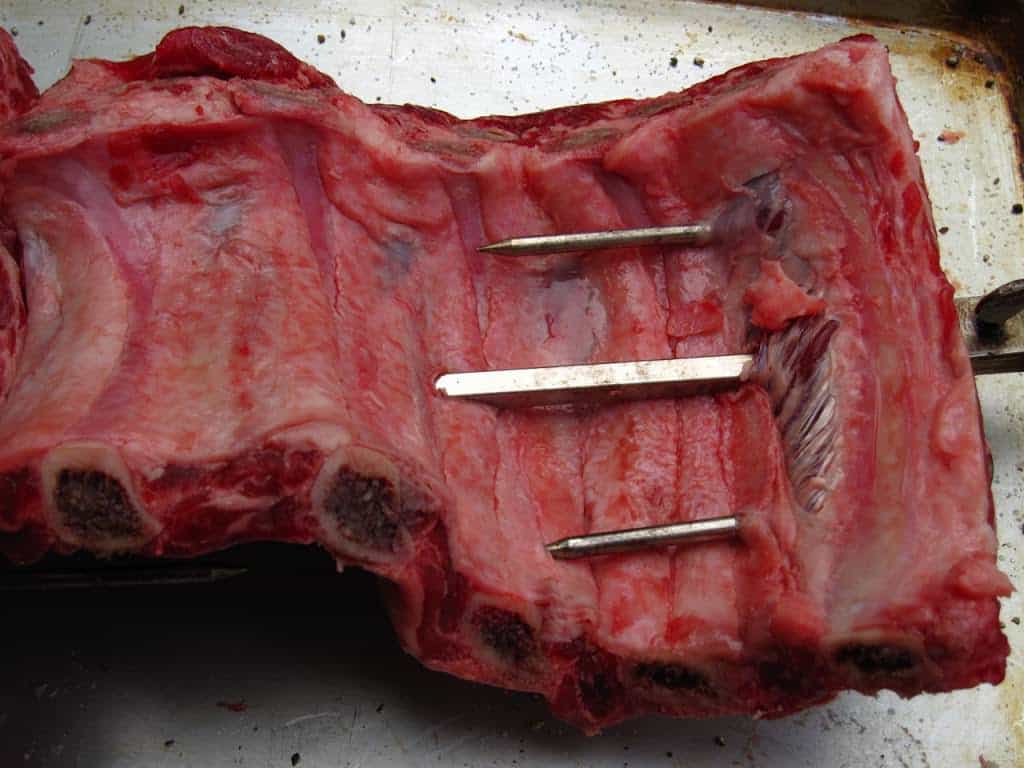
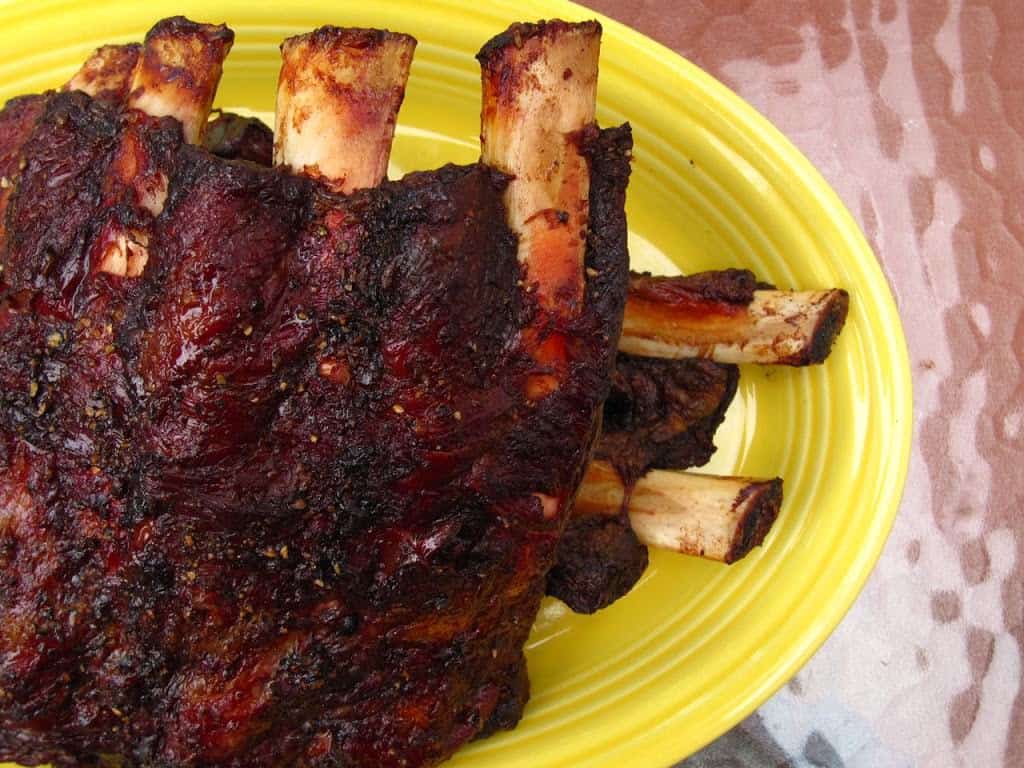
I didn't think they'd be able to do it, but they did.  They made my favorite pans even better.  The d5 pan heats up faster, and holds that heat longer than my older Stainless pan. This results in excellent searing:

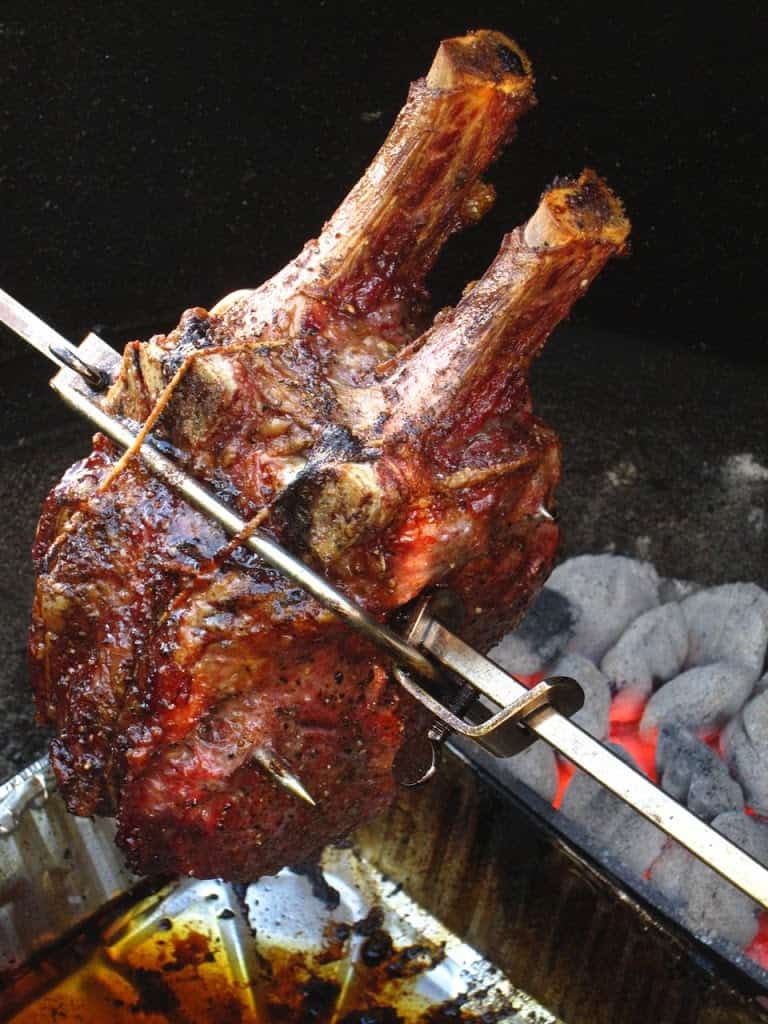
*Yes, that's the seared beef picture from my Texas chili recipe.  I was holding out on you!  I was testing the d5 pan, but I wasn't allowed to talk about it yet.  I feel so guilty...so ashamed...OK, I'm over it.


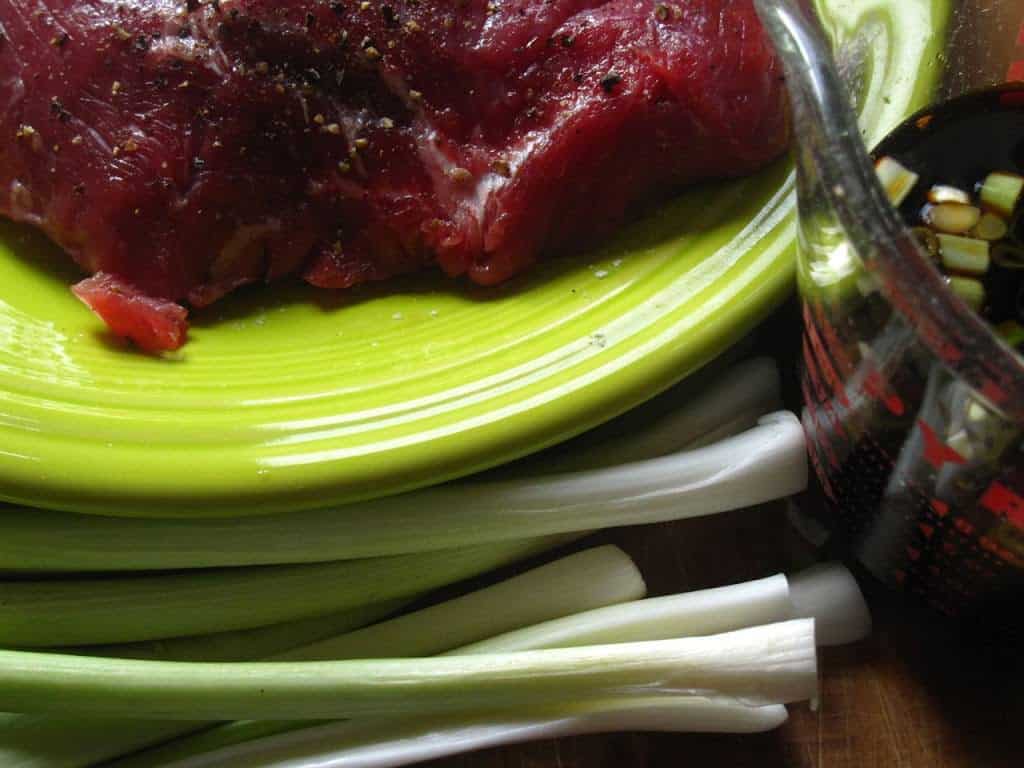
The d5 pan is much more efficient; it almost caught me off guard the first time I used it.  I was doing a pork chop saute, and put a cold pan with oil and butter over medium-high heat, like I always do.  I started salting and flouring the chops, and was almost done when I noticed the butter was already browned across the entire pan.  Normally, I've got time to get the chops ready, and then I have to wait for the pan to be ready.  Not any more!

Also, they recommend that you use the pans over medium heat.  As I said above, my default for a sear or a saute is always medium-high.  I need to adjust that down with the d5 pan - on my stove, medium is just right for this pan.  In the past, when I've done my searing on medium, the second side of the meat doesn't brown as well.  With this new pan, that's not a problem - it holds the heat long enough to get a good sear on the second side as well.
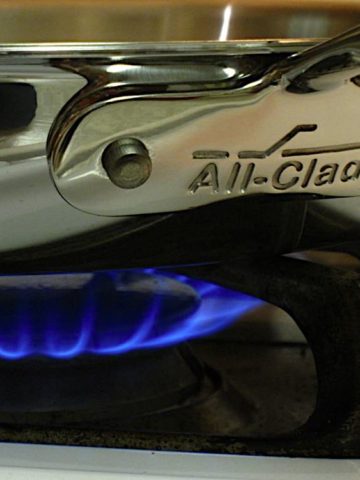
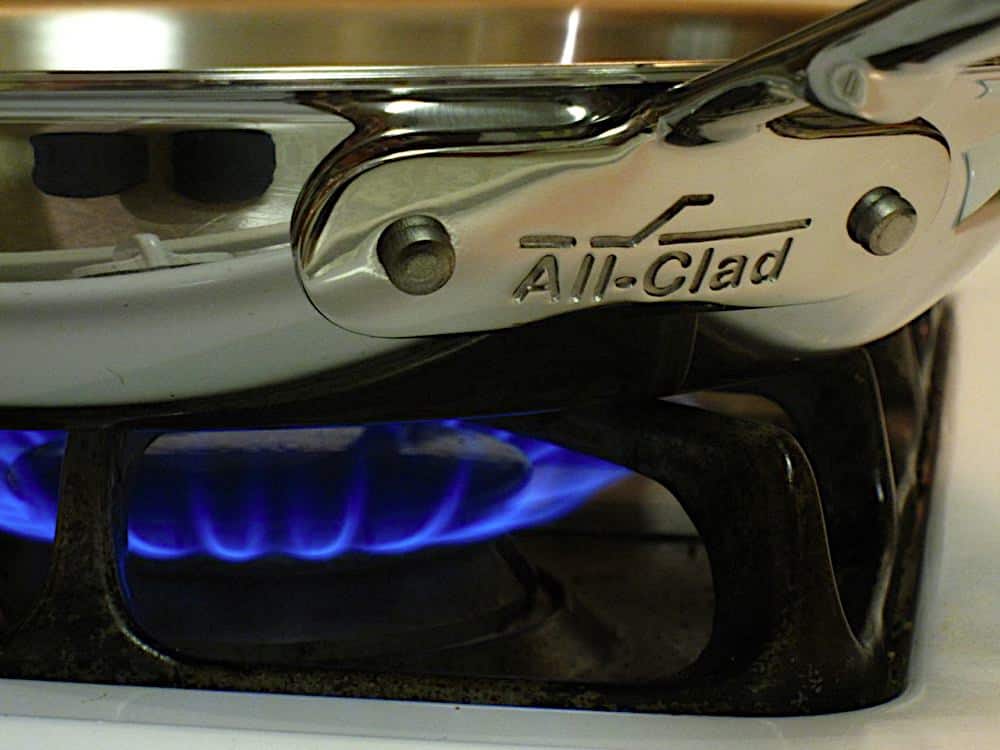
Better handles:
I love the handle on the d5 fry pan. It didn't look like much of a difference; there's a subtle change in the thumb groove, and it's hard to see if you're not looking for it. All-Clad rounded the edges, and made the handle a little less thick. The result is amazing - it is much more comfortable in my hand. I can't wait to see what they did with the lid and helper handles on their other pots, to see if they're as improved.
*Yes, I'm a cookware geek. I get excited by how things feel in my hand when I'm using them.

Am I buying a whole new set of pans?
As I said, the d5 pans are a noticeable improvement over the regular Stainless line. It looks like they're going to be priced about 10% more for the d5 pans, and at first they will only be available through Williams-Sonoma.

If you're getting new pans, I would definitely get the d5 versions.

If you're like me, you already have a pretty complete set of pans.  Is it worth replacing the ones you already own, especially at full All-Clad prices?  Probably not.  As I said, the current line is great; these are just better.

That said, the the 2 quart saucepan with a rolled pouring lip is calling my name. And I always use the 6 quart stock pot for soups and stews, so I wouldn't mind upgrading that pan as well…
*In other words, at next summer's All-Clad factory sale, don't stand between me and the d5 counter. It might get ugly.

Chicken breast saute- recipe below

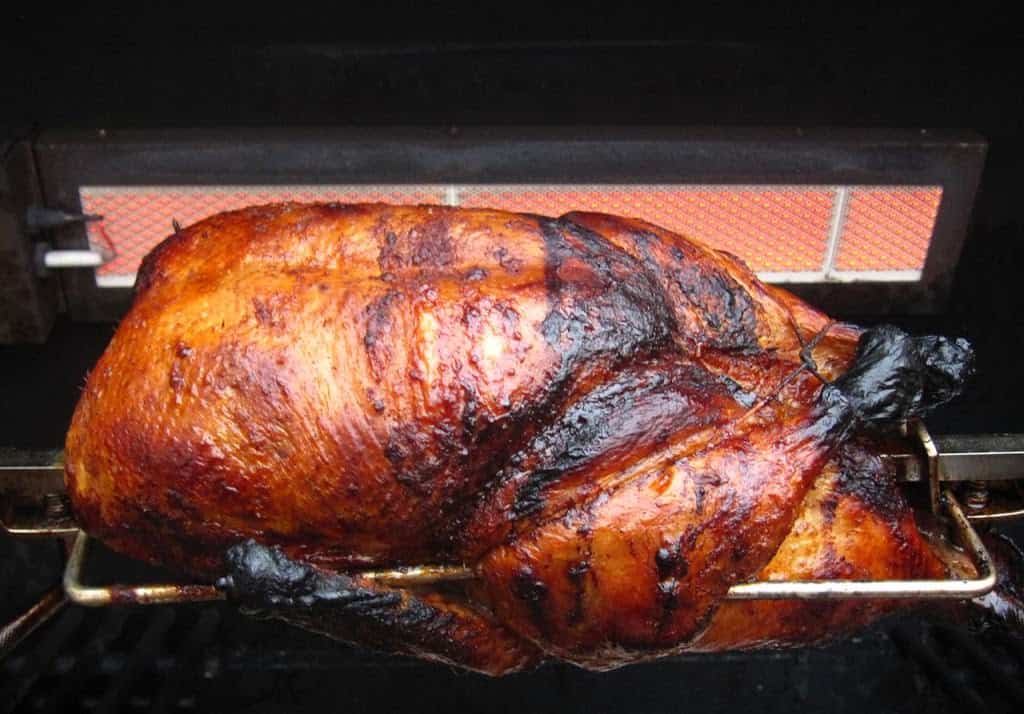
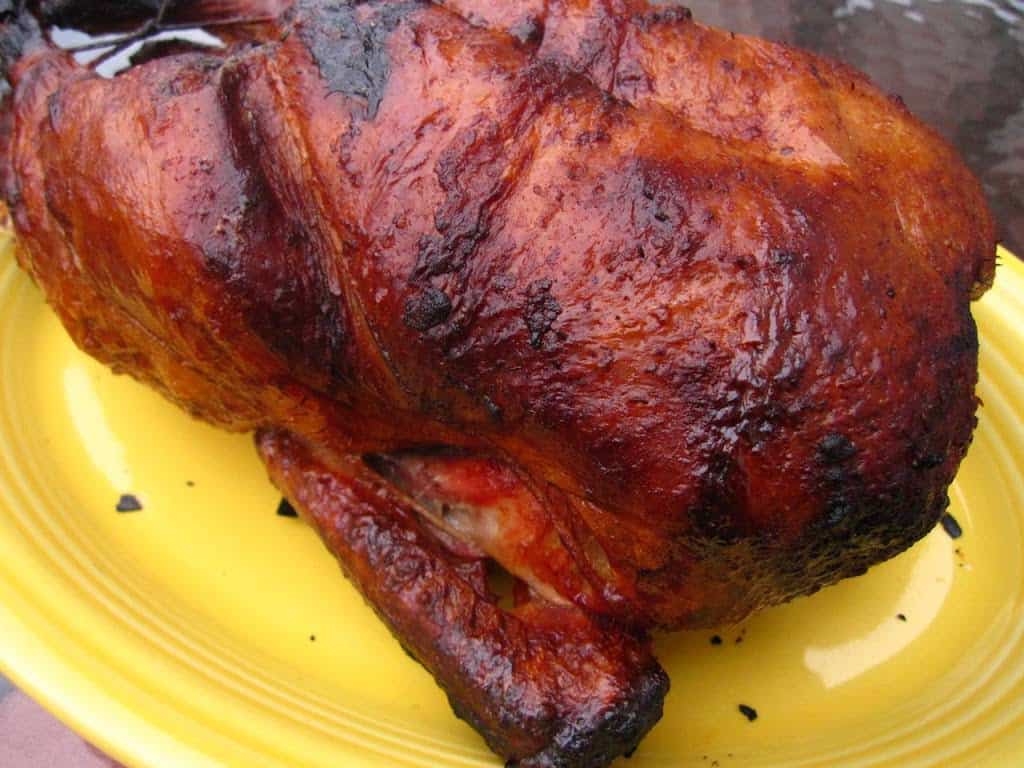
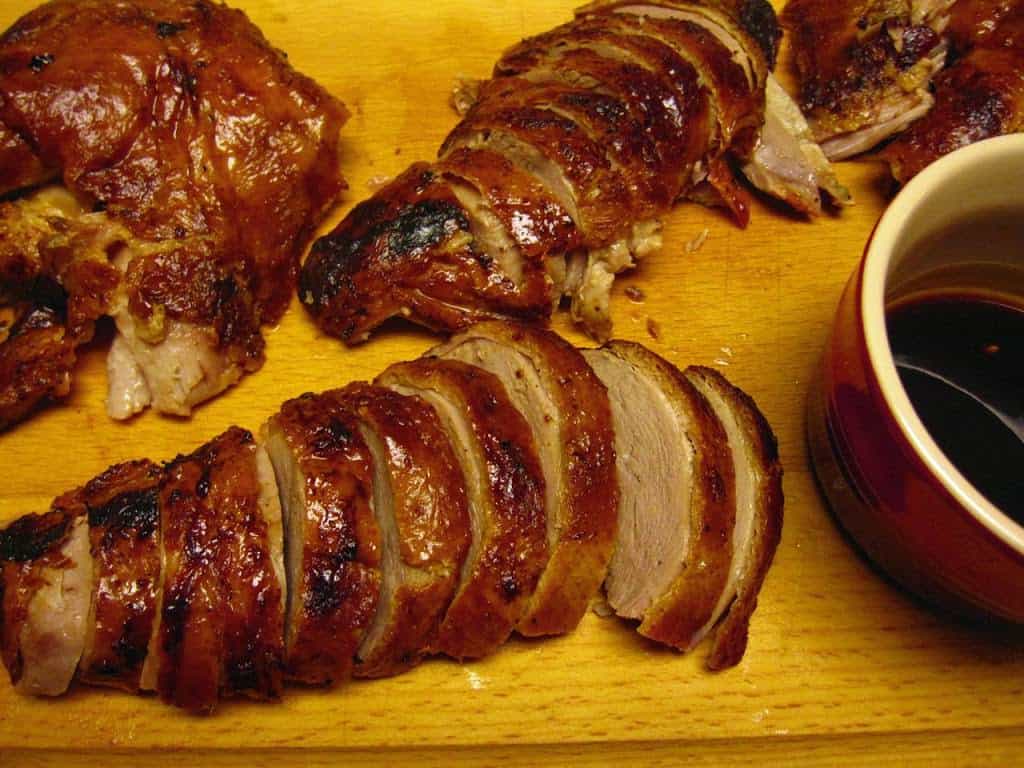
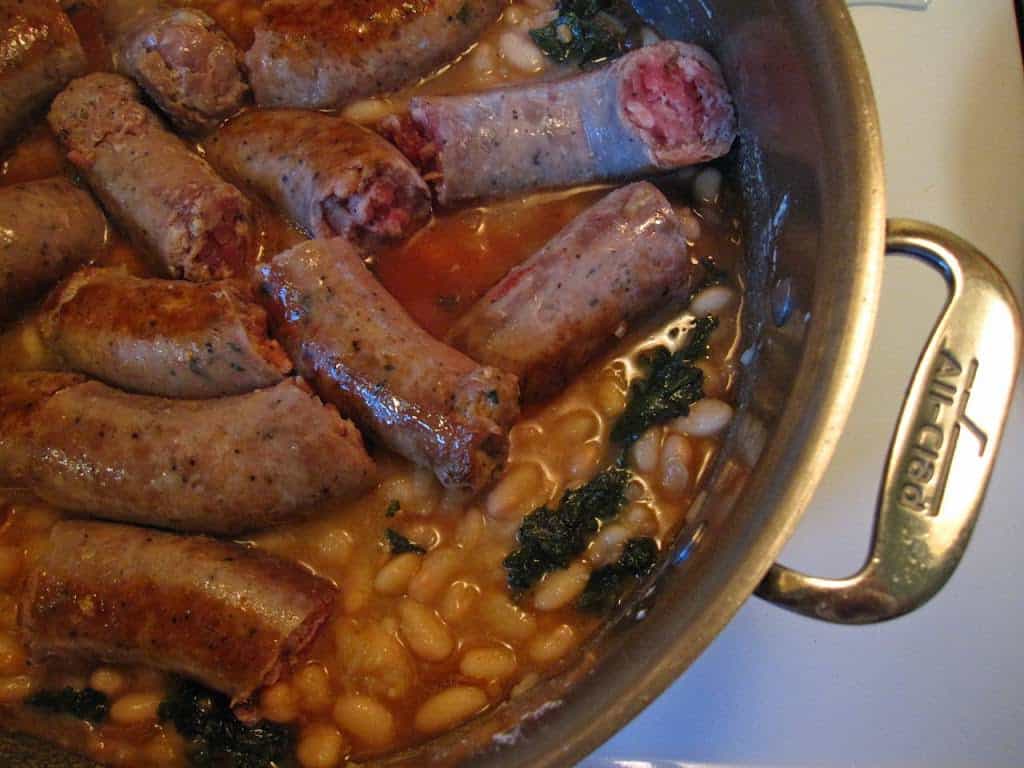
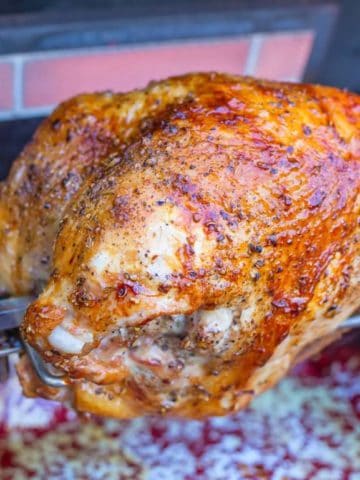
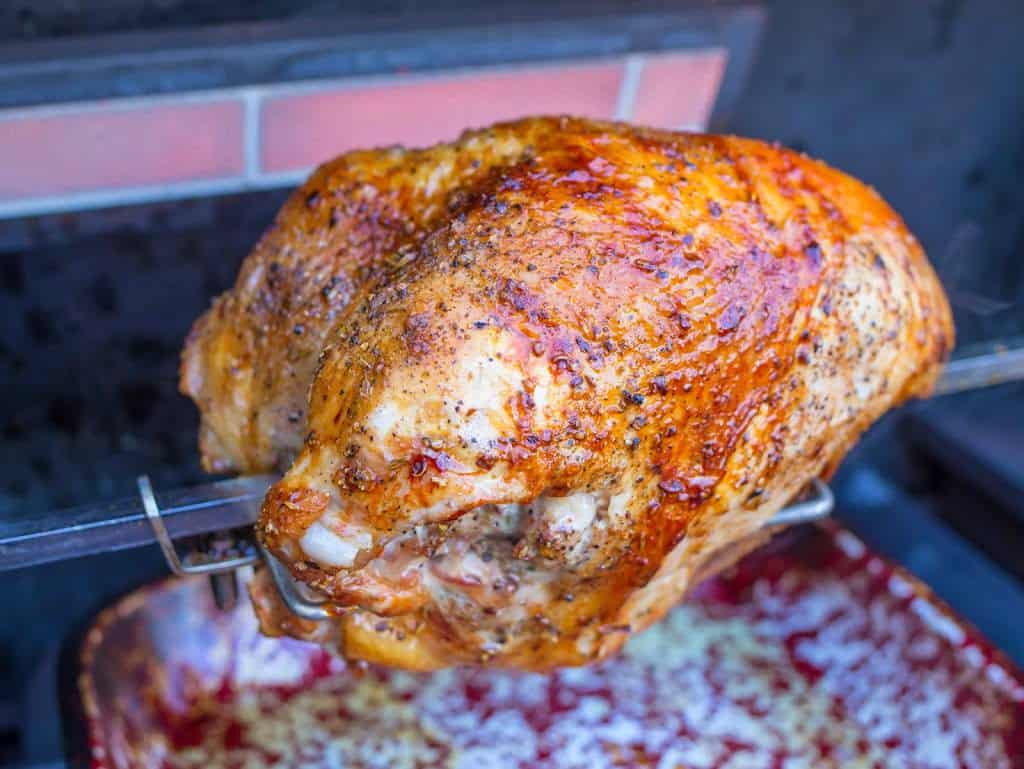
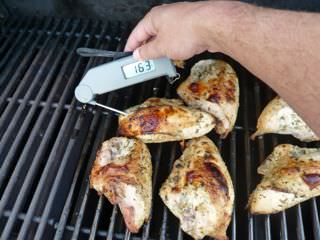
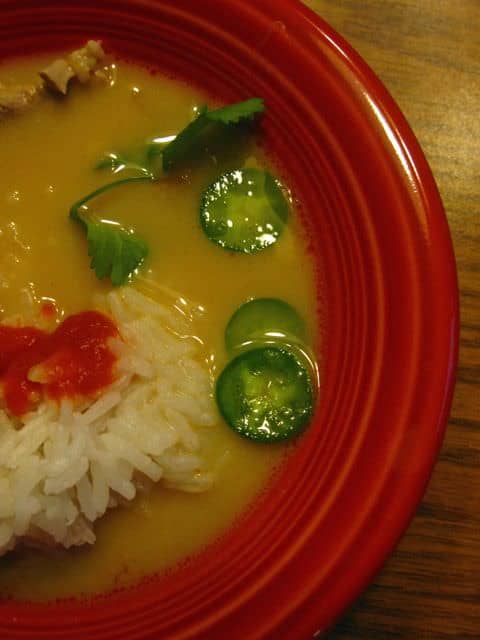
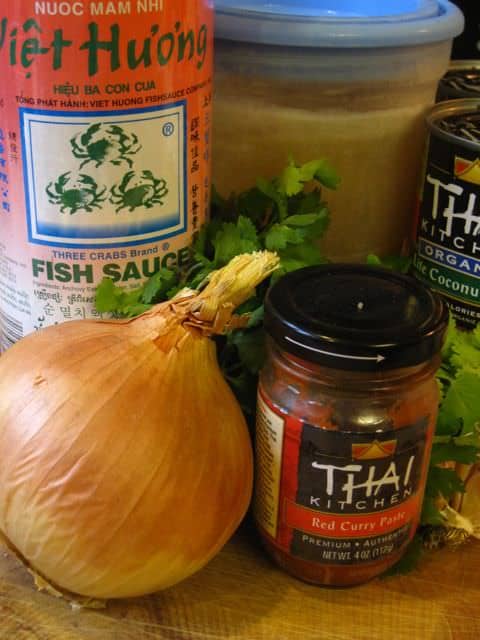
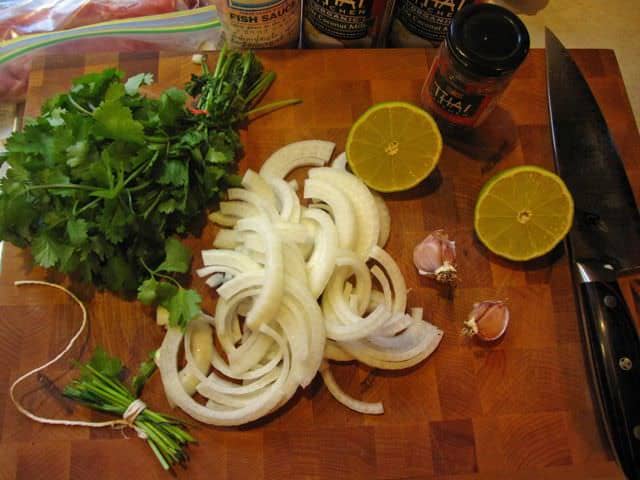
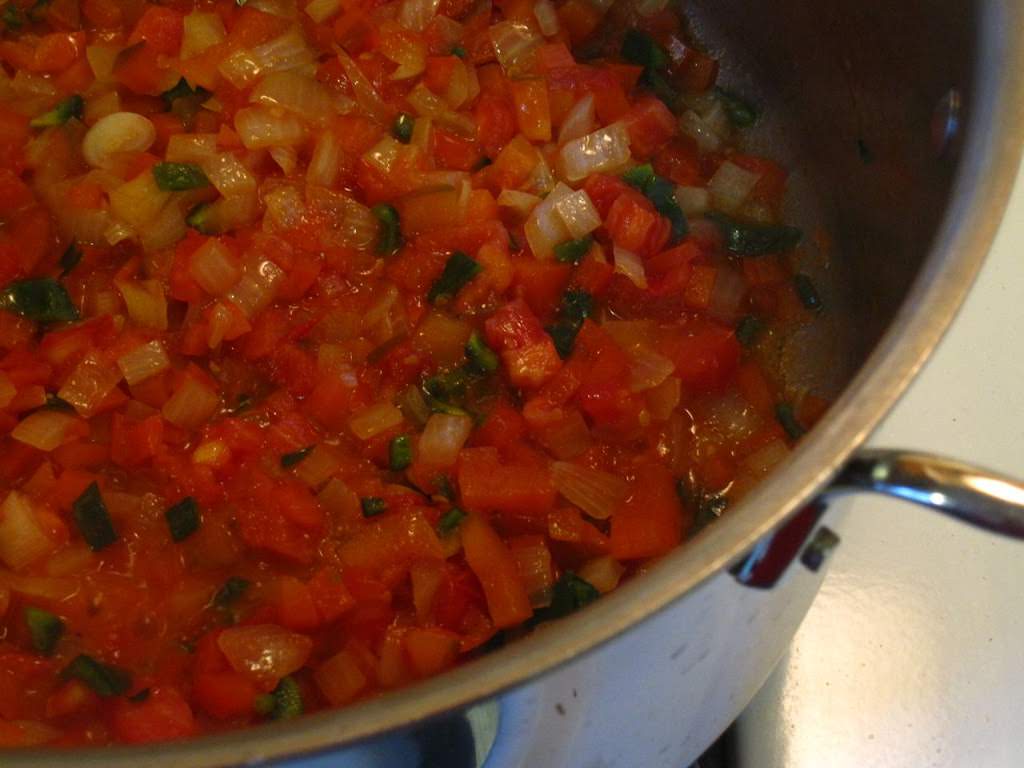
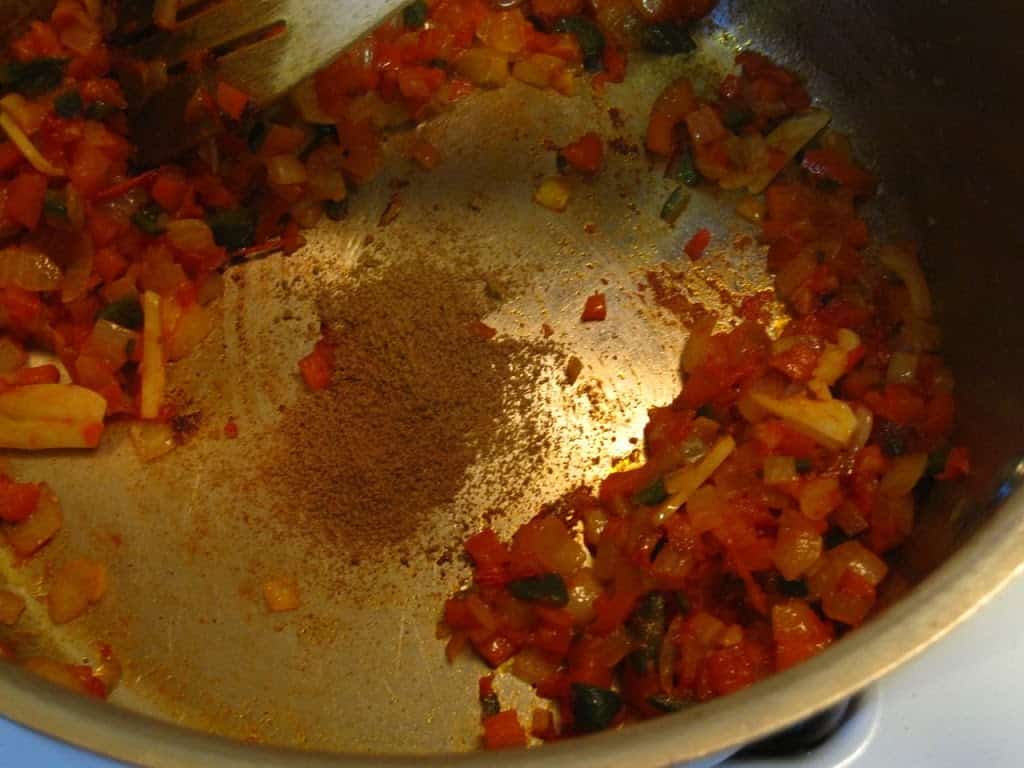
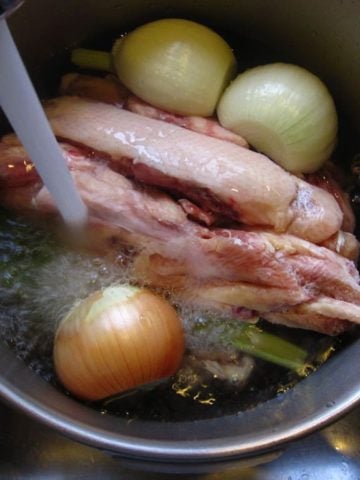
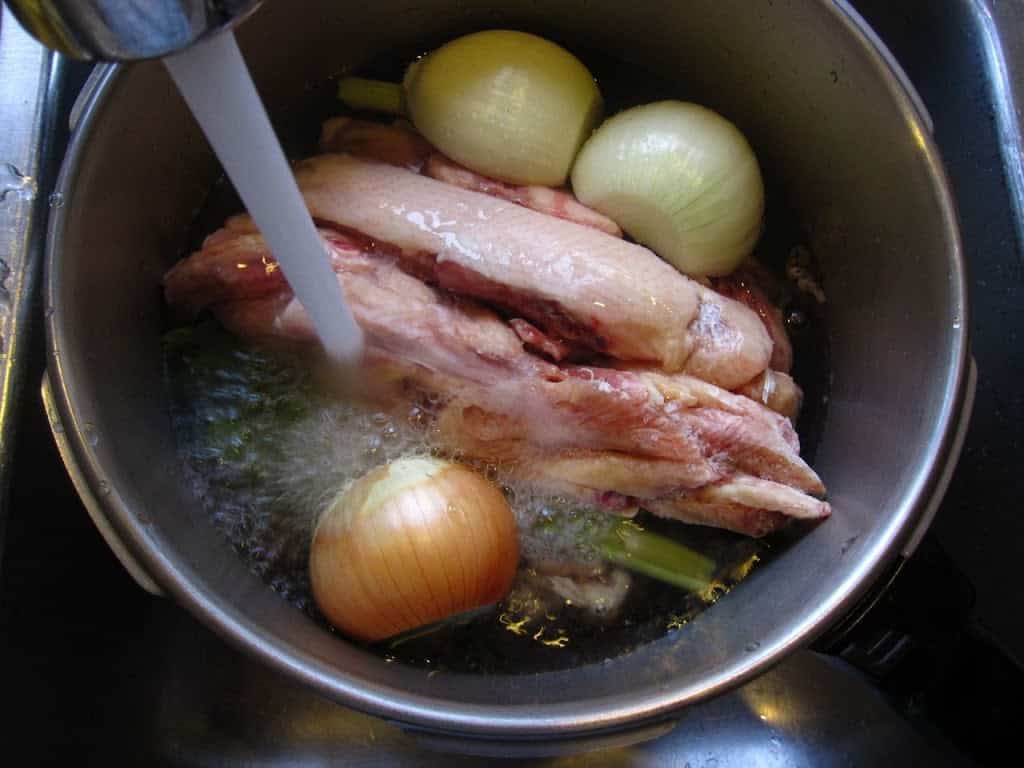
Recipes I used to test the d5 fry pan:
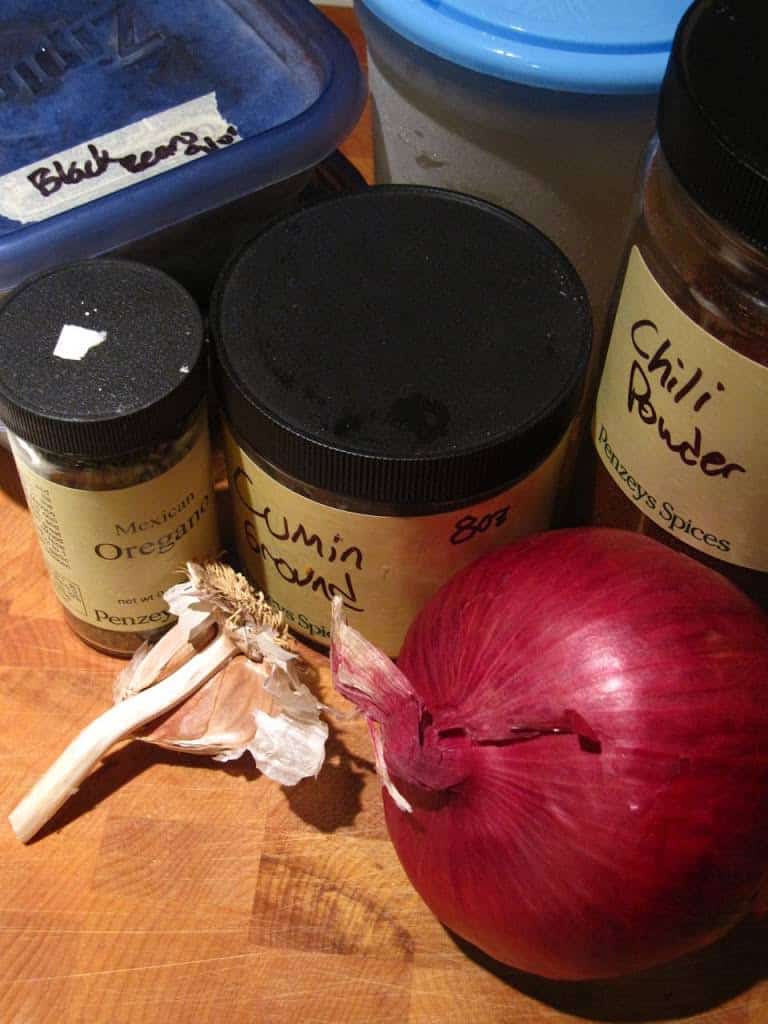
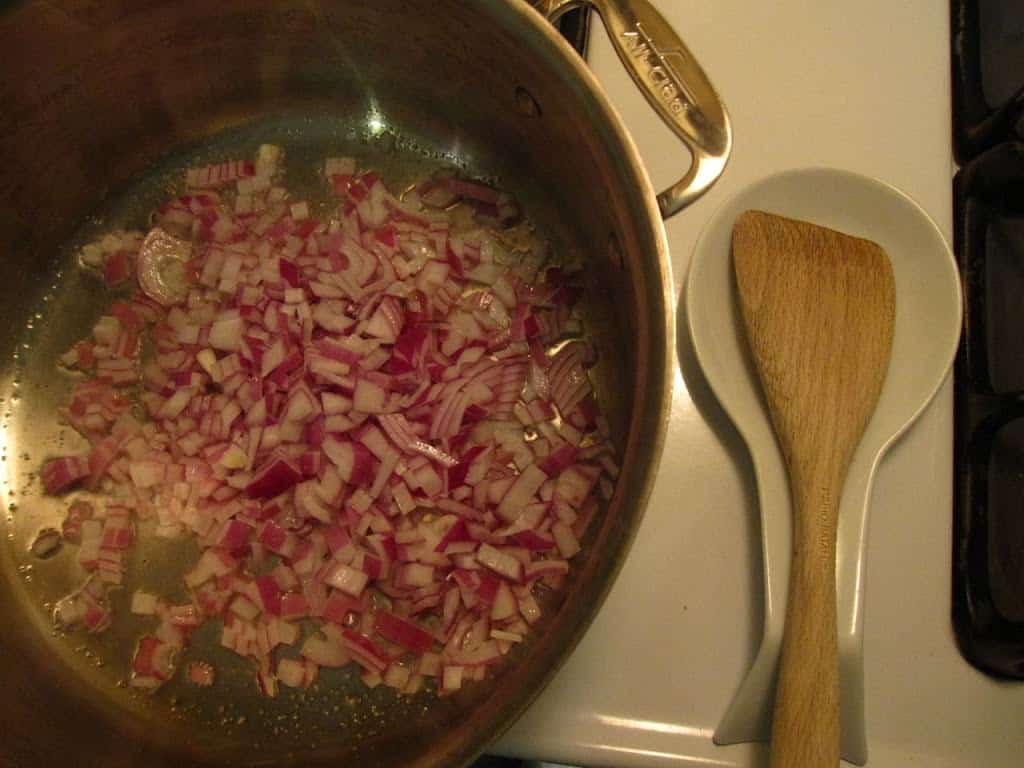
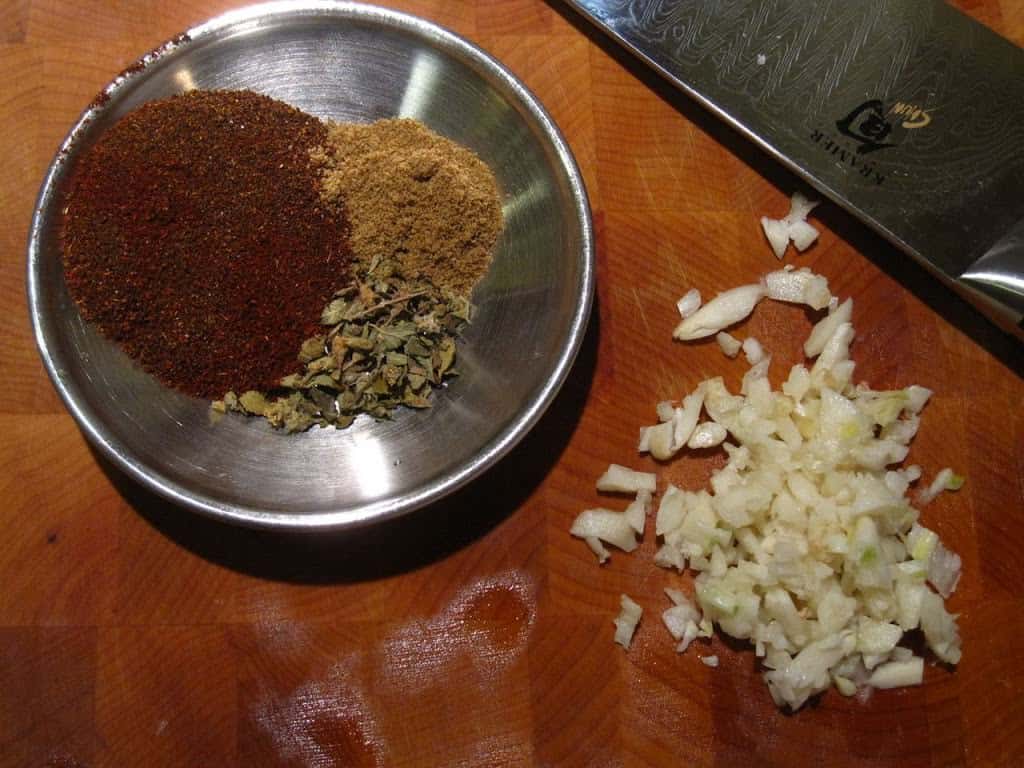
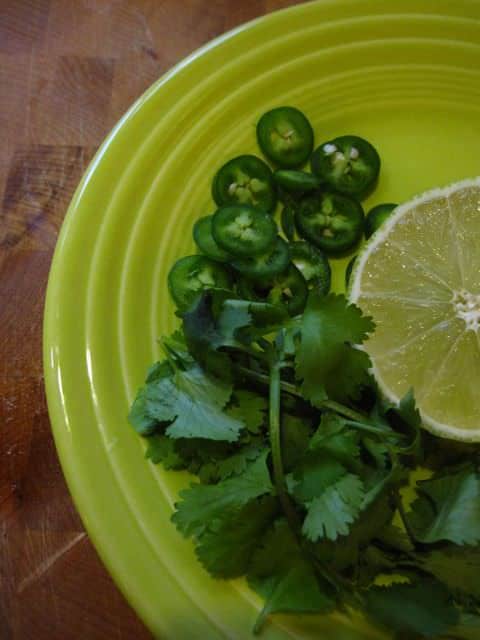
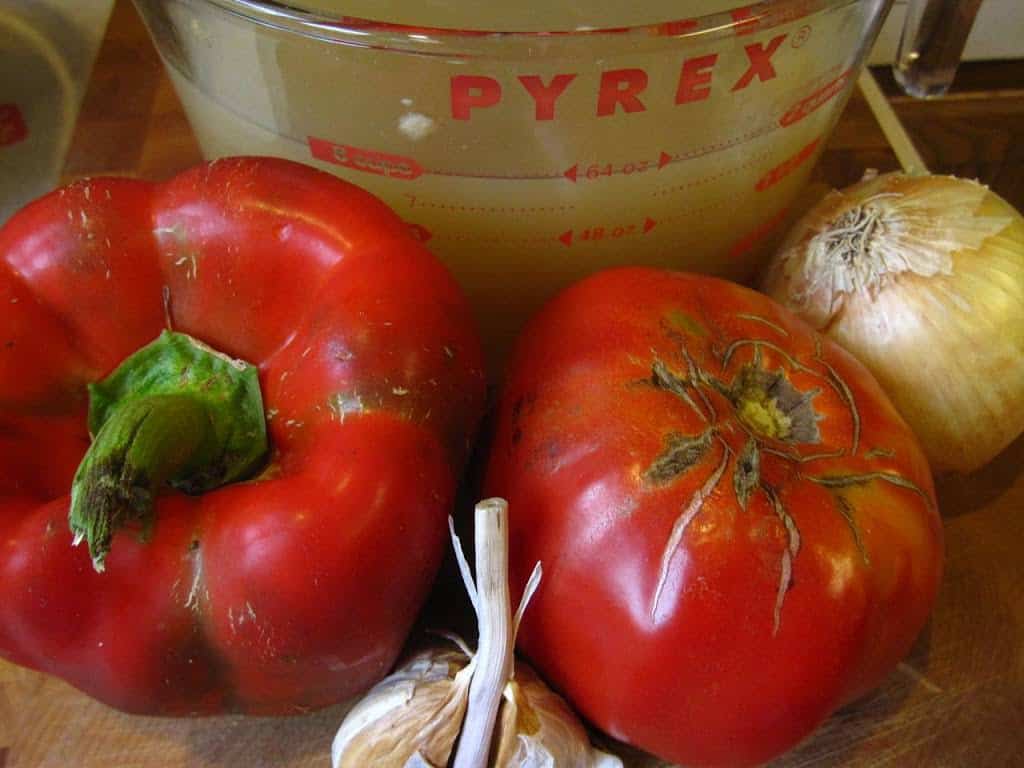
Texas Red Chili
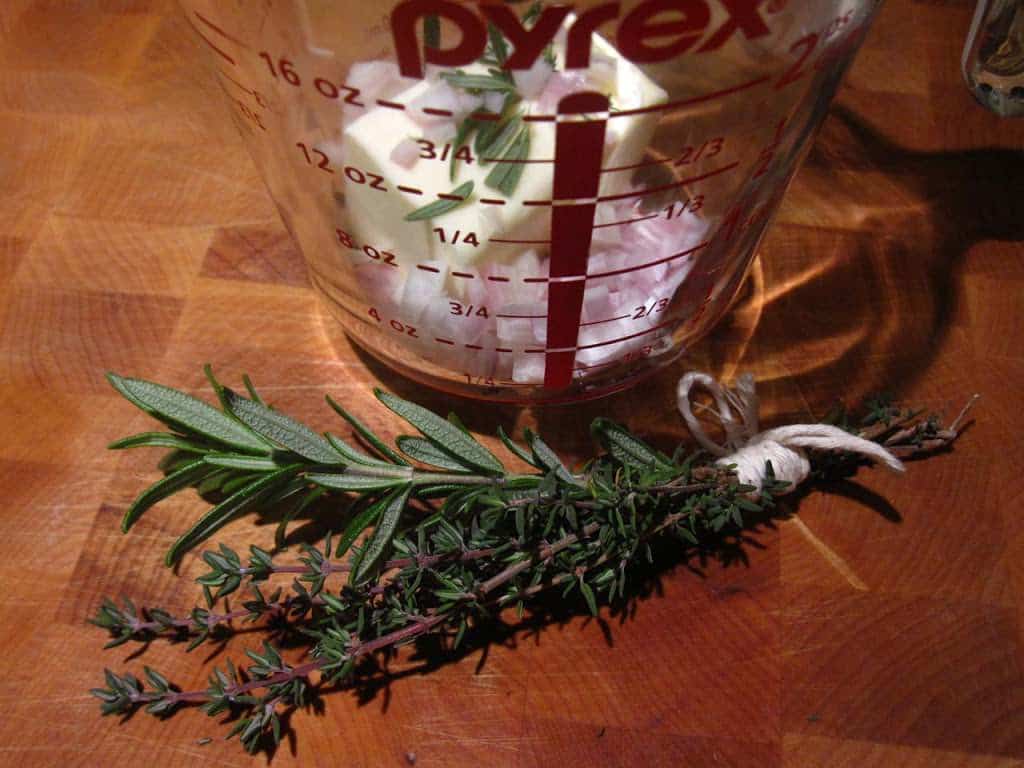
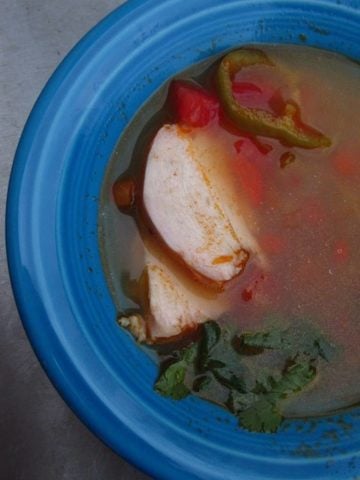
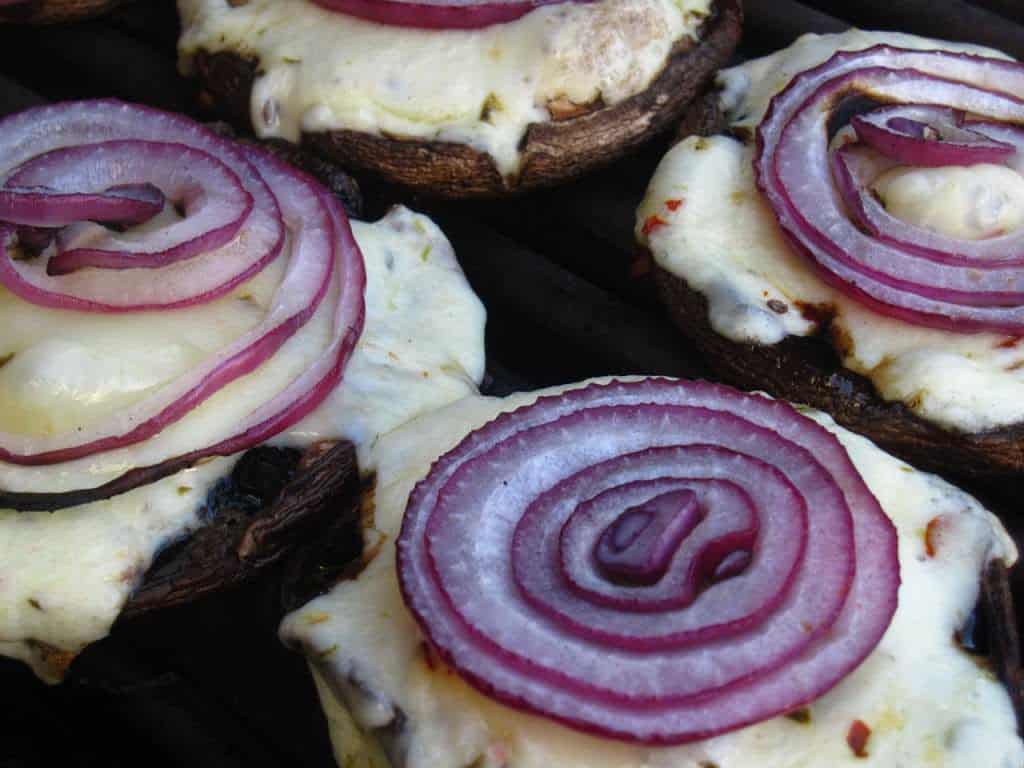
Sear Roasted Chicken Breasts with Shallot Herb Pan Sauce
Chicken Breast Saute with Marsala Sauce
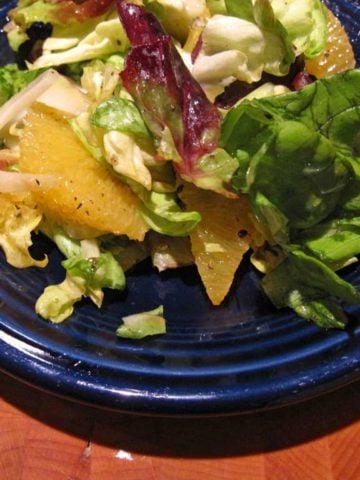
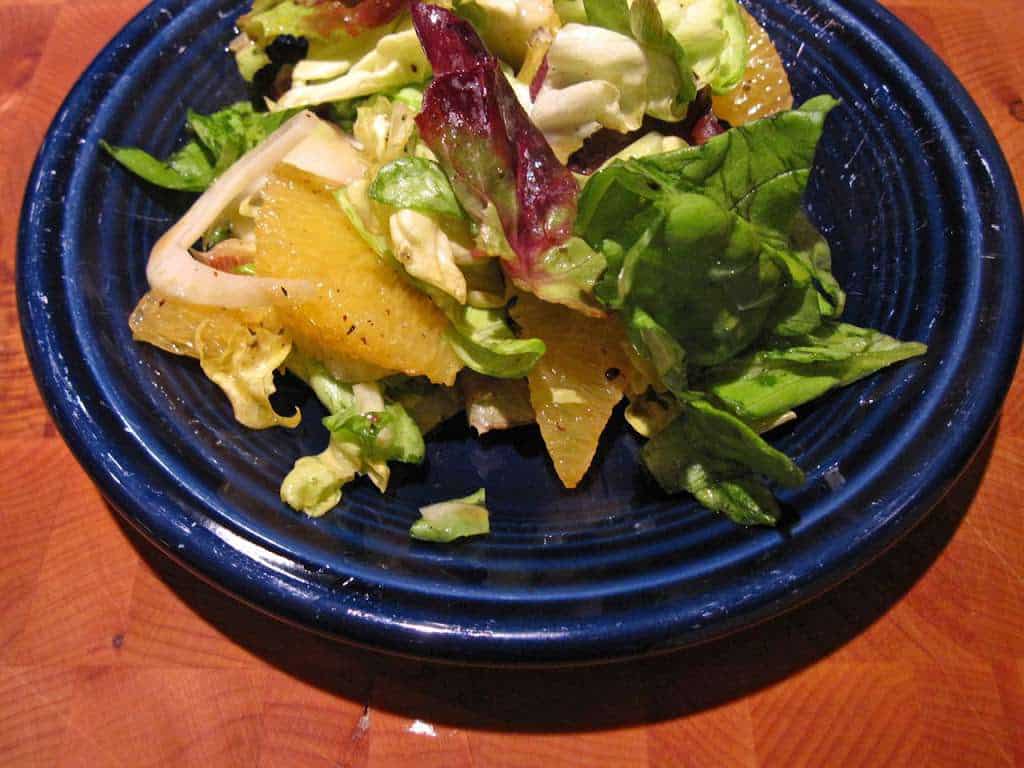
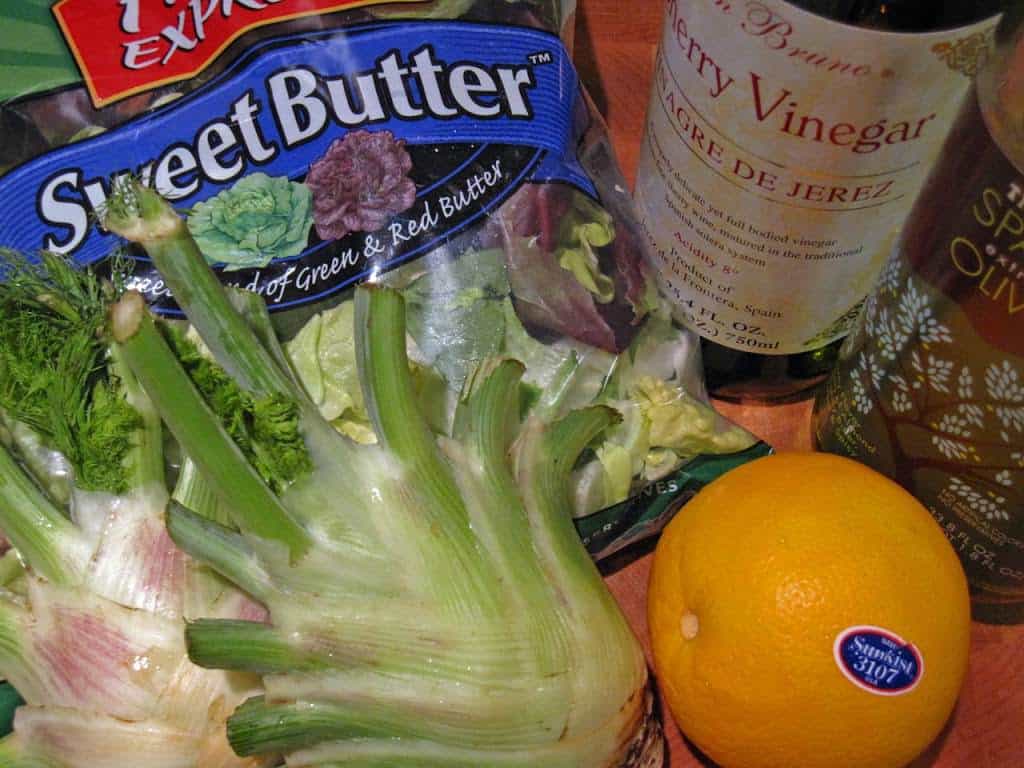
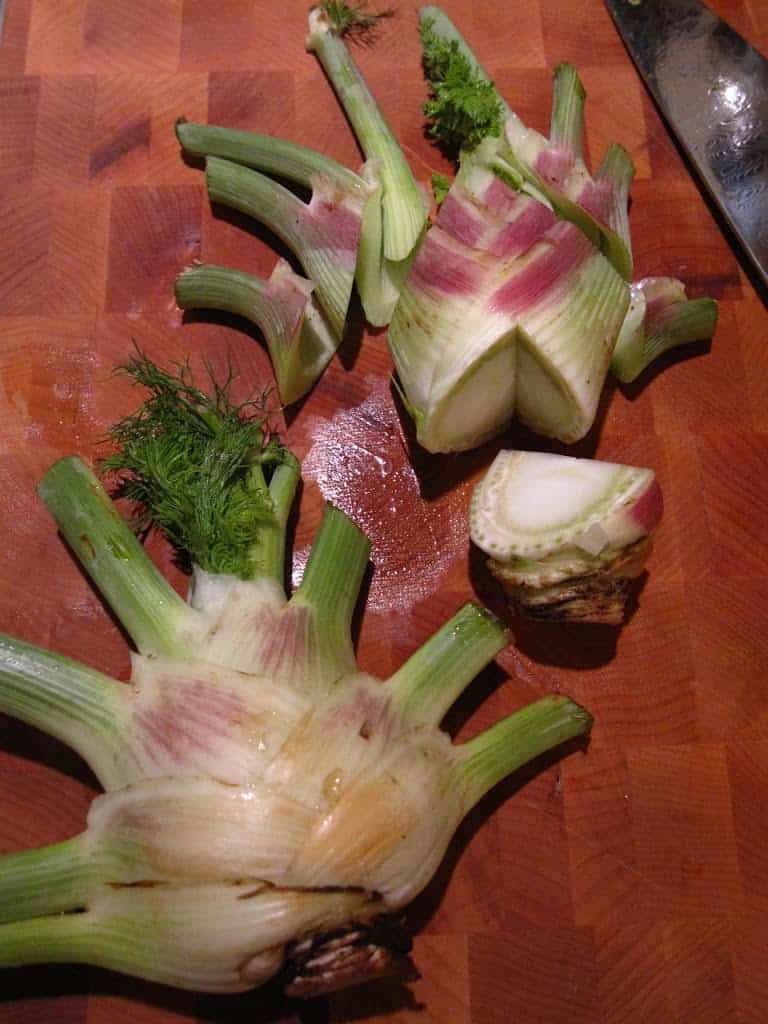
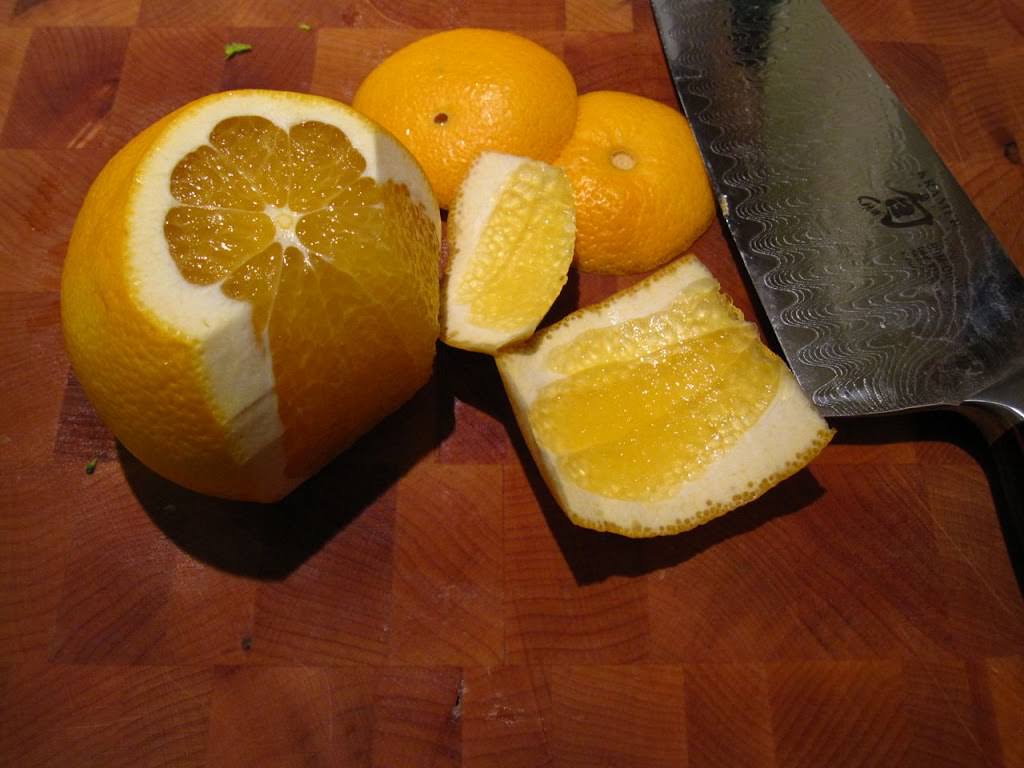
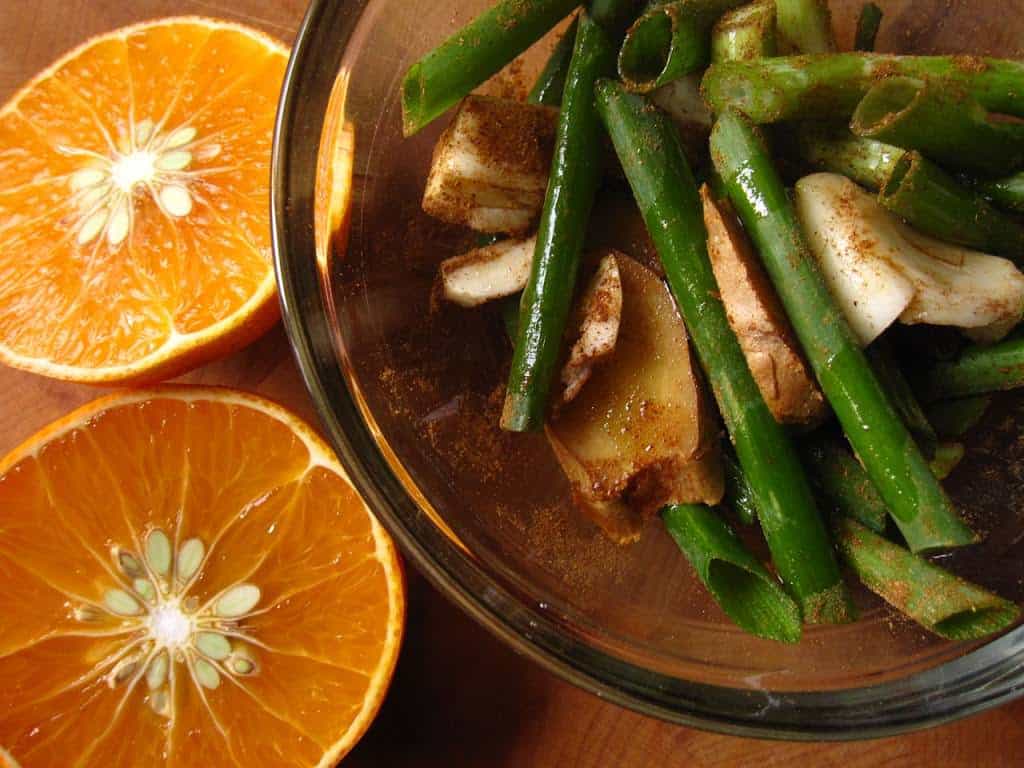
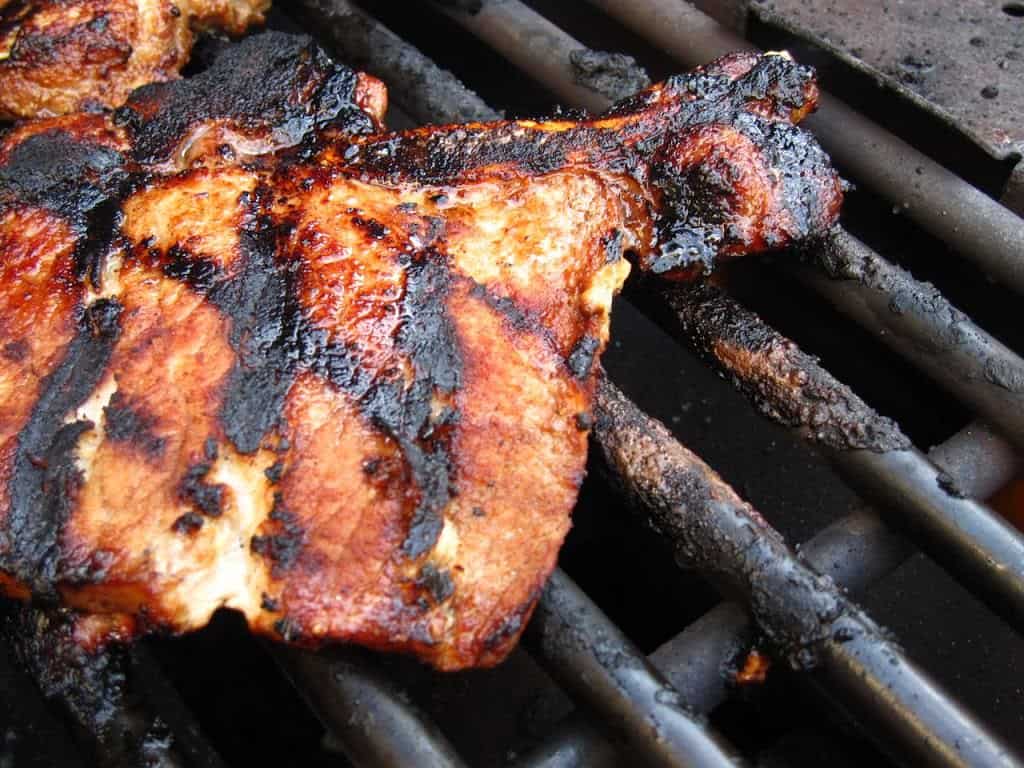
Pork Chop Saute with Orange Mustard Sauce

The d5 Stainless line will be available at Williams-Sonoma starting December 26th.
[Update 12/28:] All-Clad's d5 site is now open.

*Enjoyed this post?  Want to help out DadCooksDinner?  Subscribe using your RSS reader or by Email, recommend DadCooksDinner to your friends, or buy something from Amazon.com through the links on this site.  Thank you!

Merry Christmas!

December 25, 2009 by Mike Vrobel 1 Comment

How the Grinch Stole Christmas!

And the Grinch, with his grinch-feet ice-cold in the snow, stood puzzling and puzzling: "How could it be so?  It came without ribbons!  It came without tags!  It came without packages, boxes or bags!"  And he puzzled three hours, 'till his puzzler was sore.  Then the Grinch thought of something he hadn't before!  "Maybe Christmas," he thought, "doesn't come from a store.  Maybe Christmas...perhaps...means a little bit more!"
[Dr. Seuss, How the Grinch Stole Christmas]

Merry Christmas, everyone!

Mike V
DadCooksDinner

Inspired by:


Heifer International

*Enjoyed this post?  Want to help out DadCooksDinner?  Subscribe using your RSS reader or by Email, recommend DadCooksDinner to your friends, or buy something from Amazon.com through the links on this site.  Thank you!

Dad Cooks Christmas Dinner(s)

December 21, 2009 by Mike Vrobel 2 Comments

I'm cooking two Christmas dinners this year; one dinner for Diane's side of the family on Christmas, and then another dinner for my side of the family the next day.  I'll be cooking a Rotisserie Ham on day 1, and a Rotisserie Prime Rib on day 2, and I'll be doing both with a side of rotisserie pan potatoes.
*My goal is to spend time with my guests, not with the meal. I'm trying to rein in my "if it's worth doing, it's worth overdoing" impulses. I've sent out a call for help from the rest of the families, and they've responded in a big way. I think I'll just have to fill in a couple of things.
**Yes, I'm trying to hold myself back. I'm making a grill-smoked side of salmon a day ahead that I can use as an appetizer for both dinners. Oh, and some green beans; recipe coming tomorrow. And…no, stop, that's enough. See? There I go again.

My tip for Christmas?  Cook your Christmas roast on the grill.  When I'm having people over, the space in the oven is always at a premium.
*Unless you're one of those lucky people with two ovens in their kitchen.  My grandmother had them, and now I understand how important that was to feeding our crowd on holidays.  Someday, when I remodel my kitchen, they will be mine.  Oh yes, they will be mine.

Moving the roast outside leaves the oven free for side dishes, so they don't pile up waiting to be cooked or re-heated.  And it doesn't hurt that grilling on Christmas will impress your guests.  Particularly if it's snowing.

Dad Cooks Dinner Christmas Roast Recipes:
Here are some suggestions for a grilled Christmas roast:
Rotisserie Beef Tenderloin with Shallot Herb Butter and Horseradish Cream
Rotisserie Boneless Pork Loins, Brined and Maple Sugar Glazed
Rotisserie Turkey

Don't have a rotisserie?  You can still use my recipes - set the grill up for indirect cooking, put a drip pan in the middle, put the grate back on the grill, and cook your roast over indirect heat, turning halfway through the cooking time.  If that's not specific enough instructions for you, then here are some good sources of grill-roasting recipes:

Good sources of Grill Roasting Recipes on the web:
Stephen Raichlen's PBS show, Primal Grill: [primalgrill.org]
Primal Grill recipes, season one
Primal Grill recipes, season two
(Or get one of his many cookbooks.  How to Grill is a great introduction to grill roasting)

Weber grills has a couple of different recipe resources you can use:
Weber.com recipes [weber.com]
WeberNation recipes and grilling videos with Jaime Purviance [webernation.com, free registration required]
(Or get one of their many cookbooks, like Weber's Way to Grill)

Merry Christmas, everyone!  And good luck with your Christmas dinner!

What do you think? Questions? Other ideas? Leave them in the comments section below.

*Enjoyed this post?  Want to help out DadCooksDinner?  Subscribe using your RSS reader or by Email, recommend DadCooksDinner to your friends, or buy something from Amazon.com through the links on this site.  Thank you!

Rotisserie Beef Prime Rib Roast

December 17, 2009 by Mike Vrobel 38 Comments

Rotisserie Prime Rib Roast | DadCooksDinner.com

Rotisserie Beef Prime Rib Roast. The king of beef roasts is fantastic cooked on the rotisserie. The spinning rotisserie bastes the roast in its own juices, giving it a gorgeous crisp browned crust. The trick to this simple recipe, other than the rotisserie, is salting a day ahead. This dry brines the roast and lets the salt season deep into the roast.

A prime rib roast cooked on the rotisserie
Rotisserie Prime Rib Roast
[feast_advanced_jump_to]

Why Prime Rib?

And now, my preferred cut of beef.  Prime rib.  There will be no messing around with it.  Beef with salt, pepper, time to rest, and a spin in the grill.  This recipe is simple perfection.

*It's so simple that I hesitate to call it a recipe.  It's almost all technique.  Salt the beef early, then cook it over a rotisserie until it's medium rare.  Done.

The key to this recipe is the beef.  You really want a Prime rib roast, not just a regular beef roast.  Yes, it will be expensive.  In a recipe this simple, the quality of the ingredients (ingredient?) really stands out.
*It will work with a good rib roast.  It won't be the transcendent experience that a Prime roast is, but it will work.

Prime rib is what I'm cooking for my side of the family at our Christmas dinner.  It's not that my wife's side of the family doesn't like beef; they do.  But us Vrobels, we LOVE our beef.
*I've been beef heavy on the blog recently.  We'll have a more balanced diet in the new year.  But for right now, it's Christmas!  It's time to celebrate!  This is one of the meals that I will pass up Christmas cookies for, just to make sure I have extra room.  Yes, it's that good.

What to serve with Prime Rib

I love horseradish with my prime rib, so I always make a batch of my Quick Horseradish Sauce. I'll also make mashed potatoes, or toss some potatoes in the pan under the beef and make Rotisserie Pan Potatoes. For something green, I like to go with green beans or asparagus. Oh, and of course, wine. I like a good Californian Cabernet Sauvignon with this big beef roast.  (A French Bordeaux from St. Emillion or Lalande de Pomerol are also good. Or Italian super Tuscan wine are also good.)

Equipment

  • Grill with Rotisserie attachment (I use a Weber Summit with an infrared rotisserie burner. Here is the current version of my grill.)
  • Aluminum foil drip pan (9"x13", or whatever fits your grill. I use an enameled steel roasting pan.)
  • Butchers twine
  • Instant Read Thermometer

Substitutions and Variations

  • Herb Crust: See my Rotisserie Rib Roast with a Herb Crust recipe
  • Smoking wood: Add one fist sized sized piece of smoking wood to the coals when you put the roast on the grill.  I would use oak, preferably a Wine Barrel Stave, but hickory would be acceptable.
  • Butter basted: Use the butter baste from my Rotisserie Beef Tenderloin. There is a lot of fat in a prime rib roast, so this borders on overkill.  If you're into overkill, go for it.

Tips and Tricks

  • As I said in the opening, the key to this recipe is the Prime beef.  The better the beef, the better the outcome.  My top choices would be Prime, then Certified Angus, then...well, at that point, have you considered a Christmas ham?
  • A Rib roast is very thick; even with the pre-salting, the center of the roast is basically unseasoned.  You should pass some salt at the table for your guests to sprinkle on the sliced pieces of roast.  Use Kosher salt, or a flaky sea salt, like Maldon or Fleur De Sel de Camargue.
  • I cut the ribs off of the roast and serve them on the side, for people who like to eat with their hands. (Like me.) If no one is looking, I eat one of the ribs after I'm done carving.  Or while I'm carving, if I'm hungry enough.
  • I Frenched the bones on the roast in the pictures - I cut the meat and fat between the bones away, so they poke out. It makes the roast look pretty, but you get less meat on the bones.
Rotisserie Grilling by Mike Vrobel

I wrote a cookbook!

Rotisserie Grilling Cookbook

New to your rotisserie and need help with the basics? Love your rotisserie and looking for new ideas? Grab a copy of Rotisserie Grilling! You'll get 50 of my favorite rotisserie recipes and expert tips on how to set up and use your rotisserie.

Click here to buy →
Pre-salting the beef
Rotisserie Beef Prime Rib Roast

What do you think?

Questions? Other ideas? Leave them in the comments section below.

Related Posts

Rotisserie Rib Roast, Reverse Seared
Rotisserie Ribeye Roast with a Herb Crust
Rotisserie Beef Tenderloin, Herb Butter Basted
Rotisserie Pan Potatoes
Click here for my other rotisserie recipes.

Inspired by:
Steven Raichlen's: Primal Grill: One Good Turn. [primalgrill.org]

*Enjoyed this post? Want to help out DadCooksDinner? Subscribe to DadCooksDinner using the RSS or Email options on the right, link to this post from your blog, recommend DadCooksDinner to your friends, or buy something from Amazon.com through the links on this site. (Like my Rotisserie Grilling cookbook...)

Disclosure Policy

December 14, 2009 by Mike Vrobel 1 Comment

Who am I?  I am an enthusiastic amateur who loves to cook, and loves to tell people about it.  Cooking is my hobby, and my obsession.  I cook a lot, read about cooking a lot, and think about cooking a lot.  I've learned a few things over the years, through classes, reading, and trial and error.  Do I know everything?  Of course not.  That's part of what I love about cooking - there's always something new around the corner to learn about or try.  And it usually tastes delicious.

Recipes: I attribute recipes to their original publisher, or whoever inspired me to go wandering off on my own path.  I'm grateful to everyone who helped me learn what I know; they deserve all the credit I can give them and more.  When I don't attribute a recipe, it's because it is so traditional that it's tough to tie back to an original.

Biases: I have biases.  Weber grills with rotisserie attachments, say, or Alton Brown.  I think they're pretty obvious in my writing.  Just remember, this stuff is all my opinion.  If you don't like it, say so in the comments.  Or start your own blog.

How I make money: I make money on this blog through the advertising on this site, and when people buy something from Amazon through my links.  It helps defray the cost of recipe ingredients; rotisserie beef tenderloin is expensive.
*As of December 2009, it's supported my cookbook habit…slightly. I've bought this one, and this one, and this one with my Amazon proceeds. Yes, three books in one year. And I gave away the first one!

Free Stuff: This post was inspired by the new FTC guidelines on blogger disclosure.  I have just received my first free item to review, and it came from a company I trust.  (I'm not free to share my review about it yet, but I will soon.)  When opportunities like this come around, I'll decide if the item is worth reviewing.  When I write about it, I'll disclose that I received the item for free.
*Everything in my "Things I Love" series is purchased with my own money.  Those posts are because I'm a gadget geek, and I can't help sharing about the stuff I love to use.  I'm going to distinguish freebies with a different title, maybe "Dad Reviews…" or something like that. "Review:" is the title I'm using.  Not very original, I know, but it explains things best.
[Update 12/29/2009]: Now I can tell you it was All-Clad's d5 cookware - they sent me a pan to review.

What do you think?  Does this feel like the right approach?  Anything I missed?  Am I selling out to The Man?  Leave your thoughts in the comments, below.
*Written while listening to "Sell Out" by Reel Big Fish

Thank you for reading my blog. Your comments and questions are what keep it interesting!

Inspired by:
The new FTC guidelines on endorsements and blogging.

Guest post on Black Iron Dude: Grilled Green Beans

December 12, 2009 by Mike Vrobel 2 Comments

Self portrait: "Are the green beans done?  It's freezing out here!"

Check out my guest post on Black Iron Dude: Grilled Green Beans.
*[BlackIronDude.blogspot.com] is highly recommended, and not just because he let me loose on his blog.  I love reading about his obsession with cast iron cookware.    Trust me, I know obsession.

Swiss Chard Saute

December 10, 2009 by Mike Vrobel 7 Comments

This week, I'm sharing recipes that were inspired by my winter CSA box.
Other than the turnips. The Locavore's Dilemma - What do you do with the turnips?

Swiss Chard is my favorite green. It has the deep, biting flavor of greens, but because it's a tender green, you can have it cooked in fifteen minutes. It is a regular in my rotation of weeknight side dish vegetables.
Nothing goes better with pork chops and mashed potatoes than a side of greens. This is one of my core beliefs, right up there with family, god, country, basic techniques instead of recipes and making your own stock.

And Swiss Chard is so pretty! Instead of the usual monochrome vegetable, you get a rainbow of green, yellow, orange and red. The explosion of colors brings a smile to my face.

Recipe: Swiss Chard Saute

Equipment:

  • 12" frying pan with a lid (I like my All-Clad 12 inch nonstick fry pan for this, but any 12" pan with a lid will do)

Ingredients:

  • 1 tablespoon olive oil
  • 1 bunch swiss chard (roughly 1 pound)
  • ½ teaspoon kosher salt
  • 2 cloves garlic, minced or pressed through a garlic press
  • ½ teaspoon kosher salt
  • Juice and zest of one orange (optional)
  • More salt and ½ teaspoon freshly ground pepper

1. Prep the chard: Separate the leaves of the swiss chard from the stems. I do this by folding the leaf on my cutting board, along the stem. Then I run my knife down the edge of the stem, separating both sides of the leaf from the stem. Slice the stems into ¼ inch slices, and cut the leaves into 1 inch slices.
*If the chard has dirt on it, I fill a salad spinner with water to clean it. I separate the stems from the leaves first, then I swish the stems in the water in the spinner to clean them. I slice the leaves, and put them into the water in the spinner. Then I use the spinner to rinse and dry the leaves.

2. Saute the Stems: Heat the olive oil in a frypan over medium heat, until shimmering. Add the sliced stems, and sprinkle with ½ teaspoon kosher salt. Saute for 5 minutes, or until softened. Make a hole in the center of the stems, add the garlic, and saute for 1 minute.

3. Steam the Leaves: Add the leaves to the pan, sprinkle with another ½ teaspoon kosher salt, then cover and cook for another five minutes.

4. Seasoning: Remove the lid, pour in the orange juice, grind some black pepper on top, and toss the leaves and stems until combined. Taste a leaf, and add more salt if necessary (it usually needs an extra ½ teaspoon of kosher salt).  Remove to a platter, and sprinkle the orange zest on top. Serve.

Variations:
Use regular chard instead of the swiss chard. It isn't as pretty, but it tastes just as good.

Use butter in place of the olive oil.

Substitute a lemon for the orange.

Use a splash of balsamic vinegar instead of the orange juice and zest

To really go for broke, calorically speaking, substitute bacon for the olive oil. Cook a couple of slices of bacon in the frypan, set the bacon aside, and saute the chard in the bacon fat. Crumble the bacon over the chard just before serving.

Notes:
The leaves take up a lot of space until they start to wilt. If you want to double this recipe, use a 6 quart or larger dutch oven. You will need the extra space to fit all the leaves before they wilt.

*I usually cook this in a nonstick fry pan, but you don't have to. It works just as well in a regular fry pan; the leaves generate enough liquid that you don't have to worry about sticking. It's just that I'm usually using my stainless fry pan for the main course when I'm making this.

What do you think? Questions? Other ideas? Leave them in the comments section below.

Related posts:
Fennel and Orange Salad
Stir-fried swiss chard

Inspired by:
Pam Anderson: How to Cook Without a Book
(And check out her blog: ThreeManyCooks.com)

*Enjoyed this post?  Want to help out DadCooksDinner?  Subscribe using the RSS or Email options on the right, recommend DadCooksDinner to your friends, or buy something from Amazon.com through the links on this site.  Thank you!

Fennel and Orange Salad

December 8, 2009 by Mike Vrobel 3 Comments

This week, I'm sharing recipes that were inspired by my winter CSA box.
Other than the bags and bags of potatoes.  I know how this person at The Kitchn feels, but potato recipes will be coming later this winter.

First up: fennel.

I've discussed the "what do you do with fennel" question before.  This time, I'm not going to cook it, I'm going to slice it thin and use it in a salad.

Raw fennel is very crunchy, and has a strong anise or licorice flavor. This pairs very well with orange.  This is good, because it is also the time of year where oranges flood into grocery stores.
Yes, I know that's not very locavore.  I view local and sustainable as a goal, not an absolute requirement.  If I had to live without lemons, limes, and oranges, it would be a VERY long winter.

Recipe: Fennel and Orange Salad

Ingredients:

  • 1 large fennel bulb (I used 2 small ones instead)
  • ¼ teaspoon kosher salt (a small two-finger pinch)
  • 1 large orange
  • 1 head of leaf lettuce (red or green leaf), torn into 2 inch pieces (or a 7oz bag of pre-cut lettuce)

Orange sherry dressing:

  • Juice from your sectioned orange (should be about 2 tbsp)
  • pinch of zest from your sectioned orange
  • 1 teaspoon sherry vinegar (or other vinegar)
  • ½ teaspoon Dijon mustard
  • pinch of kosher salt
  • ½ teaspoon ground black pepper
  • ¼ cup olive oil

Directions:
1. Prep the Fennel: Trim the fronds from the top of the fennel bulb, and then cut out the core. Cut the bulb in half, then into thin slices. Put the sliced fennel in a large bowl, sprinkle with ¼ teaspoon kosher salt, and toss to coat evenly.

2. Section the Orange: Zest the orange, and set the zest aside. Cut the top and bottom off of the orange, set down on one of the cut sides, then cut the skin and pith off by cutting around the side of the orange. (See picture below). Over a small bowl, section the orange by cutting in a V shape just along the membrane holding each section together. When you're done, squeeze the juice into the bowl from the remaining membrane. Remove the orange sections to the large bowl with the fennel, leaving as much of the juice behind as you can for the vinaigrette.

3. Make the vinaigrette: Add the sherry vinegar, pinch of salt, pinch of pepper, pinch of orange zest, and dijon mustard to the orange juice in the small bowl. Whisk to combine, then allow to sit for a minute for the salt to dissolve. Whisk the olive oil into the bowl in a slow stream.
*For details, see my Vinaigrette Basic Technique

4. Toss and serve: Easy way: Add the romaine to the large bowl with the fennel and orange slices, pour in the vinaigrette, and toss until well coated. Finesse way: Add 1 tablespoon of vinaigrette to the fennel/orange bowl, and toss to coat. Put the romaine in a separate bowl, and toss with the rest of the vinaigrette. Serve by putting a bed of romaine on each plate, then topping with some of the fennel/orange mix.

Variations:
Like in my lemon herb dressing, orange and herbs go well.  I'd start with thyme, but any herb you like will probably match well.

Fennel, orange and olive salad is a classic Sicilian recipe.  Adding some olives to this salad is a great idea.

Notes:
Taste the orange juice/vinegar mix after the salt has dissolved; you want balance of sweet and tart.   I add ½ teaspoon of sugar to the vinaigrette if the orange juice isn't sweet enough, or a splash more of the vinegar if it isn't tart enough.

Don't throw away the leafy fronds you trimmed from the top of the fennel. They are used as herbs, and will last for up to a week in the refrigerator. Strip the leafy part off the stems, and use it like you would use thyme or rosemary. It's particularly good with white-fleshed fish; I used fennel fronds with my grilled trout recipe.

What do you think? Questions? Other ideas? Leave them in the comments section below.

Related Posts:
Grill Roasted Fennel
Lemon Herb Dressing
Vinaigrette Basic Technique

Inspired by:
Basics class at the Western Reserve School of Cooking in Hudson, Ohio.

*Enjoyed this post?  Want to help out DadCooksDinner?  Subscribe to DadCooksDinner using the RSS or Email options on the right, link to this post from your blog, recommend DadCooksDinner to your friends, or buy something from Amazon.com through the links on this site.  Thank you!

Texas Red Chili

December 3, 2009 by Mike Vrobel 43 Comments

Texas Red Chili
Texas Red Chili

The first cookbook I bought after Diane and I got married wasn't really a cookbook. It was a recipe booklet from Betty Crocker, the ones they sell in the checkout aisle at the grocery store. Soups, Stews and Chilis was full of very bland recipes, except... In the middle was an insert. In that insert were the recipes that won the International Chili Society cook off between 1989 and 1993. Those recipes were another step on my way to becoming DadCooksDinner.
In Ohio, in 1994, it was a revolutionary concept to make chili Texas style, with big chunks of beef and without beans. And the flavor! A half cup of chili powder! This was a culinary revelation.

Texas Red Chili became my signature recipe.
Yes, I know I'm not from Texas.  I'm so far from being a Texan that I'm approaching it from the other side.

Beef cut into 2 inch cubes

Over the years, I've brought it to potluck lunches at work, tailgating at Ohio State, family gatherings, and countless Super Bowl parties. All of my younger brother's friends know this recipe. My parents hold a Super Bowl party every year, and my brothers would invite their friends from college over. The starving college students would descend on the pot like locusts.  Nowadays, they're all successful professionals. But they still come to the super bowl party, and they still clean out the pot.

This recipe started my Chili Fest tradition at work. Someone suggested a chili cook-off among us computer programmers, and I brought in a crock pot full of my Texas Red All-Beef Chili.
I still had to explain the "all beef" thing back then.

Added the masa harina and simmered to thicken

It was so popular, people started asking when I could bring it in again. I couldn't make enough chili to feed everyone, so I sent out an email asking for other people to bring in some chili, and we'd make a lunch of it. We've been doing our Chili Fest every fall for the last eight years, and last time I had volunteers bringing in twelve different types of chili, other main courses, side dishes, and desserts.  Chili just brings people together. Today is this year's Chili Fest, and I'm publishing the recipe in its honor.
This will also give me something to point people to when they ask for the recipe.

Recipe: Texas Red Chili


A bowl of red

Notes:
*Fond is the browned bits of meat and vegetables that stick to the bottom of the pan.  It is the basis of flavor in most stews and chilis.  The more fond you have, the more flavor you get in the chili when it dissolves into the cooking liquid.  Because of this, do not brown the meat for your chili in a nonstick pan!  You want the sticking, because that's how you build a good fond, and that's how you build flavor.  In this recipe we're doing it twice; once when you brown the beef, and once when you're sauteing the onions and spices.

*Browning three batches of beef in your pot can take a while, and lead to burning the fond on the bottom of your pan.  You can speed up this step by browning some batches of beef in a separate skillet.  When you're done, put the water (or stock) in that skillet, bring it to a simmer, and scrape the browned fond off the bottom. You don't want to lose any of the browned bits - they're all flavor.  Add this water from the skillet when you would add it in the recipe.
Double burner browning


*The masa harina slurry is optional, but it helps thicken up the chili.

If you want to reduce the heat, you can halve the jalapenos and chipotles, or omit one or the other.
Or just skip the peppers all together.  But this IS Texas chili...why are you making the recipe if you can't take the heat?

You didn't hear it from me, but you can add up to four cups of kidney or pinto beans to this chili.  Just don't use the name Texas in the title if you do that.  And I'll claim I've never met you before in my life.
The chili police are relentless, and very specific...no beans allowed.
**Of course, some true believers are going to be after me for adding tomatoes.  I'm not a number!  I'm a free man!

If you really want to go all out, use bacon fat instead of the vegetable oil.  If you really want to do it right, start the recipe by cooking 8 pieces of bacon. Reserve the fat, use it for the cooking, and mince the bacon and sprinkle it on as a garnish when you serve.

I usually make this recipe for a crowd - if you want to scale it back (serving 6-8), cut back to 3 pounds of beef, and halve the rest of the ingredients.

What do you think?  Questions?  Other ideas?  Leave them in the comments section below.

Related posts:
Ranch Hand Chili
White Chicken Chili done right

Inspired by:
The International Chili Society's World Chili Champions, 1989 through 1993. [chilicookoff.com]

*Enjoyed this post?  Want to help out DadCooksDinner?  Subscribe to DadCooksDinner using the RSS or Email options on the right, link to this post from your blog, recommend DadCooksDinner to your friends, or buy something from Amazon.com through the links on this site.  Thank you!

Michael Symon Cooking Classes

December 2, 2009 by Mike Vrobel 4 Comments

[Update 12/17/2009]: Sorry everyone; according to lolabistro.com, the classes for 2010 are sold out.  I know it's a long wait, but they seem to go on sale on or about December 1st.  Try again on 12/1/2010...


[Update 3/2010]: Here is my post about Michael's Greek cooking class

If you're a Michael Symon fan, and live in Northeastern Ohio, then I have an opportunity for you!

His 2010 Cooking with Michael Series just started taking reservations.  The classes are $160 apiece (ouch), but include a signed copy of his book, Michael Symon's Live to Cook. I've taken a cooking class with Michael in the past; I learned a lot, and they're a lot of fun.
His personality on TV isn't an act - that's how he is in real life as well.

If you're interested, sign up quickly, because the classes are filling up fast. Also, don't be surprised if you have to wait on hold for a while. They're a little busy this time of year...
*Last night I signed up for his Greek class (on March 16th), and was told there was only one opening for his Comfort Food classes left.

[h/t gardengrocerygadgetgirl.blogspot.com for the heads up on the classes]

Rotisserie Beef Tenderloin with Shallot Herb Butter and Horseradish Sauce

December 1, 2009 by Mike Vrobel 20 Comments

Looking for a recipe to shock and awe your holiday guests?  Look no further.  I was going to start this recipe with my usual rant about needing fat to have flavor in meat, and how beef tenderloin needs a lot of help.  Then I tasted the results from this recipe.  Between the early salting, basting with herb butter, and the kick from the horseradish sauce, this dish is loaded with flavor.1OK, you do have to help it out a little...

Trimmed, folded, cut, and trussed

Maybe it's not quite as flavorful as a prime rib, but it's still excellent.  And there is something about beef tenderloin that says "luxury". You and your guests will appreciate it.

Herb brush and butter ready to be microwaved

Recipe: Rotisserie Beef Tenderloin with Shallot Herb Butter and Horseradish Sauce

Equipment

  • Grill with Rotisserie attachment (I use a Weber Summit with an infrared rotisserie burner. Here is the current version of my grill.)
  • Aluminum foil drip pan (9"x13", or whatever fits your grill. I use an enameled steel roasting pan.)
  • Butchers twine
  • Instant Read Thermometer

Notes

  • Serve with rotisserie pan potatoes and a salad of arugula tossed in lemon herb dressing.
  • Fine Cooking magazine has a good set of pictures explaining how to remove the chain and the silver skin from the beef tenderloin: How to trim a beef tenderloin [finecooking.com]
  • I fold the tenderloin over on itself before cooking, to try to even out the size - the tail is very narrow compared to the tip, and I don't want the tail to be well done before the tip is even medium rare. Also, this makes the roast thicker, which slows down the cooking long enough to get good browning on the outside.  That said, the smaller end will cook a bit quicker than the thick end - I had medium-well beef on one end, and rare on the other.  This worked well for me, because I had guests who wanted a range of doneness.
  • Yes, beef tenderloin is expensive. I try to cut the expense down by waiting for cryovac wrapped whole tenderloins to go on sale at my local megamart, and then trimming them myself. Warehouse clubs also have tenderloin relatively cheap. (By "cheap", in both these cases I'm talking about $9.99 a pound.) If you've got the money, buy two chateaubriand roasts (center cut roasts from the tenderloin), and tie them together. (And don't mind me while I turn green with envy.)
  • Leftovers make great sandwiches. Slice the beef as thin as you can, pile it on a roll, top it with some arugula and leftover horseradish sauce.

What do you think?

Questions?  Other ideas?  Leave them in the comments section below.

Related Posts
Rotisserie Beef Rib Roast with Herb Crust
Click here for my other rotisserie recipes.

Inspired by
Cook's Illustrated Roast Beef Tenderloin (subscription required)


Check out my cookbook, Rotisserie Grilling.

Everything you could ask about the rotisserie,
plus 50 (mostly) new recipes to get you cooking.

It's a Kindle e-book, so you can download it and start reading immediately!


*Enjoyed this post? Want to help out DadCooksDinner? Subscribe to DadCooksDinner using the RSS or Email options on the right, link to this post from your blog, recommend DadCooksDinner to your friends, or buy something from Amazon.com through the links on this site. (Like my Rotisserie Grilling cookbook...)

Things I Love: Shun Bob Kramer Chef's Knife

November 30, 2009 by Mike Vrobel 12 Comments

When have you spent too much money on your tools? That's a question I'm often asking myself. I always lust after the latest and greatest kitchen gadget. I try to deal with this by buying the best tool in the first place, since I will probably come up with an excuse to buy it eventually.
*"Buy the best, and only cry once" is the best summary of this approach.  Also, I'm trying to stick with a one in, one out strategy for new kitchen tools.  If I buy a new toy gadget essential tool, I get rid of something to make space for it.

This long winded introduction is because I'm a little embarrassed about the price of this one. I love my Shun Bob Kramer 8-inch chef's knife. Yes, it's a $340 chef's knife. Yes, I know that I was telling you how much I loved the regular Shun chef's knife not that long ago.
*I am fickle with my knives. The regular Shun is a great knife, and if the Shun Bob Kramer didn't exist, I'd still be using it happily. 
**It's a testament to the usability of the plain, boring, cheap Victorinox 8-inch chef's knife that I used it as long as I did. I still use the Victorinox when I am doing something that might dull the blade on my "good" knives, like cutting a squash or sectioning a chicken. If you don't agree with the "always buy the best" approach, then the $30 Victorinox is the best value knife out there.  It's 90% of the knife that the Shuns are, for a tiny fraction of the price.

I'm obviously a little conflicted about the price of this knife.
*And even then I wouldn't have bought it, except I had a gift certificate burning a hole in my pocket after my last birthday. Thank you, Pat, Erin and Olivia!

But...oh, my. Shun's regular line of knives are gorgeous, but the Shun Bob Kramer knives are works of art. They are made out of Shun's SG2 powdered steel, and clad with a thin layer of stainless Damascus steel.  You get the beauty of Bob Kramer's Damascus steel, the ease of maintenance of stainless steel, and the hardness of Shun's high tech powdered steel.
*Want to know what this all means?  Check out Chad Ward's An Edge in the Kitchen for an excellent overview on knives, sharpening, hardness and metallurgy.

The Bob Kramer knife is heavier than the regular Shun, but every bit as sharp. It feels better in my hand, and I love the wider blade. It's a brilliant combination of art and function.  My chef's knife is the most important tool in my kitchen.  It is the tool I use the most, by far.  I want one that feels like it's an extension of my arm, one that just works.*  And if it happens to double as a beautiful work of art?  That's even better.
*Which is the key to a good kitchen knife.  Does it fit in your hand?  Does it feel right?  That's the most important thing about knives.  It's why I stuck with the Victorinox for so long; the only knives I've used that felt noticeably better were the Shuns.  Until they came along, everything else didn't quite fit my hand as well.
**But!  I'm 6'3", so my hands may be larger than yours.  Make sure that you can play with a knife before you buy it, to see how it feels.  At least, if you buy online, make sure the vendor has a good return policy.

(left to right: Victorinox, Shun, Shun Bob Kramer)

If I could afford one, I would get a real Bob Kramer knife.  One that he has hand forged out of Damascus steel.  I know I was just talking about "buying the best." But.  While the Shun version of his knives cost $340, his hand-forged knives cost roughly that much...per inch of length. For my eight inch chef's knife, that would be a LOT of money.
*Now, maybe someday when this little food blog makes me Rich and Famous...

Here is a video of the master bladesmith at work:

Watch CBS News Videos Online

What do you think?  Questions?  Other ideas?  Leave them in the comments section below.

Inspired by:
Shun Bob Kramer Knives at SurLaTable.com
Kramer Knives
Details of the Shun and Bob Kramer collaboration [chadwrites.com]

Giving Thanks 2009

November 26, 2009 by Mike Vrobel 2 Comments

I'm thankful for my beautiful, caring wife.
*Who hasn't thrown me out of the house for blogging when I should be spending some time with her.  At least, not yet.

I'm thankful for my kids, who are equal parts cute, smart, funny, and annoying.*  How did I get so lucky, to have such wonderful kids?
*I've realized that being a parent involves loving your kids, being proud of them, and wanting to ground them for life, often all at the same time.

I'm thankful for my family, who puts up with my food obsessions much more gracefully than I deserve.
*Later today, I'll be spending time with them.  I'll be the one with a turkey drumstick in one hand, a glass of wine in the other, and a plate stuffed with all the side dishes I can carry on the table front of me.

I'm thankful for Thanksgiving leftovers.  I'm already looking forward to a turkey sandwich with a side of reheated stuffing, mashed potatoes and gravy.
*And, just to check...you ARE making turkey stock with your leftover carcass, right?

I'm thankful for all my readers.  You're what makes writing this blog fun. Have a happy Thanksgiving, everyone!

Mike V

Inspired by:

Heifer International

Southwestern Turkey and Black Bean Soup

November 24, 2009 by Mike Vrobel 7 Comments

I love leftovers from Thanksgiving dinner.  What would I do without them?  I'd be lost...

"The heavenly aroma still hung in the house.  But it was gone, all gone!  No turkey!  No turkey sandwiches!  No turkey salad!  No turkey gravy!  Turkey hash!  Turkey a la king!  Or gallons of turkey soup!  Gone, ALL GONE!"
[Ralphie, A Christmas Story]

But even I'll admit that turkey sandwiches get old after a few days.  If you're looking for something different, with a spicy, southwestern flavor to it, have I got the recipe for you...

Recipe: Southwestern Turkey and Black Bean Soup

Ingredients:

  • 1 tablespoon vegetable oil
  • 1 medium onion, diced
  • 1 jalapeno, minced (optional)
  • ½ teaspoon kosher salt
  • 1 tablespoon chili powder
  • 1 teaspoon cumin
  • ½ teaspoon oregano (dried mexican oregano, if you can find it)
  • 3 cloves of garlic, minced or pressed
  • 15oz can of diced tomatoes, drained (Muir Glen fire roasted diced tomatoes are preferred)
  • 4 cups cooked black beans (Homemade are best, but you can substitute 2 cans, drained)
  • 1 quart homemade turkey stock
  • 1 teaspoon kosher salt
  • 4 cups cooked turkey, diced (One half of a turkey breast, cut it into rough 1" cubes)
  • Juice of 1 lime
  • 1 tablespoon brown sugar

Toppings

  • cilantro leaves, minced

Optional toppings and garnishes

  • Pickled hot peppers
  • Sour Cream
  • Hot Sauce
  • Shredded cheese
  • Diced avocado
Saute the onion

Directions:
1. Saute the aromatics: Heat the vegetable oil in a dutch oven over medium-high heat until shimmering, then add the onion and peppers, and sprinkle with the ½ teaspoon of salt. Saute until softened, about 5 minutes.  Make a hole in the center of the pan and add the garlic, chili powder, cumin and oregano.  Toast for 30 seconds to 1 minute, or until you start to smell garlic. Stir into the rest of the aromatics, and saute for another 1-2 minutes or until they just start to brown.

Garlic and spices, ready to go

2. Simmer the broth: Add the tomatoes, beans and turkey stock to the pot. Turn the heat to high and bring to a boil, then boil for 1 minute.  Reduce the heat and simmer, add the turkey, and simmer for 10 minutes to allow the flavors to mingle.
*I keep my stock in the freezer, so I thaw it in the microwave while I'm doing step 1. If it's still frozen at this point, that's OK.  Just put the big ice cube of stock into the pot, and it will melt on its way to boiling.

One turkey breast, diced into 1 inch cubes

3. Season the soup: Add the lime juice and brown sugar, then season to taste with salt, pepper, more lime juice, more sugar, and maybe a little hot sauce.

4. Serve: Ladle into bowls, and top with a little minced cilantro. Serve, with the garnishes available for adding on at the table.

Variations:
*If you like a "soupier" soup, up the turkey stock to 2 quarts.

*If you like it heartier, add a cup of cooked rice when you add the turkey cubes.

*For the onion/tomato/pepper/garlic aromatics, substitute 1.5 to 2 cups of leftover tomato salsa. In step 1, Cook the salsa in the oil until it turns dark red in color, then move on to step 2 and the chicken stock.

*No limes? Add a splash of cider vinegar.

*You can always substitute chicken stock and leftover chicken for the turkey, if you're reading this recipe after Thanksgiving.

Notes:
*I serve this with a salad and tortilla chips on the side.

*This is a great "refrigerator velcro" meal for me, to use up leftover turkey and frozen black beans.  Oh, and I was out of tomatoes, so I skipped them.  As you can probably tell, this recipe is pretty flexible.

Questions? Comments? Other ideas? Leave them in the comments section below.

Related Posts:
Pressure Cooker Turkey Stock
Turkey Stock the right way
Turkey Noodle Soup
Slow Cooker Black Beans

Inspired by:
The Cook's Illustrated Complete Book of Poultry

*Enjoyed this post?  Want to help out DadCooksDinner?  Subscribe to DadCooksDinner using the RSS or Email options on the right, link to this post from your blog, recommend DadCooksDinner to your friends, or buy something from Amazon.com through the links on this site.  Thank you!

Dad Cooks Thanksgiving Dinner

November 23, 2009 by Mike Vrobel 6 Comments

Thanksgiving!  If you're as obsessed with food as I am, it's like Christmas, New Year's Day, and the Super Bowl rolled into one!

What am I going to be doing on Thanksgiving?  I'll be packing my Weber kettle and driving to my parent's house.  There, I'll be directing our crew in a production of dinner for thirty people.*  I'll be grilling a turkey, my mom's big Butterball will be in the oven, and my brother will have the turkey fryer bubbling.
*Yes, there are a lot of us in the Vrobel/Weck/Springer clan
**I say "directing", but as I said above,  I'm a control freak I care about food a little to much, so I wind up doing a lot of the work.  Luckily, my brothers and my brother-in-law usually ignore me, and insist on helping.

Need some last minute help?  Here are a collection of DadCooksDinner recipes for your holiday meal:

Turkey:
Rotisserie Turkey, Brined
Rotisserie Turkey Breast, Dry Brined

Sides:
Grilled Mashed Sweet Potatoes
Rotisserie Pan Root Vegetables

Leftovers:
*You are making turkey stock with your leftover carcass, right?
Turkey Stock Done Right
Pressure Cooker Turkey Stock
Turkey Noodle Soup
Southwestern Black Bean and Turkey Soup

Wow.  That's all I have?  I need to post some more recipes, particularly for side dishes. To make up for the essentials I'm missing, here are some great Thanksgiving recipes from other sites on the web:

Turkey:
This is the recipe I've been using for years:
Apple Brined Turkey - Jamie Purviance [weber.com]

But, after years of brining, I've switched allegiances.  I believe that dry brining gives you a better tasting turkey.  Russ Parsons at the LA times is doing a great job of explaining, testing, and expanding that technique:
A more flavorful dry brined turkey and Your questions answered about the 'Judy Bird' - Russ Parsons [latimes.com]

[Update 11/23/09]
Pam Anderson is also publishing a series of articles on Thanksgiving, starting with her twin Dry Brined Turkeys with Herbes De Provence...

Sides:
Cooks Illustrated has everything covered on their master Thanksgiving page, but a subscription is required. [cooksillustrated.com]

Kris at Cheap Healthy Good has her 38 Dishes for a Stellar Turkey Day [cheaphealthygood.com]

And then there's Mark Bittman, with his over the top collection of 101 recipes you can make before the turkey goes in the oven [nytimes.com]

One more for the road:
Last, but not least...my thanksgiving isn't complete without a viewing of the holiday classic: Romancing the Bird, a Good Eats Thanksgiving.

What recipes will you be using?  Found any good Thanksgiving recipe roundups on the web?  Let me know in the comments, below.

One more "one more for the road": I couldn't pass up the Swedish Chef Thanksgiving, where he tries to rotisserie a turkey.  The turkey may have other ideas...
[h/t SeriousEats.com]

*Enjoyed this post?  Want to help out DadCooksDinner?  Subscribe to DadCooksDinner using the RSS or Email options on the right, link to this post from your blog, recommend DadCooksDinner to your friends, or buy something from Amazon.com through the links on this site.  Thank you!

Rotisserie Duck, Peking Style

November 19, 2009 by Mike Vrobel 24 Comments

Rotisserie Pekin Duck

Rotisserie Peking Duck

Peking duck is a classic recipe at the Chinese-American restaurants I grew up with.  Much to my surprise, it's an authentic Chinese recipe as well.  This post was inspired by Anthony Bourdain's No Reservations in Beijing.  The Li Qun Roast Duck Restaurant cooks their ducks by hanging them over a roaring fire in a huge wood fired oven.  I took one look at the ducks browning over the fire, and I knew I had to try it myself.
*If you've enjoyed Tony's books and TV shows, you might want to check this out.  His...well, warped sense of humor is in full view in: Anthony Bourdain's Alternate Universe.  It's the Tony Bourdain cartoon!  Just don't say I didn't warn you about the "warped" part...

Recipe: Rotisserie Peking Duck

Equipment

  • Grill with Rotisserie attachment (I use a Weber Summit with an infrared rotisserie burner. Here is the current version of my grill.)
  • Aluminum foil drip pan (9"x13", or whatever fits your grill. I use an enameled steel roasting pan.)
  • Butchers twine
  • Instant Read Thermometer

Ready to stuff the cavity

Trussed, spit, and ready for the grill

Done, ready to carve

Carved and ready to serve

Notes:
*I serve this with a side of white rice and a stir-fried vegetable or two.  Any leftover sauce is great drizzled on the rice.

*For Peking duck in the style of your local Chinese restaurant,  you should also serve Chinese pancakes and scallion shreds on the side.  You should be able to find the pancakes at your local asian market.

Questions? Suggestions?  Ideas?  Leave them in the comments.

Related Posts:
Rotisserie Duck
Stir Fried Bok Choy
Basic White Rice

Click here for my other rotisserie recipes.

Adapted From: Steven Raichlen's Rotisserie episode of "Primal Grill"


Check out my cookbook, Rotisserie Grilling.Everything you could ask about the rotisserie,
plus 50 (mostly) new recipes to get you cooking.

It's a Kindle e-book, so you can download it and start reading immediately!


*Enjoyed this post? Want to help out DadCooksDinner? Subscribe to DadCooksDinner using the RSS or Email options on the right, link to this post from your blog, recommend DadCooksDinner to your friends, or buy something from Amazon.com through the links on this site. (Like my Rotisserie Grilling cookbook...)

Lentil stew, Umbrian style

November 17, 2009 by Mike Vrobel 1 Comment

This recipe is another example of how to vary the flavor profile of a dish.  I'm using the basic technique from my Lentil Dal stew.  We'll change the flavor from Indian to Italian by switching some of the aromatics and spices.
*Oh, and by adding a little pancetta.  You can never go wrong when you add a little bacon to your beans.


I also get to use some fennel from my CSA box.  Only a few more bulbs to go!

Recipe: Lentil Stew, Umbrian Style

Ingredients:

  • 1 slice pancetta, diced (or 2 slices thick-cut bacon)
  • 1 tablespoon olive oil
  • 1 onion, diced
  • 1 fennel bulb, diced
  • 1 teaspoon kosher salt
  • 4 cloves garlic, minced or pressed
  • pinch hot red pepper flakes (optional)
  • 2 sprigs fresh thyme
  • 1 small sprig fresh rosemary (No more than 4 inches long)
  • 1 lb lentils, (preferrably Umbrian Lentils or Lentils Du Puy) picked over and rinsed
  • 4 cups water
  • 4 cups chicken stock (Homemade stock, please.  If you don't have homemade, use water instead)
  • salt and pepper to taste

Directions:
1. Sort and rinse the lentils: Spread the lentils on a sheet pan, and sort through them, removing any stones or twigs you find. Pour the lentils into a colander, and rinse them with cold water.


2. Brown the pancetta: Put the pancetta in a dutch oven or large saucepan, and put the pan over medium heat.  Cook the pancetta, stirring, until it is getting crisp, about 5 minutes.
*Starting the pancetta in a cold pan will help it render more of its fat, which we use to saute the aromatics in the next step.

3. Saute the aromatics: Add the olive oil, and let heat for a minute, then add the onion and fennel and a teaspoon of salt. Cook, stirring occasionally, until softened but not browned.  This should take another 5 minutes.

4. Add the spices: Make a hole in the middle of the vegetables and add the garlic and hot pepper flakes. Cook until fragrant, 30 seconds to 1 minute, then stir into the vegetables. Add the thyme and rosemary, and stir into the vegetables.

That's a quart of frozen chicken stock.  I thaw it in the pan, and then make sure I bring it to a boil for a full minute before simmering.

5. Cook the lentils: Add the lentils to the pan and stir to combine with the vegetables. Add the water and stock, and scrape any browned bits fro the bottom of the pan.  Bring to a boil over high heat.  Reduce the heat to low and simmer for 20-30 minutes, stirring occasionally, until the lentils are tender.  Remove the thyme and rosemary sprigs. Add salt and pepper to taste, and serve.

Variations:
*Add sliced mushrooms with the aromatics, and cook for another 3-5 minutes (the mushrooms will release a lot of liquid)

*Add a 15 ounce can of diced tomatoes with the lentils

*To make this more of a soup than a stew, add another 4 cups of chicken stock or water

*A squeeze of lemon juice, or some balsamic vinegar are good flavoring options, as is passing some pecorino romano or parmesan cheese for grating at the table.

Notes:
*Serve with pasta (I like orzo for this) for a quick meal.  Or, serve it with rice.  Rice and lentils are always a good combination.

*Umbrian lentils are a specific type of lentil, grown in Umbria, Italy.  If you can find them at your local Italian market, they're the best choice for this recipe.  If not, Lentils du Puy from France are your next best bet, and are more widely available.

*My kids will eat this!  Natalie loves it, and Timmy will eat it about 50% of the time. (Ben just eats the pasta or rice.  As Meat Loaf said, Two Out Of Three Ain't Bad.)
*Yes, I have a soft spot for cheesy, operatic rock.  Don't let that deter you from trying my recipes; my cooking is much better than my taste in music.

Related posts:
Lentil Soup, Dal Style

Inspired by:
The Umbrian lentils at Carrie Cerino's, where we celebrated  Diane's Grandfather's birthday party.  They wouldn't give me the recipe.  Not even a hint to what the ingredients were.  I had to search the internet to find out what goes into Umbrian lentils.

Questions? Comments? Other ideas? Leave them in the comments section below.

*Enjoyed this post?  Want to help out DadCooksDinner?  Subscribe to DadCooksDinner using the RSS or Email options on the right, link to this post from your blog, recommend DadCooksDinner to your friends, or buy something from Amazon.com through the links on this site.  Thank you!


Things I Love: All-Clad Stainless Cookware

November 16, 2009 by Mike Vrobel 1 Comment


Things I Love: All-Clad Stainless Cookware
[Update: For information on the latest All-Clad Factory Sale, Click Here: AllClad Information.]
[Update 12/29/2009: All Clad contacted me after this post to test their new d5 Stainless cookware.  I like it even better than the regular stainless line I talk about below.  I don't know how they did it - they made the best pans I own even better.]


I was introduced to All-Clad by (who else) Alton Brown, and by Cooks Illustrated's many positive reviews. My cooking ability jumped at the same time I bought my first pan All-Clad pan, way back in 1999.
Three quart saucier.

Part of that was my learning the craft of cooking, but part of it was having high quality pans for the first time.
That is, my first pans that were not copper bottomed RevereWare. (Shudder.)  If you give those pans a meaningful stare, they develop a hot spot. Not that I'm bitter about that burnt pot roast in 1996. Or the burnt chili in 1995. Or…no, really, I'm over it. Why do you ask?

Why do I love All-Clad stainless steel cookware? They have the best combination of quick, even heating, durability, and ease of cleaning. To explain why, I have to digress into a little metallurgy.
Doesn't cooking take you in wonderful directions?

Aluminum is lightweight, and heats evenly because it is conducts heat very well. Unfortunately, it also scratches easily, and turns really interesting colors if you put it in a dishwasher. Worse, it is reactive with acidic foods, and gives them a metallic taste.
That's not good for, say, a tomato sauce.

Stainless steel is very durable, and non-reactive with acidic food, but it is a terrible conductor - heat doesn't disperse at all. Hence my problem with hot spots on the Revere copper bottom pans - they're stainless steel with a thin layer of copper to make them look nice.
To complete the metallurgy discussion: Copper is an even better conductor than aluminum, but is very heavy and very, very expensive. Cast iron is almost the opposite - it is such a poor conductor that it holds onto heat very well. It takes a long time to heat, but once it's heated, it dishes out the heat for a long time as well.  But it rusts easily, and is also reactive with acidic foods.

Cookware manufacturers solve this dilemma by using both aluminum and stainless steel in their pans. Cheaper pans put a disc of aluminum on the bottom of a stainless pan. All-Clad solves this problem by making the basic shape of the pan in aluminum, then "cladding" it in a thin layer of stainless steel.
Hence the name All-Clad. It is an aluminum pan, entirely clad in stainless steel.

I think you can do 99% of your cooking with the following set of four pans:
All-Clad Stainless 12 Inch Fry Pan with Lid

All-Clad Stainless 12 Inch Nonstick Fry Pan
Note - the 12" nonstick is on sale at Williams-Sonoma for $100 with a lid

All-Clad Stainless 8 Quart Stockpot
Really, this is a dutch oven, but you can use it as a stock pot if you need to

All-Clad Stainless 4 Quart Saucepan

If you want just a little bit more:
I got by with just those pans for years, and really, you don't need any others. But...I've expanded my batterie de cuisine, and it includes the following pans that I use often:
All Clad Stainless 3 Quart Saucier
This was the first pot I bought from All-Clad. I think the 4 quart saucepan is more versatile, but I do still love this pot.  Anything that needs to be whisked works better with the flared sides.

All-Clad Stainless Roasting Pan


All-Clad 13 Inch Nonstick French Skillet
*With a lid from their 6 quart saute pan, this is my go-to stir-fry pan.


All-Clad Stainless 12-Quart Multi Cooker with Steamer Basket
*My pasta pot.  Just don't use the pasta insert; it's a waste of water.  The steamer basket is nice, though.

All-Clad Stainless 6 Quart Stockpot
*I probably don't need this one and the 8 quart stock pot, but I got such a deal on it at the All-Clad factory sale, I couldn't pass it up.  I find myself using it more than the 8 quart, which only comes out if I'm making a double batch of something like chili.

All-Clad Stainless 10 Inch Fry Pan

All-Clad Stainless 2 Quart Saucepan

What I wish I had:
All-Clad Stainless 13-Inch Braiser Pan

All-Clad Stainless Flared Roasting Pan

What I wish they made:
Nonstick sauce pans. All-Clad doesn't make them for some reason. I love my Calphalon Nonstick 4-½-Quart Saucepot.

A lid for their 14" fry pans. I like the extra space and helper handle on their 14" fry pans, but they're not as useful without a lid.

Wow, that's expensive:
Now, at this point, you probably have your calculator out. "But, Mike, that's…that's over a thousand dollars worth of cookware! Are you nuts?"
Well, yes. But not about my cookware. Because, if you live in Northeastern Ohio, have I got a deal for you.

All-Clad Factory Sale:
All-Clad's factory is located in Canonsburg, Pennsylvania. Twice a year, on the first weekend in June and December, All-Clad holds a factory seconds sale at the Washington County Fair and Expo Center. It's about a two hour drive from the Akron area. You get prices from 40% to 70% off on factory seconds. In most cases, the damage is just cosmetic; a little scratching on the stainless, or a lid handle that's a bit offset from center.

They have most of their line of cookware available, but not all, and some favorites (like the 12" stainless fry pan, and its lid) are hard to find. Overall, though, it's an amazing value.  Make sure you get there early - there can be up to an hour wait.
[h/t Garden, Grocery, Gadget Girl for reminding me the sale's coming up in two weeks.]

Questions? Comments? Other ideas? Leave them in the comments section below.

*Enjoyed this post?  Want to help out DadCooksDinner?  Subscribe to DadCooksDinner using the RSS or Email options on the right, link to this post from your blog, recommend DadCooksDinner to your friends, or buy something from Amazon.com through the links on this site.  Thank you!

Grill Roasted Fennel

November 10, 2009 by Mike Vrobel Leave a Comment

I just got my last CSA box for the year from the Crown Point Ecology Center CSA.  This post is in honor of all their hard work, and all the vegetables they gave me and Pam this year.
*Pam and I split a CSA share.  Hi, Pam!

I was picking up my vegetable share a few weeks ago, and I was happy to see that the fennel was in.  It's one of my favorite vegetables to grill.  Then I looked in the "adopt a vegetable" bin as I was leaving, and saw another six bulbs.  I couldn't help myself - I grabbed them all.

When I got home, I shot Pam an email:

MikeV: I got the share today, and I hit the jackpot.  Lots of fennel this week!

Pam: Fennel?  I'm glad you got it.  What do you do with fennel?

What do you do with fennel?  Let me tell you...

Recipe: Grill Roasted Fennel
Equipment:

  • Grill (I used a Weber Summit 650. Here it is.)

Ingredients:

  • 2 large fennel bulbs
  • Olive oil
  • Salt and Pepper

Directions:
1. Prepare the Fennel: Trim the root end of the bulb, and the stalks on the top. Cut the bulb in half. Sprinkle evenly with the salt and pepper, and drizzle with the olive oil.

2. Prepare the grill: Set your grill up for indirect cooking at medium to high heat. For my Weber Summit, this means turning the two outer burners (burners 1 and 6) to high, and leaving the middle burners unlit.

3. Sear, then Roast the Fennel: Put the fennel, cut side down, over the direct heat part of your grill, and grill for 3-6 minutes, or until you get some good grill marks.  Move the fennel over the unlit burners (indirect heat), flip so the cut side is up, and cook with the lid closed for 30 to 45 minutes.  The fennel is done when it can be pierced easily with a paring knife.
*The thick inner core takes longer to cook than the outer leaves - give it time and you will be rewarded.


4. Serve: Remove from the grill, cut each half a bulb into 4 wedges, and serve.

Variations:
Skip the direct heat: If you don't want to mess with it, cook the fennel using indirect heat the whole time.  Give it 45 minutes to an hour to get nice and soft.

Over direct heat: If you are in a hurry, you can cook the fennel directly over the flame.  Instead of cutting the fennel in half, cut it into ½" slices.  Cook the slices over medium heat for about 8 minutes a side, rotating a quarter-turn after 4 minutes to get diamond grill marks.

Grilled Fennel and Orange Salad: Peel and orange and section it over a bowl, to catch the juices.  Use the juices to make a vinaigrette, and toss the grilled fennel and orange sections in the vinaigrette.

Notes:
Fennel has a strong licorice taste.  When it's raw, that taste can be overpowering, but cooking the fennel softens that taste, gives it a sweet taste with a hint of licorice.

Grilled fennel makes a great addition to a tossed salad, or go with the Orange-Fennel salad in the variations.

The fronds make a great herb, with a strong licorice taste. Since I was cooking them at the same time, I used some in stuffing my grilled trout.

Questions? Comments? Other ideas? Leave them in the comments section below.

Related Posts:
Grilled Asparagus
Grilled Mashed Sweet Potatoes
Grilled Beets

Inspired by:
Picture of grilled fennel on Another Pint Please... [anotherpintplease.com]
As usual, his picture is what I wish mine looked like...

Enjoyed this post?  Want to help out DadCooksDinner?  Subscribe to DadCooksDinner using the RSS or Email options on the right, link to this post from your blog, recommend DadCooksDinner to your friends, or buy something from Amazon.com through the links on this site.  Thank you!

Grilled Mashed Sweet Potatoes

November 9, 2009 by Mike Vrobel Leave a Comment

Sweet potatoes have a particular affinity for the grill. The long, hot cooking caramelizes the sweet potatoes, and they get a touch of smoky flavor as well. They make a great mashed sweet potato.

I like to play on the smoky taste by adding a little chipotle puree.* Also, I love the touch of heat chipotle brings to the dish - it goes really well with the sweet flavor of the potato and brown sugar.
*I learned this trick from Alton Brown.

Grilled mashed sweet potatoes are a great side dish. If you're going to have the grill going for an hour to cook a roast, why not throw some sweet potatoes on there while you're at it?

Recipe: Grilled Mashed Sweet Potatoes

Cook time: 60 minutes

Equipment:

  • Grill (I used a Weber Summit 650. Here it is.)

Ingredients:

  • 2 large sweet potatoes
  • 1 tablespoon brown sugar
  • 1 tablespoon butter
  • 1 teaspoon pureed chipotle pepper (optional)
  • Salt and Pepper

Directions:
1. Prepare the Sweet Potatoes: Rinse off the sweet potatoes, and poke them with a fork a few times.


2. Prepare the grill: Set your grill up for indirect cooking at medium to high heat. For my Weber Summit, this means turning the two outer burners (burners 1 and 6) to high, and leaving the middle burners unlit.

Bubbles of sweet pototo carmelizing on the outside are a good sign that they're done

3. Cook the Sweet Potatoes: Put the sweet potatoes over the unlit burners (indirect heat) and cook with the lid closed for 45 minutes to 1 hour, depending on the thickness of your sweet potato. They're done when they can be pierced easily with a paring knife.
*They're almost impossible to overcook. When in doubt, cook them longer. You want absolutely no resistance when you poke the sweet potato - the knife should glide right through.

4. Mash the Sweet Potatoes: Remove the sweet potatoes from the grill, and let rest for 5-10 minutes to cool.  Cut in half, and remove the skin. (This works best for me if I put them cut side down on a plate and squeeze the skin off; it lifts right off the potato.) Put the potatoes in a bowl, add the sugar, butter and optional chipotle pepper. Mash and stir until thoroughly combined. Add salt and pepper to taste.

Variations:
*Maple syrup: substitute 2 tablespoon maple syrup for the brown sugar.

*Cinnamon: Add ½ teaspoon of cinnamon with the brown sugar, butter and chipotle.

*Marshmallows: Don't do it!
*OK, if you insist, top with some mini-marshmallows…

*Over direct heat: If you don't have room for indirect heat, you can cook the potatoes directly over the flame. Cook them over medium heat, rotating a quarter turn every 15 minutes, and expect some of the outside of the potato to be burnt. When you're mashing them, just scoop the unburnt middle of the potato out.
*Steven Raichlen has an extreme version of this.  Forget indirect grilling.  Forget direct grilling, even.  He cooks his sweet potatoes in the coals of a charcoal fire.

Notes:
*This is one of my favorite Thanksgiving side dishes.  I'll make a double or triple batch earlier in the day, and reheat them for Thanksgiving dinner.  I put them in a oven-safe baking dish, cover with foil, and reheat at 350*F for about 30 minutes, or until warm in the center.

*If you like smooth sweet potatoes, puree them in a food processor instead of mashing. I like them a bit more rustic, so I go with the potato masher. Unlike regular potatoes, sweet potatoes can be pureed in a food processor - you get a smooth puree, not a gluey, gummy mess.

*Sweet potatoes are almost impossible to overcook; they just get sweeter. A little blackened outside, like you see in my pictures, is just good flavor - it gives the mashed sweet potatoes a smoky taste. If you do manage to burn the outside, scoop the un-burnt section out of the middle of the potato.

Questions? Comments? Other ideas? Leave them in the comments section below.

Related Posts:
Grilled Asparagus
Grilled Fennel
Grilled Beets

Inspired by:
Jaime Purviance - Mashed Sweet Potatoes with Grilled Onions - Weber's Big Book of Grilling

*Enjoyed this post?  Want to help out DadCooksDinner?  Subscribe to DadCooksDinner using the RSS or Email options on the right, link to this post from your blog, recommend DadCooksDinner to your friends, or buy something from Amazon.com through the links on this site.  Thank you!

Slow Cooker White Beans with Greens and Italian Sausage

November 3, 2009 by Mike Vrobel 2 Comments

When fall arrives, and the weather starts to get cold, I crave stews.  Especially hearty, bean based stews, with big flavors.  This recipe fits the bill - white beans, sausage and kale make for a perfect dinner on a crisp, fall day.

This recipe was inspired by a recent article in Bon Appetit, on how to use a pot of white beans to make five different dinners.  While I loved the article, and enjoy reading Bon Appetit, I didn't post this article right away.  I think I'm having second-hand survivor's guilt.  Why did they close down Gourmet magazine?  Why?  Sure, the recipes in Bon Appetit were more practical.  But the food writing in Gourmet was second to none.  I loved the editorial direction that Ruth Reichl used.  Rest in peace, Gourmet.  Come back soon, if you can.
Hey, it worked for Christopher Kimball and Cook's Illustrated...
**PS: Mr. Kimball?  Interesting article, but I have to say that blaming people like me, who are some of your biggest fans, for the demise of a magazine that we loved dearly...well, maybe that isn't a good idea.  And the comment about "true expertise" at the end?  I'm self taught home cook, in large part thanks to the help of your magazine, and I'm proud of it.  Other than that, keep up the good work - love your magazines, TV shows, books... 
***PPS: Sorry about the digression.  That one's been bothering me for a while.
****PPPS: Update 11/4/09 - I think Russ Parsons hit the nail on the head about Gourmet's demise: Apres Gourmet: Food magazines find their niches [latimes.com]

Recipe: Slow Cooker White Beans with Greens and Italian Sausage
Equipment:

  • 6 quart or larger slow cooker (Crock Pot brand is fine, but I like my fancy ones from All-Clad and KitchenAid)

Ingredients:
Slow Cooker Beans

  • 1 lb. dry cannellini beans (or great northern, navy, or other white bean)
  • 1 medium onion, trimmed and peeled
  • 3 cloves garlic, crushed
  • 1 sprig of fresh rosemary (3-4" long)
  • 1 teaspoon salt
  • 2 quarts water

Sausage, Aromatics and Greens

  • 1 lb. mild italian sausage, cut into 1 inch pieces
  • 1 tablespoon olive oil
  • 1 medium onion, diced
  • ½ teaspoon salt
  • 2 cloves garlic, minced or pressed
  • pinch red pepper flakes (optional)
  • 1 cup homemade chicken stock (or water, or bean cooking liquid)
  • 2 pounds kale, stemmed, rinsed and sliced into (or other tough green, like turnip or mustard greens)

Garnishes

  • Balsamic Vinegar
  • Parmesan for grating (Pecorino romano is a good substitute)

Directions:
1. Cook the beans: Put the beans in a pot, cover with 2 inches of water, and bring to a boil. Boil for ten minutes, then drain. Transfer the beans to your slow cooker, and add the onion, garlic, rosemary, salt and water into the slow cooker.  Cook on low for 6 to 8 hours.
*See my Basic Technique: Slow Cooker Beans for more details on this step.

2. Brown the sausage: Heat a dutch oven over medium-high heat for 1-2 minutes, then add the sausage.  Cook for 3 minutes a side, or until well browned, then remove to a bowl.  (The sausage will not be cooked through at this point; we'll finish cooking it in step 5).

3. Saute the aromatics: If you have more than 1 tablespoon of fat left in the pot from the sausage, pour it off.  Reduce the heat to medium, add the olive oil, and heat until the oil starts shimmering. Add the onions, sprinkle with the salt, and cook until softened, about 5 minutes. Make a hole in the center of the pan and add the garlic and red pepper flakes; cook until you can smell the garlic, about 30 seconds to 1 minute.


4. Simmer the greens: Add the cup of stock to the pot, and scrape any browned bits from the bottom of the pot.  Add the greens to the pot, cover, and increase the heat to high. Bring to a boil, then reduce the heat and simmer, covered, for ten minutes.

5. Simmer the sausage and beans: Pour the sausage (and any juices they released) into to the pot.  Add the cooked beans and just enough of the bean liquid to cover.  Stir to combine with the greens, bring to a simmer, and simmer for 10 minutes with the lid off, scraping the bottom occasionally to prevent burning.  Taste for seasoning, adding salt, pepper, lemon juice or balsamic vinegar as needed.

5. Serve: Serve, passing the balsamic vinegar and parmesan at the table, as a garnish.

Variations:
Leftover beans - use 4-6 cups of frozen bean and their liquid. (You do make extra beans for later, don't you?)

Canned beans - use three cans of cannellini beans, drained, instead of the slow cooker beans, and add chicken broth or water instead of the bean liquid.

Tender greens - if you have chard or spinach, skip the simmering step; put the chopped tender greens in the pot, then immediately add the beans.

Vegetarian - this makes a great vegetarian recipe if you skip the sausage, and use bean liquid or water instead of the chicken stock

Notes:
Serve with a salad made of spring mix and a vinaigrette, and with some crusty bread for dipping.

I think of this as Chili, Italian style.  It's the same technique I use when I make chili; I'm just using a different set of spices to give it an Italian flavor profile.

I usually cook two pounds of beans when I make this recipe, use half, and freeze the other half for later use.

Questions? Comments? Other ideas? Leave them in the comments section below.

Related Posts
Basic Technique: Slow Cooker Dried Beans
Slow Cooker Red Beans and Rice
Slow Cooker Caribbean Black Beans

Inspired by:
In Praise of Peasant Cooking: Lori De Mori [bonappetit.com]
The 7 Rules of the Italian Kitchen: Lori De Mori [bonappetit.com]

Enjoyed this post?  Want to help out DadCooksDinner?  Subscribe to DadCooksDinner using the RSS or Email options on the right, link to this post from your blog, recommend DadCooksDinner to your friends, or buy something from Amazon.com through the links on this site.  Thank you!

Rotisserie Turkey Breast, Dry Brined

October 29, 2009 by Mike Vrobel 28 Comments

A turkey breast on a grill's rotisserie, with a lit rotisserie burner in the background.

Rotisserie turkey breast is the easiest rotisserie recipe I have.  Yes, I know that cooking on the rotisserie is a bit of a hassle.  You have to hook up the motor, truss your meat, skewer it, and find someplace to put the searingly hot spit when you're done.  Why do I go through all that?  Results.  Rotisserie cooking just works better than roasting.

A turkey breast on a grill's rotisserie, with a lit rotisserie burner in the background.
Rotisserie Turkey Breast

Look at the skin in the picture!  Rotisserie cooking gives you perfect browning, and browning is the maillard reaction giving you flavor.  Also, the meat just seems juicier after I've cooked it on the rotisserie.

I love cooking a whole turkey, but it's a lot of meat.  If I'm just feeding my wife and the kids, then a turkey breast is a more reasonable amount to cook.  Even so, it's still a lot of food.  I plan a few extra meals around the leftovers.
*If you're like me, then the leftovers are the best part of Thanksgiving.  With this recipe, you can have those leftovers whenever you want.

Turkey breast can be pretty bland, so we're going to use a dry brine, inspired by Judy Rodgers of San Francisco's Zuni Cafe.  The dry brine seasons the breast and deepens the turkey flavor.  It's impressive how such an easy technique improves the results.  All you need is time - you have to salt the breast at least a day ahead.

Dry brining has been the secret to a couple of my other recipes, and I've started to prefer it to the wet brine I used to use all the time.  Just don't use it with pork; it doesn't work as well as a traditional brine.  See my When should you salt meat? article for the details.

Turkey Breast Tips

  • Serve with rotisserie pan potatoes and a salad, and you have an easy, healthy meal.  Mashed sweet potatoes are another great accompaniment.
  • As I mention in the recipe, the key is to cook the breast to 160*F - turkey breast is so lean, that it goes from juicy to terribly dry at just above 165*F.  You really need an instant read thermometer to tell if your turkey breast is cooked.
  • Leftovers make wonderful turkey sandwiches.  I will cook this recipe just to get the leftovers, really; it gives me meat for sandwiches and soup all week.
  • Speaking of soup, use the carcass to make turkey stock, then make some turkey noodle soup.
Carved and ready to serve

What do you think?  Questions?  Other ideas?  Leave them in the comments section below.

Related Posts

Rotisserie Pan Potatoes are a great side dish to cook with this recipe.
Rotisserie Turkey Breast with Spice Rub
Rotisserie Turkey, Dry Brined with Orange and Spices (The whole bird on a charcoal grill)
Rotisserie Turkey with Cajun Dry Brine (The whole bird on a gas grill)

Click here for my other rotisserie recipes.

Inspired by:
Russ Parsons, It's the turkey everyone loves [latimes.com]
Judy Rodgers, The Zuni Cafe Cookbook


Check out my cookbook, Rotisserie Grilling.


Everything you could ask about the rotisserie,
plus 50 (mostly) new recipes to get you cooking.

It's a Kindle e-book, so you can download it and start reading immediately!


*Enjoyed this post? Want to help out DadCooksDinner? Subscribe to DadCooksDinner using the RSS or Email options on the right, link to this post from your blog, recommend DadCooksDinner to your friends, or buy something from Amazon.com through the links on this site. (Like my Rotisserie Grilling cookbook...)

Things I Love: Thermapen Instant Read Thermometer

October 27, 2009 by Mike Vrobel 2 Comments


Things I Love: Thermapen Instant Read Thermometer

I consider an instant read thermometer an essential kitchen tool.  You need an instant read thermometer to correctly answer the question "is it done?".  Particularly for meat.  Why?  Because the most accurate way to check doneness is to take the internal temperature at the thickest part of the meat.  That accuracy can be the difference between medium rare and medium well beef, or the difference between juicy and dry turkey breast.
*Is it done?  Here's my quick cheat sheet for internal temperatures of meat.
125*F - Beef - Medium Rare
140*F - Pork - Medium
160*F - Poultry - Well done

The Thermapen Instant Read Thermometer by Thermoworks is the best instant read thermometer out there.  Many thermometers call themselves instant read, but the Thermapen is the only one that really is instant read. You get the temperature in four seconds, instead of the 30 seconds or so that other "instant read" thermometers take.
*Why?  The Thermapen has a thermocouple in its tip, instead of a thermistor.  Why does that matter?  I don't know.  I have to rely on the experts: Go here to see what a thermocouple means in performance vs. a thermistor.

The only downside to the great performance you get out of the Thermapen is the price.  At $89, it is much more expensive than other instant read thermometers.  I've bought a bunch of those other thermometers, looking for a less expensive alternative, and I've been sorely disappointed.  If my Thermapen broke tomorrow, I'd immediately pay for a new one, and I'd pay extra for overnight shipping.  It's one of the few cooking tools that I bring with me on vacation*, because I feel naked without it.  I hate having to guess what's going on inside a roast, when I'm used to being able to check instantly.
*While I believe that adaptability is the key to successful cooking, I do have my "bring if at all possible" list: A chef's knife, a paring knife, a cutting board, a pair of tongs, my Thermapen, and (if I'll be able to grill), my kettle grill and charcoal chimney.  

What do you think? Comments? Other ideas? Leave them in the comments section below.

[Updated 12/8/2009 - The original Thermapen has been replaced by their new splash-proof model.  I don't have one yet, but Cooks Illustrated says it is as good as the old one.]
Splash-Proof Super-Fast Thermapen - Instant Read Thermometer

*Enjoyed this post?  Want to help out DadCooksDinner?  Subscribe to DadCooksDinner using the RSS or Email options on the right, link to this post from your blog, recommend DadCooksDinner to your friends, or buy something from Amazon.com through the links on this site.  Thank you!

Iced Sweet Tea

October 26, 2009 by Mike Vrobel 4 Comments

I discovered sweet in Charlotte, NC. I'm a Northerner, and I didn't know that sweet tea (pronounced "Sweetea") is the default. You have to ask for "unsweet". And, boy, they were right about "sweet" - I wasn't expecting that much sugar. (I wasn't expecting ANY sugar.)

Which brings me to another installment in my "favorite sentences in recipes" series.  This one is from Jaime Purviance, in his recipe for iced tea in Weber's Big Book of Grilling:

If you want a sweet batch, add about 3 tablespoon of sugar to the boiling water.  If you're from the south, pour it on until it feels right.

Sweet tea is the perfect drink to have with barbecue. (Non-alcoholic category). But, as good as it is, I only made sweet tea at home about once a summer. Making a big batch is a fair amount of work: boiling a gallon of water, steeping a lot of tea bags, waiting for it to cool down…it's a lot of work for something that seems so simple.

Then I saw this recipe on TheKitchn a couple of months ago. Now I drink iced tea almost every day; I make this recipe about twice a week.  Why do I love it? Because you don't boil all the water! You make a very concentrated, 2 cup base of tea and sugar, and fill the rest of a gallon pitcher with water to make your tea. This gets around all the work; if you don't have to deal with a gallon of boiling water, suddenly the recipe is effortless.

I've adapted the recipe to my northerner tastes (more tea, less sugar), and my limitations in equipment (no gallon pitcher - only 2 quarts). Enjoy!

Steeping the tea

What do you think?

Questions? Comments? Other ideas? Leave them in the comments section below.

Related Posts:
Iced tea is the perfect drink with barbecue:
Barbecued chicken pieces
Rotisserie spare ribs, dry rubbed

Inspired by:
Kathryn Hill: How to Make Sweet Tea [thekitchn.com]
Jamie Purviance: Weber's Big Book of Grilling

Enjoyed this post?  Want to help out DadCooksDinner?  Subscribe to DadCooksDinner using the RSS or Email options on the right, link to this post from your blog, recommend DadCooksDinner to your friends, or buy something from Amazon.com through the links on this site.  Thank you!

Grilled Trout, Herb and Citrus Stuffed

October 22, 2009 by Mike Vrobel 2 Comments

Grilled whole trout is a great recipe if you prefer mild fish, or fish with a subtle flavor.
Like, say, my kids.

This is a very impressive presentation - serving a whole fish per person is quite a show.  The only downside is the fish head - some people don't like their dinner staring back at them.
You can always cut the head off if you're squeamish.  Or have your fishmonger do it for you.

For all that presentation value, it's a simple recipe, and pretty foolproof - stuff the whole trout, only flip it once, carefully, and you're done.  Best of all, the result is a very hands-on meal - you have to remove the fish fillets from the skeleton, and while trained waiters can do this with only two spoons, for me it involves a playing with my food.
*Why just eat, when you can get your hands on the food?

Recipe: Grilled Trout, Herb and Citrus Stuffed

Ready to grill!

Equipment:

  • Grill (I used a Weber kettle, like this one.)
  • Large spatula or fish turner (I like this spatula, and this fish turner).


Ingredients:

  • 2 Whole Trout, cleaned and scaled, bone-in, about 12 oz each
  • kosher salt
  • fresh ground black pepper
  • ½ lemon, sliced thin
  • 4 sprigs thyme
  • 4 sprigs parsley

Directions:
1. Prepare the grill: Prepare your grill for cooking with direct, medium-high heat, then clean with your grill brush. For my Weber kettle, I light a chimney starter* ¾ full of charcoal, wait for it to be covered with ash, then pour it evenly over one side of the grill grate. This gives me half the grill on the heat, and half off the heat.
*I highly recommend the Weber Chimney Starter, because it is larger than most chimney starters. It holds 5 quarts of charcoal, which is exactly the right size for cooking this recipe.
**If cooking on a Gas grill, preheat to medium-high and cook with the lid closed.  Other than that, follow the rest of the instructions.

Coals for medium-high heat


2. Stuff the Trout: Meanwhile, pat the trout dry with paper towels, then sprinkle evenly inside and out with the salt and pepper. Open the trout's cavity, and stuff with a layer of lemon slices, 2 sprigs of thyme and 2 sprigs of parsley.

3. Cook the Trout: Cook on direct medium-high heat for 6 minutes a side.  Put the trout on the grill, over the heat, and cook, uncovered, for 5-6 minutes.* Don't mess with the trout - leave it be. After 6 minutes, it should be well browned on the bottom. Carefully flip the trout, flipping over the backbone so you don't dump the stuffing into the grill. Cook another 5-6 minutes, then check for doneness - peek in the cavity and make sure the trout is cooked in the very middle. Remove from the grill to a serving platter.
*The key to this recipe (and cooking fish in general) is not to mess with it - it tends to break apart. That's why you want only one flip.

4. Serve the Trout: Serve the trout whole, with a wedge of lemon and some extra salt for adding at the table.  See the notes for instructions on removing the bones from the trout.

Variations:
Citrus: Oranges, lemons and limes all work well in this recipe, or use a mix.

Herbs: Different herbs also work well in this recipe.  Use whatever you like!  In the pictures, you can see the fennel fronds that I used, because I had some lying around.

Mexican style: Sprinkle the trout with Ground Ancho chile powder instead of the pepper.  Stuff the trout with lime slices, thinly sliced onion, and sprigs of cilantro.

Fish camp style: Put two pieces of bacon between paper towels, and microwave for 1 minute.  After stuffing the trout, wrap each with two slices of bacon.  Cook as directed.

Notes:
I like cooking this recipe with whole fish, scaled and gutted only, for three reasons.  First, fish with the bones cook up juicier than fish that has been boned.  Second, I like the presentation of a whole fish with the head on.   It just looks good.  Finally, as I said in the opening, I like the chance to play with my food, and I love to skin and bone my fish myself at the table.

But...if you want it easier, or can't find bone-in fish, get two fillets (or a whole boned trout), put the stuffing between the fillets, and tie them shut with three pieces of butcher's twine.  Only cook for 5 minutes a side instead of six, because the fillets will cook quicker without the bones.

What do you do with that whole fish?  Here's the process for deboning:

  1. Cut the head off of the fish (I use a large spoon for all of these operations on the fish; with a cooked trout, you can cut with the edge and lift with the bowl of the spoon.)
  2. Peel the skin from the top of the fish (gently...)
  3. Run a spoon down the top of the spine, along the back of the fish, to separate the fillet from the spine.
  4. Gently work a spoon under the fillet, and lift the top fillet from the skeleton.  If you lift gently but firmly, you will leave the bones of the skeleton behind, and have the top fillet in two or three large pieces.
  5. Using your spoon, cut the tail off of the fish.  Then, grab the spine of the fish at the tail and, gently but firmly, lift it away from the bottom fillet.  This will leave you with the bottom fillet intact.
  6. Lift the bottom fillet off of the skin (or, eat it as is.)

*That doesn't make sense?  Watch Alton Brown's Hook, Line and Dinner episode to see how to do it.  The serving demonstration starts at 8:10 into this video.  It's a bass, but the technique is the same for a trout, just smaller.

Questions? Comments? Other ideas? Leave them in the comments section below.

Related Posts:
Click here for my essay on Sustainable Seafood
Grill Smoked Salmon
Grilled Barramundi
Grilled Corn is a great side dish to serve with this recipe

Inspired by:
Jaime Purviance: Weber's Big Book of Grilling

*Enjoyed this post?  Want to help out DadCooksDinner?  Subscribe to DadCooksDinner using the RSS or Email options on the right, link to this post from your blog, recommend DadCooksDinner to your friends, or buy something from Amazon.com through the links on this site.  Thank you!

Grill Smoked Salmon

October 20, 2009 by Mike Vrobel 7 Comments

Side of grill smoked salmon on a sheet of foil

Grill smoked salmon on a yellow platter
Grill Smoked Salmon

Hot smoked salmon is my favorite appetizer for a crowd.  When I want to show off for a dinner party, this is what I make.  A whole side of smoked salmon is very impressive, particularly when your guests are used to the small, sealed pouches of smoked salmon you can get at the store.
*Yes, I like to show off with my cooking.  You couldn't tell?

This recipe works around some common issues with grilling fish.  It's hard to overcook, because the whole point of grill smoking is to cook the fish until it is well done.  It doesn't stick to the grill.  You cook it with the skin down the whole time, on a homemade foil tray; easy on, easy off.
Finally, it's excellent if you make it ahead of time.  Normally I'm not a fan of "leftover" fish - I want it hot off the grill.  This recipe tastes just as good, if not better, if it's been in the refrigerator for 24 hours.

Side of salmon on a piece of aluminum foil
Brined and on its foil tray, ready for the grill

Ready to cook: fire with smoking wood on one side, salmon on the other

Grill Smoked Salmon

What do you think?

Questions? Comments? Other ideas? Leave them in the comments section below.

Related Posts

Other grilled fish recipes: try my Grilled Trout, Herb and Citrus stuffed, Grilled Salmon with Coriander-Fennel Spice Rub, or Grill Smoked Trout. For other ways to cook salmon, try Cedar Plank Salmon, Sous Vide Salmon, or Sear-Roasted Salmon.
For more grilling recipes, check my Grilling Recipes Index

Adapted from:
Barbecued Hot Smoked Salmon The Cook's Illustrated Guide To Grilling And Barbecue

*Enjoyed this post?  Want to help out DadCooksDinner?  Subscribe to DadCooksDinner using the RSS or Email options on the right, link to this post from your blog, recommend DadCooksDinner to your friends, or buy something from Amazon.com through the links on this site.  Thank you!

Sustainable Seafood

October 19, 2009 by Mike Vrobel Leave a Comment

I've avoided writing seafood recipes for DadCooksDinner.  It's not that I don't love seafood.  I do.  It's that seafood has become an ethical dilemma.

Science magazine published an article saying that, at our current rate of fishing, there will be no wild fish left in 50 years.  Farmed Atlantic salmon uses 3 pounds of wild fish for every 1 pound of of salmon they grow.  Salmon farms also concentrate disease, pesticides, antibiotics, and fish waste, polluting the waters in the area.  Shrimp trawling in asia catches 3 to 15 pounds of other, waste fish for every pound of shrimp caught.  These are just a few examples; if you add in mercury and PCB concerns with seafood, it's a bleak picture.

Does this mean that we should stop eating seafood altogether?  While it is tempting to say "this is too confusing, I'm staying away", that is the wrong way to solve the problem.  We need to use our power as consumers to promote sustainable, environmentally balanced ways of fishing and fish farming.  If we're going to be enjoying seafood in the future, we need to support the fishermen and fish farmers who are doing the right thing.  And we need to push those who aren't doing the right thing in the right direction.
As a Dad who Cooks Dinner, I want my kids to be able to enjoy seafood with their kids in 50 years.

How do we do that?  By becoming educated consumers, and shopping where you have good choices.  If you don't know what's sustainable, then you can't help promote good seafood.  My go to source is the Seafood Watch pocket guide from the Monterrey Bay aquarium.  The pocket guide is a list of Best Choices, Good Alternatives, and Avoid.  Their website has all the details behind those decisions, and is a wonderful resource if you'd like to learn more.
They even have an iPhone App version of Seafood Watch.  I love technology.

When I don't have my seafood guide with me, I have a few fish that I look for:

The Alaskan fisheries are well managed.  Any wild Alaskan seafood is good, particularly my favorite, wild Alaskan salmon.
Mmmm.  Copper River Salmon.

United States farmed trout, catfish and tilapia are all good choices; their farming systems are self-contained, minimizing the environmental problems they cause, and the fish will eat anything, so they don't have to catch wild fish to feed their farmed fish.

Clams and mussels are farmed worldwide in a sustainable manner; in fact, clam and mussel farms are good for the surrounding environment.

Also, look for the Certified Sustainable Seafood label from the Marine Stewardship Council.  They certify fisheries and fish farms that are sustainable.

So please, for all of us, make sure your next fish dinner is sustainable!
And I'll have a few suggestions for recipes during the rest of the week...

Resources:
Seafood Watch: Monterrey Bay Aquarium
Great Lakes Seafood Guide: Shedd Aquarium, Chicago
Certified Sustainable Seafood: Marine Stewardship Council
Alton Brown for Sustainable Alaskan Seafood: Video by my hero!

*Enjoyed this post?  Want to help out DadCooksDinner?  Subscribe to DadCooksDinner using the RSS or Email options on the right, link to this post from your blog, recommend DadCooksDinner to your friends, or buy something from Amazon.com through the links on this site.  Thank you!

Thai Coconut Soup

October 15, 2009 by Mike Vrobel 1 Comment

Thai Coconut Soup is another chicken broth based soup that I make a lot. I view it as a variation on the Tortilla Soup recipe I posted yesterday.
*I think this is a universal recipe; every culture has it. Yesterday we did the Mexican version, today we'll do the Thai version. We did the American version with our turkey noodle soup from a while back.


The basic steps are exactly the same; saute your aromatics and spices, add your chicken broth, simmer, then pour over your starch and meat.  The differences are in the details.  As an example, let's look at the aromatics:
Mexican: Onion, hot pepper, garlic, tomato, lime juice, cilantro, cumin
Thai: Onion, hot pepper, garlic, cilantro, lime juice, fish sauce, thai curry paste, coconut milk

There's a lot of overlap on those lists, no?

Recipe: Thai Coconut Soup

Ingredients:

  • 1 tablespoon peanut oil (or vegetable oil)
  • 1 medium onion, halved and sliced thin
  • 1 teaspoon Thai Curry Paste (use up to 1 tablespoon if you like hot food)
  • 3 cloves of garlic, minced or pressed
  • Stems from ¼ bunch of cilantro
  • 1 lemongrass stalk (optional, but good if you can find it)
  • 3 cloves of garlic, minced or pressed
  • 1 quart homemade chicken stock
  • 2 cans coconut milk (Regular or Light, not sweetened)
  • 1 teaspoon fish sauce
  • 2 tablespoon soy sauce
  • Juice of 2 limes
  • 1 tablespoon sugar

Toppings

  • Leftover cooked rice, preferably Jasmine rice
  • Cooked chicken, sliced (I use about 1 pound, or a couple of chicken breasts)
  • Cilantro leaves, minced
  • Jalapeno, sliced thin (or serrano, or thai bird chile if you can find it)

Optional toppings and garnishes

  • Peanuts, minced
  • Sriracha sauce or other asian hot sauce
  • Lime wedges

Directions:
1. Saute the aromatics: Heat the peanut oil in a dutch oven over medium-high heat until shimmering, then add the onion. Saute until just starting to brown, about 8 minutes. Make a hole in the center of the pan and add the cumin and garlic. Toast for 30 seconds to 1 minute, or until you start to smell garlic.

I tie the cilantro bundle to the handle to make it easy to fish out later

2. Simmer the broth: Add the chicken stock, coconut milk, and fish sauce to the pot. Tie the cilantro stems and lemongrass into a bundle, and put in the pot. Scrape the bottom of the pot to loosen up any browned bits of onion, then turn the heat to high. Bring the pot to a boil, and boil for 1 minute.  Reduce the heat and simmer for 10 minutes to allow the flavors to mingle.
*I keep my stock in the freezer, so I thaw it in the microwave while I'm doing step 1. If it's still frozen at this point, that's OK.  Just put the big ice cube of stock into the pot, and it will melt on its way to boiling.

Note the big block of frozen chicken stock on the left...

3. Season the soup: Remove the cilantro stem/lemongrass bundle, and discard. Add the soy sauce, lime juice and sugar, then season to taste with salt, pepper, more soy sauce, more lime juice, more sugar, and maybe a little hot sauce.  Remember that in Thai cooking, the goal is to balance hot, sour, salty and sweet.


4. Serve: I prefer to build the soup in individual serving bowls.  Put some rice and chicken in a bowl, and cover with the broth. Top with a little cilantro and some slices of hot pepper, and whatever optional garnishes you have.

Garnishes, ready to go

Variations:
*Want to cook this with fresh chicken? After simmering the broth, and before seasoning, add a pound of boneless, skinless chicken breasts cut into ¼" slices. They'll cook through in three to five minutes - simmer until they are just no longer pink.

*Pork is a good substitute for the chicken in this dish as well.  Either pork loin or tenderloin will work.

Notes:
*This is a hearty soup, so I usually serve it on its own.  If I'm really hungry, I make some stir fried vegetables as a side dish.

*I used to be able to find lemongrass at my local grocery stores, but they don't seem to carry it any more. I'll have to keep an eye out for it the next time I go to an asian market.

*Make sure you use coconut milk in this recipe, not coconut cream.  Coconut milk is the backbone of Thai cooking.  Coconut cream is sweetened, and should be used to make fruity beverages.  It's way too sweet for this recipe.

Questions?  Comments?  Other ideas?  Leave them in the comments section below.

Related Posts:
Pressure Cooker Chicken Stock
This recipe is a great way to use up Grilled Thai Chicken
Asian Noodle Salad

Inspired by:
Meredith Deeds and Carla Snyder: The Take-out Menu Cookbook

*Enjoyed this post?  Want to help out DadCooksDinner?  Subscribe to DadCooksDinner using the RSS or Email options on the right, link to this post from your blog, recommend DadCooksDinner to your friends, or buy something from Amazon.com through the links on this site.  Thank you!

Tortilla Soup

October 14, 2009 by Mike Vrobel 3 Comments

Tortilla soup is a regular in my weeknight dinner rotation. It's one of my "big soup" recipes, which are filling enough to be the main course of a meal. And it is probably my kids' favorite soup.
*They love anything to do with tortillas.

I like this recipe because it is refrigerator velcro. If I roasted a chicken on Sunday, I make chicken stock with the bones, and I can use up the leftover meat in this soup. The best part is that it doesn't seem like leftovers - this recipe is different enough that it doesn't feel like "leftover chicken, again?".

And now…witness the power of this fully armed and operational chicken stock.
*For some reason, that was more impressive when the emperor said it.

Recipe: Tortilla Soup

Ingredients:

  • 1 tablespoon vegetable oli
  • 1 medium onion, diced
  • 1 red bell pepper, diced
  • 1 jalapeno, minced (or 1 teaspoon chipotle puree)
  • 1 cup tomatoes, diced and drained (Muir Glen Fire Roasted Diced Tomatoes are best, if it's not tomato season)
  • 1 teaspoon cumin
  • 3 cloves of garlic, minced or pressed
  • 2 quarts homemade chicken stock
  • Juice of 2 limes
  • 1 tablespoon brown sugar

Toppings

  • Crushed Tortilla chips (the dregs from the bottom of a bag are best for this)
  • Cooked chicken, shredded (I use about 1 pound, or ½ a chicken)
  • Cilantro leaves

Optional toppings and garnishes

  • Pickled hot peppers
  • Sour Cream
  • Hot Sauce
  • Shredded cheese
  • Diced tomato
  • Diced onion
  • Diced avocado
  • Salsa
  • Cooked rice
  • Cooked beans (black or pinto beans are authentic)

Directions:
1. Saute the aromatics: Heat the vegetable oil in a dutch oven over medium-high heat until shimmering, then add the onion, peppers, and tomatoes. Saute until softened, about 5 minutes.  Make a hole in the center of the pan and add the cumin and garlic.  Toast for 30 seconds to 1 minute, or until you start to smell garlic. Stir into the rest of the aromatics, and saute for another 1-2 minutes or until they just start to brown.

Sautéing the aromatics

Toasting the spices


2. Simmer the broth: Add the chicken stock to the pot, turn the heat to high, bring to a boil, and boil for 1 minute.  Reduce the heat and simmer for 10 minutes to allow the flavors to mingle.
*I keep my stock in the freezer, so I thaw it in the microwave while I'm doing step 1. If it's still frozen at this point, that's OK.  Just put the big ice cube of stock into the pot, and it will melt on its way to boiling.


3. Season the soup: Add the lime juice and brown sugar, then season to taste with salt, pepper, more lime juice, more sugar, and maybe a little hot sauce.


4. Serve: I prefer to build the soup in individual serving bowls.  Put some crushed tortilla chips and shredded chicken in a bowl, and cover with the broth.  Then top with a little cilantro, and whatever optional toppings or garnishes you want.
*I serve this like "make your own taco night" in a bowl, and I've never met a garnish I won't try to add.

A few optional garnishes

Variations:
*Want to cook this with fresh chicken? After simmering the broth, and before seasoning, add a pound of boneless, skinless chicken breasts cut into ½" cubes. They'll cook through in a minute or two - just simmer until they are no longer pink.

*For the onion/tomato/pepper/garlic aromatics, substitute 1.5 to 2 cups of leftover tomato salsa. In step 1, Cook the salsa in the oil until it turns dark red in color, then move on to step 2 and the chicken stock.

*No limes? Add a splash of cider vinegar.

*Go nuts with the toppings and garnishes. If you like it in a mexican meal, it will go well in this soup.

Notes:
*I serve this with a salad and tortilla chips on the side.

*I like this meal because my kids can be picky eaters, and it's very flexible if you let them build their own soup bowl. One wants only chicken and broth; another wants everything; a third just wants to eat the tortilla chips and cheese. I can put this out on the table, and let them pick what they want without any power struggles at dinner.
*That way, we can move onto the power struggle about dinner conversation. "So, tell me about your day. What happened?" "Nuthin…"

Questions? Comments? Other ideas? Leave them in the comments section below.

Related Posts:
Pressure Cooker Chicken Stock
Turkey Noodle Soup
Rotisserie Chicken with Red Chile Marinade

Inspired by:
Rick Bayless: Mexican Everyday

*Enjoyed this post?  Want to help out DadCooksDinner?  Subscribe to DadCooksDinner using the RSS or Email options on the right, link to this post from your blog, recommend DadCooksDinner to your friends, or buy something from Amazon.com through the links on this site.  Thank you!

Pressure Cooker Chicken Stock

October 13, 2009 by Mike Vrobel 22 Comments

Pressure Cooker Chicken Stock - adding water to cover

Pressure Cooker Chicken Stock - adding water to cover

In Ratio: The Simple Codes Behind the Craft of Everyday Cooking, Michael Ruhlman says:

Stock is the single preparation that might elevate a home cook's food from decent to spectacular.

I absolutely agree. Stock is flavor, pulled out of leftover bones and meat. With homemade stock, I can make rich and silky pan sauces, gravy with depth, and stews with body. And, of course, soup. The best way to make soup - the *only* way to make soup, in my opinion - is by starting with stock.

When I make chicken stock, I use my pressure cooker. Pressure cooker stock is quick...relatively speaing; it takes a few hours, instead of all day. I make chicken stock while I'm cleaning up after a roast chicken dinner. Everything goes in the pot, I fire it up, and then I finish cleaning the kitchen. About an hour later, the stock is done cooking, ready to be strained and refrigerated.

Chicken stock seems like culinary magic. You take scraps - chicken pieces that you can't even eat as leftovers, some vegetables, some water - and turn them into culinary gold. Make your own chicken stock - you'll never go back to the insipid stuff in the can.

Removing a refrigerated fat cap | DadCooksDinner.com
After refrigerating overnight, the fat cap is easy to lift off

Chicken stock portioned into storage containers

Notes

As I mention in the ingredients, I have a few different ways I get the chicken bones for the stock:

  1. After a roast chicken dinner, I can make stock right away. I carve the meat off the bones, serve dinner, and then make stock with the carcasses.
  2. I keep a gallon zip-top bag of chicken trimmings in the freezer. Leftover bones and trimmings are added to the bag. When the bag is full, it's time to make a batch of stock. Trimmings make great stock; chicken backs, wings or wingtips, rib bones from breasts…all add a lot of collagen to the stock.
  3. If I'm out of trimmings and desperate for stock, I buy frozen chicken backs from my local grocery store. They're cheap and do the job just fine.

What do you think?

Questions? Comments? Other ideas? Leave them in the comments section below.

Related Posts

Use the stock to make soup:

Tortilla Soup
Thai Coconut Soup

My other Pressure Cooker Recipes

Inspired by:
Just about every cookbook I've ever owned; they all say to make your own stock.
Fagor Duo 10-Quart Pressure Cooker/Canner
Cooking Under Pressure (20th Anniversary Edition)

*Enjoyed this post?  Want to help out DadCooksDinner?  Subscribe to DadCooksDinner using the RSS or Email options on the right, link to this post from your blog, recommend DadCooksDinner to your friends, or buy something from Amazon.com through the links on this site.  Thank you!

Rotisserie Rack of Pork, Apple Cider Brined

October 8, 2009 by Mike Vrobel 10 Comments

Fall is my favorite season. I love a crisp, clear fall day, with the leaves in a riot of colors while you make a trip to the apple orchard.  In fall, my cooking starts to shift back to heartier meals.  The colder temperatures lead me back to soups, roasts, and stews.  This recipe just shouts "fall" to me: rotisserie bone-in pork loin with an apple cider brine.
*The apple cider came from Rittman Orchards.  

Pork and apples is one of the classic food combinations, because it goes so well together.  I like this brine because of the layers of flavor it gives you.  The sweet-sour combination of the apple cider and brown sugar give you a more complex set of flavors than a regular salt water brine.

Recipe: Rotisserie Rack of Pork, Apple Cider Brined

Equipment:

  • Grill with Rotisserie attachment (I used a Weber Summit 650 with an infrared rotisserie burner. Here it is.)
  • Aluminum foil drip pan (9"x12", or whatever fits your grill)
  • Butcher's twine

Ingredients:

  • 1 3 to 4 lb Bone in pork loin (I asked for a five bone roast cut from the rib side of the loin)

Apple Cider Brine

  • 2 quarts apple cider
  • 1 quart water
  • ½ cup table salt
  • ¼ cup brown sugar

Directions:
1. Brine the pork roast: Four to eight hours before cooking, mix the brine ingredients in a container large enough to hold the pork roast. Stir until the salt and sugar are dissolved, then add the pork roast. Cover and refrigerate until it's time to cook.

2. Prepare the grill: Set your grill up for rotisserie cooking at high heat. For my Weber Summit, this means preheating my grill for 15 minutes with all the burners on high.  (Make sure you remove the middle grill grate before you do this, so you don't have to juggle a hot grate.)  Then I turn off all the burners except for the two outer burners (burners 1 and 6), and I light the infrared burner and turn it to high as well.  I put my drip pan in the middle of the grill, over the unlit burners. (See My Rotisserie Basic Technique Post for more rotisserie setup details.)

3. Truss and skewer the pork roast: While the grill is pre-heating, remove the pork from the brine and pat dry with paper towels. Truss the pork by tying it with the butcher's twine between each bone. I had a 5-bone roast, so I trussed it five times. Skewer the roast lengthwise with the spit, aiming a little off-center, towards the bones.


4. Cook the pork roast: Put the pork roast in the rotisserie, and start it spinning. Cook with the lid closed, roughly 35 - 50 minutes, or until the roast reaches an internal temperature of 140*F to 145*F at its thickest part. My four pound roast cooked in 45 minutes. I would expect a larger roast to take a little longer, but not much, since the time is determined by the thickness of the roast, not the weight. When you reach the correct internal temperature, remove the roast from the spit and let rest for 15 minutes.

5. Serve the roast: Remove the twine from the roast, then carve.  There are two ways that I like to carve the roast. The first is to cut the bones from the roast, turning it into a boneless roast, and a rack of ribs.  Then I cut the roast into ½" thick slices, and the ribs between the bones, to serve as individual ribs.

The second way to carve is to cut the roast into chops; this is what you see in the pictures.  Cut down along the side of each bone, and serve each slice as a bone-in chop.  Either way, pour any juices saved from the resting or carving over the sliced roast, and serve.

Variations:
*Plan brine: Replace the apple cider with water, and increase the brown sugar to ½ cup.

*Apple juice brine: Replace the apple cider with apple juice.

*Apple cider/maple syrup brine: Replace the brown sugar with ½ cup of maple syrup.

*Spice or herb rub the roast after brining: The spice rub from my rotisserie pork shoulder would go really well with this.


Notes:
*I had to cook this recipe twice to get it right for the blog.  The first time, I tried cooking the roast using only the rotisserie burner, without using the grill's outer burners like I usually do.  Pork roasts aren't that thick, and I was hoping that the lower overall heat would give me some extra time to brown the roast.  I was also hoping that the direct infrared heat from the rotisserie burner would also help with the browning. This approach gave me an internal grill temperature of 350*F.  The pork loin didn't brown as well as I had hoped (see the pictures below).  I did some browning, as you can see in the pictures, but it was only browned really well at the rib tips.  Compare it to the other picture, which was my second try using my normal approach - light the IR rotisserie burner and the outer burners, which gives me a 575*F to 600*F temperature inside the grill.  Cooking it that way worked much, much better - I had excellent browning by the time the pork's internal temperature reached 140*F.  What lesson did I learn?  High heat is more important than infrared heat when it comes to browning your roast - you want the grill as hot as you can get it if you want good browning.

"Before" - IR Burner only - look how pale the roast is, except around the bones
"After" - IR Burner plus grill's outer burners - much, much better browning

*To make the pork easy to remove from the bones, ask your butcher to either cut through the chine bone on the back of the roast, or remove it entirely.  It's very thick, and you really need a butcher's band saw to cut it.  The picture of the brined loin between steps 2 and 3 has the chine bone entirely removed.

*Serve with mashed potatoes, and a vegetable side; I like braised cabbage for the fall theme. I don't know why, but pork roast just goes better with mashed potatoes than anything else I cook. Rotisserie chicken? Give me some roasted redskins in the pan. Rotisserie prime rib? Baked potato is my starch of choice. Mashed potatoes and pork just match perfectly.

*Oh, and as you can see in the "before" picture, a hearty red wine goes well with this.*  We served an Acacia Pinot Noir from Carneros, California.
*Always keep your cook well lubricated, that's my motto.

Questions? Comments? Other ideas? Leave them in the comments section below.

Related Posts:
Click here for my Rotisserie Boneless Pork Loin recipe
Click here for my Rotisserie Pork Shoulder recipe
Click here for my Rotisserie Baby Back Ribs recipe
Click here for my other rotisserie recipes.

Inspired by:
Everyone finding my blog through Google searches for Rotisserie Pork Roast. Thanks, guys!


Check out my cookbook, Rotisserie Grilling.

Everything you could ask about the rotisserie,
plus 50 (mostly) new recipes to get you cooking.

It's a Kindle e-book, so you can download it and start reading immediately!


*Enjoyed this post? Want to help out DadCooksDinner? Subscribe to DadCooksDinner using the RSS or Email options on the right, link to this post from your blog, recommend DadCooksDinner to your friends, or buy something from Amazon.com through the links on this site. (Like my Rotisserie Grilling cookbook...)

Grilled Portobello Mushroom Burgers with Grilled Onions

October 7, 2009 by Mike Vrobel 8 Comments

As I've said a few times on this blog, I'm not a vegetarian. But I do have some sympathies with them - my sister is a vegetarian*, and eating lighter on the planet makes sense to me. I try to make a vegetarian dinner at least one day a week.**
*Hi, Deb!
**Yes, I know, you wouldn't know it from reading this blog. I tried Mark Bittman's "Vegan until six" approach from Food Matters, but I couldn't make it work.  I count too much on intentional leftovers for my lunch.  I kept winding up with gladware containers of dinners that I wasn't "allowed" to eat.  So I switched to being a part-time vegetarian.  I try to eat one or two vegetarian days a week.

Portobello burgers are one of my regular vegetarian dishes. When I do a hamburger cookout for our kids' parties, I always throw a few of these on the grill. That way, my sister has something she can eat, as does anyone who wants something healthier than regular burgers.
*I'm not sure how much healthier; by the time I'm done marinating them in oil and topping them with cheese, I think most of the caloric advantage is gone.  But they sure do taste good!

Recipe: Grilled Portobello Mushroom Burgers with Grilled Onions

Cook time: 12 minutes

Equipment:

  • Grill (I used a Weber Summit 650. Here it is.)

Ingredients:

  • 8 large Portobello Mushroom caps (look for caps a little larger than your hamburger buns)
  • 2 teaspoon kosher salt
  • 8 red onion slices, ¼" thick

Balsamic Vinaigrette Marinade

  • ¼ cup balsamic vinegar
  • pinch of salt
  • ½ teaspoon ground pepper
  • 1 clove of garlic, minced or pressed with a garlic press
  • ½ cup extra virgin olive oil

Condiments and toppings

  • 8 whole grain hamburger buns
  • lettuce leaves
  • tomato slices
  • pickles (homemade, if you have them!)
  • whole grain or dijon mustard

Directions:
1. Prep the mushrooms and onions: Wipe any dirt of the tops of the mushrooms with a wet towel, and pull the stem off if it is still attached. Put the mushrooms in a large baking dish, and sprinkle evenly with the kosher salt. Slice the red onion into ¼" thick slices, and sprinkle with salt as well. Whisk the balsamic vinaigrette ingredeints in a small bowl until well combined, then pour evenly over the mushroom caps.

2. Prepare the grill: Preheat your grill, then set it up for grilling on direct medium heat. For my Weber Summit, this means turning all the burners to high and preheating for 10 minutes, then turning them all down to medium and starting to cook.

Mushrooms and onions - mushroom just starting to bubble on the top...

3. Cook the mushrooms: Put the mushrooms on the grill, top side down. Put the onions on the grill as well. If you are cooking with a gas grill, all cooking should be done with the lid closed. Cook for 5 minutes. Remove the onions to a plate, and rotate the mushroom caps 90 degrees. Do not flip the mushroom caps - you want to keep all the vinaigrette and juices in the mushroom! Let the mushrooms cook for another 3-5 minutes, or until the juices in the mushroom are bubbling and the mushroom is starting to wilt. Put the pepper jack cheese on top of the mushrooms, then the reserved red onions, and cook for another minute or two, until the cheese is melted. While the cheese is melting, put the hamburger buns, cut side down on the grill to toast - 30 seconds to 2 minutes. Watch the buns carefully; they go from toasted to burnt in a heartbeat.

4. Top and serve: Remove the buns to a serving platter. put some grainy mustard on the bottom bun, then put the mushrooms on top. Again, do not flip the mushrooms; you're trying to keep all those tasty juices in the mushroom. Serve with the other condiments on the side so people can finish their burgers the way they want to.

Variations:
*Cheese: Use your favorite cheese. Sharp cheddar works well, melted on top of the mushrooms; my other favorite is to get spreadable goat cheese and spread it on the top of the bun instead of melting it on the mushroom.

*Vinaigrette: Use any vinaigrette you like. For example, lemon herb dressing is a great alternative. I'd stick with a oil/vinegar vinaigrette, instead of the creamy ones - I'm worried they would curdle in the heat of the grill.

Notes:
*Again, the secret to this recipe is to cook the mushrooms entirely with the top of the cap facing down. If you flip it over, you pour all the delicious juices into the grill.  If your mushrooms are starting to burn on the bottom, move them to indirect heat (over an unlit burner) and cook with the lid closed.

*Toppings: My personal burger preference is the "drag it through the garden" approach - if you've got it, I'll try to fit it on top. So, when it comes to toppings, I say "go nuts!" what do you have?  I'd avoid bacon, since the point of this is a vegetarian burger, but anything else is fair game.  I've used avocado slices, roasted red or poblano peppers, pickled onions, barbecue sauce...you name it, it will work.


Questions? Comments? Other ideas? Leave them in the comments section below.

Related Posts:
Why not make a grilled vegetable side dish while you're at it?
Grilled Zucchini recipe
Grilled Corn recipe
Grilled Asparagus recipe

Inspired by:
Mark Bittman: Food Matters: A Guide to Conscious Eating with More Than 75 Recipes

*Enjoyed this post?  Want to help out DadCooksDinner?  Subscribe to DadCooksDinner using the RSS or Email options on the right, link to this post from your blog, recommend DadCooksDinner to your friends, or buy something from Amazon.com through the links on this site.  Thank you!

Road Trip: Mustard Seed Market

October 6, 2009 by Mike Vrobel 2 Comments

Mustard Seed Market is my local health food store. While I'm not into "health" food, I am into good food, and they have plenty of that.  If you want good vegetables, you go to the store that caters to vegetarians.*
*It took me a while to figure that connection out.  Yes, I can be a bit dense sometimes...

The more I've learned about eating ethically and locally, the more impressed I've been with Mustard Seed. Sure, I feel out of place there sometimes*, but they care about their food.  I've found that this matters - I can taste the difference in the ingredients I buy there.
*Frankly, the "supplements" aisle scares me. The level of pseudo-science and unsupported claims it has makes me avoid walking down it. It's like I'm afraid I'll get converted, or something. But I'm willing to put up with it if I can get good fruit, vegetables, and ethically raised meat.

Mustard Seed Market
West Market Plaza
3885 West Market Street
Akron, OH 44333
330-666-7333
mustardseedmarket.com

My top five list of favorite things they sell are, in no particular order:

1. Vegetables: As I said in the opener, they have an excellent vegetable section. Some of it can be expensive, particularly out of season. I think it's because the nature of the store makes it more honest about "food miles" and their costs; you can't get organic peppers out of season unless you're willing to pay for them. That said, the vegetables are a great value. They really, really care about their vegetables, and they are higher quality and, I believe, fresher than what I can get at my other local grocery stores.
*It just seems like they last longer when I get them home. From other stores, if I forget something in the crisper drawer, it seems to go bad within a week. I usually get a few extra days out of the vegetables I buy here; they last 7-10 days, and those couple of extra days can mean the difference between dinner and compost.

2. Bulk section: Bulk sea salt. Bulk rolled and steel cut oats.  Bulk couscous.  And, most importantly, bulk dried beans!  I try to buy my beans here whenever I can.  Every bean recipe I ever read says that you want to buy your beans from a store that "has high turnover". Vegetarians eat beans as their main protein source. Where are you going to get higher turnover?


3. Meat department: Not what you expected me to say, is it? They specialize in ethically raised meat, and I've had some of the best steaks I've ever eaten from this meat counter.  The also carry a lot of different cuts of buffalo in the freezer in their meat department, which can be hard to find in our area.

4. Wine selection: They don't have the biggest wine section in town, but it is a good one, specializing in lower to mid-priced wines. They have a section of "suggested selections", usually around ten dollars a bottle, with helpful tasting notes written out for you. More important is their wine lady, who is always ready to help out, and has never steered me wrong. Oh, and their beer selection is quite good as well, with strong selections of microbrews and imported beers.
I'm ashamed to say I don't remember her name; I think it's Jaime. We "know" each other by sight, since I'm always tracking her down for advice when I'm buying some wine.


5. Canned goods: Again, this shows where caring about your food makes a difference.  I know, you're thinking: "Canned tomatoes?  What's the difference?"  Believe me, it matters.  They specialize in a lot of brands that just taste better. Muir Glen tomatoes, Spectrum vinegars and oils. Eden asian products. While you're there sample the hummus in the ready made foods section. Or, even better, go to their cafe, upstairs, and order lunch with one of their fresh-made smoothies!
*Mmmmm.  Blue Moon smoothie....

Here's the map:
 
View Larger Map


Related posts:

My list of Ethnic and Gourmet stores in the Akron, OH area.

*Enjoyed this post?  Want to help out DadCooksDinner?  Subscribe to DadCooksDinner using the RSS or Email options on the right, link to this post from your blog, recommend DadCooksDinner to your friends, or buy something from Amazon.com through the links on this site.  Thank you!

Grilled Boneless Skinless Chicken Breasts, Quick Brinerated

October 1, 2009 by Mike Vrobel 9 Comments

Boneless, skinless chicken breasts with a quick brinerate is my original weeknight grill recipe, and it's still the one I turn to the most. When I need a quick dinner, it's boneless, skinless chicken breasts to the rescue!

There's a problem with this approach. If there's a food as bland as a boneless, skinless chicken breasts, I haven't tasted it. I've complained about pork loin being bland; the reason it's bland is they are trying to turn it into boneless, skinless chicken breasts. So...chicken needs a lot of help if it's going to have good flavor. That's where the brinerade comes in, and why it's the core of my quick weeknight grilling.

The soy/sweet/vinegar combination in the brinerade gives the chicken a big hit of flavor, and helps keep the very lean meat from drying out while cooking. The soy and sugar in the brinerade also helps the surface of the chicken to brown really well, giving it another layer of flavor.  That being said...chicken breasts are still pretty neutral. I try to serve them as a supporting player in a meal with a lot of other, bolder flavors. You can see some examples in the notes at the end of the recipe.

You'll see a lot of similarities to the pork chop recipe earlier in the week, because...well, it's pretty much the same technique. I cook the pork chops for a shorter period of time because they're so much thinner; otherwise, the two are interchangeable.

Recipe: Grilled Boneless Skinless Chicken Breasts, Quick Brinerated

Equipment:

  • Grill (I used a Weber Summit 650. Here it is.)

Ingredients:

  • 2 to 3 lbs boneless skinless chicken breasts

Brinerade

  • ¼ cup soy sauce
  • 2 tablespoon lemon juice (juice of ½ lemon, or substitute balsamic vinegar)
  • 2 tablespoon honey
  • 2 tablespoon olive oil

Directions:
1. Brinerate the chicken: Whisk the brinerade ingredients in a small bowl until well combined.
*I use a 2 cup pyrex measuring cup for my bowl, and I whisk with a fork.
Put the chicken breasts in a medium bowl, and pour the brinerade over them, reserving roughly 2 tablespoon of the brinerade for later. Toss the chicken to evenly cover with the marinade, and toss once or twice while the grill preheats.

2. Prepare the grill: Preheat your grill, then set it up for grilling on direct medium heat. For my Weber Summit, this means turning all the burners to high and preheating for 10 minutes, then turning them all down to medium and starting to cook.


3. Cook the chicken: Toss the chicken breasts one more time in the bowl, put them on the grill, and keep the lid closed while cooking. Let them cook for five minutes, until they have good grill marks on them, then flip them, and cook on the other side for another five minutes.
As usual with chicken, you're looking for a temperature of 160F in the thickest part of the meat.  This timing always works for me on my gas grill, but if you have any doubts, get out the thermometer.

4. Glaze and serve: Remove the chicken to a platter, and pour the reserved brinerade over the breasts, trying to get an even coating on all of them. Let rest for five minutes (if you can), then serve.

Variations:
*Asian style: the soy sauce is already giving them a little bit of an asian flavor; you can play this up by replacing the lemon juice with seasoned asian rice vinegar, and the olive oil with peanut or sesame oil.

*Boneless Skinless Chicken Thighs: I prefer chicken thighs to the breast; they have more flavor. When I can find them at my local grocery store, I cook them exactly the same way listed above. They're a little smaller, but you want to cook them more than the chicken breasts, so it works out in the end.

*Thin cut chicken breasts or chicken tenders: If you're really in a hurry, buy these instead of whole chicken breasts. They cook in roughly half the time; I cook them like I cook thin pork chops - don't turn them, only rotate them to try to get really good browning on one side.

Notes:
*If you can get a jump start on dinner, start the brinerating step up to an hour and a half before it's time to cook. Don't go beyond that, or the lemon juice in the brinerade will start to pickle the chicken.

*For the rest of your meal, serve a caesar salad, and grilled garlic bread that you cooked with the chicken. To get fancy, cut the grilled garlic bread into crouton sized pieces and serve it as part of the salad.

*I also use this recipe for a quick soft taco dinner. Serve with tortillas, quick salsa, pickled chile peppers, and your choice of other toppings.

*And...I use this recipe, or leftovers from it, in my White Chicken Chili. I skip the ground chicken and the browning step, and replace it with cubed pieces of chicken breast.

*Watch out for Individually Quick Frozen (IQF) chicken breasts. They usually come "20% marinated" in a salt water solution - in other words, they're already brined, and you're paying 20% for salt water. This means brinerating is probably going to make them too salty. Also, they tend to be cut in wildly uneven sizes, which makes cooking them evenly a problem.  Get some natural chicken breasts, even if you have to pay more.  They're worth it.

Questions? Comments? Other ideas? Leave them in the comments section below.

Related Posts:
This recipe is part of Quick Grilling Week
If you have the time, I prefer grilled bone-in chicken pieces. Here's my basic technique
Grilled Garlic Bread recipe

Inspired by:
Grilling: Basic Technique section in Weber's Big Book of Grilling

*Enjoyed this post?  Want to help out DadCooksDinner?  Subscribe to DadCooksDinner using the RSS or Email options on the right, link to this post from your blog, recommend DadCooksDinner to your friends, or buy something from Amazon.com through the links on this site.  Thank you!

Grilled Teriyaki Flank Steak

September 30, 2009 by Mike Vrobel 1 Comment

This weeknight grilling recipe is Teriyaki Flank Steak, a variation on my Flank Steak with Chimichurri recipe that I posted a few months ago. While I prefer ribeye steaks, I don't think of ribeyes as a weeknight meal. They're more of a special occasion meal for me, due to the price, and how rich they are.
*I already have to watch my weight; I can't imagine what it would be like if I ate ribeyes all the time.

Flank steak is my weeknight beef of choice. It grills quickly, and it has long fibers of muscle that allow it to absorb a marinade well (or a glaze, like we use here).  It's a healthy cut of protien, because it's very lean. And it's cheap!*
*Or, cheaper than ribeye. If you're really tight on grocery money, stick with pork and chicken, which are much cheaper.

Recipe: Grilled Teriyaki Flank Steak

Equipment:

  • Grill (I used a Weber Summit 650. Here it is.)

Ingredients:

  • 1.5 lbs flank steak
  • 1.5 teaspoon kosher salt

Teriyaki Sauce

  • ½ cup soy sauce
  • 2 tablespoon Mirin or seasoned rice wine vinegar
  • 2 tablespoon honey
  • 1 clove garlic, minced or pressed (optional)
  • ½" ginger, grated (optional)
  • 1 green onion, trimmed and diced (optional)

Directions:
1. Salt the steak and make the Teriyaki sauce: Sprinkle the kosher salt evenly over the steak, and let rest in the refrigerator while you preheat the grill. Whisk the teriyaki ingredients in a small bowl until well combined.
*I use a 2 cup pyrex measuring cup as my small bowl, and I whisk with a fork.

2. Prepare the grill: Preheat your grill, then set it up for grilling on direct medium heat. For my Weber Summit, this means turning all the burners to high and preheating for 10 minutes, then turning them all down to medium and starting to cook.

3. Cook the steak: Put the flank steak on the grill. Let it cook for 5 minutes with the grill cover down, flip the steak, and let it cook for another 5 minutes.
*For a 1.5lb steak, this will give you a medium-rare to medium steak. If you'd like it medium to medium well, go 6 minutes a side

4. Glaze and serve: Remove the steak to a baking dish, pour the teriyaki sauce over it, and turn a couple of times to coat.  Let the steak rest in the teriyaki sauce for five to ten minutes. Turn a couple more times in the dish, then remove to a cutting board and slice across the grain into ½" thick slices. Move to a platter, and pour the teriyaki sauce over the top of the sliced steak. Serve!

Steak resting in Teriyaki sauce

Variations:
*Chinese style: Instead of the teriyaki sauce, make a sauce of ¼ cup soy sauce and ¼ cup hoisin sauce, mixed together.

Notes:
*If you can get a jump start on dinner, salt the steak 1 to 2 hours ahead, and let rest in the refrigerator. If you don't have that much time, don't salt the steak until you're about to preheat the grill - you don't want the salt to pull the juices out and not have time for them to be reabsorbed.  Also, brush the steak with the teriyaki sauce when it's about one minute away from being done, to help it glaze better.  (Don't skip the resting in the baking dish, though - you want the steak to soak up the teriyaki sauce while it rests.)

*For the rest of your meal, serve with short grain white rice, and grilled zucchini that you brush with some of the teriyaki sauce while it's cooking.  Flank steak doesn't use much space on the grill, so make sure you use that space for your vegetable side(s).

*Also, you'll see some trimmed green onions in the pictures - they make a nice grilled side.  Trim the root end and any ragged looking parts from the green end, then cook them for 1-2 minutes a side at the end of your steak's time on the grill.
*Just don't put them on the grill with the steaks at the start, like I did.  They were burnt to a crisp five minutes later when I went to turn the steak...

Questions? Comments? Other ideas? Leave them in the comments section below.

Related Posts:
This recipe is part of Quick Grilling Week
Grilled Flank Steak with Chimichurri recipe
Korean Grilled Short Ribs (Kalbi) recipe
Grilled Zucchini recipe
Grilled Steak Fajitas Recipe

Inspired by:
Cook's Country Best Grilling Recipes

*Enjoyed this post?  Want to help out DadCooksDinner?  Subscribe to DadCooksDinner using the RSS or Email options on the right, link to this post from your blog, recommend DadCooksDinner to your friends, or buy something from Amazon.com through the links on this site.  Thank you!

Grilled Thin Pork Chops, Quick Brinerated

September 29, 2009 by Mike Vrobel 57 Comments

Grilled Thin Pork Chops, Quick Brinerated

Thin pork chops are an idea I learned from from John Willoughby and Chris Schlesinger in Gourmet magazine. They suggest you think thin, crispy and flavorful, instead of the usual thick and juicy. For a quick weeknight meal on the grill, thin is good - it cooks quickly, and gets dinner on the table that much faster.

Even though we're going for thin and crispy, be careful to not overcook lean pork loin, or it will dry out. The brinerade gives us a little cushion, but the real trick is to only cook the chops on one side. The pork chops are thin enough to cook through, and they'll be nicely browned on the one side that's always facing the grill.

Grilled Thin Pork Chops, Quick Brinerated | DadCooksDinner.com
Grilled Thin Pork Chops, Quick Brinerated
[feast_advanced_jump_to]

Equipment

  • A grill. (I use a Weber Summit, which is overkill for this recipe.)

Inspired by: "Doc" Willoughby and Chris Schlesinger: Grill It!

Grilled Thin Pork Chops, Quick Brinerated | DadCooksDinner.com
Brinerating the chops
Grilled Thin Pork Chops, Quick Brinerated | DadCooksDinner.com
After 4 minutes, the chops are cooked through - even though they've never been flipped.
Grilled Thin Pork Chops, Quick Brinerated | DadCooksDinner.com
Ready to serve

Variations

  • Asian style: the soy sauce is already giving them a little bit of an asian flavor; you can play this up by replacing the balsamic vinegar with seasoned asian rice vinegar, and the olive oil with peanut or sesame oil.
  • Barbecued pork chops: When done, brush the chops with barbecue sauce instead of the reserved brinerade.
  • Don't forget to gnaw on the bones...it's my favorite part!

What do you think?

Questions? Comments? Other ideas? Leave them in the comments section below.

Related Posts
This recipe is part of Quick Grilling Week
Grilled Boneless Pork Loin Chops, Brined and Honey Glazed recipe
Grilled Corn recipe
Rotisserie Pineapple
My other Grilling Recipes

Inspired by:
"Doc" Willoughby and Chris Schlesinger: Grill It!

Enjoyed this post? Want to help out DadCooksDinner? Subscribe to DadCooksDinner via email and share this post with your friends. Want to contribute directly? Donate to my Tip Jar, or buy something from Amazon.com through the links on this site. Thank you.

Weeknight Grilling on DadCooksDinner

September 28, 2009 by Mike Vrobel 1 Comment

*Wherein we discuss Dad Cooking Dinner when the chips are down.

I've mentioned this scenario before: It's been a long day at work, the kids are ricocheting off the walls (and each other), and the wife has left for evening classes.  You're tired, and not motivated to cook.  The siren song of pizza delivery is singing in the back of your head.  What do you do?

This week, I'm getting quick and dirty.  You need a protein, a veg, and a starch, and you need it now, or you're going to lose your nerve and go to the drive-through.  Again.

What do I do?  I can have dinner on the table in 30 minutes.  45 minutes, tops.  It may not be gourmet, but it's good, it's quick, and it's homemade.  All the other recipes and techniques I've shown you on this blog?  They're my passion, obviously; I love food and cooking.  But sometimes I'm just not in the mood.  Or, we're in a hurry to get to a kid's soccer game.  Or...well, you know how life gets in the way.

For me, throwing something on the grill always helps me get my cooking groove back, so I'm going to start with Weeknight Grilling.  Even when I'm not inspired, I enjoy live fire cooking.  That helps me get some positive momentum, and dinner on the table.

Basic Technique: Weeknight Grilling

1. Cook something thin: If you need it to cook quickly, it has to be thin, and it has to be tender.  Steven Raichlen calls this his "Rule of Palm".  If it's as thin as your palm, or thinner, it will cook quickly over direct heat.  It has to be a tender cut of meat as well, because quick cooking won't help tenderize it.  Think of breast or loin meat, cut one inch thick or less.

2. Give it a quick brinerade:  While the grill's heating, soak the protein in a marinade that has a lot of soy sauce in it.  This seasons the meat, and will help it brown quickly.  At its simplest, I use equal parts soy sauce, olive oil and balsamic vinegar.*
*I hate to admit it, but I picked this up from Rachel Ray.  The horror!  I learned it in her first 30-Minute Meals book, the one with the ugly green cover, back before she became the cultural juggernaut that she is now.  It wasn't until later that Cook's Illustrated gave it the catchy "brinerate" name and explained to me why it works so well.

3. Use a gas grill set to direct medium heat: I know I come across as a charcoal snob, but if you're juggling multiple dishes because you're in a hurry, the ease and reliability of a gas grill can't be beat.  Also, if I'm rushed for time, I prefer cooking over medium heat.  The slightly lower heat means you don't have to watch the food as carefully.  You can usually say "5 minutes a side" and be done with it.

4. Grill the vegetable side at the same time: While you're cooking the main course, throw a vegetable on the grill right next to the protein.  (Like some corn, asparagus, or zucchini).
4a. Or, make a salad: You already know how to whip up a quick vinaigrette, right?  Just pour it over a bag of spring mix greens, and toss.

5. Make a quick starch: White rice, couscous, or just serve some bread on the side.

6. Serve: Serve it family style - put it all on serving platters, and set it on the table.  Dig in!

So, what are we going to see this week?

Tuesday: Grilled Thin Pork Chops, Quick Brinerated
Wednesday: Grilled Teriyaki Flank Steak
Thursday: Grilled Boneless Skinless Chicken Breasts, Quick Brinerated

Questions?  Comments?  Other ideas?  Leave them in the comments, below.

Related Posts:
I've already done a couple of recipes that qualify as quick weeknight grilling, so to whet your appetite, check these out:
Grilled Boneless Pork Loin Chops, Brined and Honey Glazed recipe
Grilled Flank Steak with Chimichurri recipe

Inspired by:
Reading my "Hello World" post after one year of blogging, and realizing that all I was posting was elaborate, Sunday dinner types of meals...

TheKitchn.com and their September theme of Quick Weeknight Meals

*Enjoyed this post?  Want to help out DadCooksDinner?  Subscribe to DadCooksDinner using the RSS or Email options on the right, link to this post from your blog, recommend DadCooksDinner to your friends, or buy something from Amazon.com through the links on this site.  Thank you!

Rotisserie Beef Ribs

September 24, 2009 by Mike Vrobel 9 Comments

I'm a fan of beef ribs cut off of a rib roast; I eat them as my cook's treat when I make a rib roast.  I'm also a big fan of pork ribs, cooked low and slow.  So, whenever I made beef ribs on their own, without the roast, I would cook them low and slow.  The beef ribs were good, but not great; I would always prefer pork ribs.  I couldn't figure out why the same low and slow technique you use with pork ribs didn't work as well with beef ribs.

Finally, it dawned on me - I liked the ribs cut from the roast better because they were roasted.  I wasn't cooking them at a high enough temperature to get a nice, crispy crust on them, and I was drying them out with the long cooking time.  Why not cook them the same way I cooked my rotisserie baby back ribs, which always turned out with a wonderful, crisp crust? And, voila!  My new favorite rib recipe was born.

These ribs are huge. My kids were calling them dinosaur ribs, because each one is about twice the length of a pork rib.
*Actually, they picked the "dinosaur ribs" up from me. They've never seen The Flintstones. I was flabbergasted when I realized this - they're kids, and they have no idea who Fred and Barney are. I'm getting old...


When I eat pork ribs, I need about half a slab to be full.* For beef ribs, I only need about three of them, so adjust your meat purchase accordingly.
*Unfortunately for my waistline, I rarely stop at a half a slab.

Recipe: Rotisserie Beef Ribs

Equipment:

  • Grill with Rotisserie attachment (I used a Weber kettle with the Rotisserie attachment; the kettle is this Weber Grill and the rotisserie attachment is this Weber charcoal kettle rotisserie)
  • Aluminum foil drip pan (9"x12", or whatever fits your grill)
  • 1 fist-sized chunk smoking wood (preferably hickory)

Ingredients:

  • 4 lbs beef ribs
  • 3 teaspoon kosher salt
  • 2 teaspoon freshly ground pepper

Directions:
1. Pre-Salt the Ribs: Two to four hours before grilling, sprinkle the ribs evenly with the salt and pepper, then refrigerate. One hour before cooking, remove the ribs from the refrigerator and let rest at room temperature, and put the wood chunk in water to soak.


2. Skewer the ribs: Weave the ribs onto your spit, poking the spit through the ribs every two bones and alternating sides. (See the picture, below.)

3. Prepare the grill: Prepare your rotisserie for cooking on indirect medium heat (see details My Rotisserie Basic Technique Post) and add the wood chunk to the coals. For my Weber kettle, I light a chimney starter* half-full of charcoal, wait for it to be covered with ash, then pour it in two equal piles on the sides of the grill, and put the drip pan in the middle, between the piles.  Then I put the wood chunk on one of the piles.
*I highly recommend the Weber Chimney Starter, because it is larger than most chimney starters. It holds 5 quarts of charcoal, which exactly the right size for cooking this recipe.

4. Cook the ribs: Put the skewer on the rotisserie, and cook with the lid closed for 1 ½ hours, or until the ribs are well cooked and the meat has pulled about ½" down from the bones on the end. You want to maintain a temperature of about 300*F to 350*F. On a charcoal grill, add 16 coals (8 to each pile) after the first hour of cooking to keep the heat going.


5. Serve: Remove the ribs from the grill, and let rest 10-15 minutes. Cut between each bone and serve.

Variations:
*Rotisserie barbecued beef ribs, dry rub style: Use a barbecue rub on the ribs when salting them, then give them one more even sprinkle of rub when they come off the grill.

*Rotisserie barbecued beef ribs, wet style: Use a barbecue rub on the ribs when salting them.  Then, baste them with barbecue sauce with about ten minutes left in the cooking time.  This will give them a good glazing of barbecue sauce.  Give them one more basting with sauce when they come off the grill.

Notes:
*As you can see in the pictures, I had two smaller slabs of ribs instead of one big one; this was harder to work with, but it's how the ribs come from my local market. The one slab only had three ribs, and I wasn't able to weave it on, so I ran my fork through it to hold it in place.

*To get good ribs, you need meat on them. Check the ribs before you buy them - you don't want to see much of the bone exposed, and ideally the bones will be completely covered with meat.

*Ribs that have the meat cut down to the bone are called "shiners", and are something you should try to avoid. Even worse - sometimes my grocery store sells ribs with the meat cut out between the bones. I don't understand who would buy them. You need some meat on the bones to eat, don't you?

What do you think? Questions? Comments? Other ideas? Leave them in the comments section below.

Related Posts:
Click here for my rotisserie baby back ribs recipe
Click here for my rotisserie beef rib roast recipe
Click here for my other rotisserie recipes.


Check out my cookbook, Rotisserie Grilling.

Everything you could ask about the rotisserie,
plus 50 (mostly) new recipes to get you cooking.

It's a Kindle e-book, so you can download it and start reading immediately!


*Enjoyed this post? Want to help out DadCooksDinner? Subscribe to DadCooksDinner using the RSS or Email options on the right, link to this post from your blog, recommend DadCooksDinner to your friends, or buy something from Amazon.com through the links on this site. (Like my Rotisserie Grilling cookbook...)

Zucchini Pickles, Zuni style

September 23, 2009 by Mike Vrobel Leave a Comment

As I was finishing up pickle week, I stumbled across this recipe for zucchini pickles from Zuni Cafe in San Francisco.  I'm embarrassed that I didn't find it earlier.  Zuni is one of my favorite restaurants in the world, and I've talked before about how influential the Zuni Cafe Cookbook has been on my cooking.  I've also talked about how overrun by zucchini we are this time of year.  But a recipe in the cookbook that I've looked through hundreds of times?  Somehow, it managed to elude me.

In the spirit of better late than never, here it is.  I like these pickles as much, if not more than, the cucumber pickles I made.  Zucchini is always easier to find than good cucumber pickles, so I will be using this recipe again.
*And I love saying "Zuni Zucchini".  It rolls off the tongue.  Zunicchini.  Yes, my seven year old self is never far from the surface...

Sliced and ready to go

Recipe: Zucchini Pickles, Zuni style

Equipment:

  • A clean quart jar with a tight fitting lid (Canning jars or flip top gasket jars are the usual choices.)

Ingredients:

  • 1 pound zucchini or summer squash, sliced 1/16 inch thick (I used my food processor's slicing disk)
  • ½ onion, sliced thin
  • 2 tablespoon table salt
Pickling Liquid:
  • 2 cup cider vinegar
  • 1 cup sugar
  • 1 tablespoon mustard seeds
  • 1 coriander seed
  • 1 tablespoon black peppercorns

Directions:
Click here for the basic technique of pickling vegetables.

1. Prep and brine the vegetables: Put the sliced zucchini and onions in a large bowl, sprinkle with the kosher salt, and toss to evenly coat with the salt. Add cold water to just cover, and let sit for 1 hour to brine.  Drain, and dry thoroughly; Judy Rodgers recommends using a salad spinner to help get all the moisture out.  Put the vegetables in your jar.

Brining the zucchini and squash

2. Make the pickling liquid: Combine the Pickling Liquid ingredients in a medium saucepan, and bring to a boil over high heat.  Reduce the heat, and simmer for 5 minutes to open up the flavor of the spices. *Note: in the original recipe, Judy recommends cooling the pickling liquid to room temperature BEFORE continuing to the next step. She says this will give you much crisper pickles. My schedule didn't allow me to wait, and the pickles turned out anyhow.


3. Combine the liquid and the vegetables: Carefully pour the pickling liquid into the jar until the vegetables are covered.  (Optionally, pour pickling liquid through a fine mesh strainer first, to strain out the herbs and spices; your pickled vegetables will look less rustic that way.)
*I pour the pickling liquid from my sauce pan into my Pyrex 2-Quart Measuring Cup, and from there into the jar.  The spout on the measuring cup makes this much less messy.

4. Refrigerate: Let cool at room temperature, close the lid on the jar, and refrigerate. It's best to refrigerate for at least one day, and preferably one week. They will last, refrigerated, for up to 3 months.

What do you do with (yet another) three pounds of zucchini?

Variations:
*In the original recipe, you were supposed to use 1.5 teaspoon mustard seed and 1.5 teaspoon ground mustard; I only had mustard seeds.  Also, you were supposed to use 1 teaspoon turmeric.  I was out, so I substituted 1 tablespoon of coriander seed.  (Why? Because I like coriander.)


Notes:
*Use these anywhere you would use cucumber pickles - the taste is very similar.  They are great on hamburgers and sandwiches.  I just have to watch myself; if I leave the jar on the table, I start eating them straight after I'm done with my sandwich, and the next thing I know they're all gone.

*Obviously I scaled this recipe up - I had 3 pounds of zucchini and squash, as you can see in the picture.  I tripled the rest of the ingredients.  Just keep the proportions the same, and it works fine.

*As I mentioned in the recipe, Judy recommends that you cool the brine off completely before you pour it over the pickles.  I'm going to try that next time; they turned out great without it, but I wonder how crisp they'll get if I follow instructions.  I'm probably going to add a crushed clove of garlic as well.

*Also, I'm going to remember to get some turmeric before I pickle the next time; everyone adds it to give their pickles some color.  I thought I had some in my spice cabinet (again), but I was out.
*Yes, I was forgetful enough that I was out of turmeric during pickle week, and still out two weeks later.  I thought I had bought some after pickle week, but I hadn't.  If this is how I am now, I'm scared to think how forgetful I'm going to be when I'm older...

Questions? Comments? Other ideas? Leave them in the comments section below.

Related Posts:
Click here for my Sorta Sour Pickled Cucumbers recipe.
Click here for my Pickled Vegetables basic technique.


Adapted From:
Judy Rodgers's The Zuni Cafe Cookbook


*Enjoyed this post?  Want to help out DadCooksDinner?  Subscribe to DadCooksDinner using the RSS or Email options on the right, link to this post from your blog, recommend DadCooksDinner to your friends, or buy something from Amazon.com through the links on this site.  Thank you!

Hi, I'm Mike, and I'm a Recipe Oversharer

September 22, 2009 by Mike Vrobel Leave a Comment

Lisa Abraham, Akron Beacon Journal food writer, wrote a recent article on sharing recipes.  In it, she says that her job is getting people to share their recipes with her.  But she also has a couple of family recipes that she won't share.*
*Her mother gave them to her, with threat of excommunication from the family if she ever gave them away.

I enjoyed the article, but I realized that there is no recipe that I won't share.  I'm a recipe oversharer.  If you show a hint of interest my cooking, I won't let you escape until I've explained how to make it.  In excruciating detail.

That's why I started this blog - I enjoy explaining how to do things, and I love cooking.  I'll admit, we don't have any secret family recipes to keep, but if we did, I'd be sharing them anyhow.*
*The closest we have is my Mom's hollandaise sauce.  She makes eggs benedict every Easter, and I just love her sauce.  She hasn't told me the recipe, but I don't think there really is a recipe.  She just says "show up early next year and watch me make it."

I have three reasons for being a recipe over-sharer.  The first, as I said in my rant about "The death of home cooking", is that I'm trying to get people to cook at home.  If it might get you to cook it at home, I'll gladly tell you the recipe.  To paraphrase Michael Ruhlman, I'm part of a growing group of bloggers who have learned how to cook, and we are forming our own community on the web to promote home cooking.  I'm writing this, not because I want you to think I'm a good cook, but because I want you to enjoy what I've learned, and try it yourself.*
*When I was in the Steak Cook-Off at the Taste of Akron, I was passing out copies of my recipe to everyone who walked by, including all my competitors.  When I went in front of the judges, I explained it to the point that one of them said "Wow - I think I can do that at home myself!"  That was exactly what I was looking for...

The second reason is: I don't believe in recipes.  I believe in basic techniques, ratios, and flavor profiles.  Those are the base of cooking, not some secret ingredient.  Sure, I might not be able to duplicate your potato salad (to pick on Lisa), but I can get 98% of the way there with what I already know.  One of the things I love about cooking is that Close Enough is Good Enough.  You'll often see me attribute a recipe that I put on this blog as "Adapted from..." a source.  What that usually means is I used their recipe for most of the basic technique and ratios, then started winging it once I got to the ingredients.  Even when I'm making one of my OWN recipes, it's never exactly the same as last time.
*Again, when I was in the Steak Cook-Off, this almost got me in trouble.  Tom Lorditch, executive chef of West Point Market, said that they would be checking to make sure that we actually cooked the recipe the way we submitted it for the contest.  I asked: "But what if you never make a recipe the same way twice?"  He didn't look amused, and said: "My chefs always make my recipes the way I want them to."  Yet another reason I'm a home cook, and not a chef.

The third reason is a take off of the second: I believe that recipes get in the way of cooking.  I'm a firm believer in The Art of Simple Cooking, as preached by the San Francisco school of American Cooking.*
*Alice Waters, Judy Rodgers, and all the other west coast "get good, local ingredients and don't screw them up" proponents.  Of course, that's easier to do in California than it is in Northeastern Ohio in the middle of the winter, but that's a story for another day.

If you really are a Dad who Cooks Dinner, and its Thursday night, you've had a long day at work, the kids are picking at each other again, and your wife is busy studying for her Physics test*, and you just aren't feeling it...you can't spend your time reading a recipe.  You need to have the basic techniques and ratios down, so you can just look at what's in the fridge and start cooking.  Leftover chicken, onions, peppers, and some canned beans?  Chili powder and garlic in the pantry?  We're having Chili tonight!  The beauty of simple cooking is its adaptability.  Once you get used to the basics, you can vary things based on a different flavor signature.  See the above list of ingredients?  It's also Italian Bean Soup if you use some rosemary and thyme instead of chili powder, and have some chicken stock in the freezer.  Or, Stir Fry - make a pot of rice and stir fry everything else with some soy and hoisin sauce.
*Not that that happened to me today...
**And I know this is more Bittman than Waters at this point.  If you're really going to cook at home all the time, instead of eating out when you're tired, then being able to Get It Done trumps everything else. 

And, OK, the final reason is that I have a strong streak of "Know-it-all" in my personality, and I love telling people how things work.  You couldn't tell from reading this blog?

What do you think?  Questions?  Comments?  Better ideas?  Leave them in the comments, below.

Inspired by:
Lisa Abraham: Don't take secret recipe to the grave [ohio.com]

Alice Waters: The Art of Simple Food


*Enjoyed this post?  Want to help out DadCooksDinner?  Subscribe to DadCooksDinner using the RSS or Email options on the right, link to this post from your blog, recommend DadCooksDinner to your friends, or buy something from Amazon.com through the links on this site.  Thank you!

  • « Previous Page
  • 1
  • …
  • 32
  • 33
  • 34
  • 35
  • 36
  • 37
  • Next Page »

Welcome to Dad Cooks Dinner!

I'm Mike Vrobel, a dad who cooks dinner every night. I'm an enthusiastic home cook, and I write about pressure cooking, rotisserie grilling, and other food topics that grab my attention.

More About Me →

Popular

  • Three bowls of cooked Pinto Beans on a wood table
    Instant Pot Pinto Beans (No Soaking)
  • Pressure Cooker Beef Shank (Osso Bucco)
  • Pressure Cooker 7 Hour Leg of Lamb (in 90 minutes)
    Pressure Cooker 7 Hour Leg of Lamb (in 90 minutes)
  • Pressure Cooker Brown Jasmine Rice
  • Grilled Tomahawk Steak (Long Bone Ribeye, Reverse Seared)
    Grilled Tomahawk Steak (Long Bone Ribeye, Reverse Seared)
  • A green bowl full of chicken noodle soup
    Instant Pot Rotisserie Chicken Noodle Soup

Seasonal

  • A bowl of asparagus risotto
    Instant Pot Asparagus Risotto (Pressure Cooker Recipe)
  • Grilled Butterflied Chicken with Garlic Butter
  • Sous Vide rack of lamb sliced into chops
    Sous Vide Rack of Lamb with Dijon Bread Crumb Crust
  • A bowl of beef stew with asparagus, carrots, and radishes.
    Instant Pot Spring Vegetable Beef Stew
  • A Rotisserie Chicken (Pollo Asado)on a platter of shredded cabbage
    Rotisserie Chicken Pollo Asado
  • Rotisserie Pork Shoulder Roast with Carolina Mustard BBQ Sauce
    Rotisserie Pork Shoulder with South Carolina Mustard Barbecue Sauce

Footer

↑ back to top

About

  • Privacy Policy

Newsletter

  • Sign Up! for emails and updates

Contact

  • Contact

Copyright © 2025 Dad Cooks Dinner