DadCooksDinner

  • Home
  • Rotisserie
  • Recipes
  • Tools
  • Books
  • Merch
menu icon
go to homepage
  • Recipes
  • Books
  • Tools
  • Merch
  • About
subscribe
search icon
Homepage link
  • Recipes
  • Books
  • Tools
  • Merch
  • About
×
Home » Recipes

Lazy Summer 2010

June 29, 2010 by Mike Vrobel 5 Comments

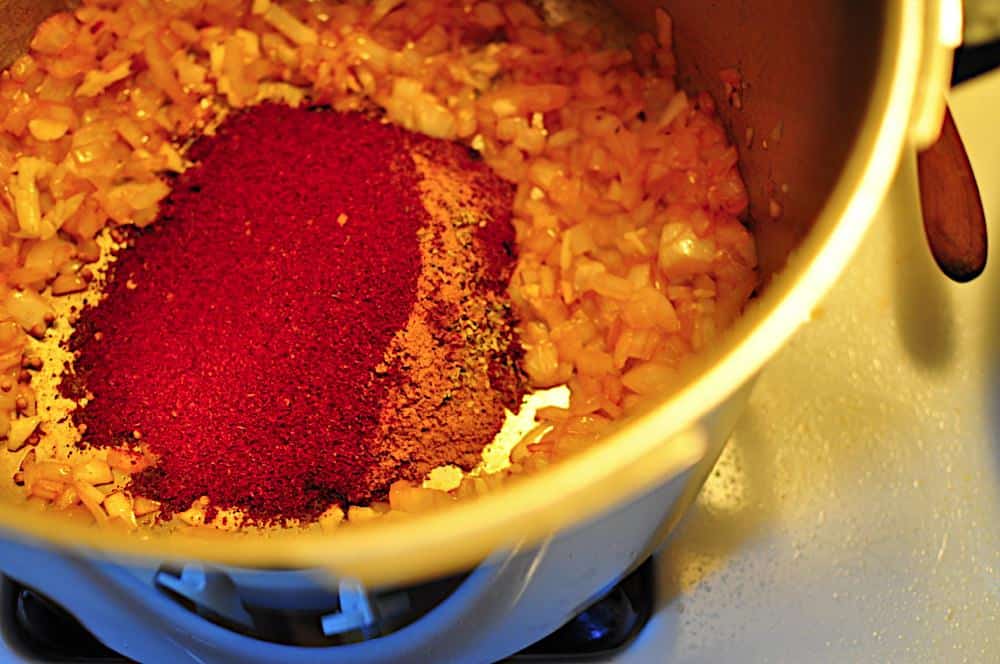
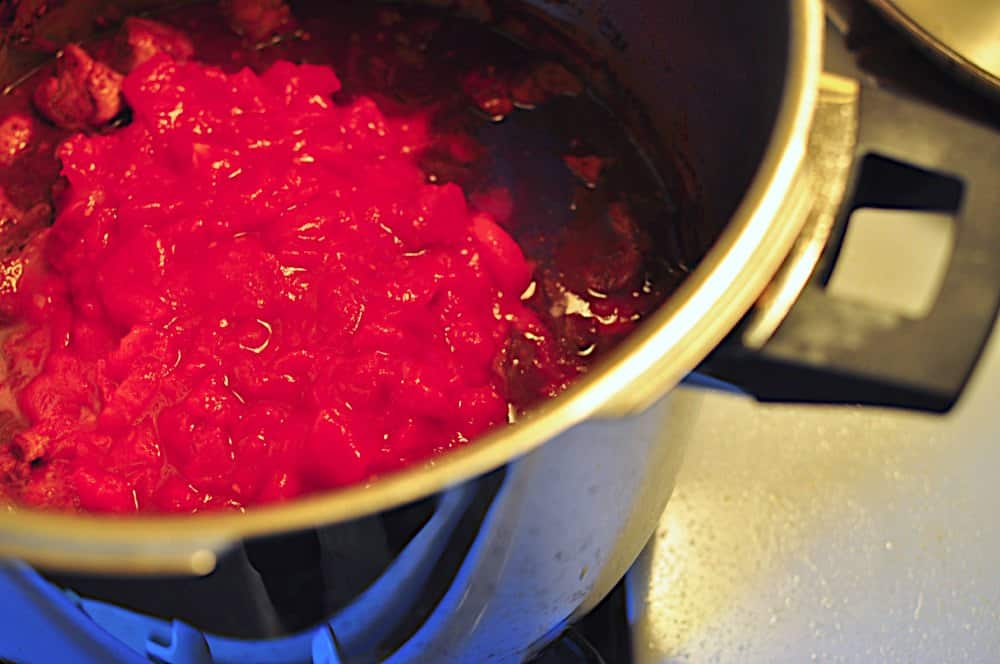
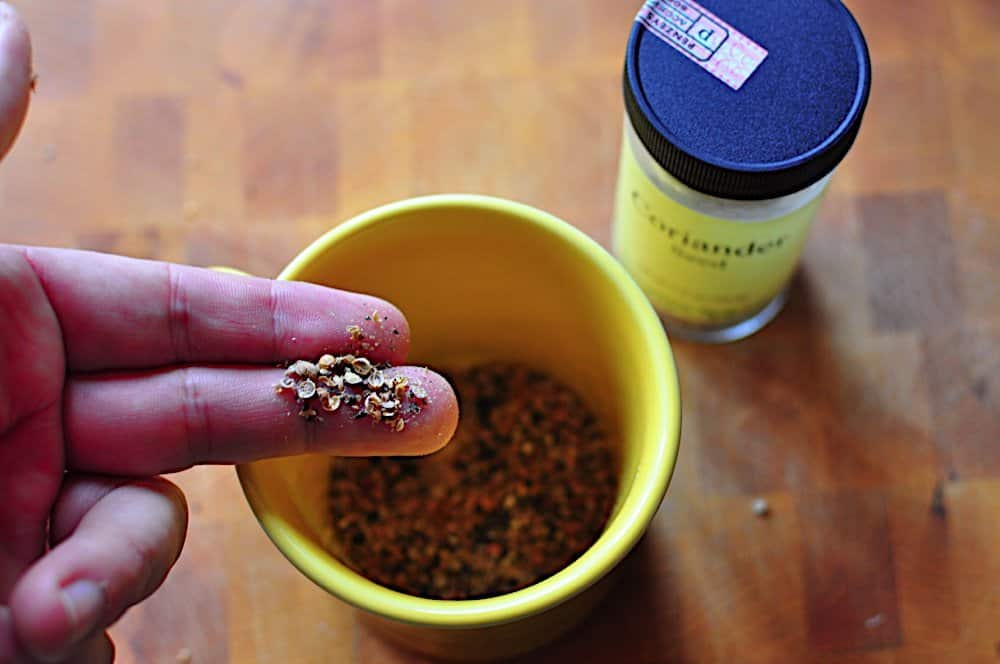
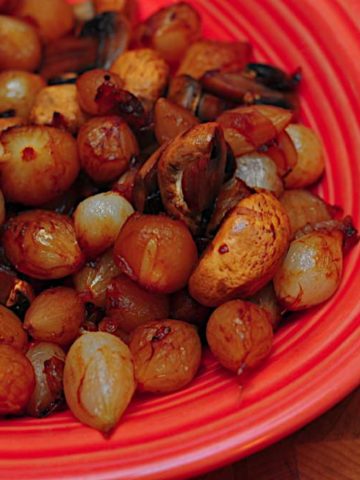
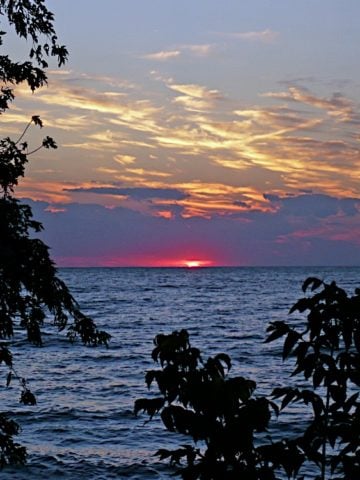
Sunset over Lake Erie

A programming note:
I will be out of town a lot in July, so DadCooksDinner will be published on a summer schedule until August. New posts will go up on Tuesday and Thursday, with no Monday post unless something really grabs me. Comment approval will be sporadic as well; my internet access will be limited to coffee shop visits.
*I have a bunch of posts "in the can", ready to go for the month...but I was stressing out trying to get more done. My usual three posts a week, done a month in advance adds up to a lot of writing. It dawned on me that this was silly. I write this blog because I enjoy it, not to raise my stress levels. I decided to cut back a bit and enjoy my time off.

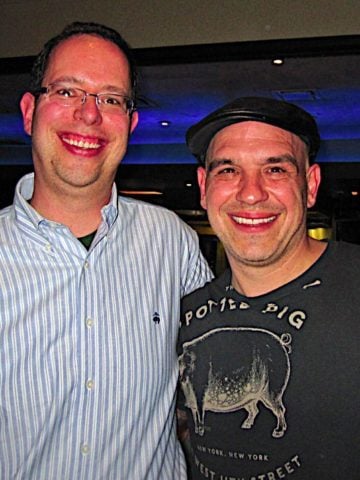
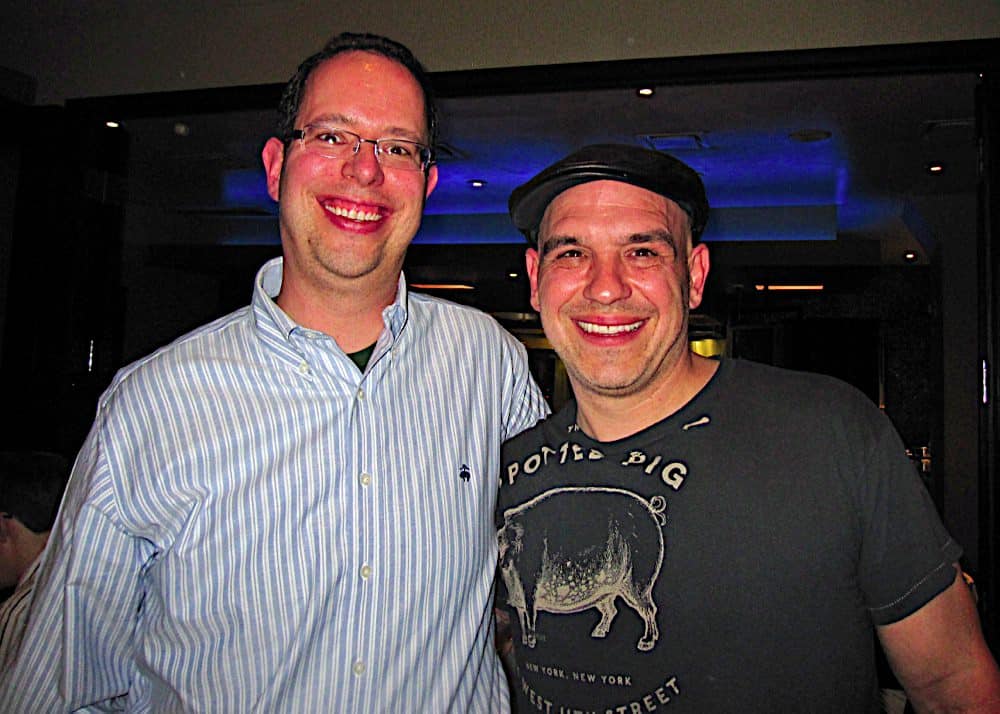
What's happening? I'm going on vacation! (Whoo hoo!) I'm spending one week in Chicago, taking the kids to all the museums and hole-in-the-wall ethnic restaurants I can find. Then I'm packing up my Weber kettle and heading for my family's cottage on Lake Erie. The upside? A relaxing month, visiting the big city, then relaxing on the beach. The downside? Neither location has internet access. This is probably a good thing; it will force me to relax, and spend time away from my computer.
*Who am I kidding? I'm getting the shakes already. And I don't leave until Saturday. How much is a 3G iPad? What do you mean we can't get a 3G signal in Madison-On-The-Lake? I guess I really will have to relax on my vacation.

Enjoy your summer, everyone; I'll see you in August!

What do you think? Where are you going on vacation? Have any restaurant suggestions for Chicago? (I want to go to the Weber Grill Restaurant, Frontera Grill, and Brasserie Jo; any other suggestions, particularly for small, neighborhood places on the north side of town?) Talk about it in the comments section below.

*Enjoyed this post?  Want to help out DadCooksDinner?  Subscribe using your RSS reader or by Email, recommend DadCooksDinner to your friends, or buy something from Amazon.com through the links on this site.  Thank you!

Things I love: Weber Charcoal Chimney Starter

June 28, 2010 by Mike Vrobel 9 Comments

Things I love: Weber Charcoal Chimney Starter

A chimney starter is the best way to start a charcoal fire. Stuff some newspaper in the bottom, fill the top with charcoal, and light it up; thirty minutes later, the charcoal is ready to use. It's quicker, easier and cleaner than lighter fluid, and the food you cook doesn't wind up tasting like, well, lighter fluid.

The chimney concentrates the heat of the burning paper, and forces it to rise up into the coals.  Once the coals start to light, they add to the heat, until all the coals are lit and ready to go. I've used it in almost all weather conditions, from sunny to windy to snowing heavily. The only problems were caused by very high winds, where the fire was blown out before it got the coals started.
*Oh, and I don't use it in heavy rain...but that's more because I don't like grilling in a downpour.

Why the Weber chimney starter? Two reasons. First, most chimneys are too small. They only hold about three quarts of charcoal. The Weber chimney, filled to the top, holds 5 quarts of charcoal. This is enough to make a single layer of coals across the grate of a Weber kettle, or to make a perfect indirect high heat fire by piling the coals in two piles on the sides of the grill. If you have a smaller chimney, you have to light the coals in two steps - first, use the chimney to get a batch of coals going. Then spread the coals out in the bottom of the grill, pour extra unlit coals coals on top of them and wait ten minutes for those coals to light. I prefer the chimney that holds enough coals that I can just dump and start grilling.

The Weber also comes with a helper handle. This handle is a simple, brilliant addition to the chimney. It helps control a chimney full of hot coals; it is amazing how much extra control comes from that second point of leverage. The coals just go where I want them to go.

So, how do you actually use a chimney? Here are my (foolproof) instructions:
*I'm getting really basic here. It will take you longer to read this section than it will to actually start a chimney of charcoal. If you've ever used a chimney before, skip to the "oil the paper" trick, then move on to another post.

1. Prep the grill: Remove the lid from the grill, remove the grate from the grill, and open the air vents. This lets the air flow to start the fire.
*Also, if I don't do this now, I forget, and smother the coals when I put the lid on later.

2. Put the paper in the bottom of the chimney: Use two sheets of newspaper, loosely wadded up into a ball. The paper should just fit inside the bottom of the chimney.
*I prefer the food section, or the comics, but that's because I'm weird.
**If there is a trick to using a chimney, this is it: Do not use more than two sheets of paper, or crumple the paper into a very tight ball! If the paper is packed too tight, it smothers the fire, and it never really gets going.

3. Oil the paper (optional): If the weather conditions are bad (that is, windy), I pour 1 tablespoon of vegetable oil on the paper. This is a trick I learned from Alton Brown (my hero!). The oil catches fire easily, and burns longer than the paper, and it gives the starting of the chimney a little extra oomph. I usually drizzle a little oil on the paper before I wad it up. Or, if I forget, I pour the oil into the chimney before I add the charcoal.
*Note that this will result in a smoky, greasy fire for the first ten minutes the chimney is burning, so don't do it if you're afraid of smoking out your neighbors.

4. Add the charcoal: Put the chimney, paper side down, on the charcoal grate of your grill. Fill the chimney with charcoal (or fill it to the level you want. Most of my recipes use a full chimney for indirect high heat, or a ¾ full chimney for direct medium-high heat.)

5. Fire it up! Light the paper in the bottom of the chimney in a couple of places. The charcoal will be ready in 20 to 30 minutes. The charcoal is ready when the coals on the top have a coating of white ash on them. They don't need to be completely covered, but the white ash should be visible on most of the top of the charcoal. Spread the coals out in the grill, add the grate, and it is time to grill.
*Oh, and check the chimney after five to ten minutes. If you look through the little holes on the side, you should see a core of coals that are glowing a fiery orange. If you don't see that, you many need to add more paper and try again. Chimney failure has only happened a handful of times during my years of using a chimney, on very windy days. So you can probably skip it. But... checking the chimney is a habit that has saved dinner for me a couple of times.

Notes: 
While the Weber chimney is the best choice, any chimney is better than using lighter fluid. If you're desperate, you can use any metal cylinder as a chimney. I've seen chimneys improvised out of coffee cans; cut the top and bottom off the can, use the pointed end of a bottle opener to punch a ring of holes in the bottom of the can, stuff the newspaper in the bottom, and fill the rest of the can with charcoal.

Next week, I'll show how to set up different types of fires in a charcoal grill. Stay tuned!

What do you think? Questions? Other ideas? Leave them in the comments section below.

Related Posts:
Things I Love: Why Weber Grills?
Basic Technique: Direct Heat Grilling (coming soon)
Basic Technique: Indirect Heat Grilling (coming soon)

Weber Charcoal Chimney Starter

*Enjoyed this post?  Want to help out DadCooksDinner?  Subscribe using your RSS reader or by Email, recommend DadCooksDinner to your friends, or buy something from Amazon.com through the links on this site.  Thank you!

Kale Chips

June 24, 2010 by Mike Vrobel 7 Comments

I've mentioned The real omnivore's dilemma before - what do you do with all the kale in your CSA? The last time I asked that question, I got a response from reader Maria in an email, saying: You make kale chips, of course!

Kale chips are a food blogosphere sensation - everyone has done them.
I mean everyone: Other versions are here, here, here, and here.
...and here, here and here.  I'll stop now, you get the point.

Normally, I don't know what to do with all the kale in my CSA; now I was impatient, waiting to get some.  It arrived, and finally I could try the recipe.
It just didn't seem right, after calling it the CSA box dilemma, to go buy some kale from the grocery store.

I found out why they are such a sensation - they're fiendishly addictive. They come out crispy and salty; the roasting gives them a sweet taste at first, and a little bitter bite at the end. They're so crisp that my first thought was "how am I going to store the extras? They're all going to crumble!" Then I tasted one. And another. And another. Then Diane joined in the tasting. Soon I realized I hadn't taken the "beauty shot" I needed for this blog post, and all the kale was gone. Oh, well, nothing to do but make another batch.
Yes, I know, I'm really suffering for my art over here.
**Yes, I did eat an entire bunch of kale in one sitting. And then I wanted to lick the bowl clean. I don't normally have that strong an attraction to greens.

If you're looking for braised kale, check out my Instant Pot Kale (with garlic and lemon) recipe.

Recipe: Kale Chips

Inspired by Michael Pollan's Omnivores Dilemma, and the list of recipes I linked to above.

Ingredients:

  • One bunch of kale (roughly 8 ounces, or half a pound)
  • 1 tablespoon olive oil (or vegetable oil)
  • 1 teaspoon balsamic vinegar (optional)
  • 1 teaspoon kosher salt

Directions:
1. Prep the Kale: Turn the oven to 300F. Trim the stems out of the kale, and cut the remaining half a leaf into 3 pieces (each piece should be 2 to 3 inches square - see pictures below). Toss the kale with the olive oil and vinegar until well coated. Spread the kale out on two baking sheets, making sure to keep it in a single layer, then sprinkle with ½ teaspoon of the salt.
*Coating the kale with the oil and vinegar is tougher than it seems - the kale's many ridges trap the oil. I had to toss the kale much longer than I usually toss a salad to get an even coating.

Fold the kale along the stem
Chop the stem out
Cut what's left into 3 pieces

2. Cook the Kale: Put the baking sheets in the oven, and cook for 15 to 25 minutes.  The kale will be papery and crisp, and just starting to turn a dark olive color. Remove the baking sheets from the oven, and sprinkle with the remaining ½ teaspoon of salt. Allow the kale to cool for 15 minutes, or as long as you can restrain yourself, then serve.

Ready for the oven
Done!

Variations:
Vinegar: Use whatever vinegar you have on hand; I like the extra hit of sweet in balsamic vinegar, but sherry vinegar and white wine vinegar also worked.

No Vinegar: Skip the vinegar if you like. My favorite potato chips are salt and vinegar flavored, so I like the extra sour element the vinegar gives you.

Notes:
*Don't under cook the kale; you want it shatteringly crisp. It is OK if you overcook it a little, but be careful - the longer you cook it past crisp, the more bitter the kale gets.  I like a little hint of bitter, so I go for olive color; if they turn out too bitter for you, try cooking them until they're just crisp, about 15 minutes, and see if you prefer that version.

What do you think? Questions? Other ideas for using up kale? Leave them in the comments section below.

Inspired by:
Tim Knorr, who runs the farm at Crown Point CSA, and keeps me stocked with vegetables for the summer. Thanks, Tim!

Michael Pollan Omnivores Dilemma

*Enjoyed this post?  Want to help out DadCooksDinner?  Subscribe using your RSS reader or by Email, recommend DadCooksDinner to your friends, or buy something from Amazon.com through the links on this site.  Thank you!

Napa Cabbage Slaw with Honey Lime Dressing

June 22, 2010 by Mike Vrobel 5 Comments

I got a huge Napa cabbage in my first CSA box last week. I combined it with some of the other vegetables in the box - some radishes and spring onions - to make an early summer version of the slaw that is served with fish tacos.
*I share my Crown Point CSA with my friend Pam; we alternate weeks. Her first answer to "what do I make with this random vegetable?" is always "make a slaw". Turnips? Beets? Kohlrabi? Pam says: slice it thin.
**My first thought is usually: steam-saute it.

This slaw made a great side dish for a Tex-Mex dinner. It has green, crunchy cabbage, a little heat from the radishes and onions, and the tart, sweet honey-lime dressing. It was a great counterpoint to the spicier dishes in the rest of the meal.

This recipe is another example of how to use basic techniques and flavor profiles in cooking.  I knew I wanted the slaw to taste Tex-Mex, so I used lime and honey as the base flavors with my vinaigrette basic technique.  Then I thin-sliced the vegetables, added some cilantro, tossed it all together, and I was done.  Voila!  I went from a box of random CSA vegetables to a side dish in ten minutes, and if I can do it, you can too.

Recipe: Napa Cabbage Slaw with Honey Lime Dressing

Ingredients:

  • 1 ½ lbs Napa Cabbage
  • 1 bunch radishes
  • 3 spring onions (or 4 green onions)
  • ¼ cup cilantro

Honey Lime Dressing

  • 1 tablespoon rice wine vinegar
  • Juice and zest of 1 lime
  • 1 tablespoon honey
  • 1 clove garlic, minced
  • ½ teaspoon salt
  • ½ teaspoon black pepper
  • ¼ cup extra virgin olive oil


Directions:
1. Prep the vegetables: Core the cabbage, and cut it into ¼" to ½" thick slices. Trim the leaves and roots from the radishes, and cut into ¼" slices. Trim the leaves and roots from the onions, halve, and cut into ¼" slices. Mince the cilantro. Put all the ingredients in a salad spinner, rinse thoroughly, then spin dry.

Slice the napa cabbage thin
...and the radishes...
...and rinse and spin everything

2. Make the dressing: Put the vinegar, lime, honey, garlic, salt and pepper in a large bowl, and whisk until the honey and salt have dissolved in the vinegar. Add the olive oil in a thin stream, whisking constantly to emulsify the oil.

3. Toss the slaw: Add the vegetables to the bowl with the dressing, and toss until the vegetables are thoroughly coated with dressing. (To make ahead, save this step until just before it is time to serve the slaw.)

Variations:
Spicy salad: To add some kick to the salad, add a thin sliced jalapeno or serrano pepper to the vegetables.

Creamy dressing: Replace half the olive oil with mayonnaise.

Notes:
Cabbage slaw is the traditional topping for Baja fish tacos. Why? Lack of refrigeration. Taco stands on the shores of the Pacific couldn't store lettuce, which needs to be refrigerated, but they wanted a green, crunchy topping for their fish tacos. Cabbages are fine without refrigeration, and cabbage slaw makes the perfect companion for fish tacos.
My grilled fish taco recipe is coming soon. Can you tell?

I sliced the cabbage relatively thick - if you want a finely shredded slaw, go ahead and slice it as thin as you can. I liked the thicker pieces of cabbage, since I was serving this as a side dish rather than a topping.

What do you think? Questions? Other ideas? Leave them in the comments section below.

Related Posts:
Vinaigrette basic technique
Lemon Herb dressing (a variation on the honey-lime dressing in this recipe)
Grated carrot salad

Inspired by:
Spicy Napa Cabbage Slaw with Spicy Dressing [epicurious.com]
Carottes Rapees [davidlebovitz.com]

Enjoyed this post?  Want to help out DadCooksDinner?  Subscribe using your RSS reader or by Email, recommend DadCooksDinner to your friends, or buy something from Amazon.com through the links on this site.  Thank you!

Cooking Demo: Meet me at the Market, June 24th 2010

June 21, 2010 by Mike Vrobel Leave a Comment

Cooking Demo at the Market: June 5 2010

I'm doing a grilling demonstration at the Stan Hywett farmers market next Thursday, June 24th, from 4:00 PM to 7:00 PM. If you're in the area, please stop by and say hello!

I am a huge fan of the Countryside Conservancy farmers markets, and I had a great time doing the demo a few weeks ago at the Saturday morning market in the Cuyahoga Valley, and I am looking forward to checking out the market at Stan Hywett - I've never been to it before.

My theme is "Grilling the Farmers Market".  I have to check out the vendors at the market, to see what I'll be able to cook, but I know I'll be doing grilled garlic toast, and a few other vegetables.  Part of the fun of cooking from a farmers market is finding out what's available that week.

Information about the Stan Hywett farmers market: CVCountryside.org

View Larger Map

I hope to see you there!

Pressure Cooker Pork Chili with Beans

June 17, 2010 by Mike Vrobel 15 Comments

Pressure Cooker Pork Chili with Beans

When Kuhn Rikon sent me their Family Style cooker to test, the first recipe that I thought of was chili. I've been eyeing that cooker for a while because of how wide it was, thinking that extra surface area would be great for browning the cubes of meat that make up chili (or a stew.)
*It doesn't take much for me to think of making chili. New pot to try out? I should make chili! Pot-luck party at a friend's house? I should make chili! Bad day at work? I should make chili! High sunspot activity? I should...well, OK, that last one is a stretch...but I should make chili!

And so, without further ado, here is my pressure cooker adaptation of pork chili.
*Don't have a pressure cooker? Check out my Ranch Hand Chili recipe.

Recipe: Pressure Cooker Pork Chili with Beans

Adapted From: Ranch Hand Chili, Cooks Country Magazine

Equipment:

  • Pressure cooker, at least 6 quarts (bigger is better, like my giant Kuhn Rikon 12-quart pressure cooker)
Cut pork shoulder into 1 ½ inch cubes
Brown the pork in batches
Toasting the spices
Ready for the lid
Under Pressure (exciting, I know...)

4. Serve: Serve the chili straight up, or with diced onions, sour cream, shredded cheese, minced cilantro, hot sauce, tortilla chips, pickled jalapenos...whatever you like as toppings for your chili.

Variations:
*Beans: To add beans, or not to add beans...that is the question. And the major variation in this recipe. If you choose to add beans (not that there's anything wrong with that), you can replace the kidney beans with pinto or black beans.

Notes:
*Speed up the browning by using two pans.  Instead of browning all the pork in the pressure cooker, brown one batch in a frypan and the other batch in the pressure cooker.  Remove all the pork to a bowl, continue with the onions in the pressure cooker, and simmer the stock (or water) in the frypan, scraping the browned pork on the bottom of the pan into the stock. Those browned bits are where the flavor is - don't lose it!  Pour the stock from the frypan into the pressure cooker when the recipe says it is time to add the stock.

*If you have the time, make this recipe a day ahead, refrigerate overnight, and reheat the next day.  The extra time helps the flavors; straight out of the pot tastes great, but the extra time takes this from great to sublime.

*This recipe makes for phenomenal leftovers.  Don't worry about having too much chili.  I freeze it in 2 cup containers, and then I can have a bowl of chili for lunch after five minutes of microwaving.

*So, how does the pressure cooker do with this recipe? I think there's something to the "cook in a sealed vessel to trap the flavors" argument. I've made a lot of chili in my day, and this recipe made me sit up and say "wow, I can really taste the pork and spices. This might be one of the best chilies I've ever made."

*Even better - I can easily double this recipe, which I do when I'm making chili for the super bowl or some other party. I've always made those chilies in my regular pots, because my pressure cooker wasn't quite large enough for a double batch. The Kuhn Rikon Family Style? It was made for double batches.

What do you think? Questions? Other ideas? Leave them in the comments section below.

Related Posts:
Ranch Hand Chili (non-pressure cooker version of this recipe)
Pressure Cooker Beans
Instant Pot Pork Stew
Instant Pot Carnitas
My other pressure cooker recipes

Adapted from:
Ranch Hand Chili: Cooks Country Magazine

*Enjoyed this post?  Want to help out DadCooksDinner?  Subscribe using your RSS reader or by Email, recommend DadCooksDinner to your friends, or buy something from Amazon.com through the links on this site.  Thank you!

Review: Kuhn Rikon 12 Quart Family Stockpot Pressure Cooker

June 14, 2010 by Mike Vrobel 31 Comments

Review: Kuhn Rikon 12 Quart Family Stockpot Pressure Cooker

When I wrote about my love of pressure cookers, I said Size Matters. I mentioned that I'd love to try the largest pressure cooker out there - the Kuhn Rikon 12 Quart Family Style Stockpot pressure cooker. Someone at Kuhn Rikon read that article, and they offered to send me one for a review. I couldn't say "YES!" fast enough.

I have been a pressure cooker fan for close to a decade now, and I have heard about the quality of Kuhn Rikon pressure cookers. They are true second generation cookers, made in Switzerland, and are built really, really well. The Family Stockpot 12 quart cooker they sent me is no exception. It is huge, solid, and fits together like (excuse the allegory) a Swiss watch.
*Also, the ½ and ⅔rds fill lines are marked inside the pot, which is a "why doesn't everyone do this?" feature. Pressure cookers need head space to come up to pressure. They shouldn't be filled beyond ⅔rds full. Why doesn't everyone make that level obvious?

Handy ½ and ⅔rds lines

Why does size matter so much with pressure cookers? If a pressure cooker is over ⅔rds full, there isn't enough room in the cooker to build up pressure. Because of this ⅔rds rule, a bigger pressure cooker is almost always better. This 12 quart cooker is as big as they get; it is 2 quarts bigger than my current cooker, the 10 quart Fagor Duo. The extra 2 quarts translates into 1 ⅓ quarts of usable space, and I always want more space in my cooker. The Kuhn Rikon swallowed two gallon bags of frozen chicken pieces when I made stock for my first test run, and looked like it could take two more.  I made large batches of food with all my tests, and I still wasn't filling this cooker to its limit.  I don't think I'll need to break apart my turkey carcass when I make my annual batch of turkey broth at Thanksgiving - the Family Stockpot cooker is that big.

Space isn't just about volume; width is also important. Every pressure cooker I've used, until this one, was very narrow. I think it is the nature of pressure cookers - it's easier to build them if the column of air they are pressurizing is narrow. The Kuhn Rikon Faimly Style is 11 inches wide. That extra surface area is a big help; it has as much space as my frypan for browning. My Fagor pressure cooker is only 10 inches wide, and is noticeably more narrow. All the other 8 inch wide cookers I've used are tiny in comparison. This is a big advantage of the Kuhn Rikon.
*And I think it explains why the Kuhn Rikon Family Style cookers cost as much as they do. That extra width must increase the pressure, and requires a stronger cooker. But we'll get to my cost-benefit analysis later.

Kuhn Rikon 12 quart on the left,
Fagor 10 quart on the right

Finally, there is a second generation, spring loaded pressure valve on the cooker. The spring loaded valve has two lines on it, and when the second line comes into view, the cooker is up to pressure. This is a much better pressure indicator than I have on my current cooker, which uses escaping steam to let you know it is up to pressure. With the Kuhn Rikon, there is no release steam unless it is over-pressurized, and needs to release some of that pressure.  In other words, there is no more hissing! I loved how quiet this cooker is.

And...I keep hearing how that lack of escaping steam is a good thing when it comes to flavor. Heston Blumenthal, the molecular gastronomist behind the Fat Duck restaurant, swears by his pressure cooker. Heston says that sealed pressure cookers give you better flavor in your food. His explanation goes like this: when you cook something uncovered on the stove top, your kitchen smells great; this is a bad thing, because it means the flavor compounds are escaping into the air. The sealed environment of the pressure cooker traps those flavor compounds, and letting the pressure come down naturally gives them time to settle back into the meal. This means the Kuhn Rikon (and any true second generation pressure cooker that doesn't release steam) should have a flavor advantage over pressure cookers that allow steam to escape while they are cooking.

The French Culinary Institute's blog came to the same conclusion in their taste test of regular versus pressure cooked chicken stock. The FCI found conventionally cooked chicken stock tasted better than pressure cooked stock - with their older, jiggle style pressure cooker. But! When one of their tests cooks brought his Kuhn Rikon from home, the results of the test switched. The Kuhn Rikon pressure cooked stock tasted noticeably better than the conventional chicken stock and jiggle-top pressure cooked stock.

I haven't had a chance to do a side by side tasting of stock, comparing the two cookers I have; that's my project for Thanksgiving, when I'll have a bunch of turkey carcasses to work with. I can say that my test recipes tasted great, and the pork chili I made in the Kuhn Rikon had a richer, porkier taste than any other pork stew I've done in a pressure cooker.
This will obviously take more research and tasting. Yum!

As you can probably tell, the Kuhn Rikon was passing my tests with flying colors. Is it perfect? No. There are a few minor quibbles I have with it.

The first is the lack of a locking pressure release. Most cookers have a way to set the pressure valve to "open" so you can dump the pressure quickly. It's noisy, but it works. For the Kuhn Rikon, you have to hold the pressure valve down to get it to quick release the pressure. You can't just throw a switch and step back. Now, this isn't critical, because you can use the old fashioned quick release method - run cold water down the side of the cooker. This is what I usually do with my pressure cookers, because it is faster and quieter than their quick release valves.
My kids usually clear out of the kitchen if I use the quick release valve - it is very noisy.

The second quibble is the Kuhn Rikon isn't a fully clad cooking pan, like my favorite All-Clad pans. It has an aluminum disc on the bottom; the aluminum doesn't come up the side walls of the cooker. That said, it browned meat very well in my tests. The browning was even, and not too quick; it wasn't quite as good as my All-Clad frypan, but it was certainly good enough. Besides, whenever I have to brown a lot of meat I use both the cooker and my frypan so I can brown two batches at once.
I don't think I'm ever going to see a fully-clad pressure cooker. A fully clad pot costs about as much as a similar sized pressure cooker. Combining cladding with a pressure cooker lid seems like it would be very, very expensive. And speaking of cost...

The final issue is the cost. This is not a cheap piece of cookware; it lists for north of $400. I've always wanted one, but it is expensive enough that I would always think "I'll save up for it later." Now that I've used it, I love it. It is definitely worth the money. The volume, width, build quality, and second generation pressure valve make it worth the extra expense.
If I had to give it back, I'd be buying myself one. I am already used to the extra space it gives me; my other cookers look puny in comparison. And it's so quiet!

If you just can't spend the $400, I would definitely look at the narrower Kuhn Rikons. I was impressed by this cooker's performance, and the advantages of the build quality and second generation pressure valve are available in their less expensive models. If you love pressure cooking (like I do), the extra width and space in the Kuhn Rikon Family Stockpot 12 quart cooker make it a great value for the money.
*If you're looking for something smaller, instead of cheaper, I would check out the other Family Style models - the 5 quart braiser and 8 quart stockpot models have the same 11 inch width as this cooker.

**Oh, no...the 5 quart braiser model is calling to me now...


Summary:

Pros:

  • Excellent build quality - built like a Swiss watch
  • Huge - extra cooking surface and cooking capacity
  • Second generation pressure valve - no hissing, better flavor

Cons:

  • No automatic quick release - have to hold down the valve or run water down the side
  • Not fully clad - disc on the bottom
  • Expensive (but worth it)

Recommendation: Highly recommended

FTC Disclosure: Kuhn Rikon gave me the pressure cooker for this review. Thank you, Kuhn Rikon! [KuhnRikon.com]

What do you think? Questions? Other ideas? Leave them in the comments section below.

Related Posts:
Things I Love: Pressure Cookers
Coming Tuesday: Pressure Cooker French Lentils
Coming Thursday: Pressure Cooker Pork Chili
Pressure Cooker Chicken Stock
Click here for my other pressure cooker recipes.

Kuhn Rikon 12-Quart Family Style Pressure Cooker

*Enjoyed this post?  Want to help out DadCooksDinner?  Subscribe using your RSS reader or by Email, recommend DadCooksDinner to your friends, or buy something from Amazon.com through the links on this site.  Thank you!

Grilled Butterflied Leg of Lamb, Dry Brined with Garlic, Lemon and Herbs

June 10, 2010 by Mike Vrobel 7 Comments

Grilled Butterflied Leg of Lamb, Dry Brined with Garlic, Lemon and Herbs

I am a fan of the taste of lamb, especially grilled lamb. The "labminess" that seems to worry people is an extra depth of flavor that I love.
*Is lambiness a word?  Not according to my spell check.  I'm going with it anyhow.

I don't understand the concern about the flavor. When I cook lamb for people, they seem surprised at how much they like it. I had this exact reaction at the farmers market cooking demo I did last weekend. The one quote I remember was:

Taster: The pork is delicious!

Me: Um...that's butterflied leg of lamb.

Taster: Oh, really? Wow, I never would have guessed. It's good!

Another was..."That was lamb?  It tasted interesting." I'm guessing that most of the tasters liked it - they ate every last scrap of lamb I served.

There were a number of lamb fans in the audience, who got excited when they heard I was serving lamb. When I told Jane Snow that we would be tasting the lamb in twenty minutes, she got a gleam in her eye and said "I'll be back."
*Think Arnold Schwarzenegger in Terminator level "I'll be back". I could see that gleam in her eye through her sunglasses.

If you haven't had lamb in a while, and think you don't like it, give it a try. You'll be pleasantly surprised. Particularly if you get a good, locally grown lamb, like the leg I was cooking, donated at cost by Great American Lamb.  My only regret about the lamb was they couldn't make it to the market last Saturday, and people kept asking where they could buy it.  They will be at the market this weekend, so stop by and pick something up from them.  (And tell them I sent you.)

Recipe: Grilled Butterflied Leg of Lamb, Dry Brined with Garlic, Lemon and Herbs

Adapted From: Pam Anderson CookSmart

Equipment:

  • Grill (I use a Weber kettle.)
  • Charcoal Chimney (The Weber Chimney is the perfect size for this recipe)
Lamb on one side, coals on the other
Carve and serve
Carve and serve

Notes:

Serving options: At the market, I served the lamb with a grated carrot salad; tzatziki sauce is also very traditional. I agree with Michael Symon: an acidic sauce goes well with lamb.

Leftover lamb means Gyros to me. Make some tzatziki sauce, serve with pita bread, sliced red onions and (maybe) a Greek salad. Or, make them middle eastern by using hummus, harissa and pita bread, and serving with tabbouleh. (See my Instant Pot Hummus recipe to make your own hummus.)

Leftover lamb also makes a great sandwich. Lamb, mayo, some lettuce (mesclun mix is nice) between two pieces of bread. Make sure the lamb is thin cut, or the sandwich is hard to eat. If I have big pieces of lamb, I chop them into thin strips before putting them in the sandwich.
Oh, and I meant to baste this with the garlic and butter baste I used in my grilled steak recipe, using a herb brush...but I forgot in all the excitement at the market.

What do you think? Questions? Other ideas? Leave them in the comments section below.

Related Posts:
Grilled Lamb Loin Chops Michael Symon Style
Grilled Rack of Lamb
Rotisserie Boneless Leg of Lamb

Special Thanks:
Thanks to Great American Lamb for supplying the lamb for the cooking demo, and this post.
Thanks to Tamara Mitchell at DineInDiva.com for the pictures.

Adapted from:
Pam Anderson: CookSmart

*Enjoyed this post?  Want to help out DadCooksDinner?  Subscribe using your RSS reader or by Email, recommend DadCooksDinner to your friends, or buy something from Amazon.com through the links on this site.  Thank you!

Rotisserie Chicken, Dry Brined

June 8, 2010 by Mike Vrobel 5 Comments

At my farmers market grilling demo, I heard:

This chicken is great! What kind of barbecue sauce did you use on it?

The answer: no barbecue sauce. The chicken was salted a day ahead of time, I put a sprig of thyme under the skin of the breast, and I cooked it on my rotisserie with a chunk of smoking wood. That's it!
*This recipe was my hook at the market; it reeled people in. When a group of people walked by, I'd lift the grill lid and show the browned chicken rotating over the coals. Every time I did that, I had the attention of the crowd - they'd stop what they were doing and listen to me. Behold: the power of rotisserie chicken!

This recipe is all about the art of simple grilling. The salt and smoke enhance the flavor of the chicken, and the rotisserie crisps up the skin. There's nothing between you and the taste of the bird, so make sure to get a bird with a lot of flavor. I had the advantage of a pasture raised chicken from Brunty Farms, so I had a great chicken to show off my cooking.
*Difeo's Poultry is another place in Akron for quality poultry. If you don't have access to a local farmer selling fresh chicken, get the best bird you can. My local grocery carries Gerber poultry, which is a good option. I've had good results with Bell and Evans chickens as well.

Recipe: Rotisserie Chicken, Dry Brined

Adapted from: Judy Rodgers, Zuni Cafe Cookbook

Cook time: 60 minutes

Equipment:

  • Grill with Rotisserie attachment (I used a Weber kettle with the Rotisserie attachment)
  • Aluminum foil drip pan (9"x11", or whatever fits your grill)
  • Butcher's twine for trussing the chicken

Ingredients:

  • Two whole chickens, 3.5lbs to 4.5 lbs
  • ½ teaspoon kosher salt per pound of chicken (2 teaspoons per chicken)
  • 4 thyme sprigs (2 per chicken)
  • 1 chunk smoking wood, fist sized (oak, hickory, or a fruit wood like apple or cherry)

Instructions:
See my Basic Technique: Rotisserie Poultry for more details. And, sorry for the lack of pictures - I got caught up in talking with people at the market.  See the basic technique, and the other rotisserie recipes at the bottom of the post for pictures on how to set up a rotisserie chicken.

1. Dry brine the chicken: Salt and refrigerate the chicken at least the night before cooking, and up to 3 days ahead of time. Sprinkle the salt evenly over the entire chicken. I start by sprinkling salt in the cavity of the bird. Then I salt and rotate: first the breast, then one side (with the leg and wing facing up), then flip and do the other leg and wing side.  Finally, I salt the bottom (backbone) side of the chicken. I use about ½ teaspoon of salt per "side", using a little less in the cavity and on the backbone. Next, I  loosen the skin from the breast meat by gently running a finger under the skin of each breast.  Then I put a sprig of thyme under the skin, on top of each breast - two per chicken. Refrigerate the chicken in a roasting pan.  If you are salting more than a day in advance, cover the chicken with plastic wrap, and remove the plastic the night before cooking to let the chicken dry.

2. Truss and skewer the chicken: One hour before cooking, remove the chicken from the refrigerator. Fold the wingtips back under the chicken, then truss the chicken tightly. (Again, see the basic technique for trussing details). Skewer the chicken on the spit - get it on there tight! I like to put one set of prongs under the breast of the first chicken, then the other skewer through the thighs. Then, I put the second bird on upside down compared to the first bird. This makes the whole spit more balanced, which eases the load on the rotisserie motor. Also, it looks cool that way.*
*Yes, I'm a cooking nerd.

3. Prepare the grill: Prepare your rotisserie for cooking on indirect high heat. For my Weber kettle, I light a chimney starter* full of charcoal, wait for it to be covered with ash, then pour it in two equal piles on the sides of the grill, and put the drip pan in the middle, between the piles. I put the chunk of smoking wood on one of the piles of charcoal, and I'm ready to cook.
*I highly recommend the Weber Chimney Starter. It is larger than most chimney starters. It holds 5 quarts of charcoal, which exactly the right size for cooking this recipe.

4. Cook the chicken: Put the spit on the grill, turn on the rotisserie motor, and cook with the lid closed.  The cooking time will be from 45 minutes to 1 hour 15 minutes, depending on the size of the bird. A 4 lb bird will be done in about an hour.  The chicken is done cooking when the temperature in the thickest part of the breast meat is 160*F to 165*F; start checking about 15 minutes before you think the bird will be done.
*It is better to determine doneness with an instant read thermometer, but the dry brine does give you some room for error.  I overcooked the chicken I was serving at the market, because I was too busy chatting with people.  Even though the breast showed 174*F when I took it off, the chicken was juicy and delicious.

5. Serve: Remove the spit from the grill, remove the chicken from the spit, and remove the trussing string from the chicken. Let the chicken rest for at least 15 minutes, then carve and serve.

Stopping traffic
with a rotisserie chicken

Variations:
I prefer to keep things simple when I have a good chicken, fresh from the farmers market. For a change of pace, I like to try these variations:

*Put half a lemon and herbs in the cavity before trussing the bird. Any herbs will do; use whatever you have on hand. I like the "Simon and Garfunkel" herbs - parsley, sage, rosemary and thyme, in whatever combination is available.

*BBQ rub - Skip the thyme sprigs. Sprinkle barbecue rub all over the chicken with the salt (or instead of the salt, depending on how much salt your barbecue rub has). Work some of the rub under the skin, on the breast meat, as described for the thyme.

Related Recipes:
Don't have a rotisserie? Try my butterflied chicken recipe instead.
Rotisserie Chicken, brined and cooked on a gas grill
Rotisserie Chicken, Red Chile Marinated
Click here for my other rotisserie recipes.

Special Thanks:
Thank you to Jeff and Melanie at Brunty Farms for the chicken.
Tami Mitchell at DineInDiva.com and GardenGroceryGadgetGirl.blogspot.com for the pictures in this post.

Inspired by:
Judy Rodgers: Zuni Cafe Cookbook


Check out my cookbook, Rotisserie Grilling.

Everything you could ask about the rotisserie,
plus 50 (mostly) new recipes to get you cooking.

It's a Kindle e-book, so you can download it and start reading immediately!


*Enjoyed this post? Want to help out DadCooksDinner? Subscribe to DadCooksDinner using the RSS or Email options on the right, link to this post from your blog, recommend DadCooksDinner to your friends, or buy something from Amazon.com through the links on this site. (Like my Rotisserie Grilling cookbook...)

Grilling the Farmers Market

June 7, 2010 by Mike Vrobel 3 Comments


Recipes I demonstrated at the market:
Rotisserie Chicken (Other versions of roti chicken are here and here)
Grilled Butterflied Leg of Lamb (Coming Thursday)
Grilled Asparagus
Grated Carrot Salad
Grilled Garlic Bread

Last Saturday was my grilling demonstration at the Countryside Conservancy's farmers market in the Cuyahoga Valley. I was so excited to have the chance to do a demo at the market; I've been going there since Ben was small enough to fit in a Baby Bjorn.*  I loved the chance to help out the market, instead of just shopping.
*Ben is nine now, and rolls his eyes when he hears this story.

Earlier in the week I picked up my donated meats: chicken from Brunty Farms, and lamb from Great American Lamb. The night before, I seasoned the meat, and packed my grills in the car. I started the morning at 7:45 AM, when I backed my minivan up to my tent in Howe meadow. I had a leisurely hour while I set my grills up and got my charcoal burning. I walked around, bought some asparagus and carrots, and picked up some donated bread and goat cheese for my garlic toast. I met Rochelle, my assistant for the day. And then...Beth Knorr rang the bell, the market opened, and the first wave of people arrived.

At first, I had a hard time getting people to stop by and see what I was up to. I'm a little shy in public, and it took me a few minutes to warm up. Everyone was using the "I'm staying ten feet away, just walking by, just looking, I don't want to get involved" approach to checking out the market. I'd say hello, they would nod back, and keep walking. Then I figured out how to use my secret weapon - rotisserie chicken. I'd lift the lid on the kettle, show them the chicken spinning in it, and say "Hi! We're doing a grilling demo today!" The sight of the chicken would stop people in their tracks - it looked so good, they had to come closer and see what I was up to. Then I'd move to the other kettle: "and here's the butterflied leg of lamb I'm cooking. We'll be grilling some asparagus later. Come back in thirty...twenty...ten minutes for a free sample!"

That started a regular flow of visitors, but it really took off when we were ready to give out samples of the food. As the lamb and chicken approached the finish line, a crowd started to form and watch me grill the asparagus. We started passing out the samples, and...the next two hours were a blur of slicing, serving, answering questions, and saying "the recipes are on my website - take a card!". The stream of people didn't stop until about 11:15, when we were out of food to give away. Luckily, that was also when the customers at the market were starting to thin out.

What did I learn for next time? Get a second round of food on the grill as soon as possible. I was having a great time: cutting up food, chatting with people, and answering questions. But I didn't start the second batch of charcoal in time. By the time I realized this, it was too late. The second round of lamb and chicken I had planned were too late. That said, I cooked and served: A whole chicken, 3.5lbs of lamb, a pound of asparagus, a french baguette sliced into garlic bread, and two bunches of carrots. Nothing was left by the time I was done! And, really, that's how I judge success - did they like the food?

I wanted to thank a few people who made it such a fun morning:

Rochelle, doing the dirty work
of julienning carrots

The first person I want to thank is Rochelle, my sous chef for the morning. I met Rochelle for the first time at 9AM, right when the market was opening. She volunteered to help out at the market, and they asked her to be my assistant. My first thought was "Assistant? Oh, that's OK, I won't need one. I do this all by myself all the time. I won't need the help." I thought it would be nice to have someone to talk to during the slow times, and that was all. Boy, was I wrong about that! A half an hour later, I was spending all my time talking to the people in front of the tent, showing them my rotisserie chicken and leg of lamb on the grill...and Rochelle was hard at work in the back, shredding carrots and whisking vinaigrettes. I would have been deep in the weeds without her. Thank you, Rochelle!

No picture of Tamara - she was behind the camera
so I'll show you her great shot of my grilled asparagus instead!

Tamara Mitchell, of DineInDiva.com, stopped by to say hello and cheer me on. She regaled me with stories of her haul from the All-Clad factory sale, and kept me chatting while I prepped the food samples.
*She also saw that I was busy, and took all the pictures you see. Thank you, Tami!

Mike and Jane Snow, sampling the lamb

Jane Snow also stopped by. I'm still a little bit in awe of her, after years of reading her food column in the Akron Beacon Journal. She gave me some good advice for working the crowd ("Tell them who you are!") and, when she saw the hint of pink in my medium-cooked lamb, said "That's the piece I want!"
*She also mentioned that I should get a custom apron with DadCooksDinner.com on it. I told my wife I was going to have one made, and she said "Oh, no you don't! Now I have something I can get you for Father's day!"

Unknown Blog Reader #1 was a really nice guy who stopped by to say hi, and tell me how much he liked DadCooksDinner. He kept checking in until I had some food cooked, told me how good it was, then headed home. And I never thought to ask his name (or if he told me, I never caught it.) Whoever you are - thank you for coming to the market to say hello!
*And leave a comment to let me know your name. It's killing me.

Beth Knorr. Beth runs the market, gave me the opportunity to do the grilling demonstration, and kept checking in on me to see if everything was going OK. Thank you, Beth!

Thanks to all the farmers who gave or sold me the food I cooked:
Brunty Farms (chicken)
Great American Lamb (lamb)
Lake Erie Creamery (goat cheese)
Great Lakes Baking Company (french bread)
Klimos Farms (asparagus)
Breezy Hill Farm (carrots)

Special thanks to Jeff at Brunty Farms for the chicken, and Brad at Great American Lamb for the leg of lamb. Their food was the center of my presentation, and they jumped through hoops to get it to me early.

If you didn't get to visit on Saturday, I'll be doing my demo again at the Cuyahgoa Conservancy's Stan Hywett market on Thursday, June 24th from 4PM to 7PM. I can't wait. Stop by to say hi!

*Enjoyed this post?  Want to help out DadCooksDinner?  Subscribe using your RSS reader or by Email, recommend DadCooksDinner to your friends, or buy something from Amazon.com through the links on this site.  Thank you!

Grilled Sausage

June 3, 2010 by Mike Vrobel 15 Comments

Sausage on the grill

Grilled Sausage - basic technique. This is a weeknight grilling recipe, but just barely. It takes 30 to 45 minutes, end to end, counting preheating the grill. But most of that time is hands off, because I cook the sausage over indirect heat, so there are no flare-ups. A quick browning at the end and the sausage are ready! Also, because sausage is already stuffed with flavor, there is no other prep work. I take the sausage out of its packaging and put it directly on the grill.

Sausage on the grill
[feast_advanced_jump_to]

Grilling sausage is an essential skill for every grill master. Especially me. My Dad is from Wisconsin, and I was born there. Knowing how to cook bratwurst is a family requirement.

Grilling sausage is not easy. Cooking a sausage all the way through before it burns on the outside is tricky, and flare ups from dripping fat make it even harder...if you cook them over direct heat. Sausages are a prime candidate for sear-roasting on the grill. Start them over indirect heat, and leave them there until they are cooked through. Then, brown the sausage quickly over direct heat to finish.
If the grill is hot enough, you can skip the browning step - on my charcoal grill, 20 minutes of indirect heat is enough time to brown the sausage AND cook it through.

This is a weeknight grilling recipe, but just barely. It takes 30 to 45 minutes, end to end, counting preheating the grill. Half of that time is hands off - the indirect cooking part - and you can get other parts of your dinner done while the sausages are grilling. Also, because sausage is already stuffed with flavor, there is no other prep work. I take the sausage out of its packaging and put it directly on the grill.

Italian ans Lamb Merguez sausage

Ingredients

  • Uncooked sausages (I usually cook 1 to 2 packages, roughly 2 to 3 pounds)
  • (See Variations for sausage suggestions)
Sausage over a foil pan on the grill

How to Grill Sausages

Prepare the grill (Gas Grill) - Indirect 400°F+

Set the grill up for cooking with indirect high heat. For my Weber Summit, I preheat the grill with all the burners on for ten to fifteen minutes, then I clean grates with my grill brush. Then I set up for indirect heat by turning off two of the burners, and putting a foil pan under the grill grate, on top of those unlit burners. On my Summit 650, this means burner 1 is on, 2 and 3 are off and 4 to 6 are still on (I use 4-6 as a grilling area for other things...like peppers and onions.)

OR: Prepare the grill (Charcoal Grill) - Indirect

For a charcoal grill, like my my Weber kettle, I light a chimney starter full of charcoal, wait for it to be covered with ash, then pour it in two equal piles on the sides of the charcoal grate, and put the drip pan on the charcoal grate, between the piles.

Checking sausage temperature with an instant read thermometer

Cook the sausages

Put the sausages on the grill grate over indirect heat. (That is, over the unlit burners and drip pan). Cook with the lid closed for fifteen minutes. Flip the sausages, and check their temperature. They should be 160°F in the middle; if not, cook with the lid closed for another five minutes, or until they are 160°F. Now, if the sausages aren't browned enough, move them over the direct heat (one of the lit burners) and grill until browned, watching carefully for flare-ups, about 2 minutes. Flip the sausages and brown the other side, about 2 more minutes. Serve and enjoy!

Serving suggestions

  • On a bun: Pop them in a bun and load them up with toppings and some mustard. My favorite is grilled peppers and onions and brown mustard. Or, pickle relish and yellow mustard. Or, sauerkraut and grainy mustard. Or sliced jalapeños and hot and sweet mustard. The choices are almost endless
  • With pasta: This is especially good with Italian sausage. Cut the sausages into 2 inch pieces and toss them with pasta. Add some fresh diced tomato, minced garlic, basil leaves and olive oil, and you have a perfect pasta recipe for the height of summer.
  • As an appetizer: Cut the sausages into 1 inch pieces, and serve as an appetizer with pickles and a variety of mustards. If you want to be fancy, skewer each piece of sausage on a toothpick. (These are particularly good with the wood smoked variation, below)
Sausage in a bun with grilled peppers and onions

Variations

What kind of sausage can you grill?

What kind do you have? I've used this recipe with

  • Italian sausage (sweet and hot)
  • Merguez sausage (lamb sausage from my local farmers market)
  • Bratwurst (Johnsonville, my favorite)
  • Hungarian sausage (from Al's Quality Market)
  • Sicilian sausage (from DeVitis)
  • Chorizo (Spanish, uncooked style)
  • Chicken sausage (from Mustard Seed Market)

Add some wood smoke

A great addition to this recipe is wood smoke. This works best on a charcoal grill. I soak a fist-sized chunk of hickory (or other smoking wood) in water for an hour. Then I drain it and put it on the lit coals, right before I add the sausage. On a gas grill I soak a cup of wood chips for an hour, drain them, wrap them in a foil packet, and put them under the grate, on the burner cover over a lit burner. (Or put them in the smoker box on my Weber Summit).

Equipment

  • Grill (I use a Weber Summit. Here is the current version of my grill.)

What to do with leftover grilled sausages

Leftover sausages are great to have in the refrigerator.  Slice them up, then use them in pasta (see the variations), or in a soup, or with beans. They'll last for a few days in the refrigerator, or for a few months in the freezer.

What do you think? Questions? Other ideas? How do you like to serve sausages - any other suggestions? Leave them in the comments section below.

Adapted From: Stephen Raichlen's BBQ USA

Rope sausage on the grill, browning over direct heat

Related Posts

  • Grilled Tomahawk Steak - Long Bone Ribeye Reverse Seared
  • Grilled Short Ribs with Smoked Spanish Paprika Rub
  • Grilled Thin Pork Chops Quick Brinerated
  • Grilled Ham with Honey-Bourbon Glaze

Click here for my other grilling recipes

Did I mention this goes well with: Grilled Peppers and Onions

*Enjoyed this post?  Want to help out DadCooksDinner?  Subscribe using your RSS reader or by Email, recommend DadCooksDinner to your friends, or buy something from Amazon.com through the links on this site.  Thank you!

Cooking Demo: Meet me at the Market, June 5th 2010

May 30, 2010 by Mike Vrobel 2 Comments

Cooking Demo at the Market: June 5 2010

I'm doing a grilling demonstration at the Howe Meadow farmers market in the Cuyahoga Valley next Saturday, June 5th, from 9:00 AM to Noon. If you're in the area, please stop by and say hello!

I'm a big fan of the farmers market in the Cuyahoga Valley - I've been dragging my family there on Saturday mornings since Ben (my 9 year old) was small enough to fit in a Baby Bjorn. I asked if they had any openings for cooking demos.  Beth Knorr, who runs the market said "sure - when are you available?"
*I'm excited, and nervous, and it's still a week away. 

My theme is "Grilling the Farmers Market".  I will be cooking rotisserie chicken (from Brunty Farms), butterflied leg of lamb (from Great American Lamb), asparagus (hopefully, if it's still available next week), grilled garlic toast, and a few other vegetables (I won't know what is available until I get there...part of the fun of a farmer's market!)

If you can't make it Saturday, I will be doing another demo at the Stan Hywett farmers market on Thursday, June 24th from 4:00 to 7:00 PM.

Information about the Cuyahoga Valley farmers market: CVCountryside.org

I hope to see you there!

Grilling for Memorial Day 2010

May 28, 2010 by Mike Vrobel 4 Comments

It's Memorial Day Weekend!  Grilling season is now officially open!
*Of course, for me, it never really closes...

Want more than some hot dogs on the hibachi? Here are some suggestions from the DadCooksDinner archives:

Grilled Ribeye Steaks with Mediterranean Herb Butter - Did I mention it won an award? And that my "semi-vegetarian" sister-in-law loves it?
Grilled Lamb Loin Chops, Michael Symon Style
Grilled Butterflied Chicken, Thai Brinerated
Grilled Boneless Pork Chops, Brined and Honey Glazed
Grilled Trout, Herb and Citrus Stuffed

Three more, because I love my rotisserie:
Rotisserie Chicken with Red Chile Marinade
Rotisserie Baby Back Ribs
Rotisserie Prime Rib Roast

*Oh, and before you start grilling - have you cleaned your grill this year?  Now is a good time to do it, while you have the long weekend off, before the party starts this weekend.  And then your grill will be ready to go for the rest of the summer.

Here are a couple more grilling recipes I've enjoyed recently, from across the web:
ThreeManyCooks: Beer Can Chicken
*I can't believe I haven't done a beer can chicken recipe yet.  I'll have to get to work on that...

Serious Eats: A Hamburger Today's Burger (Outstanding) Of The Year

What do you think? Questions? What are you grilling this Memorial Day Weekend? Talk about it in the comments section below.

*Enjoyed this post?  Want to help out DadCooksDinner?  Subscribe using your RSS reader or by Email, recommend DadCooksDinner to your friends, or buy something from Amazon.com through the links on this site.  Thank you!

Thai Noodle and Pork Stir Fry

May 27, 2010 by Mike Vrobel 4 Comments

Noodle stir fries are a quick weeknight meal in my recipe arsenal. I turn to it when I'm bored with my standard chicken stir fry with a side of white rice. The kids would be happy if we had rice every night, but I want some variety in my stir fries. I can't live on rice alone.
*I think my kids would be willing to try living on rice alone.

Rice vermicelli noodles are the key ingredient. They are a quick cooking replacement for the rice, and they add some needed bulk to the meal. Rice vermicelli doesn't need boiling water; the noodles soften when soaked in hot tap water for 20 minutes. Drain them, and they're ready to go in the pan with the stir fry.

This recipe is improvised from Su-Mei Yu's rice noodle stir fry technique (Fine Cooking Feb/Mar 2006). I was thinking about Pad Thai when I started, but I was missing some key ingredients. I adapted what I had into a general Thai noodle dish. Thai flavors are a big hit with my kids; they love the "sweet" part of the hot, sour, salty, sweet balance in Thai cuisine.

*While my kids are starting to appreciate heat in their food, I cut back on Thai heat for them. I serve some thin-sliced serrano chiles on the side with my Thai dishes, so I can add my extra heat at the table.

**I cut back on "Thai heat" for myself, too.  Thai is one of the cuisines where "hot" is defined, as John Pinette once said, not as "oooh, my tongue is tingling", but as "AAAAAAAAAH!"

***My list so far consists of Thai, Indian and Chinese. Never dare a chef from those areas to make it "really hot".

Recipe: Thai Noodle and Pork Stir Fry

Adapted from: Su-Mei Yu's rice noodle stir fry technique from Fine Cooking [Feb/Mar 2006]

Cook time: 6 minutes

Ingredients:

  • 4 ounces rice vermicelli
  • hot tap water (to cover the vermicelli)

Sauce Ingredients

  • ¼ cup soy sauce
  • 2 tablespoon fish sauce
  • 2 tablespoon sugar
  • 1 tablespoon hoisin sauce
  • Juice of 1 lime
  • ¾ lb thin boneless pork chops
  • 2 teaspoon soy sauce
  • 1 teaspoon cornstarch
  • 2 tablespoon peanut oil (or vegetable oil)
  • 2 cloves of garlic, smashed
  • pinch of red pepper flakes (or 1 tsp, if you like it hot)
  • 2 scallions, trimmed and cut into 1 inch pieces
  • ¼ cup unsalted peanuts, crushed (or leave them whole)
  • ¼ cup coarsely chopped cilantro, or basil, or a mix of the two
  • 1 serrano or jalapeno chile, sliced thin (optional)

Directions:
For an overview, see my Basic Technique: Stir Fry
1. Preparation: Soak the noodles in hot tap water for 20 minutes, or until softened. Meanwhile, mix the sauce ingredients in a small bowl until the sugar is dissolved. Slice the pork chops into ¼" thick slices, and toss with the soy sauce and cornstarch; let the pork soak in the soy/corn starch until ready to cook. Smash the garlic, slice the scallions, chop the cilantro, and crush the peanuts. Set all these ingredients aside until you need them.

Soaking the rice noodles
Slice the pork chop thin
Crushing the peanuts

2. Stir fry: Heat the 2 tablespoon of peanut oil in a large nonstick skillet over medium-high heat until the oil is shimmering. Add the smashed garlic, then immediately add the pork. Stir fry the pork for 2 minutes, until it is starting to brown. Add the scallion and cook for 1 more minute. Add the sauce, and bring to a simmer. Add the noodles, and toss until the noodles have evenly absorbed the sauce.

Brown the pork
Sauce to a simmer
Noodles tossed with sauce

3. Top and serve: Remove the pork and noodles to a serving bowl. Top with the peanuts, cilantro, basil and serrano chile. Or, put the noodles in individual serving bowls before topping with the nuts and spices.

Variations:
*Chinese style: In the sauce, replace the fish sauce with 1 tablespoon rice wine vinegar, and the lime juice with 1 tablespoon oyster sauce. Top with thin sliced scallion in place of the cilantro and basil.

*More vegetables: I like to add thinly sliced onions and bell peppers to this dish. After cooking the pork, remove it to a plate with a slotted spoon, then stir-fry the vegetables until browned and just softening. Add the pork back to the pan, and continue with the recipe.

*Side dish: If you want a vegetarian side dish instead of a one-pot meal, skip the pork. Or, replace it with the "more vegetables" option above.

Notes:
*Organization is the key to stir frying. I have less steps in this recipe than I usually do, because everything needs to be prepped before the stir fry starts. Once it starts, things move quickly, and the recipe comes together in five to ten minutes. Make sure you have your mise en place* before you start.

*French kitchen slang, defined by cooks as having everything in place for cooking. According to Tony Bourdain, this is usually shortened to "meez" in professional kitchens, as used in this sentence: "Get your *&#$@#$ing meez done, here comes the dinner rush."

*This is a good stir fry for a beginner - knife skills are less important than they are in most stir fries. If you buy "stir fry pork", pre-sliced from your local grocery store, you only have to cut up the scallion, herbs and hot pepper.

What do you think? Questions? Other ideas? Leave them in the comments section below.

Related Posts:
Basic Technique: Stir Fry
Chicken with Peppers and Onions Stir Fry recipe
Bok Choy Stir Fry recipe
Velveted Chicken Stir Fry

Adapted from:
Su-Mei Yu's rice noodle stir fry technique from Fine Cooking [Feb/Mar 2006].

Su-Mei Yu The Elements of Life

*Enjoyed this post?  Want to help out DadCooksDinner?  Subscribe using your RSS reader or by Email, recommend DadCooksDinner to your friends, or buy something from Amazon.com through the links on this site.  Thank you!

Ginger Fried Rice, Bittman and Vongerichten Style

May 25, 2010 by Mike Vrobel Leave a Comment

I'm a fan of Mark Bittman's Minimalist column in the New York Times. His best recipes seem to be inspired by working with professional chefs. Mark combines his knack for stripping a recipe down to its minimalist essence with the flavor combinations that the chefs have painstakingly developed.

His work with Gary Danko produced his baked mustard chicken thighs recipe, which is in heavy rotation at my house. And no-knead bread, made with Jim Lahey, was an sensation on the Internet, and deservedly so - it revolutionized home bread baking.

Bittman has been collaborating for years with Jean-Georges Vongeritchen, head chef of the Jean-Georges restaurant empire. They have worked together on many books; the brilliance of Jean-Georges' French and Asian flavor combinations, and the simplicity of Mark Bittman's basic approach makes them a good team.
*I've heard great things about their Simple to Spectacular cookbook. When I was writing this post, I realized that I've never read it. I just added it to my Amazon wish list for future reference.

Mark recently posted Jean-Georges' ginger fried rice recipe. Since my kids are such rice monsters, I gave it a try. I was floored by this deconstructed fried rice. The recipe looks so simple, with Jean-Georges assembling it in layers. Fill a bowl with fried rice and leeks, top it with an egg, sprinkle on the crispy garlic and ginger bits, then trickle in some salty soy sauce and nutty sesame oil. The layers are the key - it keeps the flavors separate until you get it in your mouth, where it all comes together while you chew, and it makes the flavors really stand out. I've fallen in love with this recipe, and make it about once a month. Give it a try - you will feel like a rock star chef, mastering a fusion of French and Asian cooking, in the comfort of your own kitchen.
*My only problem with this recipe is the leftover rice. I never have any. I keep making larger and larger batches of rice, and my kids keep eating it all. I found out that Tim, my preschool aged son, loves having rice for lunch. Eventually, just to get pictures for this post, I had to make a batch of rice after lunch so I would have the "leftovers" for dinner.

Recipe: Ginger Fried Rice, Bittman and Jean-Georges Style

Adapted From: Mark Bittman and Jean-Georges Vongerichten: Ginger Fried Rice [nytimes.com]

Cook time: 20 minutes

Ingredients:

  • ¼ cup peanut oil
  • 2 inches of ginger, peeled and cut into slivers
  • 4 cloves garlic, peeled and cut into slivers
  • ¼ teaspoon kosher salt
  • 1 cup thin-sliced leeks (or shallots, or green onions)
  • ½ teaspoon kosher salt
  • 4 cups leftover rice (preferably Jasmine rice)
  • 4 eggs
  • sesame oil and soy sauce for drizzling

Directions:
1. Fry the Ginger and Garlic: Heat the ¼ cup peanut oil over medium-high heat until it is shimmering. Add the ginger and garlic slivers and cook until they are golden brown and crisp. Remove with a slotted spoon to a paper towel lined plate, leaving as much oil behind as possible. Sprinkle the fried garlic and ginger with ¼ teaspoon kosher salt.

2. Saute the Leeks: Put the leeks in the pan, sprinkle with ½ teaspoon kosher salt, and toss to coat with the oil. Cook the leeks for 5 minutes, or until they are until softened, but not browning.

3. Fry the Rice: Add the rice to the pan. Stir and toss the rice to mix in the leeks and break up any clumps. Cook the rice until it is heated through. Taste the rice, and add salt to taste. Remove the rice to four serving bowls, one cup of rice per bowl.

4. Scramble the Egg: Turn the heat down to medium, and add the eggs to the pan. Scramble the eggs, cooking and stirring occasionally for 2-3 minutes. Once the eggs are mostly set, form them into a rectangular shape. When they are cooked to your liking, cut into four equal pieces and put one on top of each bowl of rice.

5. Top the Rice and Serve: Sprinkle a heavy pinch of the fried ginger and garlic on top of each bowl. Drizzle each bowl with a half teaspoon of soy sauce and a quarter teaspoon of sesame oil. Serve.

Variations:
*Fried egg: The original recipe had you cook the eggs sunny-side up, and top each bowl of rice with one egg. When you cut into the sunny-side up egg, the yolk will run into the rice, mixing in and giving the rice even more flavor. Unfortunately, my kids only eat scrambled eggs, so that's how I make it.

*Pork fried rice: If you have some leftover pork (preferably Char Siu, but any pork roast or pork chop will do), cut it into ½" strips and stir fry it with the leeks.

*Spice it up: Adding a quarter teaspoon of red pepper flakes right before the rice gives it a little heat. Or, do what I do, and add some sriracha with the soy sauce and sesame oil.

Notes:
*You have to try the fried ginger and garlic slivers. I love the combination of the crisp-fried exterior, sweet garlic, and spicy, almost hot ginger. I keep "taste testing" them while I'm cooking the rice, to the point of almost running out.

*Slivering Ginger and Garlic: I learned how to do this from illustrations in Barbara Tropp's The Modern Art of Chinese Cooking. First, peel the ginger. Then cut it crosswise into coins, each about ¼ of an inch thick. (Mine are roughly the size and shape of a quarter.) Fan the coins out like a deck of cards, with each ginger coin overlapping the ones next to it. Slice across the fanned out ginger, holding the fan down with your hands - again, about about ¼ inch thick. Voila! Ginger slivers! Garlic uses the exact same technique - cut into coins, spread them out overlapping each other, then cut across.
*What's that? That doesn't make sense? OK, check out the pictures below.

Cut into coins
Fan out like a deck of cards
Cut into slivers

What do you think? Questions? Other ideas? Other Bittman or Vongerichten recipes you love cooking? Leave them in the comments section below.

Related Posts:
Click here for Stir Fried Bok Choy with Basil Lemon sauce
Click here for Baked Chicken Thighs with Mustard and Herbs

Adapted from:
Mark Bittman and Jean-Georges Vongerichten: Ginger Fried Rice [nytimes.com]
Video: Jean-Georges' Fried Rice

Mark Bittman and Jean-Georges Vongerichten Simple to Spectacular

*Enjoyed this post?  Want to help out DadCooksDinner?  Subscribe using your RSS reader or by Email, recommend DadCooksDinner to your friends, or buy something from Amazon.com through the links on this site.  Thank you!

Road Trip: Asian Food Market

May 24, 2010 by Mike Vrobel 2 Comments

The name is generic, but Asian Food Market in Cuyahoga Falls is worth the trip. They have more of a Korean and Japanese focus than CAM Asia Market up north, and they carry ingredients for almost every type of Asian cuisine.

Last year, they moved up the road to a new store (in what used to be the Golden Dragon restaurant). It is a nice upgrade - the new store is cleaner and has better lighting than the old one.

Asian Food Market
2419 State Road
Cuyahoga Falls, OH 44223-1503
(330) 928-4710

My top five list of favorite items they sell, in no particular order:

1. Thin sliced beef, Korean style: Look in the freezer area for Short ribs for Kalbi, and thin-sliced boneless beef for Bulgogi (recipe still in development.)

2. Rice vermicelli noodles: I always keep a package of rice vermicelli noodles for a quick stir fry (recipe coming later this week).  They do not need to be boiled; soak them in hot water for ten minutes and they're ready to go.  I like the packages of noodles tied into one ounce portions.  It makes it easy to grab just what is necessary for a recipe, and leave the rest of the noodles for later.

3. Large bags of rice:As I mentioned in my CAM Asia Market post, I always buy my rice at asian markets. The price is right, the quality is high because they have a lot of turnover, and I can buy 25 pound bags. When your kids eat as much rice as mine do, you have to buy in bulk to stay ahead of them.

4. Huge propane fired wok burner: I love poking through the housewares section of ethnic markets. You find things like a propane wok burner. Picture the base of a turkey fryer, with rings set up to hold a wok over the flame. Why? More power! You just can't get that kind of flame from a home stove.
*Why not?  Gas pipes into a home are too narrow; they do not push enough gas through for the flames you see in the wok burners at asian restaurants.
**Am I going to buy it? No. But it shows a seriousness of purpose that I respect.

5. Kimchi: The famous korean pickle. (Or infamous, if you haven't acquired the taste for it.) Their refrigerator section has it in sizes from pint jars to two gallon jugs.


...Also, pretty much everything on my list from CAM Asia Market is available here as well...

Here's the map:

View Larger Map
What do you think? Questions? Other ideas? Know of any ethnic markets in the Akron area that I need to check out? Leave them in the comments section below.

Related Posts:
Click here for my Ethnic and Gourmet Markets in Akron

*Enjoyed this post?  Want to help out DadCooksDinner?  Subscribe using your RSS reader or by Email, recommend DadCooksDinner to your friends, or buy something from Amazon.com through the links on this site.  Thank you!

Pork Tenderloin, Brined and Pan Basted, Adam Perry Lang Style

May 20, 2010 by Mike Vrobel 14 Comments

*This recipe is from Adam Perry Lang's BBQ 25; I used it as a test for my review.

Some cuts of meat need help.

Pork tenderloin doesn't have much flavor on its own, so it makes an excellent canvas for carrying other flavors. This is where Adam Perry Lang (APL hereafter) is at his peak. He uses every trick he has to build layers of flavors into this mild cut of pork. You get a browned, grilled exterior, basted with butter, oil and herbs, combined with the salty, sweet flavor of his brine. I complained about how elaborate his recipes can be in my review, but this one is worth every bit of effort.

This recipe also showcases one of the techniques APL uses throughout BBQ 25: Back and Forth. Adam likes to have a baking pan on the grill with a layer of butter, oil, and spices gently simmering in it. Back and Forth is his shorthand for how he uses the baking pan while grilling. He starts the meat on the grill, to get it seared. Then he moves the meat into the baking pan and rolls it in the baste to coat. Then the meat goes back on the grill to sear some more. After a while, it goes back into the pan with the baste. Back and forth. Then, after the meat is well seared, it goes into the baking pan to cook until just about done. Then, one more quick sear on the grill, and back into the baking pan for a last bath in the baste before serving.

This technique is a great idea for thicker cuts of meat, like pork tenderloin, that are not cooked all the way through once they have been seared on the outside. Why cook them over indirect heat when they can cook over indirect heat in their basting liquid?
*I liked this technique enough that I'm going to buy a grill safe pan; I need to decide between cast iron and enameled steel.

Recipe: Grilled Pork Tenderloin, Brined and Pan Basted, Adam Perry Lang Style

Equipment:

  • Grill (I used a Weber kettle, this Weber Grill)
  • Grill safe baking pan (I used an 9x13 aluminum foil pan)

Ingredients:

  • 2 pork tenderloins, 1 ½ pounds each

Brine

  • 2 tablespoon table salt (or ¼ cup kosher salt)
  • 2 tablespoon brown sugar
  • 1 teaspoon fresh ground black pepper
  • 1 teaspoon paprika (preferably smoked Spanish paprika)
  • 3 cloves garlic, smashed
  • 3 sprigs fresh marjoram (or oregano, or thyme)
  • 4 cups water

Baste

  • ¼ cup olive oil
  • ¼ cup butter (½ a stick)
  • 2 cloves garlic, smashed
  • 4 sprigs fresh rosemary
  • ¼ teaspoon kosher salt (a 2 finger pinch)
  • ¼ teaspoon fresh ground pepper

Directions:
1. Brine the pork: Put the brine ingredients in a gallon zip top bag. Mix, crushing the ingredients through the bag, until the salt and sugar dissolve. (Watch out for any sharp ends on the marjoram sprigs; don't poke a hole in the bag). Add the pork tenderloins, zip the bag closed, and let rest in the refrigerator for 1 to 4 hours.

2. Make the baste:Put the baste ingredients in the grill-safe pan. Leave the pan at room temperature to let the butter soften while you prepare the grill.

3. Prepare the grill: Prepare the grill so half of it can be used for cooking on direct medium-high heat. For my Weber kettle, I light a chimney starter* ¾ full of charcoal, and wait for it to be covered with ash, about 20 minutes. Then I pour it in an even layer over half of the charcoal grate. Next, I put the grill grate in the grill, let it heat up for a minute, then brush it clean with my grill brush.
*I highly recommend the Weber Chimney Starter, because it is larger than most chimney starters. It holds 5 quarts of charcoal, which exactly the right size for cooking this recipe.

4. Grill the pork: Remove the tenderloins from the brine, and pat them dry with paper towels. Put the pan with the baste on the grill, over the direct heat. Heat the pan until the butter melts and the garlic starts to sizzle, then move it to the side of the grill that doesn't have direct heat. Put the tenderloins on the grill, over the direct heat. Grill for 3 minutes, until the tenderloins are starting to brown on the bottom. Move the tenderloins into the basting pan, and roll them to coat with the baste. Put the tenderloins back on the grill, with a non-browned side facing down. They will flare up at this point, due to the fat in the baste; if the flames get too high, move them to a part of the direct heat that isn't flaming as badly. Grill for another three minutes. Move the tenderloins back into the basting pan, and roll to coat with baste. Put them back on the grill, with another non-browned side facing down, and grill for another three minutes.
*The tenderloins should have a nice, browned crust over most of their surface at this point.

Sear over the heat...
...roll in the baste...
...back to the grill

Move the tenderloins into the basting pan, roll to coat with baste, then move the pan back to the direct heat side of the grill, with the tenderloins still in the pan. Cook the tenderloins in the pan for six minutes, rolling them in the baste every few minutes, and changing the side that is facing down.
doneness of the tenderloins at this point; I recommend measuring with an instant-read thermometer in the thickest part of the pork. They should be 140F for medium pork (Cooked through with just a suggestion of pink). If medium pork worries you, continue to grill them until they get to 160F. Remove the pork to the basting pan, roll in the baste, then remove the basting pan from the grill.

Saute in the basting pan
Final sear

5. Rest, then serve: Let the tenderloins rest for 10 minutes, then roll them one last time in the baste. Cut the tenderloins crosswise into ½" thick slices, drizzle a little of the baste on top of the slices, and serve.

Variations:
*Bacon baste: Use half the butter (2 tbsp) and add 8 slices of bacon to the baste. (This was in APL's original recipe. I didn't have any unfrozen bacon.)
*APL Board Dressing: Adam pours some of the baste on the cutting board before slicing the tenderloins.

Notes:
*I know the "Grill the pork" section of the recipe is very wordy. Here it is, stripped down: Put the pork on one side the grill, over direct heat, and the baste pan on the other side, over indirect heat. Grill the pork for 3 minutes, then roll it in the baste. Flip, grill for 3 minutes, roll in baste again. Flip, grill for final 3 minutes. Move pork to baste pan, move baste pan over direct heat, cook for 6 minutes, rolling pork in baste occasionally. Grill pork for one more minute, or until done. Roll one last time, rest, slice, and serve.

*As I said in the opening, this is a great way to cook pork tenderloin, and I think it would also be a good technique to use with thick boneless pork chops. This recipe made better pork tenderloin leftovers than I'm used to having - rolling it in the baste really seemed to help the flavor.

*Due to the brine, I don't think of this as a weeknight recipe. But...if you have the time to start the brine around lunchtime, the rest of the recipe is quick enough for a busy weeknight.

What do you think? Questions? Other ideas? Leave them in the comments section below.

Related Posts:
Grilled boneless pork chops, brined and honey glazed
Grilled thick pork chops with adobo spice paste
Grilled thin pork chops, quick brinerated

Adapted from:
Adapted from BBQ 25 by Adam Perry Lang copyright 2010 with permission of William Morrow/An Imprint of HarperCollins Publishers
Adam Perry Lang: BBQ 25

*Enjoyed this post?  Want to help out DadCooksDinner?  Subscribe using your RSS reader or by Email, recommend DadCooksDinner to your friends, or buy something from Amazon.com through the links on this site.  Thank you!

Top Sirloin Steak, Marinated and Butter Basted, Adam Perry Lang Style

May 18, 2010 by Mike Vrobel 1 Comment

*This recipe is from Adam Perry Lang's BBQ 25

As I said in my review, Adam Perry Lang (APL hereafter) has a very distinctive style of grilling. His recipes are all about building layer after layer of flavor. These steaks are marinated, seasoned, coated with oil, squashed flat under a brick on the grill, basted with butter using a herb brush, and, finally, chopped on a cutting board covered with oil and more herbs.
*I have to confess - I skipped a few of those steps. Like the bricks.

Looking at this recipe, my first thought was "This will be a lot of work!" But, as I made the recipe, the ingredients came together quickly. Adam has obviously put a lot of thought into his basic techniques, and has good tips on how to use them quickly.  The marinade, in particular, is almost all pantry ingredients; toss them into a zip top bag, smash together, and the marinade is ready.

The results? My wife loved the steaks; I thought they were very good, with a strong taste of the tangy marinade topped off by the sweet, garlic-herb taste of the butter baste. This recipe is great for leaner cuts of steak, the kind of cuts that take well to marinades.
*In other words, chuck, skirt, flank and rump steaks. Don't use it on a steak that can stand on its own; it would overwhelm the flavor of good beef.  In other words...if you do this to a prime porterhouse, I will find you and steal your grill tongs to make sure you don't do it again.

If you are the kind of person who thinks "more is more", who thinks steak isn't complete without some sort of sauce on it*, or who wants to put on a show for guests, this recipe is for you.
*Like my mom. Hi, mom!

Recipe: Grilled Top Sirloin Steak, Marinated and Butter Basted, Adam Perry Lang Style

Equipment:

  • Grill (I used a Weber kettle, this Weber Grill)
  • Herb brush (tie 4-5 sprigs of thyme around a sprig of rosemary), or a basting brush
  • Grill safe pot (optional, for the butter baste)

Ingredients:

  • 4 top sirloin steaks, ¾" thick (or flank, skirt, or chuck steaks)

Marinade

  • 1 tablespoon Worcestershire sauce
  • 2 tablespoon soy sauce
  • 2 tablespoon balsamic vinegar
  • 1 tablespoon fresh ground black pepper
  • 2 tablespoon grated sweet onion (¼ of a vidalia, ososweet, or use a red onion)
  • 4 cloves garlic, minced
  • 3 sprigs fresh thyme
  • 1 cup water
  • 2 tablespoon ancho chile powder

Butter baste

  • 2 tablespoon olive oil
  • 2 tablespoon butter
  • 2 cloves minced garlic
  • ¼ teaspoon kosher salt (a 2 finger pinch)
  • ¼ teaspoon fresh ground pepper

Board Dressing

  • 3 tablespoon extra virgin olive oil
  • 1 tablespoon chopped fresh parsley (or use some of the other herbs from the brush)
  • ¼ teaspoon kosher salt (again, a 2 finger pinch)
  • ¼ teaspoon black pepper
Ready for the grill - steaks, herb brush,
butter baste, board dressing

Directions:
1. Marinate the steaks: Put the marinade ingredients in a zip top bag, and mix, crushing the ingredients through the bag. (Watch out for any sharp ends on the thyme; don't poke a hole in the bag). Add the steaks, zip the bag closed, and let rest at room temperature for 1 to 2 hours.

2. Make the butter baste and board dressing:Put the butter baste ingredients in a grill-safe pot. (If you have a grill safe pot, you can melt the butter on the grill; if you don't, put them in a microwave safe bowl and microwave until the butter is melted and the garlic is starting to sizzle.) Put the board dressing ingredients in a bowl, and mix until well combined. Pour the board dressing out on the middle of your carving board, spreading it out so it will cover the steaks.

3. Prepare the grill: Prepare the grill so half of it can be used for cooking on direct medium-high heat. For my Weber kettle, I light a chimney starter* ¾ full of charcoal, and wait for it to be covered with ash, about 20 minutes. Then I pour it in an even layer over half of the charcoal grate. Next, I put the grill grate in the grill, let it heat up for a minute, then brush it clean with my grill brush.
*I highly recommend the Weber Chimney Starter, because it is larger than most chimney starters. It holds 5 quarts of charcoal, which exactly the right size for cooking this recipe.

4. Grill the steaks: Remove the steaks from the marinade, and pat them dry with paper towels. Put the pot with the butter baste on the grill, over the direct heat, and melt the butter. Once the garlic starts to sizzle, move the pot to a part of the grill that isn't over direct heat. Put the steaks on the grill, over the direct heat. Grill for 6 minutes, rotating the steaks 90 degrees halfway through, until the steaks have a nice, caramelized crust on the bottom. Flip the steaks, and grill the second side for 3 minutes. brush the steaks with the butter baste, using the herb brush. (Expect flareups when you do this). Check the donenes of the steaks at this point; I recommend measuring with an instant-read thermometer in the thickest part. For rare, they should have an 115F internal temperature; 120F for medium-rare, and 130*F for medium. Continue to cook the steaks until they reach the desired doneness, probably another 3 minutes for medium-rare. Flip the steaks one more time, baste them with the butter again, and remove them to your carving board with its board dressing. Give the steaks one final baste of butter.

5. Rest, then serve: Let the steaks rest for 10 minutes, then serve.

Variations:
*APL Bricks: Adam Perry Lang likes to press his steaks with a aluminum-foil covered brick while they're cooking to help them caramelize. I haven't noticed a difference when I use this technique, but it sure looks impressive, so if you want to show off for guests, give it a try. Just move the brick from steak to steak as they sear. (Use tongs, please, the brick will be hot!)

*APL Basting Brush/Board Dressing: If you used the herb brush and the board dressing, just before you put the steaks on the board, chop the tender ends of the herbs off the brush and onto the board dressing for an extra layer of herbs.

Notes:
*I'm definitely keeping the marinade part of this recipe handy. It was easy to put together, and quite tasty. I'm going to skip the grated onion next time, though; that step seemed like more trouble than it was worth.

*Marinating Time: Adam says you can marinate for up to 24 hours. I wouldn't go past two hours; beyond that and I think you will completely overwhelm the flavor of the meat.

What do you think? Questions? Other ideas? Leave them in the comments section below.

Related Posts:
Award winning Grilled Ribeye Steaks with Herb Butter Baste (Inspired by APL)
Grilled Flank Steak Teriyaki
Grilled Flat Iron Steak with Salsa Verde

Adapted from:
Adapted from BBQ 25 by Adam Perry Lang copyright 2010 with permission of William Morrow/An Imprint of HarperCollins Publishers
Adam Perry Lang: BBQ 25

*Enjoyed this post?  Want to help out DadCooksDinner?  Subscribe using your RSS reader or by Email, recommend DadCooksDinner to your friends, or buy something from Amazon.com through the links on this site.  Thank you!

Picanha - Rotisserie Top Sirloin Steaks, Churrascaria Style

May 13, 2010 by Mike Vrobel 13 Comments

Here is another idea from Steven Raichlen's Planet Barbecue: Brazilian picanha, cooked churrascaria style on the rotisserie.

Picanha is a Top Sirloin Cap Roast, with the fat still on (the fat is key).  It is cut across the grain into three steaks, bent into a "C" shape, and cooked on the rotisserie. (Find a Brazilian butcher if you can.  If you can't find one, here are pictures for an American butcher, so he'll know what you want: Top Sirloin Simple Cuts [pdf]).

Finding picanha turned into an adventure. My local grocery store only gets top sirloin cap roasts in cryovac packaging, with the fat removed - the French coulotte cut. I need that fat!

I went to West Point Market, where they pride themselves on having butchers on the premises.  Thanks to the pictures in the above link, I was able to explain what I needed.  Success!
*Once he saw the picture of what I wanted, he said "oh, you want a Tri-Tip!" Now, far be it from me to contradict the expert, and he did get me the cut I wanted...but I don't think it's a tri-tip. I think that comes from the bottom sirloin. But, I can't find a diagram of the tri-tip cut like I did for the top sirloin. Any butchers out there who can help me out?
*Update 6/10/2010: I was right, Tri-Tip is a cut from the bottom sirloin, according to Ryan Adams at Eat Me Daily: Tri-Tip [eatmedaily.com]

That's the hard part - finding the steaks.  Other than that little problem, this is about as simple as rotisserie grilling gets. Steak, salt, fire, rotisserie, done. When it is done, it is a perfectly browned steak, crusty with salt, sliced thin.

Recipe: Picanha - Rotisserie Top Sirloin Steaks, Churrascaria Style

Cook time: 15 minutes

Equipment:

  • Grill with Rotisserie attachment (I used a Weber Summit with an infrared rotisserie burner. Here is the current version of my grill.)
  • Aluminum foil drip pan (9"x12", or whatever fits your grill)
  • Instant Read Thermometer (not absolutely necessary, but highly recommended.)

Ingredients:

  • One Top Sirloin Cap Roast (Picanha), with fat cap left on - you want 1 to 1 ½ inches of fat
  • 4 teaspoon of kosher salt

Directions:
1. Cut and Skewer the Steaks: Cut the roast across the grain into three steaks, each one roughly three inches across. (The grain runs from the "tip" to the wide end of the roast, left to right in the pictures below.) Skewer the steaks with the spit, bending them into a "C" shape with the fat cap on top (the outside of the "C" - again, see the pictures below). Watch your fingers! Salt the steaks heavily, then let them rest at room temperature while you preheat the grill.

Picanha, or Top Sirloin Cap Steak
Cut into 3" wide steaks
Bent into a "C" and skewered
Ready for the grill

2. Prepare the Grill: Set the grill up for rotisserie cooking at high heat. The higher the heat, the better the sear you will get.  For my Weber Summit, this means preheating the grill with all burners on high for a full fifteen minutes. I leave the cooking grates in the grill for the thermal mass - they help hold the heat in the grill, and I don't need the extra clearance for these steaks. After fifteen minutes, turn off all but the two outer burners (burners 1 and 6), light the infrared burner, and set it to high as well. Put the drip pan in the middle of the grate, over the unlit burners, and it's ready to roll.*
*Get it? Roll? Hello? Is this thing on?.
(See My Rotisserie Basic Technique Post for more rotisserie setup details.)

3. Cook the Steaks: Put the spit on the rotisserie, and start the motor turning. Cook the steaks with the lid closed until the internal temperature reaches 115*F for Rare, or 120*F to 125*F for medium-rare, 20 to 30 minutes. Start checking the temperature in the thickest steak every five minutes after 15 to 20 minutes of cooking.
*Watch out for the spit when you're checking the temperature - it can throw the reading off. Also, the steak you get from the pointy end of the roast is a little smaller than the others, so it will cook quicker - if the largest steak is rare, the small one will be medium-rare to medium.

4. Serve: Remove the spit from the grill, and remove the steaks to a carving board. Let them rest for ten to fifteen minutes. Slice across the grain (that is, along the "C" shape), making sure to get a little fat on each cut.

Variations:
*Garlic butter: An idea inspired by the Fogo de Chao website: Brush the steak with garlic herb butter just before you take it off the rotisserie.

*Top Sirloin Steak: If you can't find the picanha cut with the fat cap still on it, use a different trick I saw on the Fogo de Chao website. Do what they do with their filet mignon - wrap the top sirloin steaks in bacon before you skewer them.

Notes:
*Spring was conspiring against me with this recipe. I really wanted to use the charcoal grill, for the extra-high heat that charcoal can provide. But we were under a severe thunderstorm watch all day, and it was raining on and off. There was a gap in the rain, just some minor sprinkles, so I pushed ahead with the gas grill. I can't wait for summer, when the constant threat of is past.  I want to try this one again with charcoal.

Landscape: Grill with Rain

*In Brazil, they cook directly over the coals. I thought I'd try this on my grill, and I had to act quickly to keep the grease fire from getting out of control. Make sure to use indirect heat on this one, and have a drip pan under the steaks. That fat cap is delicious, and you need it to help moisten this cut, which is relatively lean. But it drips a lot of fat while it's cooking, and it's not fun to juggle a hot rotisserie while there are flames pouring out of the fat pooled in the bottom of your grill.
*Yes, I've been having a bad streak with grease fires recently. Some lessons I have to re-learn the hard way every spring. Sigh.

*Speaking of Brazil: If you'd like to see how a professional does the cutting and spitting of picanha, watch this video.  (Jump to 0:44 in to see the meat being worked on):

What do you think? Questions? Other ideas? Leave them in the comments section below.

Related Posts:
Don't have a rotisserie? Try the technique from my award winning grilled steak instead.
Click here for my other rotisserie recipes.

Special Thanks:
The butchers at West Point Market

Adapted From:
Steven Raichlen: Planet Barbecue


Check out my cookbook, Rotisserie Grilling.

Everything you could ask about the rotisserie,
plus 50 (mostly) new recipes to get you cooking.

It's a Kindle e-book, so you can download it and start reading immediately!


*Enjoyed this post? Want to help out DadCooksDinner? Subscribe to DadCooksDinner using the RSS or Email options on the right, link to this post from your blog, recommend DadCooksDinner to your friends, or buy something from Amazon.com through the links on this site. (Like my Rotisserie Grilling cookbook...)

Farmers Market: Saturday in the Cuyahoga Valley

May 12, 2010 by Mike Vrobel Leave a Comment

Spring is officially here! The weekly Countryside Farmers Market in the Cuyahoga Valley National Park starts this weekend. It runs every Saturday from 9AM to Noon, from May 15th through the end of October.
*If you don't live in Northeastern Ohio, make sure to find your own local farmers market.

I have some exciting news: I'll be doing cooking demos at the market this summer! I'll be at the Howe Road market on June 5th, and at the Stan Hywett market on June 24th. I hope to see you there!
I won't be able to make it to this weekend's market; my son has a conflicting soccer game. And, since I'm the coach...I have to be there. I'm sure I'll see you all at the market at some point this summer!

Here's the address:
Countryside Farmers' Market at Howe Meadow
4040 Riverview Road
Peninsula, OH

More information is available at their website:
Cuyahoga Valley Countryside Conservancy


View Larger Map

Related posts:
My list of Ethnic and Gourmet stores near Akron, Ohio.

Rotisserie Chicken Legs, Churrascaria Style

May 11, 2010 by Mike Vrobel 8 Comments

Steven Raichlen's Planet Barbecue has a bunch of great rotisserie recipes from Brazilian churrascarias. One recipe he didn't include in the book, but that he showed a picture of, is frango - rotisserie chicken legs. I'm always looking for a new way to cook dark meat chicken*, and I love my rotisserie, so I knew I had to give it a try.
*If you only knew the power of the Dark Side ...wait, I promised I'd stop.

My big question was: Is it worth it to use the rotisserie with chicken legs? I have a good recipe for cooking chicken pieces on the grill. Is it worth the extra effort to skewer all those legs onto the spit? The answer: oh my, yes. The extra work results in juicy chicken legs, with the evenly browned and crackling crisp skin that only comes from rotisserie grilling.

The only problem I had to overcome was: how do you keep something as small as a chicken leg attached to the spit? As it turns* out, eight chicken legs was more than two spit forks could hold on to. I could get the main spit, and the fork prongs through the two end legs, but the four legs in the middle were only skewered in one spot by the spit. The result was the four outside legs, held by the forks, would rotate without any problem, but the four middle wound up hanging loose while the spit rotated inside of them. Not exactly what I was hoping for; if the middle legs weren't turning, then so much for the browning of the rotisserie!
*Get it? Turns? On the Rotisserie? OK, I'll stop that too.
**In Brazil, they use sword-shaped skewers (where the wide, thin blade holds the chicken steady), or twin skewers (where the two spit prongs hold the chicken steady.)

To fix this problem, I simulate twin skewers using my extra set of spit forks. I put a new spit fork on for every two legs. The result was four forks and eight legs. Easy!

Recipe: Rotisserie Chicken Legs, Churrascaria Style

Equipment:

  • Grill with Rotisserie attachment (I used a Weber Summit with an infrared rotisserie burner. Here is the current version of my grill.)
  • Aluminum foil drip pan (9"x12", or whatever fits your grill)

Ingredients:

  • Eight chicken legs (thighs and drumsticks, still attached)
  • 4 teaspoon of kosher salt (roughly ½ teaspoon per leg)

Directions:
1. Skewer and salt the legs: Skewer the legs on the spit, two legs for each spit fork.  I skewer the legs at  a 45 degree angle, slightly to the thigh side of the leg. It's OK if the legs overlap slightly, but try to keep a slight gap between the legs so they brown properly. Salt the legs heavily, then let rest at room temperature while preheating the grill.
*See the pictures below for an explanation of this process - it's tough to describe, but easy to show.  

Slightly to the thigh side of the leg...
One leg on the spit fork
Second leg on the spit fork
Repeat, adding spit forks
and pairs of legs

2. Prepare the grill: Set your grill up for rotisserie cooking at high heat. For my Weber Summit, this means removing the grates, turning the two outer burners (burners 1 and 6) to high, and turning the infrared burner to high. Then I put my drip pan in the middle, over the unlit burners, and let the grill preheat for ten to fifteen minutes. (See My Rotisserie Basic Technique Post for more rotisserie setup details.)

3. Cook the legs: Put the spit on the rotisserie, and start the motor turning. Cook the legs with the lid closed for 30 to 45 minutes, checking every ten minutes or so, until the legs are well browned and 180F in the thickest part. Legs are tough to overcook, so I would favor browning over temperature - you can go as high as 190F without overcooking them.

4. Serve: Remove the spit from the grill, and remove the legs to a platter. Let them rest for ten to fifteen minutes. Serve whole, or cut the legs into drumstick and thigh portions before serving.

Variations:
*Tempero: I love the simplicity of this recipe, but it would be every bit as authentic if you brushed the chicken legs with a tempero sauce.  Combine the following: the juice of three limes, ½ teaspoon kosher salt, and 3 cloves of minced garlic.  Brush this on the chicken a few times during the last ten minutes of cooking.

*Thighs only: Instead of legs, just use chicken thighs.

*Wood smoke: Add 1 cup of soaked wood chips, wrapped in foil (gas grill) or a fist sized chunk of wood to the fire before the chicken legs.

Notes:
*The beauty of this recipe is simplicity. You have chicken, salt, and a rotisserie. It doesn't get much more elemental, and the results are amazing. My lovely wife said "these are as good as the wings from your rotisserie chicken!" From her, this is high praise, since she always goes for the wings first.

*Traditionally, the meat is carved off the spit at the table by a server. This isn't realistic with my Summit's spit fork - it's almost four feet long.  I'd rather just remove the legs from the spit and serve them individually.

*If you don't have the extra spit forks for your rotisserie spit, you can try one of two things. First, just pack the legs closer together, until they hold each other in place while the rotisserie spins. This will leave you with uncrisped skin where the pieces are touching, but still gives you pretty good chicken. The better option is to use your spit forks to attach the end pieces, then run a regular kebab skewer through the thigh portion of all the legs to pin them all together. Depending on the length of your skewers, you may have to use more than one to do this.

What do you think? Questions? Other ideas? Leave them in the comments section below.

Related Posts:
Don't have a rotisserie?  Try my Grilled Chicken Pieces Basic Technique instead.
Want to cook the whole bird?  Use my Rotisserie Chicken recipe.
Click here for my other rotisserie recipes.

Inspired by:
Steven Raichlen: Planet Barbecue (From his pictures in the Brazilian grilling section)


Check out my cookbook, Rotisserie Grilling.

Everything you could ask about the rotisserie,
plus 50 (mostly) new recipes to get you cooking.

It's a Kindle e-book, so you can download it and start reading immediately!


*Enjoyed this post? Want to help out DadCooksDinner? Subscribe to DadCooksDinner using the RSS or Email options on the right, link to this post from your blog, recommend DadCooksDinner to your friends, or buy something from Amazon.com through the links on this site. (Like my Rotisserie Grilling cookbook...)

Using Five Senses in the Kitchen

May 10, 2010 by Mike Vrobel 4 Comments

Using Five Senses in the Kitchen

A few days ago I was making a stir fry for dinner. A pot of rice was on the stove, and I was busy chopping vegetables. I wasn't watching the pot of simmering rice. Once the water boils down to the top of the rice, I am supposed to lower the heat and put the lid on the pot. I missed see it; I was busy working on the vegetables. Luckily, something made me stop chopping. The sound of the boiling had shifted. It was higher pitched, and it sounded like a smaller amount of water was boiling. I wasn't actively listening for this, but "The rice doesn't sound right" popped into my head. I checked on the rice, turned down the heat, and dinner was saved.

This made me think: How do I use my senses when I cook? I've spent enough time in the kitchen to be aware of what's going on around me when I'm cooking. I'm not just using my sense of sight, or my sense of taste. While I work on the task directly in front of me, I also pay attention for other clues. I'm using all my senses, all the time.
*I think this is part of why I love cooking - when I'm doing it, I get pulled into the work. It helps me relax at the end of the day. And I get to eat the results.

What are these clues? I decided to make a list.
*I'm a blogger. List posts are what we do.

Sound: I was surprised at how many different ways I use sound in the kitchen. The sound of cooking changes as it goes along, giving you clues to its different stages. Browning meat, for example. When the meat first goes in the pan, there should be a quick, ripping sizzle, or the pan wasn't hot enough. Then it quiets down to a bubbling sizzle. After cooking for a while, the meat starts to develop the crispy brown crust I'm looking for. The sound of the searing gets sharper, with a hint of crackle that wasn't there earlier. That sound has saved me any number of times.
*Another example: When I'm grilling with the lid closed, I'm listening for the difference between the sizzle of the occasional drop of fat hitting the coals, and the constant flaring of a grease fire. If I can catch it at that point, I can open the lid and move things around, and stop the fire before it gets started.  If not, I start to see black smoke coming out of the grill...and it is too late.

Touch: The best way to tell if something is done is to touch it:

  • Poke the steak to see if it's medium-rare. 
  • Stick a skewer through a sweet potato; if there is no resistance, it is cooked through. 
  • Scrape a flat edged spoon along the bottom of a simmering pot; if it feels rough, the sauce is sticking and about to burn

And, as I said in my Kosher salt post, I can judge a half teaspoon of salt the feel of it in my fingers.
*This is why food fanatics like me have such atrocious table manners. We're always poking, prodding, and picking up our food with our hands. We can't help ourselves. Sorry, Mom.

Sight: Is it browned enough?  I'm watching for that moment of golden, brown, and delicious success that comes just before a black, burnt failure. Also, I can see the line of cooked protein working its way up the side of a raw piece of meat; then I see juices start to pool on the top of the meat. Time to flip it!  When heating oil in a pan, it is hot enough to start cooking when the oil is shimmering.

Sorting black beans requires a soft focus. I'm trying to find a dark brown clod of dirt that's the same size as a black bean...and that dirt is surrounded by beans that look almost exactly like it. As I move the beans around, I'm looking for something that "just doesn't seem right."  When I get that feeling, I look very closely at the beans in that area...and I find some dirt.

Smell: Smell is a critical piece of how food tastes. The tongue detects four flavors - salty, sweet, bitter, sour. (You can add the sensation of heat from capsaicin, and umami, the taste of fatty or rich that was recently discovered). However, the human nose senses hundreds of different smells, in tiny amounts. A combination of both taste and smell creates what we think of as the taste of food.
*This is why food tastes so bland with a stuffed up nose. And, take my word for it - don't go to a wine tasting with a head cold. It becomes very expensive grape juice.

While I'm cooking, my sense of smell also serves as an early warning system. Things usually smell great right before they burn. If I smell something delicious, it's a sign that the food is just about done. This is particularly true with my beloved steam-saute technique. If I can smell the vegetables, the water has boiled off, and they're starting to brown. Get them off the stove now!

Taste: Taste as you go! Season to taste! In the end, cooking is all about how things taste. It's obvious, I know.  But if I don't taste while I'm cooking, and season to taste when I'm done, then I'm flying blind and hoping for the best.
*To paraphrase Julia Child, any mistake in the kitchen can be fixed, except for a fallen souffle. But if I don't taste it, I won't know it needs to be fixed.

How do you use your five senses when you're cooking? Anything I missed? Talk about them in the comments section below.

*Enjoyed this post? Want to help out DadCooksDinner? Subscribe using your RSS reader or by Email, recommend DadCooksDinner to your friends, or buy something from Amazon.com through the links on this site. Thank you!

Ribeye Steak Saute with Red Wine Pan Sauce

May 6, 2010 by Mike Vrobel Leave a Comment

When I hear "steak in red wine sauce", images of Parisian bistros scroll across my mind's eye. Busy waiters bustle about, there is a carafe of red wine on the table, and a plate with steak frites has just appeared in front of me.
*And...I didn't have steak frites the week I was in Paris. I had veal, pork, duck, lamb, fish...but no steak frites. Somehow, in the entire week I was there, I missed what I think of as the classic bistro meal.

When I want to bring that picture of a bistro out of my head and into my kitchen, I saute a steak and serve it with red wine sauce. Steak and red wine is a classic combination, and one of the few ways to cook a steak that compares with grilling.

Sauteed steak is as simple as any other saute, and it makes a very elegant weeknight meal. If you've had a rough day and need to pamper yourself with some beef and a glass of hearty red wine, this is the recipe to try.

Recipe: Ribeye Steak Saute with Red Wine Pan Sauce

Cook time: 15 minutes

Equipment:

  • 12 inch stainless steel fry pan (I love my All-Clad 12" fry pan. I was inspired to post this recipe as part of testing the new d5 All-Clad pans).

Ingredients:

  • 2 boneless ribeye steaks, ¾ to 1 inch thick (About 2 pounds of beef)
  • 2 teaspoon kosher salt (1 teaspoon per steak)
  • 1 teaspoon fresh ground black pepper (½ teaspoon per steak)
  • 1 teaspoon vegetable oil

Sauce ingredients:

  • 1 small shallot, minced
  • 1 cup of chicken stock (preferably homemade, or substitute water)
  • ½ cup red wine (Cote du Rhone is traditional, any inexpensive red blend works well)
  • 1 tablespoon unsalted butter (Or herb butter, like I had in the freezer)
  • salt and pepper to taste

Directions:
*For an overview, see my Saute with Pan Sauce basic technique 
1. Prepare the Sauce Ingredients: Mince the shallot, measure the chicken stock and red wine into a measuring cup, and measure out the butter. Let these ingredients rest at room temperature until it is time to make the sauce.

2. Prepare the Steaks: Sprinkle the salt and pepper evenly over the steaks.

3. Prepare the pan: Heat the oil in the fry pan over medium-high heat, until the oil is shimmering and just starting to show tiny wisps of smoke. Swirl the oil to get a very thin coat on the entire bottom of the pan.

4. Saute the Steaks: Place the steaks in the pan. Shake the pan to get the oil under the steaks, then let sit for 3 to 4 minutes, or until well browned. Flip the steaks, and cook the other side for another 3 to 4 minutes, or until well browned. Remove the steaks to a plate.
*3 minutes for ¾ inch thick steaks; 4 minutes for one inch thick steaks. I prefer the 1 inch/4 minutes version, because you get a better sear on the beef.

Don't crowd the pan!
Well seared
...good fond for the sauce

5. Make the Pan Sauce: Turn the heat down to medium, and add the minced shallot. Cook for 30 seconds to 1 minute, or until just softened, then add the wine and stock. Increase the heat to high, and scrape the bottom of the pan until all the browned bits of steak are loose in the sauce. Pour any juices from the plate with the steaks into the pan. Boil until reduced by half, about 4 minutes. Turn off the heat, and whisk in the butter. Taste the sauce, and add salt and pepper until it is well seasoned.

Bring to a boil, scraping the bottom
Add the juices from the plate
boil until reduced by half

6. Serve: Cut each steak in half crosswise to get four servings. Serve with 1 teaspoon of sauce drizzled on top of each serving, and pass the rest of the red wine sauce at the table.

Variations:
*New York Strips or Sirloin: Use the same instructions. Aim for 1 ½ to 2 pounds of meat; any more than that and you will be crowding the pan.

*Herbs: Add a sprig or two of fresh thyme, rosemary or tarragon with the wine and stock to give a hint of herbal flavor to the sauce.

*Italian style: Use a minced garlic clove instead of the shallot, use a hearty Italian red wine, and substitute a tablespoon of olive oil for the butter.

Notes:
*Cote Du Rhone is the traditional wine to use for the pan sauce. I've had good luck with a variety of wine blends, from Spain to Australia to California. I would avoid any heavily oaked wine (Cabernet Sauvignon comes to mind), and anything really expensive. I hate to waste good wine in a pan sauce, where all the subtle flavors are cooked out. That said, don't cook with something you just wouldn't drink at all. There has to be something worthwhile going on in the wine to make a good pan sauce.

*Don't crowd your pan! If they are on the small side, I might (might!) be able to fit a third ribeye in the pan...but I wouldn't push it. A crowded pan won't give as good of a seared crust to the beef. That crust (and the resulting fond) adds flavor and depth, to both the steaks and the sauce. If you need to cook more steak, do it in batches, or use two pans.

What do you think? Questions? Other ideas? Leave them in the comments section below.

Related Posts:

Chicken Breast Saute with Marsala Sauce
Pork Chop Saute with Orange Mustard Sauce

Adapted from:
Pam Anderson How to Cook Without a Book


*Enjoyed this post?  Want to help out DadCooksDinner?  Subscribe using your RSS reader or by Email, recommend DadCooksDinner to your friends, or buy something from Amazon.com through the links on this site.  Thank you!

Quick Gazpacho

May 4, 2010 by Mike Vrobel 2 Comments

Gazpacho, the famous cold tomato soup of Spain, can seem strange to American taste buds.
*I was raised to expect tomato soup to come from a can with a red and white label (just like Andy Warhol). It was also be perfectly smooth, and served with grilled cheese sandwiches.

If you've never tried gazpacho, don't let the unfamiliar combination of cold and tomato stop you. Gazpacho is a wonderful first course or side dish, with sweet tomatoes and sour sherry vinegar balanced out by the richness of olive oil. It is one of Spain's most famous food exports for a reason; it is a classic combination of flavors.

Gazpacho is obviously at its best with fresh, ripe summer tomatoes. In my humble opinion, it is not worth the effort to make gazpacho with those reddish, cardboard things they pass off as tomatoes grocery store tomatoes. They just don't have enough flavor, and without the sweet flavor of tomatoes, you don't have gazpacho. You have a very chunky vinaigrette.

When I'm outside tomato season, I rely on canned tomatoes. If you get good quality canned tomatoes, you can make a decent gazpacho.* And with canned diced tomatoes and a food processor, this recipe comes together with almost no effort. *It is not as good as with fresh, peak of ripeness tomatoes, obviously...but that's a recipe for another day.

Recipe: Quick Gazpacho

Equipment:

  • Food Processor (I like my KitchenAid, but Cuisinart is also a good brand.)

Ingredients:

  • 4 cloves garlic, peeled
  • 2 bell peppers, seeded and cut into large pieces (I like 1 red and 1 green pepper)
  • ½ seedless cucumber, cut into large pieces
  • ½ medium red onion, peeled and cut into quarters
  • ½ teaspoon Pimenton de la Vera (Spanish Smoked Paprika)
  • 2 teaspoon kosher salt
  • ½ teaspoon ground black pepper
  • 2 slices of good bread, crusts removed (leftovers from an Italian or French loaf are good for this.)
  • 1 28oz can diced tomatoes (Get a good brand, like Muir Glen, or San Marzano)
  • ¼ cup sherry vinegar
  • ¼ cup extra virgin olive oil
  • More salt, pepper, and sherry vinegar to taste; more olive oil for serving.

Directions:
1. Dice the aromatics using the food processor: Drop the garlic through the feed tube of a running food processor, and let run until the garlic is completely minced. (It will stop "bouncing around" in the processor when it's done.) Stop the processor, and add the bell pepper, cucumber, and red onion pieces, along with the paprika, salt and pepper. Pulse with one second pulses, scraping down the side if necessary, until diced. (Don't turn it into soup, though; stop when you have a good dice.)

Minced garlic
Peppers and cukes in chunks
Diced aromatics

2. Blend the gazpacho using the food processor: Add the bread, and pulse a couple of times to break it up. Add the tomatoes and sherry vinegar, and turn on the processor. Pour the olive oil in a slow stream through the feed tube of the running processor, then leave the processor running until everything is well blended; this should take 30 seconds to 1 minute total. Taste the gazpacho - you should get a balance of sharp vinegar, fresh vegetables, and sweet tomatoes. If necessary, add salt to bring up the sweetness level, pepper for a little more hot bite, and vinegar if it needs more of a sour kick.

Tomatoes and bread
Well blended and ready
to serve

3. Rest and serve: If you have the time, let the gazpacho rest in the refrigerator for an hour. (This will give the flavors time to mingle, but if you're in a hurry for dinner you can skip it.) Serve cold or at room temperature with a drizzle of olive oil on top of each bowl.

Variations:
*Spicy Gazpacho: If you want to give your gazpacho some more kick, add a few shots of hot pepper sauce when you're tasting for flavor. Or, add a jalapeno or two with the bell peppers.
*Or both - you know your heat tolerance better than I do.

*Cumin: Substitute cumin for the smoked Spanish paprika.

Notes:
*I know I sing the praises of fresh, ripe tomatoes in the opening, but this recipe is surprisingly good with canned tomatoes.

*Why wouldn't I wait until tomato season? Well, let's say (um...hypothetically...yeah, that's it) you promise to have some friends over for a Spanish themed party. A few iced bottles of Cava, a first course of gazpacho and some manchego cheese, and then a grilled paella. When you tell everyone about this great idea, it is the middle of July. Then life gets in the way, various schedules collide...and you're having your party in November.
*And then you forget you took those pictures for the blog until you're looking for an idea for a post in early May...

What do you think? Questions? Other ideas? Leave them in the comments section below.

Related Posts:
Grilled Paella

Adapted from:
Cooks Illustrated: Quick Food Processor Gazpacho (July 2001)

*Enjoyed this post?  Want to help out DadCooksDinner?  Subscribe using your RSS reader or by Email, recommend DadCooksDinner to your friends, or buy something from Amazon.com through the links on this site.  Thank you!

Steam Sauteed Asparagus

April 27, 2010 by Mike Vrobel 4 Comments

It's spring! It's asparagus season! I'm waiting patiently* for my first CSA share of the year from Crown Point, and the big bunch of asparagus it usually contains.
That is...not very patiently. I share my CSA with my friend Pam, and I'm letting her get the first week's share. She got us into the CSA, so fair's fair. As a result, I have to wait an extra week for my first CSA box. Hurry up!

While I was waiting, I got a surprise gift. Our backyard garden has finally produced asparagus! We planted the asparagus two years ago, and had to wait until this year to get anything from it. Diane proudly presented me with...two asparagus spears.
By We, I mean my lovely wife, Diane. She does all the gardening around here. I built some Square Foot Gardening boxes for her to use a few years ago, stood back, and she took off with the rest.

I had to go to the grocery store to satisfy my spring asparagus cravings. Here's the recipe I use for a quick, weeknight side dish of asparagus, following the steam-saute technique from Pam Anderson's How to Cook Without a Book.
How many more days until my CSA box arrives?

Recipe: Steam Sauteed Asparagus

Equipment:

  • Wide saucepan or fry pan with a lid

Ingredients:

  • 1 pound asparagus, stem ends snapped off at the tough part (see notes)
  • ½ cup water
  • ½ teaspoon kosher salt
  • ¼ teaspoon freshly ground pepper
  • 1 tablespoon olive oil or butter (optional, but the asparagus is pretty plain without it)

Directions:
1. Steam the Asparagus: Put the asparagus in the pan. Add ½ cup water, ½ teaspoon kosher salt, ¼ teaspoon ground pepper, and 1 tablespoon oil or butter. Cover the pan, and put over medium-high heat. Wait for the water to come to a boil, then cook, covered, for 5 minutes (for thin asparagus) to 10 minutes (for really thick asparagus).

2. Saute the Asparagus: Remove the lid, and cook, tossing the asparagus occasionally to rotate new spears to the bottom of the pan. Keep cooking until all the remaining water boils off, the asparagus is tender, and it is just starting to brown. This will take another 2-3 minutes.
*The asparagus will start to sizzle in the pan once all the water is boiled out, because all that is left in the pan is fat. That's when the saute part actually starts. I test for doneness by biting into a spear as a test. Depending on how you like your asparagus cooked, it should either have just a hint of crunch to it, or it should be perfectly tender.
**I like mine with just a bit of crunch.

Variations:
*Garlic: Add a minced clove of garlic (or two) with the asparagus and other ingredients.

*Citrus: Add a tablespoon of citrus zest to the asparagus after you're done cooking - I like both orange and lemon zests for this.

*Vinaigrette: Skip the butter, and when you're done pour a vinaigrette over the asparagus.

Notes:
*Traditionally, you should snap the bottom off of every spear of asparagus to remove the tough bottom part of the spear. That's too time consuming for me. Here's how I trim asparagus, the quick weeknight way. Take the bunch of asparagus, and remove the bottom rubber band, leaving the top rubber band on the bunch to hold it together. Now, pick a spear on the top of the bunch, grab it in the middle (without removing it from the bunch), and snap off the bottom of the spear. This gives you a guide mark - use a chef's knife, and cut the entire bunch where that spear snapped.
*Or, do what I did in the pictures to make it easier to see - remove the one spear, and line it up with the top of the bunch after it's snapped to see where your guide line is.

One spear snapped
as a guide
...and the rest of the bunch
is done with one chop!

What do you think? Questions? Other ideas? Leave them in the comments section below.

Related Posts:
Some of my other favorite vegetable side dishes are Grilled Asparagus, Steam Sauteed Green Beans, Steam Sauteed Leeks, and Cast Iron Brussels Sprouts.

Adapted from:
Pam Anderson: How to Cook Without a Book

*Enjoyed this post?  Want to help out DadCooksDinner?  Subscribe using your RSS reader or by Email, recommend DadCooksDinner to your friends, or buy something from Amazon.com through the links on this site.  Thank you!

Favorite Links - April 2010

April 26, 2010 by Mike Vrobel 4 Comments

I read a lot about food on the internet. Here are three sites I've enjoyed so much that I wanted to share them with you.

Kenji Lopez-Alt at Serious Eats:Kenji has been on a roll in his The Food Lab and The Burger Lab series over at Serious Eats. It's no surprise I love him. He was a test cook and editor at Cooks Illustrated, and his writing style makes me think of an (even more) obsessive-compulsive Alton Brown.
*Yes, you heard that right. Even more obsessive-compulsive than Alton. Or, maybe even me. Yikes.

My favorite recent post was How often should you flip a burger? One flip only, or keep the burger moving? Years ago, I read an article by Harold McGee, the OG food scientist, where he said you should flip every 15 seconds for best results.
*Yes, every 15 seconds.

This contradicted a lot of what I've read, and I always wondered about it. Kenji tested that question (his answer: for best results, flip often, preferably every minute.) He has a number of other posts with a similar funny, obsessive food science slant, and I've been enjoying every one of them.
*I'm going to try his substitution of a thermos cooler and hot tap water for a sous vide system when cooking rack of lamb very soon.

Three Many Cooks:
I've sung the praises of Pam Anderson's cookbooks before, but the blog that she's writing with her daughters is also a delight. Sharon posted a recipe for Sweet Potato and Chickpea Curry was a huge hit when I made it a few weeks ago. Maggy's article about her trip to Penzey's spices had me nodding along, and saying "yep, that's me..". And Pam's article about her Ikigai made me say "awwww...."

Casual Kitchen:
Dan over at Casual Kitchen posts his thoughts on food and food politics on Tuesday, and he always has an idea that gets me thinking. Some recent favorites of mine include his Food Absolutism, and his post about Eight Myths about Vegetarians and Vegetarian Food had me laughing out loud.

My favorite was when Dan had his Week of Eating Raw. Better him than me...but I'm sure glad he did it, and told us all about it. I couldn't stop reading.
*Oh, and his Friday Links are always worth looking at. In fact, I kind of borrowed the idea for this post...


Any articles about food that you've enjoyed reading? Tell us in the comments, below.

*Enjoyed this post?  Want to help out DadCooksDinner?  Subscribe using your RSS reader or by Email, recommend DadCooksDinner to your friends, or buy something from Amazon.com through the links on this site.  Thank you!

Rotisserie BBQ Baby Back Ribs

April 22, 2010 by Mike Vrobel 21 Comments

I love the crisp, almost bacon-like flavor I get from rotisserie baby back ribs. I also love barbecued ribs, cooked low and slow, and glazed with barbecue sauce. I wanted to combine the two, but I had to be careful. Part of what makes barbecued ribs taste so good is sugar.

Sugar is a key ingredeint in both barbecue rubs and barbecue sauce, and it burns easily. I had to be careful with the high heat of the rotisserie. I want ribs that are sweet and glazed, not bitter and burned.

The rotisserie itself helps with this - the constant turning keeps the sugar from being exposed to direct heat, except in short blasts. To be on the safe side, I also cut back on the heat - I cooked the ribs at medium high insead of my usual high heat. I held back the sweet barbecue sauce until the very end, brushing it on the ribs for the last ten minutes of cooking. That way, the heat of the grill would turn the sauce into a glaze on the ribs, but it wouldn't have enough time to start burning.

These tricks worked. I now have ribs with a crisp crust from the rotisserie, covered with layer of sweet, glazed barbecue sauce. Ahhh...pork heaven.

Recipe: Rotisserie BBQ Baby Back Ribs

Cook time: 90 minutes

Equipment:

  • Grill with Rotisserie attachment (I used a Weber kettle with the Rotisserie attachment; the kettle is this Weber Grill and the rotisserie attachment is this Weber charcoal kettle rotisserie)
  • Aluminum foil drip pan (9"x11", or whatever fits your grill)
  • 1 fist-sized chunk smoking wood (preferably hickory)

Ingredients:

  • 1 slab baby back ribs
  • 2 teaspoon kosher salt
  • 2 teaspoon barbecue rub (My BBQ rub recipe is here, or use your favorite)
  • 1 cup barbecue sauce (My BBQ sauce recipe is here, or use your favorite)

Directions:
1. Prep the ribs: Remove the membrane on the bone side of the rib. Loosen it by running a butter knife between the membrane and one of the bones on the end of the rib, then pull it off. Sprinkle each side of the rack with 1 teaspoon kosher salt and 1 teaspoon of barbecue rub. Let rest at least one hour, and up to 48 hours (keep in the refrigerator if resting for over a couple of hours). Also, at least one hour before cooking, put the wood chunk in water to soak.

2. Skewer the ribs: Every three bones, poke a hole in the middle of the meat (between the bones) with a paring knife. Then, weave the ribs onto the skewer through the holes.

Ribs woven onto the skewer.

3. Prepare the grill: Prepare your rotisserie for cooking on indirect medium heat (see details My Rotisserie Basic Technique Post) and add the wood chunk to the coals. (Indirect Medium heat should be 325*F to 350*F). For my Weber kettle, I light a chimney starter* three quarters full of charcoal, wait for it to be covered with ash, then pour it in two equal piles on the sides of the grill.  I put the drip pan in the middle of the charcoal grate, between the piles of coals. Finally, I put the wood chunk on one of the piles.
*I highly recommend the Weber Chimney Starter, because it is larger than most chimney starters. It holds 5 quarts of charcoal, which exactly the right size for cooking this recipe.

Ready to cook - note that I had to use two chunks of
wood to get my "fist sized" piece.

4. Cook the ribs: Put the skewer of ribs on the rotisserie, and start it spinning. Cook with the lid closed for 1 hr 15 minutes to 1 hour 45 minutes. (I had very meaty ribs, and I had to cook them for 1 hour and 45 minutes this time). After one hour of cooking, add 16 unlit coals to the grill, 8 to each pile of coals, to keep the temperature going for the second hour of cooking. The ribs are done when they are nicely browned, and the meat has pulled back from the bones on the end by about ½".

The ribs are ready for glazing

5. Glaze the ribs: Brush the ribs with the barbecue sauce, and then cook, covered, for another ten minutes to glaze the ribs.

Brushing on the sauce

6. Serve: Remove the ribs from the spit and let rest for 15 minutes. Cut the ribs into serving size portions and serve, passing extra barbecue sauce at the table.

Variations:
*Honey glazed ribs: Instead of the barbecue sauce, make a glaze of ½ cup honey and 2 tablespoon apple cider vinegar, mixed together.

*Don't have a rotisserie?  Set your grill up for cooking on indirect medium-high heat, with a drip pan in the middle, just like I show above.  Then put the ribs on the grate, and flip them every half hour or so until they are cooked through.  Other than that, it's the same recipe!

Notes:
*You can cook 1 or 2 slabs of ribs at a time, depending on the size of your rotisserie skewer. On my kettle, I can just squeeze two slabs onto the skewer; on my big Weber Summit, I can fit three easily.

*The weaving is the hard part; the thicker your skewer, the harder it is to fit it between the bones. But, really, it's not THAT hard, and the results are worth it. Give it a try!

*Oh, and don't do what I did this time - I forgot to put the first fork on my spit before I wove the ribs on, and I had to take them back off to get it on there.

What do you think? Questions? Other ideas? Leave them in the comments section below.

Related Posts:
Click here for my basic Rotisserie Baby Back Ribs recipe
Click here for my Rotisserie Beef Ribs recipe
Click here for my Rotisserie Spare Ribs with Dry Rub recipe.
Click here for my other rotisserie recipes.

Inspired by:
Steven Raichlen: How To Grill


Check out my cookbook, Rotisserie Grilling.

Everything you could ask about the rotisserie,
plus 50 (mostly) new recipes to get you cooking.

It's a Kindle e-book, so you can download it and start reading immediately!


*Enjoyed this post? Want to help out DadCooksDinner? Subscribe to DadCooksDinner using the RSS or Email options on the right, link to this post from your blog, recommend DadCooksDinner to your friends, or buy something from Amazon.com through the links on this site. (Like my Rotisserie Grilling cookbook...)

Things I Love: Diamond Crystal Kosher Salt

April 20, 2010 by Mike Vrobel 3 Comments

The key to cooking is learning how to salt your food.* Kosher salt is the ingredient I reach for with almost every recipe I make.**
*Paraphrased from a cooking class I took years ago with Michael Symon.  This was the best cooking tip I got in a class, bar none.
**Exceptions: recipes with lots of soy sauce and when I'm baking (where the finer grained table salt works better).

Diamond Crystal Kosher salt has been my household salt for years. I prefer the feel of Diamond Crystal Kosher salt to Morton's Kosher salt - the grains of salt in the Diamond Crystal brand are flakier, and have a better feel to my fingers. For me, the feel of the salt is critical, because my measuring tool for salt is my fingers. A two finger pinch (pointer and middle finger, plus thumb) is a half a teaspoon of salt.* A single finger pinch (pointer and thumb) is a quarter teaspoon; a generous three finger pinch is a teaspoon. I've also poured a tablespoon of salt into my palm, to get a feel for its size there as well. Because of this, I don't need measuring spoons for most of my cooking - I can measure by feel, and I'm good to go.
*I grabbed my usual pinch of salt and measured it in a teaspoon to verify this years ago. Actually, I did it a few times, to make sure I had a reasonable sample size. Yes, I'm a cooking geek. I had to know!

A two fingered pinch of salt

One thing to remember when using Kosher salt - it is much less dense than table salt, and that will throw off measurements if you're not careful. According to Cook's Illustrated, Diamond Crystal Kosher salt weighs half as much as table salt. One cup of table salt weighs as much as two cups of Diamond Crystal Kosher. In other words, if you are using a recipe written for table salt, and want to substitute kosher salt, you need to double the amount of salt you add to the recipe. In all of my recipes, I try to specify Kosher or table salt, and I almost always use Kosher salt.
*CI also says that Morton's Kosher Salt is heavier than Diamond Crystal, but still lighter than table salt; one cup of table salt equals one and a half cups of Morton's Kosher salt.

Want to learn a whole lot more about salt, particularly Diamond Crystal salt? Check out Alton Brown's interactive, online ad for Diamond Crystal at http://salt101.com/. It may be advertising, but it's a whole lot of fun, and really well done. I spent an enjoyable half an hour poking around and listening to Alton talk about the glory of Kosher salt.

And one final thing: It's not "Kosher" salt; technically, it's Koshering salt. All salt, almost by definition, is Kosher. Koshering salt is used in the process of making other food Kosher, following Jewish dietary traditions. We've just shortened the name to Kosher for everyday use.

*FCC Disclosure - As always with my Things I Love posts, Diamond Crystal didn't pay for this post in any way. I'm just a loyal customer who has been using their salt for years. I would love to have their ad for salt101.com on my site...but it doesn't seem to be running through Google's ad program. Darn.

What do you think? Questions? Other ideas? Leave them in the comments section below.

Diamond Crystal, Salt Kosher, 3-Pound (12 Pack)

*Enjoyed this post?  Want to help out DadCooksDinner?  Subscribe using your RSS reader or by Email, recommend DadCooksDinner to your friends, or buy something from Amazon.com through the links on this site.  Thank you!

April Winter Farmer's Market Reminder

April 14, 2010 by Mike Vrobel Leave a Comment

The April Winter Farmer's Market in the Cuyahoga Valley National Park is this weekend.  It is on Saturday, April 17th from 9AM to noon. The market is located in the Happy Days Lodge, 500 W. Streetsboro Road in Peninsula, Ohio.
*If you don't live in Northeastern Ohio, make sure to find your own local winter farmer's market.

(This is the last Winter Farmer's Market - the summer market starts Saturday, May 15th, and runs every Saturday through the end of October.  Hooray!)

Here's my post about the market, including a map: Winter Farmer's Market in the Cuyahoga Valley
Here's the official site for the market: Cuyahoga Valley Countryside Conservancy

See you there!

Pressure Cooker Beans (Basic Technique)

April 12, 2010 by Mike Vrobel 12 Comments

A pyrex bowl of beans covered in water

Here's another killer application for my pressure cooker.  Dried beans, cooked in under an hour.

[Update 2021-10-09] - This recipe is a historical artifact, one that I'm leaving up for sentimental reasons. It is a good, simple overview of my pressure cooker bean technique. I now have specific recipes for almost all the beans listed below in my Instant Pot Bean Recipes list - check them out. I hope you enjoy this blast from the past!


A 2 quart measuring cup full of mixed beans.
Beans!

I do something that will sound a little weird. I use my pressure cooker to make dried beans…and then freeze them. I know, I know. You would think a pressure cooker would be best for making beans just before you use them. And it is - fresh made pressure cooker beans are much better than beans that come out of a can. But so are dried beans that are pressure cooked, then frozen. The cooking liquid from homemade beans has a lot of flavor in it, and it tastes good even when frozen. The liquid in canned beans? It's not good; throw it away.
*Lorna Sass taught me this trick, in her The Pressured Cook cookbook - she sings the praises of make ahead beans, and I'm passing the word along. Lorna knows what she's talking about.
**I freeze my beans in two cup containers; that way, they replace the 1.5 cups of beans you get in a "regular sized" can of beans. Two cups of beans will thaw in five minutes in my microwave. See? They're as easy as canned beans, and taste better, too!

When I'm pressure cooking dried beans, I always make at least one pound of beans, and I usually make two pounds. It doesn't take any longer, and it gives me more beans for the future. I usually plan a meal around the beans, cook them up in the PC, then scoop out the beans I need for tonight's dinner. After dinner, when I'm cleaning up, I freeze the rest in their cooking liquid for use later on.
*One of the reasons I love my Fagor 10 quart pressure cooker is that it can fit two pounds of beans, plus the water to cook them. If I only had a six quart cooker, it would be too small to fit two pounds of beans.

In general, I don't soak my beans before cooking them. I am not organized enough to sort and soak the beans the night before. It should be easy, and it cuts the cooking time in half…but if I'm that far ahead of the game, I wind up slow cooking my beans.
*I tried the recent Cooks Illustrated suggestion of brining beans as part of their pre-soaking. It worked well. But, I've only used it once, with cannelini beans. I keep meaning to try it again…but that requires a level of organization that I just can't seem to manage.

Basic Technique: Pressure Cooker Beans

Cook time: 60 minutes

Equipment

  • 6-quart Pressure Cooker (I love my Instant Pot Electric PC)

Ingredients

  • 1 pound beans, sorted (any dirt and bad beans removed) and rinsed
  • 7 cups water
  • 1 small onion or 2 cloves of garlic, peeled (optional, but adds some flavor)
  • 1 bay leaf (again, optional, but adds some flavor)

Instructions

Make sure you've read the manual for your pressure cooker before starting - you need to know how to lock and unlock the pressure cooker, and how to tell when it's come up to high pressure.
1. Sort, rinse, and cook the beans: Sort the beans, removing any stones or dirt clods you find. (I like to do this on a half sheet pan - I pour the beans on one side of the pan, and brush them a little bit at a time to the other side, removing anything that looks odd while I'm doing it.) Rinse the beans, then put them in the pressure cooker. Add the water, onion and/or garlic, and bay leaf. Bring the cooker up to high pressure, then pressure cook for the time listed in the chart below. Once you've reached the cooking time, turn off the heat, and let the pressure come down naturally.*  Check a couple of beans for doneness, then use the beans (and their liquid). Save the beans for later by refrigerating (for up to a week) or freezing (for up to six months, or longer.)
*Optionally, cook for five extra minutes, then quick release the pressure.

Bean typeStovetop PC Time
(at High Pressure, with natural pressure release)
Electric PC Time
(at High Pressure, with natural pressure release)
Black, Navy, Pinto30 minutes35 minutes
Red kidney, Great northern, Cannellini35 minutes40 minutes
Chickpeas40 minutes45 minutes

Notes

  • Sometimes, even after the pressure cooking times listed above, I wind up with tough beans. I seem get different results depending on the age of the beans. When I buy beans from Mustard Seed Market, my local health food store, I don't have problems. They sell a lot of beans, and have good turnover of their stock, so the beans are always fresh. When I get them from my local grocery store, sometimes they take a little longer to cook. I'm assuming this is because they're older and a little more dried out.
    Beans are one of the things where I try to splurge on the organic version; they don't cost that much more, and the results are much better.
  • When I open the cooker, I try a couple of the beans. If they're still tough, I do one of two things. If the beans are close to done, I simmer them (without locking the pressure cooker lid) for another five to ten minutes. If the beans are a little tough, I lock the lid on, bring the pot back up to pressure, and cook under pressure for another 5 minutes. Then I quick release the pressure and check them again. That usually does it, but once or twice I've had to repeat that process - lock the lid and bring it up to pressure for another five minutes. If you're really worried about it, I'd just start by adding an extra five minutes on to the cooking time above. The worst that will happen is you'll have very soft beans…which I kind of like.
  • Remember, the cooking time starts once the beans are at high pressure.  To get to high pressure, the water has to come to a boil and build up that pressure in the cooker.  This will add another 5 to 10 minutes on the front end of the cooking time.  Make sure to take that extra time into account if you are cutting it close for serving dinner.  I assume it will take about an hour, total, between bringing the cooker up to pressure, cooking, and letting the natural pressure release happen.

Related Posts

Pressure Cooker Chickpeas
Pressure Cooker Hummus
Click here for my other pressure cooker recipes.

Adapted from

Lorna Sass's various pressure cooking cookbooks. For beans, I like Lorna's Great Vegetarian Cooking Under Pressure. It has a handy chart inside the cover with timings for all different types of beans, soaked and unsoaked.

*Enjoyed this post?  Want to help out DadCooksDinner?  Subscribe using your RSS reader or by Email, recommend DadCooksDinner to your friends, or buy something from Amazon.com through the links on this site.  Thank you!

DadCooksDinner is now on Facebook!

April 11, 2010 by Mike Vrobel 1 Comment

Are you a reader of DadCooksDinner who is also a Facebook junkie?
*Rena, Paul, Dan...I'm looking at you...

Well, I'm finally able to help you out. The official Fan Page for DadCooksDinner is now open for business. To follow my posts on Facebook, click on the "Become a Fan" link below, or in the sidebar on the right. Thanks!
*I know, I know, I'm on the cutting edge of technology...from 2007. I just want to make sure this whole internet thing isn't a fad.

Grilled Thick Pork Chops with Adobo Spice Paste

April 8, 2010 by Mike Vrobel 6 Comments

I'm an obsessive cook. I was reminded of this in a recent chat with a friend I haven't seen in a while. He does some of the cooking for his family, but isn't as obsessive about it as I am. He said:

"I love your blog, but the recipes...I read until I get to the ingredient I don't have, then I stop."

I understand this - while I am usually a "live to eat" kind of person, there are nights where you have to cook a "eat to live" kind of meal. In general, weeknights can't be elaborate, gourmet meals - there just isn't enough time.

*And...I know I have a weakness for some unusual ingredients; Spanish smoked paprika, dried lemon peel, chipotles en adobo. But really - they're all available in your local grocery store! Just go look in the "international" aisle, or poke around in the spices. You'll be amazed at what you find.

Today I'm going to try to straddle the "live to eat, eat to live" fence. This is a recipe I cook both ways - one way when I'm going all out, the other when I'm in a hurry. The adobo spice paste gives a complex, savory depth to a simple grilled pork chop. It tastes great if it has a couple of hours to soak into the pork, but it also works well if you spread it on just before you start to grill. The heat of the grill turns the paste into a wonderful, spicy crust outside the sweet, tender chop.

Recipe: Grilled Thick Pork Chops with Adobo Spice Paste

Equipment:

  • Grill (I used a Weber Summit 650. Here it is.)
  • Mortar and pestle or coffee grinder (for the "do it right" version of the recipe)

Ingredients:

  • 4 thick cut pork loin chops, bone in (1 ¼" to 1 ½" thick)

Adobo paste ingredients, do it right version

  • 1 teaspoon coriander seed
  • 1 teaspoon cumin seed
  • 2 tablespoon orange zest (zest of ½ an orange, or substitute lemon zest, or substitute dried orange peel and dried lemon peel)
  • 1 teaspoon dried oregano (preferably Mexican oregano)
  • 2 cloves garlic, minced or pressed with a garlic press
  • 2 tablespoon ancho powder
  • 2 teaspoon brown sugar
  • 1 teaspoon kosher salt
  • ½ teaspoon fresh ground black pepper
  • 2 tablespoon olive oil

Adobo paste ingredients, quick weeknight version

  • 1 teaspoon ground coriander
  • 2 cloves garlic, minced or pressed with a garlic press (or substitute 2 teaspoon garlic powder)
  • 1 teaspoon dried oregano (preferably Mexican oregano)
  • 2 tablespoon chili powder (grocery store blend is fine)
  • 2 teaspoon brown sugar
  • 1 teaspoon kosher salt
  • ½ teaspoon fresh ground black pepper
  • 2 tablespoon olive oil

Directions:
1. Prepare the adobo paste: Up to a day before grilling, make the adobo paste.
For the "do it right" version: First, grind the cumin and coriander seeds to a powder, using a mortar and pestle (or a coffee grinder as the spice grinder). Put the coriander and cumin, along with all the other dry ingredients in a small bowl, and stir until evenly mixed. Add the olive oil, and stir until it is a thick paste.
For the "quick weeknight" version: Put the dry ingredients in a small bowl, and stir until evenly mixed. Add the olive oil, and stir until it is a thick paste.

Adobo paste ready to go
On the chops
"rub the paste evenly on the pork"

2. Rub the paste on the pork: Before pre-heating the grill, and up to two hours ahead of time, rub the paste evenly on the pork chops, using roughly two teaspoons of paste per chop. Let the chops rest at room temperature until the grill is ready.

3. Prepare the grill: Set the grill up for cooking at direct medium-high heat, with a section set up for indirect heat. For my Weber Summit, this means turning all the burners to high, and letting the grill preheat for fifteen minutes. Then I turn the burners down to medium-high, brush the grates clean, and wipe them with a paper towel dipped in vegetable oil. Finally, I turn off half the burners - I leave burners 1 through 3 lit, and turn off burners 4 through 6. This gives me half of my grill for direct medium-high heat, and half of my grill for indirect heat.

4. Grill the chops: Put the chops on the grill over the direct heat. If cooking on a gas grill, keep the lid closed while cooking; if using charcoal, keep the lid open. Grill the chops for 2-3 minutes, or until they have good grill marks on the bottom, and release easily from the grate. Rotate the chops 90 degrees, and cook for another 2-3 minutes, until the bottom side is well browned. Flip the chops, and cook for another 2 to 3 minutes, then rotate 90 degrees and cook for 2-3 more minutes. At this point, the chops should have a nice, brown crust on them, but they will not be cooked through in the middle. Move them to the indirect heat side of the grill, over the unlit burners. Cook with the lid closed for 5 to 10 more minutes, depending on the thickness of the chops.  Cook the chops over indirect heat until they reach an internal temperature of 140*F, measured in the thickest part of the chop with an instant read thermometer.

5. Rest and serve: Remove the chops from the grill, and let them rest for ten minutes before serving.

Variations:
*Rick Bayless "Everyday" adobo paste: See his recipe here: Adobo Marinade.

*Add some heat: There isn't much heat in this adobo sauce, in spite of all the spices. If you want to add some kick to the adobo paste, add a teaspoon of pureed chipotle en adobo, or chipotle powder.

Notes:
*I like the brown sugar in this recipe; it adds a hint of sweetness that goes well with pork. That said, it makes the pork chops go from browned to burnt rather quickly. That's why I cook this recipe on medium-high, and if you have a really hot grill you should consider cooking it at medium. Either way, keep an eye on the chops, and move them to the indirect section of the grill as soon as they are well browned.

*You can, of course, go somewhere between "do it right" and "weeknight" with this recipe. You get the best flavor with recently crushed whole spices, and the quickest results with powdered spices and a limited set of ingredients. The key to cooking is showing adaptability - use what you have in the time you have, and don't apologize for what you can and can't do.

What do you think? Questions? Other ideas? Leave them in the comments section below.

Related Posts:
Grilled boneless pork chops, brined and honey glazed
Grilled thin pork chops, soy brinerated

Adapted from:
John Willoughby and Chris Schlesinger: Spice Pastes (Gourmet magazine, gourmet.com)

*Enjoyed this post? Want to help out DadCooksDinner?  Subscribe using your RSS reader or by Email, recommend DadCooksDinner to your friends, or buy something from Amazon.com through the links on this site.  Thank you!

Grilled Split Cornish Game Hens, Brinerated

April 6, 2010 by Mike Vrobel 2 Comments

Talking to myself about grilling cornish game hens…

Question: I'm hungry. What are we making today?

Answer: Today, we're grilled cornish game hens. Be patient, they'll be done soon.

Q: It's raining? Again? Why does it always start to rain when it's time to light the grill?

A: It is spring in Northeastern Ohio. It's the rainy season. Mother Nature doesn't care that I have grilling fever. Or, maybe she does, and she just likes watching me squirm. Besides, it's just sprinkling. The hens will be fine.

Q: Hmm. Smells good. What ethnicity is that brinerade?

A: Well, it's got Mediterranean olive oil, British worchestershire sauce, Asian soy sauce…let's call it pan-ethnic.

Q: I'm getting hungrier. These hens were supposed to be done in a half an hour. What's taking so long?

A: Christopher Kimball said you should never trust the cooking times in a recipe. Which is good, because the timings for grilling cornish game hens I found in Cooks Illustrated are too fast. Besides, I'm always saying you need to go by internal temperature, not by time, when you're cooking. This is particularly true with grilling - live fire cooking never happens the same way twice.  See?  The instant read thermometer says they're 160*F now..time to sear them.

Q: I'm still hungry. Aren't they done yet?

A: Good grief, you're worse than the kids. Here, try a drumstick.

Q: Yummmmmmm...

A: That's right. A little grilled poultry to soothe the soul.

Recipe: Grilled Cornish Game Hens, Brinerated

Equipment:

  • Grill (I used my Weber Summit 650. Here it is.)
  • Gallon zip top bag

Ingredients:

  • 2 Cornish Game Hens (assume ½ a hen per person)

Brinerade ingredients

  • ¼ cup extra virgin olive oil
  • ¼ cup soy sauce
  • ¼ cup worchestershire sauce
  • 2 tablespoon brown sugar
  • 3 cloves garlic, minced

Directions:
See my Basic Technique: Grill Roasted Chicken Pieces for more details on this technqiue. *I know the technique is for chicken; cornish game hens work the same way. They just cook a little quicker, because they're smaller.

1. Split the hens: Using kitchen shears or a heavy chef's knife, split the hens in half. Cut down one side of the backbone, open the chicken up, then cut it in half through the middle of the breast.

Cut down one side of the backbone...
...then through the breast...
...result: two split hens

2. Brinerate the hens: Whisk the brinerade ingredients together in a medium bowl until the sugar has dissolved in the other ingredients. Put the halved hens in a gallon zip top bag, and pour the brinerade over them. Squeeze all the air out of the bag, and zip closed. Refrigerate for one to four hours, turning the bag every hour or so to keep the hens coated with the brinerade.

3. Prepare the grill: Set your grill up for cooking with indirect high heat. For my Weber Summit, this means preheating the grill with all the burners on high for fifteen minutes. Then I brush the grate clean with my grill brush, and rub the grate with a paper towel dipped in vegetable oil. Finally, to set up for indirect high heat, I turn off all the burners except for the two outer burners (burners 1 and 6).

4. Cook the chicken: Remove the hens from the brinerade, and pat them dry. Put the hens on the grill skin side down, over the indirect heat of the unlit burners. Cook with the lid closed for 20 minutes, then flip the hens skin side up and cook until the hens have an internal temperature of 160*F in the thickest part of the breast, another 5 to 15 minutes.
Finally, sear the hens by cooking them over the direct heat of the lit burners for 2-3 minutes a side, until the skin is browned and crisp.

Indirect, skin down
Flip after 20 minutes
Sear over direct heat

5. Serve: Let the hens rest for 10 minutes, then serve ½ a hen per person.

Variations:
*Thai Brinerade: Use the brinerade from my Thai Butterflied Chicken

*Greek Brinderade: Use the brinerade from my Greek Rotisserie Boneless Leg of Lamb

Notes:
*Kitchen shears are the tool of choice when you're halving cornish hens. The only hard part is the keel bone, under the breast. I try to aim slightly off-center, so I'm not cutting through the keel itself. Then…squeeze as hard as you can; it takes some force to cut through it.

*I assume one half a hen per person, or one whole hen for big eaters. The recipe makes enough brinerade for two hens. I can just squeeze a third hen into a gallon sized bag, but it's cutting it close. To cook more hens than that, double the marinade recipe, and use two bags.

*My apologies to Terry Pluto for borrowing his Talking to Myself style in the opening.

What do you think? Questions? Other ideas? Leave them in the comments section below.

Related Posts:
Rotisserie Cornish Game Hens, Brined and Herbed
Grilled Butterflied Chicken, Thai Brinerated

Adapted from:
Cooks Illustrated: Don't Marinate, Brinerate [cooksillustrated.com, subscription required]

*Enjoyed this post?  Want to help out DadCooksDinner?  Subscribe using your RSS reader or by Email, recommend DadCooksDinner to your friends, or buy something from Amazon.com through the links on this site.  Thank you!

Spring Grilling Fever

April 5, 2010 by Mike Vrobel 1 Comment

This was a particularly brutal winter.  I was starting to get a bad case of seasonal affective disorder - by the end of February, I was desperate to see the sun again.

And then?  March started with a week of blazing sunshine and warm weather.  Now the gray thoughts from gray days have been replaced with my springtime grilling mania.*  This happens every year; the moment the thermometer hits 50*F, I'm ready to rush out to my back yard with my tongs in hand.
*I know that early April usually has one last snowfall.  I don't care.  I'm doing my part to convince summer that it's time to arrive by firing up the grill.  

The downside to spring grilling is the rain.  It seems like every day comes with a 40% chance of afternoon thunderstorms.  The day I don't grill, that 40% turns into blue skies and sunshine.  They day I decide to chance it, the clouds roll in and thunder starts to rumble the moment I start to preheat the grill. I try not to get too invested in grilling this time of year, but as you can probably tell, it's hard.  I want to be out there, enjoying spring!
*Why is it that temperatures are so relative?  Come September, the first 50 degree day sends me running for my coat. In Spring, after months of freezing temperatures, I want to put on shorts and a t-shirt the moment it hits 50.

The key to spring grilling is flexibility.  One day it's 40 degrees and raining; later in the week it's 60 and sunny.  Or, if your weather is like ours here in Northeastern Ohio, it might be both in the same day.*  I love my charcoal grill, and use it whenever I can...but in the spring, if there is any question about the weather, I use my gas grill.  The "light it and forget it" advantage of the gas grill lets me stay inside during a passing rain shower if I have to.
*This has been a really weird spring.  In two weeks, starting in late March, we had 65*F and sunshine, followed by 2 inches of snow (so I had to shovel my deck again, arrrgh), followed by a record 85*F in the first weekend of April.  In two weeks!

This week's posts are dedicated to spring grilling.  Get out the tongs, fire up the grill, and let's get cooking!

What do you think? Are you a spring griller? Or do you wait for the lazy days of summer to light up the grill? Leave your thoughts in the comments section below.

*Enjoyed this post?  Want to help out DadCooksDinner?  Subscribe using your RSS reader or by Email, recommend DadCooksDinner to your friends, or buy something from Amazon.com through the links on this site.  Thank you!

Grilled Lamb Loin Chops, Michael Symon Style

April 1, 2010 by Mike Vrobel 2 Comments

A plate of grilled lamb loin chops with a grill in the background
Grilled Lamb Loin Chops Michael Symon Style

Michael Symon on grilling:

 "Leave it alone! Stop messing with it! My friends do this..."
*He dances his tongs around on the grill like he's Erroll Flynn in a pirate movie.
Here is what I tell them. Put it on the grill. Let it sear while you drink a beer. Flip it, then drink another beer. You're done. You don't need to constantly be flipping or turning. You know why they grill that crosshatch pattern at Ponderosa, right?

Cue his maniacal laughter.
*If you've ever been to his restaraunts, or watched him on TV, you know that laugh. It's a kick, hearing it in person.

Lamb loin chops (aka Lamb T-Bones, as Michael calls them) are a slightly more economical cut than rack of lamb. You don't get the same wonderful "lamb popsicle" look that you get from a rack of lamb. But you get more lamb for your dollar, and lamb loin is every bit as tender and flavorful as the rack of lamb.

Recipe: Grilled Lamb Loin Chops, Michel Symon Style

Cook time: 12 minutes

Equipment:

  • Grill with Rotisserie attachment (I used a Weber kettle, like this one this Weber Grill)

Ingredients:

  • 8 lamb loin chops
  • 2 teaspoon kosher salt (about ½ teaspoon per two chops)

Spice rub

  • 4 teaspoon whole coriander seed
  • 2 teaspoon whole peppercorns
  • a pinch of red pepper flakes
  • a pinch of sugar (I used turbinado sugar, but regular, granulated sugar is fine)

Directions:
1. Dry brine the chops: 2 hours before cooking, trim any excess fat from the lamb, then sprinkle evenly with the salt. Grind all the spice rub ingredients until they are coarsely ground. Sprinkle the rub over the lamb chops, and press it into the chops to help it stick. Let the lamb rest at room temperature until it is time to cook.
*You can season the chops up to 24 hours ahead of time. If you do, refrigerate them, then remove them from the refrigerator two hours before cooking. The two hours at room temperature gives them enough time to take the chill off before grilling.
**You can season as little as one hour before cooking and still get the dry brine effect from the early salting. If you can't season one hour before cooking, do it just before putting the chops on the grill.

Salted
Salted
Rubbed
Rubbed
Rested 2 hours
Rested 2 hours
Salted
Rubbed
Rested 2 hours

2. Prepare the grill: Prepare your grill for cooking on medium-high heat. For my Weber kettle, I light a chimney starter* three-quarters full of charcoal, wait for it to be covered with ash, then pour it in a thick single layer of coals on the charcoal grate. (The coals should cover about half of the kettle's charcoal grate). Then I put the grill grate in, and cover for five minutes to heat it up, and clean it with my grill brush. Finally, just before putting the meat on the grill, I brush the grates with a folded paper towel dipped in oil.
*I highly recommend the Weber Chimney Starter, because it is larger than most chimney starters. It holds 5 quarts of charcoal, which exactly the right size for cooking this recipe.

3. Grill the chops: Put the lamb chops on the hot part of the grill, directly over the lit coals, and cook for 5-6 minutes (or until well browned). Flip the chops, and cook for another 5-6 minutes, until well browned. The chops should have an internal temperature in the thickest part of the meat of 120*F for medium-rare. (115*F for rare, 130*F for medium). If they need more cooking time, move them to the indirect side of the grill, where there aren't any coals, and cook, covered, until you get the internal temperature you are looking for.  Remove from the grill, and let rest for 10 minutes before serving.

Grilling the lamb chops

Notes:
*Lamb chops are small - I serve 2 per person, or 3-4 per person for big eaters.

*Michael loves the classic Greek combination of meat, fat and acidity you get by serving these chops with the yogurt-lemon flavor of Tzatziki sauce. A salad with lemon dressing also makes a great side dish.

*Toast the coriander: Michael highly recommends toasting the coriander before grinding it; it adds another dimension to the flavor. I…um…well…I forgot. And it turned out great, so I'd leave the toasting up to you.

*Grinding the rub: Even if you don't toast the coriander, you'll get a much better flavor if you grind whole coriander seeds. Don't have a mortar and pestle, or a coffee grinder dedicated to being a spice grinder? Improvise a mortar and pestle using a coffee cup and a spice jar:

What do you think? Questions? Other ideas? Leave them in the comments section below.

Related Posts:
Serve with Tzatziki sauce

Grilled Rack of Trader Joe's Lamb

Award Winning Grilled Ribeye Steaks with Mediterranean Herb Butter
Grilled Flank Steak with Chimichurri
Grilled Flat Iron Steak with Salsa Verde

Thanks to Great American Lamb for supplying the lamb for this post.

Adapted from:
Michael Symon: Grilled Lamb T-Bones in Live To Cook

*Enjoyed this post?  Want to help out DadCooksDinner?  Subscribe using your RSS reader or by Email, recommend DadCooksDinner to your friends, or buy something from Amazon.com through the links on this site.  Thank you!

Tzatziki Sauce

March 30, 2010 by Mike Vrobel 3 Comments

Tzatziki sauce is THE Greek condiment. When you get a gryo, the white sauce served on the side is trying to be tzatziki sauce. It is usually a pale imitation of the real thing. Here is Michael Symon's version, made with thick greek yogurt and a large hit of lemon juice to give it a tart backbone.

Michael Symon's mom is Greek, so he grew up eating a lot of food with a high acid flavor profile. Greek food uses a lot of lemon juice and red wine vinegar; they like to balance sweet, fatty tastes with sharp, tart flavors. Michael finds the classic combination of grilled steak and mashed potatoes to be boring. It's soft, fatty meat with soft, fatty potatoes. Because of what he grew up with, he prefers an acidic side dish with his grilled meat. In class, he said his three favorite things to serve with meat are Tzatziki sauce, Salsa Verde, and Giardinieria.
*In his cookbook, he also mentions dicing up some pickled peppers as a side for grilled meat. I can't wait to try it this summer.
**Come to think of it, that's why pickles go so well on hamburgers. But that is a post for another day.

Recipe: Tzatziki Sauce

Cook time: 15 minutes
Ingredients:

  • ¼ english cucumber, peeled and diced
  • ½ teaspoon Kosher salt
  • 1 cup Greek yogurt (I like fage brand Greek yogurt)
  • ½ shallot, minced (about 1 tbsp, or add another minced garlic clove)
  • 2 cloves garlic, minced
  • 1 teaspoon minced fresh oregano
  • 1 teaspoon minced fresh mint
  • juice of 1 lemon
  • salt and fresh ground black pepper to taste

Directions:
1. Salt the cucumber: Toss the diced cucumber with the ½ teaspoon kosher salt, and let sit in a strainer to drain. (Let it drain for 15 minutes, if you have the time).

2. Make the sauce: Put all the ingredients except for the salt and pepper in a medium bowl, and stir until well combined. Taste for seasoning; it should be tart and highly seasoned. Add salt, pepper, herbs, or more lemon juice if you think it needs it.

Variations:
*Herbs: Mint and dill are the traditional herbs in tzatziki sauce. I used oregano because I had it on hand. I can find mint overpowering, so go easy on the mint if you use it.

Notes:
*Michael Symon wants this to be a very tart sauce, and I agree. Most recipes use half as much lemon juice as I do. If you prefer a less tart tzatziki sauce, start with the juice of a half a lemon, and add more as you taste.

*Michael also says to always balance grilled meat with something tart. I don't know that I agree with this. At least not all the time. I love steak with herb butter, but I also love steak with Salsa Verde. Oh, darn, I guess I'll have to do more research. Time to fire up the grill!


What do you think? Questions? Other ideas? Passionate defenses of mashed potatoes? Leave them in the comments section below.

Related Posts:
An Evening with Michael Symon
Grilled Lamb Loin Chops, Michael Symon Style (Coming Thursday)
Rotisserie Boneless Leg of Lamb, Greek Style

Adapted from:
Michael Symon: Tzatziki Sauce in Live To Cook


*Enjoyed this post?  Want to help out DadCooksDinner?  Subscribe using your RSS reader or by Email, recommend DadCooksDinner to your friends, or buy something from Amazon.com through the links on this site.  Thank you!

Michael Symon: Greek Cooking Class

March 29, 2010 by Mike Vrobel 3 Comments

An Evening with Michael Symon

I went to Michael Symon's Greek cooking class on March 16th. It was an entertaining mix of fine dining, passionate pleas to cook for yourself and to buy quality ingredients, funny stories about being a TV chef, and nostalgia for growing up in Cleveland.

The classes are held upstairs at Lolita, Michael's restaurant in the Tremont neighborhood of Cleveland. They have half the room devoted to a demonstration kitchen, and the other half set up for white tablecloth dining after the class is over. It was just me, Michael…and 41 other students. He showed us recipes from the cookbook he wrote with Michael Ruhlman, Live to Cook. While he's doing his demonstration, he explains how the recipe works, his theories about cooking, and answers any questions asked by the students.* Afterwards, there is a sit down dinner with the other students. We were all served the same dishes Michael demonstrated, with wines chosen to match, and a dessert from Michael's pastry chef.
*Actually, he'll explain just about anything, if you ask him. Dinner was late, because we kept getting him off on tangents. This was fine until he started cooking the keftedes (lamb meatballs). I didn't notice how late dinner was going to be until the smell of lamb in hot oil hit me. Even then I didn't want him to stop the stories he was telling, or the questions from the audience. His rapport with the class was amazing; we were just having a large, extended conversation about food, cooking, and celebrity.

Michael is amazingly genuine in person. He didn't become a chef to be famous; he started before there was a Food Network, or the concept of being a Celebrity Chef even existed. His love of Greek cooking (his mom is Greek) shone through; he gave a passionate explanation of Greek flavors, and how Greek cooking uses high acid components (lemon juice, red wine vinegar) to balance out rich foods.

Years ago, I attended a class that Michael gave, and it had some of the best cooking advice I ever heard. He said: "The key to cooking is learning how to salt your food." I was hoping for more advice like that, and boy, did he deliver. I was frantically scribbling in my notebook, trying to get down all the witty comments and interesting ideas he was throwing out to us.

What was his advice from this class that still sticks with me, days later?

"If you learn a recipe, you can cook the recipe. If you learn the technique, you can cook anything."

"Cook to your own palette, to (the level of acidity, salty, fatty and spicy) what you like. Taste as you go, and adjust. Food changes, and you need to change with it."

"Vegetarians: I don't dislike them. I just don't understand them."
*He said the most annoying complaint he's received, recently, was: "The vegetarian selection at B-Spot wasn't very good." B-Spot Burgers is his new hamburger restaurant. "If you wanted vegetarian, why did you come to a hamburger joint?"

Based on his experience, Michael believes that most chefs would have been diagnosed as ADD when they were kids. He says he sure fit the description. Michael believes that professional cooking attracts people with ADD, due to the nature of the job: "Order up! Cook cook cook…faster faster faster…order done. Ooo! New Order up!".

Michael now salts all his protein 6 to 24 hours ahead of time, after reading Judy Rodgers Zuni Cafe Cookbook, and trying out her early salting (dry brining?) techniques. At first, he just thought she was crazy: "Put the salt on the meat that early? It will dry out!". After testing it, he became a convert. He also says you have to bring meat to room temperature, or "take the chill off", from 15 minutes to two hours before cooking.  "If it's still cold in the middle, you have to hammer it with heat to get it cooked to medium. And the outside isn't good at that point."

There were lots and lots of questions about Iron Chef. He really respects Jeffrey Steingarten as a judge, because he knows a ton about food, and never pulls any punches when he's judging. Michael says that "Jeffrey is the one judge that always, always catches me when I try to slip something by him."

But my favorite quote, when asked about Alton Brown (my hero!): "Alton Brown? He's insane. But a good guy."

Thank you, Michael, for a fun evening!

And now, for our lucky winner of a copy of Michael's cookbook, Live To Cook.

Random.org gave me number 5, which means that commenter rhonda is our winner! Congratulations!

*If you didn't win, I'm sorry, but I only have the one book.  I'm not giving up my copy!

Michael Symon Live To Cook

Beef Burgundy

March 25, 2010 by Mike Vrobel 11 Comments

And now, for a stew that is elegant enough to serve at a dinner party...if I ever had such a thing.
*I just "have people over", as Pam Anderson says.

Beef Burgundy, Julia Child's way, is a tour de force production.  It was the recipe she made in the first episode of "The French Chef", and she chose it for a good reason.  The big chunks of beef, bathed in the velvety wine sauce, with browned pearl onions and mushrooms mixed in at the last minute...amazing. Julia's recipe takes a maximum effort, and gives a maximum reward. I've made Julia's version.  Once. I loved it, but I'm using a simpler version here.
*I've heard that this recipe plays a big part in Julie and Julia.  As of this writing, I haven't seen it yet.  Yes, I know, I'll have to turn in my foodie membership card.

I follow what I think of as my basic stew technique.  Brown the beef (in some bacon fat...yum...). Saute the aromatics in the leftover fat, add the liquid (burgundy...yum again...), and simmer in the oven for 3 hours, until the beef apart tender.  Stir in some sauteed pearl onions and mushrooms, and the result an elegant and refined stew.

Recipe: Beef Burgundy (aka Beef Bourguignon)

Makes 5 quarts (serves 8-10, and is great for leftovers)

Ingredients:

  • 1 teaspoon vegetable oil
  • 8 ounces thick-cut bacon, sliced thin
  • 4 lbs beef chuck roast, trimmed of fat and cut into 1 ½ inch to 2 inch cubes
  • 2 teaspoon plus ½ teaspoon kosher salt
  • 1 large onion, diced
  • 1 large carrot, diced
  • 1 tablespoon tomato paste
  • ½ cup flour
  • 2 cups chicken stock (homemade is best, or use water)
  • 2 cups red wine (Burgundy or Pinot Noir is best, a blend like a Cote du Rhone is a good substitute)
  • 1 bay leaf
  • 4 sprigs of thyme and parsley, tied together into a bouquet garni
  • 1 large dried mushroom (optional)
  • salt and fresh ground black pepper to taste

Instructions:
1. Saute the bacon: Put the bacon and teaspoon of oil in a large dutch oven, then turn the heat to medium. Cook, stirring, until the bacon is well browned, five to ten minutes. Move the bacon to a large bowl using a slotted spoon, leaving as much bacon fat behind as possible.

Slice thick cut bacon
Brown the bacon
Brown the beef in the bacon fat

2. Sear the Beef: Salt the beef cubes with 2 teaspoon of salt. Increase the heat under the dutch oven to medium-high, and add half the beef. Sear for 3 to 4 minutes per side, until well browned. I usually treat the cubes as having two "sides" - 3 minutes, flip, 3 minutes on the other side. Move the browned cubes to the bowl with the bacon. Add the second batch of beef to the pan, and just like the first batch, sear until well browned, then move them to the bowl. You should have a nice browned fond on the bottom of the pot. If the fond looks like it is starting to burn, reduce the heat to medium, and put the beef cubes directly over the part of the pan that's in danger of burning.
*I use two batches because that allows me to brown the beef without overcrowding the pan. It works best if you use two pans for the browning; you don't have to watch out for burning as carefully.
**Overcrowding leads to steaming, not browning, and without browning you don't have as much flavor in your stew.

3. Saute the aromatics: Reduce heat to medium. There should be 2 tablespoons of fat in the pan; Add more vegetable oil, or pour out fat to get to 2 tbsp. Put the onions, carrots and remaining ½ teaspoon salt in the pot.  Saute until softened and just starting to brown, 5 to 10 minutes. Scrape the bottom of the pot after a minute or two, to loosen up the browned fond from the beef. Once the vegetbales are softened, stir in the tomato paste, then sprinkle in the flour. Cook, stirring and scraping, for one minute. The flour should be well mixed with the vegetables, and no longer look dry.

Saute the aromatics
Add stock, wine, herbs, mushroom
Done!

4. Cook the stew: Make sure your oven rack is in the bottom third of the oven, then heat oven to 325*F. Add the stock, wine, bay leaf, herb bouquet and dried mushroom to the pot. Scrape the bottom of the pot to loosen any stuck onions or flour. Add the beef and bacon, and any juices they released. Turn the heat on the stove to high, and bring to a boil. Cover the pot, and move it into the oven. Bake for 3 hours.

5. Final Seasoning:Remove the pot from the oven, and discard the bay leaf, herb bouquet, and dried mushroom.  Season to taste with salt and pepper, and serve with sauteed pearl onions and mushrooms.

6. Rest and Reheat: (Optional, but helps the flavor a lot.) Leave the pot on the counter, uncovered, until it cools to room temperature. Cover and move to the refrigerator. Refrigerate overnight, or up to four days. Remove from the refrigerator about 30 minutes before you want to serve, and bring to a simmer over medium-high heat. Check the seasoning again, add the pearl onions and mushrooms, then serve.

Variations:
*Strain and degrease the sauce before serving: If you want to serve beef burgundy at its best, strain and defat the sauce.  Remove the meat to a platter with a slotted spoon, then strain the liquid through a fine mesh strainer.  Let the liquid settle, then spoon the fat off of the surface (I use a gravy strainer for this).

Notes:
*Serve with: Be sure to make the companion steam-sauteed pearl onions and mushrooms; they add a lot to the final dish.  Serving beef burgundy with boiled potatoes is traditional, and you could also serve it with noodles.  But...I love, love, LOVE mashed potatoes with the sauce from this dish.

*As usual, I used two pans (my 8 quart dutch oven, and my 12 inch frypan) to do the browning, instead of browning in two batches.  Make sure to get all the browned bits from the frypan into the stew by deglazing the pan with the stock, scraping up all those delicious browned bits.  Pour the stock from the frypan into the dutch oven when the recipe says to add the stock.

*I know this dish is called Beef Burgundy, but I rarely use real French burgundy in it.  If I'm going to buy burgundy...I'm going to drink it.  I usually buy a cheap Pinot Noir for the pot, and a good burgundy to serve at the table.
*Since you only use 2 cups of wine, and a standard bottle holds 3 cups, you will have to dispose of the extra wine somehow. I find that it helps the chef to relax and get into the flow of the recipe...

What do you think?  Questions?  Other ideas?  Leave them in the comments section below.

Related posts:
Steam-Sauteed Pearl Onions and Mushrooms

Inspired by:
Julia Child The Way To Cook
*This was my first Julia Child cookbook, and is still my favorite.

Ginette Mathiot: I Know How to Cook (Je Sais Cuisinier)
*The French "Joy of Cooking" - more home cooking French than Julia's Cordon Bleu inspired recipes.  Here is Ginette's version of this recipe: Beef Bourguignon [nytimes.com]

*Enjoyed this post?  Want to help out DadCooksDinner?  Subscribe to DadCooksDinner using the RSS or Email options on the right, link to this post from your blog, recommend DadCooksDinner to your friends, or buy something from Amazon.com through the links on this site.  Thank you!

Steam Sauteed Pearl Onions and Mushrooms

March 23, 2010 by Mike Vrobel 1 Comment

It's winter, and it feels like I haven't seen the sun for weeks. It's time for rich, hearty stews. Before I get to Beef Burgundy, I have to show you this recipe for sauteed Pearl Onions and Mushrooms.

Julia Child's classic "Mastering the Art of French Cooking" convinced me that pearl onions and mushrooms shouldn't be cooked as part of the stew. She makes the onions and mushrooms separately from her beef burgundy, and adds them in at the very end of cooking. As a result, the onions and mushrooms have their own distinctive tastes to add to the stew, adding another layer of complexity on top of the beef an the wine sauce. If you add them at the beginning, they give their flavors up to the sauce, and you lose the complexity that elevates beef burgundy above an average stew.
*I like a lot of onions in my beef burgundy, probably more than most people would eat. I serve them separately so I can load myself up, while still making a beef burgundy that everyone else can eat.

I don't consider this recipe to just be a part of beef burgundy. Pearl onions and mushrooms make an excellent side dish for stews and braises of all kinds. The sweet, caramelized onion and mushroom flavor also matches well with roasted and grilled meat. I have to admit that I cheat a little and use pre-peeled frozen onions, as suggested by Cooks Illustrated. The end result is a recipe for pearl onions and mushrooms that is quick enough to be a weeknight side dish.

Recipe: Steam Sauteed Pearl Onions and Mushrooms

Equipment:

  • 12 inch fry pan with a lid.

Ingredients:

  • 1 pound bag frozen pearl onions
  • ⅓ cup water
  • 1 tablespoon butter
  • ¼ teaspoon + ½ teaspoon kosher salt
  • 8 ounces white mushrooms, cleaned and cut in half
  • 2 tablespoon brandy (optional)

Directions:
1. Steam the pearl onions: Put the frozen pearl onions, water and butter in a 12 inch fry pan. Sprinkle with ¼ teaspoon salt, then turn the heat to medium-high and cover. Once the water comes to a boil (you'll see the steam escaping around the lid), cook for five minutes, covered.

Ready for steaming

2. Saute the onions and mushrooms: Remove the lid from the fry pan and add the mushrooms. Sprinkle with the remaining ½ teaspoon salt. Saute the onions and mushrooms, stirring occasionally, until the mushrooms lose their liquid. Continue to saute until both the mushrooms and onions are browned in spots. In total this should take about 5 to 10 more minutes.

3. Flambe the onions (optional): Remove the fry pan from the heat, and add the brandy. Put the pan back over the heat, and ignite the brandy. (I use a click lighter for this; or, if I'm feeling adventurous, I gently turn the pan until the fumes from the brandy catch in the flames of my gas burner.) Shake the pan until the flames extinguish themselves, then scrape the browned bits from the bottom of the pan into the liquid.
*Make sure you keep the lid nearby; if you are in danger of burning anything, put the lid on the pan to smother the flames.

4. Serve the onions and mushrooms: Serve.

Variations:
*Don't want the excitement of flaming brandy in your kitchen? Use a quarter cup of water to soften the browned fond in the bottom of the pan and incorporate it into the onions and mushrooms.

Notes:
*If you want to serve the onions and mushrooms as part of a stew, instead of as a side dish, do the following. While you are simmering the stew, make the mushrooms and onions. Stir the mushrooms and onions into the stew when it has about 15 minutes of simmering time left to go, and let them reheat in the stew.

*I know, I'm cheating with the frozen onions. The results are good, and I just don't have the patience to par-boil and peel a pound of pearl onions. I made it Julia's way a couple of times…this is so much easier that I can't go back, even though Julia's way is perfection.
*I'm so ashamed…shame…shame…OK, I'm over it. When's the stew going to be ready?

What do you think? Questions? Other ideas? Leave them in the comments section below.

Related Posts:
Beef Burgundy
Steam Sauteed Green Beans
Barbecued Frozen Corn

Adapted From:
Cook's Illustrated: Beef Burgundy, The New Best Recipe
Julia Child: Mastering the Art of French Cooking

*Enjoyed this post?  Want to help out DadCooksDinner?  Subscribe using your RSS reader or by Email, recommend DadCooksDinner to your friends, or buy something from Amazon.com through the links on this site.  Thank you!

Rotisserie Lamb Shoulder

March 18, 2010 by Mike Vrobel 6 Comments

A rotisserie lamb shoulder roast, still on the rotisserie spit
Rotisserie Lamb Shoulder

I'm a fan of shoulder cuts of meat, like beef chuck and pork butt. Lamb shoulder is another of my favorites, but it can be harder to find in my local grocery stores. It is worth the effort to hunt down. Lamb shoulder gives you all the advantages of shoulder cuts; it is tough to overcook, well marbled with fat, and has lots of connective tissue that melts into tender gelatin, if it is cooked long enough  As a bonus, lamb shoulder is cheaper than the "better" cuts from the loin and leg, but still gives you the distinctive flavor of lamb.

Luckily, I have a source for my lamb shoulder.  I put in a special order for a boned and tied lamb shoulder roast from the Great American Lamb company, and picked it up at the Cuyahoga Valley Winter Farmer's Market last month.
*Don't be afraid to talk to your butcher!  They are happy to special order cuts like this, as long as they have some advance notice.  It will also show your butcher that you have a seriousness of purpose, and will probably get you better service next time.

Recipe: Rotisserie Lamb Shoulder

Equipment:

  • Grill with Rotisserie attachment (I used a Weber Summit 650 with an infrared rotisserie burner. Here it is.)
  • Aluminum foil drip pan (9"x12", or whatever fits your grill)
  • Butcher's twine

Ingredients:

  • 3 to 4 pound boneless lamb shoulder roast
  • 1 teaspoon kosher salt
  • 3 cloves garlic, minced
  • 1 tablespoon minced fresh rosemary
  • 1 teaspoon lemon zest

Rosemary olive oil baste

  • ¼ cup olive oil
  • 2-3 sprigs fresh rosemary (tied together to make a brush)

Directions:
1. Dry brine the lamb shoulder (optional): One to two days before cooking, remove the lamb from any wrapping or netting, and rinse under cold water. Pat dry with paper towels, then trim the exterior fat from the lamb shoulder. Open the lamb up if it is rolled - there should be an "inside" and an "outside". Sprinkle the lamb evenly with the salt, then put it with the inside facing up in a baking dish. Sprinkle with the garlic, minced rosemary, and lemon zest. Cover with plastic wrap and refrigerate until ready to cook.
*If you don't have the time for the dry brine, do this step just before cooking.

2. Prepare the lamb shoulder for cooking: Two hours before cooking, remove the lamb from the refrigerator. Roll the lamb into a tube shape, and truss every two inches with the twine. Skewer the lamb lengthwise with the spit for your rotisserie. Let the lamb rest at room temperature until it is time to cook.

3. Prepare the grill: Set your grill up for rotisserie cooking at medium heat. For my Weber Summit, this means removing the grates, turning the two outer burners (burners 1 and 6) to medium, and turning the infrared burner to medium. Then I put my drip pan in the middle, over the unlit burners, and let the grill preheat for ten to fifteen minutes. (See My Rotisserie Basic Technique Post for more rotisserie setup details.)

4. Cook the lamb: Put the spit on the rotisserie, start it spinning, and cook with the lid closed. After one hour of cooking, baste the lamb with the olive oil, using the rosemary brush. (Also, if you have an infrared rotisserie burner, turn it off after one hour of cooking, when the exterior of the lamb should be well browned.) Baste the lamb with the olive oil and the rosemary brush every 15 to 30 minutes until the lamb is done. Cook until the lamb reaches an internal temperature of 180*F, measured in the thickest part of the roast. This should take 1 hour 15 minutes to 2 hours, depending on the thickness of the roast. Start checking the lamb's temperature after 30 minutes, and watch out for the spit - it can throw the reading off.
*This roast was on the small side, slightly under 3 pounds, so it took 1 hour and 15 minutes to cook.
**Shoulder cuts need to be cooked to well done.  If you want medium-rare lamb, cook a lamb leg instead.

5. Serve: Remove the spit from the grill, remove the lamb from the spit, and remove the twine from the roast. Baste one last time with the olive oil and rosemary brush, then let rest for 15 minutes. Slice the lamb into ½" thick slices, and serve.

Notes:
*Normally, shoulder cuts give you a large cushion in cooking - they're tough to overcook.  However, my lamb wound up with a very thin section on one end when I was done tying it.  That section overcooked by the time the lamb was cooked through in its thickest part. It wasn't awful, but it was a little chewy. My lesson?  Next time, I'm going to try to truss it into a more even shape.

*When I think of lamb on the rotisserie, I think of Greek food, thanks to "My Big Fat Greek Wedding".  Even though this is more of a generic Mediterranean flavor profile, I served this roast with a Greek salad and tzatziki sauce.  And, as I've said many times, leftover lamb is begging to be used in gyros. Just buy some pita bread, make some more tzatziki sauce, thin slice some red onion, and dinner's ready.

What do you think? Questions? Other ideas? Leave them in the comments section below.

Related Posts:
Rotisserie Boneless Leg of Lamb, Greek Style
Rotisserie Leg of Lamb Provencal
Rotisserie Beef Chuck Roast Barbacoa
Click here for my other rotisserie recipes.

Inspired by:
Boned and tied lamb shoulder from the Great American Lamb company at the Cuyahoga Valley Winter Farmer's Market


Check out my cookbook, Rotisserie Grilling.


Everything you could ask about the rotisserie,
plus 50 (mostly) new recipes to get you cooking.

It's a Kindle e-book, so you can download it and start reading immediately!


*Enjoyed this post? Want to help out DadCooksDinner? Subscribe to DadCooksDinner using the RSS or Email options on the right, link to this post from your blog, recommend DadCooksDinner to your friends, or buy something from Amazon.com through the links on this site. (Like my Rotisserie Grilling cookbook...)

  • « Previous Page
  • 1
  • …
  • 30
  • 31
  • 32
  • 33
  • 34
  • …
  • 37
  • Next Page »

Welcome to Dad Cooks Dinner!

I'm Mike Vrobel, a dad who cooks dinner every night. I'm an enthusiastic home cook, and I write about pressure cooking, rotisserie grilling, and other food topics that grab my attention.

More About Me →

Popular

  • Three bowls of cooked Pinto Beans on a wood table
    Instant Pot Pinto Beans (No Soaking)
  • Pressure Cooker Beef Shank (Osso Bucco)
  • Pressure Cooker 7 Hour Leg of Lamb (in 90 minutes)
    Pressure Cooker 7 Hour Leg of Lamb (in 90 minutes)
  • Pressure Cooker Brown Jasmine Rice
  • Grilled Tomahawk Steak (Long Bone Ribeye, Reverse Seared)
    Grilled Tomahawk Steak (Long Bone Ribeye, Reverse Seared)
  • A green bowl full of chicken noodle soup
    Instant Pot Rotisserie Chicken Noodle Soup

Seasonal

  • A bowl of asparagus risotto
    Instant Pot Asparagus Risotto (Pressure Cooker Recipe)
  • Grilled Butterflied Chicken with Garlic Butter
  • Sous Vide rack of lamb sliced into chops
    Sous Vide Rack of Lamb with Dijon Bread Crumb Crust
  • A bowl of beef stew with asparagus, carrots, and radishes.
    Instant Pot Spring Vegetable Beef Stew
  • A Rotisserie Chicken (Pollo Asado)on a platter of shredded cabbage
    Rotisserie Chicken Pollo Asado
  • Rotisserie Pork Shoulder Roast with Carolina Mustard BBQ Sauce
    Rotisserie Pork Shoulder with South Carolina Mustard Barbecue Sauce

Footer

↑ back to top

About

  • Privacy Policy

Newsletter

  • Sign Up! for emails and updates

Contact

  • Contact

Copyright © 2025 Dad Cooks Dinner