DadCooksDinner

  • Home
  • Rotisserie
  • Recipes
  • Tools
  • Books
  • Merch
menu icon
go to homepage
  • Recipes
  • Books
  • Tools
  • Merch
  • About
subscribe
search icon
Homepage link
  • Recipes
  • Books
  • Tools
  • Merch
  • About
×
Home » Recipes

Eat Local Challenge

October 4, 2010 by Mike Vrobel 10 Comments

This week's posts are inspired by my fall CSA box, a trip to a local apple orchard, a rogue pumpkin planting from my youngest son, and the Ohio Eat Local challenge.
*Yes, there's a theme in there. Really. I promise.

From the Ohio Department of Agriculture:

Eat Local Challenge, October 2-8: The Ohio Department of Agriculture challenges you to eat local! This week, plan and prepare one meal every day using foods that are made, grown or raised in Ohio.

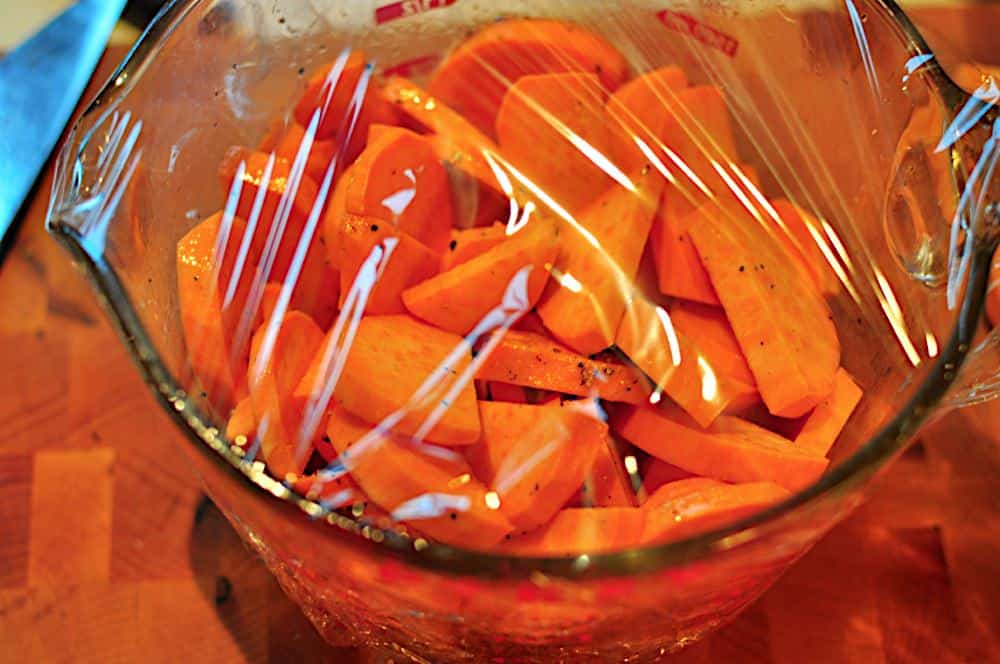
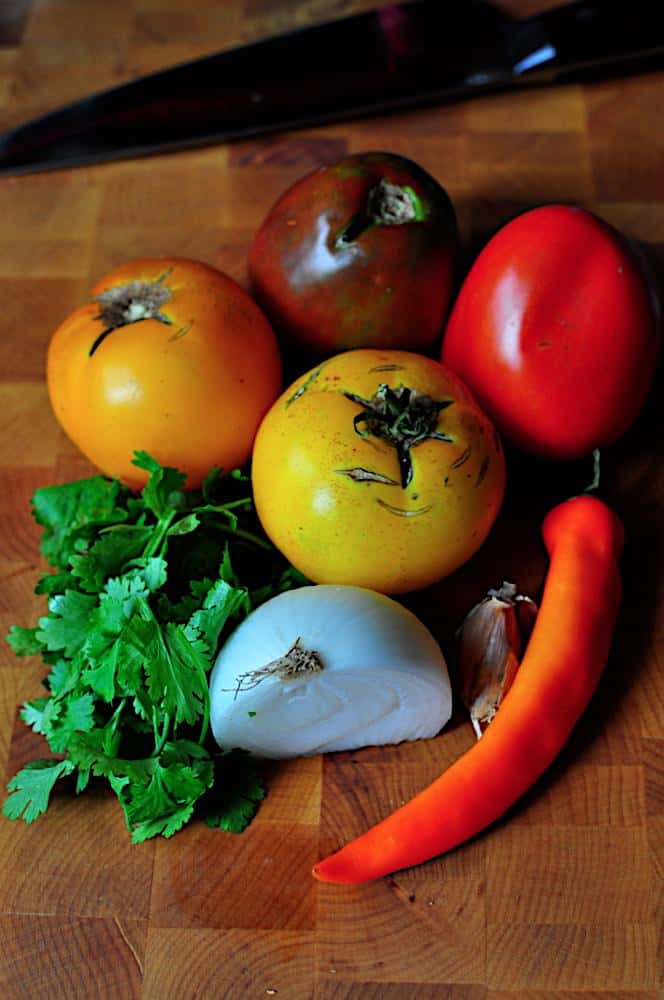
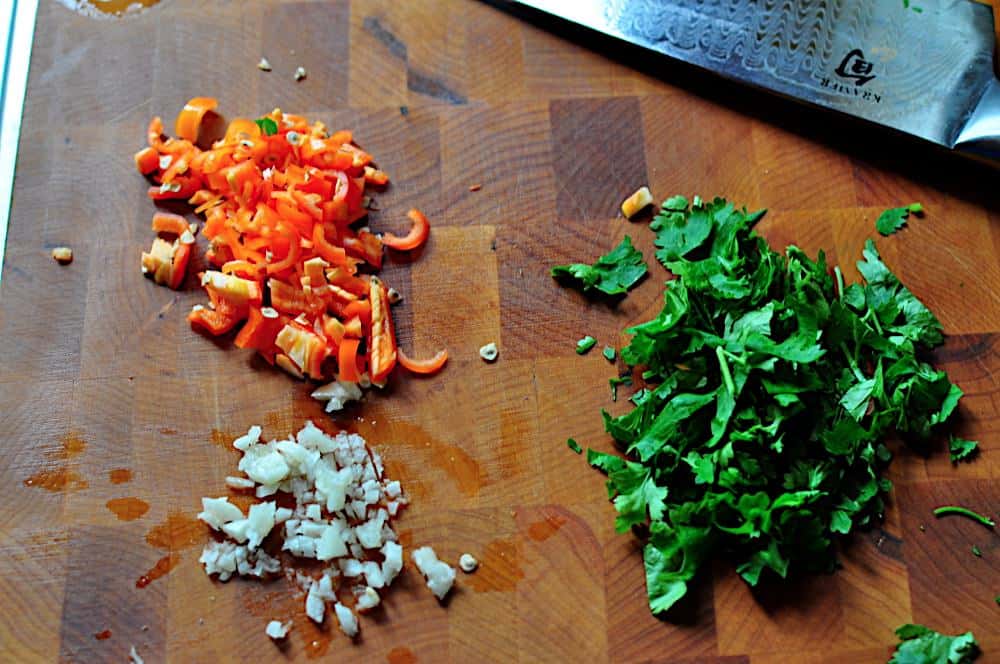
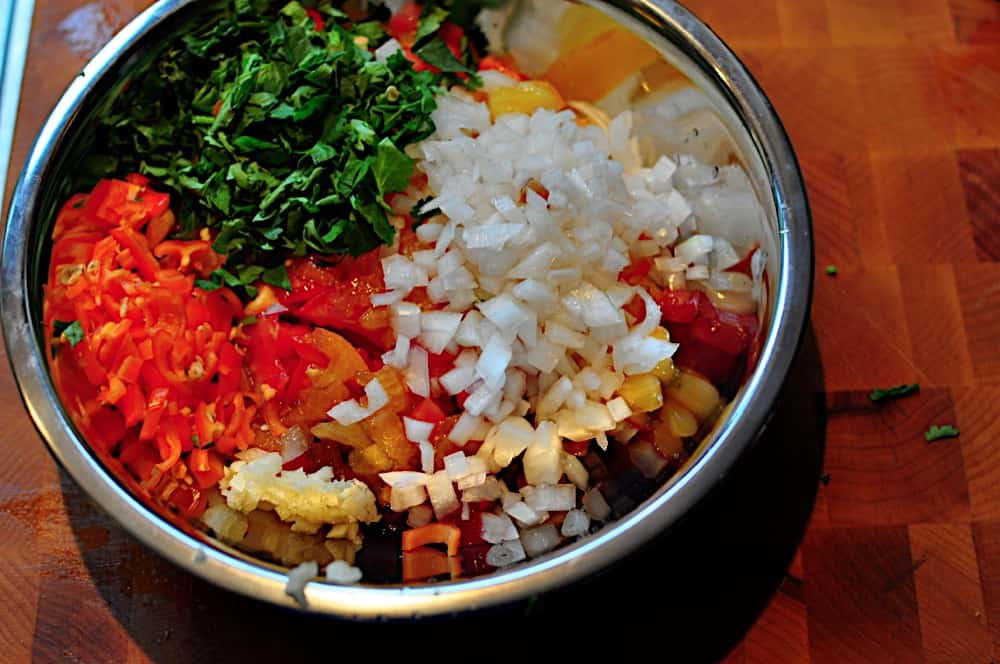
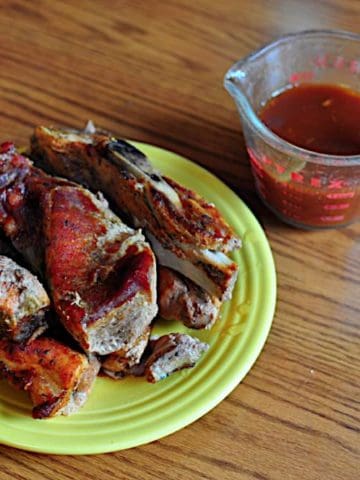
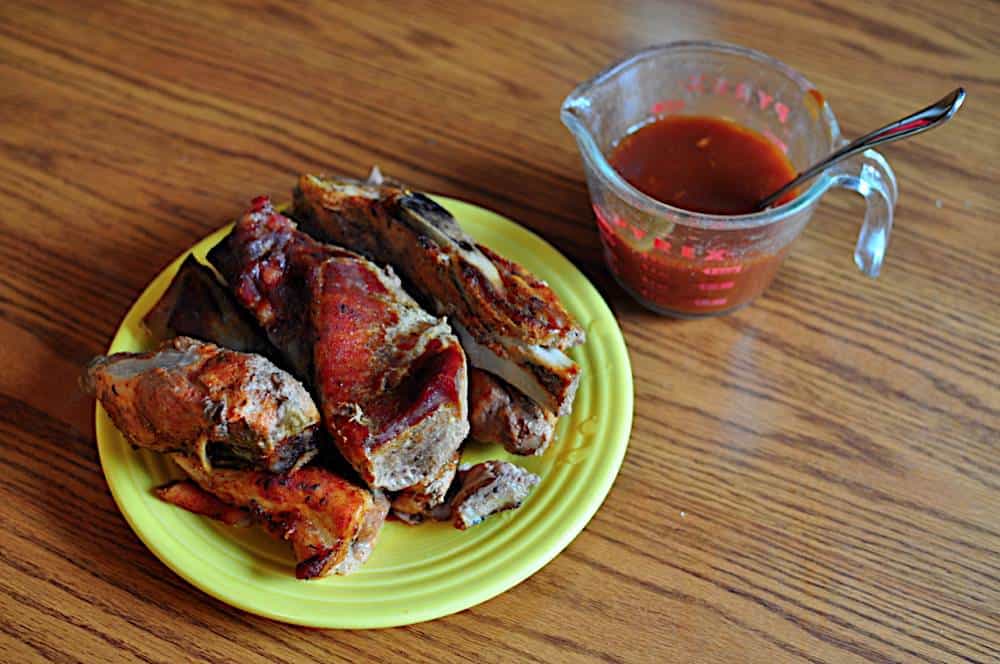
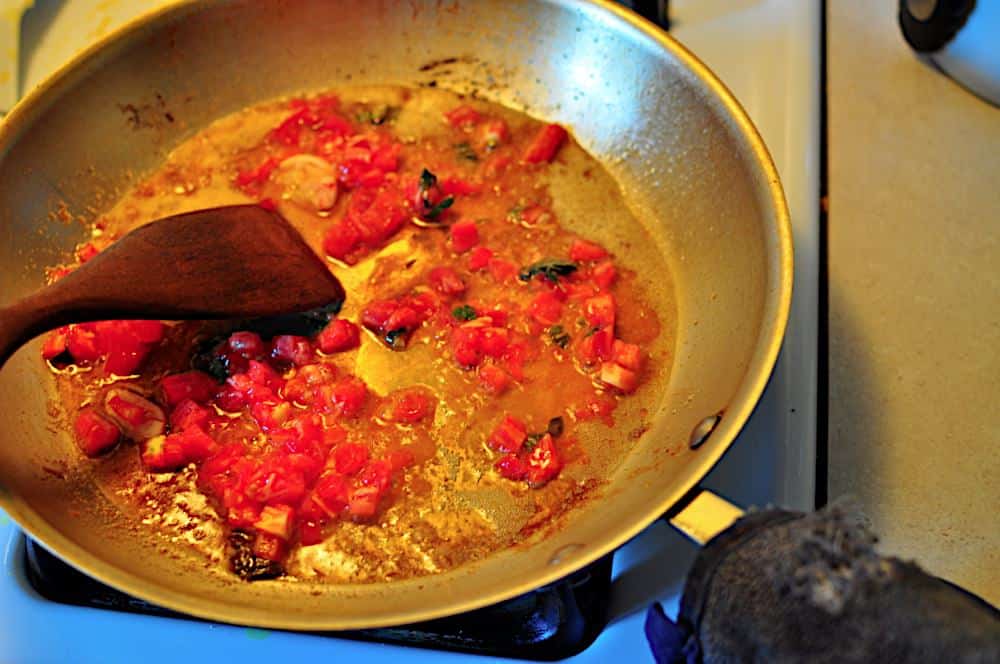
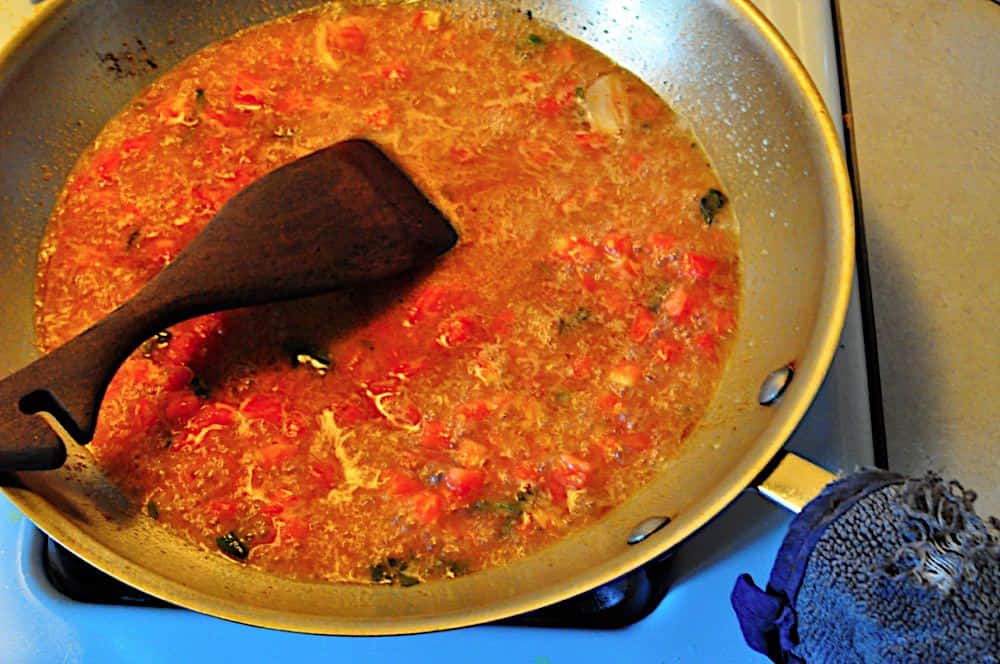
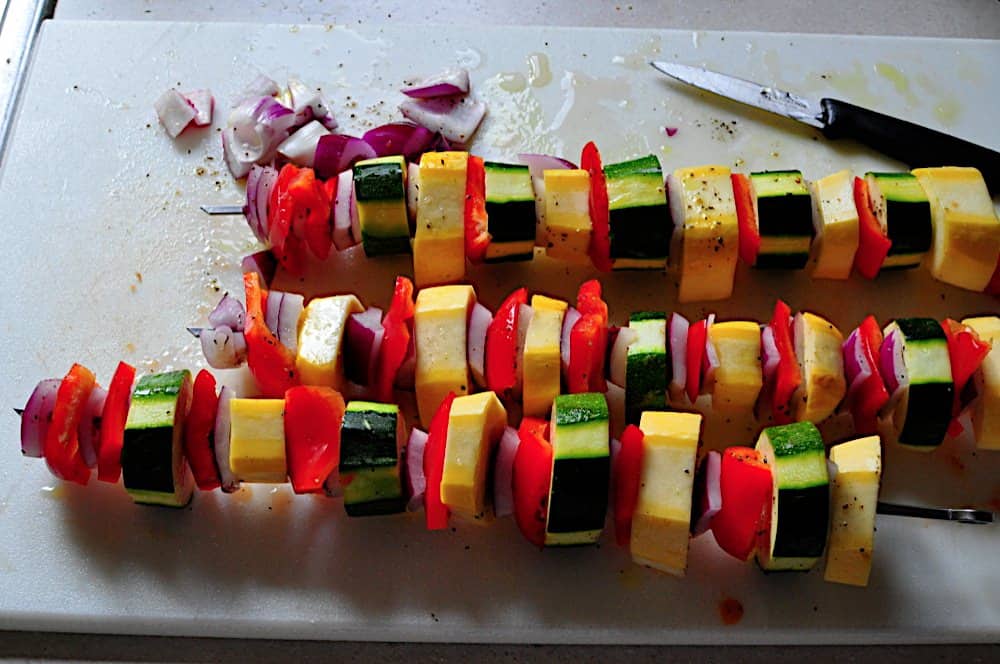
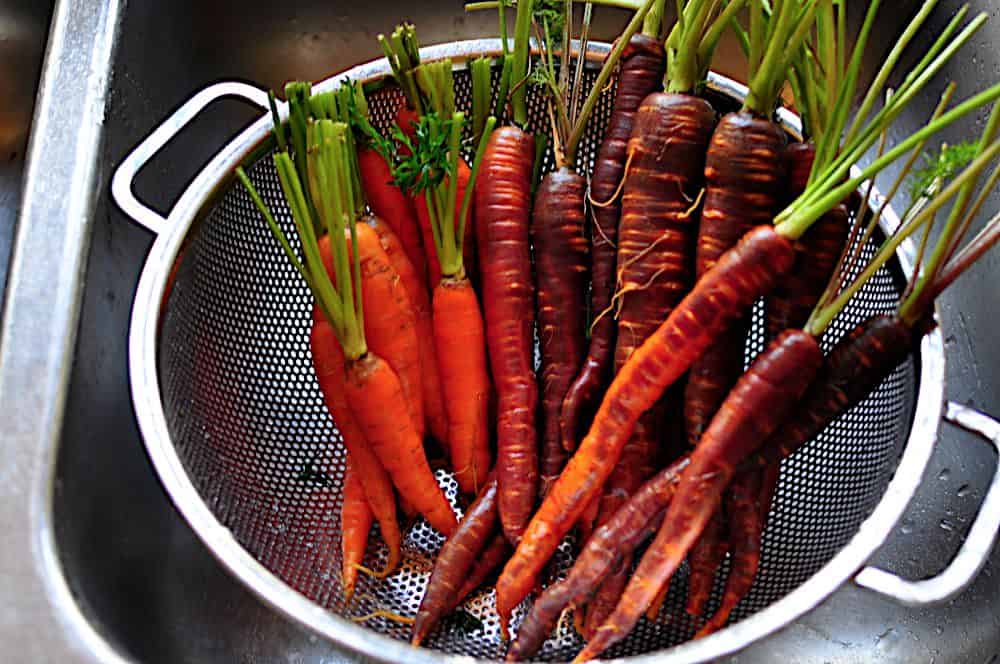
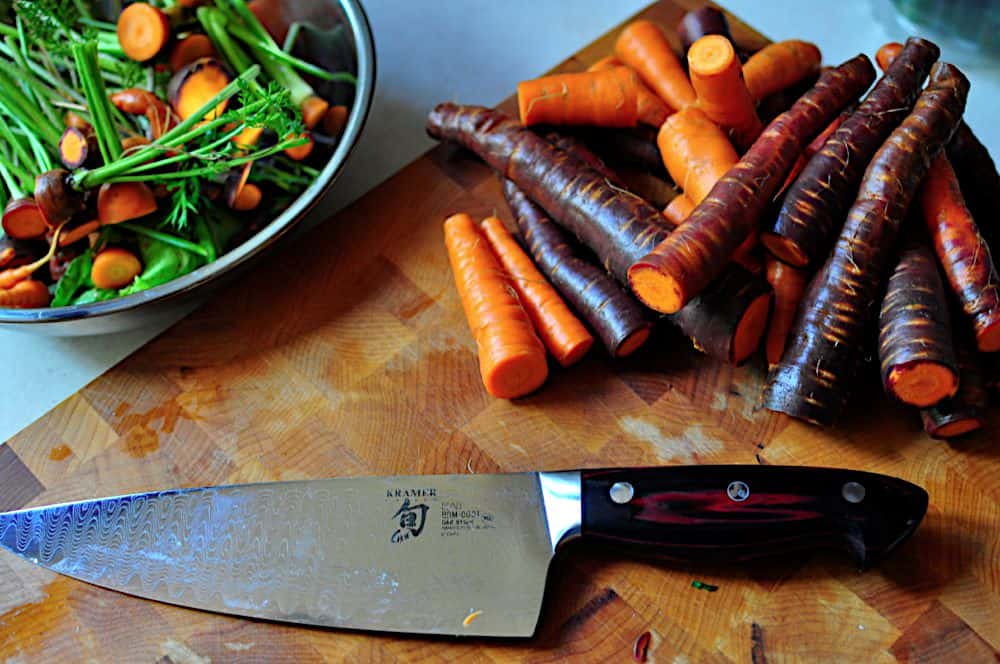
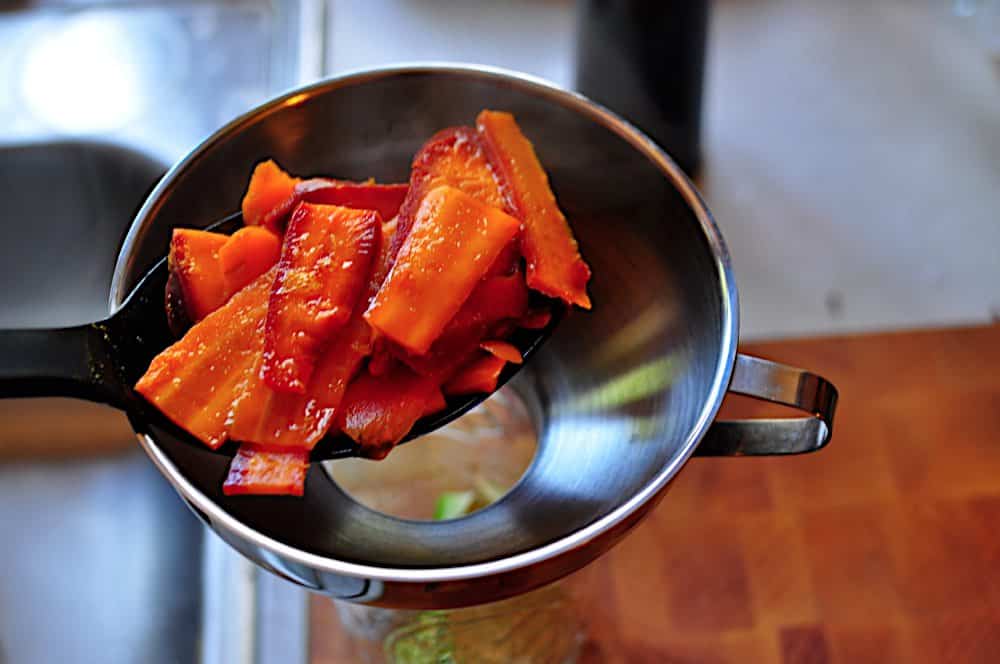
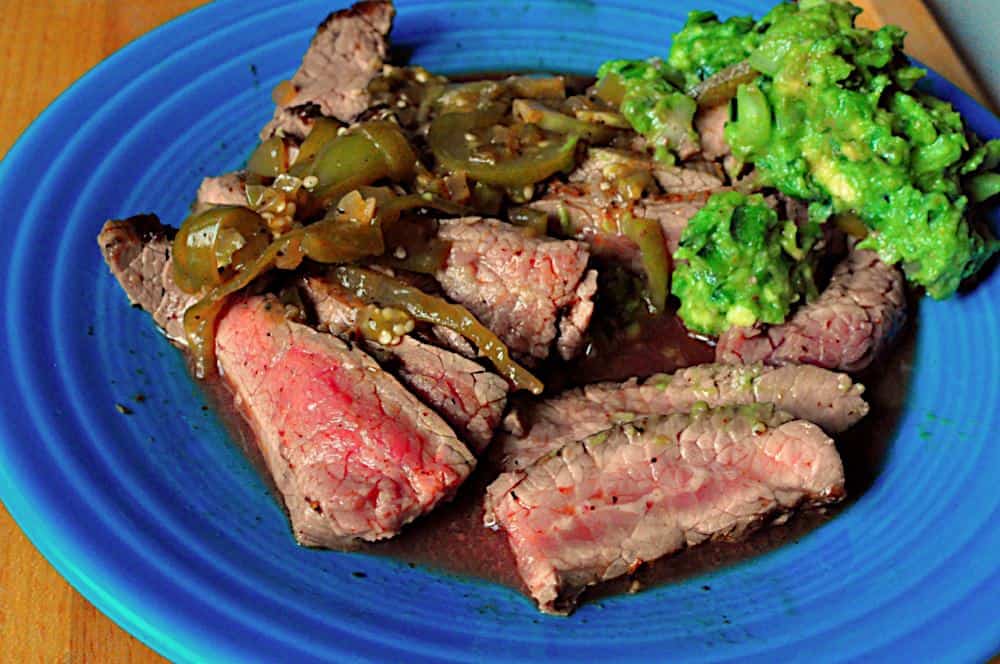
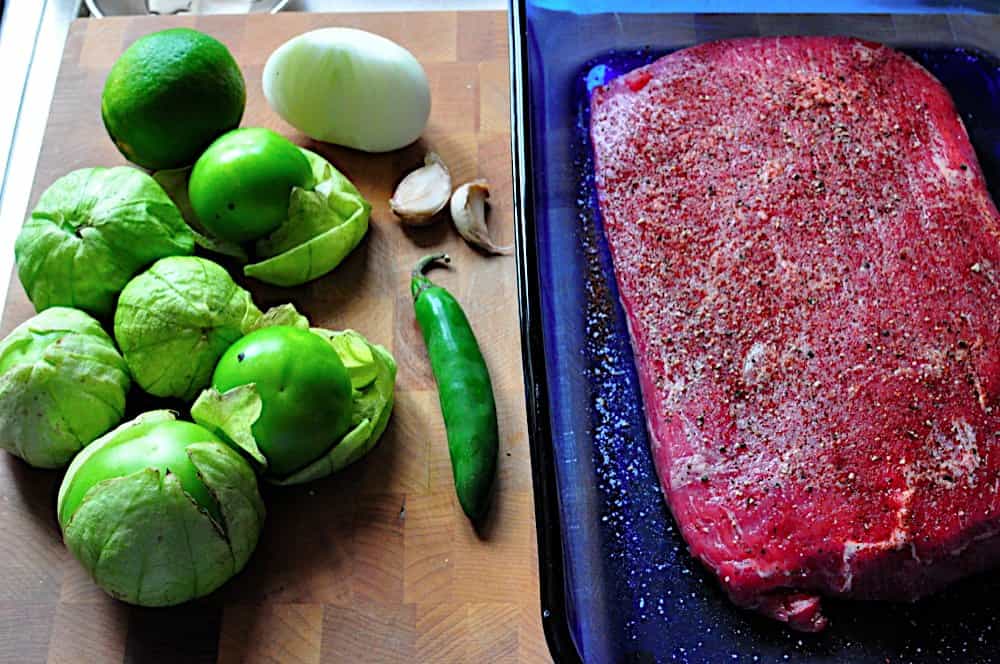
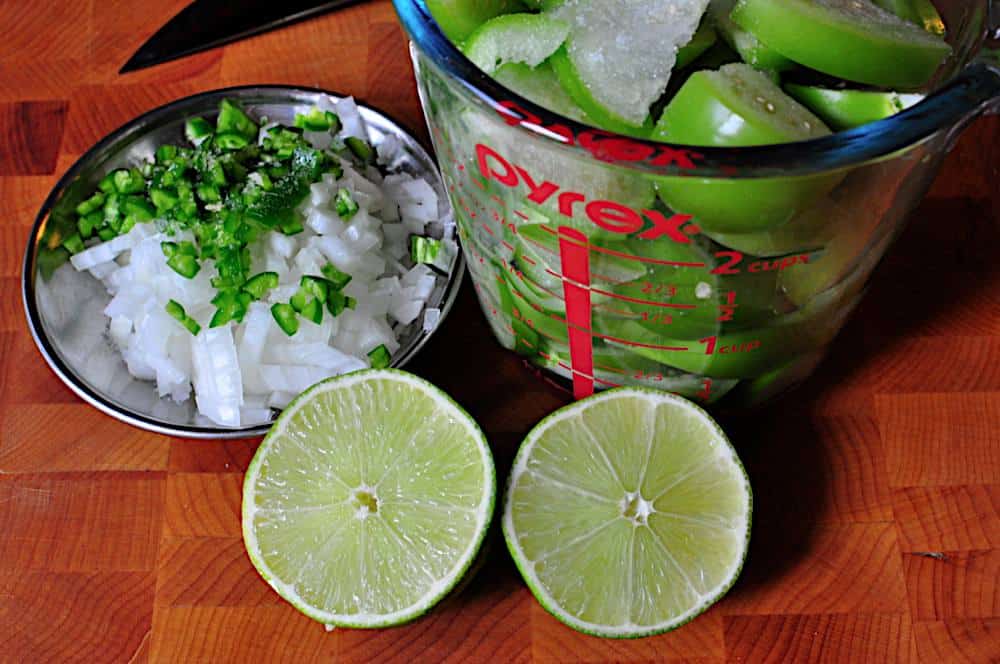
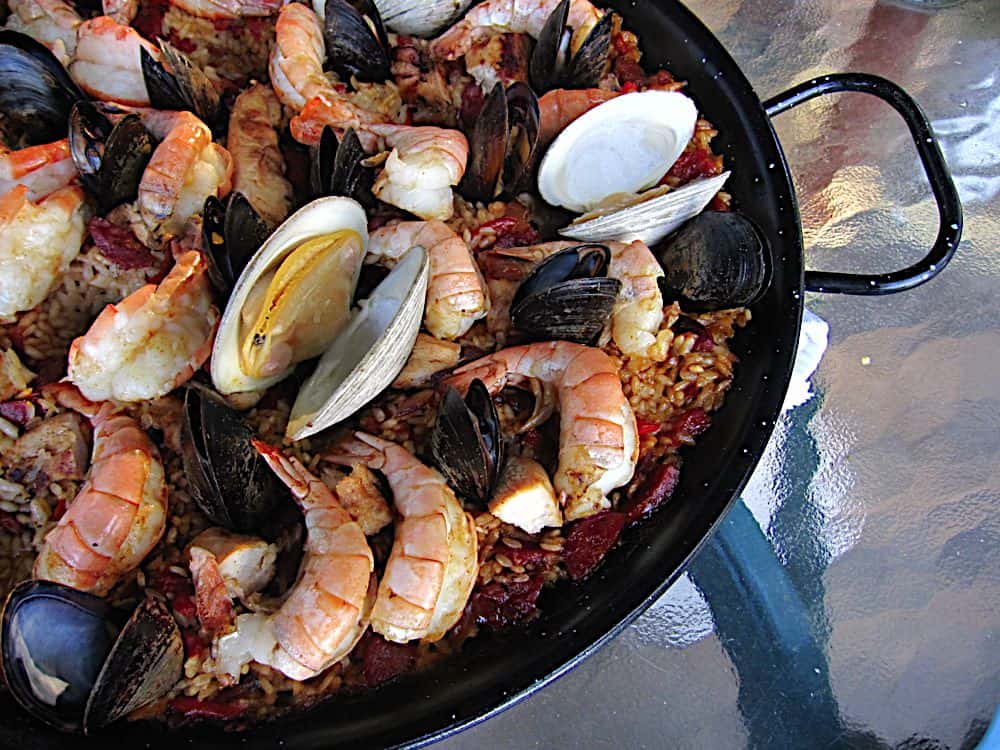
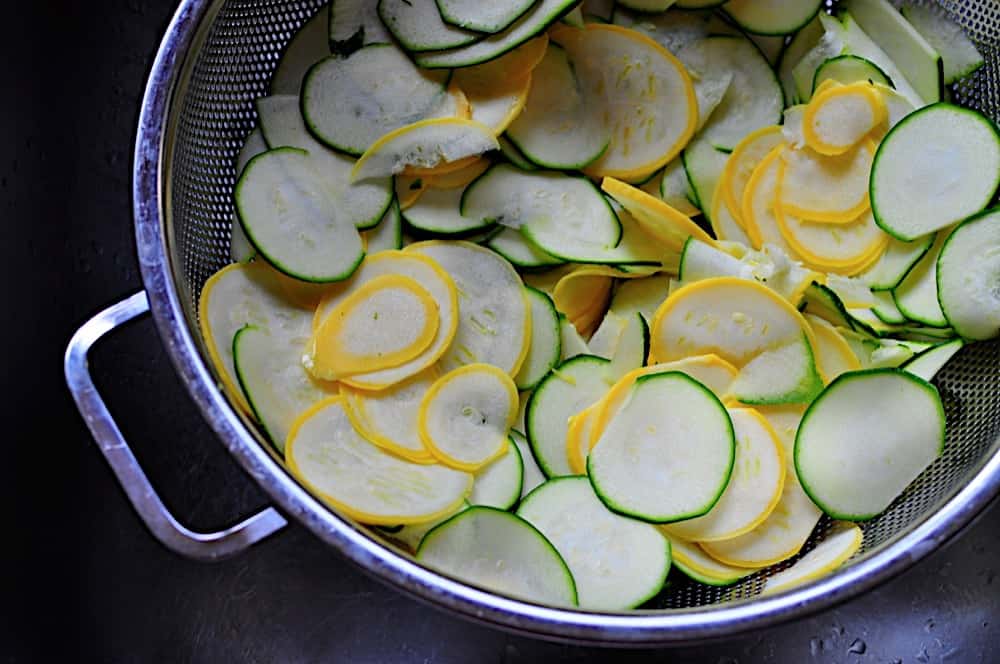
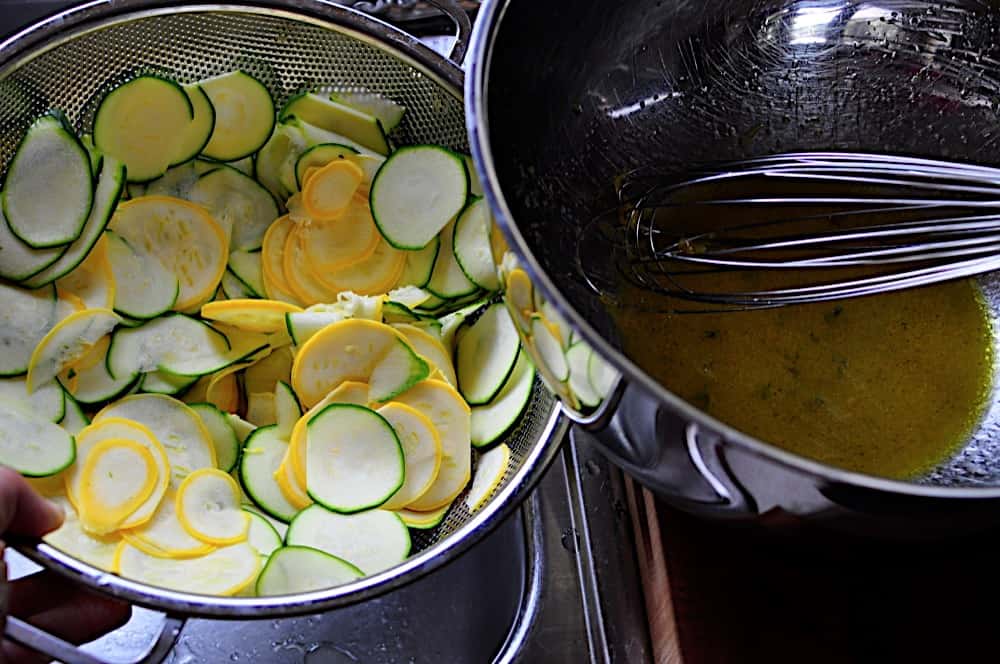
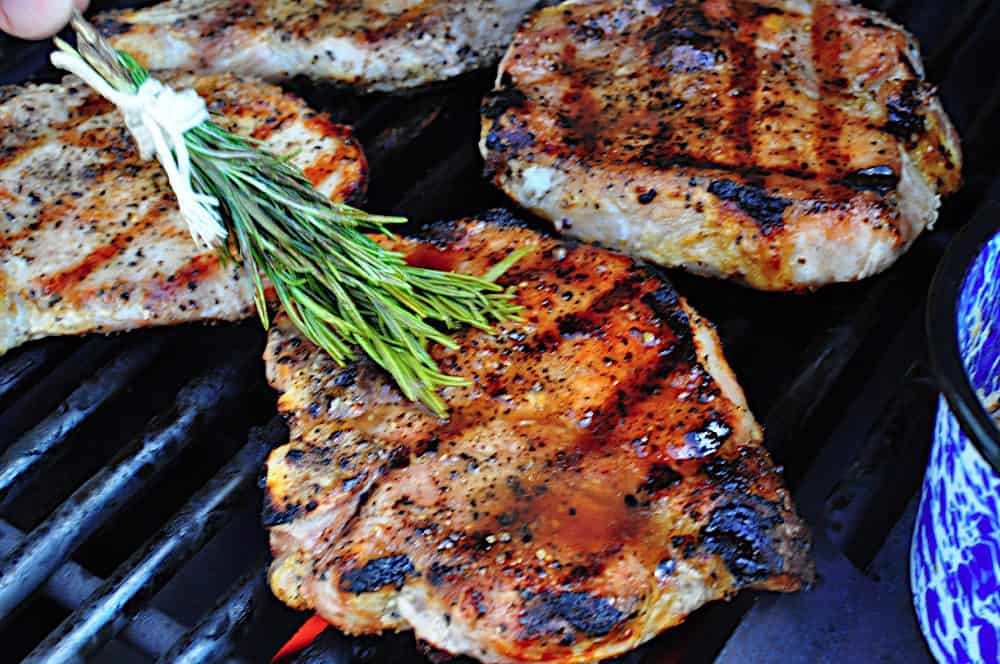
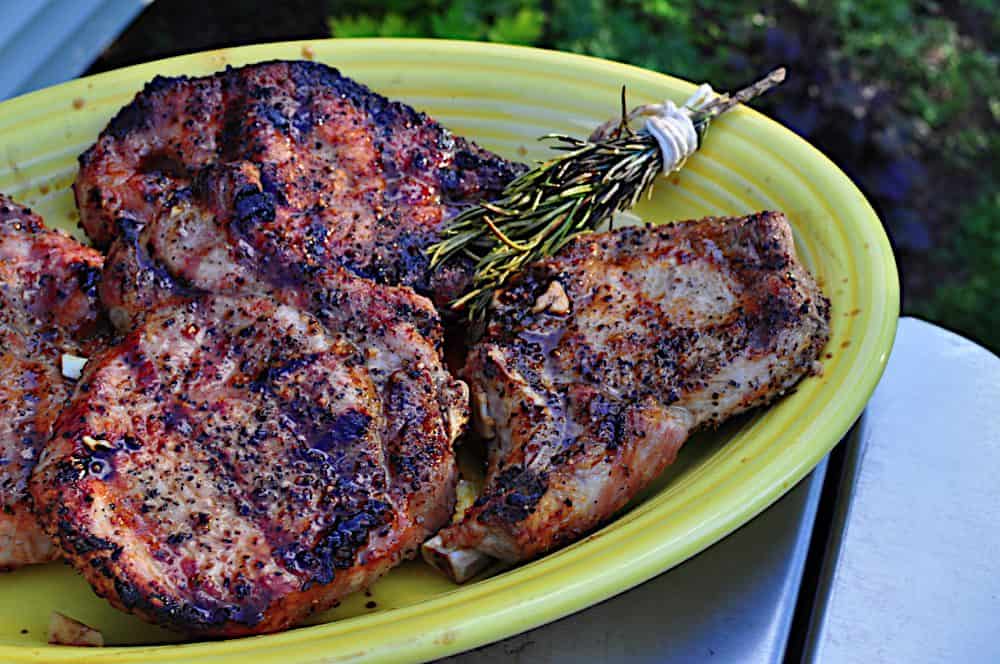
Regular readers of this blog know that I try to eat local as much as possible.* In my neck of the woods (Northeastern Ohio), this is a great time of year to eat local. We have the tail end of the summer's vegetables, and fall vegetables are starting to come in. In my last CSA box, I had the last of the year's tomatoes, and the first winter squash, leeks, chard, and broccoli. I do live in Northeastern Ohio. Eating local in the middle of February means meat and a lot of root vegetables. I can't bring myself to give up on fruit and green vegetables at that time of year. I have enough problems with Seasonal Affective Disorder as it is. That's why I'm a regular attendee at my local winter farmers market...but that's a discussion for another day.

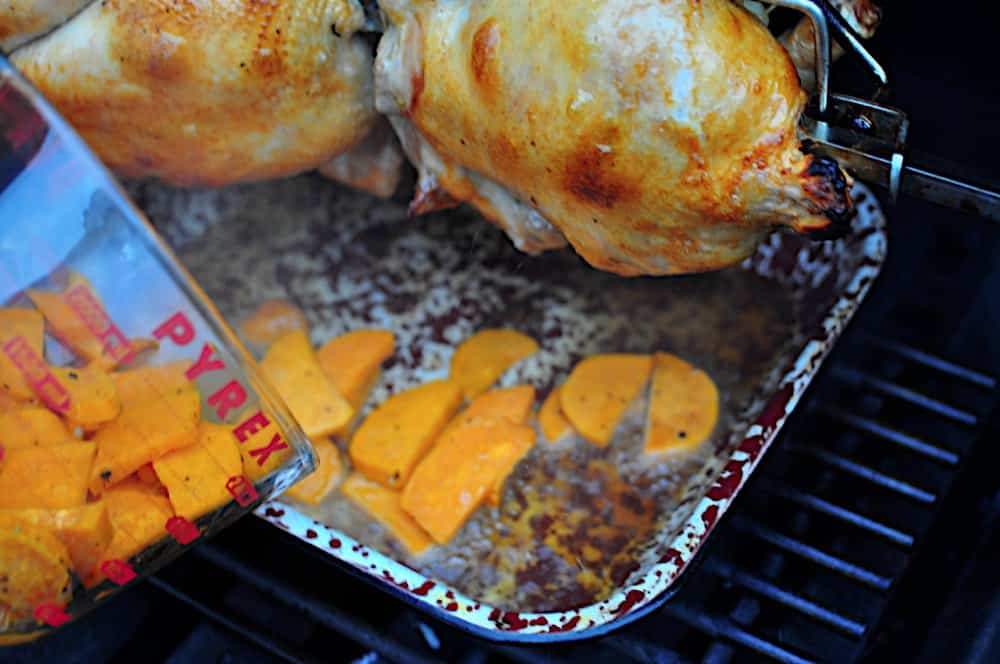
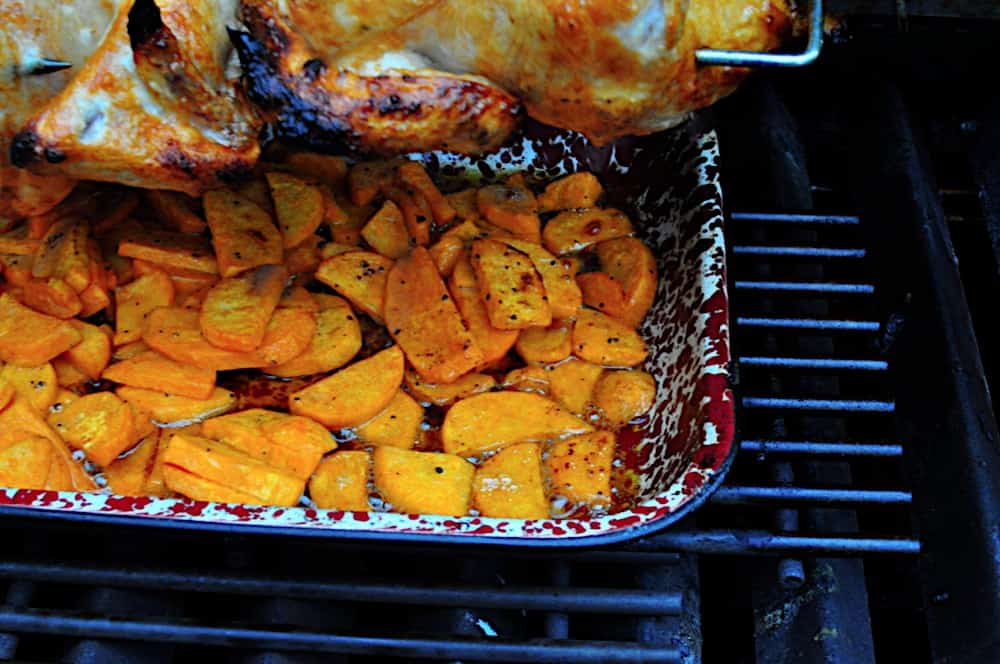
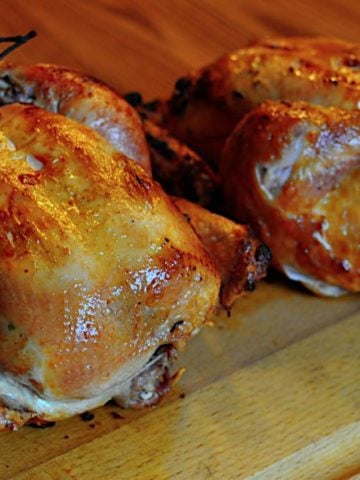
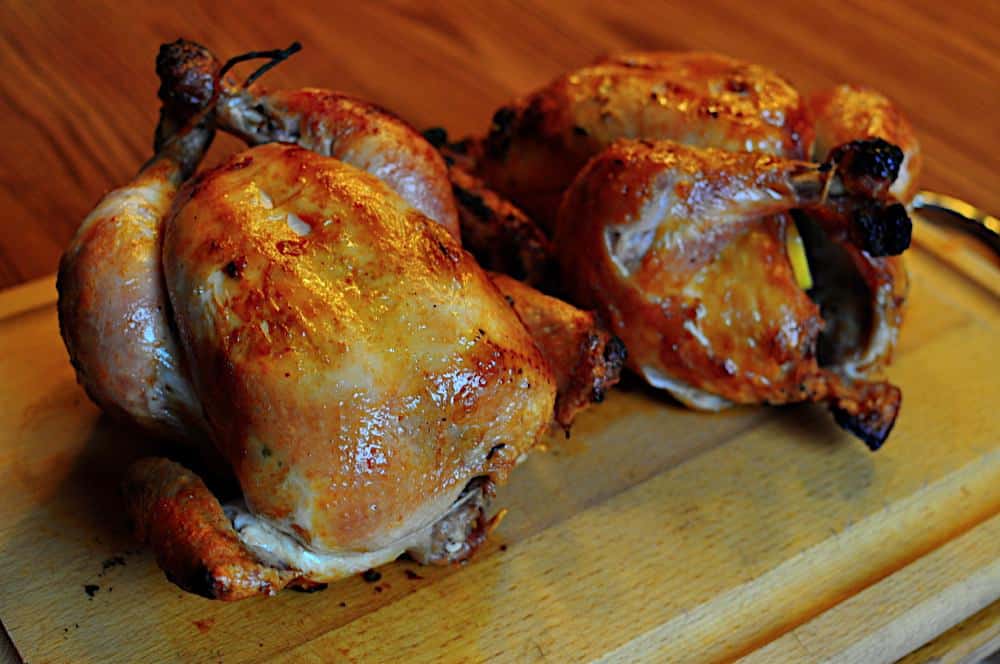
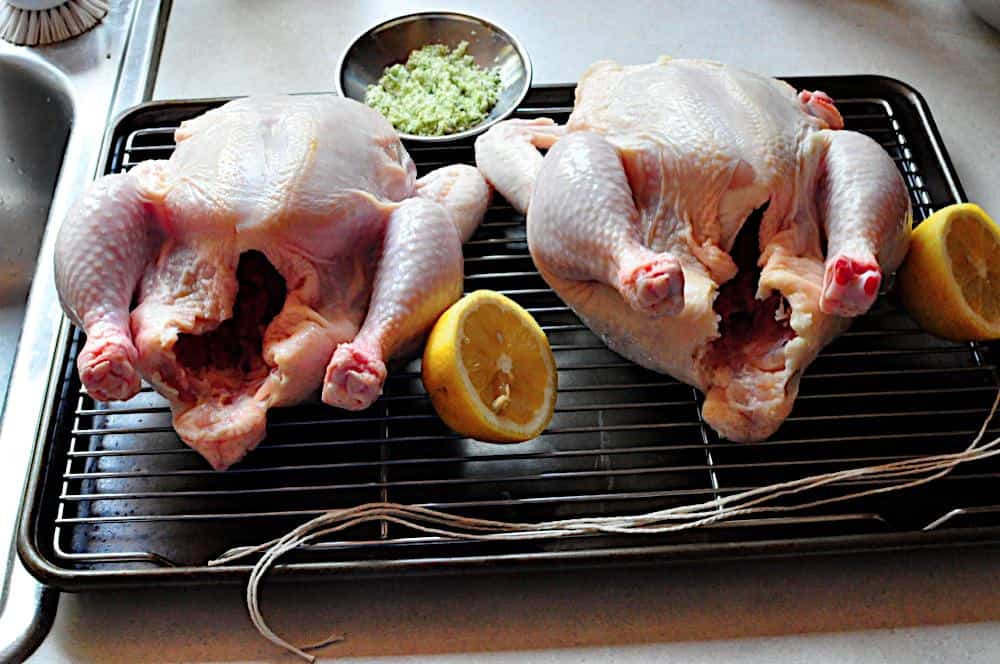
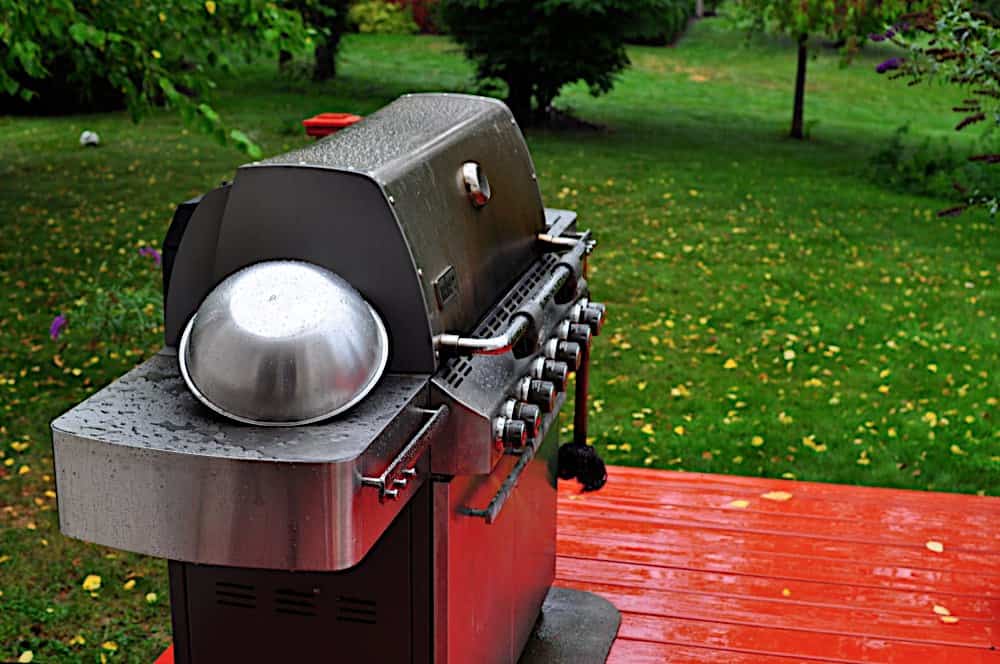
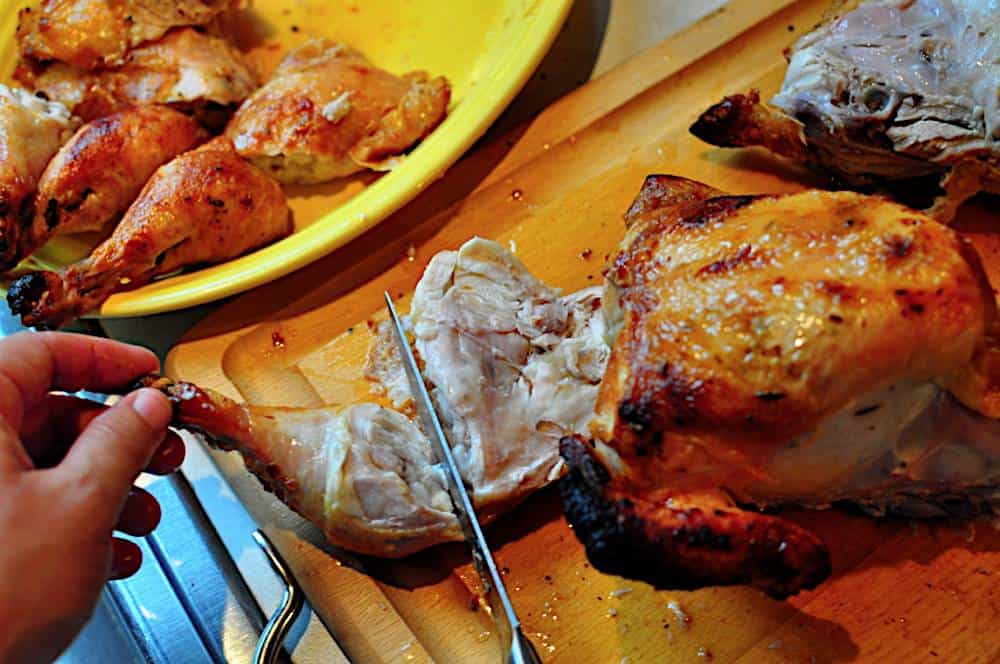
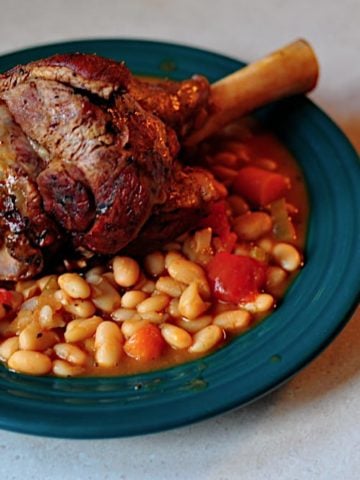
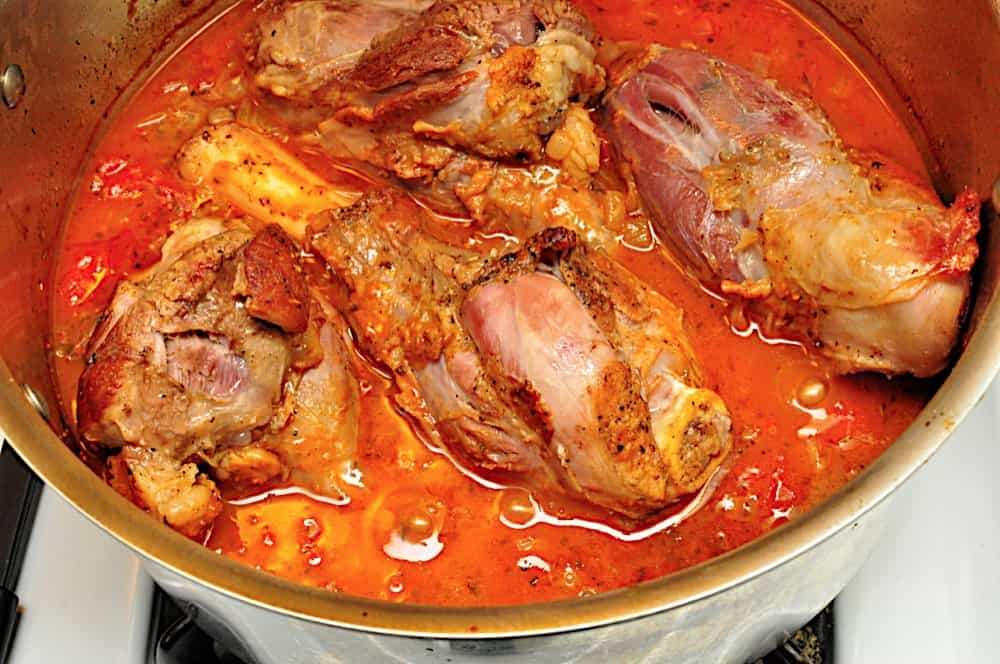
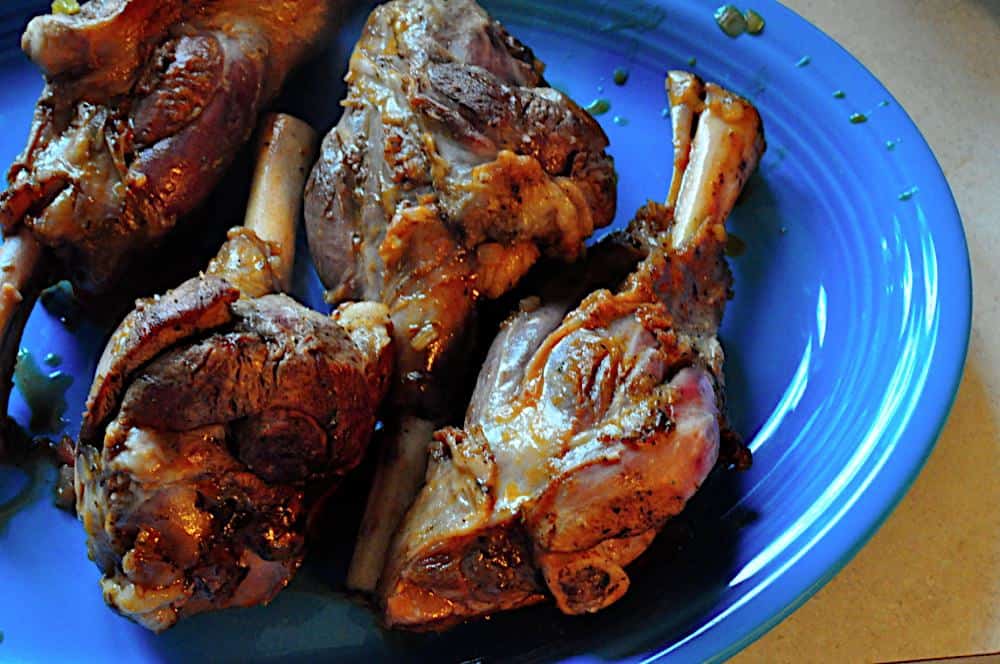
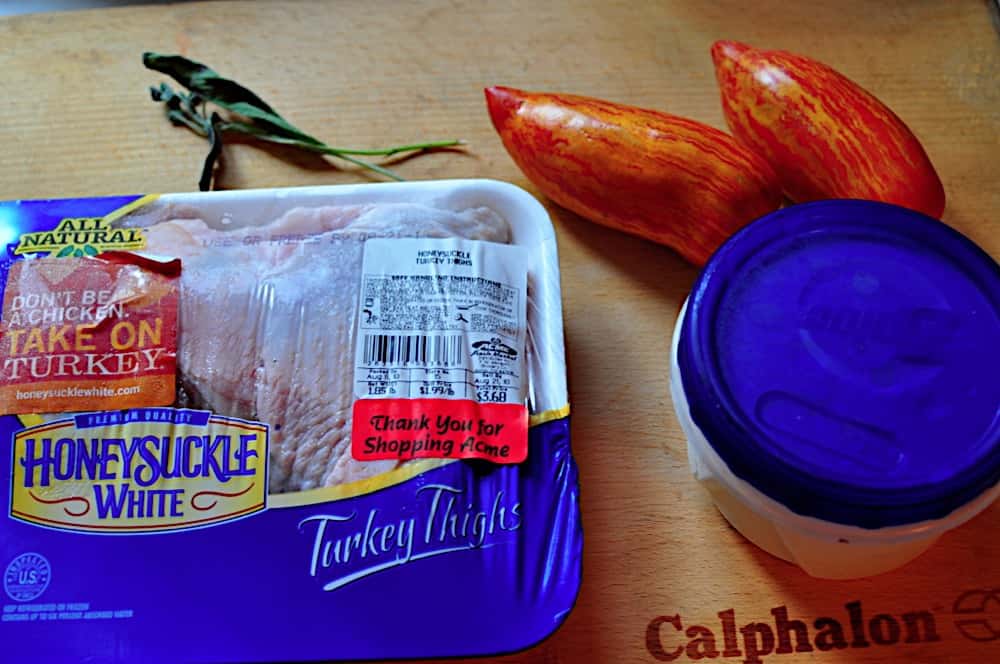
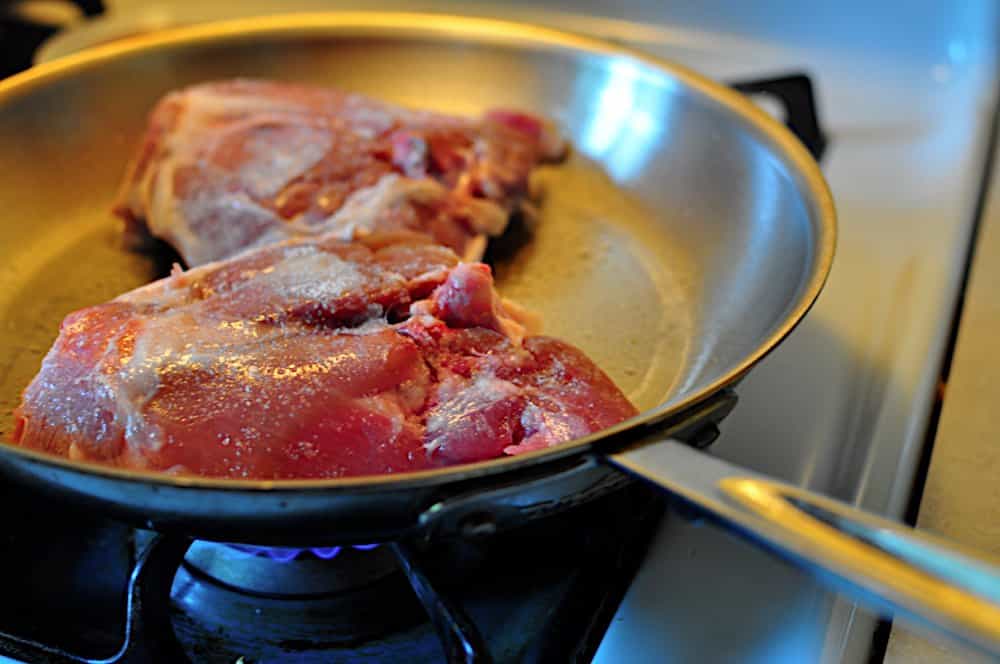
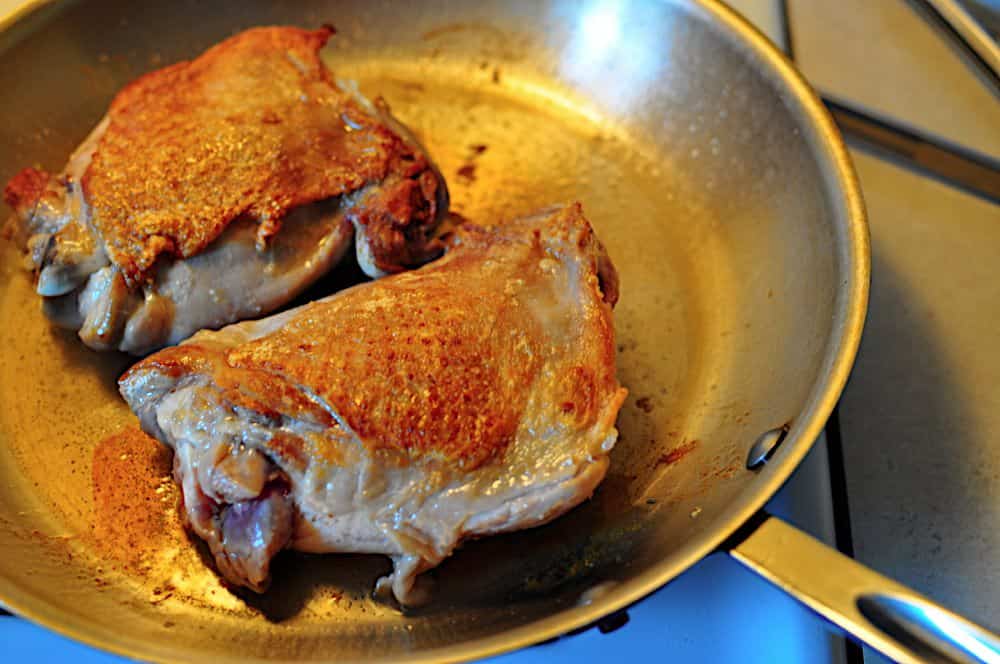
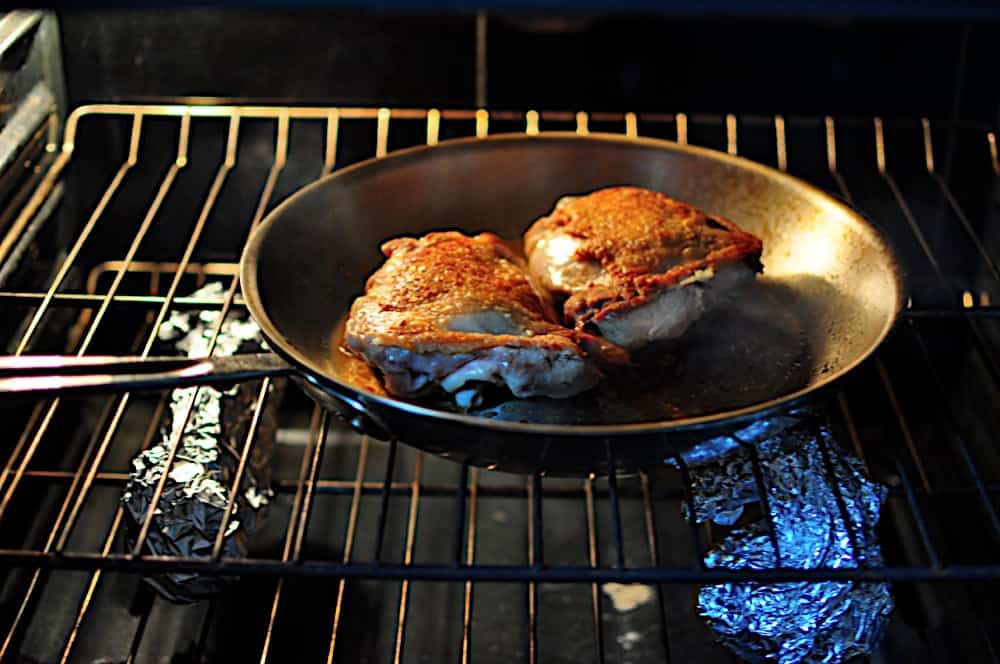
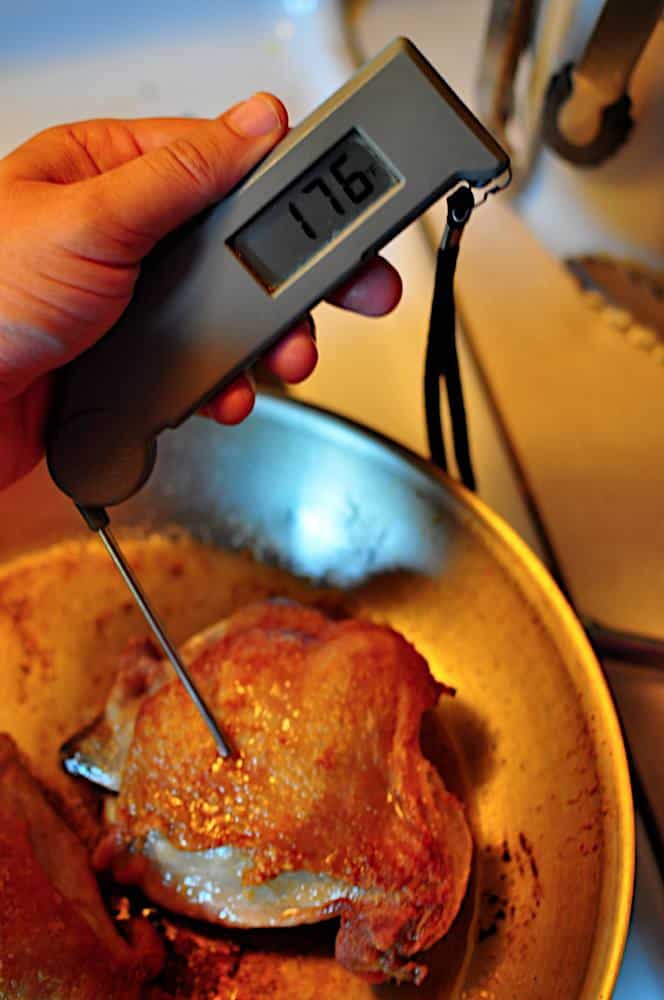
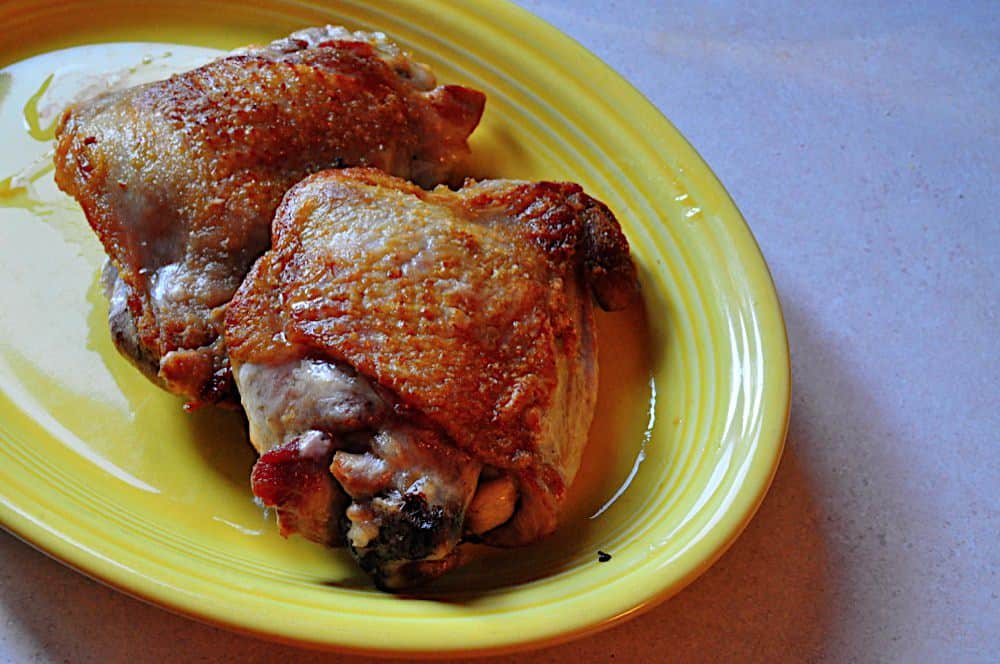
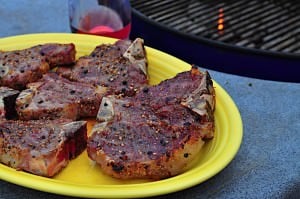
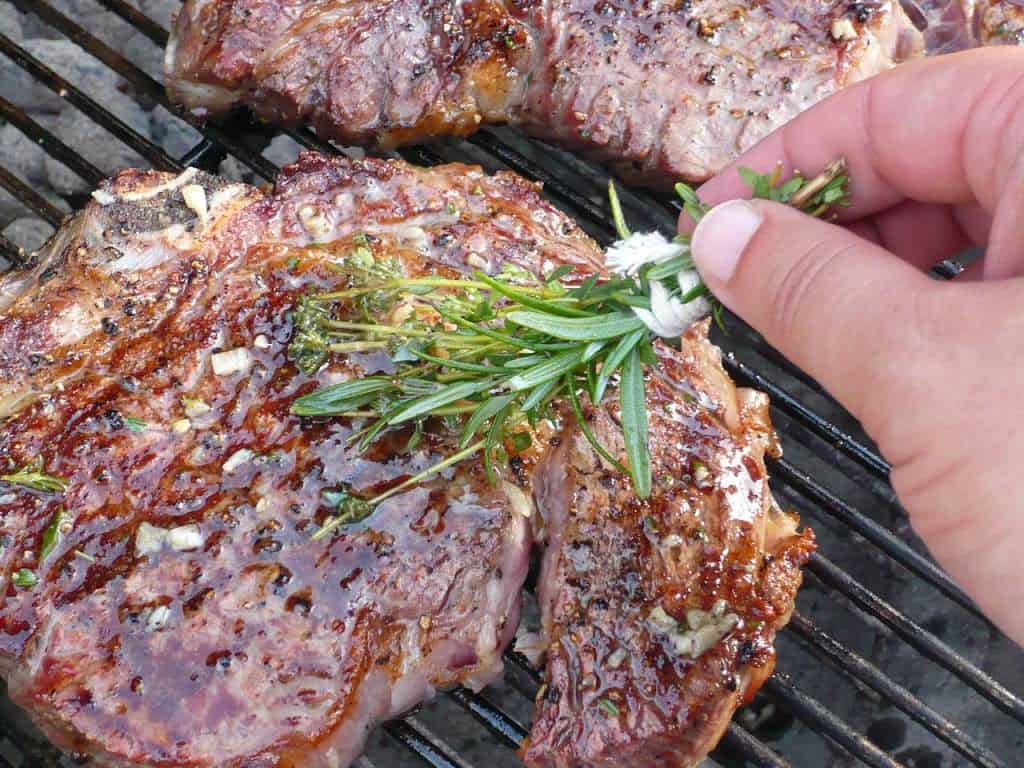
So, I'm taking on the Ohio Eat Local Challenge. What do I have up my sleeve for a week's worth of local meals? Meat is easy - we know meat here in Ohio. I can get good, local chicken, beef, pork, lamb, and even buffalo. (I'm still looking for local duck.) Dairy? Cheese? Eggs? No problem. Apple season is just starting, so fruit is taken care of. And as I mentioned above, fall produce is coming in strong; with my CSA box I'll be good for the week.
And I guess I'll have to drink Great Lakes beer all week.  And maybe throw in a glass of Harpersfield Pinot Noir for variety.  Oh, the sacrifices I have to make.

The hard part is the starch. This is the perfect time of year for local potatoes. But...the kids just won't eat potatoes. Unless they are french fries. This baffles me.  When I was a kid, I lived for mashed potatoes with a big pat of melting butter in the middle.
The butter had to be pushed into the mashed potatoes, so it didn't leak.  I would try to eat from the middle, so the butter was trapped in the potatoes for as long as possible.

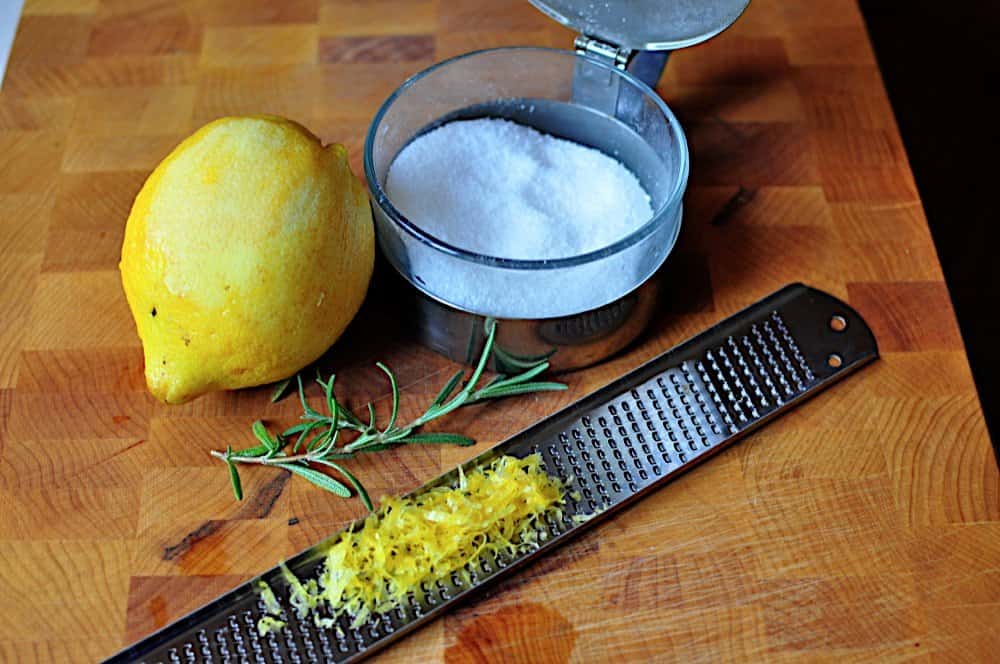
What can I do?  I'm going to try to get some local flour at the farmers market this weekend, so I can make bread or pizza. But after that, I'm kind of at a loss. Pasta? Other grains? I know we can grow wheat and grains here in Ohio, but I don't know of a source for locally grown versions.
Forget about rice and corn tortillas, two of my kids favorite things to eat. We're too far north to grow rice locally. I haven't found an ohio grown version of Masa Harina. Actually, I haven't found an American version; when I buy Masa Harina, I trust the experts, and buy Mexican brands.
**And no, I can't count the Great Lakes beer as my starch.  At least, not for the kids...

Can you take on an Eat Local Challenge in your neck of the woods? One meal, every day, made entirely of food grown in your state? Know of any good sources for Ohio grown grains, for my own Eat Local Challenge? Let me know in the comments.

Special Thanks:
To the people who keep me in locally grown food:
Crown Point CSA
Cuyahoga Valley Conservancy Farmers Market
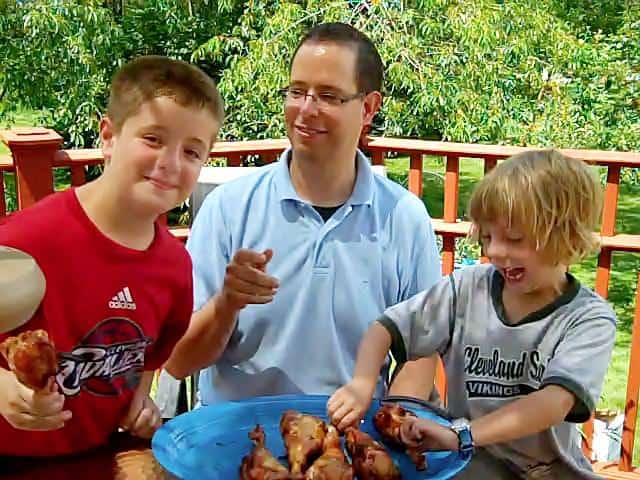
Brunty Farms (for my eggs and chicken)
Acme Fresh Market
Mustard Seed Market
West Point Market

Related Posts: 
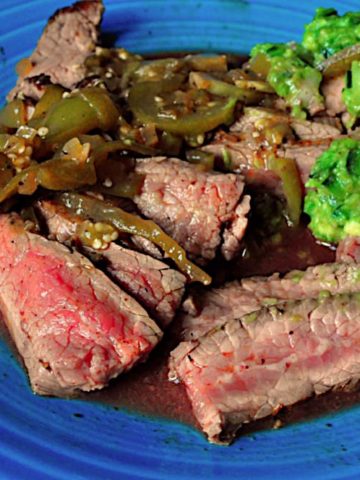
Tarte Tatin with Puff Pastry (coming Tuesday)
Pumpkin and Squash Soup (coming Thursday)

*Enjoyed this post?  Want to help out DadCooksDinner?  Subscribe using your RSS reader or by Email, recommend DadCooksDinner to your friends, or buy something from Amazon.com through the links on this site.  Thank you!

Rotisserie Pan Sweet Potatoes

September 30, 2010 by Mike Vrobel 4 Comments

Sweet potatoes are my favorite starchy vegetable. I love their sweet, earthy flavor. I'm surprised it took me this long to put two and two together, try cooking them in my rotisserie pan.

The trick to the recipe is giving the sweet potatoes a head start in the microwave. That head start softens the sweet potatoes, and by the time they are done browning in the grill, they will be perfectly cooked through.

Sweet potatoes match well with the mild flavor of rotisserie chicken, turkey or pork. The sweet potatoes come out of the pan browned and sweet, crispy and bathed in the fat of whatever you're cooking.

So, if you are looking for an easy rotisserie side dish for your meal, one that isn't the same old potatoes, give these a try.

Recipe: Rotisserie Pan Sweet Potatoes

Equipment:

  • Grill with Rotisserie attachment (I used a Weber Summit with an infrared rotisserie burner. Here is the current version of my grill.)
  • Aluminum foil drip pan (9"x12", or whatever fits your grill)

Ingredients:

  • 2 large sweet potatoes
  • 1 teaspoon kosher salt
  • ½ teaspoon fresh ground black pepper
  • 1 teaspoon vegetable oil

Directions:
1. Prep the sweet potatoes: Peel the sweet potatoes, slice them in half lengthwise, then cut into ½ inch thick slices. Put the slices in a microwave safe bowl and toss with the salt, pepper, and vegetable oil until evenly coated. Cover the bowl with plastic wrap and microwave on high for 5 minutes.
*I like to use my 2 quart Pyrex measuring cup as the bowl, because the handle makes pouring the potatoes into the pan easier in the next step.

2. Pan roast the sweet potatoes: On a grill set up for rotisserie cooking at medium to high heat, carefully pour the sweet potatoes into the drip pan, and spread into an even layer. Cook for 30 minutes, or until the sweet potatoes are browned and crispy on the top. Stir the sweet potatoes halfway through the cooking time if some sections are browning quicker than others.

3. Serve the potatoes: Remove the sweet potatoes from the drip pan with a slotted spoon, leaving as much of the cooking fat behind as possible. Serve.

Variations:
*No rotisserie? No problem. If you are grill-roasting using a drip pan, you can use this recipe. The only difference is figuring out how to get the potatoes in and out of the pan, because the grate will probably be over the pan on the grill.  There isn't enough clearance for me to do this on my gas grill, but on my charcoal grill, I ask someone to help.  They carefully lift the grill grate (using oven mitts!) so I can pour the potatoes under the roast.

*Southwestern potatoes: With the salt and black pepper, add ½ teaspoon of ground chipotle powder. (I love the combination of chipotle's smoky heat and sweet potatoes.)

*Brown sugar glazed sweet potatoes: After removing the potatoes from the drip pan with the slotted spoon, sprinkle 1 tablespoon of brown sugar over the potatoes.

Notes:
*On my Weber Summit, the rotisserie infrared burner is in the back of the grill, so the sweet potatoes tend to brown quicker on that side of the pan. After I stir the potatoes, I rotate the pan to get the other side closer to the heat of the rotisserie burner.

*While sweet potatoes are good for you, these potatoes are going to be coated in the fat dripping from whatever you are cooking. This fat gives them their delicious flavor, but can overwhelm them if they sit in it for too long. As soon as they are done cooking, get them out of the fat in the drip pan and onto a serving platter.

*I've noticed, in doing different recipes in my drip pan, that drip pan recipes work better on my gas grill than they do in my Weber kettle. The drip pan recipes work on the charcoal grill, but they don't get quite as browned and crispy as they do on the gas grill. This surprised me, because the charcoal grill rotisserie browns the meat on the spit better than my gas grill. I think it's the combination of the infrared burner and the positioning of the burners on the gas grill - the pan is getting heat from all sides. On the charcoal grill, it is directly between two piles of coals, so it gets heat at the edges, but nothing from underneath. Score one for the gas grill!

What do you think? Questions? Other ideas? Leave them in the comments section below.

Related Posts:
Rotisserie Chicken Dry Brined with Rosemary and Lemon
Rotisserie Pan Potatoes
Instant Pot Collard Greens
Click here for my other rotisserie recipes.


Check out my cookbook, Rotisserie Grilling.

Everything you could ask about the rotisserie,
plus 50 (mostly) new recipes to get you cooking.

It's a Kindle e-book, so you can download it and start reading immediately!


*Enjoyed this post? Want to help out DadCooksDinner? Subscribe to DadCooksDinner using the RSS or Email options on the right, link to this post from your blog, recommend DadCooksDinner to your friends, or buy something from Amazon.com through the links on this site. (Like my Rotisserie Grilling cookbook...)

Rotisserie Chicken, Dry Brined with Rosemary, Lemon, and Garlic

September 28, 2010 by Mike Vrobel 23 Comments

Rotisserie Chicken, Dry Brined with Rosemary, Lemon, and Garlic | DadCooksDinner.com
Rotisserie Chicken, Dry Brined with Rosemary, Lemon, and Garlic

In my interview with Dishin' in the Kitchen, I was asked about my favorite meal. The answer? I didn't hesitate - Rotisserie Chicken. I love a lot of foods, but this one is my clear favorite. I make it once a month, to feed my chicken cravings.*
*OK, maybe every other month in the winter, when I'm forced to roast my chicken indoors.

Even though it is my favorite meal, I still want some variety in my rotisserie chicken. I am always trying out different brines, rubs and marinades. Today I'm sharing a fancier version of dry brined chicken. Fresh rosemary and lemon zest up the flavor of the dry brine, and give the chicken an Italian flavor profile that matches well with a side of pasta and some quick-sauteed chard in olive oil.

Rub Ingredients
Rub Ingredients
Grinding the rub
Grinding the rub
Chicken ready to rub and truss

Don't have a rotisserie? That's OK - dry brine the chicken as instructed, and use the split chicken method I link to in my notes. Or, use your favorite oven roasting technique. This dry brine is too good to pass up.

Recipe: Rotisserie Chicken, Dry Brined with Rosemary, Lemon, and Garlic

Adapted from: Russ Parsons: The California Cook: A more flavorful dry brined turkey [latimes.com]

Equipment

  • Grill with Rotisserie attachment (I use a Weber Summit with an infrared rotisserie burner. Here is the current version of my grill.)
  • Aluminum foil drip pan (9"x13", or whatever fits your grill. I use an enameled steel roasting pan.)
  • Butchers twine
  • Instant Read Thermometer


Chickens with sweet potatoes in the drip pan


Not letting a little rain slow me down


Notes:

  • Drip pan potatoes are a great accompaniment to this recipe. Or, try some drip pan sweet potatoes - that recipe is coming on Thursday.
  • I...um...I forgot the garlic when I cooked the recipe above.  It was still delicious, so the garlic is optional...
Carve and serve
Carve and serve

Related Recipes:
Don't have a rotisserie? Try this dry brine with my butterflied chicken technique.
Rotisserie Chicken, dry brined (and cooked on a Weber charcoal kettle)
Rotisserie Drip Pan Sweet Potatoes 
Click here for my other rotisserie recipes.

Special Thanks:
Thank you to Jeff and Melanie at Brunty Farms for the chicken.

Adapted From:
Russ Parsons: The California Cook: A more flavorful dry brined turkey [latimes.com]


Check out my cookbook, Rotisserie Grilling.

Everything you could ask about the rotisserie,
plus 50 (mostly) new recipes to get you cooking.

It's a Kindle e-book, so you can download it and start reading immediately!


*Enjoyed this post? Want to help out DadCooksDinner? Subscribe to DadCooksDinner using the RSS or Email options on the right, link to this post from your blog, recommend DadCooksDinner to your friends, or buy something from Amazon.com through the links on this site. (Like my Rotisserie Grilling cookbook...)

Things I Love: Cordless Rotisserie Motor

September 27, 2010 by Mike Vrobel 1 Comment

I love my rotisserie. I love the browned, crisp crust and even cooking it gives me.  But...it does add a bunch of extra steps to grilling. Instead of just tossing the meat on the grill, I have to truss the meat, skewer the meat on the spit and forks, and carry that spit loaded with uncooked meat from my kitchen to the grill. Then I have to get my extension cord unwound so I can plug in the rotisserie motor, and start the whole thing spinning.

That last step? Unwinding the extension cord and running it to the grill? I don't have to do that any more. I picked up this battery powered rotisserie motor from Ribolator.com, and I love it. Removing that one extra step from the process, not having to mess with the cord, makes my life a little bit easier when I rotisserie grill.

I bought the battery powered motor for my farmers market demos, so I could take my rotisserie on the road. This worked better than I could have hoped; people would see the chicken, browning and rotating next to me, and it would lure them over to check on what I was doing.

Now I use this motor all the time. The two D-Cell batteries have lasted through the summer and into the fall with no signs of running out of power. The motor is powerful enough to handle everything I've thrown at it; it is rated for 25 pounds of food, which is much heavier than anything I have put on the spit. I'm going to use it with my Thanksgiving turkey this year, which will be the big test. (That said, I always grill 12 to 14 pound turkeys, not the 20 pound monsters. I'm wondering if I can fit two twelve pounders on my Summit's rotisserie spit, since I'm having a lot of people over this year. But I digress...)
*Another bonus: I found out the motor is very rain resistant...when I left it out overnight during a thunderstorm this week. I took the batteries out and put it in a bag full of rice for a couple of days, to absorb the water. I just put the batteries back in, and it is working like a champ.

The only minor issue with the motor is it is a little loose on my rotisserie mount; it was built for a slightly larger bracket. This results in the motor shifting around slightly when it is turning a heavy load of food. This was a little disconcerting at first, but it hasn't had any effect on the cooking - it just keeps on spinning, with a little jump at the end of every rotation when the weight on the spit grabs it.

One final advantage? I can rotisserie in the rain without fear of electrocuting myself! I use a bowl as an umbrella, and the motor is protected from the rain.

Improvised umbrella
"Spinning in the rain"...sorry
Improvised umbrella - the bowl balances on the spit
and the motor

Looking for an add-on that will make your rotisserie grilling a little easier? Pick one of these up. You won't be disappointed.

Cordless Rotisserie Motor from Amazon.com
[Update 9/29: You can also get the motor, with a plug-in AC cord directly from the manufacturer: Battery Rotisserie Motor at onegrill.com]

What do you think? Questions? Other ideas? Leave them in the comments section below.

Related Posts:
Click here for my rotisserie recipes.

*Enjoyed this post?  Want to help out DadCooksDinner?  Subscribe using your RSS reader or by Email, recommend DadCooksDinner to your friends, or buy something from Amazon.com through the links on this site.  Thank you!

Lamb Shanks with Tomatoes and White Beans

September 23, 2010 by Mike Vrobel 6 Comments

It has been cool here in Copley; summer is ending, and the wind is carrying a hint of fall. That's why, when I was paging through Pam Anderson's Perfect One-Dish Dinners, this recipe jumped out at me as the one that I had to make. Lamb shanks with white beans and tomatoes screams "fall comfort meal" to me, and it seemed like the ideal recipe to start with in my review of Pam's book.

As usual, Pam has the recipe dialed in - she has it just as simple as it can be, and no simpler. The recipe is straightforward without being overly simplistic. The lamb is tender and falling apart, like a good braised lamb should be. Her technique of braising in a high-heat oven, with a foil wrapped pan worked well.
*I had to cook the lamb a bit longer than Pam recommended to get it truly fork tender. That seems to happen to me with a lot of published recipes, from a variety of sources. I wonder if my oven is running a little cool.

I'm a huge fan of lamb, and lamb shanks. But the best part of this recipe is the white beans. They're more than a base for the lamb. They get a short simmer in the pot at the very end of the cooking, just before serving. The beans keep their unique creamy flavor, which mingles with the meaty juices and sweet aromatics that have been braising in the pot. The result is white beans and vegetables with layers of flavor.

Recipe: Lamb Shanks with Tomatoes and White Beans

Adapted From: Pam Anderson, Perfect One-Dish Dinners

Equipment:

  • 8 quart dutch oven
  • heavy duty aluminum foil

Ingredients:

  • 1 teaspoon olive oil
  • 4 lamb shanks
  • 2 teaspoon kosher salt
  • ½ teaspoon fresh ground black pepper
  • 2 tablespoon olive oil
  • 1 onion, minced
  • 2 stalks celery, minced
  • 1 cup baby carrots (or 2 large carrots, peeled and cut into 1" pieces)
  • ½ teaspoon kosher salt
  • 3 cloves garlic, minced or pressed through a garlic press
  • 2 teaspoon herbes de provence
  • 1 tablespoon tomato paste
  • 2 tablespoon all-purpose flour
  • ½ cup dry red wine
  • 1 ½ cups homemade chicken stock (or water.  Pam's OK with store-bought broth, but I'm not a fan of it...)
  • 1 15 oz can diced tomatoes
  • 4 cups navy beans (or other white beans), drained, preferably homemade (but canned are OK.  Pam and I agree on that one.)

Directions:
1. Brown the lamb shanks: Set the oven to 450*F. Sprinkle the lamb shanks evenly with 2 teaspoon kosher salt and ½ teaspoon fresh ground black pepper. Heat the oil in the dutch oven over medium-high heat until just showing wisps of smoke, then brown the lamb shanks well on their two wide sides, about 4 minutes per side. Move the shanks to a bowl. The browning may need to be done in two batches if the shanks are too big for all four to fit in the dutch oven at once.

I crowded the pan a bit in this picture, to get the ends
of the two shanks to brown

2. Saute the aromatics: Add enough oil to the fat in the dutch oven to bring it up to 2 tablespoons, and heat over medium-high heat until shimmering. Add the onions, celery, and baby carrots to the dutch oven, then sprinkle with the ½ teaspoon kosher salt. Saute, stirring and scraping the bottom of the pan until the aromatics are softened, about 5 minutes. Make a hole in the center of the aromatics, and add the garlic, herbes de provence, and tomato paste. Let them sit for about a minute, or until you can smell the garlic, then stir them into the other aromatics. Sprinkle with the flour, and cook, stirring, for 3 minutes, until the flour is no longer dry and evenly spread throughout the aromatics. Add the red wine, and cook for 1 minute, scraping to loosen any aromatics or flour stuck to the bottom of the pan. Add the chicken stock and the tomatoes, increase the heat to high, and stir to mix all the ingredients in the dutch oven. Put the lamb shanks and any juices back into the dutch oven, submerging them in the liquid as much as possible.

3. Braise the lamb: Tear off a piece of foil a little larger than the pan lid, and, using pot holders, press it down against the lamb shanks. Seal the foil against the rim of the dutch oven, then push the lid down on top of the pot, making sure it is tightly sealed against the foil and the rim of the dutch oven. Leave the dutch oven over high heat until you hear the contents bubbling, then transfer to the oven and cook for 1 ½ hours. Remove from the oven, remove the lid, and carefully remove the foil from the pot. (Remember- the pot and the lid are rocket hot from being in a 450*F oven - don't brand yourself!) Put the pot back in the oven without the lid, and cook for another 30 minutes, or until the top of the lamb is browned, and the lamb is fork tender.

Foil pushed down
on top of the shanks
Lid pushed down on foil
to seal it tight

4. Finish the dish: Remove the pot from the oven to the stove top, and put over medium heat. Remove the lamb shanks to a platter. Add the white beans to the liquid in the dutch oven and cook, stirring occasionally, for five minutes. Taste the beans and liquid, and season to taste with salt and pepper. Serve the lamb shanks on a bed of the beans and liquid.

Notes:
*As I said in the opening, I used Pam's technique of braising in a high heat oven, with foil pressed right against the surface of the food and sealed with the lid. It worked pretty well, but I had to cook the lamb for some extra time to get it properly tender. Again, I think this is a function of different ovens. As Christopher Kimball once said, never trust the timings in a recipe! I always check if something is done, especially with my oven - it seems like roasts and baking always take longer than suggested for me.

*Pam originally sized this recipe for six shanks, and cooks it in a heavy-duty roasting pan. I'm still working on getting one of those so I scaled the recipe down for four shanks to fit in my dutch oven. The shanks were big ones, so this was plenty of food for all five of us, with some wonderful leftovers for lunch the next day.

Unfortunately, the kids were a little turned off by the vegetables mixed in with the beans. I have this problem a lot with stews. I love them, but for the kids there's just too much "stuff" in there. I've got them converted to chili with beans, and my daughter was willing to fish the white beans out of the other "stuff" to eat them, so I think I'm making progress.
Boy, do I hope so...

What do you think? Questions? Other ideas? Leave them in the comments section below.

Related Posts:

Looking for Instant Pot lamb? Try my Instant Pot Lamb Shanks or Instant Pot 7-hour Leg of Lamb. If you want to go global, try my Instant Pot Goat Curry (Indian Style), Instant Pot Massaman Curry, or Instant Pot Jamaican Beef Stew.

Adapted from:
Pam Anderson Perfect One-Dish Dinners: All You Need for Easy Get-Togethers

*Enjoyed this post?  Want to help out DadCooksDinner?  Subscribe using your RSS reader or by Email, recommend DadCooksDinner to your friends, or buy something from Amazon.com through the links on this site.  Thank you!

Salmon Salad Bites with Sushi Flavors

September 21, 2010 by Mike Vrobel 13 Comments

Here is a recipe I tested from Pam Anderson's Perfect One-Dish Dinners. This is an appetizer that Pam published on ThreeManyCooks.com as Poor Man's Sushi. I can only imagine the internet perfectionists that it brought out of the woodwork:

But this isn't sushi! It doesn't have raw fish in it! And...sushi means the sweet vinegar rice in Japanese, and there is no rice in it!

OK, OK, that might have been me when I first saw it. But Pam had never led me wrong in the past, and I already had most of the ingredients in my pantry. So I tried it out.

What I found is a remarkable appetizer. They're homemade, make good use of pantry ingredients, and can be thrown together in almost no time. It's not really sushi, but you get the flavors of sushi on a bite sized nibble - a hit of wasabi, pickled ginger, fish, all on a crunchy rice cracker. They are the perfect appetizer for an Asian themed party...if your guests aren't food purists who will lecture you on what sushi really is.* If they are purists, just cram one of these into their mouth; it will quiet them down, and once they taste it they may stop the lecture.
*Umm...like me. Really, I'm working on getting over myself. But it's a long road.

Now, I couldn't just leave Pam's recipe alone. I'm too much of an improviser, thanks to her How to Cook without a Book. The first thing I did was up the wasabi.  I love the subtleties of great sushi, but even average sushi is OK with me as long as it serves as a wasabi delivery system. I added a small pea of wasabi to the top of every nibble to up the horseradish kick.

Next, I made a change to the fish. Pam made the original with canned tuna; I had salmon in a pouch in my pantry.  The pouch salmon worked perfectly; it was already drained, I just had to mash it to be ready to go. I've made the recipe both ways now, with pouched salmon and tuna, and I have a slight preference for the taste of the salmon version.
*If you do go with tuna, make sure to buy sustainable tuna, please! Look for the MSC symbol on the can or pouch, and your tuna will be OK. All Alaskan salmon is sustainable, so you don't have to worry as much about it.

This recipe has become one of my standards. When I need an appetizer for an adventurous group that enjoys a healthy kick of wasabi, this is what I turn to.

Recipe: Salmon Salad Bites with Sushi Flavors

Cook time: 10 minutes

Adapted From: Pam Anderson Perfect One-Dish Dinners

Ingredients:

  • 2 (6 ounce) pouches skinless, boneless salmon (or canned skinless boneless salmon, drained)
  • 2 scallions
  • ½ cup mayonnaise
  • 1 tablespoon + 1 tablespoon wasabi powder (or use pre-mixed wasabi in a tube)
  • Sesame rice crackers
  • Pickled ginger

Directions:
1. Mix the salmon salad:Put the salmon in a medium bowl, and mash with a fork. Slice the scallions thin, and add to the bowl with the salmon. Add the mayonnaise and 1 tablespoon of wasabi powder to the bowl with the salmon. Stir until evenly mixed. This can be made up to 24 hours before serving - keep refrigerated until it is time to assemble the bites, below.

2. Assemble the salmon bites: Make wasabi paste by mixing the remaining 1 tablespoon of wasabi powder with 1 tablespoon of hot water. On each sesame rice cracker, put 2 teaspoons of the salmon salad, and top with a small pea of wasabi paste and a piece of pickled ginger. You should get about 24 salmon bites from the recipe.

2 teaspoon of salmon salad
top with pickled ginger
...and extra wasabi

Variations:
*Wasabi! I like a lot of kick in my salmon bites; that's why I add the extra pea of wasabi on the top. Since some of my guests don't appreciate that extra wasabi heat, I usually make half the batch without the extra wasabi on top.

*Spicy bites: Want some long burn to go with the wasabi kick? Put a drop of sriracha sauce on the top of the bite with the wasabi and pickled ginger. Or, to really feel the burn, draw a squiggle on the top with sriracha. (If you go with the squiggle, know that you're in for some Serious Heat.)

*Tuna salad bites: In the original, Pam Anderson used tuna instead of salmon. Like I said in the opening, I prefer the salmon version, but tuna works well in the recipe.

Notes:
*My 2 teaspoon cookie scoop is perfect for making these bites - it is exactly the right size, and it makes topping the crackers easy.

*Make sure you get skinless, boneless salmon.  It's a pain picking the skin and bones out before mashing...not that I've ever had to do that because I didn't pay attention at the grocery store.

*I keep meaning to add soy sauce to the mix, because that is another flavor I love with my sushi. But...I always forget. I'm planning on adding a teaspoon to a tablespoon of soy sauce with the mayo next time.

What do you think? Questions? Other ideas? Leave them in the comments section below.
*Comments that are long winded rants about how this isn't Real Sushi will be deleted. Unless they're funny, in which case I may let them through.

Related Posts:
Review: Pam Anderson's Perfect One-Dish Dinners

Adapted from:
Adapted From: Pam Anderson Perfect One-Dish Dinners

*Enjoyed this post?  Want to help out DadCooksDinner?  Subscribe using your RSS reader or by Email, recommend DadCooksDinner to your friends, or buy something from Amazon.com through the links on this site.  Thank you!

Review: Pam Anderson's Perfect One-Dish Dinners

September 20, 2010 by Mike Vrobel 1 Comment

Pam Anderson's new book - Perfect One Dish Dinners
(With bookmarked recipes to try out, and my morning coffee)

*Disclaimer: Pam is one of the major influences on my cooking, and one of my blog buddies. Pam's How to Cook Without a Book taught me the difference between following recipes and knowing how to cook, which was one of the major steps I took on the path that led to this blog. So I'm not sure I can be perfectly objective about this one.  That aside, I think this is one of her best cookbooks.

Usually, when I read a cookbook, I page through it and look for recipes that interest me. Not this one. Pam Anderson's Perfect One-Dish Dinners grabbed me with the first recipe - Frogmore Stew, a one-pot seafood and sausage boil. From there, I kept turning pages and saying:

 "I have to make that Choucroute. No, I'll do the Cassoulet. Ooh - Tamale pie! Wait...I'll try the Osso Bucco with polenta first. But...those Lamb Shanks with tomatoes and white beans are too good to pass up..."

By the time I finished flipping through the book, I was fired up to cook dinner...for the next six months.  All at once.

This book is a treasury of comfort meals, but they are comfort meals from across the globe, and for all seasons; they aren't all heavy stews for the fall and winter. There are a lot of spring and summer recipes, like spicy coconut shrimp stew, roast salmon with potatoes, asparagus and lemon-dill-caper drizzle, and coq au vin blanc with spring vegetables.

More important than the individual recipes is why Pam put this book together. She was looking for recipes that make entertaining less stressful. By centering a party around a one-dish main course, she simplifies the process - no struggling to get a bunch of different dishes cooked at the same time, because the whole meal is in one pot.  The chapters are built to show how a dinner party could be put together around that one dish. Each chapter starts with the one dish main course, and follows with a related appetizer, salad, and dessert. As an example, here are the recipes in the Salsa Verde Chicken with Dumplings chapter:

  • Salsa Verde Chicken with Herbed Cornmeal Dumplings (main)
  • Pimento Cheese with Green Olives and Flatbread Crackers (appetizer)
  • Baby Spinach Salad with Mango, Avocado, Red Onion and Orange Vinaigrette (salad)
  • Miniature Lemon-Raspberry Cakes (dessert)

Where possible, she adds an "instant" replacement for the appetizer and dessert made mostly of store-bought ingredients. That way, if you really don't have time to prepare all the courses, you can replace them quickly without losing the effect of the whole meal. (Example: the instant alternative to the Pimento Cheese with Green Olives is a box of boursin cheese with a sprig of fresh dill on top. It's not as elegant, but it is much quicker.)

It's a great approach, because it lets the cook choose the level of complexity of the meal. For a family dinner, make the one dish main course, plus the related side salad. For a low effort dinner party, add the suggested instant appetizer and dessert. If you want to go all out, add the suggested appetizer and dessert, and you have a four course meal that is mostly hands-off once the guests arrive.*
*Which is something I need to focus on when I'm entertaining. I'm notorious for spending most of my dinner parties fussing away in the kitchen.

On top of the great concept, Pam has a couple of interesting techniques in this book. I'm going to try them out, to see if they should become part of my basic techniques.

The first technique is how she does oven braising. Like Pam, I've always been a fan of simmering my braises, stews and chilis in the oven instead of on the stove top. I put them in a 350F oven, and the even heat simmers them without needing any stirring. Pam has an interesting twist on this technique. She covers her braises with aluminum foil, pushing it down on top of the surface of the food, puts the lid on the pot to seal the foil, and then puts the pot in a 450F oven. She says the sealed aluminum foil traps the steam in the pot, and this steam gives you an improvised pressure cooker - it speeds up the cooking, and helps tenderize the meat.
*Of course, I'm a big fan of pressure cookers, so I'm going to be adapting a few of these recipes to work with my PC.

The second technique that grabbed my attention is how Pam uses roasting pans. She suggests using a heavy roasting pan instead of a dutch oven in the larger recipes. By searing across two burners, covering the pan in aluminum foil, and braising in the oven, she cuts down on extra pans, gets a lot more surface area for browning, and can fit enough of a one-dish meal into the pan to serve eight or more. She also combines this with the previous idea, of wrapping with foil and braising at high heat for a pressure cooker effect. She braises in the roasting pan, covered with a layer of foil pressed right against the food, with a second layer on top as the lid.
*I really want to try this technique out; it seems like a great way to get more out of a roasting pan. Unfortunately, I don't trust my current roasting pan on the stove - it is thin steel. I'm trying to be patient and wait for the December All-Clad Factory Sale to get one of their new flared, fully clad roasting pans at a discount. But, as usual, I'm weakening every time I walk past Williams-Sonoma.

I've tested a handful of recipes from the book, and they've all been fabulous. Pam works hard to get the recipe as simple as it can be without losing the essential flavors of the dish, and that shines through here. The recipes are straightforward, but not over-simplified.

In summary, if you are looking for a great collection of one-dish meals with a global variety of flavors, and simple to elegant side dishes that pair with them, buy this book.


Highly recommended.

PS: Visit Pam and her daughters, Maggy and Sharon, at ThreeManyCooks.com

Pam Anderson: Perfect One-Dish Dinners: All You Need for Easy Get-Togethers


Related Posts:
Salmon Salad bites with Sushi Flavors (aka Mock Salmon Sushi) [Coming Tuesday]
Lamb Shanks with Tomatoes and White Beans, Pam Anderson style [Coming Thursday]

*Enjoyed this post?  Want to help out DadCooksDinner?  Subscribe using your RSS reader or by Email, recommend DadCooksDinner to your friends, or buy something from Amazon.com through the links on this site.  Thank you!

Refried Pinto Beans

September 16, 2010 by Mike Vrobel 6 Comments

Earlier this week, I said that brothy beans are my favorite side dish with a Mexican meal. My kids love Diane's homemade tortillas above all other foods, so we have a lot of Mexican meals at my house.
The kids' top 5 favorite foods of all time:
1. Tortillas
2. White Rice
3. Pizza
4. Chicken Lettuce Wraps
5. Brats
(Oh, and of course, Banquet Chicken Nuggets. Oh, the shame. But when we're trying to get the kids fed for the babysitter so we can go out to a real, grown-up dinner, compromises have to be made...)

Even though I love them, with how often we eat tortillas, brothy beans can get repetitive. For something different, I make refried beans using leftover brothy beans from my freezer. With some help from my food processor I can quickly get refried beans on the table. And...the kids will sometimes eat them. Timmy, my youngest, is turning into a beanivore.
That's a word, right? Well, it is, if you've watched Timmy eating beans. I had to do a sales job to convince him that these were "smushy beans", but once I did, I had to stand back.

So, are you looking for a quick weeknight side dish for your next taco night? Here it is.
And, trust me...it tastes so much better than the stuff in a can.

Recipe: Refried Pinto Beans

Adapted From: Cooks Illustrated Magazine

Equipment:

  • Food Processor (Like my KitchenAid, but any food processor that can fit four cups of beans will do.)

Ingredients:

  • 2 cloves garlic
  • 1 jalapeno pepper
  • 4 cups pinto beans (Preferably homemade, but three 15oz cans will do)
  • ½ teaspoon kosher salt
  • 2 tablespoon vegetable oil (or lard, if you want to be authentic and have better tasting beans)
  • salt and pepper to taste

Directions:
1. Mince the aromatics: Peel the garlic; cut the stem off the jalapeno, and cut the jalapeno in half. (To reduce the heat, remove the seeds and white ribs from inside the jalapeno with a teaspoon.) Drop the garlic cloves and jalapeno into a running food processor, and let it process until they are finely minced. (They are done mincing when they stop bouncing around in the processor). Scrape the garlic and jalapenos into a 12" nonstick fry pan, and add the 2 tablespoon of vegetable oil. Don't worry about cleaning out the food processor; the garlic and jalapeno add flavor to the beans.

2. Process the beans: If you are using homemade beans, put them and their liquid into the food processor, and add the ½ teaspoon kosher salt. (If you are using canned beans, drain and rinse the beans and put them in the food processor with 1 cup of water to substitute for the bean liquid. Skip the salt, because canned beans are pretty salty to begin with.) Process the beans for 1 minute, or until smooth.

3. Cook the beans: Turn the heat to medium under the fry pan. In a couple of minutes the garlic will start sizzling; when it does, scrape the beans from the food processor into the fry pan. (Be careful, this may splatter a bit.) Cook the beans, stirring and scraping until they thicken up in the pan, five to ten minutes. When they are thickened, taste for seasoning, and add salt and pepper to taste.

Variations:
Different beans: You can make this recipe with black beans or kidney beans instead of the pinto beans; everything else works just about the same.

If you want to get fancy, replace the oil in the pan with a couple of slices of bacon. Cut the bacon into small pieces, then cook it over low heat until it renders its fat and is brown and crisply. Continue with the aromatics and beans from there.

Notes:
I thaw my freezer beans in the microwave. It takes about eight minutes, with a stir of the beans after four minutes to get the frozen clump of beans in the center out to the edges, where they will thaw quicker.

How do you get homemade beans to use in this recipe? Cook some slow cooker dried beans, or pressure cooker dried beans, and freeze them in 2 quart containers. Or you could, you know, cook them in a regular pot. But I've got all these toys that I want to play with.

What do you think? Questions? Other ideas? Leave them in the comments section below.

Related Posts:
Pressure Cooker Pinto Beans in Tex-Mex Broth
Basic Technique: Pressure Cooker Beans
Basic Technique: Slow Cooker Beans

Adapted from:
Cooks Illustrated Magazine

*Enjoyed this post?  Want to help out DadCooksDinner?  Subscribe using your RSS reader or by Email, recommend DadCooksDinner to your friends, or buy something from Amazon.com through the links on this site.  Thank you!

Pressure Cooker Pinto Beans in Tex-Mex Broth

September 14, 2010 by Mike Vrobel 21 Comments

Pressure Cooker Pinto Beans in a Tex-Mex Broth

Pressure Cooker Pinto Beans, Tex-Mex style with bacon, onions, jalapeno, garlic, and cumin.

I consider beans an essential side dish for Tex-Mex meals. Give me some tortillas, some salsa, and a bowl of brothy beans, and I'm a happy guy.

While there's nothing wrong with plain beans, seasoned with a little salt, I like to boost the flavor with some aromatics, spices, and...bacon. This is a cowboy cooking* inspired version of beans, from the north of Mexico and south of Texas, where pinto beans are the local bean of choice, and culinary ideas have been crossing the border for years. It's a little more south of the border, more Caballero than Cowboy, but what it really is nowadays is the perfect example of a Tex-Mex dish using the best of both worlds.
*Cue Blazing Saddles clip..."How 'bout some more beans, boss?" "I'd say you've had enough!" My inner 13 year old giggles every time I think about it.

Pressure Cooker Pinto Beans in a Tex-Mex Broth
[feast_advanced_jump_to]

I'm using a "brine the beans while soaking" technique I learned from Cooks Illustrated. I sort and soak the beans the night before, or first thing in the morning; by the time I come home from work they're ready to go, and the soaking cuts the cooking time down dramatically. By soaking the beans, I can have my brothy, earthy side dish in right around a half an hour.

🥫Ingredients

This is a simple dried bean recipe, so the ingredients list is pretty basic

  • Dried Pinto beans
  • Bacon
  • Vegetable oil
  • Onion
  • Jalapeno
  • Garlic
  • Cumin

See recipe card for quantities.

🥘 Substitutions

No dried pinto beans? Check the tips and tricks section for canned bean instructions.

If you want to be really authentic, replace the vegetable oil in the recipe with lard. Pork fat makes everything taste better!

Or, go the other way, with the vegetarian option: skip the bacon entirely.

If you want smokier beans, substitute a canned chipotle en adobo, with sauce, for the fresh jalapeño.

Or, skip the jalapeño if you don't want any heat.

🛠 Equipment

A 6-quart pressure cooker. Pressure cooker dried beans are one of the reasons I became a pressure cooker convert, and love my Instant Pot. Try them - you'll never go back to canned beans. (OK, maybe you will, for convenience - but see the Storage section for tips on make ahead freezer beans.)

📏Scaling

This recipe scales down easily - cut everything in half if you don't need as many beans, or have a 3-quart pressure cooker. Scaling up runs into space issues; if you have an 8-quart pressure cooker, you can double this recipe, but it's too much to fit in a 6-quart pressure cooker.

Soaking the beans

🤨 Soaking pinto beans

I get the "to soak, or not to soak?" question all the the time. I go both ways with my pinto beans. In this recipe I soak them overnight, with 18 minutes under pressure...when I remember.

When I forget to soak the beans, I skip the soaking step, and pressure cook the un-soaked beans for 40 minutes at high pressure. I get the same results both ways, so do whichever works better for you.

💡Tips and Tricks

  • Salt your bean water! "Salt toughens beans" is a myth. Salting before cooking helps season the beans all the way through as they cook. That's why I'm brining while I soak.
  • Try to buy beans from a store with lots of bean turnover. Beans dry out as they age, which makes them a little tougher to cook.
  • If your beans are still tough when the cooking time is over, especially any "floaters" at the top of the pot, you probably got some old beans. Give the pot a stir, lock the lid, and pressure cook the beans for another five minutes.
  • Simmer to thicken: If you have the time, and want thicker bean liquid, simmer the beans for 20 minutes after pressure cooking. I set my Instant Pot to Sauté mode adjusted to low, set the timer to 20 minutes, and leave the lid off to let the broth evaporate.
  • Use make-ahead beans: If you have pre-cooked pinto beans in the freezer, you can use those instead of cooking a new batch. Sauté the aromatics and the bacon, then add 4 cups of pre-cooked beans with their cooking liquid. Don't pressure cook the beans, just bring them to a boil, then simmer for 15 minutes to let the flavor mingle. (I either do this on the stovetop, or use Sauté mode in my Instant Pot for everything.
  • Use canned beans: If you're desperate, you have my permission: use canned beans. Drain and rinse two 15-ounce cans of pinto beans. Like the "make ahead beans", above, don't pressure cook, just do the Sauté the aromatics and the bacon step, add the beans and 1 cup of water, and simmer for 15 minutes to let the flavors mingle.

Adapted From: Robb Walsh The Tex-Mex Grill and Backyard Barbacoa Cookbook

☃️ Storage

A 2-cup container of beans, with cooking liquid, replaces a 15-ounce can of beans from the grocery store. They'll last in the refrigerator for a few days, and freeze for up to 6 months. I always make extra beans, and freeze the leftovers for use in other recipes. Freezer beans are ready to use with about 5 minutes in the microwave, and are so much better than canned.

🤝 Related Posts

Basic Technique: Pressure Cooker Beans
Refried Pinto Beans
Click here for my other pressure cooker recipes.

Adapted from:
Robb Walsh The Tex-Mex Grill and Backyard Barbacoa Cookbook

*Enjoyed this post?  Want to help out DadCooksDinner?  Subscribe using your RSS reader or by Email, recommend DadCooksDinner to your friends, or buy something from Amazon.com through the links on this site.  Thank you!

Slow Cookers and Red Kidney Bean Poisoning

September 13, 2010 by Mike Vrobel Leave a Comment

Slow Cookers and Red Kidney Bean Poisoning | DadCooksDinner.com

Slow Cookers and Red Kidney Bean Poisoning | DadCooksDinner.com
Slow Cookers and Red Kidney Bean Poisoning

I have to publish my first major retraction today. I can't believe I didn't know about this before, but...do NOT follow my old slow cooker beans technique when cooking beans, especially kidney beans, cannelini beans, or broad beans.

Old Technique:
Put the beans and 8 cups of water into the slow cooker. Cook on low for 8 hours.

Do this instead:
Put the beans in a pot, cover with 2 inches of water, and bring to a boil. Boil for ten minutes, then drain. Put the drained beans into the slow cooker and add 8 cups of water. Cook on low for 8 hours.

Red kidney beans contain high levels of a toxin that occurs naturally in beans, Phytohaemagglutinin (also known as Kidney Bean Lectin.) If raw or undercooked red kidney beans are eaten...well, bad things happen. Let's just say you'll be getting to know the pattern of tiles in your bathroom very well.
For all the gory details, check here.

With normal cooking, this isn't a problem. The toxin is destroyed after ten minutes of boiling (cooking at 212*F or 100*C.), and most stovetop recipes easily take care of the toxin with their hours of simmering at that temperature. Raw, soaked beans are bad; eating four of them is enough to cause symptoms. Now, here's the problem with slow cookers: undercooked beans (cooked at 80*C, roughly 170*F) increase the toxicity fivefold. And, most slow cookers have their "low" setting at about 180*F. If your slow cooker runs a little cooler than most... England tracks this more carefully than we do here in the US. They had seven outbreaks of kidney bean poisoning between 1976 and 1979, caused by raw, soaked kidney beans or kidney beans cooked in a slow cooker.

The toxin occurs in red kidney beans, and to a lesser extent in white kidney beans (cannellini beans) and broad beans. Other beans contain the toxin, but at much lower levels.

How did I miss this? I never had, um, gastrointestinal issues from slow cooked kidney beans. My slow cookers must run hot enough that the toxin was destroyed. Also, I prefer black or pinto beans to kidney beans, so those are the beans I'm usually slow cooking. In the future, I am always going to boil my beans for at least 10 minutes before cooking them in a slow cooker. This takes some of the simplicity out of the "dump and cook" technique that I use, but it's still pretty simple. And the alternative is not pretty.

I want to extend my sincere apologies to anyone who followed my technique. I hope I didn't cause you any...problems.

Update 2016-01-15: Since I was asked...what's my solution to this problem? I switched to using a  pressure cooker to cook dried beans.

References

  • Phytohaemagglutinin (Kidney Bean Lectin) [fda.gov]
  • Raw Kidney Beans [Penn State University Extension]
  • Related posts: Basic Technique: Slow Cooker Dried Beans

Update 2015-12-16 and 2017-09-22: I closed comments on this post. They keep turning into denial and name calling.

To sum up: Saying: "This hasn't happened to me, therefore it doesn't exist" is faulty logic.

If it hasn't happened to you, great! You got lucky, and I hope your slow cooker keeps running hot enough.

BUT: "It didn't happen to me" does NOT mean "It does not exist."


In the Media: On TV again!

September 8, 2010 by Mike Vrobel 2 Comments

If you live in Northeastern Ohio, set your Tivos on Stun!

I'll be on Good Company Today on WKYC Channel 3 Cleveland. My appearance is Thursday, September 9th, sometime between 10AM and 11AM.

I will be in a "Meet the blogger" segment, sponsored by Cleveland MomsLikeMe, talking about weeknight dinners for busy parents. Please tune in!
*If you can take the excitement of watching me live on television, that is.

Pico De Gallo Salsa (Fresh Tomato Salsa)

September 7, 2010 by Mike Vrobel 2 Comments

Pico de gallo, made with fresh, ripe, summer tomatoes, is my favorite salsa. It is a perfect combination of raw ingredients: sweet, juicy tomato combined with sharp, biting raw onion and hot, spicy peppers.
Pico de gallo means "rooster's beak" in Spanish, referring to the heat of the peppers.

This is not a recipe to make out of season; the key to the recipe is fresh summer tomatoes. I wait, saving this salsa for late summer and early fall, when the peppers and tomatoes are fresh from the garden.

This is also not a recipe to make if you doubt your knife skills. Cutting tomatoes into a fine dice, as required by this recipe, isn't easy. The thick skin, combined with the soft interior of the tomatoes, results in an ingredient that keeps moving with the knife instead of being cut by it. Serrated tomato knives are OK, but tend to be kind of small; I prefer to use my serrated bread knife, or if it is particularly sharp, my chef's knife.

Is it worth it? Is it worth the waiting, and the work? Absolutely. This recipe is a showcase of late summer vegetable flavors. The results are so much better than the salsa you get at your local Tex-Mex joint; the flavors just explode in the mouth. You will amaze your friends and family when you make it at home with fresh ingredients.
It's even more impressive with a variety of heirloom tomatoes in different colors, like I got from my CSA.  Thank you to Tim and his hard working assistants.

Recipe: Pico De Gallo Salsa (Fresh Tomato Salsa)

Adapted From: Rick Bayless Mexican Everyday

Ingredients:

  • 1 lb tomatoes (2 large, or 3-4 medium)
  • ¼ teaspoon kosher salt
  • ½ white onion
  • 1 hot pepper (jalapeno or long hot for medium salsa, serrano for hot salsa)
  • 1 clove garlic
  • ¼ cup cilantro
  • salt and pepper to taste

Directions:
1. Prep the tomato: Core the tomatoes, then, using a very sharp knife (or a serrated knife), dice the tomato into ¼ inch pieces. Sprinkle the diced tomatoes with the ¼ teaspoon kosher salt, then move the diced tomatoes into a fine mesh strainer. Let the tomatoes drain while preparing the rest of the recipe.

2. Prep the onion: Trim and peel the onion, then dice small (again, ¼ inch pieces). Put the onion in a small bowl, and cover with cold water. Let the onion soak while preparing the rest of the recipe.

3. Mince the rest of the ingredients: Trim the pepper, and mince fine. (If you want to reduce the heat, remove the seeds and membrane from the inside of the pepper). Mince the garlic. Chop the cilantro, leaves and stems included. Put all these ingredients into a medium bowl.

4. Combine and toss the salsa: Shake the strainer full of tomatoes to remove any excess liquid, then add to the bowl with the peppers and herbs. Pour the onions and water through the strainer, shake to remove any excess liquid, then add to the bowl. Toss until thoroughly mixed, then taste, and add salt and pepper as needed. Rest for ten minutes to let the flavors mingle, then serve.

Ready to toss

Variations:
Chipotle: Replace the fresh hot pepper with 1 teaspoon (medium) to 1 tablespoon (hot) pureed chipotle en adobo sauce.

Herbs: No cilantro? Replace it with an equal amount of parsley, or 1 tablespoon of fresh thyme.

Notes:
There are two tricks to this recipe. Draining the chopped tomato is the first one. Chopped fresh tomatoes have a lot of extra liquid in them. If you don't drain the tomatoes after chopping them, you wind up with a pool of liquid in the bottom of your salsa bowl, and the salsa gets very watery. Draining helps this - you'll still have a pool of liquid in the bottom of the bowl, but it will be much smaller than it would be without the draining.

Soaking the onion is the second trick. Soaking rinses away a lot of the sulfurous heat that comes from cutting the onion, and and leaves the sweet onion flavor behind. (That sulfur is what makes you tear up while chopping the onions.) With very fresh onions this isn't an issue, but with older onions the onion flavor can overpower the tomatoes. Soaking the onion prevents that from happening.

This is our time of year for ripe fresh tomatoes, and I'm trying to make the most of them. If tomatoes are out of season, you can make this salsa with small cherry or grape tomatoes. But, as I said in the opening, it's not quite the same. I would rather make salsa with canned tomatoes out of season; it tastes better.

This recipe works best if you have good knife skills. I made a triple batch this summer at our cottage, and I was chopping for much longer than I thought I would be. A trick from Rick Bayless is to use a food processor to mince the garlic, onions, then half the tomatoes. Then he has you hand-dice the remaining tomatoes, so you get the chunks of tomato that give this recipe its unique taste.

What do you think? Questions? Other ideas? Leave them in the comments section below.

Related Posts:
Quick Red Salsa
Tomatillo Salsa
Mango Salsa

Adapted from:
Rick Bayless Mexican Everyday (recipe online here: Chunky Fresh Tomato Salsa)

*Enjoyed this post?  Want to help out DadCooksDinner?  Subscribe using your RSS reader or by Email, recommend DadCooksDinner to your friends, or buy something from Amazon.com through the links on this site.  Thank you!

Things I Love: My Thyme Bush

September 6, 2010 by Mike Vrobel 6 Comments

I know of nothing that will improve the taste of your cooking as much as using fresh herbs.* I always keep some handy. Fresh herbs, a little garlic, a little lemon, a little salt - you can season everything from rotisserie chicken to grilled vegetables, from beef stews to carrot salads. If you have good basic ingredients, adding some fresh herbs will make them shine. But there is one fresh herb that I keep coming back to, time and time again.
*The next big step after that? Making your own stock.  But that's a much bigger time commitment, and a rant for another day.

Years ago I decided to grow a herb garden. I bought pots from the local garden store, some potting soil, and a variety of herbs. And, optimistically, a jalapeno pepper plant. I put them on my deck and watered them every day...for the first week. Then I neglected them. Diane would keep reminding me: "You need to water your plants!" I would agree, and then promptly forget about them. I guess I'm not really that into gardening, just the results.
*What's the opposite of a green thumb? Whatever it is, that's what I have.

And those results were dismal. The basil produced a few lonely leaves; cilantro turned brown and dried up. The parsley never really took off. Oregano was overrun with weeds. (Weeds! In a potted plant!). The rosemary grew OK, enough for a sprig every couple of weeks without completely cutting down the plant. The jalapeno plant gave me one tiny, and very lonely, pepper. In the end, in spite of all this disaster, this herb garden was one of my best cooking experiments.

Why? Because of the thyme. The wonderful, thriving thyme made up for all the failures. It didn't care that I neglected it, that it only got water when it rained. I ignored it, except when I came out with the scissors, looking for fresh herbs to add to dinner. What did the thyme do? It just kept growing and growing. Thanks to that thyme, I have been hooked on having a herb garden ever since.
*One herb makes a herb garden, right? Right.
**Diane, who always did the flower gardening around our house, took over the herbs when she started her vegetable garden. Thanks to her efforts, the other herbs aren't neglected any more, and I get basil, parsley, oregano, and chives to go with my thyme.

That thyme bush has moved to the front of my house, between the sidewalk and the driveway, and it is still going strong. It's not supposed to be an annual plant here in Ohio...but it comes back every year. It lasts to the first frost and beyond - I cut my last Thyme sprigs for Christmas dinner last year. It laughs at my neglect and just keeps on keeping on.

Thyme is one of the backbone flavors in my cooking, thanks to the reliability of that bush. It matches with just about everything, from my dry brines, to my pan sauces, to making the herb brushes for my butter baste. I use it as the base of my fresh herbs, in combination with any other herbs I have. Thyme is my stand-in for any fresh herb I don't have on hand. When the bag of parsley in the refrigerator has gone bad, when the rosemary plant has one wimpy stalk that I don't dare cut, when a recipe calls for mint and I forgot to pick some up, thyme does the job. My cooking gets a hit of fresh, green herbs, and nobody really notices that it isn't the "right" one.

Once the bush shuts down for the winter, I'll pick up a pack of "poultry mix" fresh herbs from the grocery store. I'll cringe at the $2 price tag for the small bunch of herbs. The little plastic pack will have a bunch of different herbs in it, but the main one? My old friend, thyme.

What do you think? What's your favorite fresh herb? Anything that does particularly well in your windowsill herb garden? Other uses for my favorite shrub? Leave your thoughts in the comments section below.

*Enjoyed this post?  Want to help out DadCooksDinner?  Subscribe using your RSS reader or by Email, recommend DadCooksDinner to your friends, or buy something from Amazon.com through the links on this site.  Thank you!

Slow Cooker Pork Western Shoulder Ribs with Barbecue Rub and Sauce

September 2, 2010 by Mike Vrobel 70 Comments

A plate of cooked western shoulder ribs with a measuring cup full of BBQ sauce

Slow Cooker Pork Western Shoulder Ribs with BBQ Rub and Sauce are an easy weeknight dinner.

My kids just started school, so this week I'm featuring weeknight dinners. Today, I'm using my slow cooker...and I'm cheating. Oh, the shame...

A plate of cooked western shoulder ribs with a measuring cup full of BBQ sauce
Slow Cooker Pork Western Shoulder Ribs with BBQ Rub and Sauce

I'm almost embarrassed to publish this as a recipe. It's almost too easy. Almost. But, because this is an attempt to simulate low and slow barbecue, it works

Ribs sprinkled with rub

The key to this recipe is to find pork shoulder cut into 1" to 2" thick strips. My local grocery store calls these Western Ribs; make sure you see the words pork shoulder somewhere on the label. Country Ribs, which are cut from the pork loin, will dry out if they are cooked for this long. The loin doesn't have the fat and connective tissue that the shoulder does, and that connective tissue is what makes the shoulder "ribs" so tender and juicy after the long cooking time.

Are these really ribs?  No. Is this real barbecue? Absolutely not. Is it as good as real, low and slow, smoke kissed pork shoulder? Not a chance. But...if you need some tender, juicy pork to feed the family after a long day at work (for you) and school (for them), this will get the job done nicely.

This recipe is a simple version of my Crockpot Pork and Sauerkraut - if you're looking for a fancy recipe, try that one.

Recipe: Slow Cooker Pork Western Shoulder Ribs with Barbecue Rub and Sauce

Equipment:

  • 6 quart or larger slow cooker (Crock Pot brand is fine, but I like my fancy ones from All-Clad and KitchenAid)
  • Fat Separator

Notes

  • Tex-Mex ribs: substitute ground ancho powder or chili powder for the barbecue rub, and substitute tomato salsa for the barbecue sauce. (This works best if you shred the ribs with a fork, and serve with tortillas as a taco filling).
  • Serve with cheap white bread (for sopping up juices and barbecue sauce), dill pickle slices, cole slaw, and potato salad. And a cold beer, of course.  Or, rough chop the ribs into chunks, and serve with hamburger buns as rib sandwiches.
  • Normally, I will brown meat before putting it in the slow cooker; it adds an extra depth of flavor to the recipe. In this case, the small amount of water in the cooker leaves most of the ribs exposed, and the cooker browns the ribs for me. That said, if you have the time, brown the ribs before putting them in the slow cooker. Heat 1 teaspoon of oil over medium-high heat until just showing wisps of smoke, then put the (salted, bbq rubbed) ribs in the pan and sear for 3 minutes per side or until well browned. Put the ribs in the slow cooker crock, then add the ½ cup water to the pan over medium heat. Once the water comes to a simmer, scrape the pork bits from the bottom of the pan and pour the water into the crock. Cook the rest of the recipe as described.

What do you think? Questions? Other ideas? Leave them in the comments section below.

Related Posts:
Slow Cooker Pork Pot Roast
Slow Cooker Caribbean Black Beans and Rice
How to make Instant Pot Spare Ribs

*Enjoyed this post?  Want to help out DadCooksDinner?  Subscribe using your RSS reader or by Email, recommend DadCooksDinner to your friends, or buy something from Amazon.com through the links on this site.  Thank you!

Sear-Roasted Turkey Thighs with Tomato Sage Sauce

August 31, 2010 by Mike Vrobel 1 Comment

My kids start school today, so this week I'm featuring weeknight dinners. Today, I'm using the sear-roast technique on turkey thighs.

The sear-roast results in crisp, browned skin, with juicy, flavorful dark turkey meat. Even better, it is done in under forty-five minutes. It's a touch long for a weeknight dinner, but it is very easy - there is a lot of hands off time in the recipe. This lets me relax and get a couple of side dishes done while I wait for the turkey to finish cooking.

The other reason I'll put up with the extra time on a weeknight is the crispy turkey skin and juicy, flavorful dark meat. I've always been a dark meat fan, and the big, flat expanse of turkey skin on the thigh is just asking to be browned until crackling. The thigh finishes cooking gently in the oven, where the dark meat becomes tender and juicy - no dry as dust turkey here; the dark meat gives you a cushion, and is hard to overcook.

Finally, the turkey juices and browned bits left in the pan make the base for a pan sauce. I went with a tomato sauce because I had some fresh tomatoes from my CSA that needed to be used up.

Want a recipe that shows why turkey shouldn't just be for Thanksgiving? Give this one a try.

Recipe: Sear-Roasted Turkey Thighs with Tomato Sage Sauce

Adapted From: Pam Anderson How to Cook without a Book

Equipment:

  • 12" oven safe fry pan (It needs to be a heavy pan - I love my All-Clad 12" fry pan for this. My second choice would be a 12" cast iron skillet.)

Ingredients:

  • 2.5 lbs bone in turkey thighs (2 to 3, depending on size)
  • 2 teaspoon kosher salt
  • ½ teaspoon fresh ground pepper
  • 1 teaspoon vegetable oil

Pan Sauce

  • 1 clove of garlic, crushed
  • 2 ripe Roma tomatoes, diced (or 1 large tomato, or a 14oz can diced tomatoes if it is not tomato season)
  • 1 teaspoon of chopped fresh sage
  • 1 cup chicken stock (preferably homemade, or substitute water)
  • ½ tablespoon butter
  • Salt and pepper to taste

Directions:
1. Prepare the turkey: Heat your oven to 350F. Sprinkle the turkey with the salt and pepper, using 1 teaspoon kosher salt and ¼ teaspoon pepper per turkey thigh. Let rest at room temperature until the pan is heated.
If you have the time, you can dry brine the turkey by salting it 4 to 24 hours in advance, and leaving it in the refrigerator. Or, you can brine the turkey. Dissolve 1 cup of kosher salt in 2 quarts of water, then soak the chicken in this brine for 1 to 4 hours. Pat dry with paper towels before using.

2. Sear the turkey: Put the teaspoon of oil in your fry pan, and heat over medium-high heat until the oil is shimmering. Swirl the oil around to coat the pan, then add the turkey, skin side down. Sear for 4 minutes, or until the skin is a dark golden brown. Flip the turkey and sear the bone side for 4 minutes.
*Searing time will depend on how crowded your pan is. With 3 thighs, which crowds the pan a little, it may take as much as 6 to 8 minutes with the skin side down to get good browning. If your pan isn't very crowded (like in the picture below), searing will take less time.

3. Roast the turkey: Move the pan into the oven and roast until the turkey is cooked through, 20 to 25 minutes. The turkey should be 170*F in the thickest part of the meat. (I'm using an instant read thermometer in the pictures, but the best way to track this is with a probe thermometer - the wire runs into the oven, and it beeps when the thighs are ready.) Using an oven mitt or pot holder, remove the pan from the oven, and move the turkey to a serving plate.

Saute aromatics
Boil chicken broth
...until reduced

4. Make the sauce: Remember, the handle is still rocket hot!* Using an oven mitt or pot holder, put the pan over medium heat. Add the garlic to the pan and saute, stirring, for 30 seconds. Add the tomatoes and the sage, and cook for another minute. Add the chicken stock, then turn the heat to high. Scrape the bottom of the pan with a wooden spoon to loosen all the browned bits of chicken, then boil the stock until reduced by half, about 5 minutes. The plate holding the turkey thighs will have some turkey juice on the bottom; add it to the pan. Turn off the heat, then whisk the butter into the sauce. Add salt and pepper to taste - you want the sauce to be highly seasoned, so don't be afraid to add more salt or pepper if it needs it.
*From time to time, I forget that the pan just came out of the oven, and brand myself with the handle. I try to leave my oven mitt on the handle of the pan to remind me that it is still hot.

Hot! Hot! Hot!

5. Serve: Spoon a teaspoon of sauce over each breast, then serve, passing the rest of the sauce on the side.

Variations:
*Different herbs: I had sage from the farmers market

*Change up the sauce. If you have a favorite pan sauce, use it here; the only real key is to use enough liquid to loosen the browned turkey fond from the pan. The simplest sauce I know is: deglaze the pan with 1 cup chicken stock or water, with some salt and pepper for seasoning. The browned bits in the pan give this simple sauce a surprising depth of flavor.

Notes:
*The tomato and garlic pan sauce gives this dish an Italian flavor, so I usually serve it with pasta. Quick orzo pilaf is my favorite, and spaghetti works just fine. But, my kids are on a kick right now where they only eat bow tie pasta, so that's what I made.

*Don't have fresh tomatoes? Use cherry or grape tomatoes, or canned diced tomatoes. Please don't buy out of season tomatoes. They won't have enough flavor. Go with the can of diced tomatoes, picked and canned at their peak of freshness.

*If you want to cook more turkey, you can probably squeeze three large thighs in a pan, but you'd be better off to double the recipe and use two pans. Or, a trick I learned from Pam Anderson at ThreeManyCooks.com - use a roasting pan over two burners instead of a frypan.

What do you think? Questions? Other ideas? Leave them in the comments section below.

Related Posts:
Sear Roasted Chicken Thighs with Lemon Sauce
Sear Roasted Chicken Breasts with Shallot Herb Sauce

Adapted from:
Pam Anderson How to Cook without a Book

*Enjoyed this post?  Want to help out DadCooksDinner?  Subscribe using your RSS reader or by Email, recommend DadCooksDinner to your friends, or buy something from Amazon.com through the links on this site.  Thank you!

Why Dad Should Cook

August 30, 2010 by Mike Vrobel 10 Comments

I've noticed an interesting pattern while I do my farmers market demos. Every now and then a couple, obviously a husband and wife, will stop by my booth. I'll go into my pitch, tell them who I am, and offer a taste of what I'm cooking. The woman will say "Dad Cooks Dinner. Hmmm. What an interesting idea..." and look pointedly at her husband. He will suddenly be fascinated by something in the trees on the other side of the market, and start edging away from my tent.

The first few times, this was funny. After a while, I found it a bit sad. First, I don't like to get my fellow guys in trouble with their wives. Second, and more important, I love to cook. In this example, both the husband and wife see cooking as a chore that they don't want to do, and the wife is "stuck" with it. I'm writing this blog to encourage people to cook more, and they're looking to cook less.

Cooking less is what got us into this mess we're in, with factory farms focused on quantity and not quality, rising obesity, tasteless out of season tomatoes, and "fast casual" dining joints replacing family dinners.
I think the the tasteless tomatoes are the worst part of that equation.

I agree with Michael Ruhlman's assertion that someone in every family should know how to cook, and do it often. It doesn't have to be gourmet, it shouldn't be fancy; we just need people to have the skills to make real food for themselves and their families. I'm writing this blog to show that it doesn't have to be the wife or mother. I cook because I enjoy eating good food, enjoy the challenge of making something that tastes good, and enjoy sharing it with my family.
Diane is a good cook herself, but she knows how much it means to me, so she lets me do it. She's turned her attention to being the family baker.

Now, I don't want this to come out wrong.  I don't cook because it's "good for me", like exercise and eating my vegetables.* Or, at least that's part of it, but not the real reason.

*OK, maybe I'm weird, but now that I'm a cook, I do like to eat my vegetables.  I'm channeling all those talks my mom had with me when I was a kid with that one.

I cook because I love it.  I'm a computer programmer by trade, and sit in front of a keyboard all day.  Cooking gives me something real to do, something with my hands, something that changes based on the seasons, the ingredients, and my mood.  When I get home, I make dinner to relax.  It helps me focus on what I'm doing right now. It gives something tangible to my family, something I've made with my own two hands, to show them how much they mean to me.

I cook because I love to eat. I couldn't afford to eat as well as I do, if I paid other people to do the cooking.  Doing it myself?  Now, that I can afford. What's your favorite thing to eat?  Learn how to cook it - that's how I started.  I wanted to learn how to grill a steak that was better than what I could get at a restaurant.  Once I mastered that, I wanted to know how to make good barbecued ribs.  Pretty soon I was reading cookbooks in my spare time, and figuring out how thermal dynamics relate to the transfer of heat to protein.

And that brings me to: I love to cook because it has changed my point of view.  Food and cooking give me a window to world history, physics, farming, biology, politics, chemistry, and cultures across the globe.  (If they make something worth eating, I want to learn about it!) I care about these things, because they affect my cooking, and I care about my cooking because it affects these things.  Cooking has tied me into the larger world around me.  And, for an introverted computer geek, that's a pretty big thing.


What I'm trying to say is...food is central to the human experience. Feasts bring family and friends together to celebrate. Everyday dinners are the common meeting point for a family in our hectic schedules. We cannot afford to give away responsibility for our food. That is why Dad should cook, or Mom should, or (preferably) both should. Cooking for ourselves and our family is too important to leave to anyone else.

What do you think? Questions? Other ideas? Leave them in the comments section below.

*Enjoyed this post?  Want to help out DadCooksDinner?  Subscribe using your RSS reader or by Email, recommend DadCooksDinner to your friends, or buy something from Amazon.com through the links on this site.  Thank you!

Grilled Beef Kebabs with Tomato, Onion, Lemon, and Thyme Marinade

August 26, 2010 by Mike Vrobel 7 Comments

Today we're going to discuss glutamic acid.
*I know, the excitement never ends here on DadCooksDinner. Please buckle your seat belts, and keep your hands and arms inside the ride until we come to a complete stop.

The September/October issue of Cooks Illustrated published an interesting recipe about beef kebabs, with a marinade that included tomato paste. Why tomato paste? Because, tomato paste is full of glutamic acid, which adds depth to the beef flavor of the kebab. Glutamic acid is the source of "umami", or the potential fifth basic taste of savoriness.

Glutamic acid occurs naturally in a number of foods, including cheese, mushrooms, and soy sauce. This is why I use soy sauce it in my quick marinades - it gives a boost to the savory taste of meat. The author of the CI article, Charles Kelsey, wanted to avoid soy sauce because it has a very distinct flavor.  As he put it, everything winds up tasting like beef teriyaki if you add soy sauce to the marinade. He chose tomato paste as his substitute source of glutamic acid.
*He also included canned beef broth in his marinade, which includes glutamic acid to increase its savory, beefy flavor. I'm not willing to buy canned broth, so I left it out.

The tomato paste does its job well - it gives these kabobs an extra depth, and the tomato goes well with the Mediterranean flavor profile of the rest of the marinade; the combination of onions, garlic, thyme, lemon and tomatoes is classic across much of the region.

Recipe: Grilled Beef Kebabs with Tomato, Onion, Lemon, and Thyme Marinade

Adapted From: Charles Kelsey, Cooks Illustrated, Sept/Oct 2010

Cook time: 8 minutes

Equipment:

  • Grill (I used a Weber Summit. Here is the current version of my grill.)
  • 2 - 12" grilling skewers (I prefer metal, but bamboo will work if you're OK with burnt bamboo tips).

Ingredients:

  • 2 lbs Sirloin, cut into 2" chunks (I buy thick-cut steaks to start)
  • 1 red bell pepper
  • 1 large red onion

Tomato, Onion, Lemon, and Thyme Marinade

  • 4 cloves garlic, peeled
  • 1 medium onion, trimmed and peeled
  • zest and juice of 1 lemon
  • ¼ cup water
  • 2 teaspoon fresh thyme
  • ⅓ cup vegetable oil
  • 3 tablespoon tomato paste
  • 2 tablespoon kosher salt
  • ½ teaspoon fresh ground black pepper
  • 1 teaspoon honey

Directions:
1. Cut and marinate the sirloin: One hour before cooking, cut the sirloin into 2 inch chunks, and put in a zip-top bag. Drop the garlic cloves into a running food processor, and process until they are finely minced. Cut the onion into large chunks, add to the food processor, and pulse until chopped. Add the lemon zest and juice, water, thyme, vegetable oil, tomato paste, salt and pepper. Run the food processor until you have a smooth paste, about one minute, scraping down the sides once or twice. Pour the marinade over the sirloin chunks, zip the bag closed, then shake and toss to coat the beef with the marinade. Refrigerate for one hour, and up to four hours, turning the bag and tossing after every half an hour.

2. Cut the vegetables:Just before grilling, prepare the vegetables. Remove the core from the red pepper, and cut it into 1 inch chunks. Trim the red onion, remove the skin, then cut it in half. Remove the central "core" of the onion, leaving three or four layers of onion. Cut the remaining layers into eight pieces (cut each half in half lengthwise, then in half again, then cut crosswise.) You should get ¾" to 1" pieces of onion - here's a picture of how the onions should be sliced from Tuesday's zucchini kebab post:

3. Skewer the kebabs: Remove the beef from the marinade, wiping as much off with your fingers as you can - you don't have to be perfect when removing it, because it will add a nice crust to the beef. Skewer the kebabs in the following pattern: one piece of beef, one piece red pepper, one piece onion. Repeat until you are at the end of a skewer, then add a final piece of beef.

4. Prepare the grill: Set the grill up for cooking with direct medium-high heat. For my Weber Summit, this means preheating the grill for ten to fifteen minutes on high, then brushing off the grill grate and turning the burners down to medium-high.

5. Grill the kebabs: Put the kebabs on the grill over the direct medium heat. If cooking on a gas grill, cook with the lid closed as much as possible. Grill for 6 to 8 minutes total, turning the kebab a quarter turn every 2 minutes. That is: Grill 2 minutes, quarter turn, grill 2 minutes, quarter turn, grill 2 minutes. Check for doneness by peeking at the middle of a kebab skewer - if the meat in the middle isn't done to your liking, turn another quarter turn (this should be the last un-browned side on the kebab) and grill for 2 to 4 more minutes. On my grill, I had medium-rare after 8 minutes over medium-high heat.

6. Serve: Let the kebabs rest for 10 minutes, then serve. Each skewer should serve two people; big eaters will probably have an entire skewer for themselves.

Variations:
*Like the idea of Teriyaki kebabs? Replace the water in the marinade with soy sauce, and cut the salt back to ½ tsp.

Notes:
*This is a brinerade, not a marinade, due to the high proportion of salt added to the marinating liquid. The rest of the ingredients are forming a spice paste for the exterior of the meat, particularly the lemon, thyme, honey, and oil.  But the salt and glutamic acid will penetrate into the meat and flavor it all the way through.

*Oh, and the trade name for glutamic acid, when it is extracted from seaweed and sold as a separate ingredient? MSG. Don't worry - the health effects of MSG are statistically non-existent. If you can handle cheese, mushroom, and tomatoes, then you can handle the level of glutamates in this dish.

What do you think? Questions? Other ideas? Leave them in the comments section below.

Related Posts:
Grilled Thin Pork Chops, Quick Marinated
Grilled Boneless Skinless Chicken Breasts, Quick Marinated
Grilled Teriyaki Flank Steak
Grilled Beef Fajitas Recipe

Adapted from:
Charles Kelsey, Cooks Illustrated, Sept/Oct 2010

*Enjoyed this post?  Want to help out DadCooksDinner?  Subscribe using your RSS reader or by Email, recommend DadCooksDinner to your friends, or buy something from Amazon.com through the links on this site.  Thank you!

Zucchini and Summer Squash Kebabs

August 24, 2010 by Mike Vrobel 2 Comments

The tidal wave is here - I'm up to my armpits in zucchini and summer squash, and there's no end in sight.  I used this recipe for Zucchini and Summer Squash kebabs at the Seville Farmers Market for their Zucchini Explosion event.
*I needed an excuse to bring my grill.  Some people have their blankie, some have a lucky rabbit's foot...I have a Weber kettle.  It's not as cuddly, but it feeds me better.

This recipe uses a trick I learned from Cooks Illustrated - kebabs taste better when they are flavored by peppers and onions.  I never make a kebab without some peppers and onions on the skewer, to give their flavor to the other ingredients.  Other than that, it is about as simple as a recipe gets - toss the vegetables in olive oil, salt and pepper, and cook over medium-low heat until they are browned and softened.  And did I mention it uses up zucchini and summer squash?
*Yes, I was developing this recipe on August 8th, "Sneak some zucchini on your neighbor's porch day".  I can neither confirm nor deny my participation in this holiday beyond working on this recipe.

Recipe: Zucchini and Summer Squash Kebabs

Adapted From: The Cooks Illustrated Guide to Grilling
Cook time: 15 minutes

Equipment:

  • Grill (I used a Weber Summit. Here is the current version of my grill.)
  • 4 - 12" grilling skewers (I prefer metal, but bamboo will work if you're OK with burnt bamboo tips).

Ingredients:

  • 1 medium zucchini (8 ounces, about 1 ½" in diameter. If it is larger, cut lengthwise into halves or quarters)
  • 1 medium summer squash (8 ounces, about 1 ½" in diameter. If it is larger, cut lengthwise into halves or quarters)
  • 1 large red bell pepper
  • 1 large red onion
  • 2 tablespoon olive oil, plus more for brushing on at the end
  • 1 teaspoon kosher salt
  • ¼ teaspoon fresh ground black pepper

Directions:
1. Prep the vegetables: Slice the ends off the zucchini and summer squash, and cut them crosswise into 1 inch thick pieces. (Optional - peel them in a stripe pattern, like I did in the pictures.) Cut the core out of the bell pepper, and cut it into 1" to 1 ½" pieces. Trim the red onion, remove the skin, then cut it in half. Remove the central "core" of the onion, leaving three or four layers of onion. Cut the remaining layers into eight pieces (cut each half in half lengthwise, then in half again, then cut crosswise.) You should get ¾" to 1" pieces of onion - see the picture below. Toss all the vegetables with 2 tablespoon olive oil, salt and pepper until evenly coated.

2. Skewer the vegetables: Skewer the vegetables in the following pattern: one slice zucchini, one piece red pepper, one piece onion, one slice summer squash, another piece red pepper, another piece onion. Repeat until you are at the end of a skewer, then add a final piece of zucchini or squash.
*The last piece of zucchini holds everything together.  Onions and peppers at the end of the skewer tend to fall off into the grill.

3. Prepare the grill: Set the grill up for cooking at direct medium-low heat. For my Weber Summit, this means preheating the grill for ten to fifteen minutes on high, then brushing off the grill grate and turning the burners down to medium-low.

4. Grill the skewers: Put the skewers over the direct medium-low heat, and cook with the lid closed. Total cooking time is 12-15 minutes; rotate the skewers a quarter turn every three minutes or so, to brown them evenly. The skewers are done cooking when they are well browned, and are shrinking and softened. After 9 minutes of cooking, brush the skewers with a little olive oil to keep them moist.

5. Serve the skewers: Remove the skewers from the grill, and brush with a little more olive oil. Serve.

Variations:
*Balsamic skewers: Instead of plain olive oil, salt and pepper, replace the olive oil with balsamic vinaigrette. Use it for coating the vegetables before you skewer them, and use it for brushing during the cooking time.

*Lemon herb dressing skewers: Again, instead of plain olive oil, salt and pepper, use lemon herb dressing.

Notes:
*It is hard to overcook zucchini and squash. If you have extra time (your main dish is cooking longer), don't pull the skewers off the grill right away. Instead, turn your grill to low and leave the skewers on for another 3 to 9 minutes, turning and brushing with some olive oil as you go. You want them as soft as you can get them without burning, and the medium-low to low heat gives you that. Or, just move them off the heat completely and let them sit over unlit burners. Extra cooking time never hurt zucchini or squash.

*Getting a charcoal grill to medium-low to low heat is harder...unless you give a charcoal fire some time. When the coals are first dumped into the grill, you have a high to medium-high heat fire. If you grill your protein first, and put the zucchini skewers over indirect heat while you do, by the time the protein is done grilling the coals will have cooled off. Even so, watch out for burning over charcoal - it is much less forgiving than gas when it comes to vegetables.

Me and the winner of the "Largest Zucchini" contest.
Now, which of my neighbors forgot to lock their screen door?

What do you think? Questions? Other ideas? Leave them in the comments section below.

Related Posts:
Grilled Monster Zucchini
Zucchini and Summer Squash Salad

Adapted from:
The Cooks Illustrated Guide to Grilling

*Enjoyed this post?  Want to help out DadCooksDinner?  Subscribe using your RSS reader or by Email, recommend DadCooksDinner to your friends, or buy something from Amazon.com through the links on this site.  Thank you!

Year Two of DadCooksDinner

August 23, 2010 by Mike Vrobel 9 Comments

I'm going to celebrate the second anniversary of DadCooksDinner with a motley collection of top 5 lists. Why? Because of my favorite movie, that's why.

Top 5 moments in Year Two of DadCooksDinner:

  1. Receiving my first Google Adsense check: I am officially a professional writer!
    *Until this year, I was just a talented (?) amateur. Now that I get paid for my writing...I'd be a starving artist if it wasn't for my day job.  But, even if it's a pittance, I'm getting paid!
    Thanks to you, my loyal readers, I earned (checks the numbers...) enough money to buy a couple more cookbooks. Someday this blog is going to make me billions, BILLIONS! But, until then, it supports my cooking habit by paying for things like this, and this, and one of these. Thank you to everyone who clicks on my ads, and buys things through my Amazon links.
  2. Cooking demos at local farmers markets: I've been bringing my kids to my local farmers market since they were small enough to carry in a Baby Bjorn I was thrilled when Beth Knorr at Cuyahoga Valley Countryside Conservancy agreed to let me do a cooking demo. I had a great time, getting away from the computer and the kitchen, taking my grill on the road. I enjoyed being on the other side of the table at the market, and doing my little bit to help promote our great local farmers. I've been to the Stan Hywett market, I just finished a demo at the Seville market, and my favorite was my trip to my "home" market in the Cuyahoga Valley National Park.
  3. DadCooksDinner Sells Out: My blog actually got enough notice that companies asked me to mention their products. I'd like to think I've been choosy, only talking about products I actually use. I don't want to sell my integrity out to The Man just to get more stuff. But I'll have to admit, when All-clad emailed me and wanted me to test out their new D5 cookware, I was excited.
    *All-clad! My favorite pans in the world! They want ME to test it out!
    And then I was sent a copy of Adam Perry Lang's BBQ 25 for review, and a bunch of turkey legs for a cook-off, and a massive Kuhn Rikon pressure cooker that's quickly become one of my go-to pots.  The down side has been the (minor) flood of requests for items that don't interest me. These are sent by publicists who don't seem understand that, when I ignore them, I'm not interested. *That said, if Weber ever calls, I'm selling out in a heartbeat. With full FTC disclosure, of course.
  4. Look - I'm on TV! I'm in the Newspaper! I'm Z-List famous! Thanks to this blog, and all you readers, I got to go on TV very early in the morning to chat about food, and was featured in my local paper's food section. I'd like to say that I'm not in it for the glory, but it was a lot of fun to be on TV and in the paper.
    *Also, as a rule, I'm terrified of public speaking.  I can do it, but it gets my fight or flight instinct kicked into overdrive.  But I'm so passionate about food that it doesn't stop me.  I've found that if you give me an interviewer, and they ask me a food question, watch out...they'll be begging me to stop before the next commercial break. After it is over, instead of thinking "oh, that sounded dumb", I think "oh, I should have told them about THIS recipe..."
    And I'm Z list famous because of all my wonderful (intelligent, beautiful, tasteful, well mannered) readers. When I wrote this update last year, I was thrilled with the 2,000 visitors I had in the previous month. Today, I've had 10,000 visitors in the last month. Holy cow.
    *I say "Z list" because I'm sure not on the A list. Or B list, or C, D, E...
  5. I'm a food writer: My favorite thing is being part of the food community. Because of this blog, I've corresponded with a bunch of my cooking influences: Pam Anderson, Lorna Sass, Jane Snow, and Lisa Abraham. I compare notes with other food bloggers: Dan at Casual Kitchen, Tom at Exploring Food My Way, Tami at GardenGroceryGadgetGirl, and Mike at Another Pint Please. I've been linked to by larger blogs like Three Many Cooks, Casual Kitchen, Cheap Healthy Good, Black Iron Dude and TheKitchn. I've had thank you notes from other writers I admire for mentioning them in my blog. Little old me, writing in my bedroom, grilling on my back deck...and they treat me like a colleague. It's all I can do to not fall all over myself when these people write me. They are my influences, the people who helped me learn how to cook, and how to write about it, and they're thanking ME?

My top 5 favorite pictures from the last year:
*I bought a SLR for the blog in Februrary, because the lack of natural light was hurting my pictures. Yet another reason this blog will never make me any money - there are too many cool gadgets out there.

Top Sirloin Steak, Marinated and Butter Basted
All-Clad D5 Frypan
Grilled Lamb Loin Chops
Thai Noodle and Pork Stir Fry
Rotisserie Prime Rib Roast

My top 5 favorite recipes from the last year:

  1. Sear Roasted Chicken Breasts with Shallot Herb Sauce
  2. Pressure Cooker Short Ribs
  3. Zucchini and Summer Squash Salad
  4. Rotisserie Pork Shoulder, Char Siu Style
  5. Rotisserie Chicken Legs, Churrascaria Style

My Top 5 recipes...according to my kids:

  1. Rotisserie BBQ Baby Back Ribs
  2. Rotisserie Turkey Legs
  3. Lentil Stew, Dal Style (Natalie's favorite)
  4. Basic Pressure Cooker Beans (Tim's favorite, particularly kidney beans)
  5. Turkey Lettuce Wraps, Chinese Style (Ben's favorite)

The best part of writing this blog? Knowing that people read it. It makes me all warm and fuzzy inside when I get a question about a recipe.  I love it when I hear I helped someone make dinner, grill a great steak, buy a new chef's knife, or try something new with their cooking. I'm obsessed about cooking, obviously, so I'd be writing this anyhow...but I'm glad to know that you are out there, reading what I have to say. Thank you!

*Enjoyed this post?  Want to help out DadCooksDinner?  Subscribe using your RSS reader or by Email, recommend DadCooksDinner to your friends, or buy something from Amazon.com through the links on this site.  Thank you!

Interviewed by Dishin' in the Kitchen

August 20, 2010 by Mike Vrobel 1 Comment

DadCooksDinner media blitz week continues!

Mac Ledesma at Dishin' in the Kitchen does podcast interviews with home cooks.  We talked last week, and the interview was just published:

Chatting in the Kitchen with Mike Vrobel of DadCooksDinner [DishinInTheKitchen.com]


I just listened to the opening bit; I'm saving the rest of it for my drive into work. My voice sounds strange to me when I hear it, like it does to most people. I can't believe my voice is that gravelly.
*I sound like a blues singer with a pack-a-day habit.  All I need is a cool nickname - "Grease Fire" Vrobel?  And, as the Simpsons said, a reason to sing the blues for someone with no real problems.

Mac had a hard time ending the interview - once I get on a roll about cooking, it's hard to get me to stop.  Luckily, she's a good editor - she cut my ramblings down to 15 minutes. Go listen to my thoughts on meal planning, steak cook offs, and dry brining chicken.  Or subscribe to the Dishin in the Kitchen podcast on iTunes, so you can hear all of Mac's interviews.

Thank you, Mac!

Related posts:
Weekly Meal Plans
Rotisserie Chicken, Dry Brined

Rotisserie Tri-Tip

August 19, 2010 by Mike Vrobel 15 Comments

Tri-tip is an odd cut from the bottom sirloin. It is famous as the cut of beef used for Santa Maria Style Barbecue, which is made with tri-tip rubbed with salt, pepper, and garlic salt, and cooked over a red oak fire. That recipe has been copyrighted by the Santa Maria Chamber of Commerce, to make sure it is always "the real thing". The official recipe is here: Santa Maria Barbecue (pdf), and check out this video which shows the ingenious grill grate elevators they use: Santa Maria Style Barbecue Video.
*That is, if you can tear yourself away from watching the chef's moustache. My goodness.

Now, I don't want to get the Santa Maria Chamber of Commerce mad at me, so I'm not going to call this Santa Maria Barbecue. Santa Maria is a long way from here, so I have to take a few shortcuts.
*For the longest time, I couldn't find tri-tip roasts here in Akron. They were a California thing, and not readily available; I had to make do with top sirloin roasts.  Times have changed - over the last couple of years, I can regularly find tri-tip roasts at my local grocery store.

I use my rotisserie to get the same beautifully seared results that come from their elevator grills, and some oak smoking wood with charcoal instead of burning down red oak logs to make the coals.  The results are well worth it.  Now, if I can only come up with an excuse to go to Santa Maria to try out the original...

Recipe: Rotisserie Tri-Tip

Adapted From: Santa Maria Chamber of Commerce Barbecue (pdf)

Cook time: 25 minutes

Equipment:

  • Grill with Rotisserie attachment (I used a Weber kettle with the Rotisserie attachment; the kettle is this Weber Grill and the rotisserie attachment is this Weber charcoal kettle rotisserie)
  • Aluminum foil drip pan (9"x12", or whatever fits your grill)
  • Basting brush

Ingredients:

  • 2 lb Tri-tip roast
  • 2 teaspoon kosher salt
  • ½ teaspoon fresh ground black pepper
  • ¼ teaspoon garlic powder (or, use 1 teaspoon garlic salt and cut back on the kosher salt)
  • 1 loaf french bread, split lengthwise, then cut into sandwich size pieces
  • 2 tablespoon butter
  • 2 tablespoon olive oil
  • 2 cloves garlic, minced or pressed through a garlic press
  • pinch of salt and pepper
  • 1 fist-sized chunk smoking wood (Oak is traditional. I use oak wine barrel staves.)

Directions:
1. Prepare the tri-tip: One to two hours before cooking, sprinkle the tri-tip evenly with the kosher salt, pepper and garlic powder. Skewer the tri-tip on the rotisserie spit, and let rest at room temperature until ready to grill.

2. Prepare the bread: Split the loaf of french bread lengthwise, then cut crosswise into sandwich size pieces. Assume three to four sandwiches per loaf, depending on the size of the loaf and the appetite of the eaters. In a microwave-safe bowl, combine the butter, olive oil, garlic, and pinch of salt and pepper. Microwave on high for 1 minute, or until the butter is melted and the garlic is just starting to sizzle.

3. Prepare the grill: Prepare the grill for cooking on indirect high heat (see details My Rotisserie Basic Technique Post). For my Weber kettle, I light a chimney starter* full of charcoal, wait for it to be covered with ash, then pour it in two equal piles on the sides of the grill, and put the drip pan in the middle, between the piles.
*I highly recommend the Weber Chimney Starter, because it is larger than most chimney starters. It holds 5 quarts of charcoal, which exactly the right size for cooking this recipe.

4. Cook the tri-tip: Place the wood chunk on the coals. Put the spit on the rotisserie, start the motor, and cook with the lid closed for 20 minutes, then check for doneness. It should take 20 to 25 minutes to get to medium-rare. Check the temperature in the thickest part of the roast; the internal temperature should be 115*F for Rare, 120*F to 125*F for Medium-rare, and 130*F for Medium. Once you reach the desired level of doneness, remove the tri-tip from the spit and let it rest for at least 10 minutes before carving.
*Watch out for the spit when you're checking the temperature - it can throw the reading off. Also, the steak you get from the pointy end of the roast is a little smaller than the others, so it will cook quicker - if the largest steak is rare, the small one will be medium-rare to medium.


5. Toast the bread: Brush the cut side of the bread with the garlic butter mix. The grill should be at medium heat by this point - if using a gas grill, turn the burners down; if using charcoal, the coals should have burned down to about medium while the roast was cooking. Put the bread cut side down on the grill, over the direct heat of the coals. Toast the bread until just browned - 30 seconds to 1 minute, then flip and toast the crust side for another 30 seconds to 1 minute. Be careful - bread will burn in a heartbeat, so watch it carefully!

6. Serve: Slice the tri-tip across the grain as thinly as possible, then serve on the toasted bread. Traditionally, pico de gallo salsa (Santa Maria style) is used as a condiment on the sandwiches, and pinquito beans and a green salad are served as side dishes.

Notes:
*Toasting bread on a grill is tricky, especially over live coals. Bread goes from toasted to burnt very quickly. I usually toast one piece to get a feel for the fire, checking it every ten to fifteen seconds. Then I use that cooking time as a baseline for the rest of the bread.

*I use one baguette of french bread because it is just enough for dinner, and I always have some some leftover tri-tip for sandwiches during the week. Or, at least it worked, until this summer. The kids decided they really like sandwiches on toasted bread. Now I'm thinking two baguettes, minimum.

*I'm still working on my Pico de Gallo salsa recipe for the blog. It's coming, I promise.

What do you think? Questions? Other ideas? Leave them in the comments section below.

Related Posts:
Click here for my other rotisserie recipes.

Adapted from:
Santa Maria Chamber of Commerce Barbecue (pdf)


Check out my cookbook, Rotisserie Grilling.

Everything you could ask about the rotisserie,
plus 50 (mostly) new recipes to get you cooking.

It's a Kindle e-book, so you can download it and start reading immediately!


*Enjoyed this post? Want to help out DadCooksDinner? Subscribe to DadCooksDinner using the RSS or Email options on the right, link to this post from your blog, recommend DadCooksDinner to your friends, or buy something from Amazon.com through the links on this site. (Like my Rotisserie Grilling cookbook...)

DadCooksDinner In the News: Akron Beacon Journal, August 18th, 2010

August 18, 2010 by Mike Vrobel 4 Comments

Check me out - I'm on the front of the food section of my local paper, the Akron Beacon Journal:

Bloggers share love of cooking, eating [ohio.com]
(And...a couple pictures of me grilling dinner: Food Bloggers Gallery [ohio.com])

I'm in an article about local food bloggers, with a picture of me grilling on the front of the paper.  (The other blogger they profile is Tom over at ExploringFoodMyWay.  Hi, Tom!)

Thank you to Lisa Abraham, our food columnist in the ABJ, for saying such nice things about me. And for taking my ramblings about how this blog came about and making them sound so...coherent.
And, thank you for the canning advice you gave me while we were doing the interview. I was finishing a batch of pickles when she called. "Listen for the ping" she said.  She was right - I could hear the ping as the jars cooled down and sealed.

If you're here in Akron, buy a copy!
Or two copies, and give one to a friend. Or ten, and pass them out to complete strangers. That's my plan - I'm going to paper my neighborhood with copies the article, send it to all my relatives, hand it to random passers by...hey, did you see me in the paper today?

*Enjoyed this post?  Want to help out DadCooksDinner?  Subscribe using your RSS reader or by Email, recommend DadCooksDinner to your friends, or buy something from Amazon.com through the links on this site.  Thank you!

Recipe I'm cooking in the picture in the paper:
Grilled Pork Chops Agrodolce
Grilled Peppers and Onions

Spicy Pickled Carrots

August 17, 2010 by Mike Vrobel 1 Comment

Last year, I made refrigerator pickles from a whole range of CSA and farmer's market vegetables. I loved having the the pickled peppers and zucchini for a few months after their season was over.
*I would have loved the dilly beans, but Diane ate them all before I could get to them.

Unfortunately, the pickles started to go after a while - they were only refrigerator pickles. After a few months, the few remaining jars were cloudy, and I figured they were not safe to eat. With a tear in my eye, I had to dump my last two jars of zucchini pickles.
* I've read that refrigerator pickles are safe for anywhere from three weeks to three months...but not longer than that.

This year, I decided to extend my pickle season by truly canning them, so they would be preserved. I started reading up on canning, and found that pickles are good for canning - the brine has a lot of acid, which helps preserve them. I already had most of the equipment - canning jars, a large pot, and a canning funnel. Sites like Food in Jars and Saving the Season inspired me with their photography and recipes. And, in the back of my mind were Mexican carrot pickles.

A few years ago I ate at Mi Pueblo in Cleveland. The dinner was good, but what really grabbed me were the pickled Mexican carrots that were put on the table as we arrived. They were a revelation - the sweetness of carrots, pickled, with a big hit of heat, Mexican style. When I decided it was time to start canning, this was my starting point. I picked up a few bunches of regular and purple carrots from the Cuyahoga Valley farmers market, and went to work.

For my first attempt at canning, the results are encouraging. All my jars sealed properly, and the first batch tastes delicious. But...if you don't feel like canning, that's OK.  Make these carrots as refrigerator pickles.  They'll keep for a month or two, and I'll be surprised if they last that long.

Recipe: Spicy Pickled Carrots

Adapted From: University Of Georgia, National Center for Home Food Preservation: Pickled Carrots

Equipment:

  • 4 clean pint or ½ liter jars (I used wide mouth pint jars)
  • Wide mouth funnel (Optional if you have steady hands when spooning boiling liquids.)
  • (Optional, if canning) Large pot for the canning water bath, and a rack to lift the jars from the bottom of the pot
  • (Optional, but useful) Canning tools - jar lifting tongs, bubble removal tool, and lid lifter

Ingredients:
This recipe makes four pints of pickled carrots, and scales up easily

  • 2 ½ lbs carrots, cleaned, trimmed, and sliced ¼" thick
  • 5 ½ cups vinegar (white or cider)
  • 1 cup water
  • 2 cups sugar
  • 2 tablespoon canning salt
  • 2 Jalapeno or Serrano peppers
  • 4 cloves garlic, peeled and crushed
  • 4 bay leaves
  • 20 peppercorns
  • 4 teaspoon salt

Directions:
For an overview of boiling water canning, see the Principles of Home Canning or pick up a copy of the Ball Blue Book 

1. Prep the ingredients: Trim the carrots, then slice into ¼" thick slices. (I use the thin slicing disk on my food processor.) If canning the carrots, put the canning pot on the stove and fill it with enough water to cover the jars when they are added. Cover the pot, and bring to a simmer.

2. Simmer the carrots: Meanwhile, put the carrots, vinegar, water, sugar and 2 tablespoon canning salt in a large saucepan or dutch oven, and bring to a boil. Reduce the heat, and simmer the carrots for 15 minutes.

3. Fill the jars: In each pint jar, put ½ a jalapeno pepper, 1 bay leaf, 5 peppercorns, and 1 teaspoon salt. Using a slotted spoon, fill each jar with carrots, leaving ½" of head space at the top of each jar. Ladle enough brine into each jar to cover the carrots, again leaving ½" of head space. If you are doing refrigerator pickles, you're done - cover the jars and skip to the "rest for at least a week" step. If you're canning the pickles, read on...
*This step is where the canning funnel comes in handy. Spooning hot carrots and ladling hot brine is a mess. The funnel helps get everything into the jars, and not all over the counter top.

4. Process the jars: Wipe the rims of the jars and apply the lids. Lower the jars into the canning pot, and make sure they are covered with 1" of water. Cover the pot with its lid, bring the water to a rolling boil, then process in the hot water bath for 15 minutes. Remove the jars from the pot, and let rest for 12 to 24 hours before testing the seal on the lids.

*This step is where the jar tongs really come in handy. If you don't have them, wrap a rubber band around the heads of your regular kitchen tongs to give them extra grip, and be very careful.

OK, you caught me...those are my gingered dilly beans processing.
Forgive me...I needed a processing picture.

5. Rest and serve: Let the jars rest for at least a week, two if possible, before using. If the jars were processed in the hot water bath, and sealed properly, they will last at room temperature for a year. Once you open a jar, store it in the refrigerator, and it will be good for a month or two. The same goes for refrigerator pickles - since they weren't processed, they work just like a jar that has been opened: keep them refrigerated for a month or two.

Variations:
*Refrigerator pickles: As I say in the opening, you don't have to go all-in to canning to have good pickles.  Skip the canning steps, and just refrigerate the pickles. If they disappear as quickly as mine have, you'll eat them all before they start to turn bad. If they've been in the refrigerator for over a month, keep an eye on them, and throw them out at the first sign of cloudiness or mold.

Notes:
*I started with just under 2 pounds of carrots, and once I was done trimming, slicing, simmering, and canning, I had three pint jars full. I think 2 ½ pounds should fill four pint jars...but I'm estimating.

*I'm basing this recipe on one from the National Center for Home Food Preservation. I've played around with the spices, but not the proportions of vinegar, salt, sugar and water. Since this is my first foray into canning, I didn't want to go too far afield from the tested recipes. I've read that you can get into trouble that way. And these pickled carrots are very good. I really like them. But...they're not the same pickles I had at the Mexican restaurant. I want to cut back on the sugar. Does anyone know of a pickled carrot recipe, one that's been tested for canning, that doesn't include as much sugar?
*Diane thinks I'm crazy.  She says these are the best pickles I've made.  She may be right; they have a great balance of sweet, hot, and salty. Don't let my search for a different recipe keep you from trying this one!

What do you think? Questions? Other ideas? Leave them in the comments section below.

Related Posts:

Click here for my other pickle recipes.
Click here for my other canning recipes.

Adapted from:
University Of Georgia, National Center for Home Food Preservation: Pickled Carrots

*Enjoyed this post?  Want to help out DadCooksDinner?  Subscribe using your RSS reader or by Email, recommend DadCooksDinner to your friends, or buy something from Amazon.com through the links on this site.  Thank you!

Cooking Demo: Meet me at the Seville Farm Market, August 21st, 2010

August 16, 2010 by Mike Vrobel 2 Comments

Cooking Demo at the Seville Farm Market: August 21st, 2010

I'm doing a cooking demonstration at the Seville farmers market next Saturday, August 21st, from 9:00AM to Noon. If you're in the area, please stop by and say hello!

I am looking forward to checking out the Seville market - I've never been to it before.  Back in my bicycling days, I used to ride through Seville fairly often, and I loved the farms in the countryside.  Now I get to eat what they grow!

I will be there at the same time as their Zucchini Smackdown contest.  My theme is, well, zucchini. It seemed like the right thing to do.  I'll be making Zucchini and Summer Squash Salad and grilling some zucchini skewers (recipe coming next week.)  I have to check out the vendors at the market to see what else I'll be able to cook. As I always say, part of the fun of cooking from a farmers market is finding out what's available that week.
[Update: The Zucchini Smackdown contest is open to all visitors to the market.  There are three contests:  best Sweet dish, best Savory dish, and largest zucchini by weight.  Bring your best zucchini dish, and good luck!]

Information about the Seville farm market: SevilleFarmMarket.blogspot.com

View Larger Map
I hope to see you there!

Pan Seared Flank Steak with Tomatillo Salsa Pan Sauce

August 12, 2010 by Mike Vrobel 2 Comments

Wherein I figure out a weeknight dinner when mother nature throws me a curve ball...

Sometimes, when things don't go according to plan, it works out for the best. I wanted to grill for the blog, but it would not stop raining. I checked my schedue, and realized I had to cook this flank steak - it was tonight, or it would have to go in the freezer. So I improvised.

I decided to pan-sear the flank steak. I turned to the sear with pan sauce basic technqiue I have memorized from Pam Anderson's How to Cook without a Book. Just use a lot less oil - about 1 teaspoon instead of two tablespoons.) I had tomatillos, onions and peppers from my CSA, and my original plan was taco night with tomatillo salsa. I decided to make the salsa in the pan, using the original Spanish definition of salsa - "sauce", loosely inspired by a pork roast recipe from Rick Bayless's Salsas That Cook. I pulled out my trusty All-Clad fry pan*, and got to work on Seared Flank Steak with Tomatillo Salsa.
*I've been grilling so much that my pan thinks I've deserted it. Don't worry, good buddy, you'll be back in heavy use when the weather turns colder.

The results were perfect for taco night - I had my tortilla filling of thin-sliced flank steak, and a spicy, tart, sweet tomatillo sauce to spoon on top. Not bad for a last minute change of pace!
*My daughter, the adventurous eater, tried the salsa on a chip. Her verdict? It was "pretty good, but hot salsa is weird, dad."

Recipe: Pan Seared Flank Steak with Tomatillo Salsa Pan Sauce

Inspired By: Pam Anderson How to Cook without a Book, Rick Bayless Salsas That Cook

Cook time: 25 minutes

Equipment:

  • 12" Fry Pan (NOT nonstick - I prefer my All-Clad Stainless 12" Frypan)

Ingredients:

  • 1 teaspoon vegetable oil
  • 1 Flank steak, 1 inch thick (1 to 1.5 pounds, but go by thickness instead of weight)
  • 1 teaspoon kosher salt
  • ½ teaspoon fresh ground pepper
    Tomatillo sauce

  • ½ small onion, minced fine (as small as you can get it)
  • 1 jalapeno, minced fine (use serrano instead if you like it hotter, or skip if you like it milder)
  • 2 cloves garlic, minced or pressed through a garlic press
  • 4 medium tomatillos, husked, rinsed and cut into eighths
  • ½ cup water
  • ½ teaspoon salt
  • ½ teaspoon sugar
  • Juice of 1 lime
  • salt, sugar, and pepper to taste

Directions:
1. Prepare your ingredients: Salt and pepper the flank steak evenly. For the tomatillo sauce, mince the onion, jalapeno and garlic, then husk, rinse, and chop the tomatillos.

Rinsing the tomatillos
Sauce ingredients ready to go

2. Sear the steak: Heat the vegetable oil in the fry pan over medium-high heat until shimmering and just starting to show wisps of smoke. Add the flank steak to the pan and sear without moving for 4 minutes. Flip the flank steak and sear the other side for another 4 minutes. Remove the steak to a platter.

Searing side one
Searing side two
Fond, ready to make the sauce

3. Make the tomatillo sauce: Reduce the heat under the pan to medium, and immediately add the onion, jalapeno and garlic. Saute for one minute, or until the onion and jalapeno are just starting to soften. Add the tomatillos and water, then sprinkle with the salt and sugar. Scrape the browned bits from the bottom of the pan into the sauce, and pour any juices from the steak platter into the pan. Turn the heat to high, and bring the water to a boil, then reduce the heat to a simmer.  Simmer for 10 minutes, or until the tomatillos have softened. Turn off the heat, and add the lime juice. Taste the tomatillo sauce, and add more sugar, salt and pepper as necessary. The sauce should be highly seasoned.

Aromatics added
Cooked for one minute
Tomatillos and water added
Simmered for 10 minutes

4. Serve: Slice the flank steak across the grain into ¼" thick slices, and serve with the tomatillo sauce on the side.

Variations:
*Red sauce: Replace the tomatillos with one large or two medium tomatoes, diced.

*Really quick red sauce: Skip the tomatillos and water, and substitute a 15 oz can of fire roasted diced tomatoes with their juices.

*Better steak: This recipe works exactly the same with boneless strip steak, ribeye or sirloin - just make sure the steaks are 1" thick.

Notes:
*Serve as a main dish, or as a taco filling with tortillas. Guacamole is an excellent side dish, as you can see in the opening picture.

*One inch thickness is the key for a medium-rare to medium steak. If the steak is thinner (say, ¾"), only cook it for three minutes a side. If it is thicker, sear-roast the steak. Heat the oven to 350*F and, after searing the second side, move the pan into the oven for another 5 to 10 minutes, until the flank steak is 125*F measured in its thickest part.

What do you think? Questions? Other ideas? Leave them in the comments section below.

Related Posts:
Salmon Saute with Tequila Orange Sauce
Pan-seared Rib-eye Steak with Red Wine Sauce

Inspired By:
Pam Anderson How to Cook without a Book
Rick Bayless Salsas that Cook

*Enjoyed this post?  Want to help out DadCooksDinner?  Subscribe using your RSS reader or by Email, recommend DadCooksDinner to your friends, or buy something from Amazon.com through the links on this site.  Thank you!

Turkey Lettuce Wraps, Chinese Style

August 10, 2010 by Mike Vrobel 4 Comments

Ben, my oldest, will not eat vegetables or fruit. This is painful for me. While I will never become a vegetarian, I do enjoy all the vegetable options I get from my CSA and farmers market. I plan two vegetable side dishes with every meal. And Ben? Until recently, he wouldn't allow them on his plate. They were too "Yucky."

Now, he'll try a bite of a fruit or vegetable. Then he'll make a face, and look at me and say "it was OK."
*Translation: "I took a bite. What more do you want from me?"

Recently, I had a breakthrough. He has always liked stir-fried chicken. He made the mistake of showing a slight bit of interest in lettuce wraps, so I made him take a taste of this recipe at dinner. I laid on the sales job: "Lettuce doesn't taste like much, really, and it adds a nice crunch with the chicken. Try it!"

Eventually, after much persuasion, he took a bite. And, to my surprise, he kept going. He finished the one lettuce wrap, and started making himself another one. "Dad, this is my favorite meal!" he announced. I was stunned. My son? Eating a vegetable? I tried to keep my hopes in check - It would never last.

Boy, was I wrong. He's been asking me to make lettuce wraps ever since, and when I told him I was doing this recipe for the blog, he gave me a big hug.*
*A hug! For a vegetable!

So. Are you looking for a quick, easy, weeknight stir fry, that even vegetable-averse kids will eat? Have I got a recipe for you...

Recipe: Turkey Lettuce Wraps, Chinese Style

Inspired by: Joanne Weir, Weir Cooking In the City

Cook time: 10 minutes

Ingredients:

  • 1 ½ lbs ground turkey
  • 2 tablespoon peanut or vegetable oil
  • 2 cloves garlic, minced
  • 1 inch piece of ginger, peeled and minced
  • 1 scallion, trimmed and sliced thin
  • 1 head bibb lettuce, separated into leaves

Marinade:

  • 1 tablespoon soy sauce
  • 1 tablespoon dry sherry
  • 1 teaspoon cornstarch

Sauce

  • 2 tablespoon soy sauce
  • 1 tablespoon hoisin sauce
  • 1 tablespoon dry sherry
  • 1 teaspoon sriracha sauce (optional - I omit this for the kids, and pass it at the table)
  • 1 teaspoon sugar
  • 1 teaspoon cornstarch
  • 1 teaspoon sesame oil

Directions:
See my stir fry basic technique for an overview
1. Prepare the ingredients: Break the ground turkey into large chunks, and put in a medium sized bowl. Whisk the marinade ingredients together until the cornstarch dissolves, then pour over the turkey. Let the turkey marinate while preparing the other ingredients. Whisk the sauce ingredients together until the cornstarch dissolves. Mince the garlic, ginger, and scallion, and set aside. Separate the Bibb lettuce leaves, rinse clean, and dry in a salad spinner.

2. Preheat wok or pan: Put 1 tablespoon of the peanut oil in a 12" to 14" wok or fry pan, and heat over high heat until just showing wisps of smoke.

3. Stir fry the turkey: Remove half the turkey from the marinade using a slotted spoon and add to the wok. Stir-fry, breaking up the turkey as it cooks, until it has just lost its pink color, about 3 minutes. Remove the cooked turkey to a plate. Add the remaining 1 tablespoon peanut oil to the wok, and heat for one minute. Add the rest of the turkey to the wok, and stir-fry for another three minutes, until it has just lost its pink color.

4. Add the aromatics and sauce: Add the plate of cooked turkey with its juices back into the wok. Make a hole in the center of the wok, and add the garlic, ginger, and scallion. Cook without stirring for 30 seconds, or until you can smell the garlic, then stir into the turkey. Slowly pour the sauce into the wok, stirring as you go, and cook and stir until the turkey is coated with sauce and looks glossy, about another minute. Transfer to a bowl, and serve with the bibb lettuce.

Variations:
*Really quick sauce: Mix equal parts soy sauce and hoisin sauce. Or, just use hoisin sauce - squeeze it straight into the pan.

*Other sauce options: See my stir-fry basic technique for other ideas for the sauce, or use a favorite stir-fry sauce.

*Hide some vegetables in the mix: I like this with diced red bell pepper, or thin-sliced cabbage, added with the second batch of turkey. But, my kids can be suspicious of extra stuff in the mix. I'm pushing my luck with the scallions as it is, so I usually stir-fry a batch of vegetables as a side dish, and add them into the lettuce wrap as I'm assembling it.

Notes:
*Quick white rice is the traditional side dish - you can add it to the lettuce wraps, or if you have really, really picky eaters (like I did...right up until the events of this post), they can eat the rice and chicken without the lettuce.

*I always put a bottle of hoisin sauce and a bottle of sriracha on the table, so people can add a little more sweet or hot sauce if they'd like. Slicing up another scallion and passing it as a condiment is also a good idea.

What do you think? Questions? Other ideas? Leave them in the comments section below.

Related Posts:
Stir fry basic technique
Thai noodle and pork stir fry
Green bean stir fry

Inspired by:
Joanne Weir, Weir Cooking in the City

*Enjoyed this post?  Want to help out DadCooksDinner?  Subscribe using your RSS reader or by Email, recommend DadCooksDinner to your friends, or buy something from Amazon.com through the links on this site.  Thank you!

Road Trip: A Best Fixture/A Best Kitchen Restaurant Supply

August 9, 2010 by Mike Vrobel 7 Comments


View Larger Map

A Best Fixture (aka A Best Kitchen at AKitchen.com) is a restaurant supply store in Akron that is open to the public. Looking for basic, professional quality, inexpensive cookware? Start here, or at your local restaurant supply store.

By professional quality, I don't mean high end. This is the real stuff, tools used in every professional kitchen from school cafeterias to local restaurants. For some reason, you can't buy them at most stores that sell housewares. Or, houseware stores sell them for ridiculous prices. I don't want flimsy, nonstick "cookie pans". I want professional strength aluminum half-sheet pans that won't buckle if I put something heavier than a cookie on them. I want my bowls to be stainless steel and shallow, not plastic, or glass, or "non-skid" with a handle and pouring lip.
Or having some other so-called improvement to the design. Of a bowl.

And, really, when you're flipping hamburgers on the grill, you want the same spatula that a professional would use, not one of those "grill spatulas" that include sawing edges and a bottle opener in the handle.
*Phew...sorry, I didn't know I had that rant coming on. I feel better now.

I love my expensive kitchen ware. I'm not giving up my All-Clad fry pan without a fight, and I'll give up my Shun knives only at gunpoint. But, if I was outfitting a kitchen from scratch, this is where I would do most of my shopping. For an example, see Mark Bittman's No-Frills Kitchen, where he shows how to outfit an entire home kitchen for under $300. How does he do it? He buys it all at a restaurant supply store.

Me? I have a mix. I have a lot of basics from restaurant supply stores, from the All-Clad factory sale, from Cooks Illustrated's "highly recommended" list, from Alton Brown's shows, and from other random cooking magazine and Internet recommendations. But I'm an obsessive cook. For a minimalist kitchen, you could do much worse than an All-Clad fry pan, a chef's knife that feels good in your hand, a good wooden cutting board, an enameled cast-iron dutch oven, and everything else from a kitchen supply store. Then, if you use a particular pot, pan or tool a lot, you can upgrade it to a more expensive version later.

A Best Fixture/A Best Kitchen
424 West Exchange Street
Akron, Ohio 44302
Phone: 330-535-2811
Web: www.AKitchen.com

My top five list of favorite items they sell, in no particular order:

1. Half sheet pans: Sheet pans are a jack of all trades in my kitchen. I use them for baking, of course. I also use them for food preparation, to keep ingredients organized and together, and to isolate meat from my preparation surfaces. They are the perfect tray for general kitchen use, and I own about eight of them. Best of all, if you buy them at a restaurant supply store, they're dirt cheap - here they sell them for $7 each.

2. Stainless steel mixing bowls: For food preparation, I like shallow stainless steel bowls. I had a set of nesting glass bowls, but I chipped them all. Stainless just works better for me. And I like the shape of shallow bowls - they make it easier to mix ingredients by tossing them with the bowl itself.
*Kenji Alt just did a post on mixing bowls that matches my experiences, in his usual entertaining style.

3. Mundial Knives: I love my Shuns, and I own a few different Victorinox knives as cheap backups that I can beat up without feeling guilty. I've heard good things about Mundial knives, similar to what people say about Victorinox - they are inexpensive, workhorse knives that are much better than their price would suggest. I picked up a Mundial paring knife at the checkout counter, because I can never have enough cheap paring knives.
*And, if you put your knives in the dishwasher, please do NOT buy anything more expensive than Victorinox or Mundial. High heat and detergents corrode the steel in good cooking knives. Victorinox and Mundial will give you 80% of the quality of the best cooking knives, and if you have to replace them, it won't be a big deal. Just be sure to keep them sharp!

4. Kitchen Gadgets: Spiders and spatulas, muddlers and mashers...oh my. You want it, they have it. They have a potato masher as tall as I am...and I'm 6' 3".

5. The Wall of Pizza Peels: Wood and metal, wide and narrow, short handles and yard-long handles. If you make pizza at home on a regular basis, get yourself a metal peel. You'll thank me later.

Someone asked where I got the 8 quart Rubbermaid food service container I used in my Rotisserie Turkey Leg video - A Best Fixture is where I found them.

Here's the map:

View Larger Map


What do you think? Questions? Other ideas? Know of any other restaurant supply stores open to the public in the Akron area? Any mental tricks on spelling restaurant, which I always spell "restaraunt"? Leave them in the comments section below.

Related Posts:
Click here for my Ethnic and Gourmet Markets in Akron

*Enjoyed this post?  Want to help out DadCooksDinner?  Subscribe using your RSS reader or by Email, recommend DadCooksDinner to your friends, or buy something from Amazon.com through the links on this site.  Thank you!

Grilled Paella with Shellfish, Chorizo, and Chicken (Paella Mixta)

August 5, 2010 by Mike Vrobel 12 Comments

Pan full of cooked paella, covered with clams, mussels, and shrimp, on a glass table
Grilled Paella with Shellfish, Chorizo, and Chicken (Paella Mixta)

I talked tough about taking it easy on vacation, didn't I? Sometimes my cooking ambitions get away from me. My big production meal while I was at the cottage was paella on the grill. Paella on the grill is a great recipe for a crowd, but I forgot how much dicing is involved.  It is a bit of work when you've been throwing the kids into Lake Erie all day. But I made my Mom happy.  Isn't that what really matters?

I have modified my technique since I last posted about paella on the grill. I read an article by Sarah Jay in Fine Cooking magazine about paella, where she explains the cardinal sin of paella cooking: having too much rice in the pan. Sarah says you want just enough rice to cover the pan. This makes sure the rice cooks evenly, and gives a higher proportion of browned soccarat rice on the bottom. According to the article, my old 13 inch paella pan was too small for the 3 cups of rice I usually cook, so I traded up to a 16 inch pan from PaellaPans.com. I love it, but I still want to go larger - my kettle is 22.5 inches wide, so I can fit a 22 inch pan in there.
Bigger is better, right?
Yes, gadget lust is an ugly thing. But...anyone out there have a large paella pan in their Weber kettle? How big of a pan will fit before you catch the handles on the grill grate? Let me know in the comments.


Sarah is right about the rice proportions, too - the rice was tastier cooked in the larger pan. The shellfish added their brine into the rice, the chorizo gave it a spicy, meaty flavor, and the grill added a hint of smoke. It was a lot of work...but it was worth it to sit down with a glass of Spanish Cava, relax for a minute, then dig in.

Charcoal in a tight single layer
Rice in the pan with the first batch of broth
Seafood added
Seafood cooked and mussels starting to open

What do you think?

Questions? Comments? Other ideas? Leave them in the comments section below.

Related Posts:

Grilled Paella with Chorizo and Chicken
Quick Gazpacho
Grilled Beef Fajitas Recipe

Adapted From:
Sarah Jay, Classic Seafood Paella, Fine Cooking Magazine

Enjoyed this post?  Want to help out DadCooksDinner?  Subscribe using your RSS reader or by Email, recommend DadCooksDinner to your friends, or buy something from Amazon.com through the links on this site.  Thank you!

Grilled Corn and Pineapple Salsa

August 3, 2010 by Mike Vrobel Leave a Comment

Madison, Ohio, is corn country. My family's cottage is right on lake Erie; travel just a mile to the south and you are in one of Ohio's big farm areas. I grew up spending summers eating corn from those farms. Now that I'm a grown-up*, I worry about things like "why did we buy two dozen ears of corn for six adults? What do we do with all this extra grilled corn?"
*Alleged grown-up. Chronologically, I am aging. But I don't seem to get any more mature. My inner thirteen year old keeps breaking out.

I'm going to make grilled corn salsa, that's what I'm going to do with the extra corn. I refrigerate the corn in zip-top bags, pull it out a few days later, and make this salsa.
*Or at least a variation of this salsa - I always wing it. See the "notes" section for variations.

Corn and pineapple are a good combination. The sweet, crunchy corn goes well with the sweet, acidic, juicy pineapple, and the kick of onion and hot peppers gives it a tongue-tingling finish. This salsa was a hit - my dad and brother kept coming back for seconds.
*That's dad doing the taste test in the picture below.

Recipe: Grilled Corn and Pineapple Salsa

Ingredients:

  • 4 ears corn
  • 2 poblano peppers
  • 1 pineapple
  • 2 large tomatoes
  • ½ small red onion
  • juice of 2 limes
  • kosher salt to taste

Directions:
1. Grill the corn and pepper: Husk the corn. Stem and seed the poblano peppers, then cut them in half. Grill the corn and peppers over medium, direct heat for 8 to 10 minutes, until cooked through and a little charred. For details, see my grilled corn recipe and my grilled pepper recipe. (This step can be done a day or two ahead of time; refrigerate the corn and peppers until it is time to make the salsa.)

2. Prep the ingredients: Strip the kernels of corn from the corn cobs. Dice the pepper into ½" pieces. Trim the leaves and skin from the pineapple, remove the core, and cut into ½" chunks. Core the tomatoes, and cut into ½" pieces. Dice the red onion. Juice the limes.

3. Prepare the salsa: Put the corn, peppers, pineapple, onion, and tomato in a large bowl, and toss to mix. Pour the lime juice into the bowl, and toss again to coat. Sprinkle with kosher salt to taste, tossing to mix the salt evenly. Serve.

Variations:
*As I said in the opening, this recipe started as a way to use up leftover corn.  You don't need to make corn just for this recipe. Leftover boiled or grilled corn will both work; I happened to have grilled corn when I was making this.

*I like the contrast of grilled corn and fresh pineapple in this recipe, but if I had leftover grilled pineapple, I wouldn't hesitate to use it

*A fresh, green herb would go well in this salsa - say a couple of tablespoons of fresh thyme or oregano, or a quarter cup of minced cilantro or parsley.

*Another common substitution I make is diced, grilled green onions for the red onion.

*To kick up the heat, use jalapeno or serrano peppers instead of the poblanos. And, if you have leftover corn but not peppers, go ahead and toss them into the salsa raw. I had my grill fired up when I was making this salsa, so grilling the peppers was easy to do. I wouldn't fire the grill up just for the peppers.

Notes:
*Serve with tortilla chips as an appetizer, or as a side dish with fish, chicken or pork.

*As you can probably tell from the variations, this is a refrigerator velcro salsa - I used what is on hand. For example, I completely forgot the cilantro, which we had in the refrigerator. Doh! The keys are the corn, pineapple, and hot pepper. They give the salsa a sweet (corn), acidic (pineapple), hot (pepper) taste profile. I added the onions and tomatoes because it doesn't feel like a salsa to me without them, and I had them on hand. Like I said - refrigerator velcro.

What do you think? Questions? Other ideas? Leave them in the comments section below.

Related Posts:
This recipe is a great way to use up lefovers from Grilled Corn, Grilled Peppers and Onions, or Rotisserie Pineapple.

*Enjoyed this post?  Want to help out DadCooksDinner?  Subscribe using your RSS reader or by Email, recommend DadCooksDinner to your friends, or buy something from Amazon.com through the links on this site.  Thank you!

Vacation Cooking

August 2, 2010 by Mike Vrobel 2 Comments

My family has a cottage on Lake Erie.  When I go there on our annual vacation, I pack my Weber grill.  Everyone packs a grill for a beach vacation, right?

The trick to cooking on vacation is not to get too elaborate.  If I spend all day in the water, and the temperature is the 90s, I want to keep it simple; I'm too drained by the end of the day to go crazy.  Quick and simple is the key, so I can spend time splashing with my kids, not slaving over a hot stove.
*Um...but, you know me.  Later in the week you'll see the Paella I cooked while I was at the cottage.  That was a production, but it was worth it.  And the best meal I had?  Probably my brother's mixed seafood grill, inspired by a cover picture from Fine Cooking magazine. He went to Euclid Fish for lobster and mussels, cooked them on the grill, and served them with some melted butter.  Oh...it was amazing.  I can still remember wrestling with the lobster claws, trying to get all the meat out...
**Oh, and the big advantage to bringing the grill is you can cook outdoors.  When it is 95*F with 80% humidity, and the cottage doesn't have air conditioning, cooking outdoors is not a choice, it is a survival skill.  Once, I made the mistake of stir frying some green beans on the stove. It was while Matt was grilling the lobsters.  I couldn't just stand around; I was getting twitchy, and had to cook something, anything.  I was drenched in sweat by the time I was done.  The beans were good, though.


I learned simple summer cooking from my Mom.  She was my Original Locavore, stopping at all the  farm stands in Madison, Ohio, near our cottage.  She didn't do this for any big, ethical reasons; she just knew that if she bought great tasting local corn, tomatoes, and fruit, she wouldn't have to mess with it.  A little salt on some sliced tomatoes, some boiled corn, and all dinner needed was my dad or an uncle grilling some protein.  Even as a teenager, when I would eat anything that wasn't nailed down, I could see why Mom would seek out fresh, local food.  The flavors were eye opening - it tasted so much better when you bought it from the farm, the day it was picked.
*Even if I did get stuck with shucking a lot of corn.  Now I find it soothing, kind of a zen experience.


This week, I'll be sharing a couple of recipes I cooked at the cottage. What recipes do you pull out when you're on vacation, trying to beat the heat, and relax by the water?  Share them in the comments below.
*I want to apologize in advance - the pictures in this week's recipes are few and far between, because, well, I was on vacation!  

Related recipes:
Here are some summer favorites from DadCooksDinner:
Grilled Corn
BBQ Chicken
Grilled Monster Zucchini
Green Bean Stir-Fry (not recommended, but if you're interested...)

*Enjoyed this post?  Want to help out DadCooksDinner?  Subscribe using your RSS reader or by Email, recommend DadCooksDinner to your friends, or buy something from Amazon.com through the links on this site.  Thank you!

Zucchini and Summer Squash Salad

July 29, 2010 by Mike Vrobel 3 Comments

Time for another Omnivore's Dilemma: What do I do with all the zucchini? Or summer squash? Or both? Zucchini is one of the first summer vegetables I get in abundance in my CSA box.
Non-greens, non-lettuce category.

I might not be able to find anything else at the farmer's market, but there will always be zucchini. It is wonderful to have this bounty...but after the first few weeks I start to wonder. What do I do with it all?

Michael Symon gave me this idea in his Greek cooking class - a raw zucchini and summer squash salad with almonds and lemon dressing. I'm always trying to figure out what to do with zucchini come late July. Here, in the middle of March, was a new recipe, and a delicious one at that. The meaty squash is brightened by the lemon, and the nutty crunch of the almonds gives the salad extra depth. I saved the idea, waiting for the first summer zucchini. Now I get to share it with you!
*It was a long wait - the class was last March, and I was excited at the idea of a new way to cook squash.
**Yes, I get excited easily. But it something new to do with zucchini. And it is delicious! Normally, when it comes to zucchini, I'm somewhere between resigned acceptance and mild dread. "Oh, more zucchini...OK, I'll take it if no one else will." I've spent the last few months actually looking forward to summer squash. Thank you, Michael!

Recipe: Zucchini and Summer Squash Salad

Adapted From: Michael Symon, Live To Cook

Ingredients:

  • 2 lbs zucchini and summer squash, sliced thin
  • ½ teaspoon kosher salt
  • ½ cup slivered almonds (optional)

Lemon Dressing

  • Juice and zest of 1 lemon
  • 1 teaspoon honey
  • 1 garlic clove, minced or pressed
  • 2 teaspoon fresh thyme
  • pinch of salt
  • pinch of fresh ground black pepper
  • ⅓ cup extra virgin olive oil

Directions:
1. Prepare the zucchini: Trim the ends of the zucchini and squash, then slice thin on the bias. Put the squash in a colander, sprinkle with salt, and toss to coat evenly. Let sit in the colander for 15 to 30 minutes, so the salt can pull a little water out of the squash.

2. Prepare the salad: In a large bowl, whisk together all the lemon dressing ingredients until smooth. (See detailed lemon herb dressing instructions here.) Add the zucchini and squash to the bowl, and toss to coat with the dressing. Add the slivered almonds, and toss until well mixed. Serve.

Variations:
Squash: Use any variety of tender summer squash or zucchini.

Nuts: The almonds are optional; skip them, or replace them with another nut - pecans and pine nuts are two good replacements.

Herbs: In the original Michael used dill; I used thyme because I had it on hand. Any herb you have available would go well in the dressing.

Notes:
I like the ultra-thin slice I get by slicing with a vegetable peeler...but I get bored with peeling after the second squash, and switch to my chef's knife. If you're even more impatient than I am, use a mandoline or a food processor's thin slicing disk. Just remember to cut the squash as thin as you can.

Smaller squash are better with this recipe, because they'll have less seeds. I want 3 to 4 squash to get to my 2 pounds. If all I have are monster sized squash, I slice the meaty part of the squash away from the seeds lengthwise, then cut the squash into thin strips. (Or use the vegetable peeler trick, below, and stop peeling when you get to the seeds.)

Sweet or sour?: Michael Symon does not have honey in his recipe, and has an extra two lemons. I went with my regular lemon herb dressing. Both versions are delicious; my version has a hint of sweetness to it, and Michael's is much sharper. Use whichever version you think will go well with the rest of your meal.

What do you think? Questions? Other ideas? Leave them in the comments section below.

Related Posts:
Grilled Monster Zucchini
Zuni Zucchini Pickles
Mixed Summer Vegetables Provencal (Tian Provencal)

Adapted from:
Michael Symon, Live To Cook

*Enjoyed this post?  Want to help out DadCooksDinner?  Subscribe using your RSS reader or by Email, recommend DadCooksDinner to your friends, or buy something from Amazon.com through the links on this site.  Thank you!

Finest Cut Steak Cook-Off 2010

July 27, 2010 by Mike Vrobel 3 Comments

I went in to this contest determined to do three things:

  1. Have a good time
  2. Make sure everyone around me had a good time
  3. Cook the steak properly.  (I hate it when I overcook a steak.  Hate it!)

I think I did a better job cooking my steak this year than I did last year, but it wasn't enough to get me one of the prizes. The judges seemed to favor more elaborate recipes this year. All the winners had extra toppings, and sauces; I like my steak to be, well, just a great steak. Last year that won me the contest. This year, this set of judges...it wasn't what they were looking for.
My story from last year: I was telling my parents about the contest.  I said I won with a plain steak, without an elaborate sauce, which allowed the beef to shine.  Mom's response was: "What do you mean you didn't have a sauce? That's the best part!" My own mother...

All the entries I sampled were great. I loved mine, of course, but I'm biased. I loved the other ones I tasted as well. The judges had their work cut out for them - I would have hated to be a judge and have to pick one as "best".  They were all very, very good.
Yes, I'm obsessing. I'm a little disappointed that I didn't win anything. I didn't think I'd be lucky enough to come in first place two years in a row, but I was hoping to get one of the top four spots, and a West Point Market gift certificate.  I was going to go straight to their wine section. Oh, well, I guess I have to spend my OWN money on wine. Darn!

Jack Hart's Steak Newburg -
This took fourth place.  I didn't see his amazing
 presentation until he sent me this picture.

What about my goals? I had a great time. I was last on the turn-in schedule, so I had a couple of hours to kill before I could start cooking. I filled the time by chatting with my fellow contestants and their friends. It's fun to be surrounded by people who are as obsessed about food as I am, sharing notes and exchanging tips.

I got to talk a lot with the contestants in the tents next to mine: Bill Moll, John Kusinski, and (the eventual winner) Stephanie Yost.
*Stephanie's family is a hoot - her son is a character, and her husband and I had a long discussion about the brick pizza oven he just built in their back yard. Like I said - it's fun to be around people who are as obsessed about food as I am!

**Also, thank you to John Kusinski and Jack Hart for sending me the pictures you see.  Thanks, guys!
Congratulations to Stephanie Yost on her victory. Stephanie, it couldn't have gone to a nicer person. And your steak was delicious, too!

Thanks to West Point Market for sponsoring the contest, and Lisa Abraham for doing such a great job as the Master of Ceremonies. I'll definitely be entering again next year - it's a lot of fun even if you don't win.


Here's a video from the Taste of Akron - they interviewed a bunch of the contestants; we start about thirty seconds into the video (I'm at 1:15).
Taste of Akron video [ohio.com]

Related Posts:
Grilled Ribeye Steaks with Mediterranean Herb Butter - last year's winning recipe
Grilled Ribeye Steaks with Chipotle Lime Butter Baste - this year's recipe

*Enjoyed this post?  Want to help out DadCooksDinner?  Subscribe using your RSS reader or by Email, recommend DadCooksDinner to your friends, or buy something from Amazon.com through the links on this site.  Thank you!

Meet me at the Steak Cook-off

July 22, 2010 by Mike Vrobel 2 Comments

Tonight is the Finest Cut Steak Cook-off at the Taste of Akron. The cook-off is from 6 to 8PM at Hardesty Park in Akron. I'll be there, defending my title with this recipe:

Grilled Ribeye Steak with Chipotle Lime Butter

Wish me luck*, and if you're at the Taste of Akron, stop by and say hello!

*Don't tell the judges...but I prefer my winning recipe from last year: Grilled Porterhouse with Mediterranean Herb Butter. I've been tweaking this year's recipe, right up to the last minute, trying to balance the steak, chipotle, lime and butter. I'll find out what the judges think of it tonight!

[Update: 9:47PM] I was shut out! Darn! But I had a great time, cooking, chatting, and sharing stories with my fellow contestants. Congratulations to Stephanie Yost, this year's steak cook-off winner. Stephanie and I were neighbors last year, and she and her entourage (especially her son and cooking assistant) help make the cook-off such a fun time. I'll have more on the cook-off soon; some of my fellow contestants took pictures, and I'm waiting for their email. Again, congratulations Stephanie!

Green Bean Stir-Fry

July 20, 2010 by Mike Vrobel 1 Comment

The beans are coming! The beans are coming!

It's green bean season at my CSA. Pretty soon, maybe even by the time you're reading this, I'll have all you can pick green beans. Have I mentioned that Diane loves green beans before? Yes? Well, this time of year is heaven for her. Normally, she feels a little competition with our CSA. Diane is proud of her garden, and wants to make sure that I'm cooking HER vegetables first, before the CSA veggies. But not when it's green bean season. That's the one time of year she is 100% behind the CSA. She'll take the kids to Crown Point for the you-pick-em beans.

My first thought when I see a new vegetable at the CSA is "stir fry it!". Beans aren't new, but the idea still stands. I love the wave of fresh green beans...at first.  After a month or so, I get a little bored. When I get tired of steam-sauteed beans, or grilled beans, or pickled beans...my stir fry technique is waiting to make them interesting again.

I made a major change in my stir fry technique recently. Kenji Alt inspired me to try a real carbon steel wok with his Wok 101 series. He challenged the skillet vs wok rules that I learned from my culinary teachers, Pam Anderson and Cooks Illustrated. CI has said, over and over, that a skillet is better than a wok on an American stove. Kenji (who worked at CI for a while) says that, while they usually know what they're talking about, they missed the boat with woks:

What I haven't seen in print is anyone saying anything about how the food actually tastes, and I'm certain it's because the same folks conducting the tests didn't actually know how to use a wok properly. Fortunately, I've conducted blind taste tests myself on identical dishes prepared in a skillet and in a wok on the same range, and I can tell you with absolute certainty that stir fries cooked in a well-seasoned wok taste better than those cooked in a 12-inch skillet.
[Kenji Alt, Stir Fry 101, SeriousEats.com]

Now, them's fightin' words. (Read the rest of that link for Kenji's thoughts on why. He can't give a scientific reason...which for him seems like an admission of a personal fault.) Of course, being a gadget obsessed cook, I saw this as an excuse to buy a carbon steel wok. Especially when the wok Kenji recommends is under $30. I figured I could try it out and see who I agreed with - Kenji or CI. Now, this recipe is my first attempt, but Kenji is on to something here. I liked the stir-fry results with the wok, and I think they may have been better than with my frypan. This was my first test run - I'll need to do more research. When is Bok Choy season again?
*While Kenji says he prefers the carbon steel to the All-Clad wok, I know what I'm going to be buying at the next All-Clad sale - more testing is required. Who hoo! New toys!
**Don't have a wok?  Forget everything I said above, and use a fry pan or skillet.  It's worked fine for me for years.  This is probably a case of the best being the enemy of good enough.

Recipe: Green Bean Stir-Fry

Adapted From: Cooks Illustrated Magazine: Sichuan Green Beans


Ingredients:

  • 1 lb green beans (or yellow beans), trimmed
  • 2 cloves garlic
  • 1 inch piece of ginger
  • 1 scallion
  • 2 tablespoon peanut oil

Sauce:

  • 1 tablespoon soy sauce
  • 1 tablespoon dry sherry
  • 1 tablespoon chili-garlic paste
  • 1 teaspoon honey
  • 1 teaspoon cornstarch
  • 1 teaspoon sesame oil

Directions:
For a Stir-Fry overview, see my Stir Fry Basic Technique.


1. Prepare the vegetables and sauce: Trim the green beans, and set aside. Mince the garlic and ginger, slice the scallion, and combine the garlic, ginger, and white part of the scallion; save the green part of the scallion for a garnish. Combine the sauce ingredients, and whisk until the corn starch dissolves.

Trimmed beans

Minced garlic and ginger

Ready to start stir-frying

2. Preheat a wok or pan: Put the peanut oil in a 12" to 14" wok or fry pan and heat over high heat until just showing wisps of smoke.

3. Stir Fry the beans: Add the beans to the pan and cook, stirring and tossing constantly. The beans will turn spotty black almost immediately; that's OK, just keep them moving and they won't burn. After five minutes or so the beans will wrinkle up and soften. Test for doneness by biting into one of the bigger beans - it should be cooked through, but still have some crunch left in it. Make a hole in the center of the pan, and add the garlic/ginger/scallion mix. Cook for 15 seconds, or until you can smell the garlic, then stir into the beans. Drizzle in the sauce, and toss until the beans are coated. Serve.

Variations:
Season the oil: This is another addition to my basic stir-fry technique that adds some finesse to the end result. Add a peeled clove of garlic and a quarter-sized slice of ginger to the oil after it is heated, and let cook until browned, about 30 seconds. Remove with a slotted spoon, then continue with the recipe. (This is not absolutely necessary, but adds an extra hit of garlic and ginger to the dish that I like. Just make sure you get all of the garlic and ginger out - anything left in the oil will burn.)

Simple weeknight version: Replace the sauce with 2 tablespoon soy sauce and 2 tablespoon hoisin sauce.

Notes:
Don't let the sauce sit in the pan. The cornstarch will thicken the sauce quickly once it hits the heat of the pan, so make sure you toss the beans quickly, or you will have a big blob of sauce.
Ummm...not that I did this because I was taking pictures for a blog or anything...

*Don't worry about the beans blackening a bit at first - black spots are a sign that your wok is hot enough. If you let them sit, though, they will burn - if you have to step away from the pan for more than a minute, make sure it is off the burner. Or, turn the heat down to medium-high and cook for longer, say ten minutes total. Then you don't have to watch the beans so closely, but they don't quite get the seared exterior and crunchy interior that makes a great stir fry.


What do you think? Questions? Other ideas? Leave them in the comments section below.

Related Posts:
Swiss Chard Stir-Fry
Bok Choy Stir-Fry With Basil Lemon Sauce

Adapted from:
Cooks Illustrated Magazine: Sichuan Green Beans

*Enjoyed this post?  Want to help out DadCooksDinner?  Subscribe using your RSS reader or by Email, recommend DadCooksDinner to your friends, or buy something from Amazon.com through the links on this site.  Thank you!

Shameless Plug: Vote for me in the Take on Turkey Challenge!

July 19, 2010 by Mike Vrobel Leave a Comment

Voting is now open in the Honeysuckle White Take On Turkey Challenge. Since the results are entirely based on internet voting, how could I lose?

I'm going with the shameless approach:

Vote for me! Vote early and vote often, even if you're dead!* Please?
*Yes, I learned a few tricks on my Chicago vacation. why do you ask?

Here's the link:

http://www.honeysucklewhite.com/TakeOnTurkey/

Thank you!

Related posts:
Recipe: Rotisserie Turkey Legs, Brined and Honey Basted
Video: Rotisserie Turkey Legs

Family Dinners and Busy Kids

July 15, 2010 by Mike Vrobel 6 Comments

Dad is ready to pitch to the kids

We have always made family dinner a priority. This has been tested more in the last couple of months than at any time in the decade I've been cooking. Our kids are getting busy, and it feels like it's just getting started.

In the past, we've had dinner conflicts one night a week, sometimes two. The kids would have religion classes, Ben would have one weeknight sports game (soccer or baseball). I would have to hurry a meal onto the table one or two nights a week. This was workable. This spring, both Ben and Natalie were in sports. This was resulting in three nights a week, maybe four, of trying to get a meal cooked, eaten, and cleaned up in the hour between work and game time.
Now, in spite of what you see on this blog, I don't make elaborate meals on weeknights. I cook for 30 to 45 minutes, and sometimes an hour when it's a really hands-off dish. I have dinner on the table by 6:30PM. If I go past that, Diane gets a little peckish. With our game schedules, we have to be out the door by 5:30. That doesn't leave me much time.

Now, don't get me wrong; I want our kids playing sports. Ben loves it. Being part of the team, running around outside, playing games...he just lives for it. I enjoy it too; I have been helping out with coaching for a few years now, and it is a lot of fun to work with the kids.
This is in spite of my complete lack of coaching knowledge. I'm a sports fan, but everything I know about coaching is what I've picked up from the kids and other coaches. For example...I've been coaching soccer for the last two years, in spite of never watching a game until Ben started playing. Luckily, at this age, coaching is more about pointing them towards the right goal, yelling "spread out, everyone!" a lot, telling them they did a great job, and making sure there are snacks after the game.

But...I feel like I'm robbing Peter to pay Paul. And I think it's only going to get worse. Tim's already kicking a soccer ball around on the sidelines while watching his big brother play, and he will be old enough to start in the Fall. Natalie is doing well with her violin lessons. When all three are going in different directions...well, I get nervous just thinking about it.
*I can't imagine what it would be like if Ben was on a travelling team. Those schedules sound like a real grind.
**It doesn't help that, on top of all this, Diane is taking evening classes, and I'm trying to find the time to blog about home cooking...

Here are Dad Cooks Dinner strategies for busy weeknights:

1. Have a collection of ultra-quick meals. One hour before game time is not when I want to be fussing with dinner. This is when the basic techniques I've learned really come into play. Forget thirty minute meals - if it takes more than twenty minutes for everything, it is taking too long. I slap together a quick grilled or sauteed protein, a steam-sauteed vegetable, a salad with a basic vinaigrette, and a quick starch. If it's going to take any real time or attention, it's going to have to cook another night.

2. Cook with leftovers in mind. When I have time earlier in the week, chilis, soups, and stews give me leftovers that I like to eat - they taste better after a rest in the refrigerator. Reheat, whip up a salad, serve with some bread, and dinner is ready. Also, side dishes are good to have as leftovers. Make a double batch of vegetables or starch, store in microwave-safe two quart containers, and you can just nuke and eat.

3. Cheat shamelessly. Hey, kids! How about Peanut Butter and Jelly sandwiches for dinner? Hot dogs and baked beans? I know...let's have breakfast for dinner - who wants eggs? Or, my personal favorite, Dad's Super Sub Sandwich - slice a loaf of french bread in half, and pile things on. Add lunch meat, pickled peppers, bag salad, mustard, oil and vinegar...whatever you want.

In other words - I'll do whatever it takes. Family dinner is that important to me. Of course, I'm not perfect; every now and again we'd wind up at our local Thai restaurant. But that only happened a couple of times over the spring and summer, so I think I did a pretty good job of taking care of my family's competing needs.

What are your experiences? How do you balance family dinner and kids activities? Any go-to techniques or recipes to share? Leave them in the comments, below.

Related Posts:
Weekly Dinner Plans
Basic Technique: Saute with Pan Sauce
Much Depends on Dinner: Michael Ruhlman at TEDxCLE

Suggested Reading:
Pam Anderson How to Cook Without a Book

*Enjoyed this post?  Want to help out DadCooksDinner?  Subscribe using your RSS reader or by Email, recommend DadCooksDinner to your friends, or buy something from Amazon.com through the links on this site.  Thank you!

Grilled Pork Chops Agrodolce

July 13, 2010 by Mike Vrobel 6 Comments

It started with the cover of Saveur magazine. Grilled Pork Chops Agrodolce, Roman style (aka Maiala in Agrodolce, Italian for sweet and sour pork). The cover photo stopped me in my tracks. Two pork chops, covered with a dark red glaze and a casually placed sprig of rosemary.  It looked so simple, and so delicious.

The recipe is as simple as the photo, and perfectly suited for grilling a weeknight dinner. I've adjusted it a bit for my own use. In the original, you reduce balsamic vinegar and honey to make a syrupy glaze, then stir in some butter and a sprig of rosemary. I can't reduce vinegar in my house; my loving wife, Diane, has been very sensitive to the smell of boiling vinegar since she was pregnant with Tim, our youngest. I trust the heat of the grill to thicken the glaze for me, and I upped the amount of honey to make up for the lack of reduction.
*My first thought when I saw the recipe was "Rosemary herb brush!"
**And I added crushed garlic, because I just can't help myself sometimes.

Don't let the simple set of ingredients fool you.  The result in a complex set of flavors.  The sweet/sour taste of balsamic vinegar is balanced by a big hit of sweet from the honey. Then you get the pine scent of rosemary, and an undertone of heat from cracked black pepper*.
*Black pepper is big in Rome, and has been since the spice route ran to Europe through the Roman Empire.

I also enjoy how different the flavors are from the Italian-American tradition I'm used to. There is not a tomato in sight, but you can't eat these pork chops and think the taste is anything but Italian. Give this recipe a try; you'll be impressed with the results.

Recipe: Grilled Pork Chops Agrodolce (Sweet and Sour Pork, Roman style)

Adapted From: Sweet and Sour Glazed Pork Chops, Anya von Bremzen, Saveur magazine [saveur.com]

Equipment:

  • Grill (I used a Weber Summit 650. Here it is.)
  • Rosemary herb brush made with 2 to 3 sprigs of rosemary (or use a regular basting brush, and add a little more rosemary to the glaze)

Ingredients:

  • 6 pork loin chops, bone in (¾" to 1" thick)
  • 3 teaspoon salt (½ teaspoon per chop)
  • 1 ½ teaspoon coarsely ground black pepper (¼ teaspoon per chop)

Agrodolce glaze

  • ¼ cup balsamic vinegar
  • 3 tablespoon honey
  • 2 tablespoon butter
  • 2 tablespoon extra virgin olive oil
  • 2 cloves garlic, crushed
  • ½ teaspoon fresh rosemary, minced
  • ½ teaspoon fresh ground pepper

Directions:
1. Prepare the chops, glaze and herb brush: Sprinkle the pork chops evenly with the salt and pepper, and let them rest at room temperature while the grill heats. Combine the glaze ingredients in a microwave-safe dish (I use a Pyrex measuring cup), and microwave on high for 1 minute, until the butter is melted and you can just smell the garlic. Tie the sprigs of rosemary together at the stems to make a brush.

2. Prepare the grill: Set your grill up for cooking at direct medium-high heat, with a section set up for indirect heat. For my Weber Summit, this means turning all the burners to high, and letting the grill preheat for fifteen minutes. Then I turn the burners down to medium-high, brush the grates clean, and wipe them with a paper towel dipped in vegetable oil.

3. Grill the chops: Put the chops on the grill. If cooking on a gas grill, keep the lid closed while cooking; if using charcoal, keep the lid open. Grill the chops for 3 minutes, or until you have good grill marks on the bottom, and the chops release easily from the grate. Rotate the chops 90 degrees, and cook for another 3 minutes, until the bottom side is well browned. Flip the chops, and cook for another 3 minutes, then rotate 90 degrees. Baste the chops with the agrodolce glaze, let them cook for one minute, then flip and baste with the glaze again and cook for one more minute. At this point, the chops should be done; their internal temperature should be 140*F measured at the thickest part with an instant read thermometer. Remove the chops to a platter, baste them one more time with the glaze, then let them rest for ten minutes before serving.

Variations:
*Add some heat: The fresh cracked pepper gives these chops a bit of heat; if you want more, add ¼ teaspoon of red pepper flakes to the glaze.

Notes:
*For a quick weeknight meal, serve these chops with grilled peppers and onions, a salad, and orzo pilaf topped with grated pecorino romano.

What do you think? Questions? Other ideas? Leave them in the comments section below.

Related Posts:
Grilled boneless pork chops, brined and honey glazed
Grilled thin pork chops, soy brinerated

Adapted from:
Adapted From: Sweet and Sour Glazed Pork Chops, Saveur magazine [saveur.com]

*Enjoyed this post? Want to help out DadCooksDinner?  Subscribe using your RSS reader or by Email, recommend DadCooksDinner to your friends, or buy something from Amazon.com through the links on this site.  Thank you!

Video: Rotisserie Turkey Legs

July 8, 2010 by Mike Vrobel 9 Comments

This is my video entry in the Take On Turkey Challenge:

I've been meaning to do video blogs for a while now, but I could never get myself started. A large part of why I signed up for the contest was to force myself to make a video.  The contest gave me a deadline, which does wonders for focusing my attention.
What did I learn?

1. Speak up! And smile! I have a bad habit of mumbling when I do public speaking. I had to constantly remind myself to project my voice when I was filming, particularly in the outdoor scenes. And would it kill me to smile a little, once in a while?
*I took a public speaking class a few years ago where they filmed you giving a presentation in front of a group...and then made you watch it. You learn a lot that way, but they told us to watch it once to get all the negative thoughts out, then watch it again to see what you did right. Because that first time through...holy cow. Watching myself on video is painful; I just pick myself apart. "Speak up!...wow, I should lose ten pounds...slow down, you're mumbling..." At least I know I'm going to do it, so I can get past that and look for what went right to include in the video.

2. Watch out for the charcoal chimney! When I set up the grill for indirect heat, I put my chimney on the patio stone I keep next to the grill, like I always do. Then I turned back to the camera and started filming the "Welding gloves are a griller's best friend!" bit. Except it came out "Welding gloves arOUCH!" as I backed into the blazing hot charcoal chimney.
*Even worse, I accidentally deleted the shot while I was cleaning out some other bad shots. I was going to include it as an outtake, but it's gone now. So I have a crescent shaped scar on my right calf, and nothing to show for it other than this story...

3. My kids are cute! But I knew that already. Watch the closing scene of the video to see what I mean.

4. My wife is patient! But I knew that already, too. She was my second unit director, assistant editor, and technical expert. I'm the computer guy in the house, and normally I have to answer the technology questions. But she's had more experience with iMovie than I have. She had to show me the basics so I could get going. Thank you, dear!
*And...we're both opinionated, so she had to put up with me while doing it:

Diane: That section is too jerky. You need a transition in there.

Me: But...that's the effect that I'm looking for! Bang, bang, bang, legs on the spit.

Diane: But it's...(takes a deep breath)...ok, whatever...

5. You can buy your neighbors off with turkey legs! My next door neighbor was power washing his deck at the same time I was shooting this video. I kept trying to film around him; I'd wait for him to stop, then try to get my shot. Between my flubbing my lines, and him starting up again in the middle of them, I was struggling. I went over, explained what I was doing, and asked him if he could take a break. I promised him a turkey leg when I was done, and he quickly agreed. His daughter told me later that they fought over the turkey leg I gave them. So, I have at least one positive review for this recipe...

What do you think? How was my directorial debut? Any other recipes you'd like to see me do in video? Leave them in the comments section below.

Related Posts:
Recipe for Rotisserie Turkey Legs, Brined and Herb Basted


Check out my cookbook, Rotisserie Grilling.

Everything you could ask about the rotisserie,
plus 50 (mostly) new recipes to get you cooking.

It's a Kindle e-book, so you can download it and start reading immediately!


*Enjoyed this post? Want to help out DadCooksDinner? Subscribe to DadCooksDinner using the RSS or Email options on the right, link to this post from your blog, recommend DadCooksDinner to your friends, or buy something from Amazon.com through the links on this site. (Like my Rotisserie Grilling cookbook...)

Rotisserie Turkey Legs, Brined and Honey Garlic Basted

July 6, 2010 by Mike Vrobel 10 Comments

Turkey legs on a rotisserie spit in a kettle grill
Rotisserie Turkey Legs

State fair turkey legs have always been a weakness of mine; they make me want to go to the state fair just so I can get one. I love eating food off the bone. There is something primal about eating food that comes with a built-in handle.

Me, Ben, and a Turkey Leg at Walt Disney World

(There's something so Henry VIII about gnawing a turkey leg. I want to give orders to my royal subjects, while waving the drumstick like a baton. Luckily, I made it through thanksgiving without me shouting "off with their head!" at the table. So far, at least.)

I wanted to duplicate those state fair turkey legs on the rotisserie. When Shady Brook Farms invited me to participate in their Take On Turkey Challenge, I knew exactly what I wanted to make. I played with this recipe for a while*, and I think I've nailed it. This recipe gives me a crispy, smoky turkey leg, tender to the bone, with a sweet, garlicky, herby glaze. Give it a try, and let me know what you think.

(Much to my surprise, my family was OK with eating a lot of turkey legs. And I mean, a LOT of turkey legs. Thanks, guys!)

Dad and kids with turkey legs
Taste Test

Notes:
*I have four forks for my spit, so theoretically I can cook up to eight legs at a time. That would be a tight fit on my kettle grill, but I think it would fit. On my monster gas grill? No problem.

*Add a hunk of smoking wood to the coals! I forgot to do that for the video, but a fist-sized chunk of hickory, oak, cherry or apple wood gives an extra layer of smoky goodness to the legs.

What do you think? Questions? Other ideas? Leave them in the comments section below.

Related Posts:
Rotisserie Turkey Legs video recipe for the contest
Rotisserie Turkey Breast, Dry Brined
Rotisserie Chicken Legs, Churrascaria Style
Click here for my other rotisserie recipes.


Check out my cookbook, Rotisserie Grilling.

Everything you could ask about the rotisserie,
plus 50 (mostly) new recipes to get you cooking.

It's also available as a Kindle e-book, so you can download it and start reading immediately!


*Enjoyed this post? Want to help out DadCooksDinner? Subscribe to DadCooksDinner using the RSS or Email options on the right, link to this post from your blog, recommend DadCooksDinner to your friends, or buy something from Amazon.com through the links on this site. (Like my Rotisserie Grilling cookbook...)

Grilled Ribeye Steaks with Chipotle Lime Butter Baste

July 1, 2010 by Mike Vrobel 3 Comments

A year ago, I won the Finest Cut Steak Cook-Off at the Taste of Akron. Here is the recipe I'm going to use to defend my title: Grilled Ribeye steaks with Chiptole Lime Butter Baste.

I had a great time at the cook off last year...and not because I won. It was fun hanging out with other obsessed home cooks. People like me, who would sign up for a contest like this.
*I still don't envy the judges at this contest. Taste is so subjective, and all the steaks I had a sample of were great. I would have hated to have to choose among them. I thought mine was just a little better, of course, but I'm biased...

I couldn't wait to get back out there, but I didn't want to just rest on my laurels by cooking the exact same recipe I did last time. I tried a few marinades and spice rubs, and they were good, but they tended to cover up the taste of the beef. The prime steaks West Point Market supplies for the contest are amazing. I want that huge, beefy flavor to be front and center. I kept coming back to the dry brined, herb butter basted technique that won the contest for me last year. The flavor of the herbs, garlic and butter don't cover up the beef, they add to it.

In the end, I stopped trying to out think myself.  I did what I should have done in the first place; I followed my own advice from this website. I have a basic technique, dry brined steaks with a herb butter baste, and it working well. It is time to add a flavor variation to that basic technique.
*Yes, I know.  Listen to my own advice?  What kind of crazy idea is that?

I changed my herb butter around to make it more complex; in addition to the butter and garlic, I added a hint of heat with the chipotle, and a dash of fruity, sour taste from the lime. Oregano and cilantro in the herb brush give the flavors a final tweak. See? A couple changed ingredients, and I've moved from the Mediterranean to Northern Mexico.

Finest Cut cook-off, here we come!

Recipe: Grilled Ribeye Steaks with Chipotle Lime Butter Baste

Cook time: 12 minutes

Equipment:

  • Charcoal Grill (I used a Weber kettle, like this one.)
  • One bunch thyme, a sprig of oregano, and some cilantro stems, tied together to use as a basting brush (or, you can just a regular basting brush. I like the Oxo Silicone Basting Brush.)

Ingredients:

  • 2 Ribeye steaks, 1.5" thick, bone-in (should be roughly 1.25 to 1.5 pounds each, but go for thickness over weight)
  • 1 clove garlic, peeled and sliced in half
  • 3 teaspoon kosher salt
  • 1 teaspoon fresh, coarsely ground black pepper

Chipotle Lime Butter

  • 4 tablespoon unsalted butter
  • 2 cloves garlic, minced or pressed through a garlic press
  • 1 tablespoon honey
  • 1 ½ teaspoon pureed chipotle en adobo (about ½ of a pepper, with some of the sauce)
  • zest of one lime
  • pinch kosher salt
  • pinch fresh ground black pepper

Directions:
1. Pre-salt the steak: One to two hours before cooking, season the steaks. Rub the sliced garlic clove over the bone on the ribeye to rough it up, then rub it over the meat. Sprinkle the salt evenly onto the steaks; roughly ¾ teaspoon of kosher salt per side, 1.5 teaspoon total per steak. Pat the salt into the steak, then let them rest at room temperature until ready to cook.
*If there isn't time to salt the steaks *at least* a half an hour ahead of time, then wait until just before the steaks go on the grill.

2. Prepare the grill: Prepare your grill for cooking with indirect, medium-high heat, then clean with your grill brush. For my Weber kettle, I light a chimney starter* ¾ full of charcoal, wait for it to be covered with ash, then pour it evenly over one side of the grill grate. This gives me half the grill on the heat, and half off the heat.
*I highly recommend the Weber Chimney Starter, because it is larger than most chimney starters. It holds 5 quarts of charcoal, which is exactly the right size for cooking this recipe.

3. Prepare the Chipotle Lime Butter Baste, and herb brush: While the grill heats up, put the chipotle lime butter baste ingredients in a small bowl or ramekin. Microwave on high until the butter has just melted, and the garlic is starting to sizzle, then stir to combine. (Or, put the ingredients in a grill safe pot or cup, and melt them on the grill while you sear the steaks.) Make the herb brush by tying the thyme, oregano, and cilantro together at the base of their stems.

4. Sear the steaks: Pat the steaks dry with paper towels, then sprinkle with the black pepper. Put the steaks on the grill, over the coals. Cook uncovered, for 2-3 minutes, until the steak is just starting to brown a little. Rotate the steak 90 degrees (don't flip yet), and cook another 2-3 minutes, until well browned. Flip the steak, and cook another 2-3 minutes, rotate 90 degrees, then cook a final 2-3 minutes until well browned.
*Summary of the searing pattern: 3 min, rotate, 3 min, flip, 3 min, rotate, 3 min, done.

5. Indirect cook the steaks until done: Move the steaks to the side of the grate that is not over the coals. Brush both sides of the steak with the chipotle lime butter, using the herb brush. Check the internal temperature in the thickest part of the steak, away from the bone. They are medium rare with an internal temperature of 120*F to 125*. If the steak is not done yet, cover the grill and cook for 2 minutes, then check the temperature again. If they're still not done, baste with the herb butter, flip the steaks, and re-cover the grill. Continue to cook, checking the temperature, basting with the herb butter, and flipping the steaks every couple of minutes. Depending on the heat of the grill, they should be done in another 2-6 minutes.
*For rare, cook to an internal temperature of 115*F to 120*F. For medium, cook to an internal temperature of 125*F to 130*F. If you want the steaks ruined well done, just keep going. 150*F or higher will be what you want. Just don't tell me about it afterwards.

6. Serve the steaks: Brush your serving platter with a little of the chipotle butter. Remove the steaks to the platter, and give them one more brush of the chipotle butter. Rest the steaks for ten minutes before serving. Serve the steaks whole on the bone, or carve the meat off the bone and cut into ½" thick slices.

Variations:
*Other cuts: this recipe works well with any tender, thick cut, bone in steak. T-Bones and Porterhouses are good substitutions.

*Gas grill: Set the grill up for indirect cooking by preheating with all burners on high for 15 minutes. Leave one burner on high, and turn the others off. Do the searing step over the lit burner, and the indirect step just next to it. Cook with the cover down throughout the cooking time, and expect the searing step to take at least 3 minutes per rotation, and 6 minutes per side.

Notes:
*Salting the steak early: Letting the steak rest for an hour or two after salting results in the steak brining in its own juices. The salt starts pulling juices out of the steak immediately, but by about a half an hour of resting time both the juices and the salt are being re-absorbed into the steak, due to osmosis. This results in the salt being pulled deeper into the meat of the steak, seasoning it more thoroughly. However, if you don't wait at least a half hour, then the juices are just pulled out, leaving you with a dried out steak. If you want to, you can do this overnight; just make sure the steak is wrapped in plastic wrap and refrigerated until about an hour before cooking.

*Serve with a tortillas, salsa, pinto beans, and guacamole.

*Oh, and of course, serve with a good bottle of wine. I know margaritas are the Tex-Mex favorite, but I just don't like something that sweet when I'm eating a steak. I'd recommend a good Cote Du Rhone, or maybe a Rose if the weather is warm enough, but let your taste be your guide.

*If you can get Prime grade meat for this, do it. The taste is worth the extra expense. Too pricey for you? I would pay for the prime meat, but buy less of it, and eat less high-quality steak. I usually cut these steaks in half, and serve four people with them.

Questions? Comments? Other ideas? Leave them in the comments section below.

Related Posts:
Click here for my Grilled Flank Steak with Chimichurri recipe.
Click here for my When Should you Salt Meat? article.

Inspired by:
Cook's Illustrated Magazine
Serious Barbecue by Adam Perry Lang

*Enjoyed this post?  Want to help out DadCooksDinner?  Subscribe to DadCooksDinner using the RSS or Email options on the right, link to this post from your blog, recommend DadCooksDinner to your friends, or buy something from Amazon.com through the links on this site.  Thank you!

  • « Previous Page
  • 1
  • …
  • 29
  • 30
  • 31
  • 32
  • 33
  • …
  • 37
  • Next Page »

Welcome to Dad Cooks Dinner!

I'm Mike Vrobel, a dad who cooks dinner every night. I'm an enthusiastic home cook, and I write about pressure cooking, rotisserie grilling, and other food topics that grab my attention.

More About Me →

Popular

  • Three bowls of cooked Pinto Beans on a wood table
    Instant Pot Pinto Beans (No Soaking)
  • Pressure Cooker Beef Shank (Osso Bucco)
  • Pressure Cooker 7 Hour Leg of Lamb (in 90 minutes)
    Pressure Cooker 7 Hour Leg of Lamb (in 90 minutes)
  • Pressure Cooker Brown Jasmine Rice
  • Grilled Tomahawk Steak (Long Bone Ribeye, Reverse Seared)
    Grilled Tomahawk Steak (Long Bone Ribeye, Reverse Seared)
  • A green bowl full of chicken noodle soup
    Instant Pot Rotisserie Chicken Noodle Soup

Seasonal

  • A bowl of asparagus risotto
    Instant Pot Asparagus Risotto (Pressure Cooker Recipe)
  • Grilled Butterflied Chicken with Garlic Butter
  • Sous Vide rack of lamb sliced into chops
    Sous Vide Rack of Lamb with Dijon Bread Crumb Crust
  • A bowl of beef stew with asparagus, carrots, and radishes.
    Instant Pot Spring Vegetable Beef Stew
  • A Rotisserie Chicken (Pollo Asado)on a platter of shredded cabbage
    Rotisserie Chicken Pollo Asado
  • Rotisserie Pork Shoulder Roast with Carolina Mustard BBQ Sauce
    Rotisserie Pork Shoulder with South Carolina Mustard Barbecue Sauce

Footer

↑ back to top

About

  • Privacy Policy

Newsletter

  • Sign Up! for emails and updates

Contact

  • Contact

Copyright © 2025 Dad Cooks Dinner