DadCooksDinner

  • Home
  • Rotisserie
  • Recipes
  • Tools
  • Books
  • Merch
menu icon
go to homepage
  • Recipes
  • Books
  • Tools
  • Merch
  • About
subscribe
search icon
Homepage link
  • Recipes
  • Books
  • Tools
  • Merch
  • About
×
Home » Recipes

DadCooksDinner Needs to Lose Weight. Again.

January 4, 2011 by Mike Vrobel 13 Comments

*Or: Does this food blog make me look fat?

Last year, I wrote my triumphant "how I lost weight, and kept it off" post. I'm not as thin as I was at my lowest weight, but I've kept off 40 pounds for a long time.

In October, my workplace offered a health screening. I went, to see where I was at. The results were not good. I weighed 228 pounds, about 10 more than I did at the beginning of the year. Even worse, my blood pressure is up, and while my overall cholesterol is OK, my good cholesterol is low. This worried me; my blood pressure had been good ever since I went through my original weight loss. And I was surprised I weighed as much as I did.  My weight had been stable at 220, plus or minus a few pounds, for quite a while.  228 was heavier than I wanted to be.

I decided to get back to how I lost weight in the first place:

  • Track my calories, and reduce overall eating
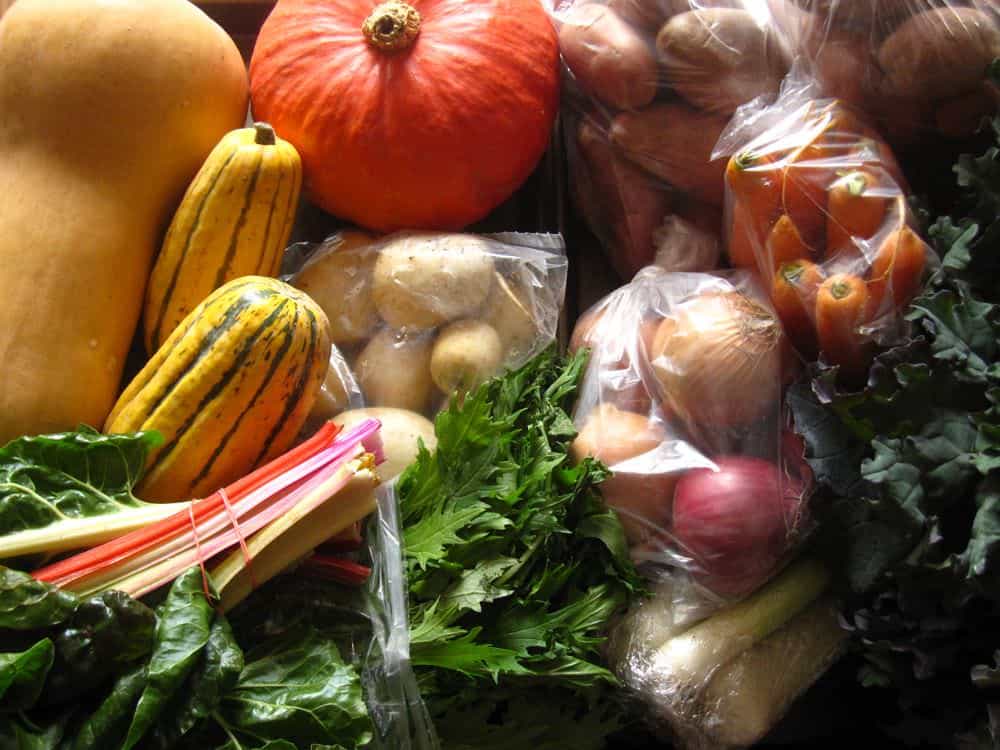
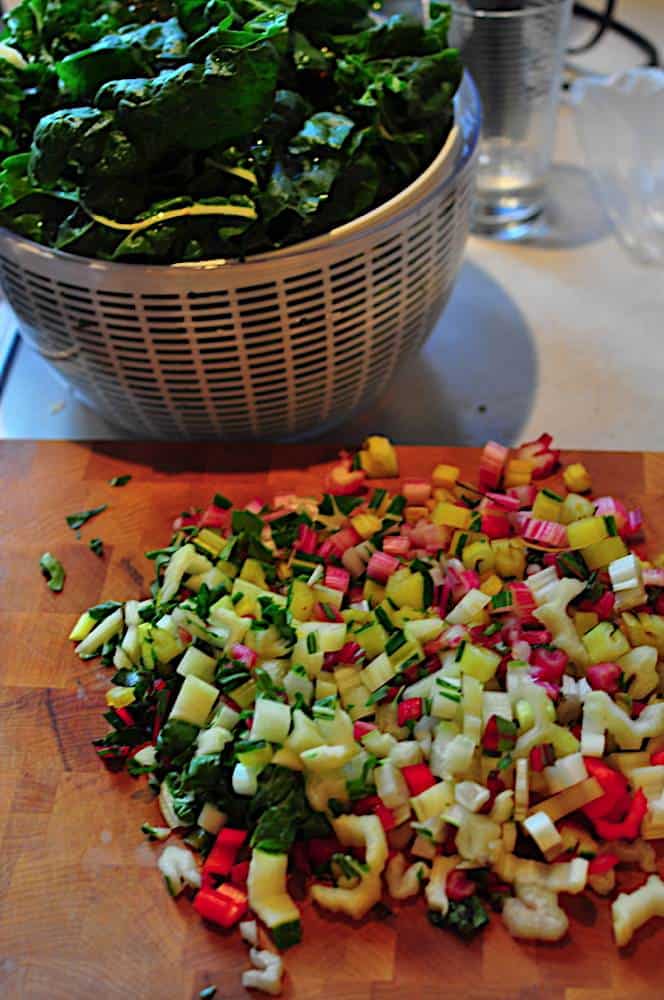
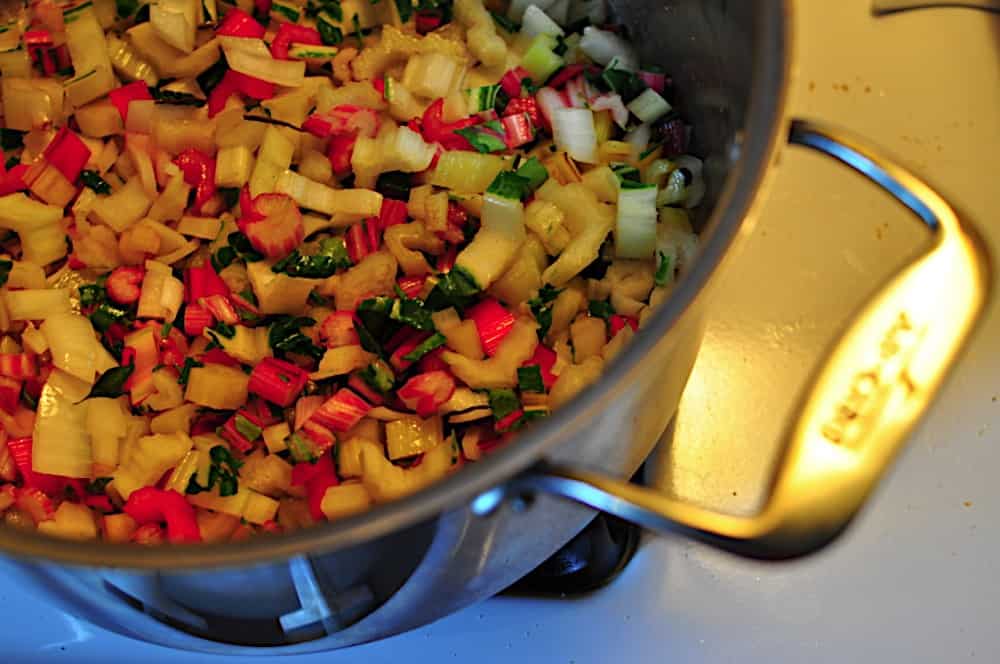
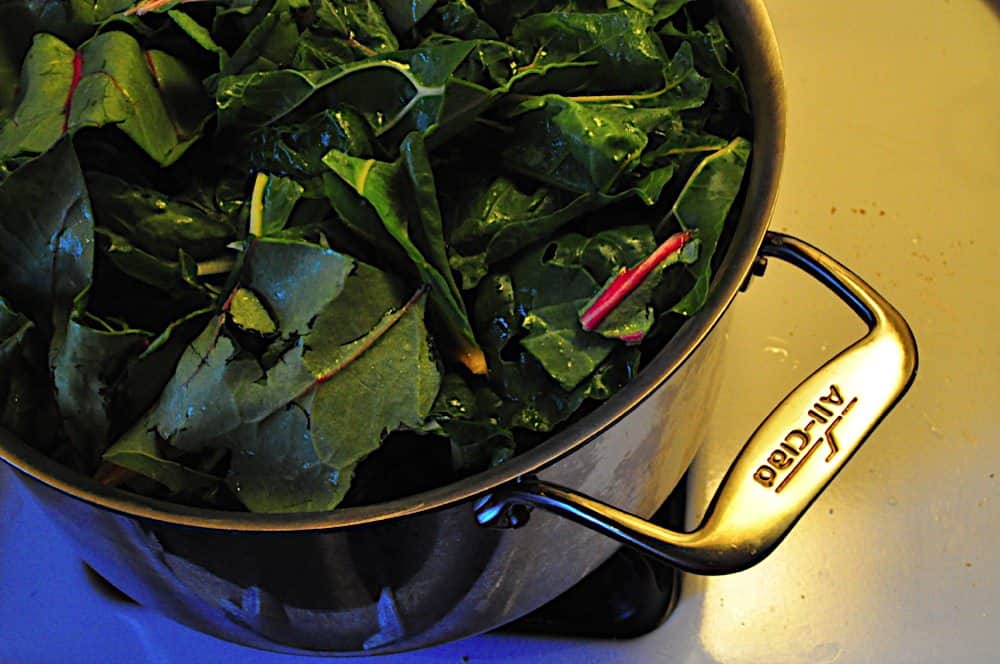
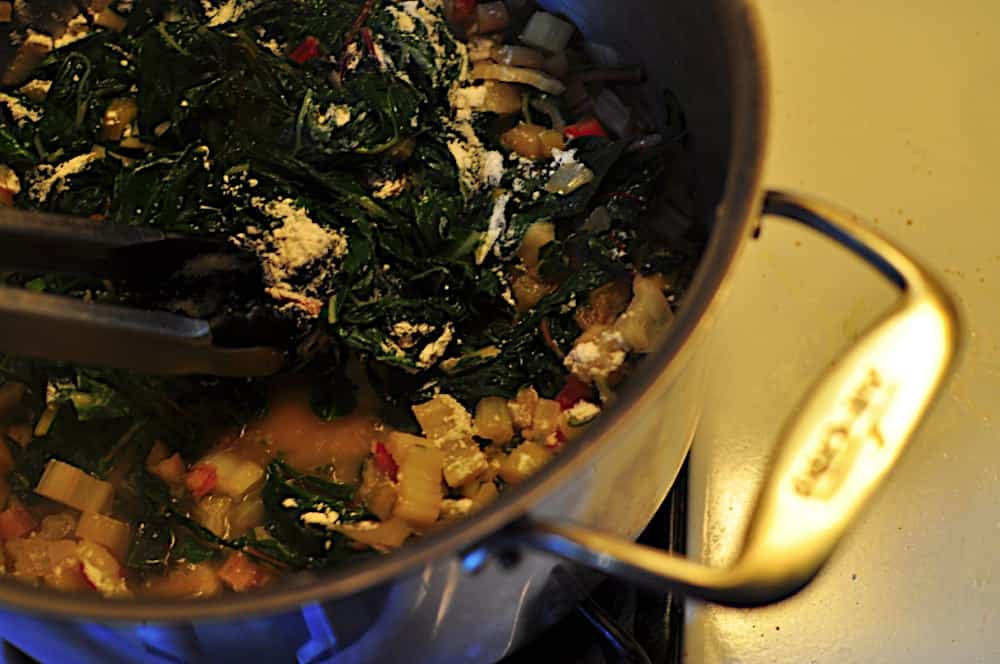
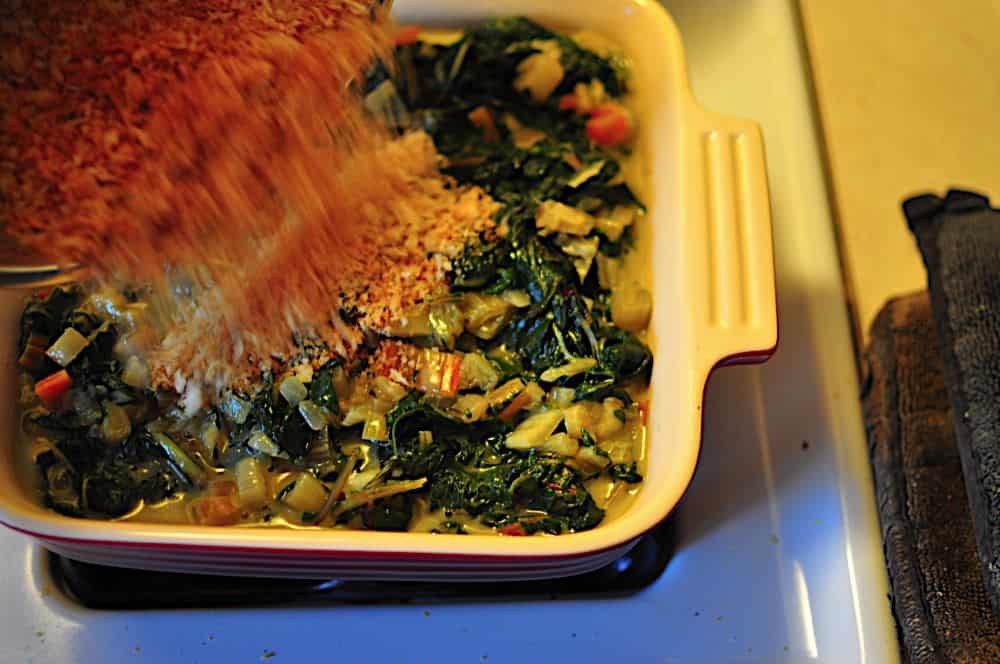
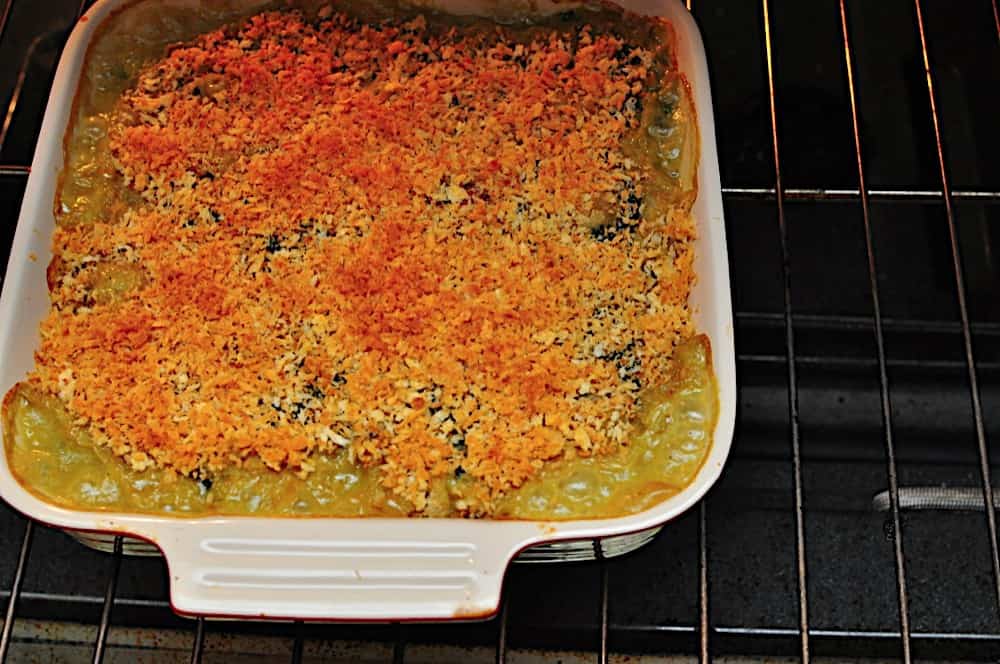
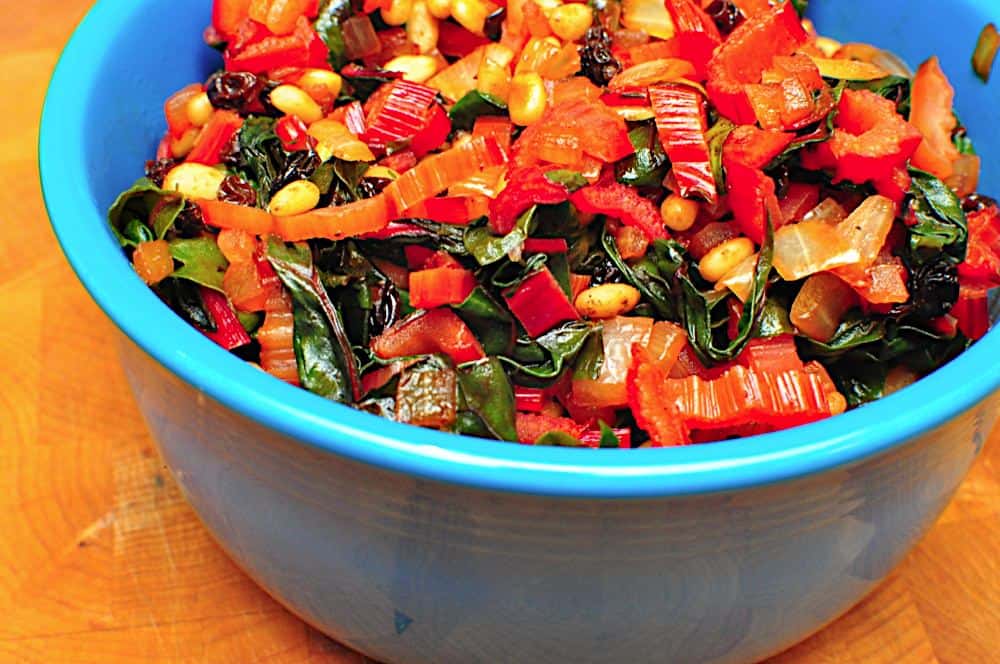
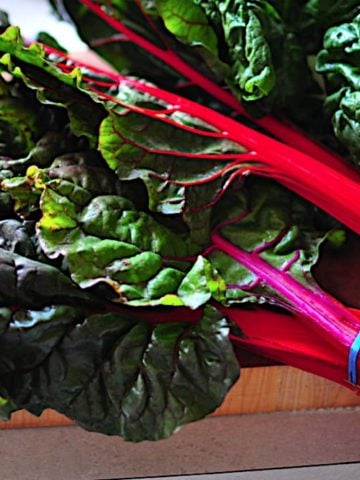
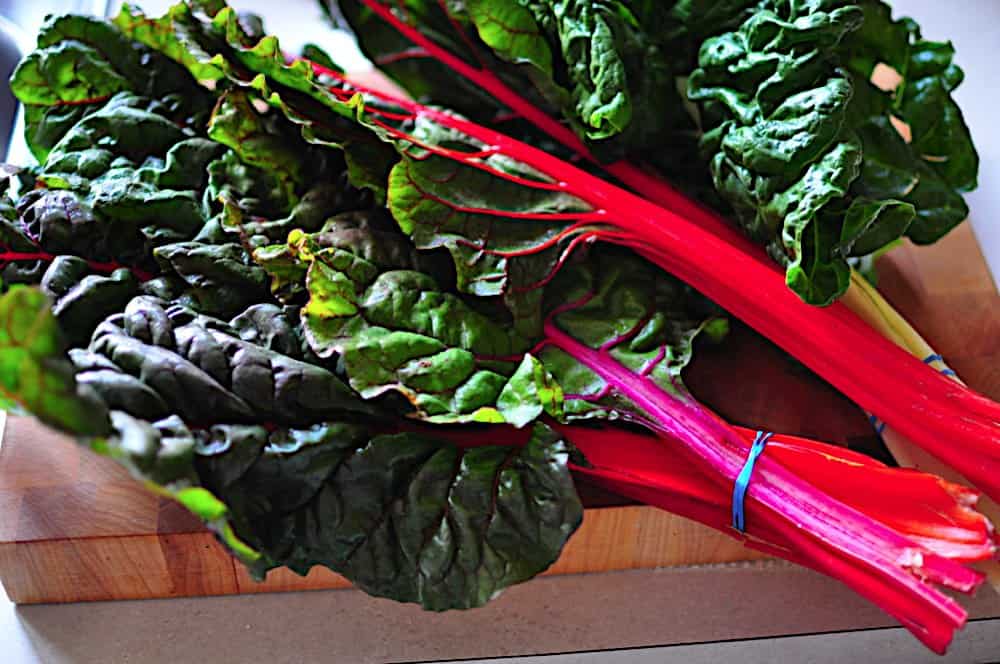
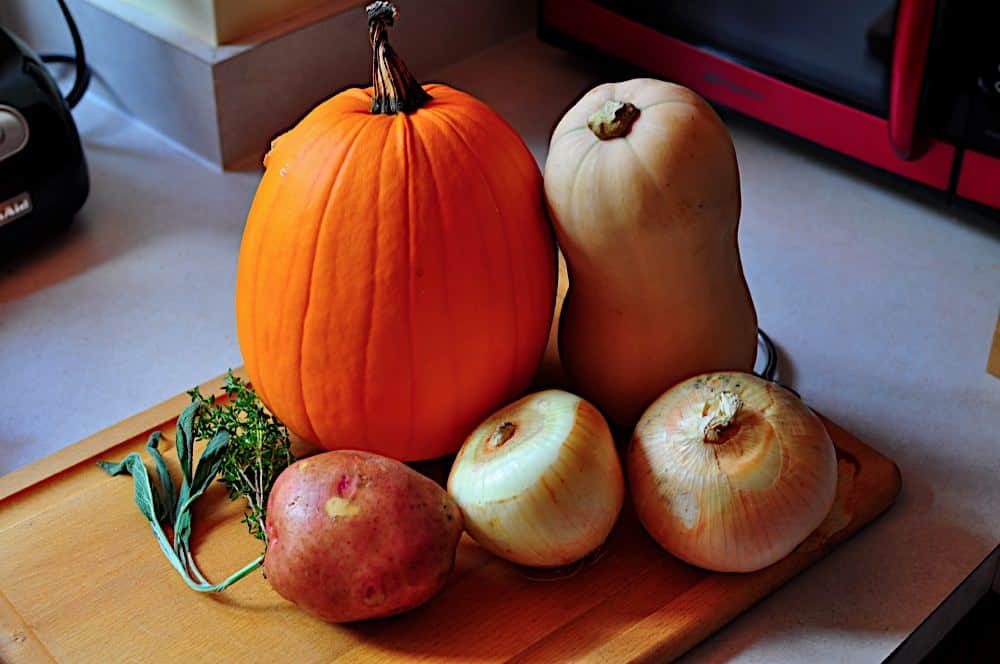
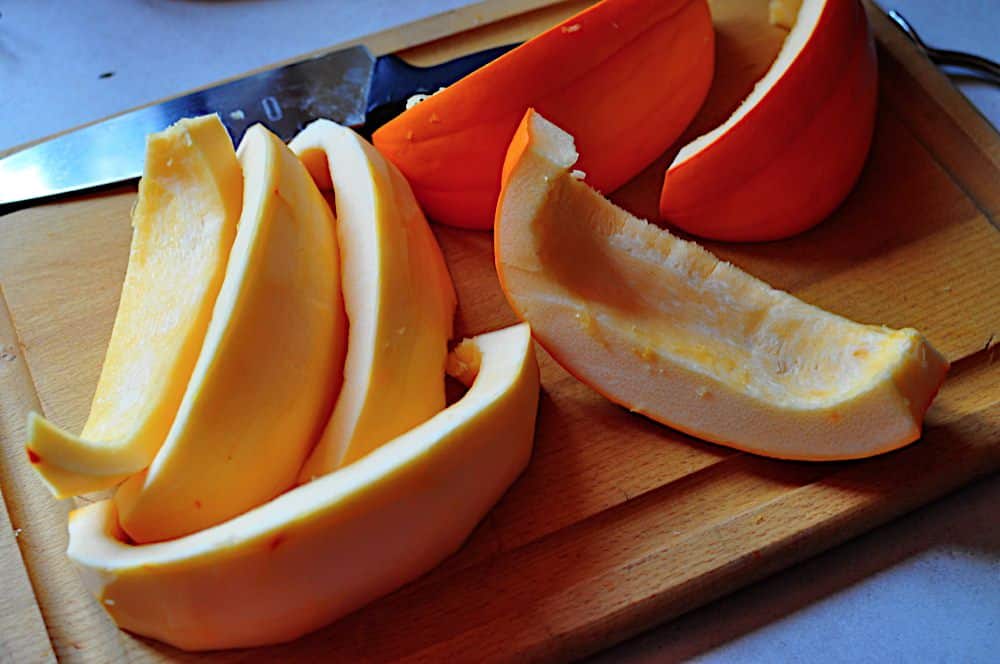
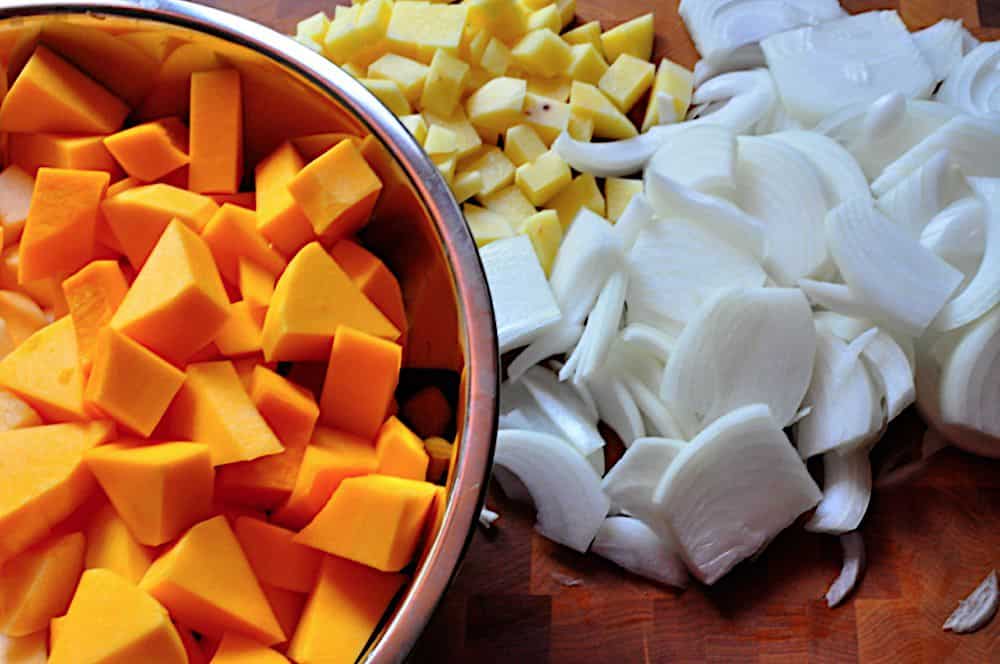
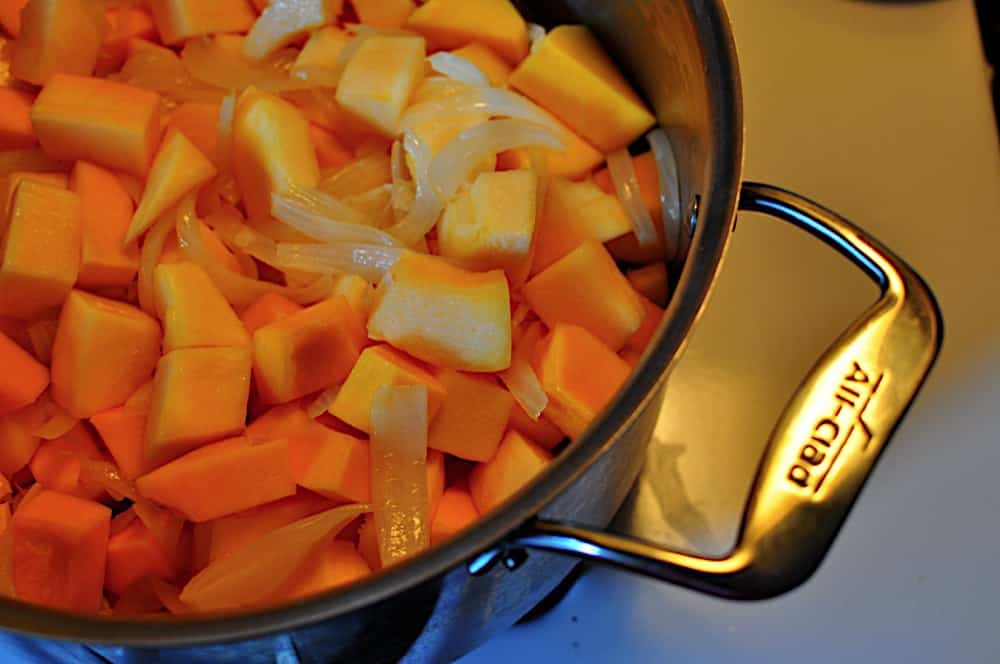
  • Eat more vegetables (relative to meat, dairy and starch)
  • Eat lean meats and nonfat dairy
  • Eat whole wheat rice, pasta and bread

Exercise isn't on the list. I've become a slug. I need to work on that, too. But I digress...

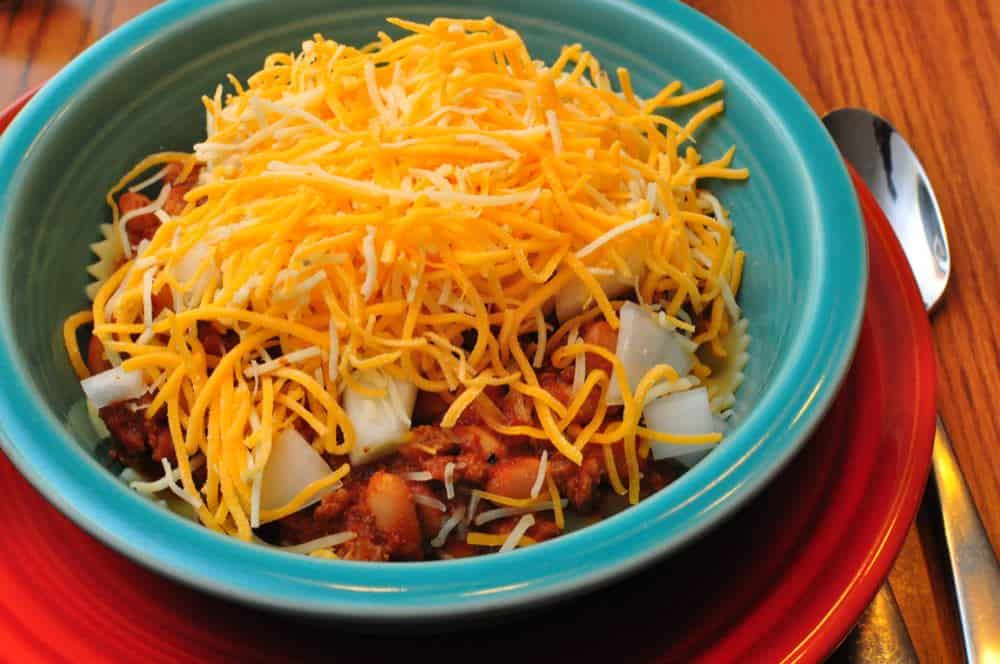
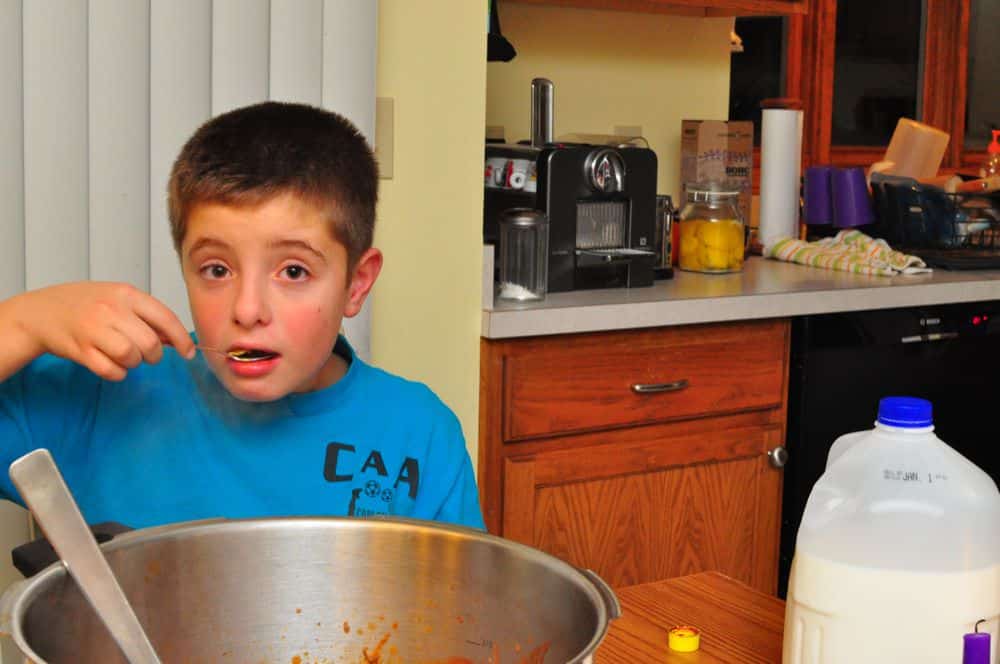
For a couple of weeks, maybe a month, I was a good boy. I tracked my calories, didn't go back for that third helping of chili, and stopped after a glass of wine with dinner. OK, maybe two glasses. According to my home scale, I weighed 222 to 224 pounds the whole time - no weight gain, no weight loss. Then I stopped paying attention again.

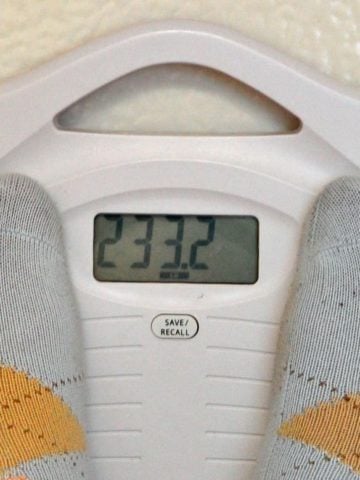
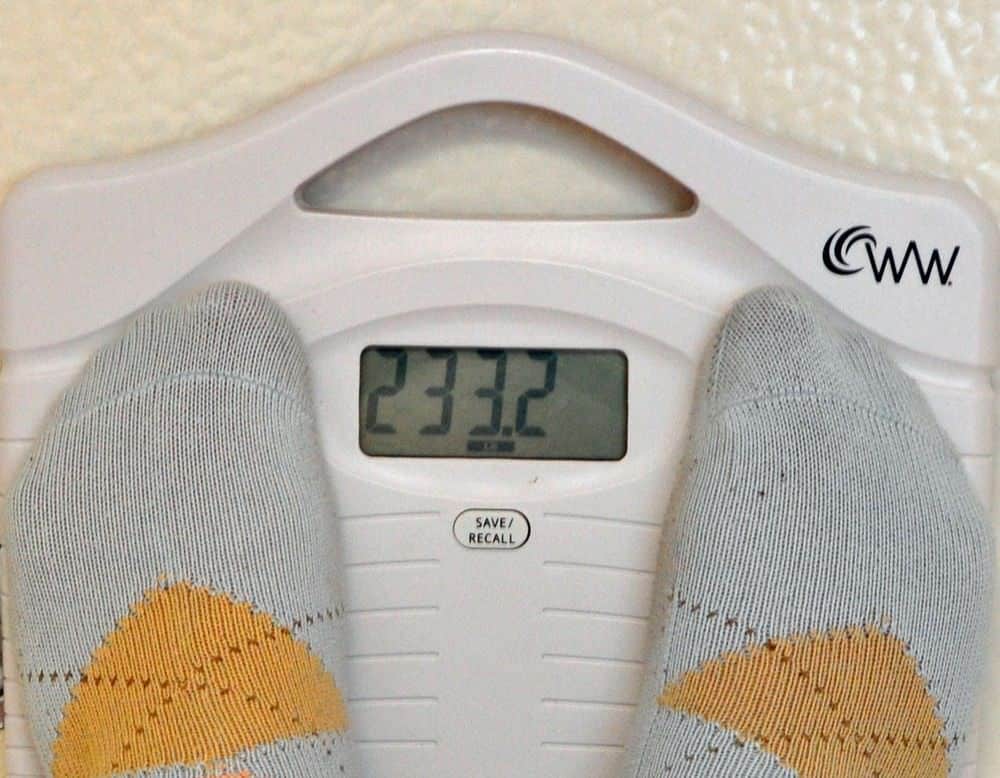
Now it's the New Year, and I wanted to write a follow up post about weight loss. And I was struggling with it. I couldn't get myself to sit down and write these words. I think I new what was coming. After stalling for a couple of days, I took a deep breath, readied the camera, and got on the scale.

Two hundred and thirty three pounds.

Gulp.

Since this time last year, I gained FIFTEEN POUNDS. According to my scale, which said I was 222 at the time of my health screening, I am up ten pounds since October!

As much as I try to avoid it, this really isn't a surprise. I know that my meals have been pretty light on vegetables, particularly when Diane has been taking evening classes. My three picky eaters just won't eat vegetables, so it seems like too much effort to make them. And I do go back for that third helping of chili, or spaghetti, or ribeye. And that glass of wine or two with dinner sometimes turns into "one more glass, just to finish the bottle".

And...I'm worried I gained weight because of this blog.
Oh, yeah, and a complete lack of self-discipline. I tend to forget that part.

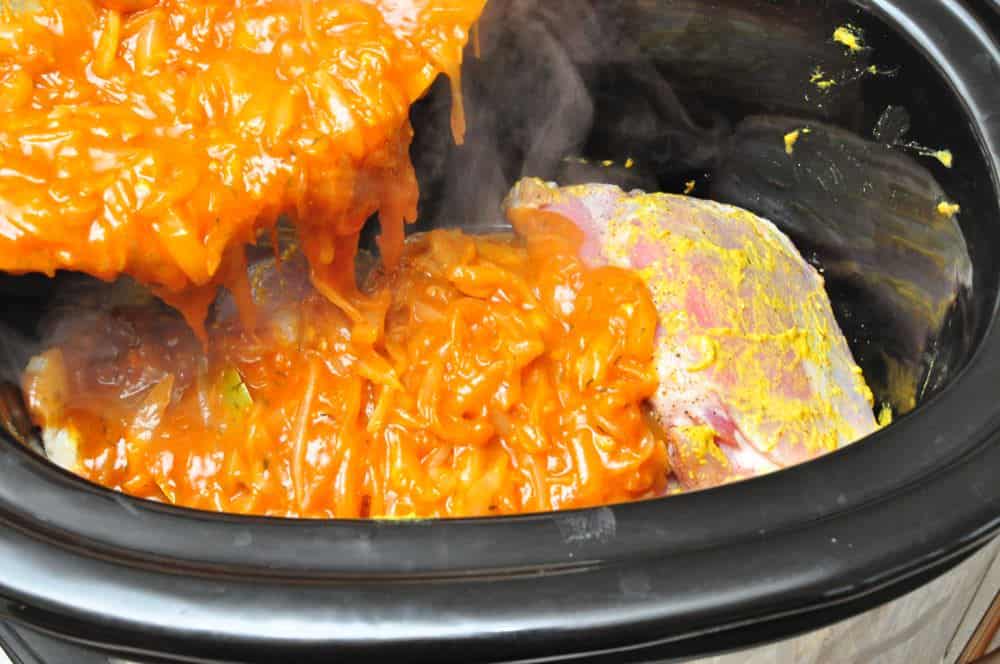
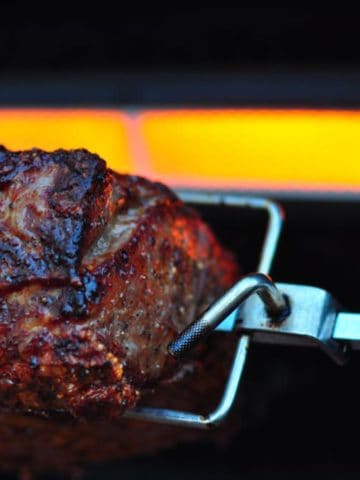
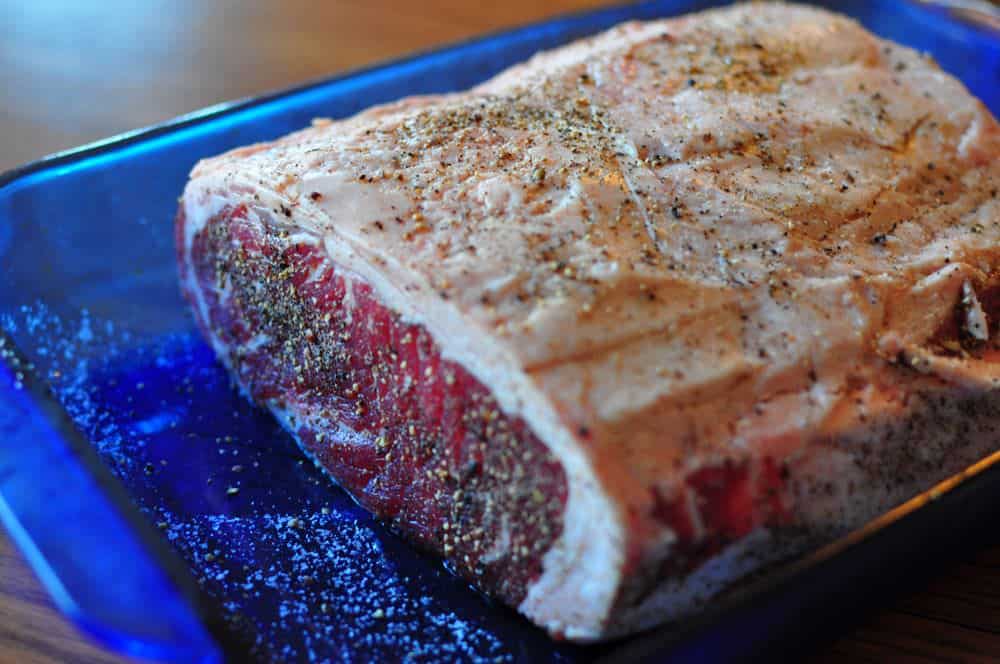
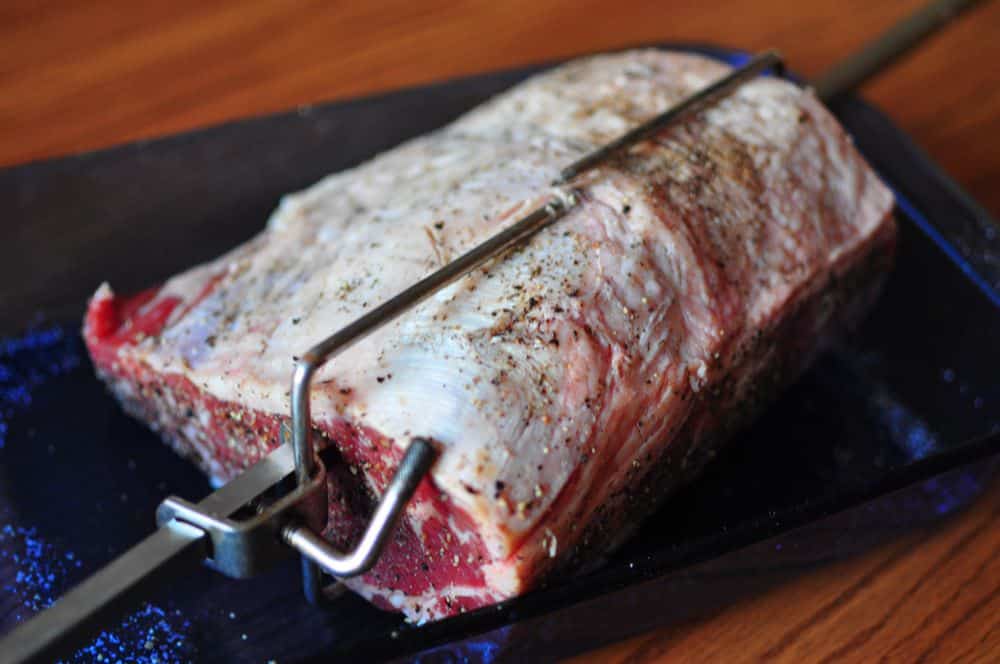
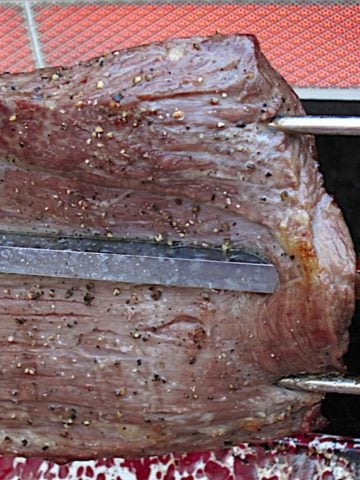
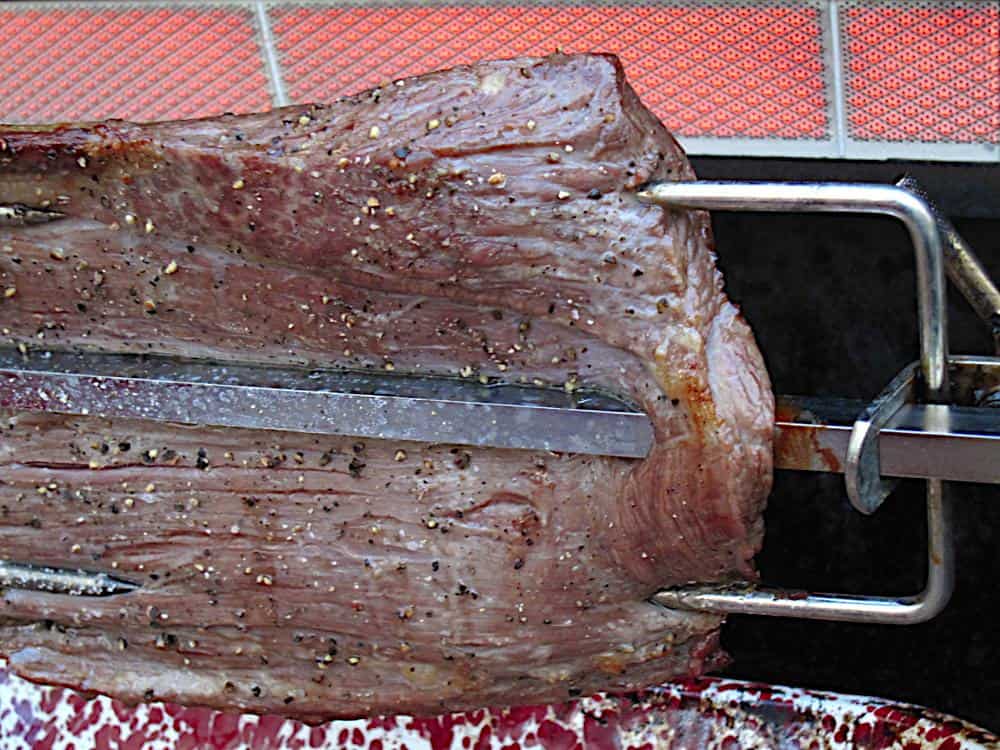
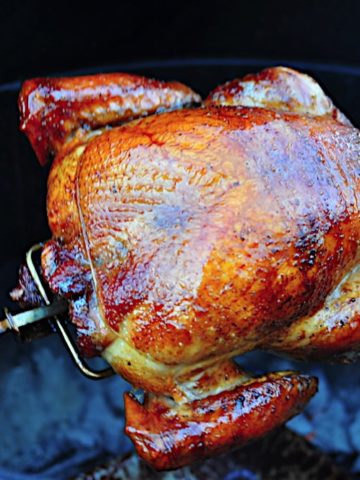
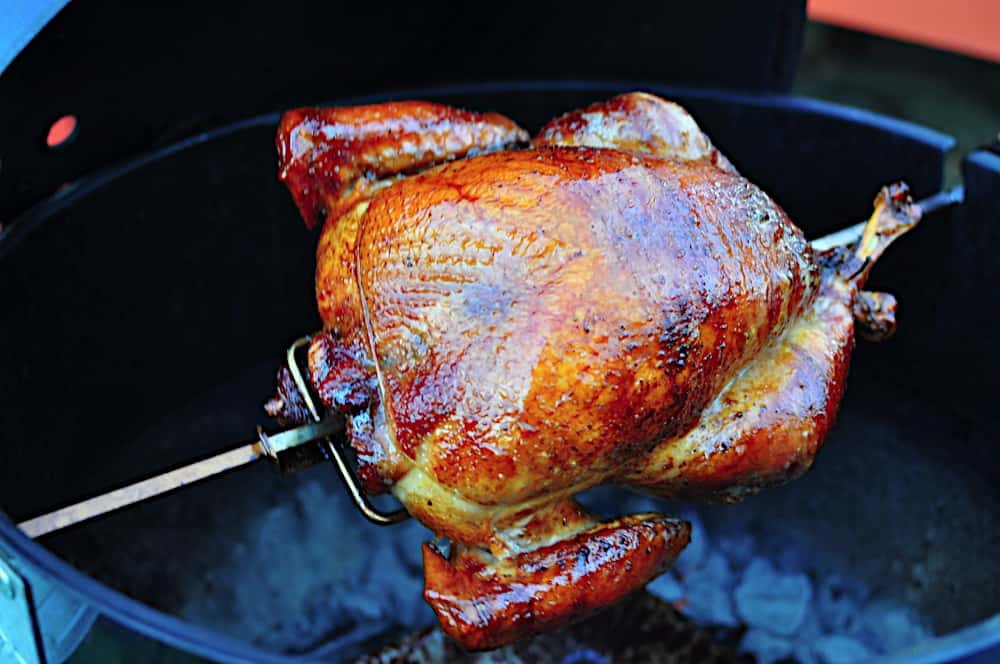
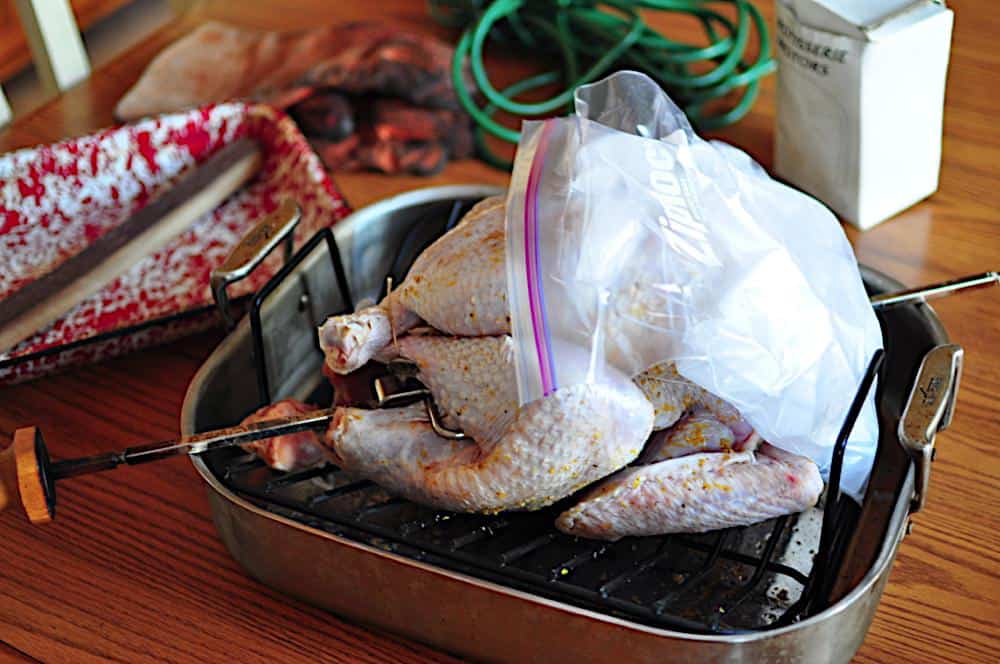
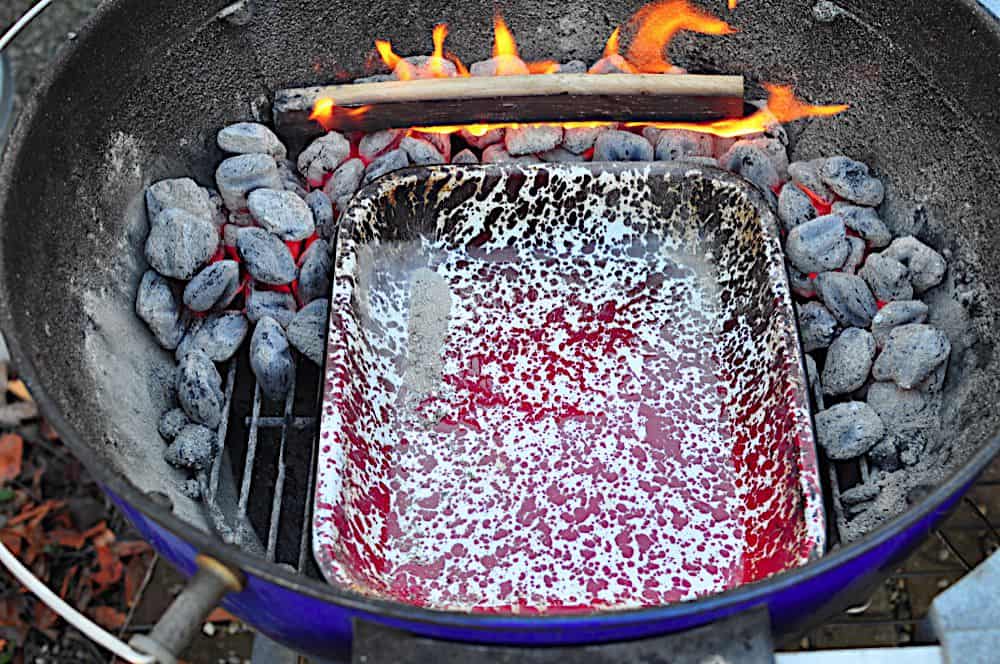
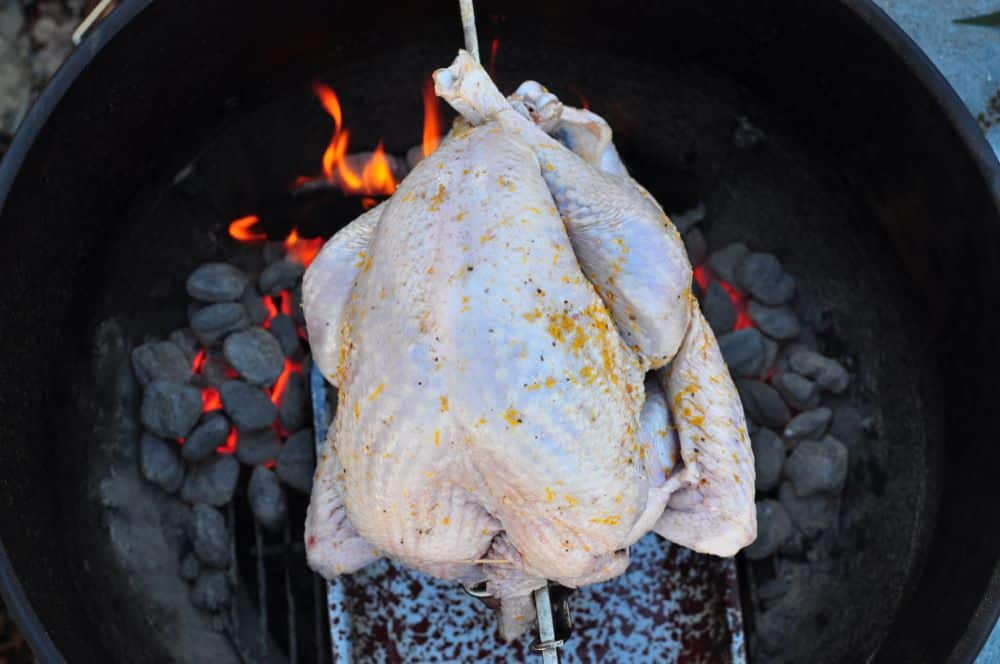
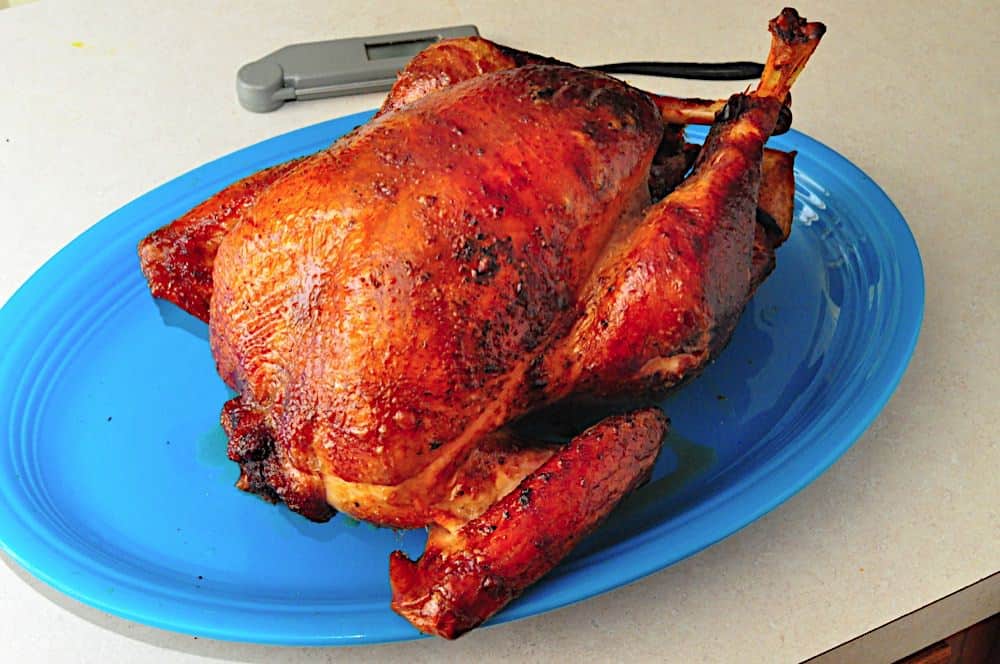
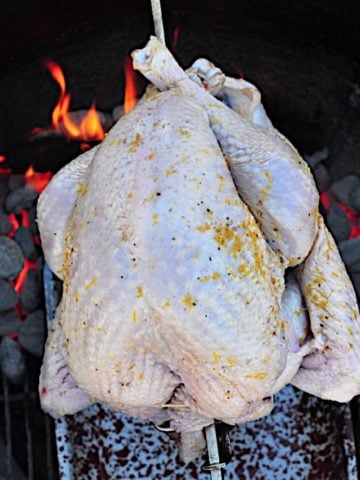
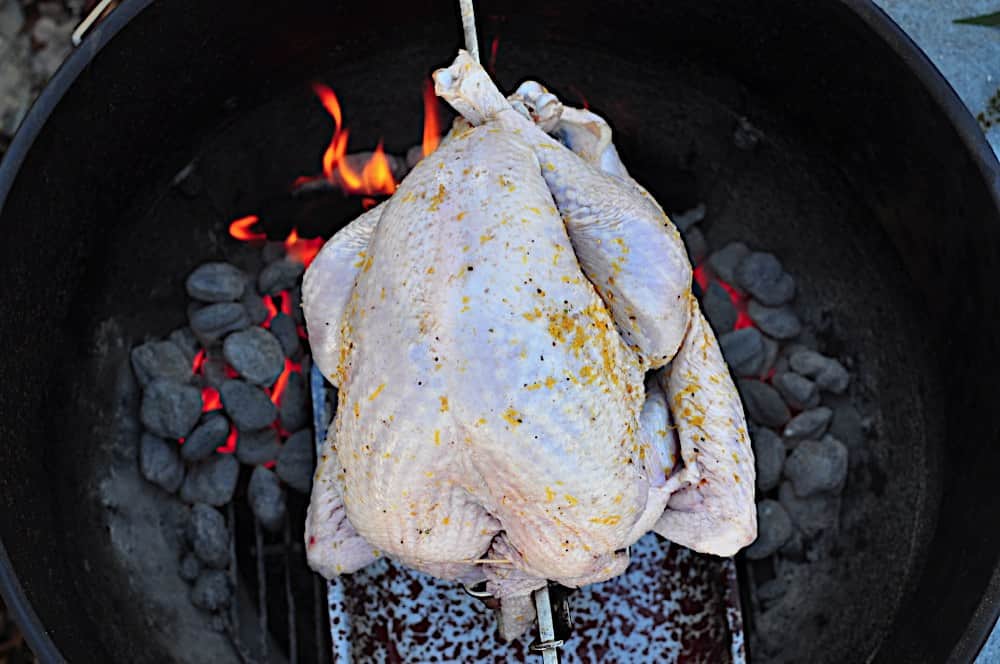
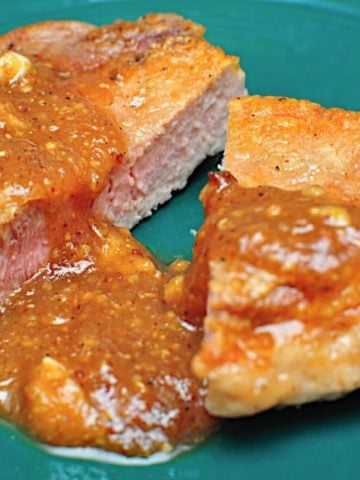
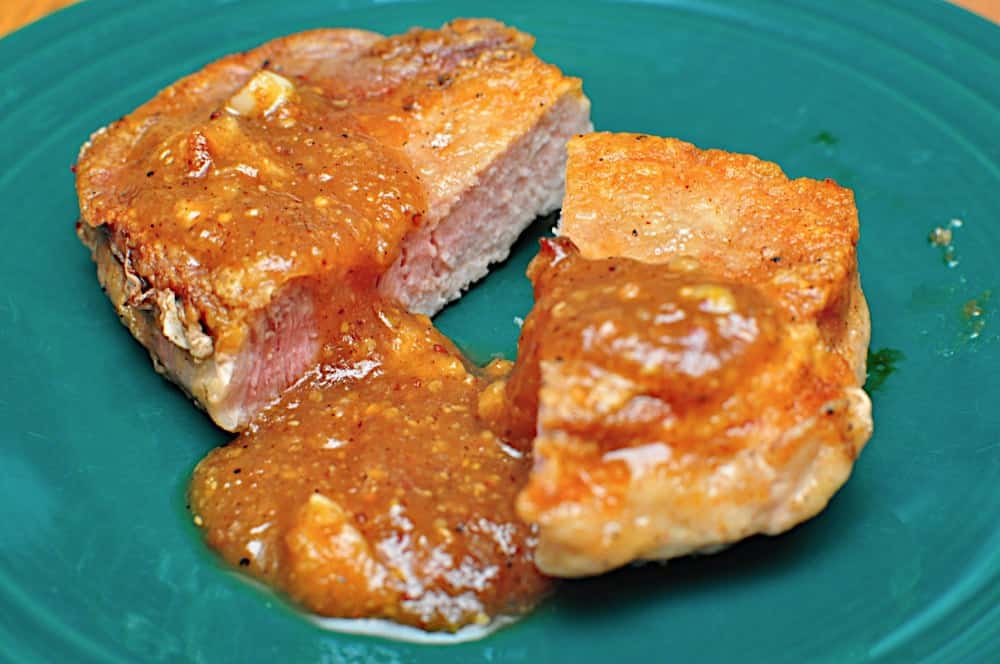
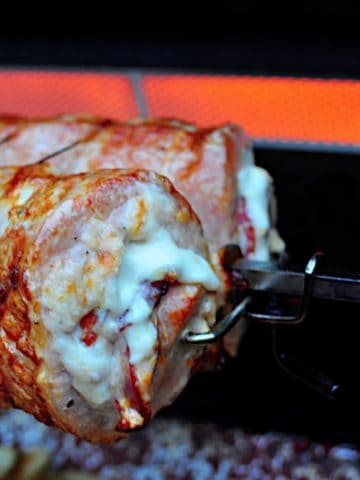
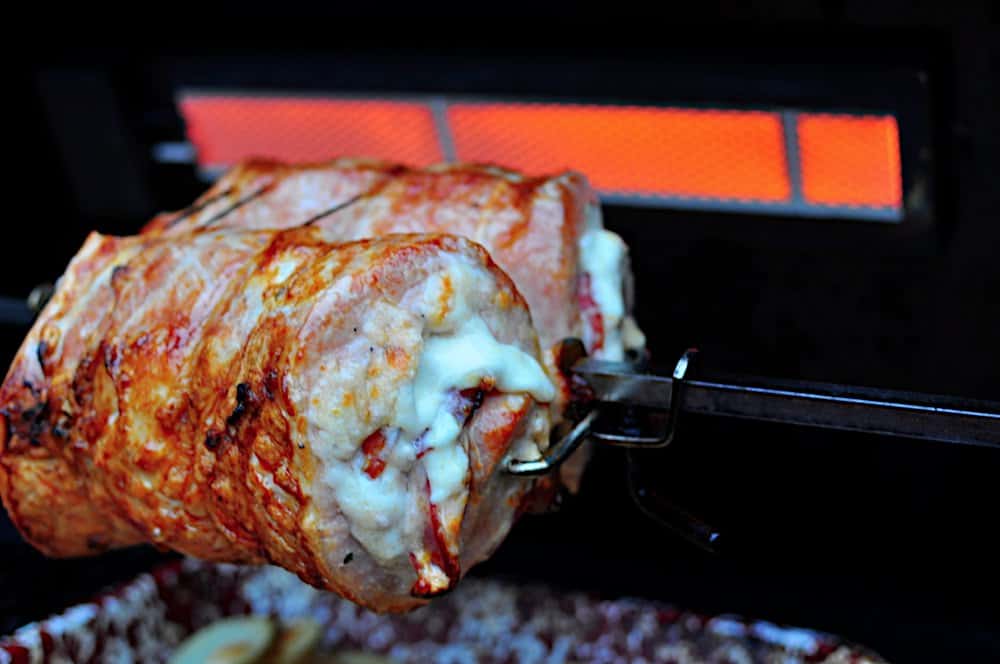
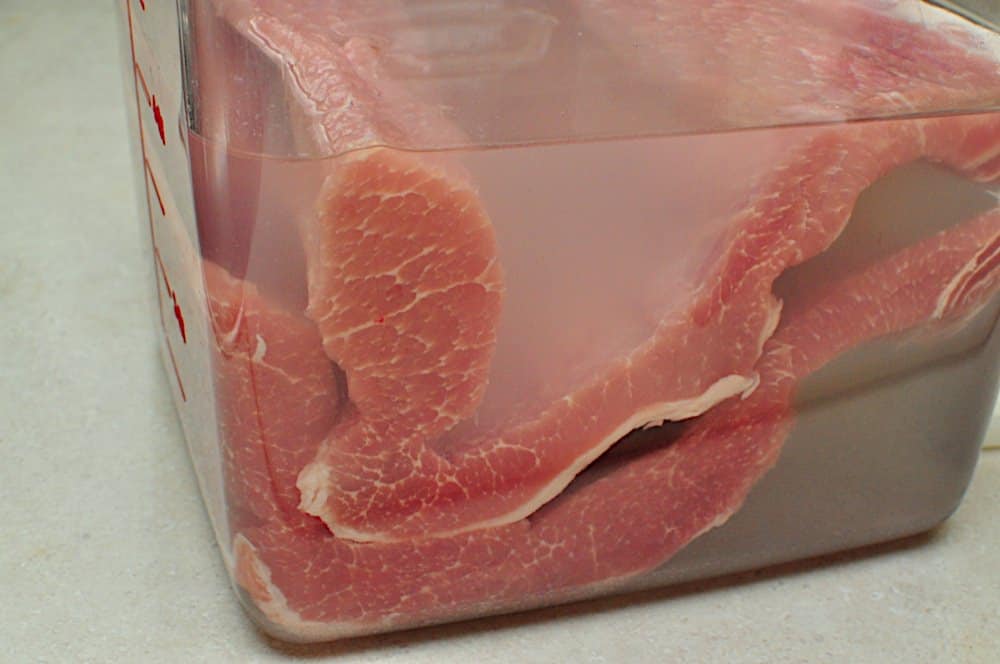
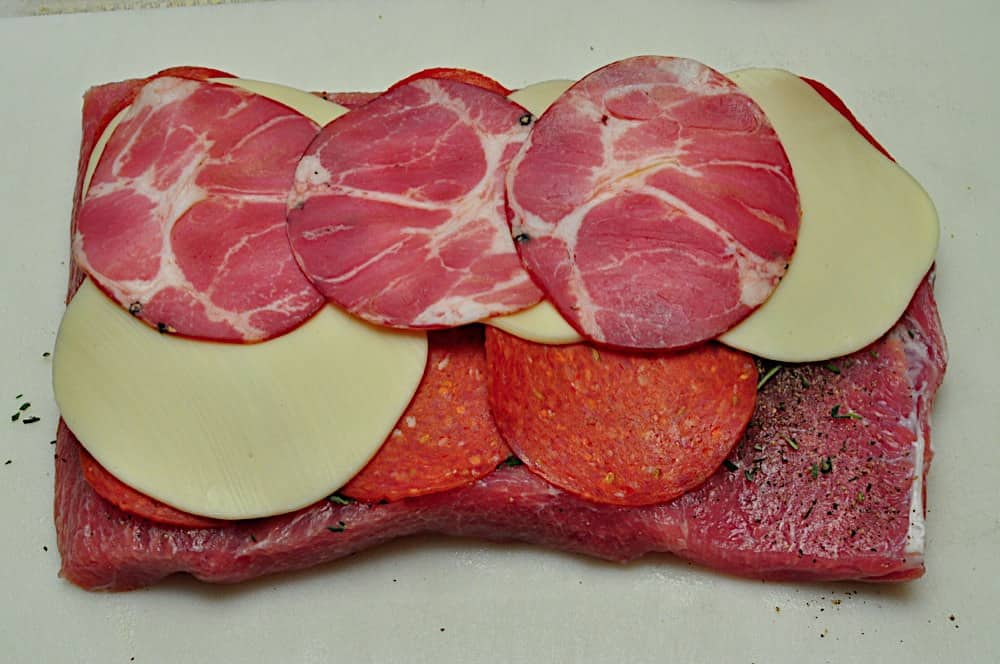
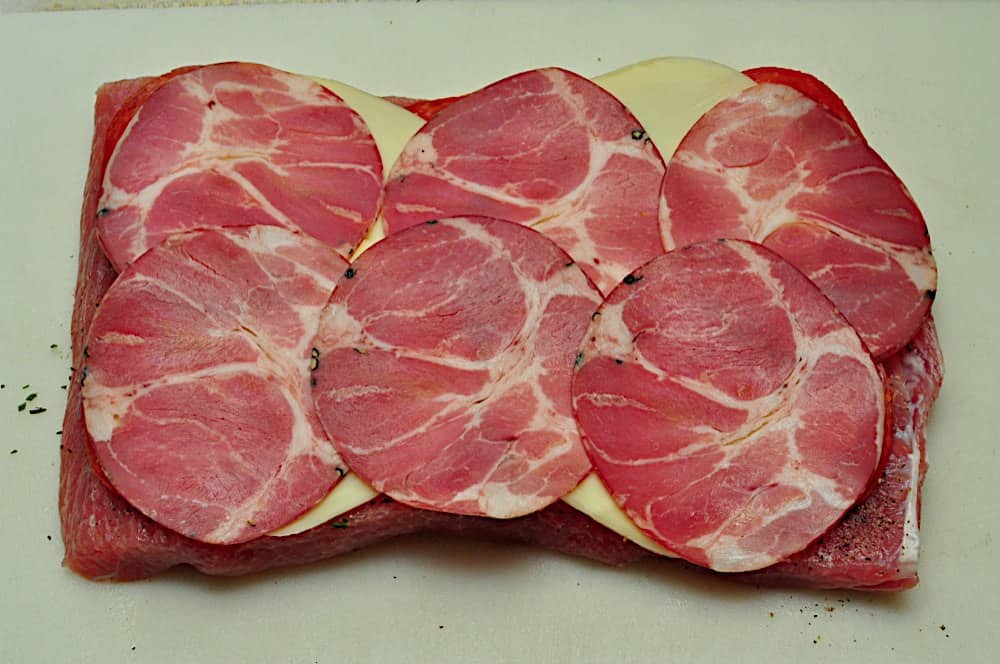
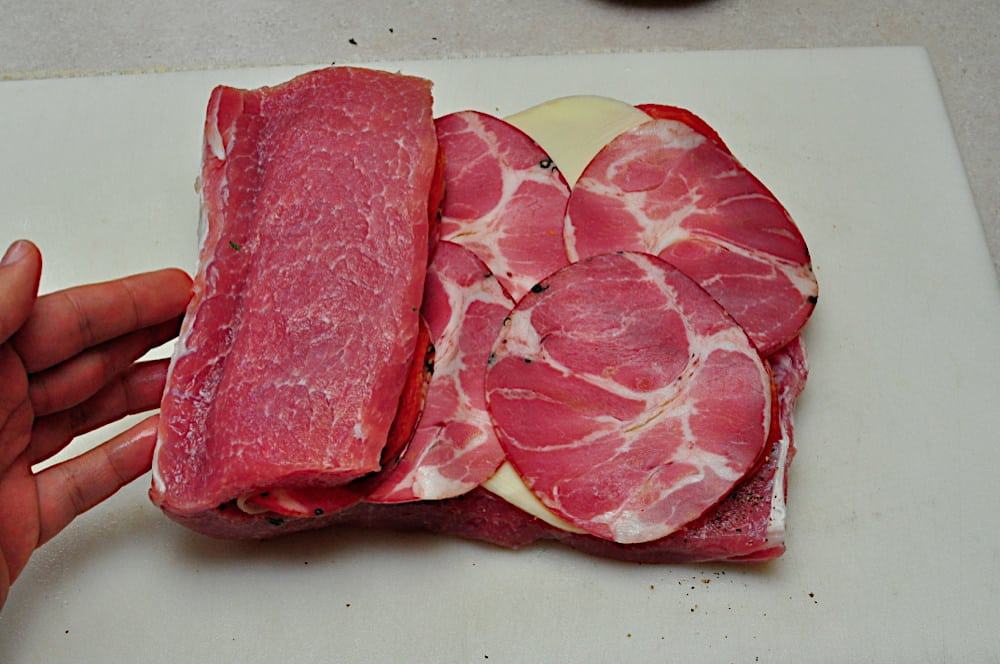
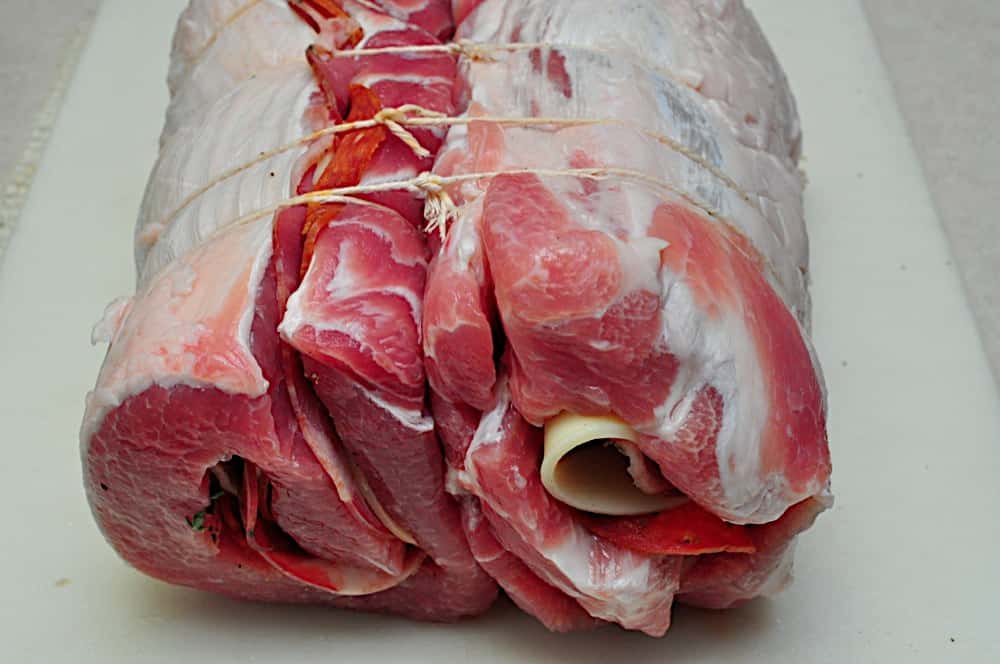
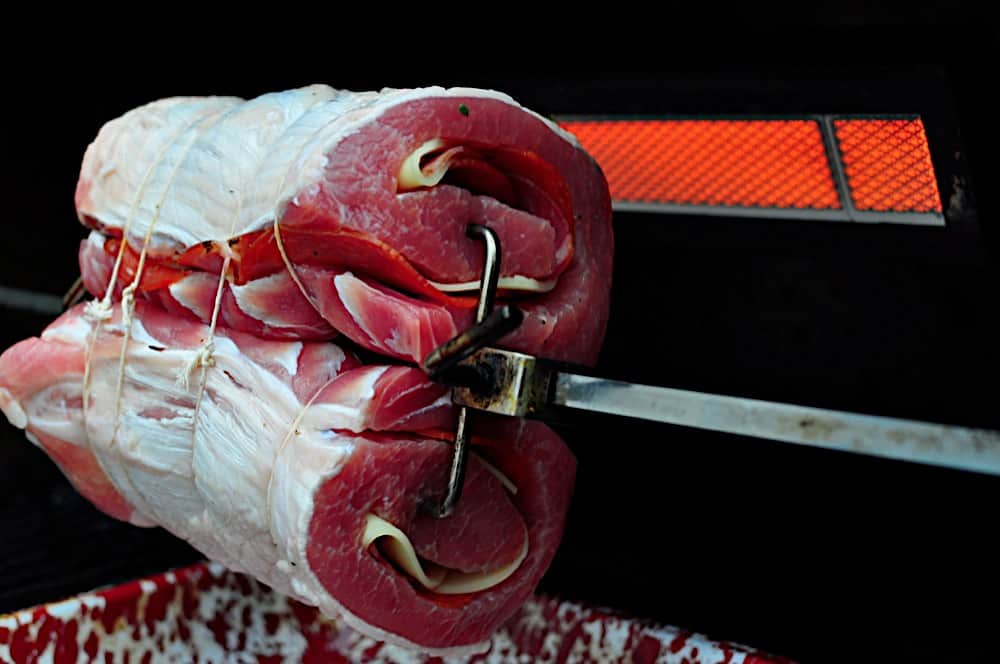
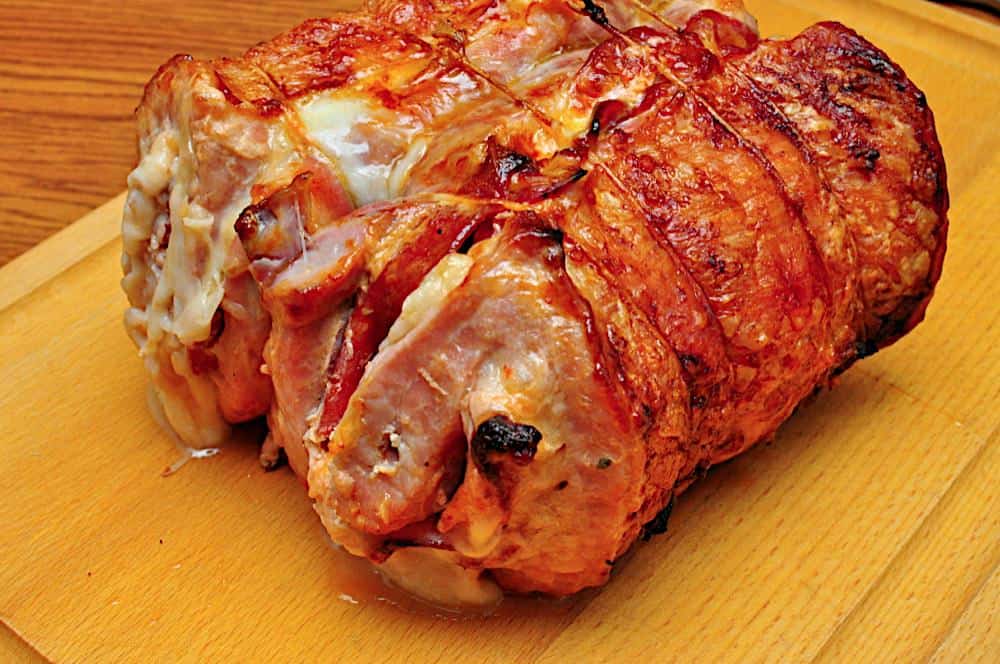
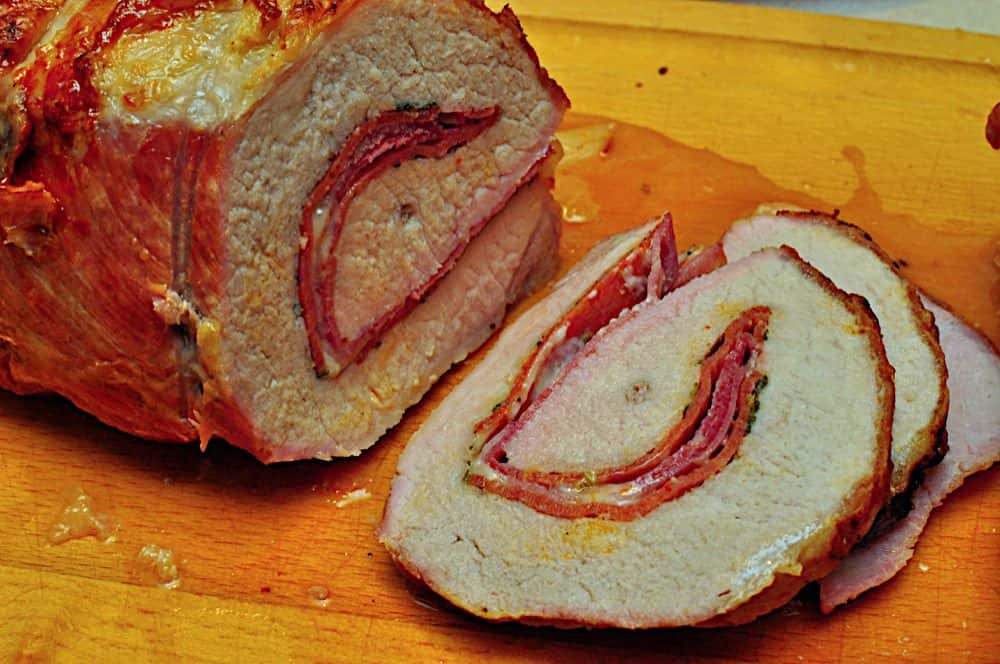
I love writing recipes like rotisserie pork loin stuffed with cheese and capicola and grilled ribeye steaks with chipotle butter baste. And they're great to eat...in moderation. Those should be celebration meals, not something I cook weekly.
Or, even worse, a couple of times a week.

Now, don't get me wrong; I'm not going to stop writing those kind of recipes. Or cooking them. But I am going to try to cook, eat, and write healthier in the new year.

Time to get back on track. As of today, I'm counting my calories, watching my portion sizes, and making sure half of my plate is vegetables. I still get to celebrate (Fiesta!) once a week, but I have to be vigilant with my other meals.

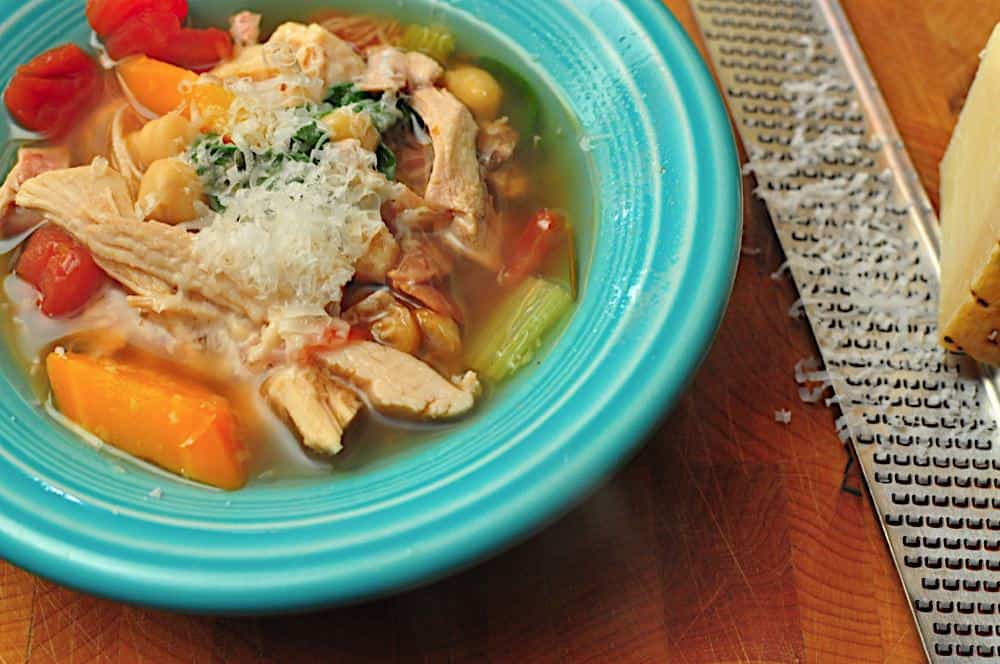
Vigilant doesn't have to mean boring. Good food seems to help me lose weight. Mindless eating is all too easy. Good food helps me pay attention while I eat, and makes me more satisfied with smaller portions.

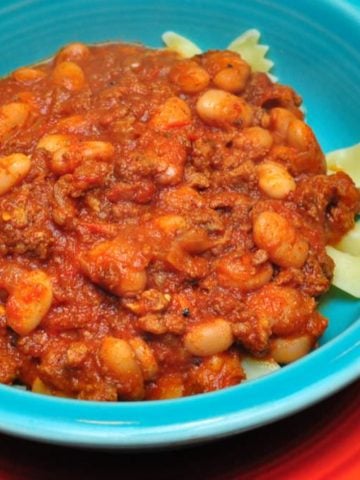
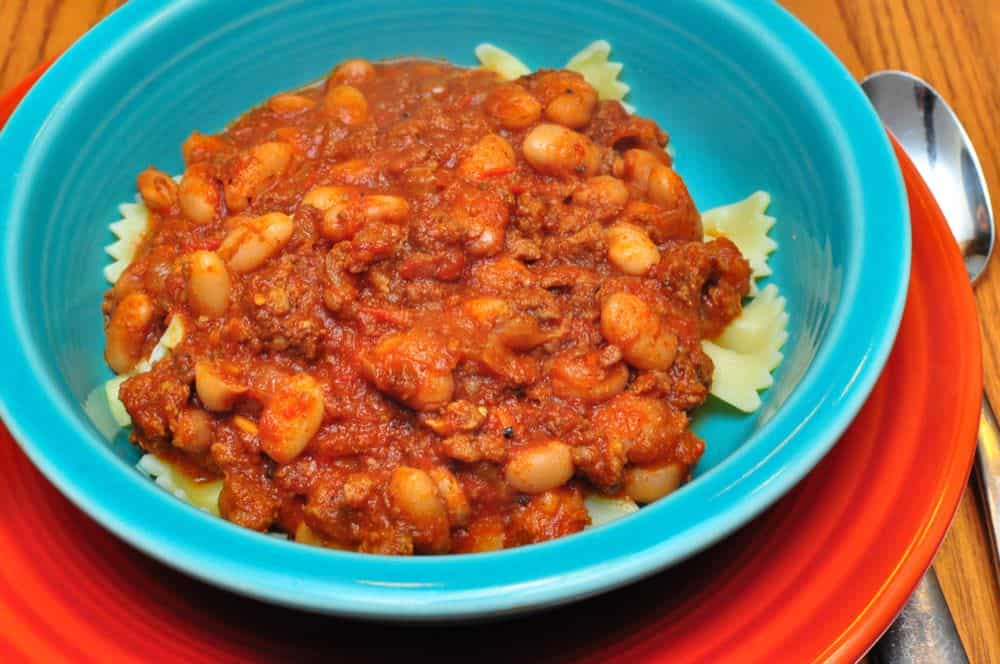
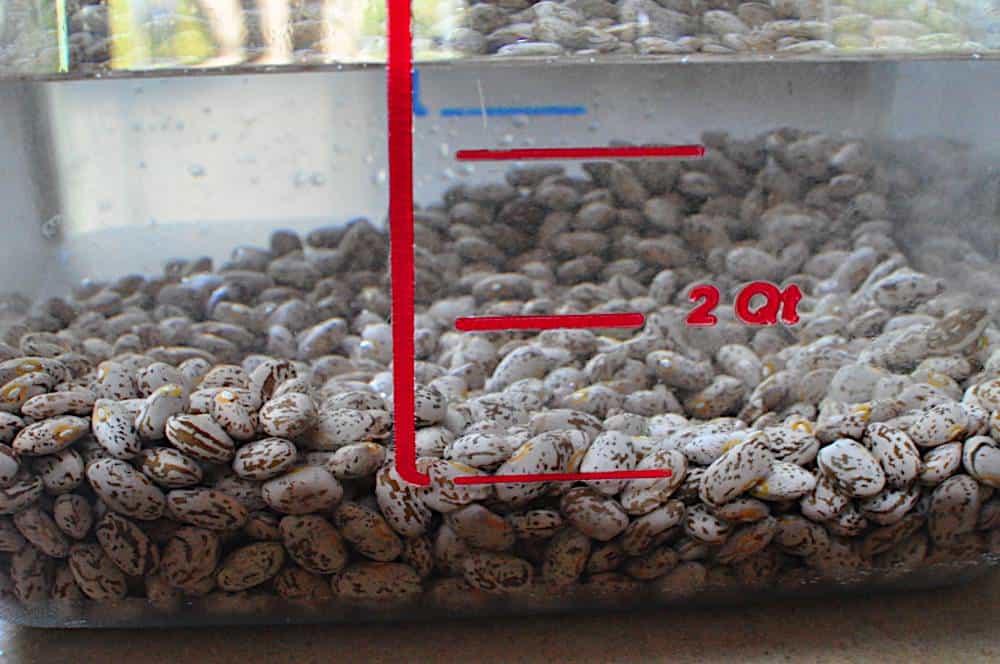
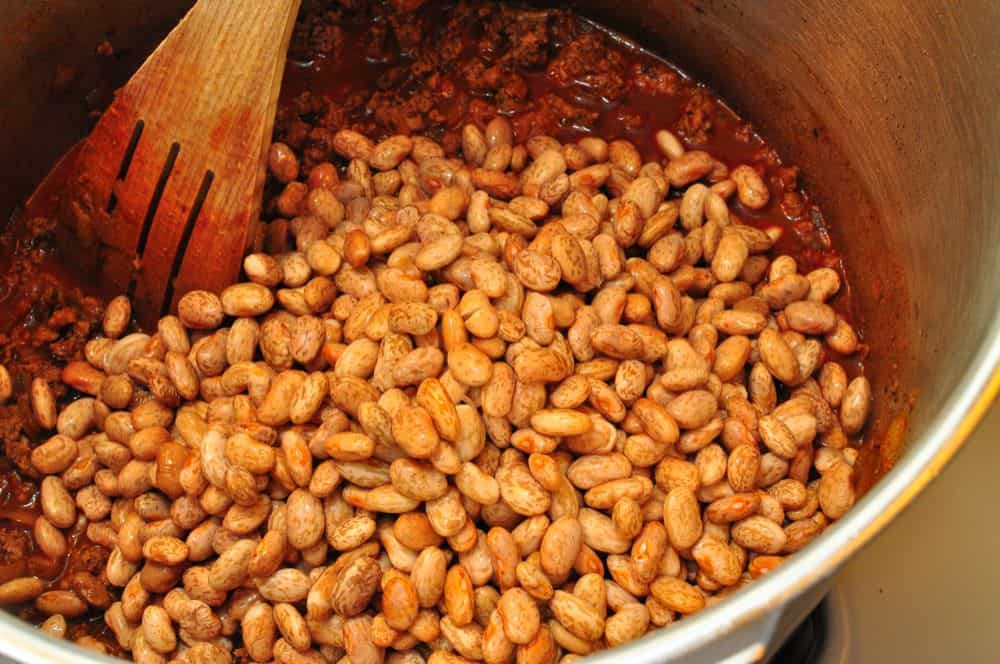
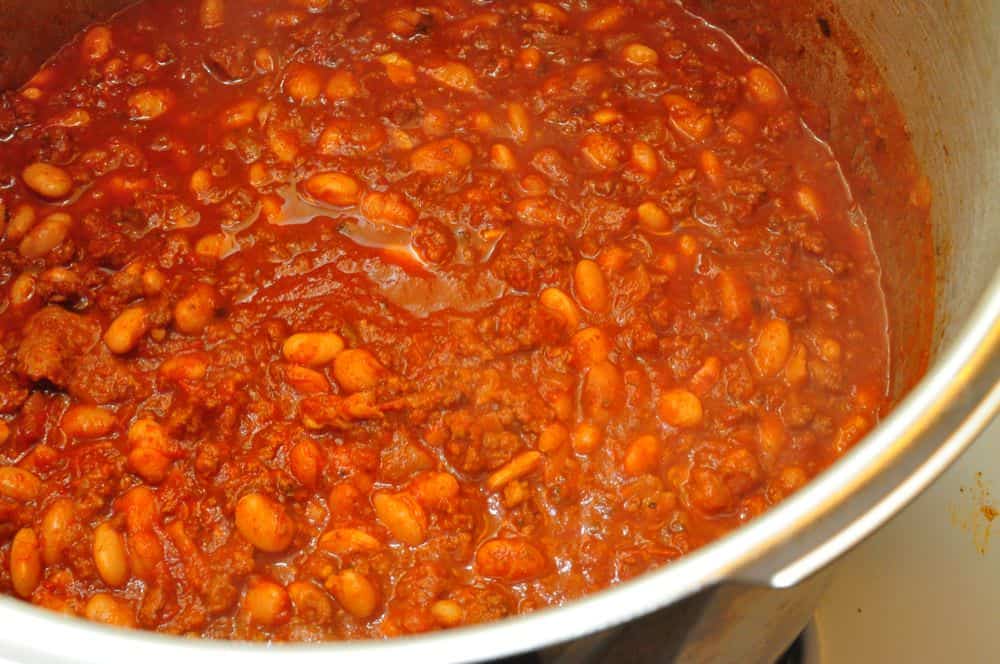
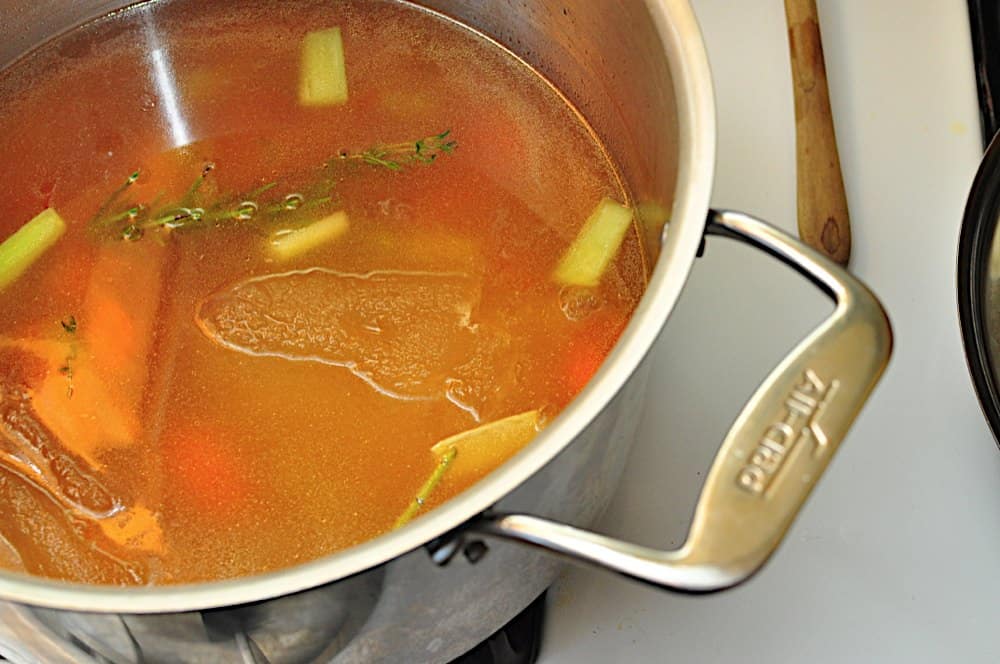
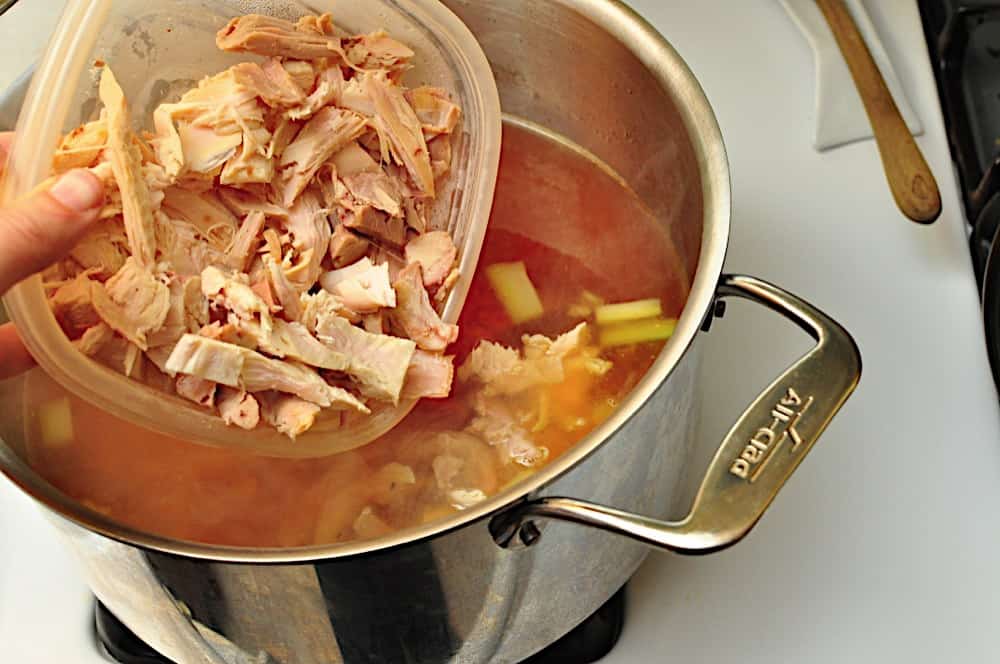
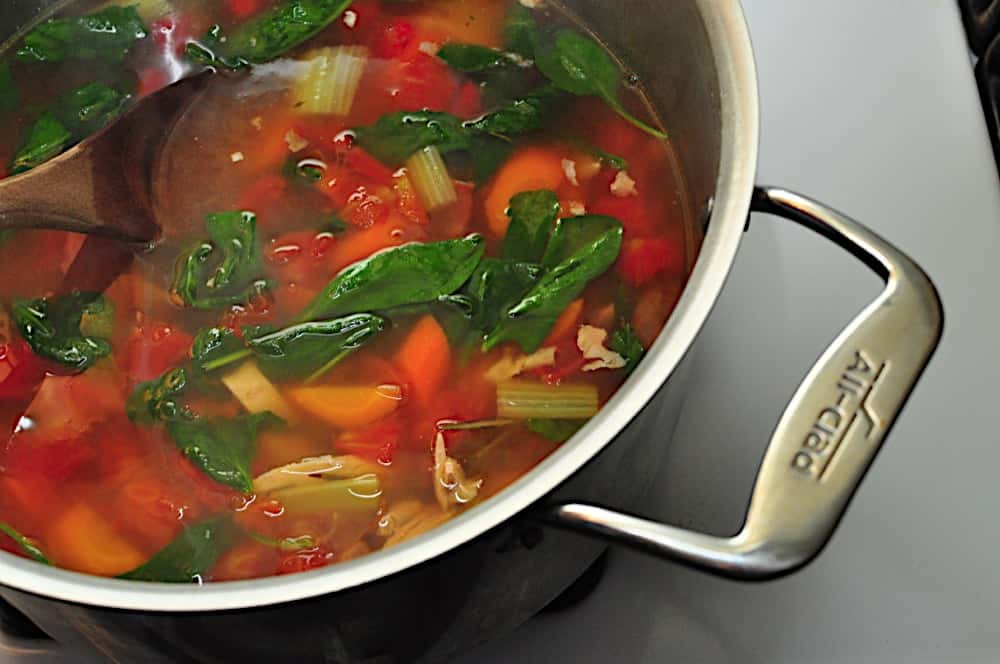
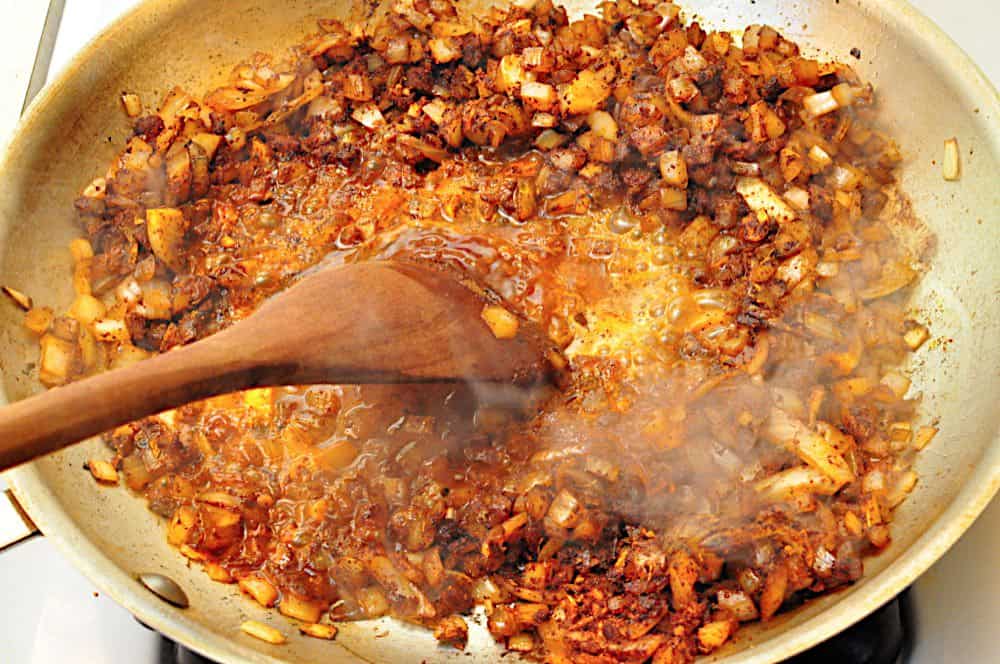
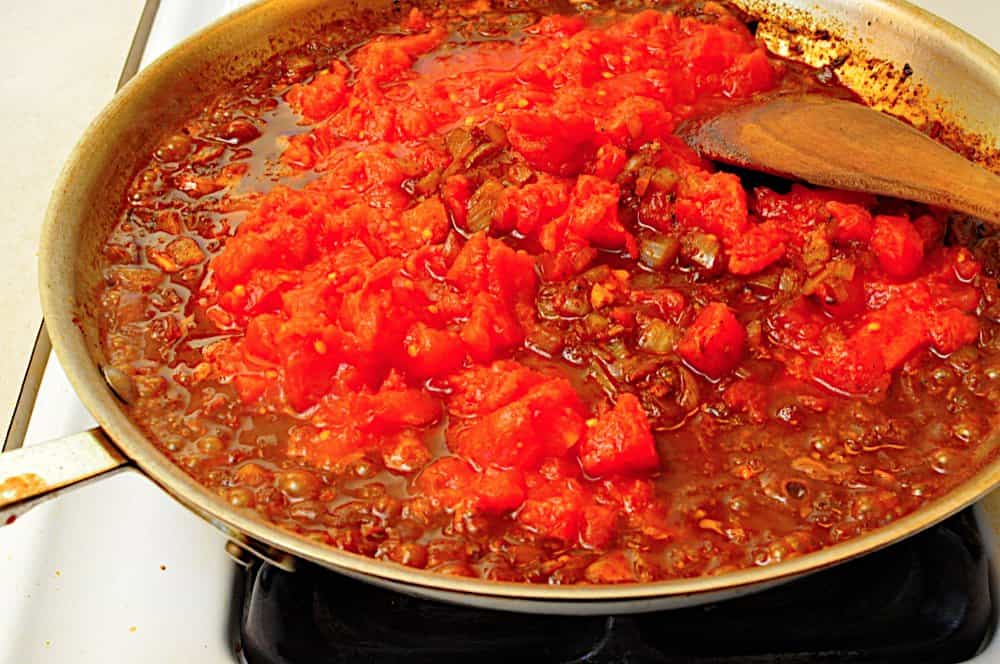
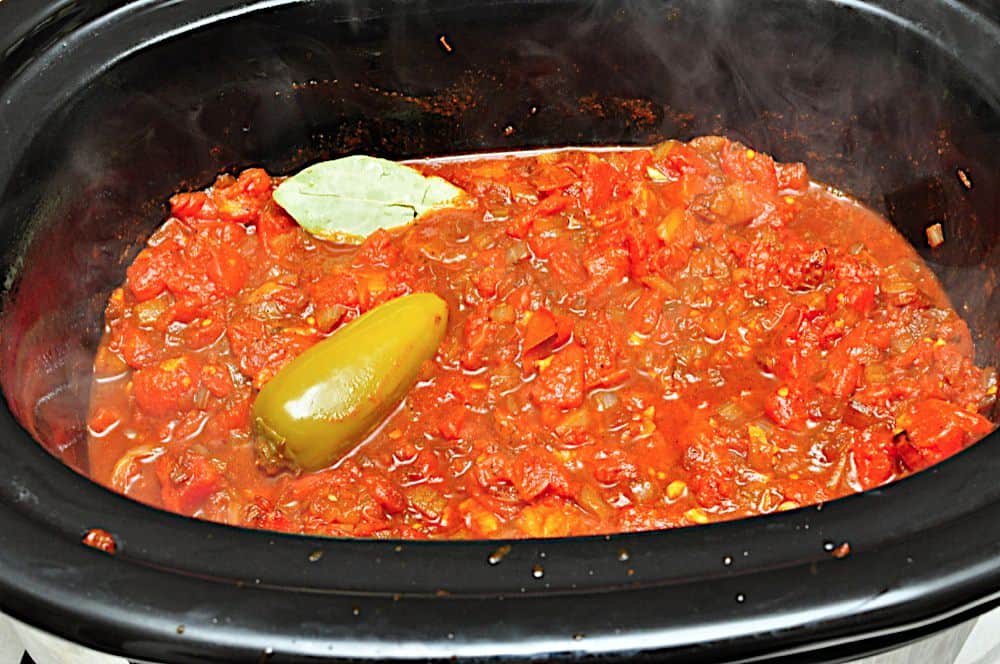
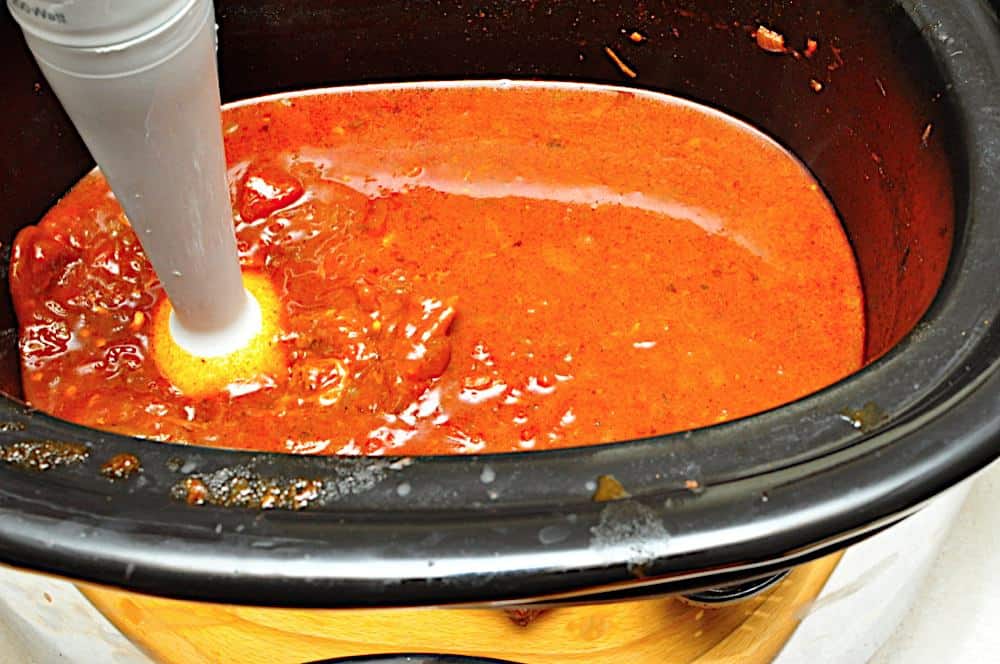
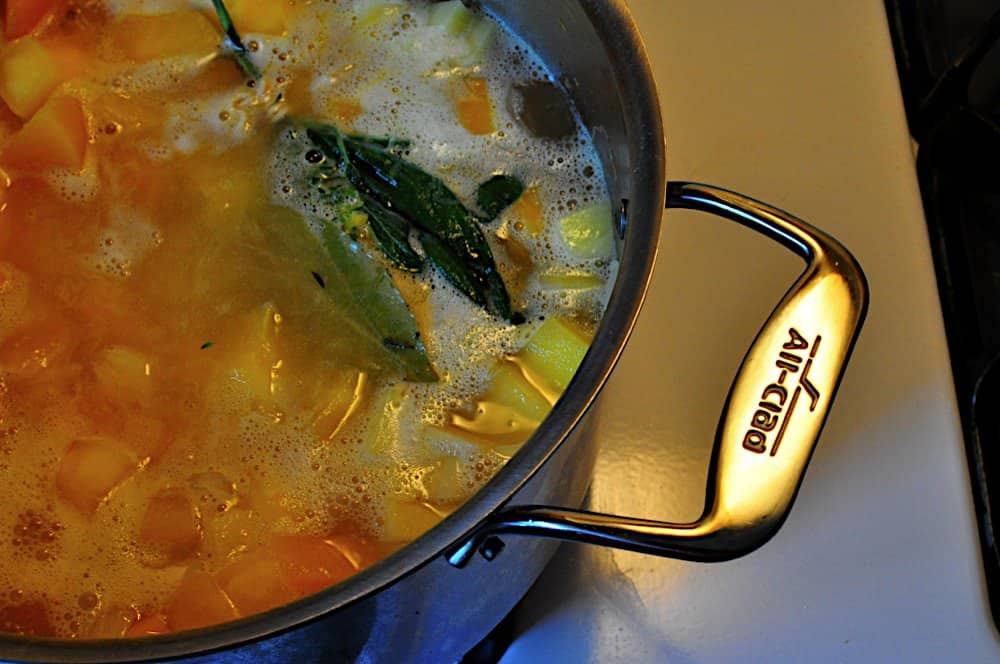
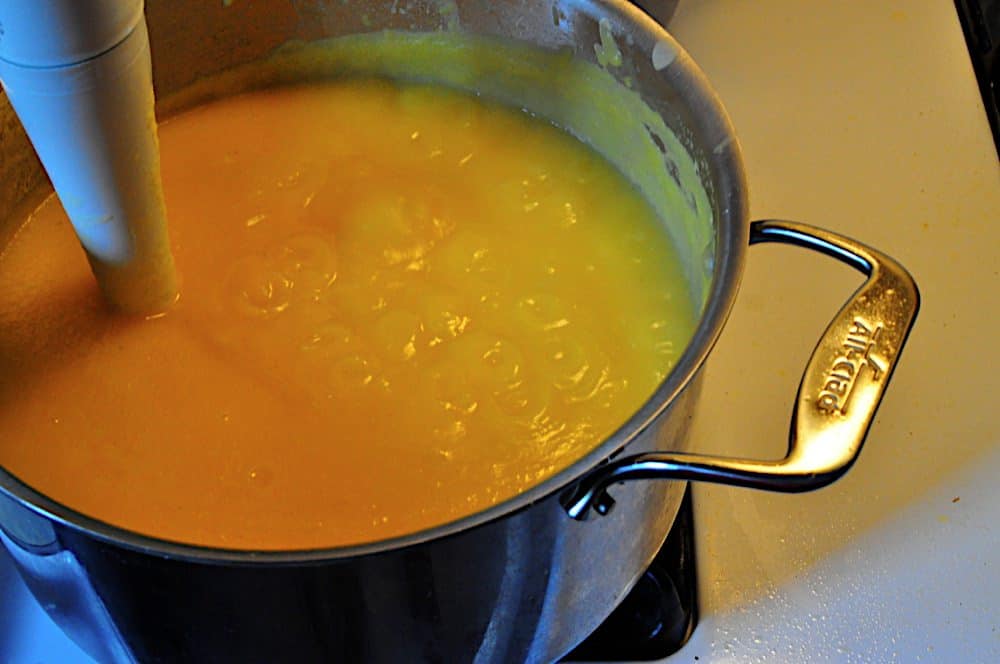
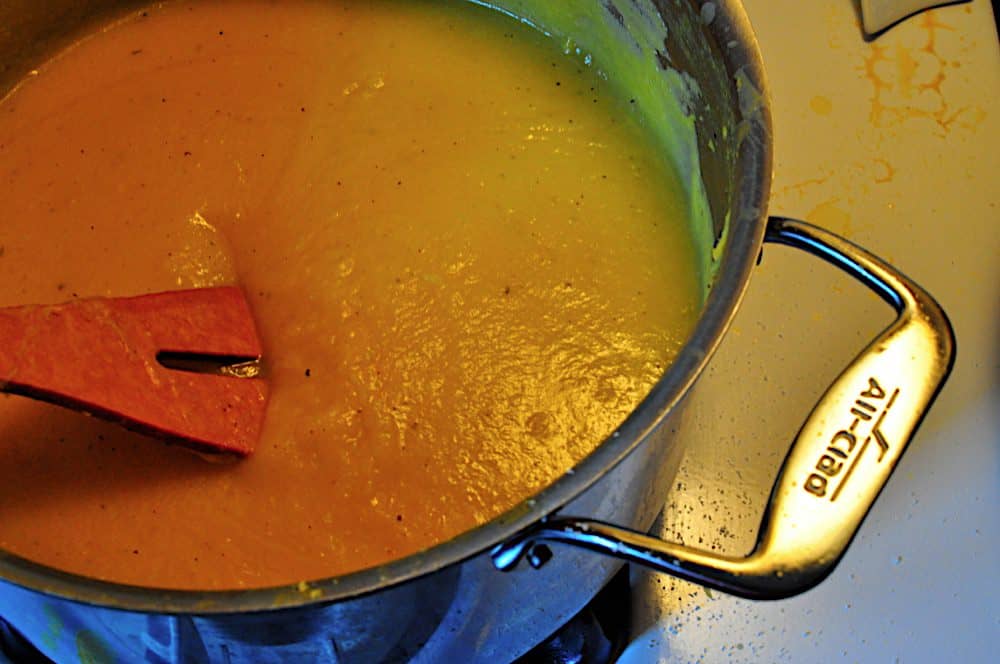
And, because mindless eating is so easy, it's time to go to my bag of tricks. If I'm going to slip up, and eat mindlessly, I want it to work for me. Smaller portions are key; using 9 inch dinner plates tricks my brain into thinking the portions are larger. Food with low calorie density helps; eating a lot of soup (or a big dinner salad, or a vegetable heavy stew, or bean heavy chili) fills me up while keeping the calories down. Finally, I need more meals where meat is a condiment, not the whole dish (like a stir fry where one pound of meat is bulked up with a bunch of vegetables).
I'm still trying to convince myself that brown rice and whole wheat pasta are as good as the regular versions. Whole wheat bread? Love it. Brown rice? OK, I can manage it, if I mix it with beans. Whole wheat pasta? Well, I'd rather not, if it's all the same to you.

What do you think? What are your New Year's resolutions? Any calorie reducing tricks you would like to share? Good ways to cook brown rice? Leave them in the comments section below.

Related Posts:
My Rules for losing weight still work, if I bother to follow them.
DadCooksDinner Loses Weight...then gains some back

Recommended Reading:
Pam Anderson The Perfect Recipe for Losing Weight and Eating Great

*Enjoyed this post? Want to help out DadCooksDinner? Subscribe using your RSS reader or by Email, recommend DadCooksDinner to your friends, or buy something from Amazon.com through the links on this site.  Thank you!

I'm on a mission...

January 3, 2011 by Mike Vrobel 7 Comments

For the New Year, my resolution is to write a cookbook.*
*No, I don't have a book deal.  I think my cookbook will be too much of a niche project, and I'll have to publish it myself as an e-book or through Amazon.com.  I'll figure that out once I have enough of a book to show someone.

Unfortunately, I can't write a book and keep up with posting three times a week.  Starting today, for the indefinite future, my new blogging schedule is posts on Tuesday and Thursday.
*I will have an occasional Monday post, when there is something I want to share that I just can't hold back.   Like I always ask: if you want to make sure you don't miss anything, subscribe to the blog (through a rss reader or through email) or follow me on Facebook or Twitter.

Thank you to all my loyal readers. I promise, I'm not abandoning you. You'll just have to get by with a little less of my opinions on food for a few months.  Then, hopefully, I'll have something new to show you!

Happy New Year!

January 1, 2011 by Mike Vrobel 2 Comments

Thank you to everyone who helped make 2010 a great year.  I can't wait to see what 2011 brings!

As a bonus, here the top 5 top 6 most popular articles I wrote in 2010:
1. Slow Cooker Pork Pot Roast
2. Rotisserie Pork Shoulder, Char Siu Style
3. Pressure Cooker Short Ribs
4. Rotisserie BBQ Baby Back Ribs
5. Picanha - Rotisserie Top Sirloin Steaks
6. Weekly Dinner Plans

Happy New Year!

Slow Cooker Turkey Thighs with Beer and Onions

December 28, 2010 by Mike Vrobel 24 Comments

Did you get what you wanted for Christmas this year? I did! There was an All Clad deluxe slow cooker with nonstick aluminum insert under my tree.
*Hey, we can't all want an official Red Ryder carbine action 200 shot range model air rifle for Christmas. And I'm much less likely to shoot my eye out.  But more likely to burn myself, so I guess that's a wash.

Turkey thighs are perfect for the slow cooker. They have enough fat and connective tissue to make them hard to overcook. Even better, turkey thighs have a big, meaty flavor to match the sweet beer and onion sauce.
*Hard to overcook is the key to slow cooking, because it means simmering for hours on end. I cringe when I see a slow cooker recipe with lean protien, like pork loin or chicken breasts. All I can think of is dry, dry meat.

I pull the skin off the thighs before cooking, a trick I learned from Cooks Illustrated. Turkey skin doesn't add anything to the recipe. Or at least, not anything good. After the long, slow cooking the skin comes out flabby and chewy. All it does is add extra fat to the sauce, which I don't want anyhow.

The final trick is to keep the liquid to a miniumum. There isn't much evaporation in slow cooking, so watery sauces are a real danger. I add a quarter cup of flour to thicken the sauce as it cooks, and only one bottle of beer for liquid. The turkey and onions give up more than enough liquid while they slow cook, and the result is a thick, creamy sauce of beer and onions.

If you are a dark meat fan (like me!), this recipe should be in your arsenal.

Recipe: Slow Cooker Turkey Thighs with Beer and Onions

Equipment

  • 6 quart or larger slow cooker (Crock Pot brand is fine, but I like my fancy one from All-Clad)


Ready to smear the mustard on the turkey


Notes

  • You will want something to soak up this wonderful sauce; serve with a side of egg noodles or mashed potatoes. Dinner rolls are a good addition as well. I like to serve this with green vegetables; I chose peas and a green salad.
  • Beer: What beer is best? Something with a lot of flavor, but not very bitter. I usually use Eliot Ness Amber Lager or Edmund Fitzgerald Porter from Great Lakes Brewing Company. (They're my local brewery.  I like to support the home team, so I usually have them on hand.) I also recommend Ommegang Abbey Ale from Cooperstown, NY; this Belgian style ale has the perfect flavor combination for the recipe. As a bonus, the extra large Ommegang bottle leaves plenty of beer for the cook.

What do you think? Questions? Other ideas? Leave them in the comments section below.

Related Posts:
Slow Cooker Pork Pot Roast
Slow Cooker Tex-Mex Pot Roast

*Enjoyed this post?  Want to help out DadCooksDinner?  Subscribe using your RSS reader or by Email, recommend DadCooksDinner to your friends, or buy something from Amazon.com through the links on this site.  Thank you!

Beating the Winter Farmers Market Blues

December 27, 2010 by Mike Vrobel 6 Comments

This time of year, "Buy local" gets interesting in Northeastern Ohio. It seems like all there is to buy is root vegetables. Anyone want more potatoes? Anyone?
*And what in the world do you do with celeriac? Help!

But! If you have a winter farmers market, make the trip. You'll be surprised by the abundance our farmers have for us at this time of year. Between storage vegetables, high tunnels, and cold frames, they provide a surprising variety of produce.

For example, here's the list of vegetables that were in my Christmas CSA box from Crown Point:

  • Beets
  • Butternut squash
  • Carrots
  • Daikon radish
  • Watermelon radish (looks like a turnip to me)
  • Cabbage
  • Sweet Potatoes
  • Lettuce mix
  • Garlic
  • Parsnips
  • Celeriac (What do I do? This is a serious cry for help!)
  • Eggs
  • and lots and lots of Potatoes, of course

Tim Knorr, who runs my CSA, apologized for giving us dirty root vegetables. The root crop washer "works with water, not ice", he explained. We have a foot of snow on the ground, last week's high was 22F, and you gave me enough (locally grown) vegetables to strain my back as I carry them to the car. I don't mind if the root vegetables are a little dirty!

Even if the vegetable selection isn't quite the same as the middle of August, I still want to visit my winter market. Before Christmas, I saw locally grown eggs, lamb, pork, beef, chicken, and even buffalo. (Can you tell I loaded up my freezer?)

Sure, buying local is easiest in the middle of the summer. But, even in the deep midwinter, it is worth the effort. Find your winter farmers market. You'll thank me!

What do you think? What do you buy at the winter farmers market? Any good recipes for celeriac?  Tell us about it in the comments section below.

Inspired by:
My CSA: Crown Point CSA
My local farmers market: Cuyahoga Valley Countryside Conservancy Farmers Market
Thank you all for your hard work this year!

*Enjoyed this post?  Want to help out DadCooksDinner?  Subscribe using your RSS reader or by Email, recommend DadCooksDinner to your friends, or buy something from Amazon.com through the links on this site.  Thank you!

Merry Christmas 2010

December 25, 2010 by Mike Vrobel Leave a Comment

Scrooge was better than his word. He did it all, and infinitely more; and to Tiny Tim, who did not die, he was a second father. He became as good a friend, as good a master, and as good a man, as the good old city knew, or any other good old city, town, or borough, in the good old world. Some people laughed to see the alteration in him, but he let them laugh, and little heeded them; for he was wise enough to know that nothing ever happened on this globe, for good, at which some people did not have their fill of laughter in the outset; and knowing that such as these would be blind anyway, he thought it quite as well that they should wrinkle up their eyes in grins, as have the malady in less attractive forms. His own heart laughed: and that was quite enough for him.

He had no further intercourse with Spirits, but lived upon the Total Abstinence Principle, ever afterwards; and it was always said of him, that he knew how to keep Christmas well, if any man alive possessed the knowledge. May that be truly said of us, and all of us! And so, as Tiny Tim observed, God bless Us, Every One!
[Charles Dickens, A Christmas Carol]

A Christmas Carol

Merry Christmas, everyone!

Mike Vrobel
DadCooksDinner.com

Pressure Cooker Turkey Chili with Chorizo and Pinto Beans

December 23, 2010 by Mike Vrobel 8 Comments

Pressure Cooker Turkey Chili with Chorizo and Pinto Beans

How does a pressure cooker help get dinner on the table on a weeknight? Here's a perfect example. I wanted a hearty pressure cooker turkey chili for a cold winter night. This recipe came together from my pantry and freezer; all the ingredients are things I keep on hand, just in case.

I have fallen head over heels in love with pre-soaked beans from my pressure cooker. In the past, I couldn't be bothered to pre-soak my beans. I have to think ahead to pre-soak beans; it too much effort. *The thinking is the effort, not the sorting. Sorting beans for pre-soaking takes five minutes. I would just not remember at all, get home, and say "darn it!"


But then, I tried the Cooks Illustrated suggestion of brining my beans while they pre-soak. While testing that approach, I found out how quickly the beans are done cooking when pre-soaked; instead of thirty to forty minutes, they're done in ten to twelve. That meant I could cook the beans with my other ingredients, and have a bean stew ready in under a half an hour of cooking time. And the brined beans had a depth of flavor that I couldn't seem to get, no matter how much salt I added at the end of cooking. Since I put these ideas together a few months back, I have remembered to soak my beans.  The results have been good enough for me to overcome my inherent laziness!  Now I make bean soups, stews, and chilis about once a week. They are the perfect dinners for fall and winter.

This recipe was inspired by the recent "Our Favorite Chili" recipe in Cooks Illustrated, where they brine their beans and add cocoa powder to the spice blend to add an earthy depth to the chili. I didn't go with their full-on version (chunks of beef, spice paste made of dried chiles instead of chili powder) because this was a Tuesday night dinner, and it needed to be done quickly.
*I need to try the spice paste made out of dried chiles. Both CI and Kenji Alt have recommended it. But again, Tuesday dinner. Not the time to go whole hog.

Do you have a pressure cooker, and the presence of mind to soak beans before you leave for work? Here's a weeknight chili recipe for you.

Recipe: Pressure Cooker Turkey Chili with Chorizo and Pinto Beans

Inspired By: Our Favorite Chili, Cooks Illustrated Magazine Jan/Feb 2011
Cook time: 35 minutes

Equipment:

  • Pressure cooker, at least 6 quarts (bigger is better, like my giant Kuhn Rikon 12-quart pressure cooker)
Brining the beans
Brining the beans


Variations:
*Don't have a pressure cooker? Cook the recipe in a dutch oven. In step 3, instead of pressure cooking on high, bring all the ingredients to a boil. Then cover the pot and move it to a 350*F oven for 2 hours. Remove from the oven, and season to taste.

*Even quicker pressure cooker chili: If you have pre-cooked beans, you can use them instead of dried. Skip the brining step, and cook the chili for only 4 minutes under high pressure.

*Increase the heat: The chorizo and chili powder will add a medium heat level to the chili. If you want more firepower, add a teaspoon of cayenne with the spices, or a couple of diced jalapeno peppers with the aromatics.

Notes:
*I like to serve this chili Cincinnati style. Serve on top of pasta, then top with diced raw onions and shredded cheddar cheese.

*As with most stews and chilis, this recipe freezes well. I freeze it in 2 cup containers for future lunches.

Wait...are you taking my picture?
Daaaaad!

What do you think? Questions? Other ideas? Leave them in the comments section below.

Related Posts:
Pressure cooker pork chili with beans
Pressure cooker beef short ribs
My other pressure cooker recipes

Inspired By:
Our Favorite Chili, Cooks Illustrated Magazine Jan/Feb 2011

*Enjoyed this post?  Want to help out DadCooksDinner?  Subscribe using your RSS reader or by Email, recommend DadCooksDinner to your friends, or buy something from Amazon.com through the links on this site.  Thank you!

Rotisserie Strip Loin Roast

December 16, 2010 by Mike Vrobel 13 Comments

I wanted a different rotisserie beef roast for Christmas this year. I found a winner. The hardest part? Figuring out what it's called.

My local grocery store sells this cut of meat as the Strip Loin Roast. The Cattlemen's Beef Board calls it Top Loin Roast. I think of it as New York strip, because every steakhouse I've been to cuts it into steak and calls it that. Except, allegedly, in New York City, where the steakhouses call it a Kansas City Strip.1Allegedly. I've read this in a number of places. But when I went looking through the menus of New York City steakhouses, I couldn't find a single one with a Kansas City strip steak on the menu.

DSC_1044

Whatever it is called, it is the cut of meat opposite the tenderloin on a short loin. Picture a porterhouse - that's a cross cut of the short loin. On one side of the T bone is the tenderloin, on the other is the New York strip steak.

New York strip is one of my favorite cuts of beef; tender, full of flavor, and well marbled with fat. I often use it for steaks, but I've never cooked it as a roast before. I used my standard rotisserie roast technique; salt early (at least 2 hours before cooking), go simple (only salt and pepper), let the rotisserie work its magic (amazing browned crust in 45 minutes).

DSC_1045

The results made me wonder why this cut isn't more popular as a roast. It is the perfect middle point between a prime rib roast and a tenderloin roast. It has big, beefy flavor of a rib roast, in a leaner, boneless roast like a tenderloin. Looking for a great roast for the holidays? Give this recipe a try.

Recipe: Rotisserie Strip Loin Roast

Equipment

  • Grill with Rotisserie attachment (I use a Weber Summit with an infrared rotisserie burner. Here is the current version of my grill.)
  • Aluminum foil drip pan (9"x13", or whatever fits your grill. I use an enameled steel roasting pan.)
  • Butchers twine
  • Instant Read Thermometer

Notes

  • Herb rubbed: Looking for more than just salt and pepper? Use the herb rub from my Rotisserie Rib Roast.
  • Butter basted: While this roast has enough flavor to stand on its own, a little butter baste never hurts. Use the butter baste from my Rotisserie Beef Tenderloin recipe.
  • Serve with horseradish sauce and rotisserie pan potatoes.

What do you think? Questions? Other ideas? Leave them in the comments section below.

Related Posts:
Rotisserie Prime Rib
Rotisserie Beef Tenderloin
Rotisserie Pan Smashed Redskin Potatoes
Click here for my other rotisserie recipes.


Check out my cookbook, Rotisserie Grilling.Everything you could ask about the rotisserie,
plus 50 (mostly) new recipes to get you cooking.

It's a Kindle e-book, so you can download it and start reading immediately!


*Enjoyed this post? Want to help out DadCooksDinner? Subscribe to DadCooksDinner using the RSS or Email options on the right, link to this post from your blog, recommend DadCooksDinner to your friends, or buy something from Amazon.com through the links on this site. (Like my Rotisserie Grilling cookbook...)

Rotisserie Pan Smashed Potatoes

December 14, 2010 by Mike Vrobel 5 Comments

An eagle eyed reader spotted these in the background my rotisserie flank steak recipe, and asked about them. Anonymous, here you go: my recipe for Rotisserie Pan Smashed Potatoes.

When I saw Ree Drummond's recipe for smashed red-skin potatoes on The Pioneer Woman, I had to try them. Smashing the potatoes* gives them lots of nooks and crannies to brown and crisp, turning them into extra thick potato chips. Or whole food tater tots. Either way, I can't stop eating them.
*Good name for a band..."Smashing the potatoes".

Since my motto is "everything tastes better on the rotisserie"*, I cook my smashed potatoes in the drip pan while my main ingredient spins above them. The high heat of the grill crisps the potatoes while they soak up the drippings and fat from the main ingredient.
*If you follow this blog, you're probably thinking: now he figures out his motto? What took him so long?

Recipe: Rotisserie Pan Smashed Potatoes

Adapted From: Ree Drummond Crash Hot Potatoes [thepioneerwoman.com]

Equipment:

  • Grill with Rotisserie attachment (I used a Weber Summit with an infrared rotisserie burner. Here is the current version of my grill.)
  • Aluminum foil drip pan (9"x12", or whatever fits your grill)

Ingredients:

  • 1 ½ lbs new potatoes (preferably red-skin new potatoes)
  • 1 tablespoon kosher salt (for the boiling water)
  • 1 ½ teaspoon Kosher salt (for sprinkling on the potatoes)
  • ½ teaspoon fresh ground black pepper
  • 1 tablespoon vegetable oil

Directions:
1. Pre-cook the potatoes: Put the potatoes in a pot, cover with water, and add 1 tablespoon kosher salt. Bring to a boil, then simmer for 10 minutes, until the potatoes are just cooked through - they should offer only slight resistance when pierced with a paring knife. Drain the potatoes.

2. Smash the potatoes: Spread the potatoes out in the drip pan with about an inch of space between each potato. Using a potato masher, gently smash each potato until it is half its original height. (See picture below). Sprinkle the smashed potatoes evenly with the salt and pepper, then drizzle with the vegetable oil.

3. Prepare the grill: Set the grill up for rotisserie cooking at the heat your recipe calls for - rotisserie pan potatoes work best at medium to high heat. For my Weber Summit, this means removing the grates, turning the two outer burners (burners 1 and 6) to high, and turning the infrared burner to high. Then I put my drip pan in the middle, over the unlit burners, and let the grill preheat for ten to fifteen minutes. (See My Rotisserie Basic Technique Post for more rotisserie setup details.)

4. Cook the potatoes: Put the drip pan under your main rotisserie ingredient and cook for one half hour to one hour, until the potatoes are well browned. If possible, rotate the drip pan halfway through the cooking time; my grill has an infrared rotisserie burner on the back wall of the grill, so the potatoes closer to the burner brown quicker.

5. Serve: As soon as the potatoes are well browned, remove them from the drip pan using a slotted spoon. Dripping fat can be too much of a good thing if the potatoes sit in the pan too long.

Variations:
*Microwave method: Replace step 1 with: Put the potatoes in a microwave safe bowl, cover with plastic wrap, and microwave on high for 6 minutes.

Notes:
*I prefer new red-skin potatoes, about 1 to 1 ½ inches across for this recipe. Fingerling potatoes also work well. If you want to go with regular sized red potatoes, you may have to boil them for 15 minutes to get them tender enough to smash.

*When pre-cooking the potatoes, you want them just barely cooked through - firm enough to hold together when you smash them, but not so firm that they can't be smashed at all.

*If my main ingredient cooks a longer than an hour, I add the potatoes with about an hour left in my cooking time. I pull the drip pan out (carefully - it is hot and full of fat) and smash the potatoes in it. If I had a second drip pan, I could swap it in, but I think most of the fat and drippings happen in the first hour of cooking, and I'd rather the potatoes sat in them while they cooked than in a clean pan.

*Also, if my main ingredient is really fatty, like duck or pork ribs, I skip drizzling the potatoes with the vegetable oil.

What do you think? Questions? Other ideas? Leave them in the comments section below.

Related Posts:
Rotisserie Pan Potatoes
Rotisserie Baby Back Ribs
Rotisserie Duck
Rotisserie Stuffed Pork Loin (Smashed potatoes bathed in dripping pork fat and cheese. Don't tell your cardiologist.)
Click here for my other rotisserie recipes.

Adapted from:
Ree Drummond Crash Hot Potatoes [thepioneerwoman.com]
The Pioneer Woman Cooks: Recipes from an Accidental Country Girl


Check out my cookbook, Rotisserie Grilling.

Everything you could ask about the rotisserie,
plus 50 (mostly) new recipes to get you cooking.

It's a Kindle e-book, so you can download it and start reading immediately!


*Enjoyed this post? Want to help out DadCooksDinner? Subscribe to DadCooksDinner using the RSS or Email options on the right, link to this post from your blog, recommend DadCooksDinner to your friends, or buy something from Amazon.com through the links on this site. (Like my Rotisserie Grilling cookbook...)

Things I Love: Unicorn Magnum Plus Pepper Grinder

December 13, 2010 by Mike Vrobel 5 Comments

The key to cooking is properly seasoning food. When a recipe ends with the instruction season to taste, I reach for salt and pepper. I use them in just about everything that comes out of my kitchen.

Pre-ground pepper is flat and lifeless. It has a little heat, nothing more. Fresh ground pepper is sharp, spicy, and bursting with flavor. Why use pre-ground? All it takes to improve your cooking is a good pepper mill, so why wouldn't you use one? Well, because some pepper mills are a pain. They're hard to fill, hard to turn, and only grind a tiny amount of pepper.

The Unicorn Magnum pepper mill is the best pepper grinder around; it solves all those problems, and makes fresh ground pepper easy.
*I love this pepper grinder in spite of the name. Every time I say it, I have to bite my tongue to not follow with: "The most powerful pepper mill in the world."

The Magnum has a very large grinding mechanism, which produces a huge shower of ground pepper with each twist of the knob.
*15 twists of the top give me 1 teaspoon of pepper, which is a very large amount. I usually start with 7 twists, or a half teaspoon of pepper, when seasoning to taste.

The Magnum has a wide range of grinds, adjusted by turning a small knob in the business end of the mill. The grinds range from a fine powder (my favorite for soups and stews) up to very coarse (perfect for topping a steak).

Coarse grind on the left; fine grind on the right

Finally, it is easy to fill. There is a big loading hole in the side, hidden behind a twisting collar just under the grinding knob. You don't have to remove any of the grinder to fill it; twist the collar, pour in the pepper, then twist it shut.

This loading collar is, unfortunately, the only problem I have with the design. The loading collar is directly under the knob. Sometimes, when I'm grinding, I accidentally grab the loading collar along with the knob. This opens up the loading hole, and if the mill is full enough, I get a spray of whole peppercorns bouncing out. I've learned to keep my fingers off the collar when I'm grinding. And, after all the other, really awful loading mechanisms I've dealt with, I'm willing to alter my grinding grip to have the easy loading.

I own the giant Magnum Plus model, which is 9 inches tall and holds almost one cup of peppercorns; the regular sized Magnum model is 6 inches tall and holds a half cup of peppercorns. Both have identical grind mechanisms, so they have all the benefits I list above. They also come in any color you like...as long as it's black.
*Everyone who reviews it makes a reference to Darth Vader. It's the pepper mill that finds your lack of faith...disturbing.
**Sorry, had to do it.

Want to own the best pepper mill? Get yourself a Magnum.

Disclaimer: This month I'm writing about essential kitchen tools. As with all my "Things I Love" posts, I am not receiving anything from the manufacturer, and I bought all the items with my own money. I use these tools every day in the kitchen, and I would hate to live without them. I thought, with Christmas coming, you might need a few gift ideas for the cook in your life. And, as always, if you buy something through the Amazon.com links on my site I get a small commission from the purchase. Thank you!
(OK, I'm good with the FCC now.)

Unicorn Magnum Plus Pepper Mill 9-in.
Magnum Peppermill - 6-Inch

*Enjoyed this post?  Want to help out DadCooksDinner?  Subscribe using your RSS reader or by Email, recommend DadCooksDinner to your friends, or buy something from Amazon.com through the links on this site.  Thank you!

Pressure Cooker Turkey Stock Revisited

December 9, 2010 by Mike Vrobel 14 Comments

This post is dedicated to loyal reader Jason. Jason asked me what I thought of this recipe for "Perfect" Pressure Cooker Chicken Stock, from Kyle Connaughton by way of Heston Blumenthal's test kitchen.
Perfect Pressure Cooker Chicken Stock [saveur.com]

My initial reaction was mixed. They were not bragging when they said "Perfect". This is an attempt to make the ultimate stock.  I found myself asking: "Why so fussy?" Why buy specific ingredients to make stock, like chicken wings and ground chicken? My goal with pressure cooker stock is to use things up. I take scraps and leftovers, add a few aromatics, and turn them into a delicious base for future meals. *Making stock feels like culinary sleight of hand. I use scraps that would normally be discarded, and turn them into a stock far better than any of that "broth" they sell in a can at the grocery store.

Even though his recipe looked finicky, I was intrigued by Mr. Connaughton's explanations. Why does a pressure cooker makes such good stock?  Why did he make specific choices in the ingredients and technique? He explains it all. By the time I was done reading, I wanted to try some of the tricks in Mr. Connaughton's recipe. Making stock from my leftover Thanksgiving turkey was the perfect opportunity.
*Also, I wanted to try out my Kuhn Rikon Family Stockpot with a whole turkey carcass. It swallowed it easily, with enough room to spare to squeeze a second carcass in if I wanted to. Wow. Every other pressure cooker I've owned needed the turkey carcass broken up to fit in the pot. I'm loving the Kuhn Rikon more and more.

The first trick I wanted to use is thin-slicing the aromatics. Mr. Connaughton says thin slicing increases the surface area, which helps extract more flavor from the aromatics.
*He uses chicken wings in his stock for the same reason - smaller bones mean better flavor extraction.

The second trick is adding a cup of white wine to the pot. I've done this in the past; I learned my turkey stock recipe from Cooks Illustrated, and they always added white wine to their turkey stock. I stopped doing it when I went to the pressure cooker method; I assumed the wine flavor would get lost under pressure. Also, I didn't want to open a bottle of wine just to make stock. According to Mr. Connaughton, I was making a mistake. Wine was going back into the recipe.
*Even better, I had a half bottle of white wine left over from Thanksgiving. No wasted wine!

These two simple tricks were worth the effort. The wine adds a hint of fruit and acid to the turkey flavor in the stock. I used the stock in a simple turkey noodle soup, and I re-filled my bowl three times.
*Okay, maybe four times.

I know I'm adding some extra steps here. One of the advantages to my original recipe is its simplicity. But, if you have leftover turkey bones and want to make the ultimate pressure cooker stock, this is the technique to use.
*And yes, I will eventually try the Perfect Pressure Cooker Chicken Stock recipe as written. But right now, I'm set with stock. I had two turkey carcasses left over.  I made twelve quarts of stock. I'm out of freezer containers!

Recipe: Pressure Cooker Turkey Stock, Updated
Inspired By: Kyle Connaughton, Perfect Pressure Cooker Chicken Stock, [saveur.com]
Cook time: 75 minutes

Equipment:

  • 8 to 12 quart Pressure Cooker (I use this one: Kuhn Rikon 12-Quart Family Stockpot Pressure Cooker)

Ingredients:

  • Carcass from a roasted turkey (I had the bones from a 12 lb bird)
  • 1 cup white wine
  • 2 medium onions, trimmed, peeled, and sliced thin
  • 2 large carrots, trimmed, peeled and sliced thin
  • 1 large leek, white and light green parts, trimmed, peeled, rinsed carefully, and sliced thin (or substitute 2 bay leaves)
  • 6 quarts of water, or just enough to cover the ingredients

Directions:
1. Prep and fill the pressure cooker: Put the turkey carcass in the pressure cooker. (If you have a smaller pressure cooker, you may have to break the carcass into a few pieces to get it to fit.) Add the white wine and bring to a boil over high heat, then reduce the heat to low and simmer while you clean and slice the vegetables. Add the sliced vegetables to the pot, and add water to cover the turkey by about 1 inch.

2. Pressure cook the stock: Lock the lid on the pressure cooker, increase the heat to high, and bring the cooker up to high pressure. Lower the heat to maintain the pressure at high and cook for 45 minutes. Remove the pot from the heat, and allow the pressure to release naturally, usually about 20 minutes.
*Make sure you read your pressure cooker manual for the details of how to lock the cooker and bring it up to pressure. Every model does things a little differently.  Also, because of all the water in the cooker, it will take longer to come up to pressure and cool down.

3. Strain the stock: Strain the stock into another pot through a fine mesh strainer and cheesecloth. See my stock straining post for details.

4. Defat the stock: (Optional) Refrigerate the stock overnight, or up to 2 days, so the fat floats to the surface and forms a hard cap. Remove the fat cap from the top of the stock.

5. Use or freeze the stock: Use the stock immediately, or freeze for later use. I portion the stock into both 1 quart and 2 cup containers for freezing; see the picture at the top of the post.

Variations:
*Add some herbs - if I have them on hand, I add a quarter bunch of parsley or parsley stems, and/or a sprig of fresh thyme. I wouldn't use rosemary, because it can be overpowering.

*Add some garlic - Adding a clove or two of garlic to the broth gives it a nice flavor.

Notes:
**I don't add any salt when I make stock.  That means, when I use it, I cannot forget to add salt.  If I don't add it, whatever I'm cooking will taste flat.  (Especially if the recipe is depending on all the extra sodium that store-bought stock contains.)  Remember, seasoning to taste is the key to good cooking.

*White wine - I avoid Chardonnay, which is usually made with a lot of oak.  I prefer whatever cheap white wine I can find beyond that; I tend to gravitate towards Pinot Grigiot and Sauvignon Blanc, mainly because I like them, and I don't mind having ⅔rds of a bottle left over.
*One of the keys to cooking is staying calm.  A glass of wine works wonders when I'm facing a disaster in the kitchen.

*Don't have a pressure cooker? Make stock in your oven for a long, slow, even simmer. Use the ingredients from this recipe with the following technique: Turkey Stock Done Right.

*What to do with all that stock? It's time to make soup! See the Related Posts section for ideas.

Questions? Comments? Other ideas? Secret ingredients in your stock recipe? Leave them in the comments section below.

Related Posts:

Turkey Noodle Soup

Tortilla Soup
Thai Coconut Soup
Pressure Cooker Turkey Stock
Straining stock

Inspired by:
Kyle Connaughton, Perfect Pressure Cooker Chicken Stock, [saveur.com]

*Enjoyed this post?  Want to help out DadCooksDinner?  Subscribe to DadCooksDinner using the RSS or Email options on the right, link to this post from your blog, recommend DadCooksDinner to your friends, or buy something from Amazon.com through the links on this site.  Thank you!

Pork Tenderloin with Tomatillo Salsa and White Beans

December 7, 2010 by Mike Vrobel 2 Comments

In Rick Bayless's Salsas That Cook, there is a Sunday dinner worthy recipe for roast pork loin simmered in a tomatillo salsa and white bean sauce. The flavors are a revelation; the meaty pork loin, spicy tomatillo salsa, and creamy white beans are a brilliant combination.

I love that recipe, but I never make it anymore. My adapted version is this quick weeknight recipe. Instead of long-cooking pork loin, I use pork tenderloin. The tomatillo salsa and white beans make a quick pan sauce, and the whole thing finishes in the oven.

When I'm prepared, and my freezer is stocked, this is a homemade recipe. I'll have homemade tomatillo salsa and beans in the freezer. When my stock of homemade ingredients is dwindling, canned beans and store bought tomatillo salsa* come to the rescue. Either way, this is a remarkably easy recipe - brown the pork, dump the can of salsa and the drained beans, heat through, and it is ready to eat.
*My preference is for Rick's Frontera Tomatillo Salsa, out of loyalty to the original recipe.

Looking for a weeknight Mexican recipe, one with a different flavor profile than the usual taco night? Give this recipe a try.

Recipe: Pork Tenderloin with Tomatillo Salsa and White Beans

Inspired By: Rick Bayless, Salsas That Cook

Equipment:

  • 12 inch fry pan with oven-safe handle (or a wide dutch oven)

Ingredients:

  • 1 teaspoon vegetable oil
  • 2 pork tenderloins, roughly 1 pound each
  • 1 teaspoon kosher salt (½ teaspoon table salt)
  • 2 cups tomatillo salsa (homemade or 16oz of good store bought salsa)
  • 2 cups white beans, drained and rinsed (homemade or 15 oz canned)

Directions:
1. Sear the tenderloins: Set the oven to 400F. Heat the teaspoon of oil in the fry pan over medium-high heat. While the pan is heating, pat the tenderloins dry with paper towels, trim the silver skin out (optional) and sprinkle with the salt. When the oil in the pan is shimmering, add the tenderloins to the pan. Sear for 3 minutes, until the first side is well browned. Rotate the tenderloin by a third, sear for another 3 minutes, rotate it by another third, and sear for a final 3 minutes. Remove the tenderloins to a plate.
I treat tenderloins like they have three "sides"; their shape is more triangular than round.

2. Deglaze the pan: Add the tomatillo salsa and beans to the pan and stir, scraping the browned bits of pork from the bottom of the pan. Once the salsa and beans are simmering add the pork back into the pan, submerging it in the sauce as much as possible.

3. Roast the pork: Move the pan to the oven. (Be careful, it will be heavy.) Roast in the oven for 15 to 20 minutes, until it has an internal temperature of 140F in its thickest part.
Optional: Cook the pork on the stove top. Instead of moving the pork into the oven, reduce the heat to a simmer and put a lid on the pan. Cook on the stove top, turning the pork occasionally, until 140*F in its thickest part.

4. Slice and serve: Remove the pan from the oven. (Again, be careful; now the pan is both heavy and very hot.) Remove the pork to a cutting board, and let rest for 5 minutes. Pour the tomatillo and bean sauce onto a serving platter. Slice the pork crosswise into ½" thick slices, and serve on top of the tomatillos and beans.

Variations:
*Spice rubbed pork: When salting the pork, add ½ teaspoon of chili powder and ½ teaspoon of ground cumin.

*Different salsa and beans: Use your favorites: Chipotle salsa and black beans are particularly good.

Notes:
*Serve with white rice, tortillas (or tortilla chips), and a green salad.

*Rick's Salsas that Cook taught me that Mexican salsa is not just for dipping tortilla chips - the different varieties of sauce can completely change the flavor profile of a recipe.

What do you think? Questions? Other ideas? Leave them in the comments section below.

Related Posts:
Tomatillo Salsa
Pan Seared Flank Steak with Tomatillo Pan Sauce

Adapted from:
Salsas That Cook : Using Classic Salsas To Enliven Our Favorite Dishes

*Enjoyed this post?  Want to help out DadCooksDinner?  Subscribe using your RSS reader or by Email, recommend DadCooksDinner to your friends, or buy something from Amazon.com through the links on this site.  Thank you!

Things I Love: Victorinox Paring Knives

December 6, 2010 by Mike Vrobel 1 Comment

I have two workhorse knives in my kitchen. My chef's knife does eighty percent of the cutting work. The remaining twenty percent is done by my paring knife.
*Well, other than a "Less than 1%" category that falls to my bread knife and my boning knife.

I own a bunch of different paring knives. I have expensive paring knives from Germany and Japan, cheap paring knives from Switzerland and Brazil. I even own an Alton's Angle paring knife, because I had to try out the angle to see if it was worth it.

*Yes, I have a knife buying issue. I've kept a tight watch on my purchases, because my knife block is overflowing. Once I get a bigger block, watch out...

**Now, I would be curious to try out a Sheep's Foot paring knife, as recommended by Kenji Alt.

***Arrgh. There I go again.

Normally, I'm a fan of the "buy the best, and only cry once" approach. My chef's knife is embarassingly expensive, and I love it. But...well...see that array of paring knives up there? I laid them out from least to most expensive, left to right. Which one do you think I reach for every time?

The Victorinox paring knife, second from the left, is my favorite. It's sharp, light, and effortless to use.  With a chef's knife, I want some weight, some heft, so the knife does the work.  With a paring knife, that extra weight makes it feel heavy and slow.  The Victorinox feels light and swift in my hand.

I use it when I want a really fine mince. (Shallots, usually). I use it to trim meat, because it is so inexpensive I don't feel guilty throwing it in the dishwasher. It is my free-handed cutting utensil; when I need to core an apple, or trim the ends off an onion to throw in the stock pot, it leaps from the block into my hand.
*Yes, I know, shame on me for trimming an onion free-handed. Sometimes I don't feel like cleaning off the cutting board...

How much would you pay for such a versatile tool? Thirty dollars?  Forty?  Sixty? Here's the best part. It costs $5. That's right - five dollars. Can you pass up such a bargain? (Checks Amazon)...wait, what? They upped the price to eight dollars? What a rip off! That's robbery! That's...well, that's still a great price for such a good knife. If you have space in your knife block, grab one of these today. As you can see in the picture, I have two. I would get depressed when I reached for it and it was in the dishwasher.

*All joking aside, Victorinox knives are a great deal.  If I was just starting out, outfitting my kitchen, the first two things I would buy are the Victorinox Chef's knife and this paring knife.  Later on I would add their boning knife and bread knife.  That's all you really need.

*Beyond that...God help you if you become a knife addict like me.  But have you seen this knife? I'm in love.

Disclaimer: This month I'm writing about essential kitchen tools. As with all my "Things I Love" posts, I am not receiving anything from the manufacturer, and I bought all the items with my own money. I use these tools every day in the kitchen, and I would hate to live without them. I thought, with Christmas coming, you might need a few gift ideas for the cook in your life. And, as always, if you buy something through the Amazon.com links on my site I get a small commission from the purchase. Thank you!
(OK, I'm good with the FCC now.)

Victorinox 47508 3-¼-Inch Paring Knife

*Enjoyed this post?  Want to help out DadCooksDinner?  Subscribe using your RSS reader or by Email, recommend DadCooksDinner to your friends, or buy something from Amazon.com through the links on this site.  Thank you!

Rotisserie Flank Steak, Churrascaria style (Fraldinha)

December 2, 2010 by Mike Vrobel 8 Comments

I am always looking for new rotisserie recipes. That is part of why I started this blog; when I was searching the internet for rotisserie recipes, I couldn't find them. One of the few sources of rotisserie recipes has been Steven Raichlen, both in his cookbooks and on his TV show. When he turned his sights on Brazil in Planet Barbecue, I was in heaven. Brazil's famous churrascarias spit roast all their meat on the rotisserie, and turn out some of the most famous barbecued meat in the world.
*Get it?  "Turn" out?  I amuse myself.

Rotisserie flank steak jumped out at me from the pages of Planet Barbecue. I never thought about cooking flank steak on the rotisserie; it seemed way too thin to get the crispy, browned crust that is the mark of a good rotisserie recipe. After reading Steven's recipe, and seeing the pictures on the Fogo de Chao website, I had to give rotisserie flank steak a try.

The steaks they had at my local grocery store were thin, even for flank steaks.  Would it brown enough before it overcooked?
*For me, anything past medium is overcooked.

Stephen hadn't led me wrong. The rotisserie gave it a browned crust, particularly at the edges, and it was cooked to a perfect, warm pink medium in the middle. When topped with a sharp, vinegary Brazilian salsa, the result was a steak I'm going to make again.

Recipe: Rotisserie Flank Steak, Churrascaria style (Fraldinha)

Adapted From: Steven Raichlen Planet Barbecue

Equipment:

  • Grill with Rotisserie attachment (I used a Weber Summit with an infrared rotisserie burner. Here is the current version of my grill.)
  • Aluminum foil drip pan (9"x12", or whatever fits your grill)

Ingredients:

  • 1 flank steak, 1 ½ lbs or larger (thicker is better)
  • 2 teaspoon kosher salt
  • ½ teaspoon fresh ground black pepper

Brazilian Salsa (optional, but a great flavor boost for the beef)

  • ¼ cup fresh parsley leaves
  • 1 red bell pepper, stemmed and cored
  • ½ medium red onion, trimmed and peeled
  • ¼ cup red wine vinegar
  • 1 teaspoon kosher salt
  • ½ teaspoon fresh ground black pepper
  • ¼ cup extra virgin olive oil

Directions:
1. Prepare the flank steak: Attach the flank steak lengthwise to the rotisserie spit and forks. I run the spit and forks through each end of the flank steak, about 1 inch in from each edge, and secure it with the forks. (See picture below). Sprinkle the salt and pepper on the steak.

2. Prepare the grill: Set the grill up for rotisserie cooking at high heat. For my Weber Summit, this means removing the grates, turning the two outer burners (burners 1 and 6) to high, and turning the infrared burner to high. Then I put my drip pan in the middle, over the unlit burners, and let the grill preheat for ten to fifteen minutes. (See My Rotisserie Basic Technique Post for more rotisserie setup details.)

3. Prepare the salsa: While the grill is heating, I prepare the salsa with my food processor. First, put the parsley leaves in the processor and and process with 1 second pulses until finely minced. Then add the red bell pepper, cut into chunks, and process with 1 second pulses until it is finely minced. Next, add the red onion, cut into chunks (again), and process with 1 second pulses until it is finely minced (again). Add the red wine vinegar, salt and pepper, and pulse a few times to combine, then add the olive oil and process for for 10 to 20 seconds or until completely mixed.
*Don't have a food processor? Mince the parsley, bell pepper and red onion, then combine in a bowl with the rest of the ingredients, and stir to combine.

4. Cook the flank steak: Put the spit on the grill, start the rotisserie motor, and cook with the lid closed. Cooking time will be 10 to 15 minutes for medium; a good rule of thumb is 10 minutes of cooking time per inch of thickness.
*The best way to determine the doneness is with an instant read thermometer. The flank steak will be medium when it measures 130*F internal temperature at its thickest point. When checking the temperature, watch out for the spit and the forks, because they will throw the reading off; aim for the center mass of the flank steak.

5. Serve: Remove the steak from the spit, and rest for at least ten minutes before carving. Cut the steak across the grain into thin slices, ¼" to ½" thick. Top the slices with some of the salsa and serve, passing the rest of the salsa on the side.

Notes:
The key to this recipe is getting the biggest flank steak you can find. The longer the steak cooks, the better; more time on the grill leads to a better browned crust on the steak. I bought the thickest flank steak at my local grocery store, but it was only 1.5 lbs, which isn't all that big. Next time I'm going to one of my local specialty stores to get a thicker steak. My steak was about 1 inch thick; if you can find a thicker flank steak, increase the cooking time by about 5 minutes per half-inch of thickness.

*Another tip from Mr. Raichlen is to find a steak with as much fat on it as possible. I've never seen a flank steak with much fat on it, but I'll pass the tip along in case you get lucky.

*The key to this recipe is high heat. I think you should only do this recipe if you have a charcoal grill, or a dedicated infrared rotisserie burner on your gas grill. It will be hard to get enough heat to brown the flank steak without one or the other; a regular gas grill will struggle to generate enough heat. (If you give it a try on one, let me know about it in the comments; I want to hear how it went.)

What do you think? Questions? Other ideas? Sources for fatty flank steaks in the Akron area? Leave them in the comments section below.

Related Posts:
Picanha - Rotisserie Top Sirloin Steaks
Rotisserie Chicken Legs
Click here for my other rotisserie recipes.

Adapted from:
Steven Raichlen Planet Barbecue


Check out my cookbook, Rotisserie Grilling.

Everything you could ask about the rotisserie,
plus 50 (mostly) new recipes to get you cooking.

It's a Kindle e-book, so you can download it and start reading immediately!


*Enjoyed this post? Want to help out DadCooksDinner? Subscribe to DadCooksDinner using the RSS or Email options on the right, link to this post from your blog, recommend DadCooksDinner to your friends, or buy something from Amazon.com through the links on this site. (Like my Rotisserie Grilling cookbook...)

Tapenade

November 30, 2010 by Mike Vrobel 2 Comments

Tapenade is Provence in an easily portable form. Take all the great Provencal ingredients: olives, basil, lemon, capers, anchovies, and grind them into a paste. Voila! Tapenade! In Provence, it is a universal topping. It is at its best spread on slices of french bread. You could toast the bread (over an open fire) if you really wanted to gild the lily. Goat cheese is a natural accompaniment. Tapenade is also a great topping for pork, chicken, and especially lamb. Lamb and tapenade is a match made in heaven.

And now, my personal re-enactment of Field of Dreams... 

Is this heaven?
No, It's Provence.
Provence? When I saw the tapenade, I could have sworn this was heaven.


Now this is not fancy French cuisine. It is not served in four star white tablecloth restaurants by hovering waiters. This is a recipe from the home, best served as a bite before dinner. It will help fill the stomach while sipping on an ice cold, bone dry Rose, or a chewy Cote Du Rhone.

In other words, it is the Provencal equivalent of Salsa. Which is how I use it, and also how I make it. I can't imagine making this recipe without a food processor; with one, it is ready to go in ten minutes, and that's if I'm stopping to take a bunch of pictures for the blog while I'm making it.

Recipe: Tapenade
Adapted From: Patrick Payet Famous Provence

Equipment:

  • Food Processor (I like my KitchenAid)

Ingredients:

  • 2 cloves garlic, peeled
  • 5 basil leaves (or 1 tablespoon thyme leaves, or ¼ cup parsley)
  • 2 cups pitted kalamata olives, rinsed
  • 1 tablespoon capers
  • Juice of ½ lemon
  • ½ teaspoon fresh ground black pepper
  • 2 anchovy fillets, rinsed (optional)
  • ¼ cup extra virgin olive oil

Directions:
1. Mince the dry ingredients: Drop the garlic cloves into a running food processor and process until completely minced. Turn the processor off, add the basil, and process with one second pulses until finely minced. Add the olives, capers, lemon juice, pepper and (optional) anchovy fillets. Process until finely minced, using one second pulses and scraping down the sides of the bowl if necessary.

2. Add the olive oil: Turn the processor on, and drizzle the olive oil into the running processor, stopping and scraping down the sides of the bowl if necessary. Once all the oil is added the tapenade should be a thick, emulsified paste. Use immediately, or store in the refrigerator for up to a week.

Variations:
*The anchovies really are optional. They add an extra depth to the flavor, a hint of the sea that you can't really put your finger on. I like to add them if I have them. But there is enough going on in the recipe; they are not absolutely necessary.

Notes:
*If you don't have a food processor, you can use a mortar and pestle. It would be more authentic that way. But it is a LOT more work.

*My apologies to to W.P. Kinsella, Kevin Costner, James Earl Jones, Amy Madigan, and anyone else even vaguely connected to Field of Dreams.

What do you think? Questions? Other ideas? Leave them in the comments section below.

Related Posts:
A Week In Provence
Things I Love: Food Processor

Adapted from:
Patrick Payet Famous Provence

*Enjoyed this post?  Want to help out DadCooksDinner?  Subscribe using your RSS reader or by Email, recommend DadCooksDinner to your friends, or buy something from Amazon.com through the links on this site.  Thank you!

Things I love: Food Processor

November 29, 2010 by Mike Vrobel 2 Comments

I own my fair share of cooking gadgets - slow cookers, pressure cookers, garlic presses, Asian mandolines. There are only a handful of cooking tools that I keep out on the counter, so I can get at them right away:

  • Knife block and wooden cutting board
  • 12 inch stainless fry pan, 4.5 quart nonstick sauce pan, 2 quart sauce pan
  • Can opener
  • Utensil jar: tongs, spoons, spatulas, whisks
  • Salt cellar and pepper mill

and, today's topic, my food processor.

I believe knife skills are critical for cooking. I use my knife more than all my other cooking tools combined. But...there are some recipes that I can't imagine making without a food processor. In my kitchen, the food processor always does these three tasks:

1. Purees and finely chopped mixes: I use my food processor for anything involving a puree. Gazpacho, hummus, salsa, refried beans, marinades; they all come out of my food processor.
Especially my quick red salsa.  I make that recipe twice a month, if not more often.

When the end goal is somewhere between a chunky salsa and a smooth hummus, the food processor shines. All the mincing work can be done in the processor. Recipes that require a lot of detailed knife work become drop dead simple. The trick is to mince with one second pulses; this gives an evenly chopped result

The exception? When I need a mince to be dry and evenly sized. Stir fries are the big one for me; every time I try to use my food processor to short cut my stir fry, I wind up with chopped, mushy mess. The results don't stir fry well, because there is too much water in the mix.
Onions in particular; with the slightest bit of over-processing, they break down into onion juice. Which is good if I want onion juice, but not if I want to saute them.

2. Large amounts of thin-slicing or grating: If I need more than a cup of sliced or grated items, I pop my slicing disk into the food processor. Potato gratin is a great example; first the processor thin-slices the potatoes, then it grates the cheese.  Two minutes of processing instead of fifteen minutes of detailed knife work. My processor did the heavy work when I was canning this summer. I used it to thin-slice pounds of carrots, cucumbers, peppers and zucchini. I can't imagine canning without one.

3. Kneading dough: My wife, the family baker, kneads most of her doughs in the food processor. It does the work of a stand mixer in half the time. Our kids love it when mom does pizza night, and the food processor is a key piece of equipment. The only downside to kneading with a food processor is the size of the recipe; the dough ball can't be too large, or it will overwhelm the processor.

Which one?There are a lot of brands of food processor out there, but the two that consistently top the ratings from people I trust are Cuisinart and KitchenAid. I bought a KitchenAid years ago, and it has always worked well for me.
*Except for that one time I put way too much dough in it and burnt out the motor. I immediately went out and bought a new one.

I don't think there is enough of a difference between the two to recommend one over the other; either one is a good choice. I recommend getting at least a 12 cup processor; purees, especially wet ones like salsa and gazpacho, will leak if they are higher than the central post.

Food processor minced garlic

My favorite food processor trick? Using it to mince garlic. Peel the cloves of garlic, and trim off the stem end. Then drop the garlic into a running processor. Wait about thirty seconds, or until the garlic stops dancing around, and your processor will be full of minced garlic. That is always my first step in making salsa. (Next is adding the cilantro, and pulsing until chopped.)

What do you think? Questions? Food processor tricks or recipes you want to share? Leave them in the comments section below.

Related Posts:
Quick Red Salsa
Quick Gazpacho
Hummus
Pickled Chile Peppers

*Enjoyed this post?  Want to help out DadCooksDinner?  Subscribe using your RSS reader or by Email, recommend DadCooksDinner to your friends, or buy something from Amazon.com through the links on this site.  Thank you!

Giving Thanks 2010

November 25, 2010 by Mike Vrobel Leave a Comment

I'd like to thank:

My loving wife, Diane, who puts up with the time I spend on this blog.

My wonderful kids, Ben, Natalie and Tim, who put up with the all the recipes I make.

My family and friends, who don't run screaming from the room when I start talking about food.

My loyal readers; your interest, questions, comments, and suggestions are what make this blog fun.

Happy Thanksgiving!

And, if you are particularly thankful this year, consider making a donation to a worthy cause:

Heifer International

The Countdown Has Begun!

November 24, 2010 by Mike Vrobel Leave a Comment

T minus 48 hours and counting...
The turkeys are dry brining in the refrigerator (with a beverage chilling for the chef)

T minus 24 hours and counting...
The stuffing and gravy are ready for tomorrow.

I'm so far ahead of the game that I have time to write a blog post. How did this happen?

Turkey Soup with Chickpeas and Vegetables

November 23, 2010 by Mike Vrobel 1 Comment

The second best part of Thanksgiving is making soup from the leftovers.
*The best part? Sitting at the table, surrounded by friends and family, while gnawing on a turkey leg from a grill-smoked turkey.

Every year, I make a big pot or two of turkey stock with the carcasses from my birds. I use that stock to make one old fashioned batch of turkey noodle soup, then I use my stock to go on a world tour.
*You are making turkey stock from your carcass this year, aren't you?

This year, I was aiming for an Italian style soup, with pancetta and greens. I wound up farther south on the Italian boot that I thought.  I was aiming for Tuscany.  I probably wound up in Sicily, because my freezer was missing some key ingredients! Prosciutto replaced the pancetta, chickpeas replaced the white beans, and baby spinach became the green.

Even though I wound up improvising, the results were worth it. The smoky turkey stock, made from grilled birds, was the perfect broth for the shredded turkey meat, vegetables and chickpeas. Looking for a way to use up your thanksgiving leftovers? Try this soup!

Recipe: Turkey Soup with Chickpeas and Vegetables
Ingredients:

  • 1 tablespoon vegetable oil
  • 1 medium onion, Chopped in ½" chunks
  • 2 carrots, peeled and chopped into ½" chunks
  • 1 stalk celery, chopped into ½" chunks
  • 1 oz prosciutto (5 pieces), sliced crosswise into ¼" slivers
  • ½ teaspoon kosher salt
  • 2 cloves of garlic, minced or pressed
  • 1 sprig each of fresh thyme, rosemary and sage
  • ½ cup white wine (optional)
  • 2 quarts homemade turkey stock
  • 4 cups shredded cooked turkey
  • 15oz can of diced tomatoes, drained
  • 2 cups cooked chickpeas (homemade or canned, drained)
  • 1 handful (about 1 cup) baby spinach
  • 1 tablespoon balsamic vinegar
  • salt and pepper to taste

Toppings

  • Grated Parmesan cheese

Directions:
1. Saute the aromatics: Heat the vegetable oil in a dutch oven over medium-high heat until shimmering, then add the onion, carrots, celery, and prosciutto, and sprinkle with the ½ teaspoon of salt. Saute until the vegetables are softening and the prosciutto is getting crisp, about 3 minutes. Add the garlic and herb sprigs, and toast for 30 seconds to 1 minute, until you start to smell garlic.

2. Simmer the broth: Turn the heat to high, and pour in the white wine. Scrape the bottom of the pan to loosen any browned bits, and boil the wine for a minute, until reduced by half. Add the turkey stock, bring to a boil, and boil for 1 minute. Add the shredded turkey, tomatoes, and chickpeas; leave the heat on high until the soup returns to a simmer, then reduce the heat to medium-low and simmer for 15 minutes.
*I keep my stock in the freezer and thaw it in the microwave while I'm doing step 1. If it's still a little frozen at this point, that's OK.  Put the big ice cube of stock into the pot, and it will melt on its way to boiling.

3. Finish the soup: Fish out the herb sprigs. Add the spinach and simmer for a minute, until the spinach wilts. Add the balsamic vinegar, then season to taste with salt, pepper, and more vinegar if necessary.
*Season the soup heavily - when using homemade stock, it won't have much salt in it. and the soup needs salt or it will taste watery.

4. Serve: Ladle into bowls, and top with grated Parmesan cheese.

Variations:
*For the Tuscan version of the soup, replace the chickpeas with white beans and the spinach with kale.

*If you like a heartier soup, more like an Italian turkey chili, reduce the stock to 1 quart.

*No balsamic vinegar? Use lemon juice.

*You can always substitute chicken stock and leftover chicken for the turkey, if you're reading this recipe after Thanksgiving.

*You can substitute a low sodium store-bought chicken broth for the turkey stock.  But promise me you'll try to make your own stock next time?  It comes out so much better...

Notes:
*I serve this with a salad and slices of french bread on the side.

*The kids were a little put off by all the "stuff" in the soup. They would have preferred a turkey, chickpea and broth soup. The spinach leaves were probably the last straw, so leave those out if you have picky eaters. But...for my picky eaters, one was fishing out the meat, another was fishing out the chickpeas, and then they all slurped up as much broth as they could without catching too much of the "yucky" stuff.  That's a dinnertime win in my book.

Questions? Comments? Other ideas? Leave them in the comments section below.

Related Posts:
Pressure Cooker Turkey Stock
Turkey Stock the right way
Turkey Noodle Soup
Southwestern Turkey and Black Bean Soup

*Enjoyed this post?  Want to help out DadCooksDinner?  Subscribe to DadCooksDinner using the RSS or Email options on the right, link to this post from your blog, recommend DadCooksDinner to your friends, or buy something from Amazon.com through the links on this site.  Thank you!

Dad Cooks Thanksgiving Dinner 2010

November 22, 2010 by Mike Vrobel Leave a Comment

I spent last week showing you what I'm doing with my Turkey on the big day:
Grill your Thanksgiving Turkey!
Video: How to Truss and Spit a Turkey for the Rotisserie
Rotisserie Turkey, Dry Brined with Orange and Spices

To warm everyone up for the high holy day of American food, I want to share some Thanksgiving posts that have inspired me.

Kenji Alt - Deep Fried Whole Buffalo Turkey [SeriousEats.com]
*I have a deeply held belief. Grilled turkey is far superior to deep fried turkey.  But...oh, my.  Deep Fried Whole Buffalo Turkey is madness.  Or genius.  Or is doing backflips on the line between madness and genius.
**Kenji's entire Food Lab Thanksgiving Special series has been great.  If you are looking for basic recipes, this is a good place to start.

Harold McGee - Ten Thanksgiving Tips [SeriousEats.com]
*The Original Food Scientist gives advice for cooking Thanksgiving dinner. He used to use an ace bandage to strap ice packs on the breast of his turkey, to make sure it didn't overcook.  Too bad this grossed his family out...

Sharon Anderson - Stuffed! [ThreeManyCooks.com]
*Obsessed about stuffing?  Sharon sure is.  And I trust her judgement - this is the stuffing I'll be making this year.

Jules Clancy - Do you make the most common thanksgiving mistake? + how to avoid it [thestonesoup.com via CasualKitchen]
*I always make this mistake.  Read on to find out what it is...

Lisa Abraham - Carve up tasks wisely this holiday [ohio.com]
*How to organize dinner, including an answer to the question "how many pounds of meat per person?" from Jim DiFeo of Difeos Poultry.

What do you think? Other links you've loved this Thanksgiving? Leave them in the comments section below.

*Enjoyed this post?  Want to help out DadCooksDinner?  Subscribe using your RSS reader or by Email, recommend DadCooksDinner to your friends, or buy something from Amazon.com through the links on this site.  Thank you!

Rotisserie Turkey, Dry Brined with Orange and Spices

November 18, 2010 by Mike Vrobel 78 Comments

A turkey on the rotisserie over a charcoal grill

Rotisserie Turkey Dry Brined with Orange and Spices. My go-to Thanksgiving turkey, the one I make every year.

This Thanksgiving, I'm using all the finesse techniques I've learned to cook my Turkey. Here's what I'm going to do.

A turkey on the rotisserie over a charcoal grill
[feast_advanced_jump_to]

Why Dry Brine a Turkey?

My first trick is to dry brine the turkey. For years, my gold standard for turkey brines was the apple cider brine from Weber's Art of the Grill by Jamie Purviance. I am a complete convert to dry brines now, and I wanted to come up with a dry brine that uses the same flavor profile. I have most of the major ingredients from the Weber brine in my dry rub - salt, a little brown sugar, orange zest, ginger, garlic, and cloves. When combined with a chunk of smoking wood in the grill, you get layers of flavor in the bird - sweet, smoky and salty, with an interesting mix of fruit and spices. This is a turkey that doesn't need gravy to be edible.
*You'll see some bay leaves in the pictures of the dry brine. Ignore them. They're not really there. These are not the bay leaves you're looking for. (Waves hand in dismissive manner.)
**OK, OK, you caught me. I tried to crumble them by hand, and I couldn't break them up small enough to use in my dry brine. I should have used my spice grinder, but I didn't want to get it dirty just for the bay leaves, so I left them out. It tasted great without them.

Don't Overcook the Turkey - Ice the Breast

The next step is cooking the turkey to the appropriate level of doneness. This is tricky. The white meat in the breast should just cook to 160*F so it doesn't dry out. The dark meat in the legs should be cooked above 170*F; it needs extra heat to break down the connective tissue. The problem is - they're both on the same bird, and cooking for the same length of time. I used two techniques to help solve this.

Following the suggestion in Weber's Barbecued Turkey pamphlet I set up the charcoal in a U shape on one half of the grill. This focuses the heat on the turkey's legs, and lessens the heat on the breast.

I also used a trick from Harold McGee. Mr. McGee recommended strapping a couple of ice packs over the breast of the bird after removing it from the refrigerator, so the breasts start out colder than the thighs. His family told him this was "too unappetizing", so he switched to zip-top bags full of ice.  Since McGee's On Food and Cooking is the bible of food science, I thought it would be foolish not to take his advice.

Rotisserie Turkey Is the Best Turkey

The turkey is cooked on my rotisserie, of course. Nothing comes close to the crisp, crackling skin from the constant convection caused by the circling bird.*
*Sorry, got stuck in a "C" rut there.

The result of all these steps is the best turkey I've ever made. Can you skip all this detail? Sure. Dry brine the turkey with salt, cook it on the rotisserie, and you'll get a great bird. But if you want to take the bird from great to sublime, have I got the recipe for you...

Inspired by: Lots of different sources.

Equipment

  • Grill with Rotisserie attachment (I used a Weber kettle with the Rotisserie attachment. Kettle is this Weber Grill, and rotisserie is this Weber charcoal kettle rotisserie)
  • Aluminum foil drip pan (11"x13", "turkey size", or whatever fits your grill)
  • Cotton twine
  • Gallon zip-top bag full of ice (optional)
  • Instant Read Thermometer
Dry brine ingredients
Dry Brine Ingredients

Ingredients

  • 12 to 14 lb Turkey
  • fist sized chunk of smoking wood (hickory, oak, pecan or a fruit wood; I love oak wine barrel staves)

Dry Brine Ingredients

  • ¼ cup kosher salt (I used Diamond Crystal; reduce to 3 tablespoon if using Mortons, because it is denser).
  • Zest of 1 orange (save the orange, cut in half and wrapped in plastic wrap to stuff the turkey)
  • 1 teaspoon brown sugar
  • 1 teaspoon grated fresh ginger (about a ½ inch piece)
  • 1 teaspoon grated fresh garlic (2 cloves)
  • ½ teaspoon fresh ground black pepper
  • ¼ teaspoon ground cloves

How to grill a Rotisserie Turkey, Dry Brined with Orange and Spices

Note: for an overview of the technique, see my rotisserie poultry post.

Dry brine the turkey

1 to 3 days before it is time to cook, dry brine the turkey. Mix the dry brine ingredients in a small bowl, then sprinkle and rub evenly over the turkey. Make sure to rub some inside the cavity of the turkey as well. Put the turkey on a rack over a roasting pan or baking sheet, and cover with plastic wrap. Refrigerate, removing the plastic wrap the night before cooking to allow the skin to dry. (If you are only dry brining for 24 hours, skip the plastic wrap.)

Turkey rubbed with dry brine, ready to go in the refrigerator

Prep the Turkey

One hour before cooking, remove the turkey from the refrigerator. Stuff the turkey with the halves of the orange, then truss and skewer with the rotisserie spit. Put the zip lock bag full of ice on the breast, not touching the legs or drumsticks, to chill the breast meat until cooking. Put the wood chunk in a bowl of water to soak.

Icing the turkey breast while I set up the rotisserie

Charcoal Grill Rotisserie Setup

Prepare the grill for rotisserie cooking on indirect medium heat. For my Weber kettle, I light a chimney ¾ full of charcoal and wait for it to be covered with ash. Then, instead of pouring it in my usual two piles on the side of the grill, I pour it in a U shape at one end of the grill (see picture below). I put the drip pan in the middle of the U of charcoal. Finally, put the wood chunk on top of the charcoal, and give it five minutes to start smoking. (More details here: My Rotisserie Basic Technique Post).

Charcoal grill setup - drip pan in the middle, coals in a U shape towards the legs, smoking wood in the back.

OR: Gas Grill Rotisserie Setup

Set the grill up for rotisserie cooking at indirect medium heat (325*F to 350*F). If you can, put all the heat on one side of the grill - instead of two outside burners on medium, set one outside burner on high, and leave the other one off - this concentrates the heat on the legs, which we want to cook more than the breast. For my Weber Summit, I remove the grates, preheat the grill on high for 15 minutes, then turn off all the burners except burner #6, right next to the smoker burner. I leave burner #6 on high, turn the smoker burner on high, and set the infrared rotisserie burner to medium. The drip pan goes in the middle, over the unlit burners.

Turkey on the rotisserie spit over the charcoal grill

Cook the turkey

Put the spit on the grill, with the leg side of the bird inside the "U" of coals.  Cook the turkey with the lid closed; it will take 2 to 3 hours (usually about 2 ½ hours for a 12 pound turkey). Every hour, add 24 fresh charcoal briquettes to the grill, nestling them into the burning charcoal. Start checking the temperature in the breast with an instant read thermometer at 2 hours. The turkey is done when the breast meat registers 155*F to 160*F in its thickest part. Remove the turkey from the grill, remove the spit from the turkey, and cut the trussing twine loose. Let the turkey rest for 15 to 30 minutes before carving.

Rotisserie Turkey, off the grill and on a platter
Rotisserie Turkey

Carve the turkey and serve

If you have a favorite way of carving a turkey, go ahead and use it. My preferred method: Cut the legs free from the body of the bird, and cut the drumsticks away from the thighs. I leave the drumsticks whole (my favorite part!) and slice the meat from the thighs in ½" slices for dark meat lovers. Next, I cut the entire breast half from one side of the bird by working my knife down the keel bone from the top down to the wing, following the inside of the ribcage. Once the breast half is free of the bird, it is easy to slice into ½" thick slices on my carving board. I repeat with the other breast half. Finally, I cut each wing away from the carcass, and separate the drumette from the wing, and the wing from the wingtip. I arrange all these pieces on a platter and serve.

Fresh vs Frozen Turkey

  • Fresh vs Frozen: There are two advantages to a fresh turkey. The first is they are rarely pre-brined, which is redundant because of the dry brine. (Watch out for the words "enhanced with a X% solution" or "pre-basted") The second advantage to fresh turkey is no thawing is needed! If you have to get a frozen bird, make sure to leave an extra three days or so to thaw it in the refrigerator before staring the dry brine; start thawing it about a week before you'll need it.

What do you think? Questions? Other ideas? Leave them in the comments section below.

Related Posts

Basic Rotisserie Turkey
Rotisserie Turkey, Dry Brined with Orange and Spices
Rotisserie Turkey - The Big Turkey
Rotisserie Turkey Wrapped With Bacon
Rotisserie Turkey with Cajun Dry Brine
Rotisserie Turkey Breast with Basic Dry Brine
Rotisserie Turkey Breast with Honey Bourbon Glaze

Click here for my other rotisserie recipes.


Check out my cookbook, Rotisserie Grilling.

Everything you could ask about the rotisserie,
plus 50 (mostly) new recipes to get you cooking.

It's a Kindle e-book, so you can download it and start reading immediately!


*Enjoyed this post? Want to help out DadCooksDinner? Subscribe to DadCooksDinner using the RSS or Email options on the right, link to this post from your blog, recommend DadCooksDinner to your friends, or buy something from Amazon.com through the links on this site. (Like my Rotisserie Grilling cookbook...)

Winter Market in Cuyahoga Valley 2010-2011

November 17, 2010 by Mike Vrobel Leave a Comment

The Countryside Farmers Market in the Cuyahoga Valley National Park has switched to their winter schedule, starting this weekend.  Time to stock up on local produce for Thanksgiving!

The market will be held at Old Trail School this year, right next to their usual Howe Meadow site.  The market will be open on Saturday mornings, from 9AM to Noon.

*If you don't live in Northeastern Ohio, make sure to find your own local farmers market.  Yes, they usually run through the winter!

The schedule is:

  • November 20
  • December 11
  • December 18
  • January 22
  • February 5
  • February 19
  • March 12
  • March 26
  • April 9
  • April 23


Here's the address:
Countryside Farmers' Market at Old Trail School
2315 Ira Road
Akron, OH 44333
(330) 666-1118

More information is available at their website:
Cuyahoga Valley Countryside Conservancy

View Larger Map

Related posts:
My list of Ethnic and Gourmet stores near Akron, Ohio.

*Enjoyed this post?  Want to help out DadCooksDinner?  Subscribe using your RSS reader or by Email, recommend DadCooksDinner to your friends, or buy something from Amazon.com through the links on this site.  Thank you!

How to Truss and Spit a Turkey for the Rotisserie

November 16, 2010 by Mike Vrobel 5 Comments

It hit me when I was reading my old Rotisserie Poultry Basic Technique post. I link to two different methods for trussing poultry in that post, but I don't use either of them.  With Thanksgiving coming up, I decided to share my trussing technique. Besides, how can you do the rotisserie turkey recipe I'll be posting tomorrow if you don't know how to truss your turkey?

Now, this is how I truss all different types of poultry.  I use this technique on turkey, chicken, duck, and cornish game hens.  They all have the same layout - wings, drumsticks, breast and backbone - but it is easier to show with a turkey because of the large scale.

What do you think? Questions? Other ideas? Leave them in the comments section below.

Related Posts:
Rotisserie Poultry Basic Technique
Simple Rotisserie Turkey
Rotisserie Turkey, Dry Brined with Orange and Spices (Coming Thursday)
Click here for my other rotisserie recipes.


Check out my cookbook, Rotisserie Grilling.Everything you could ask about the rotisserie,
plus 50 (mostly) new recipes to get you cooking.It's a Kindle e-book, so you can download it and start reading immediately!

*Enjoyed this post? Want to help out DadCooksDinner? Subscribe to DadCooksDinner using the RSS or Email options on the right, link to this post from your blog, recommend DadCooksDinner to your friends, or buy something from Amazon.com through the links on this site. (Like my Rotisserie Grilling cookbook...)

Grill your Thanksgiving Turkey!

November 15, 2010 by Mike Vrobel 4 Comments

Every year, I grill my Thanksgiving turkey. This year I'll be grilling two of them.
Rotisserie grilling, of course - the picture is from the recipe coming later this week.

Family and friends watch me out in the cold, wrestling with a 12 pound bird, while they sit inside watching the football game. Someone always asks - why do you do this? Why grill your turkey? Why not cook it in the oven?
With an implied "like normal people do."

Well, I'm here to tell ya...

Top Five Reasons to grill the Thanksgiving turkey:
1. Taste: Why grill anything at all? Because it just tastes better. And, I hate to say it, but Turkey needs the help, particularly turkey breast. Turkey is very lean, which means...bland. Needs gravy. And stuffing.

That is, unless the turkey is grilled. Grilling gives the turkey browned, extra crisp skin from the dry heat of the grill, and adds a hint of smoky flavor to the bird. The turkey, especially the white meat, will have the flavor to stand on its own, instead of just being a slab of protein to cover with gravy.
Now, if you brine the bird first, and add a little smoking wood, that can only help the flavor. Oh, and go for the dark meat - I make sure I get a drumstick every Thanksgiving.

2. Space:Trying to fit the bird, stuffing, squash, green bean casserole, sweet potatoes, and dinner rolls in the oven? Ever wish you had a second oven, just for Thanksgiving? Guess what - you do, right outside on the patio. I'm serving about twenty people this Thanksgiving, and I'll be cooking two turkeys - one on my Weber kettle, the other on my Weber gas grill. I'll have plenty of room in the oven for my stuffing and side dishes.

3. Cleanup: No huge roasting pan to scrub out after dinner - crumble up the foil pan in the grill, once it has cooled down, and toss it in to the trash. Done!

4. Gets you out of the kitchen: This has two parts, the practical, and the psychological. The practical part: you don't have to elbow through all the people in the kitchen to get to the bird - it's out in the back yard, where there is plenty of space. The psychological part: you get to go outside! If you're lucky, it's a beautiful fall day, and you can take a few minutes while checking on the bird to get away from the crush of people, the heat of the kitchen. Take a deep breath of crisp fall air, sip a lovely beverage, and watch the grill for a few minutes.
I live in Northeastern Ohio, so sometimes my "beautiful fall day" is 37F with a rain/sleet mixture. I still like to get out for a few minutes. Yes, I'm an introvert- does it show?

5. Impresses the guests: I always want the Norman Rockwell picture. In my head, I'll be standing there with a beautiful turkey on a platter, surrounded by a table full of appreciative guests. Grilling the turkey adds to that "wow factor." Bringing a beautifully grilled bird in from the back yard stops everything. Conversation pauses for a second, someone lets out a low whistle, then everyone tells you how gorgeous the bird is.
Hey, I've been working on dinner all afternoon - of course I want my ego stroked a little.

Looking for a recipe?

Grilled Turkey, Dry Brined (Grilling Basics) - My basic grilled turkey recipe
Rotisserie Turkey, Dry Brined with Orange and Spices - My favorite recipe, the one I use every year

What do you think? Have I talked you into grilling the Turkey? Questions? Other ideas? Leave them in the comments section below.

Inspired by:
Weber.com - Weber has been promoting grilled Thanksgiving turkey for years. Check out their Barbecued Turkey [pdf at bottom of page].
[Update 11/2011 - Weber.com moves their links often, which breaks my link to the PDF. If that link doesn't work, go to Weber.com and search for "Barbecued Turkey"]

*Enjoyed this post?  Want to help out DadCooksDinner?  Subscribe using your RSS reader or by Email, recommend DadCooksDinner to your friends, or buy something from Amazon.com through the links on this site.  Thank you!

Pork Chop Saute with Apple Butter Sauce

November 9, 2010 by Mike Vrobel 6 Comments

This is an improvised weeknight recipe.  I made it for dinner last week, and it turned out so well I had to share it.

The idea came while I was staring into my refrigerator, trying to figure out how to use up a bunch of ingredients I had lying around. First were the pork chops cut from the shoulder end of the loin I used in last week's rotisserie stuffed pork loin. That got me thinking about a pork chop saute. I also had some apple cider left from the brine, and apple butter from my trip to the orchard. These became the base for my pan sauce. Fifteen minutes later, dinner was ready!

This recipe is a grown up version of a childhood favorite, pork chops with applesauce.* The pan sauce is full of apples and cinnamon, with a hint of heat from the grainy mustard. It's hard to go wrong with pork and apples, a classic flavor combination.
*Even though it is a grown up version, it went over well with the kids.

Recipe: Pork Chop Saute with Apple Butter Sauce

Inspired By: Pam Anderson How to Cook Without a Book

Equipment:

  • 12 inch stainless steel fry pan (I love my All-Clad 12" fry pan).

Ingredients:

  • 5 boneless pork loin chops, 1 inch thick (About 2 pounds of pork)
  • 2 ½ teaspoon kosher salt (½ teaspoon per pork chop)
  • 1 ¼ teaspoon fresh ground black pepper (¼ teaspoon per chop)
  • ½ cup flour (optional)
  • 1 tablespoon olive oil
  • 1 tablespoon butter

Sauce ingredients:

  • 2 cloves garlic, minced (or pressed through a garlic press)
  • ½ cup apple cider (or homemade chicken stock, or water with a pinch of salt added)
  • 3 tablespoon apple butter
  • 1 tablespoon whole grain mustard
  • salt and pepper to taste

Directions:
*For an overview, see my Saute with Pan Sauce basic technique 
1. Prepare the Sauce: Mince the garlic, and set aside. Combine the apple cider, apple butter, and grainy mustard in a small bowl, and stir until evenly mixed.

2. Prepare the Pork: Sprinkle the salt and pepper evenly over the pork chops. Put the flour in a shallow pan, and coat the pork chops with a thin layer of flour, shaking to remove any excess.

3. Prepare the pan: Heat the butter and olive oil in the fry pan over medium-high heat, until the butter has stopped foaming and is just starting to turn brown.

4. Saute the Pork: Place the floured pork chops in the pan. Shake the pan to get the oil under the chops, then let sit for 3 minutes, or until well browned. Flip the pork, and cook the other side for another 3 minutes, or until well browned. Remove the chops to a plate.

5. Make the Pan Sauce: Pour off any leftover oil, turn the heat down to medium, and add the minced garlic to the pan. Cook for 30 seconds to 1 minute, or until just softened, then add the sauce mixture. Cook, scraping the bottom of the pan until all the browned bits of pork are loose in the sauce, and the sauce has thickened, about 2 minutes. Taste the sauce, and add salt and pepper until it is well seasoned.

6. Serve: Serve each pork chop with 1 teaspoon of sauce drizzled on top, and pass the rest of the sauce at the table.

Variations:
*Sautes work with any thin cut of lean meat. With the sweet apple flavor in this pan sauce, I wouldn't use beef, but this sauce is great with chicken breasts or turkey cutlets.

*I like the subtle hit of heat that the grainy mustard adds to the sauce. If you want to tone it down some, use Dijon or brown mustard instead of the whole grain mustard.

*Pork chops with a pan sauce has an almost infinite set of variations. Check out my other sautes with pan sauces for ideas of different pan sauces you can use.

Notes:

*As I said in the saute basic technique, don't crowd your pan! You'll get steaming, not browning, and the crisp crust on the pork is the best part of this recipe.

*Cooking for a crowd, and want to double the recipe? (Like, say, five people, like I am?) Cook the pork in two batches, adding another tablespoon of oil and butter to the pan between batches.

What do you think? Questions? Other ideas? Leave them in the comments section below.

Related Posts:
Saute with Pan Sauce basic technique
Pork Chop Saute with Orange Mustard pan sauce
Other recipes that use the Saute with Pan Sauce basic technique.

Inspired by:
Pam Anderson How to Cook Without a Book


*Enjoyed this post?  Want to help out DadCooksDinner?  Subscribe using your RSS reader or by Email, recommend DadCooksDinner to your friends, or buy something from Amazon.com through the links on this site.  Thank you!

Ruhlman: Cooking Is What Made Us Human

November 8, 2010 by Mike Vrobel Leave a Comment

Once a year, it seems, Michael Ruhlman gets to the heart of the matter.  He takes all the scattered thoughts I have about cooking, random things that I can feel the edges of, and distills them down into their essence. He puts the reason I cook for my family every day into words.

 Like...this:


Had Something to Say - Cooking from michael ruhlman on Vimeo.

I loved Catching Fire, and found it just as moving as Ruhlman did, but...man. I wish I could be that eloquent. Michael, thank you, and keep fighting the good fight.  We're with you.

PS: He has another great video on what makes Thomas Keller and Grant Achatz who they are Michael Ruhlman...had something to say at Ruhlman.com.

For further reading:
Catching Fire: How Cooking Made Us Human
Ratio: The Simple Codes Behind the Craft of Everyday Cooking

*Enjoyed this post?  Want to help out DadCooksDinner?  Subscribe using your RSS reader or by Email, recommend DadCooksDinner to your friends, or buy something from Amazon.com through the links on this site.  Thank you!

Dianne Jacob and Laura Taxel at the Fabulous Food Show

November 7, 2010 by Mike Vrobel 4 Comments

[Update 11/10/2010: Never mind.  I got a call last night saying the writing workshops were cancelled.  Darn!]

Next weekend is the Fabulous Food Show at the IX Center in Cleveland. Two of my favorite authors will be giving a workshop on food writing: Food Writing for Food Lovers.

Dianne is the author of Will Write for Food, the best handbook I've found for food writers (like me and this little blog).

Laura is the author of Cleveland Ethnic Eats, and knows more about local, ethnic places all around Northeastern Ohio than anyone else I know.

Their class is at 10:30AM on Saturday, November 13th, and lasts for two hours.  The class is $50, and includes entry to the Fabulous Food Show. I'm not a big Food Network guy, so normally I wouldn't get excited about going to the show.  But...on top of the chance to take a class with Dianne and Laura, my hero Alton Brown is going to be there.  I can't wait!

Information about the Food Writing for Food Lovers workshop, including a link to buy tickets, is here: Fabulous Food Writing.

Information about the Fabulous Food Show is here: Fabulous Food Show.

[Update: And I just noticed that Tom from ExploringFoodMyWay will be at the class too. See you there, Tom!]

*Enjoyed this post?  Want to help out DadCooksDinner?  Subscribe using your RSS reader or by Email, recommend DadCooksDinner to your friends, or buy something from Amazon.com through the links on this site.  Thank you!

Rotisserie Stuffed Pork Loin with Pepperoni, Provolone and Capicola

November 4, 2010 by Mike Vrobel 18 Comments

I complain a lot about bland pork loin. By breeding out the fat in pork, the Other White Meat has become a slab of protein without any real flavor, and one that turns dry if it is slightly overcooked. Here is my solution to those problems - use pork loin as a carrier for other ingredients that have a big hit of flavor.

The problems I listed above are an advantage when pork loin is used as a delivery system for stuffing. The solid slab of protein makes it easy to cut into a wide, thin, flat surface. The bland meat takes on whatever flavors it is stuffed with. I still have to watch out for overcooking, but I brine the pork loin to give an extra cushion, and to pump the loin up with flavor.

The next step was to pick out the type of stuffing I wanted to use. I chose an Italian cured meat theme. Sandwich pepperoni and capicola were on sale at my local grocery store, and I added provolone for a layer of melted cheese. Finally, I picked up a package of mixed poultry herbs to add the flavors of thyme, sage and rosemary. The result is layers of flavor. It starts with the brined pork loin, with that incredible browned crust from rotisserie. That gives way to a layer of herbs, followed by the spicy pepperoni and the smoky capicola, and a finishing hit of oozing provolone. Pork loin is not boring if it is filled with this much good stuff.

Recipe: Rotisserie Pork Loin Stuffed with Pepperoni, Provolone and Capicola

Inspired by: Steven Raichlen How To Grill

Equipment:

  • Grill with Rotisserie attachment (I used a Weber Summit with an infrared rotisserie burner. Here is the current version of my grill.)
  • Aluminum foil drip pan (9"x12", or whatever fits your grill)
  • Butcher's twine

Ingredients:
Roast and brine

  • 6 lbs Pork Loin (cut in half to yield two 3lbs roasts)
  • 2 quarts water
  • ½ cup table salt (or 1 cup kosher salt)
  • ¼ cup brown sugar (or regular sugar)

Stuffing

  • 2 tablespoon minced fresh herbs (I used thyme, rosemary and sage)
  • fresh ground black pepper
  • 6 oz pepperoni, sliced thin (I used sandwich pepperoni)
  • ½ lb provolone, sliced thin
  • 6 oz capicola, sliced thin (I used sweet capicola)

Directions:
1. Butterfly and brine pork loins: Mix the brine ingredients together in a container large enough to hold the pork loins. Let the salt and sugar in the brine dissolve while preparing the pork loin. Slash the fat on the top of the pork loin by making parallel, shallow cuts about ½" apart. Butterfly the pork loins, opening them up for the stuffing. (See pictures below for a visual explanation.) Turn the loin on its side, and a lengthwise cut, ⅓ of the way into the loin, cutting to within ½" of the far side - the cut should go almost all of the way through, but not quite. Fold this cut open, then turn your knife and continue the cut into the loin, mid-way through the remaining, larger side of the loin, cutting again to ½" from the far side. When you fold this final cut open, the loin should be an even thickness all the way across. Repeat with the second loin. Stir the brine until the salt and sugar are dissolved, then add the butterflied pork loins. Refrigerate for 2 to 4 hours to let the brine penetrate the meat.

2. Prepare the grill: Set the grill up for rotisserie cooking at high heat. For my Weber Summit, this means removing the grates, turning the two outer burners (burners 1 and 6) to high, and turning the infrared burner to high. Then I put my drip pan in the middle, over the unlit burners, and let the grill preheat for ten to fifteen minutes. (See My Rotisserie Basic Technique Post for more rotisserie setup details.)

3. Stuff and tie the pork loins: While the grill is preheating, stuff and tie the pork loins. Remove the loins from the brine, and pat dry with paper towels. Spread the loin out, fat side down. Sprinkle with half the herbs and a light coating of black pepper. Top the loin with a layer of pepperoni, a layer of provolone, and a layer of capicola. Roll the loin back up the way you sliced it; the fat should wind up on top, with a spiral of stuffing inside the loin. Truss the loin in a couple of places with butchers twine. Repeat with the second loin, stuffing and tying. Now, take the two loins and put them together with the fat caps facing outward, and trust the two loins together, using butchers twine about every inch and a half. Finally, run the rotisserie spit between the two trussed loins, driving the forks into the middle of the loins to hold them steady.

4. Cook the stuffed pork loins: Put the spit on the grill, start the rotisserie motor, and cook with the lid closed. Check the loins after 45 minutes, and every 15 minutes after that; if they are getting too browned, turn the heat on the grill down to medium (I do this in my Summit by turning off the rotisserie burner; in a charcoal grill it happens naturally as the coals burn down.) The total cooking time will be an hour to an hour and a half; the loin is done when it measures 140*F internal temperature at its thickest point when measured with an instant read thermometer. When checking the temperature, watch out for the spit and the forks, because they will throw the reading off; aim for the center mass of one of the loins.

5. Serve: Remove the loins from the spit, and cut the twine from the loins. Let them rest for at least ten minutes before carving. Cut the loins crosswise into ½" thick slices and serve.

Variations:
*Different deli meat in the stuffing: Any Italian deli meat will do in the stuffing - I picked pepperoni and capicola because they were on sale, but I have to admit that I went in planning on prosciutto. I just couldn't get over the price difference, especially since it wasn't the real thing from Italy. In the end, I would get about a pound of whatever looks good, with one half being a salami or pepperoni style meat, and the other half being a ham, capicola, or prosciutto style meat. (But if I did buy prosciutto, I would cut the amount of meat in half, to showcase it).

*Different cheese in the stuffing: I picked provolone because it was easy, and I think it has more flavor than mozzarella. But, mozzarella would work, and asiago would also be a good choice.

Notes:
*The cheese will ooze out of the sides of the loin, so make sure to cook some rotisserie pan potatoes in the drip pan. The potatoes will be covered in cheesy, pork fatty goodness.

*Leftovers make great sandwiches. Thin-slice any pork you want to use in sandwiches, because the pork loin can be tough to bite through if it is cut too thick.

What do you think? Questions? Other ideas? Leave them in the comments section below.

Related Posts:
Rotisserie Pork Loin
Rotisserie Pan Potatoes
Click here for my other rotisserie recipes.

Inspired by:
Steven Raichlen How To Grill


Check out my cookbook, Rotisserie Grilling.

Everything you could ask about the rotisserie,
plus 50 (mostly) new recipes to get you cooking.

It's a Kindle e-book, so you can download it and start reading immediately!


*Enjoyed this post? Want to help out DadCooksDinner? Subscribe to DadCooksDinner using the RSS or Email options on the right, link to this post from your blog, recommend DadCooksDinner to your friends, or buy something from Amazon.com through the links on this site. (Like my Rotisserie Grilling cookbook...)

Slow Cooker Pot Roast, Tex-Mex Style

November 2, 2010 by Mike Vrobel 5 Comments

The first issue of Cooks Country magazine suggested making a slow cooker pot roast with a Tex-Mex flavor profile, and this is now my favorite way to make pot roast. It combines the best part of a pot roast, the tender beef chuck covered with a thick sauce, and adds the punchy flavors of Tex-Mex cuisine - chili powder, tortillas, oregano and jalapenos.

The result is a meal I can use a couple of times during the week. The first night I serve it as a straight-up pot roast. Then, a couple of days later, I shred the leftovers, reheat them, and serve them as shredded beef tacos. If that doesn't finish off the meat, it freezes well, so I can save some for a weeknight whey I'm rushed to get dinner on the table. I can thaw some shredded beef in the microwave, add some store bought tortillas and dinner's ready in no time at all.

And...don't ask me why*, but I always make pot roast in the slow cooker. Stews, chilis, other braises that take a long time? Sometimes I make them in the slow cooker, sometimes in the pressure cooker, sometimes in a regular pot. But for years I have only made my pot roast in the slow cooker.
*Really, don't ask me. I don't know why.

Recipe: Slow Cooker Pot Roast, Tex-Mex Style

Adapted From: Cooks Country Magazine

Cook time: 10 hours

Equipment:

  • 6 quart or larger slow cooker (Crock Pot brand is fine, but I like my fancy one from All-Clad)

Ingredients:

  • 5 lbs boneless beef shoulder roast (I used two 2 ½ lb roasts)
  • 2 teaspoon kosher salt
  • ½ teaspoon fresh ground black pepper
  • 1 teaspoon chili powder
  • A handful of tortilla chips, crushed (optional)
  • 1 tablespoon vegetable oil
  • 1 large onion, diced
  • ½ teaspoon kosher salt
  • 4 cloves garlic, peeled and crushed
  • 1 tablespoon ground cumin
  • 1 teaspoon dried oregano (preferably mexican oregano)
  • 8 oz beer (Drink the other 4 ounces. Yes, that's part of the recipe.)
  • 28oz can diced tomatoes (preferably fire roasted)
  • 1 whole pickled jalapeno (optional)
  • 1 bay leaf
  • 2 tbps chopped cilantro leaves

Directions:
1. Brown the beef: Heat a 12 inch fry pan over medium-high heat until hot, about 3 minutes. While the pan is heating, sprinkle the beef roast with the 2 teaspoon kosher salt, pepper, and chili powder. Once the pan is hot, sear the beef for 3 minutes on one side, or until well browned. Flip the roast, and sear for another 3 minutes on the other side. Put the crushed tortilla chips in the slow cooker crock, and add the beef on top.

2. Saute the aromatics: Reduce the heat in the fry pan to medium and add the vegetable oil. Heat for a minute, then add the onion and ½ teaspoon kosher salt, and stir to combine. Saute the onion for 5 minutes, or until lightly browned, scraping any browned bits of the beef into the onions. Once the onions are lightly browned, make a hole in the middle of the onions and add the crushed garlic, cumin and oregano. Let toast for about 1 minute, or until you can smell the garlic, then stir into the onions. Add the beer and scrape any browned bits from the bottom of the pan. Add the tomatoes and bring to a simmer, then add to the crock with the beef.

3. Slow cook the roast: Submerge the pickled jalapeno and bay leaf in the liquid in the crock, then cover and cook on low heat for 10 hours or high heat for 6 hours.

4. Serve the roast: Remove the beef to a carving board, let rest for five minutes, then slice into ½" thick slices or pull apart. For a rustic style roast, serve the sauce left in the crock as it is; for a more refined sauce, use an immersion blender to puree the sauce before serving. Top the sliced beef with some of the sauce, then sprinkle the cilantro on top. Serve, passing the rest of the sauce on the side.

Notes:
*To make this a meal, I pull out my other slow cooker and make a side dish of slow cooker pinto beans. I usually serve it with tortillas; they just seem like the right starch to serve, though cornbread is another good choice. Sometimes I thin-slice red onions for as a topping, and I will always have a selection of hot sauces on the table. I usually serve this with corn and/or a tossed salad as my vegetable side.

Dueling crock pots - pot roast in one, beans in the other

*As I said in the opening, this recipe begs to be used for leftovers. Shredded beef tacos is my default for the leftovers, but Cooks Country used it as the filling for a tamale pie, shredded and mixed with the leftover sauce and some pinto beans, then topped with cornmeal mush and baked in the oven until warm. It also makes a great, if messy, sandwich - shred or slice the pot roast and pile it on a hamburger bun, then top with the sauce.

*Any leftovers that I don't use I shred, mix with just enough of the sauce to moisten, and freeze in quart sized zip-top bags. Then, when I need a quick pile of shredded beef, I can pull it out of the freezer and microwave the bag for two minutes. Voila - instant shredded beef leftovers.

What do you think? Questions? Other ideas? Leave them in the comments section below.

Related Posts:
Slow Cooker Pork Pot Roast
Slow Cooker Dried Beans

Adapted from:
Cooks Country Magazine

*Enjoyed this post?  Want to help out DadCooksDinner?  Subscribe using your RSS reader or by Email, recommend DadCooksDinner to your friends, or buy something from Amazon.com through the links on this site.  Thank you!

Road Trip: BayLobsters Fish Market

November 1, 2010 by Mike Vrobel Leave a Comment


Update 2015-12-31: BayLobsters Fish Market is closed.


For my Four Fish Week posts, I needed to find a good fish market.  I can find decent seafood at my local megamart, but when I want the best, I go to a fish market. I've been meaning to check out BayLobsters Fish Market in Twinsburg, and reading about sustainable seafood in Four Fish gave me the push I needed to make the trip.

I knew I was in the right place as soon as I opened the door. The briny, slightly sweet smell of high quality fish greeted me as I entered the store. That is my first test for a fish market - does it smell right? BayLobster sure does. The display case of fish is a work of art - whole fish and sides of fish, carefully arranged to show how beautiful they are. And, the place was hopping - it is clambake season and they were doing a brisk business. There was a steady stream of customers during the Friday lunch that I visited.

The customer service was excellent. I went in looking for Barramundi for last week's recipe. They didn't have any in stock, but ordered it for me and had it within the week. They are happy to cut fish to your specifications, explain what they have in stock, and answer all the questions I asked.

Looking for excellent fish? BayLobsters Fish Market has them for you.

And...BayLobsters has sponsored Jane Snow's weekly newsletter for as long as I can remember. Anyone who supports Jane deserves our support as well!

CLOSED: BayLobsters Fish Market
9224 Darrow Rd
Twinsburg, Ohio 44087
Phone: 330-486-0713
Website: BayLobsters.com


My top five list of favorite things they sell are, in no particular order:
1. Fish: It's what they do, and they do it very, very well. They had gorgeous tilapia, Alaskan salmon and halibut, mahi-mahi, trout, and many others in the fish case. They also have a large selection of frozen fish in their freezer case, if that's what you're looking for.

2. Shellfish: Clams, shrimp, oysters...you want it, they've got it. The U10 scallops were calling me; the only reason I didn't buy them is I knew I wouldn't have a chance to cook them before they went bad.  I'm heading back there next week to pick some up.

3. Fish related products: They carry a lot of the ingredients you need to go with your fish - seasonings, toppings, coatings; sauces, oils and vinegars. I was pleasantly surprised to see them stocking Olive Tap oils at list price.
The guy cutting my fish said he loves to cook barramundi and top it with the lemon-infused olive oil. I'm going to have to try that one myself...

4. and 5. Did I mention the fish?  I don't have five things today; I don't need them. This is a specialty shop, and what they do (seafood) they do very well. That's enough to make me a repeat customer.

Here's the map:

View Larger Map

Related posts:
My list of Ethnic and Gourmet stores in the Akron, OH area.

*Enjoyed this post?  Want to help out DadCooksDinner?  Subscribe using your RSS reader or by Email, recommend DadCooksDinner to your friends, or buy something from Amazon.com through the links on this site.  Thank you!

Swiss Chard Gratin

October 28, 2010 by Mike Vrobel 1 Comment

When I was looking for new recipes for Swiss Chard Overdrive week, I started at my usual point - Google. For some reason, a Swiss chard gratin popped into my head, so I did a search for that. It turned up a recipe...from a cookbook I already own. Doh!

The recipe was chard gratin from Alice Water's The Art of Simple Food. I started from the ideas in Alice's recipe, but streamlined it. Alice boils the chard until tender, toasts the bread crumbs in the oven, sautes an onion, adds the chard, then moves everything into a baking dish to brown in the oven. I cut this down to two pans, and two techniques - one pan for sauteing everything, then into the baking dish for browning in the oven.

The results were a dish that balances contrasts very well. The bitter chard had a creamy taste and texture from the flour and milk, with a hint of sweetness from the onions. The tender chard played well with the crunchy, toasted bread crumb topping.

This recipe is a lot lighter than I thought it would be; when I hear gratin, I think of potatoes covered in cheese and cream. This isn't a diet recipe per se - butter, milk, flour and bread crumbs are involved, after all. But the recipe uses just a little of those ingredients for flavor, with the chard being the star of the show. If you want to serve chard to someone who thinks they won't like it, this recipe is a great place to start.

Recipe: Swiss Chard Gratin

Inspired By: Alice Waters The Art of Simple Food (via TheWednesdayChef.com)

Cook time: 45 minutes

Equipment:

  • 6 quart or larger dutch oven with a lid (I love my 8 quart All-Clad Stockpot for this )
  • Medium baking dish (I used my 9 inch square Le Creuset baking dish)

Ingredients:
Toasted bread crumbs:

  • 1 tablespoon butter
  • 1 cup Panko (Japanese bread crumbs - or make fresh bread crumbs with a food processor and a few slices of bread)

Chard:

  • 1 tablespoon olive oil
  • 1 tablespoon butter
  • 2 bunches Swiss chard (roughly 2 pounds)
  • 1 medium onion
  • ½ teaspoon + 1 teaspoon kosher salt
  • 1 tablespoon flour
  • ⅔ cup milk
  • A few grates of fresh nutmeg

Directions:
*For an overview of the basic technique, see my Swiss Chard Saute
1. Toast the bread crumbs: Turn the oven to 400*F to preheat. Melt 1 tablespoon of butter in a dutch oven over medium heat, then add the bread crumbs and toss to coat. Cook, stirring often, until golden brown, about 3 minutes. Remove the toasted crumbs to a plate.
*Pay attention and keep tossing in this step; bread goes from browned to burnt in an instant.

2. Prep the chard and onion: Separate the leaves of the Swiss chard from the stems. I do this by folding the leaf on my cutting board, along the stem. Then I run my knife down the edge of the stem, separating both sides of the leaf from the stem. Slice the stems into ¼ inch slices, and cut the leaves into 1 inch slices. Trim, peel, and dice the onion.
*If the chard has dirt on it, I fill a salad spinner with water to clean it. I separate the stems from the leaves first, then I swish the stems in the water in the spinner to clean them. I slice the leaves, and put them into the water in the spinner. Then I use the spinner to rinse and dry the leaves.

3. Saute the onions and the chard stems: Heat the 1 tablespoon olive oil and 1 tablespoon of butter in the dutch oven over medium heat until the butter stops foaming. Add the sliced stems and the onions, and sprinkle with ½ teaspoon kosher salt. Saute for 5 minutes, or until softened.

4. Steam the Leaves: Add the leaves to the pot, sprinkle with 1 teaspoon kosher salt, and toss to combine. Cover the pan and cook for five minutes, or until the leaves are tender.

5. Prepare the gratin: Sprinkle the flour over the chard, and stir until evenly mixed. Add the milk and the nutmeg, and cook, stirring, for 5 minutes.  The chard should be moist, but not swimming in liquid.  Taste for seasoning, and add more salt if necessary. Pour the chard into the baking dish, top with the bread crumbs in an even layer, and put the baking dish in the oven. Bake for 20 minutes, or until the crust is well browned and the chard is bubbling.

6. Serve: Remove the baking dish from the oven, let it rest for 10 minutes to cool down, then serve.

Variations:
*Use regular chard instead of the Swiss chard. It isn't as pretty, but it tastes just as good.

*For an extra hint of sweetness, take a trick from my recipe earlier in the week and add ¼ cup of raisins to the pot with the chard leaves.

Notes:
*I used my square Le Creuset baking dish because it looks good on the table as a serving dish, and it seems more authentic to use a french dish for this recipe.*  But Pyrex would work fine as well.
*And...OK, you got me, because I like having the extra hit of color in the pictures for the blog.

What do you think? Questions? Other ideas? Leave them in the comments section below.

Related posts:
Sauteed Swiss Chard with Pine Nuts and Raisins
Basic Sauteed Swiss Chard
Stir-fried swiss chard

Inspired by:
Alice Waters The Art of Simple Food (via TheWednesdayChef.com)

*Enjoyed this post?  Want to help out DadCooksDinner?  Subscribe using the RSS or Email options on the right, recommend DadCooksDinner to your friends, or buy something from Amazon.com through the links on this site.  Thank you!

Swiss Chard Sauteed With Pine Nuts and Raisins

October 26, 2010 by Mike Vrobel 3 Comments

A blue bowl of multicolored cooked and chopped Swiss Chard | Swiss Chard Sauteed With Pine Nuts and Raisins
A blue bowl of multicolored cooked and chopped Swiss Chard | Swiss Chard Sautéed With Pine Nuts and Raisins
Swiss Chard Sautéed With Pine Nuts and Raisins

For Swiss Chard Overdrive week, I needed a weeknight side dish. I sure wasn't going to use up all my Swiss chard if I waited for the weekend. Time for a swiss chard saute!

Here is a fancy update to my basic sauteed Swiss chard, using the classic Mediterranean combination of greens, pine nuts, and raisins. The sweet raisins and creamy, nutty pine nuts match well with the slightly bitter greens; I add a splash of balsamic vinegar at the end for a sour edge that perks up the flavors. And, really, it is the same amount of work as my basic Swiss chard. Just add the pine nuts and raisins after sauteing the stems. That's it - suddenly I have a much more complex side dish than the basic version.
*Which makes me wonder - what took me so long to figure this one out?

Puzzled by what to do with the Swiss chard in your CSA box? Try this recipe, and you'll never leave the chard in the vegetable adoption bin again.

What do you think?

Questions? Other ideas? Leave them in the comments section below.

Related Posts

For more swiss chard, try this Basic Swiss Chard Saute recipe, or try my Cast Iron Brussels Sprouts for another favorite vegetable recipe.
Stir-fried Swiss Chard

Inspired by:
Pam Anderson: How to Cook Without a Book
(And check out her blog: ThreeManyCooks.com)

*Enjoyed this post?  Want to help out DadCooksDinner?  Subscribe using the RSS or Email options on the right, recommend DadCooksDinner to your friends, or buy something from Amazon.com through the links on this site.  Thank you!

Swiss Chard Overdrive

October 25, 2010 by Mike Vrobel 3 Comments

The Loneliness of the Vegetable Adoption Bin
or
What We Have Here is a Failure to Communicate

Swiss chard is my favorite green. It is a tender, mild flavored green, and quick enough to cook that I can make it as a weeknight vegetable side. I love its rainbow of colors- red, yellow, pink, orange, and all different shades of green. It is one of the prettiest things you can eat.

I don't understand why it is not a favorite at my CSA. Whenever we get Swiss chard, I find it in the vegetable adoption bin. I can't help myself - it comes home with me. It was particularly bad a couple of weeks ago; I got a huge bunch in my CSA share, and someone left their huge bunch in the adoption bin. I drove home thinking "That's a lot of chard. I'm going to have to come up with a new recipe for this week, just for some variety."

And then...life happened. The next morning was a Saturday, which is when I usually do my grocery shopping. Both of my sons had soccer games, and I'm the coach of my youngest son's Kindergarten soccer team.
The kids were cute. My coaching consisted of as many high fives as I could possibly give out, reminding them you can't use your hands in soccer, and yelling "Look out! Here comes the ball!" a whole lot.

Diane wanted to help out by doing the grocery shopping while I was coaching. I was reluctant; call me strange, but I enjoy going to the grocery store. But it seemed like a good plan, because we were going to be very busy otherwise. I quickly put a meal plan together, and filled in the grocery list below it. I wrote down all the vegetables I got from the CSA in the middle of the page, so I would remember what I had while I made the meal plan for the week. "2 big bunches chard, new potatoes, beets..." and so on down the page. Normally I title this section, something like "CSA Vegetables", but today I didn't. I was in a hurry. Diane left for the store with Natalie while I got the boys ready for their games.

The boys and I were late, as usual. We were in the middle of a frantic search for shin guards and matching socks when my cell phone buzzed. Diane was calling from the store. I thought "I'll call back once we're in the car...we're late..." And promptly forgot all about the call. Of course, she was calling to find out what the list of CSA vegetables in the middle of the shopping list meant. She was suspicious, but when I didn't call back, she bought the whole list to be safe. Now I had double my usual amount of vegetables. Except for the Swiss chard, which was quadrupled.

So, I'm declaring this to be Swiss Chard Overdrive week. Wondering what to do with that last crop of Swiss Chard from your CSA? I found a couple of delicious recipes while I was using up my jumbo chard pile. Stay tuned...

What do you think? Questions? Other ideas? Favorite Swiss Chard recipes? Leave them in the comments section below.

Related Posts:
Basic Swiss Chard Saute
Swiss Chard Saute with Pine Nuts and Raisins (Coming Tuesday)
Swiss Chard Gratin (Coming Thursday)

Enjoyed this post?  Want to help out DadCooksDinner?  Subscribe using your RSS reader or by Email, recommend DadCooksDinner to your friends, or buy something from Amazon.com through the links on this site.  Thank you!

Tilapia with Brown Butter and Lemon Sauce

October 19, 2010 by Mike Vrobel 3 Comments

Tilapia is an example of a good farmed fish. They are omnivorous, and thrive on a vegetarian diet; don't mind being packed tight in growing pens; do well in any water conditions, as long as it is warm; and grow quickly to market size. And, in the United States, tilapia is farmed in closed inland systems to protect against escapees and pollution. Because of these traits, tilapia is now the third most common farmed fish, behind carp and salmon.
Tilapia's big advantage is being omnivorous, which helps their feed conversion ratio. They take in less protein than they produce; tilapia farming is a net gain in protein. The counter-example is salmon. Salmon are carnivorous, and farmed salmon requires at least three times as much protein as it produces.

Tilapia is a mild tasting, white fleshed, flaky fish, perfect for a weeknight fish dinner. I like them steamed and poached, but my favorite way to cook tilapia is sauteing. I coat this mild fish in a cornmeal crust to give it some crunch, and make sure to serve it with a flavorful sauce. In this recipe, I went with a simple browned butter sauce and a squeeze of lemon. The result is a fish dinner that even my kids will eat, that comes together in no time at all.

I try to find farmed tilapia from the US, as recommended by Seafood Watch. If you want to try really fresh tilapia, seek out your local Asian market with a fish counter. I can almost guarantee they will have a tank of live tilapia, and will kill it for you on the spot.  Don't worry if the water in the tank looks dirty or cloudy, or if the fish are packed in there - tilapia thrive under those conditions.
*As Tony Bourdain said, the Asian definition of fresh fish is much different from ours.  Theirs is: was the fish alive when it entered the kitchen?

Recipe: Tilapia with Brown Butter and Lemon Sauce

Inspired by: Paul Greenberg Four Fish: The Future of the Last Wild Food

Ingredients:

  • 2 lbs tilapia ( 6 to 8 tilapia filets, depending on thickness)
  • salt and pepper
  • 1 cup cornmeal
  • 2 tablespoon vegetable oil
  • 3 tablespoon butter
  • juice of 1 lemon

Directions:
1. Prepare the tilapia: Sprinkle the tilapia evenly with salt and pepper. Put the cornmeal in a shallow pan. Just before cooking the tilapia, coat it with a thin layer of cornmeal, shaking to remove any excess.

2. Saute the tilapia: Heat 1 tablespoon of vegetable oil in a 12" nonstick fry pan over medium-high heat until it is shimmering. Cook the tilapia in two batches. Put half of the tilapia in the pan. Shake the pan to get some oil under the fish, then cook undisturbed for four minutes, or until well browned. Flip the tilapia and cook for another 2 to 4 minutes on the other side. The fish should flake when pressed. Remove the tilapia to a platter, and add the remaining 1 tablespoon of oil to the pan. Let the oil heat for a minute, then add the second batch of tilapia to the pan. Cook the same way as the first batch - 3 minutes, flip, then 2-4 minutes or until browned and flaking. Move the second batch to the platter, and drizzle the tilapia with the lemon juice.

3. Make the browned butter sauce: Reduce the heat under the pan to medium, then add the 3 tablespoons of butter. Cook, stirring often, until the butter is just turning brown, about 3 minutes. Pour the butter over the tilapia, and serve.

Variations:
Toasted Almonds: For some extra crunch, add toasted almonds to the pan with the butter when making the sauce.

Garlic butter: While making the browned butter sauce, add 1 clove of crushed garlic after the butter has melted but is still foaming. Cook the butter and the garlic until the butter is browned.

Pan sauce: Browned butter is quick, but a more complex pan sauce will also go well with tilapia.  I like the combination of citrus and fish, so the first two sauces that jumped to mind are orange-mustard pan sauce and tequila-orange pan sauce.

Notes:
Tilapia fillets seem to come in two sizes - thin (about ¼ to ½" thick) and thick (about ¾" thick thick). The cooking time depends on the thickness - the thin fillets will be done in about 6 minutes total cooking time; the thick ones will take about 8 minutes total.

What do you think? Questions? Other ideas? Leave them in the comments section below.

Related Posts:
Sustainable Seafood
Review: Four Fish by Paul Greenberg
Air Fryer Tilapia
Grilled Barramundi

Thanks to BayLobsters Fish Market for the wonderful tilapia I used in this recipe.

Inspired by:
Paul Greenberg Four Fish: The Future of the Last Wild Food

*Enjoyed this post?  Want to help out DadCooksDinner?  Subscribe using your RSS reader or by Email, recommend DadCooksDinner to your friends, or buy something from Amazon.com through the links on this site.  Thank you!

Review: Four Fish by Paul Greenberg

October 18, 2010 by Mike Vrobel Leave a Comment

Four Fish: The Future of the Last Wild Food


Last year, I shared my personal philosophy towards fish in my Sustainable Seafood post. I just finished reading a book that helped expand my knowledge about fish, and the challenges we have ahead of us.

Four Fish: The Future of the Last Wild Food by Paul Greenberg is an entertaining, sobering, in-depth, and practical look at fish and sustainability.

Mr. Greenberg focuses on the four fish that predominate in the modern fish market: Salmon, Tuna, Bass and Cod. He shows how fishing for each of these species has advanced across human history, and the problems and successes we have had with their sustainability. Don't be fooled by this summary - the book isn't just history and environmentalism. Mr. Greenberg approaches fish from his viewpoint as an enthusiastic amateur fisherman. Four fish is a fascinating view of today's world of fishing, with stories of the people who catch and farm our fish. And, as a fisherman, Mr. Greenberg feels he has to catch these fish himself, and his personal fish tales are some of the best parts of the book.

In the book, he answers questions like: Why is wild Alaskan seafood sustainable, but wild bluefin tuna almost certainly doomed to extinction? Why did striped bass start appearing on every restaurant menu at the same time?  Why is farmed salmon a bad idea, and why are attempts to farm bluefin tuna are even worse? The answer to the last one, in a nutshell: feed conversion ratios. It takes three pounds of wild fish to grow one pound of wild salmon, and tuna is much worse. But he's not against fish farming. He makes a strong case for it, as long as we pick fish that lend themselves to farming, like tilapia and barramundi.

What I really like about the book is that he doesn't just throw his hands up and say "That's it, fish are doomed. Get used to eating chicken." He has thought through the problem, and investigated what is working in the world today. Mr. Greenberg has some good suggestions on where we need to go to have fish in the future. His conclusion is that we have to change our view of fish. Instead of viewing all fish as an inexhaustible bounty, and driving them into extinction, we have to view them as two different types of fish.

The first type is wild fish. Some wild fish are sustainable, if caught in a well managed way. Alaskan salmon and halibut are the best examples of this; Alaska has a good track record for sustainable fishing. But we have to stop treating wild fish like commodities; we have to view them as a delicacy, as wildlife, and not a factory food source. Mr. Greenberg suggests a model similar to what we use with Maine lobsters, where licenses help fishermen take the long view. Their license is worth more if they support the environment the lobsters are in, do not over fish them, and therefore have a better harvest in the future. They take of the fishery, and over time, their license is worth more. Will this make wild fish more expensive? Yes. But if we want them to be available to eat in the future, we have to start treating them as a delicacy. Copper River salmon is a good example; high quality wild fish that is expensive, but worth it.
*Mr. Greenberg explains this as the dilemma with bluefin tuna. They are so far-ranging that it is impossible for one government to set limits on their catch. Everyone wants their piece of the pie. We (the US) could set limits, but there are so many countries that have a legitimate claim to tuna that it wouldn't matter. Tuna fishing is every man for himself, with the tuna on the losing end. Wild salmon works better, because one government (US/Alaska) has control over the breeding grounds and a lot of their natural range.

His second type is farmed fish. Right now, our farmed fish are chosen because the wild version is popular, not because it is a good choice for farming. Again, see farmed salmon; we farm it because it is popular, not because it makes sense. Mr. Greenberg suggests we focus on fish that it makes sense to farm, fish that are good at being sustainably farmed. (In other words - fish that have low feed conversion ratios, that breed well in captivity, and that don't cause problems with waste or disease. Fish that do well in closed system farms are particularly good for farming.) These fish can be treated as commodities, and as the generic "fish" that can be used as cheap protein for the vast majority of our fish purchases. He likens it to the animals we have chosen to farm - beef, pork, poultry, lamb - where we have, over time, picked the handful of species that work well as human food sources. We need to go through the same process with fish, using modern knowledge instead of centuries of trial and error. As I mentioned above, tilapia and barramundi are two good examples of this.

I'm going to follow Paul Greenberg's advice. This week, I'll be sharing recipes for tilapia and barramundi, two of the fish he highlights as good fish for farming. If you are interested in sustainable food, where your fish come from, an entertaining fish story, or all of these topics, get a copy of Four Fish.

Highly Recommended.

Related Posts:
Sustainable Seafood
Sauteed Tilapia with Brown Butter Sauce
Grilled Barramundi (Coming Thursday)

Four Fish: The Future of the Last Wild Food

*Enjoyed this post?  Want to help out DadCooksDinner?  Subscribe using your RSS reader or by Email, recommend DadCooksDinner to your friends, or buy something from Amazon.com through the links on this site.  Thank you!

Slow Cooker Chinese Red Cooked Chicken Thighs

October 12, 2010 by Mike Vrobel 7 Comments

I've been reading a lot of authentic chinese cookbooks recently, looking for ideas to expand my weeknight stir-fries. One technique that caught my eye was red cooking, braising meat for a long time in a Shaoxing wine, soy and caramelized sugar broth. The result of red cooking is tender meat with a reddish hue from the broth.

I don't have one of the traditional Chinese sand pots that are used for red cooking.  And, I was looking for a weeknight dinner, not a weekend extravaganza.  So, I turned to my trusty slow cooker. It seemed like a natural for red cooking - a long simmer at low heat is exactly what the slow cooker does best. My cooking instincts were good - red cooking chicken thighs in the slow cooker is a great idea. The chicken was fall off the bone tender, and flavored through with the sweet, sour and salty broth. The only problem was the aroma - it smells so good, but you have to wait six hours to eat!

Now, my red-cooked chicken thighs weren't exactly red.  It was more of a dark, wine/brown color that looked quite interesting. At least, I thought the color was interesting.  The kids were put off by the color at first. "Oh, no, not the slow cooker!" was Ben's comment. I replied: "Try it - it's been simmering in chinese barbecue sauce all day".
*Yes, I'll bend the truth a little if I think it will get them to try something. I think of it as marketing. If I can get my kids to try a new food because they think it's something else, I'm OK with that.

After some hemming and hawing, he tried it. And loved it! He went back for seconds, even mixing some of the sauce in with his rice. If you're looking for a simple slow cooker meal with an international flair, try out these red cooked chicken thighs.

Recipe: Slow Cooker Chinese Red Cooked Chicken Thighs

Adapted From: RedCook.net
Equipment:

  • 6 quart or larger slow cooker (Crock Pot brand is fine, but I like my fancy ones from All-Clad and KitchenAid)

Ingredients:

  • ½ cup Shaoxing wine (Chinese cooking wine) or dry sherry
  • ½ cup soy sauce
  • ¼ cup brown sugar
  • 3 cloves garlic, peeled and crushed
  • 1 inch piece of ginger, peeled and crushed
  • ½ teaspoon five-spice powder (or: 2 star anise pods and 1 stick cinnamon)
  • 3 lbs bone-in chicken thighs

Directions:
1. Prepare the chicken: Put the wine, soy sauce, and brown sugar in the slow cooker. Peel and crush the garlic and ginger, and add to the slow cooker. Add the five-spice powder, then stir until the sugar is dissolved. Remove the skin from the chicken thighs, then add them to the slow cooker, turning to coat with the sauce.

2. Slow cook the chicken: Slow cook for 6 hours on low or 3 hours on high.

3. Serve: Remove the chicken to a platter. Spoon ½ cup of the liquid from the crock over the chicken, and pour the rest of the liquid into a gravy boat to pass at the table. (If you have a fat separator, use that as your gravy boat.)

Variations:
*Common additions to red cooking broth are scallions, cut into 2" lengths, and a length of orange peel.

Notes:
*Removing the chicken skin, while an annoying step, is necessary for this recipe. Since the chicken isn't browned, the skin will still be full of fat. If it is left on the chicken, the sauce will be very greasy.

What do you think? Questions? Other ideas? Leave them in the comments section below.

Related Posts:
Slow Cooker Pork Pot Roast
Slow Cooker Caribbean Black Beans and Rice

Adapted From: RedCook.net
*Enjoyed this post?  Want to help out DadCooksDinner?  Subscribe using your RSS reader or by Email, recommend DadCooksDinner to your friends, or buy something from Amazon.com through the links on this site.  Thank you!

Cooking Authentic or Cooking Everyday?

October 11, 2010 by Mike Vrobel 12 Comments

A little bit ago, there was a kerfluffle in the media about Martha Stewart and Rachel Ray. Apparently, Martha said something about Rachel's kitchen skills, and how they were lacking. This quickly morphed into a food blog personality test. Who ya got? Who are you as a cook, Rachel or Martha? Are you Rachel Ray, as in 30-Minute Meals, using shortcuts and prepared ingredients and bagged, pre-cut vegetables to get the meal on the table as quickly as possible? Or are you Martha Stewart, as in Martha Stewart Entertaining, do it The Right Way, have a large garden so you can have fresh greens, raise your own chickens, and have dinner linens that match the seasons?

I started in the Martha camp. Or, in my case, the Cooks Illustrated's Best Recipe camp. I cooked elaborate meals on the weekends, got really deep into multiple day barbecues, and would take forever just to get dinner on the table. Then I set out to learn the Rachel, get a dinner on the table on a weeknight side of cooking. Except...her show hadn't come on the air yet. In my case, it was Pam Anderson's How to Cook Without a Book. For a while, all my cooking was simple and direct, as I learned basic techniques.

Now my cooking is bipolar.* I love cooking, so doing things The Right Way appeals to me. On weekends, for dinner parties, when I have the time, I'm going for it. I love to find out the Right Way, the ultimate recipe, and do it that way (at least once). But, on weeknights, I have to use the 30 minutes or less style. Life gets in the way; if taking a few shortcuts lets you get dinner on the table, then it's the right thing to do. What's wrong with tailoring your cooking to the time you have available?
*As readers of this blog already know. My posts veer between recipes that are "done in 30 minutes" and recipes that start with the words "2 to 3 days before you want to cook, salt the meat..."

As I've improved my cooking technique, I've had the two styles bleed together. There are shortcuts that I won't use any more with my weeknight dinners, and complicated techniques that I skip when making elaborate dinners. I can't just follow a recipe any more; I have to use my intelligence and experience to make it fit my cooking style. I use homemade stock, or I'll use water - no canned broth. I make my own vinaigrettes, because bottled dressing tastes like its stabilizing chemicals to me. I dry brine everything I possibly can, because it adds so much to the flavor. But...I use canned tomatoes and mayonnaise all the time. Bagged salad gives me a quick vegetable side. And I always have some frozen corn and peas in the back of the freezer, just in case.
*And, at my best, I can use the elaborate style to help the everday meals. I make pressure cooker chicken stock on the weekends, after a roast chicken dinner. The result is stock that makes a quick weeknight soup or sauce taste like I slaved away on it. And I did slave away...when I had a little free time.

It's about a mindset. I think: am I cooking a Pam Anderson, How to Cook without a Book meal or a Cooks Illustrated, Best Recipe meal? Is it Mark Bittman's simple side of Simple to Spectacular, or is it Jean-Georges Vongerichten's spectacular version? Rick Bayless from Mexican Everyday, or Rick Bayless from Fiesta at Rick's? And, does it all have to be one way or the other? Can I short-cut a few of the sides, and do the main dish in an elaborate fashion on a weekday? Can I make a hearty, homey stew that doesn't need a lot of fussing while my guests arrive for a dinner party?

I think the problem comes in when you try to do a Martha recipe in a Rachel way. Or vice versa. Paella is not a weeknight dish, and the compromises to make it in 30 minutes are too great. You might make a good rice dish, but it's not Paella. A weeknight dinner is about feeding your family simple, good food, and making every dinner into a multi-course showcase is overkill. But for a family gathering, a party, or a holiday? Stand back - I'm going all out.
*Rick Bayless hits the nail on the head in the opening of Mexican Everyday. Cooking an everyday meal for your family should be simple, healthy cooking. Cooking a meal for a party (Fiesta!) is completely different, and should be about celebration and excess. And we need both kinds of meals in our lives.

What do you think? What are your cooking personalities? Are you a Rachel kind of cook, or are you a Martha kind of cook? Let me know in the comments below.


*Enjoyed this post?  Want to help out DadCooksDinner?  Subscribe using your RSS reader or by Email, recommend DadCooksDinner to your friends, or buy something from Amazon.com through the links on this site.  Thank you!

Follow DadCooksDinner on Twitter

October 10, 2010 by Mike Vrobel Leave a Comment

Follow DadCooksDinner on Twitter

Are you a reader of DadCooksDinner who is also a Twitter junkie?

Well, I'm finally able to help you out. The official Twitter feed for DadCooksDinner is now open for business. To follow my posts on Twitter, click on the "Follow me on Twitter" link above, or in the sidebar on the right. Thanks!

Pumpkin and Squash Soup

October 7, 2010 by Mike Vrobel 3 Comments

Diane had an unexpected bonus in our garden this year. Tim, our youngest, planted a seed while he was helping Diane, and it gave us a mystery squash that we were puzzling over for most of the summer. We assumed it was a rogue zucchini, but there was only one of them, and it kept getting bigger and rounder. It had tendrils reaching out to our deck, and was taking over one side of the 4 foot garden box it was planted in. Eventually, it became obvious, even to a garden novice like me - Tim had planted a pumpkin!

Tim was so excited. He loves helping mom with the plants, and now he had a pumpkin of his very own. Every time he saw it, he would wiggle with excitement. Finally, it was a nice, bright orange, and it was time to pick it. Now what? I had to do something worthy of Timmy's pride and joy.

I went with a recipe I learned from Patrick Payet while I was in Provence. This recipe that taught me the value of patience in cooking. The pumpkin simmers for a while, then is pureed, then the puree is returned to the pot and simmered some more. When the puree went back in the pot, Patrick had me taste it. It was bland and watery; there wasn't much flavor. Mentally, I wrote the dish off. "This one isn't going to work", I thought. Then it simmered down, and I learned that extra twenty minutes makes all the difference. The soup went from watery and bland to thick and full of pumpkin flavor. Sometimes, all a dish needs is a little more time to come together.

So, are you looking for a recipe to use those beautiful pumpkins you see at the Farmers Market, or that you received in your CSA?  Try this one out.

Recipe: Pumpkin and Squash Soup

Adapted From: Patrick Payet, Famous Provence

Ingredients:

  • 1 small pumpkin (4 to 5 lbs)
  • 1 butternut squash (3 to 4 lbs)
  • 1 large onion
  • 2 cloves garlic
  • 1 large red potato
  • 1 large sprig fresh thyme
  • 1 large sprig fresh sage
  • 2 sprigs parsley
  • 1 bay leaf
  • 1 tablespoon olive oil
  • 5 cups water
  • 2 tablespoon brown sugar
  • Kosher salt, pepper, and balsamic vinegar to taste

Directions:
1. Prep the vegetables: Peel and seed the pumpkin and the squash, and cut into 1" cubes. Peel and slice the onion thin, peel and crush the garlic clove, peel and dice the red potato. Tie the thyme, sage and parsley with butchers twine, to make a bouquet.

2. Saute the vegetables: Heat the 1 tablespoon olive oil in a large dutch oven over medium high heat until shimmering. Add the onion and ½ teaspoon kosher salt and saute until softened, about 5 minutes. Add the garlic and saute for 1 minute, or until you can smell the garlic. Add the pumpkin and squash and saute, stirring, for 5 to 10 minutes, until the squash is slightly browned.

3. Cook the squash:Add the potato, herb bouquet, bay leaf, and enough water to just cover the squash - 5 cups of in my dutch oven. Bring to a boil, then reduce the heat to a strong simmer and cook, stirring occasionally, until the pumpkin and squash are cooked through, 20 to 45 minutes.
*Yes, that's a wide time range - it depends on your squash and pumpkin. When you can crush a piece of pumpkin in your tongs, it is done.

4. Puree the soup and simmer until thick: Remove the herb bouquet and bay leaf. Blend the soup until completely smooth. I do this in my pot with a stick blender, but you can also do this by transferring the squash to a blender, in batches, using a slotted spoon. Bring the pureed soup back to a simmer and cook, stirring often, until the soup is thickened, about another 20 minutes. (If you have a splatter screen, now is the time to use it.) Stir in the brown sugar. Taste, and add salt, pepper, and balsamic vinegar as needed.

Variations:
*Chicken or vegetable stock: If you have homemade chicken or vegetable stock stock on hand, substitute it for half of the water.  This adds extra body to an already rich soup.

*All squash soup: No pumpkin? That's OK. Substitute 5 pounds of butternut squash, or any other fall squash.

*All pumpkin soup: No squash? That's OK. Add another 3 to 4 pounds of pumpkin. (I'd just get a larger one, say eight to ten pounds.)

Notes:
*As I mentioned in the opening, the key to this soup is the extra simmering after it has been pureed. The difference before and after the simmer is amazing - taste as you go to see what I'm talking about.

*Make sure the soup is seasoned properly at the end - there are a lot of vegetables in there, and they need a good amount of salt and pepper to punch up the flavor. I also like to add a shot of balsamic vinegar, for the sweet/sour combination it adds to the soup.

*A dollop of sour cream or heavy cream when serving adds a nice contrast to the soup, and the creamy dairy flavor adds another level of flavor.

*Peeling and seeding a pumpkin and squash can be work, so if you are lucky enough to have a store that sells pre-seeded sections of pumpkin and squash, buy them. When I was taking my cooking class with Patrick, the local grocery store in Cavaillon had beautiful looking pumpkin sections, shrink-wrapped and ready for cooking.

What do you think? Questions? Other ideas? Leave them in the comments section below.

Related Posts:
Quick Gazpacho

Adapted from:
Patrick Payet, Famous Provence

*Enjoyed this post?  Want to help out DadCooksDinner?  Subscribe using your RSS reader or by Email, recommend DadCooksDinner to your friends, or buy something from Amazon.com through the links on this site.  Thank you!

Tarte Tatin with Puff Pastry

October 5, 2010 by Mike Vrobel 5 Comments

I am a sucker for fresh produce. My checkbook trembles in fear when I go to a farmers market; there is always something that looks so good that I have to buy it. What happens when I go to an apple orchard? Especially a you-pick apple orchard? I wind up with a lot of apples.
*A LOT of apples.

What do I do with all those apples? Here is a quick, easy tarte tatin recipe that I learned while I was on my trip to Provence.* Tarte tatin, an upside down apple pie, is a great example of simple French cooking. Butter, sugar, apples, lemon juice and puff pastry - that's it, and the results are better than any apple pie I've ever made.
*Did I mention that I spent a week in a cooking class in Provence? Yes? Well, it still makes me happy just thinking about it.

Now, I'm not a dessert kind of guy. Don't get me wrong, I like dessert. I won't turn it down if it is offered. But, in the end, I'd rather eat more of the main course and pass on dessert.
*Diane, my loving wife, is exactly the opposite. She's the baker in our household, and has quite a sweet tooth. When I need a dessert, I ask her to do it.

That's why this is the first dessert published on DadCooksDinner - I don't make dessert that often. But I'll admit, when I'm entertaining, I like to have something sweet as the final course for my guests. When Diane isn't making dessert, I turn to this five ingredient recipe.*
*OK, there are six ingredients if you count a tub of good vanilla ice cream. And, really, if you're going to make an apple tart, you don't want to forget the ice cream.

The key is the puff pastry; it makes this recipe almost laughably easy. Thaw the puff pastry, and it is ready to top the caramelized sugar and apples. No fussing with a dough, no rolling, no resting; just a quick slash with a knife, and fifteen minutes in the oven to brown.

Recipe: Tarte Tatin with Puff Pastry

Adapted From: Patrick Payet, Famous Provence

Equipment:

  • 10 inch nonstick skillet with oven-safe handle

Ingredients:

  • 4 large apples (or 6 medium)
  • Juice of 1 lemon
  • 6 tablespoon butter (¾ of a stick)
  • ¾ cup sugar
  • 1 sheet of puff pastry, thawed

Directions:
1. Thaw the puff pastry: 45 minutes before cooking, remove the puff pastry from the freezer and leave it on the counter to thaw, covered with a sheet of plastic wrap. (Or, thaw for 4 hours in the refrigerator...see here for puff pastry details). Once the puff pastry is thawed, unfold it and re-cover it with the plastic wrap.

2. Prepare the apples: Turn the oven to 450*F. Peel the apples, cut into quarters, and trim the cores and stems. Put the apple quarters in a medium bowl, pour the lemon juice on top, and toss until evenly coated.

3. Caramelize the sugar and cook the apples: Melt the butter in the nonstick fry pan over medium heat. Add the sugar and stir often. The sugar will look very dry; that is normal. Keep stirring until the sugar turns from sandy brown to golden brown. This will take about 5 minutes, but go by the color, and keep stirring, because the sugar goes from sandy brown to golden brown very quickly. Once the sugar is browned, add the apples in a spiral pattern, cut side down. Cover the fry pan with a lid and cook for 6 minutes, or until the apples are browned on the underside and getting soft.

4. Add the puff pastry and bake: Turn the heat off under the fry pan, remove the lid, and drape the puff pastry over the top of the pan. Tuck any overhanging puff pastry in around the edges (carefully - the sugar is hot and sticky!). Slash the puff pastry with a very sharp knife. Move the fry pan into the oven and bake for 15 minutes, or until the pastry is puffy and browned.

5. Serve: Remove the fry pan from the oven and let rest for 5 minutes. Run a spatula around the edge of the pan to loosen the tarte. Then, gather your nerve, and invert the tarte onto a serving platter. I do this by holding the serving platter against the top of the fry pan, then flipping them over together in one smooth, quick motion.* Lift the pan off the tart, and let the tart rest for ten more minutes. Slice and serve.
*When flipping the tart, remember: he who hesitates is lost.

Variations:
*Big Tart: Use six to eight apples, a stick of butter, and a cup of sugar in a 12 inch nonstick pan. Roll the puff pastry out a little to stretch it to fit over the larger pan.

*Apple Pie: For an American flavor profile, stir ½ teaspoon cinnamon into the browned sugar right before you add the apples.

Notes:
*I used a mix of granny smith and fuji apples, because that's what I had on hand. Any "good for baking" apple will work in this recipe; a mix of sweet apples (golden delicious, fuji) and tart apples (granny smith, macoun) seems to work best for me, but I usually just use what I have on hand. The only apple I avoid is red delicious, because it tends to be a bit mealy.

*I just plop the puff pastry down on top and tuck in the ends because it is quick and easy. If you would rather be neat, trim the corners of the puff pastry to make a circle before putting it on the apples in the pan.

What do you think? Questions? Other ideas? Leave them in the comments section below.

Adapted from:
Patrick Payet, Famous Provence

*Enjoyed this post?  Want to help out DadCooksDinner?  Subscribe using your RSS reader or by Email, recommend DadCooksDinner to your friends, or buy something from Amazon.com through the links on this site.  Thank you!

  • « Previous Page
  • 1
  • …
  • 28
  • 29
  • 30
  • 31
  • 32
  • …
  • 37
  • Next Page »

Welcome to Dad Cooks Dinner!

I'm Mike Vrobel, a dad who cooks dinner every night. I'm an enthusiastic home cook, and I write about pressure cooking, rotisserie grilling, and other food topics that grab my attention.

More About Me →

Popular

  • Three bowls of cooked Pinto Beans on a wood table
    Instant Pot Pinto Beans (No Soaking)
  • Pressure Cooker Beef Shank (Osso Bucco)
  • Pressure Cooker 7 Hour Leg of Lamb (in 90 minutes)
    Pressure Cooker 7 Hour Leg of Lamb (in 90 minutes)
  • Pressure Cooker Brown Jasmine Rice
  • Grilled Tomahawk Steak (Long Bone Ribeye, Reverse Seared)
    Grilled Tomahawk Steak (Long Bone Ribeye, Reverse Seared)
  • A green bowl full of chicken noodle soup
    Instant Pot Rotisserie Chicken Noodle Soup

Seasonal

  • A bowl of asparagus risotto
    Instant Pot Asparagus Risotto (Pressure Cooker Recipe)
  • Grilled Butterflied Chicken with Garlic Butter
  • Sous Vide rack of lamb sliced into chops
    Sous Vide Rack of Lamb with Dijon Bread Crumb Crust
  • A bowl of beef stew with asparagus, carrots, and radishes.
    Instant Pot Spring Vegetable Beef Stew
  • A Rotisserie Chicken (Pollo Asado)on a platter of shredded cabbage
    Rotisserie Chicken Pollo Asado
  • Rotisserie Pork Shoulder Roast with Carolina Mustard BBQ Sauce
    Rotisserie Pork Shoulder with South Carolina Mustard Barbecue Sauce

Footer

↑ back to top

About

  • Privacy Policy

Newsletter

  • Sign Up! for emails and updates

Contact

  • Contact

Copyright © 2025 Dad Cooks Dinner