DadCooksDinner

  • Home
  • Rotisserie
  • Recipes
  • Tools
  • Books
  • Merch
menu icon
go to homepage
  • Recipes
  • Books
  • Tools
  • Merch
  • About
subscribe
search icon
Homepage link
  • Recipes
  • Books
  • Tools
  • Merch
  • About
×
Home » Recipes

Indoor Clambake

October 27, 2011 by Mike Vrobel 7 Comments

Indoor Clambake
According to Michael Symon, Cleveland is the clambake capital of the world. Cleveland sells more clambakes than anywhere outside of New England. Don't ask me why, but we love them.

No, really, don't ask me, I don't know.

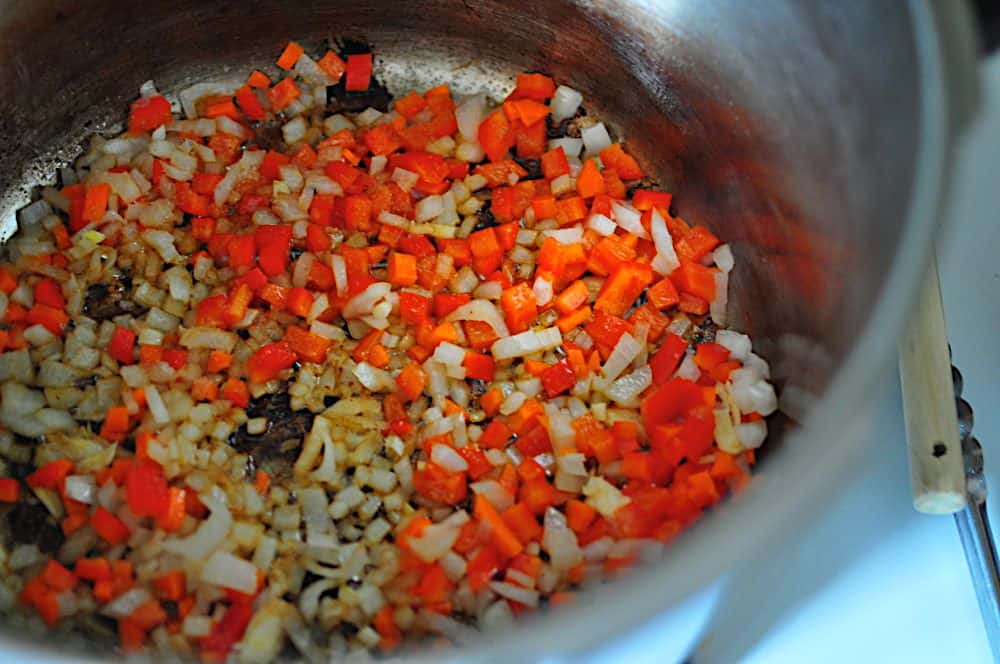
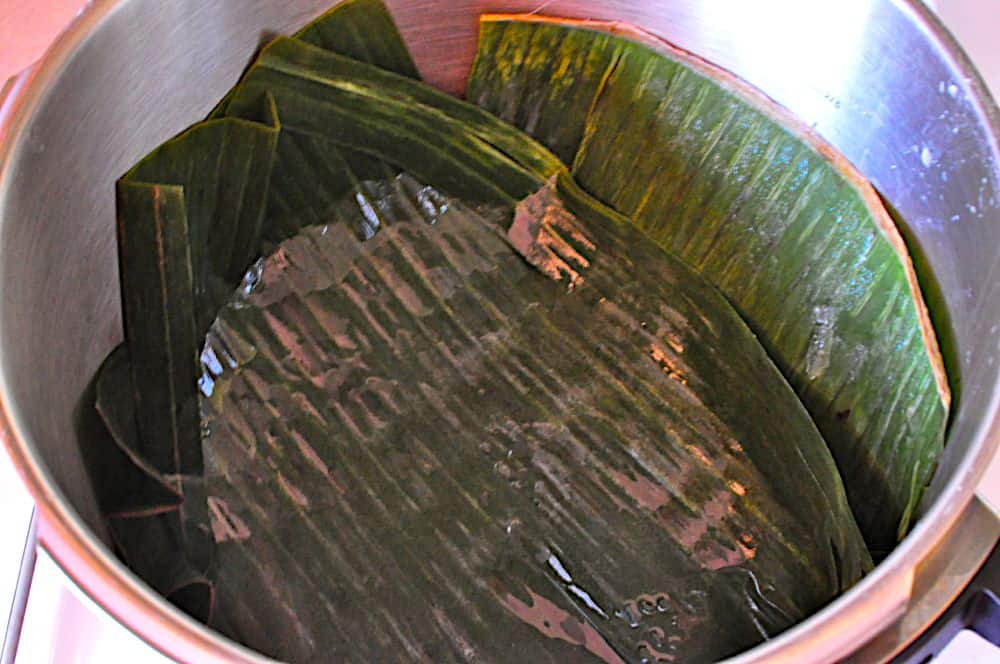
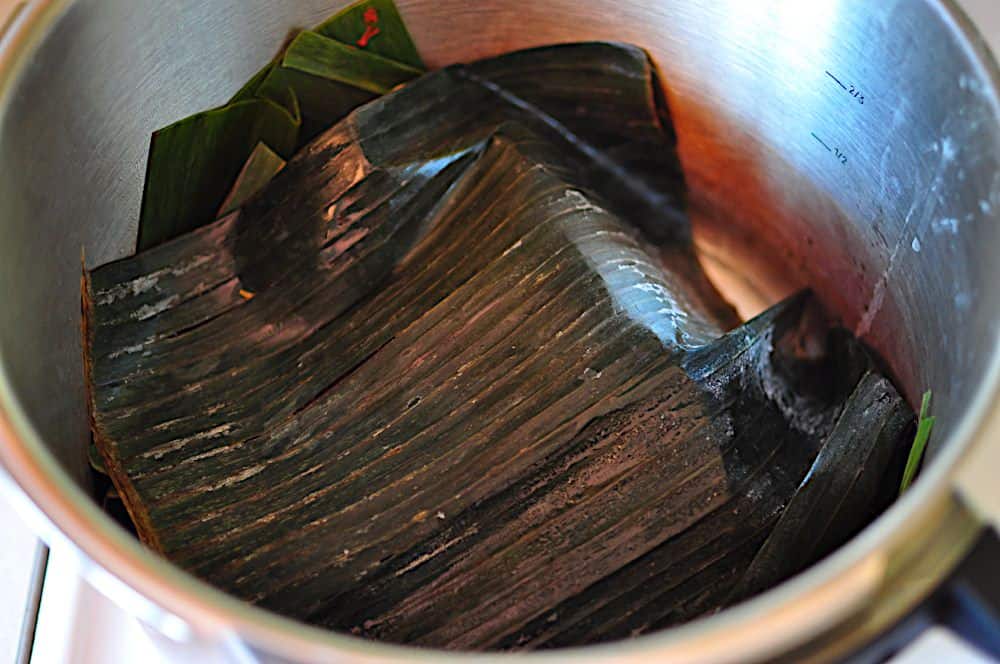
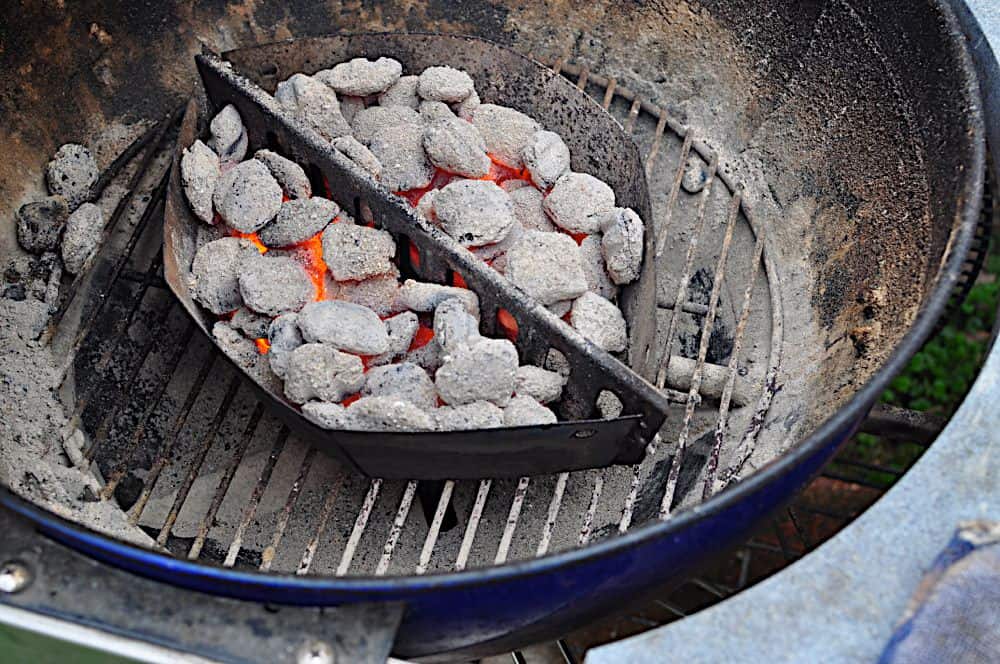
Well, OK, I might know why clambakes are so popular around here. They're perfect for a party. Everything comes out of a single pot - you can serve a crowd, and all the prep work happens ahead of time. Bring the big pot to a boil, drink a few beers, open the pot, and serve with lots of napkins.
*And melted butter. And bread. And more beer. And wine. And cups for the delicious, delicious broth.

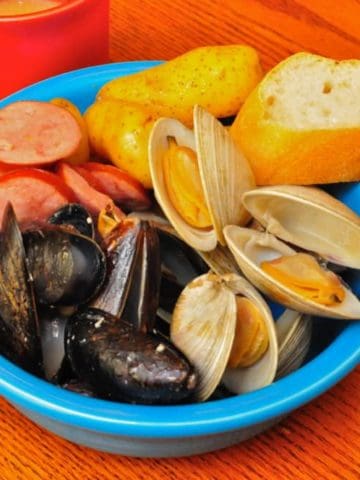
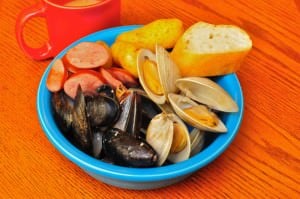
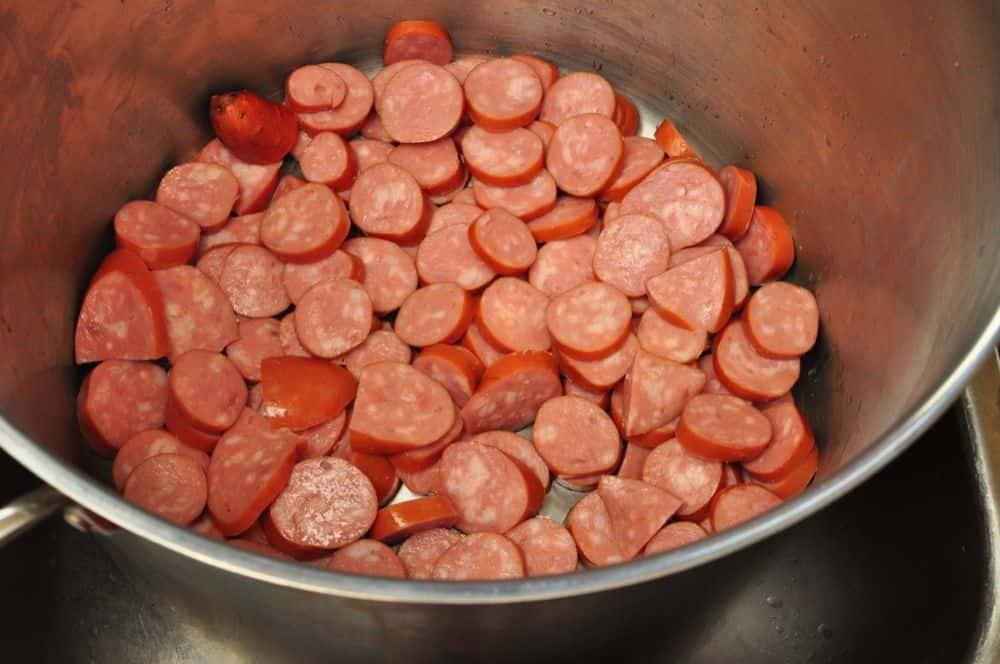
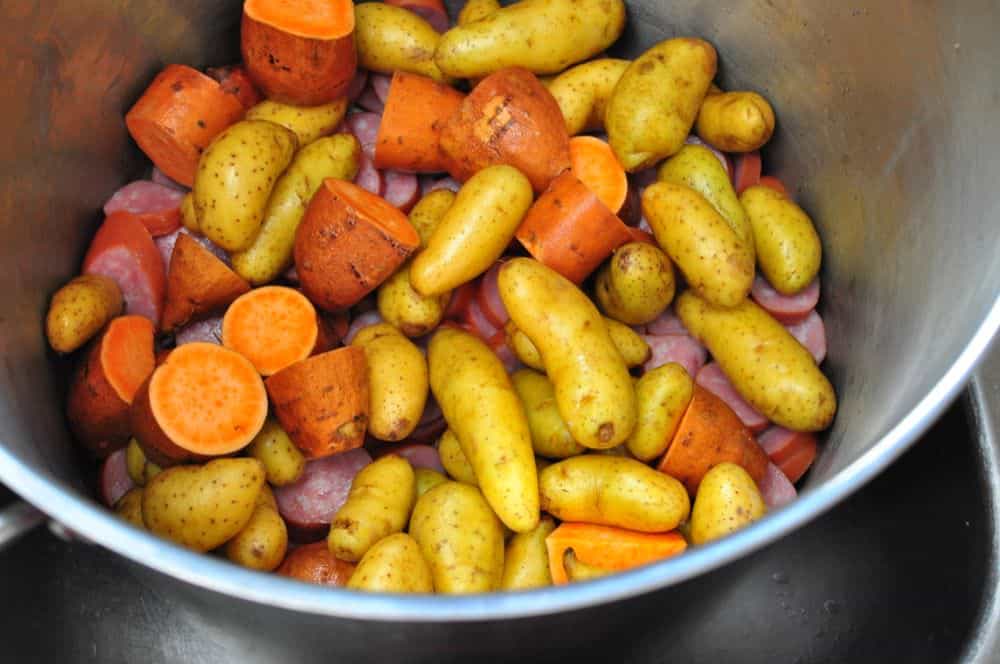
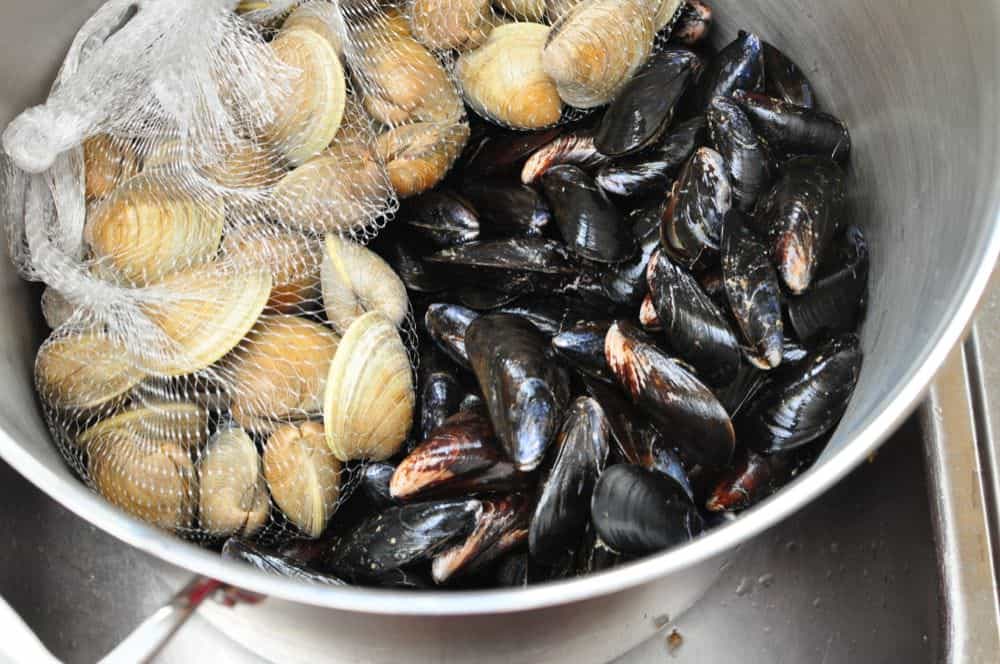
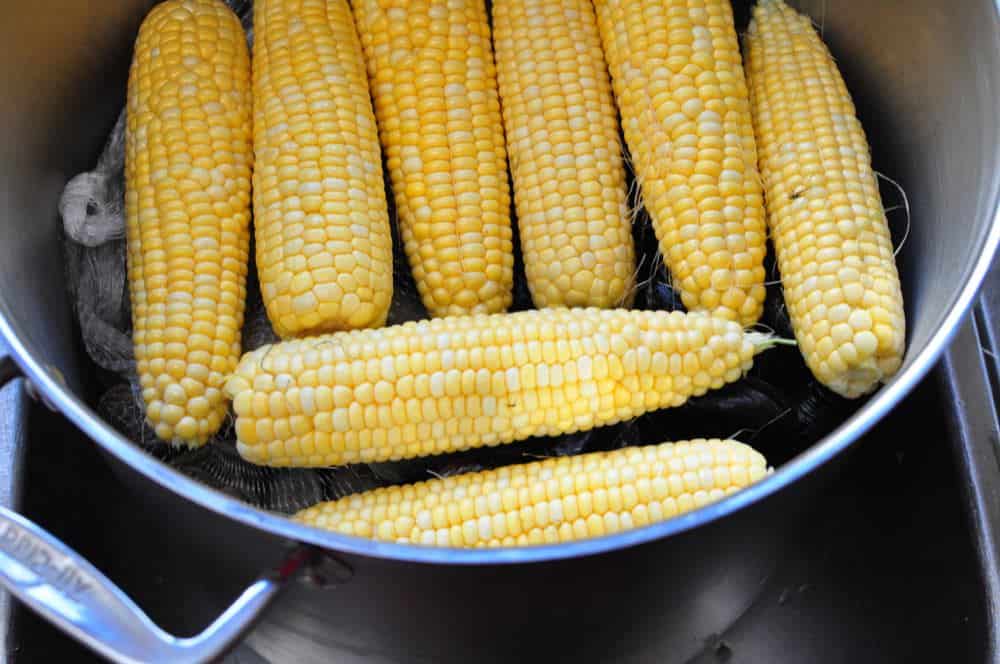
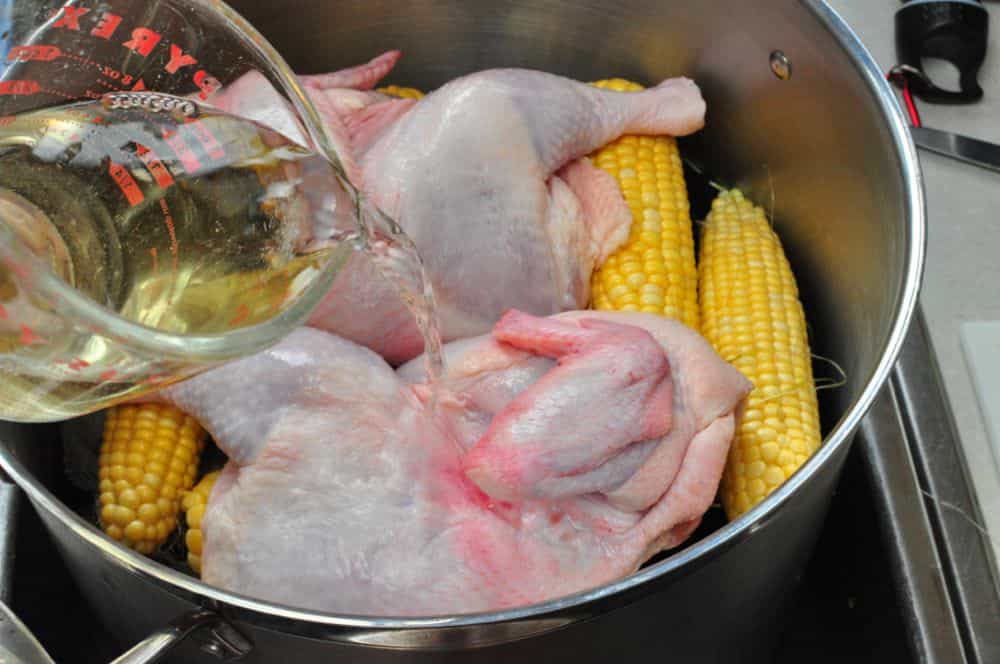
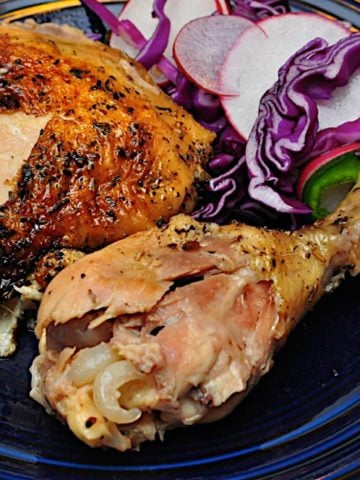
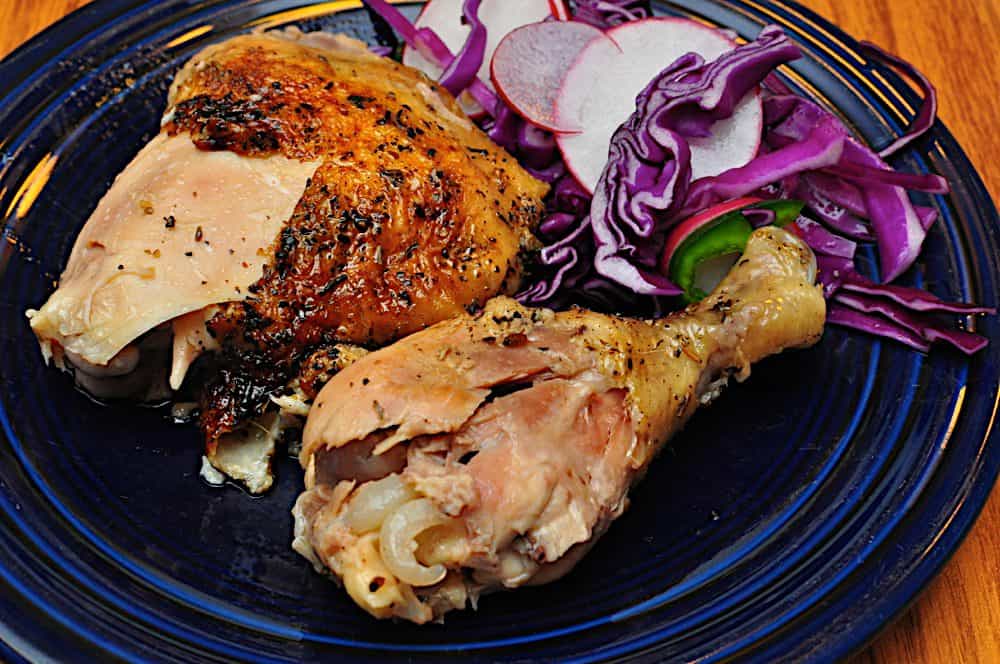
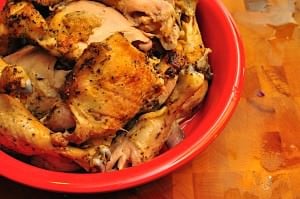
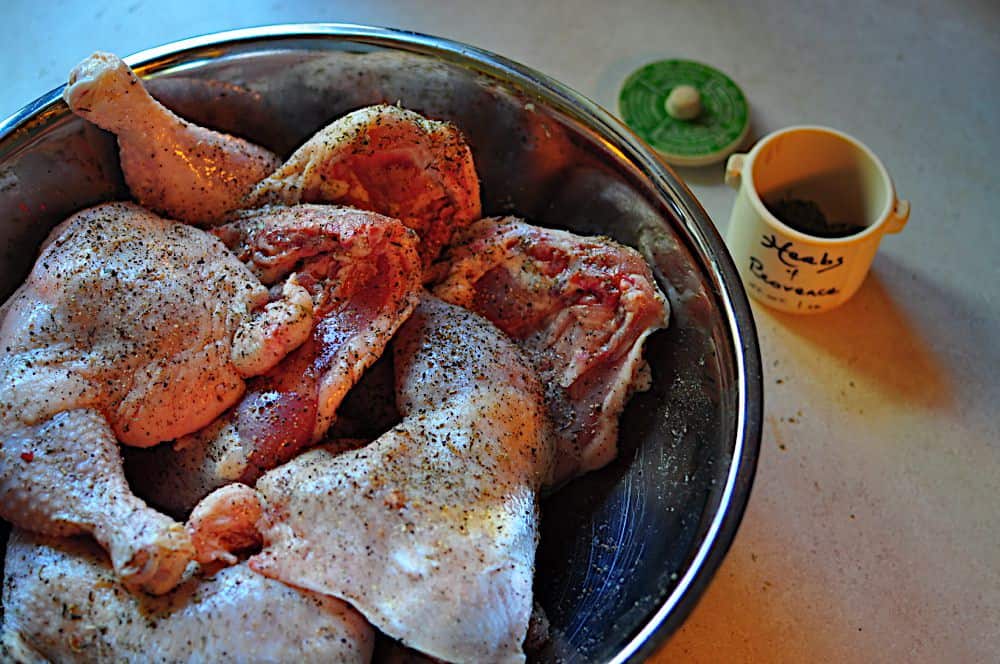
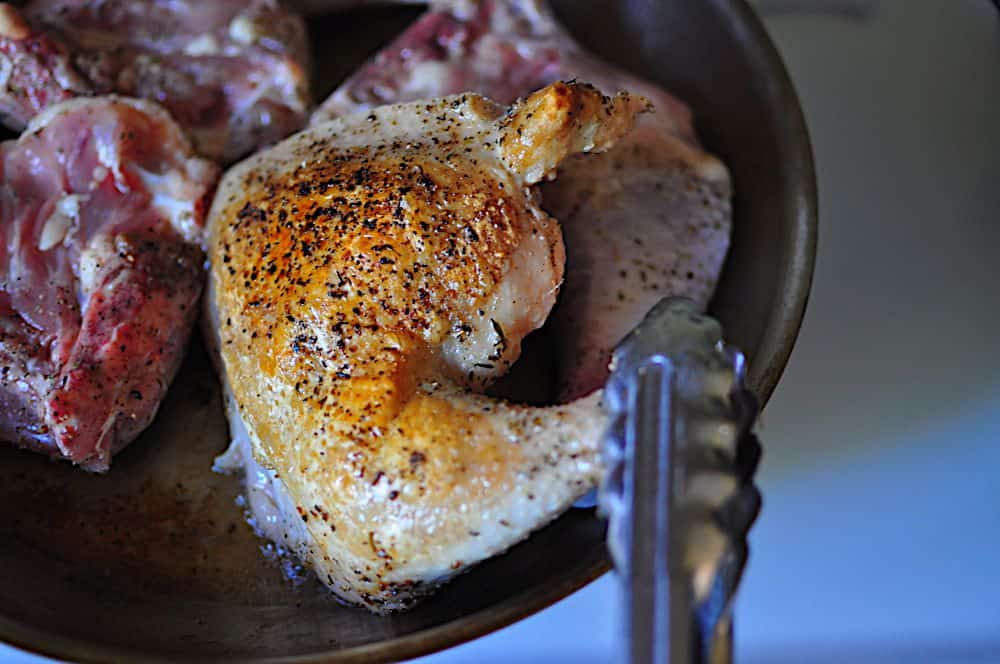
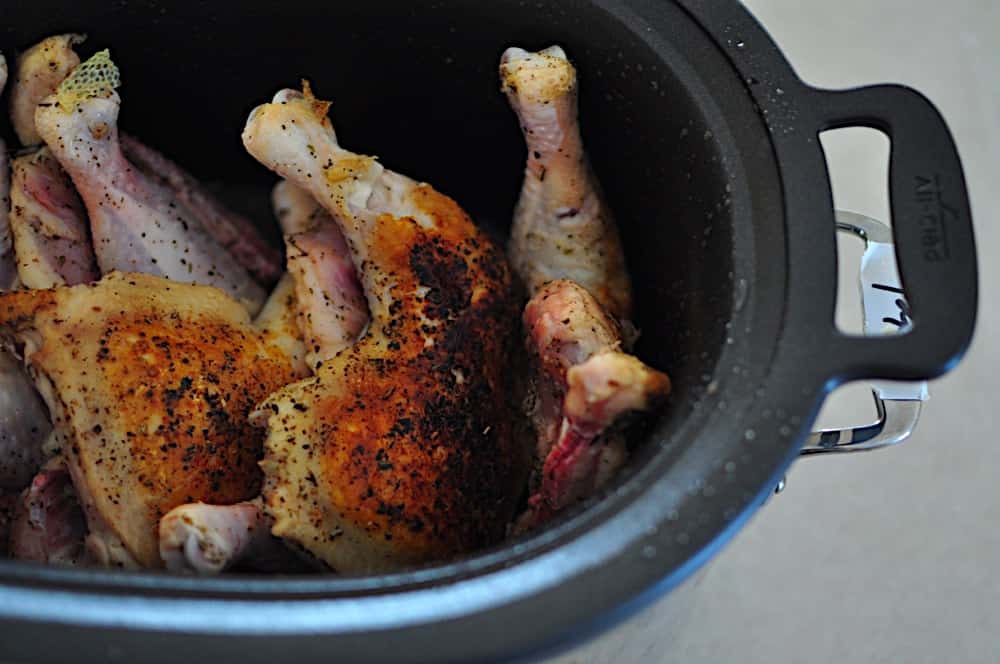
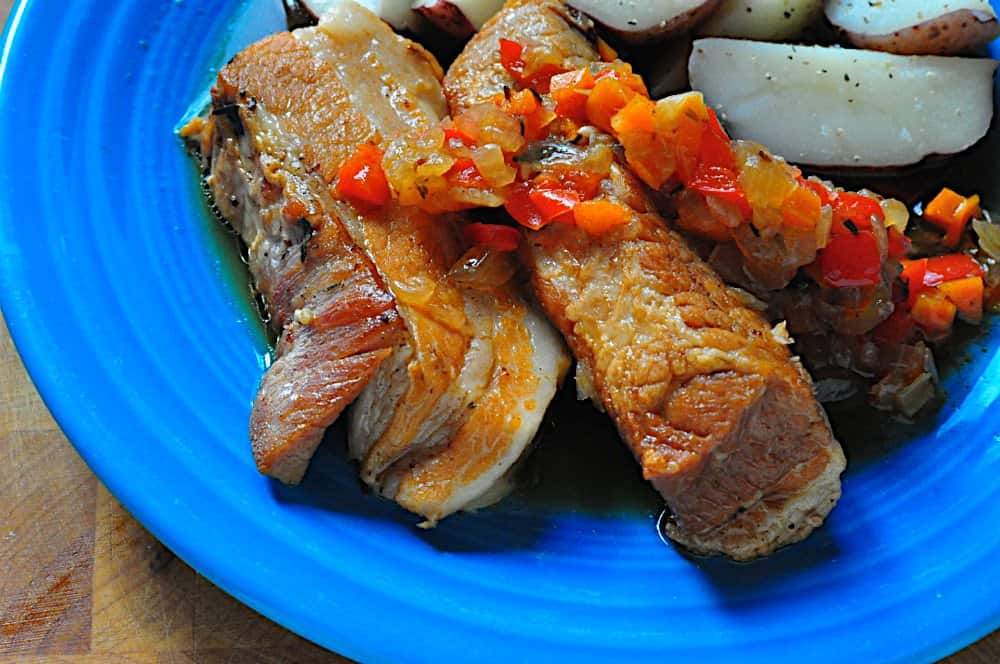
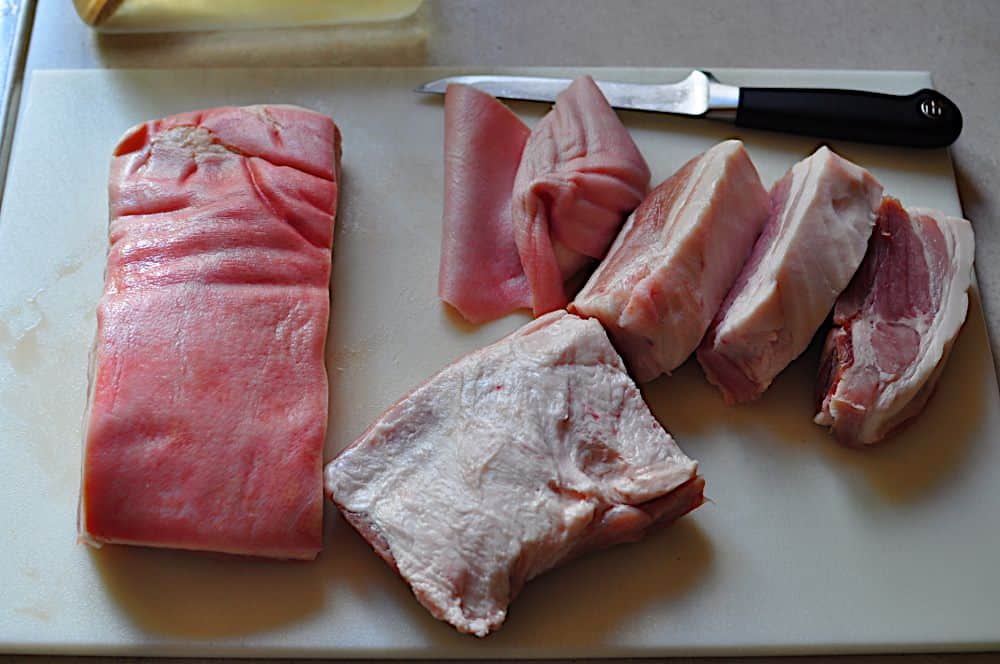
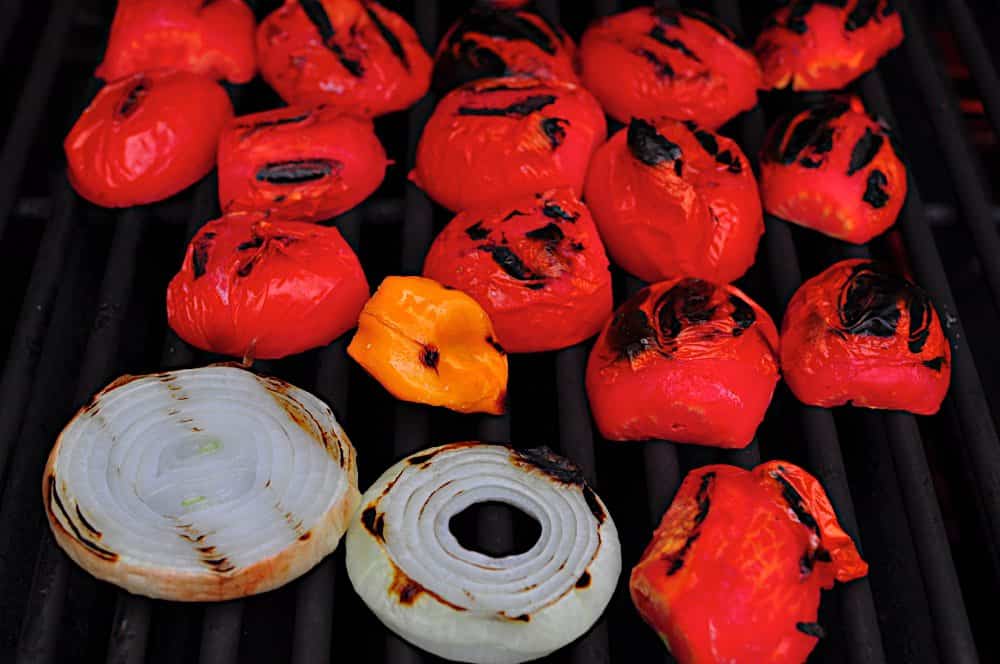
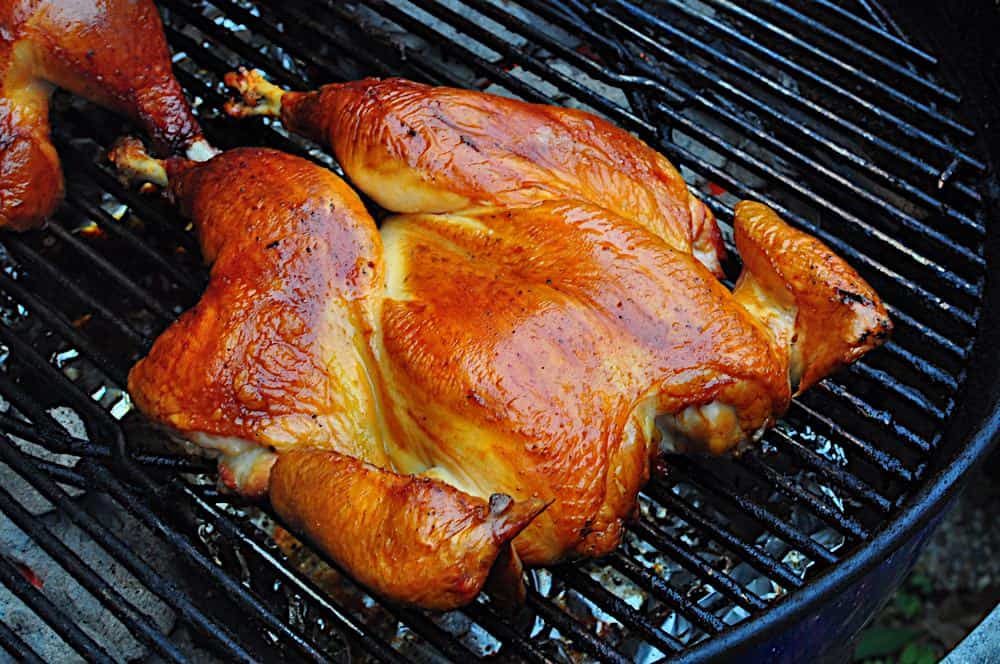
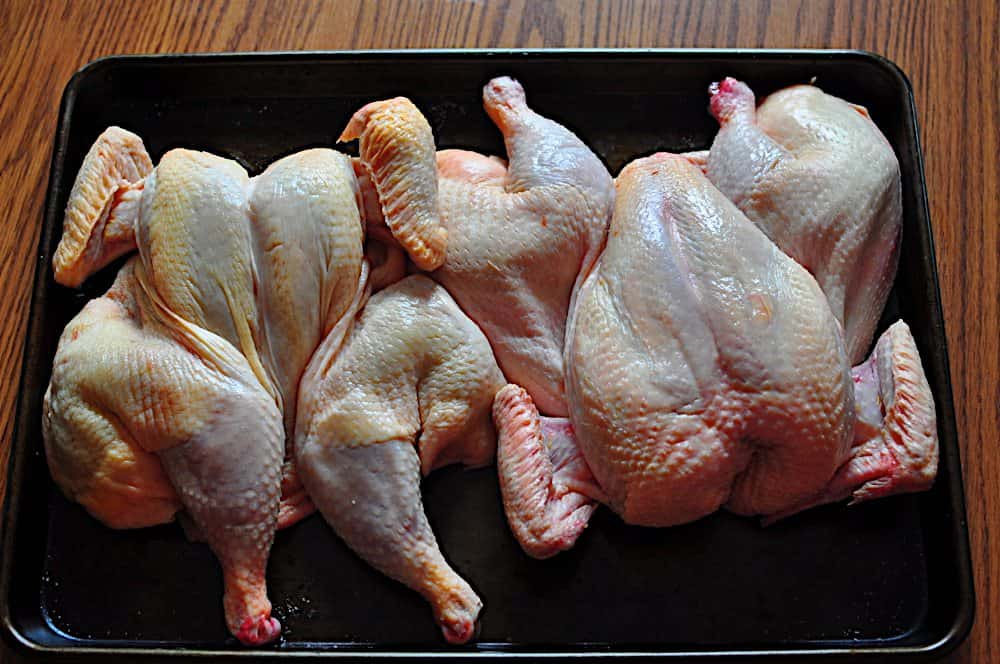
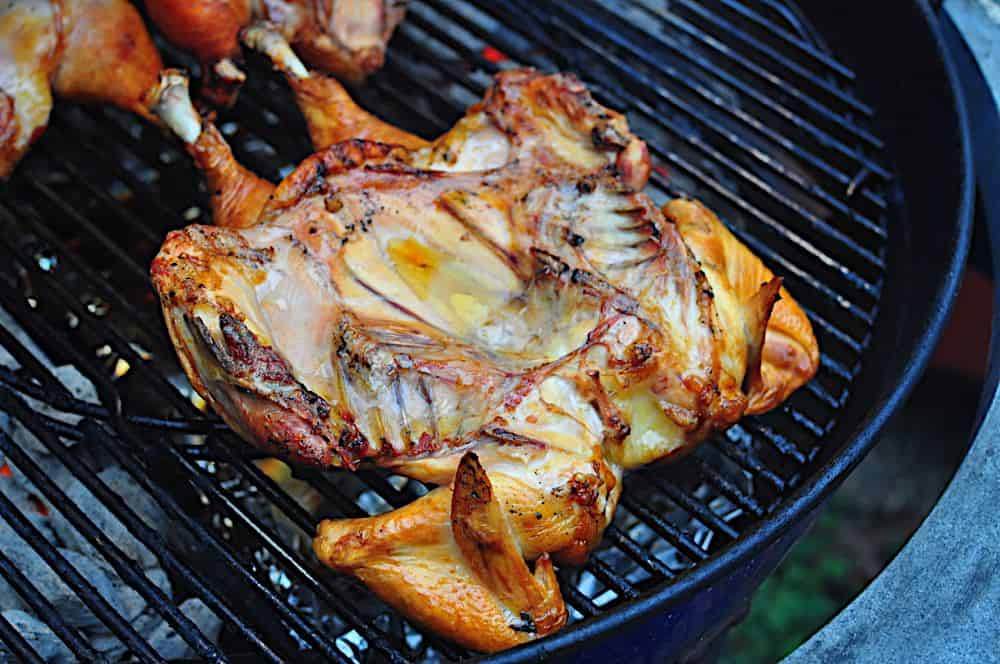
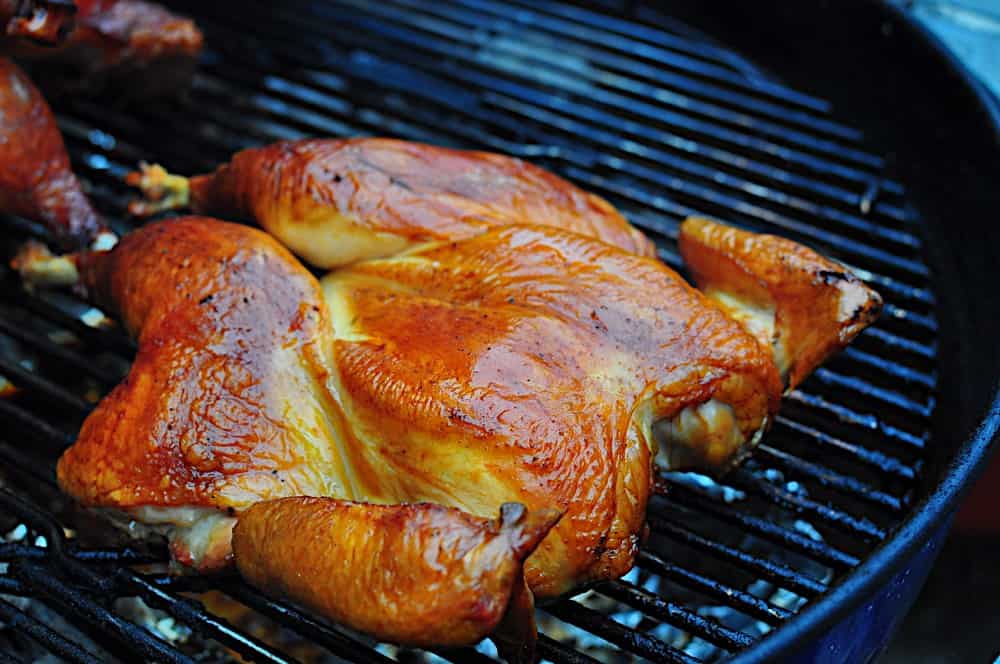
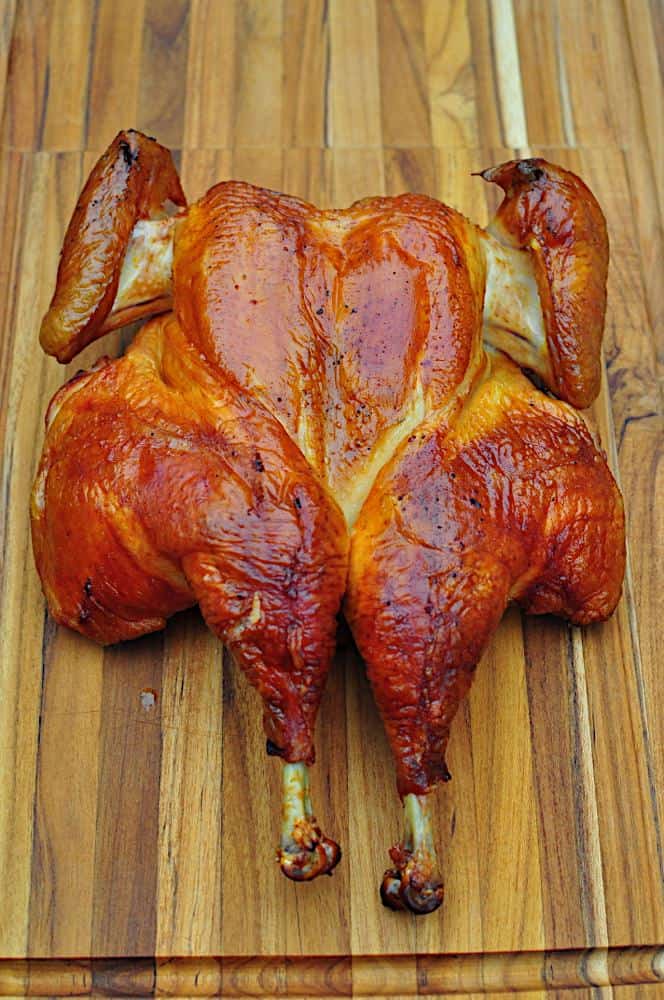
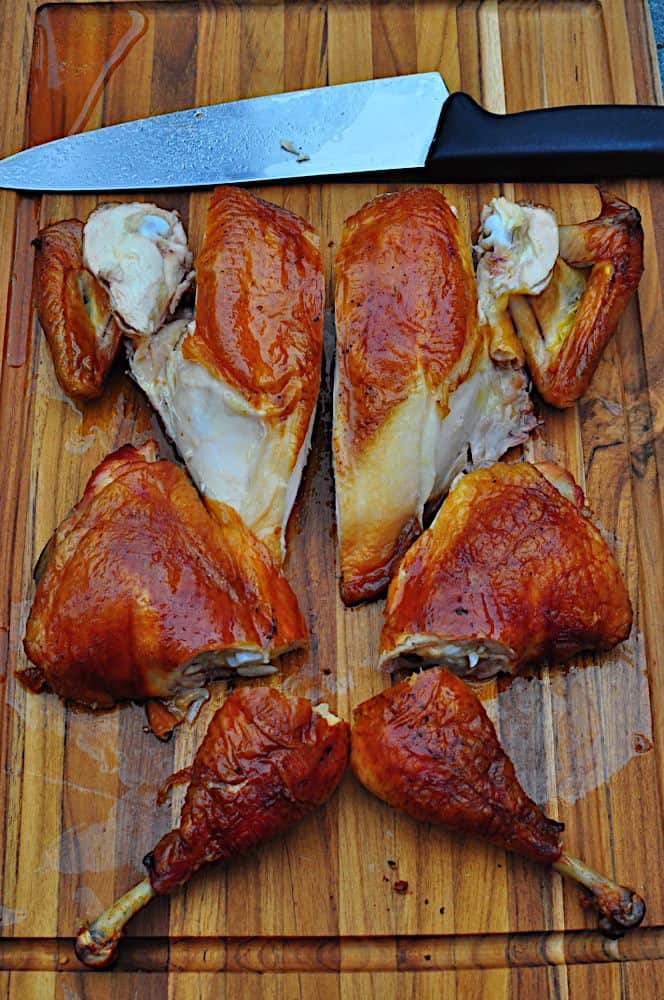
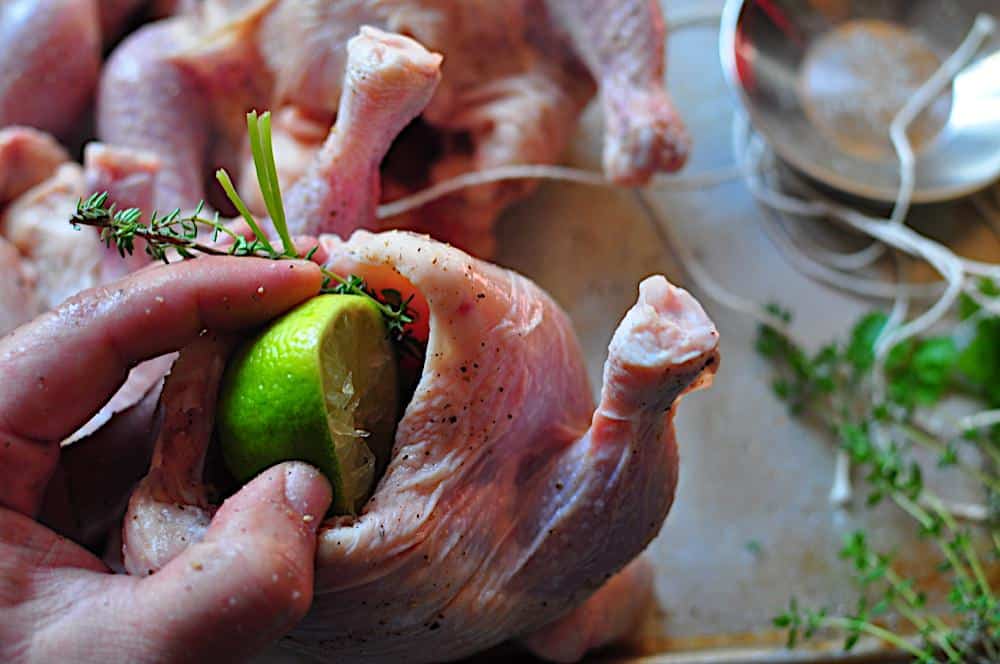
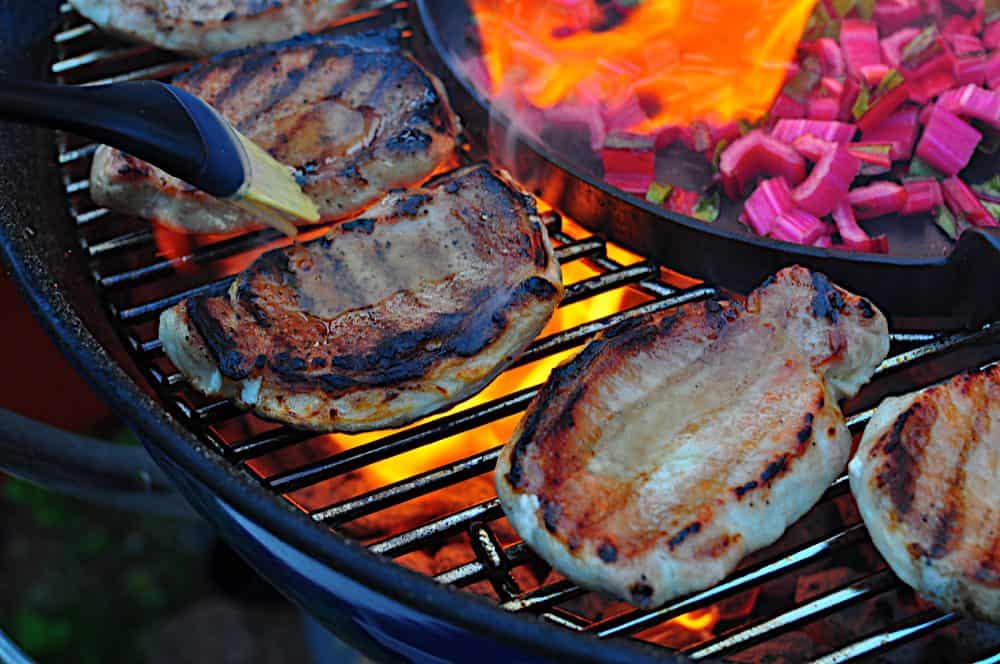
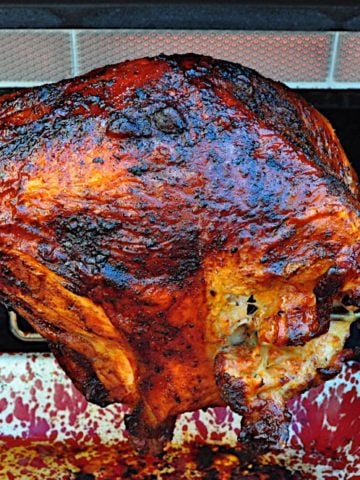
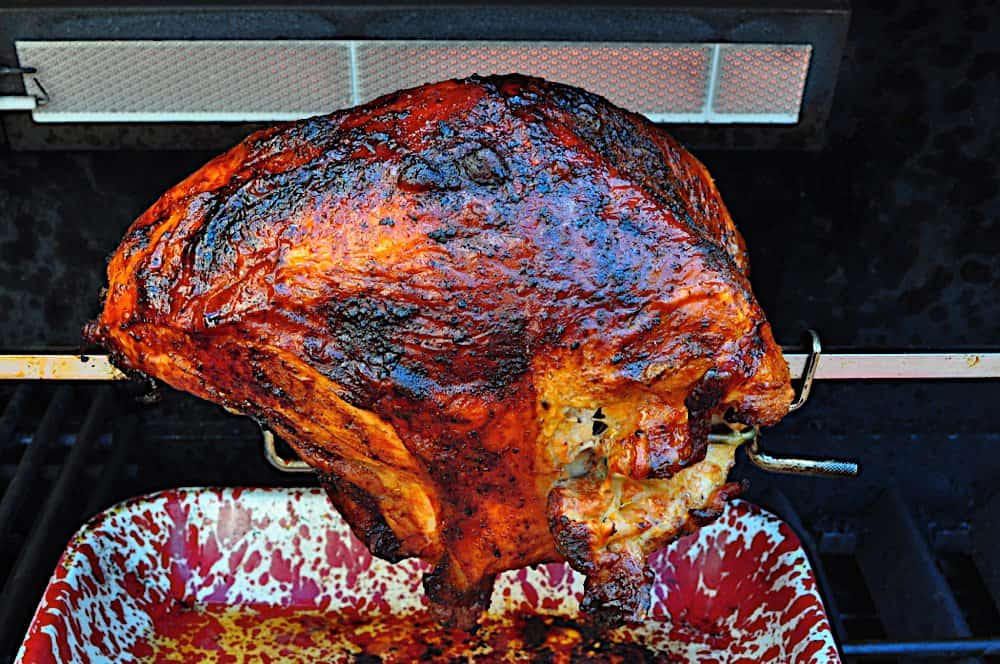
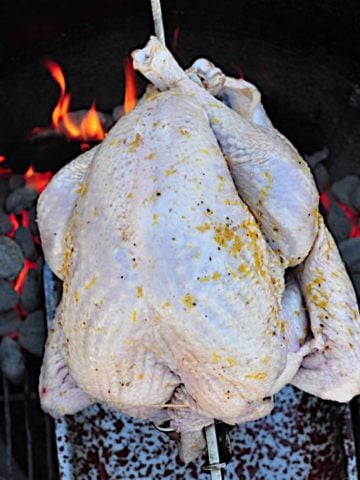
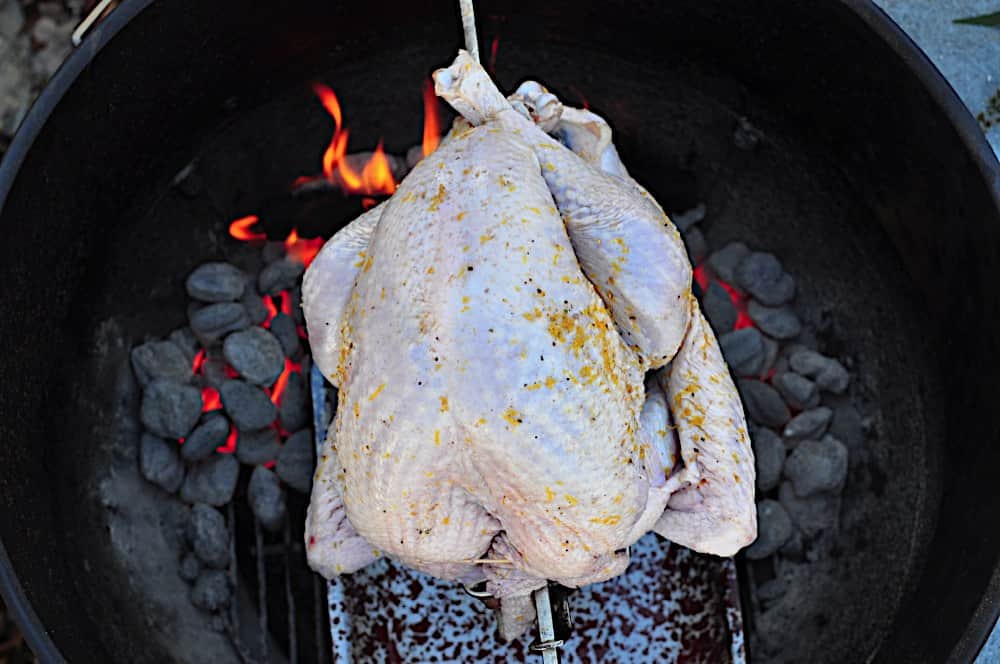
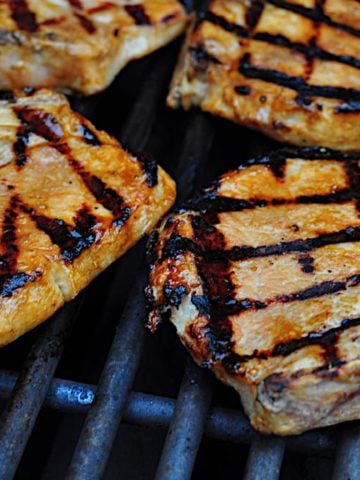
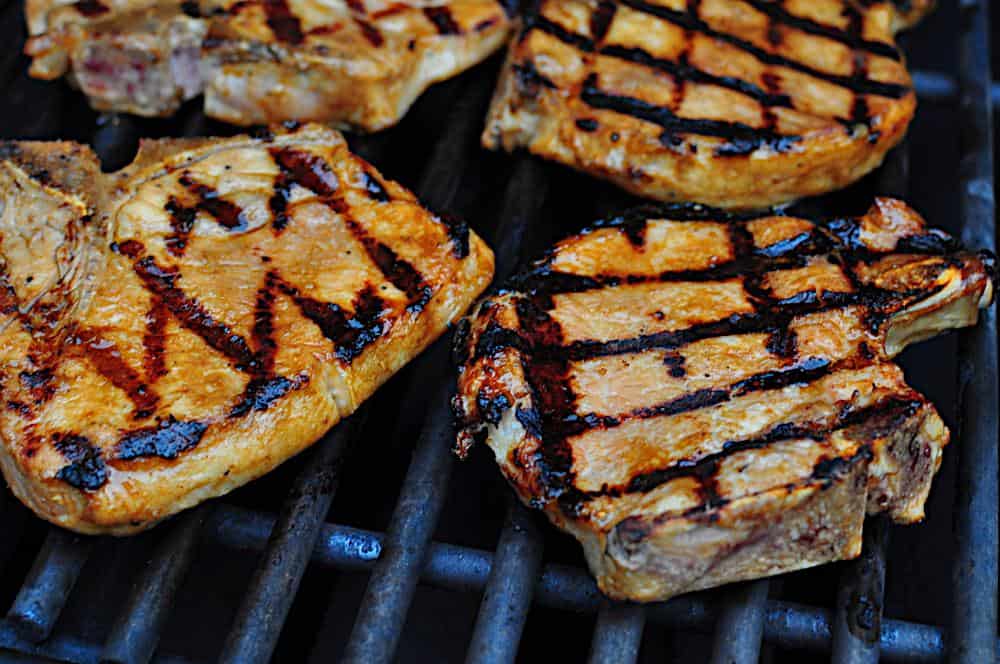
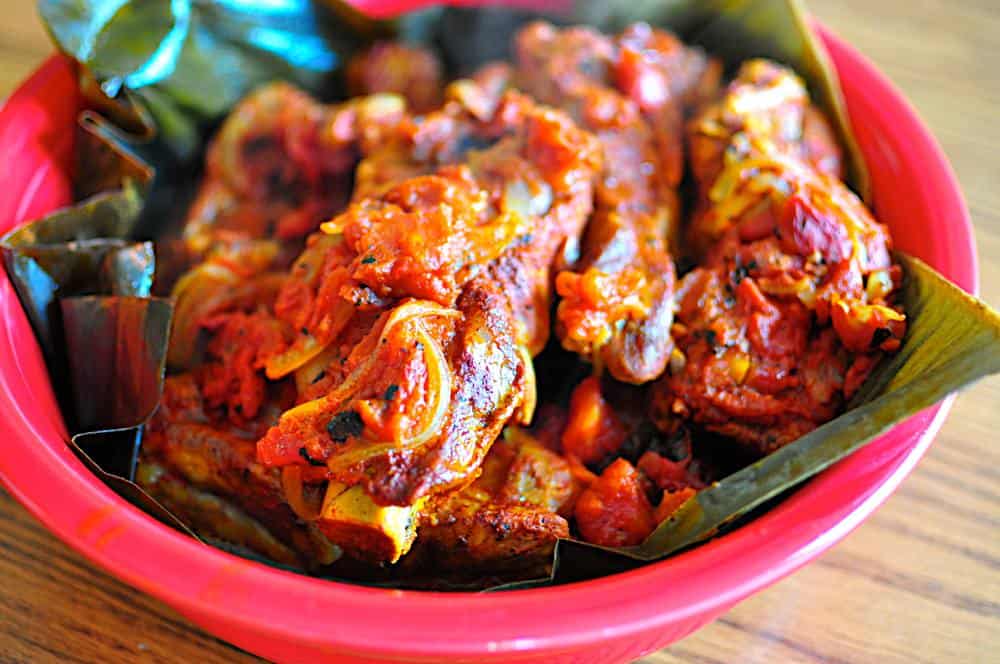
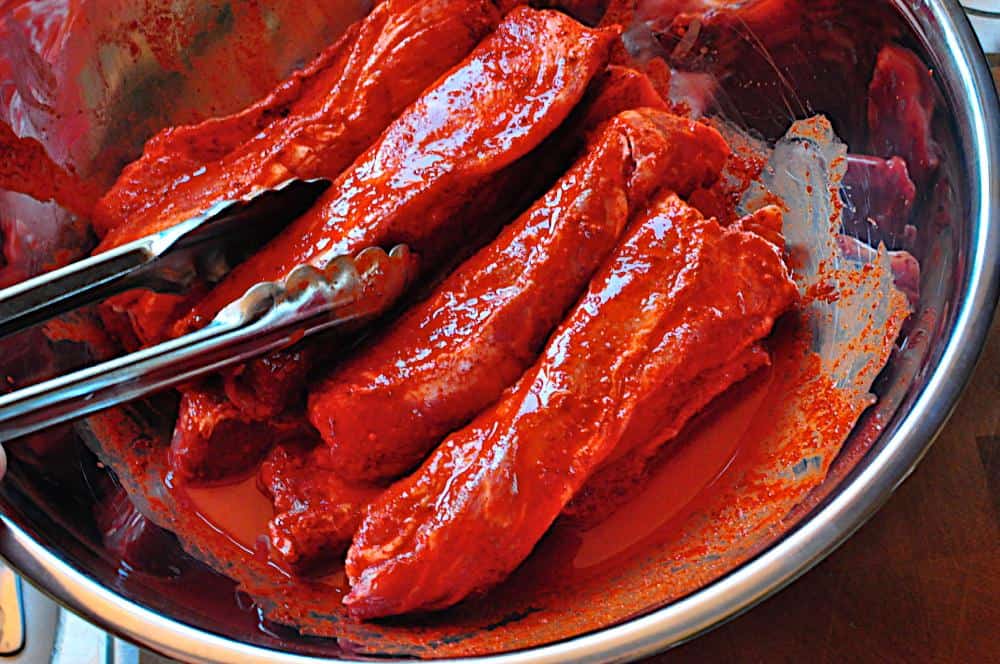
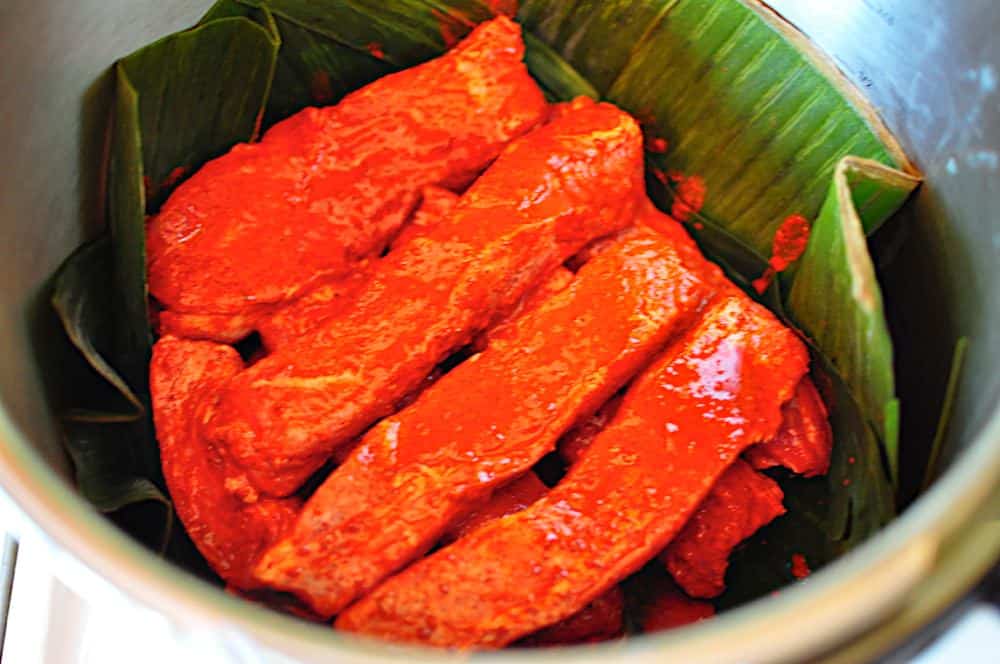
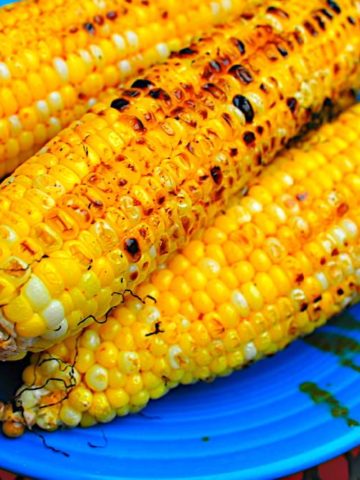
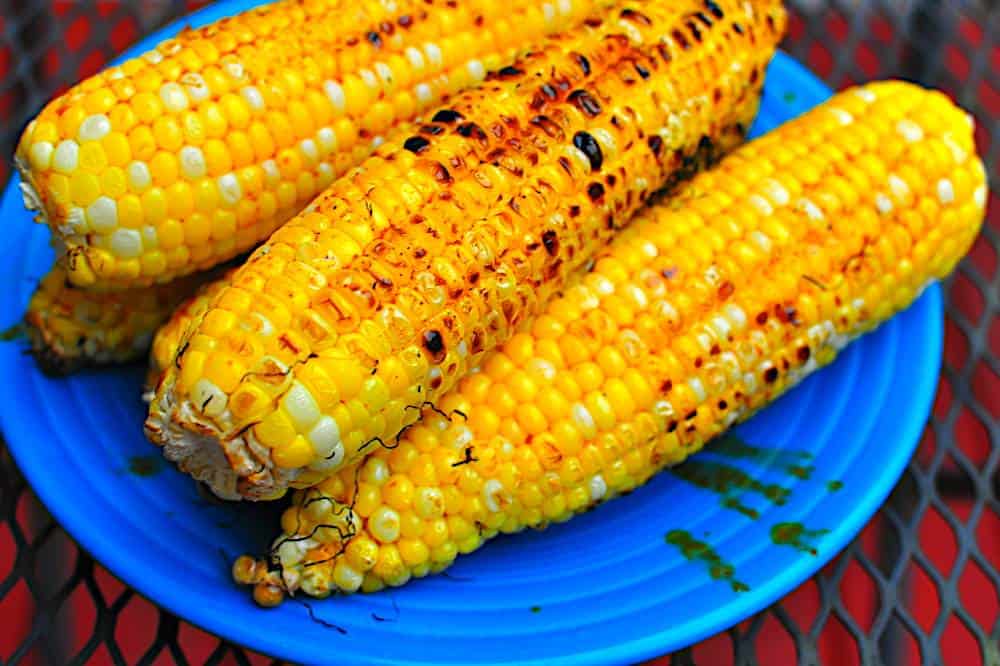
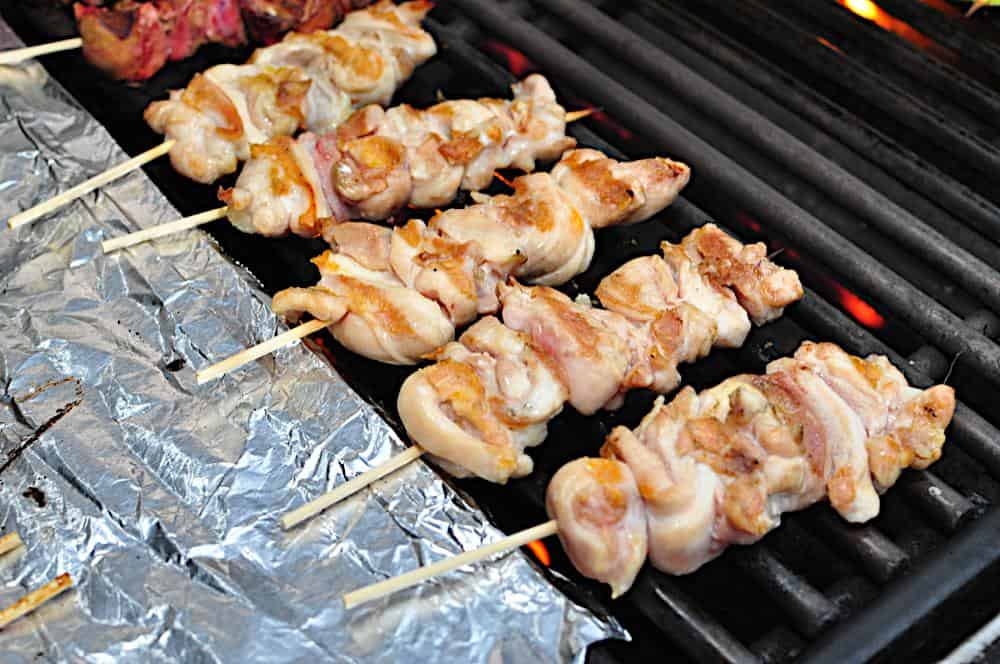
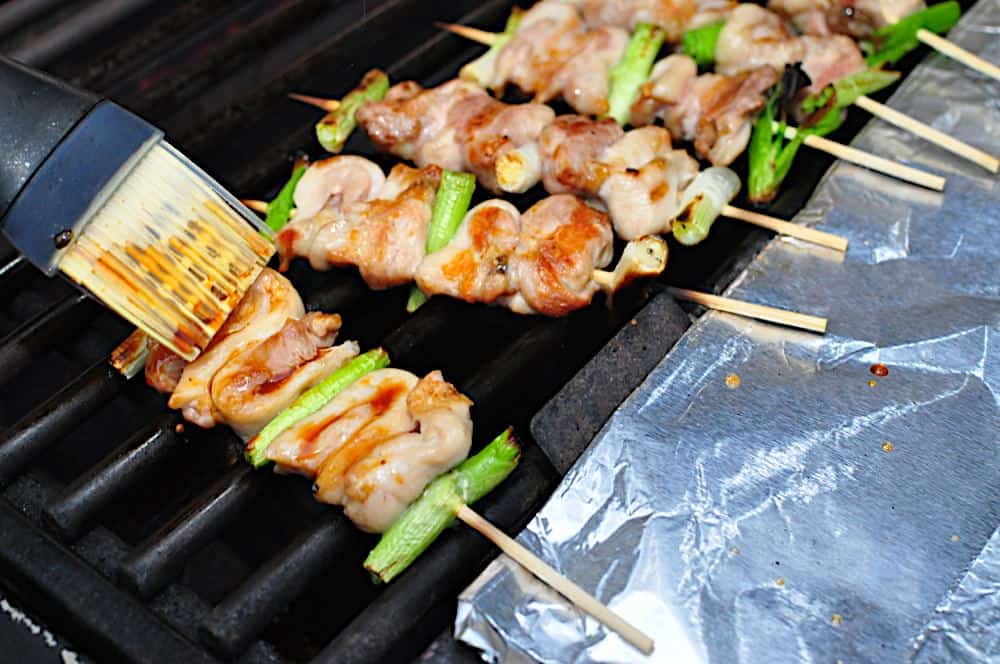
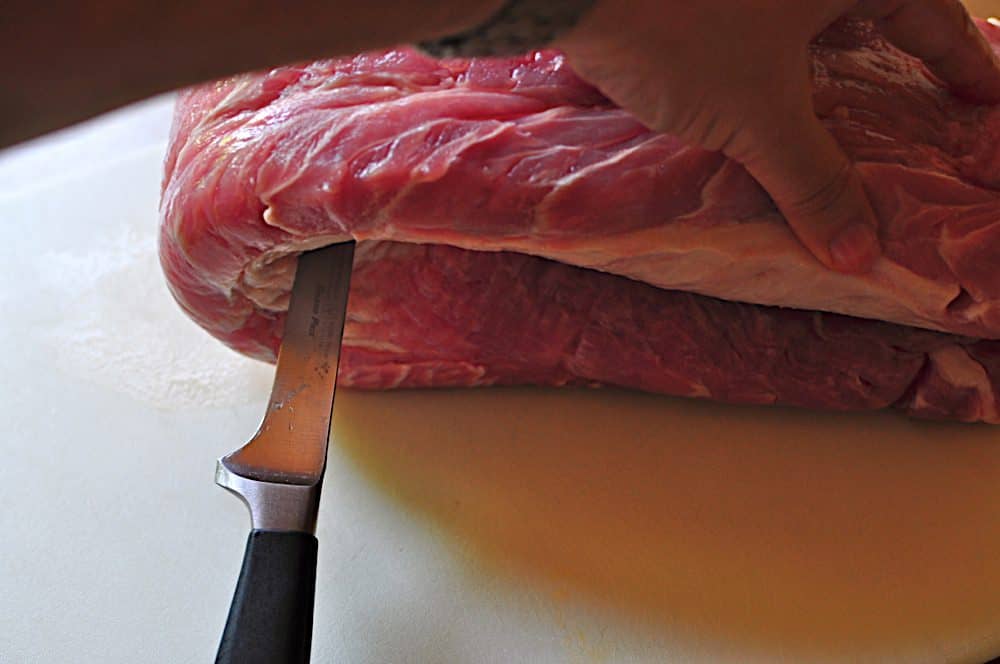
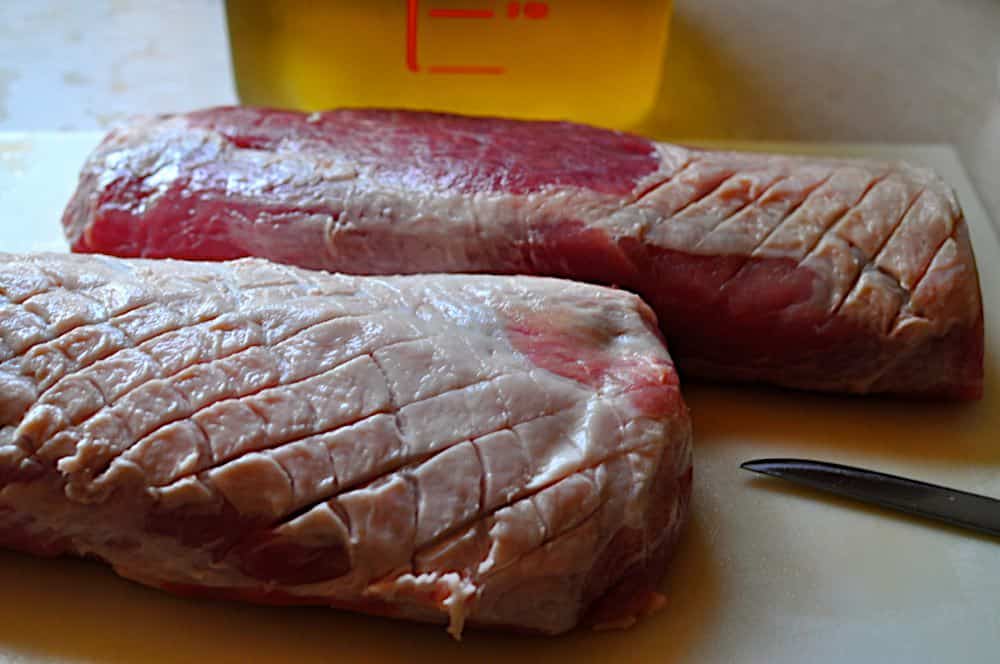
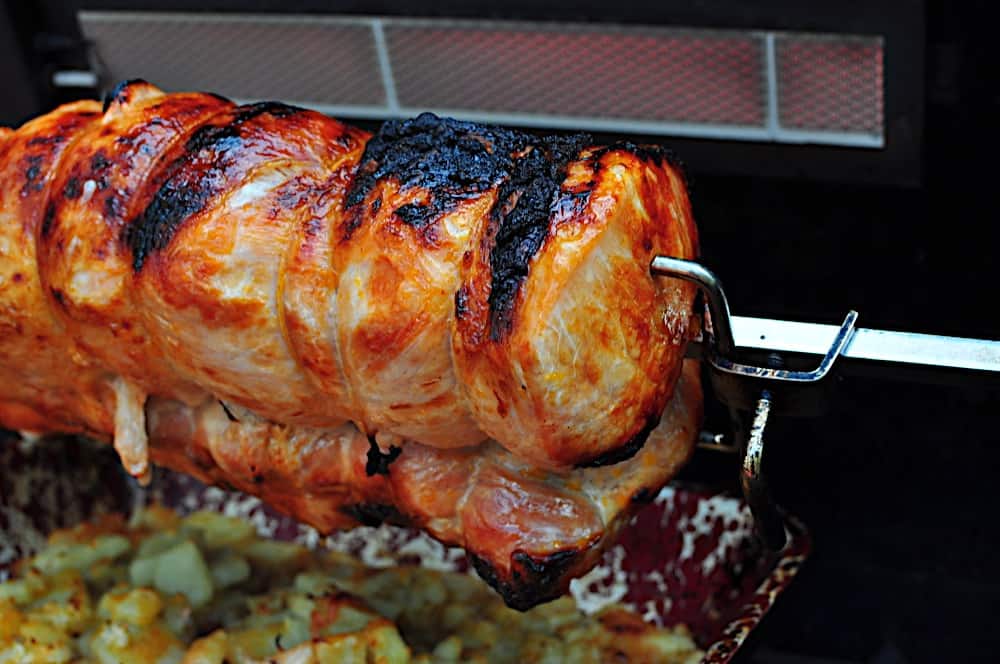
Sure, you can buy clambakes pre-assembled from the grocery store or fish market. But why? They are easy to put together, and are much cheaper that way. Even better, you can add your own ingredients - my clambake has sausage, mussels and chicken in it.
*But, if you want to buy one at the store, that's OK too. A store-bought clambake is better than no clambake at all, I say. Especially if you get it from a good fishmonger - I've had excellent clambakes from Euclid Fish in the Cleveland area and BayLobster Fish Market in the Akron area.

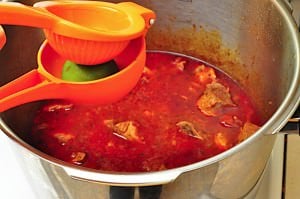
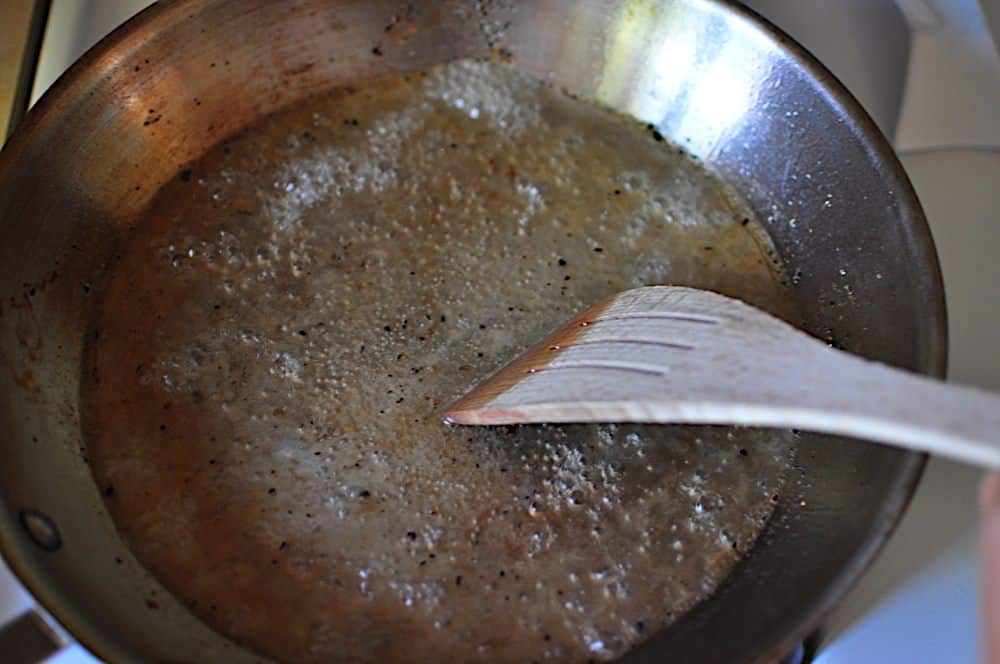
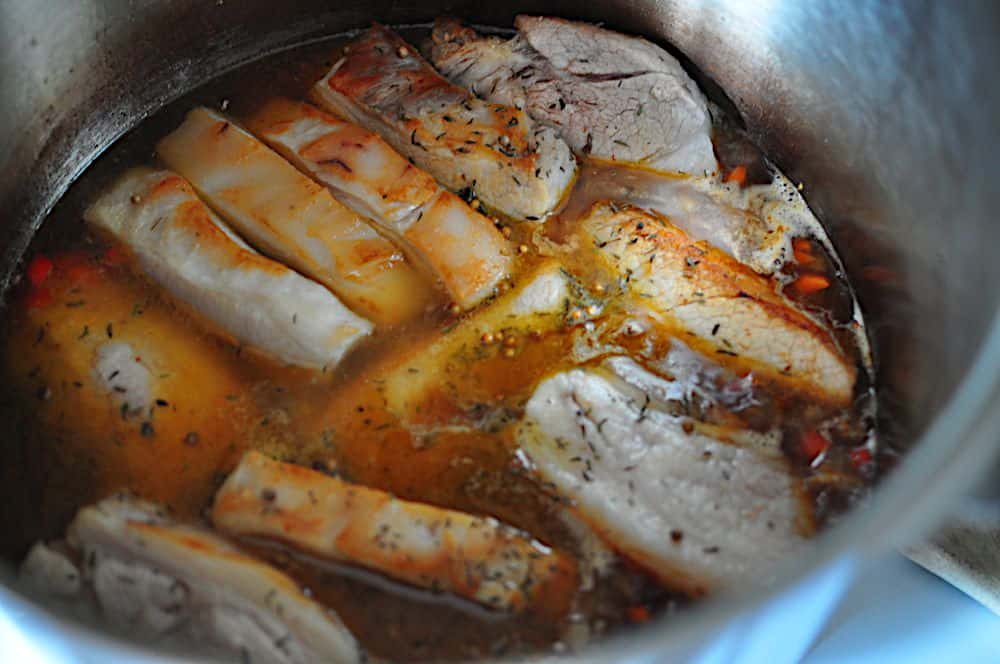
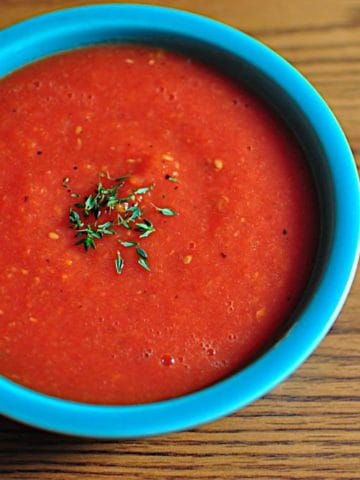
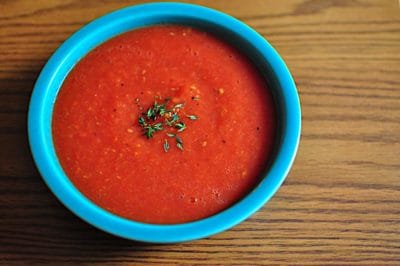
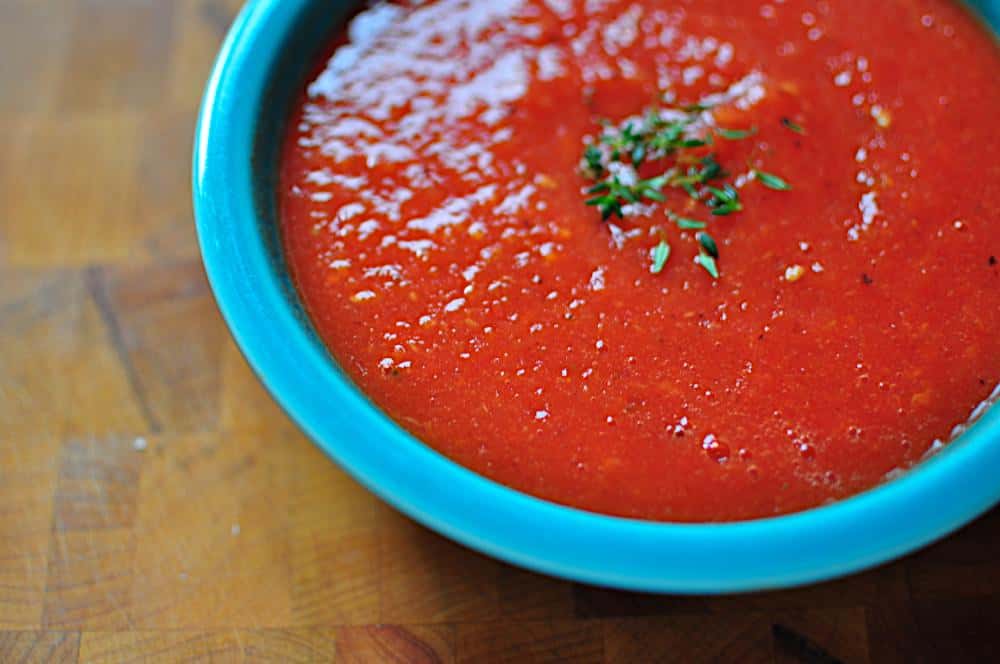
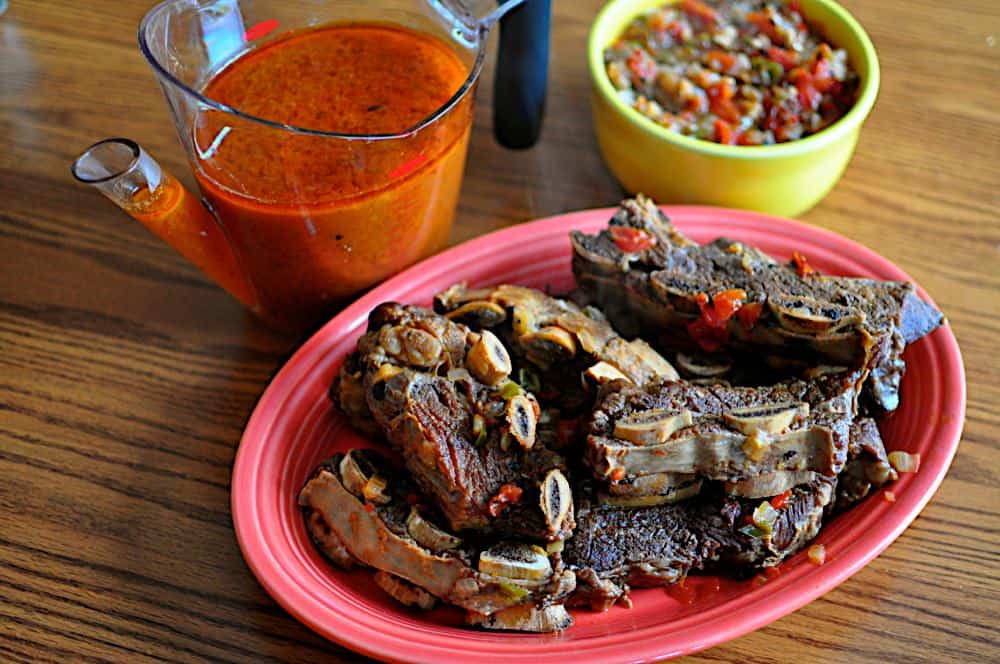
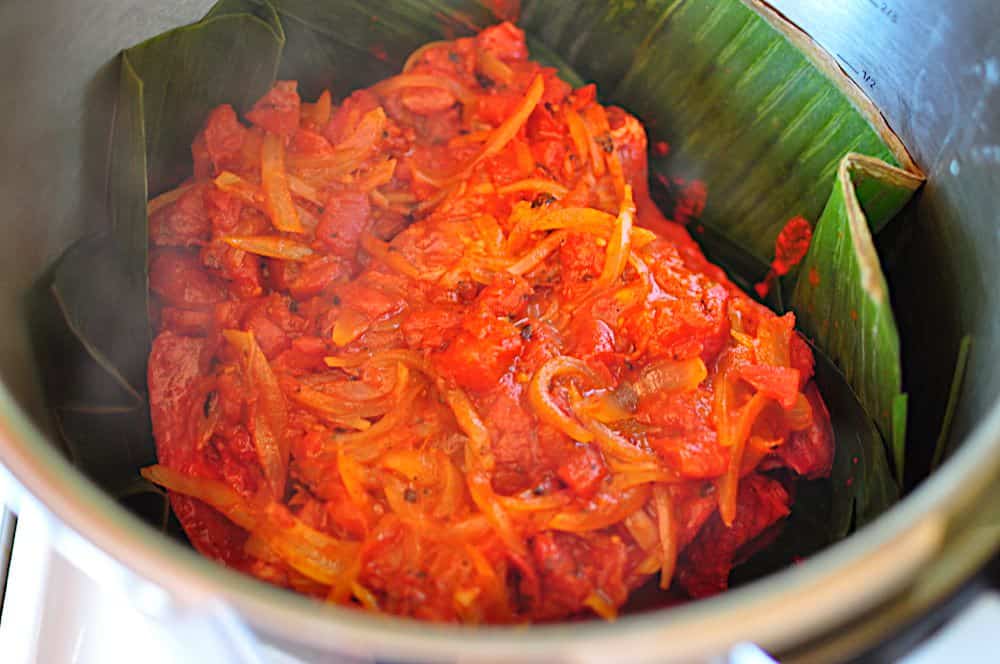
I believe the broth is the best part of the clambake. The clams give up their juices while cooking, leaving liquid gold at the bottom of the pot. Now, most clambakes are boils, with a lot of water in the pot to start, so the broth is very…brothy.
*"Brothy" is a word, right? Right.

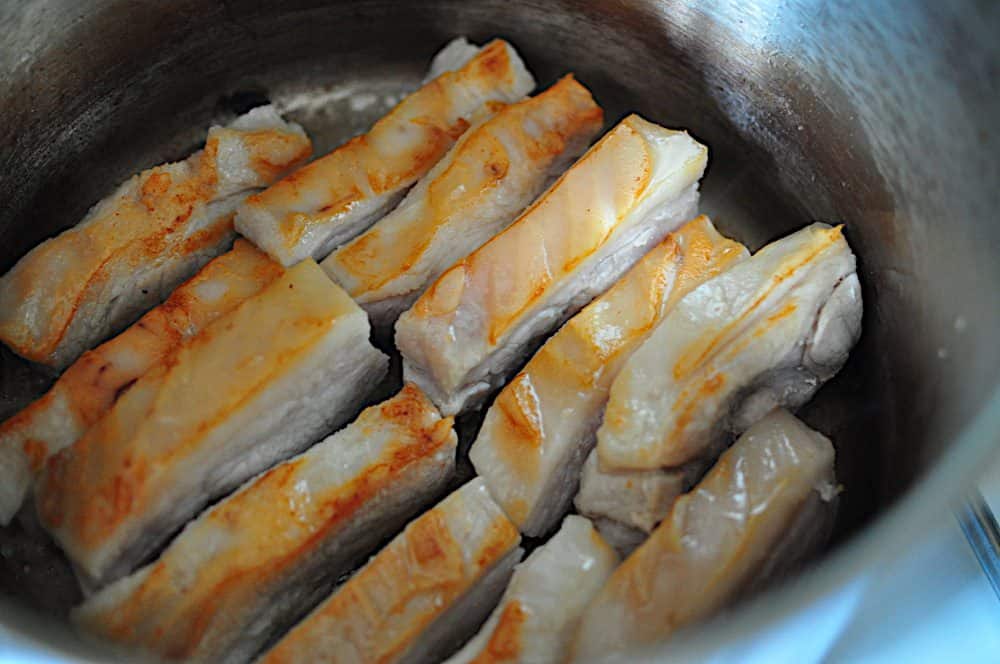
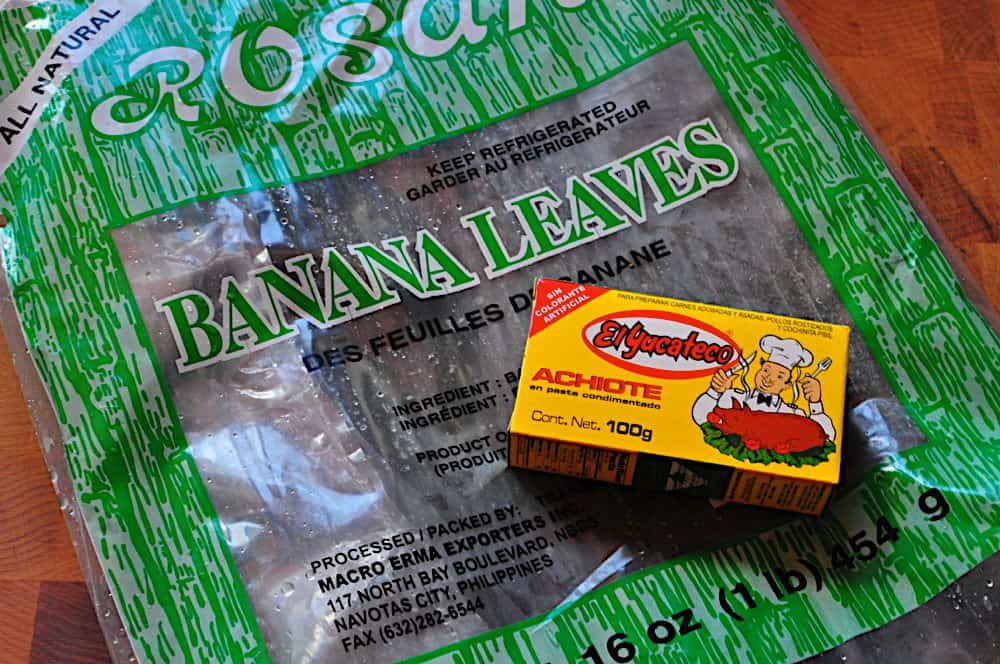
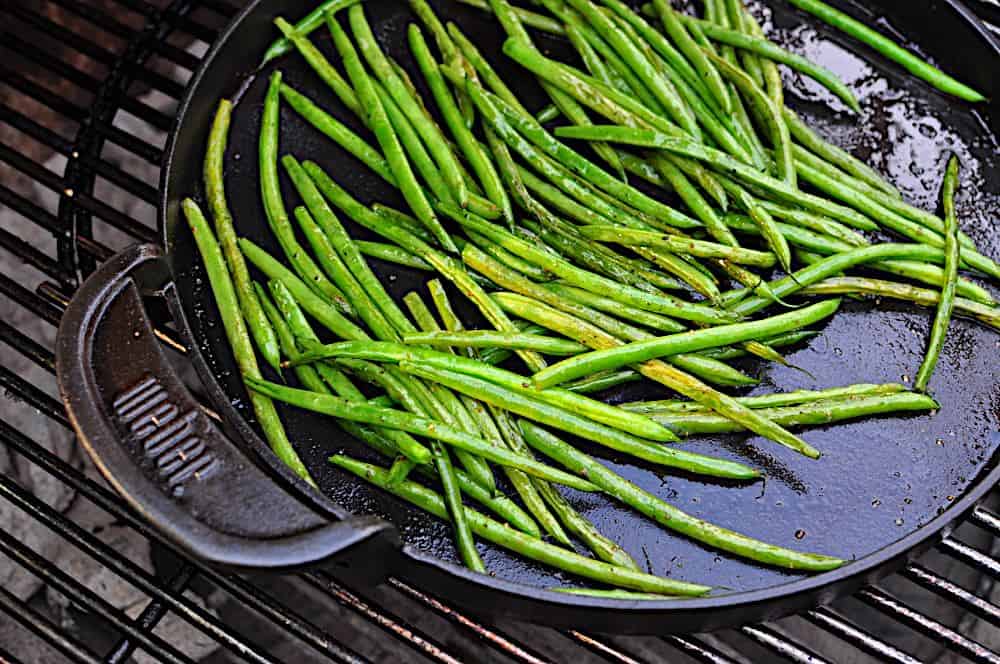
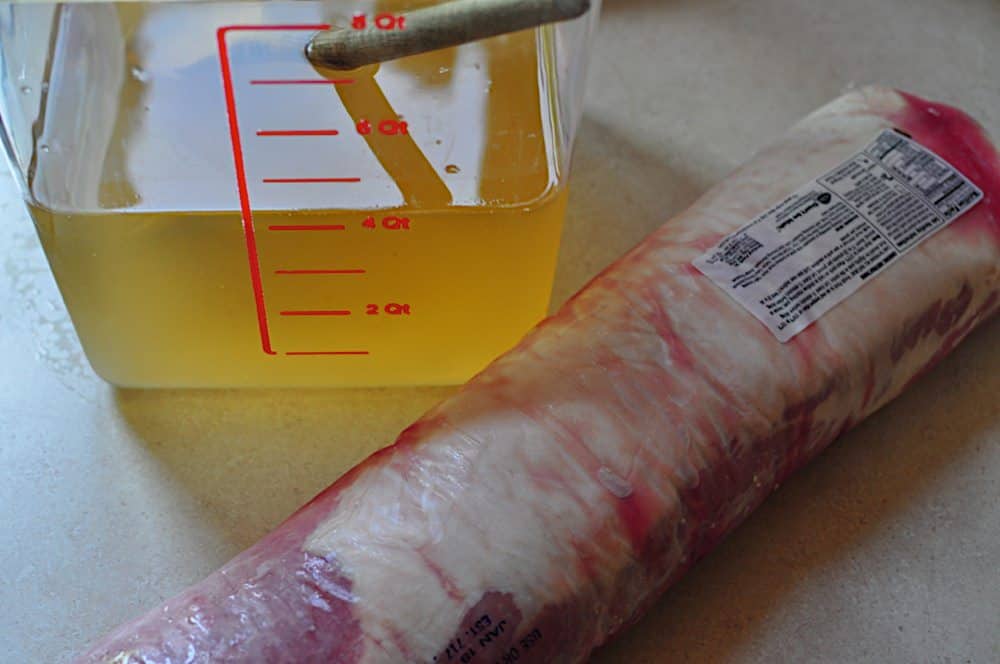
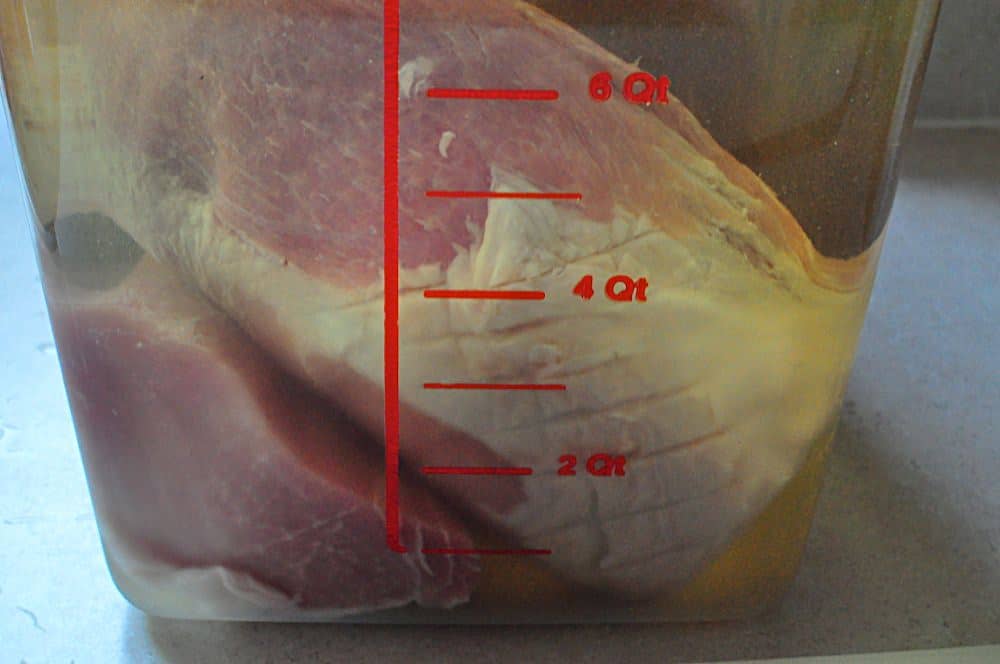
My clambake is more of a steam - I don't use much liquid. And, to add extra flavor, the liquid I use is white wine. The result is a heavier broth than usual - perfect for serving as a soup, or dipping hunks of bread.

*Note: This recipe makes a lot of food - it serves twelve big eaters, or sixteen normal people. (I fit into the big eater category, and we still had a lot of leftovers...)


What do you think? Questions? Other ideas? Leave them in the comments section below.

Related Posts:
Mussels with Spanish Chorizo
Grilled Paella with Shellfish, Chorizo and Chicken

Adapted from:
Mark Bittman The Minimalist Entertains; the Clambake, Minus the Beach

*Enjoyed this post? Want to help out DadCooksDinner? Subscribe using your RSS reader or by Email, recommend DadCooksDinner to your friends, or buy something from Amazon.com through the links on this site. Thank you!

Ruth Reichl is Coming to Town!

October 25, 2011 by Mike Vrobel Leave a Comment

Ruth Reichl is coming to Cleveland!

She is giving a talk at the Cleveland Public Library in downtown Cleveland on Saturday, October 29, 2011 at 2:00 p.m, as part of the library's Writers and Readers series.

Ruth is a food writer, author of seven books, editorial advisor for Gilt Taste, host of Gourmet's Adventures With Ruth and Gourmet's Diary of a Foodie on PBS, and...deep breath...

Former editor-in-chief of Gourmet Magazine; restaurant reviewer at the New York Times, Los Angeles Times, and New West magazine; and multiple James Beard Award winner.

Yes, she's been busy.

I love Ruth's books about her life in food - Tender at the Bone, Comfort Me with Apples, and Garlic and Sapphires - chronicles America's food revolution. Ruth had a front row seat as modern American food took shape and gained momentum. She is tightly tied to these stories; her perspective on it is both intimate and fascinating. And her book about her relationship with her mother, Not Becoming My Mother, is equal parts funny, tender, and heart-wrenching.
I am amazed at how open she is in her books. I'm a introvert, a private person at my core. Some of the stuff she talks about? I'd rather have dental surgery without painkillers than share that information.

She was editor-in-chief of Gourmet magazine when the magazine was shut down. This was a tragedy; Ruth's editorial direction made Gourmet THE most important food magazine. Sure, it had great recipes. But it covered food's intersection with sustainability, politics and culture in a way that no other magazine even tries to do any more.
The gossip hound in me can't wait until she writes her next autobiographical book, which will be about her time at Gourmet and its closing. I want her to pull out the long knives. Can you tell I'm still upset that Gourmet is gone?

Well, after all that, my favorite quote from Ruth isn't from one of her books, or from Gourmet magazine. It is a snippet from a radio interview with Terry Gross, on NPR's Fresh Air:

"I mean, if it's 4 o'clock and you're in your office and you haven't figured out what you're having for dinner tonight, the battle's half lost."

That's IT! I said, pounding on my steering wheel. She's got it, the key to home cooking. Have a plan.

Can you tell I'm a Ruth Reichl fan? Stop by and listen to her talk on Saturday, and hopefully you'll become a fan too.

Details:
Writers and Readers series at the Cleveland Public Library [cpl.org]
Saturday, October 29, 2011 - 2:00 p.m.
Cleveland Public Library, Main Library, Louis Stokes Wing Auditorium
325 Superior Avenue
Cleveland, OH 44114
(Map)
Phone: (216) 623-2800

*Enjoyed this post? Want to help out DadCooksDinner? Subscribe using your RSS reader or by Email, recommend DadCooksDinner to your friends, or buy something from Amazon.com through the links on this site. Thank you!

Pressure Cooker Beef Shank (Osso Bucco)

October 20, 2011 by Mike Vrobel 111 Comments

Pressure Cooker Beef Shank (Osso Bucco)

I love osso bucco, the perfect example of peasant cooking. The big round of shank meat, the herb and citrus flavor of the gremolata, the melting marrow from the big central bone. The only thing is - traditionally, it is made with veal shank. And with the cost of veal, this really isn't peasant cooking any more.
*OK, I'm cheap. Well, until it's time to buy a new kitchen gadget, then I won't be stopped. You expect me to be consistent?

Luckily, beef shanks are a lot less expensive than veal shanks, and provide just as good of a meal. Here's my "weeknight" osso bucco, prepared in the pressure cooker.
*Don't have a pressure cooker? No worries. See the Variations section for instructions on cooking with a standard dutch oven.

For another Italian style braised beef recipe in the pressure cooker, check out my Instant Pot Boneless Short Ribs.

Recipe: Pressure Cooker Beef Shank (Osso Bucco)

Inspired By: Lorna Sass Pressure Perfect

Equipment

  • Pressure cooker, at least 6 quarts (I use my giant Kuhn Rikon 12-quart pressure cooker)

Notes

  • Veal Osso Bucco: As I said in the opening, real osso buco uses veal shank, not beef shank. Veal shank tastes great…but is really expensive. If you can afford it (or find it cheap), it cooks exactly like beef shanks - use the same instructions and timing.
  • Don't have a pressure cooker? No worries. Use a heavy bottomed dutch oven with a lid, and increase the amount of chicken stock to 2 cups. Follow the instructions right up until "lock the lid". Then, instead of pressure cooking, bring the pot to a boil, and cover with the lid. Move the pot to a preheated 350*F oven and bake for 2 hours, until the beef shanks are tender. Continue with the prepare the gremolata step.
  • Serve with polenta or mashed potatoes to soak up the extra sauce. Also, the marrow in the bones may be the best part of the meal - scoop it out and serve on toast. (Or just eat it straight up, like I do.)
  • If you have the time, refrigerate the shanks overnight to help remove the fat. After cooking, let the shanks cool to room temperature, then refrigerate overnight, or up to 3 days. This will let the fat rise to the surface and solidify. To serve, lift the solid fat from the shanks, then reheat the shanks over medium heat on the stove.
  • The marrow is the best part of this dish, especially spread on toast. Mmmm...beef marrow...

What do you think? Questions? Other ideas? Leave them in the comments section below.

Related Posts:
Pressure Cooker Pho Bo (Vietnamese Beef Noodle Soup)
Pressure Cooker Short Ribs with Mexican Flavors
Pressure Cooker Chinese Pork with Dried Plum Sauce
Instant Pot Easy Braised Oxtail

Inspired by:
Lorna Sass Pressure Perfect

*Enjoyed this post? Want to help out DadCooksDinner? Subscribe using your RSS reader or by Email, recommend DadCooksDinner to your friends, or buy something from Amazon.com through the links on this site. Thank you!

Things I Love: Citrus Squeezer

October 18, 2011 by Mike Vrobel Leave a Comment

I use a lot of citrus juice in my cooking - lemon juice, lime juice, and occasionally orange juice.  My citrus press is in constant use. It rarely makes it back to the utensil drawer; I grab it out of the dishwasher and start squeezing.

Until recently, my standard press was the Amco enameled aluminum orange squeezer squeezer. It is sturdily built - it takes a lot of pressure to squeeze the juice out of a piece of lemon. It is large enough to hold an orange, as well as the lemons and limes I usually press.
*I don't understand why they sell sets of lime, lemon AND orange squeezers. Why have all three cluttering up the cabinet, when the largest one works with all different sizes of citrus?

My only complaint about the Amco is the enamel coating. I would carefully hand clean it after every use. Even with careful cleaning, the enamel would start to chip around the juice holes, exposing the aluminum. Eventually the chipping would get bad, and I would throw away the squeezer and replace it with a new one.

I tried many different squeezers, and I was always disappointed. The force required to repeatedly press juice out of a lemon would break them within a month. After each one broke, I buy another new Amco, and it would last for another year before the enamel started to chip again.


I have finally found a replacement that works - the Norpro stainless steel juice press. I've owned it for six months now, much longer than any other non-Amco press, and it is still squeezing away. Even better, because of the stainless steel, I can toss it in the dishwasher when I'm done. No more careful hand washing to try to save the enamel. The only downside is the Norpro stainless is not as large as the Amco orange squeezer. The Norpro can fit limes, lemons and tangerines; anything bigger than a small orange won't fit.

If you use a lot of citrus juice in your cooking, check out the Norpro stainless juice press. Highly recommended.

Disclaimer: With all my "Things I Love" posts, I am not receiving anything from the manufacturer. I bought the items with my own money. I use these tools every day in the kitchen, and I would hate to live without them. If you buy something through the Amazon.com links on my site I get a small commission from the purchase. Thank you!
(OK, I'm good with the FCC now.)

Related Recipes:
Lemon-Herb Dressing
Grilled Corn with Chipotle-Lime Butter
Salmon Saute with Tequila Orange Sauce

Norpro Stainless-Steel Citrus Juice Press

*Enjoyed this post? Want to help out DadCooksDinner? Subscribe using your RSS reader or by Email, recommend DadCooksDinner to your friends, or buy something from Amazon.com through the links on this site. Thank you!

Family Dinners and Small Kids

October 16, 2011 by Mike Vrobel 4 Comments

[This post from my archives is being re-run as part of BlogHer's Smart Mom's Guide to Being Busy editorial series, brought to you by Rice Krispies and BlogHer.]

I was moved by this question on Casual Kitchen - Ask CK: Finding Time to Cook…With Small Children. The mother of a 18 month old asked: how do we cook at home when we don't have much time? Both she and her husband work. After picking the little one up from daycare, they have an hour and fifteen minutes, then it's time to start putting the kid to bed. (Those little ones go to sleep early.)

Much to her credit, she wants to cook real food for dinner. But how is that possible in the brief window of time available?

My heart went out to her, because I lived through a similar experience. Diane was pregnant with Tim, our youngest. Tim decided after three months of pregnancy that he was ready to join us. The doctor strongly disagreed - Tim would have to wait. Diane was put on full bed rest for the next six months. Natalie was eighteen months old, Ben was just about to turn three, and I was suddenly a short-term single parent. I was asking myself the same question - how to get dinner on the table when we all got home from daycare at 6PM, and the kids were ready for bed at 7:30?

I was already DadCooksDinner by that point. I started cooking every night back when it was just me and Diane; by the time of the bed rest, I had years of experience putting quick weeknight dinners on the table for us and the kids.
*As usual, I have to thank Pam Anderson at this point - if you want to know how to really cook, not just follow recipes, start with her How to Cook Without a Book. It pushed me out of the nest and taught me to fly.

Cooking is important to me. I was determined this would not be the end of my home cooked meals. I am past cooking dinner because I want to, or because I'm obligated to; it has become a need. It is part of my daily routine. If I don't cook, I get twitchy; when I do cook, I feel more centered. For my mental health, home cooked meals were not optional. Still, this was a formidable challenge. How could I squeeze in dinner, and have a little time to spend with the kids before they went to bed?

Time Shifting:
That hour and a half window, between our arrival and the kids bedtime, was too short. I quickly learned to move as much work as possible outside that window. A big one was cleanup. Clearing the table? Doing the dishes? That could wait until the kids were in bed; then I could pour myself a glass of wine and start cleaning.

The other task to move was the actual cooking. I did this a few different ways:

1. Pressure Cooker meals: My pressure cooker let me make tomorrow's dinner tonight. After the kids were in bed, while I was cleaning the kitchen, I would cook a meal in the pressure cooker. Once it was finished, it went in the refrigerator. The next night, the moment I walked through the door, I would scrape the fat off the top of the pot and reheat it on the stove top. Dinner was ready in fifteen minutes. And, I had an unexpected bonus. Pressure cookers are best at soups, stews and chilis; they all taste better the second day. There is something about an overnight rest that lets the flavors mingle, causing the stew to taste more complete. My dinners tasted better because they were made a day ahead!
*I also have to thank Lorna Sass. I would have been stuck without her collection of one-pot pressure cooker meals, The Pressured Cook.

2. Slow Cooker meals: As with the pressure cooker, I did most of the work the night before. I would assemble everything in my slow cooker crock, and put it in the refrigerator overnight. The next morning I would drop it in the slow cooker base, turn it on, and dinner would be ready when I got home.

There are two problems with this approach. The first one I learned the hard way - a cold crock plus a hot slow cooker base can crack the ceramic crock. (I was wondering what the spider web of cracks was…until the crock started leaking, and I had to buy a replacement.) The second problem is a crock straight out of the refrigerator takes a long time to heat up. This keeps food in the "danger zone" of temperatures for bacterial growth for too long. I never got us sick, but that was probably more luck (and really long cooking times) than anything.

The solution to these problems? I get up a little early and prep the crock-pot meal first thing in the morning instead of the night before. Or, I prep the night before and store the food in a covered bowl in the refrigerator. The next morning I transfer it to my room temperature slow cooker.

3. Make ahead meals: Sunday was my chance to get ahead of the curve. I would make a large roast, so I could have leftovers for a meal during the week. Sometimes it was just reheated pork roast with mashed potatoes; other times I would pull the roast chicken from the bones and serve it with tortillas for taco night.
Also, when I had time, I would make big batches of white rice, my kids favorite food. I would always have a 2 quart container or rice in the fridge, waiting to be reheated in the microwave for a quick side dish.
*Leftovers have a bad reputation. "Let's clean out the refrigerator night", where everyone grabs their favorite two quart container of leftovers is a standby for us.

4. No Cook Meals: My final trick was to skip cooking altogether. If you don't have to turn on the stove, a meal is much faster to assemble. I started "Dad's Super Sub Sandwich" night, with a loaf of french bread sliced down the middle and filled to order with lunch meat, cheese, and bagged salad.

Big dinner salads were another mainstay. Toss bagged lettuce with a good homemade vinaigrette; add a couple different pre-cut or shredded vegetables, some good crumbled cheese, and maybe dried cranberries or pickled peppers. Top with leftover roast chicken, and we were ready to eat.

Compromises:
I had to give up on a lot of my gourmet pretensions. Yes, I know, Mr. "make your own chicken stock" had to scale it back.

Vegetables came out of bags, either pre-cut (think bagged salads and bagged carrots), or frozen (microwaveable bags of frozen corn and peas make quick and easy side dishes). Or, fruit substituted for the vegetable - apples, grapes and pineapple are all favorites.

Starches were either part of the pressure cooker meal (potatoes or beans in the stew), made ahead of time (see the rice idea above), or no-cook (Bread, pitas, tortillas). Quick cooking couscous is about the only pasta I could manage, and that was with an electric kettle to boil the water.

My gourmet cooking and farmers market shopping would wait for the weekends, when I could give them the necessary time.

Meal Planning:
Planning is critical. I couldn't come home and think "hmmm…waht do we want for dinner?". There wasn't time. I had to know exactly what to do the moment I walked through the door. Every Saturday I sat down with my grocery store flier and did my meal plan for the week. That plan would go on the whiteboard on my refrigerator, so I could check it every night to make sure I knew what was next.

I'm Not Perfect:
Finally, and most important: Perfection is the enemy of good enough. More home cooked food is always better than less. I did what I could, and cut myself some slack when I just couldn't get it done. Sure, bagged and frozen vegetables aren't as good as fresh from the farmers market. But they're better than stopping for fast food on the way home. This was a chance to get creative. What's wrong with breakfast for dinner? Eggs and toast are really quick. Or PB&J and an apple?
*And, I wasn't perfect. If I got knocked down, and gave in to the lure of a delivery pizza, I would get back up the next night and try again.

The good news is: as the kids get older, time will open up. Cooking won't always have to be in a rush. Someday, there will be time to spend a whole forty-five minutes on dinner before the kids start complaining about how hungry they are.
*Except on Soccer night, and then you'll have all these techniques to fall back on!

What do you think? What are your experiences with home cooked meals with very little time? Any other tips or tricks I didn't mention? Share them in the comments section below.

Inspired by:
Check out the orignal post on Casual Kitchen that inspired this blog:
Ask CK: Finding Time to Cook…With Small Children  [CasualKitchen.Blogspot.com]
There are a lot of great suggestions in the comments, including one from me that turned into this post.

Related Posts:

Weekly Dinner Plans
Family Dinners and Busy Kids
Family Dinners: Topic of the Day

*Enjoyed this post? Want to help out DadCooksDinner? Subscribe using your RSS reader or by Email, recommend DadCooksDinner to your friends, or buy something from Amazon.com through the links on this site. Thank you!

Slow Cooker Chicken Legs with Herb Rub

October 13, 2011 by Mike Vrobel 25 Comments

Here is a slow cooker recipe for soccer night. I walk through the door hungry, having used up my patience coaching a pack of nine to eleven year olds. I want dinner now. Now. NOW!

This is the big advantage to slow cooker meals. You can walk through the door, grab a plate, and start spooning hot food into it. All the prep and cooking happened earlier in the day.
*The downside of slow cookers is the food cooking all day. Slow cookers overcook everything; the trick is picking ingredients, like chicken legs, where overcooking is an advantage.
In other words, I've been seduced by the power of the dark side…of the chicken.

Now, this is not quite a "dump and cook" slow cooker recipe. After sprinkling the legs with salt, pepper, and herbes de provence, I take the time to brown them in a fry pan. Trust me, browning the chicken is worth the effort. Ten minutes of searing give the chicken and sauce a richer taste.
*And, really, come on now, browning chicken isn't that much effort.

Recipe: Slow Cooker Chicken Legs with Herb Rub

Equipment

  • Slow Cooker, 6 quarts or larger (I love my All-Clad, but a Crock-Pot or any other brand will do.)

Notes:

  • I served this with flour tortillas and a quick sliced cabbage slaw salad.
  • Two pan browning: My slow cooker comes with a stove-top safe insert, so I use it and a fry pan to brown both batches of chicken legs at the same time.
  • If you're really in a hurry, skip the browning step. Put the spiced legs directly into the slow cooker. But, as I said in the opening, the extra ten minutes really adds to the flavor.
  • If you have a fat separator, use it to separate the fat from the cooking liquid before serving it at the table.

What do you think? Questions? Other ideas? Leave them in the comments section below.

Related Posts:
Slow Cooker Turkey Thighs with Mustard and Onions
Slow Cooker Pork and Sauerkraut
Click here for my other slow cooker recipes.

Enjoyed this post? Want to help out DadCooksDinner? Subscribe using your RSS reader or by Email, recommend DadCooksDinner to your friends, or buy something from Amazon.com through the links on this site. Thank you!

Coconut Rice

October 6, 2011 by Mike Vrobel Leave a Comment

Plain white rice. It bores me. Sure, white rice is great as a neutral starch, soaking up the sauce from a stir fry or stew. But on its own? I get tired of it.

Unfortunately, my kids love it, so I make a lot of Plan White Rice. And for them, it has to be Plain White Rice. (Yes, you can hear them saying it with the capital letters.) Nothing fancy is allowed, or they'll push their bowl away and say they're "not hungry".

Coconut rice is the exception. Replacing some of the water with coconut milk adds a subtle sweetness to the rice. Even better, it doesn't register with the kids "not hungry" sensor - it leaves the rice looking like Plain White Rice.

Until I got wild and crazy…and added shredded coconut. It seemed like a great idea, adding a little color and crunch to the rice. But I knew I had a sales job to do on the kids. The first time I made it, I gave each of them each a lone strand of toasted shredded coconut. They looked dubious. I used sweetened coconut, though; once they got a taste of the sweet crunch, they asked for more. I dumped it on the rice, stirred it up, and passed out the bowls. And…it was a success. We had moved past Plain White Rice!

Recipe: Coconut Rice

Cook time: 30 minutes

Equipment:

  • Medium pot with a lid (3 to 4 quarts is good; I use this nonstick pot from Calphalon)

Ingredients:

  • ¼ cup shredded coconut (sweetened or unsweetened)
  • 2 cups jasmine rice
  • 2 cups water
  • 15oz can coconut milk
  • 1 teaspoon Kosher salt (or ½ teaspoon table salt)

Directions:
1. Toast the coconut: Put the shredded coconut in a cold medium sized pot, and turn the heat to medium. Cook, tossing and turning occasionally, until the coconut is toasted brown. Immediately remove the coconut to a plate.

2. Cook the rice: Put the rice, water, coconut milk and salt in the pot, stir to combine, then bring to a boil over high heat. Stir once more, then reduce the heat to medium and continue to boil until you see "fish eyes" in the surface of the rice. (That means the liquid has boiled down to just slightly below the surface of the rice, and it is bubbling up through the rice in big, eye-like bubbles.) Cover the pot, reduce the heat to low, and cook for ten minutes. Remove the pot from the heat and leave covered for another ten minutes to allow the rice to gradually finish steaming.

"Fish Eyes"


3. Serve:
Sprinkle the coconut on top of the rice. Toss and fluff the rice with a fork until the coconut is evenly distributed, then serve.

Notes:
*The toasted coconut is not essential. It adds a nice crunch, but I skip it when I'm in a hurry, or want a neutral side dish.

*The combination of jasmine rice and coconut milk is a classic pairing. But, if you don't have jasmine rice, any type of rice will do.

*When the kids seem hungry, I cook more rice. I use ⅓ cup of shredded coconut, 3 cups of rice, 3 cups of water, 1 can coconut milk, and 1 ½ teaspoons kosher salt. Make sure the pot is big enough if you use these larger quantities - this is a tight fit for my 4 quart pot.

What do you think? Questions? Other ideas? Leave them in the comments section below.

Related Posts:
Basic White Rice
Fried Rice, Bittman and Vongerichten Style
Click here for my other rotisserie recipes.

*Enjoyed this post? Want to help out DadCooksDinner? Subscribe using your RSS reader or by Email, recommend DadCooksDinner to your friends, or buy something from Amazon.com through the links on this site. Thank you!

Rotisserie Pork Shoulder with Greek Flavors

September 29, 2011 by Mike Vrobel 4 Comments

I love Greek flavors. What does that mean? To me, it means lemons, garlic, and oregano; cucumbers, feta and thick yogurt. And lots of extra virgin olive oil, preferably from kalamata olives.

That's why I was depressed. I missed Akron's Greek Festival this year, for the first time in a while.
*Why did I miss it? The usual reason - life got in the way. The kids had soccer games, I had to work the weekend, and everyone was fighting a cold. It added up to our missing the spanikopita, dolomades, moussaka, and baklava that I look forward to every year.

But then Sunday came, and my depression lifted. We had a clear blue sky with a few puffy clouds for contrast, and a high temperature in the upper sixties. Everything that was getting in the way was complete; we had an evening to relax and enjoy ourselves.
*The Cleveland Browns even won a game. It's a miracle!

Time for our own Greek Fest. I made a Greek salad, stuffed with feta, kalamata olives, cucumbers and onions and cherry tomatoes. Diane grilled some pita bread. The star of the show was a pork shoulder roast, rubbed with lemon zest, oregano, garlic and oregano. We ate on the deck, enjoying the weather, the food, the company, and some dry Rose wine.
*OK, Diane and I enjoyed ourselves. The kids wolfed down some pita bread, then asked to be excused to play with their friends. They wanted to stretch a perfect day their own way.

Recipe: Rotisserie Pork Shoulder with Greek Flavors

Cook time: 2 hours

Equipment:

  • Grill with Rotisserie attachment (I used a Weber Summit with an infrared rotisserie burner. Here is the current version of my grill.)
  • Aluminum foil drip pan (9"x12", or whatever fits your grill)
  • Butchers twine

Ingredients:

  • 4 pound pork shoulder roast (also know as "pork butt" or "pork shoulder butt roast")
  • zest of 1 Lemon
  • 2 teaspoons dried oregano
  • 4 cloves garlic, minced (or grated on the microplane zester I used on the lemon)
  • 1 tablespoon Kosher salt
  • 2 tablespoons olive oil

Directions:
1. Prep the pork shoulder: Up to 2 hours before cooking, prepare the pork shoulder. Score the fat on the top of the roast in a diamond pattern, making parallel slashes one inch apart, then going across in the other direction. In a small bowl, thoroughly mix the lemon zest, oregano, garlic, Kosher salt, and olive oil; the result should be a thick paste. Spread this paste all over the pork shoulder roast, working it into any natural seams or cuts in the meat. Truss the roast with twine, tying it every inch and a half. Skewer the roast on the spit lengthwise, aiming for the center of the roast. Let the skewered pork rest at room temperature until ready to cook.

2. Prepare the grill: Set the grill up for rotisserie cooking at high heat. For my Weber Summit, this means removing the grates, turning the two outer burners (burners 1 and 6) to high, and turning the infrared burner to high. Then I put my drip pan in the middle, over the unlit burners, and let the grill preheat for ten to fifteen minutes. This gives me grill temperature of about 550*F. (See My Rotisserie Basic Technique Post for more rotisserie setup details.)

3. Cook the pork shoulder: Put the spit on the rotisserie, start it spinning, and cook with the lid closed for an hour. At that point, the roast should be well browned; turn the heat down to medium-low. (I turn off the rotisserie burner, and turn the outer burners down to medium. This gives me a grill temperature of 275*F). Cook the pork roast until it reaches 190*F in the thickest part of the meat. This should take 1.5 to 2 hours; assume about 20 minutes per pound of meat.

4. Rest, carve and serve: Remove the spit from the grill. Be careful; the spit is hot. Remove the roast from the spit, transfer to a platter, remove the twine, and cover with foil. Let the roast rest for 15 to 30 minutes before carving the pork into ½" thick slices. Serve and enjoy!

Notes:
*Every time I rotisserie a pork shoulder, I wonder why I don't do it more often. The combination of tender, melting meat from the long cooking time is combined with a browned, crispy crust. The results are pork heaven.

*Trussing may be optional, depending on how solid the roast is. My roast had a big line of fat between two muscles of meat; I had to truss it to hold those two muscles together on the spit.

*I reduce the heat after the first hour to leave more time for the connective tissue in the pork to break down into gelatin; that's also why I cover it with foil and give it a 30 minute rest - longer than I usually rest meat before carving.

*If you have the time, you can dry brine the pork. Rub it with the paste the night before cooking, and refrigerate overnight. Take it out of the refrigerator two hours before cooking, to let it come to room temperature before cooking, and continue with spitting the roast.

What do you think? Questions? Other ideas? Leave them in the comments section below.

Related Posts:
Rotisserie Pork Shoulder Roast
Rotisserie Pork Shoulder, Char Siu Style
Click here for my other rotisserie recipes.

Inspired by:
All the great, authentic Greek recipes on Kalofagas.ca. Check them out, especially for the beautiful food photography.


Check out my cookbook, Rotisserie Grilling.

Everything you could ask about the rotisserie,
plus 50 (mostly) new recipes to get you cooking.

It's a Kindle e-book, so you can download it and start reading immediately!


*Enjoyed this post? Want to help out DadCooksDinner? Subscribe to DadCooksDinner using the RSS or Email options on the right, link to this post from your blog, recommend DadCooksDinner to your friends, or buy something from Amazon.com through the links on this site. (Like my Rotisserie Grilling cookbook...)

Pantry Orphans

September 27, 2011 by Mike Vrobel Leave a Comment

When I read  Best Intentions - when ingredients sit on the shelf. [TheKitchn.com], I burst out laughing.

I immediately thought of the tin of guava paste. It's huge - eight inches in diameter, an inch thick, and it has been sitting in my cabinet for…holy cow, five years?

What's worse is, it is under a bottle of Patak's Eggplant Pickle…
...buried behind the spices, including the untouched File powder...
…which sits above the Ouzo…
...right next to the Ponzu sauce...
…which is behind the bag of dried Pozole corn. They are orphans. Ingredients that were used once, then sat on the shelf, not needed, alone, unloved.
These aren't special occasion ingredients, that I use once a year. Dill seed comes out when I make pickles,  dried sage gives Thanksgiving stuffing the right flavor; they'll get dusted off eventually.

When I see them in there, I feel a pang of guilt. They're my responsibility. If I could just follow through…make that four hour Pozole, or that curry that really goes well with eggplant pickle. Then reality intrudes. My cooking ambitions write checks that bounce when faced with a weeknight dinner.
I really should make another batch of Pozole; I loved it the one time I made it for a party. Until then, the pozole gets in the way of the black beans I need for tonight's dinner.

Most of these orphans come from my love of ethnic grocery stores. I'm walking down the spice aisle, and I'm overcome by the exotic ingredients. Of course I'll use up a three pound bag of zatar spice - why wouldn't I?
Why do I keep buying these things? Because, when it works, I've found a new favorite ingredient. I don't know what I'd do without chipotles en adobo, chinkiang cooking wine, smoked spanish paprika or fish sauce. What if zatar spice is my next great find?

The pantry orphans all eventually leave. Usually when the kids have a harvest for hunger drive at school. I send a bag filled with canned tomatoes, pasta, and baked beans - to cover the jar of Kimchi I hid away in the bottom.

What do you think? What are your Pantry Orphans? Leave them in the comments section below.

Enjoyed this post? Want to help out DadCooksDinner? Subscribe using your RSS reader or by Email, recommend DadCooksDinner to your friends, or buy something from Amazon.com through the links on this site. Thank you!

Pressure Cooker Pork Belly Beer Braise

September 22, 2011 by Mike Vrobel 13 Comments

Pork belly. It sounds unappetizing. So, why is it on the menu of every single "modern American" restaurant? What if I called it fresh bacon - would that get your attention? If so, do I have the pressure cooker meal for you.

Pork belly is the same cut of meat as bacon, but pork belly has not been cured. It has all the advantages of bacon - meat layered with thick veins of delicious pork fat.
*The disadvantage is…all those delicious layers of pork fat. Let's just say this is not a low-cal recipe and leave it at that, shall we?

How to cook it? In this recipe, I use the pressure cooker to braise it with beer. The result is tender pork, melting fat, and a delicious sauce to pour over the top. Looking for a luxurious meal that's a bit out of the ordinary? Try this recipe.
*Don't have a pressure cooker? No worries. See the Variations section for cooking instructions with a standard dutch oven.
**h/t Michael Symon for the phrase "fresh bacon".

Recipe: Pressure Cooker Pork Belly Beer Braise

Adapted From: Michael Symon's Live to Cook

Cook time: 55 minutes

Equipment:

  • Pressure cooker, at least 6 quarts (I love my giant Kuhn Rikon 12-quart pressure cooker, but it is larger than is absolutely necessary for this recipe.)

Ingredients:

  • 2 quarts water
  • ½ cup table salt (1 cup Kosher salt)
  • 2 tablespoons brown sugar
  • 2 pounds pork belly, skin removed and cut into 2 inch strips
  • 1 large onion, diced
  • 1 carrot, peeled and diced
  • 1 bell pepper, diced
  • 2 cloves crushed garlic
  • 1 teaspoon coriander seed
  • 1 teaspoon fresh thyme leaves
  • ½ teaspoon Kosher salt
  • 1 cup beer
  • 1 cup chicken broth (preferably homemade)
Removing the skin from the pork belly
and cutting into 2 inch strips

Directions:
1. Brine the pork belly: In a container large enough to hold the pork belly, mix the water, ½ cup table salt, and brown sugar until the salt dissolves. Add the pork belly and refrigerate for 4 to 8 hours. Remove the pork from the brine and pat dry.

Searing the belly

2. Sear the pork belly: Pre-heat the pressure cooker pot over medium heat. Add the pork belly, fat side down, and sear for 5 minutes. Flip fat side up and sear for another 5 minutes, then remove to a bowl. Drain off all but 2 tablespoon of the pork fat.

Sauteing the aromatics

3. Saute the aromatics: Increase the heat to medium-high and add the onion, carrot, bell pepper, garlic, coriander seed, thyme, and salt to the pot. Saute, stirring, until the onion is starting to brown, about 8 minutes. Add the beer and scrape any browned bits from the bottom of the pot.

Ready to lock on the lid

4. Pressure cook the pork belly: Add the pork belly (in a single layer if possible), then pour the chicken broth over everything. Lock the lid on the pressure cooker. Bring the pressure cooker up to high pressure, then lower the heat to maintain that pressure and cook for 40 minutes. Remove from the heat and allow the pressure to come down naturally, 15 to 20 minutes.

Under pressure.
Exciting, isn't it?

5. Serve: Move the pork to a platter, pour the liquid from the pot into a serving boat, and serve. Top each serving of pork belly with a generous ladle of the sauce and aromatics.

Variations:
*To add more finesse to the sauce: Scoop the aromatics out of the liquid with a slotted spoon, then pour the sauce into a fat separator. Let the sauce rest for five minutes for the fat to separate, then pour back into the pot. Bring the de-fatted liquid to a boil, reducing by half. Serve as above, but top each serving of belly with a couple of tablespoons of sauce instead of a full ladle.

*Don't have a pressure cooker? No problem. Use a heavy bottomed dutch oven with a lid, and increase the amount of stock to 2 cups. Follow the instructions right up until "lock the lid". Then, instead of pressure cooking, bring the pot to a boil, and cover with the lid. Move the pot to a preheated 350*F oven and bake for 3 hours, until the pork is tender. Continue with the serving step.

Notes:
*This recipe is even better the next day. Refrigerate overnight, scrape the fat cap off the top, bring to a simmer for ten minutes, then serve.

*If you really want to be fancy, after pressure cooking, sear the pieces of pork belly. Remove them from the broth, pat dry, then sear in a fry pan for 3 to 6 minutes a side over medium-high heat. This gives them crisp "bacony" edges to go with the tender interior.
*Bacony is a word, right? If not, it should be...

What do you think? Questions? Other ideas? Leave them in the comments section below.

Related Posts:
Instant Pot Red Braised Pork Belly
Pressure Cooker Short Ribs with Mexican Flavors
Pressure Cooker Pho Bo (Vietnamese Beef Noodle Soup)
Pressure Cooker Cochinita Pibil ("Pit Cooked" pork)
My Other Pressure Cooker Recipes

Adapted from:
Michael Symon's Live to Cook

*Enjoyed this post? Want to help out DadCooksDinner? Subscribe using your RSS reader or by Email, recommend DadCooksDinner to your friends, or buy something from Amazon.com through the links on this site. Thank you!

Featured on BlogHer.com

Grilled Tomato and Habanero Salsa (Chiltomate)

September 20, 2011 by Mike Vrobel 3 Comments

Grilled Tomato and Habaerno Salsa (Chiltomate)
Grilled Tomato and Habanero Salsa (Chiltomate)

I love hot food. But habanero is a hot pepper too far. It tears me apart. I love the taste - it's been described as "fruity", which I agree with, and I've never found a similar tasting pepper. But the habanero heat is heinous.
*Say that five times fast. Then, do your best Bill and Ted imitation.

When my CSA gave me six pounds of tomatoes, plus a habanero, I had to try again. Which leads to:

[SCENE: Interior kitchen, evening. Tortilla chips sit next to a light red bowl of salsa. MIKE and THE KIDS sit around the table, staring at the salsa. Mike picks up a chip, lowers it towards the bowl of salsa, then hesitates. The kids start edging their chairs away from the table.]

MIKE: I only used one small pepper. How hot can it be?

[Dips chip in, takes a bite]

MIKE: Yum. Oh, that's good. It's a little hot, though, you guys should be carefuh...ooh…

[Beads of sweat break out on his forehead and upper lip.]

MIKE: Whooooo...

[MIKE exhales. A fireball shoots through the screen door and slams into a thyme bush, which bursts into flame. THE KIDS have disappeared; giggling is heard from behind the sofa in the next room.]

MIKE: Tha…hah…thuh…that has some kick. Mmm, but it's good.

[He plucks another chip from the bowl, and goes back for more.]

The hot one
The hot one

Do you like it hot? This is the salsa for you. But, it was too much for Diane and the kids - they could only manage a taste before grabbing for a glass of milk. Next time I'm going to remove all the seeds from the pepper, to see if I can cut the heat level down without losing that great habanero flavor.
*Of course, if you're a glutton for punishment, you could go with two peppers. But…holy cow, you must have a cast iron stomach…

Recipe: Grilled Tomato and Habanero Salsa (Chiltomate)

Adapted From: Roberto Santibañez, Saveur Magazine (Chiltomate, Saveur.com)

Equipment

  • Grill (I use a Weber Summit. Here is the current version of my grill)
  • Food processor or blender
Grilling the tomatoes, habaerno, and onions
Grilling the tomatoes, habanero, and onions
Onions and pepper in the processor
Peeling the skins from the tomatoes
Processing the tomatoes
Smooth - ready to serve
Serve!
Serve!

Variations

  • Remove the seeds to reduce the heat: As I said in the opening, you can cut down on the heat level by removing the seeds from the pepper before grilling.
  • Change the pepper: If you really want to cut down on the heat, go with a serrano or jalapeno instead of the habanero. The salsa will still be good, but you'll have more of a green pepper flavor than the fruity habanero flavor.
  • No in-season tomatoes? The grilling will sweeten up out of season store-bought tomatoes, so it isn't awful using them. But, a better choice is canned fire roasted diced tomatoes. They're picked ripe, so out of season they just taste better.

Notes:

  • No grill? No problem. Spread the tomatoes, pepper and onions out on a rimmed baking sheet and broil for ten to fifteen minutes, until browned and the tomatoes are softening. Proceed with step 3.
  • In step 3, after you have pulsed the habanero pepper and onions…don't open the jar and take a deep breath. Habanero fumes are culinary chemical weapons. Let the jar sit for a few minutes, and take shallow breaths when you open it to add the tomatoes.
  • This recipe is best with meaty roma tomatoes. You can use other tomatoes, but the results are a bit watery.

What do you think? Questions? Other ideas? Leave them in the comments section below.

Related Posts:
For different salsas, try my Pico de Gallo Salsa (fresh tomato salsa), Quick Red Salsa and Tomatillo Salsa. Also, check out my new favorite vegetable side dish, Cast Iron Brussels Sprouts.

Special thanks to Tim Knorr at Crown Point for the great tomatoes and habanero that I used to make this recipe.

Adapted from:
Roberto Santibañez, Saveur Magazine (recipe here: Chiltomate, Saveur.com)

*Enjoyed this post? Want to help out DadCooksDinner? Subscribe using your RSS reader or by Email, recommend DadCooksDinner to your friends, or buy something from Amazon.com through the links on this site. Thank you!

Grilled Butterflied Chicken with Dry Brine

September 15, 2011 by Mike Vrobel 14 Comments

Grilled Butterflied Chicken, Dry Brined

Grilled Butterflied Chicken with Dry Brine

Why butterfly? Two reasons.

First, a butterflied chicken is a quick(er) chicken. A four pound chicken grills in about 45 minutes; left whole, they take an hour or longer.

Second, a butterflied chicken is simple to carve. Seven slices and you're ready for the dinner table.
Nine if you cut the breast pieces in half like I do.

This is my favorite seasoning for chicken - an overnight dry brine with salt and pepper, then some smoking wood in the grill. Simple and delicious. Good chicken will shine with this recipe; cheap chicken will be bland. In other words, don't use the $0.69/lb store chicken with this recipe. Make the effort to get a good bird, and you will be rewarded.
If you have a good local chicken store, like my local Brunty Farms or Difeo's Poultry, great! If not, check the grocery store for a Bell and Evans bird. Or, get a Kosher bird, and skip the dry brine; kosher birds are pre-brined.

Recipe: Grilled Butterflied Chicken with Dry Brine

Equipment:

  • Grill (I use a Weber kettle, like this one.)
  • Kitchen shears (optional, but recommended)
  • Aluminum foil drip pan (9"x12", or whatever fits your grill)

Dry brining the chickens

Start the chicken skin side down

Finish skin side up
Finish skin side up

Ready, set...
Ready, set...

...carve!
...carve!

Notes

  • My kids demolished this chicken. It's amazing what a little wood smoke does for flavor. "Dad! This smells like bacon!" No picky eating this time - everyone came back for seconds and thirds.

What do you think? Questions? Other ideas? Leave them in the comments section below.

Related Posts:
Grilled Butterflied Chicken with Thai Brinerade

Enjoyed this post? Want to help out DadCooksDinner? Subscribe using your RSS reader or by Email, recommend DadCooksDinner to your friends, or buy something from Amazon.com through the links on this site. Thank you!

Video: How To Butterfly A Chicken

September 13, 2011 by Mike Vrobel 5 Comments

A friend asked how I like to grill chicken.

Me: I butterfly it, then grill it over indirect heat. Butterflied chicken cooks evenly, and it cooks quicker.

Friend: Butterfly it? What's that?

Me: You cut the backbone out, then squash it flat. Here, let me show you:


What do you think? Questions? Other ideas? Leave them in the comments section below.

Related Posts:
Grilled Butterflied Chicken, Thai Brinerated
Grilled Butterflied Chicken, Dry Brined

Kitchen Shears:
My shears are a Williams-Sonoma house brand. I've been using them for years. When they finally give up the ghost, I'll want this take-apart pair: Wusthof Come-apart Kitchen Shears. I like the idea of easy-clean shears.

*Enjoyed this post? Want to help out DadCooksDinner? Subscribe using your RSS reader or by Email, recommend DadCooksDinner to your friends, or buy something from Amazon.com through the links on this site. Thank you!

Pork Picadillo Tacos

September 8, 2011 by Mike Vrobel 5 Comments

Picadillo. I think this is where the travesty known as taco seasoning mix came from. Picadillo is common in Latin American cuisines; ground or finely minced meat, cooked with spices and tomato or tomato sauce, used to make a filling for tacos or to serve with rice.

We took that and turned it into a filling for hard-shell tacos, a packet of spices to rip open and pour over ground beef.

Now, taco seasoning mix is a travesty, but not because of the results. I fondly recall that seasoned ground beef mix of my youth.*
*Sitting there in the bottom of a taco shell, waiting. Waiting for that first bite. That first bite would shatter the taco shell and dump the greasy beef, cheese, tomatoes, and a few shreds of lettuce down my arm. Ah, memories.

My gripe is with that 1.25 oz package of spices. I hate pre-made spice blends. I really hate calling this a spice blend at all. According to the package, the first three ingredients are yellow corn flour, salt, and maltodextrin. Starch, salt, and more starch? That's what I'm paying for?

I wanted an authentic version. And I found it, as usual, in one of Rick Bayless's recipes. The first time I made picadillo was as a filling for empanadas. Empanadas are a delicious pain in the butt - rolling out the dough, filling with picadillo, and deep frying is a project. I had fun doing it with the kids, and I'll do it again someday. But the picadillo filling was a revelation. It was the grown-up version of that taco seasoning mix - without the seasoning mix. (And with some raisins and almonds thrown in.) Picadillo is now my favorite way to use ground pork.
*This recipe is also inspired by my CSA with Brunty Farms. I bought a couple of pounds of ground pork, and Melanie mentioned people always ask her what to do with it. I blurted out "Tacos!" Then I realized the recipe wasn't on my blog...

Recipe: Pork Picadillo Tacos

Adapted From: Rick Bayless Picadillo Oaxaqueno

Cook time: 35 minutes

Ingredients:

  • ¼ cup slivered almonds
  • 2 tablespoons vegetable oil
  • 1 medium onion, minced
  • ½ teaspoon kosher salt
  • 3 cloves garlic, crushed
  • 1 tablespoon ancho chile powder (or substitue regular chili powder)
  • ½ teaspoon dried oregano
  • ½ teaspoon fresh ground black pepper
  • 1 teaspoon ground cinnamon
  • ¼ teaspoon cocoa powder
  • ¼ teaspoon ground cloves
  • 2 pounds ground pork
  • 1 teaspoon kosher salt
  • 28-ounce can crushed tomatoes (preferably fire roasted crushed tomatoes)
  • 1 tablespoon cider vinegar
  • 1 teaspoon brown sugar
  • ¼ cup raisins

Directions:
1. Toast the Almonds: Toast the almonds in a large frypan over medium heat, stirring and tossing often until the almonds are lightly browned, about 3 minutes. Set the almonds aside for later.

2. Saute the aromatics and spices: Add 2 tablespoons vegetable oil to the frypan, increase the heat to medium-high, and heat until shimmering. Add the onion, sprinkle with ½ teaspoon kosher salt, and saute until just softened, about 5 minutes. Make a hole in the center of the onions and add the garlic, ancho chili, oregano, black pepper, cinnamon, cocoa powder, and cloves. Toast the spices for one minute, then stir into the onions.

3. Cook the pork: Add the ground pork to the pan and break it up. Sprinkle with 1 teaspoon of kosher salt. Cook, occasionally stirring and breaking up the pork, until the pork has lost its pink color, about 5 minutes.

4. Simmer until ready: Stir in the crushed tomatoes, vinegar, brown sugar, and raisins. Bring to a boil over high heat, then reduce the heat to a simmer and cook until the tomatoes thicken up, about 20 minutes. Stir in the almonds, then taste for seasoning and add more salt and black pepper if necessary.

Variations:
*Up the heat level: Replace the ancho chile powder with 1 tablespoon chipotle en adobo puree. 2 tablespoons if you really like it hot.

*Turkey, Chicken or Beef: Any ground meat will work, not just pork.

Notes:
*I use this as a taco filling, but as I mention in the opening, Rick's original recipe used it to stuff empanadas. Recipe here: Empanadas de Picadillo [RickBayless.com]

I like to cross culinary streams and make lettuce wrap tacos with picadillo and rice. Not very authentic, but it tastes delicious.

This recipe makes a lot of picadillo. That is intentional; picadillo freezes well. I serve half of it, then freeze the other half in a quart container. A quick run through the microwave, some tortillas, and I have a second dinner.

What do you think? Questions? Other ideas? Leave them in the comments section below.

Related Posts:
Quick Red Salsa
Slow Cooker Beef Barbacoa
Instant Pot Pork Carnitas Recipe

Adapted from:
Rick Bayless Picadillo Oaxaqueno

*Enjoyed this post? Want to help out DadCooksDinner? Subscribe using your RSS reader or by Email, recommend DadCooksDinner to your friends, or buy something from Amazon.com through the links on this site. Thank you!

Duma Meats and Farm Market

September 6, 2011 by Mike Vrobel 5 Comments

If you are in the Akron area, and are serious about meat, you owe it to yourself to take a trip to Duma Meats. Duma's is a full service butcher. And by full service, I really mean it - they raise their own cattle on site, and sell everything from a 400 pound side of beef down to their own homemade bologna.

They have two locations: the original store in Mogadore, and their new location in the Hartville Marketplace. Either location is worth a visit, but I prefer the original store.
*The original store has cattle wandering in the field out front, chewing their cud and watching you pull into the parking lot.
**Special thanks to my neighbor, Missy, for telling me I had to try Duma's

Duma Meats Farm Market
857 Randolph Road
Mogadore, OH 44260
(330) 628-3438
dumameatsfarmmarket.com

Duma's Hartville Marketplace
1289 Edison Street (Stands #2 to #8 in the Hartville Marketplace)
Hartville, Oh 44632
(330) 587-0032
dumameatsfarmmarket.com

My Top 5 list of favorite things they sell:
1. Meat bundles: Beef bundle, Pork bundle, Chicken bundle, or Mixed Beef, Pork and Chicken bundle.
The guy behind me in line had a mixed bundle, and I was getting jealous. He had 50 pounds of mixed meat for his freezer, and I didn't.

2. Whole cuts: Want to buy a 300 to 400 pound side of beef? How about just a quarter? Need a 150 pound pig? Or just half a hog? You can get it here, cut to your specifications.
I saw the bag of ground beef that came with a side; it looked like they'd be making hamburgers and chili for months. And that was just the ground beef!

3. Whole loins: Ok, maybe you don't want half a cow. How about a whole short loin, to cut porterhouses and t-bones from?

4. Regular meat counter: Just want a steak? Or some chicken legs? A few pork chops? Sure, they can do that.

5. Homemade Deli Lunch Meat: They make their own deli meat, too. The garlic bologna was heavenly. My son loves chip-chop ham, and I was impressed with the quality. Normally, chip-chop ham is an afterthought; Duma's makes it with care.

View Larger Map

Related posts:

My list of Ethnic and Gourmet stores in the Akron, OH area.

*Enjoyed this post? Want to help out DadCooksDinner? Subscribe using your RSS reader or by Email, recommend DadCooksDinner to your friends, or buy something from Amazon.com through the links on this site. Thank you!

Walnut Vinaigrette

August 25, 2011 by Mike Vrobel Leave a Comment

I'm on a Walnut Vinaigrette binge, inspired by my brother-in-law, Travis. He left a bottle of walnut oil behind at our summer cottage. When I saw the bottle, I knew what I had to make. Now I'm hooked - it has replaced balsamic vinaigrette as my go-to salad dressing.

I think of this as a "French" vinaigrette. It's a variation on a dressing Susan Hermann Loomis taught me in her cooking class in Paris*. I didn't realize quite how much of a variation until I went back to her original recipe. The original wasn't a walnut dressing…it was a hazelnut dressing. And it used red wine vinegar and thinly sliced shallots, not sherry vinegar and Dijon mustard. Oops. Sorry, Susan. Oh, well, my walnut version is quite good anyhow…
*Did I mention that I took cooking classes in France? No? I'm going to go back there someday…

Recipe: Walnut Vinaigrette

Inspired by: Susan Herrmann Loomis Cooking at Home on Rue Tatin

Cook time: 5 minutes

Ingredients:

  • 1 tablespoons sherry vinegar
  • ½ teaspoon dijon mustard
  • pinch salt
  • ½ teaspoon fresh ground black pepper
  • 3-4 tablespoons (scant ¼ cup) walnut oil

*For an overview of making vinaigrettes, see Vinaigrette Basic Technique
Directions: Easy Way
1. Whisk to blend: Whisk all the ingredients in a small bowl until creamy.

OR:

Directions: With Finesse
1. Dissolve the salt: Whisk the vinegar, mustard, salt and pepper in a small bowl until the salt dissolves, about 30 seconds.

2. Add the oil slowly: Add the oil in a slow stream, whisking until creamy and emulsified.

Notes:
*This is enough dressing for two heads of green leaf lettuce, a 6 ounce bag of bag salad, or about 6 cups of mesclun mix.

*It also makes a great topping for cooked vegetables; asparagus and green beans in particular.

What do you think? Questions? Other ideas? Leave them in the comments section below.

Related Posts:
Vinaigrette Basic Technique
Balsamic Vinaigrette
Red Wine Vinaigrette

Inspired by:
Susan Herrmann Loomis Cooking at Home on Rue Tatin

*Enjoyed this post? Want to help out DadCooksDinner? Subscribe using your RSS reader or by Email, recommend DadCooksDinner to your friends, or buy something from Amazon.com through the links on this site. Thank you!

Year Three of DadCooksDinner

August 23, 2011 by Mike Vrobel 6 Comments

A turkey on the rotisserie over a charcoal grill

It's time for my annual "State of the Blog" address... 

Thanks to all of you, my loyal readers, DadCooksDinner keeps on growing. My subscribers and monthly page views are up by 200% over last year. And, I'm actually making some money through Amazon purchases and the ads on the site. Not a huge amount; I'm certainly not quitting my day job any time soon. But I am making enough to pay for a week's worth of groceries now and again.


The downside this year: the real world getting in the way of my blog.
Last year it felt like I was on a roll. This year has been more of a grind.

At the beginning of the year, I cut back on the blog, I changed my schedule from three posts a week to two posts, to make time to write a cookbook. In February, I put together a table of contents for "The DadCooksDinner guide to Rotisserie Grilling". Then my day job got busy, my wife started student teaching, the kids got involved in their usual round of after school activities…and suddenly it's August, and I still only have that table of contents.
And Alton Brown stopped doing Good Eats. And Mark Bittman stopped being the Minimalist. It's just one thing after another. How can I cope?

OK, enough feeling sorry for myself. Here is my look back at the high points in year three of DadCooksDinner. As always, I will do this with a set of top five lists in honor of my favorite movie.

Top five happenings in the last year:
1. Winter Grilling guest post on ThreeManyCooks.com.
I am a huge fan of Pam Anderson's cookbooks. As I've said many times before, Pam's How to Cook Without a Book was a lightning bolt of inspiration, the one that pushed me to become a real cook. I was excited to write a guest post for her, Maggy and Sharon.

And, I was in a drawing from Kev Anderson!

2. Good Company Today and Cleveland MomsLikeMe.com.
Thanks to Jacquie and Ann at Cleveland.MomsLikeMe.com, I was on the Good Company Today television show on WKYC Channel 3 in Cleveland. (I was the featured "local food blogger".) I had a great time on the air, and then answering questions on Cleveland.MomsLikeMe.com about feeding a busy family.

3. Bubba Sous Vide was StumbleUponed.
Someone put my Beer Cooler Sous Vide Grilled New York Strip Steak post on StumbleUpon. I must have made the front page, becuase I had my best day ever…entirely in the hour between 11AM and Noon. The traffic trickled off after that, but still...a random February Thursday suddenly being my best traffic day ever? It was quite a shock.

4. Featured on Fine Cooking's Best of the Blogs
Related to #1 - I was featured on Fine Cooking's Best of the Blogs for that Winter Grilling post. I'm a long time subscriber to Fine Cooking, so that was a real treat.

5. Questions from readers
I love answering a good question, and I love that people see me as an expert on things. Some of my favorite questions (with short form answers - the real ones went on for pages)

Q: What kind of grill should I buy?
A: Weber!

Q: What pre-made spice rubs do I use?
A: Chili Powder, Herbes De Provence. Other than that, I make my own.

Q: Is it OK to grill a turkey without a rotisserie?
A: Of course!

Q: What kind of electric pressure cooker should I buy?
A: I don't know - but I got good suggestions in the comments.

Top five photos:

1. Rotisserie Turkey, Dry Brined with Orange and Spices
2. Pressure Cooker Short Ribs with Mexican Flavors
3. Rotisserie Cornish Game Hens with Lime and Herbs
4. Grilled Pork Chops with Bourbon Brine and Baste
5. Cajun Spice Rub

Top five most popular recipes:
Recipes that had the most pageviews, published in the last year on DadCooksDinner.
1. Rotisserie Tri-Tip
2. Beer Cooler Sous Vide Grilled New York Strip Steak
3. Grilled Mahi-Mahi Fish Tacos with Red Cabbage Slaw
4. Pressure Cooker Pinto Beans in Tex-Mex Broth
5. Salmon Salad Bites with Sushi Flavors

Top five recipes according to my kids (who would be happy if I would just make hamburgers and tater tots):
1. Patatas Bravas (Spanish Style Fried Potatoes) (Tim's favorite)
2. Yakitori Chicken Thighs (Ben's favorite)
3. Pressure Cooker Turkey Chili with Chorizo and Beans (Natalie's favorite)
4. Slow Cooker Mexican Shredded Pork (Pork Tinga) (Everone's favorite taco filling)
5. Kale Chips with Chinese Flavors (One of the few vegetables they'll eat willingly)

I'm amazed that people read my food ramblings. I wouldn't be here if it wasn't for all of your interest and support. Thank you for reading, everyone!

Related posts:
Year Two Update
Year One Update

Enjoyed this post? Want to help out DadCooksDinner? Subscribe using your RSS reader or by Email, recommend DadCooksDinner to your friends, or buy something from Amazon.com through the links on this site. Thank you!

Rotisserie Turkey Breast with Spice Rub

August 18, 2011 by Mike Vrobel 14 Comments

Spice Rubbed Rotisserie Turkey Breast

Spice Rubbed Rotisserie Turkey Breast

There is one problem with cooking Turkey to 150*F. Dark meat. Turkey breast may be better cooked to 150*F, but turkey legs and thighs need the extra heat to break down the fat and connective tissue; they're OK at 165*F, but they're better at 170*F, and great at 175*F to 180*F. This is why cooking a whole bird is such a difficult balancing act - the lean breast meat needs to come off the heat the moment it is done, but the legs are better the longer you can cook them.

The solution? Julia Child explained in "The Way to Cook" all those years ago - don't cook a whole turkey. Carve the legs off of the breast before cooking. That way, I can pull the breast meat out the moment it is ready, and leave the legs to continue to cook. At the time, this seemed sacrilegious - I want the Normal Rockwell picture. I want to carry a whole turkey to the Thanksgiving table in triumph, not a collection of turkey pieces. Eventually I realized that I shouldn't fight science, or Julia. Turkey breast just tastes better when you cook it on its own.1This might be why I'm such a fan of dark meat turkey. I cook a whole bird for Thanksgiving, but I'm first in line for the drumsticks.

Spices ready to be mixed into a rub

Here is my new favorite turkey breast recipe. I cook it to 150*F, so it is juicy and tender. The rotisserie gives it beautifully crisp skin, the spice rub adds a complex layer of flavor to the exterior. What could be better?2What could be better? The leftovers - turkey sandwiches for the rest of the week. Just add bread, lettuce, tomato and mayo.

Work the spices between the skin and the turkey
...really get it on there good

Recipe: Rotisserie Turkey Breast with Spice Rub

Inspired by: Bobby Flay Turkey Breast with Spanish Spice Rub

Notes

  • Add rotisserie pan sweet potatoes to the drip pan for a quick and easy side dish. The spice rub is a great match with sweet potatoes; sprinkle a little on the sweet potatoes before you put them in the drip pan.
  • As I mention in the head note, the key is to cook the breast to 150*F - turkey breast is so lean, that it goes from juicy to terribly dry if it is slightly overcooked. An instant read thermometer is absolutely necessary.
  • Speaking of the spice rub...I wanted to call it a Spanish spice rub, because of the smoked paprika. But the rest of the spices are there because I like their combined flavors, not because of any Spanish flavor profile. In other words, it's a global mishmash of spices to match my taste.

What do you think? Questions? Other ideas? Leave them in the comments section below.

Related Posts:
Rotisserie Turkey Breast, Dry Brined is a simple version of this recipe.
Rotisserie Pan Sweet Potatoes
Rotisserie Turkey, Dry Brined with Orange and Spices
Click here for my other rotisserie recipes.


*Enjoyed this post? Want to help out DadCooksDinner? Subscribe to DadCooksDinner using the RSS or Email options on the right, link to this post from your blog, recommend DadCooksDinner to your friends, or buy something from Amazon.com through the links on this site. (Like my Rotisserie Grilling cookbook...)

Turkey Temperature, or the 150 Question

August 16, 2011 by Mike Vrobel 12 Comments

My Samoan attorney would like me to say the following: If you are feeding infants, people with compromised immune systems, or people who like to sue penniless food bloggers, you should stick with USDA guidelines and cook turkey breast to 165°F.

165 degrees Fahrenheit for turkey breast. That temperature is burned into my memory. Don't to cook it past 165, because it dries out. Don't cook it less than 165, though! Salmonella lurks around every corner. At 165°F, salmonella is dead, instantly.

But, every now and then, I would see a rogue number. 150. Rick Bayless's Mexican Kitchen recommended 150°F as the proper temperature for turkey breast. I shook my head, assuming it was a misprint. Then Kenji Alt figured out deep fried turkey, and I realized 150 is not a misprint. It is juicier turkey.

Why 165 versus 150? First, the safety side of the issue. The USDA chose 165°F for turkey because, held at that temperature, salmonella is killed in less than ten seconds. If the turkey gets to 165, there is no chance that salmonella will survive; ten seconds of carry over heat will take care of it. But...what they don't mention in their consumer fact sheet is that salmonella is also killed at lower temperatures, if that temperature is held long enough. If a turkey is held at 150°F for 3.8 minutes, salmonella is dead. If I pull my turkey off the grill at 150°F, it will remain that temperature for at least ten minutes due to the thermal mass of the large turkey. I know I'm taking a slight risk here, but as long as I rest my turkey for ten minutes, it will be safe.

[UPDATE 2017-10/22] To eliminate even the small risk of the turkey not staying at 150°F for 3.8 minutes due to thermal mass, cook the turkey until the the internal temperature reaches 150°F, then set a timer for 4 minutes. When those 4 minutes are up, take the turkey off the grill.

Second - why 150 versus 165? Because meat is a combination of protein fibers and water. The moment meat gets to 120°F, or blood-red rare, the protein fibers start to tighten up, squeezing water out of the meat. At 165°F, almost all the water has been squeezed out. Fat and connective tissue can make up for this; they add their own juiciness, and break down at higher temperatures. The leaner meat is, the closer to rare you want to cook it; turkey breast is almost all protein. The problem? Turkey isn't safe cooked medium-rare. It needs 64 minutes at 134°F to kill any potential salmonella.

(Also, medium-rare poultry, still pink in the middle, is kind of unsettling. Even if it was cooked for those 64 minutes, I'm not sure I want to eat it. Unless it is duck breast, then I'll be first in line, with a knife and fork in hand.)

150°F, or medium-well, is the trade off. Not so well done that all the water was squeezed out; cooked long enough that salmonella is not a concern.

I have a new number. 150 is the new 165. Later this week, I put 150 to work with a new Rotisserie Turkey Breast recipe. Stay tuned!

What do you think? Questions? Other ideas? Leave them in the comments section below.

Sources:

  • Let's Talk Turkey - A consumer guide to safely roasting a turkey [usda.gov]
  • FSIS Salmonella Compliance Guidelines for Small and Very Small Meat and Poultry Establishments that Produce Ready-to-Eat (RTE) Products (Time-Temperature Tables For Cooking Ready-To-Eat Poultry Products) USDA Food Safety and Inspection Service, [PDF, usda.gov]
  • How to Sous Vide Steak, Kenji Alt, [seriouseats.com]

*Enjoyed this post?  Want to help out DadCooksDinner?  Subscribe using your RSS reader or by Email, recommend DadCooksDinner to your friends, or buy something from Amazon.com through the links on this site.  Thank you!

Grilled Pork Chops with Chinese Marinade

August 11, 2011 by Mike Vrobel Leave a Comment

I got home from vacation, and I was tired. Vacation was a lot of fun, but we kept busy - cottage vacations involve a lot of splashing around in Lake Erie. The first thing I did was unload the car. The second was grocery shopping - the refrigerator was bare. It was late in the afternoon, and three cranky kids needed dinner. (Not to mention two cranky parents.) What to do?

I went straight for the bone-in pork chops. Cooking on the bone boosts the flavor of the chops. And, believe me, modern pork needs that boost. Now, for quick grilling, I have a rule - if it won't be ready by the time the grill preheats, don't make it. That leaves fifteen minutes for the marinade to work. Fifteen minutes of marinade is not going to do it with boneless chops.
*I need an hour to brine boneless chops. And, even then, I'd rather spend that hour brining bone-in chops.

These pork chops have a Chinese flavor profile. Why? I would like to say it was all part of my master plan. But…the first thing I saw when I opened my pantry was a shaker of Szechwan pepper salt I picked up on a whim at Penzeys. Oh, well, inspiration takes many forms.

Recipe: Grilled Pork Chops with Chinese Marinade

Cook time: 9 minutes

Equipment:

  • Grill (I used a Weber Summit. Here is the current version of my grill.)

Ingredients:

  • 6 bone-in pork loin chops, ¾ inch thick
  • Szechwan pepper salt (A mix of half salt and half Szechwan pepper, about ¼ teaspoon per chop)
  • ½ cup soy sauce
  • 2 tablespoon mirin (or substitute 2 tablespoon asian vinegar plus 1 teaspoon white sugar)
  • 1 tablespoon sesame oil

Directions:
1. Prepare the pork chops: Lightly sprinkle the pork chops with the salt and szechwan pepper. Put the chops in a bowl, pour the rest of the ingredients on top, and toss to coat. Let them marinate while the grill preheats, tossing once or twice to re-coat with the marinade.

2. Prepare the grill: Set the grill up for cooking on direct medium-high heat. For my Weber summit, I preheat the grill with all burners on high for 15 minutes, clean the grate with my grill brush, then turn the burners down to medium-high.

3. Grill the chops: One at a time, remove the chops from the marinade, let any excess drip back into the bowl, then put the chop on the grill. Grill over direct heat for three minutes (with the lid closed if cooking on a gas grill.) Rotate the chops 90 degrees, then cook for another three minutes. (Rotating the chops leaves the telltale diamond grill pattern.) Flip the chops, and cook for three more minutes. At this point, ¾ inch thick chops should be done. Check the chops for doneness with an instant read thermometer; they are done at an internal temperature of 145*F. If the chops are not there yet, rotate 90 degrees and cook until done, another 3 minutes.

Variations:
*Salt and pepper chops: In a big hurry? Double the amount of salt and pepper, and skip the marinade.

*Marinated and basted: Double the amount of marinade, and reserve a half cup. Baste the chops with the reserved marinade, after flipping them and right after they come off the grill.

Notes:
*If you have the time, marinate the chops for up to an hour and a half. I wouldn't go past that or the chops will be overly seasoned.

*Szechwan pepper has a very distinctive taste. Or, should I say an interesting mouth feel; it will leave your tongue feeling slightly numb. I like that feeling - it adds another dimension to the flavor. However, if that is just too weird for you, substitute regular ground pepper for the szechwan pepper.

What do you think? Questions? Other ideas? Leave them in the comments section below.

Related Posts:
Grilled Boneless Pork Chops, Brined and Basted
Grilled Thin Pork Chops, Quick Brinerated
Grilled Pork Chops with Bourbon Brine and Baste

*Enjoyed this post? Want to help out DadCooksDinner? Subscribe using your RSS reader or by Email, recommend DadCooksDinner to your friends, or buy something from Amazon.com through the links on this site. Thank you!

The Ten Item Pantry

August 9, 2011 by Mike Vrobel 1 Comment

This post is inspired by loyal reader Guitarzan. He heard me say "I can make this out of pantry ingredients" one too many times, and asked what I keep in my pantry.

I started a list…and wound up with a five pages of "things I can't live without". I don't think you want to read that any more than I want to spend an afternoon typing it up. So I took another approach.

What is my desert island pantry? I tried to go with five items, to match the five kitchen tools idea that floated around the internet a few years ago, but I couldn't cut it down that much. I had to go with….

The Ten Item Pantry

  1. Extra Virgin Olive Oil
  2. Onions
  3. Garlic
  4. Lemons
  5. Balsamic Vinegar
  6. Beans - canned or dried
  7. Canned tomatoes (diced)
  8. Pasta (or rice, or potatoes)
  9. Chicken Stock (Homemade in the freezer, preferably)
  10. Thyme (dried, or fresh if my thyme bush is in season)

*Note: Salt and pepper were too basic. I left them off the list, assuming everyone has them.

If I have those items on hand, I'm ready to cook. A quick run through the outside walls of my grocery store* for fresh meat and vegetables, and I can make a surprising variety of food.
*Or, even better, I can stop at my local farmers market.

This list gives me my key building blocks:

  • XVOO as a cooking medium
  • Oil and vinegar to make vinaigrettes - salads and vegetable sides are covered
  • Aromatics to make the base for soups, stews, and chilis
  • Pasta and beans to bulk up whatever I make
  • Chicken stock as a soup and sauce base
  • Vinegar and Lemon to add acid, citrus, and sweet/sour flavors
  • Thyme so I can add in herbs when needed

I had to think hard before I cut the following, to get the list down to ten.

  • Butter (This was the hardest one. XVOO stands in…but barely.)
  • Dijon Mustard (The first add-in for all my vinaigrettes)
  • Canned Chipotles (I love the smoky heat)
  • Hard grating cheese (Parmesan or pecorino romano, to grate on top)
  • Chili Powder (I love chili. But coriander, cumin and smoked Spanish paprika almost made it on the list)
  • Soy sauce (essential for Asian cooking...but that's a pantry list for another day)
  • Sherry Vinegar (I kept going back and forth between balsamic and sherry. I use balsamic more...)

What do you think? What did I miss? What would your list look like? Talk about it the comments section below.

*Enjoyed this post? Want to help out DadCooksDinner? Subscribe using your RSS reader or by Email, recommend DadCooksDinner to your friends, or buy something from Amazon.com through the links on this site. Thank you!

Zucchini and Tomato Casserole (Tian Provencal)

August 4, 2011 by Mike Vrobel Leave a Comment

Summer means spending time with my family at our cottage on the lake in Madison, OH. It also means farm stands. I have never seen as high a density of farm stands as I have in Madison; every road you turn down has a table with a box of vegetables on it. Farm stands mean summer to me; fresh sweet corn, tomatoes, green beans, zucchini.

My brother-in-law, Travis, always goes out for a morning bike ride. He brings back a dozen ears of fantastic sweet corn every time. We asked him if he knew the name of the place. His reply:

I guess we could call them the Corn family. That's all it says on their cardboard sign.

This is not a great recipe for our summer cottage. The cottage does not have air conditioning. This recipe requires a hot oven. Not a good combination.* But I made it anyhow, and I'm glad I did - this is a great recipe for late summer vegetables, squash, zucchini, and tomatoes. Baking them results in a hearty, meaty dish that was a delicious change from the many salads we ate while we avoided the heat.
*The heat is my excuse. The heat is why I completely forgot the onions. There are no onions in the pictures. It was the sweat dripping off the tip of my nose while I sliced zucchini - it distracted me. Yeah, that's the ticket…

Recipe: Zucchini and Tomato Casserole (Tian Provencal)

Adapted From: Roger Verge Cuisine of the Sun

Cook time: 40 minutes

Equipment:

  • 13 x 9 roasting pan

Ingredients:

  • 1 medium onion
  • 1 clove garlic
  • 2 tablespoons olive oil
  • ½ teaspoon kosher salt
  • 1 pound zucchini or summer squash (or a mix of both)
  • 1 pound fresh tomatoes
  • 1 sprig of basil, roughly 5 leaves (or fresh thyme)
  • 1 teaspoon kosher salt
  • ¼ teaspoon fresh ground black pepper
  • 2 tablespoons olive oil

Directions:
1. Saute the onion and garlic: Preheat the oven to 450*F. Trim and peel the onion, then slice thin. Peel and crush the clove of garlic. Heat the olive oil in a fry pan over medium-high heat until shimmering. Add the onion and garlic, and sprinkle with ½ teaspoon of salt. Saute the onion and garlic until just softened. Pour the onions, garlic and any remaining oil into the baking dish and spread the onions out to evenly coat the bottom of the dish.

2. Shingle the squash and tomatoes: While the garlic is cooking, thin-slice the tomatoes and zucchini into ⅛ inch slices. Once the onions are in the baking dish, add a layer of alternating zucchini and tomatoes over the top. Mince basil, then sprinkle the squash and tomato slices with the basil, 1 teaspoon salt and ¼ teaspoon black pepper. Finally, drizzle everything with the last two tablespoons of olive oil.

3. Cook the tian: Cover the baking dish with aluminum foil, then move into the oven and cook for 20 minutes. Remove the foil and cook for another 20 minutes, or until the squash and tomatoes are softened and browned on the edges.

Notes:
*Match the size of your tomatoes and zucchini if possible. I used globe zucchini and squash because they were roughly the same size as the tomatoes at the market. When I have normal zucchini, the long kind, I use roma tomatoes.

*This dish can be served cold; cook it through, then refrigerate. (It also makes great leftovers.)

*My brother brought his mandoline to the cottage, which made this recipe a breeze to prepare. I've avoided buying a mandoline, using my chef's knife or food processor instead. This recipe pushed me over the edge - I loved how easy it was to slice the zucchini on the mandoline, and I need one now. Oh, I have needs...

What do you think? Questions? Other ideas? Leave them in the comments section below.

Related Posts:
Zucchini and Summer Squash Salad
Swiss Chard Gratin

Adapted from:
Roger Verge Cuisine of the Sun

*Enjoyed this post? Want to help out DadCooksDinner? Subscribe using your RSS reader or by Email, recommend DadCooksDinner to your friends, or buy something from Amazon.com through the links on this site. Thank you!

Things I love: Kingsford Charcoal

August 2, 2011 by Mike Vrobel 5 Comments

I love grilling with charcoal. It sears beautifully. Charcoal burns hot enough that it is cooking primarily with infrared radiation; gas grills can't generate that much heat, so they cook food by heating the air inside the grill, resulting in less browning.
Thank you, Harold McGee, for explaining that.

A $89 Weber kettle has as much searing power as even the most expensive gas grill. Now, don't get me wrong, I own a gas grill, and love it. Gas is easy and convenient. Charcoal is temperamental, with a short window before it starts to burn down and lose heat, but the results…oh, the results…
And, don't get me started about trying to use smoking wood in a gas grill. You can do it…but the smoke flavor is anemic. A fist-sized lump of oak or hickory, nestled in charcoal, is the best way to add smoke to grilling.

Steak on a gas grill
Note the searing is in the gill grate marks
Over charcoal, the whole steak sears

What kind of charcoal do I use? Kingsford. The stuff in the red, white and blue bag. It's cheap, consistent, burns hot and long; I have about a half an hour of high heat to sear with, and an hour for indirect cooking before I have to add some more coals.

Now, I'm a grilling fanatic. I should be using lump charcoal, right? Lump is pure wood charcoal. It has no binders. It burns hotter. It is recommended by my grilling heroes. Well, here's where I confess my secret shame.

I never have any luck with lump charcoal.

I tried to use it. Oh how I tried. I kept failing. It would always burn up too quickly. A blaze of lump would pour out of my chimney, leaving the grill extra-extra-hot. I had to flip the food early to keep it from burning. And then…the heat would be gone. After I flipped the food, the lump would suddenly be medium-low heat and fading fast. I fought this for years. I would start out the summer determined to master lump charcoal. Occasionally I would turn out a perfectly seared steak, just often enough to get my hopes up. Mostly I would be microwaving grilled chicken to get it to cook all the way through. Or serve steaks that were black on the outside, but so rare they went "mooo!" when poked with a fork.

Every year I turned back to my old friend, Kingsford. Suddenly, I was in charge of the fire again, not the other way around. Sure, it has a burn-down time, but unlike lump, it gave me a peak of heat followed by a slow, gradual descent. I had an hour of heat before I had to add more coals. And, I use that burn down to my advantage. I sear protein right away, while the coals are blazing hot. Later I cook easily burned vegetables, once the temperature has eased down.

Finally, I realized that lump was just not for me. I stuck with Kingsford, and never looked back. Why should I? Kingsford is cheap* and widely available.
I watch for memorial day sales, and stock up for the summer. Big-box hardware stores use Kingsford as a loss leader, so I start each summer by loading the back of my van with bags of charcoal.

I've heard that lump has a "cleaner" taste, due to the lack of additives. Kingsford has a funny smell to it when it lights, but once it is burning, I've never noticed a difference in the taste of the food that cooks on it.
Unlike lighter fluid, or (shudder) match-light coals, which give food a hint of gasoline flavor.

It is consistent, too. Every bag works the same. (Unlike some bags of lump, full of large coals, and others, full of tiny shards). A chimney full of Kingsford is high heat for direct grilling, every time. Half a chimney, set to one side of the grill and replenished with twelve coals every hour, gives me low and slow for barbecue.

Sure, they have some fancier versions of Kingsford now. I've tried Kingsford competition briquettes, and the hickory and mesquite impregnated coals. The wood-impregnated coals were too smoky for my tastes, and the competition briquettes seemed just like regular Kingsford. I'll stick with my old friend in the red, white and blue bag.
*PS: Please, whatever you do, don't use match-light coals. They are soaked through with lighter fluid. Guess what the food will taste like? I wouldn't use lighter fluid either, for similar reasons. In theory, you can burn off all the lighter fluid; in practice, I can still taste it. A charcoal chimney lights coals quicker and doesn't leave a funny taste in the food.

What do you think? Questions? Other ideas? Passionate defenses of lump charcoal or match-light briquettes? Leave them in the comments section below.

FTC disclosure: All my "Things I Love" posts are about products I use and purchased myself. I did not receive any form of compensation to write this.

Special thanks to Chris Allingham over at VirtualWeberBullet.com for inspiring this post. Looking for more charcoal information? Check out his All About Charcoal, and read about his trip to Kingsford's R and D Lab.

*Enjoyed this post? Want to help out DadCooksDinner? Subscribe using your RSS reader or by Email, recommend DadCooksDinner to your friends, or buy something from Amazon.com through the links on this site. Thank you!

Favorite Links, July 2011

July 26, 2011 by Mike Vrobel 1 Comment

My lounging on the shores of lake Erie busy schedule is keeping me hopping this month. While I'm otherwise occupied, enjoy these great grilling posts from across the internet.

Rotisserie Mojo Chicken [meatwave.com]

*A new rotisserie chicken recipe? Yes, please!

Grilled Pineapple and Corn Salsa [anotherpintplease.com]
*The best way to use up leftover grilled corn.
Watermelon and Feta Salad [kalofagas.ca]
*Not exactly a grilling recipe, but another great summer side dish. I can't wait for local watermelon to show up so I can try out this salad.

Throw Another Melon on the Barbie [nytimes.com]
Speaking of watermelon, Bittman puts it on the grill. Does this work? I haven't tried it yet...

Spatchcocked Grilled Turkey [ruhlman.com]
Turkey is not just for Thanksgiving. And I love using the term spatchcocked. It makes my inner 13 year old snicker.

Cedar Shingle Salmon [threemanycooks.com]
And I thought I was being frugal buying my 1x6 cedar boards for cedar plank salmon.

What do you think? Any other great grilling recipes I missed? Ever tried grilled watermelon? Share with us in the comments, below.

Enjoyed this post? Want to help out DadCooksDinner? Subscribe using your RSS reader or by Email, recommend DadCooksDinner to your friends, or buy something from Amazon.com through the links on this site. Thank you!

Pressure Cooker Cochinita Pibil (Yucatecan pit cooked pork)

July 21, 2011 by Mike Vrobel 17 Comments

Pressure Cooker Cochinita Pibil - Yucatecan Pit Cooked Pork | DadCooksDinner.com

Pressure Cooker Cochinita Pibil - Yucatecan Pit Cooked Pork | DadCooksDinner.com
Pressure Cooker Cochinita Pibil - Yucatecan Pit Cooked Pork

Fonda San Miguel is a restaurant in Austin, Texas that specializes in interior Mexican cuisine. Why interior Mexican? To distinguish it from the frontier Tex-Mex food that surrounds it in Texas. Not that there's anything wrong with Tex-Mex, but this meal was a whole different experience. I came back determined to make some of the food I ate while I was there.

Cochinita Pibil topped the list. It is a specialty of the Yucatan region, "pit cooked pork". It is pork shoulder, marinated in scarlet achiote paste, annato seeds and other spices ground up, then mixed with citrus juice. The pork is topped with a cooked salsa, wrapped in banana leaves, and then, traditionally, buried in a pit filled with heated stones.

I got the specialty ingredients, achiote paste and banana leaves, from my local Mexican supermercado. I was not going to dig a pit. First, there is the wife annoyance factor of a hole in the lawn. Second, and more important, a pit is way too much work. Thanks to some poor time management on my part, I didn't even have time for oven roasting; I had to pressure cook it to get dinner done on time. This wasn't a problem; the pressure cooker turned out great pibil, deeply flavored with the sweet, sour, earthy achiote.
*Don't have a pressure cooker? No problem. See the Variations section for instructions on cooking with a standard dutch oven.

Recipe: Pressure Cooker Cochinita Pibil (Yucatecan pit cooked pork)

Adapted From: Fonda San Miguel cookbook

Equipment

  • Pressure cooker, at least 6 quarts (When I wrote this, I used a giant Kuhn Rikon 12-quart pressure cooker, now I always use my Instant Pot)


Pressure Cooker Cochinita Pibil - Yucatecan Pit Cooked Pork | DadCooksDinner.com
Specialty ingredients: banana leaves and achiote paste


Pressure Cooker Cochinita Pibil - Yucatecan Pit Cooked Pork | DadCooksDinner.com
Marinating the pork in the achiote paste

Pressure Cooker Cochinita Pibil - Yucatecan Pit Cooked Pork | DadCooksDinner.com
Banana leaves in the pot

Pressure Cooker Cochinita Pibil - Yucatecan Pit Cooked Pork | DadCooksDinner.com
...next, add the pork...

Pressure Cooker Cochinita Pibil - Yucatecan Pit Cooked Pork | DadCooksDinner.com
...top with the simmered salsa...

Pressure Cooker Cochinita Pibil - Yucatecan Pit Cooked Pork | DadCooksDinner.com
...and wrap the banana leaves over the top

Notes

  • Don't have a pressure cooker? No worries. Use a heavy bottomed dutch oven with a lid, and increase the amount of water to 1 cup. Follow the instructions right up until "lock the lid". Then, instead of pressure cooking, bring the pot to a boil, and cover with the lid. Move the pot to a preheated 350*F oven and bake for 3 hours, until the pork is tender. Continue with the serving step.
  • Can't find banana leaves? They are optional. You can wrap the meat in aluminum foil, or just skip them. You can skip the achiote paste as well, if you have to. It will taste great, but it won't really be cochinita pibil. But, really, to make this recipe, you should search out your local Mexican grocery for those two ingredients.
  • In a hurry? Buy pre-mixed achiote marinade, and pre-made tomato salsa.
  • Achiote paste stains whatever it touches. (Ground annato seeds, the base for achiote paste, are used to make red dye.) I try to contain the mess in a glass or metal bowl (not plastic - it will also stain). Other options are to wear latex gloves, or live with red fingers for a few days.
  • Serve with pickled red onions, refried beans (preferably black beans), mexican crumbling cheese (substitute  feta or pecorino romano), and lots of tortillas.

What do you think?

Questions? Other ideas? Leave them in the comments section below.

Related Posts

Pressure Cooker Pinto Beans in Tex-Mex Broth
Pressure Cooker Pork Stew with Sweet Potatoes and Prunes
My other Pressure Cooker Recipes

Adapted from:
Fonda San Miguel: Thirty Years of Food and Art

*Enjoyed this post? Want to help out DadCooksDinner? Subscribe using your RSS reader or by Email, recommend DadCooksDinner to your friends, or buy something from Amazon.com through the links on this site. Thank you!

The Joy of Old Cookbooks

July 19, 2011 by Mike Vrobel 3 Comments

Dan over at Casual Kitchen asked a fascinating question - Do cookbooks go out of date? [casualkitchen.blogspot.com].

Three thoughts immediately ran through my head, one right after the other:

  1. Yes! Old recipes are hopelessly out of date.
  2. But..wait. I have plenty of old cookbooks. Real cooking is timeless.
  3. Hmm. Maybe? Cookbooks are about inspiration.

Old recipes are hopelessly out of date. What recipes immediately popped to mind? Green bean casserole, topped with canned onions. Jell-o moulds. Anything made with cream of mushroom soup. Or, taking it the other direction, heavy cream sauces, terrines made with gelatin, recipes requiring a duck press to squeeze out the carcass. In my head, out of date cookbooks are about two things: convenience foods or stodgy  techniques only fit for a restaurant in the 1930's.

But...we have plenty of that today, from Sandra Lee on one side, to the Alinea cookbook on the other. What about classic home cooking?

Real cooking is timeless. I thought about the cookbooks I have on my shelf, ones I use as reference materials. Do I cook from Julia Child? No...except when I make a stew; her beef burgundy technique underlies almost every stew I cook. How about James Beard? No...but his love for outdoor cooking has informed my rotisserie recipes. Diana Kennedy? Marcella Hazan? Irma Rombauer? I have cookbooks from all of them on my shelf, and check them often. Why? What makes these cookbooks classics? They all had the same goal. Teaching. Their aim was to teach how cooks around the world made dinner with real ingredients. Those home cooks are from Mexico, Italy, France, and the US, and the techniques they were sharing are timeless.

But...if those techniques are timeless, why don't I follow Julia's beef burgundy recipe, exactly as she wrote it? Diana's mole poblano? James's spit-roast beef?

On second thought, I need to try James's spit roasted beef as written...

Cookbooks are about inspiration  I use my old cookbooks for ideas. Then I run those ideas through my own set of techniques and flavor preferences, which are constantly evolving.

Classic techniques are the foundation. Technique changes over time; it is improved and streamlined. See Christopher Kimball's Fanny's Last Supper to see how far we've come in about a century. Today we are combining cooking and science to explain those classic techniques. The work of Harold McGee, once unique, is now exploding; my favorite food writers are pushing the envelope of knowledge about cooking.
*See: Kenji Alt, Pam Anderson, Heston Blumenthal, Alton Brown, Christopher Kimball, Nathan Myhrvold...and too many others to name. They're all using the scientific method to advance cooking techniques.

Flavors are also evolving. Classic flavor combinations are the foundation; everything builds from them. That is one of the advantages of old cookbooks - those classic flavor combinations don't change. But, flavor combinations have also evolved; imagine Italian food before the tomato crossed the Atlantic. That melting pot is still going on; simple French and Italian flavors, emphasizing fresh food, formed the basis of new California cooking. Pacific Rim fuses the flavors of a wide range of nations. Tex-Mex combines the cooking of the southern frontier of one country with the northern frontier of the other.

The best of old cookbooks give me that foundation. They help me see the world through the eyes of a cook in a different place and time. My best cooking comes when I combine those ideas with my own skills and experience. I don't cook from old cookbooks...but then, I don't really cook from new cookbooks either. I read them for ideas, techniques, flavor combinations...then I combine them into my own creation.

So, what do you think? Are old cookbooks useful to you? Which ones are your favorites?

Inspired by:
Julia Child Mastering the Art of French Cooking
James Beard Complete Book of Barbecue and Rotisserie Cooking
Samuel Chamberlain Clementine in the Kitchen
Marcella Hazan Essentials of Classic Italian Cooking

Roger Verge Cuisine of the Sun
Barbara Tropp The Modern Art of Chinese Cooking
Diana Kennedy The Essential Cuisines of Mexico

*Enjoyed this post? Want to help out DadCooksDinner? Subscribe using your RSS reader or by Email, recommend DadCooksDinner to your friends, or buy something from Amazon.com through the links on this site. Thank you!

Rotisserie Chicken and Pineapple Hawaii Style

July 14, 2011 by Mike Vrobel 1 Comment

Or, as I like to call it, Hawaii on a spit.

I love rotisserie chicken. I love pineapple on the grill. Why not put them together? Pineapple and chicken are a match made in rotisserie heaven.
*I worry about rotisserie pineapple for dessert; skewering the pineapple with a branding-iron hot spit from my main course seems like an invitation to disaster. This recipe works around the problem by cooking the chicken and the pineapple at the same time.

The pineapple made me think of Hawaii. I brined the chicken with salt and Hawaiian cane sugar to complete the theme. And I sprinkled the pineapple with cinnamon sugar, to give it extra carmelization and a spicy crust.
*The cinnamon sugar optional; unadorned pineapple on the rotisserie is great. But...why not go for the extra touch?

Now, two chickens and a pineapple are a tight fit on the spit for my Weber kettle. I had to squeeze the chicken tight on the spit forks to get enough room for the pineapple. Don't use chickens larger than 4 pounds; 3 ½ pound chickens fit even better.

Recipe: Rotisserie Chicken and Pineapple Hawaii Style

Inspired By: Steven Raichlen Planet Barbecue

Cook time: 60 minutes

Equipment:

  • Grill with Rotisserie attachment (I used a Weber kettle with the Rotisserie attachment; the kettle is this Weber Grill and the rotisserie attachment is this Weber charcoal kettle rotisserie)
  • Three spit forks for the rotisserie (two to hold the chicken, one to hold the pineapple - the third fork is optional, but useful.)
  • Aluminum foil drip pan (9"x12", or whatever fits your grill)
  • Butcher's twine

Ingredients:

  • 2 whole chickens, 4 pounds each
  • 3 quarts water
  • ¾ cups table salt
  • ½ cup cane sugar (aka turbinado sugar, or Sugar in the Raw, or substitute brown sugar)
  • smoking wood (2 fist sized chunks of oak or hickory, or 1 oak wine barrel stave)
  • 1 Pineapple, trimmed and rind removed
  • ¼ cup sugar
  • 1 teaspoon cinnamon

Directions:
See my Basic Technique: Rotisserie Poultry for an overview of rotisserie chicken.

1. Brine the chicken: In a container large enough to hold the chicken, stir the water, salt, and cane sugar until the salt and sugar dissolve. Add the chicken to the brine and refrigerate for 1 to 4 hours. While the chicken brines, soak the smoking wood in water. Also, stir the sugar and cinnamon together in a small bowl.

2. Truss and skewer the chicken and pineapple: Remove the chicken from the brine and pat dry. Fold the wingtips back under the chicken, then truss the chicken tightly. (See the rotisserie basic technique for trussing details). Cut the top and bottom off the pineapple. Working around the outside of the pineapple, cut the rind off in 1" strips, making sure you cut deep enough to remove the eyes. Once the first strip of rind is removed, the eyes are visible; use them as a guide for how deep to cut while working around the rest of the pineapple. Using a long, thin knife, poke a guide hole through the center of the pineapple. Put a fork on the spit, then skewer the pineapple. Then, skewer the chickens on the spit.
*Get them on there tight; if you're using a Weber kettle rotisserie like I am in the pictures, they will barely fit - make sure to squeeze the chickens together as much as you can. I like to put one set of prongs under the breast of the first chicken, then I put the second bird on upside down compared to the first bird; this gave me just enough room to get the second fork on the spit.

3. Prepare the grill: Prepare the grill for cooking on indirect high heat (see details My Rotisserie Basic Technique Post), then put the soaked smoking wood on the lit coals. For my Weber kettle, I light a chimney starter* full of charcoal, wait for it to be covered with ash, then pour it in two equal piles on the sides of the grill, and put the drip pan in the middle, between the piles. Finally, I put the wine barrel stave on one of the piles of coals.
*I highly recommend the Weber Chimney Starter, because it is larger than most chimney starters. It holds 5 quarts of charcoal, which exactly the right size for cooking this recipe.

On the grill with
wine barrel stave
Chicken is
almost done...

4. Cook the chicken and pineapple: Put the spit on the grill, turn on the rotisserie motor, and cook with the lid closed. The birds will cook for about 15 minutes per pound. 4 pound birds will be done after an hour, 3 ½ pound birds in 45 minutes. Ten minutes before you think the birds will be done, sprinkle the pineapple with the cinnamon sugar. The chicken is done when the internal temperature of the breast reaches 160*F to 165*F.

5. Serve: Immediately remove the chicken and pineapple from the spit, then remove the trussing twine from the chicken, and sprinkle the pineapple with cinnamon sugar one more time. Let the chicken rest for 15 minutes, then slice the pineapple, and carve and serve the chicken.

Notes:
*This recipe really works best with three rotisserie forks - one to hold the pineapple, and another two to squeeze the chicken together. I have an extra set of forks for my kettle rotisserie, left over from my Weber Genesis rotisserie. If you need extra forks for your Weber kettle rotisserie, they can be ordered directly from Weber Customer Service at 800-446-1071.

*To save a little work, you could buy a whole, pre-trimmed pineapple instead of trimming it yourself. But...to me, pre-trimmed pineapples have a hint of canned pineapple taste. Once you learn to trim pineapple yourself, using the technique I describe above, it's a breeze.  Why bother with pre-trimmed?

*Special thanks to Jeff and Melanie at Brunty Farms for the chicken. I'm in the Poultry CSA this year - two chickens and two dozen eggs every two weeks. This is the first recipe to come from the CSA; with two chickens every two weeks, expect a lot more chicken recipes from me as the summer rolls along...

What do you think? Questions? Other ideas? Leave them in the comments section below.

Related Posts:
Rotisserie Teriyaki Chicken
Rotisserie Pineapple
Rotisserie Chicken, Dry Brined
Click here for my other rotisserie recipes.

Inspired By:
Steven Raichlen, Planet Barbecue


Check out my cookbook, Rotisserie Grilling.

Everything you could ask about the rotisserie,
plus 50 (mostly) new recipes to get you cooking.

It's a Kindle e-book, so you can download it and start reading immediately!


*Enjoyed this post? Want to help out DadCooksDinner? Subscribe to DadCooksDinner using the RSS or Email options on the right, link to this post from your blog, recommend DadCooksDinner to your friends, or buy something from Amazon.com through the links on this site. (Like my Rotisserie Grilling cookbook...)

Road Trip: Lehman's Old Time Hardware

July 12, 2011 by Mike Vrobel Leave a Comment

Lehman's Old Time Hardware, located in Kidron, Ohio, specializes in non-electric tools. Their plan was to sell to local Amish communities, but when people found out about them, their business blossomed. The store started as a barn, and now it sprawls across multiple connected barns and buildings. I love to wander around and see what I find in the nooks and crannies.
Last time I saw a full-sized scythe handle on the wall. I half expected to see Death in line at the checkout counter, bony hands sticking out of his robe, pushing a shopping cart with the handle inside.

Why do I love Lehman's so much? Because a ton of those non-powered tools are for home cooking. Cast iron pots, cutting boards, cutlery, canning jars, camp stoves...and that's just the items that start with "C". Need to satisfy your kitchen gadget lust? A trip to Kidron is just what the doctor ordered.
*After seeing their stock of cast iron, I may be underestimating. It might be two tons of home cooking equipment.

Lehman's Old Time Hardware

4779 Kidron Road
Dalton, OH 44636
Phone: (330) 828-8828
Web: Lehmans.com‎

My top five list of favorite things they sell are, in no particular order:

  1. Cast Iron: Looking for new cast iron? This is the place. Lehman's stocks every cast iron pan Lodge makes. (OK, maybe not every pan...but I couldn't think of one they did not have on the shelf. They have cast iron from other manufacturers, like Wagner and Best Duty.
  2. Canning supplies: They carry the entire range of Ball/Kerr canning jars. This includes harder-to-find jars like the Ball 12oz tall jelly jar and the Kerr half pint wide mouth jar. They also carry European brands of canning jars, like Weck and Leifheit. Looking for any other canning equipment? They've got it.
  3. Enameled Steel: When my recipes recommend a drip pan in the bottom of my grill, you'll see a beautiful speckled red model from Crow Canyon. I bought it at Lehman's. (As well as the blue speckled cup I use as a small sauce pot.) There is a room full of enamelware, from Granite Ware and CGS as well as Crow Canyon.
  4. Kitchen gadgets: The array of kitchen gadgets they carry is awe-inspiring. From A (apple corers) to Z (zesters), and everything in between.
  5. Pellet grills: I think the pellet grills are cheating. Lehman's is supposed to be about non-electric tools. Then I go out on their little side patio where they keep demo models, and smell barbecue. A collection of Traeger and Memphis grills are smoking away. I open the closest grill, smoke pours out, and see a gorgeous beef brisket. I'll forgive the extension cords this one time.

Here's the map:

View Larger Map

Related posts:
My list of Ethnic and Gourmet stores in the Akron, OH area.

*Enjoyed this post?  Want to help out DadCooksDinner?  Subscribe using your RSS reader or by Email, recommend DadCooksDinner to your friends, or buy something from Amazon.com through the links on this site.  Thank you!

Pan Grilled Green Beans

July 7, 2011 by Mike Vrobel 3 Comments

Pan Grilling is an excellent technique to add to your grilling toolbox. Using a pan on the grill lets you cook side dishes that would either burn or fall through the grill grates.

Cast iron was the original grill pan - picture a cowboy chef working over a campfire - but requires careful maintenance to avoid rust. Enameled steel is another good choice. It doesn't even out the heat as well as cast iron, but it is lighter, and can handle the extreme heat of a grill. Enameled cast iron is more expensive, easy to care for, and spreads out the heat as well as plain cast iron. I love Weber's new enameled cast iron griddle. The rounded shape with short handles fits well on my kettle grill.
*I would like a large oval or half-moon griddle shape even more - something that fits up against the side of the grill would be perfect. Unfortunately, all the oval griddles I can find are too small.

Once the grill is heated up, why waste the heat? Pan grilling lets you use the leftover heat you worked so hard to build in the grill. I cook for five (or more) people; I have to cook in shifts on my kettle grill. I start with a blazing fire in the grill, and cook my main course. By the time the main course is done, the heat will have moderated a bit, down to medium-high. I put the grill pan with a side on the grill. The main course rests while the side dish cooks, and I have an entire dinner cooked right on the grill.

In this recipe, I use the griddle to move steam-sauteed green beans to the grill. I start the green beans covered, to trap steam and tenderize the beans; then finish uncovered to sear them in the heat of the grill.

Recipe: Pan Grilled Green Beans

Cook time: 10 minutes

Equipment:

  • Grill safe pan (I use the Weber Gourmet BBQ System Griddle in the pictures)
  • Aluminum foil (or a lid for the grill safe pan)

Ingredients:

  • 1 pound green beans
  • 1 tablespoon extra virgin olive oil
  • ½ teaspoon Kosher salt
  • ½ teaspoon fresh ground black pepper

Directions:
1. Prepare the beans: Trim the stem ends off of the green beans, put them in the grill pan, sprinkle with the salt and pepper, then drizzle with the olive oil. Cover the grill pan with foil.

2. Prepare the grill: Prepare the grill for cooking on direct medium-high heat. For my Weber kettle, I light a chimney starter* ¾ths full of charcoal, wait for it to be covered with ash, then then spread it in an even layer over half of the grill.
*I highly recommend the Weber Chimney Starter, because it is larger than most chimney starters. It holds 5 quarts of charcoal, which exactly the right size for cooking this recipe.

3. Cook the beans: Put the grill pan on the grill over the direct medium-high heat, and cook with the foil covering it for five minutes. Remove the foil and stir the beans. The beans are done cooking when they are crisp-tender (test by picking up a been and biting it), and some of the beans are browned, about five more minutes.

Variations:
*Herbs, spices, aromatics and citrus are good additions. Herbs and spices I add with the salt and pepper include smoked paprika, cumin, coriander, thyme, and oregano. Aromatics, like finely minced garlic or shallot, I add when I remove the foil - they tend to burn if they are on the grill for the whole cooking time. Citrus, especially lemon, makes a nice addition at the end of cooking.

Notes:
*Cooking on a grill is much more variable than on a stovetop, particularly with charcoal. The times listed above are estimates; adjust as needed based on the heat of your grill. Don't be afraid to move the grill pan around to raise or lower the heat.

What do you think? Questions? Other ideas? Leave them in the comments section below.

Related Posts:
Grilled Asparagus
Grilled Corn with Chipotle Lime Butter
Steam-sauteed Green Beans

Weber Gourmet BBQ System Griddle

*Enjoyed this post? Want to help out DadCooksDinner? Subscribe using your RSS reader or by Email, recommend DadCooksDinner to your friends, or buy something from Amazon.com through the links on this site. Thank you!

Weber Gourmet BBQ System Review

July 5, 2011 by Mike Vrobel 10 Comments

The Weber Gourmet BBQ System is a set of cast iron, porcelain enameled cookware designed for use on the grill. I love the concept - I've been experimenting with cookware on my grill for years now, and I wanted to see what Weber came up with.

The Gourmet BBQ System consists of four pieces:

  1. Griddle 
  2. Sear Grate 
  3. Wok 
  4. Grill grate with removable center piece, to hold the cast iron cookware

I should include a fifth piece. While not absolutely necessary, the Gourmet BBQ system was made to work with Weber's charcoal baskets. The charcoal baskets are the perfect size to fit underneath the hole in the grill grate, or to move the charcoal over to the side for indirect heating.

I'm glad Weber chose porcelain coated cast iron for these pieces. I love the heavy, heat absorbing cast iron combined with the no-fuss maintenance of the porcelain coating.
I never have any luck with regular cast iron. Eventually, it starts to rust on me. I'm sorry, Greg. I've strayed from the one true path of black iron...

However, there is a down side to porcelain coated cast iron. I used Weber's porcelain coated cast iron grill grates for a number of years. Each set would last about three years. Then the porcelain coating would start to crack from the high heat of the grill, and rust would start to creep up the grates from the bottom. I'm assuming the Gourmet BBQ pieces will last much longer than that; my grates would live in the grill, and have to deal with preheating and the corrosive effects of staying outdoors all the time. But I don't think the Gourmet BBQ cookware have the almost eternal life that plain cast iron does.

Also, you can't use metal utensils with this cookware; that will scratch the porcelain coating, and start the aforementioned cracking much sooner.

OK, enough preamble. It's time for the reviews.

Weber Gourmet BBQ System Griddle

The griddle is my favorite piece from the set. When I make a side dish that might fall through the grill grate, or something that needs protection from the direct heat of the grill, I reach for the griddle. I used it for a number of vegetable side dishes as well as a basting pan for pork tenderloin, and it does the job well. Griddle: Highly recommended.
*I'll share my Grill Pan Green Beans recipe later in the week.

Weber Gourmet BBQ System Sear Grate

The sear grate was a little disappointing. Now, it does what it is supposed to do: after preheating, it quickly sears diamond shaped "grill marks", and they look impressive. But the sear grate isn't very big - 12" around - and I could only fit three or four chops on it at a time. I'm serving five or more people every time I cook, so the small size forces me to sear in batches. Also, I love charcoal because you don't need the heat stored in the grates for searing; why limit myself to diamond grill marks when I can sear the entire surface of the food? A cast iron sear grate for a charcoal grill seems redundant. Sear Grate: Meh.*If you really want the extra searing power of cast iron, I recommend the Lodge grilling grate. It has a much larger surface area than the Gourmet BBQ Sear Grate, and the narrow mesh of the cast iron lets it do double duty as a vegetable grate. The lodge grate is raw cast iron, with no porcelain coating, so you have to maintain it carefully. Mine gave me years of good service before I forgot to oil it last winter...and now it's rusting. I need to scrub it clean and re-season it.

Weber Gourmet BBQ Wok

The Wok leaves me with mixed feelings. It is a beautiful piece of cookware - a hefty, cast iron, 14" diameter wok with a flat bottom. Let it heat up for a while, say ten minutes or so over the coals, and it will hold onto plenty of heat for a sizzling stir fry. But...I can't use my metal tools with this porcelain enameled wok; they'll scratch the enamel and ruin the surface. Also, I'm used to tossing ingredients with my carbon steel wok, using its long wooden handle to flip the contents into the air and get them thoroughly mixed. Trying to toss the contents of the Weber cast iron wok would be a really bad idea. It weighs a ton, is glowing hot from the charcoal, and has tiny, ear shaped handles. This is a wok that stays where you put it. Finally, I have to wait 30 minutes for my charcoal to ash over, then another ten minutes for the wok to heat up, just for a quick stir fry. The end result is a well heated wok, that can handle whatever I throw at it...but that is an awful long time to get ready for a quick stir fry. Wok: I'm conflicted. If you aren't an unrepentant wok tosser like me, and if your stove is so underpowered you need to use the grill for some real heat...then this wok is a good purchase. Or, if you're looking for a high quality porcelain enameled wok for use indoors, check this one out - nobody says it HAS to go on the grill. Me? I'll be sticking with my carbon steel wok and stir frying indoors...but I can also see myself bringing this wok along to our cottage, where the stove is weak but the Weber kettle is always waiting outside.

Weber Gourmet BBQ Grill Grate
(removable insert in place for grilling)

Finally, there is the grill grate with the removable center. It is supposed to act as a holder for all the cast iron pieces. I like using it with the wok; the hole in the center of the grate steadies the wok and keeps it from sliding around while I stir-fry. For the griddle, though, I leave the "removable center" insert in place. I don't want the griddle stuck in one spot - I adjust the heat by moving it around on the grill. Slide the griddle over the coals - high heat. Move it to the cool side of the grill - low heat. Locking it in the center of the grate means moving the coals around instead of the griddle, and that isn't as easy to do. *This is why I mentioned the charcoal baskets earlier - they do make it easier to move coals around. But...not easy enough. I still prefer moving the griddle.

Weber charcoal baskets, in position

Now, you would think this means I don't like the Weber BBQ System grill grate. Quite the opposite - I love it. It has replaced my regular Weber grill grate. Why? It is a much thicker gauge wire than the regular Weber grates. I think it was meant to be sturdier, to support the heavy cast iron pieces; whatever the reason, I love those sturdy, thick bars on the grate. The only downside is the removable insert. There is no way to lock it in place, and I'm used to hanging the grate from the side of the grill. When I do that now, the center piece drops out onto the grass next to the grill. Still, I'm willing to put up with it until Weber releases a "regular" version of their grate with these thick gauge wires. Grill Grate: Highly Recommended

Don't have a charcoal grill? Don't worry - all these pieces will work equally as well on a gas grill. (Like I said, I've been reaching for the griddle a lot - both for my charcoal and gas grilling.)

The Weber Gourmet BBQ System is a creative approach to grill cookware. In summary, I love the heavy cast iron and like the porcelain enamel coating. I love the grate that holds all the pieces, but as a regular grate, not for its intended use of locking everything in. If you are looking for a solid set of grill cookware, check out the Weber Gourmet BBQ System.

More information:
Weber's page on the Gourmet BBQ System [weber.com]

Amazon links for the pieces:
Weber Gourmet BBQ System Griddle
Weber Gourmet BBQ System Sear Grate
Weber Gourmet BBQ System Wok
Weber Gourmet BBQ System Hinged Cooking Grate

FTC disclosure: I bought all of these pieces with my own money. I do get a small commission if you buy them (or anything, really) through the Amazon.com links on my site.

What do you think? Questions? Other favorite grill cookware? Leave them in the comments section below.

*Enjoyed this post? Want to help out DadCooksDinner? Subscribe using your RSS reader or by Email, recommend DadCooksDinner to your friends, or buy something from Amazon.com through the links on this site. Thank you!

Grilled Corn with Chipotle Lime Butter

June 30, 2011 by Mike Vrobel 9 Comments

Grilled corn stacked on a blue plate

Grilled Corn with Chipotle Lime Butter Corn is my go-to grilling side dish. Corn season peaks in the heart of grilling season. I can't wait for those first ears of fresh summer corn, cooked with nothing but salt and butter. But...even the joy of summer corn wears off after a while. When the kids start saying "Corn? Again?" I turn to this recipe.

Grilled corn stacked on a blue plate
Grilled Corn with Chipotle Lime Butter
[feast_advanced_jump_to]
Chipotle-lime butter, ready for melting on the grill

Someday I will do full-on Elote, Mexican street vendor style corn. It might be a while; when I'm grilling dinner, I'm always in a hurry, and looking for a quick side dish. This simplified version is my weeknight dinner answer.

Corn and melted butter on the grill

What do you think? Questions? Other ideas? Leave them in the comments section below.

Related Posts:
Grilled Corn in the Husk
Grilled Corn and Pineapple Salsa
Sous Vide Corn on the Cob Recipe
My index of Grilling Recipes

*Enjoyed this post?  Want to help out DadCooksDinner?  Subscribe to DadCooksDinner using the RSS or Email options on the right, recommend DadCooksDinner to your friends, or buy something from Amazon.com through the links on this site.  Thank you!

Grilling in the Rain

June 28, 2011 by Mike Vrobel 2 Comments

Father's Day, 4:00 PM
Exterior of the Vrobel household. Dark clouds gather. A light rain starts to fall.

Our Hero desperately wants to grill himself a steak for Father's day. It's tradition. Hearing the rain, he looks up from his laptop. A few clicks later, he is looking at the weather radar.

"Hm. Line of thunderstorms. According to the short term forecast, they're moving through quickly. I'll be good for dinner."

5:00 PM
Sheets of rain have been falling for an hour. Outside there is a flash of lightning, followed by a thunder clap that shakes the house. Our Hero's youngest runs into the room.

"Daddy, should we be in the basement?"
"No, Tim, that's just thunder. The storm is almost past. We'll be fine." 

6:00 PM
The rain has stopped. Ominous gray clouds sit overhead. Our Hero slowly removes the cover from his grill. He does this carefully, to direct the puddle of water on top away from the deck. The Faithful Wife looks out the screen door.

"You're still going to grill?"
"Of course! It's father's day, I'm grilling steak. It's too late for charcoal, but I can beat the next line of storms if I'm quick."

A wind blows across the deck. A light pattering of rain starts...

"Darn. I'll let the grill preheat while this little drizzle blows through."

6:15 PM
A steady rain is falling. Steam rises from the top of the pre-heated grill. Our Hero and his Faithful Wife look out the screen door.

"The radar says this is a small cell of rain. Once it passes, I'll have a half an hour before the heavy stuff hits us. Plenty of time to grill."

Lightning flashes, and the rain gets a little heavier.

"Dinner will be a little late; I'll give it another fifteen minutes to pass through."
"I'll start making the margaritas" says the Faithful Wife.

6:30 PM
The rain is heavier now. Our Hero stands in front of the screen door, juggling a set of grilling tongs, a platter covered with corn and sweet potatoes, and a golf umbrella.

"Hey, kids, who wants to help me grill?"

The kids slouch down on the sofa, hoping he won't see them watching iCarly in the next room.

6:45 PM
Our Hero stands in a downpour, trying to keep the umbrella centered over the grill. His Faithful Wife waits by the open screen door, ready to receive platters of food. Our Hero shifts to the right to pick up a platter. As he does, the umbrella moves, and rain pours into the grill. A hissing, spitting cloud of steam rises. He shifts to the left, moving the umbrella back over the the grill. The platter, now out in the open, fills with water. Muttering to himself, Our Hero grabs the platter, tips the water out, moves it to the same hand that holds the umbrella, and starts to fill it with grilled corn and sweet potatoes.

A sudden gust of wind yanks the umbrella upward. Our Hero grabs it with his other hand, the one also holding the tongs, and holds tight, waiting for the wind to pass. The Faithful Wife tries not to laugh.

7:00 PM
Our Hero, having wrung out his socks, sits barefoot at the dining room table. In front of him is his grilled steak, corn and sweet potatoes. The kids are wolfing down the steak. The Faithful Wife lifts her  margarita and asks:

"Well, was it worth the effort?"

Our Hero takes a bite of his steak. He closes his eyes and smiles.

"Of course!"

7:15 PM
Exterior of the Vrobel household. Dark clouds part, blue skies appear, and the sun shines through.

*Enjoyed this post? Want to help out DadCooksDinner? Subscribe using your RSS reader or by Email, recommend DadCooksDinner to your friends, or buy something from Amazon.com through the links on this site. Thank you!

Grilled Shitake Mushrooms, Yakitori Style

June 23, 2011 by Mike Vrobel 7 Comments

A vegetarian is coming to my cookout, and I'm grilling dinner. What do I do? Grab some mushrooms. Grilling is a great way to cook mushrooms; it enhances their "meaty" flavor.
*My apologies to any vegetarians out there. I don't know how else to describe the flavor. It's the umami; mushrooms are loaded with umami, and the best way to describe umami is as a "meaty" taste.
**At least, that's what Wikipedia says, so I'm sticking with it.

I usually grill portobello mushrooms; they are easy to grill (because they are so big) and the results are perfect to stuff a vegetarian burger. I had some shitake mushrooms lying around from my CSA, and needed to use them up. My sister, the vegetarian in the family, was coming for a cookout, so I grilled the shitakes for her. A few minutes after they came off the grill, she had cornered me, demanding the recipe for my brother-in-law. I tried one, and was amazed at the difference between the shitakes and the portobellos. Portobellos are thick, juicy, meaty. Shitakes are thin, crackling, crisp. Kind of like the difference between a burger and bacon.
*Again, I apologize to the vegeta...oh, I give up.

Here is a yakitori version of shitake mushrooms, grilled on skewers for ease of handling. Enjoy!

Recipe: Grilled Shitake Mushrooms, Yakitori Style

Adapted From: Tadashi Ono and Harris Salat, The Japanese Grill

Cook time: 6 minutes

Equipment:

  • Grill (I use a Weber Summit Here is the current version of my grill.)
  • Skewers (I used 6 inch bamboo skewers soaked in water for an hour)

Ingredients:

  • ¾ pound Shitake mushrooms, stems removed, cleaned, and cut in half
  • ½ teaspoon Kosher salt
  • ½ cup soy sauce
  • ¼ cup olive oil
  • Juice of 1 lemon

Directions:
1. Prepare the mushrooms: Skewer the mushrooms on the diagonal, so they'll lay flat on the grill, then put in a shallow dish. Lightly salt with the kosher salt. Whisk the soy sauce, olive oil and lemon juice together, then pour over the mushrooms. Let the mushrooms marinate while the grill preheats

2. Prepare the grill: Set the grill up cooking on direct medium-high heat. For my Weber Summit, I turn all burners to high and preheat the grill for ten to fifteen minutes. Then I brush the grill clean and turn the burners down to medium-high.

3. Cook the mushrooms: Put the mushroom skewers on the grill over the direct medium-high heat, and grill until browned on the bottom, about 3 minutes. Flip the skewers and grill on the other side until browned, another 3 minutes. Put them back in the dish with the marinade and turn once or twice to add another layer of the marinade. Put the skewers on a serving platter and serve.

Variations:
*Different citrus: use the juice of half an orange, or two limes, instead of the lemon.

*Mediterranean version: substitute 2 tablespoons of balsamic vinegar for the lemon.

Notes:
*Single or double skewer. Double skewers are easier to work with on the grill; they keep the mushrooms from spinning on the skewer when I flip them. But I had to be gentle while skewering the mushrooms; the second skewer would break the mushroom occasionally.

*Or, no skewer at all. Don't cut the mushrooms in half; marinate them and put them on the grill whole. Be careful when flipping them, you don't want one to slip through the grill grate into the fire.

What do you think? Questions? Other ideas? Leave them in the comments section below.

Related Posts:
Portobello Mushroom Burgers with Grilled Onions

Adapted from:
Tadashi Ono and Harris Salat The Japanese Grill

*Enjoyed this post? Want to help out DadCooksDinner? Subscribe using your RSS reader or by Email, recommend DadCooksDinner to your friends, or buy something from Amazon.com through the links on this site. Thank you!

Yakitori Chicken Thighs (Momo) and Thighs with Green Onions (Negima)

June 21, 2011 by Mike Vrobel 1 Comment

I was at a hotel in the Little Tokyo neighborhood of Los Angeles. Like usual, I was looking for something interesting to eat. A guide recommended Kokekokko, a yakitori joint right around the corner from my hotel. A restaurant that serves nothing but grilled chicken? I had to try it out.

The meal was a revelation. Skewer after skewer of chicken sat over the charcoal on a long, thin grill, just wide enough for the bamboo skewers to rest on its edges. The chefs would turn the chicken every now and again while chatting with the customers, occasionally lifting a skewer and and snipping off any burnt edges with a pair of kitchen scissors. Once the chicken was cooked to their liking, they would dip it in a big crock of tare sauce and serve it.
*Tare sauce, or yakitori tare, is a combination of soy sauce, mirin, and sake, and the juices of all the grilled chicken dipped in it over the years. Yes, years - yakitori  restaurants use the same batch for years, topping it off whenever it runs low, so the flavor of the chicken keeps building.

When I say it was "all chicken", that doesn't cover the variety in the meal. Each skewer held a specific cut. We started with skewers of chicken thigh, skewers of chicken breast, and skewers of each with green onions added. Then we moved to the more intriguing part of the menu. All chicken meant all of the chicken. There were skewers of chicken livers, gizzards, hearts, and my favorite, chicken skin. The finale was hard-boiled quail eggs on the skewer, grilled like the chicken and dipped in the wonderful sauce.

I came home determined to duplicate that meal. It seemed so simple - grill chicken on a skewer, dip it in the sauce, and serve. My first few attempts were dry, bland and under seasoned. Where was the combination of chicken flavor and tare sauce that I loved so much? I set the idea aside, determined to try again later.

This spring, The Japanese Grill was released. Aha! A guide on the road to yakitori; exactly what I needed. They explained where I went wrong:

  1. Season the chicken with a little salt before grilling. I was grilling plain chicken, counting on the tare sauce to season it. A little salt helps bring out the flavor of the chicken.
  2. Double-dip with the tare sauce. I missed this at the restaraunt, but the skewers were dipped, put back on the grill to cook the sauce into a glaze, then dipped again and served.
  3. Use chicken thighs. They have more flavor and don't overcook as easily as chicken breasts.
    *You'd think that the guy who keeps preaching the power of the dark side of chicken would have figured this one out himself, don't you?

Now I have what I was searching for - yakitori that takes me back to the smoky little restaurant in Little Tokyo.
*My next project? To make yakitori using an entire chicken from my poultry CSA at Brunty Farms.

Recipe: Yakitori Chicken Thighs (Momo) and Thighs with Green Onions (Negima)

Adapted From: Tadashi Ono, Harris Salat The Japanese Grill

Cook time: 8 minutes

Equipment:

  • Grill (I use a Weber Summit Here is the current version of my grill.)
  • Bamboo skewers, soaked in water for at least 1 hour (6 inch skewers are the perfect size, but use whatever you can find.)
  • Strips of aluminum foil (to protect the uncovered ends of the bamboo skewers)

Ingredients:

  • 1 ½ pounds chicken thighs
  • 4 scallions (optional)
  • 1 teaspoon Kosher salt

Yakitori Tare sauce:

  • ½ cup soy sauce
  • ½ cup mirin (Japanese sweetened rice wine)
  • ¼ cup sake (Japanese brewed rice wine)
  • ¼ cup chicken broth (optional, preferably homemade)
  • 1 clove garlic, smashed
  • 1 thin slice ginger, smashed

Directions:
1. Chicken Thigh (Momo): Cut the chicken thighs crosswise into ½" slices. Fold each slice in half, then skewer. (When folded in half, the pieces should be about 1 inch across). Repeat until all but two inches of the skewer are covered. (For six inch skewers, 5 to 6 pieces of chicken will cover 4 inches of the skewer, leaving 2 inches uncovered.)

1a. Chicken and Scallions (Negima): Trim the scallions, then cut the white and light green parts crosswise into 1 inch pieces. Start each skewer with a piece of scallion, then add two pieces of folded chicken, then another scallion, two more pieces of chicken, and a last scallion. That should cover 4 inches of skewer (For skewers longer than six inches, keep repeating the pattern, ending with a piece of scallion.)
Once all the chicken is skewered, salt lightly with the kosher salt.

2. Prepare the grill: Set the grill up cooking on direct medium-high heat. For my Weber Summit, I turn all burners to high and preheat the grill for ten to fifteen minutes. Then I brush the grill clean, turn the burners down to medium-high, and put two strips of aluminum foil down to protect the skewers while the chicken cooks. (See the pictures below.)

3. Prepare the Tare sauce: While the grill is preheating, Bring the tare ingredients to a boil, then simmer, stirring often, until reduced by half, about ten minutes. (If you have a side burner on your grill, this is the perfect use for it.)

4. Cook the chicken: Put the skewers on the grill over direct medium-high heat, with the bamboo handles protected by the aluminum foil. Cook for two minutes, then flip the skewers. Cook for another two minutes. Brush the skewers with the tare sauce, flip again, and cook for 1 minute. Brush with sauce again, flip, and cook for one more minute. Remove the skewers from the grill to a platter, and brush one last time with the sauce. Serve.

Variations:
*Yes, you can use boneless, skinless chicken breasts for this. They'll taste great. But...chicken thigh is the favorite type of yakitori in Japan for a reason, so if you can find boneless, skinless chicken thighs, give it a try.

*If you check the pictures carefully, you can see chicken liver yakitori cooking in the background. Cook them just like the chicken thighs, but be careful when skewering. Chicken liver is much more fragile than regular chicken meat.

*You want more options? I highly recommend The Japanese Grill - they have more yakitori recipes than you can shake a stick* at.
*Preferably a six inch bamboo skewer.

Notes:
*Extra scallions? Make an all-scallion skewer

*Here is a great yakitori resource: the names of the different parts of the chicken when they're used for yakitori: About Yakitori Chicken Parts [yakitori.co.jp]

What do you think? Questions? Other ideas? Leave them in the comments section below.

Related Posts:
Yakitori Shitake Mushrooms [Coming Thursday]
Grilled Boneless Skinless Chicken Breasts, Quick Brinerated
Rotisserie Teriyaki Chicken
Instant Pot Japanese Curry

Adapted from:
Tadashi Ono, Harris Salat The Japanese Grill

*Enjoyed this post? Want to help out DadCooksDinner? Subscribe using your RSS reader or by Email, recommend DadCooksDinner to your friends, or buy something from Amazon.com through the links on this site. Thank you!

Rotisserie Boneless Pork Loin with Apricot Glaze

June 16, 2011 by Mike Vrobel 9 Comments

USDA recommends cooking all whole cuts of meat to 145 °F as measured with a food thermometer placed in the thickest part of the meat, then allowing the meat to rest for three minutes before carving or consuming.
[United States Department of Agriculture, usda.gov]

Finally, it's official! Pork loin should not be cooked until it is dry as dust! Now, I know the USDA says 145*F. And 145*F is not bad - it's a good medium. But...I prefer to cook to 140*F, with 10-15 minutes of rest, leaving just the slightest hint of pink in the middle of the pork. What can I say? I like to live on the edge.
*My Samoan attorney advises me to say the following: The previous statement should not be taken as professional health advice. If you are feeding the young, old, or infirm, please follow the FDA guidelines and cook to 145*F. If you are the kind of person who has their own Samoan attorney, and likes to sue penniless bloggers, please follow the old FDA guidelines and cook to 160*F.

In honor of this decision, it's time to revisit Rotisserie Pork Loin.

OK, you got me. I also had a crowd descending on my house and a whole pork loin in my freezer.

Pork loin still needs some help, even with the lower final temperature. I wanted something simple, but impressive; my goal was to enjoy the party, not spend my time fussing with dinner. My secret weapon? Apricot preserves.

Apricot and pork may sound weird, but pork and fruit are a potent combination, and apricot seems to bring out the best flavors of pork. The partygoers raved about how it tasted.
*Even better, I spent my time with a glass of ice cold rose', humbly acknowledging their praise. What can I say? It was a perfect party.

Recipe: Rotisserie Boneless Pork Loin with Apricot Glaze

Inspired by: Adam Perry Lang, Serious Barbecue

Cook time: 45 minutes

Equipment:

  • Grill with Rotisserie attachment (I used a Weber Summit with an infrared rotisserie burner. Here is the current version of my grill.)
  • Aluminum foil drip pan (9"x11", or whatever fits your grill)
  • Butcher's twine

Ingredients:

  • 1 whole boneless pork loin roast, roughly 8 pounds (aim for the thickest roast you can find)

Brine ingredients

  • 4 quarts water
  • 1 cup table salt
  • ½ cup brown sugar

Glaze ingredients

  • ½ cup Apricot Preserves
  • ¼ cup apple juice

Directions:
1. Brine the pork roast: Stir the brine ingredients in a large container until dissolved. Cut the pork loin into two equal pieces, submerge in the brine, and refrigerate for at least 3 hours, or up to 8 hours.

2. Prepare the pork roast: One hour before cooking, remove the pork loin from the brine, and dry them thoroughly with paper towels. Using a sharp knife, score the fat on the top of the roasts in a 1 inch diamond pattern, being careful not to cut into the meat. Truss each piece of the pork loin separately, tying them tightly every three inches, to get the loins into the shape of a cylinder. Put the roasts back to back, with the fatty sides facing out. Tie the two roasts together to make one thick roast. (See the picture, below, for how this looks when it's all done.) Finally, run the spit between the two tied roasts, making sure the prongs on the spit go into the two roasts to hold them tightly on the spit.

2. Prepare the grill: Set the grill up for rotisserie cooking at high heat. For my Weber Summit, this means removing the grates, turning the two outer burners (burners 1 and 6) to high, and turning the infrared burner to high. Then I put my drip pan in the middle, over the unlit burners, and let the grill preheat for ten to fifteen minutes. (See My Rotisserie Basic Technique Post for more rotisserie setup details.)

3. Prepare the glaze: While the grill is preheating, mix the glaze ingredients in a small, microwave safe bowl. Microwave on high heat for 1 minute, then mix until the apple juice is incorporated into the apricot preserves.

Yes, that's a juice box.
If you have kids, you understand.

4. Cook the pork roasts: Put the spit on the grill, and turn on the rotisserie motor. Cook with the lid closed. It should take 30 minutes to 1 hour, depending on the thickness of the pork roasts. My thick, 8 pound roast was done in 45 minutes. It's better to go by temperature, though - you want the roast at the thickest part to be 140*F. Start checking the temperature at the 30 minute mark.
When you check the temperature at 30 minutes, brush the roast with the glaze. From then on, brush it every 5-10 minutes, when you check the temperature for doneness.

7. Rest, carve and serve: When the roast is cooked through, remove the spit from the grill, remove the roast from the spit, and remove the butchers twine from the roast. Brush the roast once more with the apricot glaze, then let it rest for 15 minutes. Carve into ½" thick slices and serve.

Variations:
*Other jellies or preserves: Use your favorite jelly with the pork. Apple jelly with lemon juice, or hot pepper jelly have worked well for me.

Notes:
*Don't have a rotisserie? That's OK - set your grill up for cooking on indirect high heat, as described in the recipe; then put the grate back on the grill, put the trussed pork loin over the drip pan, and cook for 30 minutes. Flip the pork, start brushing with the glaze, and cook until 140*F internal temperature is reached.

What do you think? Questions? Other ideas? Leave them in the comments section below.

Related Posts:
Rotisserie Boneless Pork Loin Roasts, Brined, Rubbed and Maple Syrup GlazedRotisserie Pork Shoulder Roast
Click here for my other rotisserie recipes.

Inspired by:
Adam Perry Lang, Serious Barbecue: Smoke, Char, Baste, and Brush Your Way to Great Outdoor Cooking


Check out my cookbook, Rotisserie Grilling.

Everything you could ask about the rotisserie,
plus 50 (mostly) new recipes to get you cooking.

It's a Kindle e-book, so you can download it and start reading immediately!


*Enjoyed this post? Want to help out DadCooksDinner? Subscribe to DadCooksDinner using the RSS or Email options on the right, link to this post from your blog, recommend DadCooksDinner to your friends, or buy something from Amazon.com through the links on this site. (Like my Rotisserie Grilling cookbook...)

Farmers Market: Saturdays in Seville

June 15, 2011 by Mike Vrobel 1 Comment

One more Farmers Market update - my friends at the Seville Farm Market are back in session. Market hours are every Saturday from 9AM to Noon, From May 28th through September 24th.

The market is located in Stanhope Park on West Market Street in Seville, OH. (See the map below).

Tell them DadCooksDinner sent you!

More information about the Seville farm market: SevilleFarmMarket.blogspot.com


View Larger Map

Grilled Shrimp and Pineapple Skewers with Coconut Curry Baste

June 9, 2011 by Mike Vrobel 2 Comments

Has a recipe ever called out to you? It happens to me fairly often. As I leaf through a new cookbook, a recipe will catch my eye, and suddenly I'm a man with a mission. "That's it! I have to make that!"
*Next comes a comparison of the ingredients list with the food in my pantry, usually followed by an urgent grocery run. It gets really bad when I'm in the grip of a new recipe mania, and events conspire against me. (Like, say, kids with t-ball games, multi-hour recipes I discover on a weeknight, or thunderstorms when I need to grill.) I'm an addict, and I need my cooking fix. It's not pretty.

I had this experience with Matt Armendariz's On a Stick. I took one look at the picture of Red Curry Shrimp and Pineapple Skewers, and I knew what was for dinner. I had everything except for the pineapple. A quick trip to the grocery store, and I was cooking.

Later, after dinner, I took the time to actually read the recipe. Whoops. So much for reviewing the book. In my cooking frenzy, I took the title to Matt's recipe and wandered off on a different path. This is more of an "inspired by" recipe than I originally intended.
*Sorry, Matt. I still love your cookbook - there aren't many that get me this excited about a new recipe.

Recipe: Grilled Shrimp and Pineapple Skewers with Coconut Curry Baste

Adapted From: Matt Armendariz On a Stick!

Cook time: 8 minutes

Equipment:

  • Grill (I use a Weber Summit. Here is the current version of my grill.)
  • Skewers (I like metal skewers, but bamboo will work as well, as long as you soak them first)

Ingredients:

  • 2 pounds 13-15 count shrimp, peeled (or as small as 21-25 count, but no smaller)
  • 1 pineapple, peeled, trimmed, and cut into chunks the same thickness as the shrimp
  • ½ teaspoon Kosher salt

Coconut Curry Baste

  • half of a 15oz can of coconut milk
  • 2 tablespoons brown sugar
  • Juice of 1 lime
  • 2 tablespoon fish sauce
  • 2 tablespoon soy sauce
  • 1 tablespoon Thai red curry paste

Directions:
1. Prep the skewers and the baste: Peel the shrimp and slice the pineapple. Thread the pineapple and shrimp, alternating between the two, onto the skewers. Start and end each skewer with a piece of pineapple - it holds onto the skewers better than the shrimp. Sprinkle the skewers lightly on both sides with the kosher salt. Put the curry baste ingredients in a small bowl, and whisk until blended.
*I use leftover pineapple to make pineapple skewers. I don't salt them, or baste them with the coconut curry; plain grilled pineapple tastes great.

2. Prepare the grill: Set the grill up for cooking at medium-high heat. For my Weber Summit, I preheat the grill with all burners on high for 15 minutes. Then I clean the grates with my grill brush, and turn the burners down to medium-high.

3. Cook the skewers: Put the skewers on the grill over direct medium-high heat, and cook for three minutes, or until the pineapple and shrimp are starting to brown. Flip the skewers and cook for another three minutes, until browned on the other side. Brush the skewers with the curry baste, flip the skewers, brush the other side with the baste, and cook for one minute. Brush again with the curry baste, flip the skewers, brush the other side with the baste, and cook for one more minute. Remove the skewers to a platter, and brush one last time with the baste. Let the skewers rest for five minutes, then serve.

Variations:
*Marinade: In Mr. Armendariz's original version, the red curry baste was a red curry marinade. After trimming and peeling the pineapple and shrimp, marinate them in the baste for 30 minutes. Skewer them, and proceed with the rest of the recipe, sprinkling with the salt when the skewers are done cooking.

Notes:
*13 to 15 count shrimp means 13 to 15 shrimp per pound. You can go as small as 21-25 count, but any smaller and the shrimp will be overcooked before the pineapple has a chance to brown.

What do you think? Questions? Other ideas? Leave them in the comments section below.

Related Posts:
Grilled Beef Kebabs with Onion, Tomato, Lemon and Thyme Marinade
Zucchini and Summer Squash Kebabs
Rotisserie Pineapple

Adapted from:
Matt Armendariz On a Stick!
(And check out Matt's website: MattBites.com)

*Enjoyed this post? Want to help out DadCooksDinner? Subscribe using your RSS reader or by Email, recommend DadCooksDinner to your friends, or buy something from Amazon.com through the links on this site. Thank you!

Pickled Asparagus With Hot Peppers and Garlic

June 2, 2011 by Mike Vrobel 6 Comments

I've become a canner. Last year, I took the plunge, and canned a bunch of vegetables from my CSA. The best part of canning? Learning about all the different things you can pickle. I love pickles; salty, vinegary, sharp, cool and crunchy. A new-found favorite is pickled asparagus.

Yes, pickled asparagus sounds weird. I wondered why someone would do that to poor, defenseless asparagus. I mean, you can grill it, saute it, roast it, steam it...why bother pickling it? Two reasons. One, asparagus is perfect for pickles. The vinegar brine is a great counterpoint to the strong taste of the asparagus. The second reason is to stretch out asparagus past its late spring season. I try to buy my food seasonally; if I pickle asparagus, I still have it later in the summer. Asparagus season is so short...why not stretch it out?

Now, if canning is not your thing, don't worry. You can make refrigerator pickled asparagus. Ignore the "process in a water bath" part of the instructions, and store the pickles in the refrigerator. They'll last for about a month. Unless I come to visit; then the pickles last until I can eat my way to the bottom of the jar.
*In fact, if you want to make a small batch of these pickles, I would go the refrigerator pickle route. Canning takes extra effort; why bother with the boiling water bath to make two pints of pickles? My new rule of thumb, learned from canning last year: if I can't make four pint jars worth, it's not worth canning. In my house, three pints of pickles last less than a month. We do love our pickles.

That said, I found out why people are so into canning - it is dead easy. Picture this scenario: I am deep in the you-pick section of a farm, bag bulging with produce. I can't stop picking, it all looks so good and fresh...but I have no idea what I'm going to do with all of it. Canning is my new answer to this. Check out the Ball Blue Book Guide To Preserving, or the National Center for Home Food Preservation to get started.
*And then move on to my favorite canning blogs: Food In Jars and Savoring the Season 

Recipe: Pickled Asparagus

Adapted From: National Center for Home Food Preservation Pickled Asparagus

Processing time: 10 minutes

Equipment:

  • 6 pint canning jars
  • Water bath canner (or large, deep pot and a rack to keep the jars off the bottom)

Ingredients:
For 6 pint jars

  • 8 pounds asparagus
  • 6 cloves garlic
  • 3 dried hot chiles, rinsed and halved (or ¼ teaspoon red pepper flakes per jar)
  • 1 ½ teaspoons whole black peppercorns (¼ teaspoon times 6)
  • 1 ½ teaspoons whole coriander seed (¼ teaspoon times 6)
  • 4 ½ cups water
  • 2 ¼ cups white vinegar (5%)
  • 2 ¼ cups cider vinegar (5%)
  • ½ cup pickling salt

Directions:
1. Prep the vegetables:Rinse the asparagus, garlic, and hot chiles. Peel the garlic, and cut the chiles in half. Trim the hard ends from the asparagus and throw away. Cut the asparagus into 4 inch pieces, measured from the tips, so it fits in the jars with a ½ inch of headroom.
Save the leftover ends of the asparagus for another meal.

Ingredients, ready to go
(Not shown - my other five bunches of asparagus)
Left to Right:
Tips for pickling; stems for later; woody stalks for garbage

2. Prep the jars: Sterilize the pint jars in a pot full of boiling water (or run them through the dishwasher). Into each jar, put 1 clove of garlic, half a chile, ¼ teaspoon of peppercorns, and ¼ teaspoon of coriander. Tightly pack the each jar with asparagus, tips pointing up. In a large saucepan, bring the water, vinegar, and pickling salt to a boil to make the brine. Carefully ladle the hot brine over the asparagus, leaving at least ½ inch of headroom in each jar.
*It's OK if the asparagus tips are a little above the brine

3. Process the jars:
For an overview of canning, see Using Boiling Water Canners and Principles of Home Canning [pdf] [uga.edu/nchfp]
Wipe the edge of the jars clean with a damp cloth, then put the lids and rings on the jars. Process the pickles in a boiling water bath for 10 minutes (more at higher altitudes). Wait 2 days before opening to let the asparagus pickle.
*This step is optional. For refrigerator pickles: seal the jars, let them cool to room temperature, then store in the refrigerator and eat within a month.

An exciting picture:
boiling water

Variations:
*First, and important safety tip: when canning, you have to be very careful - the recipes must have specific levels of acidity and salinity to work. I will play with the spice or herb mix in a recipe, but I am careful to follow the brine and vegetable proportions from published, tested recipes.

*For a "standard" pickle, replace the spices and the hot pepper with a half teaspoon of pickling spice and a half teaspoon of dill seed.

*I use a half and half mix of cider and white vinegar; you can use all of one or the other, depending on your taste. The important part is the 5% acidity.

Notes:
*Buying asparagus: at your local grocery store, a bundle of asparagus usually weighs a pound. Of course, fresh asparagus from your local farmers market is better for this. Assume a pound per pint jar, plus an extra pound or two per six jars.

*If you find taller asparagus, the leftover stems can be canned. Mine were a little on the short side, so I reserved them for later.

*I've read that tall 12 ounce jelly jars are better for canning asparagus; the tall jar results in less wasted asparagus. I prefer to use wide-mouth pint jars, to standardize all the extra canning equipment I have to buy. That way, I have a single ring and lid size.

What do you think? Questions? Other ideas? Leave them in the comments section below.

Related Posts:
Steam Sauteed Asparagus (for the leftover stems)
Spicy Pickled Carrots
Pickled Dilly Beans

Adapted from:
National Center for Home Food Preservation Pickled Asparagus

*Enjoyed this post? Want to help out DadCooksDinner? Subscribe using your RSS reader or by Email, recommend DadCooksDinner to your friends, or buy something from Amazon.com through the links on this site. Thank you!

Farmers Market: Saturday in the Cuyahoga Valley, Wednesday at Highland Square in Akron

June 1, 2011 by Mike Vrobel 2 Comments

I can't believe it - my annual farmers market update is late!

The weekend Countryside Farmers Market in the Cuyahoga Valley National Park started on May 14th...and I forgot to mention it. It runs every Saturday, 9AM to Noon, from May 14th through the end of October.
*If you don't live in Northeastern Ohio, make sure to find your own local farmers market.

Countryside's weeknight market moved to Wednesday nights at Highland Square in Akron. It runs every Wednesday, 4PM to 7PM, June 1st through the end of September.

I'll see you at the market this summer!

Here are the addresses:
Countryside Farmers' Market at Howe Meadow
4040 Riverview Road
Peninsula, OH

View Larger Map

Countryside Farmers' Market at Highland Square
Corner of West Market Street and Conger Ave
Akron, OH


View Larger Map

More information is available at their website:
Cuyahoga Valley Countryside Conservancy

Related posts:

My list of Ethnic and Gourmet stores near Akron, Ohio.

What do I do with: The Asparagus Edition

May 31, 2011 by Mike Vrobel 6 Comments

Some say lilacs are the first sign of spring. Some prefer red-breasted robins. Others are fans of April showers bringing May flowers.*
*And what do mayflowers bring? Pilgrims. This is my kids' new favorite joke. I've heard it a hundred times this month. Why should I suffer alone?
**And, I know I shouldn't complain, after the truly bad weather that has hit some sections of the country. But I will anyhow. This year, April showers brought...May downpours. I have three kids in baseball this spring, and most of our games have been washed out. I was thrilled when we got a game in, and the dugout was full of mud. At least it wasn't under three inches of water, like earlier in the week!

Me? I'm a cook, an eat local fanatic. My sign of spring? Asparagus. Asparagus is the sign of good things to come at the Farmers Market; it is in the first CSA box of the year.

I share my love for asparagus often on this blog:

  • Grilled Asparagus
  • Steam-Sauteed Asparagus

...wait, that's it? I've only posted two asparagus recipes? How can that be? I can do better than that. I'll add to the list with my new favorite, pickled asparagus, on Thursday.

Now it is your turn. My love of asparagus knows no bounds, so I need more ideas on how to cook it.


What do you do with asparagus? What are your go-to recipes when spring rolls around, and piles of asparagus appear at the market? Let us know in the comments section.

*On a serious note: I'm complaining about all the rain we've had, but I feel like a whiner. There are people who have had real weather problems this year. Please donate to Bloggers Without Borders or the Red Cross to help those recovering from the tornadoes in Missouri, Alabama, and Georgia. Thank you. (More information about Bloggers without Borders is available here.)
Donate to Bloggers without Borders!

*Enjoyed this post? Want to help out DadCooksDinner? Subscribe using your RSS reader or by Email, recommend DadCooksDinner to your friends, or buy something from Amazon.com through the links on this site. Thank you!

  • « Previous Page
  • 1
  • …
  • 26
  • 27
  • 28
  • 29
  • 30
  • …
  • 37
  • Next Page »

Welcome to Dad Cooks Dinner!

I'm Mike Vrobel, a dad who cooks dinner every night. I'm an enthusiastic home cook, and I write about pressure cooking, rotisserie grilling, and other food topics that grab my attention.

More About Me →

Popular

  • Three bowls of cooked Pinto Beans on a wood table
    Instant Pot Pinto Beans (No Soaking)
  • Pressure Cooker Beef Shank (Osso Bucco)
  • Pressure Cooker 7 Hour Leg of Lamb (in 90 minutes)
    Pressure Cooker 7 Hour Leg of Lamb (in 90 minutes)
  • Pressure Cooker Brown Jasmine Rice
  • Grilled Tomahawk Steak (Long Bone Ribeye, Reverse Seared)
    Grilled Tomahawk Steak (Long Bone Ribeye, Reverse Seared)
  • A green bowl full of chicken noodle soup
    Instant Pot Rotisserie Chicken Noodle Soup

Seasonal

  • A bowl of asparagus risotto
    Instant Pot Asparagus Risotto (Pressure Cooker Recipe)
  • Grilled Butterflied Chicken with Garlic Butter
  • Sous Vide rack of lamb sliced into chops
    Sous Vide Rack of Lamb with Dijon Bread Crumb Crust
  • A bowl of beef stew with asparagus, carrots, and radishes.
    Instant Pot Spring Vegetable Beef Stew
  • A Rotisserie Chicken (Pollo Asado)on a platter of shredded cabbage
    Rotisserie Chicken Pollo Asado
  • Rotisserie Pork Shoulder Roast with Carolina Mustard BBQ Sauce
    Rotisserie Pork Shoulder with South Carolina Mustard Barbecue Sauce

Footer

↑ back to top

About

  • Privacy Policy

Newsletter

  • Sign Up! for emails and updates

Contact

  • Contact

Copyright © 2025 Dad Cooks Dinner