DadCooksDinner

  • Home
  • Rotisserie
  • Recipes
  • Tools
  • Books
  • Merch
menu icon
go to homepage
  • Recipes
  • Books
  • Tools
  • Merch
  • About
subscribe
search icon
Homepage link
  • Recipes
  • Books
  • Tools
  • Merch
  • About
×
Home » Recipes

Shop Around the Edge of the Grocery Store

August 7, 2012 by Mike Vrobel 4 Comments

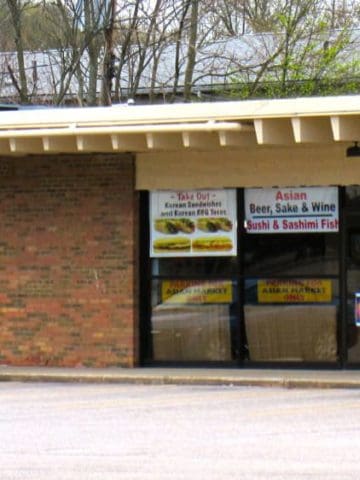
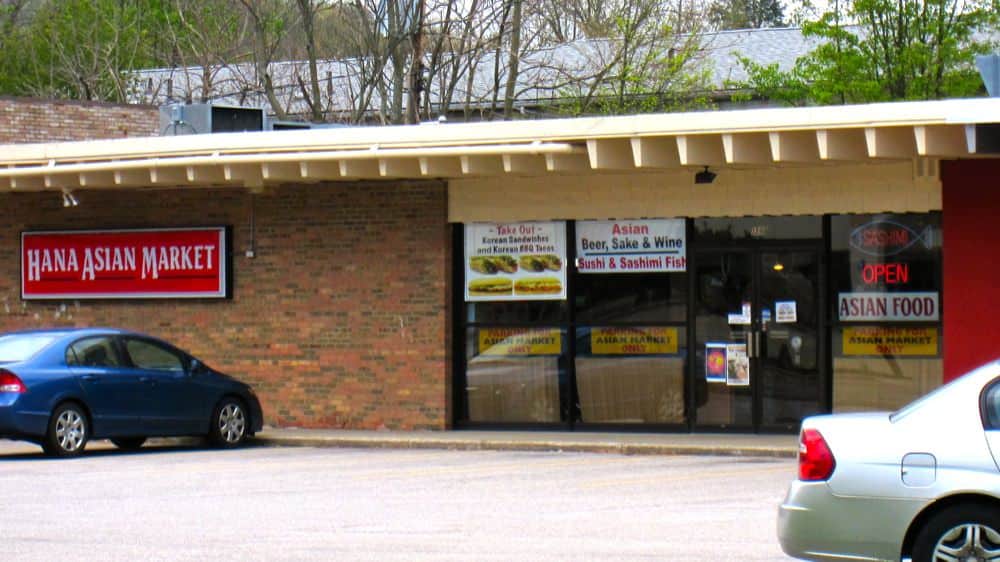
My local grocery store - Acme Fresh Market
[image via WikiMedia]

Looking to eat healthier and save money at the same time? Shop around the edge of the grocery store. All the good stuff is around the edge - fruit and vegetables, dairy and bakery, meat and fish. The middle aisles? The middle aisles are full of processed junk that I really shouldn't buy.

There are a few middle aisles that are necessary - the baking and spice aisle, the canned vegetable aisle, and the international aisle. I try to stick to canned tomatoes, dried pasta, beans, and vegetable oil.

Beyond that is a wasteland of prepared foods and snack items. (All of which the kids are begging me to buy.) It's also where all the expensive stuff is. Sure, beef tenderloin costs $15.99 a pound. But have you seen the price of potato chips?
*I had to buy cans of soup for a canned food drive, so I ventured into the soup aisle. I was horrified. Give me my pressure cooker, a leftover chicken carcass, Italian sausage, and some dried pasta and I can do better than everything they had for sale - and that's on a weeknight, when I don't have time to really cook.

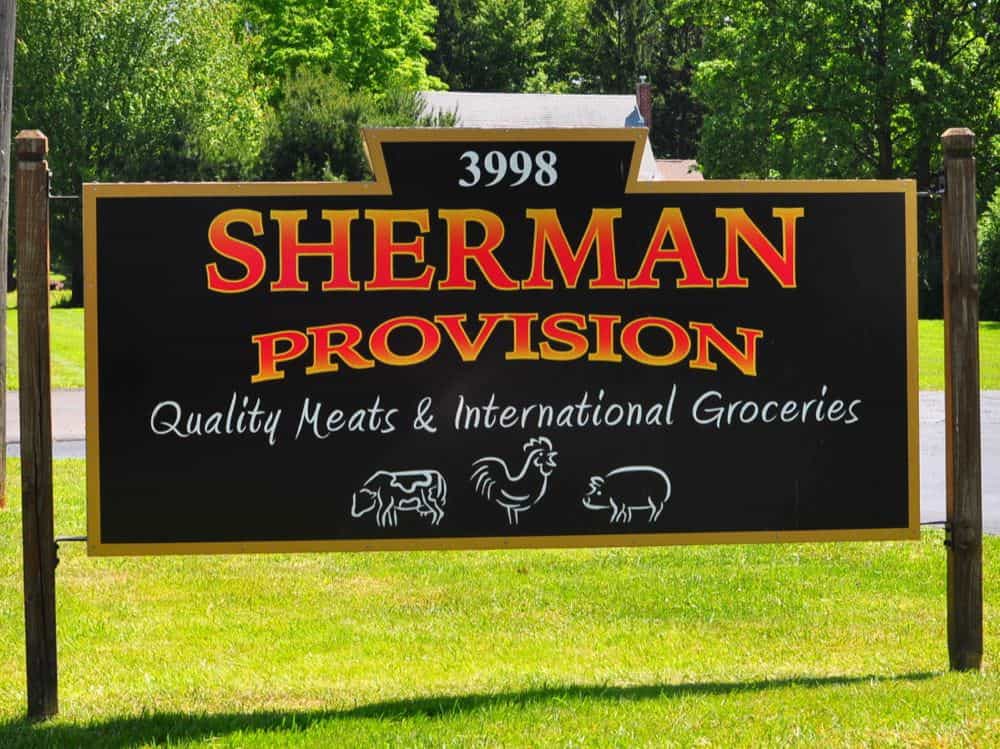
It's even better to buy the "edge of the store" items at my local butcher, farmers market, or ethnic market. I try to stock up at those places. But I'm feeding a family of five, with three busy kids; The convenience of one stop shopping is impossible to pass up. Every Saturday I sit down with the flyer from my grocery store and make a meal plan for the week based on what's on sale.

What do you think? Any special tricks you use in the grocery store? Leave them in the comments section below.

Rotisserie Chicken Zatar

August 2, 2012 by Mike Vrobel 2 Comments

I stumbled across zatar on a visit to a local ethnic market. I thought I knew my spice blends, but I had never heard of this one. I bought a bag, went home, and fired up the Internet to find out what it was.

Zatar is a Middle Eastern spice mixture, made up of thyme, sumac, sesame seeds, and salt. At least, that's the base version - there are lots of regional variations. It is a general seasoning blend - sprinkled on meat, vegetables, and pita bread, or mixed with olive oil for use as a dip.
*The name changes a lot as it gets translated into English. Wikipedia calls it Za'atar, google prefers Zaatar. My bag of spice was labeled Zatar, so that's the name I'm going with.

Here is my take on Chicken Zatar, with only four ingredients. Rub a chicken with a paste of olive oil, zatar and salt, then grill it on the rotisserie. So simple, and yet so exotic.

Recipe: Rotisserie Chicken Zatar


Cooking time: 75 minutes

Equipment:

  • Grill with Rotisserie attachment (I used a Weber Summit with an infrared rotisserie burner. Here is the current version of my grill.)
  • Grill with Rotisserie attachment (I used a Weber kettle with the Rotisserie attachment; the kettle is this Weber Grill and the rotisserie attachment is this Weber charcoal kettle rotisserie)
  • Aluminum foil drip pan (9"x12", or whatever fits your grill)
  • Butcher's twine

Ingredients:

  • 1 (5 pound) chicken
  • 2 tablespoons olive oil
  • 1 tablespoon zatar
  • 1 teaspoon kosher salt

Directions

See my Rotisserie Poultry Basic Technique for an overview of rotisserie chicken.


1. Season, truss and spit the chicken Mix the olive oil, zatar, and kosher salt in a small bowl to make a paste. Rub the chicken with the paste, inside and out, Gently work your fingers under the skin on the breast, then rub some of the paste directly onto the breast meat.

Fold the wingtips under the wings and truss the chicken. Skewer the chicken on the rotisserie spit, securing it with the spit forks. Let the chicken rest at room temperature until the grill is ready.

2. Set up the grill for indirect medium heatSet the grill up for indirect medium heat, about 350°F with the drip pan in the middle of the grill.
For my Weber Summit, this means removing the grates, turning the two outer burners (burners 1 and 6) to medium, setting the infrared burner to medium, and preheating the grill for ten to fifteen minutes.

3. Rotisserie cook the chickenPut the spit on the grill, start the motor spinning, and make sure the drip pan is centered beneath the chicken. Close the lid and cook until the chicken reaches 160°F in the thickest part of the breast, about 1 hour and 15 minutes.

4. ServeRemove the chicken from the rotisserie spit and remove the twine trussing the chicken. Be careful - the spit and forks are blazing hot. Let the chicken rest for 15 minutes, then carve and serve.

Notes

  • Zatar usually has a little salt in the mix. Salt is last in the ingredient list for my zatar, so I know there isn't much in there. That's why I added a teaspoon of salt to the recipe. If salt is higher in your zatar's ingredient list, skip the teaspoon of salt.
  • The five pound bird is a roaster, bigger than the four pound broiler/fryer birds I usually cook. If you are cooking a 4 pound or smaller bird, increase the heat to high, and cook for about an hour.
  • If you have the time, marinate the chicken in the zatar paste - rub it an hour or two ahead of time, then store it in the refrigerator until it is time to grill.

What do you think? Questions? Other ideas? Leave them in the comments section below.


Check out my cookbook, Rotisserie Grilling.

Everything you could ask about the rotisserie,
plus 50 (mostly) new recipes to get you cooking.

Available in paperback, or as a Kindle e-book so you can download it and start reading immediately!


*Enjoyed this post? Want to help out DadCooksDinner? Subscribe using the RSS or Email options on the right, link to this post from your blog, recommend DadCooksDinner to your friends, or buy something from Amazon.com through the links on this site. Thank you.

Road Trip: Penzeys Spices

July 31, 2012 by Mike Vrobel 2 Comments

Looking for great spices in Northeastern Ohio? Make a trip to Penzeys Spices in Woodmere. I've bought mail order spices from Penzeys for years, and they finally opened a store close enough to drive to.
Penzeys is a national chain - there may be one located near you. If not, check out Penzeys.com, or get on the catalog mailing list.

Penzeys carries every herb and spice I've ever looked for, and they are always fresh, due to the store's high turnover. I've complained about expensive spices before; jars of spices at Penzeys are about the same price as jars in the supermarket. But Penzeys also sells their spices in bags, by weight, which brings the prices down dramatically. I buy a jar of spices the first time, then just buy bags to refill the jar when I need it.

Penzeys Spices
28859 Chagrin Boulevard
Woodmere, OH 216.839.0777
Penzeys.com

Woodmere is southeast of Cleveland, and just east of Beachwood. It's about a 30 minute drive North of Akron. Penzeys is in the same shopping plaza as Sur La Table and Trader Joe's, so it is always worth the trip for a cooking fanatic like me.

My Top 5 list:

1. Chili Powder: I use a lot of chili powder, so I buy it from Penzeys in one pound bags. I like their basic, medium-hot chili powder blend; they have heat levels from mild (chili con carne blend) to hot. If you want to get fancy, try their Chili 3000 and Chili 9000 blends, with extra spices mixed in to boost the flavor.

2. Peppercorns: Pepper is another spice I use constantly, so I buy big bags of Tellicherry peppercorns.

3. Italian Herb Mix: I don't like store bought spice blends; they're always full of salt. Why pay salt prices for spices? Penzeys is the exception. Most of their spice blends are salt free.

4. Ingredients for my homemade rubs: If you check out my barbecue rub or cajun rub, you'll see the ingredients scale up to different bag or jar sizes from Penzeys. It's easy to make a big batch of spice rub when the spices are pre-measured in 1 pound, 8 ounce, or 2 ounce bags.

5. Coriander seed, smoked spanish paprika, sweet curry powder: I always pick up a fresh jar of these spices when I visit. And chipotle powder, herbes de provence, ground cumin, french thyme, fennel seed...

View Larger Map

Related posts:

My list of Ethnic and Gourmet stores in the Akron, OH area.

*Enjoyed this post? Want to help out DadCooksDinner? Subscribe using your RSS reader or by Email, recommend DadCooksDinner to your friends, or buy something from Amazon.com through the links on this site. Thank you!

Grilled Kale with Balsamic Vinaigrette

July 26, 2012 by Mike Vrobel 4 Comments

I like kale. That's the biggest surprise I've had writing this blog. I love all sorts of food; there are few foods I actively dislike. But greens and I have always had a stand-offish relationship. Kale chips changed all that. Suddenly, I was looking forward to those dark greens in my CSA box, and seeking them out at the grocery store.

As you can probably tell from reading this blog, I grill a lot. (I may have a grilling problem. Don't tell anyone.) I tried to get kale chips to work on the grill, oh how I tried…but I kept failing. I couldn't get the little chips off the grill quickly enough, and they would be blackened and ruined.

I stumbled across the solution earlier this summer. Don't try to make chips; instead, grill the whole kale leaf, using the stem as a handle. Now I have the crispy crunch of kale chips with the convenience of a quick grilled side dish. Why didn't I think of that?

Recipe: Grilled Kale with Balsamic Vinaigrette


Adapted from: Seamus Mullen's Hero Food

Cooking time: 4 minutes

Ingredients:

  • ¼ cup extra virgin olive oil
  • 1 tablespoon balsamic vinegar
  • 1 bunch kale, stems left on
  • ½ teaspoon kosher salt
  • ½ teaspoon fresh ground pepper

Directions:

1. Coat the kale with the vinaigrette:
In a large bowl, whisk the extra virgin olive oil and the balsamic vinegar. Add the kale to the bowl and toss until coated with vinaigrette. (I start by grabbing the bunch of kale by the stems and using the bunch like a whisk. Then I use my fingers to comb through the leaves and coat them with vinaigrette). Sprinkle the kale evenly with the salt and pepper.

2. Prepare the grill:
Prepare the grill for cooking on medium heat, then clean with a grill brush. For my Weber summit, I preheat the grill with all burners on high for 15 minutes, then turn the burners down to medium and brush the grate clean.

3. Grill the kale:
Put the kale leaves in a single layer on the grill, over direct medium heat. Grill with the lid closed until the kale starts to brown on the edges, about 2 minutes. Flip the leaves and grill on the other side until they leaves turn a dark olive color and get crispy, another 1 to 2 minutes. Remove the kale leaves from the grill as they turn olive, or they will burn.

Notes:

  • Don't crowd the grill. Depending on the size of your bunch of kale, you may have to grill the kale in batches. Don't worry - it takes four minutes a batch, so you can do two or three batches in about ten minutes. 
  • Watch out for overcooking - they go from olive (and done) to black (and burnt) in a blink. As each leaf finishes, get it off the grill immediately.

What do you think? Questions? Other ideas? Leave them in the comments section below.

Related Posts:

Kale Chips
Kale Chips with Chinese Flavors

Adapted from:

Seamus Mullen's Hero Food

*Enjoyed this post? Want to help out DadCooksDinner? Subscribe to DadCooksDinner using the RSS or Email options on the right, link to this post from your blog, recommend DadCooksDinner to your friends, or buy something from Amazon.com through the links on this site. Thank you.

Summer Fun, July 2012

July 24, 2012 by Mike Vrobel 5 Comments

I'm still discombobulated by my summer vacation. While I pull myself together, here's picture of Half Dome at sunset, and some fun food info I've picked up over the summer.
The photo is from Camp Curry's parking lot. We stayed in a wood floor tent for a week. Every time I looked up, I was awestruck.

The Wok Shop
I stopped in while visiting San Francisco, and ordered a new wok in person. (I may have to join Wok Wednesdays to break it in.) The Wok Shop is a great little store in Chinatown, stuffed to the rafters with cooking equipment. I wish I had all day to peek in all its nooks and crannies.
So, we now have Meatless Mondays, Taco Tuesdays, Wok Wednesdays, any suggestions to fill in the rest of the week?

Raichlen's Burgers
Steven Raichlen just published a quick (25 recipe) e-book dedicated to hamburgers.  It's a fun, quick read, for 99 cents.
*I noticed it while checking the sales numbers on my book. I mentioned I wrote a cookbook, right? I'm obsessed by my sales rank on Amazon. If it goes up, I'm ecstatic. If it goes down, I fall into a deep funk.
**And, as an aside from my aside, Steven's novel, Island Apart, is a fun read if you're a food fanatic like me. I started and finished it on the plane ride out west.

High Tech Shortcut To Greek Yogurt Leaves Purists Fuming
What? Greek Yogurt isn't always Greek Yogurt? I wondered why Yoplait some "Greek" yogurts taste grainy to me. There's the good version, using the traditional method of squeezing out the excess moisture...by using a huge centrifuge, and spinning the water out. I can live with that one. But the other method is to add thickeners (read: starch) to the yogurt to try to give it the same mouthfeel. Check the ingredients. If you see milk protein concentrate or cornstarch, watch out.

Mastering the Art of French Cooking App
32 of the most popular recipes from Julia Child's Mastering The Art of French Cooking, with full color photos, video of Julia making the recipes, and audio notes from editor Judith Jones. I'm getting excited just reading about it...must go order now...

Get Jiro!
Tony Bourdain, Joel Ross, and Langdon Foss's violent, hilarious graphic novel is a remake of Yojimbo and A Fistful of Dollars, viewed through Tony's...um...unique viewpoint on food. I worked at a comic book store as a teenager, watched A Fistful of Dollars more times than I can count, and loved all the inside jokes about food. It's like they designed the graphic novel just for me.
*Well, other than the over the top violence. My tolerance for that has dropped since I was a teenager. I still loved it, but be warned - this is not a comic book for the kiddies.

16 Essential Tips for Travelling with a Family [zenhabits.org]
I just spent a month travelling with my wife and kids. I read this list when I got back, and shouted "That's IT!" It describes everything that worked well for us. (I would put #5 - Gelato will keep kids happy - in bold and use an extra large font.)

What do you think? Questions? Other ideas? Leave them in the comments section below.

*Enjoyed this post? Want to help out DadCooksDinner? Subscribe to DadCooksDinner using the RSS or Email options on the right, link to this post from your blog, recommend DadCooksDinner to your friends, or buy something from Amazon.com through the links on this site. Thank you.

Grilled T-Bone Steaks with Olive Oil, Lemon, Garlic, and Rosemary Marinade

July 19, 2012 by Mike Vrobel 3 Comments

Grilled T-Bone Steaks with Olive Oil, Lemon, Garlic, and Rosemary Marinade

I should be trying to regain my title in the Taste of Akron Steak Cookoff tonight...but I don't have the competitive fire it needs. That said, I still have a steak recipe for you. It just feels like it's that time of year.
*If you're in Akron, stop by the Taste of Akron tonight - they have a great sampling from restaurants in the area. Highly recommended.This is a quick, weeknight version of the Italian classic, Bistecca alla Fiorentina, using a simple, olive oil based marinade. Now, I know marinades aren't supposed to work. They don't penetrate the meat, leaving only a thin coating of flavor on the outside. In this case, that's a good thing. I get a thin layer of oil, garlic, lemon, and rosemary flavoring the outside of the steak, and a perfect, beefy, medium-rare center.
*What's that? You don't want your steak cooked to medium rare? What is this, communist Russia? Did we lose a war? Why not just boil it? Ahem…sorry. Lost control of myself there for a second. It won't happen again.

The other benefit of this marinade is that it is oil heavy, and the thin coat of oil left after patting it dry helps browning on a gas grill. I don't just get a crosshatch of grill marks from the grill grate, I get a sear across the entire surface of the meat.
*Of course, if you use a charcoal grill, you don't have to worry. Charcoal browns a steak beautifully.

I borrow Jamie Purviance's trick and add smoking wood and a small bundle of rosemary sprigs to the grill. The rosemary gives the smoke a hint of pine and herbs, adding a subtle wood flavor to the steak.

Recipe: Grilled T-Bone Steaks with Olive Oil, Lemon, Garlic, and Rosemary Marinade

Adapted From: Jamie Purviance, Weber's Smoke

Equipment

  • Grill (I love my Weber Summit.)


Marinating the steaks


Smoking wood and rosemary in the smoker box


Good crosshatch going...


Done!
Done!

Notes:

  • Don't cook the steaks directly over the wood and rosemary. You don't want the steak directly over burning wood.
  • I used huge flakes of Maldon salt on my steak, but any coarse salt (including my usual kosher salt) works. Just make sure to salt the steaks immediately after they come off the grill, so the salt has time to melt over the surface of the steak.

What do you think? Questions? Other ideas? Leave them in the comments section below.

Related Posts:

Grilled Ribeye Steaks with Mediterranean Herb Butter
Grilled Flat Iron Steak with Salsa Verde

Adapted from:

Jamie Purviance, Weber's Smoke

*Enjoyed this post? Want to help out DadCooksDinner? Subscribe to DadCooksDinner using the RSS or Email options on the right, link to this post from your blog, recommend DadCooksDinner to your friends, or buy something from Amazon.com through the links on this site. Thank you.

Cooking For One

July 17, 2012 by Mike Vrobel 11 Comments

I'm all alone. What am I going to cook?

I just got back from vacation with my family. We had one glorious month, spent travelling the west coast, from Portland, Oregon down to Yosemite, California, with stops at Mt. St. Helens, Crater Lake, Crescent City, and San Francisco.
Of course, I ate my way down the coast. Khao Man Gai in Portland (heavy on the chicken livers), Pollo a la Brasa in Santa Rosa, Persian lamb kebabs in San Francisco. Wine country in Oregon (Willamette valley) and California (Sonoma valley). I could go on, but I'm probably boring you already. I gained ten pounds on the trip, even though we walked for miles every day. Just don't ask us to walk the Boy Scout Tree Trail again - the kids might start a mutiny.

Now Diane and the kids are gone, out to my family's summer cottage on Lake Erie. Diane is a high school teacher, and the kids are grade school aged, so they all have the rest of the summer off. I'm stuck at home, all my vacation used up. 
The kids wanted to know why I don't get the rest of the summer off too. I don't know, kids. I don't know.

For the next two weeks, I'm cooking for myself. I'm used to cooking for five - what do I do when I have to cook for one?

I grill a steak. Salt and pepper only. That, and a glass of champagne, are dinner. I really should have a salad - or at least a vegetable side dish. It would be healthier, and I need to lose those ten pounds. But not tonight. Tonight, it's just me and some beef.


This is my meal. One steak, a glass of wine. I always make it the first night I'm home alone. It makes the house feel less empty, somehow.
*Tomorrow is a pot of chili. Nothing fancy, ground meat and beans, enough to freeze for lunches later in the week.

What do you do cook when you're cooking for one? Tell me in the comments below.

Post inspired by What We Eat When We Eat Alone by Deborah Madison - I read this book a few years ago, but this is the first time since then I've been cooking only for myself.

Grilled Green Beans in Foil

July 12, 2012 by Mike Vrobel 10 Comments

Grilled Green Beans in Foil. Foil pouch grilled green beans are an easy way to make a side dish directly on the grill. The veggies steam inside the foil pouch, brown a little, and are done in about fifteen minutes, while you work on grilling the protien to a perfect medium-rare.

I got the idea from Let the Flames Begin by Chris Schlesinger and John (Doc) Willoughby. They called them Hobo Packs, and modeled them after the foil wrapped meals you would toss in a campfire.

A platter of cooked green beans with a serving spoon
Grilled Green Beans in Foil
[feast_advanced_jump_to]

Way back in Cub Scout camp, we made a lot of hobo packs...and mine never worked. A pouch of potatoes, ground beef, and ketchup went into the campfire. What came out was burnt to carbon, except for a couple of raw, crunchy cubes in the middle of the pouch. (I ate a lot of baloney sandwiches that week.)

Luckily, I learned the steam-saute basic technique when I was older, and saw past Cub Scout charred potatoes to the possibilities of foil pouches on the grill. Any vegetable that works in a steam-saute will work in a foil pouch.

Schlesinger and Willoughby made elaborate hobo packs; yuca, corn, and tomatoes for example. I make simple vegetable pouches for weeknight side dishes. My favorite, by far, is green beans. Why? Because my wife loves green beans, and I want to keep her happy.

Ingredients

  • Fresh Green Beans
  • Kosher Salt
  • Fresh Ground Black Pepper
  • Olive Oil
  • Water

How to Grill Green Beans

  • Wrap the green beans in aluminum foil: Stack 2 2-foot pieces of heavy duty aluminum foil on top of each other. Lay the green beans in a rectangle down the middle, leaving a lot of space on the sides of the foil, and a little space at the top and bottom of the foil. Sprinkle the beans with salt, pepper, and olive oil, and add a tablespoon or two of water. Bring the long sides of the foil together over the top of the beans. Fold the long sides over twice, then keep folding until you have a long envelope with the foil tight against the pile of beans. Fold the open ends of the envelope a few times to seal.
  • Grill the foil envelope of beans over direct medium heat (350°F): Preheat your grill to medium - about 350°F - and put the foil pouch of beans on the grill grate, directly over the heat, seam side up. Grill the pouch of beans for 16 minutes, flipping gently to the other side halfway through the cooking time.
  • Check and serve: Carefully open the foil pouch (protect your hands - the foil will be hot) and try a bean. They should be done, tender with a little bite to them, but if not, seal up the pouch and cook for another five minutes, or until the beans are tender. Pour the beans from the pouch onto a serving platter and enjoy.

Helpful Tips

Start the beans early

The beans usually take longer than my main course when I'm grilling, so I try to get them on the grill first.

Why two pieces of foil?

I can probably get away with one, but I worry about poking a hole in the foil. If there is a hole, all the liquid drips into the grill. This makes a mess, but also doesn't leave enough steam in the foil pouch for the beans to cook evenly.

Heavy Duty Aluminum Foil

"Regular" aluminum foil is thin and fragile. I don't like to use it when I'm flipping a big pouch full of pointy beans with metal tongs - I've poked a few too many holes in pouches that way. If you have to use regular aluminum foil, use 4 pieces to make the pouch. (I get my aluminum foil from warehouse clubs or restaurant supply stores - a 500 food roll costs a lot less per foot than the 25 foot rolls they sell at the grocery store.)

I punched a hole in the foil! Now what?

Accidents happen, even with heavy duty foil. If you punch a hole in the foil, gently flip the pouch so the hole is on the top, and cover the hole with another piece of foil wrapped tight around the package. (Protect your hands while you do this - the grill and the foil pack green beans are hot.)

Serving Suggestions

These beans make a great side dish if you already have the grill fired up for something else, like steaks, pork chops, ribs, or salmon. You can scale this recipe up or dow; I've made it half sized and double sized. When I double the recipe, I cook the beans for 24 minutes total - 12 minutes on each side of the pouch - to make sure they cook through.

If you want to make a Mediterranean version of these beans, add a clove of minced garlic and a sprinkle of red pepper flakes.

If you want an Asian taste profile for this green beans recipe, skip the salt and water and drizzle the beans with 2 tablespoons of soy sauce before closing the foil packets.

Equipment

  • Grill (I use a Weber Summit. Here is the current version of my grill.)
  • 2 (18-inch by 24-inch) pieces heavy duty aluminum foil

Adapted From: Chris Schlesinger and John Willoughby Let the Flames Begin

Variations

This technique will work with any semi-tender vegetable that you can steam in about fifteen to twenty minutes. I use it to make make foil pouch baby carrots, asparagus, and broccoli on a regular basis.

Olive oil drizzled onto a pile of green beans
Seasoning green beans on the foil
A wrapped foil pouch of green beans ready for the grill
Foil pouch, wrapped and ready to grill
A gloved hand opening a foil pouch of green beans
Opening to check the beans
A hand holding a cooked green bean with a foil pouch of beans in the background
Checking a bean for doneness
A platter of grilled green beans on the patio table.
Ready to serve

What do you think? Questions? Other ideas? Leave them in the comments section below.

Related Posts:

Some other great grilled vegetables are Grilled Asparagus, Grilled Baby Bok Choy with Lime Dressing, Grilled Peppers and Onions, and Grilled Shishito Peppers.
Click here for my other grilling recipes.

Adapted from:

Chris Schlesinger and John Willoughby Let the Flames Begin

*Enjoyed this post? Want to help out DadCooksDinner? Subscribe using your RSS reader or by Email, recommend DadCooksDinner to your friends, or buy something from Amazon.com through the links on this site. Thank you!

Grilled Foot Long Hot Dogs

July 10, 2012 by Mike Vrobel 5 Comments

I'm on vacation this week. I'm taking the easy way out and grilling hot dogs. Throw 'em on the grill, turn after a few minutes, and serve.

I can't help myself. Even when I take the easy way out…I don't take the easy way out. I found foot long hot dogs at my local megamart and topped them with everything I could find in the refrigerator. Leftover chili? Check. Pickle relish? Yep. Chop some onions, and get every jar of pickles and bottle of mustard. Let's load up them dogs!

Recipe: Grilled Foot Long Hot Dogs


Cooking time: 6 minutes

Ingredients:

  • 12 (foot long) hot dogs
  • 12 (foot long) hot dog buns

Condiment suggestions:

  • Mustard (cheap yellow, grainy, sweet-hot)
  • Pickles (pickle relish, dill spears, jalapenos)
  • Chili (I make big batches of chili, to make sure I always have some in the freezer)
  • Cheese (shredded cheddar, slices of American)
  • Grilled peppers and onions
  • Chopped raw onions
  • Sauerkraut
  • Ketchup - Never!

Directions:

1. Grill the hot dogs:
Preheat the grill to medium heat, and clean the grill grate. Put the dogs on the grate, and cook until browned on the bottom, about three minutes. Flip the dogs and cook until browned on the other side, another three minutes. Remove to the buns.

2. Serve:
Pass the dogs and the toppings, letting people top them however they want. Foot long dogs are perfect for multiple-choice topping. I like half chili dog, half polish boy…but that's just me.

Notes:

  • The kids didn't believe me when I said they were foot long dogs, and measured them with a ruler. And they were right - the dogs were only 11 inches long. The fine print on the package said "extra long hot dogs", not "foot long". What are we coming to? What kind of a world is it where a foot long hot dog isn't actually a foot long?
  • I got over it. It was the chili. I can't stay mad at a chili dog.

What do you think? Questions? Other condiments for the dogs? Passionate arguments in favor of ketchup on a hot dog? Leave them in the comments section below.

Related Posts

My favorite side dish for foot long hot dogs is my Instant Pot Potato Salad, or a big bag of potato chips.
For some other fancy hot dog recipes, try Grilled Mexican Hot Dogs or Grilled Chicago Char Dogs. Or, to branch out, check my Grilled Sausage basic technique or my Pan-Grilled Bratwurst with peppers and onions.

*Enjoyed this post? Want to help out DadCooksDinner? Subscribe to DadCooksDinner using the RSS or Email options on the right, link to this post from your blog, recommend DadCooksDinner to your friends, or buy something from Amazon.com through the links on this site. Thank you.

Rotisserie Cornish Game Hens with Port Wine and Currant Jelly Glaze

July 5, 2012 by Mike Vrobel 1 Comment

If you have read this blog for any length of time, you know I have a soft spot for cornish game hens. Every time my grandfather came to visit, we would make cornish game hens stuffed with wild rice stuffing. In honor of my grandfather, when I wrote my rotisserie cookbook, I developed a rotisserie version of the recipe.
*Shameless plug: you did buy a copy of my cookbook, right? Right. Moving on...

Then I had this discussion with my dad at a family party:

Dad: So, how's the cookbook doing?

Me: Great! I've already sold 100 copies. Did you see the wild rice stuffed hens? I wrote that just for Grandpa.

Dad: You mean the ones with a port wine and jelly glaze?

Me: Um...wait...not wild rice stuffed?

Dad: He loved those hens.

Me: You mean I've been making the wrong recipe THIS WHOLE TIME?

Dad: Grandpa really loved that glaze...

So, what did I learn today?

  1. When it comes to old family recipes, I really should ask instead of just going with what I remember. My memory can't be trusted.
  2. I need a port wine glazed cornish hen recipe!

Recipe: Rotisserie Cornish Game Hens with Port Wine and Currant Jelly Glaze

Cook time: 45 minutes

Equipment:

  • Grill with Rotisserie attachment (I used a Weber Summit with an infrared rotisserie burner. Here is the current version of my grill.)
  • Aluminum foil drip pan (9"x12", or whatever fits your grill)
  • Butcher's twine
  • Basting brush

Ingredients:

  • 4 Cornish game hens (Mine were about 1.75 pounds each)
  • 6 teaspoons Kosher salt, 1 ½ teaspoon per hen
  • 2 teaspoons fresh ground black pepper (½ teaspoon per hen)
  • ½ cup Port
  • ¼ cup red currant jelly

Directions:
*See my Rotisserie Poultry basic technique for an overview.
1. Prepare the hens and the glaze: For each hen: sprinkle evenly with 1 teaspoon kosher salt and ½ teaspoon black pepper, making sure to get some in the cavity. Truss each hen tightly. (See the basic technique for trussing details). Once the hens are seasoned and trussed, skewer them on the spit. While the grill is pre-heating, put the port wine and currant jelly over medium heat in a small saucepan, bring to a simmer, and simmer until reduced by half, about ten minutes.
*If you have the time, do this an hour before cooking. This lets the hens come up to temperature before they go on the grill, which results in better browning.

2. Prepare the grill:
Set the grill up for rotisserie cooking at high heat. For my Weber Summit, this means removing the grates, turning the two outer burners (burners 1 and 6) to high, and turning the infrared burner to high. Then I put my drip pan in the middle, over the unlit burners, and let the grill preheat for ten to fifteen minutes. (See My Rotisserie Basic Technique Post for more rotisserie setup details.)

3. Rotisserie the hens:
Put the spit on the grill, turn on the rotisserie motor, and cook with the lid closed. The cooking time will be from 30 to 45 minutes, depending on the size of the bird. My 1.75 pound Cornish hens cooked in 45 minutes. Checking the temperature in the thickest part of the breast meat with an instant read thermometer is the best way to tell if the hens are done. You want the temperature to be 160*F to 165*F. During the last fifteen minutes of cooking, brush the port wine glaze on the hens ever five minutes.

4. Serve: Brush the hens with one last coating of the glaze. Remove the spit from the grill, remove the hens from the spit, and remove the trussing string from the hens. Let the hens rest for at least 15 minutes, then split in half and serve.

Notes:
*Don't use a fine vintage port for this recipe. Use a cheap tawny or ruby port. I prefer tawny port for drinking, so that's what I used in the recipe.

What do you think? Questions? Other ideas? Leave them in the comments section below.

Related Posts:
Rotisserie Cornish Game Hens, Dry Brined
Rotisserie Cornish Game Hens, Brined and Herbed
Click here for my other rotisserie recipes.


Check out my cookbook, Rotisserie Grilling.

Everything you could ask about the rotisserie,
plus 50 (mostly) new recipes to get you cooking.

It's a Kindle e-book, so you can download it and start reading immediately!


*Enjoyed this post? Want to help out DadCooksDinner? Subscribe to DadCooksDinner using the RSS or Email options on the right, link to this post from your blog, recommend DadCooksDinner to your friends, or buy something from Amazon.com through the links on this site. Thank you!

Things I Love: Weber Charcoal Kettle Rotisserie

July 3, 2012 by Mike Vrobel 10 Comments

I love it so much, I wrote a cookbook...


The Weber charcoal kettle rotisserie is my favorite grill accessory.

Yes, at $150, it costs as much as grill itself. But it turns a simple kettle grill into the best rotisserie oven money can buy.

Why does that matter? Because a rotisserie turns out the best roasts I've ever cooked. Perfect chicken, prime rib with amazing crust, pork shoulder to die for. If you want to roast on your grill, you want a rotisserie.

Setup is simple - there is a large ring that sits between the grill and the lid, with a motor mount on one side and a notch on the other. The rotisserie motor slides onto the mount, the spit plugs into the motor, and rests in the notch on the other side of the ring.

Configure the grill for indirect heat - put coals on both sides of the grill, add a drip pan between the coals, under the spit, and you're ready to cook.

My only complaint about the kettle rotisserie? Sometimes, when I'm cooking for a crowd, I wish it was bigger. It's limited by the 22 ½ inch width of the kettle grill. I can squeeze three chickens on the spit, barely. If I need more food on the rotisserie, I have to turn to my humungous Weber Summit gas grill. And, frankly, the charcoal cooks better, especially when I use smoking wood.
*I keep hoping Weber will make a rotisserie for the extra-large 26.75 inch kettle grill. But, my guess is the 26.75 inch grill is a specialty item, and a rotisserie for it would never sell enough units to be worth the effort. Sigh.

Do you want your your humble kettle grill to be a superstar? Get the rotisserie. You won't regret it.

What do you think? Questions? Other ideas? Experiences with another electric pressure cooker? Leave them in the comments section below.

FTC disclosure: All my "Things I Love" posts are about products I use and purchased myself. I did not receive any form of compensation to write this. If you buy something through one of my Amazon links, I do get a small commission.

Related Posts:

My Rotisserie Grilling Recipes

Inspired by:

Weber 22 ½ inch Charcoal Kettle Rotissserie


Of course, once you get the rotisserie, you might want a cookbook to go with it…hint, hint…


Check out my cookbook, Rotisserie Grilling.Everything you could ask about the rotisserie,
plus 50 (mostly) new recipes to get you cooking.

It's a Kindle e-book, so you can download it and start reading immediately!


*Enjoyed this post? Want to help out DadCooksDinner? Subscribe to DadCooksDinner using the RSS or Email options on the right, link to this post from your blog, recommend DadCooksDinner to your friends, or buy something from Amazon.com through the links on this site. Thank you.

Smoke Roasted Aioli

June 28, 2012 by Mike Vrobel 1 Comment

I learned how to make aioli in Paris, in a class with Susan Hermann Loomis. She taught us to pound garlic in a mortar and pestle, stir in the eggs, and then slowly, ever so slowly, drip in the oil. The aioli was   awesome with fresh vegetables, and I vowed to make it as soon as I got home.

Of course, once I got home, I took the easy way out. I used a food processor instead of endlessly pounding with a mortar and pestle. The results were not good - a slap in the face of sharp, raw garlic, followed by a hint of bitter. I set the recipe aside, to try again someday.

Someday turned into years. This year, there was a surge of interest in food processor mayonnaise. Bittman did it, then Kenji Alt made a small batch with a stick blender. I thought it was time to resurrect the recipe, but I kept remembering the bitter garlic.

Then I saw Jamie Purviance make smoke aioli by smoke-roasting garlic on the grill, and mixing it with jarred mayonnaise. smoked. Smoke-roasted garlic! That's was it, the missing piece to my recipe.
*And, hey, you know me, any excuse to add a grilling component to a recipe…

I needed to add a lot more of the grill-roasted garlic, but the results were perfect - garlicky, sweet, with a hint of smoke.

Looking for the best mayonnaise you've ever had? The perfect dip for your next grilling party? Make your own garlicky aioli.

Recipe: Smoke Roasted Aioli


Adapted From:

Susan Hermann Loomis Cooking at Home On Rue Tatin
Mark Bittman Food Processor Mayonnaise [nytimes.com]
Jamie Purviance Weber's Smoke

Cooking time: 45 minutes

Equipment:

  • Aluminum Foil
  • 2 cups wood chips (gas grill) or fist sized chunk wood (charcoal grill)
  • Food Processor

Ingredients:

Smoke roasted garlic

  • 1 medium head garlic
  • ¼ teaspoon kosher salt

Aioli

  • 8 cloves of smoke roasted garlic (about half the head)
  • 3 egg yolks (preferably from pasteurized eggs)
  • 1 tablespoon Dijon mustard
  • 1 tablespoon fresh lemon juice
  • ½ teaspoon kosher salt
  • 2 cups grapeseed oil (or other neutral oil)

Suggested Accompaniments:

  • crunchy vegetables cut into sticks or bite sized pieces
  • grilled potato or sweet potato wedges
  • pita bread wedges
  • potato chips (my guilty pleasure)

Instructions

1. Prep the garlic:
Cut the top third off the head of garlic, exposing the cloves. Wrap the bottom of the head of garlic in aluminum foil, leaving the cut cloves exposed.

2. Smoke roast the garlic:
Preheat the grill, then set up for cooking on indirect medium-low heat (300°F). (For my grill, this means my smoking burner and one burner on the other side of the grill at medium, and all the other burners off.) Add the smoking wood to the grill and wait for it to start smoking, about five minutes. Once you see smoke, put the foil-wrapped garlic on the grill, near the smoke but not directly over the heat. Close the lid and cook until the exposed garlic cloves are golden and the whole head is soft, about 45 minutes.

3. Make the aoli:
Let the garlic cool down for a couple of minutes, then squeeze the cloves out of the head of smoke-roasted garlic. Put 8 cloves in the food processor, and save the rest for another recipe. Add the egg yolks, mustard, lemon juice, and salt to the food processor. Turn on the processor and slowly drizzle in the grapeseed oil. (If your food processor has a hole in the pusher, pour the oil into the pusher and let it drip into the processor work bowl.) The aioli is done when all the oil is emulsified.

Notes

  • This is the best vegetable or chip dip ever. Think of "french onion dip" on steroids. I love it with fresh, sweet vegetables from the farmers market - carrots and radishes in particular. But my guilty pleasure is to eat it with potato chips.
  • Aioli is from Provence, so extra virgin olive oil seems like it should be in this recipe, right? Don't use it! Food processors beat up olive oil too much, releasing bitter flavors from the oil. Use a neutral oil, like grapeseed oil.
  • Super-easy version - Jamie Purviance smoke roasts the garlic, mashes it with a fork, then stirs the mashed garlic into 2 cups of store-bought mayonnaise. Done.
Hole in the pusher tube for your food processor =>
aioli or mayonnaise is easy

What do you think? Questions? Other ideas? Leave them in the comments section below.

Adapted from:

Susan Hermann Loomis Cooking at Home On Rue Tatin
Mark Bittman Food Processor Mayonnaise [nytimes.com]
Jamie Purviance Weber's Smoke

*Enjoyed this post? Want to help out DadCooksDinner? Subscribe to DadCooksDinner using the RSS or Email options on the right, link to this post from your blog, recommend DadCooksDinner to your friends, or buy something from Amazon.com through the links on this site. Thank you.

Review: Weber's Smoke by Jamie Purviance

June 26, 2012 by Mike Vrobel 1 Comment

Weber has made their Weber Smokey Mountain bullet smoker for years. For a long time it seemed like an afterthought in their grill lineup, but the internet changed that. Fans of the WSM started to gather at the Virtual Weber Bullet and the popularity of Weber's little smoker took off.
It got so popular that Weber recently added a jumbo 22 inch WSM to their lineup.

It was only a matter of time before they published a cookbook to support the now-popular smoker. Here it is - Weber's Smoke, by Jamie Purviance.

I assumed the book would be about low and slow barbecue standards, flavored with wood smoke, and I was not disappointed. Baby back ribs are on the cover, and all the classics are there - pulled pork, spare ribs, beer can chicken, and the king of barbecue, beef brisket.
My apologies to Memphis, St. Louis, and the Carolinas. My favorite barbecue is whatever is in front of me right now; I'll never turn down good barbecue. But, if I was forced to choose only one type of 'cue, a perfectly smoked brisket would win out…barely. Maybe because it's the toughest one to get right.

But this book is not just for die hard barbecue fans. Jamie has a bunch of great ideas in here, using subtle smoke flavors that go well beyond traditional barbecue. Smoked artichokes with aioli and smoked shrimp tacos jumped out at me as recipes I had to try. And the ribeye steak with a touch of smoke from wood chips and thyme sprigs may be my new favorite way to flavor a steak.

Weber's Smoke covers smoking on a wide range of grills, from water smokers to gas super-grills, and everything in between. Jamie filled the opening of the book with tips and instructions. My favorite was tip #5 - "White smoke is good, black smoke is bad". I started laughing the moment I saw it. I learned that one the hard way. White smoke means the wood is burning properly and perfuming my food. Black smoke means fat is dripping on coals, the food is covered with oily soot, and I have to put out a grease fire.

If you want your grilling to include smoke flavors, this cookbook is a great resource.

Highly Recommended.

FTC disclosure: I did not receive any form of compensation to write this review. If you buy something through one of my Amazon links, I get a small commission.

Jamie Purviance Weber's Smoke: A Guide to Smoke Cooking for Everyone and Any Grill

*Enjoyed this post? Want to help out DadCooksDinner? Subscribe to DadCooksDinner using the RSS or Email options on the right, link to this post from your blog, recommend DadCooksDinner to your friends, or buy something from Amazon.com through the links on this site. Thank you.

Canning Jar Margaritas

June 21, 2012 by Mike Vrobel 13 Comments

Forget making pickles - this is now my favorite use for canning jars.

They are a great idea, especially for entertaining. Why mess around crushing ice in a blender when you can mix everything up, toss it in the freezer, and pull out a flat of slushy margaritas whenver you need it? The alcohol keeps them from freezing solid; dip the rim in salt before it melts, poke it a few times with a fork, and they are ready to serve.

*The only problem with this recipe: it changed my definition of "whenever I need a margarita" to "it's five o'clock somewhere, right?"

I got the idea from pictures of the Big Summer Potluck. A few years back, Colleen of SouffleBombay.com brought them to the potluck, and the moment I saw the pictures, I knew I had to make them.

I use frozen concentrated limeaid in my frozen margaritas instead of fresh squeezed limes and simple syrup. (I picked up the trick from Robb Walsh's The Tex-Mex Cookbook.) Why go through the effort of squeezing all those limes when I'm just going to re-freeze everything?
*If you're going to give me a hard time about limeaid, don't make frozen margaritas. Make Mexican Martinis instead.

Canning Jar Margaritas


Adapted from:
Frozen Chambord Margaritas [SouffleBombay.com]
Robb Walsh, The Tex-Mex Cookbook
Mason Jar Margaritas [Stetted.com]

Cooking time: 5 minutes

Equipment:

  • 12 half-pint canning jars (or 6 pint canning jars)

Ingredients:

  • 36 ounces water
  • 12 ounces limeade concentrate (1 jar)
  • 25.4 ounces tequila (one 750ml bottle)
  • 12 ounces orange liqueur (cointreau or triple sec)
  • Coarse salt (optional; I use kosher salt)

Directions:

1. Make the margaritas:
Stir the water, limeade, tequila and cointreau until the limeade dissolves. Pour into the canning jars, seal with the lids, then store in the freezer at least overnight.

2. Serve:
Take a jar out of the freezer, immediately remove the lid, and dip the rim in the coarse salt. Poke the margarita a few times with a fork to make it slushy, then drink up.

Notes:

  • For ease of storage, put the canning jars back in their box before freezing. That way, you can slide the whole box out of the freezer when you're ready to serve.
  • 8 ounce jars were kind of small. We kept going back for seconds. From now on, I'm going to double the recipe and make a flat of pint jar margaritas.
  • The first time through the recipe, I had a problem with the math. I had a case of twelve - eight ounce canning jars. That should be 96 ounces worth of margarita, right? After filling the jars, I wound up with sixteen extra ounces of margarita. Turns out, canning jars are eight ounces if they are filled entirely to the rim. I stopped pouring at the bottom of the ring, to leave space for expansion in the freezer…and that only uses seven ounces per jar. It wasn't a complete loss - I used the excess to make a single pint jar margarita.
Whoops...
  • This isn't the time to bring out the good anjeo or reposado tequila. Save that for sipping. I use the cheapest 100% agave silver (blanco) tequila I can find. (By sticking to 100% agave, I avoid the horror of "gold" tequila. Or goldish, as Terry Pratchett would say.)

What do you think? Questions? Other ideas? Leave them in the comments section below.

Related Posts:

Fiery Mexican Martini

Adapted from:

Frozen Chambord Margaritas [SouffleBombay.com]
Robb Walsh, The Tex-Mex Cookbook
Mason Jar Margaritas [Stetted.com]


*Enjoyed this post? Want to help out DadCooksDinner? Subscribe to DadCooksDinner using the RSS or Email options on the right, link to this post from your blog, recommend DadCooksDinner to your friends, or buy something from Amazon.com through the links on this site. Thank you.

Things I Love: Canning Jars

June 19, 2012 by Mike Vrobel 5 Comments

A Toast to Canning Jars

I have the canning bug. I had to buy a new shelf to hold all my jars. Most of them are empty, waiting for the start of summer produce season so I can start pickling.

With all those jars lying around, I found out that canning jars are for more than canning. They're multitaskers, useful to have in the kitchen. Just in case.
*I'm sure McGyver had flats of canning jars in his pantry. He probably used them to make a solar microwave, but still.

I use them as all purpose storage containers, from spices to spare change. But my favorite alternate use is coming Thursday - canning jar margaritas. Until then, here are some creative ways to use canning jars.

My top five favorite non-canning uses for canning jars:

  1. Salt Carton Pour Spout Retrofit

Need a quick and easy pour spout for a jar?

  1. ReCap

How about a pop-top lid, for drinking or shaking salad dressings?

  1. Redneck Wine Glasses

These were the inspiration for this post. My brother-in-law, who lives down on the edge of Amish country, had a set of the last time we went to visit. I immediately asked him to get me a set.
*I found out later you can make them yourself.

  1. Parmesan Lids Fit On Canning Jars

The ONLY reason to buy "parmesan" cheese in a green can - the lid makes the perfect shaker top for a regular mouth canning jar.

  1. Blender Jar

Need to blend something right in the jar? A regular mouth canning jar screws into most blender bases.

And, if you don't feel like canning, jars are perfect for storing refrigerator pickles, especially if you buy a set of reuseable storage caps.

What do you think? What creative uses do you have for canning jars?

Ball Regular Mouth Pint Jars


*Enjoyed this post? Want to help out DadCooksDinner? Subscribe to DadCooksDinner using the RSS or Email options on the right, link to this post from your blog, recommend DadCooksDinner to your friends, or buy something from Amazon.com through the links on this site. Thank you.

Rotisserie Barbecued Pork Belly

June 14, 2012 by Mike Vrobel 5 Comments

I wanted to make the half a pig's head from The Greenhouse Tavern, Jonathon Sawyer's monument to tender, fatty, crispy pork. He slow cooks the head, basting it with barbecue sauce. The half head is presented on a platter, with a plate of buns and a pile of crisp raw vegetables. You take it from there - shred the skin, meat, and fat from the head and use it to build sandwiches, with the crisp vegetables to help cut the fattiness of the pork.

Unfortunately, a pig head is not going to work in my back yard. The snout, the floppy ears, the wails of "it's staring at me"…it's too much for the kids.
*I took my 11 year old to the butcher. "Darn," I said, "they don't have pig's heads today." He looked at me like I was insane.

My solution? Pork belly. Almost as fatty as a pig's head, it has the same tender meat and crisp skin. I cook my pork belly on the rotisserie, of course, but if you don't have a rotisserie, check out the "No rotisserie? No worries." section in the variations.

Recipe: Rotisserie Barbecued Pork Belly


Inspired by: Jonathon Sawyer The Greenhouse Tavern

Cooking time: 4 hours

Equipment:

  • Grill with Rotisserie attachment (I used a Weber Summit with an infrared rotisserie burner. Here is the current version of my grill.)
  • Aluminum foil drip pan (9"x12", or whatever fits your grill)
  • Butcher's twine

Ingredients:

  • 6 pound pork belly, skin on

Brine:

  • 2 quarts water
  • ½ cup kosher salt (¼ cup table salt)
  • ¼ cup brown sugar

Rub:

  • 2 teaspoons paprika
  • 1 teaspoon granulated garlic
  • 1 teaspoon granulated onion
  • ½ teaspoon fresh ground black pepper
  • ½ teaspoon dried oregano
  • ½ teaspoon dried thyme

Accompaniments:

  • Hamburger buns
  • Barbecue sauce (Store bought or homemade)
  • Thin-sliced napa cabbage
  • Thin-sliced red onion

Directions:

1. Brine the pork belly
Mix the brine ingredients in a large container until the salt and sugar dissolve. Score the skin and meat in a 1 inch diamond pattern, then submerge the pork belly in the brine. Refrigerate for 4 to 8 hours.

2. Prepare the pork belly
One hour before cooking, remove the belly from the brine and pat dry. Mix the rub ingredients in a small bowl, then sprinkle over the meat side of the belly. Roll the belly into a cylinder, with the skin facing out, then truss every two inches along its length. Skewer the belly with the rotisserie spit and secure it with the spit forks, then let it rest at room temperature until it is time to grill.

3. Prepare the grill
Set the grill up for rotisserie cooking on medium-low heat, about 300°F. For my Weber Summit, this means removing the grates, turning the two outer burners (burners 1 and 6) to medium, and leaving the infrared burner off. Then I put my drip pan in the middle, over the unlit burners, and preheat the grill for ten to fifteen minutes. (See rotisserie poultry basics for more rotisserie setup details.)

4. Rotisserie the pork belly
Put the spit on the rotisserie, turn on the motor to start it spinning, and close the lid. Cook on until the pork belly measures 190°F in its thickest part, about four hours. The skin should be nicely browned at this point. To get the skin extra crispy, you want it to blister. Turn the grill up to high heat (add more coals, or turn up the burners and turn on on the infrared rotisserie burner if you have one) and cook for another ten to fifteen minutes, until the skin starts to bubble and blister.

5. Serve
Remove the spit from the grill, remove the pork belly from the spit, and remove the twine from the belly. Let the belly rest for fifteen minutes. Slice the belly with a serrated knife, which helps cut through the crunchy skin. Serve as sandwiches, topping with barbecue sauce and crunchy vegetables.

Variations:

  • No rotisserie? No worries. Brine, rub and truss the pork. Set your grill up for indirect cooking on medium-low heat, with the drip pan under the grill grates. Put the pork over the drip pan and cook, turning once an hour, for the four hour cooking time. To crisp up the skin, move the pork belly over direct heat, turning every minute or two. Continue with the "serve" step.

Notes:

  • I was torn about brushing the barbecue sauce on the pork belly as a glaze, or serving it on the side. I went with on the side, to keep the pork skin as crispy as possible.
  • If you get a smaller piece of pork belly, don't bother rolling it up. My first rotisserie pork belly was a 1 ½ pounder, which was the perfect size to skewer as a flat piece.
  • Special thanks to Sherman Provision for the beautiful piece of pork

What do you think? Questions? Other ideas? Leave them in the comments section below.

Related Posts:

Rotisserie Pork Belly
Rotisserie Pork Shoulder
Rotisserie BBQ Baby Back Ribs
Click here for my other rotisserie recipes.

Inspired By:

Jonathon Sawyer The Greenhouse Tavern


Check out my cookbook, Rotisserie Grilling.

Everything you could ask about the rotisserie,
plus 50 (mostly) new recipes to get you cooking.

It's available in paperback, and as a Kindle e-book, so you can download it and start reading immediately!


*Enjoyed this post? Want to help out DadCooksDinner? Subscribe to DadCooksDinner using the RSS or Email options on the right, link to this post from your blog, recommend DadCooksDinner to your friends, or buy something from Amazon.com through the links on this site. Thank you.

Road Trip: Sherman Provision

June 12, 2012 by Mike Vrobel 4 Comments

Looking for pork in the Akron area? Sherman Provisions is worth a trip. From simple cuts like pork loin and Boston butt, through pork jowls, and trotters, neck bones and pork belly. They even have whole pig heads available in their meat case. And, if you need a whole pig, give them a call - they can fill the order with at least week's notice.

It's not just pork, they are a full service butcher. Sherman's has homemade sausage, aged beef, fresh chicken, a wide variety of smoked meats, and a small but exotic international dry goods section.
*I think the dry goods are mainly Eastern European, but I don't recognize the language on the packages. If you know the nationality (nationalities?) of their international section, please tell me in the comments!

Sherman Provision
3998 Johnson Road
Norton, OH 44203
330.825.2711
ShermanProvision.com

My Top 5 list:

1. Pork: I was in hog heaven. Whole loins, Boston butts, spare ribs, entire pork shoulders with the skin on. Sides of pork belly, both cured for bacon and uncured. Did I mention the pig heads? Seeing that snout and floppy ears in the meat case shows a dedication to pork that demands respect.

2. Whole pigs: Want to buy a 20 pound suckling pig? How about a 300 pound hog? Something in between? Give them a call, they can get it for you.

3. Homemade sausage: Sherman's breakfast sausage was a Sunday morning hit. They also make sweet and hot Italian, garlicky Hungarian, and country sausage.

4. Aged beef: Of course, they have a wide range of beef cuts. But the whole aged rib roast was calling to me. It will be mine.

5. Homemade bacon: Do I need to say more?

View Larger Map
Related posts:

My list of Ethnic and Gourmet stores in the Akron, OH area.

*Enjoyed this post? Want to help out DadCooksDinner? Subscribe using your RSS reader or by Email, recommend DadCooksDinner to your friends, or buy something from Amazon.com through the links on this site. Thank you!

Pressure Cooker Short Ribs Braised with Beer

June 7, 2012 by Mike Vrobel 9 Comments

Pressure Cooker Short Ribs Braised With Beer

I'm craving Belgian abbey ales. Dubbels and trippels, blonds and saisons, every week I pick up a few of the extra-large bottles. Whether they're brewed by Trappist monks in Belgium, or an American brewery specializing in the abbey style, I haven't been disappointed yet.

Which brought me to dinner. (My thoughts always turn to dinner, eventually.) What goes with a Belgian ale? Beer braised short ribs, of course.
*The only problem with the recipe was bringing myself to pour the beer in the pot. I hate to waste beer…even if I'm not really wasting it.

As usual, I'm using my pressure cooker to speed things up. I love having tender short ribs in under an hour.
*Also as usual, if you don't have a pressure cooker, check out the variations section for a non-pressured version of the recipe.

Recipe: Pressure Cooker Short Ribs Braised with Beer


Adapted From: Judy Rodgers, Short Ribs braised with Chimay Ale, The Zuni Cafe Cookbook

Cooking time: 60 minutes

Equipment:

  • 6 quart or larger pressure cooker (I used my electric Cuisinart Pressure Cooker)

Ingredients:

  • 1 teaspoon vegetable oil
  • 4 pounds beef short ribs, cut between the bones into 2 inch pieces
  • 2 teaspoons plus ½ teaspoon Kosher salt
  • 1 large onion, sliced
  • 3 ounces tomato paste (half of a can, about ¼ cup)
  • 1 cup Belgian dark ale (I like Brewery Ommegang Abbey Ale)
  • 1 cup chicken stock (preferably homemade) or water
  • 6 sprigs fresh thyme
  • 1 bay leaf
  • 1 dried portobello mushroom, rinsed

Directions:

1. Brown the ribs:
Season the ribs with the 2 teaspoons of salt. Heat 1 teaspoon of vegetable oil over medium-high heat in your pressure cooker pot until it is shimmering. Add half the ribs, and sear for 3 minutes per side, or until well browned. (I treat the ribs as if they have four "sides", so this should take about 12 minutes. Make sure one of the "sides" is bone side down - that will help render some of the fat.) Remove the browned ribs to a bowl. Add the second half of the ribs to the pot, and sear for 3 minutes per side. Move the second batch into to the bowl with the rest of the browned ribs. Pour off all but 1 tablespoon of the fat in the cooker.

2. Saute the aromatics:
Add the onion and tomato paste to the pot. Sprinkle with the remaining ½ teaspoon of salt. Saute for five minutes, or until the onions are softened and the tomato paste is starting to darken. Add the beer and the chicken stock to the pot, increase the heat to high, and scrape the bottom of the pot to loosen any browned bits from the bottom.

3. Pressure cook the short ribs:
Add the thyme, bay leaves, mushroom, and reserved beef to the pot, and stir everything until it is well mixed. Get as many ribs submerged in the liquid as you can. Lock the lid on the pressure cooker. Bring the pressure cooker up to high pressure, then lower the heat to maintain that pressure and cook for 35 minutes (40 minutes for an electric pressure cooker). Remove from the heat, allow the pressure to come down naturally for at least 15 minutes, then quick release any pressure left in the pot.

4. Finish the short ribs:
Remove the short ribs from the pot with a slotted spoon. Discard the thyme, bay leaves, and mushroom. Pour the remaining liquid into a fat separator and let it rest for ten minutes for the fat to float to the surface. Serve the ribs with the degreased sauce. (If you have time, boil the degreased sauce over high heat until reduced by half, then serve.)

Variations:

  • Don't have a pressure cooker? No worries. Use a heavy bottomed dutch oven with a lid, and increase the amount of chicken stock and beer to 2 cups each. Follow the instructions right up until "lock the lid". Then, instead of pressure cooking, bring the pot to a boil, and cover with the lid. Move the pot to a preheated 350*F oven and bake until the short ribs are tender, about 2 hours. Continue with the "finish the short ribs" step.

Notes:

  • This recipe tastes even better if you can make it a day ahead of time. Cook it through step 3, then let the pot cool down to room temperature. Cover the pot and store it in the refrigerator overnight. The next day, scrape that fat cap off the top of the stew. Bring the pot to a boil over medium-high heat, then simmer for ten minutes or until heated through.
  • You don't really have to use a Belgian ale with this. Any brown ale will do.
  • I cooked these short ribs under pressure longer than usual - they were extra thick, and I wanted to make sure they were tender. It worked out perfectly - the 2 inch thick ribs took 40 minutes in my electric PC.

What do you think? Questions? Other ideas? Leave them in the comments section below.

Related Posts:

Pressure Cooker Short Ribs with Mexican Flavors
Pressure Cooker Beef Shank (Osso Bucco)
Click here for my other pressure cooker recipes.

Adapted from:

Judy Rodgers, Short Ribs braised with Chimay Ale, The Zuni Cafe Cookbook

*Enjoyed this post? Want to help out DadCooksDinner? Subscribe using your RSS reader or by Email, recommend DadCooksDinner to your friends, or buy something from Amazon.com through the links on this site. Thank you!

Are Food Bloggers "Faking It"?

June 5, 2012 by Mike Vrobel 16 Comments

Vive la revolution!

[h/t Dianne Jacob for sharing the original post.]

I told myself not to write this. There's enough negativity on the internet. Besides, I've got my blog, my self published cookbook - what good would it do? Let it go.

I can't let it go. This is a personal attack.

The test kitchen policy for my cookbook publishing company, Life of Reiley, is that the final recipe must be tested three times in the kitchen, then pass the test by a minimum of two home cooks (sometimes three depending on the recipe's complexity) before it's approved. If something doesn't work out with just one of the home cooks, we go back to the start and totally retest. I know many of you test much more. I have a friend who, as an intern, once tested a cinnamon roll recipe 100 times before it was deemed fit for publication by America's Test Kitchen. But whatever your testing policy, I know that we can all agree on the importance of ensuring that the experience of making a dish goes smoothly for a home cook.

…and...

The bloggers are, essentially, faking it. And then marketers are sharing these recipes with the public-and paying hobby cooks for the kind of skilled work most of us have spent a career developing. I also can't help but question to what extent do the companies check to ensure the resulting recipes aren't plagiarized from professional sources. The most important message I got from the seminar was that we, the professional journalists, researchers, home economists, recipe developers, food stylists, and photographers are getting aced out of much needed work in our chosen field by stay-at-home moms and accountants with a cooking hobby.

[Amy Reiley, Faking It, IACP.com]

Ms. Reiley,

Yes, I'm a computer programmer with a cooking hobby. Guilty as charged.

Articles like this make me doubt myself. Are you right? I agonize about this. Am I faking it? Where is the line between inspiration and plagiarism? If I think a recipe is my own, is it really original? Did I test it enough? Did I do enough proofreading?

You know what? I'm done apologizing. I write about cooking because I love it. I'm not a professional - cook, researcher, journalist, food stylist, or photographer. I'm self taught. I learned by reading everything about cooking I could lay my hands on, and trying it out in my kitchen. I learned photography the same way. That's how I'm learning to write - by writing. I'm sorry if that's not skilled enough for you.

With that background, I know what a home cook wants. That is what I try to write about. I follow my curiosity, keep reading, and keep learning more about food. I take pictures of what I cook, and try to explain what I learned to my readers. Then I see where I can improve - I read what I wrote, check my pictures, answer questions from my readers. I'm constantly working to get better.

I don't have a test kitchen behind me, other than the one where I cook all the food and do all the dishes. (OK, my wife and kids help a lot with the dishes.) In the end, all my recipes work - in my kitchen, in my back yard. And they work for everyone who reads this blog, if they read the instructions, then add their own experience and intelligence.

As for "tested recipes"...no recipe is bulletproof, even if it is made one hundred times before publication. Sure, the extra testing increases the odds...but by how much? I'm an accomplished home cook, and I still have disasters when I follow published recipes exactly as they're written.

Back to your real concern. Unwashed food bloggers like me. "Stay at home moms and accountants with a food hobby." I am invading your turf, and there's no one to check my bona fides, to make sure I didn't sneak in. I'll probably never get a show on Food TV, a book with a national publisher, or a column in a magazine or newspaper. I'm not sure any of that matters any more, and I think that's what scares you.

I'm my own publisher, separate from your exclusive tribe of professionals. The only people who matter are my readers - if I write something worth reading, or give them a recipe that works, they come back. If that means I'm faking it, then guess what - it's working.


Sorry about that, everyone. I know I shouldn't feed the trolls. I'm done ranting now.

If that wasn't enough for you, here's a much better thought out response to that string of insults: Eggs à l’Oignon and a Defense of Food Bloggers

And here's the post that caught my attention: Do newer recipe writers put the pros out of work?


*Enjoyed this post? Want to help out DadCooksDinner? Subscribe to DadCooksDinner using the RSS or Email options on the right, link to this post from your blog, recommend DadCooksDinner to your friends, or buy something from Amazon.com through the links on this site. Thank you.

Cookbook Update: Paperback version is now available!

June 3, 2012 by Mike Vrobel 2 Comments

The paperback edition of Rotisserie Grilling is now available!

Rotisserie Grilling: 50 recipes for your grill's rotisserie, is $9.99 through Amazon.com, with the same content as the Kindle edition. The only difference is the interior pictures - a full color book would have cost over $30, so I had to go with black and white pictures.

If you've been waiting patiently for a physical book, thank you.

Paperback: Rotisserie Grilling - $9.99, with black and white pictures.
Kindle: Rotisserie Grilling - $4.99, available for immediate download, with full color pictures

*My apologies to Nook and iBook readers. I made a mistake. I'm almost done formatting...but I can't publish until August 1st. I signed up for a "Kindle exclusive" program when I first published Rotisserie Grilling, and now I'm contractually obligated to not have other e-book versions until then. I won't do that again, I can assure you...


Thank you to everyone who passed on the news about my cookbook to their friends and readers. When it first came out, I had the #1 selling kindle book in the "Outdoor Grilling" category, and I briefly cracked the top twenty on the "Barbecuing & Grilling" category for all books, e-book or not. Sales have settled down to a couple a day, with a few more over weekends. Rotisserie Grilling would not be doing this well without all your help and support. Thank you!

Grilled Swordfish With Greek Salad

May 31, 2012 by Mike Vrobel Leave a Comment

Swordfish is great for grilling. It is a very firm-fleshed fish, and holds together where other fish flake apart. If you are just starting out with grilling fish, try swordfish.

Swordfish may be easy to grill, but it is very mild-tasting. I marinate swordfish in olive oil with lemon, oregano, and a pinch of sugar. This gives it a crunchy browned crust on the grill. Then I serve it with a Greek salad full of olives, feta cheese, and grilled peppers and onions. The result is a balance of opposites—mild, meaty swordfish meets crunchy, bold salad.

Now, if you've been around for a while (like me), you might be thinking: Swordfish? Isn't it endangered? What happened to "Give swordfish a break?"


Your memory isn't failing you. Swordfish was in trouble back in the '90s, and there was a campaign to save it. Thanks to good fisheries management, North Atlantic swordfish had fully recovered by 2009. Buy swordfish that was caught in North American waters and give your conscience a break—our swordfish is sustainable, and will be around for a very long time.

Recipe: Grilled Swordfish with Greek Salad


Ingredients:
Grilled Fish

  • 4 (1-inch thick) Swordfish steaks
  • 2 teaspoons kosher salt (½ teaspoon per steak)
  • ½ teaspoon fresh ground black pepper
  • ¼ cup olive oil
  • Juice of ½ a lemon (about 2 tablespoons)
  • Zest from ½ lemon
  • 1 teaspoon dried oregano (or 2 teaspoons fresh oregano, minced)
  • ½ teaspoon sugar

Grilled Vegetables

  • 1 large red onion, cut into ½ inch thick rounds
  • 1 green bell pepper, cored, sides cut into large planks
  • 1 red bell pepper, cored, sides cut into large planks
  • ½ teaspoon kosher salt

Greek Salad

  • Juice of ½ a lemon (about 2 tablespoons)
  • Zest from ½ a lemon
  • 2 tablespoons red wine vinegar
  • ¼ teaspoon kosher salt
  • ½ teaspoon fresh ground black pepper
  • ½ teaspoon sugar
  • 1 clove garlic, minced or pressed through a garlic press
  • 1 teaspoon fresh thyme (or 1 teaspoon fresh oregano, minced)
  • ½ cup extra virgin olive oil
  • 1 English cucumber, halved and cut into ¼ inch thick rounds
  • 10 ounces romaine, chopped (about 3 hearts of romaine)
  • 1 pint cherry tomatoes, halved
  • 8 ounces feta cheese, cubed
  • 6 ounces Kalamata olives, drained

Directions:

1. Marinate the swordfish, prepare the peppers and onions
Season the swordfish steaks with the salt and pepper. Mix the olive oil, lemon juice, zest, oregano, and sugar in a zip top bag. Add the swordfish to the bag and massage the marinade onto the fish through the plastic. Squeeze the air out of the bag, seal it, and store in the refrigerator for 30 minutes to 1 hour, turning occasionally. Season the peppers and onions with the salt, and let rest at room temperature until it is time to grill.

2. Set up the grill
Preheat the grill, brush the grate clean, then set up a two-level fire—half the grill on medium-high for the swordfish, the other half on medium-low for the peppers.

3. Prepare the salad
While the grill pre-heats, get the salad ready. In a small bowl, whisk the lemon juice, zest, red wine vinegar, salt, pepper, sugar, garlic, thyme, and olive oil to make a vinaigrette. Add the cucumber to the vinaigrette and toss to coat. Let the cucumber marinate in the vinaigrette until it is time to toss the salad.

Put the romaine in a large bowl, then top with the tomatoes, feta, and olives. Don't toss the salad yet—set it aside and let it wait.

4. Grill the swordfish, peppers and onions
Remove the swordfish from the marinade, let any excess drip off, and put the fish on the medium-high heat side of the grill. Put the peppers and onions on the medium-low heat side of the grill. On a gas grill, cook with the lid closed as much as possible; on charcoal, leave the lid open.

Cook the peppers and onions for 12 minutes, flipping after six minutes. The peppers and onions are done when they have softened and have charred around the edges.

Cook the fish for six to eight minutes, flipping after four minutes. The swordfish is done when it reaches an internal temperature of 130 degrees F. (If you don't have an instant-read thermometer, cut into the fish to check—it is done when cooked most of the way through, but still slightly translucent in the middle. Residual heat will cook the fish through while it rests.)

5. Finish the salad and serve
Trim off any burnt edges from the peppers and onions, then cut into thin strips. Add the peppers and onions to the bowl with the salad, pour the vinaigrette and cucumbers over the top, and toss until everything is well coated with vinaigrette. Serve by filling a plate with salad and topping with a swordfish steak.

Notes:

  • Don't overcook the swordfish, or it will dry out. I cook it to just shy of medium, then let the residual heat from the grill finish cooking it through.
  • Cook the swordfish with the skin on, then trim it off before serving. The skin is too tough to eat, but it adds a little extra flavor to the swordfish while cooking.

This post is part of the BlogHer Light & Fresh Summer Grilling series, which includes 100 percent editorial content presented by a participating sponsor. Our advertisers do not produce editorial content. This post is made possible by Michelob ULTRA Light Cider and BlogHer.


*Enjoyed this post? Want to help out DadCooksDinner? Subscribe to DadCooksDinner using the RSS or Email options on the right, link to this post from your blog, recommend DadCooksDinner to your friends, or buy something from Amazon.com through the links on this site. Thank you.

Things I Love: Essential Grilling Tools

May 29, 2012 by Mike Vrobel 4 Comments

Tongs - my hands on the grill

Memorial Day has passed. Grilling season is now open!

To start you off right, here is my list of essential grilling tools.
*PS: Want a summer of worry-free grilling? Now is the time to clean your grill.


1. Tongs
Tongs are my hands at the grill. 16 inch tongs give me a little extra distance from the fire; 12 inch tongs are better for close-in work with a lot of flipping (like chicken wings).


2. Grill brush
The key to non-stick grilling? A hot, clean grill grate. I preheat my grill grate (five minutes for charcoal, fifteen minutes for gas), then brush it until all the burnt pieces of my last grilling session are gone.


3. 8 inch by 3 inch offset spatula
Tongs are my tool of choice at the grill, but for burgers and flaky fish, I need a spatula. Get a long spatula with a flexible metal head. I've used one with a wooden handle for years, but a inexpensive food service model works just as well and can go in the dishwasher.


4. Thermapen
How do I answer the question "is it done yet?" By using an instant read thermometer. I've sung the praises of the thermapen before - it's expensive, and worth every penny.


5. Silicone basting brushes
I add a lot of sauces and bastes at the end of cooking, and I need a brush to do that. Silicone brushes don't spread sauces as easily as natural bristle brushes - but they come close, and I can toss a silicone brush coated with barbecue sauce in the dishwasher.


6. Skewers
Kebab time! I use three types - short, six inch bamboo skewers for yakitori, 12 inch thin metal skewers for kebabs, and specialty wide skewers for ground meat kebabs.


7. Aluminum foil
Heavy duty aluminum foil is my all-purpose tool on the grill. I foil-wrap vegetable pouches to make a easy side dish, form it into drip pans when I cook fatty meat over indirect heat, and make shields to protect bamboo skewers when I make yakitori. It's a key tool for wood chips - wood chips burn up in an instant if they aren't wrapped in a foil pouch first.


8. Welding gloves
When I need to work with something hot in the grill - preheated grill grates, a chimney starter, a drip pan full of hot fat - I put on a pair of welding gloves.


9. Grill safe griddle or pan
More and more, I use a pan in the grill itself. It protects tender vegetables from the fire, keeps small ingredients from falling through the grates, and keeps bastes warm so I can roll meat in them. Cast iron is the traditional grill pan material - but I have problems with rust. Enameled cast iron takes care of the rusting issue, but is more expensive. Enameled steel is cheap and durable, but thin and prone to hot spots. I use all three; pick whichever one works best for you.


10. Vegetable grate
If you want your vegetables to have a kiss of fire, but worry about them falling through the grill grate, a vegetable grate is your best friend. I loved my cast iron vegetable grate...until it started to rust. This stainless steel model from Weber gets good reviews, and is the next purchase for my grill.

What did I forget?

Anything you use every time you grill? Tell us about it in the comments.

FTC disclosure: All my "Things I Love" posts are about products I use and purchased myself. I did not receive any form of compensation to write this. If you buy something through one of my Amazon links, I get a small commission.

*Enjoyed this post? Want to help out DadCooksDinner? Subscribe to DadCooksDinner using the RSS or Email options on the right, link to this post from your blog, recommend DadCooksDinner to your friends, or buy something from Amazon.com through the links on this site. Thank you!

Indirect High Heat on Your Grill - Survey Results

May 22, 2012 by Mike Vrobel 7 Comments

Thank you to everyone who responded to my indirect high heat grilling survey. I got fifteen responses, which I thought was a pretty good turnout.

So, what did we learn?

  1. Most of my responders had Weber grills, and most of those grills were a Weber GenesisThis is not a big surprise - the Weber Genesis is a very popular grill. What did surprise me is that 6 of the 8 Weber Genesis responses were for the new version, with burners running front to back. I'm used to the (now retired) style with burners running left to right. My in-laws just bought a new Weber Genesis, so I'll be able to check the new design out in person.The other responses: 3 Weber Summits 600 series, 1 Brinkman, 1 Char-Broil, 1 Lynx, and 1 Weber Performer charcoal grill.
    *There's always one charcoal purist in the crowd.
  2. Most grills get hot enough to do indirect high heat with their outer burners lit and center burners off. Especially the Weber Genesis model; most people reported temperatures of 450°F or higher for indirect high on the Genesis. The Brinkman grill owner was also doing well; he got 475°F.The Weber Summit owners had the same issue I did with two burners (out of six) not being enough heat; they would add in another burner, usually the smoker burner to get the temperature up to 450°F.The Char Broil and Lynx owners were not happy with their grills ability to do indirect high heat, and reported temperatures of 400°F or lower. They didn't have any extra burners they could add, so they were stuck with indirect medium heat.
    *I had one Genesis owner who won't turn their grill above 350°F. "I like low and slow…I never go above 400°F as it makes the meat tougher" was their explanation. There's always one low and slow purist in the crowd.
  3. Most responders use a rotisserie. Only three of the responders don't use one; this doesn't surprise me, because if you found my blog, it was probably through a google search for rotisserie recipes.I didn't specifically ask if indirect high heat led to good rotisserie. I wish I did. There seemed to be a difference of opinion on the subject.There were a couple of comments from the grills that wouldn't go over indirect medium, saying they weren't happy with the rotisserie results on their grill. That matches my experience - when I'm using the rotisserie, I want the grill as hot as I can get it.

    But, I also got a couple of low and slow votes here as well - two responses saying they won't cook rotisserie over 350°F, again, because it makes the meat "tough".
    *I don't agree with that statement, but it's a matter of taste. I want a brown, crispy exterior on my roasts, which you only get from high heat. They are more concerned about a tender interior, which comes from not overcooking the meat. There is a wider time window of "not overcooked" with lower heat, reducing the risk of overcooking. I take my chances with overcooking to get a browned crust, and trust my instant read thermometer to tell me when the roast is perfectly cooked.

Thanks again to everyone who responded to the survey!

What do you think? Questions? Other ideas? Leave them in the comments section below.

Related Posts:

Click here for my grilling recipes.
Click here for my rotisserie recipes.


Check out my cookbook, Rotisserie Grilling.Everything you could ask about the rotisserie,
plus 50 (mostly) new recipes to get you cooking.It's a Kindle e-book, so you can download it and start reading immediately!

*Enjoyed this post? Want to help out DadCooksDinner? Subscribe to DadCooksDinner using the RSS or Email options on the right, link to this post from your blog, recommend DadCooksDinner to your friends, or buy something from Amazon.com through the links on this site. Thank you.

Slow Cooker Mexican Shredded Pork with Dried Chile Pepper Sauce (Pork Deshebrada)

May 17, 2012 by Mike Vrobel 8 Comments

I'm a food geek. I get enthusiastic about recipes like yakitori chicken skewers, pressure cooker Pho Bo, and rotisserie duck with a pomegranate glaze.

But what recipe do my friends and family love? Slow cooker shredded pork. That recipe has a lot of bang for the buck. Toss everything in the slow cooker, come back ten hours later, and you have shredded pork that would fit right in on a Mexican roadside taqueria.

Little league baseball is back in season, and my nights are getting hectic. I've already made my slow cooker shredded pork a couple of times this season; it is time for something new.

This is a riff on mole, the long simmered Mexican sauce. I'm using the slow cooker's long cooking time to give me the advantages of a mole without all the work. The dried peppers soften in the slow cooker, along with some other aromatics, and I use the defatted pork juices as the liquid in the sauce. A quick whiz in the blender, and I have a complex, sweet, earthy sauce with some mild heat.

Give this a try when you are bored with slow cooker pork. It is a tiny bit more work, but cleaning the blender isn't that hard - especially if you use a stick blender.

Recipe: Slow Cooker Mexican Shredded Pork with Dried Chile Pepper Sauce (Pork Deshebrada)


Inspired by: W. Park & Norma Kerr, El Paso Chile Company Texas Border Cookbook

Cooking time: 10 hours

Equipment:

  • 6 quart or larger slow cooker (Crock Pot brand is fine, but I like my fancy one from All-Clad)

Ingredients:

  • 3 pound pork shoulder roast
  • 1 ½ teaspoons Kosher salt
  • 1 teaspoon ground cumin
  • ½ teaspoon ground cinnamon
  • ¼ teaspoon ground cloves
  • 5 dried ancho chiles, stemmed, seeded, and rinsed
  • 1 dried chipotle chile, stemmed, seeded, and rinsed
  • 1 large onion, sliced
  • 3 cloves garlic, peeled
  • ½ cup water
  • 1 teaspoon brown sugar
  • Juice of 1 lime

Directions:

1. Assemble the ingredients in the slow cooker:
Put the pork roast in the slow cooker, then season all over with the salt, cumin, cinnamon, and cloves. Top with the dried chiles, onion and garlic, and water over the top of everything.

2. Slow cook the pork:
Cover and cook on low for 10 hours, or high for 5 hours.

3. Prepare the sauce:
Remove the pork from the slow cooker and set aside. Move the dried chiles, onions and garlic from the slow cooker into a blender. Add the brown sugar and lime juice to the blender. Pour the liquid from the slow cooker into a gravy strainer and let settle for 10 minutes, then pour 1 cup of the defatted liquid into the blender. Slowly turn the blender to high, then blend until you have a smooth chile puree. (Add more of the defatted liquid if the chiles are not moving around enough in the blender.)

4. Shred the pork:
While the slow cooker liquid is settling, shred the pork, discarding any bones or large pieces of fat. Toss the pork with the chile puree to coat.

5. Serve:
Serve with tortillas, red onions, crumbled cojita cheese, cabbage slaw, and lime wedges.

Notes:

  • Low for ten hours or high for five? If you have a choice, go with the longer cooking time on low heat. I think the pork shoulder turns out a little better. That said, I use the shorter, higher heat version all the time, when I'm behind schedule and don't get the slow cooker set up until lunchtime.
  • If you use a stick blender to make the sauce, be patient. You don't want to rush things and pull the head of the blender out of the sauce while it's still running...and spray a line of chile pepper sauce across the counter, the wall, your pants, and your (now annoyed) wife. Just saying.

What do you think? Questions? Other ideas? Leave them in the comments section below.

Related Posts:

Slow Cooker Mexican Shredded Pork (Pork Tinga)
Red cabbage slaw from grilled fish tacos
Click here for my other slow cooker recipes.

Inspired By:

W. Park & Norma Kerr, El Paso Chile Company Texas Border Cookbook

*Enjoyed this post? Want to help out DadCooksDinner? Subscribe to DadCooksDinner using the RSS or Email options on the right, link to this post from your blog, recommend DadCooksDinner to your friends, or buy something from Amazon.com through the links on this site. Thank you.

The Ten Item Mexican Pantry

May 15, 2012 by Mike Vrobel 2 Comments

Fish Tacos, made with pantry ingredients
(other than the fish and purple cabbage, of course)

I cook a lot of Mexican food. Taco night, with fresh corn tortillas and shredded cheese, is my kids favorite meal.
*We can't make enough tortillas to keep up with them any more, so Diane insisted they help out.

Making Tortillas

Here is my minimalist Mexican pantry, built on top of my original Ten Item Pantry list. I stock up at my local Mexican supermercado, because these ingredients are cheaper there. But, I can get everything on this list in the international aisle of my regular grocery store if I don't feel like the extra trip. With these items on hand, and I can make a wide variety of meals at a moment's notice.

As a reminder, here is my base Ten Item Pantry:


  • Extra Virgin Olive Oil
  • Onions
  • Garlic
  • Lemons
  • Balsamic Vinegar
  • Beans - canned or dried
  • Canned tomatoes (diced)
  • Pasta (or rice, or potatoes)
  • Chicken Stock (Homemade in the freezer, preferably)
  • Thyme (dried, or fresh if my thyme bush is in season)


The Ten Item Mexican Pantry

1. Fresh hot peppers - Jalapenos, Poblanos, Serranos
To my taste buds, the backbone of Mexican flavor is a combination of onion, garlic, and hot peppers. Mexican food depends on both the heat and the green flavor of fresh peppers.

2. Limes
A squirt of lime juice is the secret ingredient in a number of Mexican dishes, adding a hint of acidity and citrus that perks up the flavors.

3. Chipotle en Adobo
Chipotle peppers are smoke-dried jalapenos, and add a strong hit of heat and smoke. I buy them dried and ground, but my favorite way to get them is to buy cans of Chipotle en Adobo - peppers in a thick, red, vinegary sauce. I blend the entire jar until it forms a puree, store it in my refrigerator. Then I can spoon out a teaspoon (for a hint of heat) or a tablespoon (for a wallop of heat) whenever I need it.

4. Dried Ancho Peppers - chile powder or whole dried peppers
Yes, a third variety of pepper. Anchos are dried poblano peppers. They have a medium heat level, letting me add a lot of chile flavor without overwhelming heat. I'm torn between Ancho chile powder, which make the backbone of my Tex-Mex and Mexican dry rubs, and whole peppers, which I soak and blend up into salsa. If I had to choose only one, I'd go with the peppers, because they can be ground in a spice grinder to make a powder...but, really, get both.

5. Tortillas
The best tortillas are fresh corn tortillas. The best choice is corn tortillas straight from a tortilleria, or from a Mexican grocery that is stocked fresh every day. The next best choice is to make at home. We buy bags of Masa Harina, mix up the dough, and cook them ourselves right before serving.

The problem with corn tortillas is you can't store them. A day or two in the refrigerator and they are pale shadows of themselves. Flour tortillas don't have that problem - they'll last for weeks in the refrigerator, and once they're reheated, they're pretty good. If I have to buy tortillas from a grocery store, I buy flour tortillas.

I use both - I always have a a bag of flour tortillas in the fridge for emergency quesadillas, and plan one night a week to make homemade corn tortillas for tacos.

6. Cumin - whole seeds or ground
After dried chile peppers, cumin is the most used spice in Mexican cooking. Usually, the two are used together - cumin is a natural companion to dried chiles. Cumin can also stand on its own as a spice, especially with a squeeze of lime juice.

7. Mexican Oregano
A different plant from the Greek or Italian oregano that we are used to, I like its unique flavor in my Mexican dishes.

8. Mexican cheese
I know that drowning food in cheese is a Tex-Mex thing, not a Mexican thing. If I'm feeling Tex-Mex, my cheese is shredded colby jack. If I want a more authentic cheese, I crumble on some cotija or shred some oaxaca.

9. Tomatillos
Unwrap the husk of a tomatillo, and you'll find a small, green fruit that looks like an unripe tomato. But it is ripe, and ready to use, once the sticky coating has been rinsed away. Tomatillos are the main ingredient in green salsa, the perfect accompaniment to beef or Mexican chorizo.

10. Cilantro
Cilantro is a love it or hate it ingredient. Salsa just doesn't taste right without it, but I know some people have a strong negative reaction to the flavor. If you are cilantro-averse, substitute thyme or parsley.

The next five...especially if you have a Mexican grocery nearby

  1. Tortilla chips (Can't have salsa without Tortilla chips...)
  2. Tostadas (Fried corn tortillas. Think of the world's largest tortilla chip)
  3. Chorizo (Make sure to get uncooked Mexican style chorizo. Spanish chorizo is dry cured and delicious, but the spices are wrong for Mexican cooking.)
  4. Mexican Hot Sauce (El Yucateco green habanero, if I have to pick just one)
  5. Avocados (I have a hard time thinking of avocados as a pantry ingredient, with how quickly they turn from ripe to browned...but how else could I make guacamole?)


Guacamole!


What does this list give me?

With these ten ingredients in my pantry, and a quick stop at the grocery store, almost all of Mexican cooking is open to me. Some sample menus:

  • Chicken Tacos:

Buy some chicken thighs, sprinkle them with a rub of chile pepper, cumin, and mexican oregano, serve with a red salsa, black beans, and tortillas

  • Beef fajitas:

Buy some skirt or flank steak, sprinkle with a rub of cumin and lime, and serve with tomatillo salsa, grilled poblano peppers and onions, corn, and tortillas

  • Pork adobado:

Buy some pork chops, make a dried pepper salsa and rub it into the chops. Grill, and serve with guacamole, refried beans, peppers, and tortillas.

What do you think? Questions? Comments? Ingredients you can't believe I left out? Talk about it in the comments section...

Suggested Reading:

Diana Kennedy - From My Mexican Kitchen
Rick Bayless - Mexican Everyday

*Enjoyed this post? Want to help out DadCooksDinner? Subscribe to DadCooksDinner using the RSS or Email options on the right, link to this post from your blog, recommend DadCooksDinner to your friends, or buy something from Amazon.com through the links on this site. Thank you.

Rotisserie Grilling: Barbecued Chicken

May 10, 2012 by Mike Vrobel 22 Comments

Rotisserie Chicken with Barbecue Sauce
Rotisserie Barbecued Chicken

It's I wrote a Cookbook week on DadCooksDinner!
To whet your whistle, here's a sample recipe from Rotisserie Grilling. Rotisserie Chicken, with a spice rub and a BBQ sauce glaze. Enjoy!
---Start Excerpt---
I love real barbecue, pork shoulder and beef brisket cooked low and slow. But I'm a Northerner, so when I think of barbecued chicken, I think of thick, sweet, tomato based barbecue sauce.

The problem is, barbecue sauce burns. The high heat of the grill and the sugar in the sauce are a bad combination. I want a glaze on my chicken, not charred carbon. I wait until the last fifteen minutes of cooking, then brush on the sauce in a few layers. This is just enough time to caramelize the sugar in the sauce and thicken it into a tight glaze.

Recipe: Rotisserie Barbecued Chicken

Equipment

  • Grill with a rotisserie attachment (I love my Weber Kettle and Weber Rotisserie)
  • Aluminum foil drip pan (9"x13", or whatever fits your grill. I use an enameled steel roasting pan or Weber Extra-Large aluminum foil drip pans.)
  • Butchers twine
  • Instant Read Thermometer
Two chickens on the grill

Notes

  • If you have the time, use the barbecue rub as a dry brine. Rub the chicken the day before, and let it rest in the refrigerator overnight.
  • I make large batches of the rub and barbecue sauce. The rub keeps for about a year in the pantry, and the sauce keeps for a couple of months in the refrigerator.
Ready to take off the spit

What do you think? Questions? Other ideas? Leave them in the comments section below.

The book:

Rotisserie Grilling by Mike Vrobel

*Enjoyed this post? Want to help out DadCooksDinner? Subscribe using your RSS reader or by Email, recommend DadCooksDinner to your friends. Or, buy something from Amazon.com, like my rotisserie cookbook, through the links on this site. Thank you!

Rotisserie Grilling Sample: Charcoal vs Gas

May 8, 2012 by Mike Vrobel 1 Comment


It's I wrote a Cookbook week on DadCooksDinner!


To whet your whistle, here's a sample section from Rotisserie Grilling. I let my inner food geek run wild, and explore the science of rotisserie. Enjoy!


---Start Excerpt---

Sidebar: Charcoal vs. Gas

The cheapest charcoal grill browns meat better than most gas grills. Why?

Warning! Science content ahead. If you want to skip it, the summary is: Meat browns as meat juices are exposed to heat and evaporate. Dry heat browns better than wet heat because the extra water has to evaporate before the meat will start to brown. Burning charcoal is dry heat. Burning gas releases water, making wet heat. Therefore, charcoal browns meat better than gas.

Starting science content. My wife, the high school chemistry teacher, made sure I have the science correct. She says you better not skip ahead. There will be a quiz.

Why is dry heat better than wet heat? The Maillard reaction.
The Maillard reaction occurs when sugars and amino acids are exposed to heat in a dry environment; the result is browning and the release of water. "The result is browning" is shorthand for complex chemical interactions that scientists are still figuring out. The sugars caramelize, interact with the amino acids, and produce all sorts of flavor compounds. Those flavor compounds are what make the browned crust on a roast so delicious.

Meat is full of protein fibers and meat juices. When meat is cooked, the heat tightens the muscle fibers, and they squeeze juices out of the meat. The meat juices are full of sugars and amino acids, and when they reach the surface of the meat, they are exposed to heat. That starts the Maillard reaction. As the juices brown, they release more water. That extra water slows down the Maillard reaction until it evaporates, and browning starts again.

Water prevents browning. Meat needs to be cooked at 350°F or higher to evaporate the water fast enough to keep the browning reaction going, and higher temperatures are better. Boiled meat is gray, without any browning at all, because it is covered with water. This is why recipes recommend patting food dry before cooking; any extra water slows down browning until it evaporates.

Now we get to charcoal versus gas. (Finally!)

Charcoal is wood heated in an oxygen free environment. When all the water in the wood has evaporated, you are left with carbon. When carbon is burned, it produces heat, carbon dioxide, and a little carbon monoxide. That's our dry heat - no water.

Gas is either propane or methane (also known as natural gas). When gas is burned, it produces heat, carbon dioxide, and water. That water is the problem - it needs to be evaporated by the heat of the grill before the Maillard reaction will start.

Now for the good news: a rotisserie helps browning, whether you use gas or charcoal. Escaping juices roll around the surface of the meat, spreading the sugars and amino acids so the Maillard reaction can do its thing. Yes, a charcoal grill with a rotisserie browns better than a gas grill with a rotisserie. But, a gas grill with a rotisserie browns about as well as a charcoal grill without a rotisserie. If you have a gas grill, don't give up - the rotisserie will still help.

End Science content. You can keep reading now.

If you want a gas grill that browns as well as a charcoal grill, you need more heat, to help evaporate the extra water. This means more burners, especially infrared burners, which do a great job of generating heat. But that makes the grill more expensive. It's tough to beat a cheap kettle grill filled with charcoal.

Don't get me wrong; I use both charcoal and gas grills. In a perfect world, I would use charcoal all the time. However...gas grills are so convenient. They're easy to light and provide constant, even heat as long as you don't run out of gas. There are no worries about charcoal burning down and cooling off; there's no need to add extra coals every hour. In the middle of February, when every trip to the grill involves shoveling snow, I love that extra convenience.

---End of excerpt---

What do you think? Questions? Other ideas? Leave them in the comments section below.


The book:

Rotisserie Grilling by Mike Vrobel

*Enjoyed this post? Want to help out DadCooksDinner? Subscribe using your RSS reader or by Email, recommend DadCooksDinner to your friends. Or, buy something from Amazon.com, like my rotisserie cookbook, through the links on this site. Thank you!

My Cookbook: Rotisserie Grilling

May 5, 2012 by Mike Vrobel 16 Comments

[Updated 6/3/2012 to add the paperback edition]
As of today, I'm a (self) published author. Though I prefer the term "indie author", since that makes it sound like I'm cool enough to be in a band.

My first cookbook, Rotisserie Grilling, is available in the following formats:

Paperback edition: Rotisserie Grilling - $9.99, black and white pictures.

Kindle edition: Rotisserie Grilling - $4.99, available for immediate download, full color pictures.

Nook edition: Rotisserie Grilling - $4.99, available for immediate download, full color pictures.

iBooks edition: Rotisserie Grilling - $4.99, available for immediate download, full color pictures.

Kobo edition: Rotisserie Grilling - $4.99, available for immediate download, full color pictures.

All editions have 50 recipes for your grill's rotisserie, and are full of photographs and step-by-step instructions on how to use the rotisserie attachment for a grill.

* Sorry about the black and white pictures in the paperback - I would have to charge over $25 if I published a color picture version.


Errata:

Corrections for typos, printing errors, and other mistakes. Thank you to the readers who pointed these out - I appreciate it!

  • Baby Back Ribs, Chinese Restaurant Appetizer Style, Step 2: Spit the Ribs includes the sentence:
    "Mix the rub ingredients in a small bowl, then pat the rub on the ribs, concentrating on the meaty side."
    There is no rub in this recipe. Ignore this sentence, this is a cut and paste error.
  • Last sentence of the Cooking on the rotisserie chapter:
    "…take it on faith that it is cooled below 12F._"
    Should read: "…take it on faith that it is cooled below 120°F."

I update the book to correct these errors as they are brought to my attention; if you have the electronic version of the book, you should be able to re-download it to get the latest version.


Do you have a rotisserie for your grill? This is the cookbook for you.

If you are just starting out, Rotisserie Grilling will teach you the basics. How do you set up the rotisserie? What equipment do you need? How do you secure food on the rotisserie spit? It's all explained. Then you can move on to simple recipes for rotisserie chicken, turkey, and prime rib.

If you love your rotisserie, and are looking for new ideas, Rotisserie Grilling will get your creative juices flowing. From cornish game hens, stuffed with brown and wild rice, to dry rubbed baby back ribs; from rotisserie pineapple with a cinnamon sugar crust, to pork loin stuffed with dried fruit. There are fifty recipes with full color pictures - you are sure to find a new favorite.

Now, get outside and start grilling on your rotisserie!

I love the full color pictures, so I recommend the Kindle edition if you have a computer. (It costs over $30 to self-publish a color cookbook with 184 pages.)

If you don't have a Kindle, you can download a free Kindle reader for almost any computer, smartphone, or iPad.

Download here: Free Kindle Reading Apps

The Nook and iBooks versions are coming soon - watch this space! [Update 8/9/2012 - They're here.]

Q&A with the author

Q: Why rotisserie grilling?
A: On holidays, I get thousands of hits a day from people looking for rotisserie recipes. I was looking for those same recipes seven years ago, back when I bought my first rotisserie for my kettle grill. Since then, I figured out how to roast a whole lot of things on the rotisserie, and it dawned on me that I had the perfect subject for a cookbook.

Q: Is this just a copy of your blog?
A: No, it is mostly new material. 36 of the 50 recipes are new for the book, as are most of the pictures. There were some recipes from the blog that were too good to leave out. The how to, science of rotisserie, and seasoning food sections are improved from the blog. Unfortunately, most of the jokes are recycled.

Q: Can I get a preview of the book?
A: Sure! Go to the book's page on Amazon.com - (Rotisserie Grilling) - and "click to look inside" for a preview.

Q: Kindle? Why don't you have a (Choose one or more: Nook/iBook/Sony eReader) version of the book?
A: I made the mistake of signing up for Kindle Select Publishing when I hit "publish", and I'm locked into a 90 day e-book exclusive with Amazon. On Augst 1st, I'll publish the Nook and iBook versions.

If you have the technology to read this blog post, Amazon has a free Kindle reader for you, though, so you can get a copy of the book now if you don't want to wait.

Q: I'm a visual learner. Do you have any videos in the book?
A: I filmed two video shorts to embed in the book, "How to truss poultry" and "How to truss a roast." But the Kindle system isn't ready to accept videos.
*Even though the documentation has a "Embedding Audio and Video" section explaining exactly how to do it. Not that I'm bitter about spending a week trying to figure out why it worked on my machine, but wouldn't upload to Amazon. Grr…

I wound up posting the videos on YouTube and adding links in the book. Here they are:
Video: How To Truss Poultry
Video: How To Truss a Roast

Q: Why do you seem to have two covers?
A: I uploaded the first cover, then realized it doesn't work as the thumbnail image that Amazon uses everywhere on their site. The two chickens merged into a jumbled mess at thumbnail size, so I changed to a single chicken. But...Amazon is still pushing the new cover out to their servers, which may take a few days. I couldn't wait to tell you about the book. I was excited, and got too impatient. Sorry for any confusion.

Spread the word!

If you like Rotisserie Grilling, I'd appreciate any and all publicity you could give me. Links, posts, likes, tweets, pins, +1's, email to Uncle Bob the master griller, whatever. Every little bit helps. And if you buy the book, a positive review on Amazon would help out a lot.

Also, if you have any feedback about the book, please send it to me. Ever since I hit the "publish now" button I have nightmares about a spelling mistake on the first page.

What do you think? Questions? Other ideas? Leave them in the comments section below.

The Book:

Rotisserie Grilling by Mike Vrobel

*Enjoyed this post? Want to help out DadCooksDinner? Subscribe using your RSS reader or by Email, recommend DadCooksDinner to your friends. Or, buy something from Amazon.com, like my rotisserie cookbook, through the links on this site. Thank you!

Grilled Miso BBQ Chicken Wings

May 3, 2012 by Mike Vrobel 7 Comments

We made a trip to Noodlecat, the casual ramen restaurant owned by Jonathon Sawyer of Cleveland's Greenhouse Tavern. The ramen was great, of course, and I'll be working on my tonsoku broth recipe for a future post. The kids loved the art - there were huge paintings of cats, manga style, hanging on the wall. But what really grabbed me were the miso BBQ chicken wings.

There are no hints on Noodlecat's menu about what ingredients go into the miso BBQ sauce, and I forgot to ask the server. I need to visit Noodlecat again - exclusively for research, of course. But the weather was so nice this week, and I had some miso in the fridge. I decided to wing it.
*Get it? Wing it? I amuse myself.

And yes, I use ketchup in the recipe. The glaze needed a red color, some vinegar, and some sweet flavors; ketchup provides all three. And ketchup is the base of all my barbecue sauces, so it just seemed right as part of a miso BBQ sauce.
*I sound defensive. Ketchup feels like cheating. But that's OK - it works perfectly in the recipe.

Grilled Miso BBQ Chicken Wings


Inspired by: Tadashi Ono and Harris Salat, The Japanese Grill

Cooking time: 45 minutes

Equipment:

  • Grill (I use my monster Weber Summit. It helps to have extra space to fit all the chicken wings. Here is the current version of my grill.)

Ingredients:

  • 3 pounds chicken wings

Marinade:

  • ¼ cup miso paste(preferably red miso, but white miso also works)
  • ¼ cup mirin
  • 2 tablespoons sesame oil (or vegetable oil)
  • 2 tablespoons water
  • 1 tablespoon sake (or substitute rice vinegar)

Glaze:

  • ¼ cup of the marinade
  • ¼ cup honey
  • 2 tablespoons ketchup
  • 2 tablespoons soy sauce
  • 1 teaspoon Asian chili paste (optional)

Directions:

1. Marinate the chicken:
Whisk the marinade ingredients until the miso is completely dissolved. Reserve ¼ cup of the marinade for the glaze. Put the chicken wings in a gallon zip-top bag, pour the marinade over them, squeeze all the air out of the bag, and seal. Flip and turn the bag to completely coat the chicken wings with the marinade, then let rest at room temperature for one hour, turning the bag ever fifteen minutes.

2. Make the glaze:
Whisk the reserved marinade with the rest of the glaze ingredients.

3. Prepare the grill:
Set the grill up for cooking with indirect high heat, 450°F or higher. For my Weber Summit, I preheat the grill with all the burners set to high for fifteen minutes, brush the grate clean with my grill brush, and turn off the middle burners. (To get 450°F I have to leave three burners on. I turned off burners 3, 4 and 5, leaving burners 1, 2 and 6 lit).

4. Grill the wings:
Put the chicken wings on the grill grate over the unlit section so they are cooking with indirect heat. Close the lid and cook for twenty minutes, then flip the wings and cook until the wings are browned and crispy, about twenty more minutes. Brush the wings with glaze, cook for five more minutes, then brush with another layer of glaze.

5. Serve the wings:
Remove the wings from the grill and serve.

Notes:

  • Miso is found in the refrigerator section. If you have an Asian market, make a trip - it will be cheaper, and you can pick up the other special ingredients, like mirin and sake, while you're there.
  • While red miso is more traditional for grilling chicken, this recipe works with white miso. How do I know? I thought I had red miso...until I saw "white miso" in small print on the side of the container. This was after the wings were marinating, of course.

What do you think? Questions? Other ideas? Leave them in the comments section below.

Related Posts:

Grill Roasted Chicken Wings - The basic technique
Grilled Chicken Wings with Spicy Asian Glaze - if you like to live dangerously and grill wings directly over the fire
Grilled Buffalo Chicken Wings
Korean BBQ Chicken Wings (Grilled)
Click here for my other grilling recipes.

Inspired by:

Tadashi Ono and Harris Salat, The Japanese Grill

*Enjoyed this post? Want to help out DadCooksDinner? Subscribe using your RSS reader or by Email, recommend DadCooksDinner to your friends, or buy something from Amazon.com through the links on this site. Thank you!

Fabulous Food Show Spring 2012

May 1, 2012 by Mike Vrobel Leave a Comment

I had a great time at the Fabulous Food Show at the IX Center in Cleveland last weekend. The entire show was focused on grilling, and I was in heaven as I wandered around the show floor. Weber grills was the main sponsor, and everywhere I turned there was another grill to see. I got to check out the huge 22 inch smokey mountain smoker, the platinum kettle, with its two attached shelves that look like wings, and the massive ranch kettle, that I can barely reach my arms across.
The only grill they didn't have out on the floor was the new Summit Grill Center. I know it is only slightly different from my faithful Summit 650. I still have lust in my heart whenever I saw the celebrity chefs use one on stage.

There was a lot of fun stuff to see and do (wine tasting, salt blocks for the grill, and boneless rib sandwiches were my favorites), but I'm going to concentrate on the highlight of the show, the celebrity guests.
I want to apologize in advance for the pictures. I was excited to meet my favorite authors, and didn't pay  attention to the quality of the pictures that I grabbed random strangers to take...

Jamie Purviance

The first show I saw was Jamie Purviance. Author of numerous Weber Grill cookbooks, he talked about what he learned while writing his latest cookbook, Weber's Smoke.

Recipe I have to try:
Smoked Artichokes with Smoke Roasted Aoli Mayonnaise, from Weber's Smoke

Best Grilling Tip:
Watch the color of the smoke coming out of your grill. White smoke, maybe with a bluish tinge, is good. Black smoke is bad. Black smoke means one of two things. One: the dampers on the grill are closed too much, the smoking wood isn't getting enough oxygen, and it's releasing too much soot. Two: the food is on fire.

Funniest line:
"I don't know if your friends are like my friends. I hope not. My friends are food hoarders. With cedar plank salmon, I have to score it crosswise into appropriate serving size pieces…or else one of my friends will put half the salmon on his plate."

Steven Raichlen

Next came Steven Raichlen, my grilling guru, and author of twenty-nine (29!) cookbooks. He showed us a range of recipes from his different cookbooks, and asked an audience member up on stage to demonstrate where different ribs come from.

Recipe I have to make:
Sugarcane skewered shrimp with rum barbecue glaze, from How To Grill

Best tip:
Asparagus rafts. Skewer five or six spears with a toothpick to form a flat raft of asparagus. That way, you only have to flip a couple rafts of asparagus, and they can't work their way parallel to the grill and fall through.

Funniest line:
"The three tips to grilling are to keep the grill hot, keep it clean, and keep it lubricated. Now, there is a gender breakdown on this step. If you're a guy, you lube across the patio. The oil will be over here, and the grill is way over there. (Walks across the patio, dripping oil as he goes.)

I can't take credit for that observation. That's my wife's, and she deserves every shoe and handbag in her closet."

Branching out:
Steven is releasing a novel! Island Apart is a story of "love, loss, redemption, and really good food", and will be published in June.

Chef Sawyer with his pig's head

Jonathan Sawyer and Jason Roberts

Jonathan Sawyer is the chef/owner of The Greenhouse Tavern and Noodlecat in downtown Cleveland; Jason Roberts is a celebrity chef from Australia. The two teamed up: Jason talked about homemade sausage, and Jonathan showed how to braise half a pig's head on the grill.

Recipe I have to make:
Half a pig's head on the grill. (Jonathan said I can get a pig's head at the West Side Market.)

Best tip:
Male pigs have pheromones, and occasionally you will get one that has "boar taint" and tastes bitter. To be on the safe side, Jason always orders female pigs from his butcher.

Best line:
Jason is trying to do the math for salting the sausage, 2 percent of salt by weight, but he's used to working in kilograms.

Jason: "Ten kilograms is…five pounds. So that would be 200 grams of salt…um…what's 200 grams of salt in ounces?"

Jonathan grins. "I have no idea. Call Ruhlman. I'm sure he'll be able to tell us."

Wrap up:

And that was my trip to the Fabulous Food Show. They're back in the fall - check the schedule and see if there's a chef you want to see. If you're a food obsessive like me, it's well worth the visit.

Featured Books:

Jamie Purviance, Weber's Smoke
Jamie Purviance, Time to Grill
Steven Raichlen, Best Ribs Ever
Steven Raichlen, Island Apart

*Enjoyed this post? Want to help out DadCooksDinner? Subscribe using your RSS reader or by Email, recommend DadCooksDinner to your friends, or buy something from Amazon.com through the links on this site. Thank you!

Shaved Asparagus and Parmesan Salad

April 26, 2012 by Mike Vrobel 2 Comments

I don't know when shaved asparagus became a thing…oh, wait, I take that back. It was two months ago, on Serious Eats. There was a picture of was Jim Lahey's Bird's Nest Pizza, from his new book, and it looked amazing. A blistered crust, covered with shaved asparagus, eggs nestled in their green nests. I threw it in my ideas folder, and moved on.

Suddenly, shaved asparagus was everywhere. It was topping other pizzas. It was covering coppa. When I saw it on the cover of Charred and Scruffed - a grilling cookbook, mind you - I knew that shaved asparagus was having its moment.

So, here I go. I'm running with the in crowd, joining the new hip trend. Which surely means it already jumped the shark. That's OK - this salad is worth it, even if it is no longer "of the moment". Asparagus is in season, and it is time to celebrate. Pick some up at the farmers market this weekend and give this recipe a try.
*And, sure enough, a quick google search shows me LAST summer was when shaved asparagus salad had its moment. I'm supposed to use it to top pizza now. I'm late, as usual.

Recipe: Shaved Asparagus and Parmesan Salad


Adapted from: Jonathan Waxman Italian My Way

Cooking time: 10 minutes (9 minutes of peeling, one minute of tossing)

Equipment:

  • Vegetable peeler (I love my Y-Peeler, but I'm sure everyone has their favorite)

Ingredients:

  • 1 pound asparagus, tough ends trimmed off
  • 2 tablespoons extra virgin olive oil
  • ½ teaspoon Kosher salt
  • block of Parmesan

Directions:

1. Shave the asparagus:
Grab the tip of the asparagus, and run a vegetable peeler down the length of the asparagus spear. Repeat, peeling until you can't shave any more because the vegetable peeler is hitting the board. This will leave you with a final strip still attached to the tip of the asparagus; add that piece to the pile. Repeat until you have all the asparagus shaved.

2. Make the salad:
Put the asparagus strips in a bowl, toss with the olive oil, and then the salt. Using the vegetable peeler again, shave strips of Parmesan directly on to the bowl of asparagus. Serve.

Variations:

  • Vinaigrette: Instead of olive oil, salt and Parmesan, toss the shaved asparagus in a vinaigrette. My lemon herb dressing is particularly good with asparagus.

Notes:

  • Shaving asparagus is meditative. That's a euphemism for "it takes longer than I would like on a busy weeknight." But, really, it doesn't take that long, and this salad is the perfect way to showcase in-season asparagus.
  • For this recipe, thicker asparagus is better. Thin stalks are hard to shave because they are so small to begin with.

What do you think? Questions? Other ideas? Leave them in the comments section below.

Related Posts:

Grilled Asparagus
Zucchini and Summer Squash Salad
Grated Carrot Salad

Adapted from:

Jonathan Waxman Italian My Way

*Enjoyed this post? Want to help out DadCooksDinner? Subscribe using your RSS reader or by Email, recommend DadCooksDinner to your friends, or buy something from Amazon.com through the links on this site. Thank you!

Road Trip: Hana Asian Market

April 24, 2012 by Mike Vrobel Leave a Comment


[Update 2018-01-01:] Hana Asain Market is closed

*My Road Trip posts look at stores for home cooks in the Akron area, my home town. If you don't live in Northeast Ohio, seek out your local ethnic and gourmet markets. You can travel around the world without leaving your city!

Hana Asian Market, in the Merriman Valley area of Akron, has a great selection of Asian groceries. They specialize in Japanese and Korean food, but they have a good selection of Chinese, Thai, and Indian ingredients as well.

I've been stopping in this store a lot as I work on various Korean and Japanese recipes - they have everything I need, and they are happy to help when I can't find what I'm looking for. (Which is often - part of the fun of cooking from another culture is trying to figure out what, for example, shichimi togarashi might look like.)

Hana Asian Market also has a good selection of homemade Japanese and Korean food. There is always homemade kimchi in the refrigerator case; on Tuesday and Wednesday there are freshly made dishes to go.

Hana Asian Market

1390 N. Portage Path
Akron, OH 44313
(330) 836-2700
HanaAsianMarket.com

My top five favorite items they sell, in no particular order:


1. Thin sliced meat for Korean style grilling: Look in the freezer for thin sliced beef short ribs for Kalbi,  boneless beef for Bulgogi, and thin sliced pork (belly and shoulder) for Samgyeopsal (recipe coming soon).

2. Specialty Japanese ingredients: Shichimi togarashi (Japanese hot pepper spice blend), Sansho pepper, Ponzu sauce, miso paste, mirin, sake - they have a wide variety of specialty Japanese ingredients. And, speaking of sake...

3. Asian spirits: They have a small but varied selection of Asian beer, wine, and sake.

4. Asian noodles: Ramen, somen, soba; lo mein, bean thread, wide rice pho; dried, refrigerated or frozen. If you're looking for an Asian noodle, they have it.

5. Thai curry pastes: Want to make your favorite Thai curry? Take a shortcut, and use a jar of curry paste.

...And so much more. Jugs of soy sauce, big bags of rice, fermented beans, oyster sauce...if you're in Akron, and looking for an Asian ingredient, check out Hana Asian Market.

Here's the map:

View Larger Map
What do you think? Questions? Other ideas? Know of any ethnic markets in the Akron area that I need to check out? Leave them in the comments section below.

Related Posts:

Click here for my Ethnic and Gourmet Markets in Akron

*Enjoyed this post?  Want to help out DadCooksDinner?  Subscribe using your RSS reader or by Email, recommend DadCooksDinner to your friends, or buy something from Amazon.com through the links on this site.  Thank you!

Grilled Pork Chops with Ancho Chile Spice Rub

April 19, 2012 by Mike Vrobel 5 Comments

This month's Cooks Illustrated magazine has an interesting tip. They spray a light coating of vegetable oil on a spice rubbed steak before grilling. Why? The thin layer of oil helps bloom the spices, giving them a fuller flavor.

*Why bloom spices in oil? Flavor is in the spice's essential oils, and because of the "oil and water don't mix" thing, essential oils are extracted better by more oil. 


I fry spices in oil when I make a pot of chili, but I never thought to use the technique when I'm grilling. I had to try it out.


Grilled pork chops were already on the menu; they became my test subjects. I pressed a simple spice rub into the chops, then sprayed half of the chops with a light coating of vegetable oil.

Cooks Illustrated is on to something. The chops with the coating of oil tasted richer and sweeter than the "dry" chops. From now on, when I cook with a spice rub, I'm adding a quick spitz of oil.

Recipe: Grilled Pork Chops with Ancho Chile Spice Rub


Adapted From: Andrea Gray, Cooks Illustrated, May/June 2012

Cooking time: 10 minutes

Equipment:

  • Grill (I use a monster Weber Summit. Here is the current version of my grill.)

Ingredients:

  • 6 (¾ inch thick) pork chops (about 3 pounds worth)

Spice Rub:

  • 1 tablespoon Ancho chili powder
  • 1 ½ teaspoons Kosher salt
  • 1 teaspoon brown sugar
  • ½ teaspoon ground coriander
  • ½ teaspoon cumin
  • ½ teaspoon garlic powder
  • ½ teaspoon onion powder
  • ⅛ teaspoon ground cloves (a pinch)
  • Vegetable oil spray

Directions:

1. Rub the pork chops:
Stir the spice rub ingredients in a small bowl until completely mixed, breaking up clumps of brown sugar. Sprinkle the pork chops with a heavy coating of spice rub, then press the rub into the chops until it looks wet. Spray the chops with a light coating of vegetable oil.

2. Prepare the grill:
Prepare the grill for cooking on medium-high heat, then clean with a grill brush. For my Weber summit, I preheat the grill with all burners on high for 15 minutes, then turn the burners down to medium-high and brush the grate clean.

3. Cook the pork chops:
Put the pork chops on the grill over direct medium-high heat. Cook until the chops are starting to brown on the bottom, about 2 minutes, then rotate the chops 90 degrees (don't flip yet), moving them around if some are browning quicker than others due to hot spots on the grill. Cook until well browned on the bottom, about 2 more minutes. Flip the chops and cook on the other side until the chops reach an internal temperature of 135*F for medium rare, about 4 more minutes, rotating the chops 90 degrees after two minutes. Remove the chops to a serving platter, let rest for ten minutes, then serve.

Notes:

  • Cooks Illustrated went all out in the original recipe. (I know, that's like saying "water is wet". CI goes all out in all their recipes.) The steak was lightly scored, dry brined with salt, garlic powder, onion powder, and tomato paste to add umami. While the steak dry brined, they toasted and ground whole spices for the rub. I didn't have time; it was a Tuesday night, and I had to get dinner on the table. I skipped all those steps and went straight to a pre-ground spice rub and the light spray of oil.
  • The oil sprayed chops tasted better, but the non-sprayed chops were still good. My daughter grabbed one and ate it down to the bone. The chops are still worth making with the spice rub, even if you don't want to spray them with oil.
  • I realized, after dinner, that I should have added one more variation into my test. I should have mixed some of the rub with oil and then rubbed the spice paste onto the chops, like my adobo paste chops. That test will have to wait for another day.

What do you think? Questions? Other ideas? Leave them in the comments section below.

Related Posts:

Grilled Thick Pork Chops with Adobo Spice Paste
Grilled Boneless Pork Chops, Brined and Honey Glazed
Grilled Thin Pork Chops, Quick Brinerated
Grilled Pineapple
Click here for my other Grilling Recipes

Adapted from:

Andrea Gray, Cooks Illustrated, May/June 2012

*Enjoyed this post? Want to help out DadCooksDinner? Subscribe using your RSS reader or by Email, recommend DadCooksDinner to your friends, or buy something from Amazon.com through the links on this site. Thank you!

Pressure Cooker Chicken Gumbo

April 12, 2012 by Mike Vrobel 13 Comments

Pressure Cooker Chicken Gumbo
Pressure Cooker Chicken Gumbo | DadCooksDinner.com
Pressure Cooker Chicken Gumbo

I've never been to New Orleans. This cannot stand. I write about food, and I've never been to one of America's greatest food cities. How can I let that happen? Where's my travel agent?

*Stops, looks at credit card statement. Turns slightly pale. Slides statement to the bottom of the pile of bills.

Um…as I was saying, I like to do culinary travel in my own kitchen. New Orleans has a bunch of signature dishes - Jambalaya, etouffee, boudin, po-boys, red beans and rice…the list goes on.
*Man…remind me, why haven't I gone yet?

Gumbo is more than a dish. Gumbo is the perfect description of New Orleans. A collision of cultures mixing into the perfect pot of soup.

Now, I'm not from New Orleans. To paraphrase Terry Pratchett, I'm so far from New Orleans that I've wrapped around and am approaching from the other side. But, why let a little thing like that stop me from making their classic soup?
*PS: No pressure cooker? No worries. Check out the variations section for a non-pressured version of the recipe.

Recipe: Pressure Cooker Chicken Gumbo

Equipment:

  • 6 quart or larger pressure cooker (I used a Cuisinart electric pressure cooker, but my new love is my Instant Pot 6 quart electric PC)
DSC_5021
Brown the sausage
Browning the roux
Browning the roux
Yup, looks like it's the color of peanut butter
Sauté the aromatics
Sauté the aromatics
Looking good...
Looking good...

What do you think? Questions? Other ideas? Leave them in the comments section below.

Related Posts:

Pressure Cooker Short Ribs with Mexican Flavors
Pressure Cooker Pasta and Bean Soup (Pasta e Fagioli, AKA Pasta Fazool)
Pressure Cooker French Lentils
Instant Pot Shrimp Etouffee
Click here for my other pressure cooker recipes.

Adapted from:

Emeril Lagasse, Louisiana, Real and Rustic

*Enjoyed this post? Want to help out DadCooksDinner? Subscribe using your RSS reader or by Email, recommend DadCooksDinner to your friends, or buy something from Amazon.com through the links on this site. Thank you!


Steven Raichlen and Jamie Purviance at the Spring 2012 Fabulous Food Show

April 10, 2012 by Mike Vrobel Leave a Comment

Two of my grilling influences, Steven Raichlen and Jamie Purviance, will be at the Fabulous Food Show in Cleveland on April 28th and 29th.
Oh, and some guys named Emeril Lagasse and Bobby Flay will also be there.


Steven Raichlen is the author of the Barbecue! Bible series of cookbooks, and host of Primal Grill on PBS. Jamie Purviance is the author of Weber's grilling cookbooks. No pressure, right? I'm worried I'll do a remake of The Chris Farley Show, and spend the whole time babbling about how awesome they are.

And...the event is sponsored by Weber, including a Weber Grilling Pavilion. I am so there.

Tickets start at $25, and get you access to one of the celebrity chef's performances - luckily, Jamie Purviance's shows are general admission, so I don't have to pay extra. Because I am paying extra for a VIP ticket to do a meet and greet with Steven Raichlen on Saturday.
Mr. Raichlen? Remember when you did that recipe with the beef on the rotisserie? That was so awesome...

The Fabulous Food Show is at the IX Center in Cleveland on Saturday, April 28th and Sunday, April 29th. Hours are 10AM to 8PM on Saturday, and 10AM to 6PM on Sunday. More information is available at their website: FabulousFoodShow.com

I hope to see you there!

*Enjoyed this post? Want to help out DadCooksDinner? Subscribe using your RSS reader or by Email, recommend DadCooksDinner to your friends, or buy something from Amazon.com through the links on this site. Thank you!

Rotisserie Whole Leg of Lamb with Orange and Fennel Dry Brine

April 5, 2012 by Mike Vrobel 18 Comments

Rotisserie Whole Leg of Lamb with Orange and Fennel Dry Brine

*Here is a preview from my cookbook, Rotisserie Grilling. Coming soon to a Kindle near you!Someday I will rent out a commercial sized rotisserie and roast an entire lamb. Until then, cooking a whole leg is my stand-in.

I made a trip to the lamb specialists at the West Side Market in Cleveland to get the lamb leg. I love the way their lamb legs look, with the shank bone cracked and folded back. The shank becomes my chef's treat while I carve the lamb.
*Thanks to Mike at Turczyk's Meats for the great lamb.

Recipe: Rotisserie Whole Leg of Lamb with Orange and Fennel Dry Brine

Inspired By: Peter Minakis Rotisserie Leg of Lamb [kalofagas.ca]

Equipment

  • Grill with a rotisserie attachment (I love my Weber Kettle and Weber Rotisserie)
  • Aluminum foil drip pan (9"x13", or whatever fits your grill. I use an enameled steel roasting pan or Weber Extra-Large aluminum foil drip pans.)
  • Butchers twine
  • Instant Read Thermometer


Dry brined, trussed and ready for the grill

After one hour of cooking - 99.8°F - needs more time.

Looking good
Looking good

Notes:

  • Smoking wood is a great addition to this recipe...but I forgot to add it. Whoops. Soak a fist-sized chunk of oak, hickory, cherry, or apple wood for an hour, drain it, and add it to the coals when you put the lamb on the rotisserie.
  • A whole leg of lamb serves eight to ten people; if you need a smaller roast, get the sirloin roast from the thick end of the leg. It will cook in about one hour.

What do you think? Questions? Other ideas? Leave them in the comments section below.

Related Posts:

Rotisserie Leg of Lamb Provencal
Rotisserie Leg of Lamb, Moroccan style
Click here for my other rotisserie recipes.

Inspired by:

Peter Minakis Rotisserie Leg of Lamb [kalofagas.ca]


Check out my cookbook, Rotisserie Grilling.

Everything you could ask about the rotisserie,
plus 50 (mostly) new recipes to get you cooking.

It's a Kindle e-book, so you can download it and start reading immediately!


*Enjoyed this post? Want to help out DadCooksDinner? Subscribe to DadCooksDinner using the RSS or Email options on the right, link to this post from your blog, recommend DadCooksDinner to your friends, or buy something from Amazon.com through the links on this site. Thank you!

Survey: Indirect High Heat on Your Grill?

April 3, 2012 by Mike Vrobel 4 Comments

Indirect high heat...sort of.
Burners 6 and smoker on to cook the turkey legs more,
and also using the rotisserie burner...

Here is how I suggest setting up a gas grill for indirect high heat:

For my Weber Summit, I preheat the grill for 15 minutes with all the burners on high, then I turn off the middle burners (leaving burners 1 and 6 lit and on high heat). I want an internal temperature of 450*F, or higher if I can get it.

Reader Roy G has the same Weber Summit that I do, and he had some questions after making my  Grilled  Butterflied Chicken with Dry Brine. His grill was only 375F with burners #1 and 6 set to high - closer to what I would call medium heat. I was surprised by this; I use indirect high heat on my gas grill all the time. I was sure my temperatures were higher.

Except…my indirect cooking usually includes the rotisserie burner. Or, if I'm not using the rotisserie, I have some of the other burners on to cook a side dish.

I went out and tested my grill. Sure enough, Roy was right. Two burners on high left me with an internal temperature of 350F. If I turned the rotisserie burner on, I was right where I expected to be, at 450F.

After this test, I turn on my smoker burner to get a little extra power when I want indirect high heat on the Summit.

My next test was at my parent's house, with my dad's Weber Genesis. It only has three burners, but each burner is longer than the burners on my Summit. It turns out the longer burner matters - when I set the Genesis up for indirect high heat, with the two outer burners on and the middle burner off, the temperature was just shy of 500F. This range of temps made me wonder - what about other grills? Are there a standard set of instructions I can use in my recipes, or is it every grill for itself?

The survey:

When a recipe says "set your grill up for indirect high heat", what do you do? And, what temperature do you get? Please answer the following questions:

Create your free online surveys with SurveyMonkey, the world's leading questionnaire tool.

*If you can't see the survey, click on this link to go to the web page: Grilling with Indirect High Heat at SurveyMonkey.com

I'll keep the survey open for a week, and summarize the results for everyone later this month. Feel free to pass the survey on to anyone you think would know the answers - the more responses I get, the better the results will be.

Thank you for satisfying my curiosity!

*Enjoyed this post? Want to help out DadCooksDinner? Subscribe using your RSS reader or by Email, recommend DadCooksDinner to your friends, or buy something from Amazon.com through the links on this site. Thank you!

Grilled Scallops with Grapefruit Vinaigrette

March 29, 2012 by Mike Vrobel 1 Comment

Years ago, I had scallops in grapefruit sauce at a restaurant in St. Augustine, Florida. The combination of sweet scallops and tart grapefruit stuck with me. I was looking for a seafood dish to serve on a Lenten Friday, saw some great looking scallops at my local fish market, and the memory of that meal popped back in my head.

I grilled the scallops, taking advantage of this incredibly mild winter. I used pink grapefruit in my basic vinaigrette, and the combination was even better than I remembered.

Random scallop fact: Scallops swim by clapping their shell together. Don't believe me? Watch the video:

Recipe: Grilled Scallops with Grapefruit Vinaigrette

Cooking time: 6 minutes

Equipment:

  • Grill (My monster Weber Summit is overkill for a pound of scallops. I still love it. Here is the current version of my grill.)

Ingredients:

  • 1 pound of scallops, about 1 ½ ounces each, side tendons removed
  • 1 teaspoon Kosher salt

Grapefruit Vinaigrette:

  • ¼ cup fresh-squeezed grapefruit juice
  • pinch Kosher salt
  • ½ teaspoon fresh ground black pepper
  • ½ cup extra virgin olive oil
  • 2 tablespoons minced fennel fronds (or parsley leaves, or fresh thyme)

Directions:

1. Prepare the grill:
Prepare the grill for cooking over direct high heat, then clean the grate thoroughly with a grill brush and a paper towel dipped in vegetable oil. For my gas grill, I pre-heat with all burners on high for 15 minutes, brush the grate clean with my grill brush, and wipe the grate with a folded paper towel dipped in vegetable oil. (Held with tongs, of course - please don't bare-hand a paper towel soaked with oil over an open flame.)

2. Prepare the scallops:
While the grill preheats, set the scallops on a layer of paper towels, put another paper towel on top, and press gently to dry off the scallops. Sprinkle the scallops with the Kosher salt.

Dry scallops - note the variety of colors
Tendon - pull off of the scallop before cooking

3. Make grapefruit vinaigrette:
While the grill preheats, whisk the vinaigrette ingredients in a medium bowl until they emulsify.

4. Grill the scallops:
Put the scallops on the grill over direct high heat, and grill until they have good grill marks, about three minutes. Flip the scallops and cook until rare on the inside; when the sides of the scallops just look cooked, about three more minutes. Brush them on both sides with the grapefruit vinaigrette, then take them off the grill.

5. Serve the scallops:
Brush the scallops one more time with the vinaigrette and serve.

Notes:

  • Make sure you get dry scallops. Dry scallops will have a subtle variety of color, from parchment paper white to a very light pink.
  • Wet scallops taste waterlogged and don't brown properly. Avoid them. Wet scallops will all be the same milky white color. Wet scallops are soaked in STPP, sodium tripolyphosphate. STPP is a preservative, so the scallops last longer at the store. But it also makes the scallops hold on to water; that's why they're called wet scallops.
  • I had a fennel bulb in my crisper drawer, so fennel fronds went in the vinaigrette, and thin-sliced grilled fennel was our side dish.

What do you think? Questions? Other ideas? Leave them in the comments section below.

Related Posts:

Grilled Trout, Herbed and Citrus Stuffed
Grilled Salmon with Coriander-Fennel Rub

*Enjoyed this post? Want to help out DadCooksDinner? Subscribe using your RSS reader or by Email, recommend DadCooksDinner to your friends, or buy something from Amazon.com through the links on this site. Thank you!

Favorite Links, March 2012

March 27, 2012 by Mike Vrobel 4 Comments

Recent food articles I've enjoyed:

Rotisserie Boneless Leg of Lamb with Lemon, Rosemary and Garlic [Meatwave.com]
Josh at the Meatwave is one of the other sites regularly publishing rotisserie recipes. I get mentioned in this one, inspiring him to use a herb brush on his leg of lamb.
PS: Credit where it's due: I got the herb brush idea from Adam Perry Lang's Serious Barbecue
PPS: My Easter rotisserie lamb recipe is coming next week.

Canning 101: How to use pint and half jars [FoodInJars.com]
Marisa breaks the news: Ball is bringing back 24 ounce wide mouth canning jars, a taller version of their pint jars. I can't wait to try them with pickled asparagus.

The Feed: How to Dry Fresh Herbs in a Flash (video) [AmericasTestKitchenFeed.com]
Cooks Illustrated finally has a blog! I get my daily dose of the persnickety cooking advice that I love so much. Tips like this one, to dry fresh herbs in the microwave. Next year my thyme and rosemary won't go to waste after the first frost!
I don't remember who first called Cooks Illustrated "persnickety", but it is perfect. In the Oxford English Dictionary, the definition of persnickety should have a dot picture of Christopher Kimball next to it.

Raw Kale Salad [runningwithtweezers.com]
I love kale, but I've always cooked it. In this recipe, kale is massaged and marinated in a vinaigrette to soften. I can't wait for my next trip to the farmer's market.

Pressure Cooker Roasted Garlic in 20 Minutes [hip-cooking.com]
Whenever I think of pressure cooker recipes, I think of hearty dishes - soup, stews, chilis, stock. Laura at Hip Pressure Cooking is pushing the envelope, making really fun recipes in her pressure cooker.
Bonus: Laura's soft, medium, and Hard boiled eggs in the pressure cooker post is taking the Internet by storm, ever since it was shared on Michael Ruhlman's site.

What do you think? What posts have inspired you recently? Leave them in the comments below.

*Enjoyed this post? Want to help out DadCooksDinner? Subscribe using your RSS reader or by Email, recommend DadCooksDinner to your friends, or buy something from Amazon.com through the links on this site. Thank you!

Slow Cooker Duck Legs and Tomato Sauce (Duck Ragu)

March 22, 2012 by Mike Vrobel 3 Comments


Time for another journey to the dark side. Give me the drumstick at thanksgiving, and the legs from that roast chicken, and I'm a happy man. Duck legs are another favorite.

I wanted to make duck leg ragu ever since I read the recipe in Mario Batali's cookbook. But I could never find duck legs. They're too much of a specialty ingredient around here. I can find whole ducks, but duck legs were a special order, if I could get them at all. It was just too much of a hassle.

Then I made a trip to Cleveland's West Side Market, to get a whole leg of lamb. While I was there, I found duck legs. I snapped up all they had in the case. Duck leg ragu, here we come!
*Thanks to Tami at DineInDiva.com for the tips on where to get lamb and poultry at the West Side Market.

This recipe is more involved than most slow cooker recipes, because the duck legs must be skinned before using. Duck skin has a huge layer of fat. If the legs are cooked as-is in the slow cooker, the sauce will be more duck fat than tomatoes.
*After peeling the skin off, chop it into strips and render it in a pan. That gives you duck cracklings and duck fat, two culinary treasures.

I served this ragu country style - half country style, really. I removed the duck legs and pureed the sauce right in the pot with my stick blender. I served each plate of pasta with a ladle of sauce and a duck leg perched on top. If you want an entirely rustic meal, serve the sauce as it is. If you want a more elegant meal, follow Mr. Batali's lead - pull the meat off the duck legs, shred it, and stir it into the sauce.

Recipe: Slow Cooker Duck Legs and Tomato Sauce (Duck Ragu)


Adapted From: Mario Batali, Molto Italiano

Cooking time: 8 hours

Equipment:

  • 6 quart or larger slow cooker (Crock Pot brand is fine, and I like my fancy one from All-Clad)

Ingredients:

  • 8 duck legs, skin and fat removed
  • 1 teaspoon Kosher salt
  • ½ teaspoon black pepper
  • 1 tablespoon olive oil
  • 1 large onion, diced
  • 1 large carrot, peeled and diced
  • 4 cloves garlic, crushed
  • ½ teaspoon kosher salt
  • 1 tablespoon tomato paste
  • ½ cup white wine
  • 1 dried porcini mushroom (about ¼ ounce)
  • 8oz can whole plum tomatoes
  • 2 sprigs thyme and 1 sprig rosemary, tied together

Directions:

1. Brown the duck legs:
Season the duck legs with salt and pepper. In a large skillet, sear the duck legs over medium high heat until browned on both sides, about 4 minutes a side. Transfer to the slow cooker insert.

2. Saute the aromatics:
Add the olive oil to the pan and heat until shimmering. Add the onion, carrot, and garlic; sprinkle with the salt, then add the tomato paste and stir. Saute until the onion is softened and the tomato paste darkens, about 5 minutes. Add the wine to the pan and bring to a simmer, scraping the bottom of the pan to loosen any browned bits. Pour over the duck legs in the slow cooker insert.

3. Slow cook the duck legs:
Add the mushroom and plum tomatoes to the slow cooker, then break up the tomatoes with a wooden spoon. Add the bundle of herbs, put on the lid, and cook on low for 8 hours or high for 4 hours.

4. Finish the sauce:
Remove the duck legs to a platter. Throw away the herb bundle, then puree the contents of the slow cooker to make the tomato sauce. (I use my stick blender right in the slow cooker crock, but transferring to a blender or food processor would also work.) To serve family style, toss the tomato sauce with a pound of cooked pasta, and serve a big bowl of pasta with the duck legs on a separate platter.


Notes:

*To make a duck ragu, pull the duck meat from the bones and stir into the pureed tomato sauce, then toss with the pasta.

*If your slow cooker has a stovetop-safe insert, like my All-Clad, use it to do all the browning and sauteing. Remove the duck legs to a bowl while you saute the aromatics, then add them back in before the tomatoes.

*Can't find duck legs? Substitute chicken legs - they cook the same. Duck legs have a different flavor to them, more like red meat, but the recipe still works fine with chicken legs.

What do you think? Questions? Other ideas? Leave them in the comments section below.

Related Posts:

Slow Cooker Bolognese Sauce
Slow Cooker Chicken Legs with Herb Rub
Click here for my otherSlow Cooker recipes

Adapted from:

Mario Batali, Molto Italiano

*Enjoyed this post? Want to help out DadCooksDinner? Subscribe using your RSS reader or by Email, recommend DadCooksDinner to your friends, or buy something from Amazon.com through the links on this site. Thank you!

  • « Previous Page
  • 1
  • …
  • 24
  • 25
  • 26
  • 27
  • 28
  • …
  • 37
  • Next Page »

Welcome to Dad Cooks Dinner!

I'm Mike Vrobel, a dad who cooks dinner every night. I'm an enthusiastic home cook, and I write about pressure cooking, rotisserie grilling, and other food topics that grab my attention.

More About Me →

Popular

  • Three bowls of cooked Pinto Beans on a wood table
    Instant Pot Pinto Beans (No Soaking)
  • Pressure Cooker Beef Shank (Osso Bucco)
  • Pressure Cooker 7 Hour Leg of Lamb (in 90 minutes)
    Pressure Cooker 7 Hour Leg of Lamb (in 90 minutes)
  • Pressure Cooker Brown Jasmine Rice
  • Grilled Tomahawk Steak (Long Bone Ribeye, Reverse Seared)
    Grilled Tomahawk Steak (Long Bone Ribeye, Reverse Seared)
  • A green bowl full of chicken noodle soup
    Instant Pot Rotisserie Chicken Noodle Soup

Seasonal

  • A bowl of asparagus risotto
    Instant Pot Asparagus Risotto (Pressure Cooker Recipe)
  • Grilled Butterflied Chicken with Garlic Butter
  • Sous Vide rack of lamb sliced into chops
    Sous Vide Rack of Lamb with Dijon Bread Crumb Crust
  • A bowl of beef stew with asparagus, carrots, and radishes.
    Instant Pot Spring Vegetable Beef Stew
  • A Rotisserie Chicken (Pollo Asado)on a platter of shredded cabbage
    Rotisserie Chicken Pollo Asado
  • Rotisserie Pork Shoulder Roast with Carolina Mustard BBQ Sauce
    Rotisserie Pork Shoulder with South Carolina Mustard Barbecue Sauce

Footer

↑ back to top

About

  • Privacy Policy

Newsletter

  • Sign Up! for emails and updates

Contact

  • Contact

Copyright © 2025 Dad Cooks Dinner