DadCooksDinner

  • Home
  • Rotisserie
  • Recipes
  • Tools
  • Books
  • Merch
menu icon
go to homepage
  • Recipes
  • Books
  • Tools
  • Merch
  • About
subscribe
search icon
Homepage link
  • Recipes
  • Books
  • Tools
  • Merch
  • About
×
Home » Recipes

Grilled Corn

September 17, 2009 by Mike Vrobel 2 Comments

Grilled Corn is my favorite grilled side dish - it's quick and easy, and grilling brings out the sweet taste of the corn. The only reason I haven't posted it before this is…I thought I already HAD posted it.
*Oops.

It's a perfect recipe for September, when you can still get wonderfully sweet corn straight from the farm, but you're getting a little tired of plain boiled corn.

And…you didn't hear it from me, Mr. Buy Local, but it's also great for store-bought corn the rest of the year. Grilling the corn perks up the bland flavor of out of season corn to where it's actually worth eating!

Recipe: Grilled Corn

Cook time: 12 minutes

Equipment:

  • Grill (I used a Weber Summit 650. Here it is.)
  • Basting Brush (I like the Oxo Large Silicone Brush)

Ingredients:

  • Fresh ears of corn, husked
  • Kosher salt
  • 2 tablespoon melted butter per 6 ears of corn (optional if the corn is really fresh)

Directions:
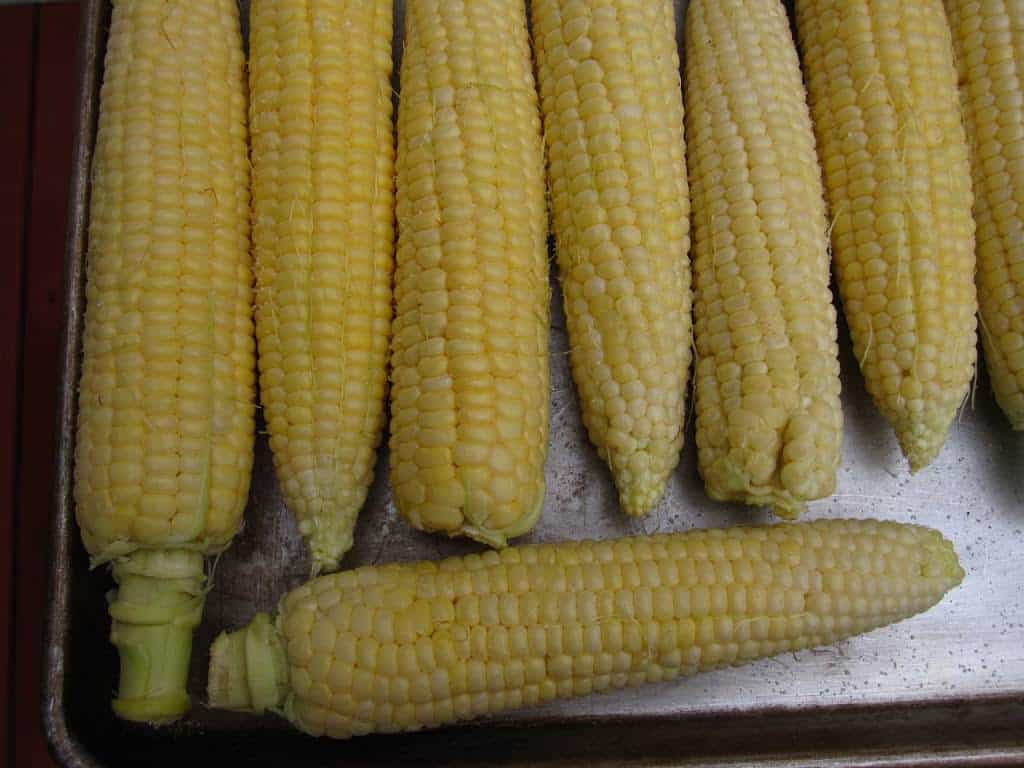
1. Prepare the corn: Husk the corn, put it on a large sheet pan and give it a good sprinkling of salt on all sides.* Let the corn sit at room temperature until ready to grill. Meanwhile, melt the butter; I do this in a pyrex measuring cup in my microwave, because the cup acts as a good holder for my basting brush.
*Yes, I know a lot of the salt will fall off; that's OK. The salt that sticks really helps. See the notes for brining the corn if it's out of season corn. (Yes, brining corn. Yes, I will brine just about anything.)


2. Prepare the grill Set your grill up for cooking on medium heat. For my Weber Summit, this means preheating with all the burners on high for 10-15 minutes, then turning the burners down to medium.
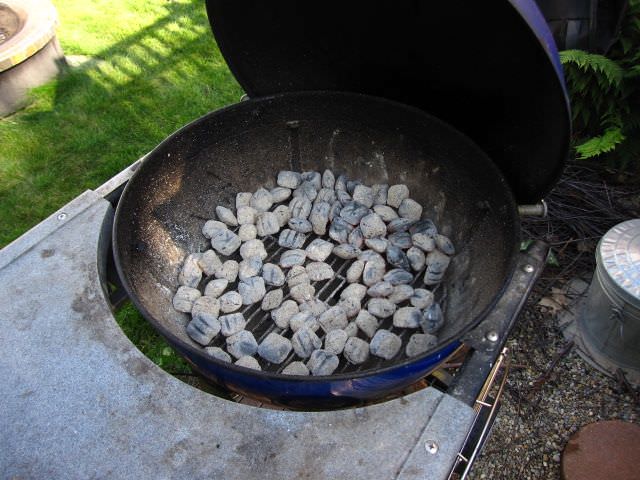
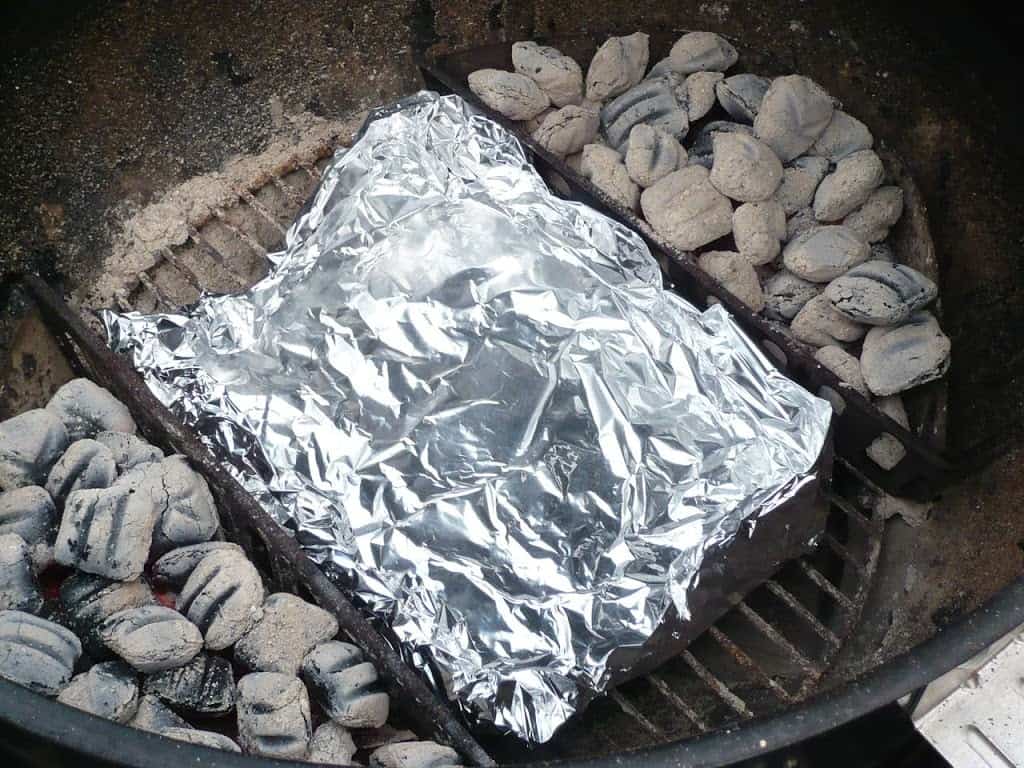
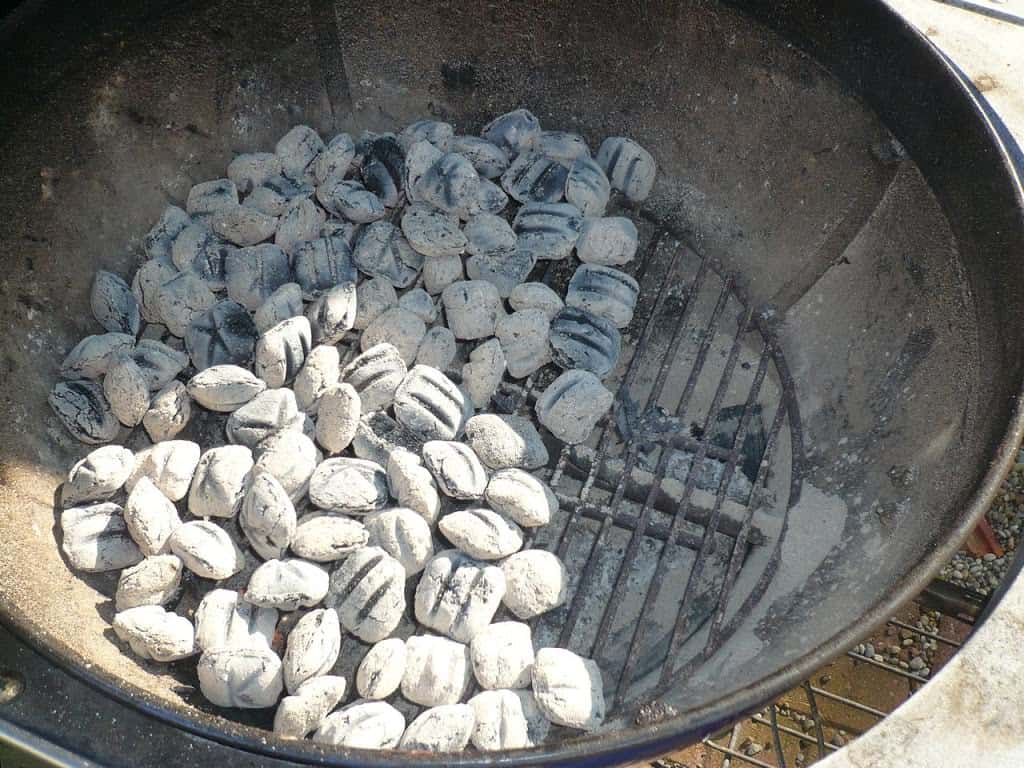
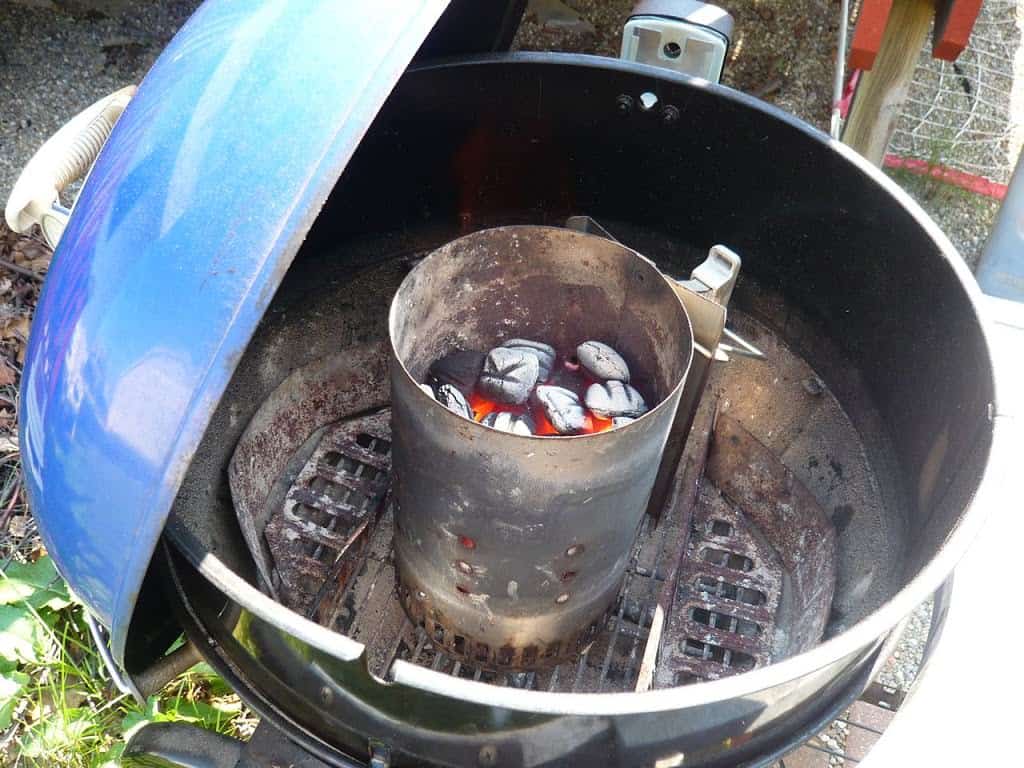
For my Weber kettle, I light a Weber Chimney Starter half full of charcoal, wait for it to be covered with ash, then pour it in a thin single layer on the grill grate.
*In practice, I usually start with more charcoal, because I'm cooking the main course first.  There isn't enough room on a Weber Kettle for corn and a main dish.  The corn is cooked second, and the coals have cooled down at that point.


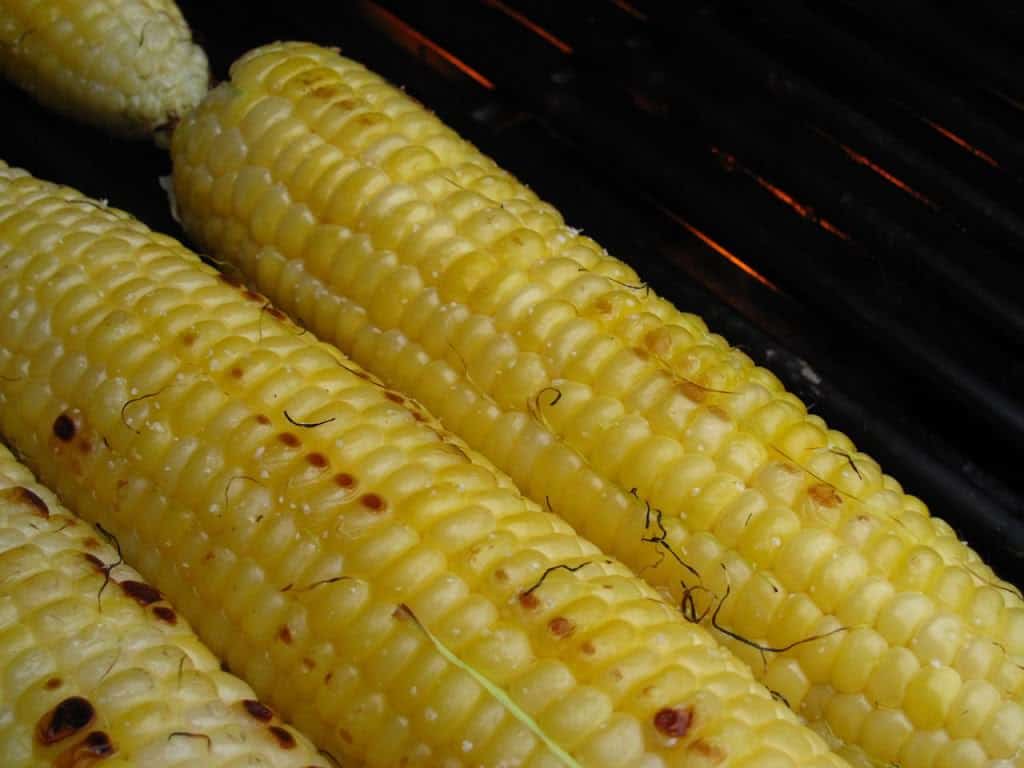
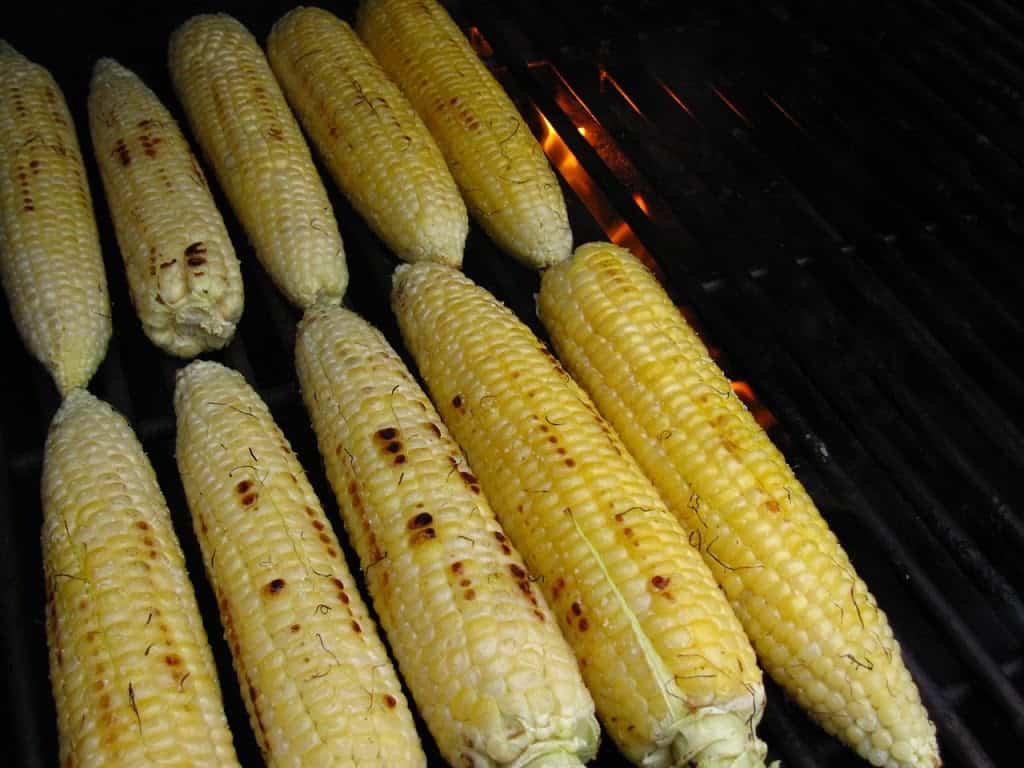
3. Grill the corn: Put the ears of corn on the grill, directly over the medium heat. If you're cooking with a gas grill, or a charcoal grill that isn't really that hot, cook with the lid closed as much as possible. Cook the corn for three minutes, or until the corn starts to brown. Give it a quarter turn (rotate the cooked section of the corn to the side), then cook for another three minutes. Another quarter turn, and another three minutes of cooking. One last turn, brush the top of the corn with the melted butter, and cook for a last three minutes. (Watch out flareups if the butter drips into the fire).
*Think of the corn as having four sides - you want to rotate each side to face the heat for two minutes. Think 3-3-3-3. If one part of your grill is browning the corn more than another, swap the ears around during one of the turns.

Lined up and cooking their final turn.  That's the level of browned that I'm usually looking for.


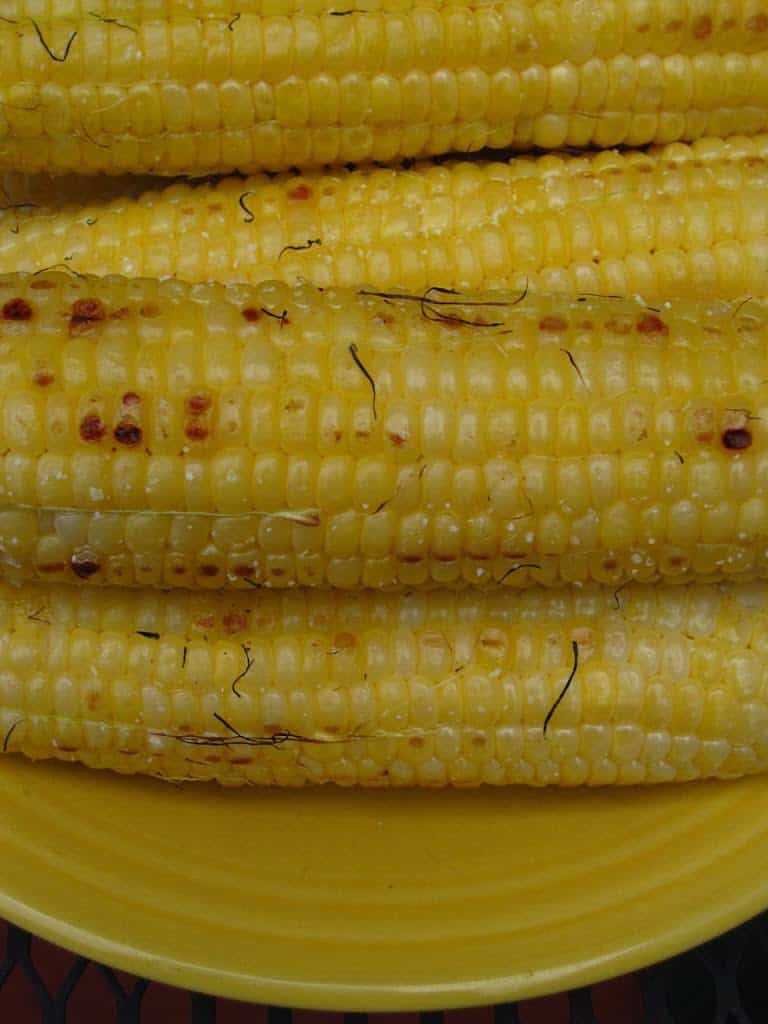
4. Serve: Remove the corn from the grill, and brush with any remaining butter.  Serve

Variations:
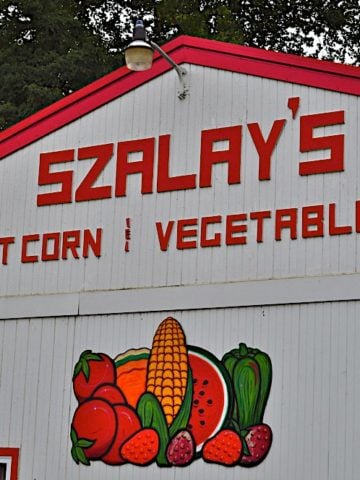
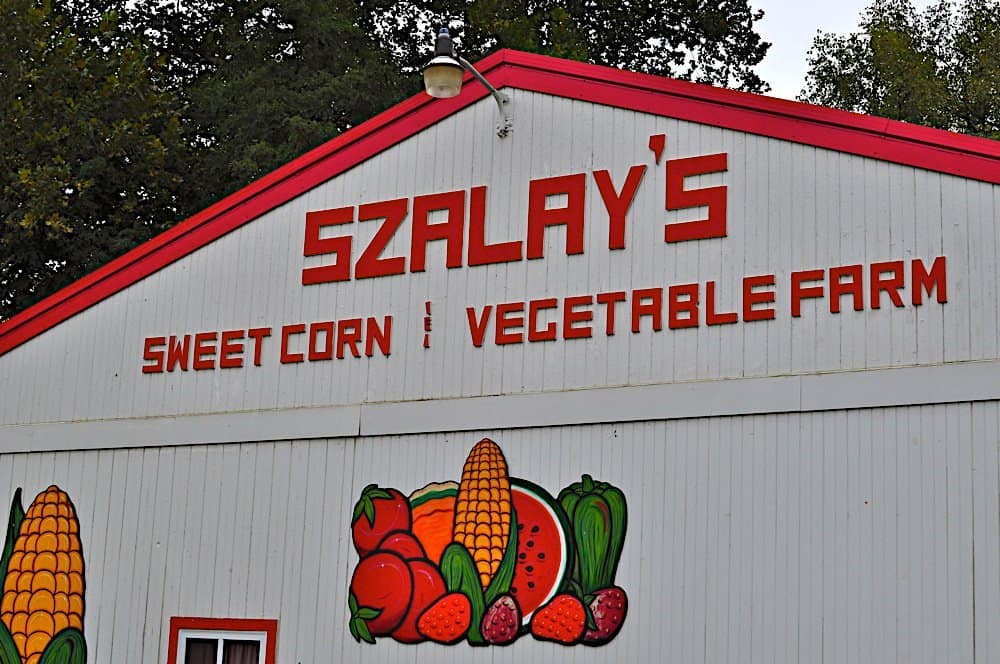
*The butter really is optional if you have great corn.  We got some from Szalay's Farm last week that only needed a little salt.

*Mexican street vendor style (Elote Asado): Mix ¼ cup mayonnaise, ¼ cup sour cream, 1 teaspoon ancho chile powder, and ½ cup grated mexican cheese in a bowl.  Cook the corn a little longer, about 3 minutes per turn.  (See note below).  Brush sour cream/mayo mix evenly over the corn after it's been cooked.

Notes:
*This timing will give you lightly grilled corn; it will be just a little browned. If you like it darker, go 4 minutes (or more) per side. Also, timings vary widely on a charcoal grill, depending on the heat, so adjust the time between turns based on how quickly the corn is browning.

*Corn takes up a lot of space on the grill.  If your grill isn't as big as mine, cook it after the entree is done; it will only take about ten minutes.
*This is part of the reason I bought my monster gas grill.  I wanted the extra surface area to cook a vegetable side dish at the same time as the main course.  Or, at least, that's how I justified it to myself...

*Cooks Illustrated recommends that you brine the corn in a ¼ cup table salt to 1 quart of water solution for a half an hour to an hour before grilling.  I've found that helps if the corn is out of season, but you don't need to do it with farm fresh corn.
[Update 2013-08-01: Never mind. Brining corn is a bad idea. ]

*Leftover grilled corn makes a great side dish - make a corn and bean salad.  Cut the corn off the cob and toss it with some black beans and/or salsa and a squeeze of lime juice.

Questions? Comments? Other ideas? Leave them in the comments section below.

Related Posts:
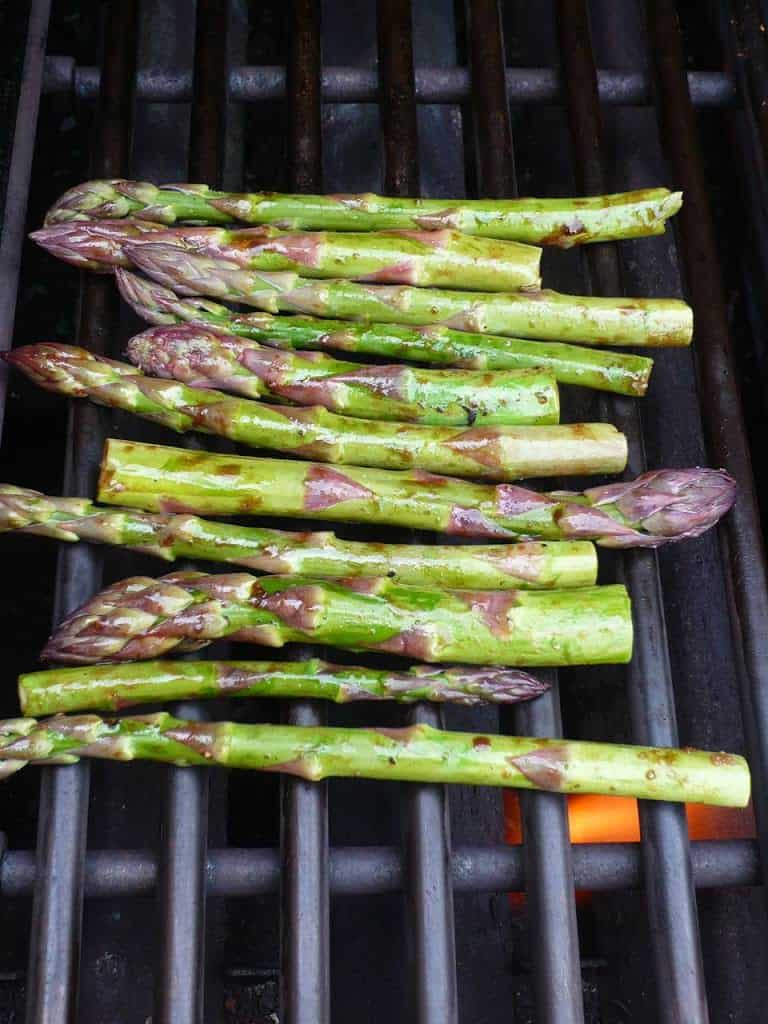
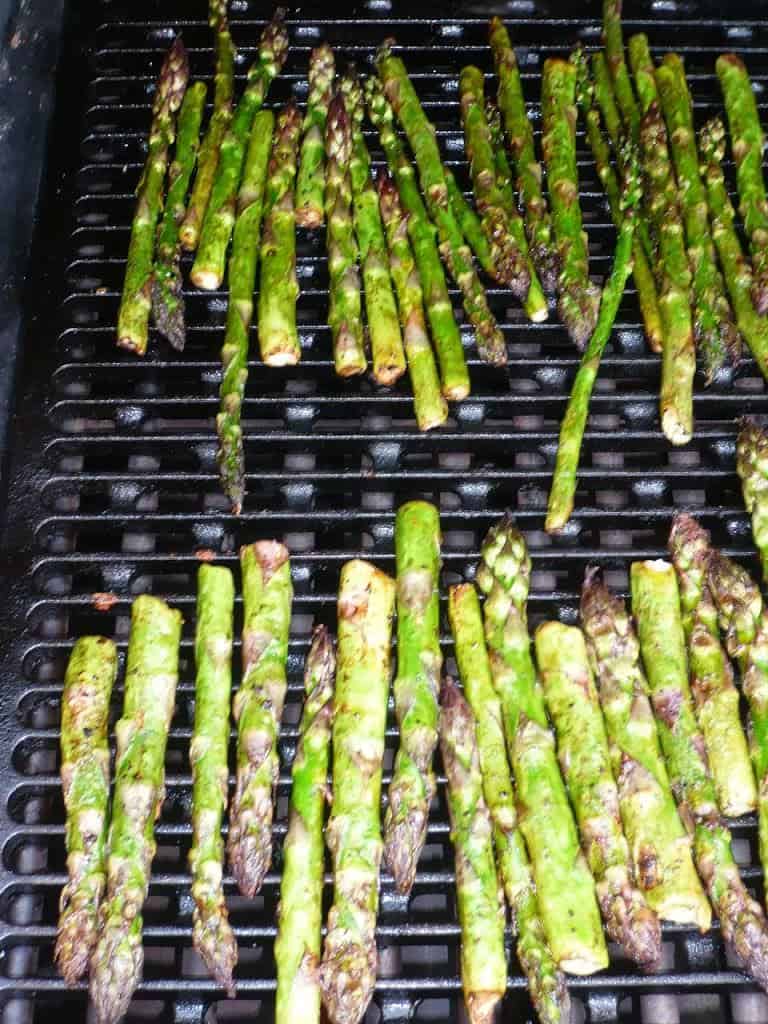
Click here for my grilled asparagus recipe
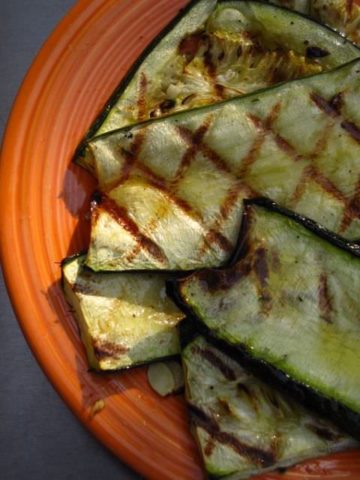
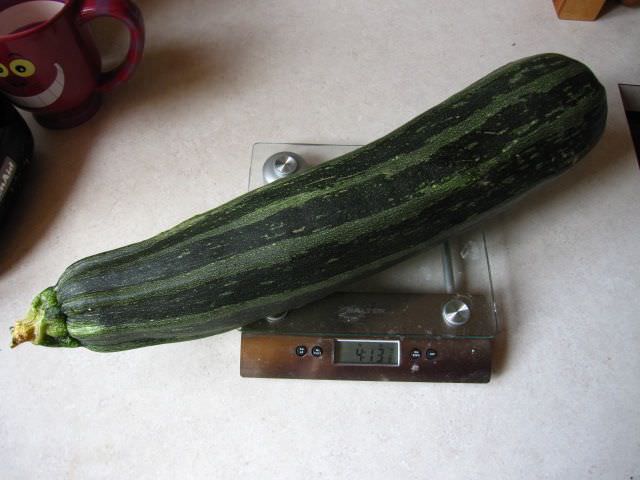
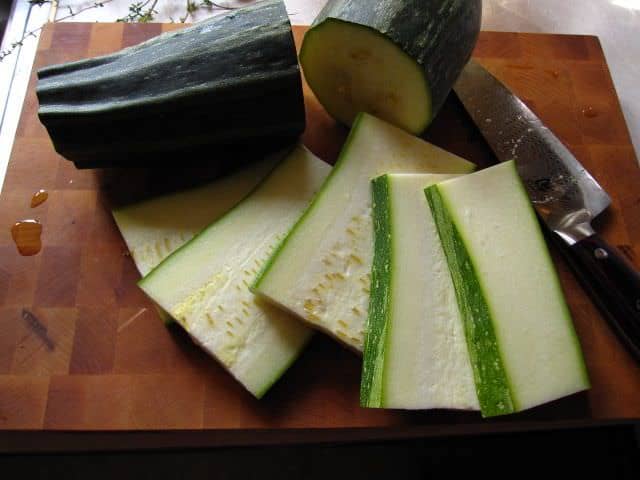
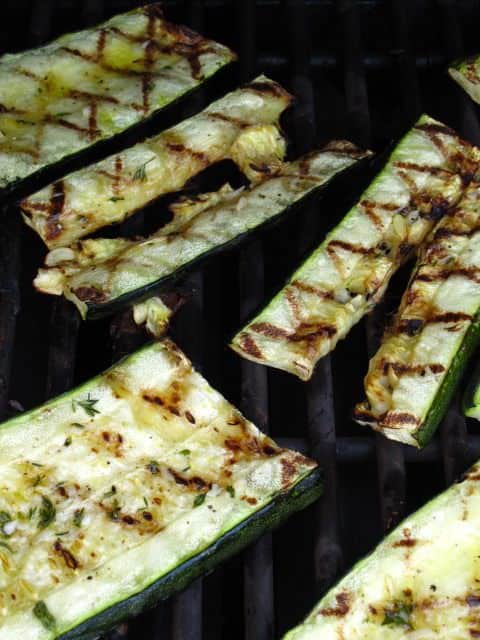
Click here for my grilled monster zucchini recipe
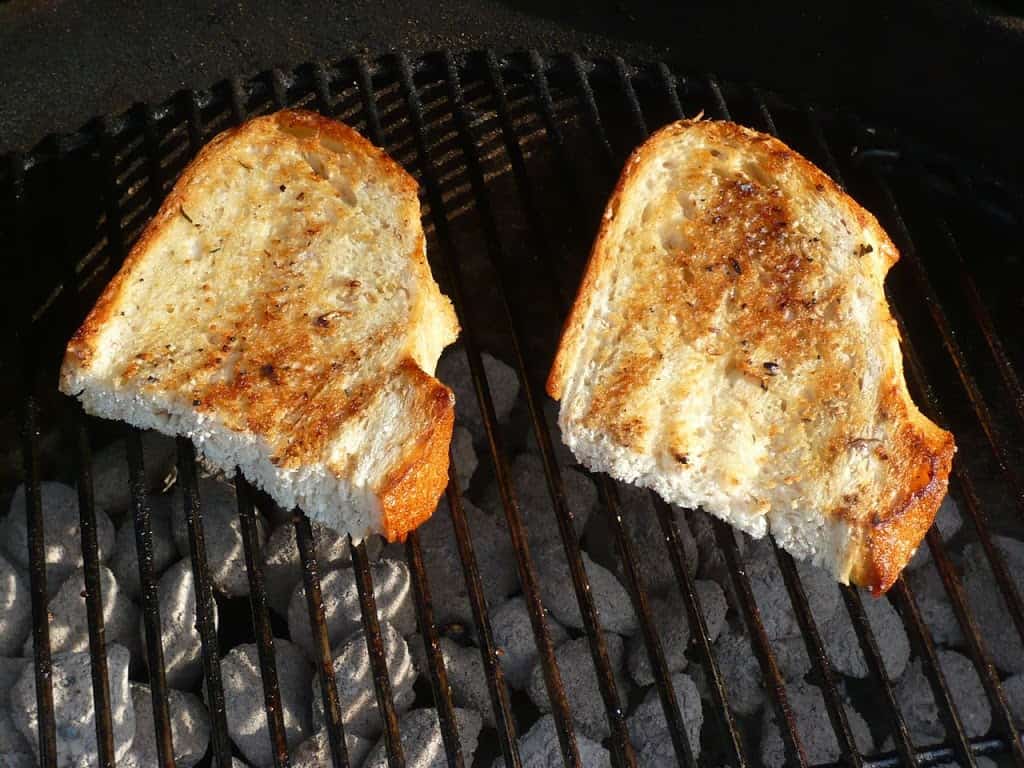
Click here for my grilled garlic bread recipe

Inspired by:
Steven Raichlen's How to Grill: The Complete Illustrated Book of Barbecue Techniques

*Enjoyed this post?  Want to help out DadCooksDinner?  Subscribe to DadCooksDinner using the RSS or Email options on the right, link to this post from your blog, recommend DadCooksDinner to your friends, or buy something from Amazon.com through the links on this site.  Thank you!

Poll: Commenting or Blog Flogging?

September 16, 2009 by Mike Vrobel 6 Comments

Or, how do you promote a blog without looking like an infomercial pitchman?
[h/t Daniel at Casual Kitchen for suggesting this topic]

I have a question for you, readers:
What is an acceptable level of promoting your blog in the comments of another blog?  Where's the line between linking back to your blog in the comments, and Blog Flogging?
Please answer in the comments section, at the bottom of the post.

Now for some context around why I'm asking this question.

Recently, I've started trying to get my blog read by a wider group of people.  I've been submitting recipes to other sites that request them for links pages, and I've become an active commenter in blogs that I follow regularly.

Now, "leave comments on other sites with links back to your site" is common advice for increasing your blog's readership.  It's such common advice that it often gets abused.  I don't like it when I see a comment along the lines of:

I agree!

http://someblogorother.blogspot.com

My prime directive when commenting is: say something that adds to the conversation.  If you can't, then don't comment.  When I write a comment, I add a signature with a link back to my blog.  My though process is: I am pushing my blog, but it's by adding  to the conversation on this blog.  If someone finds my comment interesting, maybe they'll click back to my blog to check it out.


Also, on occasion, I will link to a post on my blog in the comment.  I only do this when the subject is something I've recently written about on my blog, particularly if my post goes into the topic at a depth that doesn't fit in a comment.

This has worked reasonably well in increasing my blog readership - it's gone from friends, family and Google Searches including the words "Rotisserie" to, well, a small group of regular readers.  Nothing dramatic, but I can see the gains in my comments section and my Google Analytics numbers.  Also, and more important, I've enjoyed being part of the conversation on the other blogs.  Since I only comment on posts that I can add to, it's a post that I care about - I find myself following up on them to see what other people have to say.*
*It's all about the wider conversation.  Blogging can be a pretty solitary effort; when you start out, it feels like you're shouting at the ocean.  But there's a big group of us out there, and joining in that conversation is great.  Knowing that there are other like-minded people out there can be uplifting, even if you've never met them face to face.

Then, earlier this week, I left a comment on the Bitten Blog at the New York Times.  That's when the long knives came out.  Commenters left some pretty biting remarks about "flogging your linked blog."*
*I have to admit, the signature from one made me laugh out loud:
nobodyreadsyourlamefoodblog.blogspot.com
Maybe I should launch that site?

Oh, my. Have I crossed the line? Gone from signing my work to just being rude? Am I Blog Flogging instead of commenting? Where is the line, exactly?

I spent some time searching Google, and reading the commenting policy on the bigger blogs I follow - the answers were contradictory.*
*Imagine that.

After an email exchange with Daniel at Casual Kitchen (one of those blogs I have been commenting on, to get some feedback), I think I'm going to change my personal commenting policy to:

1. Say something that adds to the conversation.

2. Sign your work...but not with a http:// header - only add a link if you can actually use HTML in the comments.  My new "standard" signature will be MikeV @ DadCooksDinner.
*Technical details: This means, if the comments section can't handle DadCooksDinner, then I'm not getting a link back to my blog.


3. Never leave a comment on the New York Times again
*Sorry, hurt feelings

3. Be extra careful on the New York Times, and other sites that don't allow HTML in the comments.  Something about that http:// and .blogspot.com brings out the "stop pushing your blog!" in people.

So, again...readers, what do you think?


What is an acceptable level of promoting your blog in the comments of another blog?  Where's the line between linking back to your blog in the comments, and Blog Flogging?

Please leave an answer in the comments section below.  Thank you for the feedback!
*And I promise I won't yell at you if you include a link to your blog.


[Update 10/19/2009] Daniel of Casual Kitchen just posted his take on this in his Quick Writing Tips blog: A few words about blog comments [quickwritingtips.blogspot.com].

Road Trip: Szalay's Sweet Corn Farm

September 15, 2009 by Mike Vrobel 2 Comments

Szalay's Sweet Corn Farm is my favorite place in Akron, when late summer comes and the sweet corn starts rolling in.  Located in the Cuyahoga Valley National Park, they specialize in sweet corn, but have a ton of other vegetables.*
*Some of their vegetables are locally grown, and some aren't any different from what you get at the grocery store.  If that matters to you, just make sure you check their signs to see "fresh picked" or "local."  Their corn is always grown in Ohio, though some comes from fields they have South of Akron so they can start the season a little early.

Unlike some farmer's markets, they are open every day of the week.  With sweet corn, this really matters.  You want to eat sweet corn as soon as possible the day it is picked, because it starts converting its sugar into starch.  I make a special trip down to Szalay's on the day I want to cook my corn.

Szalay's Sweet Corn Farm
4563 Riverview Road
Peninsula, OH 44264
330-657-2727
Hours: Open daily, 9am-7pm, mid June to October 31st.
SzalaysFarm.com

My top five list of favorite things they sell are, in no particular order:
1. Sweet Corn: It's right there in the name.  And it's really, really good corn.  No need to peel dowh the tops to check it - just make sure you're picking ears that are heavy for their size (from the bed of the tractor that they keep it on), and you'll get great, full ears of corn.

2. Other Fruit and Vegetables: They also carry a lot of locally grown produce.  As I said before, though, they also carry a lot of produce that's not locally grown.  Just check the signs, or ask someone who works there, because the locally grown stuff is going to be much better tasting.  They usually have a sale on whatever's in season; keep an eye on the tables they have out front near the corn for the best deals.

3. Ohio Products: They carry a lot of locally made jams, jellies, pickles, and maple syrup, including their own brands.

4. and 5. Did I mention the corn?  I don't have five things.  The first one counts as five for me; I'll make the trip just to get their wonderful corn.  Everything else is just a bonus.

Here's the map:

 
View Larger Map


Related posts:

My list of Ethnic and Gourmet stores in the Akron, OH area.

*Enjoyed this post?  Want to help out DadCooksDinner?  Subscribe using your RSS reader or by Email, recommend DadCooksDinner to your friends, or buy something from Amazon.com through the links on this site.  Thank you!

It grills, it makes music...

September 14, 2009 by Mike Vrobel Leave a Comment

I have a follow-up to my Why Weber post from the other day.  And boy, is it a doozy.

A dobro is a resonant instrument, similar to a slide guitar.  A DobroQue is...well, just watch:

My hero, Alton Brown, has always said that there's no room for a unitasker in the kitchen....but this is ridiculous.

[h/t seriouseats.com]

Related posts:
Why Weber?

Rotisserie Pan Soup, Barbacoa style

September 10, 2009 by Mike Vrobel 2 Comments

Enough teasing.  Here is my favorite sentence in the instructions of a recipe:

With the precision of a steady-handed circus performer, carefully remove the pan of soup from the bottom of the grill. [Rick Bayless's Mexican Kitchen]

That sentence has everything - specific instructions, a colorful allegory that explains things better than a picture could, a grill - it's a thing of beauty.
*My second favorite sentence comes from Seven Fires: Grilling the Argentine Way.  It's part of his recipe for Una Vaca Entera.  (Yes, "One Entire Cow".)  It goes:

I must confess, after a lifetime of following fancy French recipes, that it gives me great pleasure to write the following list of ingredients:

1 medium cow, about 1400 pounds, butterflied, skin removed

2 gallons salumera

2 gallons Chimichurri

This soup is a great idea for a side dish when you're cooking on the rotisserie; you're going to have fat and meat juices dripping into the pan anyhow, why not make use of them?  And the soup is delicious.  I was going to recommend using homemade stock instead of water, but you don't need it.  The dripping juices from the meat give you more than enough flavor.

Recipe: Rotisserie Pan Soup, Barbacoa style

Equipment:

  • Grill with Rotisserie attachment (I used a Weber kettle with the Rotisserie attachment; my kettle is  this Weber Grill and the rotisserie attachment is this Weber charcoal kettle rotisserie)
  • Aluminum foil pan (9"x12")

Ingredients:

  • 3 redskin potatoes, unpeeled, scrubbed, diced into ½" cubes
  • 2 carrots, peeled and diced into ½" pieces
  • 1 onion, sliced thin
  • 2 garlic cloves, peeled and crushed
  • 1 can Garbanzo beans, drained
  • 1 teaspoon kosher salt
  • hot water to cover, probably 1 quart

Directions:
1. Prepare the soup: Combine all the soup ingredients in your pan, except for the water, and toss with the salt.  Let sit at room temperature while you prepare the grill.

2. Prepare the grill: Prepare your rotisserie as directed for your main recipe, then use the pan with the vegetables as the drip pan. Once the pan is in the grill, add the water to just cover the vegetables.
*It's much easier to get the pan in the grill when it doesn't have the water in it.  Be careful, and don't burn yourself when you add the water.


3. Cook the soup: Cook your main recipe, with the soup simmering underneath it. You want to cook the soup for at least 1 hour, and preferably 2 hours. Check the soup every half hour or so, and add more water if it is needed. The amount of evaporation will depend on the heat you're cooking at. With the barbacoa recipe, there isn't much evaporation, because we're cooking at a low temperature.

4. Remove from the grill: After the main rotisserie recipe has been removed, it's time to get the soup. To quote the master again:

With the precision of a steady-handed circus performer, carefully remove the pan of soup from the bottom of the grill. [Rick Bayless's Mexican Kitchen]

I remove the pan of soup directly onto a sheet pan that I have ready.
*The more you walk around with a foil pan full of boiling liquid, the more likely you are to scald yourself when the foil collapses.  The sheet pan supports the foil pan, so you don't have to worry about it.

5. Skim the fat and serve: Skim any fat you can from the top of the soup.*  Taste for seasoning, and add more salt (probably another teaspoon, at least) and pepper to taste.  Transfer to a large serving dish, or into individual bowls.  Serve the soup as a first course, or as part of the main course with some of the rotisserie dish cubed and added to the soup.

*Skimming the fat works best if you put a corner of the sheet pan supporting your soup slightly higher than the others (say, on an oven mitt), and let the fat settle to the opposite corner.


Variations:
*Rotisserie Pot Roast Soup: Basically, change the flavor profile by skipping the Mexican pieces.  Cook a rotisserie chuck roast with just salt and pepper as seasoning. For the soup, replace the can of garbanzo beans with a drained can of diced tomatoes. Serve by cubing the chuck roast and adding it to the soup.

*As I mentioned in the opening, this doesn't have to go with rotisserie chuck roast; any rotisserie roast will work with this idea.  Here are a few suggestions.

Notes:
*Traditionally, this is served as a first course, before the roast.  Serve with condiments to add to the soup. Good choices would be salsa, some sprigs of cilantro, grated Queso Anjejo, and hot sauce (especially a Chipotle Hot Sauce).  Pickled red onions also go really well with it.

*This soup tends to be a bit fatty, due to the drippings from whatever is being rotisserie roasted above it. Don't forget the degreasing step!

*I know, I'm getting repetitive.  I don't care.  Be careful when removing the soup from the grill!  If you have oven mitts or grill gloves, wear them.*
*And don't wear open toed shoes. Or flip flops, like I was doing while those pictures were being taken. I'm just lucky I have the precision of a steady handed circus performer.


**A clown counts as a circus performer, right?  Right?  Oh, never mind.

Questions? Comments? Other ideas?  Other favorite recipe instructions?  Leave them in the comments section below.

Related Posts:
Click here for the companion recipe, Rotisserie Chuck Roast, Barbacoa Style
Click here for my Rotisserie Pan Potatoes recipe.
Click here for my other rotisserie recipes.

Adapted from:
Rick Bayless's Mexican Kitchen


Check out my cookbook, Rotisserie Grilling.

Everything you could ask about the rotisserie,
plus 50 (mostly) new recipes to get you cooking.

It's a Kindle e-book, so you can download it and start reading immediately!


*Enjoyed this post? Want to help out DadCooksDinner? Subscribe to DadCooksDinner using the RSS or Email options on the right, link to this post from your blog, recommend DadCooksDinner to your friends, or buy something from Amazon.com through the links on this site. (Like my Rotisserie Grilling cookbook...)

Rotisserie Beef Chuck Roast Barbacoa

September 8, 2009 by Mike Vrobel 23 Comments

I'm a big fan of beef*, but not beef prices.
*I don't think any of my blog readers would confuse me with a vegetarian.

Beef rib roast is my favorite, but it can be very expensive.   What do I do when I want a beef roast, but don't want to spend an arm and a leg?  I cook a chuck roast, from the shoulder of the steer.
*Arms?  Legs?  Shoulders?  What is this, an anatomy lesson?  Well, sort of.  Read on...

Shoulder meat is tougher than the expensive cuts, but it contains a lot of connective tissue that will melt into tender collagen if you cook it long enough.  The traditional way to do this is a pot roast, but I've become a fan of cooking beef chuck low and slow on the grill.  If you give it long enough, it comes out nice and tender.

I'm cooking a Tex-Mex version of pot roast, called Barbacoa.  It's adapted from a recipe by Rick Bayless.  He puts the meat (in his case, lamb shoulder) on the grill rack over a pan, and then uses the pan to make a side-dish soup at the same time the roast is cooking.  I knew it would be perfect on the rotisserie. You're already suspending the meat over the soup, why not give it a spin while it's there?
*Rick's recipe has my favorite sentence in a recipe, ever.  But you're going to have to have patience; the Rotisserie Soup recipe is coming later this week.
**Update: The Rotisserie Soup recipe is here!  Make sure you make this with the Barbacoa.  You won't regret it.

Recipe: Rotisserie Beef Chuck Roast Barbacoa

Cook time: 2 hours

Equipment:

  • Grill with Rotisserie attachment (I used a Weber kettle with the Rotisserie attachment; the kettle is  this Weber Grill, and the rotisserie attachment is this Weber charcoal kettle rotisserie)
  • Butcher's twine for trussing
  • Aluminum foil drip pan (9"x12", or whatever fits your grill) - See companion Rotisserie Soup Barbacoa recipe

Ingredients:

  • 4 lb boneless beef chuck roast
  • 3 teaspoon kosher salt
  • 1 teaspoon fresh ground black pepper
  • 1 teaspoon Ancho chile powder
  • 1 teaspoon garlic powder

Directions:


1. Prepare the chuck roast: 2 hours before cooking, sprinkle the chuck roast with the salt, pepper, chile powder, and garlic powder.  Let rest in the refrigerator.


2. Truss and skewer the roast: One hour before cooking, remove the roast from the refrigerator. Tie the roast with butcher's string every 1.5 inches, then skewer through the thickest part with your rotisserie spit. Make sure the prongs are in the roast, to help secure it to the spit. Let it rest at room temperature until ready to cook.


3. Prepare the grill: Prepare your rotisserie for cooking on indirect medium heat (see details My Rotisserie Basic Technique Post). For my Weber kettle, I light a chimney starter* ½ full of charcoal, wait for it to be covered with ash, then pour it in two equal piles on the sides of the grill, and put the drip pan in the middle, between the piles. (If you're making the companion soup recipe, this is the pan that the soup will be cooking in.)
*I highly recommend the Weber Chimney Starter, because it is larger than most chimney starters. It holds 5 quarts of charcoal, which exactly the right size for cooking this recipe.


4. Cook the roast: Put the spit on the rotisserie, start it spinning, and cook with the lid closed. Every hour, add 8 coals to each side of the grill (16 coals in all) to keep the heat going. You want to be cooking on low heat - the grill shouldn't get much above 350*F, and 250*F to 300*F is better. The roast will cook for 2 to 3 hours. It is done cooking when it reaches an internal temperature of 185*F measured in the thickest part of the roast.  (This was a thin roast; it was 2" thick, and it took just barely 2 hours to cook.  A thicker roast would take longer, of course.)

5. Serve: Remove the spit from the grill, and let rest for 15 minutes. Remove the roast from the spit, remove the butcher's twine, and slice the roast into ½" thick slices.

Lots of beef, a little soup on the side...

Variations:
*Salt and Pepper roast: If you want a simple roast, skip the other spices, and just use salt and pepper.

*Barbecue chuck roast: Skip pepper, chile powder, and garlic powder; use a barbecue rub instead. Then, for the last ten minutes of cooking, brush the roast with some barbecue sauce to give it a nice, glazed coating.  Serve with the barbecue sauce on the side.

*Lamb shoulder roast: In the original version of this recipe, Rick Bayless used lamb shoulder instead of beef shoulder; the cooking times are similar.

*Want the easy way out?  Cook your barbacoa in a slow cooker.  (Recipe here.)

Notes:
*Serve with tortillas, tomatillo salsa, some sprigs of cilantro, and crumbled queso fresco. Pickled red onions also go really well with it. Oh, and some margaritas, of course.  And did I mention the companion soup recipe, coming later this week?

*Chuck roast is a cut that is full of connective tissue. To get that connective tissue to melt, and give you a tender roast, you have to cook it to well done. It's almost impossible to overcook it.  If you have any doubts, keep on cooking. If you want a medium-rare cut of beef, see my Rotisserie Rib Roast recipe in the Related Posts section.

*That said, the roast wasn't quite as fall apart tender as you get with a pot roast.  Next time, I'm going to try cooking it to 185*F, then wrapping it in foil (still on the spit) and cooking for another half hour to an hour, to see if I can break down some more of the connective tissue.

What do you think? Questions? Other ideas? Leave them in the comments section below.

Related Posts:
Click here for the companion recipe, Rotisserie Soup Barbacoa Style
Click here for my Rotisserie Beef Rib Roast recipe.
Click here for my other rotisserie recipes.

Adapted from:
Rick Bayless's Mexican Kitchen


Check out my cookbook, Rotisserie Grilling.

Everything you could ask about the rotisserie,
plus 50 (mostly) new recipes to get you cooking.

It's a Kindle e-book, so you can download it and start reading immediately!


*Enjoyed this post? Want to help out DadCooksDinner? Subscribe to DadCooksDinner using the RSS or Email options on the right, link to this post from your blog, recommend DadCooksDinner to your friends, or buy something from Amazon.com through the links on this site. (Like my Rotisserie Grilling cookbook...)

What does "Season to Taste" mean, exactly?

September 7, 2009 by Mike Vrobel Leave a Comment

The Kitchn has a great post on how to properly season a dish.  When a recipe says "season to taste", what do they mean?

I tried to cover this in my Turkey Noodle Soup post, but after reading their version...boy, did I ever Fail.

They explain the thought process I go through when I'm seasoning soup, but they have some important clues that I couldn't put into words.

My explanation of when to add salt:

The tasting part of the recipe is the key piece. Does it seem bland? Add salt.

Their explanation:

1. Does It Need Salt? - Nine times out of ten, it does. Salt reduces bitterness and amplifies other flavors in a dish. We add it a half-teaspoon at a time until we can taste those two things happen and just before the dish actually tastes salty. [thekitchn.com]

That's IT!  I add salt until I taste that "reducing of bitterness."  I've always thought of it as adding salt and tasting,  until the soup starts to taste "a little sweet" - that's what I've learned to look for.
*I mention soup specifically, because this set of instructions is key for making good tasting soup.  Soup always needs something extra; more salt, spices, and some acid are requirements for a good soup.  


**That's one of the (many) things that I loved about Ratatouille; the scene where Remy is trying to fix the soup, and he thinks he's done.  He's leaving.  Then he slows down, and starts snapping his fingers.  You can see him thinking, "It's still missing something..."

They have a (great) five point list, but mine is usually a three step list:

  1. Add salt until it you taste it start to taste "a little sweet".
  2. Add spices (pepper, fresh herbs if they're in the dish) until the spices are in balance with the rest of the flavors.  I taste for "do I taste the spices?"  If the dish doesn't have fresh herbs in it, I just add freshly ground black pepper.  I don't add extra dried herbs or spices; they taste "gritty" to me, and I've learned to make sure they cook with the dish.  If it's already in the dish, adding a little extra fresh herbs at the end can make a big difference in the flavor.
  3. Add acid (hot sauce, lemon juice, or vinegar) if it tastes one-dimensional - again, I taste for "is it just sweet, or is there something else going on there?"  If it's just sweet, I add a little acid and taste again.  Hot sauce works really well, because the acid from the vinegar and the heat from the peppers both act to boost the flavor, but you have to be careful.  If the dish isn't supposed to be "hot", I add a dash of hot sauce, then switch to vinegar or lemon juice.

*Their list is better, but I lose patience after three steps when I'm finishing a dish.  

I do this automatically with soup, to the point that I'm going to get burned someday (that 10th time out of 10 they mention).  I add some salt, pepper and a splash of hot sauce, THEN I taste the soup.

Don't forget to season to taste!


Cook's Tricks: How to Properly Season a Dish [thekitchn.com]

Questions? Comments? Other ideas? Leave them in the comments, below.

Related posts:
When should you salt meat?

*Enjoyed this post?  Want to help out DadCooksDinner?  Subscribe to DadCooksDinner using the RSS or Email options on the right, link to this post from your blog, recommend DadCooksDinner to your friends, or buy something from Amazon.com through the links on this site.  Thank you!

Vietnamese Sandwich (Bahn Mi) with Chicken

September 3, 2009 by Mike Vrobel 2 Comments

Now we're down to brass tacks. This is why I showed you the butterflied asian chicken, and had you make extra. I just wanted you to have the ingredients for this recipe.

Vietnamese Sandwich, or Bahn Mi, was a flavor revelation to me earlier this year, when I went for dinner at Superior Pho in Cleveland.
*I know, I know - foodies on the coasts have known abut the glory of Bahn Mi for years now. I'm sorry I was late to the party. This recipe is still worth it.


I took one bite, then started dissecting my sandwich right there on the table, to figure out how to make one by myself. The combination Vietnamese-French ingredients - the Vietnamese filling, and the crispy loaf of French bread - is a match made in taste heaven.
*Of course this is the Americanized version of a Vietnamese classic street food. Here's a New York Times article on the variations made in NYC. That article has the best sandwich picture I've ever seen - an exploded view of a Bahn Mi, layer by layer.

I'm taking a couple of short-cuts here, and the main one is using leftover chicken. The meat in a Bahn Mi is usually different varieties of pork, but the grilled chicken works so well that I don't miss it.

Beyond this recipe, use the general idea of "sandwich" with leftovers. Why pay a deli six dollars a pound for chicken breast when you've got some in the fridge? Buy a loaf of french bread at the grocery store, pretend you're the guy making minimum wage behind the counter at Subway*, and start adding whatever else you have in the fridge. If you've got good bread, pickles, peppers, and lettuce, you're always a few minutes away from a great sub sandwich.
*If you ARE the guy making minimum wage behind the counter at Subway, then I don't blame you if you don't make this recipe. After I worked at McDonald's as a teenager, it was years before I could go back into one. I kept having this dream, where all the different beeps that tell you things are done kept getting louder, and louder, and louder...I'd wake up shaking. And wanting to drop some more french fries.


I know I've focused on Asian style food with this set of posts, but think of this as a general idea, not a specific recipe.  What leftovers do you have that would go well on a loaf of french bread?

Recipe: Vietnamese Sandwich (Bahn Mi) with Chicken

Ingredients:
Vegetable Slaw

  • ¼ cup rice vinegar
  • 2 tablespoon lime juice
  • 1 teaspoon soy sauce
  • ½ teaspoon fish sauce
  • ½ teaspoon sugar
  • pinch ground black pepper
  • 4 large carrots, grated or julienned (I had purple carrots from my CSA)

Everything else...

  • 1 loaf crusty French bread
  • 2 cups shredded chicken (Half of a leftover chicken, skin and bones removed, meat pulled apart. Or 2 chicken breasts.)
  • Mayonnaise
  • ½ seedless cucumber, thinly sliced
  • ¼ cup cilantro, leaves and tender stems (I grab the top of a bunch and pull off a small handful)
  • 4 basil leaves, thinly sliced
  • 1 jalapeno, thinly sliced (or use pickled jalapenos)

Directions:
1. Make vegetable slaw: Make the vinaigrette by combining all the slaw ingredients in a small bowl, except for the carrots. Whisk until the sugar dissolves. Add the carrots and toss until well coated. Let the carrot soak in the vinaigrette while you prep the rest of the ingredients.


2. Shred the chicken: Pull the skin and bones off of your leftover chicken, and shred into pieces roughly ½" thick and 2" long.
*Or whatever size you prefer - sometimes I pull the skin and bones, and slice the chicken ½" thick.


3. Prepare the rest of the ingredients: Slice the loaf of bread lengthwise, almost all the way through, but not quite, so the back side of the loaf can act as a hinge. Chop your cucumber, cilantro, basil, and jalapeno.


4. Build the sandwich: Open the bread, and spread a thin layer of mayonnaise on the bottom. Cover with a thick layer of cilantro, then a thin layer of cucumbers. Top with the vegetable slaw, then the chicken. Sprinkle with the basil and the jalapeno. Drizzle any leftover vinaigrette from the slaw on the sandwich, then close, cut in half, and serve.
*Again, see the exploded view from the New York Times to see what we're shooting for here.

Variations:
*To make the sandwich a little more authentic, add a layer of sliced ham with the chicken.

*Or, replace the chicken entirely with pork. This sandwich works great for leftovers from any of my pork recipes.

*To be more authentic, use some Daikon radish in place of half the carrots in the slaw. Treat it like the carrots; grate or julienne it and toss it in the vinaigrette.

*To be really, REALLY authentic, replace the mayonnaise with Pork Liver Pate. Or, really, any pate; with the grilled chicken, chicken pate is a good alternative. Liverwurst would work as well, and is much cheaper at my local stores than pate.
*And I love saying "Liverwurst." It's a fun word to say out loud.

Notes:
*Good French bread, with a crackling crust and tender crumb elevates this recipe from good to great. If you have a good local bakery, check them out for a French baguette for this recipe. You efforts will be rewarded.
*That said, I've made it with supermarket "French bread", and I'll do it again if I'm desperate, but it really is worth the effort to get good bread for this one.

*You'll notice a lot of similarities between this recipe and the Asian Noodle Salad recipe I just posted. You're swapping the salad, noodles and dressing for a bun with mayo, and stuffing the ingredients in it. This is how you use common ingredients in an ethnic flavor profile. What gives southeast asian cooking its distinctive flavor? Fresh cilantro and basil, pickled carrots, maybe some fresh cucumber, and sauce with lime, soy and fish sauce in it. Once you get the hang of the flavors a region uses, it's easy to come up with something "new" by varying what seem like the main ingredients.

*If you want to see the "regional flavor profile" at work, check out this Bahn Mi hot dog [h/t epicurious.com] for inspiration.

*And, using the same flavor profile in a set of meals is an efficient use of your shopping dollars. If you're buying cilantro, lime, and basil for a Thai recipe, why not use it multiple times during the week? A roast, a salad, a sandwich...you get variety, but also use up the cilantro and basil before the start to go bad.

Questions? Comments? Other ideas? Leave them in the comments section below.

Related Posts:
Click here for my Grilled Butterflied Chicken to make the chicken for this dish
Click here for my Asian Noodle Salad to use up the rest of the leftover chicken
Click here for my Grill-Roasted Thai Chicken Breasts if whole chickens aren't your thing

Inspired by:
A Classic Vietnamese Sandwich Absorbs Local Flavors [nytimes.com]

*Enjoyed this post?  Want to help out DadCooksDinner?  Subscribe to DadCooksDinner using the RSS or Email options on the right, link to this post from your blog, recommend DadCooksDinner to your friends, or buy something from Amazon.com through the links on this site.  Thank you!

Asian Noodle Salad with Chicken

September 2, 2009 by Mike Vrobel 2 Comments

Time to use some leftover chicken! If you're following along, you have some grilled asian chicken in your refrigerator, and (hopefully) some of the dipping sauce.
*If not, that's OK - I've made this salad with "plain" leftover chicken, and made the dressing on the fly. Or, a la minute in French. I bet you didn't think I could work my love of france into an Asian Noodle Salad, did you?

When I have leftovers, one of my first thoughts is "salad".  Steak and blue cheese salad, Greek Salad with chicken, chicken caesar salad* - if you have some leftover protein and some greens you can whip up a meal that doesn't seem much like leftovers with very little effort.  Just be sure to make your own salad dressing!
*(fill in protein here) caesar salad has turned into a cliche on restaurant menus.  Do it at home, for a weeknight dinner that's ready in about 15 minutes, and you're a hero.

This salad is a work of art. The different colors and textures layered in this salad give it an amazing presentation. I like to serve it in one big bowl, and let everyone grab with a set of tongs.

I know this seems like a lot of prep work, but trust me*, it's worth it.  If you've got average knife skills, this shouldn't take much longer to put together than any other dinner, and it winds up being a dinner in a bowl.
*My dad's a doctor...I know what I'm doing!  Oh, and my brother is one, too.
**For some reason, that doesn't sound as impressive as when they do it.

Recipe: Asian Noodle Salad with Chicken

Ingredients:
Dipping Sauce (hopefully, about ⅓ cup, left over from the Grilled Butterflied Chicken)

  • Pinch red pepper flakes
  • 2 tablespoon distilled white vinegar
  • 2 tablespoon lime juice (from 1 lime)
  • 2 tablespoon granulated sugar
  • 1 clove garlic, minced
  • 1 teaspoon fish sauce

Everything else...

  • ¼ cup peanut or vegetable oil
  • 1 large carrot, peeled and grated or shredded
  • 1 ounce thin rice noodles
  • 2 cups shredded chicken (Half of a leftover chicken, skin and bones removed, meat pulled apart. Or 2 chicken breasts.)
  • 1 small head greenleaf lettuce, torn into bite size pieces (Or, about 2 cups of bagged lettuce)
  • ½ seedless cucumber, thinly sliced
  • ¼ red onion, thinly sliced
  • 1 tablespoon chopped fresh cilantro
  • 6 basil leaves, thinly sliced
  • 2 tablespoon dry-roasted peanuts, coarsely chopped

Directions:
1. Cook rice noodles: Cook the rice noodles according to the package directions.
*Usually, this means bringing some water to a boil and pouring it over the noodles, then letting them sit for about 5 minutes. An electric kettle makes this very easy.


2. Make Dipping Sauce Vinaigrette: Put the dipping sauce ingredients in a bowl, and whisk to combine (or use leftover dipping sauce from the Asian Butterflied Chicken recipe). Drizzle the peanut oil into the bowl, whisking vigorously, until well combined. Add the grated carrot, and toss to coat. Let the carrot soak in the vinaigrette while you make the rest of the salad.


3. Shred the chicken: Pull the skin and bones off of your leftover chicken, and shred into pieces roughly ½" thick and 2" long. Put in a medium bowl, and toss with 2 tablespoon of the dipping sauce vinaigrette.
*Or whatever size you prefer - sometimes I pull the skin and bones, and slice the chicken ½" thick.


4. Prepare the rest of the ingredients: Clean and tear the lettuce, and slice the cucumber, onion, cilantro, basil, and peanuts.


5. Build the salad: In a large bowl, combine the lettuce, cucumber and onion. Toss with half the dressing until well coated. Top with the cooked rice noodles, then the chicken, then scatter the cilantro, basil and peanuts on top. Drizzle the whole thing with the remaining dressing, and serve.
*If you want to be fancy, after tossing the lettuce, build the salad on individual serving plates. I like the way it looks brought to the table in a big bowl.

Variations:
*The "easy" variation is to buy bagged lettuce and pre-shredded carrots.  I don't trust pre-cut cucumbers or onions, and please, PLEASE don't buy those strips of pre-cooked chicken.

*If you have some of my pickled red onions, they make a great substitute for the thin-sliced red onions in the recipe. You want the crunch and flavor of fresh cucumber, though, so don't use my pickles for that.

*This scales up or down depending on ingredients; want to use more lettuce? Sure! Don't have the noodles? No worries, just skip them.  No basil, or cliantro?  Substitute some mint.

Notes:
*As I mentioned in the opening, this is a great way to use up leftover chicken. It doesn't matter what it was originally; once you strip the skin off and shred the meat, almost any roasted chicken will work for this recipe.
*As long as it wasn't barbecued; that would cause too much of a flavor conflict.

*Thin Rice Noodles are available in the Ethnic aisle of your local megamart, or your local Asian Market.

Questions? Comments? Other ideas? Leave them in the comments section below.

Related Posts:
Click here for my Grilled Butterflied Chicken
Click here for my Grill-Roasted Thai Chicken Breasts

Adapted from:
Su-Mei Yu, Cool Rice Noodles and Chicken [finecooking.com]
See her blog at [sumeiyu-thailiving.blogspot.com]

Why Weber?

September 1, 2009 by Mike Vrobel 4 Comments

Why Weber?

When we moved into our house, the first thing I wanted was a Weber kettle for my back yard.  Why?  I'm not sure, exactly, but that was one of the best gut feelings I've ever had.
To paraphrase "High Fidelity" - normally, when I trust my gut, it has rocks for brains.  But not this time!

I think I wanted one because it's a classic of American design.  It's immediately identifiable.  If you have a commercial, and you want people to know it's someone's back yard, you have a red Weber kettle sitting in the background.
Never mind that they haven't made them in red for a while now.  Of course, what I really want is the Homer Simpson Limited Edition Charcoal Kettle.
**See the history of weber grills through this link: Weber Timeline.  The Wishing Well Weber leaves me giggling...

That grill started me on was the odyssey that led to this blog.  My first few grill sessions were hit or miss, so I went on this newfangled internet thing to find out what I was doing wrong.  (Oh, and I needed a recipe for ribs.)  I found the Virtual Weber Bullet, and it picked up momentum from there.
I also went to the Big Green Egg forum.  Who knows what I'd be talking about now if I had the money to buy one back then?

So...why am I so brand loyal when it comes to Weber?  They provide the best value in grills.  There are some that are cheaper; there are some that are more expensive.  Weber, hands down, gives you the best value for your money.  Why?  Three reasons: design, support, and accessories.

The first is design. There's a reason the Weber kettle is a classic, and it's not just good looks.  It's a beautiful, bulletproof design.  It's flexible enough to handle grilling and grill roasting, the two-piece body doesn't have any gaps for wind to get in, and it is compact enough that you can fit it in the trunk of a '98 Toyota Corolla if you take the legs off and nest the pieces.
Yes, I do this all the time.

The Genesis gas grill introduced Weber's "Flavorizer Bars.  Those V-shaped bars replaced all those awful lava rocks in grills.  Lava rocks are gone now; everyone uses some variation on the V shaped bar that Weber pioneered.  And they sell really, REALLY heavy grates for their gas grills.  While they don't come standard on their inexpensive grills, you can get them as replacement parts for any of their grills.  The cast iron or steel rod grates really hold on to heat, which is the key to good searing on a gas grill.
Weber isn't resting on their laurels, either.  The "one-touch" ash catching system that they added to the kettle in 2000 is a marvel.
*Also, they're almost indestructible.  My Weber Genesis Silver C was on my deck for a week, when a windstorm came up.  I was watching out the back window, wondering if I remembered to lock the wheel casters, when I saw the grill vibrate, then slide across the deck.  The grill cover was acting like a sail...right over the edge of my deck, a three foot drop.  I ran out and righted the grill, fearing the worst.  Once the wind died down, I followed instructions, wiped the hoses down with soapy water, and turned it on...not a leak to be found.  The grill worked beautifully, even with the crash landing, and is still going strong.  I find myself double checking the wheels on the grill every now and then to make sure I have them locked...

Want a second opinion? Alton Brown, in his new book, Good Eats: The Early Years, goes over the grill recommendations that he gave in his Grill Seekers episode.  Then he adds this aside:
The grill I used in this episode rotted away from use some time ago, but the red Weber kettle I've been using since "Hook, Line and Dinner" is still going strong.  That's not a product endorsement, mind you, but it is a testament to solid design.
[Alton Brown: Good Eats: The Early Years]

The second reason is support.  Weber has a help line staffed 24/7; if you have a question, just call.  Or email; they've helped me out a number of times that way.  Because grills live outdoors, the non-coated parts will start to rust, eventually.  (Make sure you keep your grill covered when not in use!)  If you need a part, they've got it.  When you rust out a grate, you can get a new one at almost any major hardware store; if they don't have it, just give Weber a call and they'll ship it out to you.  Kept your grill long enough that you rusted out the burners?  Yes, they have those as well - just follow instructions, and you can slide the new ones right in.  These grills are built with the opposite of "planned obsolescence".  When I got my new, jumbo, 6 burner Weber Summit, I gave my trusty Weber Genesis to my sister-in-law.  It's still going strong, and it's close to ten years old.


Part of their support is their constant promotion of outdoor cooking; they support it as a hobby (and an obsession).  They publish cookbooks, support good grilling shows, have an online community, they send out free booklets.  They even donated the grills that were used in the steak cook-off I won!
*Yes, I know this is self-serving.  I view it more as enlightened self interest.  They don't just want to sell you a grill, they want you to use it, and be happy with it, so you'll buy another one.  Weber has done more to promote grilling in America than...well, almost everyone else combined.

Me and my little buddy.

Finally, the accessories.  Beyond just the replacement grates, they have the accessory that I almost love more than the kettle itself, the Weber Kettle Rotisserie.  This makes the grill even more versatile, and I've got a bunch of things you can try with it.*  Their charcoal chimney is another case of their great design; it's the perfect size, and the second loop handle helps you put the coals exactly where you want them while you juggle a flaming hot cylinder of charcoal.
Start with the rotisserie chicken.  Trust me.

Are Weber grills perfect?  No.  The gas grills can be a little expensive for the features you get, but I think their bulletproof design, quality build and excellent support make up for the cost difference.  I wish they could add a way to raise and lower the charcoal grate in the kettles, but I worry it would mess with the simplicity of their design.  I wish the massive Ranch Kettle was cheaper, but the new (re-released) 26-Inch Kettle is probably the larger size kettle I need.  Now if they would just make a rotisserie attachment for it...

In closing...I love Weber.  Sure, there are other great grills out there.  But if what you want is not the cheapest, not the fanciest, but the best value, then I think Weber wins hands down.

PS: This is NOT a paid advertisement; I don't receive any sort of support from Weber (beyond what anyone else would get when they call their 1-800 number).  I don't receive any financial support or free items from anyone; if I recommend something on this blog, it's because I find it  useful.


**However, If Weber offered to sponsor this blog...I'd agree in a heartbeat.  But I'd let you know about it as well, in big, bold type.

*Thanks to blog reader (and old freind) Geoff, who asked the question that started this rant...


Questions? Comments?  Other ideas? Leave them in the comments section below.

Grilled Butterflied Chicken, Thai Brinerated

August 27, 2009 by Mike Vrobel Leave a Comment

Grilled Butterflied Chicken, Thai Brined

Grilled Butterflied Chicken, Thai Brinerated

Butterflied chicken is my second favorite way to grill chicken.
*After rotisserie grilling, of course.I picked up this technique from Su-Mei Yu in Fine Cooking magazine; I've been using it for years, and I've played with her recipe a bit. I've made it more of a brinerade than a marinade, but the flavor profile of of garlic, cilantro stems and soy sauce is her idea.
*I love that I can use cilantro stems in the recipe. I feel like I get something for nothing, by using an ingredient that would normally be thrown away.

The other idea from Su-Mei Yu's article is intentionally making leftovers. Whenever I cook whole chicken, I always cook two chickens. We eat one for the main meal, and I have leftovers for later in the week. I'll be following this recipe with a couple of examples of how to use leftover chicken to make multiple meals.
*Meals that are fancier than just eating the leftovers as they are.  I love leftover chicken, but three days of it leaves me dreading that last drumstick.

Recipe: Grilled Butterflied Chicken, Thai Brinerated

Equipment:

  • Grill (I love my Weber Kettle)
  • Aluminum foil drip pan (9"x11", or whatever fits your grill)


Thai marinade (brinerade?) ingredients

Marinating the chickens

Grilling the chicken - start skin side down

Cut up and ready to serve

Notes:
*Flipping the chicken is best done by grabbing the knobby end of both legs with your tongs, and using them to flip the chicken up and over.

*Serve with jasmine rice and stir-fried vegetables, and/or some grilled asparagus.  Also, to spice things up, I like a little Sriracha Chili Sauce on the side.

*Don't forget the dipping sauce! It pushes this recipe from really good grilled chicken to great.  If you have any left over, save it for the Asian Noodle Salad we're going to make with the leftovers.

Questions? Comments? Other ideas? Leave them in the comments section below.

Related Posts:
Click here for my Thai Style Grilled Chicken Breast recipe
Click here for my Grill Roasted Chicken basic technique

Inspired by:
Su-Mei Yu, Grilled Thai Chicken, Fine Cooking Magazine [finecooking.com]
See her blog at [sumeiyu-thailiving.blogspot.com]

Year One of DadCooksDinner

August 25, 2009 by Mike Vrobel 3 Comments

It's been a great first year. In honor of one of my favorite movies, I'm going to celebrate year one of DadCooksDinner with a set of Top Five lists.
Yes, I'm a geek. If you haven't figured that out, you haven't been paying attention...

Top Five Moments in year one of DadCooksDinner
5. Memorial Day Weekend
When you write a blog that is grilling and rotisserie centered, the opening of grilling season gets you a lot of readers. My average daily readers doubled on Memorial Day Weekend!

4. First question from a reader
I got a question about my rotisserie baby back ribs. Holy cow - someone is actually reading!

3. Rotisserie Cornish Game Hens recipe tops google
...and is still there, if you google "rotisserie cornish game hens". You get my most popular post, though the next post is gaining fast...

2. Winning the Taste of Akron Steak Cook Off:
I think writing this blog for a year is what got me into the finals. Writing recipes for a year will teach you how to get them to make sense.
I was linked to by some of my favorite food blogs, Casual Kitchen and The Kitchn
My name was in my local paper, the Akron Beacon Journal
I won $500 worth of wine, cheese, and Prime graded beef from West Point Market

*I was mentioned in Jane Snow's newsletter, twice! Which brings me to number one...

1. Email from Jane Snow telling me she loved my blog
*I've been a big fan of Jane's since I moved to Akron in 1998; she was the food writer in the local paper. She left the paper and started her own newsletter, which I can't recommend highly enough. She was the original source on a lot of the Akron ethnic markets that I write about from time to time, and I have always enjoyed her writing. In her email she encouraged me to keep writing about food! Me! I know that you couldn't stop me anymore, but it still meant a lot to hear it from her.

Top Five quotes that my (very patient) wife got tired of hearing:
5. Yes, we're having the steak again. I'm practicing for the cook-off!
4. I need a new (...cutting board...color of FiestaWare...All-Clad pot...) It will look better in the pictures.
3. Before we go, let me check my traffic on Google Analytics.
2. I'm sorry dinner's late; I had to take notes for the recipe.
1. Wait! I need to take a picture of that for the blog before we can eat it!

Top Five culinary heroes:
5. Pam Anderson
*How to Cook Without a Book - taught me that basic techniques are more important than recipes

4. Michael Ruhlman
*Beyond basic techniques, you need the Ratios that are behind all recipes
3. Rick Bayless
*There's nothing wrong with being obsessed about a food culture

2. Cooks Illustrated
*There's nothing wrong with being obsessive about perfecting and understanding recipes either (as long as you understand where they're going with their basic techniques).

1. Alton Brown
*My Hero! Food as an entry to science, politics, culture, art...and he ties it all together in an entertaining package that only lasts a half an hour. And forget good eats...it all tastes great!

Top Five pictures on the blog:
From: Rotisserie Ham
From: Grated Carrot Salad
From: Grilled Steak with Herb Butter
From: Rotisserie Spareribs
From: Red Wine Vinaigrette


Top Five blogs that influenced DadCooksDinner:
All of these have influenced my writing style. I'm still trying to find my "voice", but thanks to their inspiration I'm making progress.

  1. Joe Posnanski at joeposnanski.com
    Influenced isn't a strong enough term here. "Shamelessly stole his style of writing with footnotes in italics" is about right. When I grow up, I hope to have Joe's sense of humor and fun in my writing.

    2. Carol Blymire at French Laundry at Home and Alinea at Home
    I was thinking about doing something online with food, but I thought I was too late to find an uncrowded topic. What Carol's blog made me see was it wasn't if you were too late, it was if you could write with your own voice. To me, the recipes she's working on are secondary. When I'm reading her blog, it feels like I'm sitting in her kitchen, shooting the breeze while she works on the recipe.

    3. Michael Ruhlman at ruhlman.com
    *This is more inspirational than anything else. Michael is my favorite food writer, and Donna's pictures on his blog are awe-inspiring. I know I need to improve my writing and photography, and this is where I go to see what the best of both are like. I know this blog is just a sideline to his books, but even his throwaway writing is great.

    4. David Lebovitz at davidlebovitz.com

*David's another writer who's voice I admire. It feels like you're sitting in his tiny Parisian kitchen, chatting with him while he puts together another show-stopping dessert. And the photos! While Donna Turner Ruhlman makes art, David makes pictures that make me want to lick my computer monitor. I think I gain weight just looking at them.

5. Virtual Weber Bullet at virtualweberbullet.com

*This is where I got my start on cooking and the internet. The VWB Forum is where I cut my teeth on writing posts and recipes. I've drifted away from the barbecue-centric cooking featured here, but if you want to know how to barbecue ribs, brisket, or pork shoulder, you won't find a better site on the internet.
Top five things my kids want to eat (instead of the food I'm cooking for the blog):
5. Macaroni and Cheese from the blue box
4. Goldfish crackers
3. Mom's homemade Pizza
2. Chicken Nuggets
1. Hot Dogs

Thank you, everyone, for making this a fun year. I'm looking forward to seeing what the next year brings!

*Wait...I forgot Casual Kitchen and CheapHealthyGood should be on the blog list! Oh, and Judy Rodgers and Mark Bittman in the influences. And Steven Raichlen. And the kids would rather have Tortillas. But what gets bumped off the list? Oh, bother...


Questions? Comments? Other ideas? Leave them in the comments section below.

Pickled Sorta Sour Cucumbers

August 21, 2009 by Mike Vrobel Leave a Comment

My brother, Matt (the Doctor!) left these at our cottage this summer. I had a couple on a burger, and then fished a few out of the jar and ate them raw. Then I ate a few more. Then...well, long story short, by the time dinner was done, the pickles were all gone. And I was considering drinking some of the juice left in the jar.
*Thanks, Matt!

I received a bunch of pickling cucumbers from my CSA, and then I bought some more, to make a jumbo batch of pickles.  I put them in the crisper drawer in my refrigerator, and they sat.  I did all the other pickle recipes for Pickle Week first.  I found, much to my dismay, that cucumbers don't keep well.  By the time I got to them, all the pickles had turned bad. One batch was furry; the other was slimy. What I have since learned is cucumbers don't keep well; after 24 hours they start to deteriorate. Make your pickles as soon as you can!

This recipe is based on one from my hero, Alton Brown.
*Technically, it's from his evil twin brother, B.A.  On the "American Pickle" episode of Good Eats, Alton did a sweeter bread and butter style pickle, while B.A. did one very similar to this...

Recipe: Pickled Sorta Sour Cucumbers

Equipment:

  • A clean quart jar with a tight fitting lid (Canning jars or flip top gasket jars are the usual choices.)

Ingredients:

  • 2 pickling cucumbers, about 5" long, sliced ¼" thick
  • 4 crushed cloves of garlic
  • ½ onion, sliced thin
Pickling Liquid:
  • 1 cup water
  • 1 cup cider vinegar
  • 0.5 cups champagne vinegar (or more cider vinegar)
  • 0.5 cups sugar
  • 1.5 teaspoon table salt
  • 1 tablespoon mustard seeds
  • 1 tablespoon pickling spice
  • 1 tablespoon black peppercorns

Directions:
Click here for the basic technique of pickling vegetables.
1. Prep the vegetables: Put the sliced cucumber, sliced onions, and crushed garlic in your jar.

2. Make the pickling liquid: Combine the Pickling Liquid ingredients in a medium saucepan, and bring to a boil over high heat.  Reduce the heat, and simmer for 5 minutes to open up the flavor of the spices.

3. Combine the liquid and the vegetables: Carefully pour the pickling liquid into the jar until the vegetables are covered.  (Optionally, pour pickling liquid through a fine mesh strainer first, to strain out the herbs and spices; your pickled vegetables will look less rustic that way.) *I pour the pickling liquid from my sauce pan into my Pyrex 2-Quart Measuring Cup, and from there into the jar.  The spout on the measuring cup makes this much less messy.

4. Refrigerate: Let cool at room temperature, close the lid on the jar, and refrigerate. It's best to refrigerate for at least one day, and preferably one week. They will last, refrigerated, for up to 3 months.

Jars of pickles, onions and garlic, ready for the pickling liquid

Variations:
*In his show, Alton also did a different version, B and B's. In it, he skipped the garlic, used half the spice amounts, and used 1.5 cups(!) of sugar. If you're looking for bread and butter style pickles, try this version instead.

Notes:
*My favorite site about Good Eats is the Good Eats Fan Page. They have every bit of information you could possibly want about Good Eats - including written transcripts of every episode!

*Ideas for next time: I'm going to skip the champagne vinegar. Also, I want some garlic dill pickles - that's my next pickle adventure.

Questions? Comments? Other ideas? Leave them in the comments section below.

Related Posts:
Click here for my Pickled Vegetables basic technique.


Adapted From:
Alton Brown's Kinda Sorta Sours [foodnetwork.com]

Pickled Red Onions

August 20, 2009 by Mike Vrobel Leave a Comment

Pickled red onions are the one homemade pickle that I have made in the past. They're a common Mexican side dish, and I've often made them to serve with grilled Mexican meals.  Also, I used this recipe to preserve all the small red onions that came out of our garden last year.
*That's something you'll hear me say a lot this week - pickling is a great way to use the bounty of your garden. We're getting overrun right now, and pickling is a great way to preserve produce for later in the year.

My brother-in-law Travis made some pickled red onions while he was at our summer cottage, and I had them a about a week later on a hamburger. After that, I was putting them on my sandwiches for the rest of the week - they make a great sandwich topping.
*Thanks, Travis!

This recipe is an based on one from David Lebovitz, who I've mentioned before - David is "our man in Paris". I trust his information on food in the City of Light more than any other source.
*Oh, and his recipes happen to be great as well.  Especially if you love chocolate or ice cream.

Recipe: Pickled Red Onions

Equipment:

  • A clean quart jar with a tight fitting lid (Canning jars or flip top gasket jars are the usual choices.)

Ingredients:

  • 2 large red onions, thinly sliced
  • 1 crushed clove of garlic
  • 1 dried chile pepper, rinsed
Pickling Liquid:
  • 2 cups white vinegar
  • 0.25 cups sugar
  • 1 teaspoon table salt
  • 2 bay leaves
  • 1 tablespoon coriander seeds
  • 1 tablespoon black peppercorns
  • 10 whole cloves
Pickling liquid - I put the garlic and pepper in...

Directions:
Click here for the basic technique of pickling vegetables.
1. Prep the vegetables: Put the sliced onions, crushed garlic and dried chile pepper in your jar.

2. Make the pickling liquid: Combine the Pickling Liquid ingredients in a medium saucepan, and bring to a boil over high heat.  Reduce the heat, and simmer for 5 minutes to open up the flavor of the spices.

3. Combine the liquid and the vegetables: Carefully pour the pickling liquid into the jar until the vegetables are covered.  (Optionally, pour pickling liquid through a fine mesh strainer first, to strain out the herbs and spices; your pickled vegetables will look less rustic that way.) *I pour the pickling liquid from my sauce pan into my Pyrex 2-Quart Measuring Cup, and from there into the jar.  The spout on the measuring cup makes this much less messy.

4. Refrigerate: Let cool at room temperature, close the lid on the jar, and refrigerate. It's best to refrigerate for at least one day, and preferably one week. They will last, refrigerated, for up to 3 months.

Red (and sweet) onions ready to go

Variations:
*I used a mix of red onions and sweet (Vidalia) onions. It's traditional to use all red onions, but the sweet onions worked fine.  The only difference I noticed is that the red onions color the pickling liquid, giving the onions a garish red color; this color is a little muted in the batch in my pictures.  Next time I'm going to remember to buy enough red onions...

*Use different herbs and spices. David Lebovitz adds allspice berries instead of the coriander. *Slice the onions into 8 wedges per onion, instead of thin slices. This looks better for presentation, but I like the ease of use when you use thin-sliced onions.

*Add lime juice to the brine ingredients. This is also traditional in Mexico.

Notes:
*As I mentioned in the opening, this is a traditional side dish in Mexico; it goes great with tacos, especially beef tacos.

*I have found them useful anywhere you would use regular or grilled onions - they go particularly well on hot dogs or hamburgers, or as a side dish with grilled beef, chicken or pork. Lebovitz even recommends them as an addition to potato salad, which sounds delicious.

*Ideas for next time: I'm going to try some lime juice and water in the pickling liquid; this is the only recipe I've seen that uses 100% vinegar.

Questions? Comments? Other ideas? Leave them in the comments section below.

Related Posts: Click here for my Pickled Vegetables basic technique.


Adapted From:
Pickled Red Onions [davidlebovitz.com]

Pickled Chile Peppers

August 19, 2009 by Mike Vrobel Leave a Comment

Michael Symon and Michael Ruhlman are big names in food circles, but to those of us in Northeastern Ohio, they are hometown boys who made good.*  I was introduced to both of them years ago, when I read an article about Symon, written by Ruhlman, in a local Cleveland magazine. That article became part of Ruhlman's The Soul of a Chef, the best book about chefs that I've read.
*We're a little paranoid around here; whenever someone gets national recognition, their first move is out of Cleveland. When someone decides to stay, even after they're famous, they hold a special place in our hearts. See Kosar, Bernie.

I was excited to read that Ruhlman is co-writing Symon's first cookbook, Live to Cook. But almost as interesting was the beautiful picture of Symon's Pickled Chilli Peppers, taken by Ruhlman's wife, Donna. That picture looks like summer in a jar.
*I was a hobbyist photographer for a while, and I am just stunned by the pictures Donna takes for Ruhlman.com. They are some of the most beautiful shots I've ever seen.
*[Update 9.12.2009] Donna's online, and making her pictures available to bloggers!  Check her out at RuhlmanPhotography.com

I always have a jar of pickled jalapenos in my refrigerator*, so this recipe was an obvious one for me to try.
*In case of emergency, add pickled jalapenos.

Recipe: Pickled Chile Peppers

Equipment:

  • A clean quart jar with a tight fitting lid (Canning jars or flip top gasket jars are the usual choices.)

Ingredients:

  • 1 to 2 pounds of chile peppers, (or whatever will fill your jar)
  • 2 crushed cloves of garlic
  • 2 sprigs of fresh thyme
Pickling Liquid:
  • 1.5 cups water
  • 1.5 cups sherry vinegar
  • 2 tablespoon sugar
  • 1.5 teaspoon table salt
  • 2 bay leaves
  • 2 tablespoons coriander seeds
  • 2 tablespoon black peppercorns

Directions:
Click here for the basic technique of pickling vegetables.
1. Prep the vegetables: Put the peppers, crushed garlic and thyme sprigs in your jar.
*Fitting the peppers in the jar is a 3-D puzzle, if you have a jar with a narrow lid. It took me a couple tries before I was ready to go

2. Make the pickling liquid: Combine the Pickling Liquid ingredients in a medium saucepan, and bring to a boil over high heat.  Reduce the heat, and simmer for 5 minutes to open up the flavor of the spices.

3. Combine the liquid and the vegetables: Carefully pour the pickling liquid into the jar until the vegetables are covered.  (Optionally, pour pickling liquid through a fine mesh strainer first, to strain out the herbs and spices; your pickled vegetables will look less rustic that way.)
*I pour the pickling liquid from my sauce pan into my Pyrex 2-Quart Measuring Cup, and from there into the jar.  The spout on the measuring cup makes this much less messy.

4. Refrigerate: Let cool at room temperature, close the lid on the jar, and refrigerate. It's best to refrigerate for at least one day, and preferably one week. They will last, refrigerated, for up to 3 months.

Variations:
*Use one type of peppers. Next time, I think I'm just going to make pickled jalapenos. (Like David Lebovitz did here, in his post about the same recipe).

*Use different herbs and spices.  Michael Symon adds 1 teaspoon of cumin, and marjoram instead of the thyme. I find cumin to be a bit overpowering, so I skipped it, and I didn't have any marjoram, so I substituted the thyme.

*Slice the peppers into rings before pickling. Much easier to get into the jar, and get out in small quantities, but they don't look as good.
[Update 9.12.2009] I did this with my next batch, a bunch of anaheim chili peppers from the farmer's market.  The rings are much easier to work with both when you're making the recipe and when you're using them.

Notes:
*Use anywhere you would use regular chile peppers; you get all the heat, plus an extra kick of vinegar and spices.  In salsa, replace your hot peppers with pickled peppers.  Cut them into rings, and use them to spice up a sandwich.  Dice them, and use them as a topping on chili, or as a side for tacos.


*I used a variety of peppers because the picture Donna Turner Ruhlman took is beautiful.  I loved the variations of colors, sizes and shapes in the jar.  The downside of this approach is Hot Pepper Roulette.  The serrano was mouth-blisteringly hot; after a couple of bites I went running for a glass of milk.*  The banana pepper was mild enough that I ate it like a, well a pickle. Next time, I'm going to use one or two varieties with the same heat profile so I know what I'm getting into when I open the jar.
*Milk is what you need if you are being overwhelmed by heat.  Milk cuts the chemical bonds holding the hot stuff (capsaicin) to the taste receptors on your tongue.  Everything else you try (water, beer, more beer, even more beer) just spreads it around more.

*As I mentioned, fitting my peppers into a narrow mouth jar was an exercise in three dimensional logic. I would recommend using wide mouth jars for this recipe. Smaller chiles also help.

*I can't bring myself to use Ruhlman's "Chillis" spelling; I've got Alton Brown's Chili (with an "I") versus Chile (with an "E") stuck in my head. Chili with an I is the dish; Chile with an E is the pepper.

Questions? Comments? Other ideas? Leave them in the comments section below.

Related Posts:
Click here for my Pickled Vegetables basic technique.

Adapted From:
Michael Symon's Pickled Chillis [ruhlman.com]

Pickled Dilly Beans

August 18, 2009 by Mike Vrobel 9 Comments

Here is the recipe that started me on my pickling kick: Dilly Beans. This recipe gives you a sweet and dill combination that goes well with the flavor of the beans. I brought my first batch to a friend's party as an appetizer.* Everyone loved them, but Diane couldn't keep away from them. We ate the whole quart jar of beans, and Diane ate at least half of them.
*Hi, Pam and Dave! Thanks again!


I saw this recipe in Cook's Country magazine, the less uptight, younger sibling of Cook's Illustrated. It is a good way to use up beans; as you can see in the pictures, I had a lot of beans to use up. I tripled the recipe, and made three quarts of dilly beans.*
*It's a week later, and we have a quart and a half left. Did I mention that Diane loves green beans?

Recipe: Pickled Dilly Beans

Equipment:

  • A clean quart jar with a tight fitting lid (Canning jars or flip top gasket jars are the usual choices.)

Ingredients:

  • 1 pound beans, stems trimmed (I had a mix of green, yellow and tiger beans)
  • 2 Crushed cloves of Garlic
  • 2 Sprigs of Fresh Dill
Pickling Liquid:
  • 0.5 cups water
  • 1.5 cups white vinegar
  • 0.75 cups sugar
  • 1 teaspoon table salt
  • 2 tablespoons dill seed

Directions:
Click here for the basic technique of pickling vegetables.
1. Prep the vegetables: Trim the stem ends off of the green beans. Put the green beans, crushed garlic and dill sprigs in your jar.

2. Make the pickling liquid: Combine the Pickling Liquid ingredients in a medium saucepan, and bring to a boil over high heat. Reduce the heat, and simmer for 5 minutes to open up the flavor of the spices.

3. Combine the liquid and the vegetables: Carefully pour the pickling liquid into the jar until the vegetables are covered. (Optionally, pour pickling liquid through a fine mesh strainer first, to strain out the herbs and spices; your pickled vegetables will look less rustic that way.)
*I pour the pickling liquid from my sauce pan into my Pyrex 2-Quart Measuring Cup, and from there into the jar. The spout on the measuring cup makes this much less messy.

4. Refrigerate: Let cool at room temperature, close the lid on the jar, and refrigerate. It's best to refrigerate for at least one day, and preferably one week. They will last, refrigerated, for up to 3 months.

This is how I preserve 3 pounds of beans...

Variations:
*Blanch the beans to set their color. In the original recipe, they blanched the beans. Before step 1, bring a pot of salted water to a boil, then cook the beans for 3 minutes. Remove to a bowl of ice water to cool. Remove from the ice water, drain, and continue with recipe.

*Add some spices other than dill. In the original recipe, you add 1 tablespoon of mustard seeds and 1 tablespoon of peppercorns. And...I forgot to add them. The recipe turned out great regardless. Another good option would be pickling spices, a mix of spices that, well, they go well with pickling.*
*That's kind of how the got the name...


*[Update 9.12.2009] Or go with a less sweet dilly bean.  See this comment on GetRichSlowly for Kris's award winning Ginger Pickled Beans.  [getrichslowly.com]

Notes:
*Use as an appetizer or side dish, or as part of a vegetable salad.

*These pickles will keep for about 3 months; the vinegar acts as a pretty strong preservative. Watch out for fur or fuzz growing on top of the liquid in the jar. When you see that, it's time to throw them away.

*I had a hard time packing the beans in tight with the narrow mouth jar. I would recommend using wide mouth jars for this recipe. Or, just living with the fact that you need an extra jar.

*This recipe has a high proportion of vinegar to water (3:1 vinegar to water). Next time, I'm going to try more water, along the lines of the basic technique, just to see what happens. I'm also going to try cider vinegar, since I think it will add some flavor to the recipe. Oh, and I'm going to remember the mustard and peppercorns...

Questions? Comments? Other ideas? Leave them in the comments section below.

Related Posts:
Click here for my Pickled Vegetables basic technique. Or, for something different, try my Sautéed Cast Iron Brussels Sprouts.

Adapted From:
Cooks Country Magazine: Dilly Beans (June 2009 issue)

*Enjoyed this post?  Want to help out DadCooksDinner?  Subscribe to DadCooksDinner using the RSS or Email options on the right, link to this post from your blog, recommend DadCooksDinner to your friends, or buy something from Amazon.com through the links on this site.  Thank you!

Basic Technique: Pickling Vegetables

August 17, 2009 by Mike Vrobel Leave a Comment

Welcome to pickling week on DadCooksDinner!

I've been meaning to make some homemade pickles; I make pickled red onions from time to time, and I love them, but I've never really branched out into any other recipes.  Then our CSA announced "pick your own" green beans, with no limit.  Diane loves green beans, so she took he kids, and they came back with about five pounds worth.  Oh, and what about those pickle cucumbers I got in the CSA box?  And that gorgeous picture of Michael Symon's Pickled Chillis on Ruhlman.com?  I was off and running.

What I've found from this week is that pickling is a great way to save some of the bounty of your garden, CSA or farmer's market.  If you have an overload of a vegetable, look for a recipe.  You'll be glad you did.  And it's easy!

I'm doing this pickling mainly for flavor, not long term preserving.  These pickles will only last 2 to 3 months, and they have to be refrigerated.  I could have found recipes for canning the pickles as well, but I figured I'd take on one topic at a time.*
*And we eat the pickles so quickly that I don't think I need to can them; they're gone in weeks, not months.

Pickling was originally done using a salty brine to convert the sugar in vegetables into lactic acid, which would act as a preservative.  Sauerkraut is still made this way.  We're going to use a modern technique, which is to use vinegar as the acid, instead of waiting for the vegetables to produce their own.  This speeds up the process dramatically; you get pickles in hours or days, instead of weeks or months.

Basic Technique: Pickling Vegetables

Equipment:

  • A clean jar with a tight fitting lid (Canning jars or flip-top gasket jars are the usual choices.)

Ingredients:

  • 2 cups worth of vegetables - usually sliced thin
  • 2 Crushed cloves of Garlic (optional, but common)
  • 2 Sprigs of Fresh Herbs (optional, but common)
Pickling Liquid:
  • 1.5 cups water (sometimes less)
  • 1.5 cups vinegar (cider, white, sherry, red wine, white wine)
  • Sugar (2 tablespoon to ½ cup, depending on sweetness you want)
  • Salt ( a pinch to 1 tablespoon of table salt, depending on saltiness)
  • Spices ( 2 tbsp, usually involving dill, peppercorns, mustard seeds, but you can get creative here)

Directions:
1. Prep the vegetables: Cut the vegetables into the size of pickles you want, and put them in your jar.  If you're using crushed garlic or herb sprigs, put them in the jar with the vegetables.

2. Make the pickling liquid: Combine the Pickling Liquid ingredients in a medium saucepan, and bring to a boil over high heat.  Reduce the heat, and simmer for 5 minutes to open up the flavor of the spices.

3. Combine the liquid and the vegetables: Carefully pour the pickling liquid into the jar until the vegetables are covered.  (Optionally, pour pickling liquid through a fine mesh strainer first, to strain out the herbs and spices; your pickled vegetables will look less rustic that way.)
*I pour the pickling liquid from my sauce pan into my Pyrex 2-Quart Measuring Cup, and from there into the jar.  The spout on the measuring cup makes this much less messy.

4. Refrigerate: Let cool at room temperature, close the lid on the jar, and refrigerate.  It's best to refrigerate for at least one day, and preferably one week.  They will last, refrigerated, for up to 3 months.

Variations:
I'm going to do four variations on this technique this week:
1. Pickled Dilly Beans - Tuesday
2. Pickled Chile Peppers - Wednesday
3. Pickled Red Onions - Thursday
4. Pickled Sorta Sour Cucumbers - Friday

Notes:
*These recipes scale up very easily.  The amounts shown above are right for a quart jar packed with vegetables.  I usually make a little extra brine, just in case I spill some when I'm trying to pour.

*Speaking of pouring...I made a mess with my first try on the dilly beans.  I learned that it works better if I pour the pickling liquid from my sauce pan into my Pyrex 2-Quart Measuring Cup.*  It has a spout, which makes pouring the hot liquid into the canning jar much easier.
*I have a hard time calling it a measuring cup; it's bigger than most of the mixing bowls I own.

*I also learned to use Wide Mouth Jars if possible.  The Ball jars look beautiful, but since I'm not going to be canning, flip top jars are easier to work with.

*A Canning Funnel is a very useful tool when you're pickling vegetables, even if you're not canning; it helps when you're trying to get everything into the jar. 

*These pickles will keep for about 3 months; the vinegar acts as a pretty strong preservative.  Watch out for fur or fuzz growing on top of the liquid in the jar.  When you see that, it's time to throw them away.  To preserve them for as long as possible, start with clean jars, and remove the pickles from the container with clean utensils.  If you keep dipping your fingers in the pickling liquid, you're going to transfer bacteria, and it will eventually start to grow.
*If you go through these pickles as quickly as I do, it won't matter.  I brought a quart jar of the dilly beans to a party at a friend's house.   They were gone within a half an hour.

Reference:
Harold McGee's On Food and Cooking - The definitive source on food science. If you're a food geek like me, you'll refer to it to answer questions like "What is pickling, anyhow? What's really going on?"

Grilled Boneless Pork Loin Chops, Brined and Honey Glazed

August 13, 2009 by Mike Vrobel 14 Comments

In this part of the blog I'm supposed have a witty story, where I tell a few jokes.  I should explain why the recipe has some special meaning to me, and why it should have special meaning to you.

This is a recipe for grilled boneless pork loin chops.

And... after that, I've got nothing.

I've already told you about modern pork being bred so lean that almost all the taste is gone.  Pork loin is a bland, innocuous protein that is easily overcooked.  It shouldn't be cooked past medium or it dries out.

It doesn't even have a bone you can gnaw on when you're done with it.

I've told you how to season pork - you should brine it to get it some flavor and give it a bit of a cushion from overcooking.

What does that leave me with?

Boneless pork loin is boring.  But if you know that going in, you can help it out.  Use it as a neutral base to build on.  Give it a brine full of flavor, so it's seasoned all the way through.  Cook it carefully, so it doesn't dry out, but it does get a good sear.  Baste it with a honey glaze, so it gains an extra layer of seasoning at the end.  Layers of flavor are the key to a good pork loin chop.

Pork loin may be bland, but maybe...it just needs a little love.
*I may be a blockhead, but I can cook a good pork chop.

Recipe: Grilled Boneless Pork Loin Chops, Brined and Honey Glazed

Cook time: 12 minutes

Equipment:

  • Grill (I used a Weber Summit 650. Here it is.)
  • Herb basting brush: One small bunch of thyme, tied at the stems to use as a basting brush (or, you can just a regular basting brush. I like the Oxo Silicone Basting Brush.)

Ingredients:

  • 3 lbs pork loin roast, (or 3 lbs of pork chops, cut 1 inch thick)

Brine

  • 1 quart water
  • ¼ cup table salt
  • 2 tablespoon sugar

Honey Glaze

  • 4 tablespoon honey
  • 2 tablespoon cider vinegar
  • 1 teaspoon thyme
  • pinch black pepper
Chops sliced from the roast, 1 inch thick

Directions:
1. Prep and Brine the pork chops: Combine the brine ingredients in a 2 quart or larger container.  Stir until the salt and sugar dissolve in the brine.  If you bought the whole loin, cut it crosswise into 1" thick chops (you should get about eight).  Put the pork chops in the brine, and let sit at room temperature for 30 minutes while you prepare the grill.

Patting brined chops dry on paper towels

2. Prepare the honey glaze: Combine the honey glaze ingredients in a small bowl, and stir until the honey dissolves.

3. Prepare the grill Set your grill up for cooking at medium heat. For my Weber Summit, this means turning all the burners to high and preheating for 10 minutes, then turning the burners down to medium.


4. Cook the pork chops: Remove the pork chops from the brine, and pat dry with paper towels.  (Wet pork won't brown well, and you need the browning for flavor).  Place the pork chops on the grill, angled at about 45 degrees (pointing "northeast") and cook for 3 minutes.  (If you are cooking on a gas grill, keep the lid closed while cooking; if on charcoal, keep it open.)  Rotate the chops 90 degrees (now pointing "northwest"), and cook for another 3 minutes. Flip the chops, brush with the honey glaze, and cook for another 3 minutes.  Check the chops - you want to cook them to an internal temperature of 140*F.  They're probably done now, but if they haven't reached 140*F, rotate them 90 degrees, brush with the glaze, and cook until they're done, probably another 1-3 minutes.  Remove to a serving platter, and brush again with the honey glaze.
*Your timings may vary depending on how hot your grill gets.  You want to have good, brown markings on the chops before you rotate them, and you want it to be well browned on the first side before you flip it.  Don't worry about the second side browning; remove it from the grill when it's done, and serve with the browned side up on the plate.


5. Serve the chops: Let the chops rest for 10 minutes, then serve.

Variations:
*A barbecue rub on the chops is another nice touch: try my quick rub.
*You can also replace the honey glaze with barbecue sauce.

Notes:
*I prefer to buy a whole pork loin, and cut it into chops myself.  When I buy pre-cut chops, they tend to be uneven in thickness, and a little too thin.  It only takes a couple more minutes to cut them myself, and it is usually less expensive, because pork loin roasts tend to be cheaper than pork chops at my local grocery store.
*I picked this trick up from Pam Anderson in "How to Cook Without a Book."

Questions? Comments? Other ideas? Leave them in the comments section below.

Related Posts:
Click here for my Grilled Korean short ribs recipe.
Click here for my Grilled Flank Steak with Chimichurri recipe.

Inspired by:

*Enjoyed this post?  Want to help out DadCooksDinner?  Subscribe to DadCooksDinner using the RSS or Email options on the right, link to this post from your blog, recommend DadCooksDinner to your friends, or buy something from Amazon.com through the links on this site.  Thank you!

Grilled Monster Zucchini

August 11, 2009 by Mike Vrobel Leave a Comment

At work, there is a cardboard box with "please take me" written on it with magic marker.  In it is a big pile of vegetables.  There are tomatoes, some peppers, and then... next to the box are the zucchini.  These aren't your normal sized squash. These are Big zucchini. Monster zucchini. Zucchini the size of your forearm, if you're Arnold Schwarzenegger.*
*Think "Conan the Barbarian" era Arnold, not "Governator" era Arnold.

Whenever I see them, I think of Garrison Keillor's joke:

The only time the inhabitants of Lake Wobegon lock their cars is in the month of August.  It's so their neighbors won't fill their back seat with bags of zucchini.

They always look too good to pass up, so I take one home.  But what do you do with a 5 pound zucchini?  Why, you grill it, of course!*
*Or make zucchini bread. But that's another recipe.

Recipe: Grilled Monster Zucchini

Equipment:

  • Grill (I used a Weber Summit 650. Here it is.)
  • Herb basting brush: One small bunch of thyme, tied at the stems to use as a basting brush (or, you can just a regular basting brush. I like the Oxo Silicone Basting Brush.)

Ingredients:

  • One 5 lb Zucchini

Garlic Herb Oil

  • ¼ cup olive oil
  • 2 cloves garlic, minced or pressed
  • 1 teaspoon fresh thyme
  • pinch of salt
  • pinch of pepper
Yes, that zucchini is 4 pounds, 13 ounces.

Directions:
1. Prepare Zucchini: Slice ends off zucchini, then slice crosswise into 3 equal sized pieces. I trim the side off of each piece, and then slice it lengthwise into ½" thick planks.  See the picture below...

2. Prepare Garlic Oil: Put the garlic oil ingreidents in a small dish or ramekin, and microwave for 1 minute, or until garlic is just starting to sizzle and smell fragrant.  Make your herb brush by tying together sprigs of a bunch of different herbs.  (I used thyme in the picture below.)

3. Prepare the grill Set your grill up for cooking at medium-low heat. For my Weber Summit, this means turning all the burners to high and preheating for 10 minutes, then turning down to medium-low.

4. Grill the Zucchini: Place the zucchini on the grill, and cook it for 6 minutes with the lid down, then rotate it 90 degrees, and cook for another 6 minutes with the lid down. Flip the zucchini, and brush it with the garlic oil. Cook with the lid closed for 6 minutes, rotate 90 degrees, and cook until very softened, probably another 3-6 minutes. Remove to a serving platter, and brush again with the garlic oil.
Your timings may vary depending on how hot your grill gets.  You want to be just getting some brown markings on the zucchini before you rotate it, you want it to be well browned before you flip it, and you want it to be getting very soft before you remove it from the grill.


5. Serve the Zucchini: Serve warm or at room temperature.

Notes:
*The problem with big zucchini are the seeds - the're pretty tough. Either remove them before serving, or just eat around them.

*Of course, you can use this recipe with normal sized zucchini.  In fact, it works much better that way; you don't have to deal with the seeds.  Just trim the edges, and cut lengthwise into ½" slices.

*I like using the herb brush with this recipe, because when the zucchini are coming in tidal waves, so is my thyme bush.

Questions? Comments? Other ideas? Leave them in the comments section below.

Related Posts:

Click here for my Grilled Asparagus recipe

Click here for my Grilled Mixed Summer Vegetables recipe


Inspired by:
Garrison Keillor's sense of humor
The generous gardeners who are currently overwhelmed with zucchini, and are willing to share.

*Enjoyed this post?  Want to help out DadCooksDinner?  Subscribe to DadCooksDinner using the RSS or Email options on the right, link to this post from your blog, recommend DadCooksDinner to your friends, or buy something from Amazon.com through the links on this site.  Thank you!

Grilled Chicken Wings, Spicy Asian Glazed

August 6, 2009 by Mike Vrobel 8 Comments

As much as I like my grill-roasted chicken wings, the recipe doesn't make enough wings to serve more than a couple of people. Wings take up a lot of space on the grill, and the indirect cooking method uses up more of the precious space on my Weber kettle.
*I really need to get the recently released 26-inch Weber kettle, but that's another story. One about lust and grills, that ends in tears for my checkbook.

I decided to try cooking them with direct heat, so I could use my entire grill surface. What I found is that this is not a recipe for the easily distracted. You get good, crispy wings, but they have to be in almost constant motion. The hot spots and flare-ups you get on a charcoal grill are magnified by the large amount of chicken fat that will drip from the wings. If you lose focus for a minute, the result will be black, charred, and not very appetizing.*
*I had a few wings turn out like that, so I peeled the skin off before I tossed them with the sauce.

Why go through all this, when you can take the easy way out, and cook the wings with indirect heat? Because you can cook twice as many wings, and it takes one third of the time. Oh, and if you're the type of person who likes a little char on your wings, you get that as a bonus.

Recipe: Grilled Chicken Wings, Spicy Asian Glazed


Cook time: 15 minutes

Equipment:

  • Grill (I used my trusty Weber kettle, like this one this Weber Grill)
  • Large bowl (for tossing wings with glaze)

Ingredients:

  • 5 lbs chicken wings

Marinade

  • ½ cup peanut oil (or vegetable oil)
  • 1 cup soy sauce
  • 4 tablespoon honey
  • 4 garlic cloves, minced or pressed (or use 1 tablespoon garlic powder)
  • 1" chunk of ginger, grated (or use 1 teaspoon ground dried ginger)
Glaze
  • 1 tablespoon Chile Paste (optional, or more to taste. I prefer Huy Fong's Sambal Oelek chili paste)
  • 2 tablespoon honey

Directions:


1. Marinate Chicken Wings: One to two hours before cooking, marinate the wings. Cut the wings into tip, wing and drumette sections, and put the wings and drumettes in a gallon ziploc bag. (See Grill Roasted Chicken Wings for a picture of how to cut the wings. Reserve the wing tips for making stock). Put the marinade ingredients in a small bowl and whisk until well combined. Reserve ½ cup of the marinade for the glaze. Pour the rest over the wings in the bag, squeeze out all the air you can, and zip the bag closed. Store in the refrigerator, turning occasionally until ready to cook.


2. Make the Asian glaze: In the largest bowl you have, whisk the reserved ½ cup of marinade with the chili paste and honey until well combined. Set aside for glazing the wings later.

3. Prepare the grill: Prepare your grill for cooking on direct medium to medium-low heat (see details My Rotisserie Basic Technique Post). For my Weber kettle, I light a chimney starter* ¾ full of charcoal, wait for it to be covered with ash, then pour it so that most of the grill has a very dispersed pattern of coals. See the picture below.
*I highly recommend the Weber Chimney Starter, because it is larger than most chimney starters. It holds 5 quarts of charcoal, which exactly the right size for cooking this recipe.

Note: The bottom ⅔rds of the grill has the spacing of coals that you want - coals with some
gaps between them. I have a few too many in the top part of the grill, where they're
packed together, and it was too hot in that section.


4. Grill the wings: Remove the wings from the marinade, and put on the grill grate over the medium-low coals. Grill, turning every two minutes, constantly checking and moving around to avoid flare-ups.* It will take 10-15 minutes for the wings to be cooked.
*You will have flare-ups. The price of non-burnt wings is eternal vigilance.

5. Sauce the wings: Whisk the glaze to recombine, then put the wings in the bowl, and toss to evenly coat. Let the wings rest for 5 to 10 minutes, then toss until coated again, and serve.

Variations:
*Buffalo wings: Skip the ginger and use vegetable oil in the marinade. Replace the glaze with Buffalo Wing sauce from my Grill Roasted Chicken Wings recipe.

*Teriyaki wings: Replace the glaze with Teriyaki sauce from my Grill Roasted Chicken Wings recipe.

*Barbecued wings: Skip the ginger and use vegetable oil in the marinade. Replace the glaze with Barbecue sauce.

Notes:
*This recipe is easier to cook on a gas grill. You get an even medium-low heat, and flare ups are much less likely on gas grills. Also, you can relax a bit, because of the lack of flare-ups; you don't have to do the constant turning and moving that you have to on charcoal to avoid burning your wings.

*As I mention in the picture of the coals - I used too many (a full chimney), and had to push a bunch of them to one side. I meant to use that hotter section to help crisp them up at the end of cooking; I changed the written recipe to use less coals, and would recommend trying to keep a small section of the grill without any coals so you have a place to move wings if the flare-ups get to be too much.

*This recipe uses the Brinerate technique I've mentioned before. The soy sauce gives you a very high proportion of salt in the marinade, which gives you the effects of a brine with the flavor benefits of a marinade. But...don't marinate the wings for more than two hours. The results will be too salty.

*I'm serious when I say you should reserve the wing tips for stock. They contain a lot of connective tissue, and help you make a thick, gelatinous broth. Just put them in a gallon ziploc bag in the freezer, add more chicken bones and scraps whenever you have them, and pretty soon you have enough chicken parts for making pressure cooker stock.
*OK, that link is to turkey stock; it's the same thing, pretty much. I need to get my freezer velcro pressure cooker chicken stock recipe posted...

Questions? Comments? Other ideas? Leave them in the comments section below.

Related Posts:
If you need a more relaxed chicken wing experience, here's my recipe for Grill Roasted Chicken Wings
[5/2010]: Improved wing technique!  Check out my Grilled Buffalo Chicken Wings
Here's my recipe for Thai Style Grill Roasted Chicken Breasts


Adapted From:
Cooks Illustrated Guide to Grilling, Grilled Chicken Wings recipe

Julia, Ruhlman and Pollan. Or, why I'm a cook.

August 5, 2009 by Mike Vrobel 7 Comments

I'm a cook. It's my passion, it's why I write this blog, and it's one of the things that gets me out of bed in the morning, instead of just pulling up the covers and hoping the world goes away.*
*My first cup of coffee is usually what gets me over that feeling.

I was horrified when I read Michael Pollan's article in the New York Times magazine last Sunday, which finished with a marketing expert saying that home cooking was doomed. We're all going to be getting prepared food from the grocery store in the future, and we'll look at cooking like we look at making our own clothes. [Out of the Kitchen, Onto the Couch, nytimes.com]

I was going to write a post on it immediately, but I couldn't get my thoughts organized enough. That is, until I read Michael Ruhlman's blog post on the same article:

Another segment of our culture who also recognized that we were losing something essential to our humanity learned to cook, out of books, from their moms or grandmothers, from other cooks. And more and more are learning every day.
...
the multitude of food bloggers out there, who are actually cooking and sharing their stories and photographs and their recipes and most of all their passion. We are not seeing the end of home cooking. I believe we have just begun to cook, and not a moment too soon.

[Julie and Julia, Foodie and Cook, Ruhlman.com]

I'm one of the "multitude of food bloggers" Michael mentions.  I've been inspired by other cooks and food bloggers, and I'm writing this blog because I just can't keep my enthusiasm for cooking to myself - I want to share it with anyone who will listen.

Pollan's article HURT when I read it. I feel like I'm part of the wave of people trying to reverse the tide he describes. Like me, they're cooking for themselves, and evangelizing to their friends and family about the pleasures of cooking. But Pollan's article just made it sound so...hopeless.  It seems like we're fighting against the tide, and the tide has only just started coming in.*
*Especially when Pollan's Omnivore's Dilemma had such an impact on my evolution as a cook!

But...from where I stand, that's not what I'm seeing! Most of my freinds and family are now the same way I am. We're cooking at home much more than my parents did, or than we did, a decade ago. From where I stand, it looks like the tide is turning back towards home cooking, and has been for a while.*
*Note: my friends and family aren't quite as passionate about it as I am. But then, "insane" might be a better word to describe me than "passionate".

So, once again, Thank you, Michael Ruhlman!

**Ruhlman's distinction between Foodie and Cook is also a great one. I've been referring to myself as a cook for quite a while now, and I think I picked it up from his "Making of a Chef" book. I'm not a chef, and have no desire to be one, but cooking is one of my great joys in life.

Inspired by:
[Julie and Julia, Foodie and Cook, Ruhlman.com]
[Out of the Kitchen, Onto the Couch, nytimes.com]

Weber's On The Grill iPhone App

August 4, 2009 by Mike Vrobel Leave a Comment

WeberOnTheGrillApp

I just returned from a week's vacation at my family cottage in Madison, OH.  We had a great time, lounging around on the beach, splashing in the lake, sailing our Sunfish, and (of course, for me) cooking some meals on the grill.  I pack my backup Weber kettle into the trunk of the car, and bring it with me each year.
What?  You don't have a backup Weber kettle?  But...but...how do you grill when you go on vacation?

The upside (and downside) to the cottage is that we're pretty much technology free - no TV or internet connection at all.  This is great for the kids, because it gives them time to detox from their TV and Wii.  The downside is that *I have to detox from the internet.
Really, I can quit any time I want.  I use the internet, it doesn't use me.


My surfing was primarily about trying to find recipes on the internet, using my wife's iPhone and the spotty internet connection you can get on the shores of Lake Erie.  I can cook a lot of different things off the top of my head, but what do you do with 5 pounds of zucchini that Grandma bought at the farmer's stand, because it looked so good?  So, I spent a week looking for the one spot in the house where I could get a connection that would last.


When I get home, what is the first thing I read?  A post describing the answer to a week at the cottage with a shaky internet connection: Weber's On the Grill iPhone app.  [via: bbq.about.com]

It's a collection of 250 recipes from the various cookbooks that Jamie Purviance has written for Weber, including my personal favorite: Apple Brined Barbecued Turkey.

It also contains a section on basic grill techniques, and a few video guides.  My favorite section in the entire application is the "grill guide" - a list of how to cook just about anything on the grill, broken down by cut of meat (or vegetable).  You pick what you're cooking; they give you a quick summary of how long and at what temperature.  (For my example from earlier: zucchini, cut into ½" slices: cook for 3-5 minutes over direct, medium heat.)

It even has a countdown timer built into the application, so you can time your cooking with your iPhone.

Because of my focus on rotisserie cooking, I immediately checked their "Using a Rotisserie" section in the grilling basics.  I was a bit disappointed.  There isn't much information there; a paragraph or two of text and a few pictures.  I went back and checked their cookbooks, and found basically the same information there. I was reminded of why I started writing the rotisserie recipes on this blog - I was looking for that missing information!  I don't consider this a deal breaker - the basic technique for rotisserie cooking is the same as the indirect grilling information they give you in other sections.

If you're looking for an easy way to carry around the grilling information that Weber packs into their cookbooks, and you have an iPhone (or iPod touch), this app is worth a look.  I think it's well worth the $4.99 price tag to have this information at your fingertips.

Weber's On the Grill iPhone app download page [Apple.com]

I won!

July 24, 2009 by Mike Vrobel 4 Comments

I won! I won! I WON!
I took first place in the "Finest Cut" steak cook off at the Taste of Akron.
I can't believe it. My steak tasted great, but there were some really elaborate recipes from the other contestants; my recipe is a little more bare bones. I didn't know if I would even get one of the top four "award" spots, and I really would have struggled if I was one of the judges.
There was a lot of time to sit around; my recipe takes an hour and a half, but the first hour is done after the steaks are salted and the charcoal is lit. I have been a bundle of nerves all day, and it was hard to wait until 7 to start getting ready for my presentation at 8:02PM

I knew I had a chance when I saw the reactions of people who tasted my "second" steak. (I cooked two, and picked the better looking one for presentation, and chopped the other one up into serving size pieces.) They were enjoying it as much as I did when I tasted it.

The judges were actual Judges from the Akron area. I presented my steak to them, explained the recipe and answered questions from the master of ceremonies, Lisa Abraham. Apparently, I did OK.

And did I mention I won?

Most important, though, was I had a great time. I met Lisa Abraham and Tom Loraditch in person. I got to talk to the local Weber representative (and if you read this blog, you know what a Weber loyalist I am). I met the people who supply the meat to West Point Market, the sponsor of the contest.
Did I mention how good the meat was? I was given prime porterhouse steaks. They were AMAZING. I'm going to have to go to West Point for prime beef more often.


[UPDATE: I almost forgot. I wouldn't have been in the contest in the first place if Jane Snow hadn't mentioned it in her newsletter. Thanks, Jane!]
Most importantly, I had a great time with my fellow contestants. I'm not usually surrounded by people who are every bit as obsessed about food as I am.  Stephanie and Katie, who were on both sides of me, were really fun throughout the contest. Stephanie's son was a character, and kept things interesting. Katie had a bunch of supporters, all with matching T-Shirts! I would be trying to get in again next year, even if I didn't win a prize. I had that good of a time.
Will I be able to defend my title next year? Who knows. But I'm sure going to enjoy trying!

*A programming note: I'm on vacation, away from technology, for the next week. I'll see everyone in August!

Related posts:
My Award Winning Steak with Mediterranean Herb Butter
*Hee Hee! Award Winning! I can't believe I can say that.

Rotisserie Boneless Pork Loin Roasts, Brined, Rubbed and Maple Syrup Glazed

July 21, 2009 by Mike Vrobel 48 Comments

Rotisserie Boneless Pork Loin Roast recipe, with a wet brine, spice rub, and maple syrup glaze. This is how I turn pork loin, which can be bland, into something spectacular.

Rotisserie Boneless Pork Loin Roasts, Brined, Rubbed and Maple Syrup Glazed
[feast_advanced_jump_to]

Boneless pork loin is tough to cook.  Modern pork is bred to be very lean*, and pork loin was a lean cut to begin with, even before it became "modern pork".
*Cooking shows have renamed pork to "Modern pork is bred to be very lean". Just watch - the next time it's mentioned, you'll hear those exact words. I don't think this is what the "other white meat" people were looking for, exactly.

2.-Brined-fat-scored-ready-to-rub

Because it's so lean, it goes from cooked to overcooked in a flash. Also, since fat carries flavor, it doesn't have a whole lot of flavor on its own.

2a-Trussed-back-to-back

What can you do about this?  That's what I'm here to tell you.  In this recipe I pull out all the stops: this roast loin is brined, rubbed, cooked on the rotisserie to give it a nice, brown crust, and then glazed with maple syrup at the last minute. In the end, you get pork that is sweet, spicy, juicy, and flavored all the way through.

Equipment

  • Grill with Rotisserie attachment (I use a Weber Summit with an infrared rotisserie burner. Here is the current version of my grill.)
  • Aluminum foil drip pan (9"x13", or whatever fits your grill. I use an enameled steel roasting pan.)
  • Butchers twine
  • Instant Read Thermometer
  • One bunch thyme and a couple of sprigs of rosemary, tied at the stems to use as a basting brush (or, just a regular basting brush)

Notes

  • This next note gets into the details bacteria in pork.  If you're squeamish about that kind of thing, you may want to skip down to the recipe below.
  • Still with me?  Great!  Here we go.[/footnote]  Cooking pork to medium is almost a requirement for this recipe; that's why I recommend only cooking it to a maximum of 145°F.  Modern Pork is trichinosis free*, and very lean.  (Did I mention that already? Why?  Because trichinosis comes from the feed of the pigs (um...well, basically they have to eat garbage to get it.  See the link above, if you want all the squeamish details.)  If you buy your pork from a grocery store, you're not going to get trichinosis.
  • By cooking to 145°F, with a three minute rest, the carry-over cooking from the heat in the meat will take it over the point where the USDA says that trichinosis is definitely dead.
  • If you insist on cooking your pork to well done, use a cut of Pork Shoulder (aka Boston Butt Roast), and my Rotisserie Pork Shoulder recipe instead.  Pork shoulder has the internal fat to stand up to being cooked well done without turning into sawdust.
Rotisserie Grilling by Mike Vrobel

I wrote a cookbook!

Rotisserie Grilling Cookbook

New to your rotisserie and need help with the basics? Love your rotisserie and looking for new ideas? Grab a copy of Rotisserie Grilling! You'll get 50 of my favorite rotisserie recipes and expert tips on how to set up and use your rotisserie.

Click here to buy →

Questions?

Comments? Other ideas? Leave them in the comments section below.

Related Posts:
Click here for my Rotisserie Pork Shoulder Roast recipe
Click here for my other rotisserie recipes.

Inspired by:
I got the idea for tying the pork loins together to make a thicker roast from Jamie Purviance in Weber's Way to Grill cookbook.

*Enjoyed this post? Want to help out DadCooksDinner? Subscribe to DadCooksDinner using the RSS or Email options on the right, link to this post from your blog, recommend DadCooksDinner to your friends, or buy something from Amazon.com through the links on this site. (Like my Rotisserie Grilling cookbook...)

Road Trip: West Point Market

July 9, 2009 by Mike Vrobel Leave a Comment

West Point Market
West Point Market


UPDATE 2015-12-31: West Point Market is closed. Sigh.


West Point Market is the original, and best, gourmet grocery store in Akron.  When I first got into cooking, this was where I went when I couldn't find an ingredient at my local megamart.
OK, truth be told, I started going here because of their wine department.  It's amazing.  I kept coming for the gourmet groceries.

I don't shop here for all my groceries.  They are more expensive than other stores in the area.  That's because buying the best is never cheap.   If the quality of the ingredients really matter, this is usually the first place I think of.

An example: A friend recently asked where I would go to get heirloom tomatoes.  It's a little early in the year for them in Northeastern Ohio (it's early July), so I was going to suggest they try a different recipe that doesn't need them.  Then I remembered West Point.  If anyone would have decent tomatoes out of season, they would.
Sure enough, they had them.

CLOSED: West Point Market
1711 W Market St
Akron, OH
330-864-2151‎
westpointmarket.com

My top five list of favorite things they sell are, in no particular order:

1. Wine: West Point Market has the best wine selection in our area.  The sales staff is knowledgeable and approachable - the wines can be snobby, but the people definitely aren't.  Tell them what you want, and what price range you're looking at, and they'll help you find whatever you need.  This is where I go when I need a specific type of wine.  I know they'll have it.  The few times I've needed a specific bottle of wine, they've been able to order it.
*Say, a Silver Oak 1997 Anderson Valley Cabernet to remind you of a trip you once took to wine country...

2. Meat department: Prime beef.  Kobe beef.  If you want the highest quality beef, this is where to go

3. Cheese department: Again, they have the widest variety of cheese in the area.  You may be able to find individual stores with more depth in specific regions, but the range and quality of what they stock here is breathtaking.

4. Seafood department: They care about their fish.  When I want the freshest fish I can find, I go here.  I once watched the girl behind the fish counter pick out individual mussels for me; I'm used to being handed the bag and being on my own from there to figure out if they were good or not.
[Update 1/5/2010 - Sadly, the fish department has been combined with the meat department.  It's still high quality, but the selection is much smaller than it used to be.]

5. They Have Everything: West Point stocks specialty ingredients for almost every type of ethnic cuisine.  Their stock doesn't run as deep as what you can find in a market specializing in a particular cuisine, and it's a little more expensive.  But... when I need a good Olive Oil, some fig balsamic vinegar, a few dried ancho chili peppers, spanish tuna packed in olive oil, real prosciutto, and barbecue sauce from South Carolina, I know where I can go to find it all under one roof.

While you're there sample the fresh-made guacamole in the produce department.  It's almost always there, and I can see why.  I'm a fan of making my own guacamole, but theirs is really, really good.

*Oh, and I forgot the bakery - the Killer Brownies are exactly what the name says.

Here's the map:

View Larger Map


Related posts:
My list of Ethnic and Gourmet stores in the Akron, OH area.

Grilled Garlic Bread

July 7, 2009 by Mike Vrobel Leave a Comment

This recipe answers two questions that have when I'm charcoal grilling:

  1. What can I serve as a side dish, without having to cook in the kitchen?
  2. I've got this big pile of coals, and they're still hot.  What can I do so they don't go to waste?

*It also answers "What do I do with this extra bread we've got lying around, before it goes stale", but that's a different question.

I'm always looking for a side dish you can grill, and grilled garlic bread is one of my go-to answers for that.

This version is a side dish for my Grilled Ribeye Steak with Herb Butter recipe.   It uses leftover herb butter and the herb basting brush you'll have when you're done with the steaks.  If you're not cooking the steaks, don't worry.  This is a very flexible side dish that you can adapt it to almost anything you're making.

Recipe: Grilled Garlic Bread

Equipment:

  • Grill (I used a Weber kettle grill)
  • Basting Brush (I like the Oxo Silicone Basting Brush, or you can make your own with a bundle of herbs, like I did in my steak recipe.)

Ingredients:

  • Thick slices of good bread (I used a "French Peasant Boule" from my local bread shop, and cut it 2" thick)
Mediterranean Herb Butter (Again, I used the leftover butter and herb brush from my steak recipe)
  • 2 tablespoon unsalted butter
  • 1 cloves garlic, minced or pressed through a garlic press
  • 1 teaspoon fresh thyme leaves, minced
  • ½ teaspoon fresh rosemary leaves, minced
  • pinch kosher salt
  • pinch fresh ground black pepper


Directions:

1. Prepare the bread: Slice the bread thick - 1.5" to 2" thick

2. Prepare the grill: Prepare your grill for cooking with direct, low heat, then clean with your grill brush.
*I always make this as a side dish, so I just cook the main part of the meal, then use the coals that are left over.  Or, with my gas grill, I turn a burner or two down to low. If I was making it from scratch I would do the following.
For my Weber kettle, light a chimney starter* half full of charcoal, wait for it to be covered with ash, then spread it in a loose single layer over one side of the grill grate. This gives me half the grill on the heat, and half off the heat.
*I highly recommend the Weber Chimney Starter, because it is larger than most chimney starters. It holds 5 quarts of charcoal, which is how I sized the "half full" for this recipe.


3. Prepare the Mediterranean Herb Butter Baste, and herb brush: Meanwhile, put the Mediterranean herb butter baste ingredients in a small bowl or ramekin. Microwave on high until the butter has just melted, and the garlic is starting to sizzle, then stir to combine. (From now on, we'll just call this the "herb butter"). Make a herb brush using the bunch of thyme and rosemary sprigs - tie them together at the base of the stem, making a brush you'll use to apply the herb butter.

4. Grill the bread:  Brush one side of the bread with the herb butter, then put it, butter side down, over the lit part of the grill.  Brush the other side (that's now facing up) with the butter.  Cook for 2-4 minutes checking often, until the bread is turning golden brown.  Flip the bread, and cook the other side another 2-4 minutes, again until golden brown.
*Note: Bread goes from brown to burnt in a heartbeat.  Check it often!  A little bit of black on the bread is OK, but if you get a large burnt section make sure you scrape it off like you would burnt toast, and brush with a little more of the herb butter afterwards.


5. Serve: Remove the bread to a plate, brush once more with the herb butter, and serve.

Variations:
*Bread: Any good bread will do; I've done this with slices of French Baguette, "Italian" bread, and five grain bread from my local health food store; they all come out great.  "No Knead Bread" from Mark Bittman, or one of its many variations is also a good choice for this recipe.

*Cheese: For a little extra flavor, sprinkle some grated parmesan, pecorino romano, or other grating  cheese on the bread after flipping it; it will melt onto the top while you grill the bottom.

*Crostini: For a more authentic italian version, substitute olive oil for the butter in the herb butter.  Make sure you microwave it until the garlic is just sizzling; heat helps release the garlic flavor into the oil.

*Crostini, try 2: For a REALLY authentic version, skip the herb butter, grill the dry bread, then rub one side with a half of a garlic clove and drizzle with olive oil.

*Pan Con Tomate (Spanish tomato toast): After grilling, rub the bread once with half of a sliced tomato.  (For a more authentic version, use the "Crostini" or "Crostini try 2" variation.)

*Grilled Texas Toast: Skip the herbs in the herb butter, and add an extra clove of minced garlic.

*Cheesy grilled Texas Toast: Use the Grilled Texas Toast and Cheese variations, but use a southwestern cheese blend (cheddar, monterrey jack, or Shredded Mexican Blend from your local megamart).*
*My kids live on Shredded Mexican Blend from the megamart, so I always have it available.

Notes:
*As I mentioned in the recipe, watch the bread like a hawk - bread goes from uncooked to burnt in a heartbeat.

*The variations on this recipe are endless; I listed some of my favorites, above, but the idea of "grilled bread" crosses almost every cuisine.  Use your imagination, and come up with your own favorites.

*Grilled garlic bread with some creamy goat cheese is a match made in heaven.

Questions? Comments?  Other ideas? Leave them in the comments section below.

Related Posts:
Here's my recipe for Grilled Ribeye Steaks with Mediterranean Herb Butter.
Here's my recipe for Grilled Asparagus.

Inspired by:
Steven Raichlen's "Barbecue U"

Grilled Ribeye Steaks with Mediterranean Herb Butter

June 30, 2009 by Mike Vrobel 6 Comments

I used to be a purist. I believed that there was One True Way to cooking a steak. All I wanted was a good cut of beef, some salt and pepper, and a hot grill. Done. Anything more gets between you and the taste of the beef.

I have expanded my horizons.* I still love a simple, salt and pepper steak, but I've come to appreciate the extra depth of flavor that a herb butter provides.
*Some would say that I have strayed from the one true path. They haven't tasted this steak.

West Point Market, one of my local gourmet grocery stores, is hosting a steak cook off as part of the Taste of Akron event. This is what I submitted as my entry.
*We'll see if they like it enough to put me in the cook off.
**Actually, it's close to the recipe I submitted - I used T-Bones in that version, and wrote up the recipe you see below. But... I forgot to take pictures for the blog. The pictures are from my second attempt, and the thick-cut ribeyes at the store looked too good to pass up.

I used every trick I know to get layers of flavor into a steak. You salt early, rub it with garlic, cook it over a real charcoal fire, baste it with herb butter while it's cooking, give it a final brush with the herb butter once it's resting, and sprinkle it with some flaky sea salt at the last minute. The result is decadent, rich, luxurious...I'm running out of adjectives.
*Would I eat this every week? Of course not. My arteries are hardening just thinking about it. But it is great when you want to pull out all the stops for a celebration. Or a cooking contest.

[Update: 7/2/2009] They selected my recipe as one of the finalists! I get to cook in the competition on July 23rd. Wish me luck. I'm going to need it.


[Update: 7/23/2009] I won!  I can't believe it.

Recipe: Grilled Ribeye Steaks with Mediterranean Herb Butter

Cook time: 8 minutes

Equipment:

  • Charcoal Grill (I used a Weber kettle, like this one.)
  • One bunch thyme and a couple of sprigs of rosemary, tied at the stems to use as a basting brush (or, you can just a regular basting brush. I like the Oxo Silicone Basting Brush.)

Ingredients:

  • 2 Ribeye steaks, 1.25 to 1.5" thick, bone-in (should be roughly 1.25 to 1.5 pounds each, but go for thickness over weight)
  • 1 clove garlic, peeled and sliced in half
  • 3 teaspoon kosher salt
  • 1 teaspoon fresh, coarsely ground black pepper

Mediterranean Herb Butter

  • 4 tablespoon unsalted butter
  • 2 cloves garlic, minced or pressed through a garlic press
  • 2 teaspoon fresh thyme leaves, minced
  • 1 teaspoon fresh rosemary leaves, minced
  • pinch kosher salt
  • pinch fresh ground black pepper

Salt for serving

  • Fleur De Sel de Camargue (or Maldon, or other large, flaky salt)

Directions:
1. Pre-salt the steak: One hour before cooking, season the steaks. Rub the sliced garlic clove over the bone on the ribeye to rough it up, then rub it over the meat. Sprinkle the salt evenly onto the steaks; roughly ¾ teaspoon of kosher salt per side, 1.5 teaspoon total per steak. Pat the salt into the steak, then let them rest at room temperature until ready to cook.
*If you can't salt the steaks *at least* a half an hour ahead of time, then wait on the salt until just before you put them on the grill, in the "cook the steaks" step below.

2. Prepare the grill: Prepare your grill for cooking with indirect, medium-high heat, then clean with your grill brush. For my Weber kettle, I light a chimney starter* ¾ full of charcoal, wait for it to be covered with ash, then pour it evenly over one side of the grill grate. This gives me half the grill on the heat, and half off the heat.
*I highly recommend the Weber Chimney Starter, because it is larger than most chimney starters. It holds 5 quarts of charcoal, which is exactly the right size for cooking this recipe.

3. Prepare the Mediterranean Herb Butter Baste, and herb brush: Meanwhile, put the Mediterranean herb butter baste ingredients in a small bowl or ramekin. Microwave on high until the butter has just melted, and the garlic is starting to sizzle, then stir to combine. (From now on, we'll just call this the "herb butter"). Make a herb brush using the bunch of thyme and rosemary sprigs - tie them together at the base of the stem, making a brush you'll use to apply the herb butter.

4. Sear the steaks: Pat the steaks dry with paper towels, so they will sear well, then sprinkle with the black pepper. Put the steaks on the grill, over the coals, and cook, uncovered, for 2-3 minutes. You're looking for the steak to be just starting to brown. Rotate the steak 90 degrees (don't flip yet), and cook another 2-3 minutes, until well browned (see picture below). Flip the steak, and cook another 2-3 minutes, rotate 90 degrees, then cook a final 2-3 minutes until this side is well browned.
*Here's the summary of the searing pattern: 3 min, rotate, 3 min, Flip, 3 min, rotate, 3 min

After the flip. That's what you're looking for: golden brown and delicious.

5. Indirect cook the steaks until done: Move the steaks to the side of the grate that is not over the coals. Brush both sides of the steak with the herb butter, using the herb brush. Check the internal temperature in the thickest part of the steak, away from the bone. You are aiming for 120*F to 125*F for medium rare. Cover the grill and cook for 2 minutes, then check the temperature; if they're still not done, baste with the herb butter again, and flip the steaks. Re-cover the grill, and continue to cook, checking the temperature, basting with the herb butter, and flipping the steaks every couple of minutes. Depending on the heat of your grill, you should be done in another 2-6 minutes; My steaks are usually done after the searing, or the first 2 minutes of indirect cooking.
*If you want your steaks rare, you want an internal temperature of 115*F to 120*F. You should only need 2 minutes of covered, indirect cooking
*If you want your steaks medium, you want an internal temperature of 125*F to 130*F. You will probably need 5-10 minutes of covered, indirect cooking.

*If you want your steaks ruined well done, just keep going. 150*F or higher will be what you want. Just don't tell me about it afterwards.

6. Serve the steaks: Brush your serving platter with a little of the herb butter. Remove the steaks to the platter, and give them one more brush of the herb butter. Let rest ten minutes. Sprinkle lightly with the serving salt. Either serve the steaks whole on the bone, or carve the meat off the bone and cut into ½" thick slices.

Two steaks so big that they won't fit on the platter...

Variations:
*Other cuts: this recipe works well with any tender, thick cut, bone in steak. T-Bones and Porterhouses are good substitutions.

*Herbs: Use whatever you like, or have available, in the herb butter. Tarragon, chives, oregano and parsley could all be substituted for the herbs listed in the recipe. Just don't load up on the rosemary; it is very strong, and its piney flavor can easily overwhelm everything.

*Gas grill: Set the grill up for indirect cooking by preheating with all burners on high for 15 minutes. Then, leave one burner on high, and turning the others off. Do the Sear step over the lit burner, and the Indirect step just next to it. Cook with the cover down throughout the cooking time, and expect the searing step to take at least 3 minutes per rotation, and 6 minutes per side.

*Easy steak: Skip the herb butter and the basting, and salt just before cooking. I often do this if I have great quality steaks - they don't need anything but salt and pepper.

Notes:
*Salting the steak early: Letting the steak rest for an hour after salting results in the steak brining in its own juices. The salt starts pulling juices out of the steak immediately, but by about a half an hour of resting time both the juices and the salt are being re-absorbed into the steak, due to osmosis. This results in the salt being pulled deeper into the meat of the steak, seasoning it more thoroughly. However, if you don't wait at least a half hour, then the juices are just pulled out, leaving you with a dried out steak.

*I know that "Mediterranean" means I should be using olive oil instead of butter. It would be more authentic. But...I like butter. It just tastes right with this recipe.

*Serve with a simple green salad with a dijon vinaigrette, and a baguette, sliced 1" thick and toasted quickly on the grill. Or, go for Steak Frites - serve with thin-cut french fries.

*Oh, and of course, serve with a good bottle of wine. I'd recommend a good Cote Du Rhone, or maybe a Rose if the weather is warm enough, but let your taste be your guide.


[Updated 7/23/2009]
More notes from my testing this recipe repeatedly for the cook off:
*I think this recipe works best with a 1.25" steak instead of a 1.5" one.  You get a hit of the herb butter flavor in every bite; thicker steaks don't work as well.  They should be done after the Sear the Steaks step if they are 1.25" thick - they don't need the indirect cooking time.

*If you can get Prime meat for this, it is amazing.  I normally get choice, because of the price difference. They gave us Prime for the cook off, and it changed my mind.  I'm going to spend the extra for the Prime from now on when I really want a great steak.

*And did I mention that I won?  This is now my Award Winning steak recipe.  Whoohooo!

Questions? Comments? Other ideas? Leave them in the comments section below.

Related Posts:
Click here for my Grilled Flank Steak with Chimichurri recipe.
Click here for my When Should you Salt Meat? article.

Inspired by:
Cook's Illustrated Magazine - I learned the science behind pre-salting from them, and the basic technique of searing over direct heat, then finishing over indirect heat.
*Most of what I know about cooking science I learned from them. Or Alton Brown. I have a hard time remembering which sometimes.

"Serious Barbecue" by Adam Perry Lang - I use his idea of basting with the herb butter, using a herb brush, during the cooking to help build flavor.

*Enjoyed this post?  Want to help out DadCooksDinner?  Subscribe to DadCooksDinner using the RSS or Email options on the right, link to this post from your blog, recommend DadCooksDinner to your friends, or buy something from Amazon.com through the links on this site.  Thank you!

Rotisserie Boneless Leg of Lamb Roast with Greek Brinerade

June 25, 2009 by Mike Vrobel 29 Comments

There's a debate in the food science community over the usefulness of marinades.  They're very traditional, but all the evidence points towards two things:
1. They don't penetrate into the meat AT ALL. The flavor they give is stuck on the surface.
2. If they're too acidic, they turn the surface of the meat to mush

My twin heroes of food science,  Cook's Illustrated and Alton Brown have both recently weighed in on the topic.  If you can catch Alton's recent episode, "Tender is the Pork",  you can see his take on it.*
*He illustrates the debate in the food community by having a couple of guys in lab coats slap fighting.  Yes, it's juvenile.  I laughed, and laughed, and laughed...

Cooks Illustrated is referring to it as "Don't Marinate - Brinerate" (subscription required).  They up the amount of salt in the marinade, causing it to work as a brine, which does draw flavors into the meat.  They also keep their marinating times short, and limit the amount of acid in the mix, so the surface of the meat doesn't get cooked by the acid. This gives you the best of both worlds - the flavors that a marinade can carry, combined with the juiciness of a brine.

Also, put aside some of the marinade aside for last minute basting; an extra layer of marinade after the meat comes off the heat adds another layer of flavors.

Recipe: Rotisserie Boneless Leg of Lamb Roast with Greek Brinerade

Cook time: 45 minutes

Equipment:

  • Grill with Rotisserie attachment (I used a Weber kettle with the Rotisserie attachment; kettle is this Weber Grill and rotisserie attachment is this Weber charcoal kettle rotisserie)
  • Aluminum foil drip pan (9"x11", or whatever fits your grill)
  • Butcher's twine for trussing the roasts


Boneless lamb leg roasts, opened up and trimmed of fat

Charcoal and improvised drip pan ready to go
 

Lamb on the rotisserie

Lamb is done


Variations:
*Provencal Brinerade: Substitute Herbes de Provence instead of oregano, and add 1 teaspoon Dijon mustard to the brinerade.

Notes:
*Serve this with a greek salad, some Roasted Red Pepper Dip, pita bread, and some tapenade.  Or, serve it as Gyros - slice thin (¼" or less), and serve it with tzatziki sauce, pita bread, and some shredded lettuce and thin-sliced red onion.

*Ideally, you would cook this with one whole lamb leg that has been deboned.  I used the two half legs because that's what my grocery store sells.

Questions? Comments?  Other ideas? Leave them in the comments section below.

Related Posts:
Click here for my rotisserie bone in leg of lamb recipe, Moroccan style.
Click here for my Rotisserie Leg of Lamb Provencal
Instant Pot Boneless Leg of Lamb
Click here for my other rotisserie recipes.

Inspired by:
Want some authentic Greek cooking, with photography that shows you exactly how humble my efforts are?  Check out Kalofagas and his rotisserie bone in leg of lamb.  [Kalofagas.ca]

Cook's Illustrated Magazine, June 2009, "How to Cook: Brinerating" article [Subscription Required]


Check out my cookbook, Rotisserie Grilling.

Everything you could ask about the rotisserie,
plus 50 (mostly) new recipes to get you cooking.

It's a Kindle e-book, so you can download it and start reading immediately!


*Enjoyed this post? Want to help out DadCooksDinner? Subscribe to DadCooksDinner using the RSS or Email options on the right, link to this post from your blog, recommend DadCooksDinner to your friends, or buy something from Amazon.com through the links on this site. (Like my Rotisserie Grilling cookbook...)

Grilled Paella with Chorizo and Chicken

June 18, 2009 by Mike Vrobel 3 Comments


Paella on the grill is one of the recipes I use to show off. It looks stunning when you are done with it; I've been told that it looks too good to eat.
*Well, make that almost too good to eat.

It's also a great recipe for entertaining. It's a one-dish meal from the grill, and a big paella can feed a crowd. You don't have to run around cooking a bunch of different things while your guests enjoy themselves.
*Umm...not that I ever do that.

Make some gaspacho ahead of time, toss a salad, and when it's time, cook and serve the paella. Add some sangria, or a good Spanish red wine, and you've got an impressive party that looks like you slaved away for hours.

Recipe: Grilled Paella with Chorizo and Chicken
Equipment:

  • Grill, preferably charcoal (My favorite is the Weber Kettle).
  • Large Paella pan (I use a 13" pan, here, and this recipe just fits in it.)

Ingredients:

  • 2 tablespoon extra virgin olive oil
  • 1 lb chorizo sausage (Uncooked, Spanish style, if you can find it.)
  • 1.5 lbs boneless skinless chicken thighs
  • salt and pepper
  • 1 onion, sliced into ¼" thick strips
  • 1 red bell pepper, sliced into ¼" thick strips
  • 4 garlic cloves, minced or pressed
  • 2 teaspoon Smoked Spanish Paprika (Pimenton de La Vera)
  • 3 cups short grain rice (Valencia is authentic; Arborio is easy to find; I use CalRose from the Chinese Grocery because I always have it on hand.)
  • ½ cup white wine
  • ½ teaspoon saffron threads
  • 6 cups hot chicken stock or water (Homemade stock please.  If not, use water.)
  • ¼ cup cooked green peas
Ready to go: charcoal has grey ash; ingredients are prepped and waiting

Directions:
1. Prepare your ingredients: The key to this recipe is having all your prep work done before you start cooking.  First, cut the chorizo into 6" lengths, and salt and pepper the chicken thighs; set aside on a plate.  Chop all the vegetables as directed; put the onion and bell pepper in one bowl, and the garlic and paprika in another bowl.  Heat the chicken stock (or water), and put the saffron threads in the stock to soak.

2. Prepare the grill: Set your grill up for cooking on medium-high heat.  For my kettle grill, this means filling a Weber charcoal chimney with charcoal, lighting it, and waiting for it to be covered with white ashes. Then, I spread it over ⅔rds of the grill grate in an even, single layer of coals.

4. Brown the meat: Put the paella pan over the lit coals, then add 1 tablespoon of the olive oil to the pan.  Wait for the oil to heat up enough to start shimmering, usually about 1 minute.  Add the chorizo to the pan and brown it well on each side, about 2 minutes per side, then remove to a plate.  While the chorizo is in the pan, put the chicken on the grill grate, next to the pan.  Brown it well on each side, again about 2 minutes.  Remove to the plate with the chorizo. Later, while the rice is simmering in step 6, chop the chicken and sausage into 1-2" pieces.

Sauteing the sausage and grilling the chicken

5. Saute the aromatics: You want about 2 tablespoon fat in the pan; remove fat if you got it from the chorizo, or add more olive oil if you need it.  Add the onions and peppers to the pan and cook, stirring, until softened and lightly browned, about 5 minutes.  Make a hole in the center of the onions, and add the garlic and paprika.  Saute for about a minute, or until fragrant, then stir into the onions.

Onions and peppers are softened, and ready for the rice


Rice is shiny, ready for the first serving of stock


6. Cook the rice: Add the rice, and cook, stirring, until the grains are shiny, about 1 minute.  Add the white wine, and bring to a boil.  Add stock or water until it comes to the top of the rice, and 1 teaspoon salt, and cook, simmering, for 15 minutes.  Add more stock whenever the rice is starting to look a little dry; it will absorb most of the stock/water during the cooking time.  Rotate the pan 90 degrees every now and again to heat the pan evenly.

Looking a little dry; almost time for more stock

7. Finish the meat: Add the chicken and chorizo to the rice, nestling them into the rice as deep as you can.  Add one more pour of the stock or water, if you have any left.  Cook for another 10 minutes, rotating the pan occasionally, until the rice is tender.  Ideally, you will have the rice just starting to brown on the bottom when it's tender on the top.

8. Serve: Taste for seasoning, and add salt and pepper as needed.  Scatter the cooked peas on top of the pan, and take the entire pan to the table to serve.

Variations:
*Seafood: Skip the chicken, and the chicken broth.  Use water, and/or clam juice for the liquid.  Add ½ pound of peeled shrimp, a dozen mussels, and a dozen clams for the last five minutes of cooking time.  Put the clams/mussels with their hinges down into the rice, so they open "up" towards the top.
*Turista: Don't skip the chicken and broth; add the seafood from the seafood variation as listed above.

Notes:
*For this recipe, you want uncooked (or semi-cured), Spanish style chorizo.  If you can't find that, then cured Spanish chorizo is a good second choice; dice it into about ¼" dice, and add it with the garlic and paprika instead of cooking it earlier.  Don't use Mexican style chorizo in this recipe; I'd substitute an uncooked italian "sweet" sausage if you can't find any Spanish chorizo.

*Pimenton de La Vera is the wonderful smoked paprika from Spain; you want the distinctive, smoky taste that it gives you.  I get mine from Penzeys spices, and La Tienda is another good source if you can't find it locally.

*Paella is to Spain what Chili is to Texas - everyone believes they have the "correct" version; everyone else is just not doing it right.  The paella that we're used to having in the US is called "paella turista" in Spain.
*According to NPR, that loosely translates as "Paella for Tourists." Not that there's anything wrong with that.

*In Spain, they tend to stick with either a seafood Paella or a meat Paella. For this recipe, I went with a meat Paella - chicken thighs and chorizo sausage. This wasn't for authenticity; it was because seafood is too "icky" for my kids to eat. If I'm making Paella for a party, I'll make the "Turista" variation. It's what everyone expects when they hear "paella", and it looks great.

[Update 5/10/10]: Looking for a good source of Paella pans and ingredients?  Check out PaellaPans.com.

Questions? Comments?  Other ideas? Leave them in the comments section below.

Related Posts:
Here's my recipe for Grilled Flank Steak with Chimichurri
Here's my recipe for Grilled Garlic Bread (go with the Pan Con Tomate variation)

Adapted From:
Paella Perfect [NPR.org]
Paella on the grill [Steven Raichlen, Barbecue U]
Good Times, Good Grilling [Cheryl and Bill Jamison]

*Enjoyed this post?  Want to help out DadCooksDinner?  Subscribe using your RSS reader or by Email, recommend DadCooksDinner to your friends, or buy something from Amazon.com through the links on this site.  Thank you!

Rotisserie Chicken with Red Chile Marinade (Pollo Adobado)

June 14, 2009 by Mike Vrobel 6 Comments

Mexican is one of the alternate cuisines that I lean on a lot.  When I need a quick weeknight meal, I take some leftover meat, shred it, make some quick salsa, and ask my lovely wife to make some tortillas.

*One of my more entertaining cooking classes was taught by Tom Johnson at the Western Reserve School of Cooking.  He said that everyone should concentrate on two ethnic cuisines.  This allows you to learn the techniques, and get the specialized ingredients in detail.  He's a french chef, so he recommended French and Chinese.  I tried to do this, but I'm all over the map. American home cooking, Mediterranean by way of California, American grilling/barbecue, French, Pan-Asian (Chinese, Korean, Thai), Mexican and Tex Mex.  If it's cooked on a grill, I've probably tried it.  The only major cuisines I don't cook often are German/Eastern European, Japanese (and I'm working on my yakitori) and Indian (and I'm working on my curry).

For this recipe, I figured I'd get a head start on the leftovers by making a mexican style rotisserie chicken.  For ideas, I turned to my cookbooks from Rick Bayless.

I had one of the best steaks of my life at his Frontera Grill restaurant in chicago, and a lot of what I know about mexican cooking came from working my way through his "Salsas That Cook" book.  It should really be titled "How to make salsas ahead of time so you can quickly get mexican food on the table."

*Maybe there's a reason I'm not in marketing; I need to work on my punchy book titles.  
Anyhow, get his books if you're interested in authentic Mexican cooking.  Real Mexican cooking is a lot more interesting than Tex-Mex; the regional variations and variety of flavors can be eye opening.  Tex-Mex really qualifies as an American variation on norteno Mexican cooking; we've taken some of the ideas and turned them into one of our own regional cuisines.  For an interesting book on that subject, see The Tex-Mex Cookbook by Robb Walsh.

Recipe: Rotisserie Chicken with Red Chile Marinade (Pollo Adobado)


Cook time: 60 minutes

Equipment:

  • Grill with Rotisserie attachment (I used a Weber kettle with the Rotisserie attachment; kettle is this Weber Grill and rotisserie attachment is this Weber charcoal kettle rotisserie)
  • aluminum foil drip pan (9"x11", or whatever fits your grill)
  • Butcher's twine for trussing the chicken

Ingredients:

  • 2 whole chickens, 3.5 to 4 lbs each

Marinade (Brinerade)

  • 0.5 cup vegetable oil
  • 0.25 cup ancho chile powder
  • 1 tablespoon cider vinegar
  • 1 tablespoon salt
  • 2 teaspoon brown sugar
  • 2 teaspoon oregano (preferably mexican oregano)
  • 1 teaspoon garlic powder
  • 1 teaspoon cumin powder
  • 1 teaspoon freshly ground black pepper

Directions: (See my Rotisserie Poultry basic technique for more details)
1. Marinate (Brinerate) the chicken: One to one and a half hours before cooking, combine the marinade ingredients in a small bowl.  Reserve one quarter cup of the marinade, and rub the rest of the marinade all over chicken, including the inside of the cavity.  Loosen the skin over the chicken breast with a finger, and rub more of the marinade under the skin, against the breast meat.  Put the chicken in a baking dish, breast side down, and let rest, refrigerated, until ready to cook.


2. Prepare the grill: Prepare your rotisserie for cooking on indirect high heat (see details My Rotisserie Basic Technique Post). For my Weber kettle, I light a chimney starter* full of charcoal, wait for it to be covered with ash, then pour it in two equal piles on the sides of the grill, and put the drip pan in the middle, between the piles.
*I highly recommend the Weber Chimney Starter. It is larger than most chimney starters. It holds 5 quarts of charcoal, which exactly the right size for cooking this recipe.


3. Truss and spit the chicken: When the coals are almost ready, remove the chicken from the refrigerator, truss, and skewer the chicken onto the spit.
*See the basic technique for details on how to do this.

4. Cook the chicken: Put the spit on the grill, and turn on the rotisserie motor. Cook with the lid closed.  It should take 45 minutes to 1 hour 15 minutes, depending on the size of the bird. A 4 lb bird should be done in about an hour.  It's better to go by temperature, though - you want the breast at the thickest part to read 160*F to 165*F; start checking about 15 minutes before you think the bird will be done.


5. Serve: Brush the chicken with the reserved marinade.  Remove skewer from grill, remove chicken from skewer, let rest at least 15 minutes, carve and serve.  I carve a chicken by cutting the legs free of the body, then cutting the drumsticks from the thighs. Then I cut the wings off.  I cut the breast meat away from the carcass, the slice the breast meat ½" thick, and serve them all on a platter.

Variations:
*Brine and rub: Instead of the marinade, which is the traditional mexican way of preparing this recipe, use a brine and a rub.  Brine the chicken using the instructions in my original rotisserie chicken recipe. Combine all the marinade ingredients to make the rub, except for the oil, vinegar, and salt.  Rub on the chicken, including under the skin, before trussing in step 3.

*Spicy marinade: I toned down the heat on this one because of my kids.  Add 1 teaspoon of chipotle puree to the marinade for a spicy kick.

Notes:
*Serve with Red or Green salsa, rotisserie pan potatoes, and a side of beans.

*As I mentioned in my opening, leftovers make great tacos - shred the leftover chicken with your fingers, then serve with tortillas or taco shells, salsa, shredded mexican cheese, and whatever other toppings you would want with your tacos.

*This isn't a pure Mexican marinade; I used the "Don't Marinate, Brinerate" ideas from Cook's Illustrated magazine when building the Adobabo marinade. (Link here, subscription required.)

Questions? Suggestions?  Ideas?  Leave them in the comments.

Related Posts:
Click here for my Brined Rotisserie Chicken recipe.
Click here for my other rotisserie recipes.

Inspired by:


Check out my cookbook, Rotisserie Grilling.

Everything you could ask about the rotisserie,
plus 50 (mostly) new recipes to get you cooking.

It's a Kindle e-book, so you can download it and start reading immediately!


*Enjoyed this post? Want to help out DadCooksDinner? Subscribe to DadCooksDinner using the RSS or Email options on the right, link to this post from your blog, recommend DadCooksDinner to your friends, or buy something from Amazon.com through the links on this site. (Like my Rotisserie Grilling cookbook...)

When should you salt meat?

June 11, 2009 by Mike Vrobel 2 Comments

I've heard there are two times you should salt meat:

  1. Just before it's going to be cooked, and no sooner. Salt draws moisture out of the meat, and it will be dry if you salt it too early.
  2. As early as possible; at least a day in advance. Salt draws moisture out of the meat, but then the moisture is re-absorbed with the salt due to osmosis.

*Of course, option 3 is to use a brine.

I've been a fan of option 2 ever since I read Judy Rodgers' Zuni Cafe Cookbook. Or, more accurately, since I cooked her delicious Zuni Roast Chicken recipe, where you salt the chicken at least 24 hours ahead of time. But which way is right?

Here is a fascinating article in Food+Wine that takes on this question. A professional chef who was taught that BOTH ways are how it must be done. In two different kitchens, which both produced great food. He decided to find out for himself - when should you salt meat?

The Juicy Secret to Seasoning Meat [foodandwine.com], via [lifehacker.com]

*The short form of his answer is...it depends. On the type of meat. I won't steal his thunder; read the article to find out what that means.

Update: OK, I will summarize.
*But read the article anyhow.  It's quick and entertaining.  
Chicken, Lamb - salt early if at all possible.  Steak - it doesn't seem to matter, or it's a matter of taste; both work.  Pork - salt as late as possible.

The last one surprised me, but matched my experience with a rack of pork I cooked at Christmas (early salting = dry).  I think the summary should be: "Pork = use a brine or salt as late as possible".  Darn, this means I will have to revisit some of my recipes to see if they work better with a brine.  Are ribs on sale again?

Rotisserie Spareribs, Dry Rubbed

June 9, 2009 by Mike Vrobel 6 Comments


I was worried this would be one rotisserie recipe too many. As I mentioned in my rotisserie baby back ribs post, I'm a big fan of barbecued spareribs, cooked low and slow. There are already a lot of good takes on how to do barbecued spareribs on the internet (especially at The Virtual Weber Bullet), and I wanted to add my own twist to it.

*Of course, the other deciding factor was the sale on "St. Louis Cut" spareribs at my local grocery store. More on that in the notes section...
 
My fear was that spareribs need the low and slow treatment, to tenderize them, and they wouldn't work on the rotisserie. Would they come out burned on the outside, and tough on the inside? Or would I succeed in my crispy, tender pork rib quest?
*Don't touch that dial! Stay tuned to find out! Never mind that you wouldn't be reading this if it didn't work!

The St. Louis Cut of spareribs is what you want to use with a rotisserie. What does the St. Louis Cut mean? The big slab of spare ribs is trimmed of the skirt meat and rib tips before cooking. You want this cut for the rotisserie because the rib tips are the part that takes the longest to cook to tenderness. Either buy them pre-cut this way, or see Chris at the Virtual Weber Bullet for his Spare Rib Prep explanation, complete with pictures and video.
*I'll wait for you to come back. I've done the St. Louis Cut myself many times; once you see where the "line" of the rib tips are, it's easy to do.

Finally, I did the ribs in the Memphis Dry Ribs style, with just barbecue rub on them; no sauce. The crisp ribs you get from the rotisserie are perfect this way.
*You can serve sauce on the side, if you feel that you have to. Just promise me you'll take a taste of the ribs before covering them in barbecue sauce. I think you'll be pleasantly surprised.


Recipe: Rotisserie St. Louis cut spareribs, dry rubbed

Equipment:

  • Grill with Rotisserie attachment (I used a Weber kettle with the Rotisserie attachment; kettle is this Weber Grill and rotisserie attachment is this Weber charcoal kettle rotisserie)
  • Aluminum foil drip pan (9"x11", or whatever fits your grill)

Ingredients:

  • 2 slabs "St. Louis Cut" spareribs, membrane removed (see the video link above for prep information)
  • 3 teaspoon kosher salt
  • 3 teaspoon barbecue rub (recipe here)
  • 2 fist sized chunks of smoking wood (preferably hickory)
  • 2 teaspoon barbecue rub (optional, for an extra layer of rub right before serving)

Directions:
1. Prep the ribs: Evenly sprinkle a teaspoon and a half of salt and rub on each slab of ribs. If you are cooking immediately, let the ribs rest at room temperature for at least one hour before cooking. Preferrably, wrap them in plastic wrap and let sit overnight in the refrigerator; take them out of the refrigerator one hour before cooking.
*If you use a store bought rub, check the ingredients. If salt is the first or second ingredient, don't add extra salt - just use the rub on the ribs.


Ribs rubbbed, rested, and ready to go


2. Prep the smoking wood: Submerge the smoking wood in water for 1 hour before cooking.
*I use a gladware container; I put the wood in it, fill it with water, and seal the lid to keep the wood chunks submerged.

3. Prepare the grill: Prepare your rotisserie for cooking on medium-low heat, about 300°F. (see details My Rotisserie Basic Technique Post). For my Weber kettle, I light a chimney that's half full of charcoal, wait for it to be covered with ash, then pour it in two equal piles on the sides of the grill, and put the drip pan in the middle, between the piles. Then I put the wood chunk on top of the charcoal.

Chimney half full, covered with ash.
(Note that the charcoal baskets are where I'm going to put the coals)
 
4. Skewer the ribs: Using a sharp, thin bladed knife, like a paring knife, make a pilot hole between every two ribs. Then weave the ribs onto the skewer through the holes you just made.


Making the pilot holes


Weaving the ribs onto the spit


Ribs on the spit, ready to go
5. Cook the ribs: Put the skewer of ribs on the rotisserie, and start it spinning. Cook with the lid closed for 2 to 2 ½ hours, depending on the heat of your grill (mine took about 2 hours). You're done when the ribs are nicely browned, and the meat has pulled back from the bones on the end of the slab by about ½".
*Another test for doneness is to see if you can pull a bone loose. Pull on a bone in the middle of the slab. You should be able to pull it free of the meat with a little effort.
For a charcoal grill: after an hour, add 16 charcoal briquettes (8 to each pile of charcoal) to pick the heat back up. You can skip this if your ribs look like they're almost done.

6. Serve: Remove the ribs from the spit, sprinkle 1 teaspoon of rub on the meaty side of the ribs, and let rest for 10-15 minutes. Cut the ribs into serving size pieces by cutting between every second bone (that is, where you put your pilot holes), and serve.

Variations:
*Barbecue sauce: If you really want wet ribs, wait until the ribs are cooked, then brush them with sauce. Put the lid back on and cook an extra 5 minutes, then brush the ribs with another layer of sauce, remove from the grill, and serve.

Notes:
*Now, about those store-bought St. Louis Cut Ribs...I got two cryovac wrapped slabs from Farmland, and one of them wasn't really a St. Louis Cut. They (somehow) cut across the bones, and left the rib tips on the bottom of the ribs. It was the right shape, just cut at a weird angle. This slab came out a bit too chewy in the rib tip section. Next time I'm going to check the slab carefully to make sure that I can see the rib bones all the way across both sides of the package. Or I'm just going to cut my own ribs.

*Two slabs of ribs was a tight fit on my kettle grill's spit, as you can see from the pictures. I had to squeeze them a bit to get them to fit on the skewer. If I cooked this on my Weber Summit, I wouldn't have had a space problem, but the taste from the smoking wood on the charcoal kettle made up for the little bit of extra work.

*I thought the Memphis Dry Rib approach would work well with the rotisserie cooking method. Boy howdy, was I right about that! These were REALLY good ribs. Will I give up my low and slow spareribs? Probably not. But these took less than half the time to cook, and were just as good.

Questions? Comments?  Other ideas? Leave them in the comments section below.

Related Posts:
Click here for my Rotisserie Baby Back Ribs recipe.
Click here for my other rotisserie recipes.


Inspired by:
The Virtual Weber Bullet, if you want your ribs low and slow.
Stephen Raichlen - Ribs, Ribs, Ribs


Check out my cookbook, Rotisserie Grilling.

Everything you could ask about the rotisserie,
plus 50 (mostly) new recipes to get you cooking.

It's a Kindle e-book, so you can download it and start reading immediately!


*Enjoyed this post? Want to help out DadCooksDinner? Subscribe to DadCooksDinner using the RSS or Email options on the right, link to this post from your blog, recommend DadCooksDinner to your friends, or buy something from Amazon.com through the links on this site. (Like my Rotisserie Grilling cookbook...)

Road Trip: DeVitis Italian Market

June 4, 2009 by Mike Vrobel 1 Comment

Italian cooking has been thoroughly integrated into American cuisine. Italian-American is really our own "regional" American specialty. When our grandparents were kids, this was exotic, ethnic cooking; now, if you're like me, you grew up having spaghetti and meatballs once a week. Pizza is almost our national dish, but our pizza is significantly different from what you get in Naples.*
*And I think we have Italian-Americans to thank for good American wine. If the Mondavis, Gallos and Martinis don't move to California Wine Country, looking to reproduce what their grandparents would drink in the old country...my mouth goes dry just thinking about it.

That being said, the roots of Italian-American cooking are definitely still in Italy. More important than the garlic, tomatoes and cheese is the quality of the ingredients. We may have taken Italian cuisine and adopted it, but some of the things we've done to it aren't very helpful. Or nice. Frozen garlic bread? Spaghetti sauce in a jar? "Parmesan" cheese in a green cardboard canister?*
*Where the cardboard can has more taste than the white powder inside?

Sometimes, when you want the great ingredients that Italian-American cooking deserves, you have to go to the source. In Akron, that means DeVitis Italian Market. Their deli counter makes me drool, their cheese selection makes me weep, and I'll cross town to get their homemade Italian sausage. They have a great prepared foods counter as well, but I'm always re-energized to cook something when I've stopped in, so I haven't tried it out yet.
*Oh, and if you must get your spaghetti sauce in a jar, get it here; I've heard good things about their house brand.

DeVitis Italian Market
560 E Tallmadge Ave
Akron, OH‎
(330) 535-2626‎
devitis.com

My top five list of favorite things they sell are, in no particular order:

1. Italian sausage: Homemade "the way Grandpa used to" in three varieties: sweet, hot, and Sicilian*. I haven't decided which is my favorite. It'll take some more research. I'm going to do another round of taste testing as soon as I'm done typing.
*Sicilian style = with green and red bell peppers in it.

2. Aged Provolone: Forget that mild, boring stuff you get when you buy it at your local megamart. That's for putting on a sandwich, where it won't clash with the ham. This Provolone is strong stuff, nutty and delicious. It is for serving by itself, on a cheese tray. Preferably with some olives, and a glass of wine.
*And don't forget the asiago, or mozarella, or the parmesan, real parmesan...

3. The cured meats at the Deli Counter: I couldn't pick just one thing for this one. Salami? Sopresatta? Pancetta? Prosciutto? The list is almost endless. Good luck making a choice.

4. Fresh pasta: I'm a fan of dried pasta; I cook it a couple of times a month. But if your recipe calls for fresh pasta, you need it. They have a freezer case full of it, from angel hair up to lasagna sheets.*
*Yes, fresh pasta freezes well.

5. Gelato: Forget that hippie stuff in your grocer's freezer, and the one with the umlaut in the name. This is what you want. I prefer dulce de leche, or pistachio. In large quantities.

Here's the map:

View Larger Map

Grated Carrot Salad (Carottes Râpées)

June 2, 2009 by Mike Vrobel Leave a Comment

Here's a carrot salad that I've been making a lot, based on a recipe from my man in Paris, David Lebovitz.*
*By "my man in Paris", I don't mean to say I know him - he couldn't pick me out of a lineup if I cut in front of him. Sorry, a little Paris humor there.

I feel like I know David because of his wonderful blog, and because I relied so heavily on his recommendations when I went to Paris. The best one was to buy the pocket size "Paris par Arrondissement" map. I'm a habitual map looker, and I spent as much time thumbing through that map as I did looking at the city.
*See the link at the end of this post for David's book reminiscing on life in Paris as an expatriate American cookbook author who specializes in desserts.

Recipe: Grated Carrot Salad (Carottes Râpées)

Equipment:

  • Julienne shredder. I use the Julienne Disc for my food processor.

Ingredients:

  • ½ lb carrots, peeled and julienned. (I get one bunch with the green tips still on.)
  • ¼ cup minced parsley

Dressing (see Lemon Dressing post for a more detailed description)

  • Juice of 1 lemon (should be about 2 to 3 tbsp)
  • 1 teaspoon lemon zest
  • 1 teaspoon sugar
  • pinch of salt
  • pinch of freshly ground black pepper
  • 1 medium garlic clove, minced
  • 6 tablespoon (⅓ cup plus a little) Extra Virgin Olive Oil

Directions:
1. Make the dressing: Combine the dressing ingredients in a medium bowl, and whisk until combined.

2. Make the salad: Add the carrots and parsley to the bowl, and toss until evenly coated with dressing. Serve and enjoy.

Variations:

*Dijon Mustard: Add some mustard to the dressing - David recommends this as a variation in his original recipe.

*Make ahead: Keep the carrots and parsley separate from the dressing, and toss just before serving. It tastes best freshly tossed.

*Skip the parsley: My kids don't like green stuff, so sometimes I skip the parsley if I'm not up to giving the "just eat around it" speech.

*Herbs: Never mind what I said above about green stuff; add some herbs to the dressing. I like about a ½ teaspoon of fresh thyme, but almost any herb will do.

[Added 8/20/2009]

*Moroccan Shredded Carrots: Add 1 teaspoon ground cumin and 1 teaspoon paprika (smoked Spanish paprika if you have it) to the lemon dressing
Notes:
*Use the freshest carrots you can in this recipe. Here are my preferred types of carrots, in order:
1. Carrots with their tops on, where the green tops look fresh (from your local farmer's market, if you can)
2. Carrots, whole in a bag (aka storage carrots)
3. Baby carrots in a bag
4. Pre-shredded carrots in a bag
...and by preferred type, I mean "for flavor". I'll make this recipe with #4, and it will be good, but it won't be the experience that it is with fresh, sweet carrots.

*My knife skills are good, but not good enough to julienne a bunch of carrots. That's why I recommend a julienne shredder in the "equipment" section. If you don't have a julienne shredder, you can use the large holes on your box grater. The shreds won't come out as neat looking, but the salad still tastes great.

*This is one of the few vegetables that my youngest son loves. When he sees me julienning the carrots, he hangs around until he gets his ramekin full of carrot sticks to munch on.

Related posts:

*As I mentioned in the recipe, this is just using shredded carrots with my lemon herb dressing from vinaigrette week.

Questions? Leave them in the comments.

Inspired by:
My trip to Paris.
*Sigh. I'm going to go back there back someday.

Adapted From:
Salade de Carottes Rapees [davidlebovitz.com]

David Lebovitz - My Sweet Life In Paris

*Enjoyed this post?  Want to help out DadCooksDinner?  Subscribe to DadCooksDinner using the RSS or Email options on the right, link to this post from your blog, recommend DadCooksDinner to your friends, or buy something from Amazon.com through the links on this site.  Thank you!

Road Trip: Difeo's Poultry

May 28, 2009 by Mike Vrobel 2 Comments


View Larger Map

Where do I go when I want high quality poultry? In Akron, there's an excellent answer to that question: Difeo's Poultry. I have read that the reason their poultry is so good is that it's never been frozen, unlike almost everything you get at your local megamart. You can really taste the difference. When I'm cooking a simple roast chicken, where I don't have any elaborate seasonings that hide the quality of the bird, I make a point to head downtown and buy it from them.

While poultry is their specialty, that's not all they sell; they have a full-service butcher counter and a prepared food counter. But it's the poultry counter that keeps bringing me back. Wings, legs, breasts, drumsticks; necks, backs, feet; chicken, cornish game hens, turkeys...they have it all. And, the on-site staff will cut it to your specifications. You can order whole chickens and have them quartered or butterflied for you.
*I tend to cook mine whole, and I'm good at cutting up chicken, so I've never used this service. They always look disappointed when I say "no thanks, I'll take it just like that."

Difeos poultry
1073 Grant St
Akron, OH 44311
(330) 773-7881
difeoandsons.com

My top five list of favorite things they sell are, in no particular order:

1. Whole 3.5lbs chickens: They sell chicken for different prices per pound, depending on the size. When I'm roasting a whole chicken, I want a 3.5 to 4lb bird.

2. Chicken wings: Much better than the frozen bags you get at your local megamart when you've got a hankering for wings.

3. Chicken legs: When it comes to chicken, I've gone over to the "dark side" - I prefer dark meat to white meat. These are great for barbecued chicken.

4. Cornish game hens: For my most popular recipe.

5. Chicken backs and chicken feet: I always pick up some backs and feet when I'm there, to add some gelatin to my stock.

Here's the map:

View Larger Map

Rotisserie Cornish Game Hens, Brined and Herbed

May 26, 2009 by Mike Vrobel 28 Comments

[feast_advanced_jump_to]

I've been writing this blog for a little while now, and I've been amazed at the number of readers that my rotisserie recipes attract. I know from my own research that rotisserie recipes are few and far between - when I find a new one, I get excited about something else I can try with my favorite grill gadget.

The recipe that everyone seems to find is my Rotisserie Cornish Game Hens. That post has three times more viewers than any other post I've done. I was even more amazed to find out that I show up on the first page of search results if you Google "rotisserie cornish game hens".
*My blog? Showing up "above the fold" on Google? Whoohoo! I've hit the big time! On a busy day, I have dozens of readers. Dozens! Hmm. That doesn't sound as impressive as it did when I said it in my head.

**I'm addicted to Google Analytics. Every morning, I get up and check my stats from the day before - how did I do? What search terms brought people to my blog? Wait...someone in the Czech Republic visited my blog? Where are they from? Liberec? Where's that?

I was inspired to do a follow up post. If people like one rotisserie cornish game hen recipe, why not another one? The main reason I wanted to revisit my little chickens is: Usually, I don't pre-salt the hens.
*It's a great way to do it, but the overnight salting takes more foresight than I have under normal circumstances.

Brining the Hens

Instead, I usually brine my cornish game hens. Brining gives you more of a temperature cushion in poultry, because the brine causes the meat to suck up more moisture. That's good if you accidentally cook the breast meat past 165*F - the extra moisture keeps them from getting too dry to be good to eat. Also, and more important, it seasons the meat all the way through, and if you add a little sugar to the brine it gives it a nice hint of sweetness.

Don't have a rotisserie?

Check out my Grilled Cornish Game Hens recipe

Equipment

  • Grill with Rotisserie attachment (I use a Weber Summit with an infrared rotisserie burner. Here is the current version of my grill.)
  • Aluminum foil drip pan (9"x13", or whatever fits your grill. I use an enameled steel roasting pan.)
  • Butchers twine
  • Instant Read Thermometer
Rotisserie Grilling by Mike Vrobel

I wrote a cookbook!

Rotisserie Grilling Cookbook

New to your rotisserie and need help with the basics? Love your rotisserie and looking for new ideas? Grab a copy of Rotisserie Grilling! You'll get 50 of my favorite rotisserie recipes and expert tips on how to set up and use your rotisserie.

Click here to buy →

Variations

  • Different Herbs: The herbs listed above are what you get if you buy a "Poultry Pack" of fresh herbs, which is what I look for when I want a variety of different fresh herbs. Use whatever herbs you like, just try to use roughly the same amount, total, that I have above. Oh, and watch out for rosemary. A little is good, too much and you wind up with something that tastes like a pine tree. During the summer, when our garden is producing, I'll use what we have grown - usually some combination of parsley, basil, thyme, and rosemary.
  • (Of course, after making this, I went out and checked our garden - the thyme is growing like mad. Darn! I could have used it in the recipe. Next time...)


Tips and Tricks

  • Watch your hands with the hot spit! Use oven mitts or (preferably) welding gloves to protect your hands.
  • Drip Pan Potatoes: As you can see in the pictures, I made my rotisserie pan potatoes along side this recipe. They're almost as good as the hens - potatoes browned in chicken fat. Just don't pretend you're on a diet when you eat them...
  • Fresh vs Frozen: If you can find them, use fresh hens; they taste better. That said, it's been a busy week, and I didn't want to make the trip downtown, so I used frozen hens this time around. With the brine and the herb rub, frozen hens taste great, but not quite as good as fresh hens. If you do use frozen hens, make sure they're thawed before brining them. The brine doesn't get absorbed if the hens are frozen.
  • Watch all the extra hens on the spit: I made a big mess trying to remove these hens from the spit. The back pair of hens dripped all over the table and the floor while I was trying to get the front pair loose and on the platter. Next time I'm going to line up a sheet pan next to my platter, to give me a landing strip for the juices.
  • Brining containers: I love these Rubbermaid 8 quart food service containers for brining. They're the perfect size for 4 cornish hens (or 2 chickens) to just fit. If you don't have one of these, try your stockpot. If you need more brine to get your chickens submerged, just use a ratio of ¼ cup salt, 2 tablespoon sugar, and 1 quart water to make more.
  • What are Cornish hens? Are cornish game hens really a game bird? No, they're just a young chicken.

What do you think?  Questions?  Other ideas?  Leave them in the comments section below.

Related Posts

Click here for my original Rotisserie Cornish Game Hens recipe.

Click here for my other rotisserie recipes.

References and inspirations:
Alton Brown introduced me to brining, but Cooks Illustrated helped me get it down to a science.
The Cooks Illustrated's Guide to Grilling And Barbecue

Enjoyed this post? Want to help out DadCooksDinner? Subscribe to DadCooksDinner via email and share this post with your friends. Want to contribute directly? Donate to my Tip Jar, or buy something from Amazon.com through the links on this site. Thank you.

Time to clean your grill!

May 24, 2009 by Mike Vrobel 2 Comments

Debris from one year of cooking

Does the inside of your grill look like this? Burners not burning evenly? Grease fires happening more often than usual? If so, it's time for your annual grill cleaning.

I was amazed how much better my grill worked after I cleaned all the crud out - the big hot spot in the front of the grill was gone!

*I need to do this more often. I grill too much for a once a year cleaning.
Don't know where to start? Here are instructions from Weber on how to get your grill back into top shape:
Cleaning your gas grill [Weber.com]

Grilled Flank Steak with Chimichurri

May 21, 2009 by Mike Vrobel 2 Comments


This is one of my favorite weeknight recipes; it's a grilled steak with a herb paste with some garlic kick. But before we get to that, I need to give you a little backstory.I am a steak purist. One of the defining moments in my conversion from "guy who liked to eat" to "gourmet/gourmand/foodie" was catching an episode of David Rosengarten's TV show, "Taste". He was cooking steak, three ways. I'm a big fan of steak, but other than grilling it, I hadn't had much luck with cooking it the way I liked, so I stopped channel surfing and settled in to watch the show.
*As I recall, he pan-seared a steak in a cast iron pan, and sauteed another one in oil, and broiled the third one. I agree with the first two, but unless you have a broiler much better than mine, you really should just go to your grill.

He finished cooking his steaks, sat down to a table with a white tablecloth, his gorgeous looking steak, and...a small collection of steak sauce bottles. "A1 sauce...yuck" I thought. He was doing so well! Why did he have to mess it up?

David looked directly at the camera and said something like "You could put steak sauce on your meat...if you wanted to ruin it." Then, with a dismissive swipe, he knocked all the sauces off the table, grabbed his knife and fork, and dug into the steak.

That was it; I was hooked on the Food Network.* A few weeks later, I tuned in early, and a show called "Good Eats" happened to be on, with Alton Brown talking about shrimp. Alton's show started an education that I continue to chase after even today.
*It's sad to see what the Food Network has become, nowadays; I only watch it for Alton Brown.

So...where was I going with this? Oh, right, steak sauce. I hate it. Especially if it comes in a bottle from your grocery store. Why ruin your meat? But then I learned about Argentina, their love affair with beef, and the chimichurri sauce that is the only seasoning they use. This is the recipe that changed my mind about steak sauce.
*And then came pan reduction sauces, and flavored butters. I'm not the purist I used to be. But I still think the first option for steak is salted, peppered, and grilled.

Most importantly, this is a really quick recipe to put together - I consider it a quick weeknight option; if you use a food processor to do your mincing, you can go from "turn the grill on, take the meat out of the fridge" to "done" in less than a half an hour.
*In other words, it took me longer to get to the recipe than it will take you to cook it. Sorry about that, I was on a roll.

Recipe: Grilled Flank Steak with Chimichurri

Cook time: 10 minutes

Equipment:

  • Grill (I used a Weber Summit 650. Here it is.)


Ingredients:

  • 1 Flank steak (1.5 to 2 lbs)
  • 1 teaspoon kosher salt
  • ½ teaspoon freshly ground black pepper

Chimichurri

  • ¼ cup extra virgin olive oil
  • 2 tablespoon red wine vinegar
  • pinch salt (¼ teaspoon or so)
  • pinch hot red pepper flakes
  • ½ cup minced fresh parsley leaves
  • ¼ cup minced red onion
  • 3 cloves minced garilc
  • zest of ½ of a lemon

Directions:
1. Preheat the grill: Set your grill up for direct cooking at high heat. For my Weber Summit, this means turning all the burners to high and preheating (lid closed) for 10-15 minutes.

2. Prepare the steak: Salt and pepper the flank steak, and let sit at room temperature until the grill is ready. (Ideally, you would do this one to two hours ahead of time, to let the salt dry brine the steak, but don't worry about that if you're in a hurry.)

3. Prepare the chimichurri: Mince all the herbs. Whisk the salt, pepper flakes, and lemon zest into the vinegar, then the oil in a thin stream, then all the minced herbs.
OR: Do it in the food processor. Instructions:
Don't pre-mince the herbs. Drop the garlic in the running processor, and leave running until completely minced. Add the parsley, and run until completely minced. Add the lemon zest, salt, pepper, pepper flakes, and the onion, and pulse with 1 second pulses until finely minced. Add the vinegar, then turn on the processor and add the olive oil in a slow stream. Scrape down the sides, and you're ready.
*This is really just a herb-heavy vinaigrette - see my basic vinaigrette instructions for the technique.

4. Clean the grill: After preheating, right before cooking the steak, clean your grill grate by brushing it with your grill brush, and wiping it with a paper towel dipped in vegetable oil. (I usually use canola oil.)

5. Cook the steak:Put the steak on the grill, and grill for 5 minutes per side. This will give you a medium-rare steak. I expect to have an internal temperature of about 115-125*F when I pull the steak from the grill, because it will continue to cook in the next step. (If I got a 1.5lbs steak, five minutes a side works perfectly on my grill; try it with the thermometer a few times to get the timing down for your grill.)
*To get fancy, rotate the steak 90 degrees after 2.5 minutes. That is, 2.5 min, rotate, 2.5 min, flip, 2.5 min, rotate, 2.5 min, done. This gives you what Alton Brown calls the "Oh, look, it's grilled food!" diamond pattern on the meat.


Start pointing "northwest", cook for 2.5 minutes...


then rotate 90*, pointing "southwest", and cook for another 2.5 minutes...


Voila! Diamond grill marks.


6. Coat steak with chimichurri and rest: Put the steak in a baking dish*, coat with the chimichurri, and cover with plastic wrap. Let rest for 5-10 minutes, covered.
*I use my Pyrex 9x13 baking dish for this.

7. Slice thin and serve:Slice the steak crosswise, ¼" or thinner, and serve.
*Again, if you want to get fancy, cut at a 45 degree angle to the cutting board; the angle gives you wider pieces of meat.

Variations:
*Italian style: Substitute balsamic vinegar for the red wine vinegar. (Or, just call it "italian style". I won't tell anyone...)
*Italian gremolata style: Skip the oil and vinegar, and you have gremolata, not chimichurri.
*Pick a different steak. I like flank steak because it's cheap and has a big beefy flavor, but any good steak cut would work. Try it with a ribeye, or maybe a sirloin.

Notes:
*Flank steak has a lot of flavor, but it can be very chewy if you don't follow the slicing instructions. It has long muscle fibers running the length of the steak. You tenderize the steak by cutting across the steak - that cuts the fibers into short pieces, perfect for chewing.

*When I first started using this recipe (it's based on a recipe in the first issue of Cook's Country magazine), I assumed it was an Italian style recipe; they call it a "garlic-parsley" sauce, and it has that kind of flavor profile. It took a few years before it dawned on me that this was really a variation on an Argentinean chimichurri.
*Leftovers make great steak sandwiches - a loaf of french bread, some mayo, a little lettuce or cilantro...
*The pictures show a monster of a flank steak that I got at my local health food market, Mustard Seed Market. It was just shy of 3 lbs. I had to cook it for about five extra minutes; if you're really cooking under a deadline, try to get the 1.5lbs steak, to keep the cooking time down.
*I like to mention the guys in the meat department at Mustard Seed - they're surrounded by vegans, and deserve all the good thoughts they can get.Questions? Comments?  Other ideas?  Leave them in the comments section below.

Related Recipes:

Once you've mastered this recipe, try my Grilled Steak Fajitas recipe. It's a very similar recipe with a completely different flavor profile.

Inspired by:
Cook's Country Best Grilling Recipes

*Enjoyed this post?  Want to help out DadCooksDinner?  Subscribe to DadCooksDinner using the RSS or Email options on the right, link to this post from your blog, recommend DadCooksDinner to your friends, or buy something from Amazon.com through the links on this site.  Thank you!

Grilled Asparagus

May 19, 2009 by Mike Vrobel 2 Comments

Whenever asparagus is in season, I grab it, and toss it on the grill with whatever else I'm cooking. This helps me feel like my grilling isn't just all protein, all the time.
*When I first started cooking for us, Diane would always complain because I didn't have any vegetables in my repertoire. "Can you cook us something green? Anything? All I want is a vegetable that isn't all starch." Now I've flipped the other way; I always try to serve two vegetable sides and a starch with every meal.

This is a great weeknight side dish, if you're grilling dinner. I can usually squeeze it in on the side of my grill.
*I'm not just saying that because my grill is huge. I used to do this all the time when I had a (relatively) smaller Weber Genesis.

Recipe: Grilled Asparagus


Cook time: 10 minutes

Equipment:

  • Grill (I used a Weber Summit 650. Here it is.)
  • (optional) Vegetable grate - see notes section

Ingredients:

  • 1 lb Asparagus, tough ends trimmed

Balsamic Vinaigrette
(See Vinaigrette Basic Technique for my vinaigrette basic technique)

  • 6 tablespoon extra virgin olive oil
  • 2 tablespoon balsamic vinegar
  • ½ teaspoon kosher salt
  • ½ teaspoon ground black pepper

Directions:
1. Preheat the grill: Set your grill up for direct cooking at medium heat. For my Weber Summit, this means turning all the burners to high and preheating (lid closed) for 10-15 minutes, then turning them down to medium. If you have a vegetable grate, put it on the grill to preheat.

2. Prepare the asparagus: Trim the tough ends off the asparagus, and put in a baking dish. Make the balsamic vinaigrette by whisking the ingredients together in a small bowl, then pour it over the asparagus. Let the asparagus marinate in the vinaigrette until the grill is ready.

3. Clean the grill: After preheating, clean your grill grate by brushing it with your grill brush, and wiping it with a paper towel dipped in vegetable oil. (I usually use canola oil.)

4. Cook the asparagus: Turn the heat down to medium, and put the asparagus on the grill, in one layer, perpendicular to the grill grate. Set the baking dish with the vinaigrette aside. Turn the asparagus every couple of minutes, until browned and tender, 5-10 minutes.
*The cooking time depends on the thickness of your asparagus. My first test is sight - is the asparagus should be browned and starting to wilt. Then I test by picking a thicker spear and eating it; I want it to be tender, with just a little bite still to it.

5. Serve: Put the asparagus back in the baking dish with the vinaigrette, and toss to coat. Serve.

Variations:
*Vinaigrette mania: Use any vinaigrette instead of the balsamic - the lemon dressing goes especially well with asparagus.

Notes:
*I try to get thin to medium-thick asparagus; it takes longer than I'd like to cook thick asparagus.  That being said, in some of the pictures above you can see some locally grown asparagus I bought because it was wonderfully fresh, but the sizes were all over the board.
*It was worth it.  Fresh asparagus is a treat when all you usually get is from the local grocery store.

*The traditional method for removing the tough part of the asparagus is to snap each one off individually. I use a shortcut. I leave the rubber band on the bunch of asparagus, pull one out, snap off the tough end, then put it back in the bunch. Then, using the snapped one as a guide, I cut the tough bottoms off the whole bunch.

*The trick to cooking asparagus on a grill without losing it all is keeping it perpendicular to the grate. Don't worry about perfection; I usually lose a spear or two while doing this. If you are worried about it, see my comments on vegetable grates below.

*I use a "rolling turn" approach" to the turning - my grill tends to be hotter in the front than in the back. Using my tongs, I grab a handful (tongful?) of the asparagus from the front, move it to the back, and then roll the rest of the asparagus towards the front of the grill. If you do this every couple of minutes, you will have rotated your asparagus across the entire grill by the end of your cooking time.

*I'm not a big fan of vegetable grates; they tend to be flimsy, stamped stainless steel, and everything sticks to them.  This one is the exception.  It's a cast iron grate made by Lodge, the company famous for their cast iron cookware.  It weighs a ton, soaks up the heat, and dishes it back out to whatever you're cooking.  Just make sure to season it with some oil after every cooking session, so the cast iron doesn't rust.

What do you think?  Questions?  Better ideas?  Leave them in the comments, below.

Inspired by:
Catherine St. John's grilling classes at the Western Reserve School of Cooking in Hudson, Ohio
Lodge Logic Pre-Seasoned Barbecue Grill/Grate

Free Weber Booklet - Grilling What's Good For You

May 17, 2009 by Mike Vrobel Leave a Comment

Every year, Weber releases a free grilling booklet. In the old days, you had to call their help line to request it. Now, they're downloadable!

The new one is about healthy grilling:
Weber's Grilling What's Good For You
...and here's a direct link to the PDF itself:
http://www.weber.com/goodforyou/assets/pdf/3997_GrillingGoodforYou_lr.pdf

Enjoy!

If you like the booklet, save off a copy - they publish a new one every year, and the old ones disappear.

And, while I'm talking about Weber - check out their Weber Nation site - lots of good recipes and technique videos from Jamie Purviance. [Free registration required.]

  • « Previous Page
  • 1
  • …
  • 33
  • 34
  • 35
  • 36
  • 37
  • Next Page »

Welcome to Dad Cooks Dinner!

I'm Mike Vrobel, a dad who cooks dinner every night. I'm an enthusiastic home cook, and I write about pressure cooking, rotisserie grilling, and other food topics that grab my attention.

More About Me →

Popular

  • Three bowls of cooked Pinto Beans on a wood table
    Instant Pot Pinto Beans (No Soaking)
  • Pressure Cooker Beef Shank (Osso Bucco)
  • Pressure Cooker 7 Hour Leg of Lamb (in 90 minutes)
    Pressure Cooker 7 Hour Leg of Lamb (in 90 minutes)
  • Pressure Cooker Brown Jasmine Rice
  • Grilled Tomahawk Steak (Long Bone Ribeye, Reverse Seared)
    Grilled Tomahawk Steak (Long Bone Ribeye, Reverse Seared)
  • A green bowl full of chicken noodle soup
    Instant Pot Rotisserie Chicken Noodle Soup

Seasonal

  • A bowl of asparagus risotto
    Instant Pot Asparagus Risotto (Pressure Cooker Recipe)
  • Grilled Butterflied Chicken with Garlic Butter
  • Sous Vide rack of lamb sliced into chops
    Sous Vide Rack of Lamb with Dijon Bread Crumb Crust
  • A bowl of beef stew with asparagus, carrots, and radishes.
    Instant Pot Spring Vegetable Beef Stew
  • A Rotisserie Chicken (Pollo Asado)on a platter of shredded cabbage
    Rotisserie Chicken Pollo Asado
  • Rotisserie Pork Shoulder Roast with Carolina Mustard BBQ Sauce
    Rotisserie Pork Shoulder with South Carolina Mustard Barbecue Sauce

Footer

↑ back to top

About

  • Privacy Policy

Newsletter

  • Sign Up! for emails and updates

Contact

  • Contact

Copyright © 2025 Dad Cooks Dinner