DadCooksDinner

  • Home
  • Rotisserie
  • Recipes
  • Tools
  • Books
  • Merch
menu icon
go to homepage
  • Recipes
  • Books
  • Tools
  • Merch
  • About
subscribe
search icon
Homepage link
  • Recipes
  • Books
  • Tools
  • Merch
  • About
×
Home » Recipes

Update on Instant Pot as a Slow Cooker

June 1, 2017 by Mike Vrobel 20 Comments

Instant Pot Lineup | DadCooksDinner.com

Instant Pot Lineup | DadCooksDinner.com

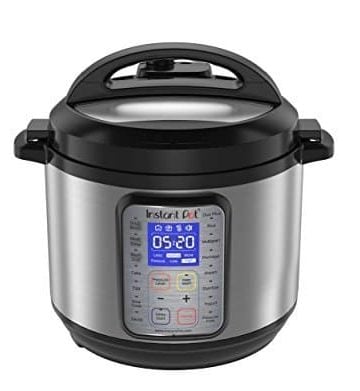
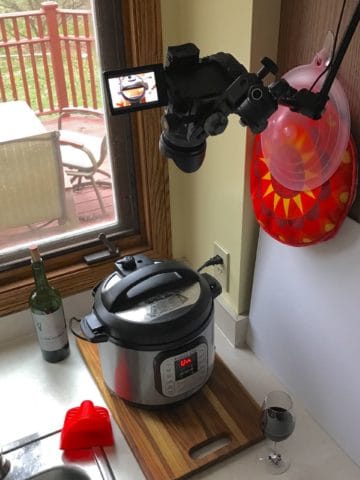
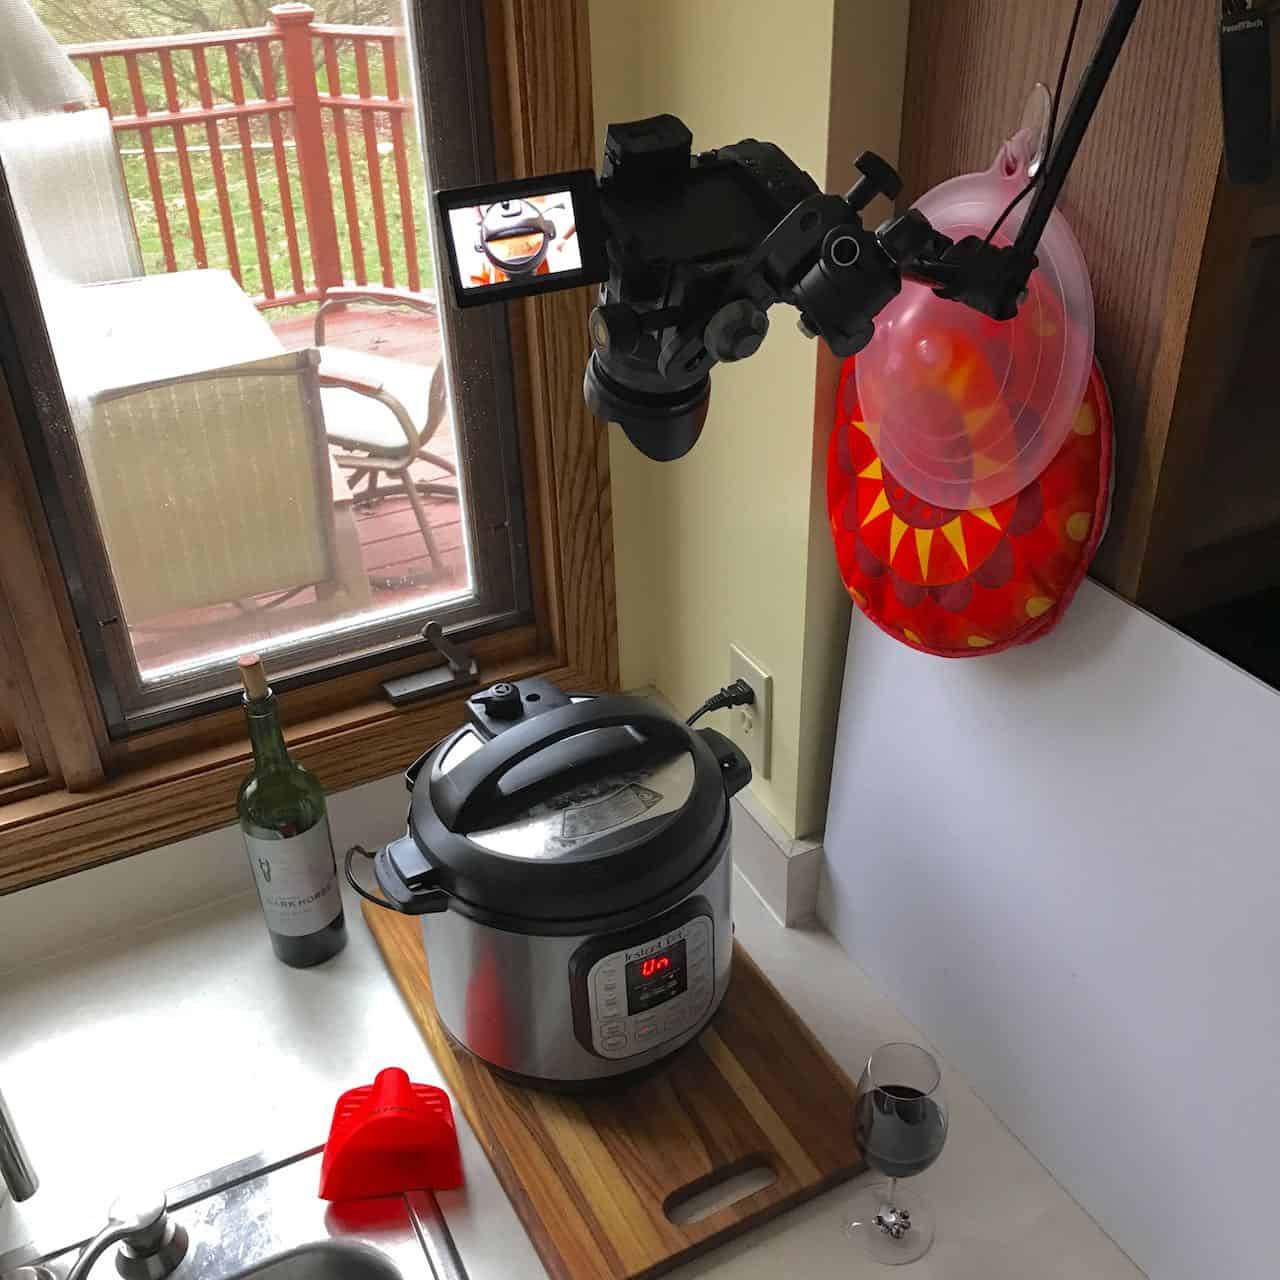
A few months back, I threw a question out to my readers: are you using your Instant Pot as a slow cooker? Is it working for you?

Instant Pot as a Slow Cooker? [DadCooksDinner.com]

When is Low too Low?

The answers I got back were...not encouraging. It's working for some of the commenters, but most people are having problems with it. The most useful tip was:

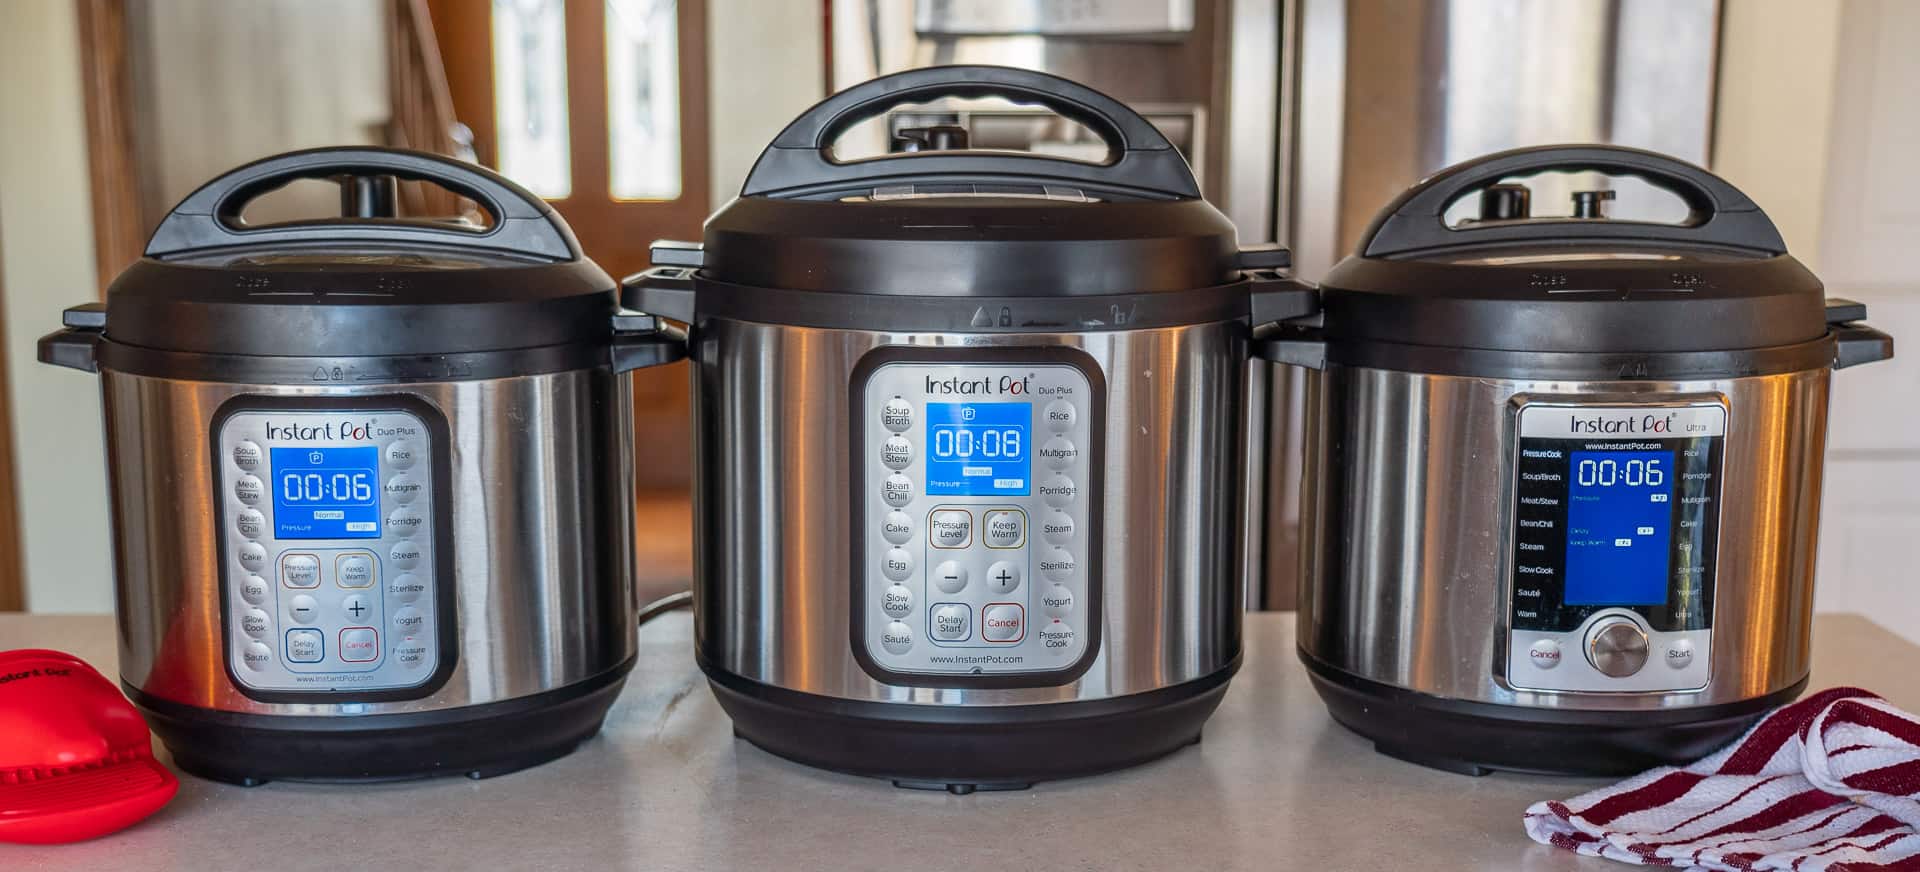
  • Instant Pot's slow cooker "Low" mode equals a regular slow cooker's "Keep Warm" mode
  • Instant Pot slow cooker "Medium" equals slow cooker "Low"
  • Instant Pot slow cooker "High" equals slow cooker "High"

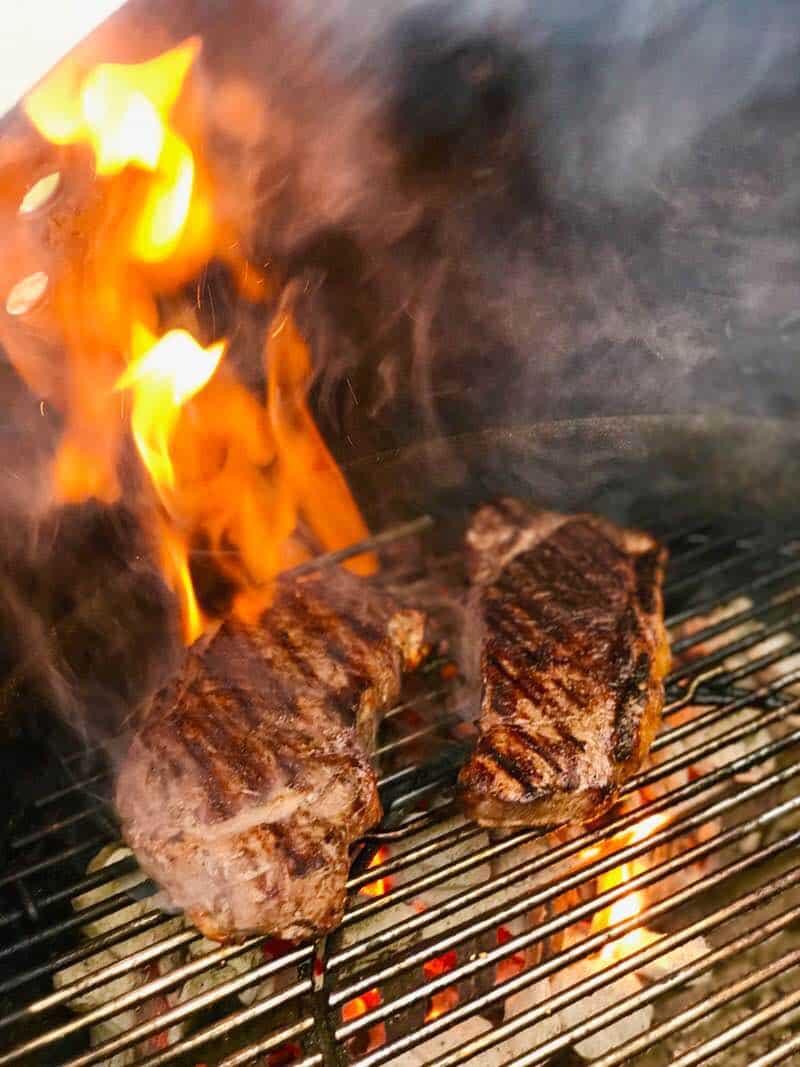
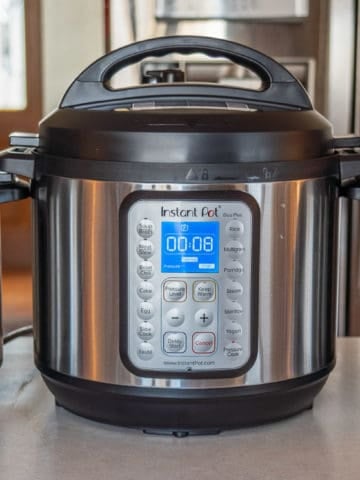
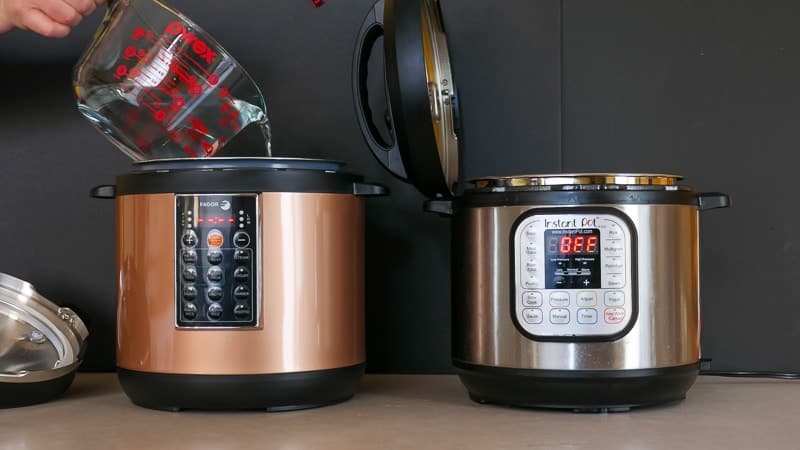
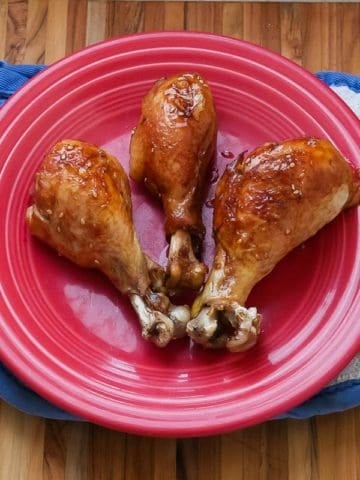
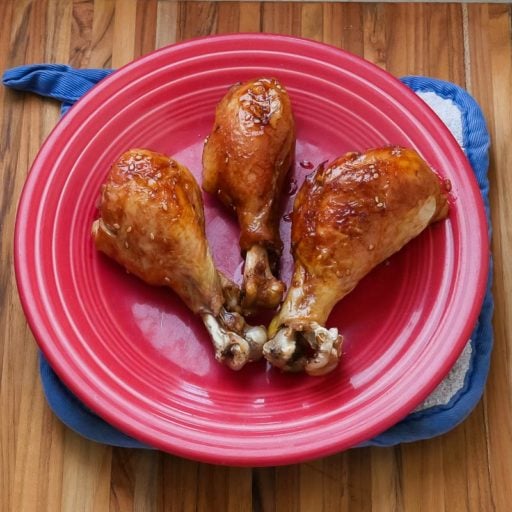
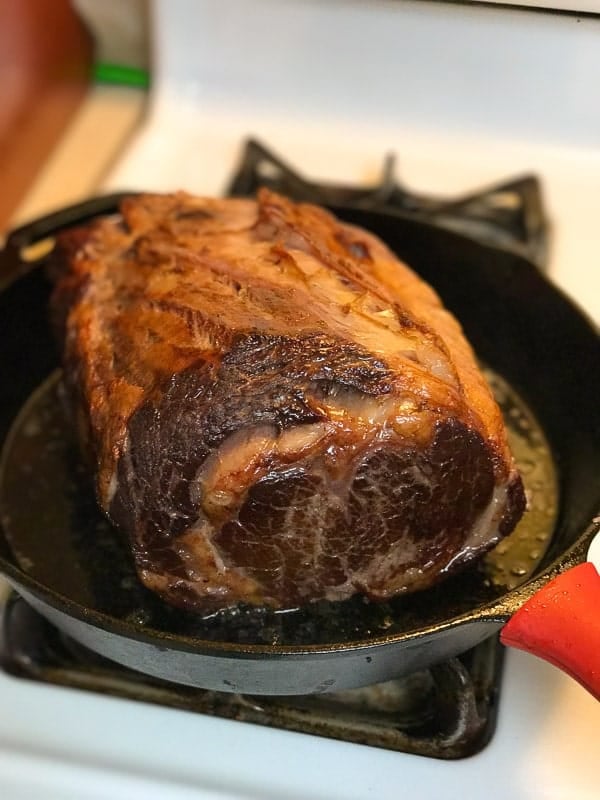
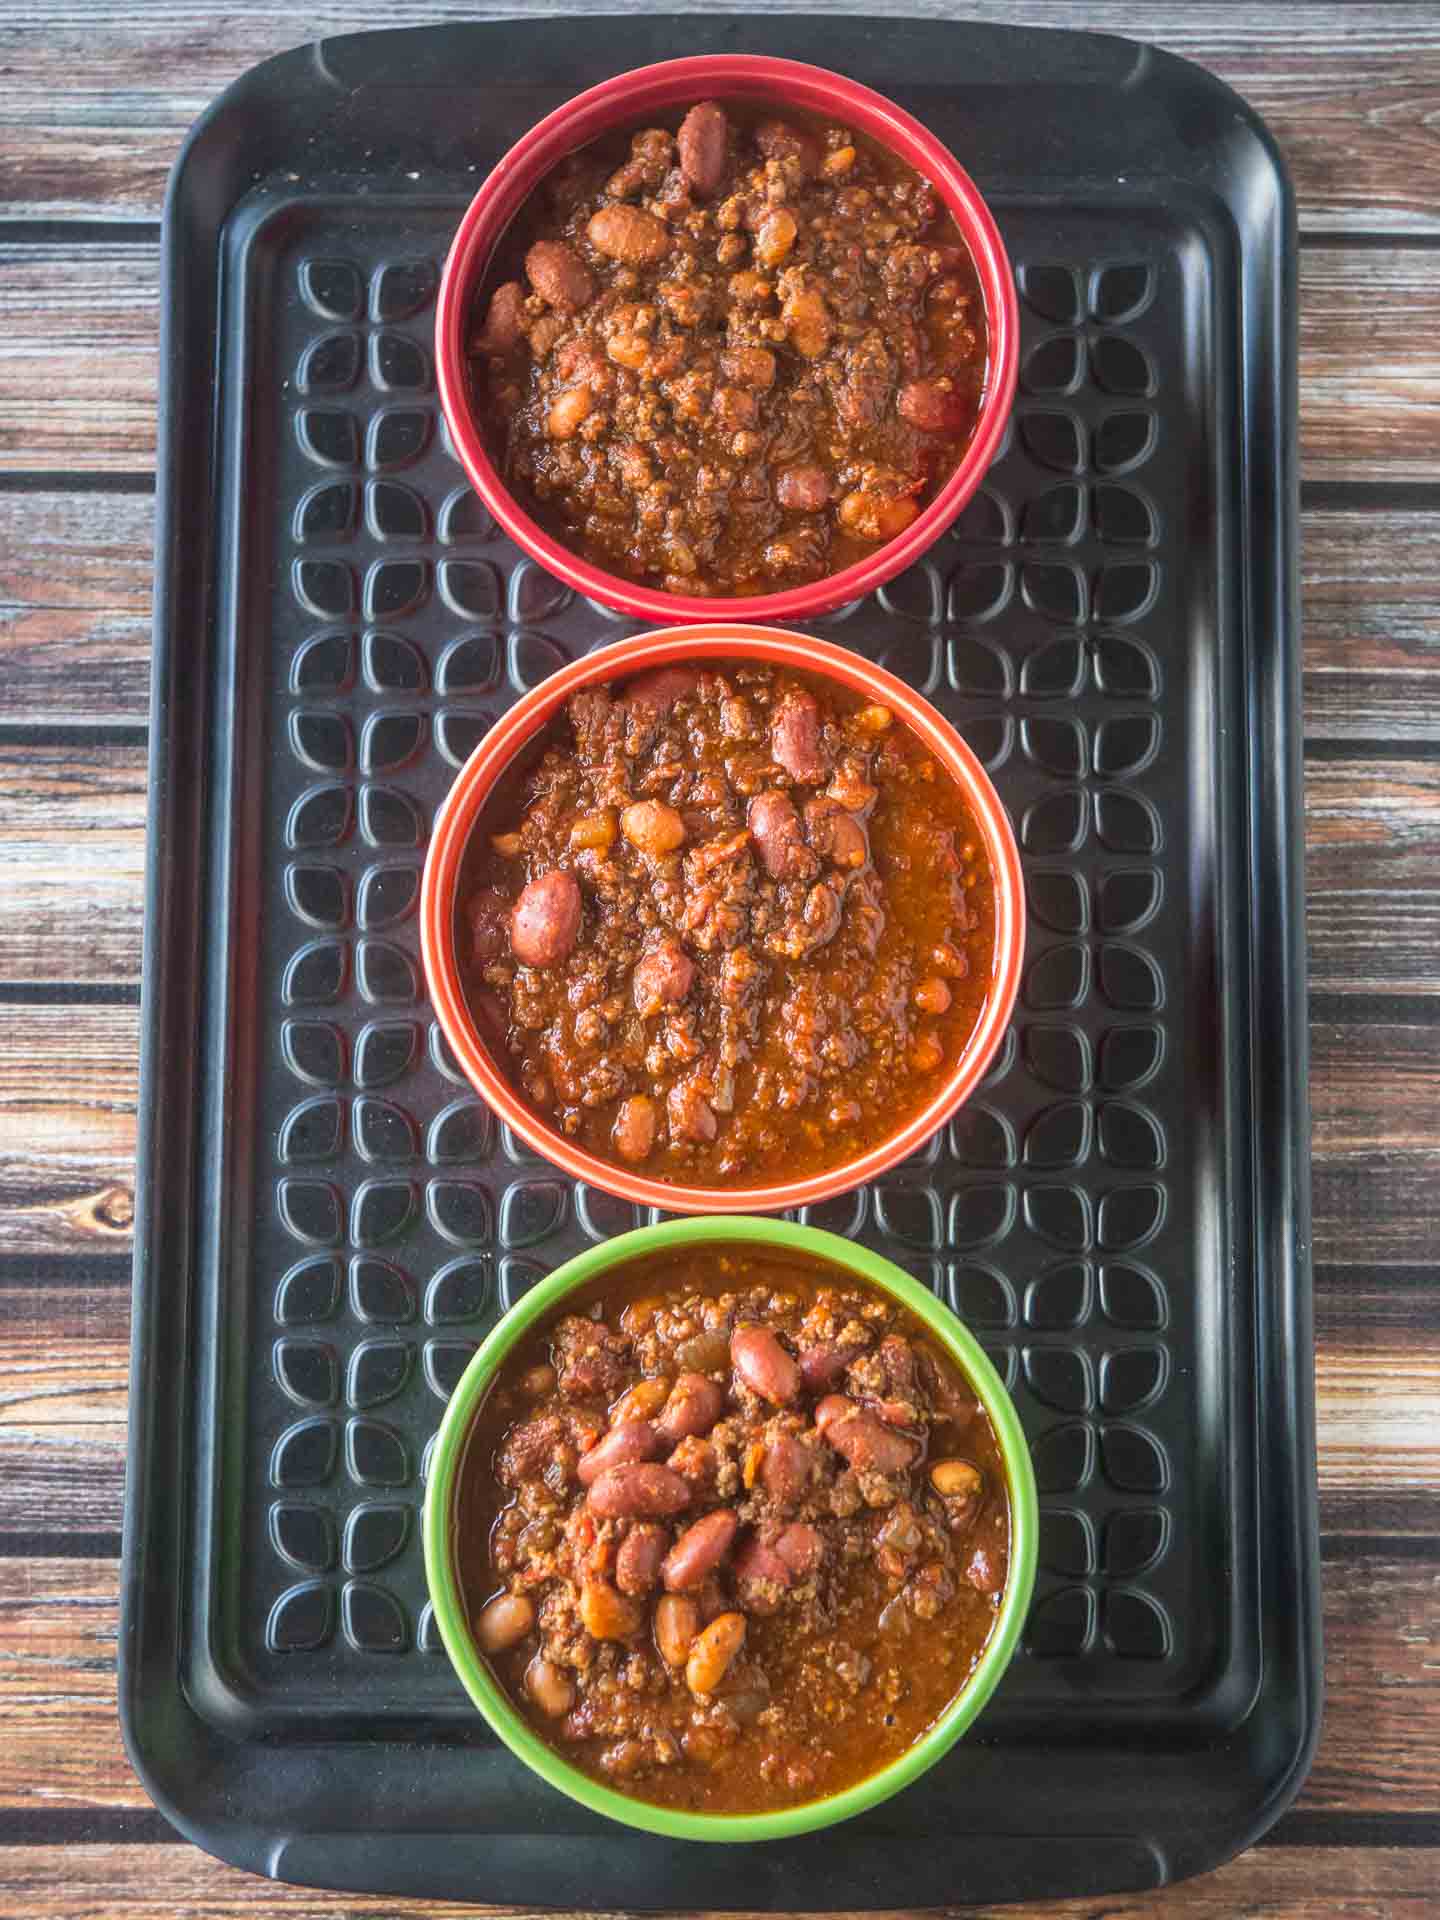
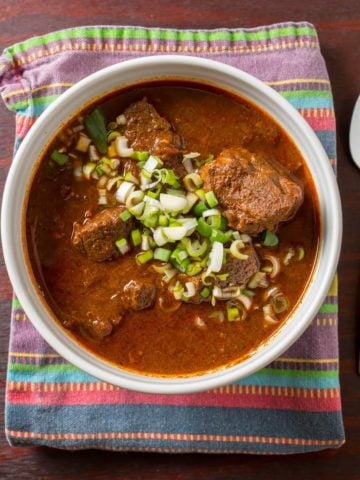
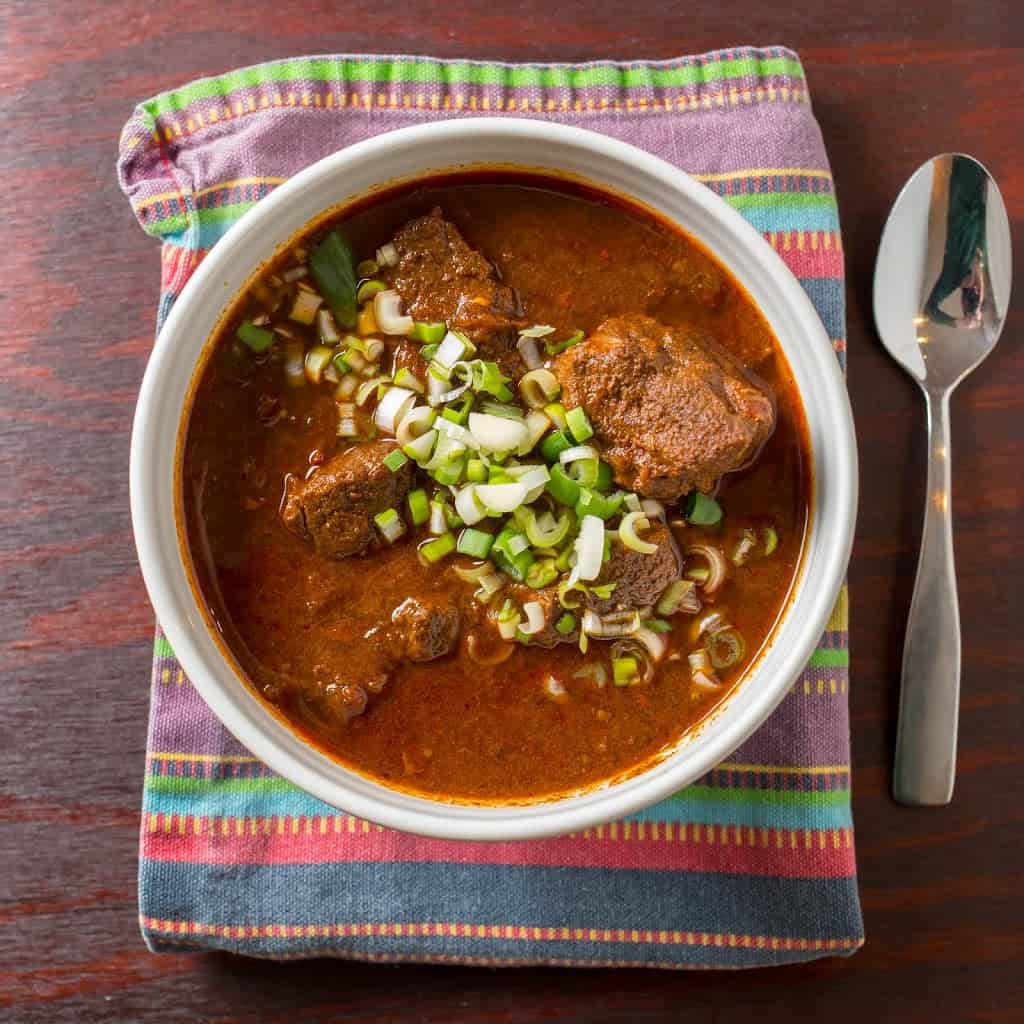
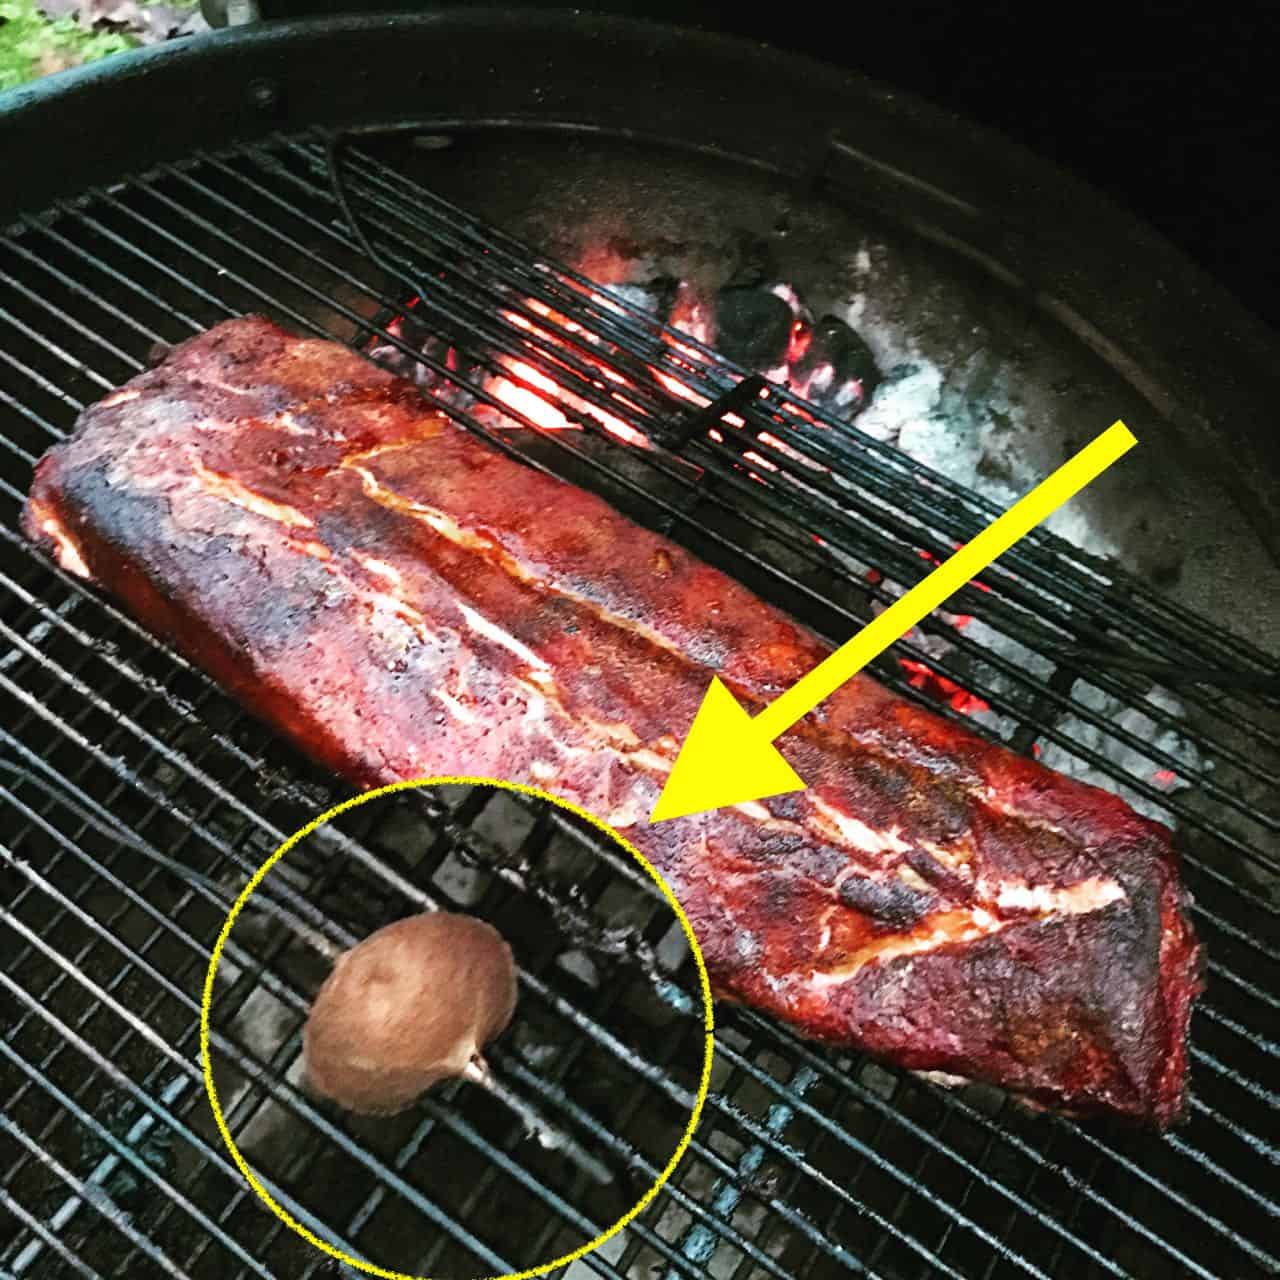
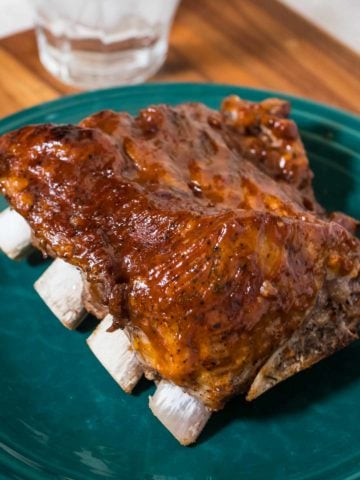
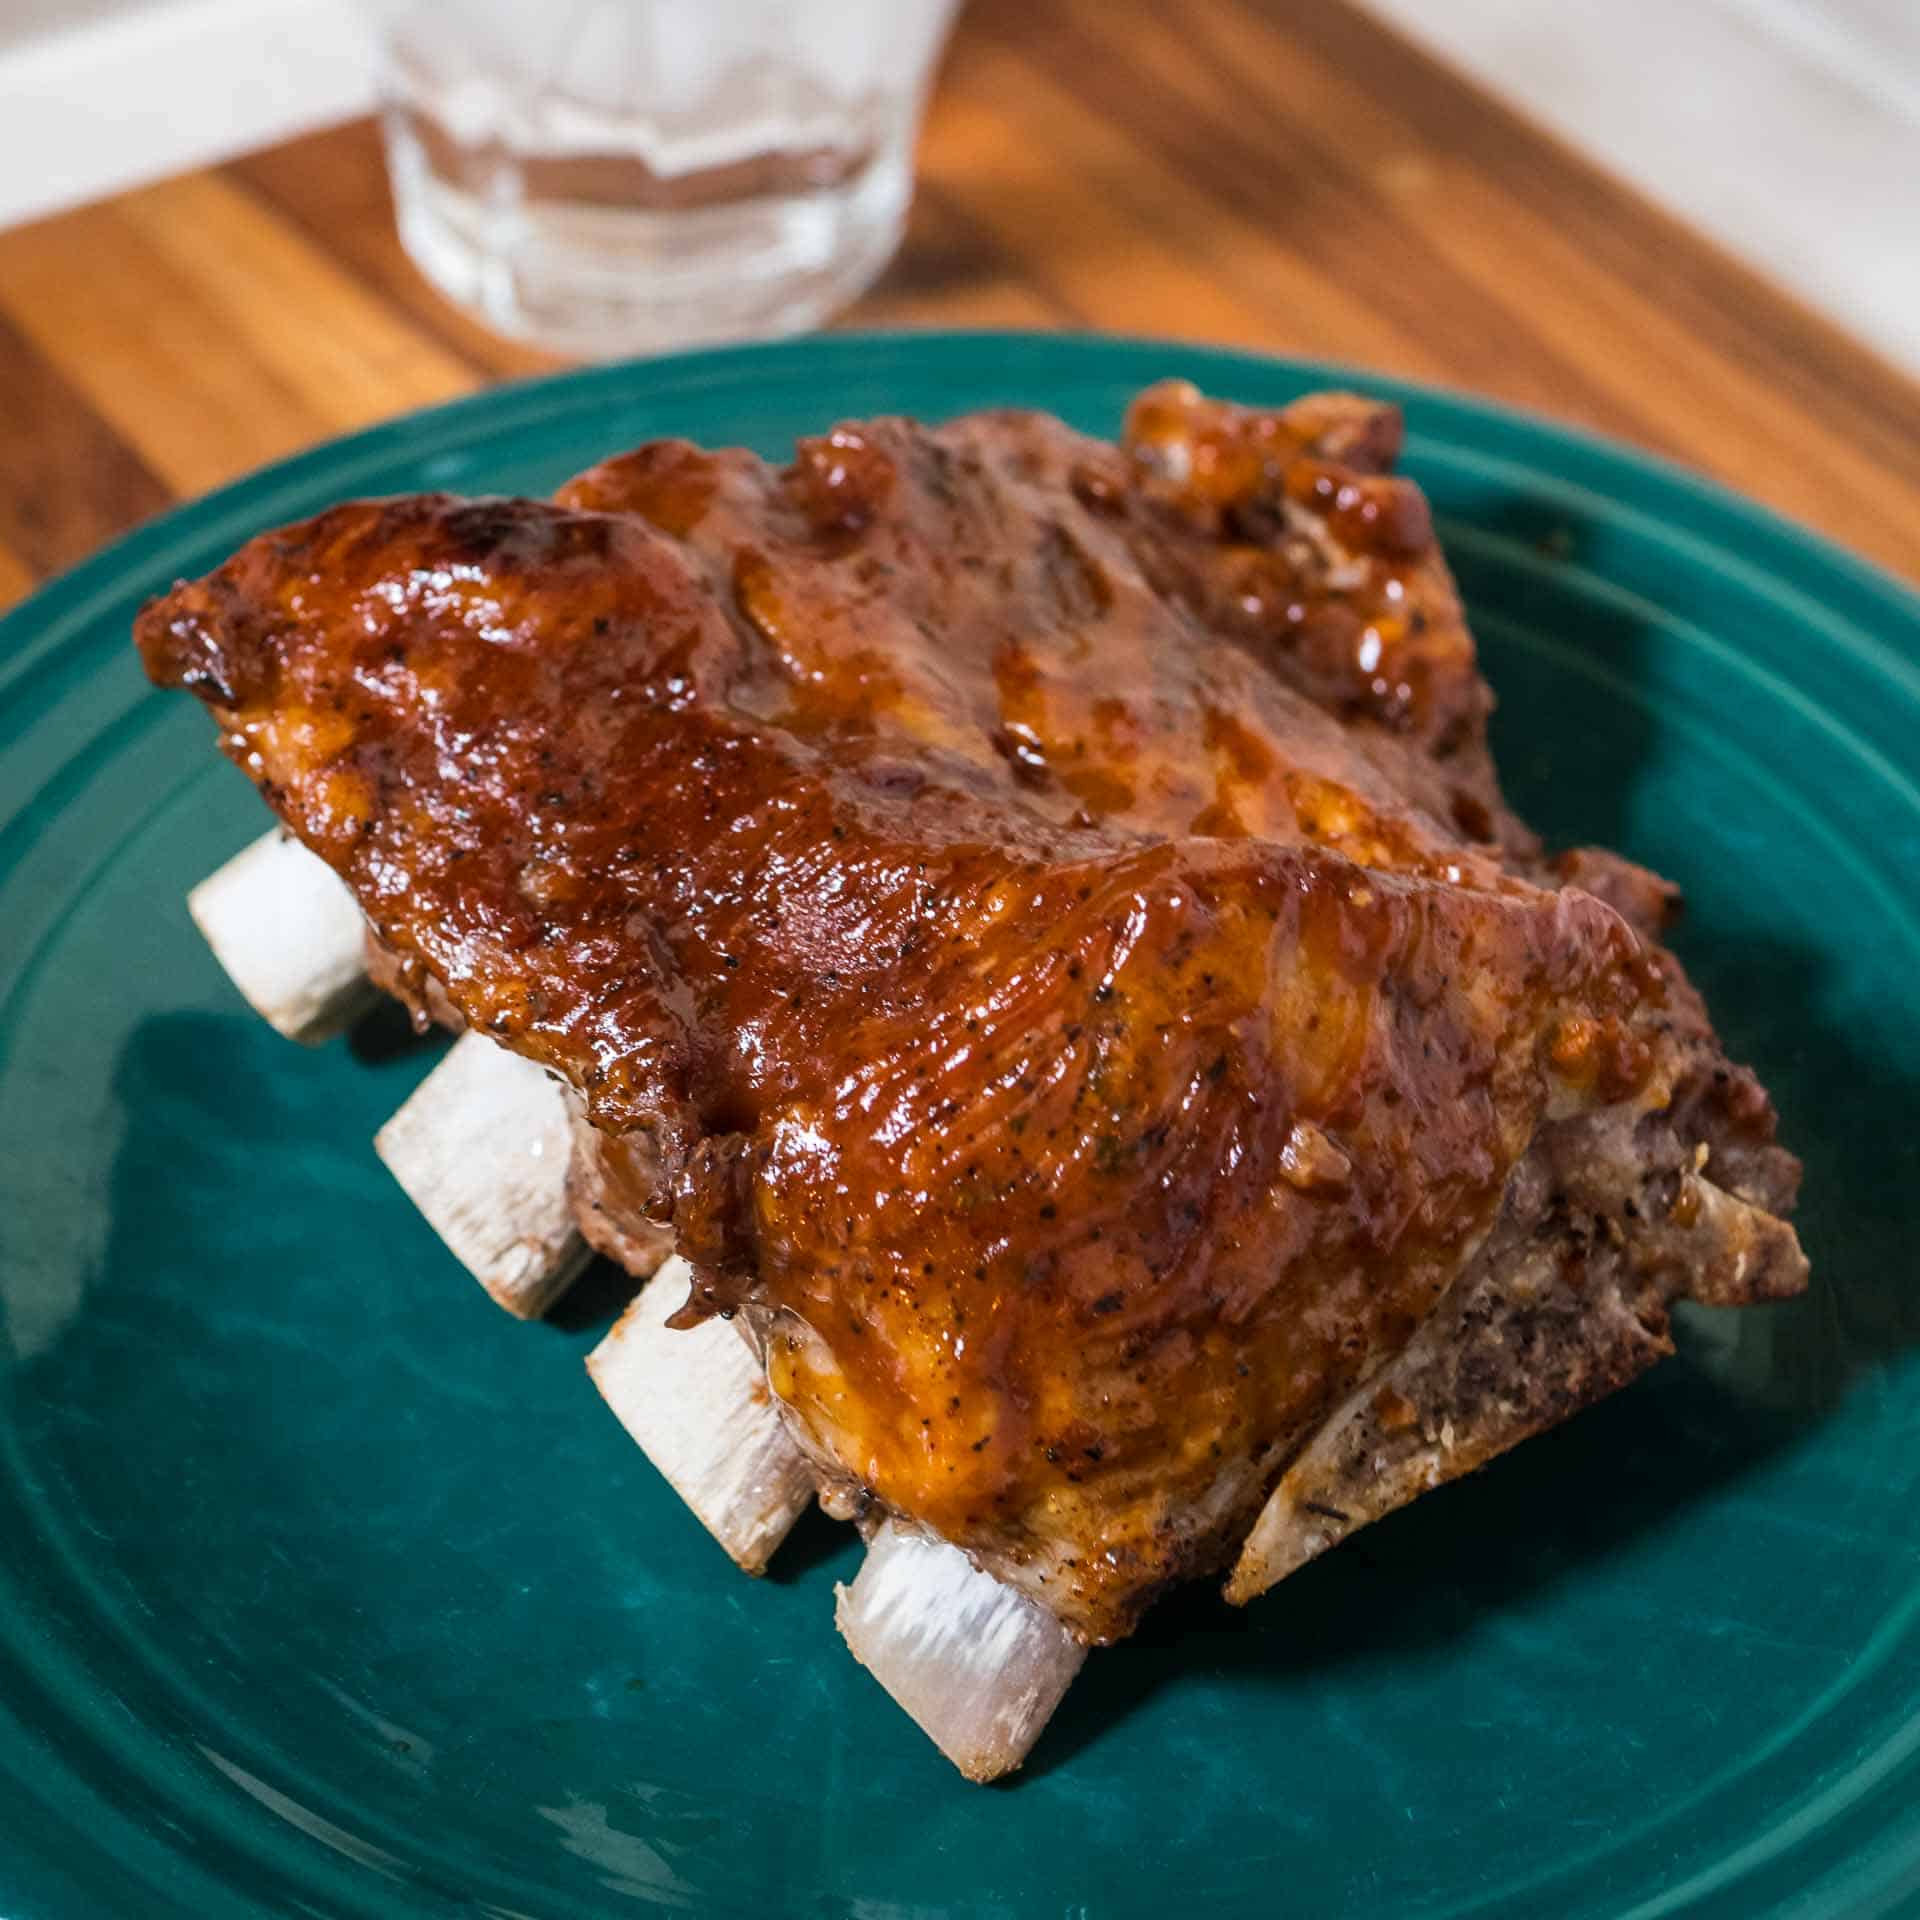
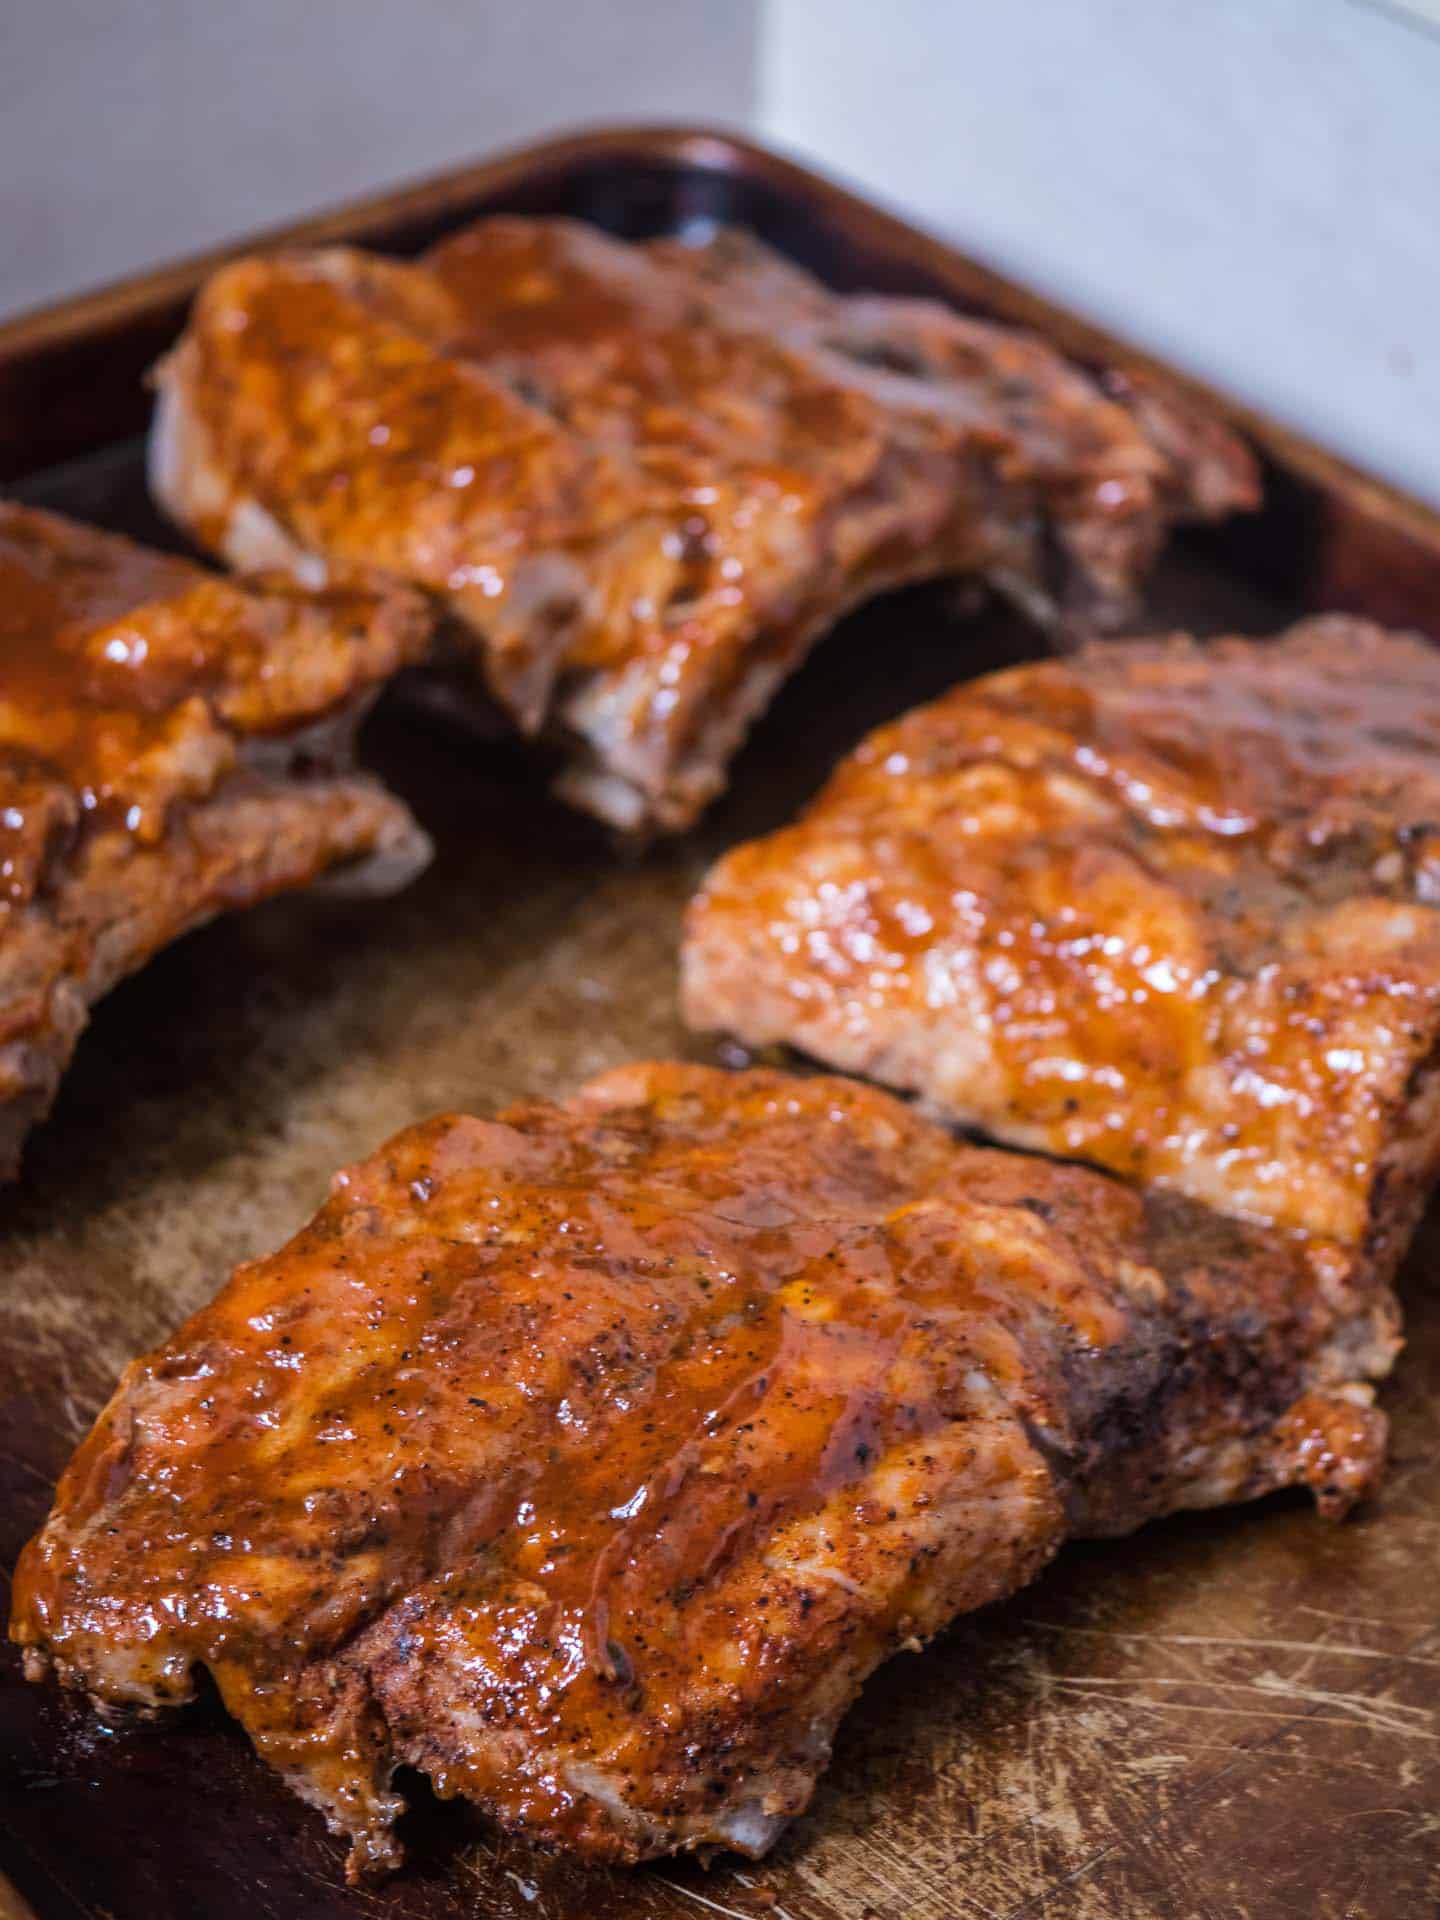
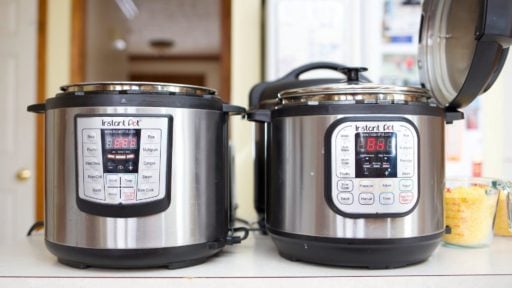
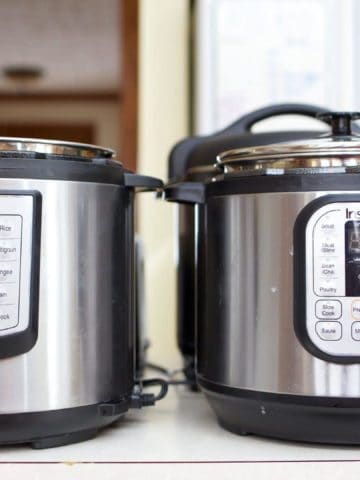
Using those settings, I tested my Instant Pot Duo 6 quart and 8 quart models with my favorite Slow Cooker Shredded Pork recipe, and the non-pressure lid. I got good results in Medium=Low and High=High modes, so it can work as a slow cooker for some recipes.

But...there were still a lot of comments (and I mean a LOT of comments) about slow cooking failures in the pot. So many that I couldn't just say "hey, it works for me" - it's obviously not working for the majority of my readers. (Or, at least the ones who left comments).

Slow Cooker Heating Theory

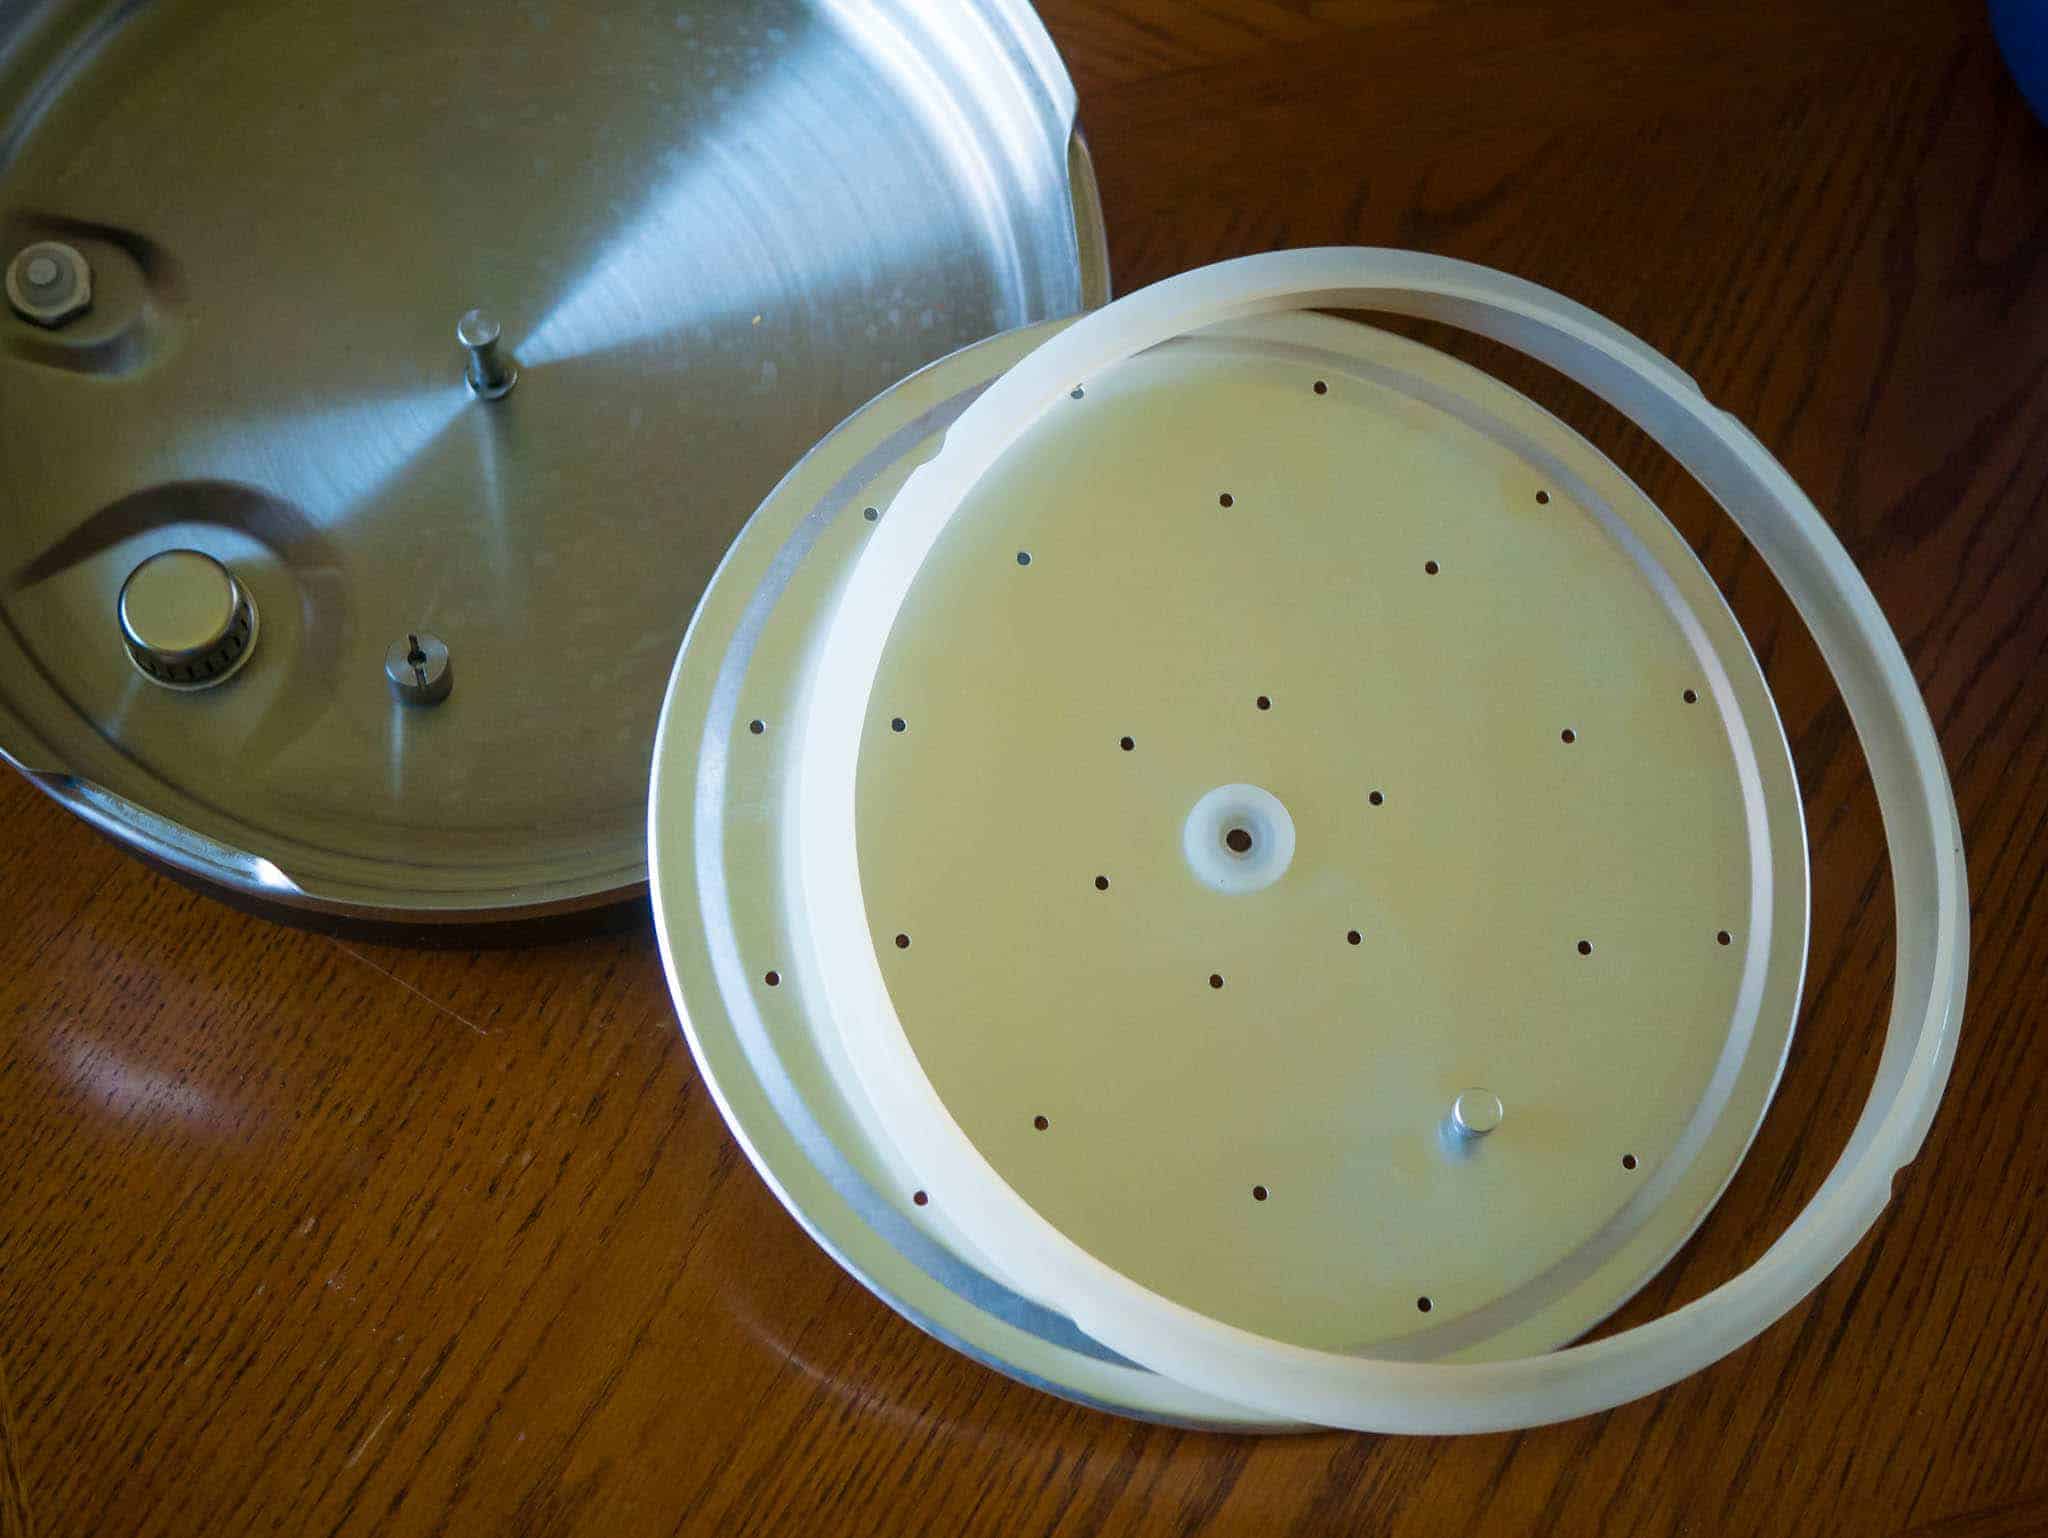
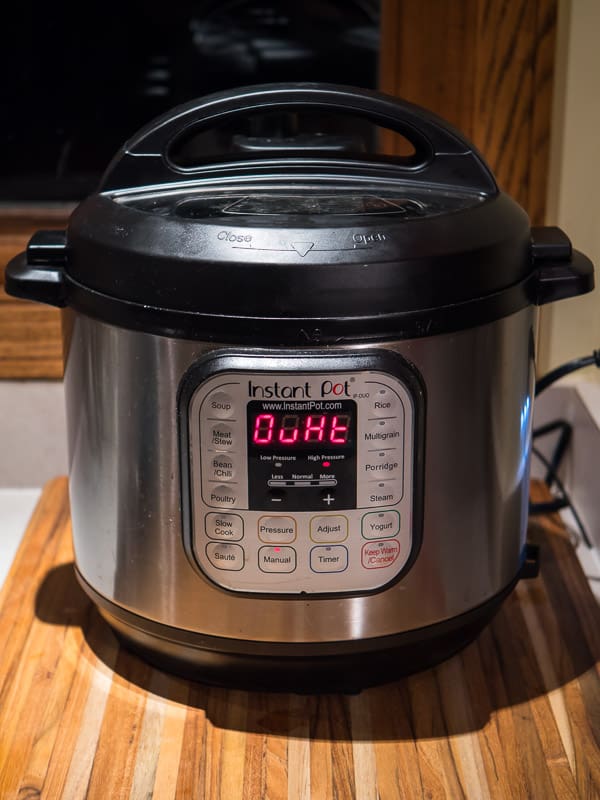
My theory about the problem: slow cookers and Instant Pots heat differently. A slow cooker's heater is on the bottom and comes up the sides, and the heavy, ceramic slow cooker crock soaks up the heat and spreads it out in all directions. In an Instant Pot (and every other electric "multi-cooker" style pressure cooker I have seen) has a heater on the bottom. And, the thin metal pot does not spread out the heat. This works fine for pressure cooking, where the heat comes from the pressurized steam trapped in the pot - but not so well for slow cooking.

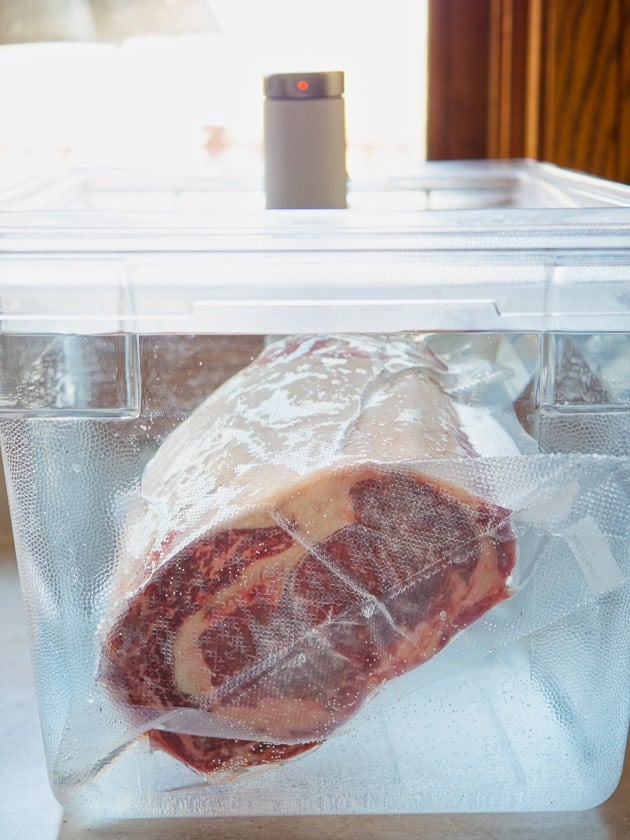
A few commenters contacted Instant Pot, and were told that you need 1.5 to 2 cups of liquid in the cooker for it to work as a slow cooker. I think this helps spread out the heat - the water heats up the entire cooking pot. But, it doesn't work for recipes that are thick, or don't use much water.

Don't throw out that crock pot (until you convert to pressure cooking)

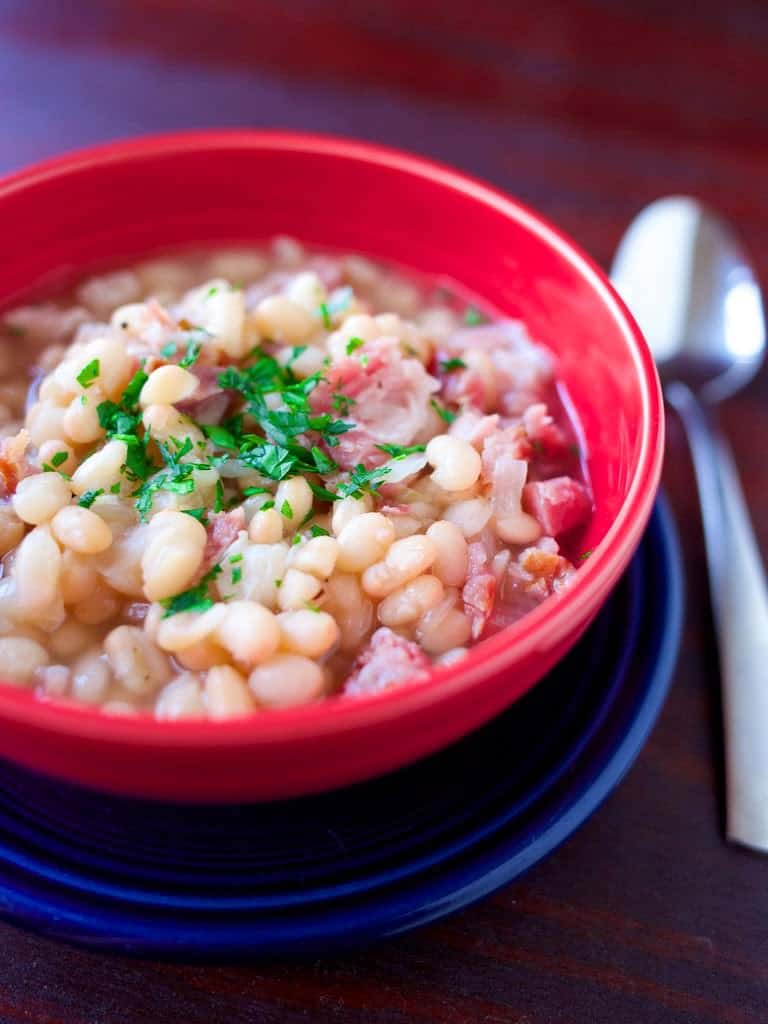
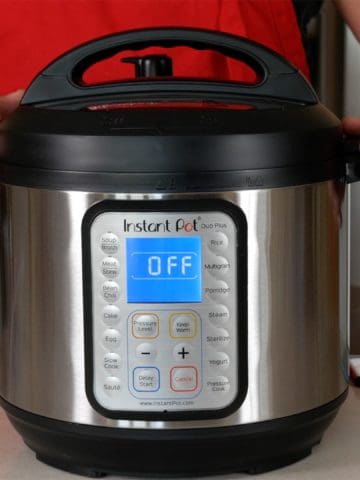
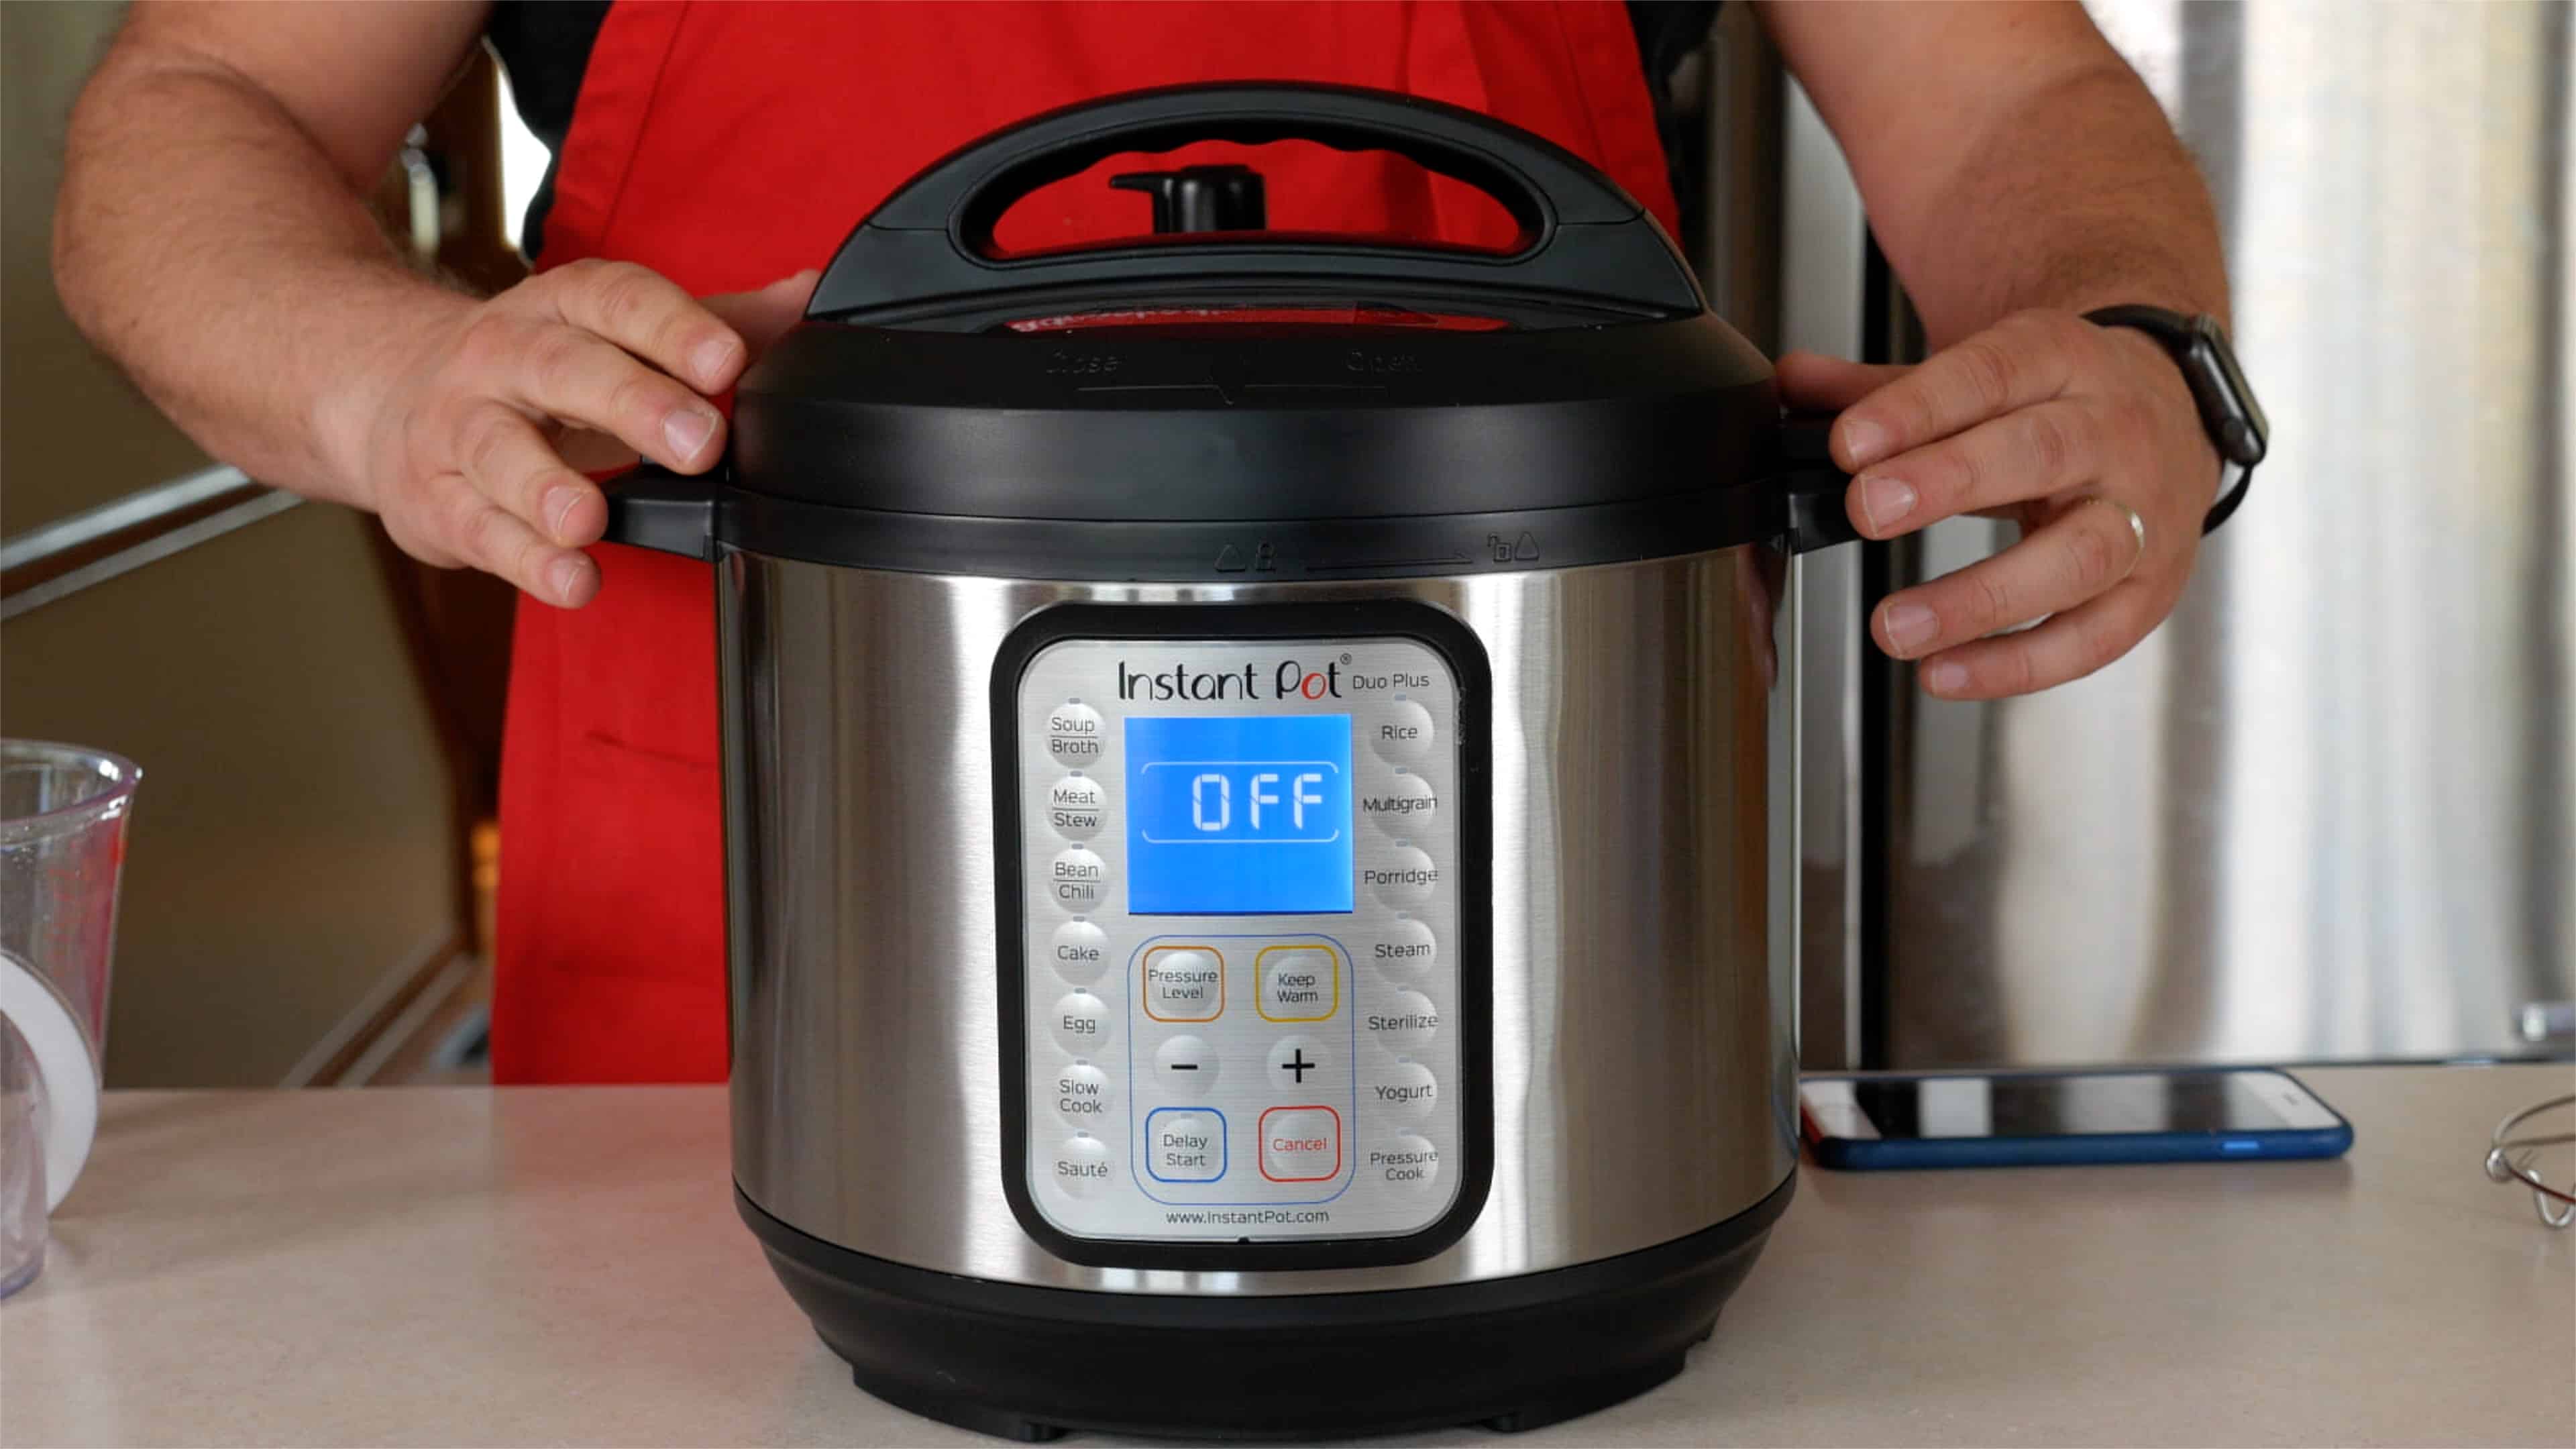
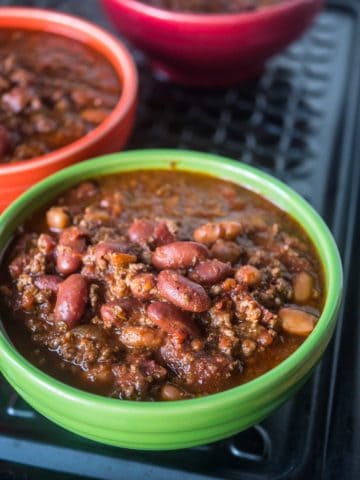
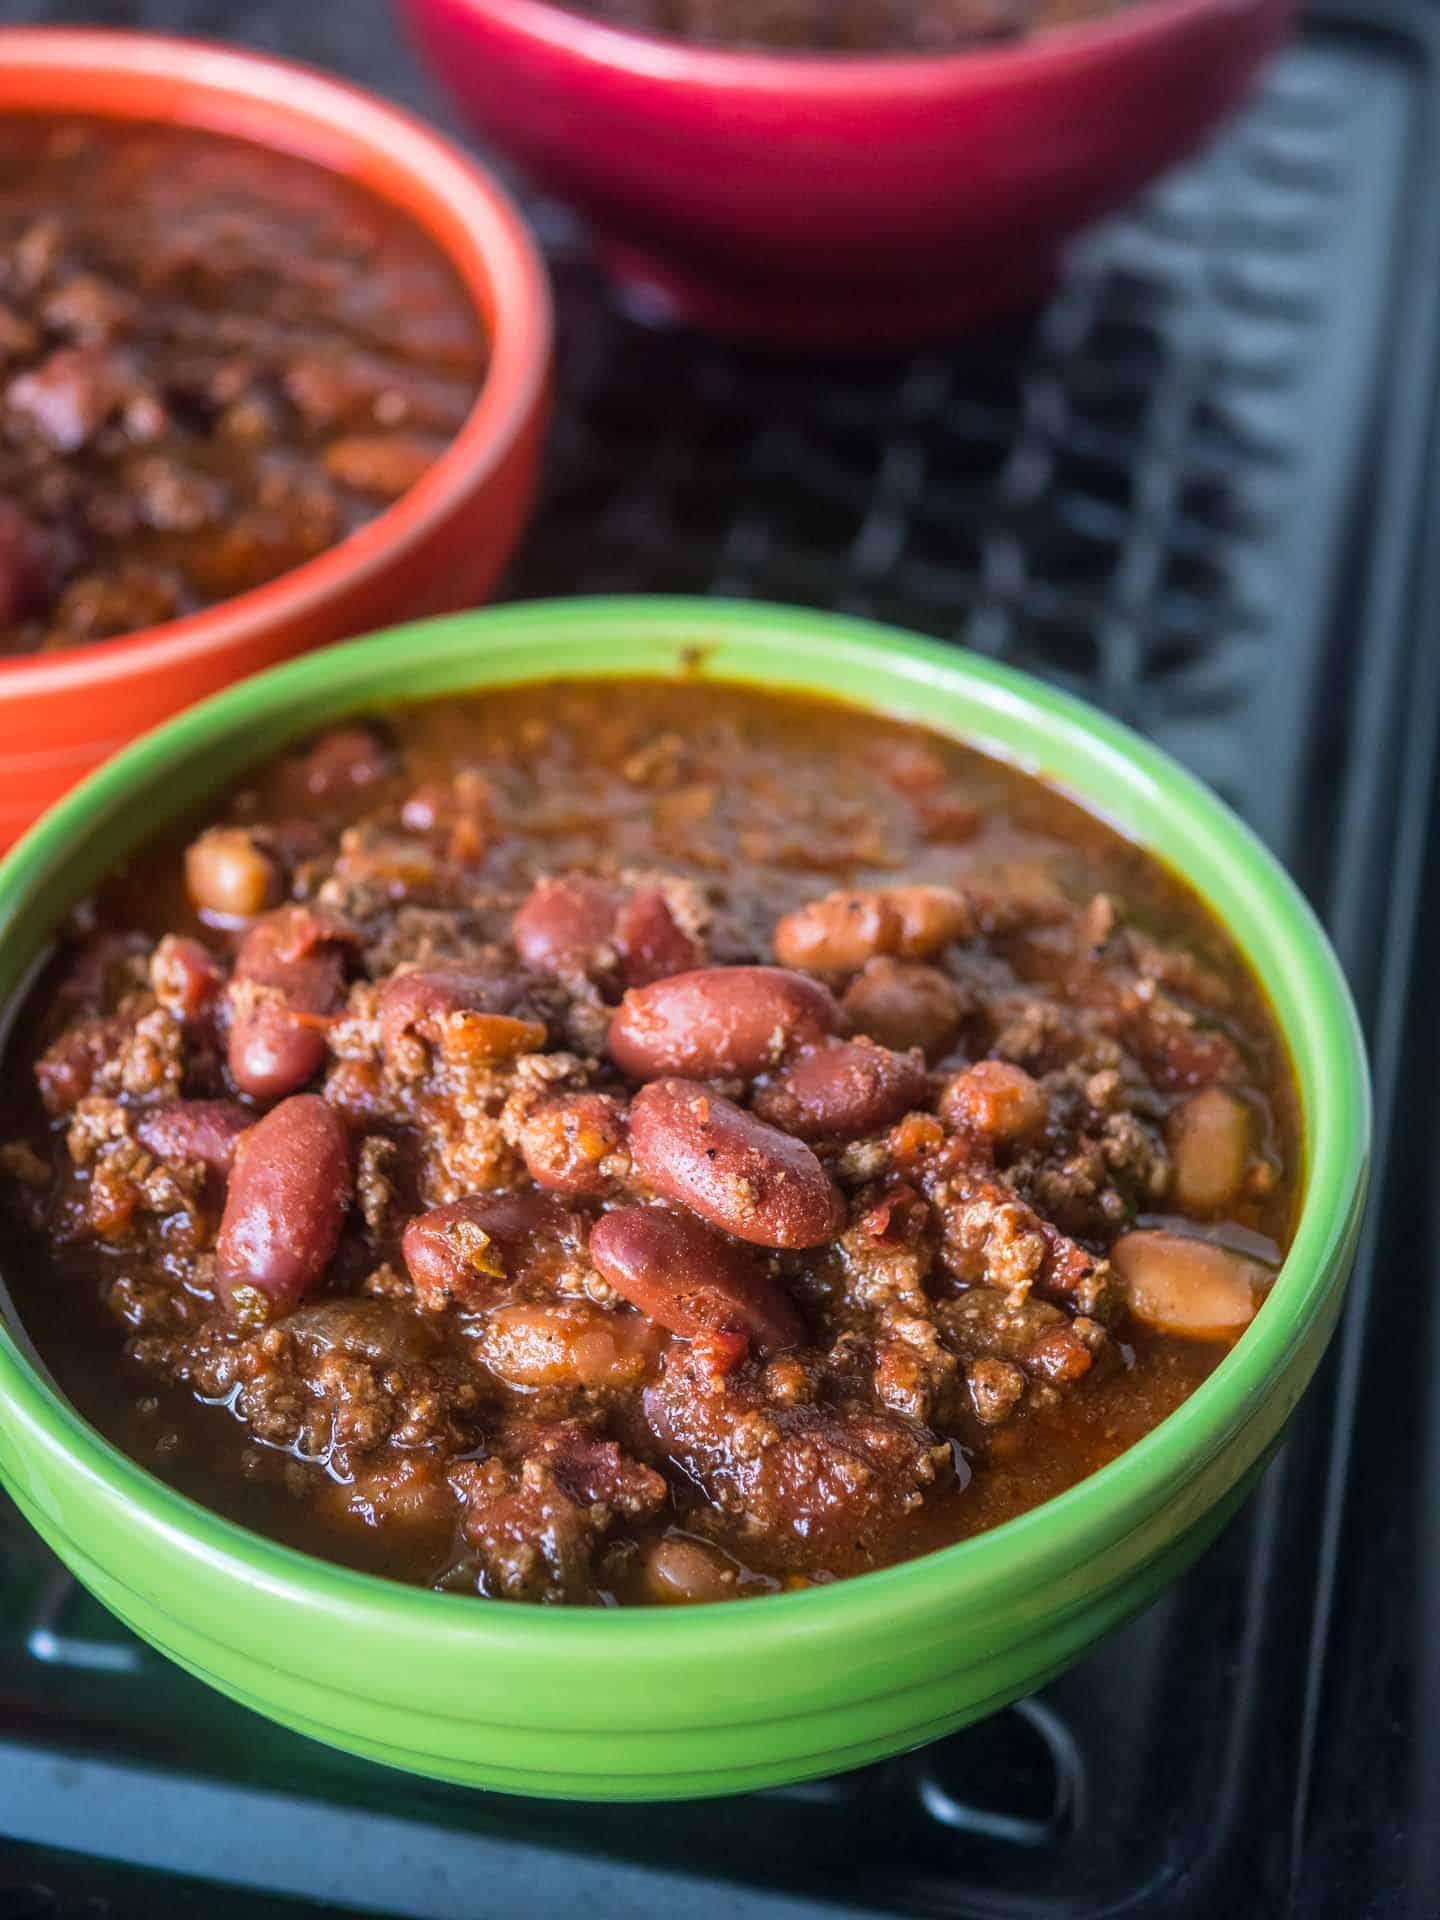
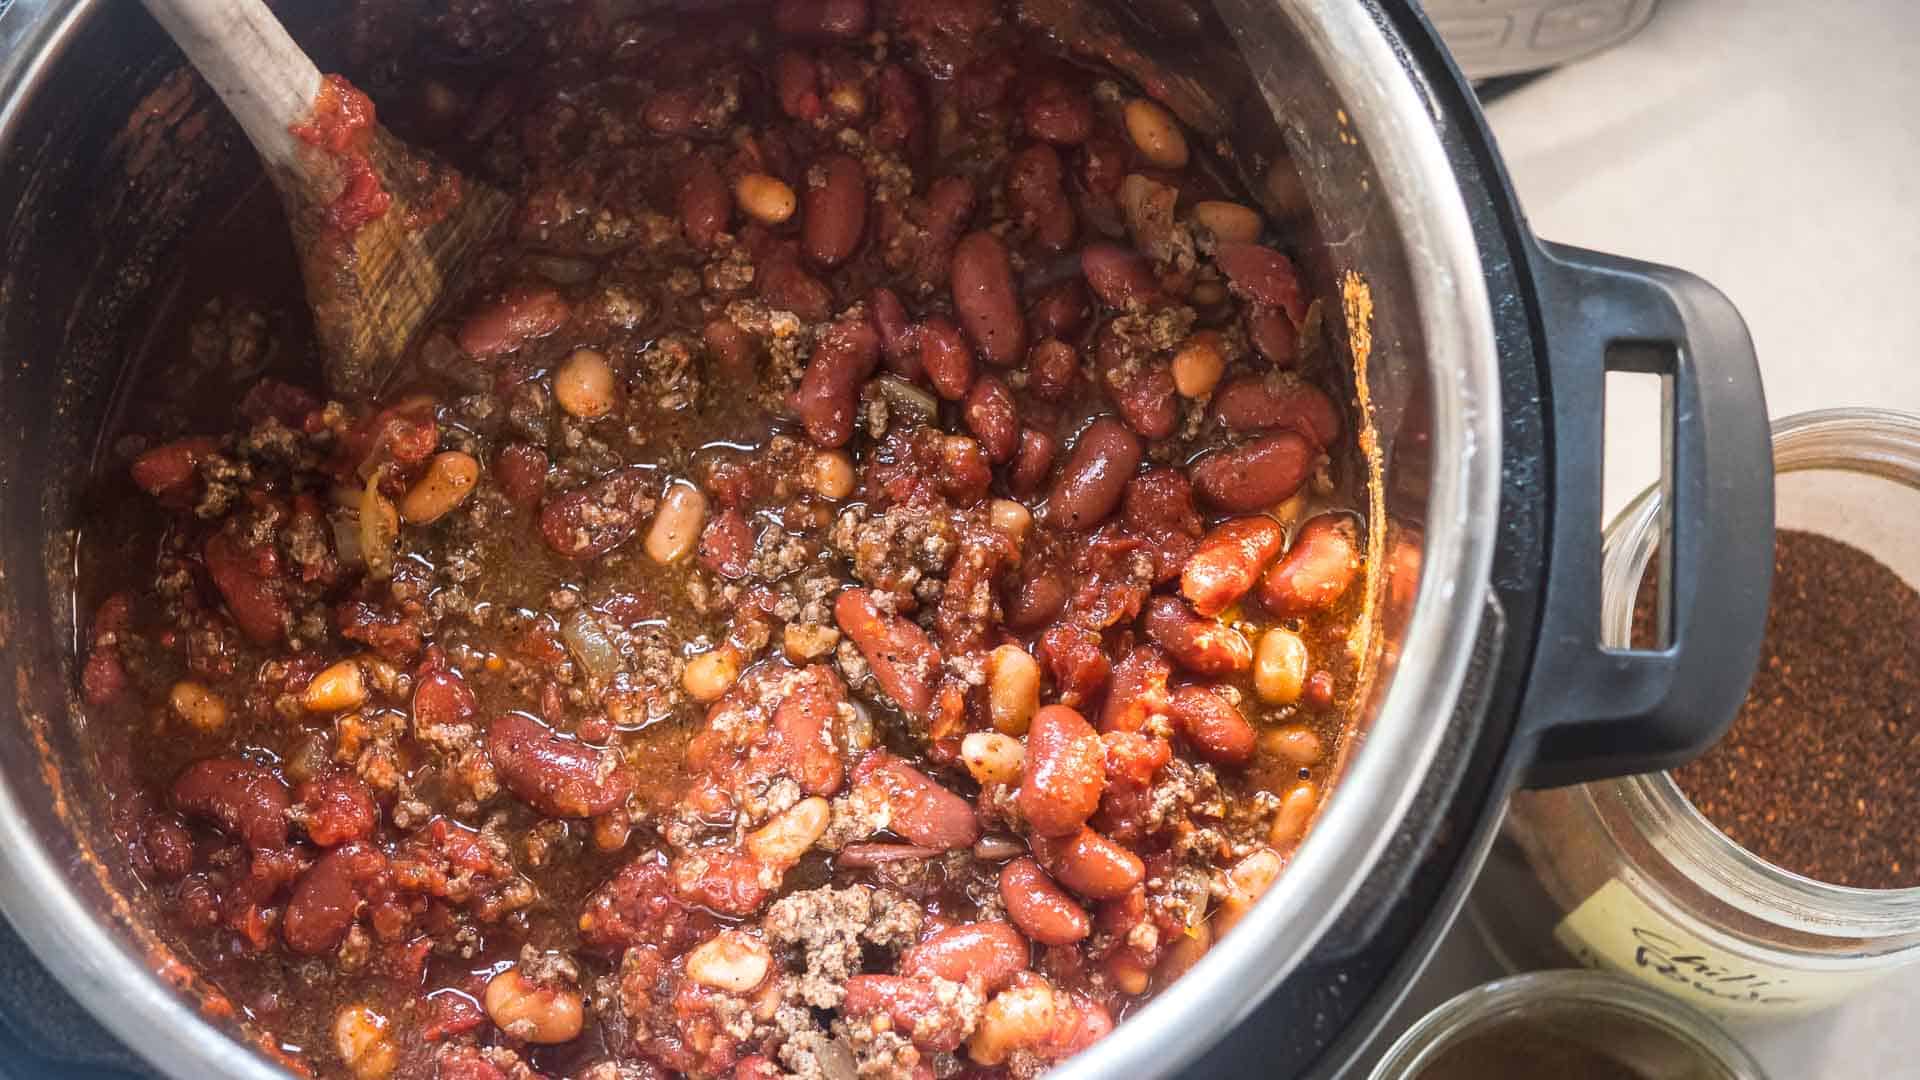
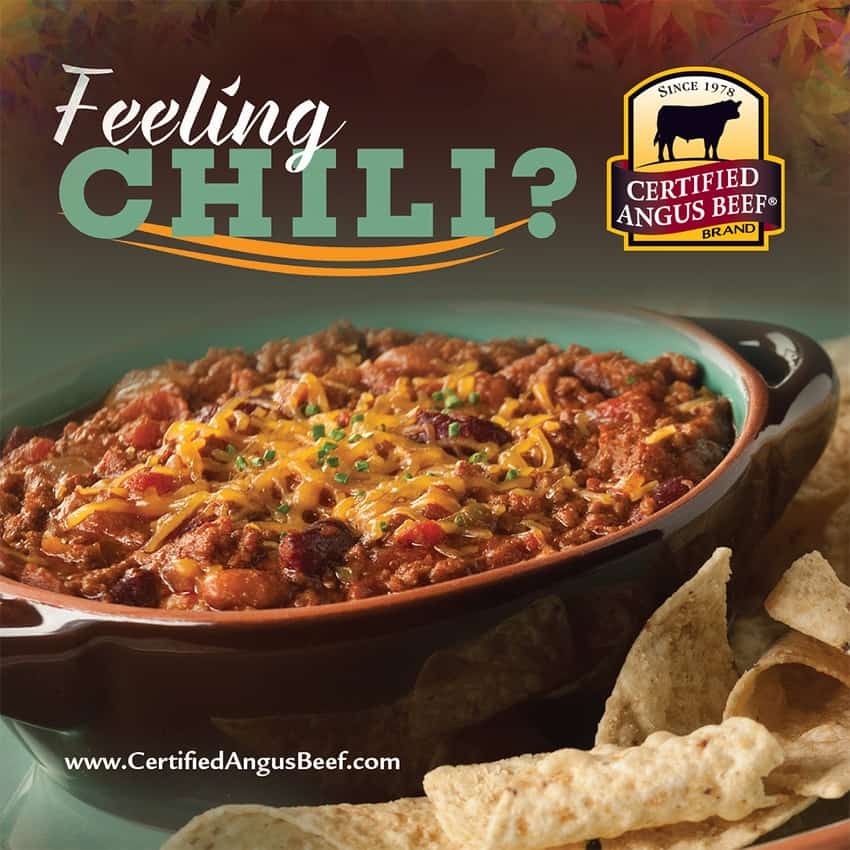
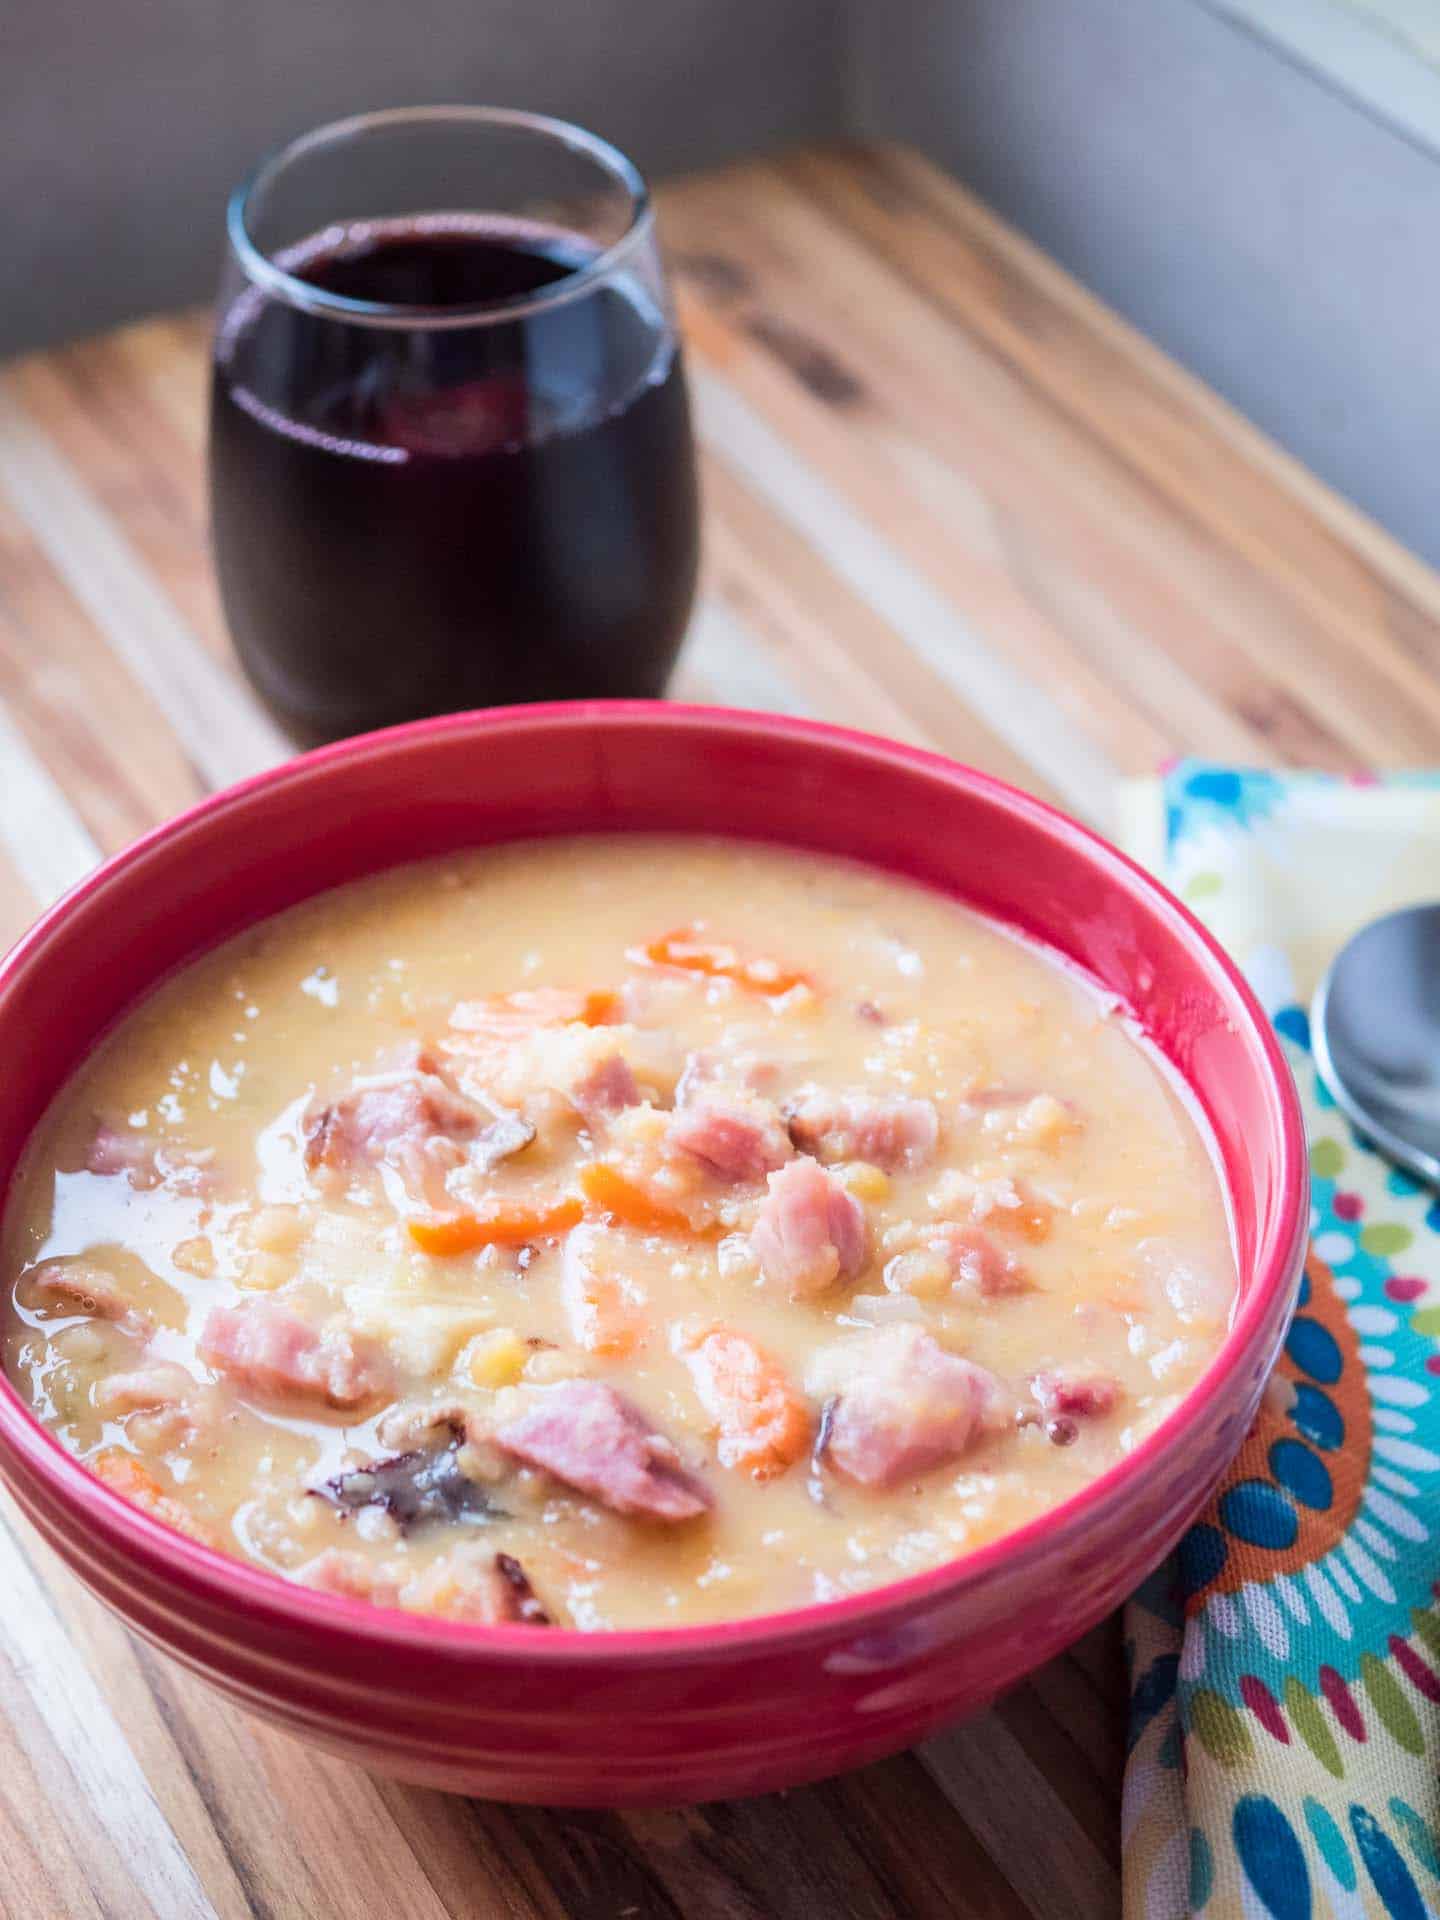
Does this mean my Instant Pot is a failure? No, of course not. I bought it as a pressure cooker, and I love it. I've owned an Instant Pot of some sort for going on six years, and since I got my Instant Pot, my slow cooker has been gathering dust. My biggest use of the slow cooker was for potlucks - using it as a warming dish, essentially. Nowadays, when I take a pot of chili to a potluck, I bring it in the Instant Pot. I reheat with Saute mode, then set it to Keep Warm until it is time to serve. I have to stir more - I don't want to scorch the chili on the bottom of the pot - but it does the job well.

Thank you for the feedback!

Special Thanks to everyone who left a comment on the original post. I wouldn't have been able to figure this out without your help!

Related Posts

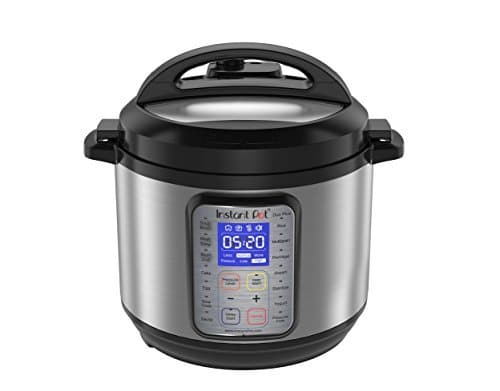
If you want to see the (quite extensive) list of complaints about Instant Pot slow cooking, check out the original post:

Instant Pot as a Slow Cooker? [DadCooksDinner.com]


Enjoyed this post? Want to help out DadCooksDinner? Subscribe via eMail or RSS reader, recommend DadCooksDinner to your friends, and buy something from Amazon.com through the links on this site. Thank you!

Pressure Cooker Vaquero Beans in Broth

May 30, 2017 by Mike Vrobel 9 Comments

Pressure Cooker Vaquero Beans in Broth - Portrait framed | DadCooksDinner.com

Pressure Cooker Vaquero Beans - beans in broth as a side dish. Simple, delicious, and done in about an hour thanks to the pressure cooker.

Vaquero beans remind me of dairy cows, with their black and white spots. (They're also called Orca beans for a similar reason…but I'm from Ohio. When I see that pattern, I think cows.)

I got these beautiful beans in my Bean of the Month Club bean box from Rancho Gordo. What, why are you laughing? Doesn't everyone belong to a Bean of the Month Club?

Pressure Cooker Vaquero Beans in Broth - Portrait framed | DadCooksDinner.com
Pressure Cooker Vaquero Beans in Broth
[feast_advanced_jump_to]

Don't have Vaquero beans? Anasazi or Pinto beans work just as well in this recipe. And, if you are a long-time reader and this technique seems familiar…that's because it is my Pressure Cooker Beans Basic Technique, and very similar to my Pinto Beans recipe.

🥫Ingredients

This is a simple dried bean recipe, so the ingredients list is pretty basic

  • Dried Vaquero beans
  • Onion
  • Bay Leaf
  • Green onion for garnish
    See recipe card for quantities.

🥘 Substitutions

Can't find Vaquero beans? Pinto beans or Anasazi beans make a good substitute.

On the flip side, Vaquero beans make a good Pinto bean substitute - use them in Refried beans, bean stews, or anywhere you would use pintos.

You can replace the onion with 2 cloves of unpeeled garlic if you like garlicky beans, and skip the bay leaf if you don't have it.

The green onion garnish is optional - but I like the crunch of fresh onion on my beans.

🛠 Equipment

A 6-quart pressure cooker. Pressure cooker dried beans are one of the reasons I became a pressure cooker convert, and love my Instant Pot. Try them - you'll never go back to canned beans. (OK, maybe you will, for convenience - but see the Storage section for tips on make ahead freezer beans.)

📏Scaling

This recipe scales down easily - cut everything in half if you don't need as many beans, or have a 3-quart pressure cooker. Scaling up runs into space issues; if you have an 8-quart pressure cooker, you can double this recipe, but it's too much to fit in a 6-quart pressure cooker.

🤨 Soaking vaquero beans?

I get the "to soak, or not to soak?" question all the the time. I didn't soak the vaquero beans in this recipe. They don't need an overnight soak, and cook to tenderness with 35 minutes at high pressure.

That doesn't mean you can't soak the beans. They turn out fine, though the bean broth isn't quite as full bodied. Soaked beans cook much quicker, 15 minutes at high pressure. I use that when I'm cooking the beans with other ingredients, where the shorter cooking time keeps me from overcooking the whole dish just to get the beans tender.

💡Tips and Tricks

  • Salt your bean water! "Salt toughens beans" is a myth. Salting before cooking helps season the beans all the way through as they cook.
  • Try to buy beans from a store with lots of bean turnover. Beans dry out as they age, which makes them a little tougher to cook.
  • If your beans are still tough when the cooking time is over, especially any "floaters" at the top of the pot, you probably got some old beans. Give the pot a stir, lock the lid, and pressure cook the beans for another five minutes.
  • Simmer to thicken: If you have the time, and want thicker bean liquid, simmer the beans for 20 minutes after pressure cooking. I set my Instant Pot to Sauté mode adjusted to low, set the timer to 20 minutes, and leave the lid off to let the broth evaporate.

☃️ Storage

This recipe freezes well, in 2-cup containers, for up to 6 months. The bread crumb crust will get soggy, but still taste good.

📷 Step by Step picture

Pressure Cooker Vaquero Beans in Broth - Step by Step Tower | DadCooksDinner.com
Pressure Cooker Vaquero Beans in Broth - Tower Image

🤝 Related Posts

Pressure Cooker Refried Pinto Beans
Pressure Cooker Santa Maria Pinquito Beans
Pressure Cooker Bean Mix Soup
My other Pressure Cooker Recipes
My other Pressure Cooker Time Lapse Videos

Enjoyed this post? Want to help out DadCooksDinner? Subscribe via eMail or RSS reader, recommend DadCooksDinner to your friends, and buy something from Amazon.com through the links on this site. Thank you!

Memorial Day Cookout 2017

May 25, 2017 by Mike Vrobel Leave a Comment

Gnawing on the bone - Tomahawk Ribeye | DadCooksDinner.com

Gnawing on the bone - Tomahawk Ribeye | DadCooksDinner.com
Gnawing on the bone - Tomahawk Ribeye

Thick steaks, thin pork chops, sausages, chicken on a spit, cheeseburgers? What's your plan for Memorial Day?

To give you some inspiration for Memorial Day, here are some of my most popular grilling posts. Me? Right now, I'm leaning towards the rotisserie chicken…but those massive tomahawk steaks are also looking good...

Grilled Tomahawk Steak - long bone ribeye, reverse seared. Looking for a steak to shock and awe your guests? This is the massive hunk of beef you're looking for.
Basic Technique: Grilled Sausages - I grill sausage starting with indirect heat, then finishing over direct heat to crisp it up. That cooks the meat all the way through, without flareups, and gives me a bit of a browned crust. Perfect for any type of sausage.
Grilled Thin Pork Chops, Quick Brinerated - What to do with thin pork chops? Marinade them in a salty, flavorful brinerade, then grill them on one side to maximize the crispness without overcooking.
Rotisserie Chicken with Knob Creek Maple glaze and Drip Pan Potatoes - My desert island meal? Rotisserie chicken with drip pan potatoes. Here it is with a sweet bourbon and maple glaze.
Grilled Cheeseburgers (Grilling Basics). Simple - but not plain. Sometimes, you just need a good grilled cheeseburger. Here is mine.
Grilled Teriyaki Asparagus. While you've got the grill heated up, why not cook a vegetable side? Asparagus is in season, and it's one of my favorite grilled veggies.

What do you think?

What are you cooking for Memorial Day? Talk about it in the comments section below.

Related Posts

Honorable mentions:
BBQ Pulled Pork on a Kettle Grill (Grilling Basics)
Grilled Salmon with Mustard Barbecue Sauce
Cedar Plank Grilled Ribeye with Peppers and Onions
Enjoyed this post? Want to help out DadCooksDinner? Subscribe via eMail or RSS reader, recommend DadCooksDinner to your friends, and buy something from Amazon.com through the links on this site. Thank you!


Pressure Cooker Korean BBQ Pork Lettuce Wraps

May 23, 2017 by Mike Vrobel 8 Comments

Pressure Cooker Korean BBQ Pork Lettuce Wraps - Portrait | DadCooksDInner.com
Lettuce wraps with shredded Korean pork, kimchi, and white rice on a red plate, with a plate of lettuce leaves in the background.
Pressure Cooker Korean BBQ Pork Lettuce Wraps

Pressure Cooker Korean BBQ Pork Lettuce Wraps - Pressure cooker pork, Korean style with gochujang sauce, wrapped in lettuce leaves.

When I first wrote about Gochujang, I had to shop at Asian specialty markets to get it. Now my family is addicted - and it looks like we're not the only ones. It went from a specialty ingredient to the international aisle of my grocery store, right next to the bottles of teriyaki sauce.

The big difference between specialty market gochujang and grocery store gochujang is the packaging - and the thickness of the paste. When I buy it at an Asian market, it comes in a rectangular tub with a texture like peanut butter. If I want to use it as a sauce, I have to thin it out, usually with soy sauce and water. When I buy it at my grocery store, it comes in a squeeze bottle, thin enough to squirt on a food - similar to ketchup. I've used both, and in recipes, they work about the same - I haven't noticed a difference. But that squeeze bottle? That's why my family is addicted. Every time we have an Asian meal - doesn't have to be Korean - they want to squirt gochujang on the rice. It's taken the place of sriracha as our favorite Asian hot sauce.

Lettuce wraps with shredded Korean pork, kimchi, and white rice on a red plate, with a plate of lettuce leaves and a bottle of gochujang in the background.
Lettuce wraps, ready to eat

As for this recipe - Pressure cooker Korean BBQ recipe is definitely a cheat. Authentic Korean BBQ is thin-sliced cuts of meat, marinated in soy sauce and gochujang, grilled over charcoal, and wrapped in lettuce. (Like in my Kalbi Recipe.) I'm taking inspiration from that meal, using the flavor profile, and converting it to the pressure cooker.

(I'm also assuming there are Korean BBQ purists, like there are Texas BBQ purists, and Carolina BBQ purists, and Memphis BBQ purists, and…well, you get the idea. I always have to fight off a swarm of "that's nice…for a Yankee from Ohio" comments whenever I do a BBQ recipe; I'm assuming Korea is as passionate about their BBQ as everyone else, so I'll start apologizing advance. Sorry about this, BBQ purists, no matter where you're from.)

The only trick to this recipe, other than shopping for the Korean ingredients of Gochujang (spicy red pepper paste) and Kimchi (spicy pickled cabbage - detecting a spicy theme?), is the cut of pork. I buy "Pork Western Ribs" at my grocery store…which aren't really ribs. They're a pork shoulder roast, cut into 1.5 inch thick strips, roughly rib shaped. They are perfect for the pressure cooker - instead of having to cook an entire roast, the strips of pork cook through much quicker. If you can't find Western ribs, cut up a pork shoulder yourself. (It's what I do when the shoulder is on sale, but the Western ribs are not).

Video: How To Pressure Cook Korean BBQ Pork for Lettuce Wraps (1:32)


Pressure Cooker Korean BBQ Pork Lettuce Wraps - Time Lapse [YouTube.com]

Recipe: Pressure Cooker Korean BBQ Pork Lettuce Wraps

Tower image of the different steps to make pressure cooker Korean bbq lettuce wraps.
Pressure Cooker Korean BBQ Pork Lettuce Wraps - Tower

What do you think?

Questions? Other ideas? Leave them in the comments section below.

Related Posts

Pressure Cooker Korean Short Ribs
Pressure Cooker Korean Beef Stew (Beef Doenjang Jjigae) - Dad Cooks Dinner
Pressure Cooker Chinese Pepper Steak - Dad Cooks Dinner
My other Pressure Cooker Recipes
My other Pressure Cooker Time Lapse Videos

Enjoyed this post? Want to help out DadCooksDinner? Subscribe via eMail or RSS reader, recommend DadCooksDinner to your friends, and buy something from Amazon.com through the links on this site. Thank you!

Jalapeno Cheeseburgers With Grilled Onions

May 18, 2017 by Mike Vrobel 1 Comment

Jalapeno Cheeseburgers with Grilled Onions | DadCooksDinner.com

Jalapeno Cheeseburgers with Grilled Onions | DadCooksDinner.com
Jalapeno Cheeseburgers with Grilled Onions


Thank you to my friends at Certified Angus Beef® Brand for sponsoring DadCooksDinner. Don’t forget - May is #nationalburgermonth, and Certified Angus Beef® has plenty of hamburger recipes for you at their website.
Also, check out hashtag #BestBeef for more beef recipes, and visit the Certified Angus Beef Kitchen Community on Facebook. Thank you!


Jalapeno burgers? My kids think I’m crazy…most of them.

Two of my kids are heat-averse; one is sensitive to things I don’t even notice, like black pepper, and mild chili powder. I add them for flavor, and he breaks out into a sweat after one bite.

Then there’s my youngest. He seems to have inherited my spicy food genes. He reaches for the El Yucateco hot sauce whenever he can.

This recipe is perfect for him…and not so much for the other two. (For them, I leave off the jalapenos).

Using a hamburger press to make the burger patties - Jalapeno Cheeseburgers With Grilled Onions | DadCooksDinner.com
Pressing out the patties

How do you make jalapeno burgers?

Everything on the grill! I’m grilling my burgers, blackening the jalapenos, and grilling the onions all at the same time. I also toast my buns for a few minutes - carefully. Buns want to burn on the grill. Then I build the burgers with a slice of pepper jack cheese, the cleaned jalapenos, a dollop of salsa, and a lettuce leaf. There you have it, my favorite burger from either side of the Rio Grande.

Jalapeno Cheeseburgers With Grilled Onions - Tower Image | DadCooksDinner.com
Jalapeno Cheeseburgers With Grilled Onions - Tower Image

What do you think?

Questions? Other ideas? Leave them in the comments section below.

Related Posts

Grilled Cheeseburgers (Grilling Basics)
Fire Roasted Poblano Burgers
My other Grilling Recipes


Enjoyed this post? Want to help out DadCooksDinner? Subscribe via eMail or RSS reader, recommend DadCooksDinner to your friends, and buy something from Amazon.com through the links on this site. Thank you!

On the road again... #EFC2017

May 4, 2017 by Mike Vrobel 2 Comments

Waiting to board at CLE | DadCooksDinner.com

Waiting to board at CLE | DadCooksDinner.com
Waiting to board at CLE

Sorry guys, no new food news to talk about today. I'm in Salt Lake City for my first day of the Everything Food conference. Yesterday was a marathon session of airline flights, with nothing to eat onboard but cookies and pretzels. It was pretty grim.

I'm writing this post at 6:30AM local time, before I head out for a day of cooking classes, meetups, and sessions with my fellow food bloggers. I'll be back with more food fun next week!

Pressure Cooker Beer Braised Flank Steak Tacos

May 2, 2017 by Mike Vrobel 11 Comments

Pressure Cooker Beer Braised Flank Steak Tacos | DadCooksDinner.com

Pressure Cooker Beer Braised Flank Steak Tacos | DadCooksDinner.com
Pressure Cooker Beer Braised Flank Steak Tacos


Thank you to my friends at Certified Angus Beef® Brand for sponsoring DadCooksDinner. Please check them out at hashtag #BestBeef for more beef recipes, and visit them at the Certified Angus Beef Kitchen Community on Facebook. Thank you!


Here’s my Cinco de Mayo recipe - shredded flank steak tacos, braised in beer.

Flank steak was a cheap cut, until sizzling platters of fajitas took off in every Tex-Mex joint in America. Normally, I don’t think about pressure cooking steaks - tender beef can’t stand up to pressure cooking.

That changed when I had a Corona braised flank steak burrito from the Wholly Frijoles food truck. Braised flank steak? It worked beautifully. The long, tough meat fibers in flank steak - that we slice across when we’re serving it grilled - are tenderized by the long, slow cooking, and shred into a fantastic taco filling. (Or burritos, of course - like in the original inspiration. Much to my shame, I've never got the hang of burrito wrapping, so I serve tacos instead.) Of course, I had to try this in my pressure cooker.

Why braise the beef in beer? It adds more flavor than water, and the acid helps cut the richness of the beef.

Corona is the classic choice for a Mexican beer braise, but…I find it wimpy for drinking. (Yes, even with a lime.) I’m not saying I would turn one down - free beer is free beer, after all - but If I buy a 6-pack of Corona, and use 1 in this recipe…the other 5 bottles are going to sit in my fridge for a long time. You can use any Ale or Pilsner in this recipe - normally, I’d go with Mexican Negra Modelo - but Great Lakes Brewery, just up the road from me in Cleveland, has a Pilsner I actually like, so I went with a bottle of that.

The only other trick to this recipe is cutting the steak into 2 inch wide strips across the grain. This helps it cook faster, and (more important) has it ready to shred into bite-sized pieces immediately after cooking. The flank steak comes out of the pressure cooker fall-apart tender, and all it takes is a minute of shredding with a fork to be ready to serve.

Pressure Cooker Beer Braised Flank Steak Tacos | DadCooksDinner.com
Pressure Cooker Beer Braised Flank Steak Tacos

What do you think?

Questions? Other ideas? Leave them in the comments section below.

Related Posts

Pressure Cooker Boneless Beef Short Rib Tacos with Dried Chile Pepper Sauce
Pressure Cooker Chicken Tacos (Tinga de Pollo)
Pressure Cooker BBQ Pulled Pork Tacos
My other Pressure Cooker Recipes
My other Pressure Cooker Time Lapse Videos

Enjoyed this post? Want to help out DadCooksDinner? Subscribe via eMail or RSS reader, recommend DadCooksDinner to your friends, and buy something from Amazon.com through the links on this site. Thank you!

Any More Salt Lake City Food Tips? #EFC2017

April 27, 2017 by Mike Vrobel 11 Comments

Ready to board in SLC | DadCooksDinner.com

Ready to board in SLC | DadCooksDinner.com
Ready to board in SLC

I'm heading back to Salt Lake City next week for the Everything Food Conference. I had a fantastic time last year, learning a lot, meeting new friends, and winning a BlendTec blender.

So, readers, any suggestions where to eat? Last year, thanks to many commenters (especially commenter Amanda), I ate at:

  • Crown Burgers (The Pastrami burger with Fry Sauce was every bit as good as advertised)
  • Tony Caputo's Market & Deli (Italian market with awesome sub sandwiches)
  • The Copper Onion (Fantastic cocktails and high-end local food)

My one regret is Red Iguana - it's the local Mexican restaurant, recommended by almost everyone I asked. I went there twice...and both times, the crowd waiting out front was too intimidating. (And I was too hungry to wait.) This year, I'm going to stick out the line.

So, once again this year - any other Salt Lake City suggestions? Any local specialties I can't afford to miss? (Also - I'm flying through Dallas/Fort Worth airport - anything worth eating at DFO, especially for a late breakfast/early lunch?) Let me know in the comments.  Thanks!


Pressure Cooker Senate Bean Soup

April 25, 2017 by Mike Vrobel 73 Comments

Pressure Cooker Senate Bean Soup

Bean soup is on the menu in the U.S. Senate's restaurant every day.

No one is exactly sure why this tradition started, but since 1903, U.S. Senate bean soup has been served in the Senate dining room every day - the only mandatory recipe on the menu.
The only exception, according to Senator Elizabeth Dole, as told to her by her husband, Bob Dole, was in 1943, during World War II rationing. It only happened for one day, and then bean soup was back on the menu.

Senate bean soup a simple recipe - navy beans, ham hocks (or ham and a hambone), onions sauteed in butter, and salt and pepper. “The Senators like their soup straightforward” said Don Perez, the Senate dining room’s executive chef back in 2003.

I’m taking a couple of liberties with the soup - Chef Perez admitted he adds a little garlic - and a recipe attributed to Senator Fred Dubois in 1903 includes mashed potatoes and parsley. I’m skipping the potatoes, but the parsley adds a splash of color that I can’t pass up.

So, why bean soup? Because I will have a ham bone and leftover ham from Easter dinner. (I’m notorious with my in-laws for taking bones home with me from family dinners.) This recipe was invented to use up leftover ham. (Well, I don't know that for sure...but it looks like what the Senate's chef would do the day after serving ham.) That said…the pictures have a (huge) smoked ham hock from my butcher. Don’t be afraid to use leftover ham; this recipe was made for it.

If you're looking for other recipes with dried navy beans, check out my Instant Pot White Turkey Chili. For another bean soup, try my 15 Bean Soup with Sausage (Instapot).

Recipe: Pressure Cooker Senate Bean Soup

Adapted from: Senate Bean Soup (via Senate.gov)

Video: Pressure Cooker Senate Bean Soup (1:47)


Pressure Cooker Senate Bean Soup - Time Lapse [YouTube.com]

Equipment

  • 6 quart or larger pressure cooker (I love my Instant Pot Electric PC)

Sources

  • Senate Bean Soup Ladles Up Tradition for 100 Years Jennifer Frey, Washington Post (via OrlandoSentinel.com)
  • Senate Bean Soup (via Senate.gov)

What do you think?

Questions? Other ideas? Leave them in the comments section below.

Related Posts

Pressure Cooker Black Bean Soup
Pressure Cooker Pasta and Bean Soup (Pasta e Fagioli)
Pressure Cooker Tortilla Soup (Sopa de Tortilla)
Instant Pot Tuscan Bean Soup
My other Pressure Cooker Recipes

Enjoyed this post? Want to help out DadCooksDinner? Subscribe to DadCooksDinner via eMail or RSS reader, recommend DadCooksDinner to your friends, buy something from Amazon.com through the links on this site, or donate through my tip jar. Thank you.

Sale on Thermoworks Classic Thermapen

April 22, 2017 by Mike Vrobel Leave a Comment

Sale on the Thermoworks Classic Thermapen | DadCooksDinner.com

Sale on the Thermoworks Classic Thermapen | DadCooksDinner.com
Sale on the Thermoworks Classic Thermapen

A sale from my friends at Thermoworks!


Limited Time Offer: Get a Classic Thermapen at Mk 1 pricing - just $59.

The first Thermapen launched in 1992 for $59. For a limited time, get a brand new Classic Thermapen at our original introductory price!


Here's the link: Classic Super-Fast® Thermapen® Thermometer from ThermoWorks [Thermoworks]

I’m a long time Thermapen fan - I loved my Classic Thermapen, and used it for about a decade. I wrote about it in one of the first posts on my blog, back in 2009.  Thermoworks saw that post, and sent me a newer model. I passed the Classic on to my Dad. He still using it - and I get visitation rights whenever I go over for a cookout in the backyard.

If you couldn't quite deal with the price of a Thermapen…this might be your chance. $59 is a great price for this thermometer.

Don’t dawdle - this price is only good through the end of April, 2017.

FCC Notice: I am a Thermoworks affiliate - if you go to Thermoworks.com from a link on this site, and buy something, I get a small commission at no extra cost to you. Thank you for supporting DadCooksDinner!

Instant Pot Duo Plus Unboxing

April 20, 2017 by Mike Vrobel Leave a Comment

Instant Pot IP-DUO Plus60 Unboxing

Instant Pot IP-DUO Plus60 Unboxing


FCC Notice: I'm an Amazon affiliate. As always, anything you buy through the Amazon links on my site support DadCooksDinner, at no extra cost to you. Thank you for your support!


I got a few questions about the Instant Pot Duo Plus, so I shot a quick unboxing video:

Video: Instant Pot Duo Plus Unboxing (6:11)


Instant Pot IP-DUO Plus60 Unboxing [YouTube.com]

Questions I didn't cover in the video (that I can think of)

Q: Do I need the Duo Plus if I already own a Duo?

A: No. The two are remarkably similar. There are a few nice little touches:

  • A fancy new display
  • The new cooker remembers your settings for three different modes
  • "Pressure Cook" mode replaces "Manual" mode
    • Oh, and a bunch of new program modes - none of which I ever use. (I'm a Saute mode and Pressure Cook mode kind of guy)
  • the ⅔ and ½ markings on the pot actually show you the pressure cooking max fill lines.

But, all in all, these are minor improvements to the Instant Pot Duo you already own. Now, if you're in love with pressure cooking, and want an excuse to buy a second Instant Pot...well...I own 6 different pressure cookers right now. I can't tell ANYONE not to buy another cooker.

Q: If I don't have a pressure cooker, should I get the Duo Plus or the Duo?

A: I'd go with the Plus. I always want the latest technology, even if it's a minor update. Now, as I write this, the old Duo is $20 cheaper. If the difference between $120 and $100 matters to you, and every dollar counts, get the older Duo - it's a great cooker. Either way, I think you'll love your new pressure cooker.

What do you think?

Other questions? Anything else I missed? Ask them in the comments below.


Instant Pot IP-DUO Plus60 [Amazon.com]

Related Posts

Which Pressure Cooker Should I Buy?
Fagor Lux vs Instant Pot: Time To Pressure testing
Instant Pot Duo 60 vs Duo 80: Longer term testing notes
My other Pressure Cooker Recipes
My other Pressure Cooker Time Lapse Videos


Enjoyed this post? Want to help out DadCooksDinner? Subscribe via eMail or RSS reader, recommend DadCooksDinner to your friends, and buy something from Amazon.com through the links on this site. Thank you!

Things I Love: Oxo 7-Piece Measuring Beaker Set

April 13, 2017 by Mike Vrobel 3 Comments

Oxo 7-Piece Measuring Beaker Set

I've talked about my love of Oxo's measuring beakers - and I finally sprung for their larger, 7-piece set. My only question to myself is "Why did I wait so long?" The 7-piece set has beakers to measure 1 teaspoon, 1 tablespoon, 2 tablespoon, ¼ cup, ½ cup, ⅔ cup, and 1 cup beaker, and they all nest together into a neat stack. (The smaller set only goes through the ¼ cup measure.)

Oxo 7-Piece Measuring Beaker Set | DadCooksDinner.com
Oxo 7-Piece Measuring Beaker Set

I use the ¼, ½, and ⅔ all the time; especially when I'm making stir-fry for dinner, and I need multiple sauces ready to go.

But, most important - those colors. I'm a sucker for bright, beautiful color in my kitchen - and this set has every color of the rainbow, Roy G Biv. 1Shout out to all the Paranoia RPG fans from the 80's - if there are any of you left. Stay alert, trust no one, and keep your laser handy!


Oxo Good Grips 7-Piece Nesting Measuring Beaker Set [Amazon.com]

What do you think?

Questions? New favorite kitchen gadgets you have to talk about? Tell us about them in the comments section below.

Enjoyed this post? Want to help out DadCooksDinner? Subscribe via eMail or RSS reader, recommend DadCooksDinner to your friends, and buy something from Amazon.com through the links on this site. Thank you!


Heads Up! Instant Pot Plus 60 is available on Amazon!

April 11, 2017 by Mike Vrobel 6 Comments

Instant Pot Duo Plus (Image Courtesy of Amazon.com) | DadCooksDinner.com

Instant Pot Duo Plus (Image Courtesy of Amazon.com) | DadCooksDinner.com
Instant Pot Duo Plus (Image Courtesy of Amazon.com)

The Instant Pot IP-DUO Plus60 is now available for purchase on Amazon, with immediate shipping! Now, I don't know how long immediate shipping will last - the IP-DUO80 wound up on backorder almost immediately - but if you hurry, I'll bet you can get one soon. (Mine will be here Thursday...Amazon prime shipping for the win. I can't wait!)


Instant Pot IP-Duo Plus60 Electric Pressure Cooker [Amazon.com]

Now, should you buy one if you already have a "regular" IP-DUO? Probably not...unless you're a pressure cooker fanatic like me. The original IP-DUO is still a great cooker, and I don't know what (if any) advantages this new cooker has. That said...I must have one. And, if you're enjoying your Instant Pot so much that you're thinking of buying a second one, now might be the time... (Or, if you're patient, maybe wait for Prime Day in July? Amazon usually has the Instant Pot on deep discount.)

FCC Notice: I am an Amazon affiliate. If you click through the Amazon links on this page, anything you buy helps support DadCooksDinner with a small commission - at no extra cost to you. Thank you for your support!

Try Amazon Prime 30-Day Free Trial


Pressure Cooker Baby Bok Choy

April 11, 2017 by Mike Vrobel 2 Comments

Pressure Cooker Baby Bok Choy | DadCooksDinner.com

Pressure Cooker Baby Bok Choy | DadCooksDinner.com
Pressure Cooker Baby Bok Choy

After Dim Sum with family and a friends last week (hi, Rhonda!), I went to the Asian market that’s right next door: Park To Shop on 30th Ave in Cleveland. As usual, I had a fantastic time, and bought a lot more than I should have. Hoisin sauce! Pocky! Sriracha and Sambal Olek! Ramune soda! I almost cracked and bought a 5 gallon tub of soy sauce…but I came to my senses and bought a 64 ounce bottle instead.

One of my Asian market staples is baby bok choy. There are always “grab and go” bags in the produce section, and they make a great side dish for a weeknight stir fry. Baby bok choy are the cute little sized ones - 4 to 6 inches long  - instead of the full-sized heads of bok choy. They're also quicker to deal with;  trim the tough stem piece from the bottom and they're ready to cook.

Instead of stir frying, I thought, what if I use my pressure cooker? Bok Choy  a tough vegetable on the bottom - similar to cabbage - and could use a little extra cooking. So I borrowed my pressure cooker kale technique, with a final drizzle of soy/vinegar/sesame oil. (I learned that trick from Fuschia Dunlop’s Every Grain of Rice.) Oh, and I added a sprinkle of red pepper flakes, for those who can take the heat.

Pressure Cooker Baby Bok Choy | DadCooksDinner.com
Pressure Cooker Baby Bok Choy

The results were fantastic, and now I have a simple, hands-off side dish for Asian food. I love my pressure cooker!

Inspired by: Fuschia Dunlop, Blanched Choy Sum in Sizzling Oil, Every Grain of Rice

Video: Pressure Cooker Cooker Baby Bok Choy - Time Lapse (1:05)


Pressure Cooker Baby Bok Choy - Time Lapse [YouTube.com]

Pressure Cooker Baby Bok Choy | DadCooksDinner.com
Pressure Cooker Baby Bok Choy

What do you think?

Questions? Other ideas? Leave them in the comments section below.

Pressure Cooker Baby Bok Choy | DadCooksDinner.com
Pressure Cooker Baby Bok Choy

Related Posts

Pressure Cooker Kale with Garlic and Lemon - Dad Cooks Dinner
Pressure Cooker Beets with Blue Cheese - Dad Cooks Dinner
Pressure Cooker Collard Greens with Bacon - Dad Cooks Dinner
My other Pressure Cooker Recipes
My other Pressure Cooker Time Lapse Videos


Enjoyed this post? Want to help out DadCooksDinner? Subscribe via eMail or RSS reader, recommend DadCooksDinner to your friends, and buy something from Amazon.com through the links on this site. Thank you!

Grilled New York Strip Steaks with Caesar Salad

April 6, 2017 by Mike Vrobel 2 Comments

Grilled New York Strip Steaks with Caesar Salad | DadCooksDinner.com

Grilled New York Strip Steaks with Caesar Salad | DadCooksDinner.com
Grilled New York Strip Steaks with Caesar Salad


It’s #BeefUpYourSalad month! Thank you to my friends at Certified Angus Beef® Brand for sponsoring DadCooksDinner. Please check them out at hashtag #BestBeef for more beef recipes, and visit them at the Certified Angus Beef Kitchen Community on Facebook. Thank you!


Thanks to the Meat Sale at my local Acme grocery store, I have a freezer full of thick-cut New York Strip steaks. A few times a year they sell whole strip roasts at a great price; I buy one, vacuum seal the steaks, and drop them into the freezer. Then I have some frozen assets2Sorry, waiting for me to crave a steak.

So, I was prepared when everything came together. It is #BeefUpYourSalad month for my partnership with Certified Angus Beef® Brand. I have gorgeous grilling weather on the first weekend of April. And, last but not least - I have a leftover bagged caesar salad I need to use. (I overbought on salad packages for a family party.) Sunday dinner was a snap once the CAB strip steaks were thawed and ready to go.

Grilled New York Strip Steaks with Caesar Salad | DadCooksDinner.com
Grilled New York Strip Steaks with Caesar Salad

The recipe is a combination of some previous recipes: Grilled New York Strip Steaks, Sear and Move Style, Caesar Salad dressing, and Grilled Garlic Bread to make the croutons.

As I mentioned above, I cheated with the salad - you can see the store-bought croutons in the pictures. (Shame! Shame!) I had to use up a bagged salad before it went bad. 2I hate throwing away food. I have to do it from time to time for the blog, when I’m testing and re-testing a recipe - no one can eat that much corned beef, for example. But that doesn’t make it any less painful. If you have a few extra minutes, make the salad and croutons yourself instead of buying them. The dressing is simple, and grilled garlic bread croutons are fantastic. That said, I won’t hold it against you if you have to cheat - like I did - and buy a bagged salad. That’s what I do on busy weeknights, and bagged salads are a lot better than they used to be.

Video: Grilled New York Strip Steaks with Caesar Salad (0:14)

View this post on Instagram

A post shared by Mike Vrobel - Food Blogger (@dadcooksdinner)

Grilled New York Strip Steaks with Caesar Salad | DadCooksDinner.com
Grilled New York Strip Steaks with Caesar Salad

What do you think?

Questions? Other ideas? Leave them in the comments section below.

Related Posts

Plank Grilled Filet Mignon with Blue Cheese Salad
Sous Vide Flat Iron Steak with Baby Kale Salad
Grilled Sous Vide Filet Mignon with Sous Vide Egg and Fresh Herb Salad
My other Grilling Recipes


Enjoyed this post? Want to help out DadCooksDinner? Subscribe via eMail or RSS reader, recommend DadCooksDinner to your friends, and buy something from Amazon.com through the links on this site. Thank you!

Instant Pot Frequently Asked Questions

April 5, 2017 by Mike Vrobel 220 Comments

Lineup of Instant Pots. 6-Quart Duo Plus, 8-Quart Duo Plus, 6-Quart Ultra on a kitchen island
Instant Pot FAQ

Because of my years of writing Instant Pot recipes, I get email with questions about how to use Instant Pot cookers. This post is to put them in one place, so I can refer everyone to it.
If you have a question I didn't cover, leave a comment, and I'll do my best to answer.

All your recipes say "cook at high pressure for X minutes." My Instant Pot does not have a high pressure button. How do I get high pressure on the Instant Pot?

Use the "Manual" or "Pressure Cook" or "Pressure Cook- Custom" button and set the pot for X minutes.

On older Instant Pots, the "Manual" button means pressure cooking. On newer pots, there is an actual "Pressure Cook" button. (Hooray!)
The default for both of those buttons is High Pressure. Press the "Manual" or "Pressure Cook" button, and check to make sure the pressure level shows as "High" in the display. If it does not, press the Pressure Level button until it shows high. Then, use the plus and minus buttons to change the cooking time to the "at high pressure time". (X in my example). Once the time is set, leave the cooker alone. After ten seconds of no buttons being pushed, the cooker will beep, and it will start cooking. (If you want to change something, press the cancel button to start again.) Then, let the cooker do the work. It will bring itself up to high pressure and start the countdown timer. When the countdown reaches zero, it will beep to let you know it is done.

Okay, so, How do I get Low pressure on the Instant Pot?

It depends. Which Instant Pot do you own?
IP-DUO, IP-SMART, IP-DUO Plus: Use the "Pressure" or "Pressure level" button to adjust the pressure level. Push the Manual/Pressure Cook button, then the Pressure/Pressure Level button until the display says "Low", then adjust the cooking time with the plus/minus buttons. Don't forget to change it back when you're done!
IP-LUX: The older IP-LUX model does not do low pressure - it's high pressure or nothing. That said - I never use low pressure. I owned an IP-LUX for years and didn't realize it was missing Low Pressure mode until someone asked about it for this FAQ.

What about natural pressure release? When the Instant Pot finishes cooking, it switches to Keep Warm mode - is that OK with a natural pressure release? Or should I cancel it?

Keep Warm mode does not affect Natural Pressure Release 
[Updated 2016-01-18] I used to tell everyone to turn off warming mode to speed up natural pressure release, but...I was wrong. (See here for details of my testing.) Keep Warm mode does not slow down natural pressure release. It does not turn the heat back on until it reaches the warming range of 145°F to 172°F, which is well below the temperature where the pressure will release.

Q: When using the Saute button, can you adjust the heat setting? (Related: How do I bring recipes to a boil before locking the lid on the pot, as some recipes recommend?)

A: It depends on your model:

On the IP-DUO Plus and newer IP-DUO (Models without an "Adjust" button): Keep pressing the Saute button to change the heat level.

On IP-LUX or older IP-DUO (Models with an "Adjust" button): Use the Saute button, then use the Adjust button to change the heat level.
The heat level of Saute mode is controlled by the "Adjust" button. From the Instant Pot website: "3 levels of temperature can be chosen with the "Adjust" key for best results:"

"Normal": ~160°C (320°F) for regular browning,
"More": ~170°C (338°F) for darker browning, and
"Less": ~105°C (221°F) for light browning.

I tend to use "Saute - More" for most things.

When I put my electric pressure cooker in slow cooker mode, what is the equivalent slow cooker temperature? Is it the same as a slow cooker on High, or on Low?

For an Instant Pot? It depends. Like Saute mode, the Slow Cook mode has multiple heat levels:
On the IP-DUO Plus, IP-Ultra, and newer IP-DUO (Models without an "Adjust" button): Keep pressing the Slow Cook button to change the heat level.
On the IP-LUX and older IP-DUO (Models with an "Adjust" button): Use the Slow Cook button, then use the Adjust button to change the heat level.
Unfortunately, the heat levels don't line up well with traditional slow cooker settings; Medium Slow Cook mode is what most crock-based slow cookers would call "Low":
More (about 210°F) is about the same as Slow Cooker high
Medium (about 200°F) is Slow Cooker low setting
Low (about 190°F) is Slow Cooker "keep warm".
Finally, use the plus/minus buttons to set the slow cooking time.
Also, the Instant Pot has some limitations as a slow cooker. For more info, see this post: Instant Pot as a Slow Cooker.

What about the other buttons? Soup? Rice? Steam? Multigrain? Yogurt?

I don't know - I never use them. I just use Manual mode for my pressure cooking. I don't know what they're doing in those other modes, so I'd rather use manual mode and control it myself.

How do you adjust the cooking time in recipes designed for a traditional 15 psi stove top cooker?

I add 20% to the cooking time. The Instant Pot operates at 11.5 psi, so to make up for the difference, I add an extra 20% of time for electric pressure cooking. That means 10 minutes stove top is 12 minutes electric; 20 minutes stove top is 24 minutes electric; 30 minutes stove top is 36 minutes electric. (And so on).
The good thing about most pressure cooking recipes is they are not very precise - a little overcooking won't hurt, and probably helps. If you're cooking something that needs precise temperatures, you shouldn't be cooking in a sealed pressure vessel.

Why does my pressure cooker come with a max fill line? Why can I only use ⅔rds of the pot?

Pressure cookers need headspace to build pressure - don't fill them past ⅔rds full. Pressure cookers are measured by total volume of the pot - how much it can hold if you fill it to the brim. But you can only use ⅔rds of that.
Why can you only use ⅔rds? Because pressure cookers need headspace to come up to pressure. The cooker needs space for the steam to build up, which is what pressurizes the pot. Also, this is a safety feature - if the bubbling ingredients in the pot get into the pressure valve, it can clog, and that's when your pressure cooker can get into trouble with over-pressurizing.
Why don't they measure the pressure cooker as ⅔rds of the pot volume? I don't know, but every pressure cooker I've seen measures their size this way. I know it can be frustrating to find out your brand new 6 quart cooker can only cook 4 quarts of food. I've got the angry comments to prove it. If anything, I think the Instant Pot, and other modern, electric multi-cookers have a better argument for using the total volume - if they can also work as a slow cooker or a normal, electric powered pot, then you actually can use the entire pot.

What is the minimum liquid amount for the Instant Pot?

2-3 cups, according to Instant Pot support About 1 cup, according to Instant Pot's Facebook page.
[Updated 2015-08-06 with answer from Instant Pot's Facebook Page]
1 cup is the minimum liquid amount, unless you're cooking something that will absorb water. From a back and forth on Instant Pot's Facebook page:

The short answer is "about a cup".
The general point is to have enough liquid to reach and maintain pressure. When cooking absorbent foods, think rice, this will require enough for the food to absorb, plus some to bring the pot to pressure. When cooking moisture containing foods, say mushrooms which release moisture when cooked, this can be achieved with less added liquid. So, as is often the case in life, "it depends". The Instant Pot is so well sealed that even a small amount of moisture can be sufficient, depending on the foods being cooked. [2015-08-06: Instant Pot Community Facebook Page]

I would NEVER suggest that you can go as low as ½ a cup of water, like I do all the time...um...I mean...nope, not me, not going to suggest it.

Can I use the Instant Pot for pressure canning?

No. The Instant Pot, and all other electric pressure cookers, are not suitable for home canning, according to the USDA and the NCHFP (National Center for Home Food Preservation.) The NCHFP says that they don't believe the processes recommended by the USDA are transferable to electric pressure cookers - you can't trust them to hold high enough temperatures for the length of time needed to ensure safe canning. For more information, see this post on the NCHFP website: Can I Can in a Multi-Cooker?

I forgot the inner pot, and poured stuff into the base. What do I do?

If it was water: Unplug it, dry it off, let it air dry for 72 hours.
If it was oil: That's not good. It probably needs to be replaced. Call Instant Pot Support.
If it was dry goods: Shake 'em out. (Remove the vent cover on the bottom if necessary to get all the dry stuff out.) The pot is ready to use once everything is out of there.
More details in this article: What do I do if I dump liquid into my Instant Pot without the pot liner?

How do you know all of this?

I read manuals, contact support when I have questions, and I've been using a pressure cooker for a long time. (Yes, I read manuals, all the way through. I can't help myself.) Instant Pot makes this easy; their manuals are online. Go to InstantPot.com/benefits/specifications-and-manuals/, click on the link to your Instant Pot cooker type, then scroll to the bottom and pick the User Manual you want (in English, French, Chinese, or Spanish).
Also, Instant Pot support is good at responding if you have questions. Drop them a line if you have a burning pressure cooker question you need answered.


Which Instant Pot should I buy?

The IP-DUO Plus 6 quart electric pressure cooker.
Why? See my post: Which Pressure Cooker Should I Buy?.

What recipes should a beginner use in the instant pot?

Soup, Stew, Beans, Chili, and...Mac and Cheese?
* Instant Pot Rotisserie Chicken Noodle Soup
* Instant Pot Easy Beef Stew
* Instant Pot Pinto Beans (No Soaking)
* Pressure Cooker Mac and Cheese (In an Instant Pot)

…from there, go to my Instant Pot (Pressure Cooker) Recipes index and look for recipes that catch your fancy.

Q: I think my Instant Pot is broken. It's not coming up to pressure/steam is escaping from the lid/nothing happens when I push a button...

I'm sorry to hear that! You should contact Instant Pot Support for help. 
Instant pot has a great support department. If you think your cooker is broken or malfunctioning, contact them at the Instant Pot contact page.

Any other questions?

Any other questions? Leave them in the comments section below.

Enjoyed this post? Want to help out DadCooksDinner? Subscribe to DadCooksDinner via email and share this post with your friends. Want to contribute directly? Donate to my Tip Jar, or buy something from Amazon.com through the links on this site. Thank you!

Heads Up: Instant Pot Duo Plus 60 is coming soon!

April 2, 2017 by Mike Vrobel 6 Comments

Instant Pot Duo Plus (Image Courtesy of Amazon.com) | DadCooksDinner.com

Instant Pot Duo Plus (Image Courtesy of Amazon.com) | DadCooksDinner.com
Instant Pot Duo Plus (Image Courtesy of Amazon.com)

I've heard rumblings about a new Instant Pot, and friend of the blog Laura over at HipPressureCooking.com just made it official - the Instant Pot Plus is on the way in "Mid-April"!

Preview: Instant Pot's Upcoming Duo Plus, [HipPressureCooking.com]

I have to admit - my first thought was "I have to double check - this could be an April Fools joke." An official Amazon.com listing sure isn't a joke, even if it is currently unavailable:

Instant Pot 6 Quart Duo Plus 60 [Amazon.com] (Listed as "Currently Unavailable" - but coming mid-April?)

From Laura's post, it looks like the basic functions of the Instant Pot stay the same - it's still my trusty pressure cooker - but they have re-designed the display on the front to make it more informative, and changed the inner pot to show the actual "max fill" line for pressure cooking. (The old max fill line was for non-pressure cooking; not very helpful when you use it almost exclusively as a pressure cooker, like I do.)

Is this worth upgrading to if you already have an Instant Pot Duo? Not from what I'm seeing - it's nicer than the current Duo, but there's not "got to have it" feature. But, if you are a pressure cooker fanatic like me, it's the perfect excuse to upgrade...and pass the old one on to a deserving family member.

I've reached out to Instant Pot to see if they have any official news they can give me about the new cooker, and will let you all know if I find out. Until then, I'm going to be checking that Amazon page roughly every fifteen minutes, mouse pointer hovering over the Buy Now button, muttering "Be there...be there..." to myself.

What do you think?

Questions? Other ideas? Leave them in the comments section below.

Related Posts

What Pressure Cooker Should I Buy?
Instant Pot Frequently Asked Questions


Enjoyed this post? Want to help out DadCooksDinner? Subscribe via eMail or RSS reader, recommend DadCooksDinner to your friends, and buy something from Amazon.com through the links on this site. Thank you!

Fagor Lux vs Instant Pot - Time to Pressure Showdown

March 30, 2017 by Mike Vrobel 7 Comments

Fagor Lux vs Instant Pot - Pressure Cooking time to pressure showdown | DadCooksDinner.com

Fagor Lux vs Instant Pot - Pressure Cooking time to pressure showdown | DadCooksDinner.com
Fagor Lux vs Instant Pot - Pressure Cooking time to pressure showdown

How could I miss something so obvious?

That’s what I was asking myself - did I miss it? Good Housekeeping’s We Found a Pressure Cooker That’s Better Than the Instant Pot article - oh, that title - unleashed a flood of questions. GH prefers the Fagor Lux to the Instant Pot because in their testing, the Fagor “came up to pressure 15 minutes faster” than the Instant Pot.

Now, I compared the 8 quart versions of the two pots in my Review: Fagor Lux 8 Quart vs Instant Pot IP-DUO80 post, and I recommend the Instant Pot over the Fagor Lux in my What Pressure Cooker Should I Buy post - I like them both, and recommend them both, but I prefer the Instant Pot. For me, it’s more convenient to use, day to day.

But now I was questioning myself. Did I miss it? Is the Lux noticeably faster? I tend to be a “set it and forget it” cook with my electric pressure cookers. That’s one of my favorite features - lock the lid, set the time, and go worry about other things. The cooker will let me know when it is done. Maybe I didn’t notice something I should have…I never ran the two head to head, in a one-on-one pressure cooker smackdown.

Also, I own the 8 quart Fagor Lux, but I’ve been eyeing the Copper colored 6 quart Fagor Lux…and that’s the size of cooker that Good Housekeeping tested…and if I bought one, I’d get a new toy…in copper…so shiny…I must have it! Ahem. I mean, I have to test the cookers, in the name of science, and as a service to my readers, so I will sacrifice and buy a new pressure cooker.

(Ooooh…so shiny!)

When the 6 Quart Fagor Lux arrived, I set it up in my kitchen next to my loyal Instant Pot Duo, set my camera to time lapse mode, and started testing. Let’s go to the videotape:

Video: Fagor Lux vs Instant Pot - Time to Pressure Showdown (1:21)


Fagor Lux vs Instant Pot - Time to Pressure Showdown [YouTube.com]

Is that all?

As you can see in the video, the results were underwhelming. And, they repeated themselves - I ran tests with 2 cups, 4 cups, and 8 cups of cold water from the tap. Every time, the Lux and Duo came to pressure within seconds of each other. Sometimes the Lux finished first by a few seconds, like in the video. Sometimes the Duo finished first by a few seconds. Basically, they ran neck and neck, with no obvious winner. 3One time I forgot to reset the pressure valves between tests, and came back to find both cookers hissing madly away, trying to build up pressure when they weren’t closed. Whoops.

I tried to run the same tests on my 8 quart cookers…and found out the lid on my 8 quart instant pot is having some issues. No matter how I adjust the pressure valve, the cooker is releasing steam before it comes up to pressure. (I have to follow my own advice, and get in touch with Instant Pot support for a fix). I’m not sure how much I can trust the results, but I had one test that worked for both cookers without lid issues. The Fagor 8 quart did come up to pressure faster, heating 4 cups of water. The Lux was up to pressure in 9 minutes; the Duo took 12 minutes - a 3 minute difference. That’s far from the 15 minutes faster that GH is promising.

I'm not seeing it

In summary, I did not get the same results as Good Housekeeping - I did not see a meaningful difference in the 6 quart cookers. Both the Fagor Lux and the Instant Pot Duo come up to pressure in about the same time for me.2In other words, the Good Housekeeping test [puts on sunglasses] doesn't hold water.

Buy the cooker you want

My favorite pressure cooker is the Instant Pot Duo 6 quart. Both the Fagor and the Instant Pot are great cookers, and I would be happy with either. But the Instant Pot has a few nice touches, like the stainless pot and lid holder integrated into the handles, that make it more convenient to use. It's still my recommended pressure cooker. (See the long-winded details in my What Pressure Cooker Should I Buy post.) If you prefer a nonstick pot, or can get a deal on the Fagor Lux 6 quart, grab it. It’s a good pressure cooker! Just don’t buy it expecting a huge jump in pressure cooking performance.

What do you think?

Questions? Anything I missed? Ask about it in the comments section below.

Cookers Tested

  • Instant Pot IP-DUO60
  • Fagor Lux 6 Quart

Related Posts

  • What Pressure Cooker Should I Buy?
  • Review: Fagor Lux 8 Quart vs Instant Pot IP-DUO80
  • Longer Term Testing Notes: Instant Pot Duo60 vs Duo80 - Dad Cooks Dinner


Enjoyed this post? Want to help out DadCooksDinner? Subscribe to DadCooksDinner via eMail or RSS reader, recommend DadCooksDinner to your friends, and buy something from Amazon.com through the links on this site. Thank you.

Review: Fagor LUX 8 Quart vs Instant Pot IP-DUO80

March 30, 2017 by Mike Vrobel 13 Comments

Fagor LUX 8 Quart

Fagor LUX 8 Quart
Fagor LUX 8 Quart


I’m working on an update to my Which Pressure Cooker Should I Buy post…and this section kept getting longer, and longer…so I’m posting it on its own.


The LUX line of electric pressure cookers from Fagor is a strong competitor to the Instant Pot. If the Instant Pot didn’t exist, I’d recommend the LUX to everyone. It’s a modern electric pressure cooker from a company with a long history of pressure cooking. Fagor supports their cookers and makes it easy to buy replacement parts.

But…if I had to pick only one pressure cooker, I’d still get the Instant Pot cooker over the LUX. Now, both cookers do a good job of their basic task - pressure cooking - but I find the Instant Pot much more useable day to day. I’ve had the Fagor LUX 8 quart for months, but I keep reaching for my 6 quart Instant Pot, even though it is smaller. I pull out the LUX when I know I need the extra room an 8 quart cooker provides; otherwise, I go with my Instant Pot. And, frankly, that isn’t that often - making a big batch of broth is about the only time I needed the extra space. 3That said, the moment I tried the new 8 quart Instant Pot , it became my primary pressure cooker, with the 6 quart Duo relegated to side dishes.

Here’s a quick comparison of the Fagor LUX 8 quart and the Instant Pot IP-DUO80

Ceramic nonstick on the left, stainless on the right

Fagor LUX 8 Quart strengths

The one big advantage to the LUX is the ceramic nonstick pot. If you want a nonstick pot, the Fagor LUX is the pressure cooker to buy. First off, the nonstick pot is blue!2[footnote]I’m like a bird - easily attracted to bright colors. Second, the ceramic nonstick is a lot tougher than traditional nonstick coatings. The problem is, I don’t trust nonstick, even this tough one from Fagor; all my nonstick pans wind up with scratches, no matter how much I baby it. For a pressure cooker, I prefer stainless steel, unless I’m cooking something particularly messy.

That meant the first thing I had to do with the LUX was pay for the add-on stainless pot. Now, don’t get me wrong, it’s a nice pot, with a good heft to it. And, good on Fagor for having the stainless pot available and easy to order. But…it is an extra expense right off the bat.

The other thing I like about the Fagor is the control panel. It has a “High Pressure” button. I’m old school when it comes to pressure cooking - I don’t use program modes. “Rice?” “Stew?” What do they mean? I don’t know, so I don’t trust them. I want to follow pressure cooker recipes - cook on high pressure for X minutes - not trust the cooker to think for me. The Fagor makes pressure cooking easy to understand with the High Pressure button.3 Unlike the “Manual” setting on my Instant Pot, which means “Manual High Pressure Cooking”. Now that I know that, sure, it’s easy. But I got the “How do I do high pressure on an Instant Pot” question so often that I wrote my Instant Pot FAQ post just to answer it. Sure there were other questions, but that was the big one.

[UPDATE 2017-03-30: Another advantage for the 8 quart Fagor - it's a little faster to heat up to pressure. I tested them after reading Good Housekeeping's We Found a Pressure Cooker That’s Better Than the Instant Pot article, and comparing the 8 quart cookers I found the Fagor came up to pressure about 3 minutes faster when heating up 4 cups of water. That is not the big gap that Good Housekeeping said they found, but I figured I should mention it. For more details, see my Fagor Lux vs Instant Pot - Time To Pressure Showdown post.]

So…seems simple, right? Switch from the Instant Pot to the Fagor. Well…that’s not what happened. I never took a liking to the Fagor, and here’s why:

3 piece lid - awkward to clean

Fagor LUX 8 Quart weaknesses:

The first thing I noticed is how light the Fagor is. If you remove the pot and the lid, it weighs almost nothing. Unfortunately, that means I can’t push the buttons. Literally. When I try to push a button, the cooker is so light that it slides across the counter. Using the Fagor is a two-handed operation - I have to grab the handle to hold it down, then push the button with my other hand.

Another problem is the three-piece lid, gasket holder, and gasket. The silicone gasket sits around a thin stainless steel disc, and the disc pushes onto a pin in the lid. It works, but it’s an extra piece I have to clean every time I use the cooker. 4And, it seems to get messier than the lid on my instant pot. Perhaps because it is closer to the surface of the food I’m cooking? I love the Instant Pot style two-piece lid and gasket, where a hoop-shaped ring is welded to the lid and the gasket fits in. 5It looks like the smaller LUX 6 quart uses the same style of lid and gasket holder as the Instant Pot. If you’re in the market for the 6 quart cooker, ignore this comment.

Lid holder - the Instant Pot’s built in handle/lid holder is so convenient. Set the lid in the handle, and I’m done. When I use the LUX, I find myself trying to set the lid on the handle, realizing it isn’t a lid holder, and then looking around for some empty counter space where I can put the lid. It’s amazing how big a difference it makes - a notch on the lid, a hole in the handle - and suddenly the cooker is that much easier to use.

Beeping in warming mode. Ugh. The LUX really wants you to know when it is done pressure cooking. It switches to keep warm mode…and then it beeps roughly every thirty seconds until you shut the cooker off. beep…beep…beep…Why. WHY? I can’t let it do a natural pressure release without THE BEEPING. THE BEEPING IS DRILLING INTO MY BRAIN. It’s not just the High Pressure program, either; if you cancel cooking, then press the “keep warm” button, the beeping starts up again. Now, I can turn the pot off to stop the beeping, but that defeats the purpose of the “keep warm” mode - the constant beeping makes keep warm mode unusable on the LUX. It feels like they really, REALLY want you to shut off the cooker and use a quick pressure release, which is an odd design decision.

[UPDATE 2017-03-30: I was asked by a reader who also owns a Fagor about beeping in keep warm mode - he wasn't hearing it. Turns out, I was wrong. If you stop pressure cooker mode, turn on keep warm mode, and press "start", it will only beep once more, after a few seconds. (I think it's a signal that it is at "keep warm" temperature.) I was confused by the additional beep, and kept shutting the cooker down in frustration. So, if the beeping makes you crazy, you can stop it without losing warming mode entirely. Not ideal, but not as bad as I originally thought.]

[UPDATE 2017-03-30: While I was testing for my Fagor Lux vs Instant Pot - Time To Pressure Showdown post, I decided to find out how long the beeping will go. Turns out, it gives up on the beeping after five minutes. That's way too long - it shouldn't beep more than once to let you know the cooking is done - but if you can stand strong you can eventually wait out the beeping Beeping BEEPING...I can't make it. I have to go turn it off now.]

Conclusion

The Fagor LUX 8 Quart is a very good pressure cooker, with a lot to recommend it. If you prefer cooking with a nonstick pot, it is the obvious choice. 6Or, like one of my readers: if you want to buy local, and can find it in a store, the LUX is a good choice. But, it is less convenient to use than the Instant Pot IP-DUO80, so I still recommend the IP-DUO80 over the LUX. (I own both...but I own way too many pressure cookers.)


What do you think?

Questions? Other ideas? Leave them in the comments section below.

Related Posts

Which Pressure Cooker Should I Buy?
Instant Pot FAQ
First Thoughts: 8 Quart Instant Pot IP-DUO80


Enjoyed this post? Want to help out DadCooksDinner? Subscribe to DadCooksDinner via eMail or RSS reader, recommend DadCooksDinner to your friends, and buy something from Amazon.com through the links on this site. Thank you.

Virtual Garage Sale - Spring 2017

March 23, 2017 by Mike Vrobel Leave a Comment

It's time again for a Dad Cooks Dinner virtual garage sale! I have a bunch of stuff up on eBay that I bought for the blog and don't use any more - photography lighting, chef's knives, and a wireless router set.

Interested in checking it out? Here's a link to the stuff I'm selling:

Items for sale by mvrobel [ebay.com]

Now that I have a few empty shelves, I'm thinking of all the stuff I can get to fill them back up again. Dear lord, have pity on me.

My Sous Vide Setup (2017 edition)

March 9, 2017 by Mike Vrobel 5 Comments

Joule sous vide and LIPAVI Model C10 sous vide container | DadCooksDinner.com

Joule sous vide and LIPAVI Model C10 sous vide container | DadCooksDinner.com
Joule sous vide and LIPAVI Model C10 sous vide container

Sunday’s picture of sous vide salmon resulted in some questions about my sous vide setup. Here’s what I currently use:7I say currently because I am such a gadget hound. This is probably everything I need - this is MORE than everything I need - but I’m always watching for the new new thing.

Joule Sous Vide

I love the compact Joule Sous Vide from the guys over at ChefSteps.com. The downside? It only works through the Joule app. The upside? It works with the Amazon Echo dot I have in the kitchen, so I don’t even have to open my phone:


Video: Alexa and Joule [YouTube.com]

The other downside is multiple Joules don’t work with the app. (Yet. ChefSteps says it is coming in an app update at some point in the future.) I do occasionally want to run more than one sous vide at once, so I’m keeping my Anova Sous Vide around until they get that fixed.

Joule App | DadCooksDinner.com
Joule App

If you’re not an Alexa or phone app kind of person, and want a manual control you can put your hands on, darn it…get the Anova Sous Vide instead of the Joule.

LIVAPI Sous vide containers with custom cut lids

The LIVAPI Model C10 is a 12 quart polycarbonate food container. I love the size - it’s large enough for almost all of my sous vide cooking, but compact enough to easily fit on my pantry shelving in the basement. I also love the matching C10L Custom Cut Lids - they have them cut for different width sous vide circulators, including both my Joule and Anova. I also like the very narrow lip on the edge of the containers. It makes it easy to clip on my circulator - the larger, sturdier lip on my regular Cambro container just gets in the way.

I just bought a LIVAPI Model C20 - the jumbo 26 quart container - for the times I need extra space. (Like in the salmon picture - this was a very long piece of frozen fish, and it was too big to fit in the C10.) It is twice the size, and I only need it occasionally - but when I need the space, I really need it. And, it is much more convenient than pulling out my jumbo Coleman cooler.

Side of Salmon in the Sous Vide | DadCooksDinner.com
Side of Salmon in the Sous Vide - from Sunday - in the LIPAVI Model C20 tank and the L10 rack

LIVAPI Sous vide racks

LIVAPI sells multiple size racks to go with their containers - I have the L10 rack that fits in the C10 sous vide container. I love the adjustability of these racks - the walls slot into tabs in the base; I can move them around to get the spacing I need. LIPAVI has racks for a bunch of different size containers. The round R20 rack, designed to fit in stock pots, is especially cute.

Vacuum Sealer

This is the next place I’m want to upgrade, but the cheap FoodSaver Vacuum Sealer I bought years ago keeps chugging along. Sure, I’d love a ridiculously expensive chamber vacuum sealer, so I can seal bags with liquid in them. (My pump vacuum sealer makes a mess of marinades.) Never mind that I don’t have the counter space to fit it, or any reasonable justification of the $700+ price. That doesn’t mean I don’t lust after one, however.

Do I need all of this?

It's not absolutely necessary, especially if you're just starting out, and want to try sous vide without committing to expensive equipment. You can take the bubba sous vide road and use a beer cooler, hot water, and a thermometer to get the water close to where you need it. Just limit yourself to quick-cooking, thin cuts of meat - no 6 hour cooks, let alone multi-day, 48 hour sous vide sessions.

But, if you get into sous vide cooking, you'll want to upgrade to a decent circulator, and get a dedicated container. The right equipment makes sous vide quick and easy. Not just for long cooks - it makes sous vide a weeknight cooking method. I can get home, throw a few steaks in there from the freezer, and dinner will be ready in about an hour with minimal effort.

What do you think?

Questions? Other ideas? Favorite sous vide equipment? Talk about it in the comments section below.

Related Posts

My Sous Vide Recipes Page


Enjoyed this post? Want to help out DadCooksDinner? Subscribe to DadCooksDinner via eMail or RSS reader, recommend DadCooksDinner to your friends, and buy something from Amazon.com through the links on this site. Thank you.

Pressure Cooker Teriyaki Chicken Drumsticks

March 7, 2017 by Mike Vrobel 23 Comments

Pressure Cooker Teriyaki Chicken Drumsticks | DadCooksDinner.com

Pressure Cooker Teriyaki Chicken Drumsticks | DadCooksDinner.com
Pressure Cooker Teriyaki Chicken Drumsticks

My grocery store had a sale on chicken drumsticks - and I think they were not the only store to do it. Last week, I got a wave of questions about pressure cooking drumsticks2Four questions in three days is a wave, right?. The questions came from two perspectives - half were asking if they could use my chicken wings recipe with drumsticks; the other half asked about my chicken legs recipe.

So, here we are in the middle - bigger than wings, smaller than legs, with a convenient handle to grab on to. I’m cooking the drumsticks like large chicken wings with a teriyaki glaze. (My oldest son is on a Teriyaki kick, so I went with Teriyaki drumsticks. Of course, he got himself invited out for pizza the night I made this recipe. Teenagers.)

There’s not much to this recipe - dump the drumsticks in the pot and pressure cook. The only tricky part is broiling the drumsticks. I broil them because it’s the quickest way to get them browned; they are kind of flabby when they come out of the pressure cooker, and need to crisp up. The tricky part is how variable broilers are. I’ve had wimpy broilers that can’t warm up a damp paper towel, and mega-powerful broilers that carbonize food the moment you take your eyes off of it. My current broiler is in the goldilocks zone, not to cold, not too hot. To even out the heat, and give myself some extra cushion, I put the rack down a few levels, in the middle of the oven. In that setting, the wings are nicely browned in about 10 minutes. Then I give them an extra coat of teriyaki and serve.

Looking for an easy substitute for chicken wings? Try out some pressure cooker chicken drumsticks.

Pressure Cooker Teriyaki Chicken Drumsticks | DadCooksDinner.com
Pressure Cooker Teriyaki Chicken Drumsticks

What do you think?

Questions? Other ideas? Leave them in the comments section below.

Related Posts

Pressure Cooker Buffalo Chicken Wings
Pressure Cooker Chicken Legs with Herb Rub
Pressure Cooker Chicken Broth and Shredded Chicken
Instant Pot Chicken With 40 Cloves of Garlic
My Instant Pot (Pressure Cooker) Recipe Index
My other Pressure Cooker Time Lapse Videos

Enjoyed this post? Want to help out DadCooksDinner? Subscribe to DadCooksDinner via eMail or RSS reader, recommend DadCooksDinner to your friends, and buy something from Amazon.com through the links on this site. Thank you.

How to Fix Instant Pot Overheating

March 2, 2017 by Mike Vrobel 26 Comments

The dreaded Instant Pot OvHt code | DadCooksDinner.com

The dreaded Instant Pot OvHt code | DadCooksDinner.com

How To Fix Instant Pot Overheating? Oh no, it's the dreaded OvHt code. OvHt is the Instant Pot’s Overheat code - and is both a blessing and a curse as I develop recipes for the Instant Pot. From the InstantPot.com “Questions after your purchase”:

This mechanism is called "burn-protection". When a high temperature (140C or 284F) is detected at the bottom of the inner pot, the burn-protection mechanism suspends heating to avoid burning food. On Instant Pot IP-DUO series, a warning message "ovHt" is flashed on the display.
Instant Pot Questions After Purchase - InstantPot.com

The Overheat blessing: it saves dinners. The sensors in the pot notice food sticking to the bottom - it starts to overheat - and turns off the power right when I’m about to burn something. In the old days of stovetop pressure cooking, I wouldn’t get Overheat mode - I’d get a layer of burnt food on the bottom of the pot. I didn’t have a digital brain in my cooker, warning me that a disaster was about to happen.

Unfortunately, burnt food is the nature of pressure cookers. Once the lid is locked, the food can’t be stirred to even out the heat. If there is a thick layer of food on the bottom of the pot, and it heats up faster than the food on top, it can burn. Especially tomatoes, or starchy foods like rice. Lorna Sass’s Cooking Under Pressure taught me to float tomatoes on top of the other ingredients - if they are stirred in, they’ll sink to the bottom and scorch. And, about starch…like my Jambalaya recipe from Tuesday…Instant Pot specifically warns:

This "burn-protection" mechanism works very well, except if the food has very high starch content. For example, if you add flour in your chili recipe, the flour sinks to the bottom, solidifies at low temperatures and can block heat dissipation.
Instant Pot Questions After Purchase - InstantPot.com

The Jambalaya rice (with tomatoes! Extra danger!) was definitely sinking to the bottom and starting to burn before the rest of the pot could heat up enough to start pressure cooking.

A related problem is a big batch of a thick recipe. Like, say, a big batch of chili that fills the pot to the max fill line. The ingredients are too thick, and heat builds up on the bottom of the pot before the top starts to boil and bring the pot up to pressure. Again, the result is overheat mode.

Is the pot about to explode?

Relax, it will be fine. (Everyone's first worry - the pressure cooker is about to explode.) This is the opposite problem - before it can even come up to pressure, it is overheating, and the digital brain in the Instant Pot turned off the heat. (Now, I’ve never had an overheat code after the pot comes up to pressure, but to be on the safe side, make sure the lid is not locked. If it is locked, the pot is pressurized. Quick release the pressure and wait for the lid to unlock before continuing. But, almost all the time, overheat will happen before the pot can pressurize, and you can open it safely.)

Why do you know so much about overheat mode?

Um…well…because I keep pushing my pot to the edge of overheating. The pressure cooker is a sealed pot that traps steam to build pressure. Sealed pot equals no evaporation in a pressure cooker. Recipes that would normally thicken up over long cooking times in a traditional pot - like chili and stew - tend to come out watery from the pressure cooker. To avoid runny chili, I cut way back on the liquid in my recipes…and sometimes, I don’t get that balance right. The result? OvHt.

How To Fix Instant Pot Overheating?

When my pot flashes the OvHt signal, it is telling me there is a thick layer of food stuck to the bottom of the pot, and it is very close to burning.

The first thing is to un-stick the food. I remove the lid and scrape the bottom of the pot with a flat edged wooden spoon. Since the pot is full, I can’t see the stuck food. But I can definitely feel stuck to the bottom of the pot - as I scrape the wooden spoon, the bottom feels bumpy and rough. Once I have cleaned the pot, the bottom will feel smooth. (This is why I love flat edged wooden spoons so much - they transfer the rough feel of the stuck food up to my hand.) Scraping the rough, overheating food can take some elbow grease. Sometimes it is really stuck on there.2Again, like my failed attempts at Jambalaya. Can you tell why I’m writing this post?

I keep working it, scraping, spinning the pan, scraping at different angles. Don’t give up - it might take a while, but eventually the rough feeling will go away, and the bottom of the pot will be clean. If I can scrape the entire bottom of the pot, paying close attention to the edges, and the whole thing feels smooth, then I’m ready to move on to the next step trying to prevent the sticking.

The second thing is to increase the amount of liquid in the pot. We want enough liquid that the whole thing heats up and starts to boil before the bottom layer sticks. I add more water or broth, depending on the recipe - at least two cups - lock the lid, and try to start pressure cooking again. If it overheats again, I repeat the whole process - scrape the bottom clean, add two more cups of liquid, and try to pressure cook again. Eventually, I’ll get the right amount of liquid in the pot for it to come up to pressure before it starts to burn.

Once it comes up to pressure I’m past the danger zone - it’s only in the building pressure zone that I get overheating. When it is actually pressure cooking, funnily enough, there’s a lot less heat on the bottom of the pot. The heating element on the bottom of the pot is on high to bring it up to pressure. Once it is at pressure, it cycles the power on and off to maintain that pressure - and this means a lot more even heat, and less chance of burning on the bottom.

What do you think?

Questions? Other ideas? Worst-sticking recipe you’ve ever had? Talk about it in the comments section below.

Related Posts

Instant Pot Frequently Asked Questions
Which Pressure Cooker Should I Buy
My other Pressure Cooker Recipes


Enjoyed this post? Want to help out DadCooksDinner? Subscribe to DadCooksDinner via eMail or RSS reader, recommend DadCooksDinner to your friends, and buy something from Amazon.com through the links on this site. Thank you.

Sous Vide Boneless Ribeye Roast

February 23, 2017 by Mike Vrobel 52 Comments

Sous Vide Boneless Ribeye Roast | DadCooksDinner.com

Sous Vide Boneless Ribeye Roast. A whole ribeye roast, cooked to perfect medium-rare thanks to sous vide.

Sous Vide Boneless Ribeye Roast | DadCooksDinner.com
Sous Vide Boneless Ribeye Roast

One of the side benefits I get from working with my friends at Certified Angus Beef® Brand is the gift packs of beef. They sent me a gorgeous 6-pound boneless Ribeye roast for the holidays, which inspired my Christmas rotisserie ribeye roast recipe and video. But…the ribeye roast in that video is not the one they sent me. I…this is embarrassing…I was all ready. I had all of my other ingredients, I told my wife and kids to keep it down, I'm shooting video that afternoon, and…the ribeye was still in the freezer. I had to run over to my local grocery store to get another CAB ribeye roast to use in the video.

Sous Vide Boneless Ribeye Roast | DadCooksDinner.com

My monster of a frozen roast - 4.5 inches thick!

I was also surprised over the holiday by the number of sous vide fans who saw that video and asked "That's nice, but…how do I sous vide a ribeye roast"? Sous vide Ribeye roast, here we come!

Now, it takes a while to bring this monster up to temperature. (I want my roast cooked to medium-rare plus, 56°C/133°F, the one true temperature for rib roast. Come at me, haters.) It takes about 6 hours for a 4 to 5-inch thick roast...if it is thawed. I cooked this 4½ inch roast straight from the freezer - which works great with sous vide, by the way - so I went with 8 hours. (After that, you could go another 4 hours or so without over-tenderizing the roast. Go with a maximum of 10 hours for a thawed roast, or 12 hours for a frozen roast.)

There are two other tricks to this roast: quick searing in a cast iron pan, and a red wine pan sauce.

Cast Iron: I made baked potatoes as one of the side dishes, so I popped my 12-inch cast iron skillet in the oven with the potatoes to preheat. You can leave the pan in there for as long as you'd like - at least 20 minutes - and the pan is ready to go, ripping hot when I pull it out of the oven. A one-minute sear on each side browns the roast - I give it a couple of extra minutes on the fat cap side to help render some of the fat.

Sous Vide Boneless Ribeye Roast | DadCooksDinner.com

Searing the roast

Red wine sauce: I hate throwing away the juices in the sous vide bag, so I used them in a red wine sauce. I put a cup of wine in a small saucepan, added a small minced shallot, and simmered it down for about 15 minutes over low heat. Then, while the roast was searing, I poured the juices into the pot with the wine, sprinkled in some salt, and served the roast.

Inspired by

How to Sous Vide Prime Rib - AmazingFoodMadeEasy.com
Win the Holidays with Herb-Crusted Sous Vide Prime Rib - ChefSteps.com

Sous Vide Boneless Ribeye Roast | DadCooksDinner.com
In the Sous Vide tank

What do you think?

Questions? Other ideas? Leave them in the comments section below.

Related Posts

Sous Vide New York Strip Roast With Bourbon Cream Pan Sauce
Sous Vide Filet Mignon With Shallot-Rosemary Butter
Simple Sous Vide Carrots
Sous Vide Flat Iron Steak
My other Sous Vide Recipes

Enjoyed this post? Want to help out DadCooksDinner? Subscribe to DadCooksDinner via eMail or RSS reader, recommend DadCooksDinner to your friends, and buy something from Amazon.com through the links on this site. Thank you.

Blog Moving Day

February 21, 2017 by Mike Vrobel 3 Comments

Blog Moving Day | DadCooksDinner.com

Blog Moving Day | DadCooksDinner.com
Blog Moving Day


Note: This is an Inside Blogging post - if you don’t care about the nuts and bolts of the blog, stop back next time for some actual food writing.

(Yes, yes. I know I said the same thing last Thursday. This blog migration took off over the long holiday weekend, and I spent my time working on that when I should have been writing a recipe post. I’m a geek. Sometimes I get lost in the tinkering. Sorry!)


Every year, my blog traffic drops February, and doesn’t really pick up again until Easter…and doesn’t take off until May. I think it’s the winter blues - everyone wants to hunker down and wait for spring. I don’t blame them - I have low level Seasonal Affective Disorder, and was thrilled to have a bright, sunny day today to lift my mood.

This year, I’m taking advantage of my February slowdown. I’m making infrastructure changes to Dad Cooks Dinner to improve site speed and security. [Footnote]For you WordPress fans out there who want details…I made a mess of things a few years ago when I migrated from Blogger.com to a BlueHost hosted WordPress site. That’s happens when you migrate first and asking questions later. I’m paying Andrew at BlogTutor.com to move me to Cloudways as my new host, and to clean up the mess that I have in my WordPress dashboard. (So many “performance” plugins…that don’t seem to help with speed.) Also, I’m getting a SSL certificate so I can run the blog as an HTTPS site, to keep Google search happy.[/footnote] These behind the scenes changes started Sunday; I apologize if the site has been going up and down over the last couple of days. It should be stabilized now. (I hope. Gulp.)

You will notice one “behind the scenes” change…if you are on my email list, that is. I switched to MailChimp as my email service. Hopefully, you won’t notice anything, other than minor formatting changes to this email. If you didn’t get your email, I’m sorry…and impressed you noticed quickly enough to come here to check. You may have to re-subscribe to get the emails flowing again. Sign up for the new email service here: DadCooksDinner eMail Signup at MailChimp

I’m also starting work with a designer to get the look of the blog overhauled. It will take a little while to get things picked out, but soon I’ll have changes you can actually see…not just the site loading a little faster.

Thanks for reading, and talk to you with new food content soon!

What do you think?

Questions? Other ideas? Leave them in the comments section below.


Enjoyed this post? Want to help out DadCooksDinner? Subscribe to DadCooksDinner via eMail or RSS reader, recommend DadCooksDinner to your friends, and buy something from Amazon.com through the links on this site. Thank you.

Nothing is certain except...

February 16, 2017 by Mike Vrobel 1 Comment

Oh, boy... | DadCooksDinner.com

Oh, boy... | DadCooksDinner.com
Oh, boy...

The good news about writing a relatively successful food blog? It provides a little side income.

The bad news about writing a relatively successful food blog? Side income complicates my taxes.

No new post today - I'm busy bookkeeping, sorting documents, and entering info into TurboTax. Yes, I'm one of those weirdos who does his own taxes. Someday the blog may make enough to get someone to do my taxes...but I have a hard time paying for something I can do myself.

I'll see everyone next week with a new recipe!


Behind the Scenes Time Lapse - Chili with Certified Angus Beef

February 9, 2017 by Mike Vrobel Leave a Comment

Behind the scenes Time Lapse - Chili Facebook Live Video with Certified Angus Beef | DadCooksDinner.com

Behind the scenes Time Lapse - Chili Facebook Live Video with Certified Angus Beef | DadCooksDinner.com
Behind the scenes Time Lapse - Chili Facebook Live Video with Certified Angus Beef

I know I've been talking a lot about my friends over at Certified Angus Beef (thanks again for sponsoring me! Check out hashtag #BestBeef!), but I still have to share this. I shot a time lapse video of my Facebook Live Chili video with Chef Michael Ollier from last week. Right before we started the live video, I put my phone on time lapse mode, out of the way in the corner. I love the quick "fly on the wall" video of what it looks like to do a live shoot:

Behind the Scenes Time Lapse - Chili Facebook Live with Certified Angus Beef [YouTube.com]

Thanks again to chef Michael Ollier, chef Gavin Pinto, videographer Matt Pinto, and everyone else at Certified Angus Beef for inviting me down and letting me talk chili. I had a great time!

Big Batch of Quick Chili in the 8 Quart Pressure Cooker

January 31, 2017 by Mike Vrobel 9 Comments

Pressure Cooker Big Batch of Quick Chili in an 8 Quart Pressure Cooker | DadCooksDinner.com

Big Batch of Quick Chili in the 8 Quart Pressure Cooker | DadCooksDinner.com
Big Batch of Quick Chili in the 8 Quart Pressure Cooker


Special thanks to my friends at Certified Angus Beef® Brand for sponsoring DadCooksDinner.

Please check them out at the hashtag #BestBeef for more chili ideas, and the Virtual #BestBeef Chili Cook-Off on Instagram. Or visit them at the Certified Angus Beef Kitchen Community on Facebook. Thank you!


I write my recipes for 6 quart pressure cookers - it is the most common size, especially with how the Instant Pot has taken off. But, now that the 8 quart Instant Pot is available, I get a lot of questions about scaling up recipes to fit.

My answer is, in general “Keep the cooking time the same, but increase the ingredients by a third”. That’s how much extra space you get using an 8 quart cooker vs a 6 quart cooker. Let me show you my math (and if you were promised there would be no math, skip to the next paragraph):

  • 6 quarts with 70% useable space to max fill = 4.2 quarts
  • 8 quarts with 70% useable space to max fill = 5.6 quarts
  • 5.6/4.2 = 33.3% more space (or about a quart and half of extra space).

Big Batch of Quick Chili in the 8 Quart Pressure Cooker | DadCooksDinner.com
Everything in the pot, right up to the max fill line

Unfortunately, no one likes that answer. And, really…I don’t use it either. I pay more attention to the extra 1.5 quarts, the max fill line, and the ingredients I think will fill out the recipe.

Let’s take my Pressure Cooker Quick Chili with Canned Beans recipe, a recent blog favorite, and one I’ll be making for a super bowl party this weekend. Instead of just scaling everything up - which I could have done - I picked my spots. I use beans to bulk up the chili, so I added an extra two cans - a 50% increase. To balance that out, I need to increase the beef - and my grocery store sells ground beef in 1 pound or 3 pound packages (on average). Instead of trying to split the family pack, I bought two smaller 1-pound packs of beef. (I’m not just trying to keep my friends at Certified Angus Beef happy. Honest.) And, I bumped the spices by 50% to match the beef and beans.

Now, that’s more than a 33% increase, so I only increased the liquid by a little - from 3 cups to 4 cups. I was still just below my max fill line, so I was good to go. Everything else - the onions, garlic, crushed tomatoes - I left the same. Of course, it helps that chili is a flexible recipe. For example: want to use the extra space by going with 4 pounds of beef? Sure, that works. Or, go with a couple more cans of beans? It’s all good. As long as you keep the pot below 70% full, and have enough liquid to build pressure, you’ll be fine.

So, here it is - a big batch of chili for the 8 quart Instant Pot. Enjoy!

What’s that? What about a 12 quart pressure cooker? Sigh.
…
Just kidding - that one is really easy - just double my 6 quart recipe. The math works perfectly.

Big Batch of Quick Chili in the 8 Quart Pressure Cooker | DadCooksDinner.com
Big Batch of Quick Chili in the 8 Quart Pressure Cooker

Related Posts

Pressure Cooker Quick Chili with Canned Beans (for a 6 Quart Instant Pot)
Pressure Cooker Texas Red Chili
Pressure Cooker Chili Verde - Green Pork Chili
My other Pressure Cooker Recipes

Enjoyed this post? Want to help out DadCooksDinner? Subscribe to DadCooksDinner via eMail or RSS reader, recommend DadCooksDinner to your friends, and buy something from Amazon.com through the links on this site. Thank you.

Watch me talk chili with Certified Angus Beef on Facebook Live!

January 30, 2017 by Mike Vrobel Leave a Comment

#BestBeef Virtual Chili Cook-Off at Certified Angus Beef | DadCooksDinner.com

#BestBeef Virtual Chili Cook-Off at Certified Angus Beef | DadCooksDinner.com
#BestBeef Virtual Chili Cook-Off at Certified Angus Beef


Special thanks to my friends at Certified Angus Beef® Brand for sponsoring DadCooksDinner.

Score Big with Chili and Game Day Appetizers!
Don’t miss Certified Angus Beef® brand LIVE on Facebook this Thursday, Feb. 2 at 12:30 p.m. Eastern. Chef Michael Ollier and friends will share chili ideas and beefy appetizers for the big game. He’ll also announce the winner of the brand’s #BestBeef Virtual Chili Cook-off.


"...and friends..." means me! I'll be broadcasting live on Facebook from Wooster, OH - home to Certified Angus Beef - and we'll be talking about chili, my first great culinary love.

Stop by Certified Angus Beef's Facebook page on Thursday, Feb 2, at 12:30PM EST to watch my Facebook Live debut - or check it out later; the replay will be in their Videos section.

#BestBeef Virtual Chili Cook-Off at Certified Angus Beef | DadCooksDinner.com

Also, you still have a couple of days to enter the Instagram chili cook-off:


There’s still time to enter your homemade chili in the #BestBeef Chili Cook-off! Just post your chili photo on Instagram with hashtags #BestBeef and #certifiedangusbeef - enter by Wednesday, Feb 1(at 11:59pm ET). A winner will be chosen during the Certified Angus Beef ® brand’s Facebook LIVE on Thursday, Feb. 2 at 12:30 p.m. Eastern.


View this post on Instagram

A post shared by Certified Angus Beef ® (@certifiedangusbeef)

Thanks, everyone, and see you live on Thursday!

Time Lapse: Which Speed Do You Prefer?

January 24, 2017 by Mike Vrobel 28 Comments

Time Lapse Video Setup | DadCooksDinner.com

Time Lapse Video Setup | DadCooksDinner.com
Time Lapse Video Setup

Mike, I really like your videos and love the time lapse "but" find myself watching them and ½ speed… (Loren D., YouTube commenter)

Reader survey time!

I enjoy shooting time lapse videos. (Regular readers are saying “No kidding” right now.) As a photography geek, they’re easy for me to make, because each video starts as a series of pictures. I set the camera up, start the time lapse feature on my camera - one frame per second - and cook the recipe. When I’m done, I stack all the pictures together at 30 frames per second - each second of video is 30 seconds of real time. Then with some minor editing, I’m ready to publish. I can knock one out in an afternoon.

I like the results - the whole recipe is there to see, and the video is done in 90 seconds, quick enough to not get bored, especially during the “sauté the onions” step that always takes longer than I think it should. 2When I make a “real” video, like my Macaroni and Cheese Video, it takes a hours of video shooting, followed by days of editing and voiceover recording. A real video takes weeks for me to put together. That’s why I’m making so many time lapses - they are much faster for me to produce.

How fast is too fast?

In the last week, a couple of people left the same comments: they like my time lapse videos…but they’re too fast, and they either slow them down, or go back over them multiple times to see what’s happening.

Can I ask everyone a favor? Watch the two following videos, and let me know: Which speed do you prefer: 24 frames per second, or 12 frames per second? I re-cut my last time lapse video, Pressure Cooker Ham and Yellow Split Pea Soup. I did it at two speeds. A little slower, 24 frames per second, and a lot slower, 12 frames per second.

Let me know in the comments - 12 or 24 fps? (Or email me, or tweet, or post on my Facebook wall - whatever it takes to get me the feedback.)

If you watch both all the way through, it will only take you 4 minutes and 26 seconds total…they are time lapses, after all. Thank you!

24 Frames Per Second


24fps Ham and Yellow Split Pea Time Lapse [YouTube.com]

12 Frames Per Second


12fps Ham and Yellow Split Pea Time Lapse [YouTube.com]

What do you think?

Like it slower, at 12 FPS? Or speed things up to 24 FPS? Tell me your preference in the comments section below.

Related Posts

My other Pressure Cooker Time Lapse Videos


Enjoyed this post? Want to help out DadCooksDinner? Subscribe to DadCooksDinner via eMail or RSS reader, recommend DadCooksDinner to your friends, and buy something from Amazon.com through the links on this site. Thank you.

Virtual Chili Cook-Off from Certified Angus Beef

January 19, 2017 by Mike Vrobel Leave a Comment

Pressure Cooker Texas Red Chili | DadCooksDinner.com


Special thanks to my friends at Certified Angus Beef® Brand for sponsoring DadCooksDinner. Check out their Virtual Chili Cook-Off on Instagram.


My friends at Certified Angus Beef are hosting their first-ever #BestBeef Virtual Chili Cook-Off on Instagram! Think you've got an award winning chili? Post a picture on Instagram with the recipe title, #BestBeef hashtag, and tag @certifiedangusbeef. You could win a $150 Cattlemen's Premium Collection of steaks.

Pressure Cooker Texas Red Chili | DadCooksDinner.com
Pressure Cooker Texas Red Chili

I'm going to enter my Pressure Cooker Texas Red Chili and Beef and Bean Chili. Think you've got something better, tough guy? (Or girl?) Bring it!

For contest details, check out Certified Angus Beef's Instagram page and Facebook Page. Good luck!

View this post on Instagram

A post shared by Certified Angus Beef ® (@certifiedangusbeef)


Pressure Cooker Ham and Yellow Split Pea Soup

January 17, 2017 by Mike Vrobel 16 Comments

Pressure Cooker Ham and Yellow Split Pea Soup | DadCooksDinner.com
Pressure Cooker Ham and Yellow Split Pea Soup

Pressure Cooker Ham and Yellow Split Pea Soup. Use up a spare hambone with this easy pressure cooker pea soup.

My family knows me as the "save the bones" guy. My sister-in-law Rena, who would never actually use the bones, always pretends she she wants them, then "reluctantly" gives in and lets me take them.

Case in point - we had Christmas day dinner at Ted and Rena's this year, and they made a gorgeous ham roast. After carving, we had this wonderful bone left over:

Pressure Cooker Ham and Yellow Split Pea Soup | DadCooksDinner.com
Hambone!

…which I just had to bring with me. After Rena finished giving me a hard time, she handed me the gallon zip-top baggie she was hiding behind her back.

The moment I saw the bone, I knew it was destined for ham and split pea soup. I had to pull the knobby part of the bone apart - it was a big knuckle, and made the bone too big for my pot. That said, don't worry if the bone just barely fits - this recipe will work as long as you can get the pot closed.

(No leftover ham bone? No worries. Check the refrigerated case of your local grocery store for smoked ham hocks. A pound or two are a great substitute, depending on how much shredded ham you want in the finished soup.)

This recipe uses the ham bone to season the peas as it cooks. Essentially, we're making ham stock in the pot, infusing the peas with smoked pork flavor. (Smoked pork and beans are an awesome combination - that's why they show up together in so many recipes.)

Also, instead of using a natural pressure release, I tried out Kenji Alt's trick of quick releasing the pressure - which causes the contents of the pressure cooker to boil vigorously, pureeing some of the soft beans and thickening the soup. It worked perfectly; I was able to skip the "puree 2 cups of beans" step I usually have to add to the end of a bean soup recipe.

Pressure Cooker Ham and Yellow Split Pea Soup | DadCooksDinner.com
No pureeing necessary - thickened and ready to serve after the quick release

My wife was thrilled with this one - she told me she ate it for a week, pulling frozen leftovers from the freezer every day for lunch, and asked for more when it was gone. Looking for a great recipe for a cold winter night?

Video

Pressure Cooker Ham and Yellow Split Pea Soup - Time Lapse [YouTube.com]

Recipe: Pressure Cooker Ham and Yellow Split Pea Soup

Pressure Cooker Ham and Yellow Split Pea Soup | DadCooksDinner.com
Pressure Cooker Ham and Yellow Split Pea Soup - Recipe Tower

What do you think?

Questions? Other ideas? Leave them in the comments section below.

Related Posts

Pressure Cooker Senate Bean Soup
Pressure Cooker Lentil and Hambone Soup
Pressure Cooker Bean Mix Soup
My other Pressure Cooker Recipes
My other Pressure Cooker Time Lapse Videos

Enjoyed this post? Want to help out DadCooksDinner? Subscribe to DadCooksDinner via eMail or RSS reader, recommend DadCooksDinner to your friends, and buy something from Amazon.com through the links on this site. Thank you.

Five Fun Food Finds January 2017

January 12, 2017 by Mike Vrobel 3 Comments

Tongs and Saute Spatula | DadCooksDinner.com

My Panasonic G7 at work | DadCooksDinner.com
My Panasonic G7 at work

I was proofreading this post. After a few times through I noticed it - the title was wrong. Five Fun Food Finds January 2016 2017.

Tongs and Saute Spatula | DadCooksDinner.com
Tongs and Saute Spatula

Two essential kitchen tools

I have to restock my kitchen after the holidays. My flat edged wooden spoon cracked, and every time I need my short, nonstick safe kitchen tongs, my only pair is in the dishwasher. I just ordered a Oxo Sauté paddle and a couple Oxo 9-Inch Tongs with Silicone Heads so I can add them to my crock of kitchen tools.

Camp Brisket

View this post on Instagram

A post shared by Kevin Kolman Grill Master (@kevin_kolman)

Foodways Texas held their annual Camp Brisket at Texas A&M university. Someday I will get there. Someday…

Griffin Hammond - Hand Cut


Video: Hand Cut by Griffin Hammond[Panasonic Lumix at YouTube.com]

(Time for some inside blogging talk. If you’re not interested in blogging gear, skip this section…but do check out the amazing ice video.)

I don’t want to get caught in the crossfire of the Canon/Nikon holy war, but…I chose neither. I am a Panasonic loyalist. I am also a gadget addict, so I get the urge to try a new camera about once a year…fancier cameras with better reputations, larger image sensors, more megapixels…but I keep returning to my trusty Panasonic.2Photography babbling - I shoot in manual mode, because I can see the changes on the Panasonic live view screen. I don’t have to trust the light meter - I can see the exposure and depth of field change as I adjust the aperture, shutter speed, or ISO. And I can change the focus point by poking the screen where I want it. I love these cameras - especially the G7 with its big grip - they just feel right in my hand. All the pictures on the blog are from my Panasonic GX8 with a 30mm macro lens, and the videos are from my Panasonic G7 with a 12–35 f2.8 zoom lens. (That's the G7 in the picture at the top, filming my Rotisserie Duck video back when the deck wasn't covered with snow.)

Panasonic was already tempting me to update the G7 to their new replacement, the Panasonic G85…and then they announced a new top-of-the line camera, the Panasonic GH5. The GH5 is a high-end video camera masquerading as a DSLR.

Want to see what I mean? Take a look at this video, “Hand Cut” by Griffin Hammond. Panasonic turned him loose with a pre-production GH5, and the resulting video makes me desperately want a cocktail. And a giant ice cube kit. And a GH5…if only it didn’t cost $2000.
(And if you haven’t seen it already, check out Griffin’s Sriracha documentary)

How following a recipe can lead to disaster

Most people who write recipes for a living spend a lot of time writing them as clearly and accurately as possible. Still, even the best recipe isn't foolproof, and most are open to interpretation. (Except for my recipe for roasted peppers, which someone asked if they could make using something other than peppers. That one stumped me.) - David Lebovitz

Jacques Pepin, talks about “the paradox between a written recipe, and the creation of a taste”…and David Lebovitz adds his own comments. As a recipe writer, I struggle with the same issues, and I loved hearing their thoughts.
How Following a Recipe Can Lead to Disaster [DavidLebovitz.com]

Grilled Steak Bibimbap Bowls

Oh, my. Check out this recipe for Grilled Steak Bibimbap Bowls from friend-of-the-blog Kita at GirlCarnivore
Grilled Steak Bibimbap Bowls [GirlCarnivore.com]

What do you think?

Questions? Other ideas? Fun Food Finds I missed, that you want to share? Leave them in the comments section below.


Enjoyed this post? Want to help out DadCooksDinner? Subscribe to DadCooksDinner via eMail or RSS reader, recommend DadCooksDinner to your friends, and buy something from Amazon.com through the links on this site. Thank you.

Improvising: Potato Thermometer Clip

January 5, 2017 by Mike Vrobel 2 Comments

Potato Thermometer Holder | DadCooksDinner.com

View this post on Instagram

A post shared by Mike Vrobel - Food Blogger (@dadcooksdinner)

A sharp-eyed reader on Instagram noticed my high-tech thermometer clip. Do you see it? Let’s look closer…

Potato Thermometer Holder | DadCooksDinner.com
What's that?

That’s right, my high-tech probe thermometer clip is...a potato.

This is the home cooking edition of “When all you have a hammer, everything looks like a nail.” The alligator clip that holds the grill temperature probe on my BBQ Guru disappeared over the summer. One minute it was there, the next it was gone. I combed through the grass near the grill, and never could find it. (My guess is it fell into the coals and was dumped when I cleaned out the ashes.)

I need an accurate temperature for the Guru to work, and I don’t think it reads right if it is lying directly on the grill grate - the metal bars of the grate might block the thermometer - so I went with a trick from my old-time BBQ days and stuck the probe through a potato. Problem solved.

Now, every time I need to use it, I think “I really should go to the BBQ Guru website and get a replacement clip…” as I grab another potato out of the pantry. It's been six months. Still haven't bought the clip.

It looks like I’m not the only one improvising - I saw friend-of-the-blog Mike Lang at Another Pint Please doing the same thing a few months ago. I’m glad to know I’m not the only cook to look around his kitchen, asking “where can I find something to hold this probe…” and have his eyes settle on the potato bin.

Apple Smoked Chicken Sunday! #soontobechickensalad #wsm #myweber https://t.co/OSZyHEElYx pic.twitter.com/DVEyE6aa12

— Mike Lang (@AnotherPintPls) October 16, 2016

One more thing…don’t try to eat the potato. It just doesn’t work. It comes out undercooked and rock hard, or smoked into a tiny piece of charred spud. There doesn’t seem to be a middle ground. Every time I think - "Hey, that looks good, let me take a taste", I regret it.

Winter Break Road Trip: Tensuke Market in Columbus, OH

December 29, 2016 by Mike Vrobel 1 Comment

Japanese Market Square | DadCooksDinner.com

Japanese Market Square | DadCooksDinner.com
Japan Market Place

My good friend Rhonda fell in love with the Mastering the Art of Japanese Home Cooking cookbook, and wanted to stock up on Japanese ingredients at Tensuke Market in Columbus, OH. A road trip to a Japanese market? How could I say no?

Tensuke Market | DadCooksDinner.com
Tensuke Market

So much green tea | DadCooksDInner.com
So much green tea

It was a fantastic little market - packed with people for their end of year sale. It was a truly a Japanese market. Most of the Asian markets near me are Chinese or Korean. They try to cover all of Asia, and I can get the ingredients I need, but you can tell where their focus is. This market was unapologetically Japanese. As an example: Tensuke Market has the best Sake selection I’ve ever seen. I threw myself on the mercy of their Sake expert, and picked up a few bottles, hoping to learn more. (I mean, hey, I have to do research for the blog, right?)

hichimi Togarashi | DadCooksDinner.com
Shichimi Togarashi - Japanese hot peppers for sprinkling on food

Rhonda and I wandered around, scrutinizing packages to see if they were on her list. I picked up a few things I needed to re-stock my Asian pantry, and some Matcha Green Tea Kit-Kats for the kids. After a lot of shopping, we packed our bags in the car and had to make our toughest decision yet - where to eat lunch. There were three restaurants in Japan Market Place plaza, surrounding the food market. Do we go to Tensuke Express, the noodle bowl shop? Or Akai Hana, the sit-down restaurant? In the end, we couldn’t pass up Sushi Ten and the Poké bowls. Stuffed with sushi, trunk full of specialty ingredients, we drove home happy.

Poké bowl at Sushi Ten | DadCooksDinner.com
Poké bowl at Sushi Ten

Sushi Ten | DadCooksDinner.com
Sushi Ten

Tensuke Market
1167 Old Henderson Rd.
Columbus, OH 43220
Web: TensukeMarket.com


Enjoyed this post? Want to help out DadCooksDinner? Subscribe to DadCooksDinner via eMail or RSS reader, recommend DadCooksDinner to your friends, and buy something from Amazon.com through the links on this site. Thank you.

Pressure Cooker Baby Back Ribs

December 27, 2016 by Mike Vrobel 59 Comments

Pressure Cooker Baby Back Ribs | DadCooksDinner.com
Pressure Cooker Baby Back Ribs

Pork for the New Year's! Here's how I make Baby Back Ribs in about an hour in my pressure cooker.

And…this is where I have to put in all the disclaimers, to keep the Barbecue Fanatics from astroturfing me. I know this is not real barbecue. I love real barbecue, and cook it whenever I can. These are not real barbecue - but that's OK. The pressure cooker turns ribs into a weeknight meal, not just an all-day affair on a lazy summer weekend. These are just good ribs, tender and falling off the bone.

There aren't many tricks to this recipe. Season a slab of ribs, cut it into pieces so it will fit in the pressure cooker, add a half a cup of water, and pressure cook until tender. The only tricky part is peeling the membrane from the bony side of the ribs; you can skip this step, but the membrane will never get tender - it is a chewy piece of gristle. Once you've done it a few times, you'll get the hang of the gentle but firm pull that peels the membrane off instead of ripping it. Until then, just keep working at it, lifting it away from the bone with a dull butter knife, then grabbing it with a paper towel and pulling.

Pressure Cooker Baby Back Ribs | DadCooksDinner.com
Pressure Cooker Baby Back Ribs

Also, if you're really in a hurry, you can skip the broiling step - the ribs are done and ready to eat straight out of the pressure cooker. But, I think it's worth the extra five minutes. A quick run under the broiler thickens up the sauce and gives it an extra layer of flavor.

One other opinion, then we'll get to the recipe - liquid smoke. A lot of pressure cooker ribs recipes include a splash or two in the cooking water. I've never liked the flavor of liquid smoke; I'll save wood smoke for my real deal ribs. Between the rich pork, the rub, and the barbecue sauce, these ribs are loaded with flavor, and don't need the extra help.

Recipe: Pressure Cooker Baby Back Ribs

Adapted from: Ribs in the Pressure Cooker [NPR.org]

What do you think?

Questions? Other ideas? Leave them in the comments section below.

Pressure Cooker Baby Back Ribs | DadCooksDinner.com
Pressure Cooker Baby Back Ribs

Related Posts

Pressure Cooker Pork Western Shoulder Ribs with Barbecue rub and Barbecue Sauce
Pressure Cooker Pork and Sauerkraut
Pressure Cooker Kielbasa and Sauerkraut
Instant Pot Boneless Short Ribs (Red Wine Braised)
My other Pressure Cooker Recipes
My other Pressure Cooker Time Lapse Videos

Enjoyed this post? Want to help out DadCooksDinner? Subscribe to DadCooksDinner via eMail or RSS reader, recommend DadCooksDinner to your friends, and buy something from Amazon.com through the links on this site. Thank you.

Merry Christmas 2016

December 25, 2016 by Mike Vrobel Leave a Comment

Christmas had come. Officially. We plunged into the cornucopia… quivering with desire and the ecstasy of unbridled avarice.

[Dad] Didn't I get a tie this year?

[Randy] Wow, whoopie! A zeppelin!

[Dad] A can of Simonize.


Merry Christmas everyone!

Dad Cooks a Christmas Roast 2016

December 22, 2016 by Mike Vrobel Leave a Comment

Rib Roast on a cutting board in front of a Christmas tree

Rotisserie Rib Roast, Reverse Seared | DadCooksDinner.com
Rotisserie Rib Roast, Reverse Seared, In front of the Christmas tree

After yesterday’s Rotisserie Ribeye Roast video and recipe, I got a lot of questions - a LOT of questions - about other potential Christmas roasts. Here are some quick answers from my back catalog:

Q: What about a Sous Vide Roast?

Much to my surprise, this was my #1 question. Try my Sous Vide New York Strip Roast with Bourbon Cream Pan Sauce, and I promise I'll have more sous vide roasts up soon.

Sous Vide New York Strip Roast with Bourbon Cream Pan Sauce


Q: How do you fit that rotisserie spit in your pressure cooker?

Ha. Ahahaha. A comedian. Here, try a 7 hour leg of lamb roast…which finishes in 90 minutes in the pressure cooker: Pressure Cooker 7 Hour Leg of Lamb (in 90 minutes)

Pressure Cooker 7 Hour Leg of Lamb (in 90 minutes)
Pressure Cooker Beef Pot Roast


Q: That ribeye roast looks good…but what about a beef tenderloin? Or a reverse seared prime rib roast? Or a cheaper eye of round roast?

I’ve got you covered:

Rotisserie Beef Tenderloin with Horseradish Crust
Rotisserie Prime Rib Roast, Reverse Seared
Rotisserie Eye of Round Roast


Q: That's a lot of beef - what about a rotisserie pork roast?

Sure. Try these out:

Rotisserie Boneless Pork Loin Roasts, Brined, Rubbed, and Maple Syrup Glazed
Rotisserie Pork Shoulder with Basic Wet Brine
Rotisserie Leg of Pork Roast with Injection Brine and Herb Rub


Q: My family insists on ham for the holiday…help?

I know the feeling - here are a few:

Grilled Ham with Honey Bourbon Glaze
Rotisserie Ham with Orange Glaze
Rotisserie Fresh Ham with Injection Brine


Which roast are you cooking?

I'm not cooking this year - gasp! I hosted Thanksgiving, and had to let someone else have the fun for Christmas. I am going to my brother-in-law's house and and brother's house, where they're cooking a ham and a rotisserie rib roast, respectively. (I've been asked to bring a veggie side, so I'm going with over-the-top Brussels sprouts.)

Merry Christmas everyone, and may all your roasts be fantastic!

Enjoyed this post? Want to help out DadCooksDinner? Subscribe to DadCooksDinner via eMail or RSS reader, recommend DadCooksDinner to your friends, and buy something from Amazon.com through the links on this site. Thank you.

Rotisserie Ribeye Roast with Herb Crust

December 20, 2016 by Mike Vrobel 17 Comments

A boneless ribeye roast cooking on a gas grill rotisserie

Rotisserie Ribeye Roast with Herb Crust. Do you want to cook the best beef roast? One that a prime rib house would be proud to serve? Ask your butcher for a ribeye roast. (Or, if you want to do it yourself, buy a bone-in rib roast, about 4 bones worth, and cut away the bone to get a big piece of boneless ribeye.) Rub the roast with salt, pepper, and a lot of minced herbs. Cook it on the rotisserie until it has a crisp brown crust and a perfectly medium-rare interior. (As much as I love gnawing on a rib bone, the advantage to a boneless roast is that crust - all the way around the outside of the roast.) Let it rest for a few minutes, then slice and serve. Easy peasy.

A boneless ribeye roast cooking on a gas grill rotisserie
Rotisserie Ribeye Roast with Herb Crust
[feast_advanced_jump_to]

What is the internal temperature of a Rotisserie Ribeye Roast cooked to Medium-Rare?

The key to perfect beef (medium-rare, thank you very much) is internal temperature. This big hunk of beef needs to come off the grill at 120°F internal temperature. Less than that (say, 110°F to 115°F) is rare - which is good, if you like your roast to "moo" when you poke it with a fork. More than that (say, 125°F to 135°F) is medium - pink in the middle, but bordering on the danger zone. Get above 135°F, and you're looking at disaster - also known as medium-well beef. Or worse.2Thinks about a gorgeous ribeye roast, cooked to well done. Runs screaming from the room The key is an instant read thermometer - cooking by time is just asking for trouble.

Rotisserie Ribeye Roast with Herb Crust | DadCooksDinner.com
Medium-rare...oh, my.

Why cook a ribeye roast on the rotisserie?

The other key to this roast is the beautiful, browned crust on the outside. That's where the rotisserie comes in. The spinning rotisserie bastes the roast in its own juices as it cooks. The result is the best crust on a roast you will ever see. The herbs add another layer of flavor to the brown, crispy goodness. My wife demands asks for the end of the roast - she doesn't care about medium-rare, she just wants as much crust as possible.

Rotisserie Ribeye Roast with Herb Crust | DadCooksDinner.com
Trussed, Spit, and ready for the rotisserie

How much ribeye roast per person

This is a big roast - assume a half pound of uncooked beef per person - so, you can serve 12 dedicated carnivores with this 6 pound roast. If you have beef dilettantes, you can get away with serving 14 to 16 people. In my family, this roast is good for 8 beef loving adults, plus a gaggle of young kids…but we love our beef.

(And, if you want to cheat, reach for the spinalis dorsi. What's the spinalis? It's the ribeye cap - the crescent of beef on top of the eye of fat in the roast. I look for the slices cut with the widest piece of spinalis. It is my favorite cut of beef, which is saying a lot. When I share a slice of beef with the kids, I make sure to take the spinalis, and leave the rest for them. I'm not proud…but I'm not changing.)

Equipment

  • Grill with the rotisserie attachment (I love my Weber Summit 6-Burner grill)
  • Butchers Twine
  • Gloves (I use welding gloves)
  • Instant Read Thermometer (I love my Thermapen - it is so choice - but the ThermoPop will get the job done for less, if you need to save your pennies.)
Rotisserie Grilling by Mike Vrobel

I wrote a cookbook!

Rotisserie Grilling Cookbook

New to your rotisserie and need help with the basics? Love your rotisserie and looking for new ideas? Grab a copy of Rotisserie Grilling! You'll get 50 of my favorite rotisserie recipes and expert tips on how to set up and use your rotisserie.

Click here to buy →

What do you think?

Questions? Other ideas? Leave them in the comments section below. Unless the comments are about well done beef. That's what my mute button is for, you monsters.

Related Posts

Rotisserie Beef Prime Rib Roast
Rotisserie Beef Tenderloin with Horseradish Mustard Crust
Rotisserie Eye of Round Roast, Baltimore Pit Beef Style
My other Rotisserie Recipes

Enjoyed this post? Want to help out DadCooksDinner? Subscribe to DadCooksDinner via email and share this post with your friends. Want to contribute directly? Donate to my Tip Jar, or buy something from Amazon.com through the links on this site. Thank you.

Instant Pot as a Slow Cooker?

December 15, 2016 by Mike Vrobel 89 Comments

Instant Pot Lineup | DadCooksDinner.com

Instant Pot Lineup | DadCooksDinner.com

I am having trouble using the Slow Cooker mode on the Instant Pot. I tried a recipe at low, and it was not even remotely cooked...am I doing something wrong?

I’ve been getting a lot of questions like this recently. And I don’t have an answer.

In all my years of using the Instant Pot2According to Amazon order history, I bought my first IP-LUX60 in October 2012, I can count on one hand the times I’ve used it as a slow cooker. And, well… those times weren't really slow cooking. I was reheating chili I pressure cooked the night before, for my annual chili potluck at work. Low heat is not enough - I need high heat to be ready by lunchtime. I start at “Slow Cook - High” for an hour or two, and then, once everything is bubbling, I turn the cooker down to “keep warm” until it is time to serve.

For all the things my Instant Pot can do - “It’s a pressure cooker, slow cooker, yogurt maker, rice cooker…”2It slices! It dices! In Japan, the hand is used as a knife! But can it cut through this tomato? I really only ask it to do two things. First and foremost, it is my pressure cooker. I use the "Manual" (now "Pressure Cook") mode. I also use “Sauté” mode to saute onions and/or brown meat before turning on pressure cook mode. (And, occasionally, to simmer food after it is pressure cooked.) That’s it, I’m done. The Instant Pot is my favorite cooking tool because of how well it does those two functions. 9 modes? 11 modes? Doesn't matter to me, all I want are those two.3I have a separate rant about not trusting program modes…what is the difference between “Soup”, “Meat/Stew” and “Bean/Chili”, anyhow? What is the pot doing? Should I trust it? But, that’s a rant for another day. Back to slow cooking.

One of the first comments on my Instant Pot FAQ asked about slow cooking mode. (Like I said, I never use it, so I had to look it up in the manual.) According to the Instant Pot manual, the Slow Cooker settings are:

  • Normal mode: 90 to 96°C/194 to 205°F.
  • More mode: 93 to 99°C/199 to 210°F.
  • Less mode: 88 to 94°C/190 to 201°F.

That looked like like “Low” mode lines up with a Slow Cooker set to low, and “High” mode with a slow cooker set to high. But over the last few months, the volume of Instant Pot as a Slow Cooker questions has jumped. More and more, I’m asked: “I set my Instant Pot to Slow Cook - Low mode, came back ten hours later, and the results were not good. Am I doing something wrong?”

Turns out:

  • Slow Cook - Normal means "Low" in a traditional slow cooker
  • Slow Cook - More means "High" in a traditional slow cooker
  • Slow Cook - Less means "Keep Warm" in a traditional slow cooker

I don’t know how to answer, yet. I’m going to test out slow cooker mode on the Instant Pot, and I will follow up on this in the New Year, but testing is going to take a while. (Ten hour slow cooks aren’t a quick answer.) But, before I start testing,

Updated: Also, the Instant Pot has some limitations as a slow cooker. For more details, see my Update on Instant Pot as a Slow Cooker post. Or the comments on this post, or the Update post.

I want to throw the question to my readers:

Questions about Instant Pot Slow Cooking:

  • Are you using the Instant Pot as a slow cooker?
  • Is it working?
  • What settings do you use? (I saw a Reddit thread that said "Slow cook - medium on an IP is a slow cooker at low. Slow cook - high on the IP is a slow cooker at high. Slow cook - low is a "keep warm" mode. Does that work for you?)

Please answer in the comments below - what are your experiences? (Or, reply by email, on Twitter, or Facebook, or whatever social media platform you can find me on. Frankly, I’d prefer blog comments - I can barely keep up with Twitter as it is, and I’ve declared Facebook bankruptcy and only check it once in a blue moon.) Thanks!


Enjoyed this post? Want to help out DadCooksDinner? Subscribe to DadCooksDinner via eMail or RSS reader, recommend DadCooksDinner to your friends, and buy something from Amazon.com through the links on this site. Thank you.

  • « Previous Page
  • 1
  • …
  • 13
  • 14
  • 15
  • 16
  • 17
  • …
  • 37
  • Next Page »

Welcome to Dad Cooks Dinner!

I'm Mike Vrobel, a dad who cooks dinner every night. I'm an enthusiastic home cook, and I write about pressure cooking, rotisserie grilling, and other food topics that grab my attention.

More About Me →

Popular

  • Three bowls of cooked Pinto Beans on a wood table
    Instant Pot Pinto Beans (No Soaking)
  • Pressure Cooker Beef Shank (Osso Bucco)
  • Pressure Cooker 7 Hour Leg of Lamb (in 90 minutes)
    Pressure Cooker 7 Hour Leg of Lamb (in 90 minutes)
  • Pressure Cooker Brown Jasmine Rice
  • Grilled Tomahawk Steak (Long Bone Ribeye, Reverse Seared)
    Grilled Tomahawk Steak (Long Bone Ribeye, Reverse Seared)
  • A green bowl full of chicken noodle soup
    Instant Pot Rotisserie Chicken Noodle Soup

Seasonal

  • A bowl of asparagus risotto
    Instant Pot Asparagus Risotto (Pressure Cooker Recipe)
  • Grilled Butterflied Chicken with Garlic Butter
  • Sous Vide rack of lamb sliced into chops
    Sous Vide Rack of Lamb with Dijon Bread Crumb Crust
  • A bowl of beef stew with asparagus, carrots, and radishes.
    Instant Pot Spring Vegetable Beef Stew
  • A Rotisserie Chicken (Pollo Asado)on a platter of shredded cabbage
    Rotisserie Chicken Pollo Asado
  • Rotisserie Pork Shoulder Roast with Carolina Mustard BBQ Sauce
    Rotisserie Pork Shoulder with South Carolina Mustard Barbecue Sauce

Footer

↑ back to top

About

  • Privacy Policy

Newsletter

  • Sign Up! for emails and updates

Contact

  • Contact

Copyright © 2025 Dad Cooks Dinner