DadCooksDinner

  • Home
  • Rotisserie
  • Recipes
  • Tools
  • Books
  • Merch
menu icon
go to homepage
  • Recipes
  • Books
  • Tools
  • Merch
  • About
subscribe
search icon
Homepage link
  • Recipes
  • Books
  • Tools
  • Merch
  • About
×
Home » Recipes

On The Road: Travel Day

April 24, 2018 by Mike Vrobel 5 Comments

St. Mark’s Square in Venice


Thirty-three thousand feet above the North Atlantic, thirty minutes west of Dingle, Ireland. Heading home.

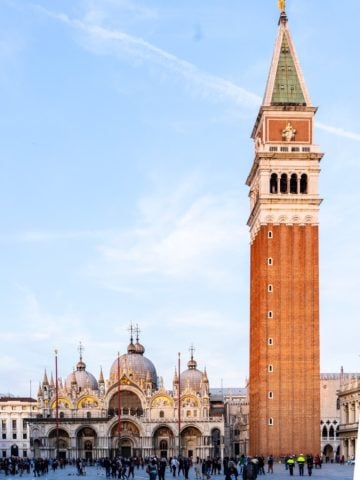
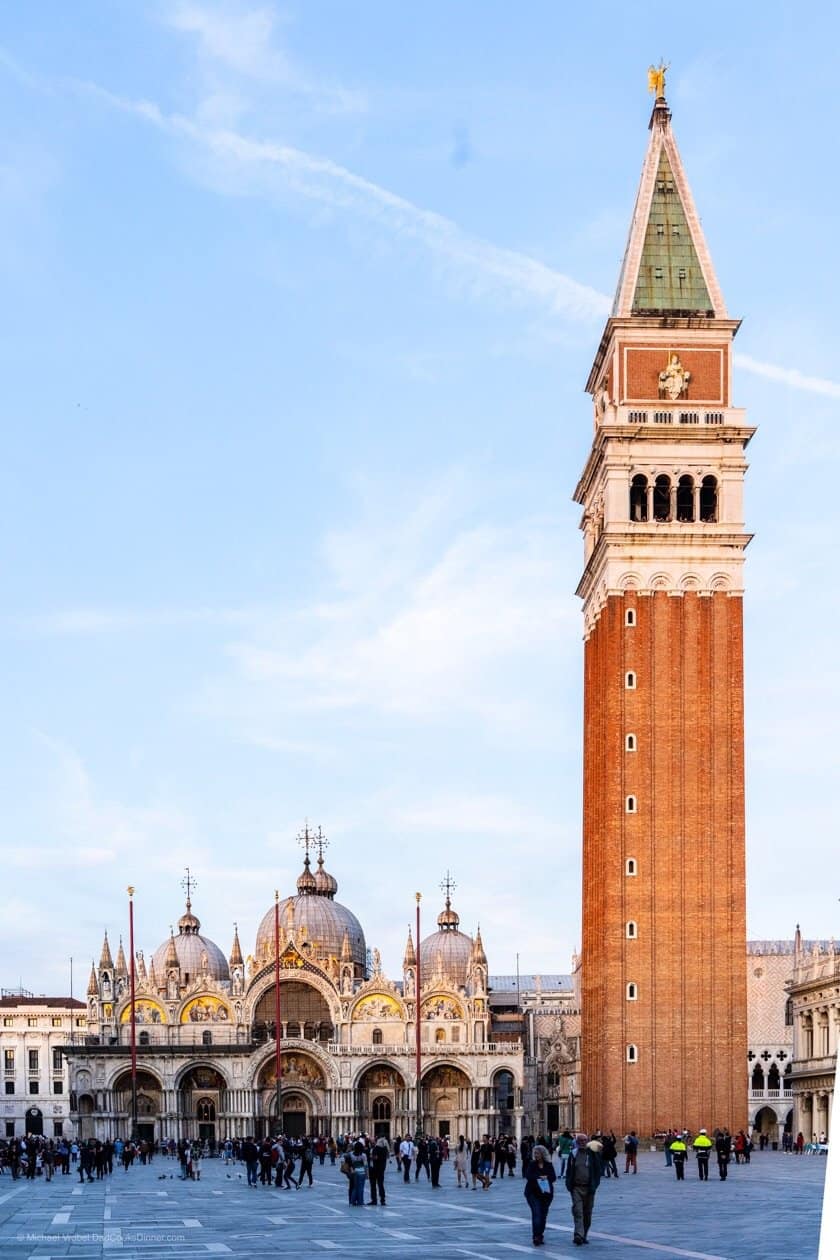
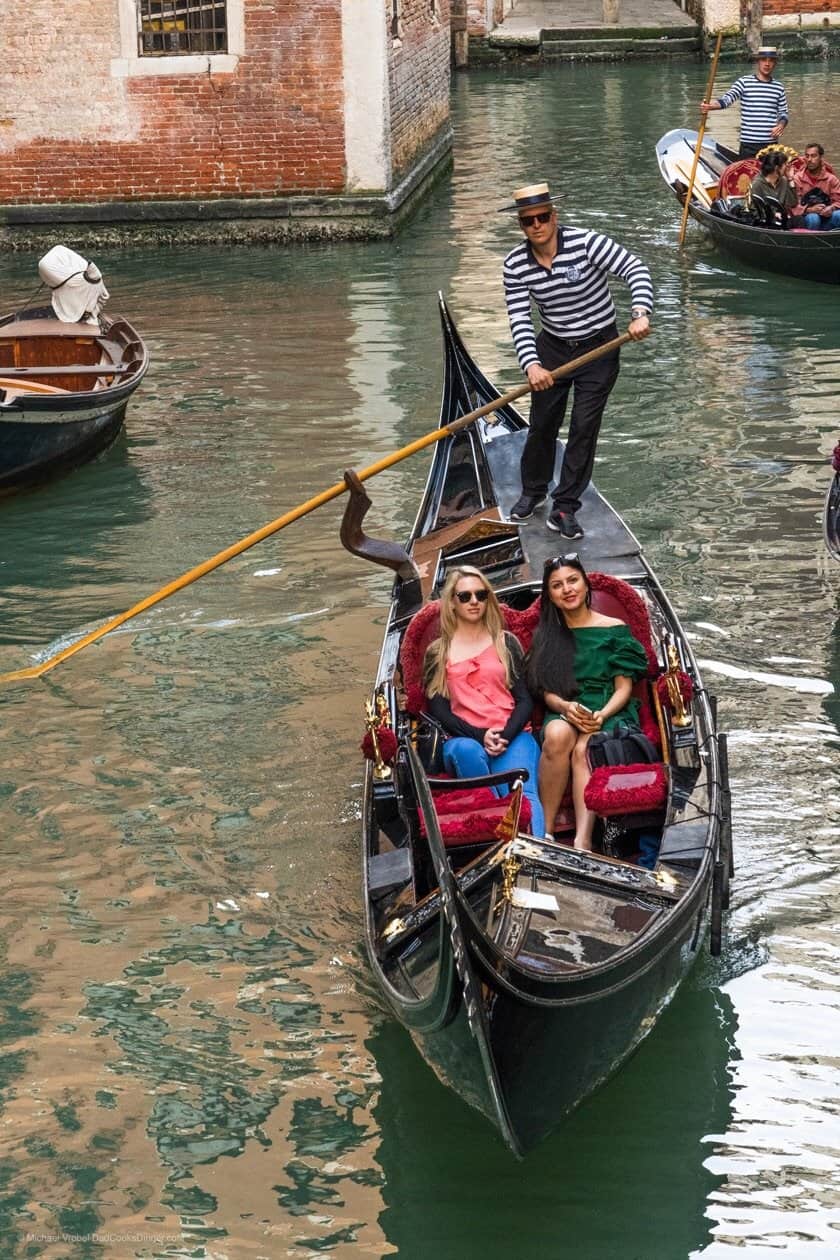
I hear an opera carrying along the canal. The sleek prow of a gondola glides into view, carrying a singing soprano and her accordionist. A middle-aged couple holds hands in the plush seat in the back, enjoying their own private Venetian concert. Except it's not private. The gondolier eases his boat along, under the bridge at my feet. The soprano is a pro; she times her finish for the bridge, using the echo to amplify her last note. It hangs in the air for a second, then applause fills the void, from the gondola and all around me on the bridge. The narrow bridge. That I stopped in the middle of, blocking traffic. Whoops. I look around, ready to excuse myself to everyone...but they're too busy clapping to notice my apology. I wasn't the only one enchanted by the melody.

Not the opera gondola - I was too busy listening to take a picture

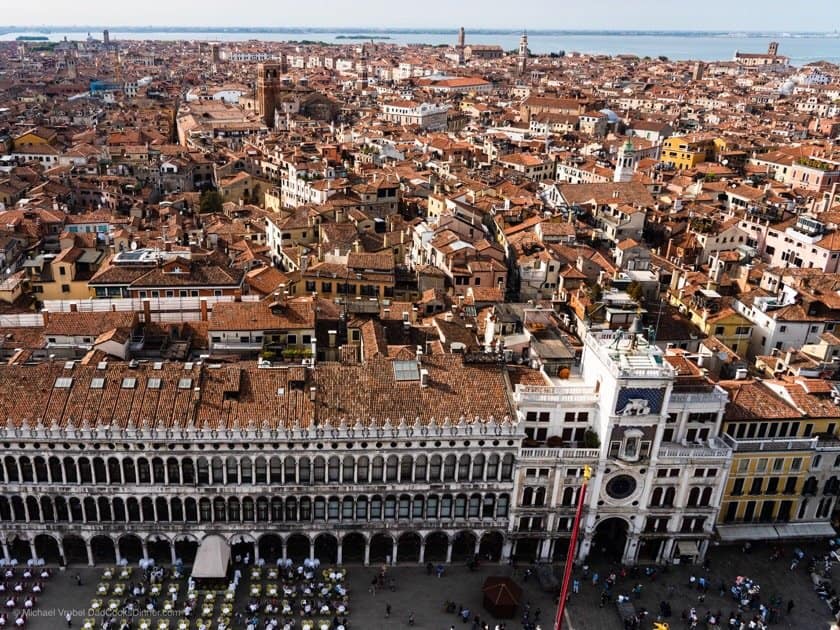
I'm not ready to go home - there's so much more to do, so much more to see, I've barely scratched the surface of Venice, let alone Italy. But my time is up. The soprano was last night; now it is morning, and I'm walking along the canal to the bus station. University students stream by in the other direction. A few balance painting canvases against their shoulders, a couple carry black instrument cases. I'm the only one going against this tide, towards the buses. Everyone seems to be late for their first class of the day, a reminder that life goes on in Venice, even if I'm leaving.

I want to linger, stretch things out, but road fever has me in its grip. The vacation is over and I can't relax until I'm at the airport. (Grandma Leiden - Mim - gave me a lecture years ago. Always be at the airport two hours ahead of time, she said. At LEAST two hours. Three would be better. I was seven, I think; that message stuck with me, unlike so many others. I break out in a sweat when *other* people saunter onto a plane thirty minutes before departure.)

He doesn’t want me to leave Venice either.

The airport security dance goes smoothly. Passport and ticket. Yes, I packed my own bags. No, I didn't take any packages from strangers. Everything out of my pockets, take off the belt, and make sure the laptop is in a separate bin. Have nice trip.

I drink one last Italian espresso at the airport cafe, trying to prolong the experience. (They give it to me in a paper cup. So much for prolonging the experience.) I wait for my group to board, find my seat, secure my electronic devices, and fasten the seatbelt. Next stop Newark, and then home.

Home.

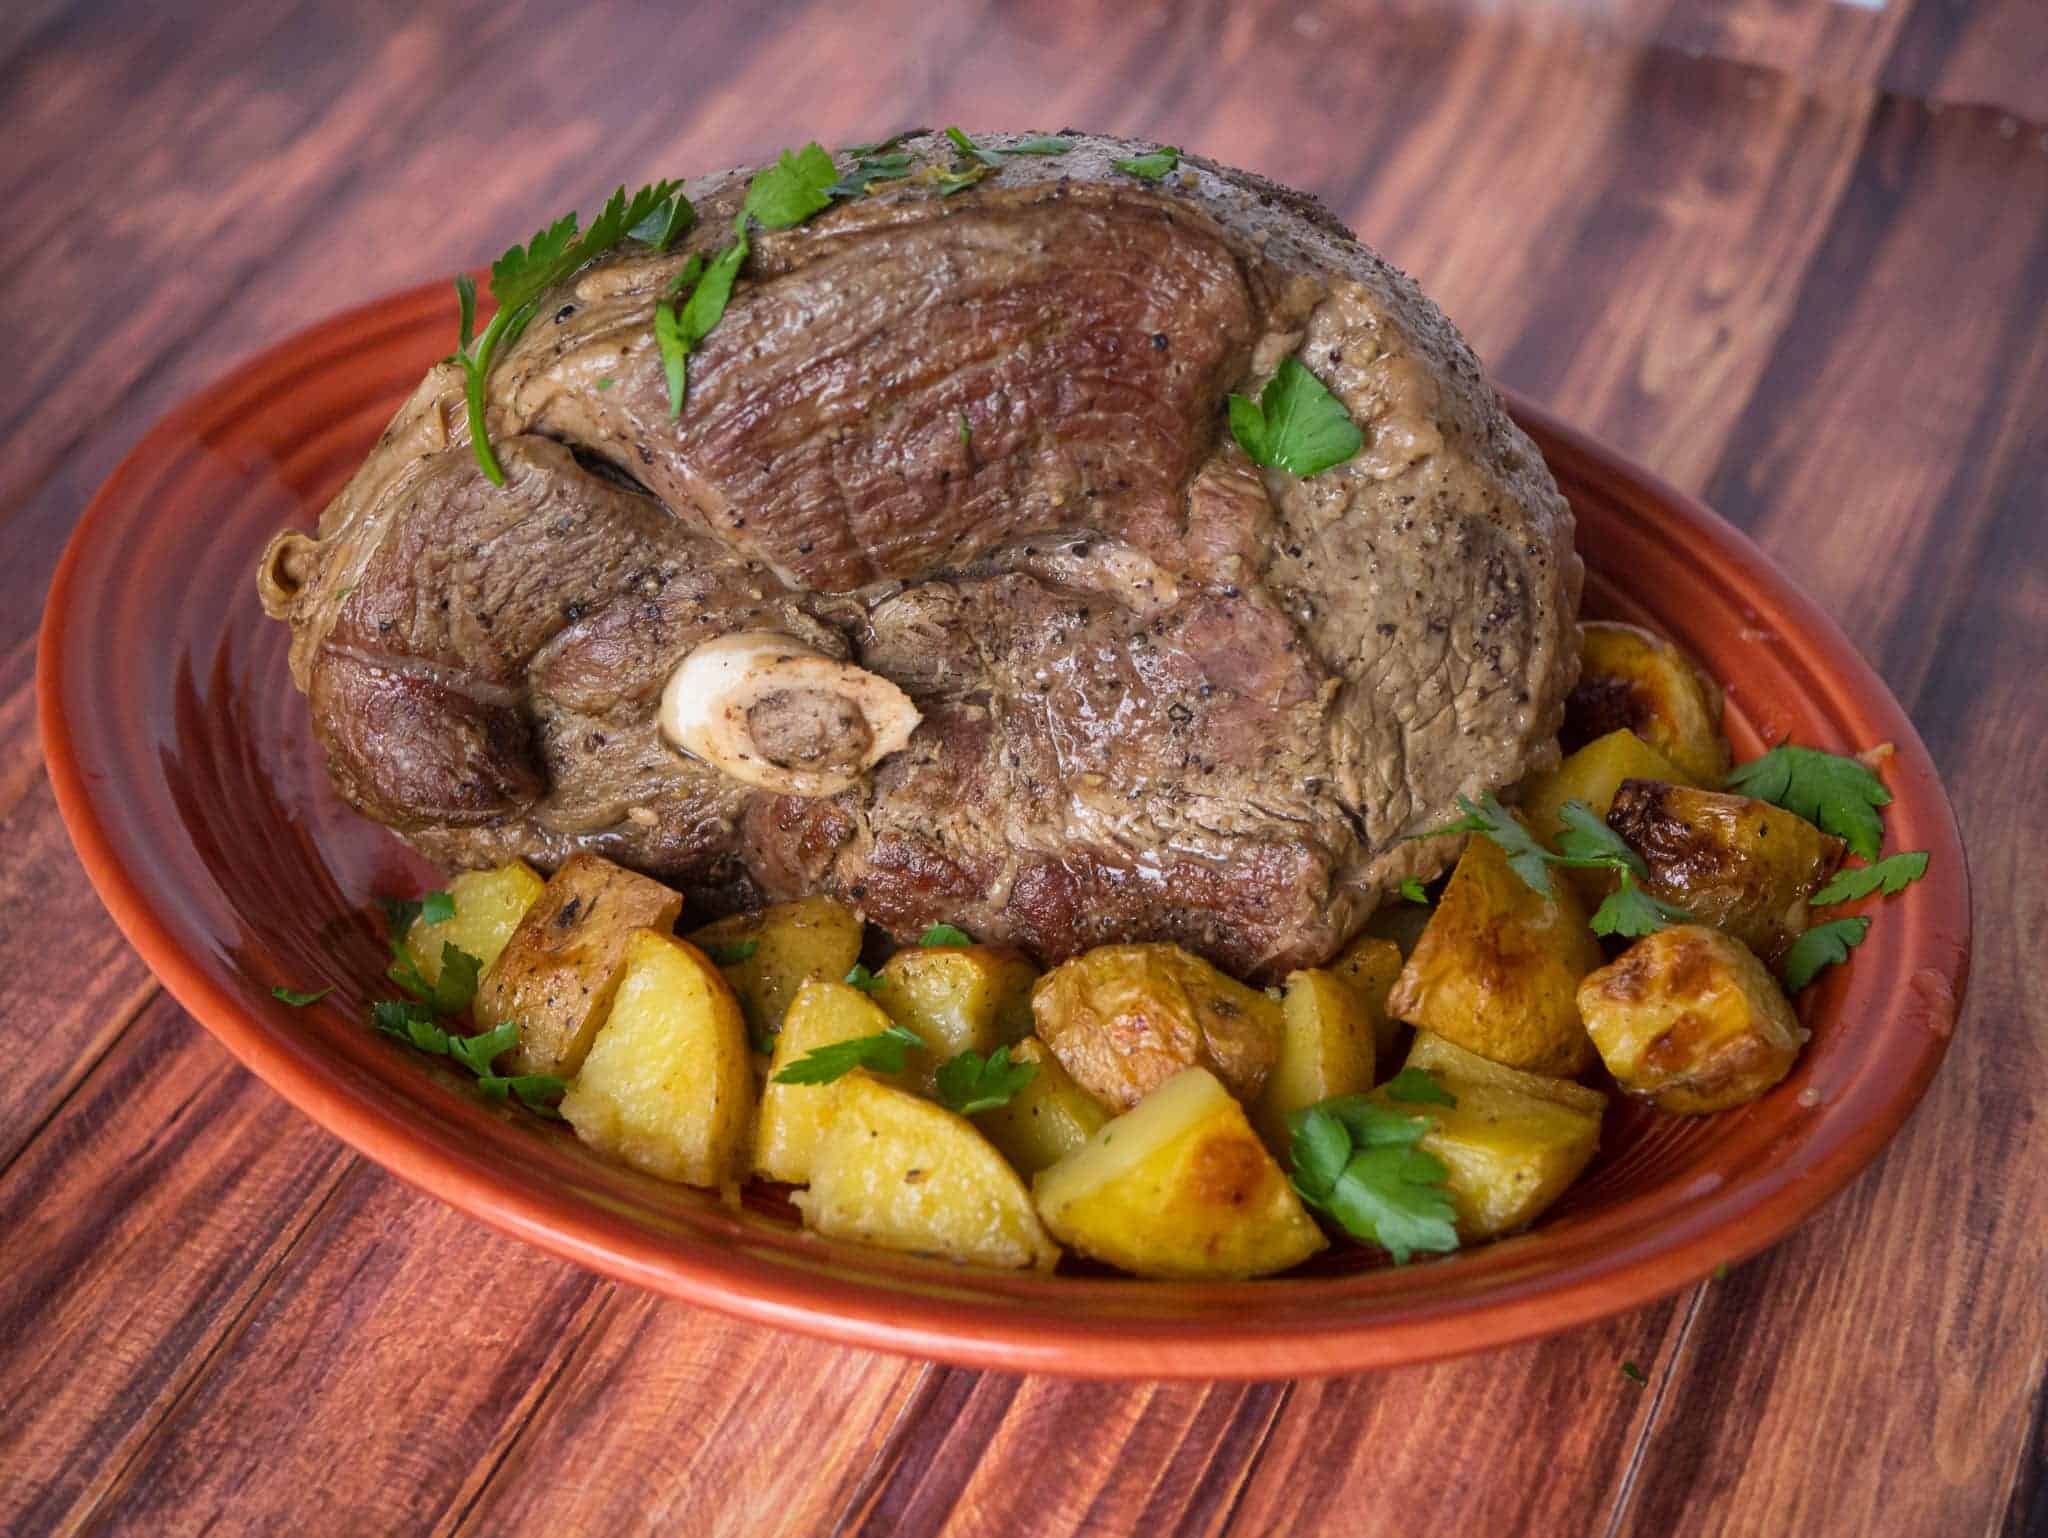
I love travel, seeing new places, and eating new things. (Especially the eating part. Good food? I'm there.)

At the same time, travel makes me anxious. I'm a foreigner in a foreign land. Will anyone understand me? What if I get cheated? Or robbed? Will I get lost? Miss a connection? What if I miss the one local specialty you have to eat?

That anxiety is a good thing, as long as I don't let it overrun everything else. It adds spice to the experience, makes it exciting. (A little case of nerves to heighten the senses. Kind of like an aperitif.) Also, travel has shown me that people are people. Sure, there are some bad apples, but most people are good people. They like their neighbors, love their dogs, smile at cute babies, and try to help when someone is lost. Especially someone from out of town.

Venice from the top of the bell tower at St. Mark’s

Finally, Home. I wish I could stay longer, and at the same time, I'm looking forward to home. I miss Diane and the kids. I want my own bed, my own routine. Sure, I would love another week in Italy...especially if someone else would pay the credit card bill? (Anybody? Anyone? No?)

Travel teaches me about the world and about myself. But it wouldn't be travel without someplace to return to. Someplace to call home.

What do you think?

Questions? Other ideas? Leave them in the comments section below.

On the road again: Tortelli in Verona, Italy

April 20, 2018 by Mike Vrobel 1 Comment

Tortelli class in Verona, Italy

Sorry this post is late; I think I lost a day to travel somewhere. That, or I'm actually relaxing on my vacation - a food writing workshop in Verona, Italy.

Today was a tortelli making class in a local restaurant. The staff showed us how, then stood back to let us try. We did OK - we are a bunch of food writers, after all. But we were not the pros. They roll and fold with flair, smooth and effortless.

Posting will be a little sparse for the next week or so, until I get home. After that, I apologize in advance for all the "Well, when I was in Italy..." stories.

Pressure Cooker Chicken Drumsticks With Peppers and Paprika

April 17, 2018 by Mike Vrobel 9 Comments

Chicken drumsticks with peppers and paprika on a white platter
Chicken drumsticks with peppers and paprika on a white platter with recipe name in text below
Pressure Cooker Chicken Drumsticks With Peppers and Paprika

When this post goes live, I will be sitting in an airport in Europe, waiting for my connecting flight to Venice. I'm on my way to a food writing workshop in Verona, home of Romeo and Juliet. This is my first trip to Italy, and you'll hear all about it in my upcoming posts. (Probably until you're sick of it.) Until then, enjoy these Italian style drumsticks in honor of my trip.

I am testing frozen drumsticks in the pressure cooker, so I Googled for drumstick ideas. I typed in "Chicken drumsticks with" and Google's first auto-suggestion is "with Peppers and Paprika." That sounds great…but why that combination? What's so popular about drumsticks with peppers and paprika?

Lidia, that's what.

Lidia Bastianich's Cosce Di Pollo Con Peperoni E Paprika recipe is in Lidia's Mastering the Art of Italian Cuisine: Everything You Need to Know to Be a Great Italian Cook, and she's demonstrated it on her TV show a couple of times. That's why everyone is looking for it.

Good food doesn't have to be complicated, and this simple recipe is a great example. Sprinkle chicken legs with salt and paprika, and brown. Sauté some peppers and onions, and bake them all together with a little white wine.

Of course, I replaced "bake" with "pressure cook." You all know me by now. If you don't feel like pressure cooking, follow these instructions, then pour everything into a baking dish and bake at 350°F until the drumsticks are cooked through, about an hour. Me? I'd rather use the pressure cooker - the whole thing is done, including time to brown the legs and sauté the peppers, in less time.

What do you think?

Questions? Other ideas? Leave them in the comments section below.

Related Posts

Pressure Cooker Teriyaki Chicken and Drumsticks
Pressure Cooker Penne with Sausage and Peppers
Pressure Cooker Italian Meat Sauce
Instant Pot Doro Wat
My list of Pressure Cooker Recipes

Enjoyed this post? Want to help out DadCooksDinner? Subscribe to DadCooksDinner via email and share this post with your friends. Want to contribute directly? Donate to my Tip Jar, or buy something from Amazon.com through the links on this site. Thank you.


Thai Curry Paste - Weight vs Volume

April 12, 2018 by Mike Vrobel 3 Comments

Can of Panang curry paste in front of two measuring cups
Thai Curry Paste - Weight vs Volume

My favorite Thai curry paste comes in 4-ounce cans. When I was testing my pressure cooker Thai curry recipe, I thought "what if someone can't get those cans? How much should they use from a tub of curry paste?"

The next time I wanted curry for dinner, I picked up a tub of curry paste instead of my usual can. I scooped tablespoons of curry paste from the tub until I had a mound about the size of my usual can of paste. 4 tablespoons looked right when I compared it to the can.

Later, I updated my ingredient list to say:

  • 4 tablespoons Thai curry paste (a whole 4 oz can)

That quick estimate came back to bite me. Every few months I get a comment on a curry recipe: "Actually (adjusts glasses), you did your math wrong. 1 tablespoon = 0.5 ounces. 4 tablespoons = 2 ounces, not 4 ounces."

OK, OK, I'm imagining the glasses adjustment. (I've worn glasses since I was 12 - I always adjust my glasses when I correct someone online. It's part of the Nerd Code.)

My answer: Weight vs. Volume.1 In English units, ounces measure weight, and fluid ounces measure volume. Unfortunately, we drop the word "fluid" from measuring cups and spoons. An ounce (of weight) does not equal a (fluid) ounce (of volume) unless you're measuring water.2

My can of Thai curry paste says: "Net Wt. 4 oz". In other words, it's a weight measurement, even though a can seems like it should measure volume.3 Curry paste is denser than water, so if you measure by volume, the curry paste weighs more. When I scoop curry paste out of a tub, I use a volume measuring device - a tablespoon. I should have cleared up the weight vs volume issue in the recipe, but I figured my actual measurements were sound.

Years pass. The questions keep trickling in. Most of them are not questions, they're statements. "Your math doesn't add up!"4 I know I checked this - I remember scooping out the paste, comparing it to the can. Maybe I'm off a little, but it can't be that much. I stick to my guns. Weight vs. Volume.

Another comment came in this week, and I'm having a bad day. Cranky kids, lots of running around, a big trip coming up. Fine! It's time to re-check my measurements! Rigorously, with pictures this time. I'll show them!

The players:

  • 4-ounce can of curry paste
  • ¼ cup measure (4 tablespoons, 2 fluid ounces)
  • ½ cup measure (8 tablespoons, 4 fluid ounces)

I spooned curry paste into the ¼ cup measure, confident it is large enough. Maybe it needs a rounded top, but it will fit. And…

Quarter cup measure full of curry paste next to a half-full jar of curry paste
That's more than a quarter cup

…whoops. I've got a lot left over, don't I? Hmm. Well. It's not going to fill the half cup measure, is it?

4 ounces of curry paste in a ½ cup measure

Darn. It's not quite full, but it's close. In other words: I was wrong. 4 ounces (by weight) of curry paste takes up almost 4 fluid ounces of volume.

Where did I go wrong? Two things:

  1. I'm a heaping scooper, and a close enough cook. When I was scooping out of the big tub of curry paste, my "tablespoons" were "how much curry can I possibly stack on this tablespoon", not "this is a leveled, exactly measured tablespoon".
  2. When I got to 4 heaping scoops, I said "Looks like the size of the can. Good enough." and started cooking dinner.

That's what I get for sloppy measuring.

My apologies to everyone I brushed off with a "Weight vs. Volume NEXT QUESTION." You were a lot closer to right than I was. I could play this off with "I meant to say heaping tablespoons", but that type of measurement drives me bananas in recipes. (Even though I'm a "heaping tablespoon, eyeball it" cook when I'm not working on a recipe. "Eh, close enough." is my kitchen motto.)

Speaking of which: now comes the close enough part. I don't quite get ½ cup of curry paste. It's closer to 7 tablespoons - 3.5 fluid ounces - than it is to 4 fluid ounces. To be technically correct, I should use 7 tablespoons. And technically correct is the best kind of correct. But that's not going to stop all the questions, is it?

So, I'm changing my ingredient list to say:

  • ½ cup Thai curry paste (a whole 4-ounce can)

…and hope no one uses a heaping ½ cup.

Sorry for the confusion…and I hope you were buying cans of curry paste.


Maesri Thai Curry Paste [Amazon.com]
Mae Ploy Green Curry Paste [Amazon.com]

What do you think?

Questions? Other ideas? Any other measurements you don't think I have right? Leave them in the comments section below.

Related Posts

Pressure Cooker Thai Green Chicken Curry
Pressure Cooker Thai Red Beef Curry
Pressure Cooker Thai Yellow Curry with Chicken
Pressure Cooker Thai Panang Beef Curry
My Pressure Cooker Recipes Index

Enjoyed this post? Want to help out DadCooksDinner? Subscribe to DadCooksDinner via email and share this post with your friends. Want to contribute directly? Donate to my Tip Jar, or buy something from Amazon.com through the links on this site. Thank you.

  1. This is why I did my Salt by Weight post - the weight of a tablespoon of salt depends on the type of salt. Table salt, sea salt, Kosher salt - they all have different densities. ↩︎
  2. Even then, it's slightly off in the US. A fluid ounce of water weighs 1.0431 ounces in the US. Why? When the US split from Britain, it kept the traditional British weights and measures going back centuries. But…Britain redefined their measurements in 1824 with the Weights and Measures act. They wanted measurements that were exactly right for water. The Imperial system of weights and measures says a fluid ounce of water weighs an ounce. (What a great idea!) But...the US didn't change to match - we kept our old, slightly off system. (Our system is called United States Customary Units.) Then Britain switched to Metric measurements in 1965, which removes the confusion by measuring volume in liters and weight in grams, and…I'm going to stop now. My tangents have tangents. Dig into US customary units on Wikipedia, start following the links, and don't say I didn't warn you... ↩︎
  3. A trick used by packaged goods companies everywhere: raise the price by using the same size box, for the same price...but measure the ingredients by weight, and slowly decrease the weight. An ounce here, an ounce there...it adds up. ↩︎
  4. It doesn't help that re-used my basic Pressure Cooker Curry technique every time I saw a new can of curry paste at the Asian market. "Oooh - I haven't tried Panang curry yet!" ↩︎

Which Instant Pot Should I Buy?

April 10, 2018 by Mike Vrobel 10 Comments

Lineup of Instant Pots. 6-Quart Duo Plus, 8-Quart Duo Plus, 6-Quart Ultra on a kitchen island
Which Instant Pot Should I Buy?

FCC Notice: I am an Amazon affiliate, and if you buy something using the Amazon links in this post, I earn a small commission. Thank you for supporting DadCooksDinner.


Quick Answer: the 6-Quart Instant Pot IP-Duo Plus

Instant Pot IP-DUO Plus60 Unboxing

Get the Instant Pot Duo Plus 6-Quart. It's the best balance of price and features in the Instant Pot lineup. Trust me. You'll love it.


Instant Pot Duo Plus 6-Quart [Amazon.com]


That's It?

What's that? Are you still here? Do you have more questions? You're my kind of person - let's get to the details.

Everything Else Is Just Details

I go into a lot of nit-picky details below. But, all the Instant Pots are great pressure cookers. They are more similar than they are different, and I'd be happy with any of them as my primary cooker. My first Instant Pot was a Lux 6-Quart that I bought back in 2012, and I've upgraded as Instant Pot comes out with new and improved models. There are some features I would miss if I had to switch back to the Lux...but I'd still be happy with it as a pressure cooker.

If Amazon has a great deal on an Instant Pot, don't worry too much about the details. Even if I have some nit-picks about the cooker later on in this post (and I will), that's OK. You'll love your new Instant Pot.

Why you should buy the 6-Quart Instant Pot Duo Plus pressure cooker

Why should you get my favorite? Because it has the best balance of features to price in the Instant Pot line:

  • Integrated lid holder in the base handles
  • Great, informative LCD display
  • "Pressure Cook" button (Instead of the confusing "Manual" button)
  • Convenient size - easily fits in my kitchen island cabinet

The 6-Quart Duo Plus is my daily driver pressure cooker. It's large enough to feed my family of five, with some leftovers for lunch later in the week. And the size is a little more convenient than the 8-quart - it's smaller, lighter, and fits in the cabinet under my kitchen island.

Buy the Duo Plus if: You want the best Instant Pot for most people.


Instant Pot Duo Plus 6-Quart [Amazon.com]

What about the other Instant Pots?

Let's compare them one at a time...while I reminisce about my history with Instant Pots.

Comparing the Instant Pot Duo Plus to the Instant Pot Lux

Instant Pot Lineup | DadCooksDinner.com
Lux on the left, Duo on the right. (The Duo is showing off its integrated lid holder)

The Lux was the original Instant Pot, and the Pot that won my heart. But, the Instant Pot line has improved over the years, and the Lux is missing some of the design elements added to later models:

  • No integrated lid holder in the handles
  • A minimalist digital display
  • No low pressure (OK, I never use low pressure)

The Lux was my daily driver for years. But I moved on to the Duo when it came out, and I never looked back. The Duo has a bunch of features that make it more convenient to use. (And the Duo Plus is the updated version.)

Buy the Lux if money is tight

The Lux costs about 60% of a Duo Plus - if money is tight, and you can live without some of the convenience, it is a great deal as an inexpensive pressure cooker.


Instant Pot Lux 6-Quart [Amazon.com]

Comparing the Instant Pot Duo Plus to the Instant Pot Duo

First Look at the 8 Quart Instant Pot IP-DUO80
A Duo of Instant Pot Duos: 6-Quart and 8-Quart

Next came the Instant Pot Duo. This is where the Instant Pot line came into its own. A bunch of design tweaks made the Duo a noticeably easier cooker to use than the Lux, especially the redesigned lid:

  • Integrated lid holder built into the handles - tabs on the lid fit into holes on the base handles. Easy and ingenious.
  • Easy-grab loop handle - keeps your hands away from the pressure valve
  • New pressure release valve

That integrated lid holder is a design masterpiece. No more looking for empty counter space to put the lid down, and any steam on the lid drips into the drain around the cooker base, keeping everything clean. The integrated lid holder is why I can't recommend the Lux. I'd pay whatever price I had to for that lid holder.

The differences between the Duo and the Duo Plus are much more subtle. The Duo Plus is the 2017 upgrade to the Duo. (It is right there in the name, after all.)

The Duo Plus adds:

  • LCD display with icons to show you what's going on in the cooker
  • "Pressure Cook" button

The Pressure Cook button is what sold me on the Plus. I don't have to explain to everyone that "Pressure cook on high" means "Push the Manual button" anymore. And, the new LCD display is much easier to understand.

Buy the Duo if: You can find a great deal

The Duo is usually a little less expensive than the Duo Plus. I don't think the extra $20 or so is worth giving up the improvements in the Duo Plus. (Also, it looks like the Duo Plus is replacing the Duo - it's getting harder to find the Duo in stock.) But, it's easy for me to spend your money. If the extra $20 matters, the Duo has most of the features of the Duo Plus. If you find a great deal for the Duo, don't hesitate - grab it.


Instant Pot Duo 6-Quart [Amazon.com]


Instant Pot Smart Bluetooth

Comparing the Instant Pot Duo Plus to the Instant Pot Smart Bluetooth

The Smart was the follow-up to the Duo, adding:

  • An LCD display
  • Bluetooth control (through an app on your smartphone)

In theory, I can control the Smart through a Bluetooth connection to my phone. In practice, the Bluetooth only had a range of a few feet - if I left the kitchen, I lost my connection, and had to shut down the cooker to re-connect. My dreams of checking the pressure cooker time on my phone while I sat on the sofa in the living room were dashed.

The improved LCD display is nice, and if it the price was close to the Duo, it might have been worth buying. But the Smart was a LOT more expensive than the Duo.

Then, when I compare it to my recommended Duo Plus?

  • Both have LCD displays - but the Duo Plus display is better
  • The Smart has the Bluetooth connection - but I don't find it useful
  • The Duo Plus costs a lot less

Buy the Smart if: Don't. Just don't.

Well, OK, that's a little strong. If you can get a deal on the Smart - say, at Lux prices - grab it. (If you can find it - I think Instant Pot has retired the Smart.) Otherwise, move on to the Duo Plus.


Instant Pot Smart Bluetooth 6-Quart [Amazon.com]

Instant Pot Ultra 6 Quart | DadCooksDinner.com
Instant Pot Ultra 6 Quart

Comparing the Instant Pot Duo Plus to the Instant Pot Ultra

The Ultra is Instant Pot's current top of the line cooker. It has some significant design changes from the Duo Plus:

  • The user interface is driven by a control knob, leaving extra space for:
  • Huge LCD display with a lot more information
  • New lid with auto-close pressure valve - closing the lid closes the pressure valve

I want to love the Ultra. The LCD is gorgeous - by removing most of the buttons there is plenty of space for more information, and the "cooking progress" graph is a great way to show where I am in my cook. The new lid fantastic; the auto-closing pressure valve eliminates "What's that hissing....oh crap, I forgot to close the pressure valve."

But…

Then I use The Knob. It feels good - a little weight to the spin, nice clicks - I like the knob feel. But it is hyper-sensitive. One spin and it zooms hours ahead. I have to turn the knob slowly. One. Click. At. A. Time. If I get impatient and spin just a little too fast...I zip around the horn and wind up with a 5 hour and 30 minute cooking time. The knob spin makes me long for the buttons on the Duo Plus. The buttons are not amazing...but they work consistently.

Duo Plus vs. Ultra is the hardest choice on this list. The lid and display on the Ultra are clear winners over the Duo Plus. But, because of that knob, and the extra cost (the Ultra is about 20% more expensive), I still recommend the Duo Plus for most people. I keep waffling back and forth between the Plus and the Ultra. When I use the Duo Plus, I want the display and lid from the Ultra; when I use the Ultra, I want the buttons back from the Duo. Right now I have them both under my kitchen island, and I tend to reach for the Ultra a little more often...but it's not a clear winner.

Buy the Ultra if: You don't mind paying for the best. (And you can relax and think calm thoughts while you spin the knob.)

If you prefer the top-of-the-line, cutting-edge, fanciest option, get the Ultra. I hope they fix the knob spin in the next version; if they do that, the Ultra becomes my clear favorite.


Instant Pot Ultra 6-Quart [Amazon.com]

Should I get the 6-quart or 8-quart size Instant Pot?

Instant Pot Duo Dimensions - 8 quart vs 6 Quart | DadCooksDinner.com
Instant Pot Duo Dimensions - 8-Quart vs 6-Quart

Summary: The 6-quart size is best for families of 5 or less. If you need to cook for larger groups, get the 8-quart size.

Details: Ah, the devil is in the details. I didn't think my Instant Pot Duo 6-Quart vs 8-Quart post would be controversial, but all it did is generate more "What ifs":

  • What if I batch cook?
  • What if I like extra leftovers?
  • What if I occasionally need a bigger cooker?
  • What if my family of four has big eaters/teenagers/hordes of locusts that descend on my kitchen and eat everything in sight?

If you have a "What If" of your own, get the 8-quart size. Or, do what I do - I have both the 6- and the 8-quart sizes. (I own -too many- a lot of pressure cookers.) The 6-quart is my daily driver, which I use 95% of the time. The 8-quart only comes out when I need the extra space:

  • Cooking a big batch of chili for the super bowl
  • Making turkey stock after Thanksgiving
  • Lamb shanks cut extra-long, making them hard to fit in the 6-quart

But when I need the 8-quart, I really need it. Mostly, it's for the extra-wide pot more than the total cooking volume; I have something that won't fit in the narrower 6-quart pot. Breaking up a turkey carcass to fit in the 6-quart is a lot of work, but that same carcass fits just fine in the 8-quart.

The other question I get a lot: Do I have to change a 6-quart recipe if I cook it in my 8-quart cooker?

No. Both are cooking at the same pressure (12psi), so they cook at the same temperature (242°F). Cooking time is determined by how long it takes to cook the individual ingredients, usually the largest piece of meat, so the 6- and 8-quart Instant Pots take the same amount of time to cook the same recipe.

The exception - if you use the larger cooker to fit a larger piece of meat. If you're cooking a stew, or chili, or something where the meat is cut into the same size pieces, but you're just cooking more of it, the cooking time is the same. (Again, cooking time is determined by the size of the thickest part of the meat, and 1-inch cubes of beef cook for the same amount of time, no matter how many there are.)

But…if you use the larger cooker to fit a larger piece of meat - say, replacing a 3 pound, 2-inch thick roast with a 6 pound, 3-inch thick piece of roast - then the cooking time will increase. How much? It depends…I'd guess about 15 minutes per inch of thickness, but I'm still testing that. (And,that's why I cut larger roasts into chunks in my recipes.)


Instant Pot Lux 8-Quart [Amazon.com]
Instant Pot Duo Plus 8-Quart [Amazon.com]
Instant Pot Ultra 8-Quart [Amazon.com]

About Pressure Cooker Sizing

Another question I get…or, should I say, an accusation leveled against me: "Hey, this rip-off pressure cooker says 6 quarts on the box, but the max fill line is only ⅔rds of that. What gives?"

The standard measure for pressure cooker size is the total volume of the cooking pot, not the usable space under pressure. Pressure cookers need headspace to build pressure - about ⅓ of the pot. Every pressure cooker I've owned says "do not fill more than ⅔rds full", and most have a max fill line marked on the pot itself.

What does that mean for sizing?

  • 6-Quart Instant Pots can pressure cook up to 4 quarts of food
  • 8-Quart Instant Pots can pressure cook up to 5.33 quarts of food

It is just assumed by the pressure cooker industry that you are getting the total volume, and know how much space is usable. Is that a good assumption? Not according to some of the angry emails I get...

What about the Instant Pot Mini or 3-Quart models?

Personally, I think 3-quart pressure cookers are too small. The max fill line is only 2 quarts, and that's not enough when I'm trying to make a soup or a stew. Now, If you only cook for two...and you're light eaters...and you never want leftovers...then maybe you should get the 3-quart. Me? I'd still get the 6-quart. It works fine for cooking smaller amounts of food.

What about the extra functions? The Ultra goes to 11!

I don't use them. I love my Instant Pots because they make pressure cooking easy - lock the lid, set it to pressure cook for a specific time, and it takes care of the details, bringing the cooker up to high pressure and shutting off when the cooking time is done. Maybe I'm old school, but that's all I want my pressure cooker to do. The only Instant Pot modes I use:

  • Pressure Cook (on the Duo Plus and Ultra) or Manual (on the Lux and Duo). Set the cooking time for high-pressure cooking. That's all I need to make almost every pressure cooking recipe ever written.
  • Sauté - For browning meat or sautéing vegetables before pressure cooking, or for simmering after pressure cooking.
  • Keep Warm - for when I can't get to the cooker right away
  • Slow Cook - For potlucks and reheating the food. Slow Cooking in the Instant Pot has some issues - see here and here for details.

And yes, I know the Ultra has ten modes - I couldn't help myself.

But…but…what about Soup/Poultry/Meat/Stew/Bean/Chili/Rice/Multigrain/Yogurt/Congee mode?

I have heard good things about the rice cooker mode - but I use Pressure Cook mode to make rice. I'm repeating myself, but…I use the Pressure Cook button and set the cooking time instead of using the mode buttons. If you really love programming modes - and you know who you are - then go ahead and use them! But they're not for me. I'm an experienced pressure cook1. I tell the Instant Pot what to do; I don't press a button and hope it knows better than I do.

Why not both?

My answer to the "which one" question? All the Instant Pots. I get them all. I've passed the Lux, Smart, and Duo 6 quart on to family members after years of use. My current lineup is the 6-quart Duo Plus, 6-quart Ultra, 8-quart Duo, and 8-quart Duo Plus. (What, I'm the only one with a shelving unit in the basement dedicated to a pressure cooker collection?)

Kidding aside, I like having both a 6-quart cooker and an 8-quart cooker. The 6-quart gets more use; it's a convenient size. I have the 8-quart when I need the extra space. And if I'm cooking for a party, I pull them both out, double up on my Instant Pot Duos, and cook for a crowd.

Amazon Sales

A note for savvy shoppers: The Instant Pot is usually on sale at a big discount on Black Friday and Amazon Prime Day (July 11th). If you can wait until late November or mid-July, you can usually get a great deal on one of the Instant Pots. You might not get exactly the cooker you want, but the price is right.

What about the Instant Pot Max?

Instant Pot is releasing the Instant Pot Max, the first electric "full pressure" cooker shortly. (I've heard Spring 2018 and Summer 2018, so…soon?)

What does full pressure mean? Electric pressure cookers (like the Instant Pot) cook at 12psi of pressure; stovetop pressure cookers use 15psi. That extra pressure in a stovetop pressure cooker means it cooks about 20% faster, and that's why recipes have different stovetop vs. Instant Pot timings.

I'm going to get one, of course, because I have a pressure cooker -problem- collection, and I will report back when I get it. Should you get one?

I would get one of the current Instant Pots. They are great and will be less expensive. That said, If you are the kind of person who has serious FOMO, or loves pressure cookers like I do, of course you should get the Max!

That said, my gut says the Max review will be like the Ultra review - if you demand the top of the line, get it, but dollar for dollar the Duo Plus is a better value. But, we'll see once it is released - maybe it will be priced close to the current Instant Pots.

My other concern about the Max is another gut feeling: will it work reliably? I have not seen a major brand of electric pressure cooker work at 15psi; they all top out at 12psi. It's the biggest argument against electric pressure cookers - they can't do "full" high pressure. So why hasn't someone fixed this already? Is 15psi too much pressure for the current electric pressure cooker design? I trust Instant Pot, and assume they have resolved any issues, but...why hasn't someone else made one yet? I'm going to get an Instant Pot Max. I can't wait! But if you don't want to live on the bleeding edge of technology, maybe you should hold off to see how they perform.

What do you think?

Other questions2? Anything I missed? Ask about it in the comments section below.

Related Posts

Instant Pot FAQ
Longer term testing notes: Instant Pot Duo 6-Quart vs Duo 8-Quart
Review: Instant Pot Ultra 6-Quart (vs Instant Pot Duo Plus 6-Quart)
My Pressure Cooker Recipes Index

Enjoyed this post? Want to help out DadCooksDinner? Subscribe to DadCooksDinner via email and share this post with your friends. Want to contribute directly? Donate to my Tip Jar, or buy something from Amazon.com through the links on this site. Thank you.

  1. Pressure cooker cook?↩
  2. I have a family of four, but one eats like a hummingbird, and another eats like a wolverine...should I get the 8-quart?↩

Pressure Cooker Mexican Flan with Caramel (Flan de Cajeta)

April 3, 2018 by Mike Vrobel 4 Comments

Mexican Flan on a red plate

I was shopping at my local Mexican market, picking up ingredients for taco night, when I saw it. A glorious tub of cajeta, Mexican caramel. Visions of caramel flan danced in my head as I put it in my car.1

I know what you're thinking. "Evaporated milk? Condensed milk? What are you doing? That's not Authentic!" As it turns out, condensed and evaporated milk are common ingredients in Mexican desserts. (They're two of the three kinds of milk in "Tres Leches" cake.) They also make custard easy - whisk them together with eggs, and they're ready to cook.

Of course, I'm pressure steaming the flan in my Instant Pot. Five minutes under pressure? It's a no-brainer. The 6 quart models are just wide enough to fit 3 (6-ounce) custard cups in a single layer. Then I stack a second layer of cups on top of the first, balancing them on the edges of the lower layer of cups.

So...why flan? I'm a fan of make-ahead desserts. Cooked flan needs to rest in the fridge for a few hours to set up, but after that, it doesn't matter when you serve. Am I using them tonight? Great. Tomorrow? Sure, that's fine. They'll last for a few days in the refrigerator. And, no fussy last-minute work is needed. Pull the flans out, unwrap, unmold onto serving plates, and serve.

Adapted from:  Vanilla Flan [VeryBestBaking.com] 

Video: Pressure Cooker Mexican Flan with Caramel (2:48)

Video: Pressure Cooker Mexican Flan with Caramel (Flan de Cajeta) [YouTube.com]

Adding caramel to cups, filling cups with custard, covering cups with foil, stacking cups in pressure cooker, adding a little extra caramel to the finished flan | DadCooksDinner.com
Pressure Cooker Mexican Flan with Caramel - step by step tower

What do you think?

Questions? Other ideas? Leave them in the comments section below.

Related Posts

Pressure Cooker Salted Caramel Cheesecake
Pressure Cooker Strawberry Cheesecake
Pressure Cooker Oreo Cheesecake
My Pressure Cooker Recipe Index

Enjoyed this post? Want to help out DadCooksDinner? Subscribe to DadCooksDinner via email and share this post with your friends. Want to contribute directly? Donate to my Tip Jar, or buy something from Amazon.com through the links on this site. Thank you.

  1. Then I had to protect the cajeta from my kids. They spotted it when I was unloading the groceries. "Can I have some of that? When are you using it? Are you sure you don't have extra?" Later, after making the flan, I found the tub in someone's bedroom, scraped clean, with the spoon still in it. Yikes. ↩

What to Do if I Dump Liquid Into My Instant Pot Without the Pot Liner

March 29, 2018 by Mike Vrobel 113 Comments

Water poised over an Instant Pot cooker base without the liner
Wait! Stop! Don't Do It!

Hi, just did this as well =(

Any updates from Instant Pot customer service on what they would have done? Thanks.

Commenter Wendy

This comment sat on The Case of the Missing Inner Pot for a while. (Sorry for the slow response Wendy!)

To summarize the original post: My son and I had a misunderstanding. I said "Put the pot liner full of beans and water into the Instant Pot." He heard "Dump the contents of the pot liner into the Instant Pot base." Time slowed down as I watched him pour the water and beans into the cooker base.

What to Do if You Dump Liquid in Your Instant Pot Without the Pot Liner

My solution is the same for all electronics:

  • Unplug it immediately
  • Dry it off as much as possible
  • Leave it to air dry for a few days before powering it back up again.

The danger is an electrical short - electronics burn out if water conducts electricity someplace it's not meant to go.1 Once it's dried out, it should be fine, as long as it didn't short out before I unplugged it.

It worked! That Instant Pot is still chugging along - I've moved on, but it's going strong for my Sister-In-Law.

That said, I was curious. "What would Instant Pot Support do?" Here's what they had to say about…

Oil: Base needs to be replaced

If the liquid is oil of some kind, we can only safely recommend they replace the base entirely.

Oil won't evaporate…sorry. Move on to "It's Dead, Jim."

Liquid: Wipe out as much as possible, let dry for 72 hours

When liquid gets into the electronics, it is very important to wait at least 72 hours before testing the unit.

The first thing to do is to wipe the inside of the cooker base and heating element with a dry cloth to remove as much of the substance as possible. Next, place the cooker base upside down to let all the liquid drain out of the pot. Additionally, to better dry the electronics, there is a plastic vent cover on the bottom of the base that you can take off (while the unit is unplugged) by removing one screw. [Update: Pics of vent cover below]

Once it is completely dry, you can use the "Saute" function for 3 minutes without the inner pot to see if the unit still heats. Please be sure to monitor your pot the whole time during the test. If the heating element is working properly, it would seem like the cooker base is functioning. If you notice any excessive smoking, please unplug your unit immediately.

The safest option would be to replace the entire cooker base.

Safety? Feh. I'll go with my "air dry it and hope". It's worked for keyboards, cell phones, and an Instant Pot.

Dry: Shake it Out!

And we have an additional one for just dry foods,

The first thing you can do is to turn your Instant Pot over, and try to shake out any food from around the element.

Next, there is a plastic vent cover on the bottom of the base that you can take off (while the unit is unplugged) by removing one screw. [Update: Pics of vent cover below]. Any food you couldn't get out from the top is likely trapped in there. While you have the cover off, please be gentle with the wires and circuitry, but feel free to reach up into the cooker housing to see if you can get the remaining food out.

I do remember a couple of rogue beans I had to fish out from under the heating element. Luckily, I didn't have any work their way deep into the insides of my pot.

How to remove the Instant Pot Plastic Vent Cover

That's the official name of the plastic on the base. My Instant Pot Duo Plus, Instant Pot Ultra, and Instant Pot Max all have the same type of cover on the underside of the base, held in place by a single screw. Back when I took these pictures, the screws were a standard Philips head. But, from reports from readers, Instant Pot has changed the screws to use a Torx T15 head. (I had to dig deep in my toolbox to find a screwdriver with a Torx head that would fit.)

To help the pot dry out, remove this base. Make sure the pot is unplugged before you remove the base! Water, electronics, and people with screwdrivers do not mix!

Unscrewing the vent cover on an Instant Pot Ultra
(You can see the tabs and notches along the edge of the cover)

Remove the screw, and the vent cover is held in place by tabs on the base. Rotate the vent cover, line up the holes with the tabs on the base, and the vent cover lifts right off.

Vent Cover removed from base of Instant Pot Ultra

When I dumped water in the pot, the vents in the vent cover held on to a lot of water, so I dried it off with a towel and set it next to the pot. There were also drops of water on the electronics board in the base, so I gently - oh so gently - patted it with the edge of a paper towel to lift the water off. Don't get overly enthusiastic and damage the electronics.

And, AGAIN, please make sure the pot is unplugged before doing any of this!

It's Dead, Jim.

Oh no! I'm sorry to hear that. If it didn't work, and the cooker is permanently damaged, you're not completely out of luck. User damage is not covered by Instant Pot's warranty, but Instant Pot Support can help you get a replacement cooker base. Contact Instant Pot support for the details: InstantPot.com/Support

What do you think?

Questions? Other ideas? Leave them in the comments section below.

Related Posts

The Case of the Missing Inner Pot
Which Pressure Cooker Should I Buy?
My Pressure Cooker Recipes

Enjoyed this post? Want to help out DadCooksDinner? Subscribe to DadCooksDinner via email and share this post with your friends. Want to contribute directly? Donate to my Tip Jar, or buy something from Amazon.com through the links on this site. Thank you.

  1. This is where all the "put your wet iPhone in a bag of rice" advice comes from - the rice is supposed to absorb the water. The rice does not matter - it doesn't do anything more than air drying - and anyhow I don't have enough rice to bury my Instant Pot, even with the big 25-pound bag from the Asian market. ↩

Fagor America is Closing

March 22, 2018 by Mike Vrobel 4 Comments

Fagor America will be shutting down operations after its parent company in Spain announced it would close, HomeWorld Business has learned.

In a letter from Fagor to its retail customers that was obtained by HomeWorld Business, company officials wrote, "Fagor America will be affected by this cessation and we anticipate the company will be closing in the next couple of months."
Fagor America to Shut Down Operations [HomeWorldBusiness.com]

I’ve used Fagor pressure cookers for years, and I’m sad to see them go. I switched from Fagor cookers to Instant Pot a while back, but I do still have a couple of Fagor Lux cookers in my collection. They were a good alternative to the Instant Pot, and I always like to see good competition in a market - it keeps the companies from getting complacent. (Not that Instant Pot seems complacent, mind you - they keep coming up with new ideas and new cookers - but I don’t want them to feel too comfortable and take their foot off the gas.)

I can’t recommend Fagor pressure cookers anymore - I have to assume support will dwindle away over the next couple of years as supplies run out.

If you have a Fagor that you like, keep using it! There’s nothing wrong with Fagor pressure cookers; this closing is entirely about finances. If you love your Fagor, and want to use it for a long time, get a spare gasket or two. The gasket is the first thing to wear out on pressure cookers, and a backup will extend the life of the cooker. ( I hold out hope that an investor will buy Fagor and rescue them from bankruptcy...you never know in business...but it’s not looking good right now.)

Adios, Fagor. I hope you’ll be back someday.

[Special thanks to reader Sigrid for bringing this to my attention.]

Sources:

  • https://www.homeworldbusiness.com/fagor-america-to-shut-down-operations/
  • https://www.hippressurecooking.com/fagor-america-closes-shop/
  • https://www.gourmetinsider.com/fagor-america-to-close-operations/

What do you think?

Questions? Other ideas? Leave them in the comments section below.

Related Posts

Review: Fagor Lux 8 Quart vs Instant Pot IP-Duo80
Fagor Lux vs Instant Pot - Time to Pressure Showdown
My Pressure Cooker Recipes Index

Enjoyed this post? Want to help out DadCooksDinner? Subscribe to DadCooksDinner via email and share this post with your friends. Want to contribute directly? Donate to my Tip Jar, or buy something from Amazon.com through the links on this site. Thank you.


Instant Pot (Pressure Cooker) Green Beans

March 20, 2018 by Mike Vrobel 6 Comments

Instant Pot (Pressure Cooker) Green Beans. A quick pressure cooker side dish. And I do mean quick: 1 minute at high pressure with a quick release.

1 minute under pressure? 1 minute under pressure. Here is the pressure cooker version of my favorite vegetable side dish, Steam Sautéed Green Beans.

Pressure Cooker Green Beans | DadCooksDinner.com
Pressure Cooker Green Beans
[feast_advanced_jump_to]

Now, let me say this up front: there is no reason to pressure cook green beans. They cook too fast. By the time the cooker comes up to pressure, the beans are done; by the time the cooker quick releases, I might as well have made them on the stovetop.

So, why pressure cook green beans? Flexibility - I use this recipe when I want to use the Instant Pot to free up the stovetop. If I'm cooking for a party, and every burner has a pot on it, the Instant Pot can jump in to act as another cooking vessel. At that moment, I don't care it's a pressure cooker, just that it can cook the green beans.

Video: Instant Pot (Pressure Cooker) Green Beans (1:26)

Video: Instant Pot (Pressure Cooker) Green Beans [YouTube.com]

What do you think?

Questions? Other ideas? Leave them in the comments section below.

Related Posts

Pressure Cooker Kale with Garlic and Lemon
Pressure Cooker Collard Greens with Bacon
Pressure Cooker Baby Bok Choy
Foil Pouch Grilled Green Beans
Instant Pot Cabbage
My other Pressure Cooker Recipes
My other Pressure Cooker Time Lapse Videos

Enjoyed this post? Want to help out DadCooksDinner? Subscribe to DadCooksDinner via email and share this post with your friends. Want to contribute directly? Donate to my Tip Jar, or buy something from Amazon.com through the links on this site. Thank you.


Nothing is certain except...2017

March 13, 2018 by Mike Vrobel 1 Comment

Oh, goody...

The wages of sin are death, but by the time taxes are taken out, it's just sort of a tired feeling.
― Paula Poundstone

The good news about writing a successful food blog? It provides a little side income.

The bad news about writing a successful food blog? Side income makes taxes complicated.

No new post today – I’m busy bookkeeping, sorting documents, and entering info into TurboTax. (I’m one of those weirdos who enjoys doing their own taxes.) Someday the blog may make enough to get someone to do my taxes. But for now, I have a hard time paying for something I can do myself.

I’ll see everyone next week with a new recipe!

Can you swap Instant Pot lids?

March 8, 2018 by Mike Vrobel 9 Comments

Can you swap Instant Pot Lids?

Instant Pot Ultra 6 Quart | DadCooksDinner.com

In my Instant Pot Ultra review, I went on and on about the fantastic auto-locking lid. It's amazing, but my frustrations with the Ultra's control knob were sending me back to my trusty Instant Pot Duo.

That led several commenters to ask: why didn't I put the Ultra lid on the Duo Plus, and get the best of both worlds?

Now, I have to say THIS IS PROBABLY A TERRIBLE IDEA and pressure cookers should not be played with and I'm a trained professional1 on a closed course, and past performance is no indicator of future returns, and your mileage may vary. In other words, don't try this at home.

But, they fit so perfectly...they are exactly the same size...why not give it a try?

Sure enough, they work fine. I kind of knew this already. A couple of times the lids got swapped in the cabinet, I didn't notice, and I ran the Ultra with the Duo Plus lid. It kind of figures that the two are interchangeable.

But, again, THIS PROBABLY VOIDS MY WARRANTY AND I AM IN NO WAY SUGGESTING THAT just because the lids are exactly the same size and designed for the same cooker base that YOU SHOULD SWAP THEM. THAT'S A BAD IDEA, KIDS.

So. Um. Here's video!

Video: Can You Swap Instant Pot Lids? (1:10)

Video: Can You Swap Instant Pot Lids? [YouTube.com]

What do you think?

Questions? Other ideas? Leave them in the comments section below.

Related Posts

Review: Instant Pot Ultra
Which Pressure Cooker Should I Buy?
My other Pressure Cooker Recipes
My other Pressure Cooker Time Lapse Videos

Enjoyed this post? Want to help out DadCooksDinner? Subscribe to DadCooksDinner via email and share this post with your friends. Want to contribute directly? Donate to my Tip Jar, or buy something from Amazon.com through the links on this site. Thank you.

  1. Not trained, not a professional. ↩︎

Pressure Cooker French Green Lentils (Lentils du Puy)

March 6, 2018 by Mike Vrobel 21 Comments

A bowl of pressure cooker French Lentils (Lentils du Puy)

Here is another recipe from my tests of the Kuhn Rikon Family Style 12 quart pressure cooker.

Lentil stew with rice has been in heavy rotation in my house for the last year or so. It is one of the key recipes in my dinner plan for Meatless Mondays; we have it every two or three weeks.

A bowl of pressure cooker French Lentils (Lentils du Puy)
Pressure Cooker French Green Lentils (Lentils du Puy)
[feast_advanced_jump_to]

Beans and rice are one of the few vegetarian combinations that fill me up. Most vegetarian meals leave me thinking "that tasted great - where's the rest of dinner?" I don't have that reaction when the meal has beans; they're hearty enough to fill me up.  But, beans and rice every week gets boring. I'm always looking for new versions I can try.

That's why I bought a pound of French lentils du Puy when I saw it at my local health foods market. I wanted to try a French-style lentil stew with a leek mirepoix, and I have the new Kuhn Rikon pressure cooker to test, et voila. I love it when a plan comes together.

The pressure cooker gives me a noticeably faster cooking time, even with the natural pressure release that I like to use with beans. The lentils are done pressure cooking in about 20 minutes, instead of the 35 to 45 minutes of simmering that they usually take. That extra fifteen minutes can be the difference between my getting dinner on the table on a busy weeknight, and succumbing to the temptation of fast food.
*Darn you, Swensons! Why do your french fries have to taste so good?

And the results? Creamy lentils in a savory broth, done in 30 minutes end to end; the pressure cooker worked its magic once again.

🥫Ingredients

This is a simple dried bean recipe, so the ingredients list is pretty basic

  • French Green Lentils (Lentils du Puy)
  • Extra virgin olive oil
  • Butter
  • Leek
  • Carrot
  • Celery
  • Garlic
  • Herbes de Provence

See recipe card for quantities.

🥘 Substitutions

Regular lentils: If you can't find French green lentils, use regular (brown) lentils.

Leek: If cleaning leeks is too annoying, use a regular onion, or three green onions.

Herbes de Provence: I keep a jar of herbes de provence on my countertop, but any salt-free herb blend can replace it, or just use dried thyme.

Vegan version: replace the butter with more olive oil.

Non-Vegetarian: For an authentic French version of the recipe, substitute chicken stock for about half the water. (Preferably homemade chicken stock.)

🛠 Equipment

A 6-quart pressure cooker. Pressure cooker dried beans are one of the reasons I became a pressure cooker convert, and love my Instant Pot. Try them - you'll never go back to canned beans. (OK, maybe you will, for convenience - but see the Storage section for tips on make ahead freezer beans.)

I originally made this recipe in a giant Kuhn Rikon 12-quart pressure cooker, which is overkill, size-wise - but it worked. I've converted to electric pressure cookers now, and my 6-quart Instant Pot is the right size for this recipe.

📏Scaling

This recipe scales down easily - cut everything in half if you don't need as many beans, or have a 3-quart pressure cooker. Scaling up runs into space issues; if you have an 8-quart pressure cooker, you can double this recipe, but it's too much to fit in a 6-quart pressure cooker.

🤨 Soaking lentils?

I get the "to soak, or not to soak?" question all the the time. Don't soak lentils. They cook too quickly - if you soak them, they fall apart when pressure cooked.

💡Tips and Tricks

  • Salt your lentil water! "Salt toughens beans" is a myth. Salting before cooking helps season the beans all the way through as they cook.
  • Try to buy lentils from a store with lots of bean turnover. Beans dry out as they age, which makes them a little tougher to cook.
  • Simmer to thicken: If you have the time, and want thicker bean liquid, simmer the beans for 10 minutes after pressure cooking. I set my Instant Pot to Sauté mode adjusted to low, set the timer to 10 minutes, and leave the lid off to let the broth evaporate.
Trimmed celery, carrot, and leeks, with a bag of French lentils du Puy and a crock of herbes de Provence
Ingredients for pressure cooker French lentils

☃️ Storage

A 2-cup container of beans, with cooking liquid, replaces a 15-ounce can of beans from the grocery store. They'll last in the refrigerator for a few days, and freeze for up to 6 months. I always make extra beans, and freeze the leftovers for use in other recipes. Freezer beans are ready to use with about 5 minutes in the microwave, and are so much better than canned.

🤝 Related Posts

  • Pressure Cooker Umbrian Lentils and Sausage
  • Pressure Cooker Beans (basic technique)
  • Lentil Stew, Dal Style (non-pressure cooker variation)
  • My other pressure cooker recipes

Adapted From

Mark Bittman Soupy Dal, American Style [nytimes.com]
Lorna Sass Pressure Perfect


*Enjoyed this post?  Want to help out DadCooksDinner?  Subscribe using your RSS reader or by Email, recommend DadCooksDinner to your friends, or buy something from Amazon.com through the links on this site.  Thank you!

Pressure Cooker Quick Chicken Tacos

February 27, 2018 by Mike Vrobel Leave a Comment

Quick Chicken Tacos on a plate with a platter of chicken and other toppings in the background

Pressure Cooker (Instant Pot) Quick Chicken Tacos - when life is crazy and dinner has to be on the table with the least amount of work, I reach for this recipe.

Quick Chicken Tacos on a plate with a platter of chicken and other toppings in the background
Pressure Cooker Quick Chicken Tacos

How do I cook chicken tacos on a crazy weeknight? Tuesday was a blur of pickups and drop-offs. Thank goodness my oldest has his license now, or I would have been circling Akron until 9 PM. In between Dad-As-Taxi service, I had a brief moment at home. It was just enough time to throw some chicken in my Instant Pot before rushing off to the next scheduled pickup.

"Throw together" is the key phrase. Quick shredded chicken is barely a recipe. If I have the time to do it right, I make Chicken Tinga Tacos. When I don't have time, this is how I get dinner on the table. The chicken goes in the pot, and warming mode keeps it ready for whenever I get home. The rest of the meal comes straight out of the fridge or pantry - tortillas, shredded lettuce, shredded cheese, jarred salsa. Toss them on the table and taco night is served.

I use both chicken breasts and thighs in this recipe because of my local grocery store. Mixed packs of breasts and thighs are often on sale - so I grab them. You can use all breast meat or all thighs if you want. If I had to choose, I'd get all thighs. Breast meat tends to overcook in the pressure cooker, but thighs are better when they're a little overcooked. (And I'm a dark meat fan, so I'd really rather have the thighs. But I can't pass up a good sale.)

And, luckily for me, the size difference between the breast and thighs makes them cook for the same amount of time - the larger breasts take long enough to cook through, giving that the smaller thighs enough time to overcook and get right where they want to be. Serendipity!

What do you think?

Questions? Other ideas? Leave them in the comments section below.

Related Posts

Pressure Cooker Chicken Tinga Tacos
Pressure Cooker Shredded Chicken with Black Mole Sauce
Pressure Cooker Thai Green Chicken Curry
My other Pressure Cooker Recipes
My other Pressure Cooker Time Lapse Videos

Enjoyed this post? Want to help out DadCooksDinner? Subscribe to DadCooksDinner via email and share this post with your friends. Want to contribute directly? Donate to my Tip Jar, or buy something from Amazon.com through the links on this site. Thank you.


Reader Survey: Pressure Cooking Frozen Chicken Drumsticks?

February 22, 2018 by Mike Vrobel 22 Comments

Chicken drumsticks in an electric pressure cooker

Chicken drumsticks in an electric pressure cooker
Instant Pot 'O Drumsticks

The most common question on my pressure cooker chicken legs and chicken drumsticks recipes:

"My drumsticks are frozen. How much time should I add?"

My answer is: I don't know? Five extra minutes, maybe?

That answer feels right, but I want to check it. I never cook my drumsticks from frozen. I'm cooking them either fresh or thawed. (I buy family packs of drumsticks. Straight out of the freezer I have a slab of chicken that won’t fit in the cooker. I have to thaw them enough to break them apart…and by that point I might as well leave them in the refrigerator overnight to thaw completely.)

I go to the store to stock up on frozen drumsticks for testing. And…neither of my local grocery stores carries them. (They have individually frozen wings, and boneless skinless breasts, but no drumsticks and no legs.)

I’m standing in the meat department, staring blankly at bags of frozen chicken wings. "What if I freeze them myself? No - no one would freeze individual drumsticks. They’re not asking about an ice block of frozen chicken pieces. Do they have a supply of frozen chicken parts I don’t? Am I frozen chicken deprived?"

Then the light bulb went on. "Why am I trying to guess what my readers are thinking when I can just ask them?."

So, it is Survey time for my loyal readers!1

Frozen Drumstick Survey

  1. Are individually frozen drumsticks (or legs) available in your area? If so, what grocery store, big box retailer, or warehouse club near you sells them?
  2. Do you buy them, and do you try to cook them from frozen?
  3. Have you cooked them from frozen in your pressure cooker? Did you add extra time to make them work?

Leave an answer in the comments section on my blog. Thank you!

  1. Drumroll please! Get it? Drumstickroll? Chicken drumsticks...it sounded funnier in my head. ↩

Throwback Thursday: Butter Basted Sous Vide Porterhouse

February 15, 2018 by Mike Vrobel Leave a Comment

Butter Basting a Sous Vide Porterhouse | DadCooksDinner.com

Butter Basting a Sous Vide Porterhouse | DadCooksDinner.com
Butter Basting a Sous Vide Porterhouse

I’m going on a bit of an “inside blogging” rant here. If you’re just interested in the recipe, here it is: Sous Vide Butter Basted Porterhouse (from the freezer, seared in a cast iron pan)

On with the rant!


I hate SEO.

SEO is “search engine optimization” - in other words, adding things to my posts so Google understands them. I want to write for people, not search engines. And yet…

If I want to write a food blog that anyone reads, I have to do SEO. According to my statistics, 75% of you found me through a Google search, so I need to keep The Algorithm happy.

(If you stuck around after that original Google search, and are still following me, thank you!)

You don’t see most of my SEO work - and neither do I. My recipe plugin takes care of most of it. You see a neatly formatted recipe; Google sees a list of tags: This is a recipe, this is a picture, this is a list of ingredients, and so on.

Unfortunately, when I started using a recipe plugin, I chose…poorly. Every time I open Google Webmaster Tools, I see a red Error badge on the top of the screen. And I’m one of those people who can’t ignore notifications - I clear all the badges on my iPhone every time I use it. (No unread email count for me, or I get twitchy.)

I have a few dozen recipes with Google Recipe Card errors. I’m working my way through the list, converting them to my new plugin. It is a trip down memory lane, revisiting early 2015.

And, what a coincidence: the first recipe on the error list looks familiar. I have a porterhouse in the freezer, and the recipe is on the menu for dinner tonight!

Porterhouse steak with slices on a cutting board
Sous Vide Porterhouse, sliced and ready to serve

Original Recipe: Sous Vide Butter Basted Porterhouse (From the Freezer)

Related Posts

Sous Vide Boneless Ribeye Roast
Sous Vide Peppercorn Filet Mignon
Sous Vide Baby Back Ribs Showdown - 48 hour vs 6 hour
My other Sous Vide Recipes

Enjoyed this post? Want to help out DadCooksDinner? Subscribe to DadCooksDinner via eMail and share this post with your friends. Want to contribute directly? Donate to my Tip Jar, or buy something from Amazon.com through the links on this site. Thank you.


Pressure Cooker Strawberry Cheesecake

February 13, 2018 by Mike Vrobel 8 Comments

Pressure Cooker Strawberry Cheesecake | DadCooksDinner.com
Pressure Cooker Strawberry Cheesecake

Pressure Cooker Strawberry Cheesecake - a quick and easy cheesecake from the pressure cooker. Perfect for Valentine's Day!

Strawberries make me think of Valentine's day...which doesn't make sense. February sure isn't strawberry season in Ohio. Strawberries are fantastic from Mid-May to Mid-June; outside of that we get strawberries from far away, which are bred to survive shipping and handling. They may look pretty, but they don't taste like much.

I stand my ground for the rest of the year - only local strawberries at the peak of ripeness! No grocery store strawberries! Except on Valentine's day. (Hey, I can't make perfect food choices all the time.) I'll buy chocolate covered strawberries and...make this cheesecake. And, for a cheesecake, canned strawberries are fine. They're canned when the berries are ripe (and packed with enough sugar that I wouldn't notice anyhow). If you make this cheesecake in strawberry season, use thin-sliced fresh strawberries, sprinkled with a hint of sugar.

(If you're forced to use fresh grocery store strawberries, sprinkle them with a lot of sugar.)

This recipe is a variation on my standard pressure cooker cheesecake: fill a 7 inch springform pan with cheesecake filling, set it (uncovered) on a rack over 2 cups of water, and pressure cook for 20 minutes with a natural pressure release. Refrigerate for at least 4 hours and you're ready to serve.

The variations? Strawberries for the topping, obviously. I use crumbled shortbread cookies for the crust, instead of graham crackers. And I add a little lemon zest to the filling to give it hint of citrus.

To head off the question I get the most: I do NOT cover my cheeesecake while cooking . I used to, but I switched my method - the results are more consistent cooking uncovered. (Cheesecake covered with aluminum foil would take forver to set in the middle, resulting in an overcooked outside even when the middle was still soft.) If a little steam settles on the cheesecake, I dab it off with the edge of a paper towel.

Looking for a sweet treat for your sweetie on Valentine's day? Here it is: pressure cooker strawberry cheesecake.

Recipe: Pressure Cooker Strawberry Cheesecake

Video: Pressure Cooker Strawberry Cheesecake [YouTube.com]

What do you think?

Questions? Other ideas? Leave them in the comments section below.

Related Posts

Pressure Cooker New York Cheesecake
Pressure Cooker Oreo Cheesecake
Pressure Cooker Salted Caramel Cheesecake
My other Pressure Cooker Recipes

Enjoyed this post? Want to help out DadCooksDinner? Subscribe to DadCooksDinner via eMail and share this post with your friends. Want to contribute directly? Donate to my Tip Jar, or buy something from Amazon.com through the links on this site. Thank you.

Video for my Instant Pot Ultra 6-Quart Review

February 8, 2018 by Mike Vrobel Leave a Comment

Instant Pot Ultra 6 Quart | DadCooksDinner.com

Video Review: Instant Pot Ultra 6-Quart

Sorry this is late…here’s a quick video companion to Tuesday’s review of the Instant Pot Ultra 6-Quart

Video: Instant Pot Ultra 6-Quart Review (3:21)

Instant Pot Ultra 6-Quart Review [YouTube.com]

What do you think?

Questions? Other ideas? Leave them in the comments section below.

Related Posts

Which Pressure Cooker Should I Buy?
Review: Instant Pot Ultra 6-Quart (vs Instant Pot Duo Plus 6-Quart
My other Pressure Cooker Recipes
My other Pressure Cooker Time Lapse Videos

Enjoyed this post? Want to help out DadCooksDinner? Subscribe to DadCooksDinner via email and share this post with your friends. Want to contribute directly? Donate to my Tip Jar, or buy something from Amazon.com through the links on this site. Thank you.


Review: Instant Pot Ultra 6 Quart (vs Instant Pot Duo Plus 6 Quart)

February 6, 2018 by Mike Vrobel 14 Comments

Instant Pot Ultra 6 Quart | DadCooksDinner.com

Instant Pot Ultra 6 Quart | DadCooksDinner.com
Instant Pot Ultra 6 Quart

The Instant Pot Ultra 6 Quart was my daily driver pressure cooker for the last couple of months, and I Have Thoughts I Must Share.

I expected the Ultra to be my new favorite pressure cooker, pushing the Instant Pot Duo Plus from kitchen island down to the shelf of backup cookers…but in the end, the Ultra wound up on the shelf, and the Duo Plus is still in my kitchen, my everyday cooker.

Why? Well, let’s get to the review.


FCC Notice: This is not a paid review. I bought these cookers with my own money. I am an Amazon Affiliate, so if you buy anything through the Amazon links on my site, I get a small commission from Amazon. Thank you!


It's an Instant Pot!

The Ultra’s strengths are same as the rest of the Instant Pot family. It has all the features that I love: a stainless steel inner pot, gasket holder built into the lid, lid holder built into the handle, and easy set-it-and-forget-it pressure cooking. It’s an Instant Pot, and that makes it a darned good pressure cooker.

A new pressure release design in the lid

Let’s start with my favorite new feature, the lid with an auto-closing pressure valve. Older Instant Pots come with a weighted pressure valve with a handle on it - pressure is released by turning the valve, which manually sits it on a little shelf that holds it open. It’s simple, and it works...except when I forget to close it before I start cooking. Part of my pre-pressure routine is “make sure the valve is closed” right after I lock the lid.

New pressure release button

The Ultra has a weighted pressure valve, but no handle and no shelf. Instead, it has a system built into the lid. There is a lifting tab under the pressure valve, controlled by a spring-loaded pressure release button. Push the button, and the tab lifts the pressure valve, releasing the pressure. I like the added safety of a separate pressure release button - there’s less chance of scalding myself with steam this way.

Auto-closing pressure valve

Even better, the system automatically closes the pressure valve when the lid locks. Rotate the lid, and the pressure valve closes. No more forgetting to check the valve, no more wondering why the cooker is hissing instead of coming up to pressure. I love this feature - it’s another simple design innovation by the Instant Pot team.

Instant Pot Ultra - Close up of pressure valve and release on lid | DadCooksDinner.com
Instant Pot Ultra - Close up of pressure valve and release on lid

Display

The new, larger display is also pretty. Its best feature is an animated heating curve, showing the pressure cooker’s progress - pre-heating, cooking at pressure, or keep warm. It is a lot easier to see where the Ultra is in its cooking cycle.

What about all those extra functions?

It's a 10-in-1! The Duo Plus is only a 9-in-1! Take that!

What's that? What's the extra function? Um…hang on…let me look.

I never use the extra functions. I use the Pressure Cook and Sauté modes, occasionally Keep Warm, and very occasionally Slow Cook. They can add all sorts of custom programs; I’m going to keep ignoring them. (If you use them and love them, great! Keep using them! I’m going to stick with Pressure Cook and changing the timer.)

OK, OK, if you insist. The new function is “Ultra”. From the Instant Pot website:

The Ultra program provides the user with complete control of pressure and non-pressure cooking. You can adjust the different settings based on your desired results.

What does that mean? I’m not sure. Like I said above, I never use it. Sorry…

About that knob…

I love the idea of the knob as a control. (It makes me think of the volume knob on my stereo back in college.) The Ultra has good knob feel (as they say in the biz) - it is solid and satisfying to spin and push.

Unfortunately, the knob causes my two complaints about the Ultra.

Twitchy Knob

The knob is overly sensitive. If I spin the knob too quickly, it jumps from changing minutes to changing hours. And “too quickly” for the knob is painfully slow. I have to slow myself down and deliberately turn the knob, click by click, waiting for the beep before I turn again. If I lose focus for even a minute, I spin too fast, and I jump past my target time. It’s not “set and go,” it’s “Set…whoops, too much, go back. Darn, missed it again. OK, gently, one…two…three. There.“

[Update 2018-02-09: I accidentally the Instant Pot support email. Adding it back in:]

The knob was so jumpy that I wondered if my unit was defective. According to Instant Pot support, no, it's just very sensitive:

The selection dial is indeed quite sensitive! It certainly does have the propensity to jump around in cooking times. I apologize for any inconvenience this may cause.

(Email from Instant Pot Support)

Less intuitive

Controlling a pressure cooker with a knob is also more complicated. Let’s walk through my pressure cooker workflow. I do the following tasks almost every time I use my pressure cooker:

  • Sauté mode to brown the meat and cook the onions
  • Everything in the pot, lock the lid
  • Cancel Sauté mode and start Pressure Cook mode.

On my IP Duo Plus, to do those tasks, the steps are:

  • Press Sauté button. Wait for the beep.
  • (Do pre-pressure sauteing and browning)
  • Press Cancel button to stop Sauté mode
  • Lock lid and check pressure valve
  • Press Pressure Cook button
  • Press Plus/Minus buttons to adjust time. Wait for the beep. Pressure cooking starts.

Total: Three button presses (Sauté mode, Cancel, Pressure Cook mode), and a handful of Plus/Minus button presses to adjust cooking time

On my IP Ultra, the steps are:

  • Spin knob to highlight Sauté mode (carefully)
  • Press knob to select Sauté mode
  • Press Start
  • (Do pre-pressure sauteing and browning)
  • Press Cancel button to stop Sauté mode
  • Lock lid (Don't have to check pressure valve - it auto locks.)
  • Spin knob to highlight Pressure Cook mode (carefully)
  • Press knob to select Pressure Cook mode
  • Press knob to select Pressure Cook Time
  • Spin knob to adjust Pressure Cook Time (carefully)
  • Press Start button

Total: Three button presses (Start, Cancel, Start), three knob presses (Sauté, Pressure Cook mode, Pressure Cook Time edit), and three twitchy knob spins, maybe more if I lose focus and turn too fast.

My wife is my “new user” tester. (I monopolize the pressure cooker - “Sorry, dear, I have to test another recipe!” - so she only gets to use it occasionally.) She knows how to operate the Instant Pot Duo, but she couldn’t figure out the Ultra. I had to walk her through it. And then walk her through it again (over the phone the next time) because she couldn’t remember the sequence. That's...not good.

Summary: The Instant Pot Ultra is a good pressure cooker, but I went back to my Instant Pot Duo Plus

I used the Ultra as my daily driver for a few months. I got comfortable enough with the interface that I did not overshoot too often, or turn clockwise when I needed to go counter-clockwise. It was fine. But, after finishing this review, I switched back to my Instant Pot Duo Plus.

Why get an Ultra? The auto-locking lid is fantastic, and almost enough for me to stick with the Ultra. The Ultra looks pretty - the large digital display, no-button interface, and shiny silver knob are more stylish than the button-covered Duo Plus. If you’re the kind of person who has to have the newest and most expensive, this is the top of the line for Instant Pot. It’s 10-in-1, and that’s one better than 9-in-1, so it must be better. (I own 6…no, 7 pressure cookers right now, so I have no room to judge your buying decisions.) Underneath it all, it is an Instant Pot and a very good pressure cooker. If it is your only pressure cooker, you won’t regret owning it.

But the Instant Pot Duo Plus is back to being my daily driver. I miss the fancy display a little, and the auto-locking lid a lot. (A whole lot.) I traded them both to go back to the reliable push-buttons on my Duo Plus.

Recommended with reservations

Instant Pot Ultra [Amazon.com]


Instant Pot Duo Plus [Amazon.com]


What do you think?

Questions? Other ideas? Leave them in the comments section below.

Related Posts

Which Pressure Cooker Should I Buy?
Review: Fagor Lux 8 Quart vs Instant Pot Duo 8 Quart
Longer Term Testing Notes: Instant Pot Duo 6 Quart vs 8 Quart
My other Pressure Cooker Recipes
My other Pressure Cooker Time Lapse Videos

Enjoyed this post? Want to help out DadCooksDinner? Subscribe to DadCooksDinner via eMail and share this post with your friends. Want to contribute directly? Donate to my Tip Jar, or buy something from Amazon.com through the links on this site. Thank you.


Pressure Cooker Asian Zing Chicken Wings (From Frozen)

January 30, 2018 by Mike Vrobel 2 Comments

Pressure Cooker Asian Zing Wings (From Frozen) | DadCooksDinner.com

Pressure Cooker Asian Zing Wings (From Frozen) | DadCooksDinner.com
Pressure Cooker Asian Zing Chicken Wings (From Frozen)

Oh, my. I got some angry comments about my PicOfTheWeek. How dare I post a picture of frozen chicken wings in my pressure cooker, and not have more details?1So…to answer the big question:

How long to pressure cook chicken wings from frozen?

12 minutes at high pressure with a quick pressure release. That is, add 4 minutes to my original recipe’s cooking time at high pressure.2 (But…see my disclaimer about “time to pressure” below…)

Now for the fine print:

  1. These timings are for individually frozen wings, also called ice glazed or IQF wings. A big frozen block of wings will not work. Leave them in the refrigerator overnight to thaw...at least enough to break the block into individual wings.
  2. They take a couple more minutes at high pressure, but it takes a lot longer to get to high pressure. I don't have exact numbers3, but it felt like five to ten minutes for a pot of unfrozen wings to come up to high pressure, and twenty minutes or more for frozen wings. (The pressure cooker has to boil the water in the pot to build pressure, and a big pile of frozen wings slows down the boiling. A lot.4) I don't worry about it; I set my pressure cooker and work on the rest of dinner while I wait for it to beep that it's done. But…in case you are surrounded by a ravenous crowd of football fans at your Super Bowl party, I want you to be ready for the extra time.
  3. Another timing note: 12 minutes at high pressure (with a quick pressure release) is my "Goldilocks" level - the wings are just right. 10-minute wings are fine - still edible - but I like my wings cooked a little more. 15-minute wings are falling apart tender, and a little too tender for me. (Also, a few 15-minute wings came apart when I tossed them in the sauce.) Four of my five taste testers preferred the 12-minute wings, but one5 loved the falling apart tenderness of the 15-minute wings, so take that under advisement for your own cooking times.

Frozen Wing Issues

A couple more things to be aware of with frozen wings:

  • Don't bother seasoning before cooking. Seasoning ice-coated chicken is pointless; I'm seasoning the ice, not the chicken, and it will melt off and wind up in the liquid at the bottom of the pot.
  • IQF wings take up a lot of space. I can fit four pounds of room-temperature wings below the max-fill line in my 6-quart Instant Pot,6 but a 2.5-pound bag of individually frozen wings takes up the same amount of space. Room-temp wings relax and settle into a tightly-packed pile. Frozen wings are, well, frozen stiff. They don't settle, they stack up on each other, and take up more room in the pot. Cooking for a crowd? Thaw the wings. Or use a larger pressure cooker…or a second pressure cooker…or both. (What, doesn't everyone have a shelving unit full of pressure cookers? Just me?)

Zing! Sauce

This is my clone of Asian Zing from BW3s. I’m usually a sauce traditionalist - Buffalo sauce all the way - but when I see a new sauce on the menu, I’ll try it out on a five-wing side order. I tried Asian Zing, and it is now part of my regular order.

My zing clone is not a perfect match, but the kids wiped the plate clean, so I think it’s ready to share. (That said, If you don’t want to make a sauce, go ahead and use a store-bought wing sauce. I won’t mind.)

Looking for a low-effort side for your Super Bowl party? Pressure Cook some Asian Zing wings!

What do you think?

Questions? Other ideas? Leave them in the comments section below.

Related Posts

Instant Pot Chicken Wings Recipe
Pressure Cooker Teriyaki Chicken Drumsticks
Pressure Cooker Chicken Thighs with Herb Rub
My other Pressure Cooker Recipes
My other Pressure Cooker Time Lapse Videos

Enjoyed this post? Want to help out DadCooksDinner? Subscribe to DadCooksDinner via eMail and share this post with your friends. Want to contribute directly? Donate to my Tip Jar, or buy something from Amazon.com through the links on this site. Thank you.


OK, a handful of angry comments. At least three. Unfortunately, the way my mind works, angry comments carry more weight than positive comments. ↩

  1. Testing of frozen wings led me to change my unfrozen wing time - I cut it back from 10 minutes at high pressure to 8 minutes. 10-minute unfrozen wings were a little too falling apart. ↩
  2. I noticed frozen took a lot longer when I was recipe testing, but I didn't think "I should time it" until I was writing this up. Darn. Maybe next time? ↩
  3. As the water in the bottom of the pot heats up, the ice glaze on the wings melts, and becomes cold water that has to be heated. ↩
  4. Hi, Natalie! ↩
  5. ⅔rds full for pressure cooking. Don't overfill! ↩

New Toy: Instant Pot Duo 8 Quart Plus

January 25, 2018 by Mike Vrobel 2 Comments

Instant Pot Duo Plus 8 Quart with Box | DadCooksDinner.com

Instant Pot Duo Plus 8 Quart with Box | DadCooksDinner.com
Instant Pot Duo Plus 8 Quart

The Big Brown Truck of New Toys just delivered an Instant Pot Duo Plus 8 Quart.

Hmmm...now I know why the IP Duo 8 Quart was on sale on Prime Day and Black Friday.

More news as I get a chance to play with it, but for now, let me savor my New Gadget dopamine hit.

And...yes, I have a gadget problem. This is my [does a quick count on fingers] 6th pot...and that's with a few I handed down to other family members. I can quit any time I want...really...any minute now...)

FCC Notice: Not sponsored by Instant Pot or UPS - I bought this pot with my own money. Not sponsored by Amazon, but I'm an affiliate, and if you buy through the Amazon links on my website I'll get a small commission.

Pressure Cooker Chinese Red Cooked Chicken Thighs

January 23, 2018 by Mike Vrobel 8 Comments

Pressure Cooker Chinese Red Cooked Chicken Thighs | DadCooksDinner.com

Pressure Cooker Chinese Red Cooked Chicken Thighs | DadCooksDinner.com
Pressure Cooker Chinese Red Cooked Chicken Thighs

Red Cooking is the Chinese technique of braising meat in soy sauce with rock sugar, spices, and aromatics. Traditionally, the meat was simmered for hours in a sand pot - which is actually made out of clay. But I’m going to speed things up by pressure cooking in my Instant Pot. 1

I substitute American grocery “international aisle” ingredients for their traditional Chinese counterparts. The traditional ingredients are in the notes section of the recipe. (Why? Because it’s fun to shop at an Asian market - I love making the trip. And, if I'm already there, why not pick up the authentic ingredients?)

That said, the “international aisle” version of this recipe is very close to the real thing, and I don’t make a special trip just for these red cooked chicken thighs.

For more red cooked dishes, try my Instant Pot Red Braised Pork Belly, or a Filipino version with my Instant Pot Pork Adobo.

Video: Pressure Cooker Chinese Red Cooked Chicken Thighs (2:59)


Video: Pressure Coker Chinese Red Cooked Chicken Thighs [YouTube.com]

What do you think?

Questions? Other ideas? Leave them in the comments section below.

Related Posts

Pressure Cooker Chinese Ribs
Pressure Cooker Chinese Pepper Steak
Pressure Cooker Chinese Kale
My other Pressure Cooker Recipes
My other Pressure Cooker Time Lapse Videos

Enjoyed this post? Want to help out DadCooksDinner? Subscribe to DadCooksDinner via eMail and share this post with your friends. Want to contribute directly? Donate to my Tip Jar, or buy something from Amazon.com through the links on this site. Thank you.

  1. I know there's a Chinese grandmother out there muttering "pressure cooker" and shaking her head. I'm sorry, grandmother, but…I don't have the time or patience to care for a clay sand pot. ↩

Things I Love: Bean Box

January 18, 2018 by Mike Vrobel 2 Comments

Rancho Gordo Bean Club Box | DadCooksDinner.com

Rancho Gordo Bean Club Box | DadCooksDinner.com
Bean club box from Rancho Gordo

Life has been coming at me fast, so I don’t have a big cooking thought to share. Or even a medium-sized one. So, here’s something I love…

"Did you get the a new bean box?"

  • My bean-loving son

It’s bean box day!

I shout my love for pressure cooker beans from the rooftops. Beans are one of the reasons I became a pressure cooker convert; dried beans are so much better than canned, and pressure cooking is quick. I can use dried beans in my day-to-day cooking, without having to plan a day ahead.

Rancho Gordo grows the best beans I’ve ever had. I heard about them on the Internet years ago, and could not get over the price…until my wife brought me back a few bags from a business trip to San Francisco. (Rancho Gordo is in the Ferry Market Building in downtown SF.) And, oh, my, what beans they were.

Why are they so good? I think they are fresher than the beans I get in the store. (Even the organic beans from the fancy natural foods store, with high turnover.) Rancho Gordo beans just taste…beanier. (Is that a word? Sure. Go with it.)

Now, they are expensive I can get a pound of beans for a buck or two at my local grocery store. (I do get them at my local grocery when I’m in a hurry and need a specific kind of bean.) Rancho Gordo beans average about $5.99/lb. I think of these beans as a luxury, like a prime grade steak - but they are a luxury I can afford on a regular basis.

That’s why I joined the Rancho Gordo bean club, and get my quarterly shipment of beans. (And, this time, a bag of black Quinoa. Interesting…) I supplement with an occasional order to stock up on my favorites, Midnight Black Beans, Pinto Beans, and Domingo Rojo Beans. As I said, they’re an everyday luxury for me.

[Update 2018-01-18: Whoops, the Bean Club is sold out. Sorry if I got anyone’s hopes up, and keep an eye out to see if they reopen.]

So, if you are willing to spend for the best beans, check out Rancho Gordo.

Note: This post is not sponsored, and I’m not an affiliate. I just love these beans.

Pressure Cooker and Oven Roasted Chickpeas

January 16, 2018 by Mike Vrobel 8 Comments

Pressure Cooker and Oven Roasted Chickpeas | DadCooksDinner.com

Oven roasted crispy chickpeas are a tasty appetizer and a fantastic snack. Crunchy on the outside, creamy in the middle, with a zing of spices. We made a batch for New Year's Eve, and they were long gone when we toasted in the New Year.

What could make them better? Homemade chickpeas. Canned chickpeas are good, but…try homemade chickpeas, at least once. You'll be surprised by the difference.

Pressure Cooker and Oven Roasted Chickpeas | DadCooksDinner.com
Pressure Cooker Oven Roasted Chickpeas
[feast_advanced_jump_to]

This recipe is an example of using the right tool for the job. Not everything is a one-pot meal, y'know? The pressure cooker is my bean-cooking secret weapon, making pressure cooker chickpeas in a little over an hour. Then I turn the job over to my oven for roasting.

(Is it still a secret weapon when I can't stop talking about it on the internet? Now, where was I? Oh, right, crispy chickpeas.)

And yes, when I talk about chick"peas", I'm talking about beans. Chickpeas are a Mediterranean bean, often called garbanzo beans because "Garbanzo" is Spanish for chickpeas.

For the spices, I keep coming back to this Western Mediterranean flavor profile: smoked Spanish paprika, cumin, coriander, and garlic. (I add cayenne for a spicy kick, but that's optional.)

🥫Ingredients

  • Dried Chickpeas
  • Baking soda
  • Extra virgin olive oil
  • Smoked paprika
  • Fresh ground pepper
  • Cumin
  • Coriander
  • Garlic Powder
  • Cayenne pepper
    See recipe card for quantities.

🥘 Substitutions

Chickpeas are also called Garbanzos in Spanish, or Ceci in Italian.

Canned chickpeas: if you must, you must. Rinse and drain 2 (15-ounce) cans of chickpeas, and continue with step 2.

The baking soda helps keep the beans tender in case of hard water. (Hard water is acidic, and baking soda helps counter that.)

If you want to cut the heat, skip the cayenne pepper. The other spices just add flavor; the cayenne brings the heat.

Other spices: Feeling Tex-Mex? Sub in ancho chile powder for the paprika and chipotle powder for the cayenne. How about Middle Eastern? Replace the salt and spices with a sprinkle of Zatar seasoning. The only limit is your imagination and the contents of your spice rack.

🛠 Equipment

A 6-quart pressure cooker. (Though it will fit in a 3-quart pressure cooker).
Pressure cooker dried beans are one of the reasons I became a pressure cooker convert. Try them - you'll never go back to canned beans. (OK, maybe you will, for convenience - but see the Storage section for tips on make ahead freezer beans.)

A rimmed baking sheet for roasting. I use half-sheet pans for a bunch of things in my kitchen, including sorting the beans. In this recipe I actually use them for their original use - roasting in the oven.

📏Scaling

This recipe scales down easily - cut everything in half if you don't need as many beans. You can double this recipe in a 6-quart pressure cooker, but use 2 half-sheet pans for roasting. (I sized the recipe to fit in a half-sheet pan without crowding, so the chickpeas crisp better in the oven.)
Tools

🤨 Soaking chickpeas?

I get the "to soak, or not to soak?" question all the the time. I don't soak my chickpeas in this basic recipe. They don't need an overnight soak, and cook to tenderness with 45 minutes at high pressure.

That doesn't mean you can't soak the beans. They turn out fine. Soaked beans cook much quicker, 20 minutes at high pressure. I use that when I'm cooking the beans with other ingredients, where the shorter cooking time keeps me from overcooking the whole dish just to get the beans tender. Since the chickpeas cook alone in this recipe, I don't bother with soaking

Sorting Beans

Beans are an agricultural product, and stuff tends to creep in when they are processed. Beans should always be sorted and rinsed before using, to get rid of any twigs, stones, clumps of dirt, or broken beans.
To sort the beans, I pour them out on one side of a rimmed baking sheet (a half-sheet pan), to keep the beans from escaping. Then I slowly run my fingers through the pile of beans, pulling them towards me on the sheet. I watch the beans as they move, looking for anything that doesn't seem right. If I see something, I poke around in the beans until I find what caught my eye, and discard it. I repeat this a couple of times, until I'm satisfied everything is out of the beans.
Then I dump the beans into a fine mesh strainer and rinse them under cold running water, to wash off any dirt or dust still on the beans.
Now the beans are sorted, rinsed, and ready for soaking or cooking.

🎬Video: Pressure Cooker Oven Roasted Chickpeas (2:31)


Video: Pressure Cooker Oven Roasted Chickpeas [YouTube.com]

💡Tips and Tricks

  • Salt your bean water! "Salt toughens beans" is a myth. Salting before cooking helps season the beans all the way through as they cook.
  • If your beans are still tough when the cooking time is over, especially any "floaters" at the top of the pot, give the beans a stir, lock the lid, and pressure cook for another five minutes. Older beans take longer to cook, and if the beans have been sitting in the shelf at your store for a while, they may need extra time.
  • Make ahead beans - I cook chickpeas by the pound, freeze them in 2-cup containers, and then I have homemade chickpeas ready for recipes like this one. I thaw them in the microwave (about 5 minutes), then continue with the drying and roasting steps.

☃️ Storage

You can make the chickpeas ahead, and store them in a 2-cup container in their liquid. They'll last in the refrigerator for a few days, and freeze for up to 6 months. Thaw them out if they're frozen, then continue with the recipe.

Roasted crispy chickpeas will last for a few days at room temperature, or a week in the refrigerator...but they'll lose some of their crunch, especially in the refrigerator.

🤝 Related Posts

Basic Recipe: Pressure Cooker Chickpeas

Pressure Cooker Hummus
Pressure Cooker Chickpeas with Toasted Parmesan Bread Crumb Crust
My other Pressure Cooker Recipes
My other Pressure Cooker Time Lapse Videos

Enjoyed this post? Want to help out DadCooksDinner? Subscribe to DadCooksDinner via eMail and share this post with your friends. Want to contribute directly? Donate to my Tip Jar, or buy something from Amazon.com through the links on this site. Thank you.

How to Fix Instant Pot Quick Release Spraying Starch

January 11, 2018 by Mike Vrobel 12 Comments

When I did the quick release I got a starchy spew with the steam that was released. Should I have let it rest a bit?

Short answer: Yes, you should let it rest a bit!

Longer answer:

I get the “quick release is spraying more than steam” question from time to time. It’s usually from my Macaroni and Cheese recipe - more on why that is in a minute - and most of the other times are from a bean recipe.

It happens to me too! Most of the time with these recipes, a quick release just releases steam. But, sometimes I get more than steam - the pressure cooker starts spitting and sputtering, and I get a mess - a fine mist of the food spraying out with the steam.

Q: What should I do when my Instant Pot quick release is spraying starch?

A: Carefully close the pressure release valve, let the pressure come down for five minutes, and try again. Carefully! The steam (and the spitting liquid) are pressure-boiling hot. Protect your hands with a towel or an oven mitt. When you try again after five minutes, the vent will spit a little bit - that’s normal, as it clears out the valve. But, if it keeps spraying stuff, repeat the process - close the valve, wait five more minutes, then try again.

It may take a few tries to get a clean pressure release. It depends on how hot the pot still is. If I'm impatient, I'll keep trying to quick release every five minutes. If I have other things to do, I’ll give up, turn off the pot, and wait for the pressure to come down naturally.

Q: What's going on? Is my pressure cooker malfunctioning?

A: No. This sometimes happens when you quick release a pressure cooker.

A couple of things could be happening when the valve is spraying more than steam:

  1. Releasing the pressure throws the liquid to a heavy boil. Pressure cooking works by increasing the boiling temperature in the pot. Under pressure, the water gets hotter before the boiling air can escape. Quick releasing the pressure reverses that process - the drop in pressure makes it easier for the air to escape, so the contents of the pot will spring to a boil. If the pot is full - right up against the max fill line - it may be close enough for the boiling to reach the vent.
  2. The contents of the pot are foaming. Foaming happens with starchy ingredients, like pasta, beans, grains, and potatoes. Starch mixes in with the liquid, and the boiling bubbles get stronger and less likely to pop. If you had a boil-over on a regular stove, you've seen this happen. The bubbles start foaming, stacking up on each other, and build up until they get too heavy and collapse on themselves...or they overflow the top of the pot. The same thing is happening inside the pressure cooker, but it is trapped inside by the sealed lid.

Spraying food is usually a combination of both - a sudden, heavy boil of starchy liquid. The result is a boil-over, like on a stove. But the boil-over can only escape through the pressure valve in a messy spray.

The workaround is the same as on a stovetop boil-over. Reduce the heat and the boil will come down. Unfortunately, we’re dealing with a sealed pot. It takes time to cool down before we can try again.

The other solution? Take preventative measures, and don’t have a boil-over in the first place. There are three ways to avoid it:

  1. Don't quick release, let the pressure come down naturally. A natural pressure release will not boil over, because you never open the valve. (Also, you don't have the vigorous boiling, which is easier on the food in the pot.) When I can, I go the natural pressure release route, but some recipes need the quick release to avoid overcooking.
  2. Don't fill the pot more than ⅔rds full: The max fill line on pressure cookers is ⅔rds of the pot. The max fill gives the pot headroom - it has to have space to build up steam so it can build up pressure - but it is also there to keep boil-overs from happening. Don't try to fit "a little bit more" into the cooker. (Note: I'm saying this as much for myself as for the readers. I always want to add a little too much water to my chicken broth recipe.)
  3. Don't fill the pot more than ½ full when cooking starchy foods: Almost all pressure cookers have a max fill recommendation of ½ the pot for foamy foods like beans, peas, pasta, and other starches. The extra headroom helps keep the foaming away from the pressure release valve. (Note: I'm also not good at this one - but I'll try to use rule #1 and not quick release when I'm cooking foamy foods.)

What do you think?

Questions? Other ideas? Leave them in the comments section below.

Related Posts

Instant Pot FAQ
How to fix Instant Pot Overheating
Instant Pot as a Slow Cooker?
My other Pressure Cooker Recipes

Enjoyed this post? Want to help out DadCooksDinner? Subscribe to DadCooksDinner via eMail and share this post with your friends. Want to contribute directly? Donate to my Tip Jar, or buy something from Amazon.com through the links on this site. Thank you.


Instant Pot Silicone Steam Rack and Sealing Rings in Red/Blue

January 4, 2018 by Mike Vrobel 2 Comments

Instant Pot Silicone Steam Rack and Sealing Rings in Red and Blue-Tower Image | DadCooksDinner.com

Instant Pot Silicone Steam Rack and Sealing Rings in Red and Blue-Tower Image | DadCooksDinner.com
Instant Pot Silicone Steam Rack and Sealing Rings in Red and Blue


FCC Notice: I’m an Amazon affiliate; I get a small commission on any Amazon purchases you make through the links on DadCooksDinner. Thank you!


I was holiday shopping on Amazon, and noticed some new Instant Pot silicone accessories. I love their silicone pinch mitts, so I bought the new silicone steam rack and colorful sealing rings to test them out. Here are my thoughts after using them for a few weeks:

Instant Pot Silicone Steam Rack | DadCooksDinner.com
Instant Pot Silicone Steam Rack

Instant Pot Silicone Steam Rack

Now, I almost didn’t buy this one. My first thought was: What's wrong with the metal steam rack that came with my Instant Pot? Why would I want one of these floppy things?

Why? Because those floppy handles are fantastic! They are a lot easier to grab than the thin, slippery wires on the standard rack. And, the flexible handles wrap around the sides of my pressure cooker cheesecake pan. I don’t need to make foil slings for cheesecake any more - that alone is worth the $8.99. I have a new favorite rack for my pressure cookers.

Instant Pot Silicone Steam Rack [Amazon.com]


Instant Pot Silicone Sealing Rings in Red and Blue | DadCooksDinner.com
Instant Pot Silicone Sealing Rings in Red and Blue

Instant Pot Sealing Ring 2-Pack (in Red and Blue)

Some people worry about smells trapped in their silicone sealing rings - they keep a second ring for recipes with a strong smell, like chilis and currys. For those people, a set of color-coded rings is an obvious purchase.

As you can probably tell from my "those people (looks down nose)" attitude, I don’t bother with separate rings. Yes, I can smell something on the ring when I'm done with some recipes. (I cook a lot of chili.) When I’m done cooking, chili or not, I clean my sealing ring in the dishwasher. (I toss it in the top rack, looped around some of the glasses.) After it dries, I store it loose in the lid, upside down on top of the cooker base, to let it air out. I’ve never noticed any smells transferring between cooks.

That said…I do keep a second ring on hand, as a backup. This is a holdover from my stovetop pressure cooker days. Gather round, kids, and let me tell you about the before times. In the good old days, pressure cooker sealing rings were made out of rubber. They had to be hand washed - none of this fancy machine dishwashing, no sir! And they worked great…for a few years. Then they would lose their flexibility. When the lid started leaking steam in all directions, it was time to replace the ring. And we liked it that way! (Now get off my lawn, you meddling kids. Grumble.)

Ahem. Sorry. Where was I?

Long story short: When I buy a new pressure cooker, I also buy a second sealing ring, just in case. If I have a second ring, why not make it colorful? I think I’m part hummingbird, attracted to the reds and blues. Do I need more sealing rings? No. But they’re so pretty. I had to have them.

Instant Pot Sealing Ring 2-Pack - 6 Quart Red/Blue [Amazon.com]\


Wait, there's more…

When I was adding the Amazon links this post, I noticed Instant Pot added a silicone cake pan, loaf pan, steamer basket, and steamer set. I guess I’ll have to buy those as well. (That is to say: More new toys! Whoohooo!)

What do you think?

Questions? Other ideas? Leave them in the comments section below.

Related Posts

Review: Instant Pot Silicone Mitts
Instant Pot Ceramic Nonstick Inner Pot
Pressure Cooker New York Cheesecake
My other Pressure Cooker Recipes
My other Pressure Cooker Time Lapse Videos

Enjoyed this post? Want to help out DadCooksDinner? Subscribe to DadCooksDinner via eMail and share this post with your friends. Want to contribute directly? Donate to my Tip Jar, or buy something from Amazon.com through the links on this site. Thank you.

Dry Brining FAQ

December 28, 2017 by Mike Vrobel 25 Comments

Sprinkling salt on a sirloin roast - Dry Brining FAQ | DadCooksDinner.com

Sprinkling salt on a sirloin roast - Dry Brining FAQ | DadCooksDinner.com
Dry brining a sirloin roast

My highly opinionated guide to dry brining your food

I got a lot of questions around Thanksgiving about dry brining…and again around Christmas. I’m answering the most common questions here in a Dry Brining FAQ, so I can refer to this post when I'm asked next time.

Opening Statement: This is supposed to be simple

Think of dry brining as “salting early.” I’m not loading up on extra salt; I’m using the same amount I would to season the roast right before cooking. Also, it’s a forgiving technique; I only sweat the details because I’m writing recipes. When I’m cooking Sunday roast chicken, I take a much more casual approach. I buy the birds on Saturday, sprinkle them with salt until they look well seasoned, then stash them in the refrigerator for the next day’s dinner.

Dry brining is born from trying to extend the shelf life of food in the good old days. Sprinkling with salt kills some of the spoilage bacteria on the surface of the meat, so it takes longer to go bad. Before refrigeration, the extra seasoning was just a bonus.

(This is not a silver bullet - don’t leave a roast in the refrigerator for weeks, thinking “I salted it, so it’s good.”)

Also, if you’re worried about dry brining - especially if you’re worried about dry brining - don’t try it for the first time on your Thanksgiving dinner. Do a test run with a roast chicken for Sunday dinner. It’s easy, tastes great, and if you hate it, you’re only out a few bucks, not the centerpiece of the biggest meal of the year.

Is dry brined meat going to be salty?

No, we’re just salting early. I use the same amount of salt than I would if I was seasoning the meat right before cooking. The salt works its way into the meat, seasoning the roast more thoroughly.

Note: People are different. (No!) Some people are naturally sensitive to salt, and some have been warned by medical professionals to avoid salt. I’ve never had a complaint about my dry brined food being “too salty,” but if you know you are sensitive to salt, you should skip it.

Why do you use kosher salt for dry brining?

I dry brine with kosher salt because it is easier to sprinkle. The large, flaky grains are easy to pinch and shower evenly over the meat. And, because of those large, airy flakes, kosher salt is less salty. Table salt has twice the actual sodium of kosher salt if you measure by volume, because table salt is much denser. In other words, the amount of kosher salt in my recipes may look high, but it’s half of what it seems if you’re used to table salt.

Sprinkling salt on the Thanksgiving turkey | DadCooksDinner.com
Sprinkling salt on the Thanksgiving turkey

Should I rinse the meat after dry brining?

No! Please, no. Two reasons:

  1. The dry brine won't be too salty. If it is, you should cut back on the salt in your dry brine, not rinse the food. Because…
  2. You should not rinse meat. It is a kitchen sanitation disaster. Rinsing means splashing meat juices all over. The sink, the counter, the sponge next to the sink, the rack of dishes drying next to the sink... (Yes, I know grandma rinsed her chicken before cooking it. It's still a bad idea.)
  3. OK, third reason - rinsing makes it harder for the meat to brown. Wet meat doesn't brown well. Yes, you can pat the meat dry with paper towels when you're done rinsing, but…see #1 and #2 again.

Minimum dry brining time?

My answer to this question is “At least 1 hour before cooking, 4 hours is better, and at least 8 hours is best.” Thanks to Kenji Alt’s research over at Serious Eats, we know that it takes about 40 minutes for the salt to start to work as a dry brine. Before that it is just pulling juices out of the meat - If you're that close to cooking, wait, and salt right before starting. Because it’s a nice round number, I go with an hour before cooking as my minimum dry brining time.

…OK, I’ll confess. The rules above are what I follow for beef. For chicken, turkey, and pork, my rule is different: my minimum dry brining time is the night before cooking. I will use a wet brine if today is the day I want to cook the meat. A 4 to 8 hour wet brine seasons the meat much more thoroughly. I prefer dry brining to wet brining in general…but for poultry and pork, the results are pretty close with a wet brine, and I’d rather get the deep seasoning. (I don’t wet brine beef. I don’t like the taste.)

Maximum dry brining time?

The longest I’ll go is about 3 days ahead of time. For example, I always pick up my Thanksgiving turkey on Monday, dry brine it, and pop it into the fridge until Thursday.

(I know some people swear by dry aging beef for a week or longer in their home refrigerator - but that’s a bridge too far for me, and a completely separate topic.)

Should I dry brine covered or uncovered in the refrigerator?

Uncovered for 36 hours or less. The refrigerator acts as a dehumidifier, and that’s a good thing - a roast with a dry surface browns better than a roast without one. I’ll let it go for a day plus overnight without covering the roast. (…and maybe two days if I’m lazy…)

When I dry brine for longer than 36 hours, I cover the roast with plastic wrap, and then unwrap it for the last 24 hours before cooking. I don’t want it to dry out too much in the refrigerator.

Should I put the dry brining meat on a rack?

I like to use a rack, to keep the air flowing and the meat from sitting in its juices…but I’m not militant about it. If I’m in a hurry, I’ll dry brine a couple of chickens and just leave them on a rimmed sheet pan overnight. For celebration meals, like a Thanksgiving turkey or Christmas roast, I break out the rack…and live with the annoying cleanup afterward.

Do I have to dry brine in the refrigerator?

Yes! Well, mostly. If you’re dry brining for an hour or two, you can leave the meat out on the counter. Any longer and it really should go in the refrigerator.

Can I use the pan drippings?

I’ve heard some people say their pan drippings are too salty to use. I wonder if they’re using store-bought chicken broth to deglaze the pan. Store-bought broth, even “low sodium” broth, has a lot of salt in it. (A lot.) I use homemade broth, and I have never had it come out "too salty." If you're worried, don't season your gravy until after you've stirred in the pan drippings - then you can taste and add more salt as needed.

Should I dry brine poultry under or on the skin?

I dry brine directly on the breast meat, by carefully working my hand under the skin and lifting it away from the meat, then rubbing the brine directly on the breast meat. But again, I’m not militant about it. If you can get it on there without tearing the skin, it helps the salt penetrate deeper. But, if you’re not comfortable working your hand under the skin, or you’re just in a hurry, sprinkle the bird inside and out. My experience is the salt penetrates through the skin and into the meat - especially since the only skin I try to remove is on the breast. I season the rest of the bird on the skin, and season inside the cavity as well, so the salt penetrates from both directions.

If you do dry brine on the skin, do it at least the day before, to give the salt time to work its way to the meat. I dry brine overnight at a minimum and prefer 24 to 48 hours.

What do you think?

Any other dry brining questions? Leave them in the comments section below, and I’ll try to answer them.

References and Sources:

Judy Rodgers - Zuni Cafe Cookbook
Russ Parsons - Dry Brined Turkey (a.k.a. the “Judy Bird”) - LA Times
Alton Brown - Good Eats
Kenji Alt - The Food Lab - SeriousEats.com
Cooks Illustrated Magazine

Related Posts

Cast Iron Roasted Butterflied Chicken
Rotisserie Turkey Dry Brined with Orange and Spices
Rotisserie Beef Prime Rib Roast

Enjoyed this post? Want to help out DadCooksDinner? Subscribe to DadCooksDinner via eMail and share this post with your friends. Want to contribute directly? Donate to my Tip Jar, or buy something from Amazon.com through the links on this site. Thank you.


Instant Pot Black Eyed Peas (No Soaking)

December 26, 2017 by Mike Vrobel 40 Comments

A bowl of cooked black eyed peas on a wooden tabletop

Instant Pot Black Eyed Peas. Looking for good luck in the New Year? A pressure cooker prepares dry black eyed peas in less than an hour.

Black eyed peas are a Southern New Year's Day tradition, where eating black eyed peas will bring you luck in the New Year. (If you want to be sure you're getting all the luck the South can offer, eat them with easy instant pot collard greens and cornbread.)

A bowl of cooked black eyed peas on a wooden tabletop
Instant Pot Black Eyed Peas
[feast_advanced_jump_to]

Am I from the South? No, I'm a Midwestern boy, with Polish side of the family that believes in Pork and Sauerkraut for luck in the New Year. I've never had the nerve to mash the Southern and Polish New Years Day dinners together - greens and beans and pork and sauerkraut seems like a bit too much all at once.

That's why I'm glad Black eyed peas are also a soul food classic and a common barbecue side dish. I don't have to wait for New Year's Day to have a pot of these beans. (And, if you want to make them as beans and greens, check out my Instant Pot Black Eyed Peas and Collard Greens recipe.)

Ingredients

  • Dry Black Eyed Peas
  • Onion
  • Garlic
  • Smoked Ham Hock
  • Fine sea salt
  • Fresh ground black pepper

See recipe card for quantities.

How to Make Instant Pot Black Eyed Peas

  1. Heat a tablespoon of oil in an Instant Pot set to Sauté mode until the oil is shimmering. Sauté a diced onion, minced garlic clove, and ½ teaspoon of salt until the onion softens
  2. Add a pound of dry black eyed peas, sorted and rinsed, to the pot, with 1 teaspoon of salt, a smoked ham hock, and 6 cups of water. Lock the lid on the pot.
  3. Pressure Cook at High Pressure for 15 minutes with a 15 minute Natural Release.
  4. Add ½ teaspoon of fresh ground black pepper, serve, and enjoy!

Substitutions

Black eyed peas and black eyed beans are the same thing - a subspecies of cow beans.

You can skip the onion and garlic - but I really like the extra flavor they add to the recipe.

For a vegetarian version of the recipe, skip the ham hock.

If you can't find the ham hock, substitute 4 ounces of hickory smoked bacon. I dice it up and crisp it up. Then I set it aside and use the bacon fat instead of the vegetable oil for sautéing the onions, then add it back into the pot with the black eyed peas and water.

Equipment

A 6-quart pressure cooker. Pressure cooker dried beans are one of the reasons I became a pressure cooker convert. Try them - you'll never go back to canned beans. (OK, maybe you will, for convenience - but see the Storage section for tips on make ahead freezer beans.)

Scaling

This recipe scales down easily - cut everything in half if you don't need as many beans, or have a 3-quart pressure cooker. Scaling up runs into space issues; if you have an 8-quart pressure cooker, you can double this recipe, but it's too much to fit in a 6-quart pressure cooker.

How Do I Cook 2 Cups of Black Eyed Peas?

2 cups of Black Eyed peas is slightly less than 1 pound. It's so close that the instructions in this recipe will work as written, with a ratio of 2 cups beans to 6 cups of water.

Can I Cook Black Eyed Peas Without Soaking?

I get the "to soak or not to soak?" question all the the time. I don't soak black eyed peas. They cook in 15 minutes under pressure - soaking them seems like a waste of time when they cook so quickly.

Sorting Peas

Black eyed peas are an agricultural product, and like other beans, stuff tends to creep in when they are processed. Dried beans should always be sorted and rinsed before using, to get rid of any twigs, stones, clumps of dirt, or broken beans.

To sort the black eyed peas, I pour them out on one side of a rimmed baking sheet (a half-sheet pan), to keep the peas from escaping. Then I slowly run my fingers through the pile of peas, pulling them towards me on the sheet. I watch the peas as they move, looking for anything that doesn't seem right. If I see something, I poke around in the peas until I find what caught my eye, and discard it. I repeat this a couple of times, until I'm satisfied everything is out of the peas.

Then I dump the peas into a fine mesh strainer and rinse them under cold running water, to wash off any dirt or dust.

Now the black eyed peas are sorted, rinsed, and ready for soaking or cooking.

Tips and Tricks

  • Salt your bean water! "Salt toughens beans" is a myth. Salting before cooking helps season the beans all the way through as they cook.
  • If your beans are still tough when the cooking time is over, especially any "floaters" at the top of the pot, give the beans a stir, lock the lid, and pressure cook for another five minutes. Older beans take longer to cook, and if the beans have been sitting in the shelf at your store for a while, they may need extra time.
  • Shred the meat on the ham hock? The ham hock adds smoky pork flavor to the beans. Once the beans are cooked, the hock has done its job. Most hocks don't have enough meat to be worth shredding and should be thrown away after cooking. If you can see a lot of meat on the hock, and you don't mind the extra work, separate it from the skin, fat, gristle, and bone. Shred the meat that remains and stir it into the beans.
  • Simmer to thicken: If you have the time, and want thicker pea broth, simmer the peas for 20 minutes after pressure cooking. Set the Instant Pot to Sauté mode adjusted to low, with a 20 minute cooking time, and leave the lid off to let the broth evaporate. I keep a loose eye on the pot, stirring every so often to keep the peas from sticking to the bottom of the pot.

Storage

A 2-cup container of cooked black eyed peas, with cooking liquid, replaces a 15-ounce can of beans from the grocery store. They'll last in the refrigerator for a few days, and freeze for up to 6 months. I always make extra beans, and freeze the leftovers for use in other recipes. Freezer beans are ready to use with about 5 minutes in the microwave, and are so much better than canned.

Related Posts

Instant Pot Pinto Beans
Pressure Cooker Collard Greens
Pressure Cooker Pork and Sauerkraut
Pressure Cooker Red Beans and Rice
My other Pressure Cooker Recipes
My other Pressure Cooker Time Lapse Videos

Enjoyed this post? Want to help out DadCooksDinner? Subscribe to DadCooksDinner via eMail and share this post with your friends. Want to contribute directly? Donate to my Tip Jar, or buy something from Amazon.com through the links on this site. Thank you.

Sous Vide Cooking Times for a Boneless Ribeye Roast

December 21, 2017 by Mike Vrobel 9 Comments

Sous Vide Boneless Ribeye Roast | DadCooksDinner.com
My monster of a frozen roast - 4½ inches thick!

I have an 8-pound Ribeye roast - how long will it take to sous vide?

Weight doesn't matter…at least for sous vide.

My Sous Vide Boneless Ribeye Roast recipe is getting a lot of traffic in the run-up to Christmas. And...I made a mistake. Not that anything is wrong with the recipe - it works fine.1

My mistake was saying "6-pound boneless ribeye roast" in the ingredients list. That's not good recipe writing. I left out the most important piece of information, and I'm getting a lot of questions because of it:

"What if my ribeye roast is 8 pounds? What if I'm cooking three 6 pound roasts at once? What if it weighs 2.2kg?" In other words, how does changing the weight change the cooking time?

How long do I sous vide a boneless ribeye roast?

6 to 10 hours at 133°F/55°C. The thickness of the roast determines the cooking time, not the weight. A normal ribeye roast is 4 to 5 inches thick, and it takes at least 6 hours for heat to reach all the way into the middle of the roast.

After that, we have a window of about 4 hours where the roast is cooked and ready to serve, for a total cooking time between 6 and 10 hours of cooking. After 10 hours, the beef will start to overcook and get too tender. (It doesn't happen immediately - you can cook the roast for 11 hours, and it will still be OK - but 10 hours is where it starts to get a little too tender.)

Recipe here: Sous Vide Boneless Ribeye Roast

What? Why doesn't weight matter?

Because science! (Specifically, the physics of heat transfer.) The hot water bath surrounds the roast, and heat transfers into the roast at the same rate from all directions. A ribeye roast is roughly box-shaped, longer and wider than it is high, so cooking time is determined by how long it takes the heat to diffuse through the high side at its thickest point - no matter how long it gets. (To use butcher terms, once you get past a 2-bone ribeye roast, the cooking time stays the same. And, smaller than that I would call a cowboy steak, not a roast.)

So, the answer to those questions: 2.2kg, 8 pounds, three roasts at once, or 6 pounds, like my roast? As long as the roasts are 4 to 5 inches thick, cook them for 6 hours. And...4 to 5 inches is the normal range for a ribeye roast. My friends at Certified Angus Beef® Brand use the width of the ribeye in their grading standards.  If it's too big or too small, it doesn't qualify as Certified Angus Beef®.

(FCC note: Certified Angus Beef® Brand is a regular sponsor of mine, but they are not sponsoring this post. I'm on my own for this one. They do have a lot of useful information about beef that I read while working on this post and the original recipe.)

Sous Vide Boneless Ribeye Roast | DadCooksDinner.com
Ribeye In the Sous Vide water bath

But…what if I got a really thin ribeye? Or a really thick one?

  • 2 inches thick…is a thick steak - 3 hours sous vide
  • 3 inches thick - 4 hours sous vide
  • 4 to 5 inches thick - 6 hours sous vide
  • 6 inches thick - 8 hours sous vide

(Yes, the time increases - a lot - as you get thicker.)

What about cooking a frozen ribeye roast?

This is a big advantage to sous vide - you do not have to thaw before you start cooking. I add 2 hours to the cooking time for a 4 to 5-inch thick roast, for a total cooking time of 8 to 12 hours.

Can I sous vide a Ribeye roast the day before, chill it, and reheat it for serving?

Another question was about cooking ahead of time and reheating. Yes, you can cook it ahead of time and reheat. But I don't think you should. This big of a roast is going to take a long time to reheat - 6 hours for the heat to reach the middle of the roast. (Sound familiar?) My opinion is: sous vide it the day you're cooking - it won't take much more time than reheating.

What do you think?

Questions? Comments? References to scientific literature about heat transfer in food? Leave them in the comments below.

Resources

Almost everything I know about the science of Sous Vide comes from Douglas Baldwin:

  • A Practical Guide to Sous Vide [DouglasBaldwin.com]
     Sous Vide Cooking: A Review  [International Journal of Gastronomy and Food Science via ScienceDirect.com]

Related Posts

Sous Vide Boneless Ribeye Roast
My other Sous Vide Recipes

Enjoyed this post? Want to help out DadCooksDinner? Subscribe to DadCooksDinner via eMail and share this post with your friends. Want to contribute directly? Donate to my Tip Jar, or buy something from Amazon.com through the links on this site. Thank you.

  1. More than fine, if medium-rare beef is your goal. I'd go so far as to say "great", especially since I'm thinking of using it on Christmas Day, to make my Christmas Morning less hectic. ↩

Dad Cooks a Christmas Roast 2017

December 19, 2017 by Mike Vrobel Leave a Comment

And he, he himself...the Grinch...carved the roast-beast!

  • Dr. Seuss

That’s all I want for Christmas - a roast beast. I’m cooking my rotisserie ribeye roast from last year; I plan to season and truss on Saturday the 23rd, then let it dry brine in the refrigerator until Christmas. We do the lap of Cleveland on Christmas day - up to see my family, then back home this year to host my in-laws.

That means the timing is going to be tight. I need to put the roast on the grill as soon as we get home. (Doesn’t everyone grill on Christmas?) Yes, I’m playing weather roulette. December in Ohio is, shall we say…unpredictable? Sometimes we get a Christmas blizzard, Just to make the trip to the grill interesting.

I found out (from my favorite food podcast) that turkey is the traditional Christmas roast in England.1 It’s a great idea for feeding a crowd, but like most Americans, I’m all turkeyed out from Thanksgiving. And in my family the traditional Christmas roast is beef. Like most traditions, anything else would feel…wrong, somehow.

Here are my suggestions for the roast beast for your Christmas feast.

And they'd feast! And they'd feast! And they'd feast! Feast! Feast! Feast!

Christmas Roast Beasts

Rotisserie Ribeye Roast with Herb Crust | DadCooksDinner.com
Trussed, Spit, and ready for the rotisserie

Rotisserie Ribeye with Herb Crust

Sous Vide Boneless Ribeye Roast | DadCooksDinner.com
Sous Vide Boneless Ribeye Roast

Recipe: Sous Vide Boneless Ribeye Roast

Rotisserie Turkey Stuffed with Herbs | DadCooksDinner.com
Rotisserie Turkey Stuffed with Herbs

Recipe: Wet Brined Rotisserie Turkey Stuffed With Herbs

Grilled Dry Brined Turkey | DadCooksDinner.com
Grilled Dry Brined Turkey

Recipe: Dry Brined Grilled Turkey (Grilling Basics)

Recipe: Rotisserie Capon with Chestnut Stuffing

Recipe: Grilled Ham with Honey-Bourbon Glaze (Grilling Basics)

Pressure Cooker 7 Hour Leg of Lamb (in 90 minutes)

Recipe: Pressure Cooker 7-Hour Leg of Lamb (in 90 minutes)

Merry Christmas and Happy Holidays, everyone!

What do you think?

What’s your favorite Christmas Roast Beast? Tell us in the comments section below.

Enjoyed this post? Want to help out DadCooksDinner? Subscribe to DadCooksDinner via eMail and share this post with your friends. Want to contribute directly? Donate to my Tip Jar, or buy something from Amazon.com through the links on this site. Thank you.


  1. I should have known. At the end of A Christmas Carol, Scrooge buys the prize Turkey for the Cratchits. You don't get more Traditional British Christmas than that. ↩

Supporting Dad Cooks Dinner - 2017

December 14, 2017 by Mike Vrobel 2 Comments

I know you’re getting a lot of requests for support during the holidays…so here’s mine! Give me your money! I want to go full Scrooge McDuck, and swim around in a vault of gold coins! Bwahahaha!

Ahem. Sorry.

DadCooksDinner is a labor of love. I spent over 800 hours in 2017 working on it. Over the years, the blog has gone from making no money to making...some money. Not enough to quit the day job, but enough to make filing taxes a mess. (Even a popular food blog like mine is not the path to a Scrooge McDuck vault of gold coins.)

As the blog grows, I try to be more professional (professionalish?). And I pick up more expenses. A test roast here, a pressure cooker accessory there, better blog hosting, a new theme…it all adds up. To help support DadCooksDinner, please consider contributing in one of the following ways:

Holiday purchases through my Amazon.com links

If you buy anything on Amazon after clicking through one of the Amazon links on this page, I get a small commission. You won't pay extra, so this is a no-cost way to help me out and do your holiday shopping at the same time. (Inside Blogging info: Amazon's affiliate commissions were cut at the beginning of the year, and I make about half as much as I did in previous years. But, half is not zero, and every little bit helps. Thank you to everyone who uses my links!) 1

Holiday Thermoworks sale

I am also a Thermoworks affiliate. The Thermapen is my favorite instant-read thermometer, and my Chef Alarm probe thermometer gets a lot of work this time of year. (It’s great for holiday roasts.) Thermoworks has a bunch of sales going on, and I'll get a small commission if you buy through this link.

Direct support through my tip jar

Not an Amazon kind of person? Want to help me out directly? You can tip me through PayPal.

(Tips are processed by PayPal, but they take credit cards if you don't have a PayPal account.)

Special thanks to reader Martha H for her ongoing tip jar subscription!

Thanks again for reading, everyone!

Related Posts

Working For Tips (Blog Economics 101 for DadCooksDinner)

  1. Another aside: I follow my own advice. I support my favorite blogs through their Amazon affiliate links - I try to do all my Amazon shopping by going through the links on their websites. Does my Amazon addiction contribute to their blogs? Oh, my. Yes it does. ↩

Pressure Cooker Brown and Wild Rice Pilaf

December 12, 2017 by Mike Vrobel 8 Comments

Pressure Cooker Brown and Wild Rice Pilaf | DadCooksDinner.com
Pressure Cooker Brown and Wild Rice Pilaf

My cooking mantra is "simple doesn't mean boring." But…I love fancy rice pilaf. A simple rice pilaf, with white rice and chicken broth? It's boring, and I'd rather just make risotto. But give me a blend of brown and wild rice? Now I'm interested. Add some fancy rice for variety: red rice, black Japonica, sweet rice? You have my full attention.

Then, stir in some dried fruit, nuts, and a little green onion, and you have a side dish that's worth second helpings.

A pressure cooker is my secret weapon for brown rice. Brown rice takes forever on the stovetop; in my pressure cooker, It is done in about 40 minutes, end to end.

Looking for a holiday-worthy side dish that is easy enough to use on a weeknight? This is the pilaf to make.

What do you think?

Questions? Other ideas? Leave them in the comments section below.

Related Posts

Pressure Cooker Brown Jasmine Rice
Pressure Cooker Risotto with Edamame
Pressure Cooker Smashed Garlic Red Skin Potatoes
Pressure Cooker Rice
Orzo Pilaf

My other Pressure Cooker Recipes
My other Pressure Cooker Time Lapse Videos

Enjoyed this post? Want to help out DadCooksDinner? Subscribe to DadCooksDinner via eMail and share this post with your friends. Want to contribute directly? Donate to my Tip Jar, or buy something from Amazon.com through the links on this site. Thank you.

Rotisserie Sirloin Roast

December 5, 2017 by Mike Vrobel 20 Comments

Rotisserie Sirloin Roast | DadCooksDinner.com

Rotisserie Sirloin Roast recipe. I love a big beef roast for parties and holidays, and a sirloin roast is the best value in beef. More tender than an eye of round roast, not as expensive as a rib roast, boneless and easy to carve into beautiful, thick slices of juicy beef. And you'll get a gorgeous browned crust cooking it on your rotisserie.

Rotisserie Sirloin Roast | DadCooksDinner.com
Rotisserie Sirloin Roast
[feast_advanced_jump_to]

Guys, I just realized - I don't have a rotisserie Sirloin Roast post!

I love a big roast for the holidays, and in my humble1 opinion, a sirloin roast is the best value. It is more tender than an inexpensive eye of round roast, can be cut into thick slabs, and is not as expensive as a rib roast. Also, it is boneless - easy to carve into beautiful, thick slices of juicy beef.

My favorite cut of sirloin is the center cut top sirloin roast. It weighs about 6 pounds and comes from a large muscle in the middle of the top sirloin. It is an evenly shaped roast, about a foot long and 6 inches wide, easy to truss and cook on the rotisserie. I ask for it at my grocery store meat counter; they usually have smaller roasts in the case, but I want the whole center cut top sirloin roast for this recipe. (That said, there are a lot of different cuts of sirloin, and almost any of them will work with this technique.)

Tips for a fantastic sirloin roast

  • Rotisserie! The roast self-bastes in its juices as it spins, and giving it a beautiful, browned crust. Nothing looks like a rotisserie roast. (And that crust…)
  • Cook to temperature, not time! (And add in carry-over cooking.) I aim for 120°F, measured in the thickest part of the roast, for medium-rare. A large roast holds a lot of heat; it will continue to cook after it comes off the grill, and the final temperature winds up in the low 130's, right where I want it for medium-rare. (Cook to 110°F to 115°F for rare, 125°F to 130°F for medium…and beyond that, I don't want to know.)
    Cooking times are an estimate. (Not just my cooking times - all recipe cooking times. But that's a rant for another day.) If you care about doneness, you need a good instant-read thermometer. (Or a great one.) Cooking times have too many variables when you're aiming for medium-rare. If the roast is straight out of the refrigerator, or a little thicker, or today is cold and windy, or the grill runs hot… All sorts of things can affect the time. So, take temperatures early and often.
  • Salt early! (If you can) If you have time, salt (and pepper) the roast the night before. Refrigerate it overnight, uncovered, on a rack over a rimmed baking sheet (or in a baking dish). Salting early seasons the roast more thoroughly, because the salt has time to penetrate deep into the roast. Also, the refrigerator acts as a dehumidifier, drying the outside of the roast - a dry roast browns better.
Rotisserie Grilling by Mike Vrobel

I wrote a cookbook!

Rotisserie Grilling Cookbook

New to your rotisserie and need help with the basics? Love your rotisserie and looking for new ideas? Grab a copy of Rotisserie Grilling! You'll get 50 of my favorite rotisserie recipes and expert tips on how to set up and use your rotisserie.

Click here to buy →
Rotisserie Top Sirloin Center Cut Roast - Tower Image | DadCooksDinner.com
Rotisserie Top Sirloin Center Cut Roast - Tower Image

What do you think?

Questions? Other ideas? Leave them in the comments section below.

Related Posts

  • Rotisserie Ribeye Roast with Herb Crust
  • Rotisserie Eye of Round
  • Rotisserie Beef Tenderloin with Horseradish Mustard Crust
  • Instant Pot Sirloin Tip Roast
  • Instant Pot Sirloin Steak
  • My other Rotisserie Recipes
  • My Rotisserie Cookbooks


Enjoyed this post? Want to help out DadCooksDinner? Subscribe to DadCooksDinner via eMail and share this post with your friends. Want to contribute directly? Donate to my Tip Jar, or buy something from Amazon.com through the links on this site. Thank you.


  1. Not so humble ↩

Frozen Assets for a Sick Day

November 30, 2017 by Mike Vrobel Leave a Comment

Jar of Frozen Turkey Noodle Soup | DadCooksDinner.com

Jar of Frozen Turkey Noodle Soup | DadCooksDinner.com
Jar of Frozen Turkey Noodle Soup

Remember when I said that having a few jars of soup in the freezer made me feel good?

A stomach bug is hitting us hard right now. (I won’t go into more detail - this is a food blog, after all.)

I’m not up to writing today’s post, let alone making dinner. No one really wants dinner, either. I hit up my Frozen Assets and pulled out jars of Turkey Noodle soup from last week. (And a few jars of Turkey Broth for those of us with extra-sensitive stomachs.)

Now I’m back in bed, finishing this little blurb. Next up - falling asleep while watching Ferris Bueller’s Day Off, my favorite sick day movie.

Pressure Cooker Day-After-Thanksgiving Vegetable Turkey Soup (From the Carcass)

November 28, 2017 by Mike Vrobel Leave a Comment

Pressure Cooker Day-After-Thanksgiving Vegetable Turkey Soup | DadCooksDinner.com

Pressure Cooker Day-After-Thanksgiving Vegetable Turkey Soup | DadCooksDinner.com
Pressure Cooker Day-After-Thanksgiving Vegetable Turkey Soup

My favorite Thanksgiving tradition is not actually on Thanksgiving. It’s day-after-Thanksgiving turkey soup. Don’t get me wrong - Thanksgiving is my favorite holiday. I love getting the family together with no obligations other than a big meal. But, I’m a bit of an introvert - I need the quiet of the day after to decompress, and part of my ritual is making a big pot of pressure cooker turkey soup.

I have a large family on both sides, so even if I’m not hosting, I get multiple turkey carcasses. (I’m hovering in the kitchen after dinner, clutching a 2-gallon zip-top bag, and asking “Are you going to use those bones?”…what, you don’t bring a jumbo zip-top bag to Thanksgiving so you can take home a carcass? Just me?)

I use one carcass on a big batch of my traditional recipe - turkey noodle - and another carcass to try something new. This year, I took a request - my wife loved Pressure Cooker Vegetable Beef Soup and asked for a turkey version.

That carcass is the key. Homemade broth, made from bones and some clinging meat, is the backbone of great soup. (Get it? Carcass? Backbone? Ahem. Sorry.)

The key to great broth is the pressure cooker. Sure, you can simmer all day, and get good results. Or, you can simmer for half the day, get better results, and move on to actually making the soup. Even better, this recipe makes more broth than you need - especially if you’re using an 8-quart pressure cooker, which has the headroom for extra water. There is enough leftover broth to freeze for a second batch of soup later.

(Unfortunately for me, my wife poaches my jars of broth for lunch. I can’t blame her. A jar of broth, reheated in the microwave, with a pinch of salt and a grind of pepper, warms you up on a cold winter afternoon.)

I see vegetable soup as a chance to clean out the pantry - or in this case, the Thanksgiving leftovers. Roast redskin potatoes? Toss them in. Green beans? Corn? Peas? Perfect for the pot. This year I didn’t have any of that on hand, so my pantry bulked up the soup. I added a bag of quartered new potatoes, a can of crushed tomatoes, and my secret weapon for vegetable soup - frozen mixed vegetables.

So here I am, a few days later, writing this post…and thinking of the extra jars of soup in the freezer. I already know what I’m having for lunch tomorrow.

Pressure Cooker Day-After-Thanksgiving Vegetable Turkey Soup - Step by Step Tower | DadCooksDinner.com
Pressure Cooker Day-After-Thanksgiving Vegetable Turkey Soup - Tower

What do you think?

Questions? Other ideas? Leave them in the comments section below.

Related Posts

Pressure Cooker Day-After-Thanksgiving Turkey Carcass Soup
Pressure Cooker Turk-A-Leekie Soup
Turkey Ramen Soup
My other Pressure Cooker Recipes
My other Pressure Cooker Time Lapse Videos

Enjoyed this post? Want to help out DadCooksDinner? Subscribe to DadCooksDinner via eMail and share this post with your friends. Want to contribute directly? Donate to my Tip Jar, or buy something from Amazon.com through the links on this site. Thank you.


Instant Pot Cyber Monday 2017 Deal

November 27, 2017 by Mike Vrobel Leave a Comment

Instant Pot Cyber Monday 2017

Instant Pot Cyber Monday 2017

Sorry for all the Instant Pot sales promotion, but…here’s another great deal for Cyber Monday...and I can’t help myself, I'm sharing it:

US: InstantPot Duo Plus 6 Quart – ONLY $74.95 USD » http://amzn.to/2hVnmpO
CAN: Instant Pot Ultra 6 Quart – ONLY $119.99 CDN » http://amzn.to/2iVTPNS

HURRY - While Supplies Last!

And, as usual, my disclaimer: I'm an Amazon Affiliate. Any Cyber Monday purchases you make through my Amazon links gives me a small commission and helps support DadCooksDinner. Thank you!

Amazon Black Friday 8 Quart Instant Pot Sale

November 24, 2017 by Mike Vrobel 1 Comment

First Look at the 8 Quart Instant Pot IP-DUO80

6 Quart and 8 Quart Instant Pot Duos
A duo of 6 and 8 Quart Instant Pots

—

FCC Notice: I am an Amazon affiliate. Any purchases you make through the Amazon links in this email give me a small commission, at no extra cost to you. Thank you for supporting DadCooksDinner by buying through my Amazon links, especially on Black Friday and Cyber Monday!

---

In the US, Amazon has the Instant Pot Duo 8 Quart for only $81.99, down from $130. If you want a big pressure cooker, take advantage of this sale quickly - Amazon only runs the sale while they have stock, and in the past, they sell out by the early afternoon Eastern Time.


Instant Pot Duo 8 Quart [Amazon.com]

If you're a Canadian reader, the Black Friday deal is the updated 6 Quart Instant Pot Duo Plus for CDN $89.99, down from CDN $150.

Instant Pot Duo Plus 6 Quart [Amazon.ca]

As always, any Amazon purchases through my Amazon links support DadCooksDinner - not just the Instant Pots. Thank you!

Country-specific Amazon links:

Amazon.com (USA)

Amazon.ca (Canada)

Amazon.co.uk (United Kingdom)

Giving Thanks 2017

November 23, 2017 by Mike Vrobel 2 Comments

Akron-Canton Regional Food Bank

I see skies of blue and
clouds of white.
The bright blessed day,
the dark sacred night.
And I think to myself
what a wonderful world.
- Louis Armstrong (by way of Israel Kamakawiwoʻole)

Happy Thanksgiving, Everyone!
On this Thanksgiving, please consider a donation to fight hunger in my home town:

Akron-Canton Regional Food Bank

Donate to the Akron-Canton Regional Food Bank [AkronCantonFoodBank.org]

Thank you, and again, Happy Thanksgiving!

Mike Vrobel
November 2017

It’s A Wonderful Thanksgiving 2017

November 22, 2017 by Mike Vrobel 3 Comments


This post started as the last question in yesterday’s Thanksgiving Q&A, but I got on a roll…and it wound up being too long to fit. And…as always, I apologize in advance.


Thanksgiving is as much about logistics as it is about cooking.

The menu is large, and the crowd is larger. Suddenly, the oven isn't large enough, the stove doesn't have enough burners, and there isn't enough time to get everything done. (Even when I use my grills as second and third ovens.)

Thanksgiving dinner for a crowd depends on planning, making things ahead, and not losing your head when chaos is swirling around you.

So...how does a typical Thanksgiving look when I'm hosting the big dinner?

Thanksgiving: Strategy vs. Tactics (vs. The Fog of War)

Or, what happens when a plan meets the enemy - and the enemy is us.

With apologies to Alton Brown. Romancing the Bird (A Good Eats Thanksgiving) inspired me and this post - but I didn't realize that until after I finished writing.

  • Monday: Dry brine the turkeys, put them in the back of the downstairs refrigerator.
  • Tuesday: Make the giblet gravy and cheesecakes, store in downstairs freezer
  • Wednesday: Wine, beer, pop, and sparkling water into coolers on the deck. In the evening, mix up the stuffing and get it in the pan. Trim and foil wrap the green beans.
  • Thanksgiving Morning: Peel and slice the mashed potatoes (store covered in water) and the sweet potatoes (just leave in the pressure cooker pot). Dig the folding chairs and extra tables out of the basement. Browbeat the kids into setting the table with the fancy dinnerware - and then the regular dinnerware when the fancy stuff runs out - and then raid the camping set for a couple of graniteware plates to finish setting the Kids Table.
  • Noon: Start the turkeys on the grills. Go back inside and watch a little of the Lions football game.
  • 2 PM: Put the stuffing pan on the grill. Start welcoming guests. Take the curious ones out to see the turkeys on the grills. Spread out all the chips and snacks the brought on the kitchen table. Hang out with the hardy souls and have a beverage in the crisp fall air. (Or throw on my parka and hustle out in the sleet to check on the turkeys. Thanksgiving weather can be dicey.)
  • 3 PM: Start the mashed potatoes on the stove, start the gravy reheating on the simmer burner on the back of the stove, and start the pressure cooker of sweet potatoes.
  • 3:15 PM: Pull brother-in-law Phil (who also loves to cook) away from the TV; take the green beans out to grill, load Phil up with finished turkeys and bring them into the house. Shoo away the sudden attention - whole roast turkeys draw a crowd - and tell everyone to be patient; dinner is at 4:15. (Aiming for 4, will be ready at 4:30) Don't let Phil escape back to the game - get him started on the cranberry relish, which I was forgotten until aunt Francis brought out her can of cranberries and asked if she could borrow the can opener later.
  • 3:30PM: Accept the dish of candied yams from aunt Janice and put in the oven to reheat, Ask uncle Rick to get you a beverage (partially for the beverage, mainly to get him away from the turkey.) Have Phil start mashing the potatoes - he can be trusted to go heavy on the butter and cream. Ask sister-in-law Sharon to mash the sweet potatoes, and aunt Rita to track down who was supposed to bring the dinner rolls - they have both been hovering, and want to help out. Run outside and get the green beans and stuffing from the grill. (Neither confirm nor deny that you stayed out there for a few minutes of peace.)
  • 3:45 PM: Bring the stuffing and green beans in, to keep warm in the oven with the yams. Find Grandma Ethel blocking the oven, with a dish of marshmallow sweet potato surprise that needs to be heated. (The surprise is you didn't know it was coming.) Put the surprise in the oven, wrap the stuffing and green beans in a beach towel to keep warm, and set the beach towel bundle on the dining room table to get it out of the way.
  • 4:00 PM: Phil is tossing the salad. Sharon is finding a bread bowl for Rita, who is slicing the baguettes someone brought instead of rolls. and the crowd is starting to close in. Ask the long-suffering Wife to organize Phil, Sharon, and Rita in setting up the kitchen island as a serve yourself station. Plates on one side, food lined up along both sides. Get out the electric carving knife and with a maniacal gleam in your eye, start carving the turkey. Threaten uncle Rick with the carving fork when he tries to take "just a taste of the white meat." Then, when he turns his back, slip a taste of the white meat to niece Jasmine, who looks a little overwhelmed by everything.
  • 4:15 PM: Done carving. Put the turkey bones in two-gallon zip-top bags for soup tomorrow. (Save the bones!) Then, send out the cry: Dinner is Served!
  • 4:30 PM: Collapse in a chair at the dining room table, with a well-deserved beverage, a drumstick, and a plate covered with stuffing, mashed potatoes, and gravy.

At least, that’s how it works when everything goes right. (Yes, this is things going right.) When they go wrong, they really go wrong:

  • I forget more than the cranberries. I have a pile of squash from my CSA, still sitting on the counter the day after Thanksgiving.
  • One turkey always finishes early - way early - and the other one is always late. "We'll just carve this one, and start serving. I'm sure the other one will finish soon...ish."
  • There's a side dish that's even later still, delaying the meal while the rest of the food sits on the counter, slowly getting cold…and it's an important one, either the stuffing or the mashed potatoes. We can't go on without the mashed potatoes!
  • Uncle Rick and Grandpa Harry stand in front of the stove, loudly reminiscing about the football game, while you subtly try to hint to them that they're in the way. (By saying things like: "Rick. Grandpa. MOVE!" and waving knives around.) They move…three feet to the right…and slowly creep back to the front of the stove.
  • The smoke alarm goes off every time you open the oven. It goes off so often that you can pull the smoke detector off the ceiling and disconnect the battery without even looking. High Heat Turkey Roasting was how I learned to cook. (Now that I cook the turkeys on the grill, this doesn't happen anywhere near as much.)
  • The nephews are all standing in the doorway arguing their case about who is hogging the XBox - as you're trying to bring in the turkeys. ("Boys. MOVE!")
  • I drop something large. And heavy. And hot. And full of liquid. On my foot.
  • The one vegetarian brother (we'll call him Anson) insists on bringing his own main dish. (He's trying to help, and not be "that guy" who insists we cook around him.) He brings a plain looking dish with three ingredients: pasta, tomato sauce, and cheese. Of course, the Kids Table sees this, and quits bickering long enough to unite in one voice: we want Pasta! None of this turkey nonsense! (Except for Ricky Jr, one arm wrapped defensively around his plate of mashed potatoes and stuffing.)
  • Anson's not the only one - surprise dishes just keep coming. Everyone has their favorite side dish, the one thing that makes Thanksgiving for them. And I'm happy to oblige! Bring it! (Like a cylinder of cranberry sauce, set upright on the plate, quivering, with marks from the tin can rings still visible.)
  • The long-suffering Wife starts dropping hints, like "Are we ready yet?", "How much longer," and "I'm going to tell everyone to sit down and start eating the dinner rolls while you finish."
  • You're sitting at the table, relaxing after a hard-fought campaign to put dinner on the table for a couple of dozen people. You've graciously accepted their thanks, praised your hard-working volunteer kitchen crew, had a turkey drumstick, some stuffing, and some gravy…a few good conversations have broken out around the table…you're relaxing, considering another beverage, or maybe some more stuffing, but you're already stuffed…and the Kids Table arrives en masse, demanding dessert.

So...yikes. I got a little carried away there. To be clear - I'm not calling out members of my family. This is a work of fiction, recreated from years of Thanksgivings. The characters are products of my imagination, and any resemblance to actual persons is purely coincidental. Except for Uncle Rick. He knows who he is...

My Perfect Thanksgiving Menu (from the blog)

  • Basic Grilled Turkey
  • Rotisserie Turkey with Cajun Dry Brine
  • Mashed Potatoes (OK, not those - I need to cook a huge batch for my family. Like, ten pounds of potatoes and the biggest pot I own large.)
  • Grill Pan Bread Stuffing with Cranberries and Apples
  • Pressure Cooker Giblet Gravy
  • Pressure Cooker Sweet Potatoes
  • Green Beans
  • Pressure Cooker Pumpkin Cheesecake
  • Pressure Cooker New York Cheesecake
  • Pressure Cooker Caramel Cheesecake

Cartoon © Randy Bish. Used with permission.

Enjoy the holiday!

More important that great recipes and detailed planning? The real key is a sense of humor. When everything is going wrong, I get tunnel vision. I focus too much on the thing that is falling apart in front of me, and not on the big picture. I have to remind myself to relax, take a (mental) step back, and take a deep breath. "Smile and wave, boys, smile and wave." I'm doing all this work because I love my family, and I look forward to bringing them together every year. Sure, there are hiccups - there always are - but they're part of the process. Enjoy it, even when things are falling apart. Especially when things are falling apart - those are the stories the family will still be telling years later. And making memories for my family is really what Thanksgiving is all about.

Have a happy Thanksgiving, everyone!

What do you think?

Questions? Other ideas? Guesses who Uncle Rick is? Leave them in the comments section below.


Enjoyed this post? Want to help out DadCooksDinner? Subscribe to DadCooksDinner via email and share this post with your friends. Want to contribute directly? Donate to my Tip Jar, or buy something from Amazon.com through the links on this site. Thank you.


Thanksgiving Q&A 2017

November 21, 2017 by Mike Vrobel Leave a Comment

Grilled Turkey and Smoke Thermometer | DadCooksDinner.com
Grilled Turkey and Smoke Thermometer

I'm not cooking a turkey this year! I don't know what to do with myself!

Thanksgiving is at my parents' house, and ever since dad retired, he has thrown himself into cooking. (Hi, Dad!) He's looking forward to cooking the turkeys this year - and who am I to stand in his way?

And, Dad definitely has the turkeys covered. He's smoking one and cooking the other one on the rotisserie. We'll have plenty of turkey. There is no need for me to bring another one. My contribution is a huge batch of mashed potatoes, and a slightly smaller batch of green beans. And being Dad's sous chef when necessary on the big day.

So…anyhow…This relaxing before Thanksgiving. It's a good thing? I think? (He says, looking around nervously for something to dry brine.)

This does leave me with plenty of time to answer blog questions. And boy, do I get questions. In the month before Thanksgiving, I'm part emergency hotline counsellor, part turkey intervention specialist. Here are some of my favorite questions I've been asked this year:

Q: Do you have any pressure cooker recipes for Turkey Breast?
(From many readers over the years)

Ah…this is one I've been avoiding on the blog. No, I don't have pressure cooker turkey breast recipes, because I think turkey breast is particularly unsuited for pressure cooking. If it is overcooked, it turns dry and stringy - and the pressure cooker is going to overcook it. In other words...join us on the dark side! Try some dark meat turkey in the pressure cooker instead:

  • Pressure Cooker State Fair Turkey Drumsticks

Where the pressure cooker shines is for side dishes. Here are my favorites that I've published on the blog:

  • Pressure Cooker Sweet Potatoes
  • Pressure Cooker Mashed Acorn Squash
  • Pressure Cooker Butternut Squash Puree with Honey and Sage
  • Pressure Cooker Turkey Giblet Gravy
  • Pressure Cooker Pumpkin Cheesecake

And…as always, SAVE THE BONES! Use the turkey carcass for after-Thanksgiving pressure cooker turkey soup!

  • Pressure Cooker Turkey Broth
  • Pressure Cooker Day-After-Thanksgiving Turkey Carcass Soup
  • Pressure Cooker Turk-A-Leekie Soup
  • Pressure Cooker Turkey Soup with Rice
  • Pressure Cooker Turkey Noodle Soup with Vegetables
  • Pressure Cooker Pinto Bean and Turkey Drumstick Soup

Q: We love to grill, but never busted out the rotisserie on our last grill. We recently completed an outdoor kitchen and got a little carried away with our grill-it cost more than my kitchen stove! We were really excited to take advantage of the rotisserie (with built-in motor) of this new fancy schmancy grill. Here's the problem-being retirees, we bought a 30-inch two burner (with smoker box) which is plenty big for our grilling purposes, BUT how can we achieve indirect heat with only two burners?? If we position the meat to one side over the non lit burner then it won't be in front of the IR rotisserie burner. Are we dead in the water? Gah!
(from Reader Beth)

That's a tough one. I'm used to grills with at least 4 burners and a rotisserie burner. On those, can cook with indirect heat - no lit burners under the drip pans - with most of the heat coming from the burners on the leg side of the bird and the IR burner.

But, you won't be able to do indirect with only two burners - like they say in the question, the bird would have to shift so far over that the IR burner would only be pointing at the legs - and that's not good.

My reply:

Can you use just the infrared rotisserie burner? If it can get the inside of the grill hot enough on its own - say, 350°F or higher - then you can probably use it all by itself. You'll have to watch out for burning, though, because IR burners are powerful.

How I would use it: IR burner on full for the first half hour to hour, to get browning started, then turn the IR Burner down to low (250°F to 300°F) and cook on low heat until the food is done. I know this will mess up recipe timing, but that's OK - internal temperature is a better way to tell if the food is done.

Q: Do you have any solid flavor injected recipes for chicken and turkey breasts?
(from Reader Dana)

I'm not a big injection fan - I'd rather brine my birds. When I do traditional injection marinades, with butter and spices, they don't penetrate into the meat. I wind up with lots of unseasoned meat, with streaks of spices through every now and again. Brining gives me much more even seasoning.

So…my injection compromise is to inject a brine into the turkey:

Rotisserie Injection Brined Turkey

That gives my brine a head start (it's deep in the meat already), and I get the seasoning effect of the brining. Honestly, I'd rather just dry brine a few days ahead of time…but if I wind up behind schedule on my turkey, and find myself needing to brine hours ahead of time (instead of the day to days that regular brining takes), then injection brining is definitely the way to go.

Q: I am doing a 20lb turkey on the rotisserie.  Should I do all the burners on the leg side, or should I do burners #1 and #6 on medium with the infra-red on?  What have you had the most luck with?
(from Reader Brian)

Even with a big bird, I do all the burners on the leg side, adjusting the grill to an internal temperature of 325°F to 350°. I run the infrared burner on medium for the first 30 minutes to an hour, until the turkey starts to brown well, then turn it off and let the heat in the grill roast the turkey the rest of the way.

Here's some blog posts I wrote that have more details about cooking a big bird:

  • Rotisserie Grilling: The Big Turkey
  • Rotisserie Turkey Wrapped With Bacon

Q: I need to ask you about dry brining. I'm anxious about doing it, because I can't seem to get a even amount of "brine" under the breast skin. Am I supposed to rub the rest of the brine on the skin (thigh, legs, etc.)? It seems like the dry brine would be very splotchy, while with the wet brine it's the same amount everywhere the brine touches. Also, won't leaving all the salt on the bird make it super salty?
(from Reader (and Uncle) Warren. Hi, uncle Warren!)

When I dry brine, I'm trying to get some of the salt under the skin on the breast - but it's not super important. The salt will penetrate, even through the skin. (Yes, I know, I didn't believe it either - but it works great.) I only do the breast because it's easy - the rest of the salt I'm sprinkling over the skin (and in the cavity).

As for "too salty" - think of it as "salting early."  You are using about the same amount of salt as if you were salting after cooking; you're just doing it ahead of time. It doesn't come out too salty - it should be just right.

I know it's too late for this year, but...try dry brining on a whole chicken or two before trying it on a turkey. It's a cheap way to test out the dry brining technique, and I think you'll like it. Unless you're a culinary risk-taker like me, you don't want your first time trying a technique to be the centerpiece of the most important dinner of the year.

(You could also do a head-to-head comparison between dry brining and wet brining with a couple of chickens if you felt adventurous. That's how I decided to switch to dry brining. Well, that and a dinner at Zuni Cafe. Oh, that chicken...)

That said, if you are a "white meat only" kind of eater, then wet brining is the way to go. Brining adds water to the breast - not a lot, but enough to make a difference in juiciness. Breast meat needs the help - with chickens, and especially turkey, it is very lean and easy to overcook. Wet brining gives you a little bit of extra cushion.

I work around the "overcooked white meat" problem on my turkeys by watching the temperature very carefully, and using the "bag of ice on the breast" to give the legs a head start.

Bonus post coming tomorrow: How would I prepare for thanksgiving if I was preparing for thanksgiving? Stay tuned. (And I apologize in advance. I got a little carried away.)

Have a happy thanksgiving, everyone!

What do you think?

Questions? Other ideas? Leave them in the comments section below.

Enjoyed this post? Want to help out DadCooksDinner? Subscribe to DadCooksDinner via eMail and share this post with your friends. Want to contribute directly? Donate to my Tip Jar, or buy something from Amazon.com through the links on this site. Thank you.

Canada and Uk Readers - Can You Help Me Out? (Amazon Affiliate Request)

November 15, 2017 by Mike Vrobel 2 Comments

Image courtesy of Wikimedia Commons

Image courtesy of Wikimedia Commons


FCC Notice: I am an Amazon Affiliate - anything you buy through my Amazon links will give me a small commission, at no extra cost to you. (You’ll see why I’m disclosing this in a minute…)


[UPDATE 2017-11-26: Thank you to my Canadian and British readers! My affiliate accounts met the minimum sales numbers, and won't be closed due to inactivity.]

Hello! I apologize for this post in advance.

(Not a good sign - I’m already apologizing in the first sentence.)

If you are not from Canada or the UK, you can skip the rest of this post. I’ll have more recipes and food thoughts next time. All you’ll miss is the minutiae of a US based blogger trying to keep their Canadian and UK Amazon Affiliate accounts open.

Still here? Great! Welcome, Canadians and Brits! (Or people who care about the nuts and bolts of food blogging!)

The Big Ask

Canadian and British readers - I need your help. Can you do me a huge favor and order something through my Amazon links to the Canadian Amazon.ca store or the UK Amazon.co.uk store? (And, let me know if the links actually take you to your local Amazon store?) I need a minimum number of orders to keep those affiliate accounts open, and time is running out.

Details, Details

I’m an Amazon Affiliate - if you buy a kitchen gadget (or anything else) through one of the Amazon links on my site, I get a small commission, and it doesn’t cost you any extra money. I like being an Amazon affiliate; It is one of the ways I earn money to keep the blog going.

Until very recently, I was only linking to Amazon.com in the US. Setting up the systems needed to switch links on the fly to all the different country-specific Amazon stores was a lot of work. (I’m in this to write about food, not work on my back-end blogging system.) So I went with where most of my traffic is, the US.

Blog Statistics: I apologize for the “US is the center of the world” talk - I know how annoying that is to non-US residents. But the vast majority of my readers, about 85%, come from the US. About 8% are Canadian, 3% are from the UK, 3% are from Australia, and the remaining 1% are spread out across the rest of the world.

A few months ago, Amazon made it easier for affiliates to link to country-specific stores. “Amazon OneLink” handles the link switching, directing people to their local Amazon stores. Great!

But...and there’s always a but...I hit a snag:

  1. I have to create a separate Amazon.ca and Amazon.co.uk affiliate accounts to make it work. Done! But...
  2. Those accounts have a clause that I didn't notice: I have to meet a minimum number of sales in the first 90 days, or they'll close the account. And...
  3. Amazon's OneLink code was not as plug-and-play as it seemed - it did not work at all with my old blog theme, and I was in the middle of getting the new one set up. Oops!

“That’s OK,” I thought, “My blog redesign is almost done. I’ll wait and add in the code once things settle down.” (I missed item #2 - the clock is ticking.) And then, I promptly forgot about it. Like I said - I’d rather be writing recipes.

That is, I forgot about it until a couple of weeks ago, when I got an email from Amazon.ca:

“Dear affiliate: You have no orders in your new account. We’re sorry, but unless you meet the required minimum of 3 orders in the next 30 days, we’re closing the account.”

Yikes! I got my tech guy to set up the Amazon OneLink code. Then I thought: “3 orders? In a month? Plenty of time.”

That was three weeks ago. I’ve got about a week to go.

I have two orders on Amazon.co.uk, and don’t have any orders on Amazon.ca. The links are working properly - I can see the clicks through to Amazon.ca and Amazon.uk in their affiliate dashboards - but no one is actually buying things. Normally, that’s no big deal. You don’t feel like buying something? No worries. I understand. But, with the clock ticking down…I have to ask for a favor.

I hate asking, but I'm running out of time…

If you live in Canada or the UK, can you help me out? Click on one of my Amazon links (like this one here: Amazon!), and order something? It doesn’t have to be big - the number of orders is what they care about, not the size. It will help me keep my affiliate accounts open, and help support my writing here at DadCooksDinner.

(And, a second thing...if you do order something through one of my links, can you let me know if OneLink works, and actually sends you to your local Amazon store? I have everything set up, and it looks like it's working, but I have no way to check it myself.)

Thank you, thank you, Thank You!

Mike Vrobel

DadCooksDinner.com

  • « Previous Page
  • 1
  • …
  • 11
  • 12
  • 13
  • 14
  • 15
  • …
  • 37
  • Next Page »

Welcome to Dad Cooks Dinner!

I'm Mike Vrobel, a dad who cooks dinner every night. I'm an enthusiastic home cook, and I write about pressure cooking, rotisserie grilling, and other food topics that grab my attention.

More About Me →

Popular

  • Three bowls of cooked Pinto Beans on a wood table
    Instant Pot Pinto Beans (No Soaking)
  • Pressure Cooker Beef Shank (Osso Bucco)
  • Pressure Cooker 7 Hour Leg of Lamb (in 90 minutes)
    Pressure Cooker 7 Hour Leg of Lamb (in 90 minutes)
  • Pressure Cooker Brown Jasmine Rice
  • Grilled Tomahawk Steak (Long Bone Ribeye, Reverse Seared)
    Grilled Tomahawk Steak (Long Bone Ribeye, Reverse Seared)
  • A green bowl full of chicken noodle soup
    Instant Pot Rotisserie Chicken Noodle Soup

Seasonal

  • A bowl of asparagus risotto
    Instant Pot Asparagus Risotto (Pressure Cooker Recipe)
  • Grilled Butterflied Chicken with Garlic Butter
  • Sous Vide rack of lamb sliced into chops
    Sous Vide Rack of Lamb with Dijon Bread Crumb Crust
  • A bowl of beef stew with asparagus, carrots, and radishes.
    Instant Pot Spring Vegetable Beef Stew
  • A Rotisserie Chicken (Pollo Asado)on a platter of shredded cabbage
    Rotisserie Chicken Pollo Asado
  • Rotisserie Pork Shoulder Roast with Carolina Mustard BBQ Sauce
    Rotisserie Pork Shoulder with South Carolina Mustard Barbecue Sauce

Footer

↑ back to top

About

  • Privacy Policy

Newsletter

  • Sign Up! for emails and updates

Contact

  • Contact

Copyright © 2025 Dad Cooks Dinner