DadCooksDinner

  • Home
  • Rotisserie
  • Recipes
  • Tools
  • Books
  • Merch
menu icon
go to homepage
  • Recipes
  • Books
  • Tools
  • Merch
  • About
subscribe
search icon
Homepage link
  • Recipes
  • Books
  • Tools
  • Merch
  • About
×
Home » Recipes

Favorite Food Podcasts

August 4, 2015 by Mike Vrobel 5 Comments

I'm addicted to podcasts. I have more subscriptions than I have time, and I have a lot of favorite food podcasts, but I don't feel like I have a good way of discovering new ones. I'm throwing the question out to my readers - What podcasts am I missing? What are your favorites?

Here are the food podcasts I listen to:

1476183_478999762213121_2005803430_n1. The Feed

Rick Bayless and Steve Dolinsky: The Feed Podcast - Rick Bayless & Steve Dolinsky
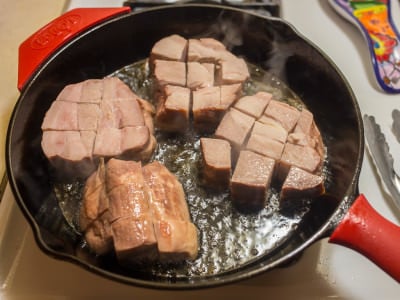
I'm a huge Rick Bayless fan - his cookbooks are a constant source of new ideas for me. I enjoy most of Rick and Steve's culinary explorations, especially since they're located in Chicago - I go to Chicago every year, and love their insight into the food scene in the city. But my favorite part of the podcast is the Ingredient Challenge, when Rick challenges other Chicago chefs to use a specific ingredient for a 15 minute weeknight meal. I always come away with ideas I can use at home.

600x600_atkradio_coverart

2. America's Test Kitchen Radio

Christopher Kimball, Bridget Lancaster, and the rest of the America's Test Kitchen crew: America's Test Kitchen Radio
My favorite part is the interview in the middle of the show. Chefs, food celebrities, cookbook authors, scientists - Chris does a great job interviewing them all about the world of food.

DaveCartoon3. Cooking Issues

David Arnold and friends: Cooking Issues - Dave Arnold
Dave is a food scientist, owner of the Booker and Dax cocktail bar, and a fast talker from Brooklyn. This podcast has more information per minute than anything else I listen to, ideas pouring out of Dave as fast as he can say them. (I got my wife, the high school science teacher, his Liquid Intelligence cocktail book for her birthday. She's been making all sorts of crazy drinks, and is muttering "now I need a dewar…and some liquid nitrogen…". Dave unleashed her innner mad scientist.)

gastropod4. Gastropod

Cynthia Graber and Nicola Twilley: Gastropod
Cynthia and Nicole do a great job of combining food history and science in their in-depth explorations of food topics. (Are you sensing a theme yet?)

Alton-Browncast-1400x1400

5. The Alton Browncast

Alton Brown: The Alton Browncast

Speaking of food science and heroes: Sigh. No new epsiodes since last December. Still lots of good stuff in the archives. Come back, Alton!

Bonus: My favorite non-food podcasts

I'm a nerd, and a computer geek, and the rest of my podcasts fall into two categories: 1I know, and I have a blog, quelle surprise!. My favorite non-food podcasts:

  • The Incomparable - Jason Snell and friends talking about nerdy pop culture. This is, by far, my favorite podcast of all. (Frankly, the entire Incomparable network is fantastic. I particularly like the Incomparable Game Show.)
  • Accidental Tech Podcast - Casey Liss, Marco Arment, and John Siracusa talk about tech and Apple. Sometimes to extraordinary levels of detail, especially when John or Marco starts rolling. (I'm an Apple fanboy, so I love it when they get rolling.)
  • Mac Power Users - Katie Floyd and David Sparks talk about how to get things done with Apple technology. See Apple Fanboy, above - but this show is more about workflows and tools you can use in the real world. 2It drives my daughter nuts that David starts every episode saying "Hello, Katie Floyd!". "Why can't he just say Katie!" she shouts every time.
  • And, practically the entire Relay.FM lineup - Upgrade, Clockwise3Really, anything with Jason Snell or Dan Moren talking about Apple., Analog(ue), Connected, Rocket….

What am I missing?

What other podcasts are your favorites?4My wife can't belive I left out the real life crime drama Serial, while my son is voting for video game centered Virtual. Leave them in the comments section at the bottom of the page on my blog.

Sous Vide Grilled Ribeye with Salsa Criolla

July 30, 2015 by Mike Vrobel Leave a Comment

Sous Vide Grilled Ribeye with Salsa Criolla

Special thanks to my friends at Certified Angus Beef for the steak used in this recipe.


What do you cook when you're home alone? My wife and kids are still at our cottage on Lake Erie. I wish I was with them, but I used up all my vacation time for the year.

I treat myself with a steak. Specifically, a sous vide ribeye, inspired by Brazilian churrascarias. Instead of seasoning the steak before cooking, I cooked it sous vide to medium-rare plus 5I picked up the term Medium-Rare Plus from meat scientist Dr. Phil Bass of Certified Angus Beef. I prefer my steak between medium rare (warm red center) and medium (warm pink center). This is easy with sous vide - I set it for 133°F and I'm good to go.
, and seared it on one side on my grill. Only when I was done cooking did I season it, with a hearty sprinkling of coarse sea salt. Oh, and I topped it with Brazil's other steak sauce, Salsa Criolla.

The results were exactly what I hoped for. The big, crunchy flakes of salt added texture, and the tart Salsa Criolla cut through sweet, beefy taste of the steak. This is a big steak meal with balance, just the thing to take
my mind off the fact that vacation is over, and it's time to get back to work.

Recipe: Sous Vide Grilled Ribeye with Salsa Criolla


Equipment

  • Sous Vide setup (I used my SousVide Supreme Demi, but see the related posts for the bubba beer cooler version.)
  • Grill (I love my monster Weber Summit.)


Sous Vide Grilled Ribeye-1030409
Steak in the water bath

Sous Vide Grilled Ribeye-1030437
A good set of grill marks

Notes

  • Of course, you can cook for more than one - add as many steaks as you can fit into your sous vide water bath.
  • No sous vide? No worries; This recipe is perfect for beer cooler sous vide, with zip-top freezer bags, hot water, and a beer cooler.
Sous Vide Grilled Ribeye with Salsa Criolla

What do you think?

Questions? Other ideas? Leave them in the comments section below.

Related Posts

Beer Cooler Sous Vide Grilled New York Strip Steaks
Sous Vide Grilled Filet Mignon With Sous Vide Egg and Fresh Herb Salad
Cooking for One


Enjoyed this post? Want to help out DadCooksDinner? Subscribe to DadCooksDinner via eMail or RSS reader, recommend DadCooksDinner to your friends, and buy something from Amazon.com through the links on this site. Thank you.

Five Fun Food Finds - July 2015

July 28, 2015 by Mike Vrobel Leave a Comment

P1030295
Mountain Goat, Glacier National Park

I am writing this from part two of my vacation, at my family's cottage on Lake Erie.2The mountain goat is from part 1 of my vacation, while visiting Glacier National Park. No, we don't get mountain goats in Ohio. It's probably good for me to disconnect for a while - no wi-fi, spotty cell phone coverage - but as a food blogger who loves grilling, I feel like I'm missing Prime Time.2I'm a blogger. Internet connectivity is like air - without it, I start gasping and my eyes bug out. Kind of like Arnold in the Martian atmosphere at the end of Total Recall. Here are some great posts from the last few months to keep you entertained while I sip a delicious beverage and watch the sun set over the lake.

1. ChefSteps: A Complete Guide to Sous Vide Packaging

Whenever I post a sous vide recipe, I get questions about the safety of cooking in plastic. Is it safe? With the plastics used for vacuum bags (and freezer zip-top bags), at sous vide temperatures, yes, it is safe.3At higher temperatures, like when my microwave melts one of my plastic storage containers while defrosting? That's where it gets iffy. For more details, see this fantastic guide from ChefSteps, answer questions about all sorts of sous vide packaging:

  • A Complete Guide to Sous Vide Packaging [ChefSteps.com]

2. Weber Blog/Mike Lang - Rotisserie Grilling for Entertaining

Friend-of-the-blog Mike Lang of AnotherPintPlease.com is guest blogging at Weber. You know me and rotisserie - how could I resist his Rotisserie Grilling for Entertaining post?

  • Rotisserie Grilling for Entertaining [Weber.com]

Bonus! My Weber Blog posts

Mike isn't the only Mike around here guest blogging on Weber.com:

  • How to Set Up Your Rotisserie [Weber.com]
  • How to Truss and Spit Poultry for the Rotisserie [Weber.com]
  • How to Truss and Spit a Roast for the Rotisserie [Weber.com]

3. Grillocracy: 10 Simple Hacks to Help Step Up Your Grilling Game

I met Clint at Certified Angus Beef's #GrillTalk class; here he is with ten great grilling tips. My most used one is #2, create a grilling brush with herbs, and I plan on trying some of the others, especially #4, grilling fish on slices of citrus.

  • 10 Simple Hacks to Help Step Up Your Grilling Game [Grillocracy.com]

4. MexicoInMyKitchen: You say Skewers… I say Alambres!

Mely is another friend-of-the-blog from Twitter; here are her gorgeous ribeye kebabs:

  • You say Skewers… I say Alambres! [MexicoInMyKitchen.com]

5. Hell's Handle Perforated Spatula

Dad! That's a bad word!

My kids are scandalized by my new grill spatula - but I like it so much that I don't care. I prefer the 8" by 3" perforated turners for flipping my burgers, and the handle on this spatula feels right in my hand. (Plus, the handle is rated up to 450°F, no small thing when I'm working on a hot grill.)

  • Hell's Handle Perforated Spatula

Bonus: Dad Spotlight podcast

Tooting my own horn again: When Chris Lewis and Don Jackson asked me to do a monthly "Cooking for Dads" segment on their Dad Spotlight podcast, I jumped at the chance. Check me out on Episode #2, talking about 4th of July grilling, and Episode #9 (I think - as I wrote this, it hasn't posted yet), talking about quick weeknight meals at the last minute.

  • Dad Spotlight Podcast
  • Dad Spotlight Episode 2: Nicole Smaglick of Cooper & Kid, Grilling, & More
  • Dad Spotlight Episode 9: Brent Almond & Cooking Quick and Healthy Meals

What do you think?

Questions? Any fun food finds I missed? Leave them in the comments section below.

Enjoyed this post? Want to help out DadCooksDinner? Subscribe to DadCooksDinner via eMail or RSS reader, recommend DadCooksDinner to your friends, and buy something from Amazon.com through the links on this site. Thank you.


Pressure Cooker Chicken Noodle Soup with Vegetables

July 23, 2015 by Mike Vrobel 5 Comments

Pressure Cooker Shredded Chicken and Noodle Soup with Vegetables | DadCooksDinner.com
Pressure Cooker Shredded Chicken and Noodle Soup with Vegetables

So, what do I do with a batch of Pressure Cooker Broth with Shredded Chicken? I make chicken noodle soup.

For me, soup is a "clean out the refrigerator" recipe; I had green beans in the crisper drawer, so that's what went in the soup. All sorts of other vegetables would be good in here; carrots, squash, zucchini, corn, peas, spinach…whatever you have on hand.

The other trick is one I picked up somewhere4Probably Cooks Illustrated magazine, but I can't find the original reference is adding a cornstarch slurry to the soup. This makes the soup extra creamy, building on the gelatin-laden pressure cooker broth. It's optional, but a nice finishing touch.

Pressure Cooker Shredded Chicken and Noodle Soup with Vegetables
Pressure Cooker Shredded Chicken and Noodle Soup with Vegetables 

What do you think?

Questions? Other ideas? Leave them in the comments section below.

Related Posts

Pressure Cooker Chicken Broth with Shredded Chicken
Pressure Cooker Chicken Stock
Pressure Cooker Chicken Gumbo
Pressure Cooker Mexican Chicken Soup in Red Chile Broth (Caldo de Pollo Rojo)

Enjoyed this post? Want to help out DadCooksDinner? Subscribe to DadCooksDinner via email or RSS reader, recommend DadCooksDinner to your friends, and buy something from Amazon.com through the links on this site. Thank you.

Pressure Cooker Chicken Broth and Shredded Chicken

July 21, 2015 by Mike Vrobel 7 Comments

Pressure Cooker Chicken Broth and Shredded Chicken

A chicken simmering in a pot. Sounds like tradition, doesn't it? A recipe passed down from generation to generation. "Let the chicken bubble on the stove during a lazy Sunday afternoon…"

[Imagine sound of record scratch here. Or for you kids today, imagine a youtube video getting all pixelated. ]

When I have a whole chicken2I was in a chicken and eggs CSA a few years back - two chickens, every other week, plus a dozen eggs. We ate a LOT of chicken soup that year., and I want chicken soup, I simmer it…in my pressure cooker.

Cooking a whole chicken is a balancing act. The white meat needs to be just barely cooked enough, and the dark meat needs to be cooked well past the point of doneness. This broth is thinner than my other chicken stock recipe, because I don't cook it as long - I'm trying to save the breast meat from overcooking. The wet environment of the pressure cooker helps the white meat - it's not perfect, like it would be if you cooked it on its own - but it's good, especially if you moisten it with a little broth (or use it in soup).

Beyond that, this recipe is straightforward. Cut the chicken into pieces and put it in the pot. Add some aromatics, cover with water, and pressure cook 25 minutes in a stove top PC, 30 in an electric PC, like I use. Let the pressure come down naturally. Scoop out the chicken and let it cool while you strain the broth. Shred the chicken, and you're ready. Chicken soup? Bring the broth to a boil, add some noodles, and maybe some vegetables…but that's a story for later this week.

Recipe: Pressure Cooker Chicken Broth and Shredded Chicken

Equipment

  • 6 quart or larger Pressure Cooker (I love my Instant Pot Electric PC)
Everything in the pot
High pressure for 30 minutes

Pressure Cooker Shredded Chicken Broth Soup-1020164
Scraping the fat layer from frozen broth

Notes

  • Don't feel like cutting up the chicken? You don't have to - but it is easier to arrange the pieces in the pot so they are completely covered with water. If you have a whole bird, put it in the pot, breast side up. It doesn't hurt if the breast doesn't completely submerge - that whole "don't overcook the breast" thing.
  • Not in the mood for soup? That's OK, use the shredded chicken now, and freeze the broth for later. Shredded chicken is great on salads, in sandwiches, as a taco filling, or any other place you need a little protein.
  • Want a heartier chicken stock? Use the carcass from a roasted chicken with one of the pressure cooker chicken stock recipes in the "Related Posts" section.

What do you think?

Questions? Other ideas? Leave them in the comments section below.

Related Posts

Pressure Cooker Chicken Stock
Pressure Cooker Chicken Gumbo
Pressure Cooker Mexican Chicken Soup in Red Chile Broth (Caldo de Pollo Rojo)
Instant Pot Shredded Beef Recipe

Enjoyed this post? Want to help out DadCooksDinner? Subscribe to DadCooksDinner via eMail or RSS reader, recommend DadCooksDinner to your friends, and buy something from Amazon.com through the links on this site. Thank you.

Summer Vacation 2015

July 16, 2015 by Mike Vrobel Leave a Comment

Reflections in Grand Prismatic Spring, Yellowstone National Park, Wyoming

I'm out West, visiting Yellowstone (and some of our other beautiful National Parks). See you soon!

Support DadCooksDinner through Amazon Prime Day

July 15, 2015 by Mike Vrobel Leave a Comment


Today is Amazon's 20th birthday. To celebrate, they are having Prime Day - great deals for Amazon.com Prime members.2I'm an Amazon Prime member, and I LOVE it. Free two-day shipping on any purchase is a game changer.

If you're taking advantage of Prime Day, please consider using one of my Amazon links (like this one right here) to go to Amazon. If you do, I get a small commission on anything you buy, so your purchases support DadCooksDinner.com. (And, even better, it doesn't cost you any more - you get the same great Amazon prices.) Thank you for your support!

Happy Amazon Prime Day - July 15 - Exclusive Deals for Prime Members - Shop Now

Dirty Grill Shame

July 14, 2015 by Mike Vrobel 4 Comments

Don't blame the grill...
Don't blame the grill, blame the griller.

My YouTube video for Rotisserie Prime Rib Roasts is getting a lot of play this summer. As a side effect, two people asked me essentially the same question last week. Here's a mashup of the two questions:

I was going to buy a Weber Summit until I saw the burn marks on your grill lid in the video. Is that permanent? Can it be cleaned? Is there another grill you'd recommend?

My poor, abused, workhorse grill. I've used it hard since 2007, and I've neglected it. Those aren't burn marks. Those are soot stains. I grill multiple times a week, year round - almost every day in the summer, and every chance I get during our cold Ohio winters.2In the summer, a lot of those grilling sessions are on my charcoal kettle, but I'd estimate half of them are on the gas grill - and most of the winter grilling sessions are on the gas grill.

I don't keep up with cleaning, especially on the outside.2I don't wash my car, either. I figure, if God wanted my car washed, he'd make it rain, and who am I to disagree? The grill works just fine - as long as I give the inside a good cleaning every year. When it's not in use, I keep the cover on, to protect it from the elements. So, I only really look at the stains when I'm about to grill. I think to myself "I really should clean my grill…some other time, when I don't have to get dinner on the table…" and promptly forget about it.

Those soot stains have zero effect on cooking - that's why I haven't worried about it. I feel like I let my grill down. It's being judged because of *my* lack of cleaning. I hope you're happy, you, you…grill shamers. I'm going to try to clean it - I'm worried I waited too long, and it is burned on - but I won't have time until I get back from a vacation, probably in August. And so the cycle continues. As usual, I'm overbooked, and cleaning the outside of the grill is the first thing to get skipped, because it doesn't affect the grill performance.

Update: As a test, I cleaned a small section with a magic eraser, just to make sure I could. It took a couple of minutes of scrubbing - like I said, it's long overdue - but the cleaned area looks brand new. 3Yes, I should try out Weber's grill cleaning products, but I had the magic eraser on hand.

Dirty Grill Shame-1020217
Scrubbed on the right...needs scrubbing everywhere else.

Disclaimer, before I get to the next section: I am a huge Weber fan, and have been for years. Almost every grill I've purchased is a Weber, and the couple of times I didn't buy the Weber, I regretted it, and wound up switching. I am also writing guest posts for the Weber blog. I am not being paid for this post - they have no idea it's coming. Now that I'm done disclaiming…

Recommend the a grill other than a Summit? Never. It is solid as a rock, still going strong after eight years. 4Should you buy a different stainless steel grill to avoid this? No, this happens to all stainless steel - if you don't keep up with the cleaning, it's going to look like that, regardless of the brand. Would I like a new grill? Sure. 5Especially one with the searing station, which came out a few years after I bought mine. But I'm not going to buy one while this grill is doing so well. 6I think…this might be an excuse to buy a new grill. Oh, no, now I have grill lust. This could get expensive. I must resist. Knowing what I now know about my cleaning habits and the need to clean stainless steel 7I worked at McDonald's as a teenager, and we had to dutch cleanser the brushed stainless steel every night at closing. Ah, the good old days., when my Summit goes to that great grill graveyard in the sky, I'm buying the lower-maintenance porcelain enameled model. Same grill, different lid material that hides the soot better. But if that model wasn't available, I'd buy the stainless in a heartbeat.

In other words - stop being so mean to my baby!

Dirty Grill Shame-1020187

(And, as a reminder - you DO need to clean the inside of your grill at least once a year. I should do it every six months, with how often I grill out - but that's another thing I keep putting off. Again, shame on me.)

What do you think?

Questions? Lectures about basic cleanliness? (Mom, is that you? Sorry, mom, I haven't changed…) Leave them in the comments section below.

Enjoyed this post? Want to help out DadCooksDinner? Subscribe to DadCooksDinner via eMail or RSS reader, recommend DadCooksDinner to your friends, and buy something from Amazon.com through the links on this site. Thank you.

New Grilling Tools Page

June 30, 2015 by Mike Vrobel Leave a Comment

Grilling Tools
Grilling Tools


After my Rotisserie Tools page went up, a few readers asked about my grilling equipment. So, here is my  Grilling Tools and Accessories page. (If you're on DadCooksDinner.com when you read this, look at the menu bar at the top for the "Tools >>" dropdown.) This page is my one-stop shop for grilling equipment recommendations. Check it out, and let me know if there is anything else I should add.

Grilled Cheeseburgers (Grilling Basics)

June 25, 2015 by Mike Vrobel 4 Comments

Grilled Cheeseburgers (Grilling Basics) | DadCooksDinner.com
Grilled Cheeseburgers (Grilling Basics)

After my trip to Certified Angus Beef, I'm excited about burgers. Ounce for ounce, a good burger has as much beef flavor as a good steak. 8And, frankly, my kids would rather have the burger - basic burgers are my kids favorite grilled meal. Nothing fancy, just ground beef, a slice of cheese, ketchup and mustard, and a bun. In one case, even that's not basic enough - my youngest wants his burger plain. No cheese, nothing but bread and ground beef.

Now, I'm not going to say burgers are hard - I know they are the first thing everyone throws on the grill - but there are a few tricks to know if you want the best possible burger.

Grilled Cheeseburgers (Grilling Basics) | DadCooksDinner.com
My kitchen helper making the patties

Tip #1: do not to overwork the meat. Use a gentle hand when you're shaping the burger - overworked burgers are dense and tough. I use a burger press - I gently form a handful of meat into a ball, then press it flat and fix any cracks in the edges. That's actually...

Tip #2 - make sure the edge of the burger is structurally sound. If there are any breaks in the edge, they will pull apart in the heat of the grill, and worst case the burger may break into pieces.2Note: This is a tip from Chef Michael Ollier at Certified Angus Beef, and was an "Of course!" moment for me in the beef class. Unfortunately, I took all the pictures with this recipe before I took the class, so you'll see some ragged edges on my burgers. Never again!

Grilled Cheeseburgers (Grilling Basics) | DadCooksDinner.com
Burgers over the heat (note the cool zone to the right)

Tip #3 is to leave some of the grill as a cool zone. Burgers drip lots of fat into the grill. The occasional flare-up is fine, but if a raging fire starts under the burgers, move them to the cool zone for a minute to let the flames die down.

Grilled Cheeseburgers (Grilling Basics) | DadCooksDinner.com
Time to move some burgers away from the flames

The final Tip, #4, is add the cheese for the last couple of minutes. I like the crispy, lacy edges that come from cheese melting on the grill, and prefer it to a cold slice of cheese on the bun.

Grilled Cheeseburgers (Grilling Basics) | DadCooksDInner.com
Mmmm...melting cheese

So, here it is, my recipe for basic cheeseburgers. Nothing fancy, and nothing better.

Recipe: Grilled Cheeseburgers

Equipment

  • Grill (My trusty Weber Kettle.)
  • Spatula
  • Optional: Burger Press (Mine is massively over-engineered. I love it.)

Notes

  • No burger press? No worries. Gently shape the burger with your hands, giving it a bit of a dimple in the middle so it doesn't puff up on the grill.
  • Burgers always shrink on the grill. No matter how I shape them, how wide I make them, they always seem to wind up smaller than the buns. If you want a burger to overflow the bun, make it wider than you think you should - wider than seems safe - and you'll be OK. Me? I think I'm going to attack the problem from the other end and buy slider buns next time.
  • Of course you can get fancy - grill the onions, use a better cheese, go crazy with the toppings. Burgers are a foundation to build on. Once you've got your basic burger, go wild! (My current favorite: Fire Roasted Poblano Burgers.)
Grilled Cheeseburgers (Grilling Basics) | DadCooksDinner.com
Burgers ready for the grill

What do you think?

Questions? Other ideas? Leave them in the comments section below.

Related Posts

For fancier burgers, check out my Fire Roasted Poblano Burgers , or for vegetarians, my Portobello Burgers. If you want a fancy way to serve ground meat on the grill, check out my Kofta Kebabs recipe. And, for a great side dish with burgers, make my Instant Pot Potato Salad.

Enjoyed this post? Want to help out DadCooksDinner? Subscribe to DadCooksDinner via eMail or RSS reader, recommend DadCooksDinner to your friends, and buy something from Amazon.com through the links on this site. Thank you.

#GrillTalk at Certified Angus Beef

June 23, 2015 by Mike Vrobel 7 Comments

CertAngusBeef-GrillTalk-2573

Certified Angus Beef invited me to their headquarters in Wooster, Ohio 3Just down the road! for #GrillTalk - two days of intensive classes about beef. Beef lessons? Of course I want to go!

(FTC disclosure: Certified Angus Beef paid for the trip, my food, and lodging while I was there. Don't tell them, but I would have happily paid to take these classes. Shh...)

CertAngusBeef-GrillTalk-1020320
Ribeye Cap rolled roast

Certified Angus Beef has a culinary education center, used to teach food professionals like butchers and chefs. This time it was for people like me - food bloggers. (That's why there's a hashtag in the class name. They know the audience.) When I say "people like me", I mean "grill crazy like me". My fellow attendees were Chris (NibbleMeThis.com), Clint (Grillocracy.com), Kita (GirlCarnivore.com), Erin (DinnersDishesAndDesserts.com), and Scott (GrillinFools.com). 2A food blogger gathering where the guys outnumber the girls is unusual. I'm used to being the token guy in an all-female crowd.

CertAngusBeef-GrillTalk-1020284
Setting up the smoker for the brisket demonstration

It was an information packed couple of days. They're proud of their beef at Certified Angus Beef, and rightly so - they care about their work, and it shows. My brain is overflowing with beef facts, and I want to dump them all on you - but I'm going to dial it back and only give you the highlights. 3You don't want my raw notes - hamburger juice stains and all - or we'll be here for days.

CertAngusBeef-GrillTalk-1020302
That's right - Ohio Proud

My first question was: why Wooster, Ohio? Back in the 1970's, an Ohio rancher was disappointed by a steak dinner at a local restaurant. "I can do better than this", he thought, and started down the road to Certified Angus Beef. What is Certified Angus Beef? It is beef from black Angus cattle, at least USDA choice grade, that meets additional quality standards for marbling, flavor, tenderness, consistency, and appearance. Phil Bass, Ph.D., corporate meat scientist for Certified Angus Beef, walked us through checking a side of Ohio prime beef. 4Not that I'm bragging about my home state of Ohio, but it passed with flying colors. OK, maybe I am bragging. Just a bit. O-H... He showed us the ten quality standards needed to qualify as Certified Angus Beef - and said that only 25% of Angus cattle pass this standard.

CertAngusBeef-GrillTalk-1020338
Dr. Bass and Chef Ollier showing us how to cut up a top sirloin primal

Our primary teachers were Dr. Bass and Chef Michael Ollier, corporate chef for Certified Angus Beef. This was a hands-on class; we put on cut resistant gloves, picked up butcher knives, and started cutting as they taught us how to break down different beef primals. (Note that "cut" is a relative term - most of the time we pulled the muscles apart along their natural seams, only using the boning knife5The Victorinox 40515 curved semi-stiff boning knife - I've ordered one the moment I got home. to cut through connective tissue.)

Picanha and other sirloin steaks

We sectioned a chuck shoulder clod to find the flat iron steak. We broke down a top sirloin into steaks, and I found my favorite Brazilian barbecue cut - picanha. The most dangerous thing I learned? How to cut the spinalis away from the ribeye. The spinalis is the ribeye cap - the curve of muscle that wraps around the "eye" of the ribeye. I save that part of a ribeye for last, so I can savor it. Now I know how to cut it away from the ribeye and serve it as its own steak. Oh, my. "Hey, kids! Here's the eye of ribeye, just for you. This piece? Oh, don't worry about it - that's the ribeye cap. I'll make sure you don't have to eat it."

Erin working on her grind

We also learned about custom hamburger blends…by making our own. Chris and I were a team (we were team "Liberated Tri-Tips"), and thought we had a winning combination with our blend of 30% beef short ribs, 20% ribeye trimmings, and 50% sirloin. And, at a 21% fat content, I was sure we'd have the juiciest burger. But...no. It wasn't as beefy tasting as the winning blend of 67% chuck and 33% short rib from Clint and Kita ("Team 3" - no fancy naming here). They had a little less fat in their blend, 18%, but  it was every bit as juicy as our burger, and the chuck flavor was better in a burger than our sirloin. Compared to their burger, ours was kind of bland. 6Clint made sure to remind us that they won roughly every fifteen minutes for the rest of the class.

CertAngusBeef-GrillTalk-2579
Clint and my burger blend on the grill

I use "opportunity" wood. What do you have nearby? In Ohio we are near apple orchards like Bauman orchards, so I use a lot of apple wood. In Texas they have post oak - that's why they use it. - Chef Michael Ollier

CertAngusBeef-GrillTalk-1020368
Deep fried brisket bites with buffalo sauce

While Chef Ollier and Dr. Bass taught us, Chef Ashley Pado and Chef Peter Rosenberg fed us. They kept bringing us fantastic samples: smoked and seared tri-tip, leftover brisket bites, deep fried and tossed in wing sauce, and my favorite, substituting sirloin flap steak for skirt or flank steak in fajitas. We tasted beef charcuterie, homemade beef jerky, and barbecued beef bottom round and sirloin beef knob, to compare less expensive alternatives to brisket.

CertAngusBeef-GrillTalk-1020349
Chef Ollier shows how to blowtorch the edges of a burger for a better picture

Then there was a heaping helping of food science and cooking tips. Here are a few facts that stand out in my memory:

  • Dr. Bass talked about how dry aged beef has different flavors in different places. Each place has its own unique mix of molds that will grow on the beef, giving a dry aged steak from Ohio a different flavor from a dry aged steak from New York City. 7That's right - dry aged beef has what French wine calls "Terroir" - flavor that comes from the place.
  • Chef Ollier explained why brisket should be cooked low and slow - low heat gently breaks down the collagen sheathing the muscle fibers; higher heat would squeeze the collagen, which would squeeze liquid out of the brisket. Low heat keeps the juices in the beef, where it belongs.
  • Dr. Bass later explained why brisket tastes so beefy - it has a high concentration of oleic acid, a monosaturated fatty acid that our taste buds love.
  • Chef Ollier showed how to form a gorgeous hamburger patty, making sure not to overwork the meat and make it tough, but working the outside just enough to form a solid outer edge so the burger doesn't break apart as it cooks. Then he took a blowtorch to it - see the picture above. 8This was part of a food photography discussion, where Chef Ollier and photographer Mark Merryweather showed us how they work together to style and photograph the gorgeous photos for Certified Angus Beef. Us food bloggers got extra meta and Instagrammed a picture of Mark's pictures. It's food photography all the way down!
CertAngusBeef-GrillTalk-1020358
45 day dry aged strip loin roast

"In the meat community, it is our responsibility to use all of the animal." - Phil Bass

But the most impressive thing about the class? The people.

Chef Pado and a brisket

First were the employees of Certified Angus Beef. They care about their work, and it shows. I chatted with them as we worked through the classes, and at meals we got to sit down and talk. One dinner I was across from Jennifer Kiko, Certified Angus Beef's blogger at GoRare.com, and another I was next to Chef Ollier. They are passionate about what they do and how they do it, and just good people - I enjoyed the chance to relax over a good meal and have conversations with them.

CertAngusBeef-GrillTalk-1020379
Bloggers in their natural habitat: group selfies

Then there were my fellow food bloggers. We're unique, us food bloggers - smartphones in one hand, butcher's knife in the other. 9And notebook in the third hand, and the Real Camera in the fourth…if an octopus ever takes up food blogging, it will be a natural. Frankly, it's a miracle I didn't lose a finger. Good thing they asked us to wear cut resistant gloves. Blogging is normally a solitary experience, with communities formed through Twitter; it was great to meet in real life. I rarely get to talk shop about food blogging itself - cameras and technology, ad networks, software we're using10They shamed me into using my long dormant Instagram account. Stay tuned., conferences to go to - it was a lot of fun to talk with people who share my passion for online food writing. Craig and Clint swapped one liners, Kita and Erin shared stories about their travels to Southeast Asia, and Chris and I were partners for the butchering. I'm sure the seam between the muscles is in there somewhere, if we can just find it…

CertAngusBeef-GrillTalk-1020304
Insert your own "Blogger Meat" joke here

I'm a committed carnivore. Meeting the people at Certified Angus Beef made me feel better about that; they care about the quality and welfare of the cattle they are serving us. Thank you to Certified Angus Beef for the visit; it was a fantastic couple of days of learning, and I would do it again in a heartbeat. 11And…now I have email addresses for a beef scientist and chef - I hope I don't wind up on their blacklist due to all my questions.

CertAngusBeef-GrillTalk-1020250

What do you think?

Questions? Other ideas? Leave them in the comments section below.

Enjoyed this post? Want to help out DadCooksDinner? Subscribe to DadCooksDinner via eMail or RSS reader, recommend DadCooksDinner to your friends, and buy something from Amazon.com through the links on this site. Thank you.

New Video: How to Rotisserie a Pineapple

June 18, 2015 by Mike Vrobel 2 Comments

Rotisserie_Pineapple_2

New video! How to Rotisserie a Pineapple:

Recipe here: Rotisserie Pineapple

What do you think?

Questions? Other ideas? Any other rotisserie videos you want to see? Leave them in the comments section below.


Enjoyed this post? Want to help out DadCooksDinner? Subscribe to DadCooksDinner via eMail or RSS reader, recommend DadCooksDinner to your friends, and buy something from Amazon.com through the links on this site. Thank you.

Five Fun Food Finds June 2015

June 16, 2015 by Mike Vrobel 4 Comments

Chefn Fresh Force Citrus Juicer
Chef'n Fresh Force Citrus Juicer

1. Chef'n Fresh Force Citrus Juicer

I go through a lot of lemon squeezers. They last a few years before I wear them out. Then they chip, flake, or break at the hinge, and I'm on to the next one. (I buy a lemon squeezer and use it for lemons, limes, and smaller oranges - you don't need three different sizes.) The Chef'n Fresh Force Citrus Juicer is my new favorite. The geared hinge means my wife and kids can now juice lemons without straining. (This might be a bad thing - when my daughter figured out she could squeeze lemons, she went on a  lemonade jag, and juiced three bags of lemons in a week.) I'm a little worried about the plastic parts, but it's lasted six months. I assume it will break eventually - they all do - and when it does, I'm buying another one.

2. How to Grill a Whole Fish, Because It's Just the Best Thing to Do via Foodspin.Deadspin.com

You can also keep the skin from attaching to the hot grill by using a specialized fish basket for grilling your fish. That's really not necessary, though, and it's especially silly if you're short on money or space for buying and storing single-use tools you'll only haul out once or twice a year. Just clean and oil your grilling grate, okay? You can do it. If you don't have a sturdy brush, use a few big wads of crumpled aluminum foil. Rub it down with canola or peanut oil when you're done scrubbing.

Albert Burneko's recipes over at Foodspin are funny, profane, rambling, and written the way I wish I had the guts to write. His recipes are stories that wander through the kitchen on the way to the finished dish, and are a joy to read. I wish he didn't swear as much as he does - the paragraph above is the only one I could pull out [Sorry, Dad Moment], but I'm not sure his stories would work as well as they do without the profanity.

3. What's on the Grill #317: Mesquite Grilled Porterhouse via AnotherPintPlease.com

I can already hear it. "Wait, Mike grilled another steak?" Yeah. Shocking, I know.

Mike's gorgeous photography got to me…again. This post made me stop at the store on the way home and pick up some ribeyes.

4. Crosscut, Butter-Basted Hasselback Potatoes via The Culinary Fanatic YouTube.com channel

5. An Illustrated History of Barbecue in America via FirstWeFeast.com

A quick overview of southern barbecue history - from Clarissa Wei at FirstWeFeast.com

What do you think?

Anything I missed? What are your fun food finds? Leave them in the comments section below.

Enjoyed this post? Want to help out DadCooksDinner? Subscribe to DadCooksDinner via eMail or RSS reader, recommend DadCooksDinner to your friends, and buy something from Amazon.com through the links on this site. Thank you.

Sous Vide 6 Hour Baby Back Ribs

June 11, 2015 by Mike Vrobel Leave a Comment

A pile of cooked and sauced sous vide baby back ribs

Sous Vide 6 Hour Baby Back Ribs. Looking for good ribs with minimal effort? Step right up, I have just the recipe for you.

A pile of cooked and sauced sous vide baby back ribs
Sous Vide 6 Hour Baby Back Ribs

It's not as distinctive as 48 hour sous vide ribs, and it's not the ultimate in barbecued ribs. 6 hour sous vide ribs are for busy people who want to put a good dinner on the table. People who want tender ribs, using modern cooking science, but have other things they have to do. 12Like picking kid 1 up from lacrosse camp after dropping kid 2 off at basketball camp and heading for kid 3's Tae Kwon Do lessons. Then we have to get home for dinner. Yikes.

The other advantage to this recipe? Freezer ribs. I buy slabs of ribs when they go on sale. Seasoned with salt and pepper, vacuum sealed, and tossed in the freezer, they're ready to go. All they need is an extra hour of cooking - drop them in the sous vide between 6AM and Noon, and dinner is ready by 7PM. Cut open the bag and serve, easy peasy.

I'm changing things up a bit - part of all the sous vide ribs I tested - and making these Asian style, with a Teriyaki sauce inspired glaze. Also, since it's summer, I'm searing them on the grill instead of under the broiler. My grill is much hotter than my broiler, and there's less cleanup.

Sous Vide 6 Hour Baby Back Ribs | DadCooksDinner.com
Ribs in the water bath
Sous Vide 6 Hour Baby Back Ribs | DadCooksDinner.com
A quick sear on the grill
Sous Vide 6 Hour Baby Back Ribs | DadCooksDinner.com
Done, ready to serve

What do you think?

Questions? Other ideas? Leave them in the comments section below.

Related Posts

Sous Vide 48 Hour Baby Back Ribs
Sous Vide Pork Shoulder Steaks with Purple Cabbage Slaw
Grill Smoked Baby Back Ribs (Grilling Basics)
Sous Vide Short Ribs Recipe (48 hours to tenderness)
My list of Sous Vide Recipes

Enjoyed this post? Want to help out DadCooksDinner? Subscribe to DadCooksDinner via eMail or RSS reader, recommend DadCooksDinner to your friends, and buy something from Amazon.com through the links on this site. Thank you.

Sous Vide 48 Hour Baby Back Ribs

June 10, 2015 by Mike Vrobel 10 Comments

Sous Vide 48 Hour Baby Back Ribs | DadCooksDinner.com
Sous Vide 48 Hour Baby Back Ribs

This recipe is modernist cooking as witchcraft. It turns the familiar - baby back ribs - into something completely different.

Baby back ribs are shreddable, fatty, and a little dry, right?

What if we take advantage of the precise cooking temperatures available sous vide, and cook the ribs to medium (141°F) for two days? We get baby back ribs that look and cut like pork chops, with a hint of pink in the middle, and firm meat that slices instead of shredding. But the ribs are also fall off the bone tender. If you're looking for something new in your cooking, give 48 hour baby back ribs a try.

When I cook sous vide for long times - 24 hours or more - two strange things can happen. (And, just to confuse me more, they don't happen all the time.)

  1. The vacuum bag puffs up, and I get "floater ribs". Gas must be escaping from the ribs, inflating the vacuum sealed bag. I turn the rack from my SousVide Supreme sideways so it holds the bags underwater for multi-day cooks.
  2. The ribs come out of the bag olive-green. (This isn't just pork - my long cooking beef recipes have a similar color). This color doesn't seem to affect the taste, but it doesn't look great. I sear the ribs, then coat them in barbecue sauce, to make sure the odd color doesn't scare the kids off.

I've Googled around, and dug into a few sous vide specific websites, and I can't find an explanation for either of these. If you know the science behind these phenomena, can you explain in the comments, below? Thank you.

Sous Vide 48 Hour Baby Back Ribs | DadCooksDinner.com
Vacuum sealing the ribs
Sous Vide 48 Hour Baby Back Ribs | DadCooksDinner.com
Done - with that distinct 48 hour, melt in your mouth sous vide texture.

What do you think?

Questions? Other ideas? Leave them in the comments section below.

Related Posts

Sous Vide 6 Hour Baby Back Ribs
Sous Vide Short Ribs (48 hours to tenderness)
Sous Vide Pork Shoulder Steaks with Purple Cabbage Slaw
Grill Smoked Baby Back Ribs (Grilling Basics)
Sous Vide Flat Iron Steak (24 hours to tenderness)
My list of Sous Vide Recipes

Enjoyed this post? Want to help out DadCooksDinner? Subscribe to DadCooksDinner via eMail or RSS reader, recommend DadCooksDinner to your friends, and buy something from Amazon.com through the links on this site. Thank you.


Sous Vide Baby Back Ribs Showdown - 48 Hour vs 6 Hour

June 9, 2015 by Mike Vrobel 16 Comments

Sous Vide Baby Back Ribs Showdown
Sous Vide Baby Back Ribs Showdown: 48 hour on the right, 6 hour on the left

I wanted to sous vide a rack of baby back ribs - they were on special at my local grocery store, and I've been meaning to try pork ribs sous vide. When I went looking for recipes, I found out there were two schools of thought on how to sous vide ribs:

  1. 6 hours at 167°F/75°C. Use sous vide as a precise version of low and slow barbecue. Set the sous vide machine to 167°F, wait six hours, and pull out tender, shreddable ribs.
  2. 48 hours at 141°F /60.5°C. Cook the baby back ribs like pork chops…for a very long time. In this method, you let the ribs cook for at least 24 hours - I go with 48 hours

That got my curiosity going - what's the difference? Which should I use? So, I ran back to the store, picked up a second slab of ribs, and plugged in my sous vide cookers. One batch went for two days, and the second went for four hours. Which contender came out on top?

Sous Vide Baby Back Ribs-0805

In the right corner… 6 hour, 167°F Ribs

Cooking at traditional "low and slow" temperatures results in a traditional rib, with tender meat that comes off the bone in shreds. The results are like oven baked ribs, but they're not as good as what you'd get from a true barbecue smoker. 2You lose the smoke and the crusty "bark" on the outside. Still, they're good ribs, especially slathered with a layer of barbecue sauce and run under the broiler to crisp up. If you're cooking for people who - ugh - boil their ribs to "tenderize" them before finishing on the grill, make these instead.

Sous Vide Baby Back Ribs-0725

In the left corner…48 hour, 141°F Ribs

This is modernist cooking, using food science and precise temperatures. The long cooking time breaks down the collagen in the ribs, even at this low of a temperature, resulting in tender ribs, but the meat doesn't dry out because of the low cooking temperature. These ribs are a revelation, with meat that slips right off the bone when you take a bite. It is perfectly tender, but still has a hint of pink and medium doneness. It is like biting into the most tender pork roast you've ever had.

The winner is…

Which do I prefer? The 48 hour ribs. I'm definitely going to make those again. The 6 hour ribs are a good, not great version of traditional ribs. I'd rather fire up my grill and get a good dose of smoke and some bite to the outside of the ribs. The 48 hour ribs are something completely different, and worth their own cooking technique.

I do think 6 hour ribs have their place. Sometimes life gets in the way, and dinner is about getting good food on the table instead of searching for the perfect meal. A bag of ribs in the freezer means I'm ready to go - I can drop them in the sous vide at lunchtime and get back to work. Then I have tender ribs ready any time I need them, between 6PM and 9PM; cut open the bag, brush with sauce, run the ribs under the broiler for a couple of minutes, and I have a minimal effort dinner. 2Sure, if I'm on the ball, I can do this a couple of days ahead of time and make the 48 hour ribs. But I can't seem to make that work in real life - dinner two days from now? I'm dealing with a baseball/softball double header tonight - I don't have time for that!

Recipes

  • 6 Hour Sous Vide Baby Back Ribs
  • 48 Hour Sous Vide Baby Back Ribs

Notes

  • Owning multiple sous vide units comes in handy when I'm doing tests like this. And, I have to say, I really like the SousVide Supreme unit for multi-day cooking. The insulated, one piece body with a lid holds on to heat better than my other units, and I don't have to worry about evaporation.

What do you think?

Questions? Other ideas? Leave them in the comments section below.

Related Posts

48 Hour Sous Vide Grilled Beef Short Ribs
Sous Vide Carnitas
Sous Vide Rack of Lamb With Dijon Bread Crumb Crust


Enjoyed this post? Want to help out DadCooksDinner? Subscribe to DadCooksDinner via eMail or RSS reader, recommend DadCooksDinner to your friends, and buy something from Amazon.com through the links on this site. Thank you.


New: Rotisserie Tools Page

June 2, 2015 by Mike Vrobel Leave a Comment

IMG_2440-Rotisserie Equipment

To support my "How to Rotisserie Grill" series of books, I added a Rotisserie Tools and Accessories page to the blog. (If you're on DadCooksDinner.com when you read this, look at the menu bar at the top for the "Tools >>" dropdown.) This page is my one-stop shop for the equipment recommendations from my books. Check it out, and let me know if there is anything else I should add.

Cast Iron Roast Duck Legs with Potatoes and Shallots

May 28, 2015 by Mike Vrobel 17 Comments

Cast Iron Roasted Duck Legs

This recipe is inspired by duck legs confit, where duck legs are submerged in duck fat and poached until tender and shreddable. Duck legs confit are fanstastic…but there's a lot of waiting, with a total cooking time of up to 2 days.

I don't have two days - I have to get dinner on the table tonight. I'm making pan-roasted duck legs, turned into a one-pan meal with a layer of potatoes and onions. I'm not going to let all that delicious duck fat go to waste!

The key to this recipe is covered cooking for the first half hour in the oven, braising the duck legs and potatoes. 3I tried cooking the legs for an hour, uncovered, thinking I'd get better browning; all I got was chewy duck legs. Then the lid comes off and the duck legs brown in the heat of the oven.

Cast Iron Duck Legs-0750
Cast Iron Duck Legs-0759
Cast Iron Duck Legs-0777

What do you think?

Questions? Other ideas? Leave them in the comments section below.

Related Posts

Cast Iron Brussels Sprouts Saute
Cast Iron Roasted Butterflied Chicken
Cast Iron Spiral Skillet Potatoes
Sous Vide Duck Legs
Smoked Duck on a Kettle Grill

Enjoyed this post? Want to help out DadCooksDinner? Subscribe to DadCooksDinner via eMail or RSS reader, recommend DadCooksDinner to your friends, and buy something from Amazon.com through the links on this site. Thank you.

Cleaning Cast Iron

May 26, 2015 by Mike Vrobel 1 Comment

Cleaning Cast Iron
Cleaning Cast Iron

Here’s my next step into the cast iron wars:

You can wash your cast iron pan with dish soap.

I know, I know, all of the cast iron zealots are rending their garments, shouting “Blasphemer!”. Really, it’s OK. Soap won’t ruin your seasoning. This is another tip passed down from Grandma that was correct back in the day, but is no longer true.2Like seasoning your cast iron with lard. Nowadays, dish soaps are milder, and are safe to use to clean a pan - which is good news when you’re trying to get sausage gravy out of your fry pan. Sometimes a little soap goes a long way.

Now that I’ve unleashed he…um, opened the floodgates, here is how I clean cast iron:

1. Scrape

When I’m done cooking, I scrape the pan with my flat edged metal spatula, trying to work any stuck bits of food loose. Then I leave the pan on the stove to cool down. Once dinner is over I check the pan; if anything is stuck to the surface, I scrape it again with my spatula. For a surprising amount of food, this gets most of the gunk removed and ready to brush away with the next step…

2. Rinse and Scrub (maybe with…dish soap….dun dun DUNNNNN)

This is where the rubber meets the road…um, I mean, the bristles meet the iron. I run hot water from my faucet, and scrub the inside of the pan out with a stiff-bristled brush (like this one from Lodge). If that’s not enough to get the pan clean, I add a couple of drops of liquid dish soap and scrub harder. (Especially if there are any sticky spots in the coating; sticky means the oil has not bonded with the pan, and it needs to be cleaned off.). Brushing usually finishes the job, but sometimes I have to bring out the big guns…

3. Scrape (again)

When my cast iron is really messy, even the brush can’t get everything. That’s where I turn to my two secret weapons:

  • Lodge plastic scraper
  • A chain mail cast iron scrubber

The plastic scraper is good for working stuck-on pieces of carbonized food loose from the pan; the chain mail scrubbie is good when the whole pan is covered with stuck-on piece of carbon. 2And using chain mail lets me feel like a Ranger from the North. After scraping, I go over the pan again with the stiff bristled brush. At this point, the pan should be clean.

4. Dry

Never, ever put a cast iron pan away wet. I wipe the pan down with a paper towel, then set it on the stove, turn the burner to medium, and let the pan heat up for five minutes to boil away any water.

5. Season

If the pan looks good, with a bright, shiny, black coating, then I’m done. I let it cool down on the stove top, and then put it away with my other cast iron.

If the pan’s seasoning doesn’t look right - If I see silver bumps showing through, or the seasoning looks dry, thin, or scraped off in sections - then I run the pan through another seasoning cycle. Wipe it with a thin coat of oil, buff the oil until the pan looks dry, put the pan in a 500°F oven for one hour, and let the pan cool in the oven. (See my seasoning cast iron post for more details.) Then I make sure to use the pan a lot for the next couple of weeks to build the seasoning back up.

Done!

That’s it. I know it looks like a lot of work. 3It is a lot more work than a teflon pan. Cast iron is worth it, if you have the time to care for it. But, I usually don’t have to go through all this. Once the pan has a good base of seasoning built up, cleanup only needs Steps 1 and 2 (scrape when done cooking, brush with hot water) and Step 4 (dry). That is, unless I cook something sticky, like sausage gravy or a pan sauce. Then I’m going to need to go through all the steps above to get the pan clean.

What do you think?

Cast iron questions? Any other cast iron topics I should cover? Anything I left out? Impassioned speeches about the evils of soap on cast iron? Talk about it in the comments section, below.


Related Posts

Cast Iron Cooking series:

  1. Why Cast Iron?
  2. The 12 Inch Cast Iron Skillet
  3. Seasoning Cast Iron
  4. Cleaning Cast Iron [This Post]
  5. Heating Cast Iron [Coming Soon]
  6. Cast Iron's Best Friend - the Flat Edged Metal Spatula [Coming Soon]
  7. Other Cast Iron Accessories [Coming Soon]
  8. Stripping Cast Iron [Coming Soon]
  9. Cast Iron Recipes


Enjoyed this post? Want to help out DadCooksDinner? Subscribe to DadCooksDinner via eMail or RSS reader, recommend DadCooksDinner to your friends, and buy something from Amazon.com through the links on this site. Thank you.

Grilled Double Cut Ribeye Pork Chops With Rosemary, Honey, and Lemon Glaze

May 21, 2015 by Mike Vrobel 2 Comments

Grilled Double Cut Ribeye Pork Chops With Rosemary, Honey, and Lemon Glaze

I had a plan - and, as usual, life got in the way.

My Memorial Day post was planned months ago - double cut pork chops, inspired by dinner at a local Italian restaurant. I have to kick off grilling season the right way, or I’ll get my food blogger license revoked.

Then spring sports season started, and I have been scrambling ever since. Saturday was going to be my big blog dinner until I realized the afternoon was a doubleheader, with me as the substitute coach for my daughter’s softball team. A leisurely dinner became: “quick, throw your cleats in the car, we have to pick up your brother and get to the grocery store for the pork chops!”

That’s OK - a quick brine, a hot fire, and double cut ribeye chops are ready in about a half an hour. You’ll have to special order these monsters - ask your butcher for double cut pork chops, or to cut a rack of pork every two bones, about 2 ½ to 3 inches thick. These are monster chops - each one is enough to feed two normal people; two of them fed my family of five, with a couple of picky eaters in the kids.

There is no way to cook this thick of a chop over direct heat; it would burn way before the inside finished cooking. Instead, I sear and move - sear the chops over direct heat, move them to indirect heat, and finish them slowly with the lid closed, brushing them with an Italian inspired honey glaze. I cook the chops until my probe thermometer reads 145°F plus a 3 minute rest. This makes them safe to eat, according to the new USDA guidelines. But with chops this thick, they need a longer rest - say 10 minutes - so the juices don’t come rushing out when I cut into the pork.

Double cut pork chops collage - raw chops on top, basting on the grill on the bottom left, grilled on the bottom right | DadCooksDinner.com

What do you think?

Questions? Other ideas? Leave them in the comments section below.

Related Posts

Grilled Pork Chops with Bourbon Brine and Baste
Grilled Ribeye Pork Chops with Smoked Spanish Paprika Rub
Grilled Thick Pork Chops with Adobo Spice Paste
My Grilling Recipes Index

Enjoyed this post? Want to help out DadCooksDinner? Subscribe to DadCooksDinner via email or RSS reader, recommend DadCooksDinner to your friends, and buy something from Amazon.com through the links on this site. Thank you.

Family Dinners for an Even Busier Cook

May 19, 2015 by Mike Vrobel 7 Comments

Bagged veggies and dips - dinner's up.

The Spring sports scramble is on.

Two out of three kids play baseball and softball, and I always wind up being the “parent volunteered to be assistant coach.” 4I’m actually getting better at coaching baseball and softball - mainly by watching the other coaches, and shamelessly stealing any good ideas I see. My youngest decided he doesn’t like baseball - no thank you, too much chance of getting beaned - so he took up Tae Kwon Do. 2No, I don’t understand it. You don’t want people throwing baseballs at you, but trying to kick you in the head is OK? For some reason, he’s fine with that - in fact, he loves it.

What does this have to do with Dad Cooks Dinner? When the kids were younger, I thought I had it rough. But…I had time to get dinner on the table most nights; I’d have to get creative three or four nights a week. Now? Between practices, games, and the usual school functions, we are busy almost every night of the week, plus weekends - sometimes with double or tripleheaders. 3Rainouts are a nightmare - especially when the game I’m at decides “I don’t think the heavy stuff’s gonna come down for quite awhile” while the other game cancels at the first drop of rain, leaving one kid stranded for a ride home. Thank goodness we have the group of parents we’ve been seeing every summer for years, who are willing to help out with a ride home.

Instead of living to eat, we're often eating to live. Dinner is forced nutrition - “Get something in your stomach with protein in it, or you’ll be starving at shortstop by the third inning!” The drive home is half going over the game, half begging for ice cream. 4I try not to give in more than once every couple of weeks on the ice cream. Complaining about the umpires? Well, I give in to that one more often..

On game nights, I cheat shamelessly. Here are our go to diners, from least to most amount of time to prepare:

  • Super sandwiches: Cold cuts, cheese, a loaf of bread, pickles, mustard, and a bag of pre-washed shredded lettuce (for the kids) and baby spinach (for the parents) so we have something green.
  • Taco night: Tortillas, leftover shredded roast beast (whatever I cooked Sunday), salsas, sour cream, shredded cheese, pickled jalapeños, and the ever present shredded lettuce and baby spinach
  • Quesadilla night: Same as tortilla night, without the leftover meat - I make the quesadillas on our electric griddle - think grilled cheese for dinner, but the Mexican version.
  • Breakfast for dinner: What's that? The refrigerator is bare? Time for scrambled eggs and toast.
  • Lettuce wraps: If only one kid has a game, sometimes I can pull off a quick pan of ground turkey with Chinese flavors, then serve it with bibb lettuce or romaine hearts.

I used to be the kind of cook who spent Saturday mornings at the farmer’s market, carefully choosing local produce. 5Now my Saturday mornings are at a baseball field, and I’m lucky if I remember my CSA box on the way home on Friday. Maybe I’ll get to the Farmers Market in July, when the season is over? Nowadays, for vegetables, if it’s sold pre-cut at my local grocery store, I buy it. Bags of fresh broccoli, brussels sprouts, green beans, mixed vegetables, snap peas - microwave and go. Salad is quick - a bag of mixed green salads or shredded lettuce. The most common vegetables are ones we can eat without cooking - pre-cut carrots, grape tomatoes, and mini-sweet peppers. 6They’re lifesavers, those mini-sweets - a quick snack that even the kids will eat. And my “salad” is often a fistful of baby spinach. We also live on refrigerator friendly jarred vegetables - all sorts of different pickles and salsa.

I’m hanging on, trying to get us through to July, when baseball and softball seasons are over.7What’s that? We’re leaving for a vacation in Yellowstone Park on July 1st? Gulp. Why do we go through all this? Because, as Gretchen Rubin said: “The days are long, but the years are short.” There’s going to come a day when they’re “too old for sports.” They’re not there yet…but I can see it from here. For now, they enjoy playing and being part of the team with their friends. I want to keep that going as long as we can.

What do you think?

Questions? Other ideas for instant weeknight dinners that don’t involve a drive-through? Leave them in the comments section below.

Related Posts

Weekly Dinner Plans
Family Dinnner and Small Kids


Enjoyed this post? Want to help out DadCooksDinner? Subscribe to DadCooksDinner via eMail or RSS reader, recommend DadCooksDinner to your friends, and buy something from Amazon.com through the links on this site. Thank you.

Rotisserie Turkey Breast Mole

May 14, 2015 by Mike Vrobel 1 Comment

Rotisserie Turkey with Mole Sauce

Rotisserie Turkey with Mole Sauce
Rotisserie Turkey Breast with Mole Sauce


Here’s a preview from my upcoming book, Rotisserie Turkey. Enjoy!


Turkey in Mole Poblano sauce is Mexico’s celebration meal. Sweet, spicy, and complex, a true Mole Poblano is an all day affair - multiple days, actually - that will test your dedication to cooking. 8Mole rhymes with Olay, not the small furry rodent. Though my kids giggled all through dinner saying they were eating “mole” sauce.

I’ve made a few Moles in my day, and they’re fantastic, but they are all day affairs. I am willing to take a shortcut, and use Mole paste. 2I’m not the only one - in Mexico, most large markets have vendors who specialize in mole pastes. You pick out the Mole you want from their towering pyramids of paste, they scoop it into a plastic bag, and your Mole is ready with minimal effort.

Rotisserie Turkey with Mole Sauce-0637

You can buy mole paste at your local Mexican mercado or well stocked gourmet food store, which do most of the cooking ahead of time. Doña María brand is widely available, and it is fine. My favorite is Seasons of My Heart, but I’m biased - I spent a week at Seasons of My Heart cooking school in Oaxaca.

Recipe: Rotisserie Turkey Breast Mole

Equipment

  • Grill with Rotisserie attachment (I use a Weber Summit with an infrared rotisserie burner. Here is the current version of my grill.)
  • Aluminum foil drip pan (9"x13", or whatever fits your grill. I use an enameled steel roasting pan.)
  • Instant Read Thermometer

Rotisserie Turkey with Mole Sauce-0700

Notes

  • No rotisserie? No worries. Set your grill up for indirect medium heat, with the drip pan in the middle, as described. Then, instead of the rotisserie, put the grill grate back in the grill, and set the turkey on the grate over the drip pan. Follow the rest of the instructions as written.
  • No grill? No worries. Preheat the oven to 350°F and bake the turkey.

What do you think?

Questions? Other ideas? Leave them in the comments section below.

Related Posts

Rotisserie Turkey Breast, Dry Brined with Italian Spices

Rotisserie Turkey Breast with Spice Rub

Rotisserie Turkey, Dry Brined with Orange and Spices

Enjoyed this post? Want to help out DadCooksDinner? Subscribe to DadCooksDinner via eMail or RSS reader, recommend DadCooksDinner to your friends, and buy something from Amazon.com through the links on this site. Thank you.

Grilled Thick Cut New York Strip Steaks, Reverse Seared

May 7, 2015 by Mike Vrobel 14 Comments

Grilled Thick Cut New York Strip Steaks, Reverse Seared

When I have the time to do it right, I reverse sear my steaks.

What is reverse searing? Set the grill up for indirect high heat, and put the steak over the indirect side - away from the heat - and let it slowly come up to temperature. Then move it over the high heat side of the grill for a quick sear to finish the steak.

Why reverse sear? I covered this in my Reverse Sear vs Sear and Move post earlier this week, but here are the highlights:

  • Edge to edge pink - indirect heat cooks the steak evenly, and the quick sear at the end doesn't have time to overcook the middle. Goodbye to the bullseye of doneness - from well done at the edges through to medium-rare in the middle; reverse sear steaks are mostly medium-rare, with a thin layer of seared crust on the outside.3My mom is a rare steak fanatic. In my mind, I'm always trying to cook it the way she likes it. A friend described it as "Chase the cow around the kitchen until it breaks a sweat, then give me a piece."
  • Tender meat - the longer the steak is between 100°F and 120°F, the more tender it is. (Enzymes work on the steak in that temperature range, tenderizing the meat.) Starting the steak with indirect heat moves it slowly through that zone, resulting in a tender steak with a buttery taste.
  • More juices in the meat - testing has shown that the steaks hang on to more of their juices when the searing is delayed until the end of the cooking time.

Now, reverse searing does take more time - about a half an hour to cook the steaks. That’s the reason I don’t reverse sear all the time; sometimes dinner needs to be on the table right away. But, like I said, when I can do it right, this is the cooking method I use. Take the time, and your patience will be rewarded.

Recipe: Grilled Thick Cut New York Strip Steaks, Reverse Seared

Equipment

  • Grill (My trusty Weber Kettle)
  • Thermometer (A probe thermometer is almost required for this - if you have to keep opening the grill to use an instant read thermometer, it will take longer for the steak to come up to temperature.)

Grilled Thick Cut New York Strip with Sear and Move-0812
Salt the steaks and let them rest for an hour

Grilled Thick Cut New York Strip with Sear and Move-0820
Set the grill up for indirect heat

Grilled Thick Cut New York Strip with Reverse Sear-0843
Cook at indirect to 115°F for medium-rare, then sear

Grilled Thick Cut New York Strip with Reverse Sear-0874
Beautiful medium-rare, edge to edge pink

Notes

  • Reverse searing needs a thick steak - at least an inch and a half, and two inches is better. Thin steaks are going to cook through as you sear them, so this technique is best reserved for the thick cuts. A thick cut New York Strip is a lot of beef; unless I'm serving the heartiest of eaters, I cut the steak crosswise into two serving pieces.
  • Don't worry about the steak sticking to the grill when you try to flip it. The surface is already cooked most of the way from the indirect heat cooking, so it won't stick. Flip often - it's the key to keeping the steak cooked evenly.
  • Thank you to Certified Angus Beef for the gorgeous New York Strip steaks that inspired this post.

What do you think?

Questions? Other ideas? Leave them in the comments section below.

Related Posts

Grilled Thick Cut New York Strip Steaks, Sear and Move Style
The Best Grilled Steak: Reverse Sear or Sear and Move?
Grilled Cowboy Chop - Double Cut Ribeye, Reverse Seared

Enjoyed this post? Want to help out DadCooksDinner? Subscribe to DadCooksDinner via eMail or RSS reader, recommend DadCooksDinner to your friends, and buy something from Amazon.com through the links on this site. Thank you.

The Best Grilled Steak: Reverse Sear or Sear and Move?

May 5, 2015 by Mike Vrobel 10 Comments

Reverse Sear vs Sear and Move


Thank you to Certified Angus Beef for the New York Strip steaks used in this week’s posts.


I want my steak grilled, and cut thick. I want pink meat surrounded by a browned crust, with a hint of char at the edges. Thick steaks need special handling - don’t cook them over direct heat. The outside will burn before the inside reaches even the bloodiest rare.

Years ago, I learned the Sear and Move technique:

  • Set the grill up with a two zone fire, one zone of high heat, and another without any heat at all.
  • Start the steak directly over high heat, and sear it until it is nicely browned on both sides.
  • Move the steak to the indirect zone, away from the direct heat. Close the lid, and cook to ten degrees below your target temperature - 125°F gives me medium-rare with carry-over heat.

This is how I’ve cooked steaks for years, and it does give me that beautiful pink center, and a crackling brown crust. But…it also gives me a bulls-eye of doneness between the two. There is a band of gray surrounding the pink center. That didn’t bother me, until…sous vide came along.

I’m spoiled by sous vide steak, cooked to the exact temperature I want, edge to edge pink, with a sear on the outside.

Now I’m experimenting with the Reverse Sear method, simulating low and slow sous vide cooking on the grill by reversing the heat order of grilling:

  • Set the grill up with the same two zone fire, high heat on one side, no heat on the other.
  • Start the steak on the indirect heat side, away from the fire. Close the lid, and cook until the steak is twenty degrees below your target temperature - 115°F for medium rare.
  • Move the steak over the fire on the direct heat side, and quickly sear the outside, about two minutes a side, flipping often. Carry over heat plus the searing will take you to the final temperature.

Note that both methods rely on a good probe thermometer - don’t trust a steak to a ticking clock, and the uncertainty of a grills’ internal temperature. A thermometer is the only way to be sure. That said, probes can burn out in the heat of a grill. Unless your probes are rated for high temperatures, keep them away from the fire on the indirect side of the grill.

I’ve enjoyed my Reverse Sear steaks - I loved the even pink in the middle - but I noticed that I wasn’t getting quite the same grilled crust. And, they certainly seemed to take longer - sometimes much longer - to finish cooking. Is the reverse sear really worth it? That’s when a care package arrived from Certified Angus Beef - a box of four gorgeous New York Strip steaks. 2Gift steaks? I love being a food blogger. Time for a head to head test - what method reigns supreme?

I fired up my trusty Weber kettle, baskets of charcoal pushed to one side. The steaks go on the grill grate - two over the coals, two over indirect heat.

Reverse Sear Vs Sear And Move-0826

Griller's log:

  • Steaks on the grill: 5:42PM - Sear and move over direct heat, Reverse Sear over indirect heat. Lid closed except when flipping every two minutes
  • Sear done - 5:48PM - 6 minutes elapsed. Move the Sear and Move steaks to the indirect heat side of the grill. 2I charred the edges of one of the Sear and Move steaks - it had a thick fat cap, and flared up while I had the lid closed.
  • Sear and Move complete: 5:56PM - 14 minutes elapsed - 125°F internal, take the Sear and Move steaks off the grill. (Reverse Sear steaks at 95°F internal). 3I left the probe in the Sear and Move steak after I took it off the grill. The internal temperature temperature peaks four minutes later, just below 135°F, then slowly starts to drop.
  • Reverse done: 6:02PM - 20 minutes elapsed - 115°F internal. Move over direct heat to sear, flipping every minute.
  • Reverse Searing complete: 6:06PM - 24 minutes elapsed - Reverse Sear steaks are browned, take them off the grill. 4Reverse searing browns quicker, and has less flareups. My understanding is the surface of the meat dries out as it cooks, speeding up browning - water on the surface has to boil off before browning can occur. We also render some fat during the low and slow part of cooking, cutting down on flareups.

Looks aren't everything…

Here’s how they looked:

Reverse Sear on the left, Sear and Move on the right

The Sear and Move steak was noticeably darker; its sear is a dark brown. The Reverse Sear was less seared - and the sear had a reddish-brown color. I let them rest for 15 minutes, then cut them open:

Reverse Sear on the left, Sear and Move on the right

The Reverse Sear has more pink, but the Sear and Move steak was closer than I thought it would be - only a narrow band of gray around the outside, most noticeable on the top left.

…how do they taste?

Next comes the taste test - also known as Saturday night dinner. My wife, who loves the charred edges of steak, went directly for a Sear and Move piece. I tried them both. There was a distinct difference in flavor - the Reverse Sear steak was noticeably more tender, with a buttery flavor. 5Science aside: My understanding is the buttery flavor is because enzymes work on meat while it cooks, between 100°F and 120°F, tenderizing it as part of the cooking process. The longer you’re in that temperature range, the more tender the meat. Reverse Sear keeps it in that range for much longer, due to the slow rise to the finished temperature. Sear and Move, because it is already heated, moves through that range much faster. The Sear and Move steak had the charred crust, but the Reverse Sear crust isn’t bad. I was a fan of the Reverse Sear, and its combo of the buttery meat and browned crust . My wife, however, tried a piece of the Reverse Sear, said “mmm…that’s good”, and immediately went and demolished her Sear and Move steak. She wants an extra-charred crust more than the buttery interior.

Reverse Sear Vs Sear And Move-0867

How do you like your steak?

So, which is better? Um…it depends. Yes, I know, Mr. Wishy-Washy. But…it really does depend on what you’re looking for:

Sear and Move if you want…

  • Quicker cooking - done in under 15 minutes
  • Thick, dark crust on the outside
  • Good pink center - but a little well done around the outside edges

Reverse Sear if you want…

  • Beautiful pink edge to edge
  • Tender, buttery meat
  • Decent sear on the outside
  • To take your time, relax, and enjoy a beverage while the steak slowly comes up to temperature

Recipes

Want to try both methods yourself? Stay tuned for later this week...

  • Grilled Thick Cut New York Strip Steak, Sear and Move Style
  • Grilled Thick Cut New York Strip Steak, Reverse Seared Style

What do you think?

Questions? Other ideas? Favorite way you cook your steak? Talk about it in the comments section below.

Related Posts

Grilled Tomahawk Steak - Long Bone Ribeye, Reverse Seared
Grilled Cowboy Chop - Double Cut Ribeye, Reverse Seared
Grilled T-Bone Steaks With Olive Oil, Lemon, Garlic, and Rosemary Marinade


Enjoyed this post? Want to help out DadCooksDinner? Subscribe to DadCooksDinner via eMail or RSS reader, recommend DadCooksDinner to your friends, and buy something from Amazon.com through the links on this site. Thank you.

Grill Roasted Asparagus

April 30, 2015 by Mike Vrobel Leave a Comment

Grill Roasted Asparagus

Asparagus means spring - those tall green shoots mean that our long, long winter is over. 6Long winter. Long. L.O.N.G. And did I mention winter was long this year?

Grilling means spring - I can go outside without boots, a parka, and a snow shovel to clean the deck.

Put them together and you see why asparagus is my favorite vegetable to grill. I love to get out there, fire up the grill, and feel the warm spring sun on my face. See the green grass, watch the trees bloom, feel the pitter-patter of the raindrops…darn it, I forgot about spring showers. Oh, well, at least it’s not snowing.2It’s not going to snow, is it? Phew.

I’ve been playing with Weber’s Elevations system. The vegetable basket is a useful gadget. It lifts out of the bracket that plugs into the Elevations grid, so I can use it as a traditional grill basket to start, then set it in the bracket to finish the asparagus with indirect roasting.

The basket holds the asparagus together - hooray, no more losing spears through the grill grates!  It also makes it easy to move the asparagus from direct heat to indirect heat. Direct heat gives the asparagus a sear, so everyone knows it was grilled; indirect heat finishes the asparagus gently, giving thick asparagus spears time to cook through without burning.

Don't just cook the main course on the grill. Impress your guests and grill the the vegetable side as well.

Asparagus, tossed with seasoning and ready for the grill


Notes

  • No Elevations system? No worries. Use any grill basket. I like the Elevations system because it gives me more indirect heating space on the grill by adding extra levels I can use. I was cooking chicken wings as our main course, so the extra space was a lot of help.

Book Review: Three Many Cooks

April 28, 2015 by Mike Vrobel 2 Comments

Three Many Cooks - Book Review

Pam Anderson is one of my biggest cooking influences, and I’ve been hearing stories about her daughters, Maggy and Sharon, since I attended a cooking class of Pam’s back in 2002.

I own all of Pam’s cookbooks, so I was excited to read Three Many Cooks: One Mom, Two Daughters: Their Shared Stories of Food, Faith & Family. I enjoy the stories on their blog, and I wanted to see what they had in a book. I was surprised - these stories cut close to the bone. They talk about love and loss, fear and hope, faith and doubt, dreams and tragedies. They don’t sugarcoat their relationship with each other - they show how they love each other even with their disagreements.

They also show how food is more than just fuel. The stories show the good side of living to eat: bringing everyone together at the table, with a common purpose. How food is central to taking care of a family, celebrating, comforting, and sharing.

As the father of three children, with my oldest inching into his teen years, this book was riveting. This book is the history of a family. From a mom with squabbling kids, to angst-ridden teenagers, to distant college students and empty nest parents, to adults with jobs and responsibilities. They don’t hold back - these are stories of the tough times, as well as the good times, and how both define a family.

Before I read this book, I felt like I knew Pam, Maggy and Sharon in that strange “internet friends” kind of way - we’ve exchanged emails a few times, and I read their blog. (I finally met them all in person at their Big Harvest Potluck blogger get together last year.) This book is exactly what I was looking for - a chance to find out more about the Three Many Cooks, a fun read, and surprisingly emotional. It made me fire up the grill and make Pam’s Lemon Chicken Wings for dinner, to bring my family together at the table. What more can I ask for in a food memoir?

What do you think?

Questions? Other ideas? Leave them in the comments section below.

Related Posts

Road Trip: The Big Harvest Potluck 2014

DadCooksDinner and Pam Anderson, back in 2002

Review: Pam Anderson’s Perfect One Dish Dinners


Enjoyed this post? Want to help out DadCooksDinner? Subscribe to DadCooksDinner via eMail or RSS reader, recommend DadCooksDinner to your friends, and buy something from Amazon.com through the links on this site. Thank you.

Rotisserie Chicken with Coriander and Peppercorn Dry Brine

April 23, 2015 by Mike Vrobel Leave a Comment

Rotisserie Chicken with Coriander and Peppercorn Dry Brine


This recipe is from my book, Rotisserie Chicken Grilling. Looking for answers to all your rotisserie chicken questions? Check out the book here.


Coriander and pepper are a great combination; French Canadians are known for Mignonette pepper, a blend of black peppercorns, white peppercorns, and coriander seed. For this recipe, I sub in a peppercorn blend for the black and white pepper, adding green and pink peppercorns to the mix.

When I’m grinding the spices in my mortar and pestle, I try not to grind them to a powder. Large pieces of coarsely ground pepper and coriander add bursts of flavor as you bite into them; it elevates this simple spice blend into something special.

Recipe: Rotisserie Chicken with Coriander and Peppercorn Dry Brine

Equipment

  • Grill with Rotisserie attachment (I use a Weber Summit with an infrared rotisserie burner. Here is the current version of my grill.)
  • Aluminum foil drip pan (9"x13", or whatever fits your grill. I use an enameled steel roasting pan.)
  • Butchers twine
  • Instant Read Thermometer

wpid7380-Rotisserie-Chicken-with-Coriander-Pepper-Dry-Brine-.jpg

What do you think?

Questions? Other ideas? Leave them in the comments section below.

Related Posts

Rotisserie Chicken with Spanish Smoked Paprika Rub

Rotisserie Chicken Zatar

Rotisserie Chicken with Chinese Oyster Sauce Glaze


Check out my cookbook, Rotisserie Chicken Grilling.

Everything you could ask about rotisserie chicken,
with more than 50 recipes to get you cooking.

It’s available as a paperback, or in Kindle e-book format if you want to download it and start reading immediately!


Enjoyed this post? Want to help out DadCooksDinner? Subscribe to DadCooksDinner using the RSS or Email options on the right, recommend DadCooksDinner to your friends, buy something from Amazon.com through the links on this site, or donate through my tip jar. Thank you.

Rotisserie Chicken Grilling - Book Update

April 21, 2015 by Mike Vrobel 4 Comments

Rotisserie Chicken Grilling Update

Rotisserie Chicken Grilling Update

Now that grilling season is upon us, I’m relaunching Rotisserie Chicken Grilling. The iBooks, Nook and Kobo editions are now available, to go with the paperback and Kindle editions. To celebrate, I lowered the price of the e-book editions to $3.49. 3$3.99 for the iBooks edition - Apple won't let me set the price to end in .49

Check out my updated book pages for Rotisserie Grilling and Rotisserie Chicken Grilling - thanks to booklaunch.io, I have fancy pages dedicated to each of my cookbooks.

Inside Baseball

Here’s a little inside baseball about self publishing a cookbook. I love the e-books I get out of iBooks Author - Apple’s formatting is much nicer than the Kindle editions. If the only thing that mattered was appearance, I’d do exclusively iBooks editions.

But…from my perspective, the market for e-books is on Amazon. I sell four times as many Kindle copies as I do iBooks through Apple's iBookstore. (Nook and Kobo are barely a rounding error - I sell a copy a month I’m lucky in their stores). I wonder if the non-Amazon versions are worth the effort.

For Rotisserie Grilling, the paperback is still outselling the Kindle edition three to one. For Rotisserie Chicken Grilling, though, the kindle edition is slightly outselling the paperback edition. Overall, Rotisserie Chicken Grilling sells a lot less than Rotisserie Grilling - I’m hoping sales will pick up as Summer rolls around.

Kindle Updates

For my Kindle edition readers - if you bought an early copy of Rotisserie Chicken Grilling 2On the Copyright page, version 1.02 or earlier, check the book on Amazon’s “Manage Your Content and Devices” page under “Your Account” - Amazon.com/mn/dcw/myx.html/ - there should be an “update” button next to the book, so you can download the latest version. I fixed a couple of typos, added a better index.

Paperback Updates

For my paperback readers - if you bought the paperback edition of Rotisserie Chicken Grilling through Amazon, the Kindle Matchbook price is “Free” - tough to beat. (Especially since, if you’re reading this, Amazon has Kindle reader software that will work on your computer, tablet, or phone.) Go to Kindle Matchbook on Amazon.com - Amazon.com/gp/digital/ep-landing-page - and click on the Get Kindle Edition button. That will get you full color images and a searchable copy of the book.

Coming Soon

What’s next in my How To Rotisserie Grill series? It’s a no brainer - every year I get a surge of people looking for rotisserie turkey on Thanksgiving. I'm rolling my years of turkey day advice into Rotisserie Turkey Grilling, with a personal goal to have it ready by Thanksgiving 2015. To make that happen, Rotisserie Turkey Grilling will be a smaller book than the first two, with a lot of content from the blog, including answers to the questions I get every year. 3I’ve done a “how to rotisserie turkey” Thanksgiving post every year since 2009. 2008. Yikes. I’m getting old.

After that? Crazy Rotisserie Grilling is next up. I have a few…let’s just say interesting…ideas for that one. Let me know about the strangest rotisserie recipe you’ve heard of, and it may make it into that book.

What do you think?

Questions? Other ideas? Leave them in the comments section below.

Related Posts

Rotisserie Grilling book page
Rotisserie Chicken Grilling book page


Enjoyed this post? Want to help out DadCooksDinner? Subscribe to DadCooksDinner via eMail or RSS reader, recommend DadCooksDinner to your friends, and buy something from Amazon.com through the links on this site. Thank you.

Grilled Red Pepper, Eggplant, and Garlic Relish

April 14, 2015 by Mike Vrobel 2 Comments

I am desperate. It's spring. I want to grill. It's time. I HAVE TO GRILL.

We had a warm snap before Easter - temperatures in the 60’s! Whoo hoo! And…I had something going on every night this week, where dinner was “quick, sandwiches everyone, we’ve got to get going.”

By Saturday, I was itching to fire up the grill. I woke up to a light dusting of snow on the ground, and 15°F with a strong, driving wind. OK, whatever. I don’t care. I’m grilling tonight, no matter what.

I needed a taste of summer. Like a roasted eggplant, red pepper, and garlic relish, inspired by Serbian ajvar 4Thanks to Mauri and Mike at Sherman Provision, my local butcher, who let me try some last week.. I skipped the traditional long simmered recipe and pulsed the roasted vegetables in my food processor to make a chunky relish. It was exactly what I needed - a reminder that winter eventually has to let go, and there will be sunny days where eggplant and peppers are in season.

Peppers, eggplant, and garlic on the grill

What do you think?

Questions? Other ideas? Leave them in the comments section below.

Related Posts

Grill-Roasted Red Pepper Dip
Smoke Roasted Aioli
Grill Roasted Baba Ghanoush


Enjoyed this post? Want to help out DadCooksDinner? Subscribe to DadCooksDinner via email or RSS reader, recommend DadCooksDinner to your friends, and buy something from Amazon.com through the links on this site. Thank you.

Sausage Gravy (In a Cast Iron Skillet)

April 9, 2015 by Mike Vrobel 5 Comments

Sausage Gravy (In a Cast Iron Pan)

Sausage Gravy (In a Cast Iron Pan)

I've always enjoyed sausage gravy 2I live in Bob Evans' home state, after all. It's impossible to avoid. but I didn't start to obsess about it until a visit to Portland and Pine State Biscuits. 2Before then, the kids refused to try sausage gravy. What’s this white glop you’re pushing? Eat it? You’re kidding, right? Being on the road in Portland made them more adventurous than usual, so they tried it. Now they can’t get enough sausage gravy.

That trip made Sausage Gravy a regular at our Sunday breakfast table. After making it for months, I’ve found it just works better in cast iron. I don’t know why. Heavy duty steel or anodized aluminum pans do the job, but the recipe didn’t come together for me until I cooked it in cast iron. Maybe it’s tradition, maybe it’s the heavy metal, but I’m convinced I need a cast iron pan to do sausage gravy right.

Sausage gravy is barely a recipe - cook a pound of breakfast sausage, then toast flour in the fat and drippings left in the pan. Whisk in milk, and keep whisking until the lumps smooth out and the milk reduces in to a thick gravy. Add salt and (lots of) pepper to taste, and serve on top of biscuits. You can find this basic recipe - with a ratio of 1 pound of sausage, ¼ cup of flour, and 2 cups milk - everywhere on the internet. My big change? I double up on the gravy, because my family can’t get enough. I add a little extra vegetable oil to the drippings in the pan to make sure there’s enough fat, then use ½ cup of flour and 4 cups of milk. 3Yup, that’s it, my big addition to sausage gravy - making more of it.

Recipe: Sausage Gravy (In a Cast Iron Skillet)


What do you think?

Questions? Other ideas? Leave them in the comments section below.

Related Posts

Weekday Oatmeal
Pressure Cooker Giblet Gravy
Cast Iron Roasted Butterflied Chicken


Enjoyed this post? Want to help out DadCooksDinner? Subscribe to DadCooksDinner via eMail or RSS reader, recommend DadCooksDinner to your friends, and buy something from Amazon.com through the links on this site. Thank you.

Seasoning Cast Iron

April 7, 2015 by Mike Vrobel 10 Comments

Seasoning Cast Iron
Seasoning Cast Iron

I’ve been avoiding this post. 4I’m terrible about procrastinating. Hey, I know, I’ll clean the kitchen instead of writing! Let’s do another test on that recipe. Let’s…vacuum the cat? There’s got to be something else I need to do around here.

Why was I procrastinating? Because this post scares me. With this post, I enter the cast iron holy wars. 2Stops, puts on helmet with crossguard, pulls on chain mail gauntlets. Tries to type. Takes gauntlets off, wiggles helmet to get it to fit better, continues typing.

Cast iron is high maintenance, and tricky to care for - until you get used to it. My first few attempts to use cast iron were ugly. Flaking, sticky, rusty - you name it, it went wrong. This is pretty common - everyone struggles with cast iron at first, especially if they don’t use the pan a lot. When people find a technique that works, they think “that’s it! I’ve found the one true grail of caring for cast iron!” They become a cast iron proselytizer, spreading the gospel of their method of cast iron care.

Or, even worse, cast iron care is passed down generation to generation, like a family heirloom. “Of course we do it this way. That’s how Mom learned it from Grandma. Are you insulting Grandma?”

The problem with all this is: cast iron care really isn’t that difficult. The most important thing is to use the pan. If a pan is used regularly, with a light coating of oil, and a good cleaning every now and again, it will season itself. Seasoning improves over time - months instead of days, years instead of months. Everything else is just details - including (gulp) what I’m about to say. I hope I haven’t joined one of the cast iron cults…but as you’ll see, I also have Strongly Held Beliefs about what works and what doesn’t. That doesn't mean that other methods don't work - they proabably work fine, as long as the pan is used reguarly. In other words, please don’t picket my house with “Follow the one true black iron! Death to the cast iron unbeliever!“ signs. If it's working for you, good. Keep doing it. 3Also, please don’t leave ”Are you talking trash about my grandma!?!" comments. Really, Grandma is wonderful. I love her. Everyone loves her. Please don’t hurt me.

Here’s the general idea of cast iron seasoning: at a microscopic layer, cast iron is very porous. Oil gets in those pores, and when an unsaturated oil is heated past its smoke point, it polymerizes into a hard, slick layer on top of the iron. That layer is the seasoning, and it’s exactly what we’re looking for. (Want more science info? Check out these great posts by David Arnold and Kenji Alt).

Enough preamble: here’s how I season a cast iron pan.

Seasoning Cast Iron

Clean the and dry the cast iron pan - wipe it dry, then set it over a lit burner until it is bone dry.
Using a folded paper towel, rub the pan with a thin coat of unsaturated oil. Then, with a new paper towel, buff the pan until it looks dry, as if all the oil was wiped off. (It wasn’t - there’s still a thin layer of oil on there.) Turn the pan upside down and slide it into a 500°F oven; bake it for 1 hour, then turn off the oven and let the pan cool in the oven for an hour or two.

wpid7311-Seasoning-Cast-Iron-7268.jpg
Rubbed with oil - the cast iron has a wet look, but no obvious puddles of oil


wpid7313-Seasoning-Cast-Iron-7271.jpg
Buffing the oil - look right above the towel - you want that dry look all over the pan.

Repeat the process. How many times? For a new pan, I do it as many times as I can can stand it - I like to go for at least six rounds of seasoning when I get a pan home from the store. I set my oven to time bake at 500°F for an hour, oil the pan, slide it in there, and set my kitchen timer for three hours. When the timer goes off, the oven will be cooled down enough to handle the pan; then I repeat the process, again and again. I do a layer of seasoning right before I go to bed, then another one when I get up in the morning. Two days worth of seasoning and I consider the pan ready to use.

Cool enough for the next round of seasoning


Then, the most important part: use the pan. The layer of seasoning is constantly evolving. The more the pan is used with oil or fat, the better. An oiled pan over medium heat, or in a hot oven? You’re building the seasoning. Cooking with liquids, especially simmering? The seasoning is wearing away. I try to avoid wet cooking in a pan until I think it has a strong layer of seasoning in it, but don’t baby the pan - keep using it, and over time the seasoning will build up.

After the initial rounds of seasoning, I re-season if I see something that looks wrong. A hint of metallic shine in the bumps on the surface of the pan, a sticky spot, the seasoning looking dry? Scrub the pan clean and do one more round of seasoning in the oven. (Maybe two rounds if it looks like it needs it.)

Seasoning Q&A

Q: What does Unsaturated Oil mean?

Pretty much any oil you can find in the grocery store. Soybean oil (aka “vegetable oil”) is the most unsaturated oil, but canola and corn oil are also good. Oh, and flaxseed oil, but that deserves its own question…

Q: What about flaxseed oil?

Ah, a Sheryl Canter loyalist? Welcome. Sheryl won the internet (cast iron care division) with her Chemistry of Cast Iron Seasoning: A Science-Based How-To post a few years ago. I love her basic technique: use high heat (500°F instead of 350°F) and wipe all the oil off of the pan (instead of leaving a thin layer of oil). As you just saw, it’s the basis of my seasoning technique. She’s a big fan of flaxseed oil, which is unsaturated, and works well on cast iron. But flaxseed oil is really, REALLY expensive. Like, “a bottle of flaxseed oil costs more than my cast iron pan ?” expensive. And it has to be refrigerated - it goes rancid very quickly at room temperature. And it smells fishy when you heat it to cast iron seasoning temperatures.4My kids always complain when they see me seasoning a pan, because they equate it with the fishy smell.
Does flaxseed work better than other oils? From my experience, no. I bought a 10 inch skillet and a 10 inch griddle and went through the seasoning process with both, then used them for cooking. I could never tell a difference between the two.

Ms. Canter touts the fact that flaxseed is a drying oil, and again, I use it, and it works fine. But, most of the seasoning on a pan forms during actual cooking - when you’re heating the pan with oil in it. You can’t cook with flaxseed oil, so over time, most of the seasoning is NOT flaxseed oil. I have a bottle of flaxseed oil in the fridge, and I paid a lot for it, so I’m using it up. But when it’s gone, I don’t think I will buy another one.

Q: What about Crisco?

Crisco is fine - it is mostly unsaturated, so it works for seasoning cast iron. Is it better than any of the oils listed above? No. Is it worse? Again, no. Use it if you have it on hand. (Or, if you’re a Crisco loyalist. Not that there’s anything wrong with that.)

Q: What about lard?

Grandma, is that you? Lard used to be the go-to fat for seasoning cast iron. Lard is relatively unsaturated when you compare it to the alternatives available before mechanical extraction of vegetable oil was developed. In other words, if your seasoning options were butter, schmaltz, tallow, olive oil, or lard, then lard is the obvious choice. Nowadays, vegetable oils are cheap and readily available, so they are a better choice. That said, cooking fatty pork in a cast iron pan will always help the seasoning. If you have easy access to lard, go ahead and use it.

Q: How much oil do I need to season a pan?

Not much, but it depends on the pan. For my cast iron skillet, I pour about a tablespoon into the pan and wipe it around until the top side of the pan looks wet. Then I flip the pan over, pour a teaspoon or so on the logo on the back, and spread it over the back and sides. (Don’t forget the handle!) Then I wipe the pan clean. Oh, and if you get a bare cast iron pan, it will suck up the oil - add as much oil as it needs to look wet and slick, then buff it until it looks dry.

Q: What about pre-seasoned pans? I don't need to go through all this with a pre-seasoned pan, do I?

They’re OK, and better than starting with bare iron, but they need more seasoning. My “two days of seasoning” process starts with a pre-seasoned pan. 5If I get an unseasoned pan, or have to strip a pan down to bare metal, it takes about six layers of seasoning to get to store bought pre-seasoned levels. If you’re itching to use your new pan, you’ll be OK as long as you use a thin layer of oil and cook relatively fatty foods. Don’t start with a pan sauce, scrambled eggs, or sausage gravy without building up a thicker layer of seasoning first.

Q: My paper towels leave lint all over the pan when I try to oil them. Help!

I have good luck with Bounty paper towels - they seem to shed less than other brands. I recently learned about blue Scott Shop Towels from Jeffrey B. Rogers, The Culianry Fanatic on YouTube.6Oh, boy, does he know cast iron - he owns so much cast iron that he could forge his own battleship. The shop towels are great - they don’t shed lint until they’re already falling apart - but they don’t work as well as general paper towels for kitchen cleanup.

Q: How do I keep my cast iron clean?

I was going to talk about cleaning cast iron, but this has gone on long enough. Cleaning cast iron will have to wait for the next post. Stay tuned!

What do you think?

Cast iron questions? Any other cast iron topics I should cover? Anything I left out? Strident defenses of flaxseed oil, Crisco, or Grandma’s lard? Talk about it in the comments section, below.

wpid7315-Seasoning-Cast-Iron-7852.jpg


Related Posts

Cast Iron Cooking series:

  1. Why Cast Iron?
  2. The 12 Inch Cast Iron Skillet
  3. Seasoning Cast Iron [ThisPost]
  4. Cleaning Cast Iron
  5. Heating Cast Iron [Coming Soon]
  6. Cast Iron's Best Friend - the Flat Edged Metal Spatula [Coming Soon]
  7. Other Cast Iron Accessories [Coming Soon]
  8. Stripping Cast Iron [Coming Soon]
  9. Cast Iron Recipes


Enjoyed this post? Want to help out DadCooksDinner? Subscribe to DadCooksDinner via eMail or RSS reader, recommend DadCooksDinner to your friends, and buy something from Amazon.com through the links on this site. Thank you.

Reverse Seared Rack of Lamb on the Grill

April 2, 2015 by Mike Vrobel 4 Comments

Reverse Seared Rack of Lamb on the Grill
Reverse Seared Rack of Lamb

This year, my Easter dinner is rack of lamb. My wife is leaving for Mexico early Easter morning, so I need something extra fancy to send her on her way. Lamb popsicles, here we come! 7Yes, I know, calling them "lamb popsicles" doesn't sound fancy. I can't help myself - that's what I see when I carve them.

I tried the reverse sear technique this year, and the result is an evenly cooked rack of lamb. Pink from edge to edge, with a browned crust on the outside. To reverse sear, set the grill up with a two zone fire - direct heat on one side, and no heat on the other. The lamb starts on the indirect heat side of the grill, away from the coals, to cook gently until it is about ten degrees below the final temperature (125°F for medium, which is how I like my lamb cooked, with a warm pink center from edge to edge.) Then we sear, crisping the lamb crust and finishing the cooking hot and fast. This gives the lamb just enough time over high heat for a browned crust, but not so much that it overcooks the inside.

Looking for a festive rack of lamb? Try the reverse sear. You won't be disappointed.

wpid7281-Reverse-Seared-Rack-of-Lamb-on-the-Grill-0166.jpg
Trimming the lamb
wpid7283-Reverse-Seared-Rack-of-Lamb-on-the-Grill-0176.jpg
Starting on indirect heat, away from the coals
wpid7287-Reverse-Seared-Rack-of-Lamb-on-the-Grill-0223.jpg
Searing to finish
wpid7289-Reverse-Seared-Rack-of-Lamb-on-the-Grill-0248.jpg
Oh my

What do you think?

Questions? Other ideas? Leave them in the comments section below.

Related Posts

Grilled Rack of Lamb (if you're in a hurry)
Grilled Lamb Loin Chops
Grilled Butterflied Leg Of Lamb, Dry Brined
My Grilling Recipes Index

Enjoyed this post? Want to help out DadCooksDinner? Subscribe to DadCooksDinner via eMail or RSS reader, recommend DadCooksDinner to your friends, and buy something from Amazon.com through the links on this site. Thank you.

Dad Cooks Easter Dinner 2015

March 31, 2015 by Mike Vrobel Leave a Comment

Grilled Ham with Honey Bourbon Glaze

Easter is the one major holiday where I don’t do much cooking. Every year my Mom makes Eggs Benedict; later in the day we visit my in-laws. This year we’re at my brother-in-law’s new house, and my only cooking duty is to bring a green bean side. 2I also get to visit my old Weber Performer at my brother-in-law’s. When I won the new one in the Weber giveaway last year, I sent it to a good home. John’s been keeping it busy. He even fixed the gas igniter, which I had given up for dead.

If you’re responsible for Easter Dinner, here are a few Dad Cooks Dinner recipes to get you going. My big Easter question is always Ham or Lamb, so I'm giving you my favorite recipes for both.

  • Grilled Ham with Honey Bourbon Glaze
  • Rotisserie Ham, Barbecue Style
  • Grilled Butterflied Leg of Lamb, Dry Brined
  • Rotisserie Boneless Leg of Lamb with Greek Flavors
  • Rotisserie Bone In Leg of Lamb Moroccan Style
  • Sous Vide Rack of Lamb

(Coming Thursday is Reverse Seared Rack of Lamb - I'm making it for my Easter Eve dinner with my wife.)

Happy Easter, everyone!

Sponsor: The National Pork Board and Chef JJ Johnson's Pork Suya with Kimchi

March 30, 2015 by Mike Vrobel Leave a Comment


PorkBeInspired

Chef JJ Johnson’s Pork Suya with Kimchi

This week, DadCooksDinner is sponsored by Chef JJ Johnson’s Pork Suya with Kimchi, from the National Pork Board.


The National Pork Board asked me to share this video Pork Suya from Chef JJ Johnson of The Cecil in Harlem. I’ve never heard of Suya before. It’s a West African spice paste, and it looks fantastic. I must try it…but first I have to find bird’s eye chili and black garlic.2From the recipe: "Black garlic can be found at some specialty stores but if you’d like, you can substitute it for 3 additional regular garlic cloves. You can also substitute a Thai chili or 2 serrano chilies for the bird’s eye chili."

If you want to try Chef JJ’s pork suya at home, the recipe is available here:
Chef JJ Johnson’s Pork Suya with Kimchi via PorkBeInspired.com

Thanks again to the National Pork Board for sponsoring DadCooksDinner!

Very Berry Smoothie (with Kale)

March 26, 2015 by Mike Vrobel Leave a Comment

Very Berry Smoothie (with Kale)

I've shared a bunch of smoothie recipes, but somehow I missed the one we make the most. We make it so often that I stock up on bags of frozen mixed berries when they're on sale at the grocery store. Smoothieless on Sunday? That would be a tragedy.

Saying this is a “recipe” is overstating things a bit - we make smoothies by emptying out the freezer and/or the pantry. An extra banana? Throw it in there. No apple juice? Substitute water, plus some honey or sugar. A half-full bag of frozen strawberries and a half-full bag of frozen peaches? Sure, that’s mixed berries. Into the blender they go. The kale is a recent addition, trying to sneak some healthy vegetables in for the kids. They were dubious at first - you want to add WHAT to the smoothie? - but now they're OK with it, as long as we don't add so much that the smoothie turns olive green.

When I say “we” make the smoothies, I mean the kids make the smoothies. They’ve even started to make them on weekdays, before heading off for school. Now if I could just convince them that saving a quarter inch of smoothie in the blender jar is not a good idea. They stash it in the refrigerator, forget about it, and I find it a few days later. 2And cleaning a blender is so easy. Fill it ⅓rd of the way with cold water, add a drop or two of dish soap, and run the blender on high for 30 seconds. Rinse out the soap, then fill halfway with fresh water, and run for another minute to finish rinsing. Put it upside down in the dish drain, and you’re done. But, when I ask the kids to do this, you’d think I asked them to clean the entire kitchen with a toothbrush.

Apple juice, frozen berries on a scale, yogurt, kale and a red Vitamix blender
Ready to blend

What do you think?

Questions? Other ideas? Leave them in the comments section below.

Related Posts

Green Monster Smoothie
Fresh Tomato Gazpacho (in a Vitamix)
Road Trip: Vitamix Factory Outlet Store

wpid7215-Very-Berry-Smoothie-with-Kale-0040.jpg

Enjoyed this post? Want to help out DadCooksDinner? Subscribe to DadCooksDinner via eMail or RSS reader, recommend DadCooksDinner to your friends, and buy something from Amazon.com through the links on this site. Thank you.

Slow Roasted Tomato Sauce

March 24, 2015 by Mike Vrobel 11 Comments

Slow Roasted Tomato Sauce

I’ve been on a quest for a long, slow-simmered tomato sauce. A lot of people swear by Marcella Hazan’s simple recipe - simmer butter, tomatoes, and a halved onion for an hour. It’s a good sauce. It’s fine. It’s not what I’m looking for. I also make a quick, weeknight tomato sauce. It’s better than jarred pasta sauce, and finishes in the time it takes to boil the pasta. That’s not what I’m looking for either. I want a classic Italian-American sauce, a slow roasted tomato sauce that cooks all day. 2There used to be an Italian-American restaurant in downtown Cleveland; their claim to fame was a pot of sauce that had been simmering since the early 1900’s. It was refreshed ever night, but the base of the sauce had been there forever. That’s the ideal version of the sauce I'm looking for.

I think my quest is over. 2My quest is never over. I’m always tinkering with recipes, but this one is good enough for me to use as the base from now on. My next test? Add a halved onion and some butter, to see if I can cross Marcella’s recipe with Frankies’. I stumbled across this sauce recipe from The Frankies Spuntino Kitchen Companion and Cooking Manual. It is barely a recipe - lightly toast garlic cloves in olive oil, add a big pinch of red pepper flakes, a lot of canned San Marzano tomatoes, and simmer for four hours. 3And yes, it’s Frankies, not Frankie’s. The Brooklyn restaurant has two chefs - Frank Falcinelli and Frank Castronovo.

I made a couple of modifications to their technique, because I can’t help myself:

  • I cut the amounts in half, which makes just enough sauce to top a pound of pasta
  • I simmer in the oven, instead of on the stove top
  • I add a sprig of fresh basil (If it's in season) or a pinch of dried Italian herbs (in the winter)

This is a great recipe for a lazy Sunday. Get the pot in the oven early, let it cook all day (and fill the house with delicious tomato sauce aroma), and serve it on pasta for an amazing Sunday supper.

wpid7164-Slow-Roasted-Tomato-Sauce-7724.jpg
Garlic's a little TOO brown - get the tomatoes in there!

wpid7166-Slow-Roasted-Tomato-Sauce-7732.jpg
Breaking up the tomatoes

After 2 hours
After 2 hours - tomatoes crumbling on their own

After 4 hours - done!

What do you think?

Questions? Other ideas? Leave them in the comments section below.

Related Posts

Baked Italian Meatballs

Weeknight Tomato Sauce

Lasagna with Sausage Sauce


Enjoyed this post? Want to help out DadCooksDinner? Subscribe to DadCooksDinner via eMail or RSS reader, recommend DadCooksDinner to your friends, and buy something from Amazon.com through the links on this site. Thank you.

Things I Love: 12 Inch Cast Iron Skillet

March 17, 2015 by Mike Vrobel 10 Comments

Things I Love: 12 Inch Cast Iron Skillet

Your first cast iron pan should be a 12 inch cast iron skillet.

I’m not the only one who thinks so - I read a lot of essential cookware lists, and they all recommend a cast iron skillet.

The 12 Inch Lodge Skillet

Which pan should I actually get? The Lodge 12 inch Cast Iron Skillet. It is cheap and available everywhere. I like this package at Amazon that comes with a silicone hot handle, but you can find this skillet in almost every store in North America.

Don’t try to save a few bucks buying an off brand; I’ve heard the steel isn't the same quality as Lodge. And, really, you’re only saving a couple of bucks - spring for the classic Lodge and you won’t regret it. (I cover some more expensive cast iron I was asked about further down in the article.)

Why the 12 inch skillet? Versatility. I use it as a fry pan and a roasting pan; cast iron works both on the stovetop and in the oven. (Or both - I start my roast chicken on the stovetop, then move it into the oven). The 12 inch skillet is big enough to roast a chicken, sauté pork chops, sear steaks, brown a pound of sausage, or make a big round of cornbread. I can even use it on my grill!

Lodge skillets come pre-seasoned, but that’s just a good base. 4Don’t even think about making eggs in the pan until you’ve been using it for a few months, and it has a good layer of seasoning. It will take a month or two of steady use to get the pan to be truly seasoned. Use it often, with a little bit of oil; keep it clean and add an extra layer of seasoning if it looks a little bare, and it will become a slick, nonstick workhorse in the kitchen. (For more details, stay tuned. My cast iron care post is coming.)

wpid7106-Things-I-Love-12-Inch-Cast-Iron-Skillet-7282.jpg


What about the 10 inch skillet

If you know that a 12 inch skillet is just too big for you, get Lodge’s 10.25 inch skillet. (For my family of five, I need the 12 inch skillet.) 2If you’re cooking for a larger crowd, you have my sympathy…and you might want to check out the Lodge 15 inch skillet, if you have the triceps for it. I need to work out more before I get that one. The 12 inch skillet is heavy enough that I feel it. The 10.25 is much easier to handle one-handed, especially when full of food. But…I need that extra space. The 10.25 is just too small when I’m trying to squeeze in pork chops for dinner.

wpid7107-Things-I-Love-12-Inch-Cast-Iron-Skillet-6648.jpg

Now, I know I said you should buy the Lodge and not look back, but some readers have asked about other cast iron brands - not the cheap knockoffs, by any stretch of the imagination - so here are my thoughts.

What about Le Creuset?

If cast iron care scares you, but you still want the advantages of cast iron, an enameled Le Creuset skillet is the way to go. Le Creuset is cast iron coated with a durable layer of enamel - no seasoning necessary.

Enameled cast iron is not as nonstick as a well seasoned cast iron skillet. Enamel is also a lot less durable - no metal utensils in an enameled pan, please! That said, enameled cast iron will not rust, it doesn’t need re-seasoning, and it doesn’t react with tomatoes or other acidic ingredients. I have a Le Creuset skillet, and enjoy using it…but I reach for my 12 inch Lodge much more often. (Dutch ovens are another story. I have a couple of different sizes of Le Creuset french oven, and I use them all the time for braising - but that’s a post for another day.)

What about Finex?

The Finex cast iron skillet is a gorgeous, handcrafted pan from Portland, OR. 3Made just down the road from where my aunt Marica and uncle Ray live. Hi, guys! I love the eight sides - multiple pouring angles - and the gorgeous spring protected handle to dissipate heat.

The most intriguing part of the Finex is the smooth cooking surface. Modern cast iron has a pebbled surface, left over from the sand mold used to cast the pan. In the old days, the manufacturers would machine the surface smooth, but Lodge stopped doing that decades ago. 4This is one of the reasons some people are so religious about vintage cast iron - the smooth cooking surface. Finex uses computer machining to get the same smooth surface as vintage cast iron. I’ve never used a smooth cast iron surface, but it seems like a smooth surface would be more nonstick.

The Finex is a work of art. I start to drool whenever I go on their website. However…the 12 inch Finex costs $195, or $270 with the matching lid. I’m saving my pennies to get one - I must have it, I must! - but I can’t fool myself into thinking it’s a value purchase. I can buy ten more Lodge skillets for the price of the Finex. Still, I want the Finex. Badly.

What about Borough Furnace?

The Borough Furnace skillet is another handmade pan, this one from Syracuse, NY. Again, it’s a work of art that you can use in your kitchen. Again, I would love to own one. (I love the design of the 9 inch frying skillet - so original.) I’m saving up for the Finex first, though, because I have a slight preference for the straighter sides and wider cooking surface on the Finex. Once I have the Finex, my pennies will go towards Borough.

What about carbon steel?

Carbon steel is similar to cast iron in that it has to be seasoned, but it acts differently from cast iron when cooking. Cast iron heats up slowly, and holds on to that heat; carbon steel heats up quickly, and cools down quickly. I have a carbon steel wok, and I love it for stir frying, but I have only used traditional carbon steel pans a couple of times. Daniel Gritzer over at SeriousEats has a great article if you want to learn more about carbon steel; my takeaway was “carbon steel for sautéing, cast iron for searing.” And that I have another thing to add to my “must try” list.

wpid7103-Things-I-Love-12-Inch-Cast-Iron-Skillet-6936.jpg


Buy the Lodge 12 inch Cast Iron Skillet. You won't regret it.

What do you think?

Questions? Other ideas? Leave them in the comments section below.

Related Posts

Cast Iron Cooking series:

  1. Why Cast Iron?
  2. The 12 Inch Cast Iron Skillet [ThisPost]
  3. Seasoning Cast Iron
  4. Cleaning Cast Iron
  5. Heating Cast Iron [Coming Soon]
  6. Cast Iron's Best Friend - the Flat Edged Metal Spatula [Coming Soon]
  7. Other Cast Iron Accessories [Coming Soon]
  8. Stripping Cast Iron [Coming Soon]
  9. Cast Iron Recipes


Enjoyed this post? Want to help out DadCooksDinner? Subscribe to DadCooksDinner via eMail or RSS reader, recommend DadCooksDinner to your friends, and buy something from Amazon.com through the links on this site. Thank you.

Pressure Cooker BBQ Pulled Pork Tacos

March 12, 2015 by Mike Vrobel 14 Comments

Pressure Cooker BBQ Pulled Pork Tacos

Pressure Cooker BBQ Pulled Pork Tacos. A southeast meets southwest mashup between BBQ pulled pork and Tacos, ready in about an hour thanks to pressure cooking.


PorkBeInspired

This week, DadCooksDinner is sponsored by America's Most Mouthwatering Mashup from the National Pork Board.


The National Pork Board asked me to write a mashup recipe, taking different food ideas and mashing them together. Pulled pork shoulder is my favorite way to serve pork. I particularly enjoy pulled pork Southern barbecue style, tossed with a sweet, sticky sauce, served on smushy white bread, and topped with cole slaw and dill pickles. My second favorite way to serve pork? Shredded pork tacos. That's it! That's my mashup.

I'm giving that barbecue sandwich a Mexican-American twist. Instead of white bread, I use corn tortillas. Then I top the sweet, saucy pork with a tart, lime based slaw and spicy pickled jalapeños. I'm keeping the sweet barbecue sauce - it stands in for tomatoey salsa. It's South of the Mason-Dixon line meets South of the border. 5I've always wondered what the Mason-Dixon line was; I knew it was the dividing line between Yankee and Dixie…but where is it? It's the line that forms the border between Pennsylvania, Maryland, and Delaware, drawn up in a dispute over the boundary during British colonial times.

According to the National Pork Board's survey, I chose well. Smoked, hot, and spicy flavors are frequently mentioned in their survey: 26% of people prefer hot flavors for their pork, 18% preferred spicy flavors for pork. Pulled Pork made up 15% of all pork mentions, and 7% enjoyed their pork in Mexican-styled dishes.

I love my pressure cooker for pulled pork; In an hour, I get tender, shredded pork shoulder that normally takes all day. (No pressure cooker? No worries…if you can cook all day. A slow cooker set on low for 8 hours gives the same tender, shreddable results.)

I'm biased, but I think I have a serious contender for America's second most mouth-watering mashup.

Recipe: Pressure Cooker BBQ Pulled Pork Tacos

Equipment

  • Pressure Cooker (I use a 6 quart Instant Pot electric pressure cooker)


wpid7052-Pressure-Cooker-BBQ-Pulled-Pork-Tacos-7618.jpg
In the pressure cooker
wpid7056-Pressure-Cooker-BBQ-Pulled-Pork-Tacos-7633.jpg
Make the Baja slaw
wpid7054-Pressure-Cooker-BBQ-Pulled-Pork-Tacos-7631.jpg
Pull the pork
wpid7062-Pressure-Cooker-BBQ-Pulled-Pork-Tacos-7648.jpg
Build the tacos

Notes

  • Don't feel like slaw and pickled jalapeños on your tortillas? Go with your favorite taco toppings - lettuce, salsa, sour cream, shredded cheese, sliced olives, diced tomatoes, chopped onions, whatever you enjoy.
  • No pressure cooker AND no slow cooker? No worries. Put the pork in a dutch oven with a heavy lid, increase the water to 2 cups, and bring to a simmer on the stove top. Cover with the lid, move to a 350°F oven, and bake for 4 hours, or until the pork is falling apart tender.

What do you think?

Questions? Other ideas? Leave them in the comments section below.

Related Posts

  • America's Most Mouthwatering Mashup
  • Rotisserie Pork Shoulder with South Carolina Mustard Barbecue Sauce
  • Pressure Cooker Pork Chili with Pinto Beans
  • Port Tenderloin with Tomatillo Salsa and White Beans
  • Instant Pot Pork Carnitas Recipe

Enjoyed this post? Want to help out DadCooksDinner? Subscribe to DadCooksDinner via eMail or RSS reader, recommend DadCooksDinner to your friends, and buy something from Amazon.com through the links on this site. Thank you.

Technical Difficulties

March 4, 2015 by Mike Vrobel 4 Comments

Sunday Dinner

I'm sorry for all the duplicate posts in my feed and emails this week. My blog move hit another pothole; on Monday something renamed hundreds of my posts. I didn't notice until last night, when I was asked about the  Not Found errors that were all over Dad Cooks Dinner.  

I had to restore from an early Monday morning backup; all the comments since then are gone, and I had to re-enter the Why Use Cast Iron post. (That's why, if you get my emails, you're getting the cast iron post again today.)

This is probably not related to a different problem - I had a RSS feed issue caused by a Pinterest plugin. When I fixed that ine the result was a bunch of duplicates from last week on Facebook and Twitter. 2It turns out that double posting on social media was an effective social media strategy. The duplicate posts got more Likes and Retweets than the originals.

Again, my apologies for all the duplicate posts. To make up for it: Here's a bonus PicOfTheWeek of our Sunday Dinner, simmering, boiling, steaming, and frying on the stove. 

Why Use Cast Iron?

March 2, 2015 by Mike Vrobel 5 Comments

Why Use Cast Iron?
Why Use Cast Iron?


"Never trust a pan you can lift." - Chef Tom Johnson

Cooking with cast iron is a high maintenance relationship - one that it took me a long time to understand. Cast iron has so many drawbacks. It must be carefully seasoned - cast iron that is exposed to air will rust. But, not too much seasoning, or it will get sticky and come off in flakes. Don’t leave it wet - that’s another invitation to rust. Wash it in the dishwasher? Never! One wash cycle will strip off the seasoning AND start the rust. Wash it with a scrub brush and hot water, using nothing but elbow grease. And, be careful what you cook in cast iron. Don’t boil water, or there goes the seasoning. And, watch out for acidic ingredients; acid reacts with the iron, giving a metallic taste to the food. On top of all that, cast iron weighs a ton, and it does not conduct heat well. We’re in the 21st century; why does anyone bother with these 18th century pans?

This is the litany that ran through my head every time I neglected my cast iron. Pans had sticky seasoning in some spots, flaky seasoning in others; grill grates had rust creeping up the sides. I didn't get it. Why did people love black iron again? I gave up on cast iron pans and went with aluminum, clad in stainless or nonstick coatings. 2Except for a few enameled cast iron pots I kept on hand - Le Creuset was my one cast iron holdout.

wpid7019-Why-Cast-Iron-7253.jpg
It's not bad at all, really. Maybe it just needs a little love.


A few years ago, I decided to try cast iron again. Too many cooks were singing its praises, cooks that I trusted absolutely on other topics. Why were they so enthusiastic about cast iron? What was I missing? I bought one pan, a twelve-inch skillet, and it turned my relationship with cast iron around. I’m a cast iron convert - for a specific set of applications, cast iron is the best tool for the job.

Over the next few months, I’m going to write a series of posts on cast iron. There is a lot of contradictory advice on the internet, old wives’ tales mixed in with nuggets of gold. I hope I don’t add to the old wives’ tales - I’m writing these posts in an attempt to figure out what I did right. So, without further preamble…2Get on with it!

wpid7013-Why-Cast-Iron-7135.jpg

Why Cast Iron

1. Cast iron hangs on to heat

Cast iron weighs a ton, and is a terrible conductor. That sounds bad, doesn’t it? It is…if you want a pan that reacts quickly to changes in heat. Instead, think of cast iron as a thermal battery. It takes a long time to heat up, but once it gets there, it hangs on to heat. I love searing on cast iron; even my expensive clad aluminum pans don’t do as good of a job of browning as an inexpensive cast iron skillet. This is also useful for baking; cornbread is cooked in cast iron to give it a crisp crust. 3My favorite part of cornbread is the crispy edges. I’ll eat around the edge, leaving the tender center for those that prefer it.

Sous vide made me appreciate cast iron. That's right, the modernist technique, cooking in a precisely temperature controlled water bath. Once my steak is cooked sous vide, perfectly medium-rare, I need it seared as quickly as possible. The longer the steak is on the heat, getting a browned and crackling crust, the more it cooks on the inside. Ripping hot cast iron to the rescue. A quick sear on a preheated pan, and my steak is charred on the outside, but still medium-rare all the way through.

2. Cast iron can take the heat

Yes, cast iron is high maintenance - in some ways. But it is also incredibly durable. Read the “use and care” guide that came with a set of regular pans. What happens if you leave one empty on a lit burner? Most manufacturers warn you never to do that, or allow a couple of minutes to heat up the pan - no more. Cast iron? It’s just getting started. It needs at least five minutes of heating to be ready to cook, and ten would be better. Go for fifteen minutes if you’re distracted, or want a ripping hot pan.

Then we move to the oven. Oven safe temperature? Cast iron laughs at your oven safe temperature. 400°F, 500°F, whatever it takes. Just don’t get the oven to self cleaning temperatures - about 900°F - because it will turn the seasoning on the cast iron to ash, and you’ll have to re-season the pan. 4This is a trick we’ll discuss in the cast iron seasoning post - the self cleaning cycle is how you strip the seasoning off of a pan you want to re-season.

3. Seasoned cast iron is nonstick

A properly seasoned cast iron pan is the closest you can get to nonstick without coating a pan in Teflon. The seasoning - a layer of polymerised, carbonized oil - acts as a nonstick coating. 5Nonstick enough to cook eggs without sticking - but don’t try that until the pan has been in use for a while, and has a nice, slick layer of seasoning. As I mentioned above, cast iron is tough. You can use cast iron with metal utensils and with high heat. Keep it clean, keep it dry, and keep it seasoned, and a cast iron pan will last forever. Nonstick? If I treated a nonstick pan the way I treat cast iron, the nonstick pan wouldn’t last a week. 6I’m not against nonstick cookware in general, especially for cooking eggs. Eggs stick to just about everything. But, overheating nonstick cookware is dangerous - nonstick coatings give off poisonous fumes starting at about 500°F. If you do cook with nonstick cookware, don’t EVER leave an empty pan on a lit burner. Put some oil in there; most cooking oils start to smoke at 400°F, and that’s plenty hot enough for whatever you want to cook.

wpid7017-Why-Cast-Iron-6931.jpg

Cast iron just wants to be useful

Earlier, I compared cast iron to a high maintenance relationship. That’s a bad analogy. It’s more like owning an animal bred to work. If you neglect it, and don’t use on a regular basis, it’s not happy. But if you use it often, and work it hard, it gets better and better.

Have I convinced you? Itching to try cast iron? Get one pan - just one - and use it until you’re comfortable with cast iron. I recommend a 12 inch cast iron skillet to start, because it’s the most versatile - but I'll talk about that more in my next cast iron cooking post.

What do you think?

Cast iron questions? Any other cast iron topics I should cover? Anything I left out? Talk about it in the comments section, below.

Related Posts

Cast Iron Cooking series:

  1. Why Cast Iron? [ThisPost]
  2. The 12 Inch Cast Iron Skillet
  3. Seasoning Cast Iron
  4. Cleaning Cast Iron
  5. Heating Cast Iron [Coming Soon]
  6. Cast Iron's Best Friend - the Flat Edged Metal Spatula [Coming Soon]
  7. Other Cast Iron Accessories [Coming Soon]
  8. Stripping Cast Iron [Coming Soon]
  9. Cast Iron Recipes


Enjoyed this post? Want to help out DadCooksDinner? Subscribe to DadCooksDinner via eMail or RSS reader, recommend DadCooksDinner to your friends, and buy something from Amazon.com through the links on this site. Thank you.

  • « Previous Page
  • 1
  • …
  • 17
  • 18
  • 19
  • 20
  • 21
  • …
  • 37
  • Next Page »

Welcome to Dad Cooks Dinner!

I'm Mike Vrobel, a dad who cooks dinner every night. I'm an enthusiastic home cook, and I write about pressure cooking, rotisserie grilling, and other food topics that grab my attention.

More About Me →

Popular

  • Three bowls of cooked Pinto Beans on a wood table
    Instant Pot Pinto Beans (No Soaking)
  • Pressure Cooker Beef Shank (Osso Bucco)
  • Pressure Cooker 7 Hour Leg of Lamb (in 90 minutes)
    Pressure Cooker 7 Hour Leg of Lamb (in 90 minutes)
  • Pressure Cooker Brown Jasmine Rice
  • Grilled Tomahawk Steak (Long Bone Ribeye, Reverse Seared)
    Grilled Tomahawk Steak (Long Bone Ribeye, Reverse Seared)
  • A green bowl full of chicken noodle soup
    Instant Pot Rotisserie Chicken Noodle Soup

Seasonal

  • A bowl of asparagus risotto
    Instant Pot Asparagus Risotto (Pressure Cooker Recipe)
  • Grilled Butterflied Chicken with Garlic Butter
  • Sous Vide rack of lamb sliced into chops
    Sous Vide Rack of Lamb with Dijon Bread Crumb Crust
  • A bowl of beef stew with asparagus, carrots, and radishes.
    Instant Pot Spring Vegetable Beef Stew
  • A Rotisserie Chicken (Pollo Asado)on a platter of shredded cabbage
    Rotisserie Chicken Pollo Asado
  • Rotisserie Pork Shoulder Roast with Carolina Mustard BBQ Sauce
    Rotisserie Pork Shoulder with South Carolina Mustard Barbecue Sauce

Footer

↑ back to top

About

  • Privacy Policy

Newsletter

  • Sign Up! for emails and updates

Contact

  • Contact

Copyright © 2025 Dad Cooks Dinner