DadCooksDinner

  • Home
  • Rotisserie
  • Recipes
  • Tools
  • Books
  • Merch
menu icon
go to homepage
  • Recipes
  • Books
  • Tools
  • Merch
  • About
subscribe
search icon
Homepage link
  • Recipes
  • Books
  • Tools
  • Merch
  • About
×
Home » Recipes

Pressure Cooker Mexican Pork Stew With Summer Vegetables

August 28, 2014 by Mike Vrobel 4 Comments

Pressure Cooker Mexican Pork Stew With Summer Vegetables | DadCooksDinner.com
Pressure Cooker Mexican Pork Stew With Summer Vegetables

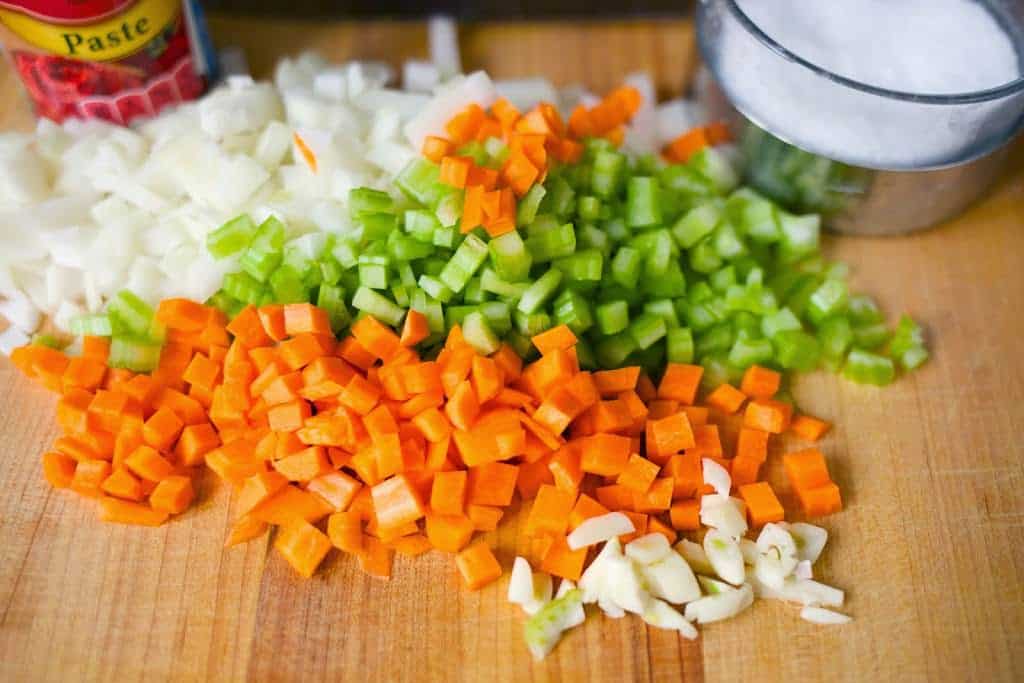
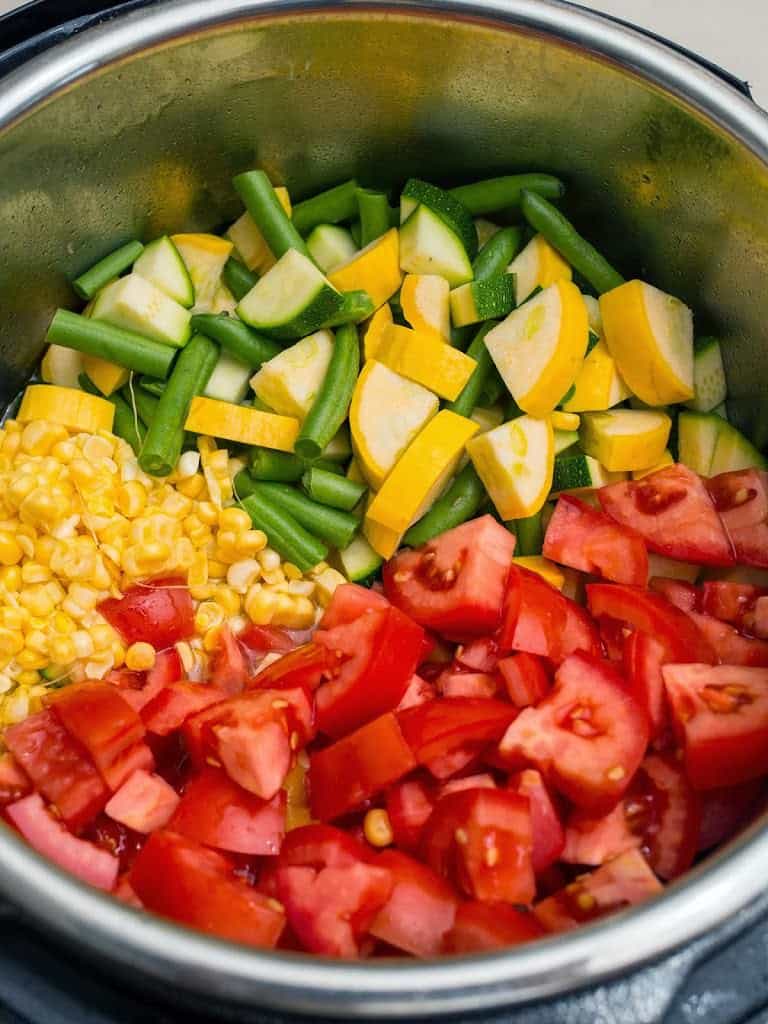
I learned about the "Three Sisters" - corn, squash, and beans - on my trip to Oaxaca earlier this year. These three crops were the basis of pre-Hispanic Mexican agriculture. They work together as they grow, providing nutrients, shelter, and protection to each other. More important, they are a balanced diet when they are eaten together.

Of course, my thought was: "Squash, corn, beans…that sounds like my CSA box in August. I can use up zucchini in a Mexican meal?"

Technically, Mexican squash are not the same thing as zucchini. But they are a close relative. Hey, any excuse to use up zucchini in August.

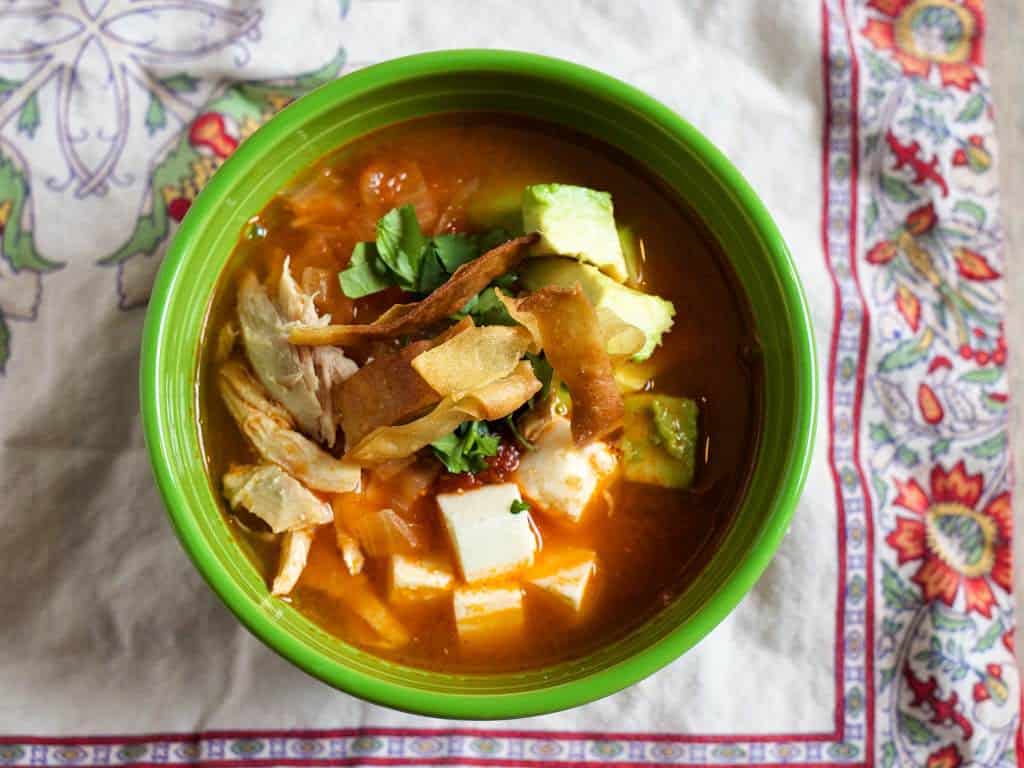
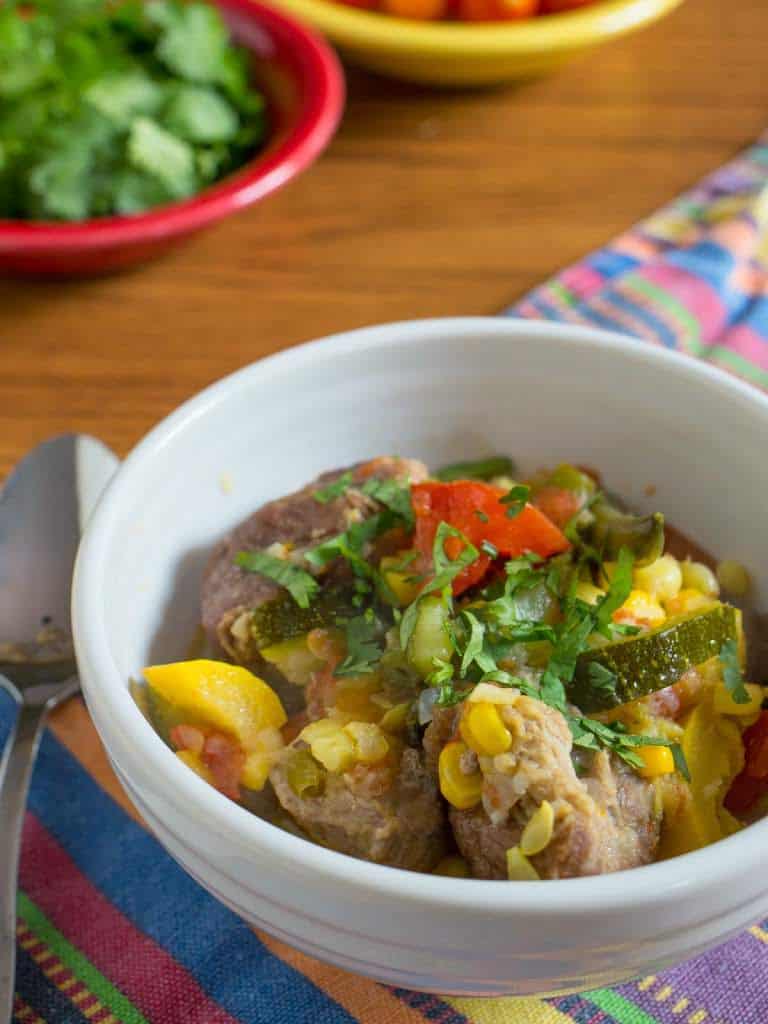
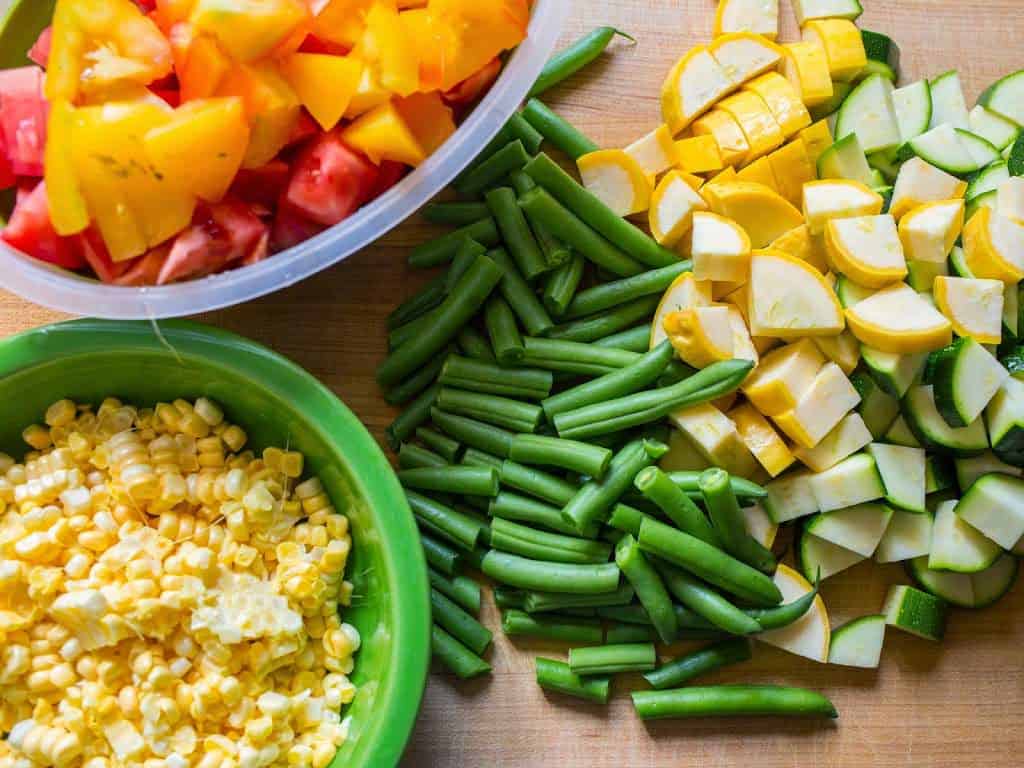
Now, you might think, "A stew? In summer? I'll save the hearty eating for the winter." OK. OK. Wait. You can make this recipe in the middle of winter, with frozen corn, canned tomatoes, out of season green beans, and zucchini flown in from the southern hemisphere. And it will be good. But, trust me - you want to try this stew at the height of summer, with sweet corn, ripe tomatoes, and fresh zucchini. This is not a heavy, hearty stew. This is a bright, sweet stew, that shows off summer's bounty.
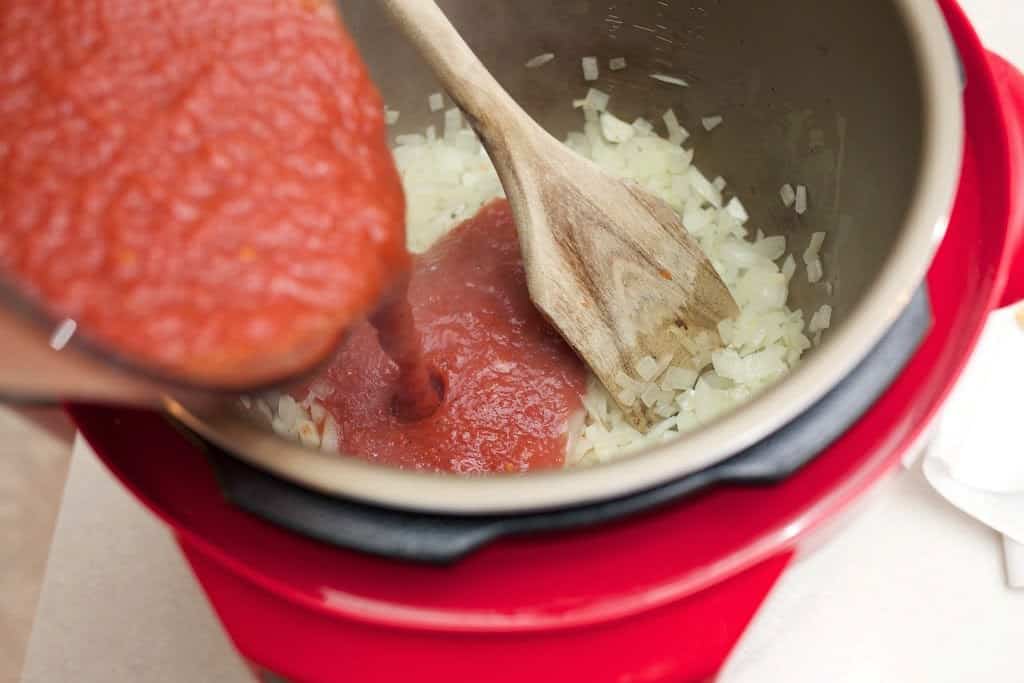
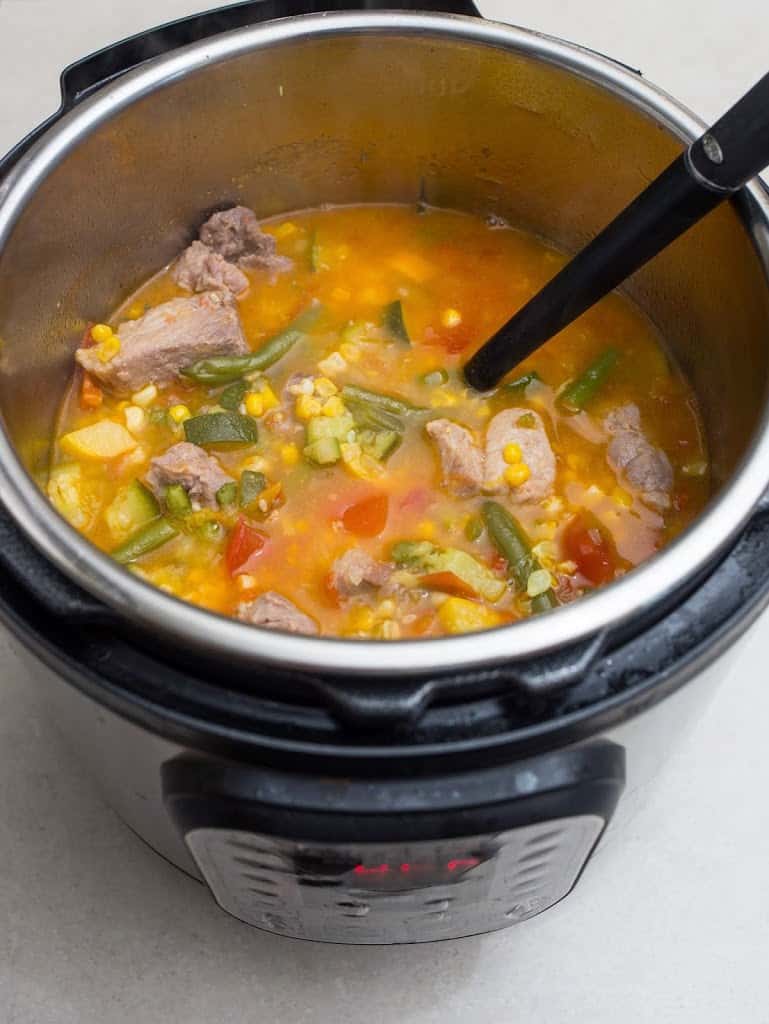
And, thanks to the pressure cooker, it's quick and doesn't heat up the kitchen. If you don't have a pressure cooker, that's OK, a traditional version of the recipe is in the notes.

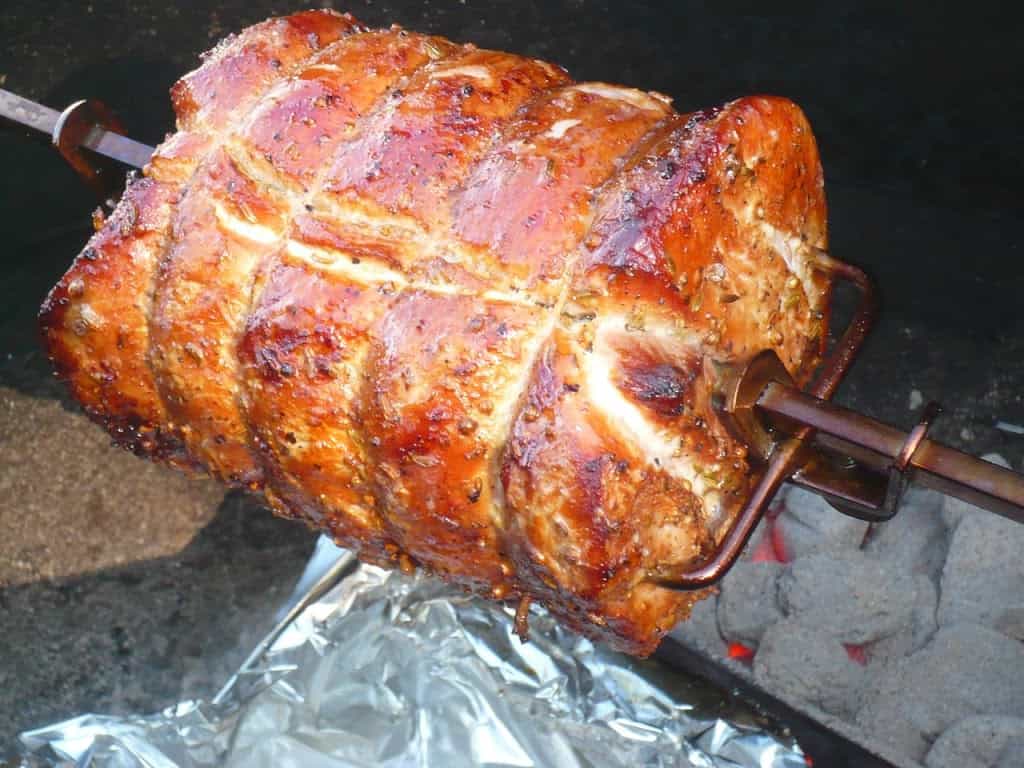
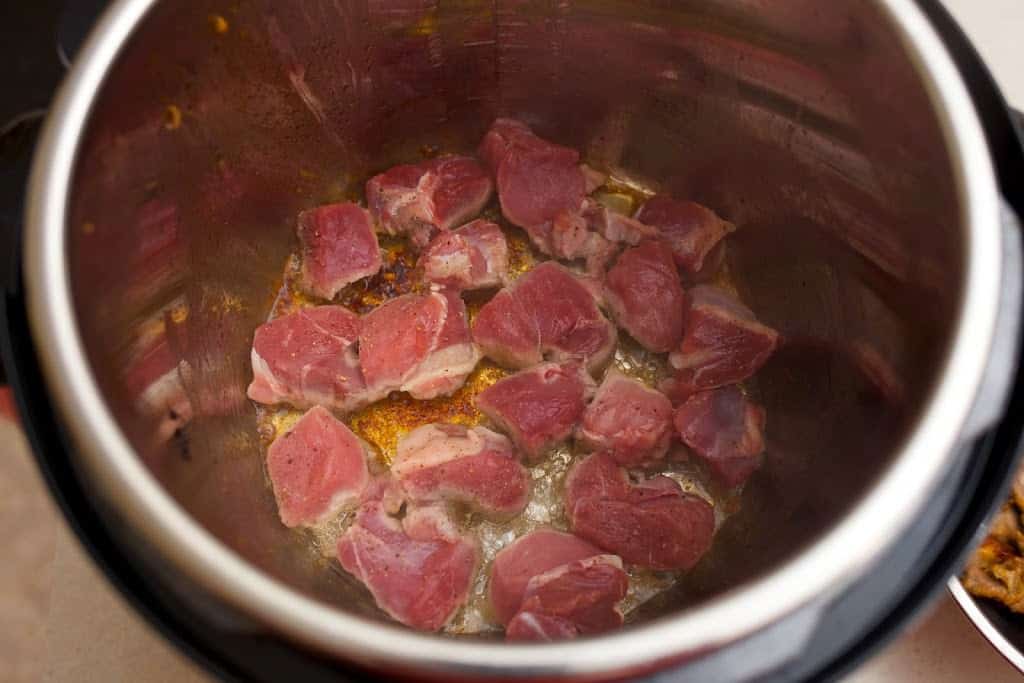
Recipe: Pressure Cooker Mexican Pork Stew With Summer Vegetables

Inspired by Pork with Zucchini and Corn Stew at MexicoInMyKitchen.com

Equipment

  • 6 quart or larger pressure cooker (I used an Instant-Pot Electric PC)
Pressure Cooker Mexican Pork Stew With Summer Vegetables | DadCooksDinner.com
Browning the pork
Pressure Cooker Mexican Pork Stew With Summer Vegetables | DadCooksDinner.com
Sautéing the aromatics
Pressure Cooker Mexican Pork Stew With Summer Vegetables | DadCooksDinner.com
Stir the reserved pork into the aromatics
Pressure Cooker Mexican Pork Stew With Summer Vegetables | DadCooksDinner.com
All the vegetables into the pot
Pressure Cooker Mexican Pork Stew With Summer Vegetables | DadCooksDinner.com
Done - taste for seasonings and serve
Pressure Cooker Mexican Pork Stew With Summer Vegetables | DadCooksDinner.com
Pressure Cooker Mexican Pork Stew With Summer Vegetables

Notes

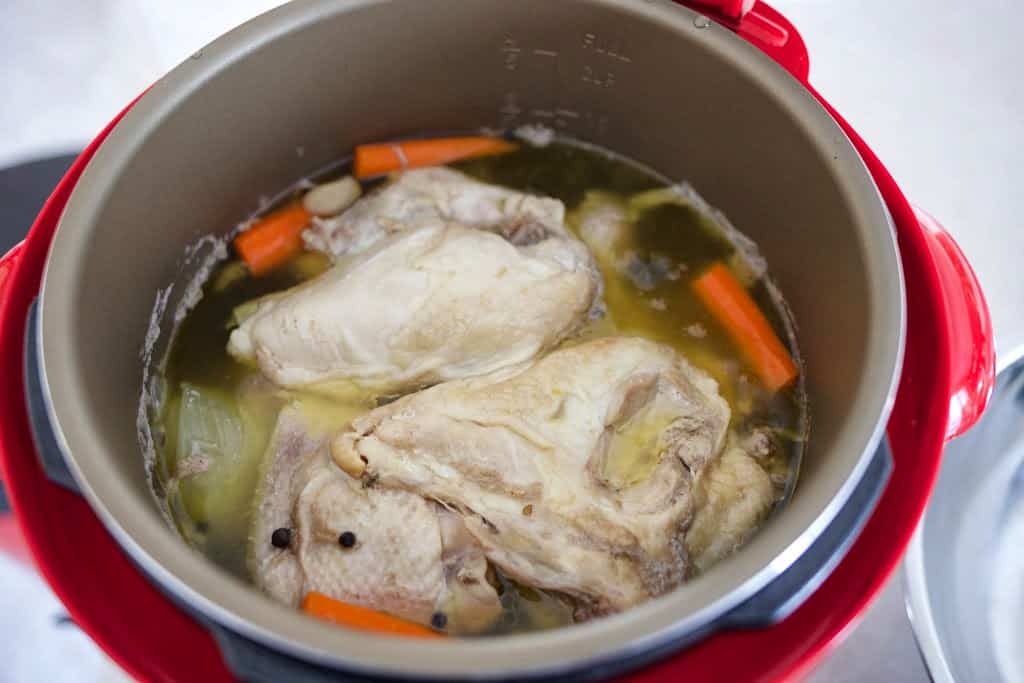
  • No pressure cooker? No worries. Use a heavy bottomed dutch oven with a lid. Increase the amount of chicken stock or water to 2 cups. Follow the instructions right up until "lock the lid". Then, instead of pressure cooking, bring the pot to a boil, cover, and move the pot to a preheated 350°F oven. Bake for 1 ½ hours, or until the pork is tender. Move the pot from the oven to the stove top, add the vegetables from step 4, cover, bring to a simmer, and simmer for 20 minutes. Continue with the stir and season step.
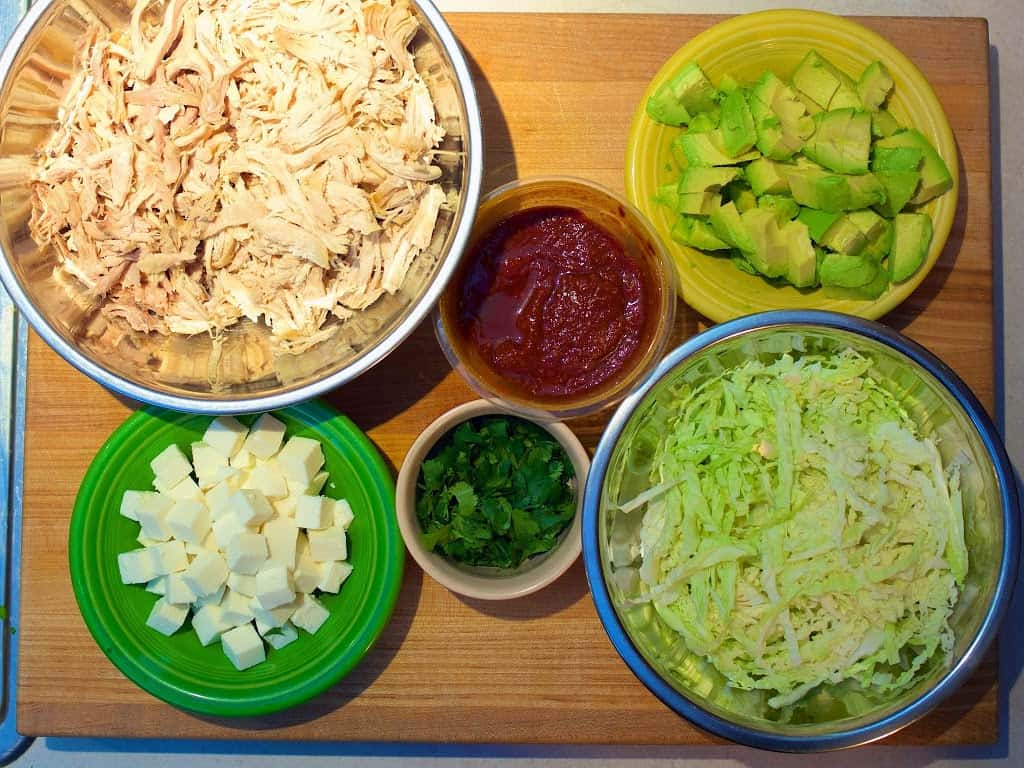
  • This is a "use up the summer vegetables" recipe. Extra summer squash? No green beans? Want to use up an eggplant? Adjust the vegetables based on what you have on hand.
Pressure Cooker Mexican Pork Stew With Summer Vegetables | DadCooksDinner.com
Everything diced and ready for the pressure cooker

What do you think?

Questions? Other ideas? Leave them in the comments section below.

Related Posts

Pressure Cooker Sopa de Ajo (Mexican Garlic Soup)
Pressure Cooker Braised Lamb Shoulder Tacos (Cordero Guisado)
Pressure Cooker Refried Pinto Beans
Instant Pot Pork Stew
My Pressure Cooker Recipes Index

Enjoyed this post? Want to help out DadCooksDinner? Subscribe to DadCooksDinner via eMail or RSS reader, recommend DadCooksDinner to your friends, and buy something from Amazon.com through the links on this site. Thank you.

Year Six of DadCooksDinner

August 26, 2014 by Mike Vrobel 1 Comment

A little voice inside my head said: "Don't look back. You can never look back."
Don Henley, Boys of Summer

On August 20th 2008, I posted for the first time, wondering if anyone would ever read what I wrote. Here I am, six years and 844 posts later, with another year of DadCooksDinner behind me. Let's look back at the highlights of Year Six, shall we?

Road Trip!

I was a wandering blogger this year. I learned about Mole at the Seasons of my Heart cooking school in Oaxaca, Mexico. I studied up on duck at Blogger Duck University at Maple Leaf Farms. I toured the Weber Grill factory in Palatine, Illinois. And I went on the Meaty Chicago tour and did a book signing at the International Association of Culinary Professionals annual convention in Chicago. Where am I off to next? I'm meeting Pam Anderson, my kitchen inspiration, at her Big Harvest Potluck at the end of September. I can't wait!

Top Five New Recipes

Here are five most popular recipes from the last year. (Last year means: Published in August 2013 or later. Popular means: most page views.)

1. Pressure Cooker Senate Bean Soup

2. Cast Iron Roast Butterflied Chicken

3. Rotisserie Prime Rib Roast, Reverse Seared

4. Sous Vide Chicken Thighs with Garlic and Herb Pan Sauce

5. Fresh Tomato Gazpacho (in a Vitamix)

Top Five Pictures

I've been working on the blog's photography over the last year. I bought a new camera, learned how to process RAW files in Adobe Lightroom, and practiced using off camera flash. It was rocky at first, but now it feels like my photography is improving. There is always so much more to learn…

1. Cedar Plank Grilled Ribeye with Peppers and Onions

2. Pressure Cooker Shrimp Étouffée

3. Grilled Asparagus and Prosciutto Wraps

4. Rotisserie Fresh Ham with Injection Brine

5. Grilled Chicago Char Dogs

Most Important

The most important thing I've learned over six years of blogging: I wouldn't be here, writing my little heart out, if you weren't interested. Back when I started, I assumed I would blog for myself, and maybe some family members (hi, dad!). I was thrilled to find out that you're out there, enjoying my writing. Thank you for reading!

What do you think?

What was your favorite recipe from the last year? Leave them in the comments section below.

Enjoyed this post? Want to help out DadCooksDinner? Subscribe to DadCooksDinner via eMail or RSS reader, recommend DadCooksDinner to your friends, and buy something from Amazon.com through the links on this site. Thank you.

Cooking Dinner Every Night Is a Chore

August 21, 2014 by Mike Vrobel 1 Comment

It's easy to cook celebration meals. They're fun! Working on a leisurely Sunday dinner, a cookout in the back yard with friends, or a holiday feast - these all remind me how much I love to cook.

Weeknight meals? Every night? They're a chore. Most weeknight dinners are about "have to", not "want to". After a long day at work…after basketball practice, violin lessons, and swimming…when everyone is tired, cranky, and hungry…or the kids want to go play with friends, and think dinner only gets in the way…

That's lot of inertia. The temptation is to sit on the couch, open a tasty beverage, and dial up a pizza delivery, so I can spend more time surfing the web.

I believe at the core of my being: dinner together, as a family, is what makes us a family. It matters to me, feeding my family to the best of my ability. It has to matter, or I couldn't overcome the inertia.

That doesn't mean every weeknight dinner is a gourmet meal. Cooking dinner on weeknights takes willpower, when my willpower is running low. So, I do what I can. A box of mac and cheese with hot dogs is better than fast food; lunch meat sandwiches and a salad are better than mac and cheese; a quick pan sauté with a side of steamed broccoli is better than lunch meat sandwiches…they're all on a continuum of better options than giving in to fast food (or fast casual) dining.

Dinner is hard work. It is a chore. It takes planning and effort. The good days are few and far between, and the bad days? Where dinner doesn't come out right, everyone is distracted, pushing food around their plates, not talking, and asks to be excused at the first possible moment? They suck.

On the good days? I get past the resistance keeping me on the couch, and start cooking. The rhythm of the kitchen takes over, and my monkey mind stops jumping around. Everyone comes together at the table, sharing stories from their days, building their favorite tacos, and we enjoy a meal with each other. And, as the kids clear the dishes, I realize - we did it, again. Another day together, as a family, at dinner.

Inspired by Cooking Isn't Fun, but you should do it anyway, by Tracie McMillan [Slate.com]. I read the story in the Best Food Writing 2013 anthology.

What do you think?

Why do you cook dinner? What tricks do you use to overcome the siren call of delivery pizza? Leave them in the comments section below.

Enjoyed this post? Want to help out DadCooksDinner? Subscribe to DadCooksDinner via eMail or RSS reader, recommend DadCooksDinner to your friends, and buy something from Amazon.com through the links on this site. Thank you.

Please Support the Grill Canopy Kickstarter

August 20, 2014 by Mike Vrobel 18 Comments

The Grill Canopy is a KickStarter campaign for a better grill cover. Easy on, easy off, rests in a bracket that attaches to the side of your grill when it's not in use.

Even better? It was designed by Canadians. I trust them design a cover that will work in the dead of winter. I hate wrestling with my frozen grill cover, trying to pry it off the grill.

Looking for a great cover for your grill? Please support the Grill Canopy Kickstarter [Kickstarter.com]. They have seven days left in their campaign. I want one of these covers. No, I NEED one of these grill covers.

FCC note: I am not being compensated in any way for this post - I want this KickStarter to succeed. I want one, now!

Pan Grilled New Potatoes

August 19, 2014 by Mike Vrobel Leave a Comment

I love roasted new potatoes, creamy on the inside, with browned, crisp edges. Summer is new potato time, when they start to show up at the farmers' market and in my CSA box. I already have the grill lit - it is summer after all - so I like to pan-roast new potatoes on my grill.

My CSA started sharing new potatoes this week, finally. This has been a bummer of a summer for my CSA's farmers. Pouring rain, a July that couldn't get out of the 70°s…everything is behind this year.

Halved new potatoes are perfect for pan grilling, small enough to finish cooking in the time it takes for the cut side to brown. I toss the potatoes with salt, pepper, olive oil, and fresh herbs. Then I preheat the grill pan over direct heat, slide it over indirect heat, and pour the new potatoes onto the pan, flipping them all cut side down. I close the lid, and thirty minutes or so later, my potatoes are ready to serve.

Move beyond the big hunk of meat on the grill. Look to the sides as well!
OK, that sounded a lot more heroic in my head.

Recipe: Pan Grilled New Potatoes


Prep Time: 5 minutes
Cook Time: 30 minutes

Equipment

  • Heavy, 12 inch grill safe fry pan (Cast iron is best for this recipe. I use Weber's cast iron griddle, or my cast iron fry pan.)
  • Grill (I love my massive Weber Summit)

Ingredients

  • 1 ½ pounds redskin new potatoes, halved
  • 1 teaspoon kosher salt
  • ½ teaspoon fresh ground black pepper
  • 1 tablespoon vegetable oil
  • 4 sprigs fresh thyme (or rosemary, or both)

Directions

1. Set the grill up for indirect medium heat

Preheat the grill, and set it up for indirect medium heat (350°F). On my Weber Summit, I preheat the grill with all burners set to high for 15 minutes, brush the grill grate clean, then I turn all the burners off except for the two burners on the left (burners #5 and #6), which I turn to medium. This gives me a two zone fire - indirect heat over burners 1 to 4, and direct medium heat over burners 5 and 6.

2. Season the potatoes

While the grill preheats: Put the halved potatoes in a large bowl, sprinkle with the salt and pepper, drizzle with the vegetable oil, add the thyme sprigs, and toss to coat.

3. Pan grill the potatoes

Put the grill pan over direct heat, close the lid, and preheat the pan for five minutes. Move the pan over indirect heat and carefully set the potatoes in the pan, cut side down. Drop the thyme sprigs on top of the potatoes, close the lid, and cook until the potatoes are easily pierced by a paring knife and crispy and brown on the bottom, about 30 minutes. Remove from the grill, slide a spatula under the potatoes to loosen them from the pan, transfer to a platter, and serve.

Notes

  • If the potatoes are browning too quickly, flip them over, skin side down, and let them finish cooking through with the cut side up. If the potatoes aren't browned enough, but are cooked through, slide the grill pan back over direct heat to crisp up the cut side.
  • For a charcoal grill, this recipe takes a careful timing. The potatoes will probably take longer to cook than the main course, and I don't want the charcoal to burn down too much before the main course starts grilling. I set the grill up with a two zone fire - half the grill with direct heat over the coals, the other half without any coals. I start cooking the pan of potatoes, and let them go for twenty minutes, before starting the main course. While the main course grills over direct heat, I let the potatoes finish over indirect heat.

What do you think?

Questions? Other ideas? Leave them in the comments section below.

Related Posts

Grill the whole meal, including the sides! Here are some ideas:
Grilled Peppers and Onions
Grilled Corn with Chipotle Lime Butter
Foil Pouch Grilled Green Beans
Pan Grilled Bratwurst and Sauerkraut

Enjoyed this post? Want to help out DadCooksDinner? Subscribe to DadCooksDinner via eMail or RSS reader, recommend DadCooksDinner to your friends, and buy something from Amazon.com through the links on this site. Thank you.

Rotisserie Chicken with Tex-Mex Rub

August 14, 2014 by Mike Vrobel 5 Comments

Pressure Cooker Butternut Squash with Sage and Honey | DadCooksDinner.com
Rotisserie Chicken with Tex-Mex Rub

I'm working on my next cookbook.

Whoops. That's supposed to be a secret. But I'm getting so close!

Rotisserie Chicken Grilling is coming soon - I'll let you know the details as it gets closer to release.  This means I'm cooking a LOT of rotisserie chicken. I tested this Tex-Mex Rub, loved it, but had to make the hard choice to take it out of the book. (I have too many rubs, and it's similar to another recipe.) But, I didn't want to give up on it, so I'm sharing it here. I hope this fulfills your rotisserie chicken cravings until the book is published.

Rotisserie Chicken with Tex-Mex Rub | DadCooksDinner.com
Chickens with spice rub

I fought through a lot more procrastination than usual with this book. I've got to get it done, ship it, and move on. It tasks me. It tasks me, and I shall finish it!

I used a bigger chicken than usual - there was a sale on roasters at the store - so I had to adjust my technique. My usual recipe calls for a four pound chicken, cooked high and fast to crisp up the skin. But this was a monster bird, close to six pounds. (I think it descended from T-Rex, not from one of those tiny velociraptors). I used the infrared rotisserie burner until the chicken was starting to brown, about 30 minutes, then turned the IR burner off and let the heat settle to indirect medium-low, about 300°F, and let the chicken coast to doneness, for a total cooking time of an hour and a half.

Rotisserie Chicken with Tex-Mex Rub | DadCooksDinner.com
Ready to start spinning

I can't argue with the results. The big bird had crackling skin, tender meat, and enough spice rub kick to make my lips tingle. I can't ask for anything more.

Recipe: Rotisserie Chicken with Tex-Mex Rub

Equipment

  • Grill with Rotisserie attachment (I use a Weber Summit with an infrared rotisserie burner. Here is the current version of my grill.)
  • Aluminum foil drip pan (9"x13", or whatever fits your grill. I use an enameled steel roasting pan.)
  • Butchers twine
  • Instant Read Thermometer

Notes

  • No rotisserie? No worries. Your best option is grilling a butterflied chicken - use the instructions in my grilled butterflied chicken recipe, but substitute the Tex-Mex rub for the dry brine, and expect the total cooking time to be an hour for the larger chicken.
  • Grill-Roast Chicken: Don't feel like butterflying the chicken? Set the grill up for indirect medium heat as described in step 2, then put the grill grate in the grill, and put the chicken, breast side down, on the grate over the drip pan. Close the lid and cook for 30 minutes, then flip the chicken breast side up (using wads of paper towels to protect your hands), and grill until the chicken measures 160°F in the breast, about 1 hour.
Rotisserie Chicken with Tex-Mex Rub | DadCooksDinner.com
Browning nicely

What do you think?

Questions? Other ideas? Leave them in the comments section below.

Related Posts

Rotisserie Chicken Zatar
Rotisserie Chicken with Knob Creek Maple Glaze and Drip Pan Potatoes
Grilled Butterflied Chicken with Dry Brine
My other rotisserie recipes


Check out my cookbook, Rotisserie Grilling.

Everything you could ask about the rotisserie,
plus 50 (mostly) new recipes to get you cooking.

It's a Kindle e-book, so you can download it and start reading immediately!


Enjoyed this post? Want to help out DadCooksDinner? Subscribe to DadCooksDinner using the RSS or Email options on the right, recommend DadCooksDinner to your friends, buy something from Amazon.com through the links on this site, or donate through my tip jar. Thank you.

Ten Steps to Rotisserie Grilling

August 12, 2014 by Mike Vrobel 7 Comments

Ten Steps to Rotisserie Grilling

I love my rotisserie. It turns out better roasts than any other method I've tried.
Get it? Turns? Thank you, thank you, I'll be here all week.

There is some extra work involved with rotisserie grilling - you can't just slap the meat on the grill - but it's worth the effort. Here is my ten step program for your grill's rotisserie attachment.

You'll need:

  • A grill with a rotisserie attachment (spit, spit forks, motor, and motor mount (which is attached to the rotisserie ring if you bought the Weber kettle rotisserie).
  • Trussing twine (look for heavy butcher's twine)
  • Heat proof gloves
  • Something to rotisserie. (May I suggest a chicken?)

1. Truss and spit the meat

No matter what meat you're cooking, it needs to be trussed. The rotisserie turns gently, but as the meat cooks, that gentle turning will tear the roast loose if it is not securely tied down.

Secure the meat to the spit with the spit forks - push them in there tight. Again, you don't want anything wobbling around.

For trussing and spitting instructions, see my YouTube videos:

  1. How to truss and spit two chickens for the rotisserie (Video)
  2. How to truss a roast (Video)
  3. How to truss a beef tenderloin (Video)

2. Set the grill up for indirect heat, with a drip pan in the middle, between the lit burners or the coals.

On a charcoal grill, light the coals, then pour them into two piles on the sides of the grill. (If your grill has charcoal baskets, they're perfect for this.) Set the drip pan on the charcoal grate between the piles of charcoal. Next, put the rotisserie ring on the grill and make sure it is seated.

On gas grill, remove the grill grates, then preheat the grill with all burners on high for fifteen minutes. Turn off the burners in the middle of the grill, leaving the two outer burners lit, and set a drip pan on top of the burner covers in the middle of the grill. (If you have a rotisserie burner, now is the time to light it - push the knob in, the knob until the burner ignites, and hold the knob down for twenty seconds to get the gas flowing properly to the rotisserie burner.)

If the roast will take an hour or less to cook, I almost always use indirect high heat (450°F or higher internal grill temperature). If it will take longer than an hour, I go with medium heat (about 350°F inside the grill.)

3. Mount the motor

Slide the rotisserie motor onto the mounting bracket, plug it in, and turn the motor on and off to make sure it is working.

4. Open the lid on the grill.

Do this now, before you go pick up the spit - you don't want to be fumbling with a yard long metal spear with a heavy roast in the middle with one hand, while you try to open the lid with the other hand.
Not that I've dropped a roast when the spit slipped out of my hand. No, that wasn't me.
Motor mount and spit
Handle end of spit into groove on ring

5. Mount the spit into the rotisserie bracket

Grab the spit with heat safe gloves or oven mitts. Plug the point of the spit into the rotisserie motor. Lower the notch on the spit into the groove on the other side of the grill. (The groove is in the rotisserie ring for a charcoal grill, or is built into the side of the firebox for a gas grill.)

What about the counterweight? If you have a gas grill, you don't have one, so skip this section. If you have a kettle grill rotisserie attachment, it comes with a counterweight; I ignore it unless I'm cooking something huge, like a 20 pound turkey. Then, I remove the motor from the mounting bracket and set the spit in the grooves on the rotisserie ring. I let the spit go, gravity takes over, and the spit ends up with the heaviest part of the roast facing down. I attach the counterweight to the end of the spit pointing straight up - voila, balanced! Slide the spit out, remount the motor, plug the spit in, and go.

6. Turn on the rotisserie motor

Make sure the spit is turning freely, the meat is secure, and the drip pan is centered below the meat. If the meat is loose or wobbly, stop the motor, loop some twine around the meat, and tie it down tight. Better to tie it down it now than find it ripped loose from the spit forks later.
Again, not that that's ever happened to me. Ever. Nope, not even that one time I…um, I mean…nope, never happened.
Rotisserie mounted and spinning

7. Cook with the lid closed

Leave the motor running, close the lid, and cook with the lid closed as much as possible until the roast is done cooking. (I check the roast after a half an hour to make sure everything is still turning properly, then close the lid again and let it cook.)

8. Using the heat safe gloves, remove the spit from the grill and transfer it to a carving board.

Be careful - the spit is a branding iron when it first comes off the grill.

9. Remove the roast from the spit, and remove the trussing twine

Remove the first spit fork from the spit. Using tongs or a carving fork, push the meat off the spit and slide it onto the cutting board. (Keep your heat-proof gloves on until you have the spit set down on a heat proof surface.) Cut the trussing string and remove it from the roast immediately. (The crust on the meat will harden as it cools; the sooner you get the trussing string off, the better.)

10. Rest, carve, and serve

Let the meat rest for ten to fifteen minutes, then carve and serve the crispest, most crackling roast you've ever cooked.

Adapted from my cookbook, Rotisserie Grilling. I did mention I wrote a cookbook, right? Right?

What do you think?

Questions? Other ideas? Leave them in the comments section below.

Related Posts

Rotisserie Prime Rib, Reverse Seared
Rotisserie Chicken with Spanish Smoked Paprika Rub
Rotisserie Leg of Pork with Injection Brine and Herb Rub
My complete list of rotisserie recipes


Check out my cookbook, Rotisserie Grilling.

Everything you could ask about the rotisserie,
plus 50 (mostly) new recipes to get you cooking.

It's available as a paperback, or a Kindle e-book, so you can download it and start reading immediately!


Enjoyed this post? Want to help out DadCooksDinner? Subscribe to DadCooksDinner via eMail or RSS reader, recommend DadCooksDinner to your friends, and buy something from Amazon.com through the links on this site. Thank you.

BBQ Beef Short Ribs on a Kettle Grill

August 7, 2014 by Mike Vrobel 5 Comments

BBQ short ribs are taunting me, popping up all over the Internet.

I don't know how I missed barbecued beef short ribs on my last trip to Austin. Maybe because I was so late getting in the line at Franklin's BBQ…but I also went to Rudy's, Sam's, Iron Works, and the Salt Lick at the airport, and I must have been too focused on brisket, because I didn't have short ribs at any of them. Of course, now, no matter where I turn, I see a picture of a rib with a two inch thick slab of meat on top. It's going to be a while before I can get back to Texas, so if I want short ribs, I have to make them myself.

Luckily there are some great BBQ short rib resources on the web; my favorite was this article by Daniel Vaughn at Texas Monthly: You May Love Beef Short Ribs, but Pitmasters Don't.

Whole beef short ribs can are tricky to find in Ohio, especially if you want the meaty short ribs from the beef plate, neighbor to the ribeye. Expect them to be a special order. My butcher, Mike at Sherman Provision, got an entire beef plate for me.

And then, don't make the same mistake I did. I was so excited that I grabbed the whole plate and headed to Mauri at the checkout. I didn't think to ask him to trim the rib tips for me; I did that myself, as you'll see in the pictures below. Separating the rib tips from the ribs is a lot of work with a butcher's knife - the bones go every which way. It is much easier for your butcher to do this - he's got a band saw in the back, and can cut across them with no problem.

Low and slow is the way to go when cooking a tough piece of meat like short ribs. I use the Minion method to control my fire, adding a handful of lit coals to a pile of unlit coals, then choking off most of the oxygen to keep the heat down. The pile of coals slowly ignites, giving me enough fuel to last through the six to eight hour cooking time. Oak is the traditional Texas smoking wood, and I love the combination of oak and beef. And I cheat, and use the Texas crutch - I foil wrap the ribs after they reach 150°F, to trap moisture and help them get past the dreaded barbecue stall.

The results are short rib heaven. The connective tissue melts in the long cooking time, and the intramuscular fat bathes the meat as it cooks. Smoky, tender, full of beefy flavor - now I know why barbecued short ribs are so big in Texas.

Recipe: BBQ Beef Short Ribs on a Kettle Grill

Adapted from: Daniel Vaughn at Texas Monthly: You May Love Beef Short Ribs, but Pitmasters Don't.

Prep Time: 30 minutes
Cook Time: 6 hours

Equipment

  • Grill (I love my Weber kettle)
  • Aluminum foil
  • 2 fist sized chunks of smoking wood (preferably oak, but hickory, cherry, apple, or pecan will work.)

Ingredients

  • 4 beef plate short ribs - you want the entire bone - and I used the rib tips as well
  • 1 tablespoon kosher salt
  • 1 tablespoon fresh ground black pepper

Directions

1. Season the short ribs

Sprinkle the ribs evenly with the salt and pepper. (If you have the time, do this the night before cooking and refrigerate the ribs to dry brine the ribs.)

2. Set the grill up for indirect low heat

Set your grill up for indirect low heat, 250°F, with a drip pan on one side of the grill and the fire as far over on the other side as you can get it.

Vents open all the way
Vents closed down ¾ of the way

In my kettle grill, I open the bottom vents a crack, with the blades of the ash sweeper covering ¾ of the rectangular holes. I make a tight pile of 80 unlit coals on ⅓rd of the charcoal grate, about three coals deep. (This is about ¾ of a charcoal chimney's worth of coals.) Put the two chunks of smoking wood on top of the unlit coals. Next, I light 10 coals in my chimney starter; when the coals are lit and covered with gray ash, I pour them on top of the unlit coals. Then I set the drip pan on the other side of the charcoal grate, add my grill grate, and brush it clean. I put the lid on the grill immediately, and set the top vent to halfway open.

3. Start cooking the short ribs

Put the short ribs on the grill over the drip pan and close the lid. Adjust the top vent to stabilize the temperature at roughly 250°F; let the temperature settle for fifteen minutes between vent adjustments. Once the temperature is stabilized, check the grill every hour to make sure the vents don't need to be tweaked. (It's OK if the temperature fluctuates; I try to keep it at 250°F, but anything between 225°F and 300°F is OK. Keep the lid closed - every time you lift the lid, heat will escape and the air you let in will cause the coals to heat up. I try not to open the lid until it is time to wrap the ribs in the next step.)

4. Wrap the short ribs and finish cooking

Cook the short ribs until they reach a temperature of 150°F in the thickest part, about three hours. Then, wrap each rib tightly with aluminum foil, put them back in the grill, increase the heat to 300°F by opening the vents more, and cook until they reach an internal temperature of at least 205°F, about three more hours. (Poke the probe thermometer deep into the thickest rib before wrapping it with foil, but don't let the probe touch the bone. Total cooking time is about six hours for these extra meaty short ribs. It is fine if the grill gets hotter once the ribs are foil wrapped - up to 350°F is OK.)

5. Rest and serve

Take the foil wrapped ribs off of the grill, put them snug against each other, and wrap in a single piece of aluminum foil to catch any leaking juices. Wrap a large towel around the foiled ribs to keep them warm. (I use a bath towel from our rag pile.) Let the ribs rest for up to one hour. Then, unwrap the ribs and serve.

Notes

  • I like my barbecued beef plain, but my kids demand barbecue sauce. My Chipotle Espresso Barbecue Sauce is a great sauce for these ribs.
  • I wrapped some of the ribs in foil, and some in pink butcher's paper, as recommended by Franklin BBQ. The ribs wrapped in foil were tender and falling off the bone; the ones wrapped in butcher paper were still a little bit tough. I should have let them go for a few more hours. The crust on both foiled and papered ribs was similar, so going forward I'm sticking with my foil wrap.
  • Reading up on butcher paper wrapping - it looks like it is more useful for holding barbecued meat when you are working in a professional kitchen than it is for home cooks. Again, from Daniel Vaughn at Texas Monthly: The Importance of Wrapping Brisket
  • In case you haven't noticed a theme to this post: if you are interested in barbecue, you need to follow Daniel Vaughn at TMBBQ.com, where he is Texas Monthly's barbecue correspondent.

What do you think?

Questions? Other ideas? Leave them in the comments section below.

Related Posts

BBQ Pulled Pork on a Kettle Grill
Grill Smoked Baby Back Ribs
Espresso Chipotle Barbecue Sauce
Grilled BBQ Chicken Thighs

Enjoyed this post? Want to help out DadCooksDinner? Subscribe to DadCooksDinner via eMail or RSS reader, recommend DadCooksDinner to your friends, and buy something from Amazon.com through the links on this site. Thank you.

Caffè Tonic

August 5, 2014 by Mike Vrobel 10 Comments

Intrigued / grossed out by this. RT @TastingTableNYC Meet coffee's new mate. Tonic water.
@Francis_Lam via Twitter

My first thought: Espresso and tonic water? No way. There's no way that tastes good.
My second thought: That's so weird, I have to try it.

It actually works! The bitter, roasted flavor of the coffee mixes with the sweet, spicy flavor of the tonic water. I tried it with the bottle of tonic water I had at home, and it was good; I went out and found the Fever Tree Tonic that Tasting Table recommends, and it was fantastic.
It was so good that I'm restraining myself. Writing this makes me want to go make another one right now, but I've hit my self-imposed espresso limit for the day. Four shots is enough, right?

If your coffee addiction started with something sweet (like cafe mocha at Arabica Coffee on Coventry back in the day), but your tastes have matured, try a caffè tonic.

Recipe: Caffè Tonic

Adapted from: Coffee Tonics are the New Iced Tonic

Prep Time: 5 minutes
Cook Time: 5 minutes

Equipment

  • Espresso machine (I depend on my Nespresso every morning)

Ingredients

  • 6 ounces of tonic water (preferably Fever Tree Tonic Water)
  • Ice
  • 1 shot espresso (2 ounces)

Directions

1. Make the Caffè Tonic

Pour the tonic water into a glass, and fill with ice. Gently pour the espresso on top of the tonic water. Serve.

Notes

  • The espresso will float on top of the tonic - that's OK, every sip will give you a mix of both.

What do you think?

Questions? Other ideas? Leave them in the comments section below.

Related Posts

Mexican Hot Chocolate
Canning Jar Margaritas
Grilled Lemon Whiskey Sour

Enjoyed this post? Want to help out DadCooksDinner? Subscribe to DadCooksDinner via eMail or RSS reader, recommend DadCooksDinner to your friends, and buy something from Amazon.com through the links on this site. Thank you.

Grilled Corn In The Husk

July 31, 2014 by Mike Vrobel 7 Comments

Half-peeled ear of grilled corn

Grilled corn in the husk. It's time for summer sweet corn, with grill-charred corn kernels. This is the easiest way I know to grill corn. Leave the husk on, and toss it on the grill grate. Pull the husks off the corn when they're done and serve with salt and butter.

Half-peeled ear of grilled corn
Grilled Corn in The Husk
[feast_advanced_jump_to]

Why This Recipe is Great

Cooking corn in the husk steams the corn and makes it easy to peel - the steamed corn silks and husk slide right off of the corn. It is messy, though - the outer husk is blackened, and after peeling the corn your hands will look like you were drawing with charcoal.

You can toss the ears straight on the grill grates, but I like to peel the outer layer of the husk and trim the silk from the top of the corn to keep the husks from burning. (Both the outer layer and the silk stick out, and tend to catch fire over direct heat.)

One last advantage to this cooking method - the corn husk protects the corn, which gives us a wide margin of error when cooking. Cooking over high heat, not medium? Forgot to flip the corn? Enjoying a tasty beverage, and left the corn on too long? The husk will blacken more, but the corn inside will be fine. You can relax and finish your beverage.

Should I Soak My Corn Before Grilling?

Some people soak the corn in cold water before tossing it on the grill. If you want to, be my guest, but I don't bother. It doesn't seem to keep the husks from catching on fire, and I want a little bit of that charred flavor in my grilled corn.

How to Grill Corn in the Husk

  1. Prep the corn: Pull the outer layer of husks off the corn, and trim the silk from the top with scissors.
  2. Prep the grill: Preheat the grill, and set it to medium heat, about 350°F.
  3. Grill the corn: Put the corn on the grill grate, directly over the burners or charcoal. Grill the corn for 20 minutes with the lid closed, flipping halfway through the grilling time.
  4. Peel and serve: Let the corn rest until it is cool enough to handle, then remove the husks. Serve with butter and salt.

What to Serve with Grilled Corn in the Husk

Grilled corn in the husk is a fantastic side dish with any grilled meal. I serve it with grilled steaks, or grilled chicken, or grilled hamburgers, or pulled pork, or...well, almost anything.

Storing Leftovers

If I have leftover corn, I cut the kernels off of the corn cobs and store them in 2-cup containers. They'll keep for a couple of days in the refrigerator. Then, I reheat them and serve them as a side, or use them in a grilled corn salsa.

What do you think?

Questions? Other ideas? Leave them in the comments section below.

Related Posts

Sous Vide Corn on the Cob
Grilled Corn with Chipotle Lime Butter
Grilled Corn and Pineapple Salsa
Grilled Green Beans in Foil

Enjoyed this post? Want to help out DadCooksDinner? Subscribe to DadCooksDinner via eMail or RSS reader, recommend DadCooksDinner to your friends, and buy something from Amazon.com through the links on this site. Thank you.

Pinterest Cleanup, or the Time Loop?

July 29, 2014 by Mike Vrobel 5 Comments

Pinterest Cleanup, or the Time Loop?

Wherein I explain my Pinterest embarrassment.

I love food photography, and I love it when people share my pictures on Pinterest. But I have a problem. My most popular post on Pinterest is a great recipe, Baked Chicken Thighs with Mustard and Herbs. But the picture with that post? Ugh.

It’s from the early years of my blog, taken at night under the harsh fluorescent lighting in my kitchen. It’s an arrangement of brown chicken on my (then) brand new, Fiesta Ware lemongrass green plate. So, so awful.

Oh, the shame...

But that recipe is so good, people keep passing it around on Pinterest in spite of the picture. On the one hand, good for me, I’ve transcended the entire point of Pinterest. On the other hand…I couldn’t take it any more. I had to go back and fix the picture.

I try not to go back and fix things, other than obvious misspellings, grammatical errors or cut and paste issues. I cringe when I read my early writing, and I know myself. Once I started wholesale fixes, I wouldn’t be able to stop. By the time I got done fixing all my old posts, I would have learned enough to go back and fix them all again. I’d be trapped in a time loop, constantly updating the blog, never posting new stuff.

But this was too much, even for me. So, please, go enjoy my updated version of Baked Chicken Thighs with Mustard and Herbs. (I rewrote the recipe while I was in there. I had to.) It really is a great recipe.

To reward you for reading this rambling post, and to showcase some recipes from my archives, here are my top five recipes according to Pinterest, all with much better pictures...

Baked Chicken Thighs with Mustard and Herbs
Fiery Mexican Martini
Foil Pouch Grilled Green Beans
Pickled Dilly Beans
Rotisserie Boneless Pork Loin Roasts

Now, if I can just avoid going back to fix any other posts...like the Homemade Barbecue Rub pictures that were #6 on my Pinterest list...Darn it.

What do you think?

Questions? Other ideas? Any other posts I have to go back and update? Leave them in the comments section below.

Enjoyed this post? Want to help out DadCooksDinner? Subscribe to DadCooksDinner via eMail or RSS reader, recommend DadCooksDinner to your friends, and buy something from Amazon.com through the links on this site. Thank you.

Sous Vide Jalapeno Infused Tequila

July 22, 2014 by Mike Vrobel 6 Comments

Canning jar full of tequila with sliced jalapeno pepper wedges sunk to the bottom
Sous Vide Jalapeno-Infused Tequila

I know how to make hot pepper infused tequila - why should I get all modernist and cook it sous vide?

Because, when I want spicy tequila, I want it as soon as possible. Regular infused tequila needs to steep overnight; by adding gentle heat, I can have spicy tequila ready in under an hour.

And, it's easier to vary the amount of heat. I found 45 minutes at 135°F to be the perfect amount of time - it transfers the jalapeno taste and the right amount of spicy heat. If you want the jalapeno flavor with just a bit of heat, infuse the tequila for 30 minutes; if you want to blast your taste buds, infuse it for an hour, extracting all the heat from the peppers.

Most sous vide infusion recipes recommend pouring the alcohol into a gallon zip-top bag, but I found that unwieldy. And by "unwieldy", I mean "I spilled tequila everywhere when the bag slipped." A quart jar is much easier to deal with; it is the right size for a standard 750ml bottle of liquor.

Oh, and one other thing - what type of tequila? You want 100% agave, sliver or blanco tequila. If the label doesn't say 100% agave, it can be up to 49% cheaper liquor - not good. Pay a few dollars extra for the 100% agave tequila. Don't get "gold" tequila - it's silver tequila with food coloring added to give it an amber color.

On the other end of the spectrum are reposado (rested) and anjeo (aged) tequila. They are aged in the barrel to add more complex flavors, and you pay more for the quality. Normally, aging is a good thing, but I find that the jalapeno infusion overwhelms the delicate aged flavors. I prefer the clean flavor of a silver tequila with the heat of the jalapeno.

Trimming and seeding the jalapeno
Jar of tequila and jalapenos in the sous vide water bath
Taste test: a fiery Mexican Martini (with Jalapeno stuffed olives, of course)

Related Posts

Fiery Mexican Martini
Canning Jar Margaritas
Sous Vide Limoncello
Or check out my list of sous vide recipes for other options

Enjoyed this post? Want to help out DadCooksDinner? Subscribe to DadCooksDinner via eMail or RSS reader, recommend DadCooksDinner to your friends, and buy something from Amazon.com through the links on this site. Thank you.

Sous Vide Duck Two Ways - Duck Breast and Duck Leg Confit

July 17, 2014 by Mike Vrobel 3 Comments

Sous Vide Duck Two Ways - Duck Breast and Duck Leg Confit

Cooking duck is a trade off. Duck breast is a tender red meat, and I want it cooked to a rosy pink medium. Duck legs are full of tough connective tissue, and should be cooked past well done, until they are tender and shreddable.

This is impossible on a whole duck. When I roast a duck, I aim to cook the legs and crisp up the skin, and live with overcooked breast. This results in a good duck - the duck fat keeps he duck breast moist, even if it is overcooked. But when I want duck perfection, I break the duck down and cook the legs separately from the breast. That lets me cook each properly - long, low and slow for the legs; a quick saute for the breast.

Can I use Sous Vide cooking to improve on perfection? Of course, or we wouldn’t be talking right now.

I start with the legs, cooking them confit style, with an overnight salting and ten hours in the water bath to tenderize. Then I drop the heat to a perfect medium, add the duck breasts, and cook them for two hours. (The legs stay in the water bath, keeping them warm while the breasts finish.) A quick sear in a hot pan gives me crackling duck skin.

And there you have it - perfect Sous Vide duck, two ways.

Though I have to confess, as much as I love duck breast, it pales in comparison to tender shreds of duck leg confit. If you skip the duck breast portion of the recipe and cook extra duck legs, I won’t blame you.

*Special thanks to Maple Leaf Farms for the wonderful duck!*

Recipe: Sous Vide Duck Two Ways - Duck Breast and Duck Leg Confit


Prep Time: 10 minutes
Cook Time: 12 hours

Equipment

  • Sous Vide water bath (I use a SousVide Supreme Demi)
  • Vacuum sealer
  • Large, heavy frypan (I use a Lodge 12 inch cast iron pan)

Ingredients

Duck Leg Confit

  • 2 duck legs
  • 4 teaspoons kosher salt (2 per duck leg)
  • 2 tablespoons duck fat (or substitute butter)

Duck Breast

  • 2 duck breast halves
  • 2 teaspoons kosher salt

Directions

1. Salt the duck legs

Sprinkle the duck legs with the kosher salt. Refrigerate overnight, or for up to 2 days.

2. Vacuum seal the duck, sous vide the duck legs

The morning of cooking, score the skin on the duck breast halves in a diamond pattern and sprinkle the breasts with the kosher salt, then put them in a quart vacuum bag. Take the duck legs out of the refrigerator and put in a quart vacuum bag with the duck fat. Vacuum seal the bags, then put the bag of duck breast in the refrigerator. Cook the bag of duck legs sous vide at 167°F/75°C for 8 to 10 hours.

3. Cook the duck breasts sous vide

Turn the sous vide down to 135°F/57°C - I add a couple of cups of ice to cool down the water quickly - then add the bag of duck breasts. Cook the duck breasts for 2 hours.

4. Sear the duck

Cut open the vacuum bags and remove the duck, then pat the meat dry with paper towels and discard the liquid. Pat the duck dry with paper towels. Heat the heavy frypan over medium-high heat until it is ripping hot. Put the duck skin side down in the pan and sear until the skin is crisp and brown, about 3 minutes. Remove the duck from the pan and serve.

Notes

  • Now all I need are some duck eggs to poach sous vide, and I can try duck three ways!
  • The liquid in the sous vide bags is mostly duck fat. Instead of discarding the fat, pour a couple tablespoons into a fry pan and use it to make duck fat potatoes. (Yes, I have a duck fat potato obsession.)
  • The first time I had duck confit was at Thomas Keller's Bouchon in Napa Valley. Techncially, I didn't have it, my wife did, on top of a frisee salad. She was kind enough to let me try it…and then had to fend me off as I kept trying to sneak more of the duck leg. Now I always want to serve duck confit on top of a salad.

Resources

This recipe was inspired by:

  • PolyScience: Sous Vide Confit of Duck Leg
  • SousVide Supreme: Bill the Butcher's Sous Vide Duck Confit
  • Kenji Alt at SeriousEats.com: Sous Vide 101 - Duck Breast
  • Maple Leaf Farms

What do you think?

Questions? Other ideas? Leave them in the comments section below.

Related Posts

Sous Vide Chicken Thighs with Garlic and Herb Pan Sauce
Pan Grilled Duck Breast with Duck Fat Potatoes
Rotisserie Duck with Honey Glaze and Drip Pan Potatoes

Enjoyed this post? Want to help out DadCooksDinner? Subscribe to DadCooksDinner via eMail or RSS reader, recommend DadCooksDinner to your friends, and buy something from Amazon.com through the links on this site. Thank you.

Summer Vacation 2014

July 15, 2014 by Mike Vrobel 1 Comment

I'm off to the beach for a week's vacation on the shores of Lake Erie. See you soon!

BBQ Pulled Pork on a Kettle Grill (Grilling Basics)

July 10, 2014 by Mike Vrobel 16 Comments

BBQ Pulled Pork on a Kettle Grill (Grilling Basics) | DadCooksDinner.com

BBQ Pulled Pork on a Kettle Grill (Grilling Basics) | DadCooksDinner.com
BBQ Pulled Pork on a Kettle Grill (Grilling Basics)

Pulled pork is my gateway to low and slow barbecue. Brisket is fantastic, and I lust after ribs, but pulled pork is easy and delicious. If you want to find out why people become barbecue fanatics, make yourself some pulled pork.

How? Well, if you have a real barbecue pit or smoker, it’s easy. (And you don’t need me to explain how to do it - you’re already an expert.) I learned how to make barbecue on my Weber Smoky Mountain. The WSM makes it easy to keep a low fire going for the eight to twelve hours necessary for real barbecue. But, that was back when I was a barbecue fool - I was doing ten hour cooks almost every weekend.

BBQ Pulled Pork on a Kettle Grill | DadCooksDinner.com
Pork butt oasts, rubbed and ready for the grill

Eventually, I moved on from my barbecue phase. (Also known as having kids. Suddenly, finding time for a ten hour cook every weekend was…difficult.) My poor WSM was neglected, and when I didn’t clean it out after my last cook of the year, all sorts of interesting things started growing inside. (I tried to clean it out, but I was never able to stop the spread of white fuzz.)

That’s when switched to doing barbecue on my kettle grill. It’s not as easy, but it’s definitely doable, and when I use the kettle as a regular grill it burns off anything left over from smoking.

BBQ Pulled Pork on a Kettle Grill | DadCooksDinner.com
Grill set up for indirect low and slow barbecue

The trick to using a kettle grill as a smoker is the Minion Method. Make a big pile of unlit coals, add a small amount of lit coals to the top, and use the airflow through the grill to control the temperature. The unlit coals provide fuel for the entire cook, as the fire slowly spreads through the pile. Opening the vents increases the temperature by speeding up the spread of the fire; closing the vents decreases the temperature by slowing down the spread of the fire. I start with my bottom vent half closed and my top vent half open to get the heat going. Once it hits 250°F I close the top vent down to halfway open, and control the fire by opening and closing the top vent. (Never close the vent all the way - you’ll smother the fire.) The Minion Method provides steady heat for eight to twelve hours of cooking, depending on how much charcoal you add to the grill.
I learned the Minion Method from the Virtual Weber Bullet website - it is the way they control the temperature on the WSM. It adapts pretty well to the kettle grill. If you dive deep into barbecue, you want to switch to a true barbecue smoker, and the WSM and the Virtual Weber Bullet are great places to start looking.

BBQ Pulled Pork on a Kettle Grill (Grilling Basics) | DadCooksDinner.com
Pork butts on the grill

I use two other tricks to bring the cooking time down.

First, I buy a whole (8 pound) pork butt roast and ask my butcher to cut it in half. The two smaller roasts cook a lot faster than the entire roast.
“Faster” is relative - 8 hours for two roasts, vs 12 hours for one huge one. This *is* low and slow barbecue we’re talking about, after all.

The final trick is the Texas crutch - wrapping the pork in aluminum foil once it reaches 150°F. This speeds up the cooking time by avoiding the dreaded “barbecue stall”, where the internal temperature gets into the 160s, then sits there for hours before the temperature starts climbing again. Wrapping the pork in foil traps the heat, braising the pork, and speeding the cooking time. I want 195°F internal for tender, sliceable pork shoulder, and 205°F for pullable pork. (I’m shooting for 205°F in this recipe.)

Now, pork shoulder is forgiving. As long as you get it to 205°F internal, and cook it for hours, the results will be great. If the heat spikes up to 400°F, or down to 225°F, the pork will be fine; it will just change the cooking time. Get the temperature back between 250°F and 300°F as soon as you can, but it’s not the end of the world if the grill is running hot or cold.

And, when you’re done? Shred the pork with a pair of forks, mixing the delicious, mahogany bark from the outside of the roast with the tender meat on the inside. (If you’re in a hurry, get a pair of Bear Paws.) Serve on cheap white buns with your favorite sauce, and (traditionally) dill pickle slices and cole slaw. Finally, consider the purchase of a WSM as you devour your awesome low and slow pork.

Recipe: BBQ Pulled Pork on a Kettle Grill (Grilling Basics)

Equipment

  • Kettle Grill (I love my Weber Performer)
  • 2 fist sized chunks of smoking wood or 2 cups soaked wood chips (preferably hickory; oak, apple, or cherry are also good)
  • 9 by 13 aluminum foil pan
  • 18" wide heavy duty aluminum foil
  • Probe thermometer (not absolutely necessary, but it makes it easy to check the pork's temperature without opening the lid)

BBQ Pulled Pork on a Kettle Grill | DadCooksDinner.com
It's a good sign when you can pull the bone out of the roast with just a tug.

Notes

  • Can I do this on a gas grill? Yes, absolutely. It's a lot easier to maintain the temperature, but you won't get as much smoke flavor. Gas grills allow too much airflow, and airflow means that the smoke escapes. That's OK - set your grill for 250°F, follow the instructions, and you'll still get good pulled pork. It just won't be as amazing as it is on a charcoal grill.
  • What do I do if the fire's running too hot? (Too hot means over 300°F, and you *really* want to keep it below 350°F). First, try closing down the vents as much as possible, without closing them all the way. (If you close them entirely, the fire will smother, and go out.) If closing the vents doesn't help, add two cups of hot water to the drip pan - the water will absorb some of the heat and bring the temperature down.
  • What do I do if the fire's running too cold at the beginning? (Too cold means below 225°F, and you really want to keep it above 200°F) Open up the top vent all the way. If that doesn't help, lift the lid, make sure the coals are lit (you should see some glowing embers), and leave the lid off of the grill for five minutes to get the fire going.
  • What do I do if the fire's running too cold after a few hours? Open the lid and check on your charcoal - is it all burned to ash? Add another 20 coals to the fire, leave the lid open for five minutes to get them started, then close the lid. (At this point, you may have to add more coals every hour or two to keep the fire going.)
  • I can't get this vent adjusting thing to work? If you're patient enough, you can start with a low fire (40 coals lit), and add twelve coals to the fire every hour to keep the heat going. For shorter cooks this is how I maintain the fire…but adding coals every hour for eight hours gets repetitive, and opening the lid every hour slows down the cooking. It will take closer to five hours to get the roast to 150°F, and closer to ten hours to finish at 205°F.

BBQ Pulled Pork on a Kettle Grill (Grilling Basics)
Pulled and ready to serve

What do you think?

Questions? Other ideas? Leave them in the comments section below.

Related Posts

Grill Smoked Baby Back Ribs
Grill Smoked Pork Western Ribs
Rotisserie Pork Shoulder with South Carolina Mustard BBQ Sauce
Instant Pot Pulled Pork
Grilled BBQ Chicken Thighs

Enjoyed this post? Want to help out DadCooksDinner? Subscribe to DadCooksDinner via eMail or RSS reader, recommend DadCooksDinner to your friends, and buy something from Amazon.com through the links on this site. Thank you.

iGrilling - 5 ways my iPhone helps me grill

July 8, 2014 by Mike Vrobel 12 Comments

iGrilling - Photo of the birds

My buddy Mike at AnotherPintPlease.com had a great photo on his flickr feed the other day - a picture of him taking a picture of his grill with his iPhone. It was very meta - the picture of the picture reminded me of something from M.C. Escher.

It made me think of how much I use my iPhone while I’m grilling. This is a new thing for me - I was a holdout, not getting an iPhone until about a year ago - and now I depend on it only slightly less than my tongs and my spatula.

Here are five ways I use my iPhone as a grilling accessory:

1. Siri: "Set a timer for three minutes"

Siri is now my primary grill timer. This is a big deal - I love all sorts of timers, but I keep reaching for the voice activated timer that I always have in my pocket. I’m a bit of a space cadet, so I need the constant reminder of timers. (Is the charcoal ready? Time to flip the pork chops. Halfway through, go check on the rotisserie chicken.) Without timers, I always have a moment where I say “Oh, crap!” and go rushing to the grill. My only quibble with Siri is she only has one timer - I could use a second timer (or more).

2. Pictures

Grill Selfie! When I’m cooking for the blog, I have my Serious Camera with me. But when I’m just cooking dinner, and suddenly I want to document something, out comes the camera phone.

3. Weather Apps

I’m a weather addict; I try out every weather app I hear about. (The built in iPhone weather app is…meh.) The new Yahoo Weather app is slick, and Dark Sky has a great prediction system, but I keep coming back to the Weather Channel app. Weather radar is my favorite feature, and The Weather Channel’s radar is the most reliable in my area. (I’m constantly checking the radar - when is the rain going to stop, or when is it going to start?)

4. Cooking Apps

I’m not much for cooking apps - I’d rather get a kindle cookbook - but my wife loves them. Looking over her shoulder, I see her using the Weber® Grills app a lot. I checked it out, and it is really well done. Recipes, video tips, favorites…they’ve got a lot of information in there.
My wife loves Mark Bittman’s How to Cook Everything app. It has a grilling section, but it’s really about, well, how to cook everything.

Photo courtesy of iDevices Inc.

5. iGrill2 and iGrill Mini

The iGrill is a remote probe thermometer with its own iPhone app. Plug the probe into the meat, turn on the app, and it will alert you when you reach your target temperature. My brother bought the original iGrill years ago, and he gets a lot of use out of it. (I have gadget envy, but I never gave in and bought myself one.) I’m checking out the new iGrill2 which handles four probes, and the iGrill Mini (one probe). I’m thinking it is time to spring for a bluetooth enabled remote thermometer.
Gadget lust is an ugly thing.

6. Byword

Bonus food-blogger-specific recommendation!
I write all my blog posts in Byword, a markdown-enabled text editor that uses iCloud to sync changes between my Mac, iPhone, and iPad. This lets me start a recipe on my Mac, surfing the internet to compare different recipe ideas. Then I switch to my iPad while I’m in the kitchen, so I can make changes as I test the recipe. Finally, I switch to my iPhone by the grill to check the recipe as I’m cooking. Byword replaced the laser-printed recipes that I used to carry around and take notes on - it’s slower to take notes on the iDevices, but they’re automatically entered in the recipe…and I can’t lose them by accidentally throwing the notes out when I’m cleaning up the kitchen. (That’s…um…just a hypothetical example. Right.)

FCC Notice

I was not paid to promote any of these products; these thoughts are my own. I do earn a commission through affiliate links if you click on any of the App Store or Amazon links and buy something. (Now I'm safe - the feds won’t come after me.)

What do you think?

Questions? Other ideas for using an iDevice at the grill? Leave them in the comments section below.

Enjoyed this post? Want to help out DadCooksDinner? Subscribe to DadCooksDinner via eMail or RSS reader, recommend DadCooksDinner to your friends, and buy something from Amazon.com through the links on this site. Thank you.

Beer Can Chicken

July 3, 2014 by Mike Vrobel 14 Comments

Beer Can Chicken | DadCooksDinner.com

Beer Can Chicken | DadCooksDinner.com
Beer Can Chicken

He said "butt". Heh heh heh.
Beavis and Butthead

I get this question a lot: how do you make a beer can chicken? And, is it worth it?
The first part first: what is beer can chicken? Take a can of beer, and pour half of it into a cup. Then, tell the chicken “relax, this will only hurt for a second”, and shove the can into the butt of the chicken.
How do I use the extra half-cup of beer? Lubricating the chef, of course.

OK, that’s overly dramatic. (And a bit gross. Sorry.) I carefully lower the chicken onto the can, and work it in as deep as possible. The can and the chicken legs form a tripod, standing the chicken up on the grill. I learned this recipe a long time ago, on the barbecue boards, when it was called beer butt chicken. (Again, barbecue guys are eight year olds at heart.) Then, in the early 2000’s, the recipe was noticed by the wider world…and picked up the family friendly beer “can” chicken name.

The tricky part of this recipe is transporting the can stuffed bird. The can and chicken legs form a stable tripod that holds the chicken upright. But, because of the breast meat, the chicken is top heavy, and it wants to flop over and spill beer everywhere. This is annoying if it happens on the way to the grill…and potentially painful on the way back, when you are suddenly juggling hot beer and chickens. If you’re cooking more than one bird at once, get someone to help you steady the birds as you carry them to and from the grill.

As for flavor…I don’t notice much of a difference between beer can chicken and chicken roasted on the grill, without the beer. Believe me, I’ve tried - I’ve done this with cheap American beer, expensive craft beer, and fancy imported beer. I’ve also done it with soda pop - both cola and root beer. If there is any difference in flavor between any of these, it is very subtle. So subtle that I haven’t noticed it.
So why am I using an expensive craft beer in the pictures? Because I get to drink the other half of the can.

If it’s a juggling act, and it doesn’t taste better, why do I cook beer can chicken? Because the can acts as a vertical roaster. I can easily fit two large chickens (5 pounds plus) in my kettle grill, and I once fit three smaller chickens (3 to 3 ½ pounds). Standing the birds up helps cook for a crowd.

OK, OK...I'll confess. This recipe is all about showmanship. Chicken stuffed with a can of beer, and cooked on the grill? Of course I’m making this recipe.

Recipe: Beer Can Chicken

Adapted from: Steven Raichlen, Beer Can Chicken: And 74 other offbeat recipes for the grill

What do you think?

Questions? Other ideas? Leave them in the comments section below.

Related Posts

Grilled Butterflied Chicken with Dry Brine
Rotisserie Chicken, Dry Brined with Rosemary, Lemon and Garlic
Grilled Butterflied Chicken with Garlic and Butter Baste
My other Grilling Recipes

Enjoyed this post? Want to help out DadCooksDinner? Subscribe to DadCooksDinner via eMail or RSS reader, recommend DadCooksDinner to your friends, and buy something from Amazon.com through the links on this site. Thank you.

Grilled Filet Mignon with Knob Creek® Bourbon Peppercorn Sauce

June 26, 2014 by Mike Vrobel 5 Comments

Grilled Filet Mignon with Knob Creek® Bourbon Peppercorn Sauce

Grilled Filet Mignon with Knob Creek® Bourbon Peppercorn Sauce. This post is sponsored by Knob Creek® Bourbon and The Original Brothers of Bourbon website.


Grilled filet mignon, Knob Creek® Bourbon, heavy cream, and a thick crust of peppercorns. Sounds decadent, doesn't it?I'm riffing on the French classic Steak au Poivre, using the big flavor of Knob Creek® bourbon and peppercorns to perk up filet mignon. Filet mignon is tender and buttery, a lean and healthy cut of beef. Unfortunately, lean and healthy can translate as "bland", so we're going to give it some help. The peppercorns add a lot of heat to the steak; I use a peppercorn blend (which isn't as hot as straight black pepper), and only coat one side of the steak with crushed peppercorns. The sauce also helps to smooth out the heat of the peppers, with the oaky, smoky flavor of Knob Creek® bourbon as a counterpoint that finishes the dish.

I cook the whole thing on the grill, including the sauce in a grill safe pot. (I use a enameled steel mug; the pot from a grill safe basting set will also work.)

As the old saying goes, "A watched pot never boils". Whoever said that wasn't watching a pot full of cream. Cream wants to boil over. It's itching to boil over. Keep an eye on the sauce while it simmers, and when the bubbles start to pile up, slide the pot to a cooler section of the grill to stop the simmering. If it does boil over, the pot will probably catch fire. That's OK - you just made Knob Creek® Bourbon Peppercorn sauce flambè. Slide the pot away from the heat, let the flames burn out, and pretend that's what you meant to do in the first place.

Recipe: Grilled Filet Mignon with Knob Creek® Bourbon Peppercorn Sauce


This post is sponsored by Knob Creek® Bourbon and The Original Brothers of Bourbon website. Knob Creek® is a registered trademark of Jim Beam Brands Co. and is used with permission. The information, comments and ideas expressed on this website do not necessarily reflect the views or opinions of Jim Beam Brands Co., its affiliated companies or any of their directors or employees.


What do you think?

Questions? Other ideas? Leave them in the comments section below.

Related Posts

Grilled T-Bone Steaks with Olive Oil, Lemon, Garlic and Rosemary Marinade
Grilled Pork Chops with Knob Creek Lemon Glaze
Grilled Shrimp Skewers with Knob Creek Pineapple Glaze

Enjoyed this post? Want to help out DadCooksDinner? Subscribe to DadCooksDinner via eMail or RSS reader, recommend DadCooksDinner to your friends, and buy something from Amazon.com through the links on this site. Thank you.

Blogger Duck University 2014 at Maple Leaf Farms

June 17, 2014 by Mike Vrobel 10 Comments


This is the story about my trip to Blogger Duck University 2014 at Maple Leaf Farms. Maple Leaf Farms paid for the classes, my meals, and my lodging. The thoughts are my own. Phew, now I’m good with the FCC.


Duck Fact: Only the female duck quacks!

I love duck. It’s one of my favorite things to order at a restaurant, usually as sliced duck breast with crackling crisp skin, or duck leg confit, shredded and melting in your mouth. Rotisserie duck with drip pan potatoes is one of my favorite recipes on this website.
Duck fat is marvelous - it has a rich flavor that no other fat has. Potatoes cooked in duck fat are one of the best things to eat, ever, hands down.

My problem: while I love duck, I’m a duck novice. I know how to pan sear a duck breast, I can make a decent duck leg stew, and like I said, I love my rotisserie roast duck. But I feel like I’m in a duck rut, stuck for new ideas, and I need help to get out of it.

Enter Maple Leaf Farms

Maple Leaf Farms produces 70% of the duck sold in the United States. I got lucky when I sat down next to Nora from Maple Leaf Farms at breakfast at a food conference. She introduced herself, and I pulled out one of my business cards - the one with the picture of rotisserie duck on the back of it. She suggested I stop by their booth and get an application for Duck University, featuring Sara Moulton as the celebrity cooking teacher. Doesn’t everyone have business cards with pictures of rotisserie duck on the back? Just me? Oh.

I signed up as soon as I got home, was accepted, and in early June was on my way to Warsaw, Indiana for two days of duck fun.

Don't we look dashing in our biosecurity suits?

Maple Leaf Farms Tour

Our first day was a tour of the different parts of Maple Leaf Farms. They are vertically integrated - they make their feed in their own feed mill, partner with local family farms to raise their ducks, process the ducks in their plants, and ship from their warehouse to distributors. They are a (4th generation) family owned business, located in Leesburg, Indiana, and are proud of supporting local farms and businesses.

The tour made me feel better about being a committed carnivore. The ducks we saw on the farm were healthy and happy, waddling around in flocks in their duck houses, and obviously cared for. (We had to dress up in biosecurity suits before entering the house - they want to protect the ducks from any germs we might be carrying.) The duck processing plant was modern, efficient, and clean. And cold… They keep the plans at refrigerator temperature, for food safety. I thought that was kind of chilly - and then we walked through the –10°F cold storage room. Oh, my. It felt like a summer day when we got back out to the “refrigerated” are. (Last winter had a few days where it was colder outside than in the cold storage room. That tells you how ridiculous last winter was.)

The knife skills on display on the processing line were humbling. I like to think I have good knife skills for a home cook, and I can (and have) cut up my own ducks in the past, cutting the breasts and legs away from the carcass so I can cook them separately. It takes me a few minutes to section a bird, and I’m pretty efficient. On the line they had the breasts off of the bird in, I’d guess, less than five seconds. And they weren’t even working that hard. I think I need to work on my knife skills some more.

Most impressive was how much care the people at Maple Leaf Farms. Everyone we talked to was passionate about their jobs, and about doing everything they could to raise healthy ducks. (With, as they put it, “thorough, science based safety practices”, for both the ducks and the people.) And they keep trying to improve. After all the horror stories I’ve read about factory farms, it was good to see a large scale operation that keeps pushing to raise their own standards.

Our crew, R to L:
Sara, Jenny, Mike, Melissa, Me, Angela

Our Crew

The best part of the class was my fellow classmates. After our opening dinner, we went back to the hotel, and a group gathered at the hotel bar. We had a few tasty beverages, and the stories started to flow. People who love food are good people - we write to share our love of food with others - and suddenly I had a bunch of new friends:

  • Jenny B of Honey & Birch from Chicago
  • Angela Buchanan of Seasonal & Savory from Colorado
  • Sara Croft of Solid Gold Eats from Indianapolis
  • Melissa and Mike Yob - husband and wife video team from New Jersey

These people made the class for me - sure, I would have enjoyed it without them, but they’re the ones who made it sing.
My only regret is the class didn’t go on long enough to get to know the other attendees - I had some great, but short, conversations, and kept overhearing food discussions that I didn’t have time to crash. Maybe next time…

Sara loves to teach

Sara Moulton

When I took my first, tentative steps to being a foodie, Sara Moulton was on the Food Network every weeknight at 6PM, hosting her live call in show. Her friendly, common sense approach was a helpful influence on my early attempts at cooking. (She’s on PBS now with Sara’s Weeknight Meals, which I haven’t seen, because with this blog I don’t watch TV any more - just short internet video clips from time to time.)

Sara is even nicer in person than she is on TV, if you can believe it. She hopped on our bus and joined us for the entire day’s tour of Maple Leaf Farms, chatting with us, sharing what she knew, asking questions, keeping the conversation going (we were still recovering from our late night at the bar…and a little quiet until the caffeine kicked in.) She spent the rest of Duck U with us, taking the tour and attending the classes like she was just one of the students. She didn’t act the tiniest bit like a “famous television personality”, just another food lover, wanting to learn and share what she knows.

The next day she switched into her chef’s coat for our cooking class. She’s doing Sara’s Weeknight Meals in part from her experience keeping family meals going for her own kids - while juggling her day job as the executive chef at Gourmet magazine and “moonlighting” on Cooking Live at the Food Network. Sara knows what it’s like to be a harried parent trying to get food on the table, and loves to teach what she knows. She told us some fun stories about her years in professional kitchens and as a television host (only 6 obscene phone calls in 6 years of live, call in TV!), and gave us some great tips about how to cook duck…like how to cook duck breast:

Sara's Duck Breast Instructions

  • Score the skin on the duck breast in a crosshatch pattern, being careful not to cut into the meat. Season the skin side with salt and pepper
  • Put the duck skin side down in a cold fry pan (she likes cast iron or nonstick for this) Turn the heat under the pan to low and let the duck cook, rendering out the fat, until the line of fat has disappeared from the side of the duck and the skin is browned and crispy, fifteen to twenty minutes.
  • Season the meaty side with salt and pepper, then move the duck to a plate, skin side up.
  • Pour off all but a tablespoon of the fat from the pan, then put the pan back on the stove over medium-high heat. Put the duck back in the pan, skin side up, and sear until the bottom is browned and the duck is medium-rare, about 3 more minutes.
  • Rest the duck on a plate, skin side up, for five minutes (while making a pan sauce), then slice the duck crosswise and serve.
Serve a bunch of bloggers, then wait for picture time to be over...

Food

And, of course, there was the food. From the opening dinner to the donuts on the last day, we ate well. The highlight was a six course duck dinner by Certified Master Chef Dale Miller. The dinner had duck in every course, from appetizers (duck mousse…oh, my) to dessert (berry crumble with duck bacon). And each course was more fantastic than the one before it. *Certified Master Chef means that Chef Miller passed the rigorous CMC test at the Culinary Institute of America - the one described in Michael Ruhlman’s Soul of a Chef.

I'm official! Thanks, Nora!


Thank you, Maple Leaf Farms

Can you tell I had a great time? I’d do it again in a heartbeat, and expect a lot more duck recipes from me in the future.

Thank you to Terry Tucker, CEO and son-in-law of founder Donald Wentzel, for your hospitality - I loved every minute of it, and you have a great team of people working for you.

Thanks to Karl and Janelle, our bus drivers and tour guides. (And thank you Karl for the late night drive to the local speakeasy, and to Janelle for the side trip on Friday to get us “Crack Donuts”, which were every bit as addictive as advertised.) Thanks to Beth and Nora, who taught our classes. (And thank you Beth for gliding around on your kick scooter - I hope your foot feels better, and to Nora for sitting next to me at breakfast at IACP and starting this trip.) They all took time off from their “real jobs” at Maple Leaf Farms and worked to make sure we had a great time.

Selfie with Sara

What do you think?

Questions? Other ideas? Favorite duck recipes? Leave them in the comments section below.

Enjoyed this post? Want to help out DadCooksDinner? Subscribe to DadCooksDinner via eMail or RSS reader, recommend DadCooksDinner to your friends, and buy something from Amazon.com through the links on this site. Thank you.

Grilled Pork Chops with Lemon, Garlic, and Honey Marinade

June 12, 2014 by Mike Vrobel Leave a Comment

Grilled Pork Chops with Lemon, Garlic, and Honey Marinade

This post is sponsored by the National Pork Board and Kroger.
Don't forget to vote for America’s Top #ChopGriller! Every vote is an entry in a drawing for a Large Big Green Egg® Grill Package and summer’s worth of pork! Voting closes June 13, 2014.


In a moment of weakness, I bought regular cut pork chops at the grocery store.
They were on sale. I have such a hard time passing up a sale.I prefer thick cut chops - they are easier to cook to a juicy medium, 145°F. Regular store bought chops, about ¾ of an inch thick, don’t leave much of a margin for error. It’s tough to get a good sear on thinner chops before they overcook in the middle.

For thin chops, I use a trick I picked up from Cooks Illustrated - marinate the chops with honey and oil. The oil conducts heat, and the honey caramelizes quickly in the heat of a grill. This gives me a quick browned crust before the chops overcook. My other trick is to only worry about one side of the chops. I make sure the first side gets a good sear, and then cook the second side just long enough for the chop to be done. Better a browned and delicious crust on one side than a pale, weak crust on both sides.

The best way to test chops for doneness is an instant read thermometer, looking for 145°F in the thickest part…but it’s tough to get a reading on thin chops. Instead, I go with the poke test. I press on the chops to see how they feel. But…how should they feel? Relax your hand and poke the fleshy area at the base of your thumb. That slightly soft feeling is what rare tastes like. Now, make an “OK” sign with your thumb and pointer finger, and press the same fleshy spot on the base of your thumb. Feel how it’s a bit tighter? That’s medium-rare. Next, touch your index finger to your thumb, and poke the base of your thumb. Feel that? There is even more resistance, with just a hint of give. That’s what medium chops feel like. If you poke your chops, and they feel like this, they’re done - get them off the grill!
I use the poke test with thicker cuts. I trust my thermometer, but the poke test gives me a second opinion on how far along the chops are.

Recipe: Grilled Pork Chops with Lemon, Garlic, and Honey Marinade


Prep Time: 15 minutes
Cook Time: 8 minutes

Equipment

  • Grill (I love my Weber Kettle)

Ingredients

  • 6 (¾ inch thick) bone-in ribeye or porterhouse pork chops

Marinade

  • ¼ cup olive oil
  • Juice and zest of lemon
  • ½ onion, peeled and grated on large holes of a box grater
  • 4 cloves garlic, peeled and grated on smallest holes of a box grater (or minced)
  • 2 teaspoons kosher salt
  • 2 tablespoons honey
  • ½ teaspoon fresh ground black pepper

Directions

1. Marinate the chops

Put the marinade ingredients into a zip-top plastic bag and squish with your hands through the plastic until well mixed. Add the pork chops one at a time, tossing in the bag to coat each chop with marinade. Refrigerate for at least one hour, preferably four to eight hours.

2. Set the grill for direct medium-high heat

Set the grill up for direct medium-high heat. In my Weber kettle, I light a chimney ¾ full of charcoal, wait for it to be covered with gray ash, and then spread it in a packed single layer over half of the grill. I put my grill grate back in the grill, brush it clean with my grill brush, and I’m ready.

3. Grill the chops

Remove the chops from the marinade, letting any excess drip back into the bag, and set them on the grill over the direct medium-high heat. (If you are cooking on a gas grill, keep the lid closed as much as possible while grilling.) Cook until the chops are starting to brown on the bottom, about 3 minutes, then rotate the chops 90 degrees (don’t flip yet), moving them around if some are browning quicker than others due to hot spots on the grill. Cook until well browned on the bottom, about 3 more minutes. Flip the chops and cook on the other side until the chops reach an internal temperature of 145*F for medium rare, about 3 more minutes. Remove the chops to a serving platter, let rest for ten minutes, then serve.

Notes

  • If you really don't trust the poke test, or want a second opinion, give an instant read thermometer a try. Insert the thermometer from the side, as deep as you can without hitting the bone. Get a couple of readings, from different parts of the chop, and go with the lowest one. You want to cook the chops to 145°F, and hopefully one of those readings will be close to the center, where the temperature will be the lowest.
  • For the poke test, you can keep going down your hand; touch the ring finger to your thumb, poke the base of your thumb, and you'll feel medium-well. Touching your thumb and pinkie gives you the feel of well done meat. But...if you're cooking thinner chops, you don't need the poke test. Overcook them to your heart's content, and pull them off when they're dark brown and have been on the grill for a long time. (Just don't tell me about it. You can do what you want, but it makes me sad to make overcooked meat.)

What do you think?

Questions? Other ideas? Leave them in the comments section below.

Related Posts

Grilled Pork Chops with Ancho Chile Spice Rub
Grilled Ribeye Pork Chops with Smoked Spanish Paprika Rub
Grilled Pork Chops Agrodolce

Enjoyed this post? Want to help out DadCooksDinner? Subscribe to DadCooksDinner via eMail or RSS reader, recommend DadCooksDinner to your friends, and buy something from Amazon.com through the links on this site. Thank you.

Grilled Avocados with Lemon Vinaigrette

June 10, 2014 by Mike Vrobel Leave a Comment

Grilled Avocados with Lemon Vinaigrette

I think of this recipe as avocado lemon butter. It makes a great appetizer - brown the avocado on the grill, then toast thin slices of bread. Put them on a platter with a spoon, set the platter in front of your guests, and stand back.
Or serve with crackers if you want an easier version that skips slicing and toasting bread. Or, serve with tortilla chips for a “scoop your own guacamole”.

One warning - the avocados have to be perfectly ripe for this recipe to work as a spread. The heat of the grill softens the avocados even more, turning them creamy and spreadable. But…there’s only so much the grill can do. If the avocados are still a little hard, they’re not going to soften enough to spread. Don’t give up, though - if you need to use the avocados today, grill them, squeeze the halves out of the skin, and slice them thin. That way, your diners can top their bread with slices of avocado.

While you have the grill lit, why not try these grilled stuffed jalapeno peppers as a second appetizer?

Recipe: Grilled Avocados with Lemon Vinaigrette

Inspired By: Canal House Cooking Vol 8: Pronto by Melissa Hamilton and Christopher Hirsheimer

Prep Time: 15 minutes
Cook Time: 10 minutes

Equipment

  • Grill (I love my Weber Kettle)

Ingredients

  • 2 ripe avocados, halved, pit removed

Vinaigrette

  • 2 tablespoons olive oil
  • Juice of ½ lemon
  • Pinch of salt
  • Pinch of sugar
  • Kosher salt to taste
  • 1 Loaf of French bread, cut on the bias into ½ inch thick slices

Directions

1. Set grill up for direct medium heat

Set the grill up for direct medium heat. In my Weber kettle, I light a chimney ⅔ full of charcoal (about 45 coals), wait for it to be covered with gray ash, and then spread it in a loose single layer over half of the grill.

2. Brush halved avocados with vinaigrette

Whisk the vinaigrette ingredients in a small bowl, then brush the cut side of the avocados with a thin layer of vinaigrette. (Save the rest of the vinaigrette for later in the recipe.)

3. Grill avocados

Set the avocados on the grill, cut side down, over direct medium heat. Grill until the avocados have softened and are browned, about 4 minutes. Remove the avocados to a platter. Brush the cut side with a thick layer of vinaigrette and sprinkle with salt.

4. Toast the bread

Put the bread on the grill and toast on one side, about 1 minute. (Pay attention when the bread is on the grill - bread goes from toasted to burnt in a heartbeat.)

5. Serve

Fan the toasted bread out on a plate, set the avocados in the middle, and serve with a teaspoon for spreading.

Notes

  • If the avocados are dead ripe, and the toasted bread is firm, you can scoop the avocado with the bread, like a dip.

What do you think?

Questions? Other ideas? Leave them in the comments section below.

Related Posts

Grilled Guacamole with Sun-Dried Tomatoes
Gucacamole Sauce (Salsa de Guacamole)

Enjoyed this post? Want to help out DadCooksDinner? Subscribe to DadCooksDinner via eMail or RSS reader, recommend DadCooksDinner to your friends, and buy something from Amazon.com through the links on this site. Thank you.

Grilled Lemon Whiskey Sour

June 5, 2014 by Mike Vrobel 1 Comment

Whiskey Sour with Grilled Lemon

Grilled citrus is having a moment. I’ve seen it in a bunch of places recently, and I had to try it out. Is it all for show?

My next thought was - grilled lemon? Sounds perfect in a drink, something to keep me quenched while I do hard work over an open fire. Grilled whiskey sour, here we come!

So, is it worth grilling a lemon? Yes, yes it is. The heat of the grill caramelizes the lemon, adding sweetness to the sour citrus. Also, I was amazed by the ease of juicing a heated lemon. I was barely pressing on my lemon squeezer, and juice was squirting everywhere.
Now, don’t get me wrong. It *is* quite a show when you pull browned lemons off the grill and start mixing drinks with them. Your guests will think you’re a grilling wizard.

Thanks to my association with Knob Creek, I have a bottle of Knob Creek Rye Whiskey ready whenever I want to make this drink again.
Like, say, tonight, while I grill dinner? Sounds like the perfect time to me.

Recipe: Grilled Lemon Whiskey Sour


Prep Time: 5 minutes
Cook Time: 3 minutes

Equipment

  • Grill (I love my Weber Summit, but you don't need a six burner supergrill for this recipe.)
  • Cocktail shaker
  • Rocks glass (or other short glass)

Ingredients (for one drink)

  • ½ a lemon
  • 2 ounces whiskey (Knob Creek rye whiskey, or use your favorite whiskey)
  • 1 ounce simple syrup (see notes)
  • Ice

Directions

1. Set the grill up for medium heat

Set the grill up for direct medium heat. On my Weber gas grill, I preheat the grill with all burners on high for ten to fifteen minutes, brush the grill grate clean, then turn the burners down to medium.

2. Grill the lemon

Grill the half lemon, cut side down, until it is browned and just showing a hint of black around the edge, about 3 minutes.

3. Shake and serve

Fill a cocktail shaker with ice. Juice the lemon into the shaker, add the whiskey and simple syrup, and shake well. Pour into a rocks glass full of ice, and serve.

Notes

  • Simple syrup: heat 1 cup of water until boiling. (I do this in the microwave). Stir in 1 cup of sugar until dissolved. Cool to room temperature and store in a covered container in the refrigerator. It will last for about a month…but we use it up before then.
  • Half a lemon? Of course I'm making two drinks. One for me, and one to share. Double everything, shake it all at once, and pour into two glasses.

What do you think?

Questions? Favorite drink recipes? Leave them in the comments section below.

Related Posts

Fiery Mexican Martini
Canning Jar Margaritas

Enjoyed this post? Want to help out DadCooksDinner? Subscribe to DadCooksDinner via eMail or RSS reader, recommend DadCooksDinner to your friends, and buy something from Amazon.com through the links on this site. Thank you.

Grilled Sous Vide Filet Mignon with Parmesan Gremolata

May 29, 2014 by Mike Vrobel 5 Comments

Grilled Sous Vide Filet Mignon with Parmesan Gremolata

I’m falling in love with sous vide all over again. Not because it cooks meat so well (and it does), but because it’s so convenient.

I used to wonder why people would buy large sides of meat and freeze them. Now I have a stack of filet mignons and New York strips in my freezer. Whenever I feel the need for some beef, I pull out a vacuum bag, drop it in the water bath, and my steak is medium-rare and ready to sear an hour and a half later.
I have two water baths now, so I can cook at two different temperatures at once - another advantage to sous vide. For Mother’s day, half the crowd wanted medium-rare (yay!) and half the crowd wanted medium (meh). Accommodating both requests was easy.

Filet mignon, even cooked sous vide to an exact medium-rare, is…well…kinda boring. Sure, it’s tender, and beefy, but it doesn’t have much going on beyond that. I topped mine with a flavor-packed gremolata, made with parsley, lemon zest, Parmesan, garlic, and a lot of black pepper. The sweet/sour citrus zest and salty cheese add a sharp counterpoint to the tender beef. Boring filet mignon? Not on my watch.

Recipe: Grilled Sous Vide Filet Mignon with Parmesan Gremolata


Prep Time: 10 minutes
Cook Time: 75 minutes

Equipment

  • Sous Vide Water Bath (I used both a Sous Vide Supreme Demi and a Sansaire)
  • Vacuum sealer and vacuum bags

Ingredients

  • 6 (6 ounce) filet mignon steaks
  • 1 tablespoon kosher salt

Parmesan Gremolata

  • ½ cup parsley leaves
  • zest of 1 lemon
  • 2 tablespoons (1 ounce) shredded Parmesan
  • 1 clove garlic, minced
  • 1 teaspoon fresh ground black pepper

Directions

1. Sous vide the steak

Set the sous vide to 131°F/55°C for medium-rare. (125°F/51.5°C for rare, 136°F/58°C for medium, 141°F/60.5°C for medium well.). Sprinkle the filet mignons with the salt, then vacuum seal the filets in quart vacuum bags, 3 steaks to a bag. Drop the bags in the sous vide and cook for 1 hour, or up to 4 hours.
To cook from frozen, cook for at least 1 ½ hours. You don’t have to thaw the steaks first - take the vacuum bag full of frozen steaks straight from the freezer to the water bath.

2. Set the grill up for direct high heat

After the steaks have been in the sous vide for 45 minutes, set the grill up for cooking on direct high heat. I preheat my Weber Summit with all burners on high for 15 minutes, then brush the grate clean with a grill brush.

3. Prepare the Parmesan gremolata

While the grill is preheating: Put garlic, lemon zest, parsley leaves, and Parmesan in a pile on a cutting board, and mince the pile to combine. Scrape into a small bowl, then stir in the black pepper.

4. Sear the steaks

Take the filet mignon bags out of the sous vide, cut the bag open, and pat the steaks dry with paper towels. Put the steaks on the grill over direct high heat and sear until browned, 1 to 2 minutes, rotating 90 degrees halfway through to crosshatch the grill marks on the steaks. Flip the steaks and brown the other side, another 1 to 2 minutes, rotating halfway through. Move the steak to a platter to rest for 5 minutes.

5. Serve

Top each steak with a tablespoon of gremolata and serve.

Notes:

  • Don't want to grill the steak? Heat a heavy fry pan to ripping hot and sear the steaks for 1 minute a side.
  • Don't have a sous vide water bath, immersion circulator or a vacuum sealer? Use a beer cooler and zip-top plastic bags. Here's the technique: Beer Cooler Sous Vide Grilled New York Strip Steaks.

What do you think?

Questions? Other ideas? Leave them in the comments section below.

Related Posts

Grilled Sous Vide Filet Mignon with Sous Vide Egg and Herb Salad
Sous Vide New York Strip Roast with Bourbon Cream Pan Sauce
Sous Vide Grilled New York Strip Steaks with Herbs
Sous Vide Porterhouse Steak

Enjoyed this post? Want to help out DadCooksDinner? Subscribe to DadCooksDinner via eMail or RSS reader, recommend DadCooksDinner to your friends, and buy something from Amazon.com through the links on this site. Thank you.

Grill Smoked Baby Back Ribs (Grilling Basics)

May 22, 2014 by Mike Vrobel 8 Comments

Grill Smoked Baby Back Ribs

It’s time to get back to basics. Let’s cook some ribs.

Ribs were my doorway to the world of cooking. I had my brand new Weber kettle, and I wanted to make ribs as good as the ones at my local barbecue joint. I started reading, and trying recipes…and from there I was smitten. I fell into my love of food, and I haven’t come up for air since.

It turns out, ribs are a good place to start when you’re learning to cook. If you have patience, that is. Low and slow is the way to go. Give the ribs time, have a cold beverage (or two, I won’t tell), and you will be rewarded with tender ribs.
And, I swear, they smell fear. If they sense that you’re in a hurry, they slow down. Give yourself plenty of time, and they cook right on schedule.

So, how do we do it? We need a low fire - 250°F to 300°F, banked to one side of the grill, with the ribs over a drip pan on the other side of the grill, away from the direct heat. (We don’t want the ribs directly over the coals, no matter how low the heat is - they’ll burn in the long cooking time if they’re over direct heat.)

We need meaty ribs, a barbecue rub, and our favorite barbecue sauce. We need smoking wood, because what are barbecued ribs without smoke? And, we need some heavy duty aluminum foil - we’re going to guarantee tender ribs by using the “Texas Crutch” and wrap them in foil for the last half hour of cooking.
I think the term “Texas Crutch” came from from Kansas City barbecue fanatics, who don’t like the idea of wrapping the ribs in foil. If you want the most tender ribs possible, though, lean on the Texas Crutch.

I’m also brining my ribs. I love the deep seasoned flavor of brined pork. But, that step is optional; the ribs taste great even if they’re sprinkled with salt as part of the barbecue rub.

And that’s it. Be patient, season properly, and you’ll have baby back ribs to put your local rib joint to shame.

Recipe: Grill Smoked Baby Back Ribs (Grilling Basics)


Prep Time: 4 hours
Cook Time: 4 hours

Equipment

  • Grill (I love my Weber Kettle)
  • Rib rack (helpful, but not essential unless you're cooking more than 2 racks of ribs)
  • Heavy duty aluminum foil

Ingredients

Brine

  • 4 quarts water
  • 1 cup kosher salt
  • 2 tablespoons brown sugar

Ribs

  • 2 slabs meaty baby back ribs

Smoking wood

  • Two fist sized chunks smoking wood (or 2 cups wood chips), soaked for an hour (hickory, apple, cherry, pecan, or oak)

Barbecue Rub (¼ cup of my Homemade Barbecue Rub), or use your favorite store bought rub

  • 1 ½ tablespoon paprika
  • 1 ½ tablespoon brown sugar
  • 1 tablespoon chili powder
  • 1 teaspoon ground black pepper
  • ½ teaspoon garlic powder
  • ½ teaspoon onion powder
  • ¼ teaspoon dried thyme

Barbecue sauce (2 cups of my Easy Barbecue Sauce), or use your favorite barbecue sauce

  • 1 ½ cups ketchup
  • ½ cup honey
  • ½ cup cider vinegar
  • 2 tablespoons Worcestershire sauce
  • 2 tablespoons soy sauce
  • 2 tablespoons Franks Red Hot

Directions

1. Brine the ribs

On the bone side of the ribs, work a butter knife between the membrane and the bone, then grab with a paper towel and pull the membrane off of the ribs. (If it tears while you're pulling, work the knife under the remaining pieces and pull them off as well.)  In a container that is big enough to hold the ribs, dissolve the salt and sugar in 4 quarts of water. Submerge the ribs and refrigerate for 4 to 8 hours. (If you don’t have time to brine, add 1 tablespoon of kosher salt to the rub in the next step.) Submerge the smoking wood in water.

2. Mix up the barbecue rub and barbecue sauce

In a small bowl, stir the barbecue rub ingredients, breaking up any clumps of brown sugar with your fingers. Set aside. In a medium bowl, whisk the barbecue sauce ingredients until smooth. Set aside.

3. Rub the ribs

Remove the ribs from the brine and pat dry with paper towels. Sprinkle both sides of the ribs with rub, concentrating the rub on the meaty side.

4. Set the grill up for indirect low heat (250°F to 300°F)

Set your grill up for indirect low heat, 250°F to 300°F, with the heat on one side of the grill, and a drip pan on the other side. On my Weber kettle I light 40 coals (⅓ of a Weber charcoal chimney, or one full Weber charcoal basket), wait for them to be mostly covered with gray ash, then pile the coals on one side of the charcoal grate. (I do this in the charcoal basket; it holds the coals in a tight pile.) Finally, I put a drip pan on the charcoal grate opposite the coals, then put the grill grate back in the grill.

5. Cook the ribs

Add the smoking wood to the coals. Put the ribs on the grate over the drip pan, as far away from the fire as you can get them. Close the lid and cook until the ribs are tender and the meat has pulled down ½ an inch from the end of the bones, about 3 hours. If you are cooking on a charcoal grill, add 12 unlit charcoal briquettes to the coals every hour to keep the fire going.

This is what the bones should look like on the ends
(Picture borrowed from my rotisserie baby back ribs)

6. Foil wrap the ribs

Time for the Texas crutch. Tear off two pieces of heavy duty aluminum foil that are longer than the racks of ribs. Pull a rack of ribs off of the grill and set it on the foil, meaty side up, and brush with barbecue sauce. Flip the ribs, brush the bone side with sauce, then wrap the ribs tightly with the foil, crimping it shut. Put the foil wrapped rack back on the grill, and repeat with the other rack. Close the lid again and cook the foil wrapped ribs for 30 minutes.
If you don’t want to use aluminum foil, cook the ribs until you can pull a bone on the end and the meat easily starts to tear, about another hour.


7. Finish the ribs

Remove the ribs from the grill and let them rest in the foil for 15 minutes. Unwrap the foil and brush the ribs with another coat of barbecue sauce. Cut the racks between every second rib and serve, passing the rest of the sauce at the table.

Notes

  • Watch out for shiners. When you're buying your ribs, take a look at the meat side. You should not see any bone - if you do, the ribs are "shiners" and have been trimmed right up against the bone. There isn't much meat on ribs to begin with - you want them cut generously, with extra pork on top of the ribs. This isn't as big of a problem as it used to be; I can get ribs with "extra meaty" stickers on them at my local grocery store now, which are perfect for this recipe.
  • This recipe is easy to double if you have a rib rack; four racks can fit on a kettle grill. Beyond that, you need a bigger grill. (Like Weber's 26.75 inch extra large kettle. Or, my dream grill, the massive Weber Ranch Kettle - 37.75 inches in diameter, large enough to cook…well, I don't know how many racks you could fit on there, but I'll bet you could go into catering if you bought one.
  • Can you tell I'm a Weber fanatic?
  • Be careful disposing of the brine - it is laced with raw pork juices, which you don't want to splash around your kitchen. Not that I've ever poured a bowl of brine into the sink…and have it rise like a wave, overflow the other side, spread over my counter and drip down my kitchen cabinets…
  • How many people will this serve? It depends on how big of a carnivore you're serving. I serve two racks of ribs to my family of five…but then I'm restraining myself. I can eat a half a slab of ribs on my own, easily. If I'm hungry, I could put away an entire slab. So, for lighter eaters, assume about a third of a slab. For big eaters, somewhere between a half a slab and "give me all the ribs."
  • Looking for a different style of ribs? Use the technique of this recipe with one of the rub and sauce options from my rotisserie rib recipes in the Related Posts section.

What do you think?

Questions? Other ideas? Leave them in the comments section below.

Related Posts

Rotisserie Baby Back Apple Ribs
Rotisserie Spare Ribs with Garlic and Oregano Rub
Rotisserie Baby Back Ribs Cuban Style

Enjoyed this post? Want to help out DadCooksDinner? Subscribe to DadCooksDinner via eMail or RSS reader, recommend DadCooksDinner to your friends, and buy something from Amazon.com through the links on this site. Thank you.

Grilled Asparagus and Prosciutto Wraps

May 20, 2014 by Mike Vrobel 5 Comments

Grilled Asparagus and Prosciutto Wraps | DadCooksDinner.com
Grilled Asparagus and Prosciutto Wraps

It’s asparagus season!

I know spring has arrived when I see stalks of asparagus in my CSA box. The long, dark winter of root vegetables is finally over; the bounty of summer is on its way.
After this winter, I needed the reminder.

Grilled Asparagus and Prosciutto Wraps | DadCooksDinner.com
Wrapped asparagus

I love grilled asparagus, and I love roasted asparagus wrapped in prosciutto. So, I gave myself a dope slap when I saw this recipe from Kalamazoo Grills - grilled asparagus and prosciutto wraps. Duh…why didn't I think of that?

Grilled Asparagus and Prosciutto Wraps | DadCooksDinner.com
Bundles of asparagus on the grill

And, as a bonus - the wrapped bundles of asparagus won't drop between the grill grates as easily as individual spears, so I don't lose any into the grill. What's not to like?

Trimming the woody ends of the asparagus spears | DadCooksDinner.com
Trimming the woody ends of the asparagus spears

Grilled Asparagus and Prosciutto Wraps | DadCooksDinner.com
Wrapping a bundle of asparagus with prosciutto

Recipe: Grilled Asparagus and Prosciutto Wraps

Adapted from: Kalamazoo Grills, Asparagus Wraps with Crispy Prosciutto and Herbed Cheese

Prep Time: 15 minutes
Cook Time: 8 minutes

Equipment

  • Grill (I love my massive Weber Summit - but any grill will work for this recipe.)

Notes

  • I like thin asparagus spears for this recipe; they cook quicker on the grill. If you have medium thickness spears, make bundles of three; if you have thick asparagus spears, wrap each spear individually.
  • When I make this recipe, I always seem to wind up with too much asparagus and not enough prosciutto. When that happens, I cut some of the prosciutto pieces in half lengthwise, then wrap in a spiral pattern to cover up more of the asparagus with the thinner slice of prosciutto.

Grilled Asparagus and Prosciutto Wraps | DadCooksDinner.com
Asparagus bundles, ready to serve

What do you think?

Questions? Other ideas? Leave them in the comments section below.

Related Posts

Grilled Asparagus
Grilled Asparagus with Whole Grain Mustard Vinaigrette
Shaved Asparagus and Parmesan Salad

Enjoyed this post? Want to help out DadCooksDinner? Subscribe to DadCooksDinner via eMail or RSS reader, recommend DadCooksDinner to your friends, and buy something from Amazon.com through the links on this site. Thank you.

Road Trip: Frank Cianciola and Son

May 13, 2014 by Mike Vrobel 10 Comments

[UPDATE 2016-11-11: Cianciola's is closed. They were bought out and shut down by a larger food distributor. Darn.]
Cianciola's is an Italian food importer and distributor in Akron's North Hill neighborhood. Their main business is supplying local pizzerias and Italian restaurants in the Akron area, but they are open to the public, and if you're looking for a good deal on imported Italian ingredients, they're definitely worth a visit.

Now, Cianciola's doesn't look like much. The building is a, square, windowless warehouse - see the picture at the top of the post. I drove past it, not realizing it was my destination until Google Maps told me to do a U-Turn. The public section is in a corner of the warehouse - they were loading pallets of flour while I was there. And, the stock is limited. This is not a gourmet emporium, looking to supply your every possible Italian food need.

So, why go there? Because what they have is carefully chosen, good quality, and sold at warehouse pricing to the general public. Their prices on real Italian cheese, olive oil, and cured meats are hard to beat.

Frank Cianciola & Son
180 Cuyahoga St.
Akron, OH 44304
Phone: 330-253-0454
Web: Cianciolas.com
Hours:
Monday-Thursday 9:30AM-4:30PM
1st and 3rd Saturday of the month: 9:30AM-12:30PM

My favorite things they sell are, in no particular order:

  1. Italian cheese: Parmesan, provolone, Romano; from Italy and America; fresh and aged. (The aged provolone was particularly good.) They are happy to give out samples to make sure you will enjoy what you order.
  2. Olives: Cianciola's sells Sicilian, Kalamata, and salt-cured olives by the pound. Tell them how big a container you want - from about a half a pound to as big as you can carry - and they'll fill it for you, at a great price.
  3. Olive oil: Imported Italian olive oil, in 3 liter cans. If you use as much olive oil as I do, buying it in big cans is the best way to go.
  4. Italian cured meats: Salami, prosciutto, capicola. Not a wide selection, but again, good quality and great prices.
  5. Italian wine: A small but great collection of Italian wines - I had to buy a bottle of prosecco to take home for the wife.

Here's the map

Related posts

My list of Ethnic and Gourmet stores in the Akron, OH area.

Enjoyed this post? Want to help out DadCooksDinner? Subscribe to DadCooksDinner via eMail or RSS reader, recommend DadCooksDinner to your friends, buy something from Amazon.com through the links on this site, or donate through my tip jar. Thank you.

Kickstarter - Anova Precision Cooker

May 12, 2014 by Mike Vrobel Leave a Comment

Image courtesy of Anova Culinary

[FCC Update 2014-05-12] After I wrote this post, but before it was published, Anova contacted me to see if I wanted a test unit. (I said yes.) This doesn't change anything I say below - I backed this project before they contacted me, because it looks like a great deal.


Interested in Sous Vide cooking? Looking for a deal on an immersion circulator with some fantastic features, including the ability to drive the cooker through your phone? Have I got the Kickstarter for you...

Anova Precision Cooker - Cook sous vide with your phone [Kickstarter.com]

Anova is Kickstarting a redesign of their popular immersion circulator. The new version has a simpler interface on the unit itself, and a iPhone app that lets you control the unit from your phone.

The best part? The new Anova has a list price of $169 - a new low for sous vide immersion circulators. But, if you act fast, you can preorder through Kickstarter for the low price of:

  • $99 for the first 1000 backers 
  • $129 for the next 1000 backers 
  • $135 for the next 500 backers 
  • $139 for the next 500 backers
  • $145 for the next 1000 backers

(Um...wow, that went fast. That's what I get for scheduling the post for next week. )

So, the current price is $159 for the next 2000 backers...and you may have to buy quickly if you want it at that price. They also have good deals for buying two units at once, in case you want to cook at more than one temperature. But, even at the full list price ($169), this is a great deal on a sous vide circulator.

The downside? The units won't be shipping until October, so you'll have to be patient. (I hate being patient. But I have already backed this Kickstarter anyhow.)

Want to learn more? Here's the video for their Kickstarter project. Visit the Kickstarter page for more detailed information.

What do you think?

Questions? Other ideas? Leave them in the comments section below.

Enjoyed this post? Want to help out DadCooksDinner? Subscribe to DadCooksDinner via eMail or RSS reader, recommend DadCooksDinner to your friends, and buy something from Amazon.com through the links on this site. Thank you.

Rotisserie Chicken with Italian Black and Red Pepper Dry Brine

May 8, 2014 by Mike Vrobel Leave a Comment

Rotisserie Chicken with Italian Black and Red Pepper Dry Brine

Rotisserie Chicken with Italian Black and Red Pepper Dry Brine

This recipe is a happy accident.

I’m working on my next cookbook, Rotisserie Chicken Grilling. I hope you all like rotisserie chicken as much as I do…because I’ve got a lot of recipes coming.
If I can just get this stupid book finished. It’s killing me. Killing me!

This recipe was supposed to be loosely modeled after Chicken Alla Diavola, with an Italian style herb paste made up of olive oil, garlic, lemon zest, black and red peppers. Except…I got a little distracted while I was making it. I was testing two recipes at once, and worrying more about the pictures I needed to take. I lost track of the ingredient list. I forgot the olive oil, garlic, and lemon zest, and made a dry brine with salt, black pepper, and a lot of red pepper flakes. That's it.

A few hours later, when the chicken was spinning on the spit, I realized this wasn’t the chicken I intended to make. I apologized to my wife and kids as I was serving it.
Which was another mistake. To paraphrase Julia Child, never apologize at the table. Just go with it, and pretend it was what you meant to do all along.

Turns out, everyone preferred the accident recipe to the other one. My wife demanded the other wing, and my oldest, who has no heat tolerance, went back for seconds.
My family is showing remarkable patience as I work on this cookbook. We’ve had a lot of rotisserie chicken over the last few months, and they’re still enjoying it. Though I think they’d be happier if I mixed in burgers every now and again.

So, here it is: accidentally dry brined rotisserie chicken. No apologies necessary.

Recipe: Rotisserie Chicken with Italian Black and Red Pepper Dry Brine

Equipment

  • Grill with a rotisserie (I use a Weber kettle with the charcoal kettle rotisserie kit)
  • Aluminum foil drip pan (9"x13", or whatever fits your grill. I use an enameled steel roasting pan or Weber Extra-Large aluminum foil drip pans.)
  • Butchers twine
  • Instant Read Thermometer


Dry Brined, Trussed and Spit


On the grill
On the grill

Notes

  • You can get a minor dry brining effect if you salt the chicken an hour before cooking, but for best results it takes at least eight hours. If you're really behind schedule, don't dry brine at all - salt the chicken right before trussing it. It won't get the deep seasoning of a dry brine, but it will still taste great.

What do you think?

Questions? Other ideas? Leave them in the comments section below.

Related Posts

Rotisserie Chicken with Spanish Smoked Paprika Rub
Rotisserie Chicken with Knob Creek Glaze and Drip Pan Potatoes
Rotisserie Chicken with Chinese Oyster Sauce Glaze
My other Rotisserie Recipes

Enjoyed this post? Want to help out DadCooksDinner? Subscribe to DadCooksDinner via eMail or RSS reader, recommend DadCooksDinner to your friends, and buy something from Amazon.com through the links on this site. Thank you.

Video: How to Carve a Chicken

May 6, 2014 by Mike Vrobel Leave a Comment

How do you carve a chicken?

I get this question a lot. Here’s my video answer:


How to Carve A Chicken [YouTube]

And, here’s a recipe to use if you need a chicken to carve: Rotisserie Chicken with Fennel, Coriander, and Red Pepper Spice Rub

What do you think?

Questions? Other ideas? Leave them in the comments section below.

Related Posts

Video: Rotisserie Grilling Two Chickens
Video: How to Butterfly a Chicken
Video: Rotisserie Turkey Legs

Enjoyed this post? Want to help out DadCooksDinner? Subscribe to DadCooksDinner via eMail or RSS reader, recommend DadCooksDinner to your friends, and buy something from Amazon.com through the links on this site. Thank you.

Grilled Ribeye Pork Chops with Smoked Spanish Paprika Rub

May 1, 2014 by Mike Vrobel 7 Comments

Grilled bone-in pork chop sprinkled with a spice rub on a blue plate with multicolored mini-peppers
Grilled Ribeye Pork Chops with Smoked Spanish Paprika Rub

The USDA has finally seen the light! I can cook Grilled Ribeye Pork Chops with Smoked Spanish Paprika Rub to medium, instead of overcooking them to well done.


Celebrate grilling season with pork at Kroger!
This post is sponsored by the National Pork Board and Kroger. Backyard barbecues can be simply delicious with tender and juicy pork, the star of grilling season. Celebrate grilling season at Kroger, the ultimate source for barbecue essentials and great pork deals. Visit Kroger.com to view special offers exclusive to your area.


Last year the USDA changed their recommended cooking temperature for pork. They no longer recommend cooking pork loin until it is dry as dust to a well-done 160°F. Now their recommendation is 145°F - medium - with a three minute rest. As the Pork Be Inspired people keep saying, "Cook it like a steak!"

Pork today is very lean and shouldn't be overcooked. To check doneness, use a digital cooking thermometer. The National Pork Board follows the guidance of the U.S. Department of Agriculture, which recommends cooking roasts, tenderloins and chops to an internal temperature of 145°F, followed by a 3 minute rest time, resulting in a flavorful, tender and juicy eating experience.
National Pork Board, PorkBeInspired.com

Along with this change in cooking temperature, the pork board updated the names of different cuts of pork to make them easier to understand. The complete list of new names is here (in pdf), and I was asked to talk about the bone-in ribeye pork chop.

That's an easy one. The ribeye is my favorite pork chop. I get tender, juicy, lean meat and a bone to gnaw on when I'm done. (If you like baby back ribs, you'll love gnawing on the bone - baby backs are cut away from the pork loin.)

I do cook my ribeye chops like a steak - I don't want a pork chop (or a steak) cooked past medium. I grill my ribeye chop for four minutes a side over direct high heat, flipping every two minutes, and rotating 90 degrees halfway through to mark the chops in a crosshatch pattern. Then I check the temperature. If the chops need more time to reach 145°F, like the thick cut chops in the pictures, I slide them over an unlit burner, close the lid, and grill-roast them for a few more minutes until they are done.
Modern pork is lean, and dries out quickly at higher temperatures. Get it off the grill as close to 145°F as possible, or you'll regret it. Let the chops rest for a few minutes as well, so the juices redistribute and don't all rush out of the chop when you cut it.

To help out the juiciness, I go with a quick brine - an hour long soak in water, salt, and a little brown sugar for sweetness. Then I rub the chops with my favorite "secret" ingredient - smoked Spanish paprika - and a few other spices. The result? Even the kids were excited about these chops.

Recipe: Grilled Ribeye Pork Chops with Smoked Spanish Paprika Rub

Brining ribeye pork chops
Brining the chops
Rubbing ribeye pork chops
Sprinkled with spice rub
Temperature check ribeye pork chops
Done, time to come off the grill
Grilled ribeye pork chops on platter
Serve!

What do you think?

Questions? Other ideas? Leave them in the comments section below.

Related Posts

Grilled Thin Pork Chops, Quick Brinerated
Grilled Pork Chops with Knob Creek Lemon Glaze
Grilled Pork Shoulder Kebabs with Peppers, Onions and Spice Rub

My Grilling Recipes Index

Enjoyed this post? Want to help out DadCooksDinner? Subscribe to DadCooksDinner via eMail or RSS reader, recommend DadCooksDinner to your friends, and buy something from Amazon.com through the links on this site, or donate through my tip jar. Thank you.

Cedar Plank Grilled Ribeye with Peppers and Onions

April 24, 2014 by Mike Vrobel 7 Comments

Cedar Plank Grilled Ribeye with Peppers and Onions | DadCooksDinner.com

Cedar Plank Grilled Ribeye with Peppers and Onions | DadCooksDinner.com
Cedar Plank Grilled Ribeye with Peppers and Onions

Emeril Lagasse taught me this recipe back in the late ’90s, before cedar plank grilling was thing.

Emeril used it on camping trips, where he’d put the steak on a plank and top it with peppers and onions (and jalapeno sauce - Bam!). The planks went over the campfire, protecting the steaks from the fire.
I want to break this recipe out on a camping trip. I love the idea of cooking steak on planks over an open fire. It’s…it’s just…it’s the camping part that I don’t want to suffer through. Sleeping on the hard ground, with rocks and branches poking me, waiting for my body heat to warm up the sleeping bag? That seemed like a great idea when I was a kid. Now, with my creaky, mid–40’s body? Can't I sleep in a bed?

Cedar Plank Grilled Ribeye with Peppers and Onions | DadCooksDinner.com
Steaks salted, plank soaking

Emeril recommended untreated cedar shingles from the hardware store; back then, the only shingles I could find were covered in dust and wrapped with rusty wire - definitely not good eats. And, like I said, cedar plank grilling wasn't a thing, so there were no planks in the grilling supply section. I went to the craft boards aisle and asked for a 1 by 6 untreated cedar board, took it home, and cut it into foot-long pieces.

Cedar Plank Grilled Ribeye with Peppers and Onions | DadCooksDinner.com
Peppers and Onions

Nowadays, cedar planks are everywhere. The grilling section of your hardware store will have them, and a well stocked store will have a choice of cedar, alder, maple, and maybe even oak, my favorite.
You can always head over to the craft board section, but make sure the boards are not “treated” wood.

Why bother with the plank? The strong, cedar wood smoke enhances the beefy flavor of the ribeye. The peppers and onions brown in the heat of the grill, making a great steak topping. And the wood protects the ribeye, so it slowly coasts to medium-rare, pink from edge to edge.

If you want to expand your grilling repertoire past a simple grilled steak, give cedar plank steak a try. You won’t be disappointed.

Cedar Plank Grilled Ribeye with Peppers and Onions | DadCooksDinner.com
Ready to serve

Recipe: Plank Grilled Ribeye Steak with Peppers and Onions

Adapted from: Emeril Lagasse, Campfire Steaks

Equipment

  • Cedar grilling plank (⅜" by 5" by 15" or so)
  • Grill (I love my Weber Kettle)
  • Probe Thermometer (not absolutely necessary, but much easier with it.)

Cedar Plank Grilled Ribeye with Peppers and Onions | DadCooksDinner.com
Step by step:
1. Sear the plank
2. Sear the steaks
3. Steaks on the plank
4. Top with peppers


Notes

  • This recipe is easy with a probe thermometer. Once the steak is flipped onto the cedar plank, run a probe into it from the side, aiming for center mass. Set the thermometer for 125°F, enjoy a frosty beverage, and wait for your delicious steak to finish. But - make sure the probe cable does not run over the direct heat side of the grill; the high heat can burn out the cable.
  • I love the taste of cedar and beef, but if you want a different flavor, try a different grilling plank. I think beef matches with oak or maple.

What do you think?

Questions? Other ideas? Leave them in the comments section below.

Related Posts

Cedar Plank Salmon
Plank Grilled Filet Mignon with Blue Cheese Salad
Plank Grilled Brie with Honey and Thyme

Enjoyed this post? Want to help out DadCooksDinner? Subscribe to DadCooksDinner via eMail or RSS reader, recommend DadCooksDinner to your friends, buy something from Amazon.com through the links on this site, or donate through my tip jar. Thank you.

Grilled Ham with Honey Bourbon Glaze

April 17, 2014 by Mike Vrobel 37 Comments

Grilled Ham with Honey Bourbon Glaze

My wife's family is coming over for Easter. And my wife, the ham fanatic, insisted on a double smoked ham from Sherman Provision.

Lucky for her, I ordered two - one for Easter dinner, and another for this blog post. One of the weird side effects to blogging is you get two holiday meals - the actual holiday, and the one you cook a few weeks ahead of time for the blog.
This is a problem when the recipe doesn't quite work and I have to cook it a few times to get it right. "Daaad, do we haave to have Thanksgiving turkey agaaain?"

Grilled Ham with Honey Bourbon Glaze
[feast_advanced_jump_to]

This time I got it right. My wife and kids started circling as I brought the glistening ham in from the grill. I had to beat them back with my grill spatula to get the pictures for this post - they kept trying to pick pieces of the crust off while I was setting up the camera. Once I had my pictures, I started carving, and for a while I couldn't keep up with them. About a quarter of the ham disappeared from the cutting board before I put the knife down and asked if we could actually sit down to eat. They slunk off and set the table.
When I turned my back, my wife grabbed another piece of ham.

So, here is my easy grilled ham, glazed with honey, bourbon, and mustard. Cook it low and slow until the ham is reheated, brush it with a few layers of glaze, then carve and serve.

Equipment

  • Grill (I use a massive Weber Summit, which I love.)
  • 9 inch by 13 inch aluminum foil pan
Ham, scored and ready for the grill


Grill setup - outside burners lit


Done - ready to carve and serve

Notes

  • Don't use a spiral sliced ham with this recipe - the pre-slicing lets all the juices leak out while the ham is heating. Most spiral sliced hams recommend serving straight from the refrigerator for this reason.
  • I recommend bone-in ham because I'm a bone-in kind of guy, and I get a less processed ham that way. (From least to most processed: "Ham", then "ham with natural juices" are the best options; at my local grocery store, "ham with natural juices" is the best I can do. Next down is "ham with water added", and the worst case scenario is "ham and water product", which tends to look like a square loaf.) Now, I'm a ham snob - I like my pork minimally processed - but this recipe will work with any ham.
  • Now, the downside to bone-in ham is carving around the bone. The bone is usually on one side of the ham, so I carve the other side first to get nice, big slices. Then I cut the rest of the ham away from the bone in largeish chunks, and carve those (or save them for later for ham salad or pea soup.)
  • Want to cook the ham on a charcoal grill? See my "Rotisserie Ham with Orange and Honey Glaze" for indirect medium-low setup options; then, instead of using the rotisserie, put the grill grate back on and continue with step 4 - Cook the ham.
  • If you really want to keep it simple, skip the glaze and the scoring. Then you're using the grill as a glorified oven to reheat your ham…which can be useful if the oven is full of Easter side dishes.

What do you think?

Questions? Other ideas? Leave them in the comments section below.

Related Posts

Rotisserie Ham with Honey and Orange Glaze
Rotisserie Ham, Barbecue Style
Rotisserie Fresh Ham with Injection Brine

Enjoyed this post? Want to help out DadCooksDinner? Subscribe to DadCooksDinner via eMail or RSS reader, recommend DadCooksDinner to your friends, buy something from Amazon.com through the links on this site, or donate through my tip jar. Thank you.

Dad Cooks Easter Dinner 2014

April 15, 2014 by Mike Vrobel Leave a Comment

Rotissierie Fresh Ham with Injection Brine

I have to confess. My Easter tradition is ending our Lenten fast with a charcoal grilled steak after midnight mass, accompanied by the best bottle of red wine we have in the house. Or, should I say, that was my tradition. We’re a 7:30AM mass family now - with the kids, we have not gone to midnight mass in over a decade.

That doesn't mean I gave up on my Easter Eve steak. This year? A thick cut ribeye with asparagus, baked potatoes, and my last bottle of 1997 Silver Oak Alexander Valley Cabernet Sauvignon.
And, with that bottle, I'm out of great wine. Someday I’ll get back to wine country. Until then, it’s cheap wine for me.

For Easter itself, the main course comes down to: are you a ham or lamb person? Either makes a great centerpiece for the dinner table. Here are some of my recipes:

Ham Recipes

  • Grilled Ham with Honey Bourbon Glaze (coming Thursday)
  • Rotisserie Ham with Orange and Honey Glaze
  • Rotisserie Ham, Barbecue Style
  • Rotisserie Fresh Ham with Injection Brine

Lamb Recipes

  • Grilled Butterflied Leg of Lamb
  • Rotisserie Whole Leg of Lamb with Orange and Fennel Dry Brine
  • Rotisserie Leg of Lamb Provencal

What do you think?

Questions? Other ideas? Favorite Easter recipes? Leave them in the comments section below.

Enjoyed this post? Want to help out DadCooksDinner? Subscribe to DadCooksDinner via eMail or RSS reader, recommend DadCooksDinner to your friends, buy something from Amazon.com through the links on this site, or donate through my tip jar. Thank you.

Grilled Chicago Char Dog

April 10, 2014 by Mike Vrobel 1 Comment

I visit Chicago fairly often - my aunt and uncle live in the Rogers Park neighborhood. Every time I’m there, I make sure to get some Chicago dogs. Superdawg drive-in was my favorite, but I’m not picky - I’ve never met a true Chicago dog that I didn’t like.

Then I went to Chicago for IACP14, and found out about char dogs at Downtown Dogs. You people! You were holding out on me! Grilled hot dogs instead of boiled? Of course I want one.

When I got home, I had to make my own char dogs. Now, Chicago hot dogs have a very specific set of ingredients and toppings, which make up their “dragged through the garden” style:

An all beef hot dog with natural casing - Vienna Beef hot dogs are the gold standard - in a poppy-seed bun, with a kosher dill pickle spear and tomato slices laid alongside the dog. Top with mustard, diced onion, pickle relish (Chicago style relish glows green like Marvin the Martian), sport peppers, and sprinkle with celery salt.
Never ketchup. Ever. I’ve warned my kids: if you order ketchup on a dog, they will drive you to the city limits and dump you in Evanston.

It was a pain to find all of these ingredients in Ohio - see the notes section - but it was worth it. Normally, when I make a “blog meal”, the kids all groan in unison. But not on char dog night - they were hopping with excitement.

Thanks to Meathead at AmazingRibs.com, a native Chicagoan, for his informative Chicago Hot Dogs post.

Recipe: Grilled Chicago Char Dog


Prep Time: 15 minutes
Cook Time: 5 minutes

Equipment

  • Grill (I use a Weber kettle)

Ingredients

  • All beef hot dogs in natural casings, with an X cut into the ends (Vienna Beef hot dogs are traditional)
  • Poppy seed hot dog buns (or plain buns - see note)
  • Kosher dill pickle spears
  • Roma tomato, halved, sliced thin
  • Yellow mustard
  • Sweet pickle relish
  • Onion, diced
  • Sport peppers (small hot peppers)
  • Celery Salt

Directions

1. Cut an X in the end of each dog

Cut a 1 inch deep X in the end of each dog. This gives the char dog its distinctive curl as it cooks.

2. Set the grill up for direct medium heat

Set your grill up for direct medium heat. For my Weber kettle, I lit ¾ of a chimney of charcoal, waited for it to be covered by gray ash, and then poured it out in an even layer over half of the grill.
Technically, I used my Weber Performer’s gas starter instead of the chimney.

3. Cook the dogs

Grill the dogs over direct medium heat until well browned on one side, about 2 minutes. Flip the dogs and grill until the cut ends are curling, and the dogs are charring a bit at the tips, about 2 more minutes.

4. Serve

Put each dog in a bun (or two dogs in one bun for a double dog), with a pickle spear along one side and a couple of slices of tomato on the other. Top with mustard, relish, and onions, add a couple of sport peppers, and sprinkle with celery salt.

Notes

  • It's easier to get char on your char dogs with a charcoal grill, but if you can't give up the convenience of gas, I won't judge. And, if you're in a hurry, and want to skip the X in the end of every dog, I won't judge either.
  • It is surprisingly hard to find these ingredients back home in Ohio. I kept having to compromise. Beef dogs OR natural casing? (Shut out on Vienna Beef hot dogs, finally found natural casing kosher dogs at Acme.) Can pepperoncini substitute for sport peppers? (Finally found sport peppers at World Market.) Is this relish green enough? (No, had to live with it.) I finally found all of the toppings…
  • …except for the poppy seed hot dog buns. I was shut out. So I bought poppy seeds, intending to try this trick from Martha Stewart. And then I forgot to brush them with butter and sprinkle with the poppy seeds before I served them. So close, and yet, so far.
  • What I'm getting at: if you're too far from Chicago, accept that you have to make substitutions, and do the best you can. Grilled beef franks, a hot pepper of some sort, and plain hot dog buns will do. (But don't tell them I told you, or they'll be watching for me at the Cook County line.)

What do you think?

Questions? Other ideas? Death threats from Bill Swerski’s Superfans? Leave them in the comments section below.

Related Posts

Grilled Foot Long Hot Dogs
Pan-Grilled Bratwurst with Onions and Peppers
Grilled Sausage

Enjoyed this post? Want to help out DadCooksDinner? Subscribe to DadCooksDinner via eMail or RSS reader, recommend DadCooksDinner to your friends, buy something from Amazon.com through the links on this site, or donate through my tip jar. Thank you.

Pressure Cooker Wild Boar Ragu (Ragu Di Cinghiale)

April 3, 2014 by Mike Vrobel 4 Comments


It’s Wild Boar Week on DadCooksDinner. (Why wild boar? I…I don’t know. Why not wild boar?)


It’s Mario’s fault.

It has to be Mario’s fault. I think of wild boar as an ingredient for traditional Italian cooking. But I’m not sure why. As much as I love the cuisine, I’m certainly not Italian. My best guess is an episode of Molto Mario, lodged in the back of my brain years ago.

Now, why wild boar? Try it and you’ll see. Traditional Italian ragu is wild boar’s killer app. The complex flavor of wild boar - mainly pork, but nuttier, and deeper, like some beef is mixed in - makes the perfect base for a pasta sauce.
For more on “why wild boar”, see my post from Tuesday. And I still say Feral Swine is a great name for a punk band.

Can’t find wild boar? Substitute pork shoulder. (If you want to try to duplicate the complex boar flavor, add a little beef chuck roast, say a 2:1 ratio of pork to beef.) It won’t be wild boar…but it will still taste great on linguine.

No pressure cooker? No worries. See the Notes section at the end of the recipe for details.

Recipe: Pressure Cooker Wild Boar Ragu (Ragu Di Cinghiale)


Adapted from: Mario Batali, Pappardelle with Boar Ragu (via FoodNetwork.com)

Prep Time: 10 minutes
Cook Time: 60 minutes

Equipment

  • Pressure Cooker (I used my Instant Pot Electric PC)

Ingredients

Aromatics

  • 1 tablespoon olive oil
  • 1 large onion, minced
  • 1 celery rib, minced
  • 1 large carrot, peeled and minced
  • 4 cloves garlic, crushed
  • 2 tablespoons tomato paste
  • 1 teaspoon hot red pepper flakes (optional)
  • ½ teaspoon kosher salt

Boar and Liquids

  • 1 cup red wine
  • 2 pounds wild boar shoulder, cut into 1 inch chunks
  • 1 teaspoon kosher salt
  • ½ teaspoon fresh ground black pepper
  • 28 ounce can crushed tomatoes
  • 1 bay leaf
  • 1 sprig fresh rosemary

Pasta

  • Linguine or pappardelle pasta, cooked according to package directions

Toppings (optional)

  • Grated pecorino Romano cheese
  • Minced fresh parsley

Directions

1. Saute the aromatics

Heat 1 tablespoon of olive oil in the pressure cooker pot over medium-high heat until the oil is shimmering. Add the onion, celery, carrot, garlic, and tomato paste to the pot. Sprinkle with the red pepper flakes and ½ teaspoon salt. Saute, stirring and scraping the the bottom of the pan to keep the tomato sauce from sticking, until the onions are softened, about five minutes. Add the red wine to the pot, bring to a simmer, and scrape the bottom of the pot again to loosen any browned bits.

2. Everything into the pot

Add the boar to the pot, sprinkle with 1 teaspoon of salt, and stir to coat with the aromatics and red wine. Add the sprig of thyme and rosemary, and then pour the tomatoes on top, but don’t stir.

3. Pressure cook the ragu

Lock the lid on the pressure cooker, bring the pressure cooker up to high pressure, then cook at high pressure for 25 minutes (30 minutes for an electric pressure cooker). Remove from the heat, allow the pressure to come down naturally - about 20 minutes. Remove the lid from the pot - be careful, the pot will be full of hot steam.

The boar is ready - a squeeze of the tongs and it shreds itself.

4. Shred the boar and serve

Break up the chunks of boar by pressing them against the side of the pot with the back of a spoon; they should break into shreds with a little pressure. Stir the shredded pork into the sauce. Taste for seasoning, add more salt and pepper if necessary, and serve on pasta, sprinkling with pecorino Romano and/or parsley at the table.

Notes

  • No pressure cooker? No worries. Use a heavy bottomed dutch oven with a lid. Increase the amount of wine to 2 cups. Follow the instructions right up until "lock the lid". Then, instead of pressure cooking, bring the pot to a boil, cover, and move the pot to a preheated 350°F oven. Bake for 2 ½ hours, or until the boar is tender and shreds easily when squeezed.
  • Can't find wild boar? Substitute pork shoulder. It won't have the taste of wild boar, but it will still be great.

What do you think?

Questions? Other ideas? Leave them in the comments section below.

Related Posts

Pressure Cooker Pasta Fazool (Pasta and Bean Stew)
Slow Cooker Bolognese Sauce (Ragu Bolognese)
Weeknight Tomato Sauce
Instant Pot Short Rib Ragu

Enjoyed this post? Want to help out DadCooksDinner? Subscribe to DadCooksDinner via eMail or RSS reader, recommend DadCooksDinner to your friends, buy something from Amazon.com through the links on this site, or donate through my tip jar. Thank you.

Pressure Cooker Wild Boar Stew (Spezzatino di Cinghiale)

April 1, 2014 by Mike Vrobel 2 Comments


It’s Wild Boar Week on DadCooksDinner. (Why wild boar? I…I don’t know. Why not wild boar?)


Wild boar! I think of a snout, tusks, and a bad attitude.

Turns out, I’m not wrong about that. (Especially the bad attitude.) We’ve got a wild boar problem in Texas. Wild boar are free range, in the original sense - we have no control over them. They roam across the countryside, rooting around in farmer’s fields, destroying backyard gardens, generally being a pest.
Picture the swine version of a nuisance animal - let’s say a raccoon - digging in your back yard. Except this one weighs 200 pounds. And did I mention the tusks? They’re a particular problem in Texas, but they’re loose in 39 states, including my home state of Ohio.

“Feral Swine” is the official USDA designation, because American wild boar is a cross between pigs that escaped the first Spanish explorers, and European wild boar introduced for hunters in the late 1800’s.
Feral swine is a great name for a band. Or a competition barbecue team. I’d be amazed if the name wasn’t already in use on the BBQ circuit.

Why am I telling you all this? Because I’ve been itching to cook wild boar shoulder for quite a while now, but I couldn’t find boar in any local stores. That is, until Giant Eagle opened their Market District store in my area, and I saw wild boar loin. Not what I wanted, but close. Even better, the boar was from D’Artagnan, the duck and foie gras people. They sell wild boar shoulder on their website.. The Internet to the rescue!

Today we’re making Spezzatino di Cinghiale - Italian wild boar stew. What does wild boar taste like? Pork, with a nutty, beefy flavor. It doesn’t taste like game, but like a stronger flavored than pork.

Dad, this stew is BOAR-ing. Hee hee heee. Get it?
[My daughter. She'll be here all week.]

No pressure cooker? No worries - see the Notes section for traditional cooking instructions. And, if you can’t find wild boar, pork shoulder is a fine substitute.

Recipe: Pressure Cooker Wild Boar Stew (Spezzatino di Cinghiale)


Prep Time: 10 minutes
Cook Time: 60 minutes

Equipment

  • Pressure Cooker (I used my Instant Pot Electric PC)
  • Steamer Basket

Ingredients

Meat

  • 3 pounds wild boar shoulder, cut into 1 inch cubes (or substitute pork shoulder)
  • 1 ½ teaspoons kosher salt
  • 1 tablespoon olive oil

Aromatics

  • 1 tablespoon olive oil
  • 1 large onion, minced
  • 1 celery rib, minced
  • 1 large carrot, peeled and minced
  • 3 cloves garlic, crushed
  • 2 tablespoons tomato paste
  • ½ teaspoon kosher salt
  • 1 cup red wine

Liquids

  • 1 sprig fresh rosemary
  • 1 sprig fresh thyme
  • 15 ounce can petite diced tomatoes (or diced tomatoes)

Carrots

  • 1 pound carrots, peeled and cut into 3 inch lengths

Directions

1. Sear the boar in batches

Sprinkle the boar cubes with 1 ½ teaspoons salt. Heat 1 tablespoon of olive oil in the pressure cooker pot over medium-high heat until shimmering. Sear the boar in 2 to 3 batches, depending on the size of your pot - don’t crowd the pot, or the boar will steam instead of browning. Sear the boar until well browned on two sides, about 3 minutes a side, then remove to a bowl and sear the next batch.

2. Saute the aromatics

Add 1 tablespoon of olive oil to the pot and heat until shimmering, about 1 minute. Add the onion, celery, carrot, garlic, and tomato paste to the pot, then sprinkle with the ½ teaspoon salt. Saute, stirring and scraping the browned bits of boar from the bottom of the pan, until the onions are softened, about five minutes. Add the red wine to the pot, bring to a simmer, and scrape the bottom of the pot again to loosen any browned bits.

3. Everything into the pot

Stir in the boar and any juices from the bowl, then add the sprig of thyme and rosemary. Pour the tomatoes on top, but don’t stir. Put a steamer basket on top of everything in the pot and set the carrots in the steamer basket.

4. Pressure cook the stew

Lock the lid on the pressure cooker, bring the pressure cooker up to high pressure, then cook at high pressure for 20 minutes (25 minutes for an electric pressure cooker). Remove from the heat, allow the pressure to come down naturally for 15 minutes, then quick release any pressure left in the pot. Remove the lid from the pot - be careful, the pot will be full of hot steam.

5. Serve

Dump the carrots in the steamer basket into the stew, set the steamer basket aside, and stir the carrots into the stew. Discard the thyme and rosemary sprigs. Taste for seasoning and add more salt and pepper to the stew if it needs it. (If the stew tastes bland and flat, add salt until the flavor brightens up. I added an additional teaspoon of kosher salt to the stew). Serve with polenta, or mashed potatoes, or pasta.

Notes

  • No pressure cooker? No worries. Use a heavy bottomed dutch oven with a lid. Increase the amount of wine to 2 cups. Follow the instructions right up until "lock the lid". Then, instead of pressure cooking, bring the pot to a boil, cover, and move the pot to a preheated 350*F oven. Bake for 2 hours, or until the boar is tender.
  • No wild boar? Substitute pork shoulder. It won't quite have that wild boar taste…but I love pork shoulder, and it would work great in this recipe. If you want to get closer to the wild boar taste, go with 2 pounds of pork shoulder, and 1 pound of beef chuck.
  • Why use a steamer basket for the carrots? Pressure cooking carrots in the liquid leaves them too mushy - they disintegrate into the stew. Lifting them above the stew and steaming helps keep them together, so you get chunks of carrot in the stew instead of carrot puree.

Sources

A Few Words on Wild Boar [via Dartagnan.com]
Buy Wild Boar Meat from D’Artagnan

What do you think?

Questions? Other ideas? Leave them in the comments section below.

Related Posts

Pressure Cooker Beef Stew
Pressure Cooker Beef Shank Osso Bucco
Pressure Cooker Pork Stew with Sweet Potatoes and Prunes

Enjoyed this post? Want to help out DadCooksDinner? Subscribe to DadCooksDinner via eMail or RSS reader, recommend DadCooksDinner to your friends, buy something from Amazon.com through the links on this site, or donate through my tip jar. Thank you.

Pressure Cooker Tortilla Soup (Sopa de Tortilla)

March 27, 2014 by Mike Vrobel 2 Comments

What surprised me the most during my trip to Mexico? Soup.

In Oaxaca, soup was everywhere. For breakfast, there was a pre-Hispanic era squash and corn soup. For lunch, barbacoa carts offered a cup of the broth with the tacos. Dinner at the market was my choice between lamb tacos, goat tacos…and my favorite, a bowl of chile-laced goat consommé, served with a platter of thin sliced vegetables.
And, of course, there is the garlic soup we made at Seasons of My Heart cooking school, one of the best things I ate on the trip.

There is one Mexican soup that has broken through in America - tortilla soup. Why? My guess: it is essentially chicken noodle soup. Just substitute fried tortilla strips for the noodles, add the flavors of salsa (now America’s favorite national condiment), and you’re done.
The other reason? It is fantastic refrigerator Velcro. This recipe is the real deal version…but my other version is a weeknight “what can I do with this leftover chicken?” recipe.

No pressure cooker? No worries. See the notes section for stove top instructions.

Recipe: Pressure Cooker Tortilla Soup (Sopa De Tortilla)

Adapted from: Susana Trilling, Country Style Tortilla Soup, Seasons of My Heart: A Culinary Journey through Oaxaca, Mexico

Prep Time: 15 minutes
Cook time: 1 hour 45 minutes

Equipment

  • 6 quart or larger pressure cooker (I used a 6 quart electric Instant Pot pressure cooker )

Ingredients

Mexican Chicken Stock

  • 1 medium onion, peeled and quartered
  • 2 carrots, peeled and cut into 2 inch chunks
  • 1 rib celery, cut into 2 inch chunks
  • 4 garlic cloves, peeled
  • 1 (4 pound) chicken, cut into pieces (legs, wings, and breasts)
    • OR 3 pounds of chicken legs, thighs, or drumsticks
  • 1 bay leaf
  • 1 whole dried chile de arbol - optional
  • 1 sprig fresh thyme (or ½ teaspoon dried)
  • 4 black peppercorns
  • 1 whole allspice
  • 8 cups water

Soup

  • ½ cup vegetable oil
  • 6 tortillas, cut into ½ inch thick strips (or substitute crumbled tortilla chips)
  • 1 medium onion, diced
  • 6 cloves garlic, minced
  • 1 (15 ounce) can fire roasted diced tomatoes, pureed (substitute crushed fire roasted tomatoes if you can find them, and don't bother pureeing)
  • 12 cups of chicken stock (from above recipe)
  • salt to taste (I used 2 teaspoons of kosher salt)
  • 2 cups shredded chicken (from above recipe)
  • 4 ounces queso fresco (or farmers cheese), cut into ½ inch cubes
  • Chipotle en Adobo Puree (about 1 teaspoon per bowl, optional)
  • 2 avocados, cut into ½ inch cubes
  • ½ cup minced fresh cilantro
  • Limes, cut into wedges

Directions

1. Make the stock

Add the vegetables, chicken, and spices to the pressure cooker pot, then cover with 8 cups of water. Lock the lid on the pressure cooker, bring it up to high pressure, then cook on high pressure for 20 minutes (24 minutes in an electric PC). Turn off the heat and let the pressure come down naturally, about 20 minutes. Unlock the lid and open it away from you - carefully, the steam is scalding. Remove the chicken with a slotted spoon and set it aside to cool. Strain the broth through a fine mesh strainer and discard the solids. This will yield about 10 cups of chicken stock; use all of it in the recipe. When the chicken is cool enough to handle, shred the meat, discarding the skin and bones.
This step can be done a day or two ahead of time - store the stock and shredded chicken in the refrigerator. Or, months ahead of time, if you freeze the stock and shredded chicken. Thaw them out when you’re ready to make soup.

2. Fry the tortilla strips (optional - substitute tortilla chips)

Wipe out the pressure cooker pot, add the vegetable oil, and heat over medium-high heat until shimmering. Add the tortilla strips in two batches and fry until golden brown, about 5 minutes; use a slotted spoon to transfer to a paper towel lined plate to drain.

3. Saute the onions, cook down the tomatoes

Pour out all but two tablespoons of the vegetable oil from the pot, then put the pot back over medium heat. Add the onions to the pot and saute until they start to turn translucent, about 5 minutes. Add the garlic and saute for 1 minute, until you smell garlic. Add the pureed tomatoes and cook, stirring often, until the tomatoes thicken up - about 10 minutes.

4. Simmer the broth

Stir in the chicken stock and scrape the bottom carefully to make sure no tomatoes are sticking. Lock the lid, bring the pressure cooker to high pressure, and pressure cook for 5 minutes at high pressure (6 minutes electric PC). Quick release the pressure. Open the lid away from you - again, be careful, the steam is scalding. Salt the soup to taste.
It will need salt. There isn’t any in the recipe up to this point. Add salt until the soup tastes bright and sweet, and gains body - you should just start to feel the salt on the tip of your tongue. I added 2 teaspoons of kosher salt to get the flavor I wanted.


5. Build the soup bowls

In the bottom of each bowl, put some shredded chicken, a few cubes of cheese, a few cubes of avocado, and a teaspoon of chipotle puree. Ladle the broth into the bowl, sprinkle cilantro and fried tortilla strips on top, and serve, passing the lime wedges at the table.

Notes

  • No pressure cooker? No worries: Cook everything in a large, heavy pot or dutch oven. In step 1, simmer everything on the stove for 1 hour (instead of under pressure for 20 minutes with a natural pressure release). In step 4, simmer the garlic and broth broth for 30 minutes (instead of under pressure for 5 minutes with a quick release).
  • About the red electric pressure cooker you see above - it's an off brand model that has an 8 quart capacity. I love the capacity, but the nonstick lining is showing signs of wear after only a handful of uses, so I can't recommend it. I have a different, off-brand 8 quart electric PC with a stainless liner that I'm trying out now; if I like it, I'll let you know.
  • Feeding picky kids? Make this a "build your own soup." Put everything on the table and let them pick out what they want.
  • In a hurry? I've got a few suggestions. Each one removes a little more flavor from the soup…but I know what it is like to be under the gun to get dinner on the table.
  • In a hurry (1): First thing to skip - frying the tortilla strips. Use tortilla chips instead.
  • In a hurry (2): Skip cooking down the tomatoes. Dump the tomato puree in the pot, scrape the bottom of the pan to loosen up the onions and garlic, and immediately move on to adding the stock.
  • In a hurry (3): Use pre-made stock and shredded leftover chicken. The broth can be made ahead and frozen - it doesn't have to be Mexican broth. And the shredded chicken can be leftovers from any meal.
  • In a hurry(4): You can…I hate to say it…get away with store-bought broth and a store-bought rotisserie chicken. There's enough else going on in this recipe. But if you own a pressure cooker, broth is so easy you really should make your own.

What do you think?

Questions? Other ideas? Leave them in the comments section below.

Related Posts

Pressure Cooker Sopa De Ajo (Mexican Garlic Soup)
Tortilla Soup (the shortcut version)
Pressure Cooker Chicken Stock

Enjoyed this post? Want to help out DadCooksDinner? Subscribe to DadCooksDinner via eMail or RSS reader, recommend DadCooksDinner to your friends, buy something from Amazon.com through the links on this site, or donate through my tip jar. Thank you.

Road Trip: Weber Grills - Palatine Factory

March 25, 2014 by Mike Vrobel 6 Comments

July 4th kettle
(Painted for display, not for cooking)

I'm a Weber fanatic.

I've always loved to eat, but cooking came to me later in life. When we bought our house, I had to have a grill for the back yard, and I asked my Dad to get me a Weber kettle as a housewarming gift. That's when I dove head first into the world of food. My Weber collection currently stands at 5: a Performer (love the side table) as my primary charcoal grill, with a 26.75" One-touch gold for entertaining and larger groups. I have a massive Weber Summit 650 for the convenience of gas and for cold weather grilling, and a Weber Q for tailgating and picnics at the park. And my original kettle is in my garage, disassembled and stacked in a neat pile. It goes on road trips a couple of times a year, to our family cottage and my parent's house for Thanksgiving.

Why am I telling you all this? Because, thanks to a connection with the people at Weber (hi, Heather!), I was able to tour the factory in Palatine, IL, about an hour northwest of Chicago.

[Me] Is this heaven?

[Voice] It's Illinois.

[Me] I could have sworn this was heaven.
Apologies to Field of Dreams

The factory at Palatine builds their Summit and Genesis grills; charcoal grills are built in Huntley, about 30 minutes away.

[David, our guide] I can't give you exact numbers, but when we're really cranking...

[Grills roll by as I watch the assembly line workers fly through their tasks]

[Me] This isn't cranking?

[David] Oh, no. This is a slow day.

I got to see them building Summit 400 series grills, the “little” brother of my massive Summit 650. We followed the grill the whole way through assembly - and I mean the whole way. It started as a roll of steel. Huge presses stamped, giant computer-driven rollers bent and shaped, and pieces I know so well started to form. Hey, that’s the side of the cart! That’s the shelf, and they’re cutting the tuck-away rotisserie door.

We peeked through a tiny glass window into the 1700°F furnace, melting powdered glass into porcelain enamel grill coating. There were some wild colors - lime green, beige - that I’m not used to seeing; apparently the European market is interested in colors that don’t sell in the US. And, more than anything else, there were row after row of flavorizer bars trundling through the furnace.

Robots cut holes in precise locations, drove screws where necessary, and then a swarming line of workers started building. As it passed each worker’s station, those parts were assembled into the grill I know and love.

The Westerner - made in 1958

Weber can’t say “made in USA” because they source some of the smaller parts (their plastic handles, for example) from overseas. But the vast majority of the grill, including the steel, is American made. Weber locally sources materials from companies all over the Midwest. (That’s right - my grill is a locavore.) The grills themselves are fabricated and assembled in their factories outside of Chicago, and David, our guide, was proud of how much work is done in the US.

George Stephen statue in the lobby

[George Stephen to his grandson] Your crazy uncles talked me into buying this building. We'll never use all this space.

George was a grilling visionary, but he was wrong about space. Weber keeps running out of room. They moved to Palatine in the early 80’s; over the years they bought all the adjacent land in Palatine, and had to move charcoal kettle production and their warehouses to nearby Huntley. Even now, the factory floor in Palatine keeps expanding, pushing into adjoining rooms, and forcing them to re-organize the offices. (Palatine isn’t just a factory; it’s Weber’s home office and their R&D center as well. All the classic grills you see were in the lobby or the office. I wish *I* had a Westerner Kettle sitting outside my cube.)

The original Kettle
(I had to caress the handle.)

I'm a professional. You can't try this at home.

Unfortunately, this tour was a special opportunity. Weber does not have tours open to the public. And…after touring the facility, I can see why. This is a working factory floor, not set up for tours, and tight on space. We had to stay out of the way of zipping forklifts and focused workers. But, If you want a taste of what I saw, you can watch Weber’s video factory tours:

http://www.weber.com/about/factory-tours

The videos show you what I saw on the tour. But the videos can’t show the quite get the massive scale of the process. Multiple buildings, pounding presses, constant stream of parts on the line, and the bustle of all the people - it was awe inspiring to see it in person.

Now, if you’re in the area, and a Weber fan, there is a reason to stop by Palatine. The Weber Parts Store is open to the public. (200 E Daniels Rd, Palatine, IL 60067). They have every Weber accessory, and I mean EVERY Weber accessory. They also carry Weber themed clothes and accessories that are only available at the Parts Store - t-shirts, sweatshirts, and polo shirts. If you’re a fanatic like me, a stop at the parts store is worth the trip.

Thank you to David for the tour, and to Heather for the chance to visit Weber!

Resources

The Weber Story - a history of Weber [via Weber.com]
Weber Grill Timeline - every Weber grill from 1952 through 2000 [PDF, via WeberGrillRestaurant.com]

Enjoyed this post? Want to help out DadCooksDinner? Subscribe to DadCooksDinner via eMail or RSS reader, recommend DadCooksDinner to your friends, buy something from Amazon.com through the links on this site, or donate through my tip jar. Thank you.

Grilled Japanese Chicken Wings

March 20, 2014 by Mike Vrobel 2 Comments

These wings are based on Japanese yakitori grilling - grilled, then dipped in tare sauce - but to do true yakitori wings, I should be skewering them, and grilling them over direct heat. But…direct heat and wings don’t work for me. No matter how careful I am, how often I flip, I burn the wings before they cook through.

I have better luck with chicken wings when I grill-roast them with indirect heat, rendering fat and browning the wings. I finish them with a dip in the sauce and a quick sear over direct heat. Even then I have to be quick - the wings still want to burn, so I sear them in small batches, turning them often, pulling them off the grill at the slightest hint of char.

I could take the easy way out and skip the direct grilling. The wings are crisp, and a dip in the sauce works pretty well. After all this, why do I risk burning the wings? A quick sear tightens up the sauce, turning it into a glaze, and adding an extra layer of flavor to the wings.


Chicken wings grilling over indirect heat while the sauce simmers over the coals

What do you think?

Questions? Other ideas? Leave them in the comments section below.

Related Posts

Grilled miso BBQ chicken wings
Grilled Chinese chicken wings Chaunr
Grilled Buffalo chicken wings

Enjoyed this post? Want to help out DadCooksDinner? Subscribe to DadCooksDinner via eMail or RSS reader, recommend DadCooksDinner to your friends, buy something from Amazon.com through the links on this site, or donate through my tip jar. Thank you.

Green Monster Smoothie

March 18, 2014 by Mike Vrobel 7 Comments

I have a couple of good friends who, whenever I post a kale recipe, immediately reply with “and try it in a smoothie!”

Ugh…a kale smoothie? Really? That seems so…crunchy granola eater. And, while I like my granola, and tend to hug trees, kale smoothies were too out there for me.

Until my youngest son started asking for them. This must come from my wife’s side of the family - or be a recessive gene or something that skipped me entirely. Green? Smoothie? In the same sentence? He loved the idea.

So, I made one. I thought I was taking one for the team, but, much to my surprise, I enjoyed it.

Even better? My son drained the glass in one gulp. His smile looked like The Joker, a green kale grin up to his cheekbones.

Recipe: Green Monster Smoothie

Prep Time: 10 minutes
Cook Time: 2 minutes

Equipment

  • Powerful blender (I love my Vitamix)

Ingredients

  • 2 cups ice cubes
  • 2 packed cups kale leaves (6 ounces, thick stems removed, rinsed if sandy)
  • 3 kiwi, peeled
  • 1 banana, peeled
  • 1 cup apple juice

Directions

1. Blend it all

Pack everything in the blender. (The kale takes up a lot of space until it starts blending - it’s OK if you have to squeeze it in there to get the lid on). Start the blender on low, slowly bring it up to high, and run it at high speed until everything is completely smooth, about 1 minute. (If the blender is having a hard time processing, add more apple juice to keep the blades moving.)

Notes

  • You can replace the two cups of ice cubes with a frozen banana (for a total of two bananas in the smoothie). When our bananas are on the edge of going bad, we peel them and throw them in the freezer to preserve them for smoothies down the road.

What do you think?

Questions? Other ideas? Leave them in the comments section below.

Related Posts

Blue Moon Smoothie
Kale Chips
Road Trip - Vitamix Factory Outlet Store

Enjoyed this post? Want to help out DadCooksDinner? Subscribe to DadCooksDinner via eMail or RSS reader, recommend DadCooksDinner to your friends, buy something from Amazon.com through the links on this site, or donate through my tip jar. Thank you.

  • « Previous Page
  • 1
  • …
  • 19
  • 20
  • 21
  • 22
  • 23
  • …
  • 37
  • Next Page »

Welcome to Dad Cooks Dinner!

I'm Mike Vrobel, a dad who cooks dinner every night. I'm an enthusiastic home cook, and I write about pressure cooking, rotisserie grilling, and other food topics that grab my attention.

More About Me →

Popular

  • Three bowls of cooked Pinto Beans on a wood table
    Instant Pot Pinto Beans (No Soaking)
  • Pressure Cooker Beef Shank (Osso Bucco)
  • Pressure Cooker 7 Hour Leg of Lamb (in 90 minutes)
    Pressure Cooker 7 Hour Leg of Lamb (in 90 minutes)
  • Pressure Cooker Brown Jasmine Rice
  • Grilled Tomahawk Steak (Long Bone Ribeye, Reverse Seared)
    Grilled Tomahawk Steak (Long Bone Ribeye, Reverse Seared)
  • A green bowl full of chicken noodle soup
    Instant Pot Rotisserie Chicken Noodle Soup

Seasonal

  • A bowl of asparagus risotto
    Instant Pot Asparagus Risotto (Pressure Cooker Recipe)
  • Grilled Butterflied Chicken with Garlic Butter
  • Sous Vide rack of lamb sliced into chops
    Sous Vide Rack of Lamb with Dijon Bread Crumb Crust
  • A bowl of beef stew with asparagus, carrots, and radishes.
    Instant Pot Spring Vegetable Beef Stew
  • A Rotisserie Chicken (Pollo Asado)on a platter of shredded cabbage
    Rotisserie Chicken Pollo Asado
  • Rotisserie Pork Shoulder Roast with Carolina Mustard BBQ Sauce
    Rotisserie Pork Shoulder with South Carolina Mustard Barbecue Sauce

Footer

↑ back to top

About

  • Privacy Policy

Newsletter

  • Sign Up! for emails and updates

Contact

  • Contact

Copyright © 2025 Dad Cooks Dinner