DadCooksDinner

  • Home
  • Rotisserie
  • Recipes
  • Tools
  • Books
  • Merch
menu icon
go to homepage
  • Recipes
  • Books
  • Tools
  • Merch
  • About
subscribe
search icon
Homepage link
  • Recipes
  • Books
  • Tools
  • Merch
  • About
×
Home » Recipes

Grilled Pork Tenderloin Skewers with Thai Sweet Chili Sauce

February 26, 2015 by Mike Vrobel 1 Comment

A platter of pork tenderloin skewers
Grilled Pork Tenderloin Skewers with Sweet Thai Chili Dipping Sauce

What did I get for Valentine's day? A Weber Elevations tiered skewer set. 1My sweetie knows me well. Most winters I grill straight through - all I need is to shovel a path to the grill. We get our share of snow in Northeastern Ohio, but we also get warm snaps fairly often. (Like the saying goes - if you don't like the weather, wait 15 minutes, it will change.)

Not this year. 2Our historical record low for February was -6°F in 1982; Last week, on Sunday, we knocked it down to -7°F; Monday, -9°F; and Friday, we hit a low of -10°F. Right now we're having a heat wave - it's supposed to get up to 32°F today! - but tomorrow morning we'll be back down to -5°F. The snow just keeps building. I tried to shovel the deck, but there's a layer of frozen snow that I can't break through. I scraped as much as I could off of the top, then grilled while standing on six packed inches of snow and ice. (It threw off my whole perspective; I felt like I was constantly leaning over, reaching down to get things off the grill.)

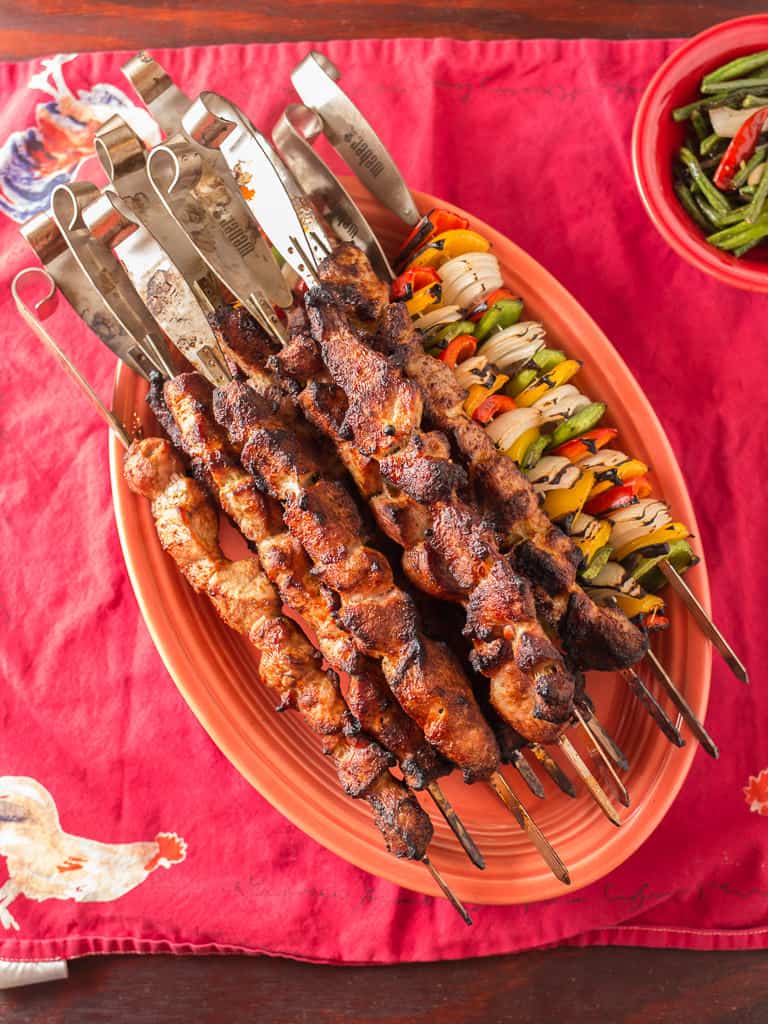
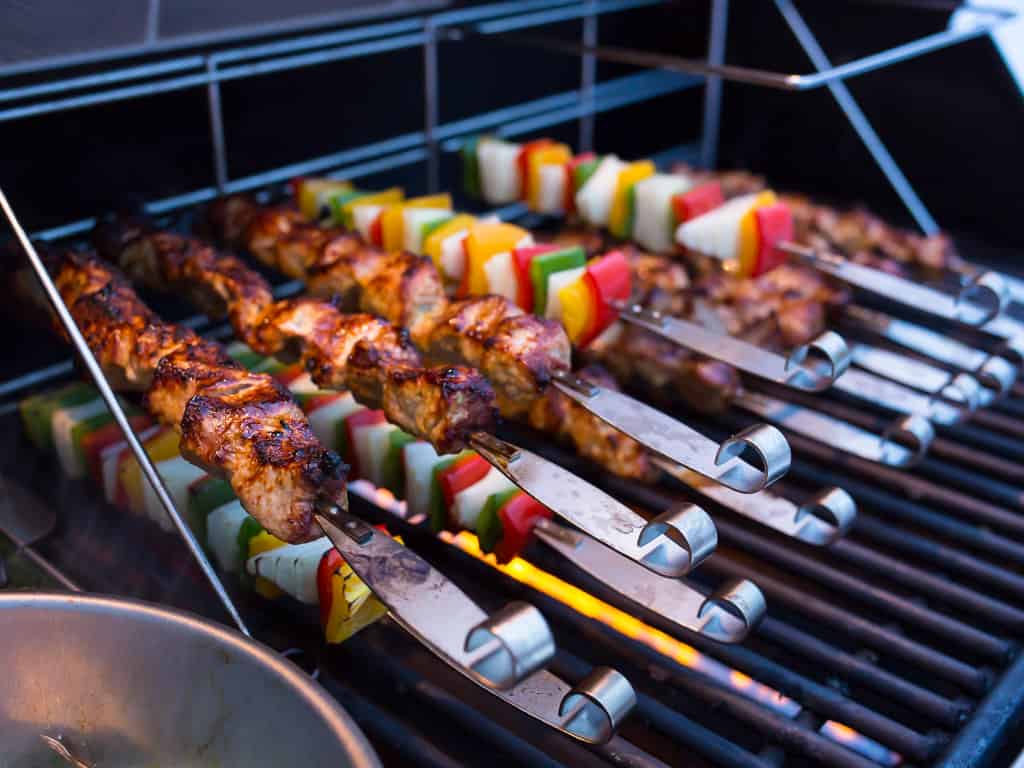
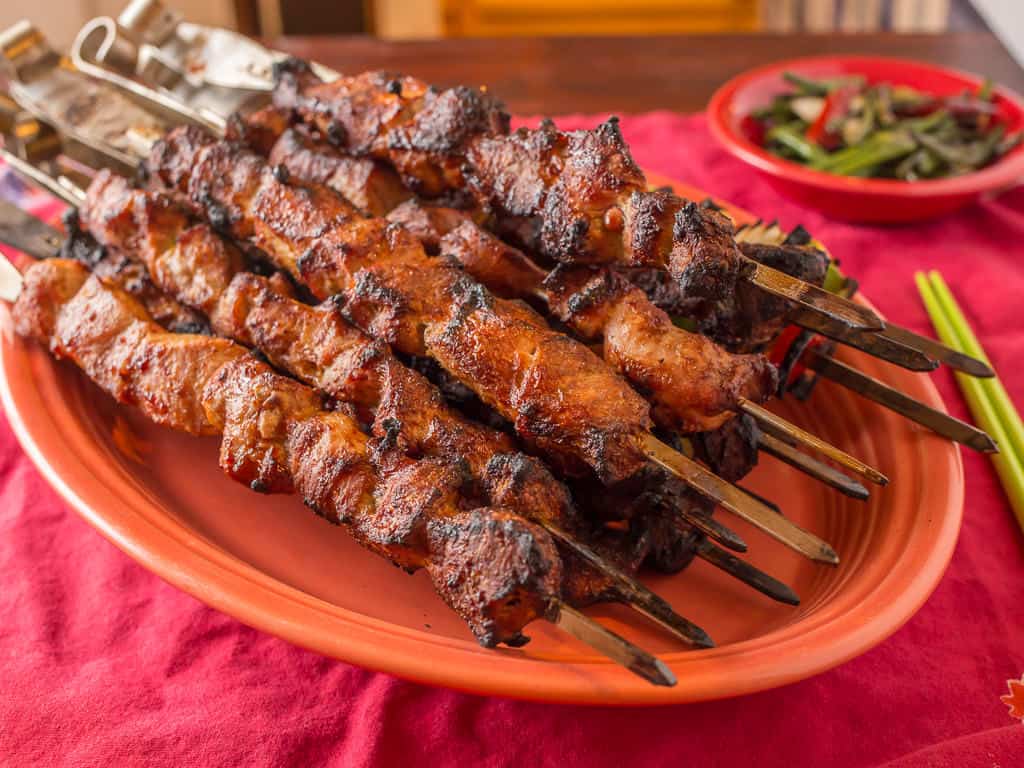
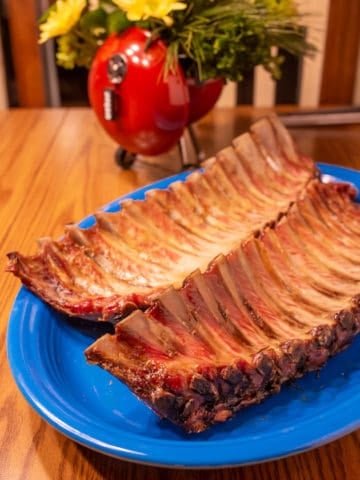
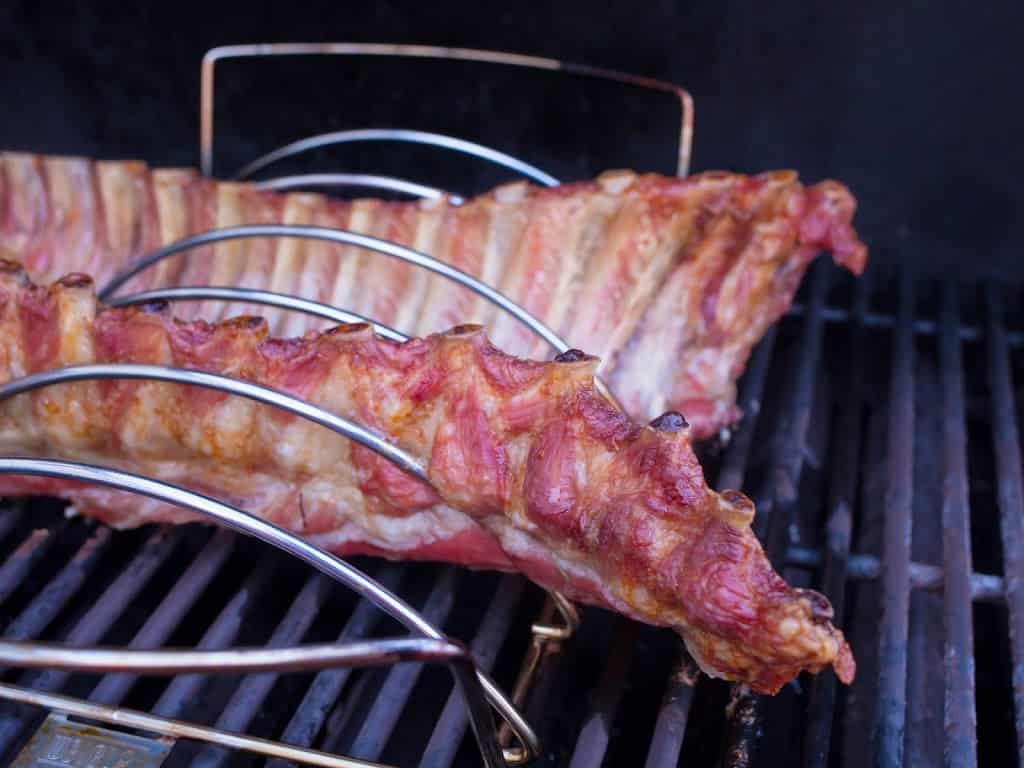
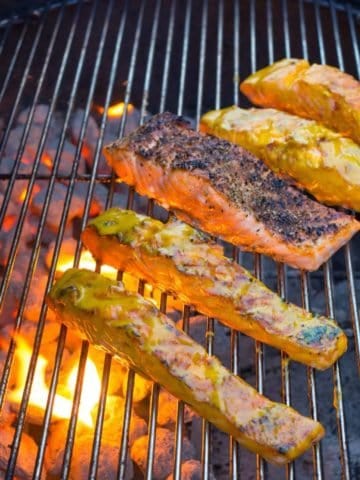
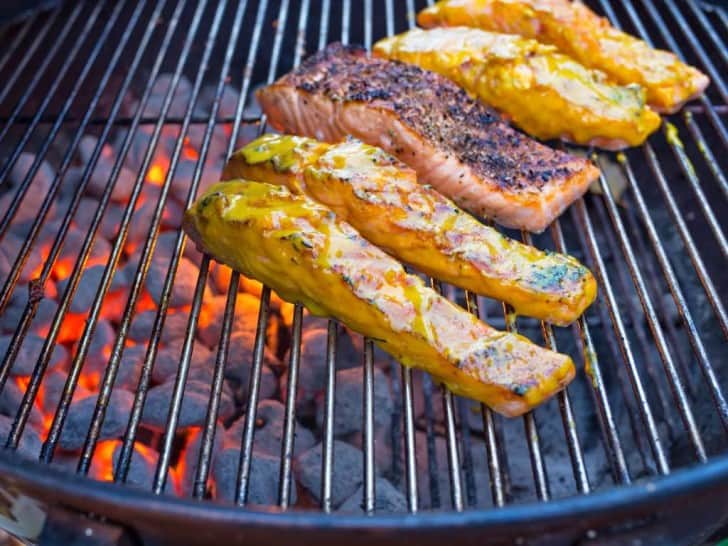
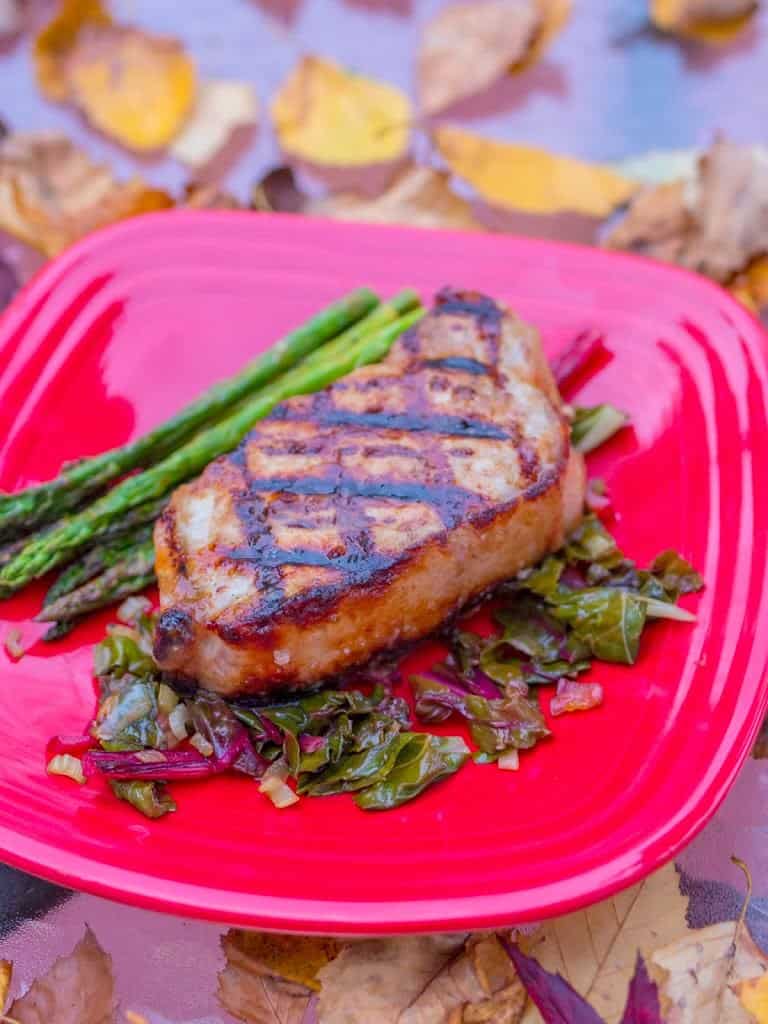
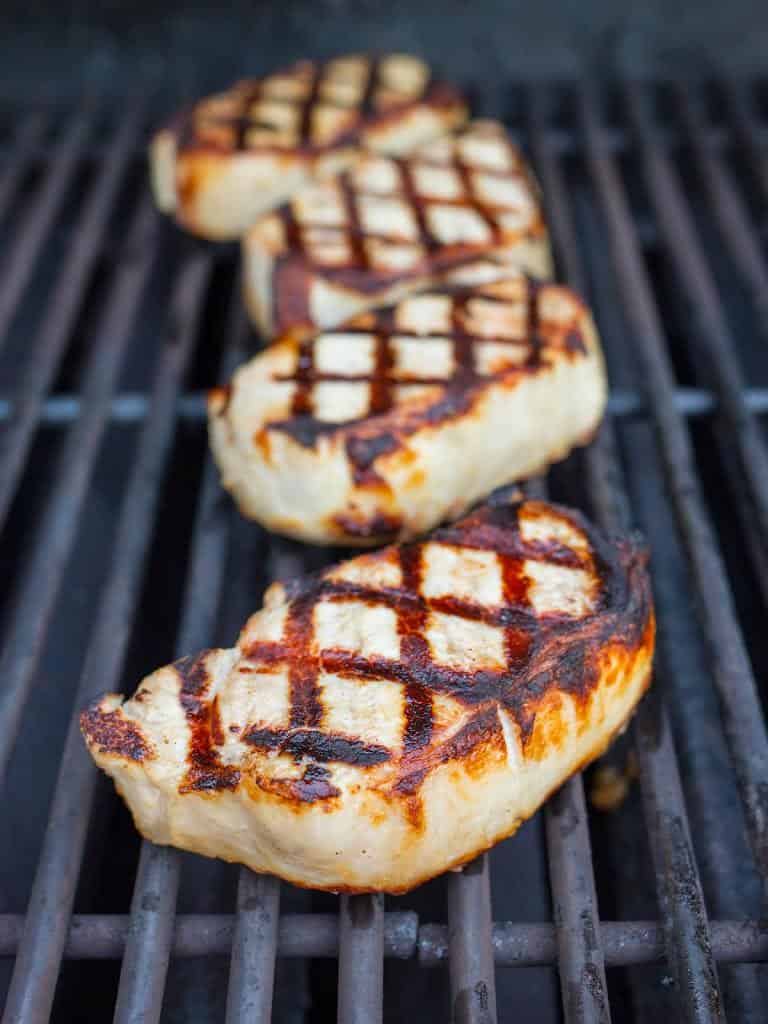
To counter the cold, I went with warm, tropical grilling - Thai pork skewers, with sweet chili sauce on the side for dipping. Now, I have to confess - I was skeptical of the Elevations set; I didn't think I'd get much browning without the pork touching the grill grate. Boy, was I wrong about that. I hung the skewers on the bottom layer of the elevations set, and they cooked perfectly; a minute or two slower than usual, but with more even browning. (I even overcooked a couple skewers - I didn't think that would be possible.) I'm an Elevations convert. I can't wait until the weather warms up a little more to really put the set through its paces. 3I bought all the Elevations accessories - the vegetable basket and the expansion rack - but that's a post for another day.

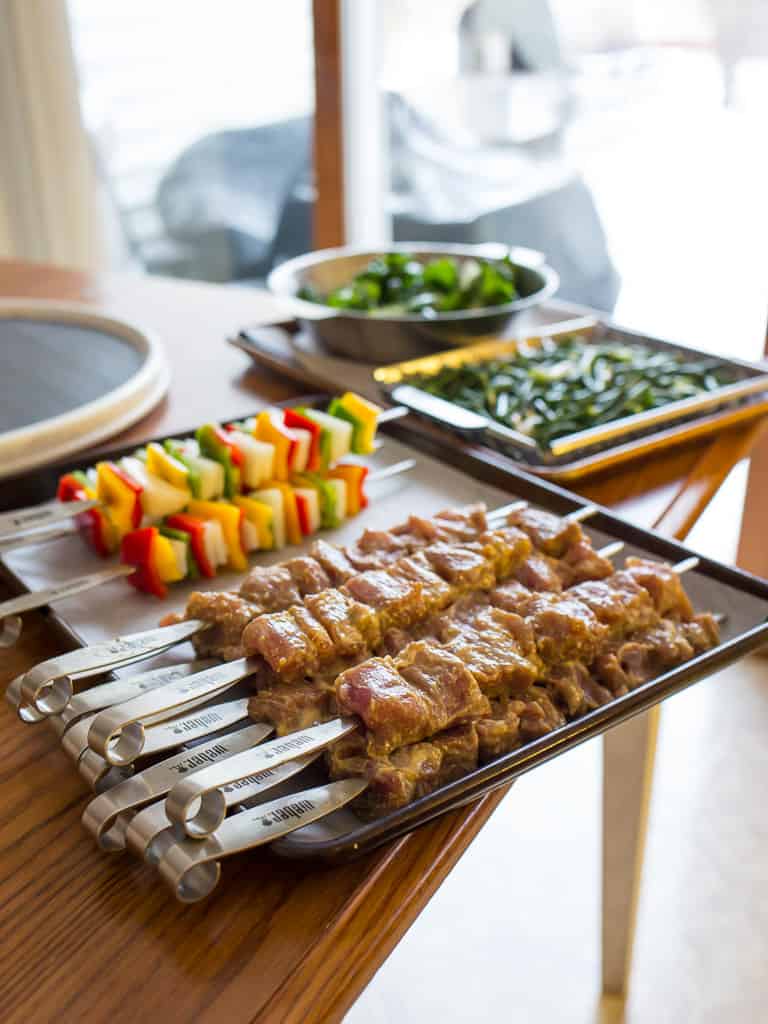
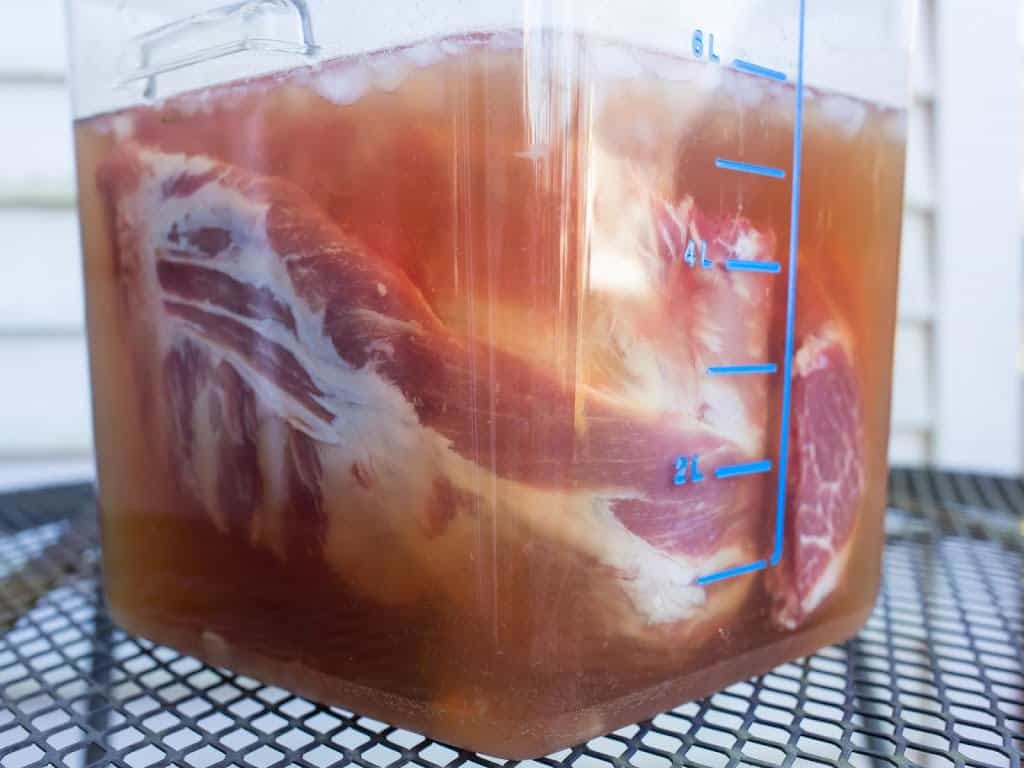
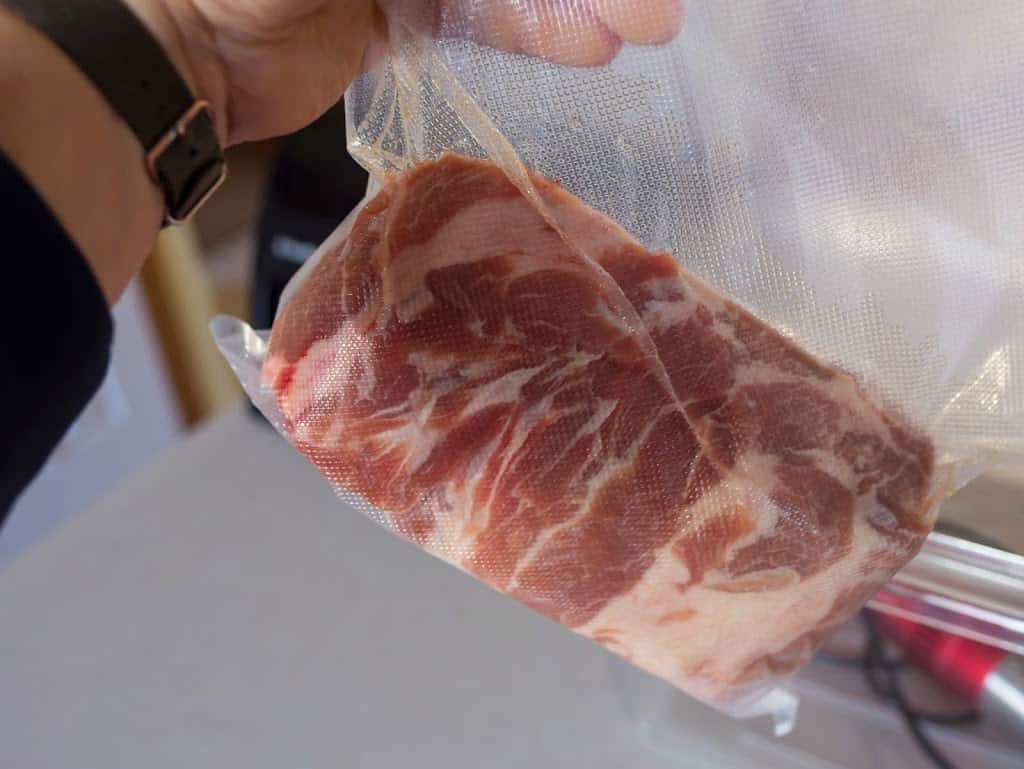
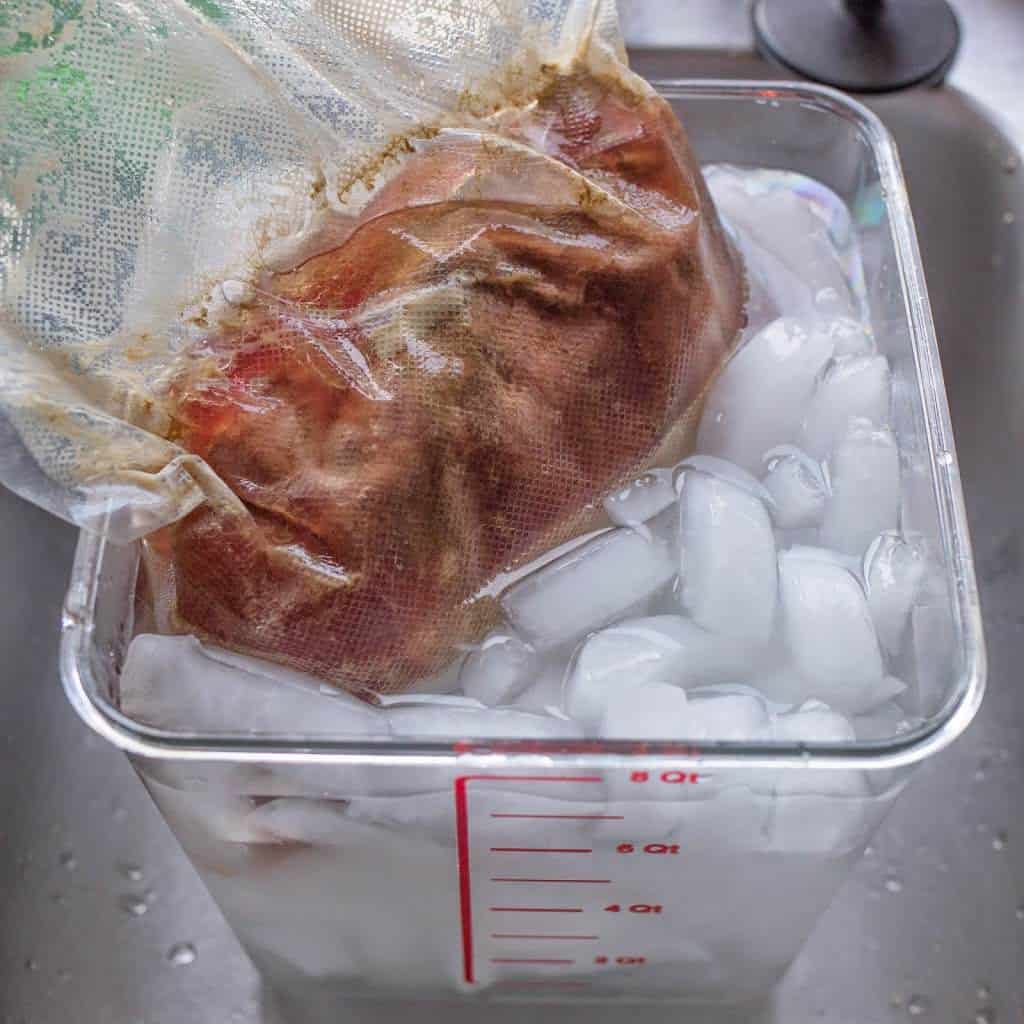
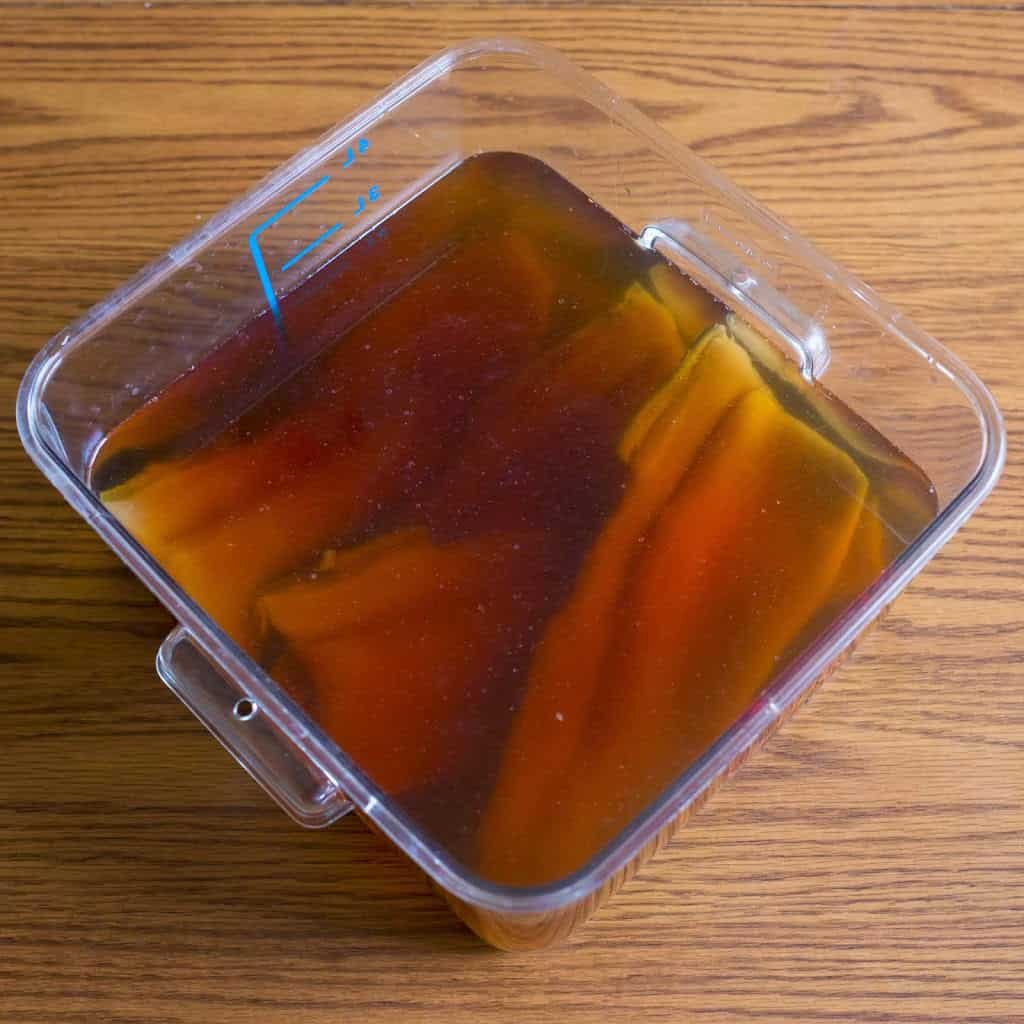
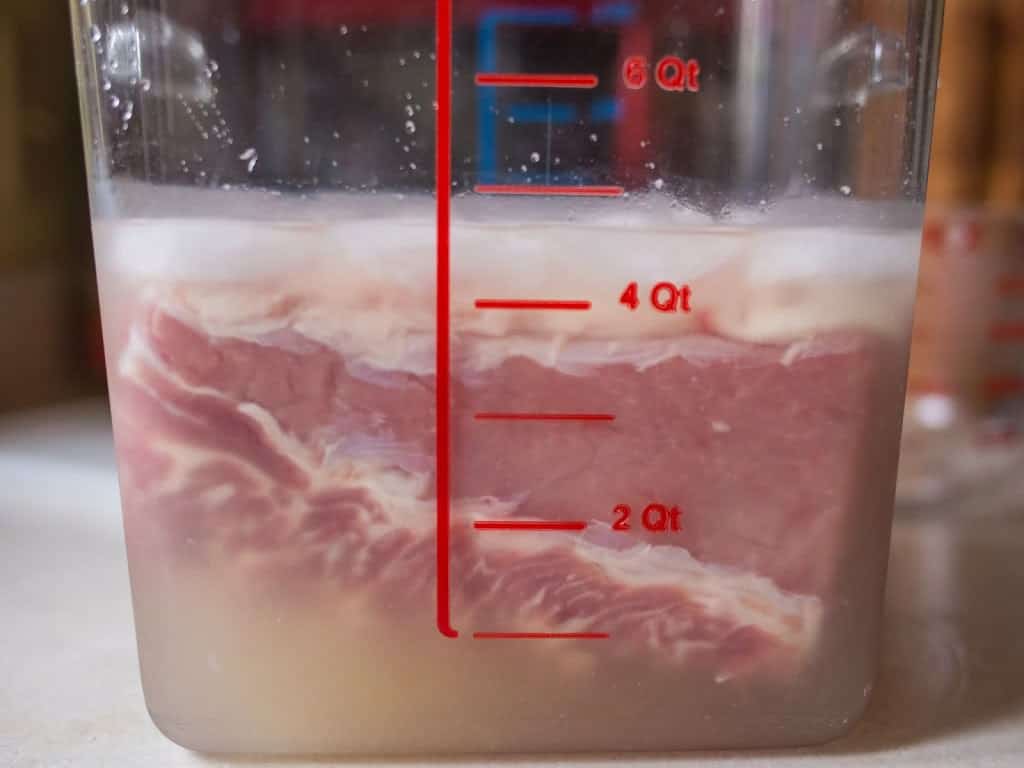
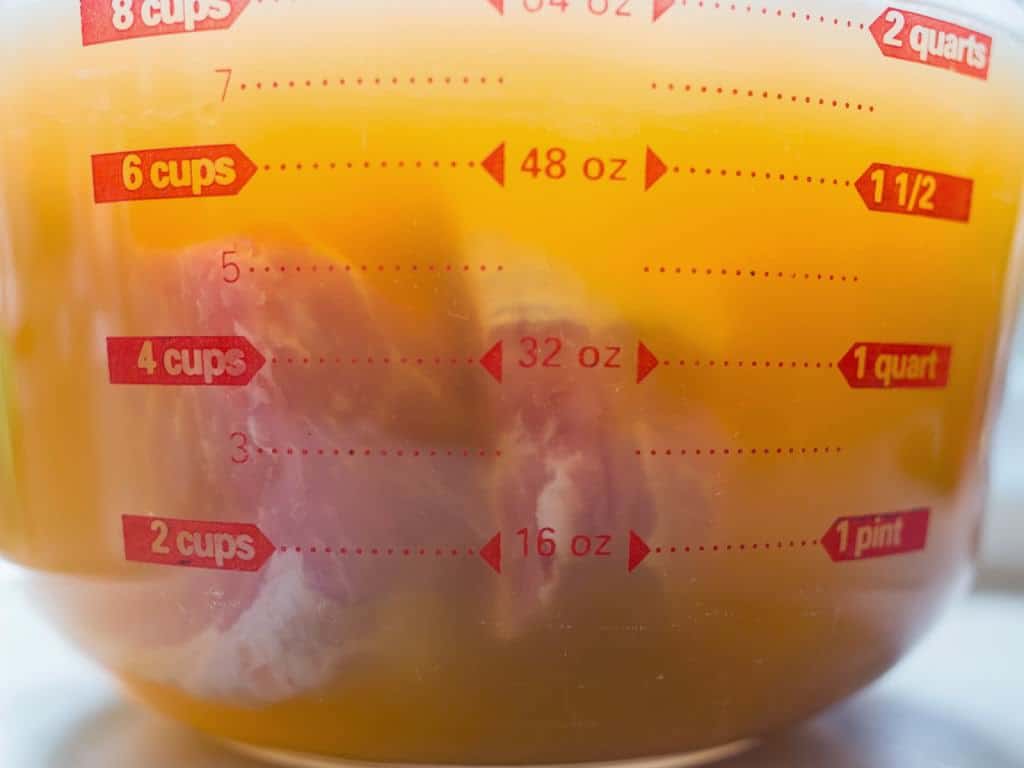
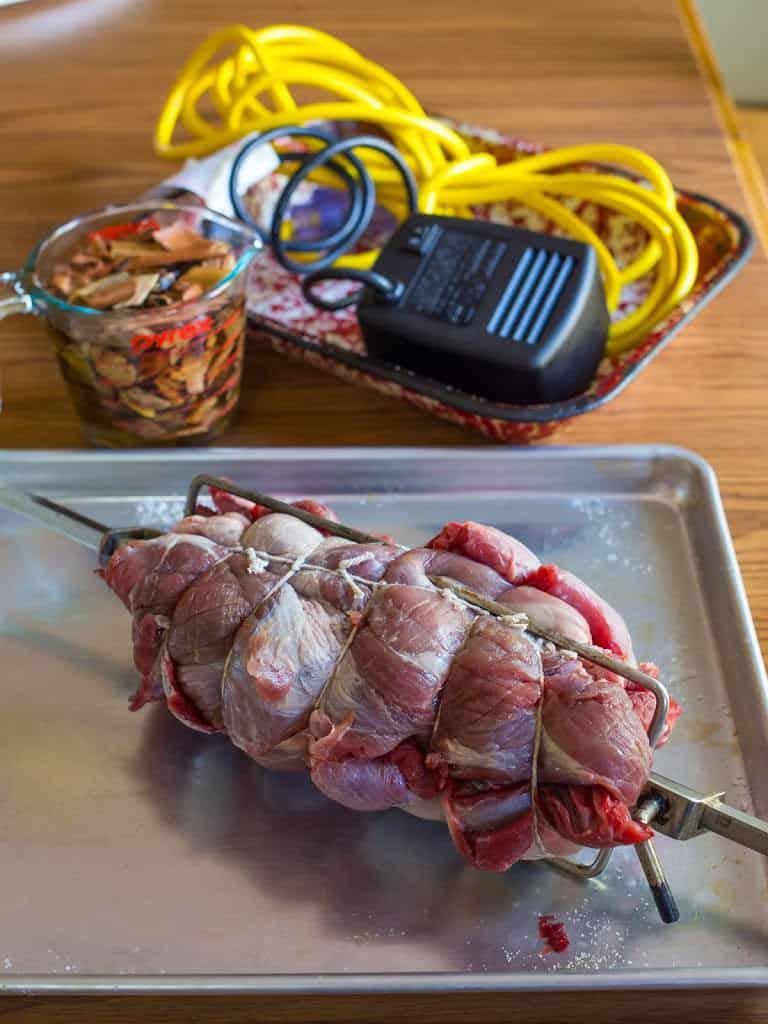
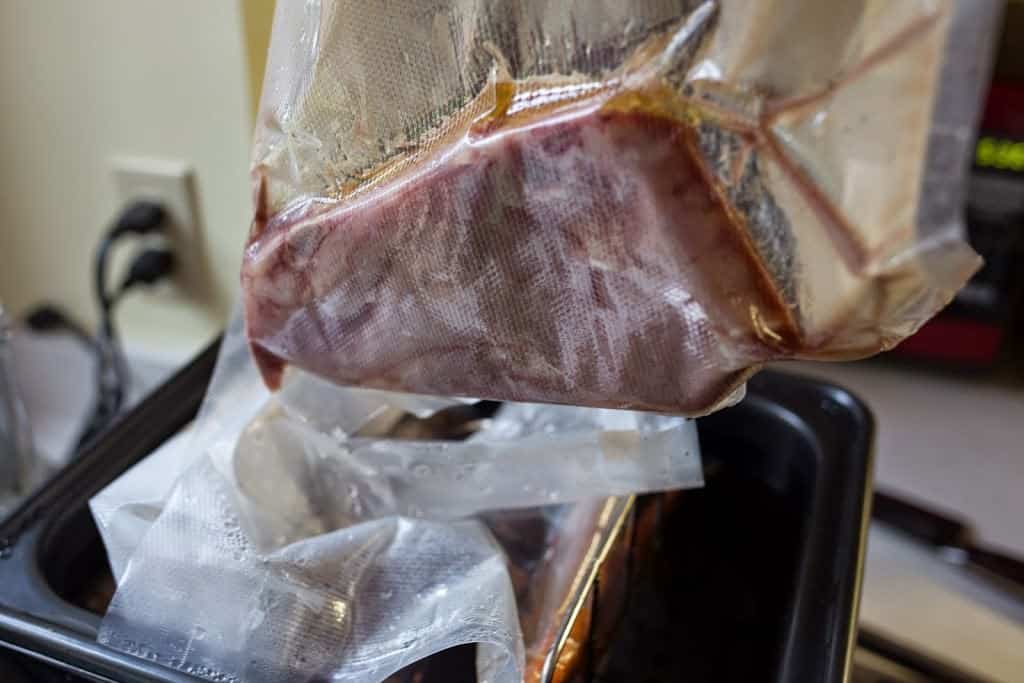
About the pork: I brinerate. 4With apologies to Cooks Illustrated magazine, where I first heard the term brinerate.

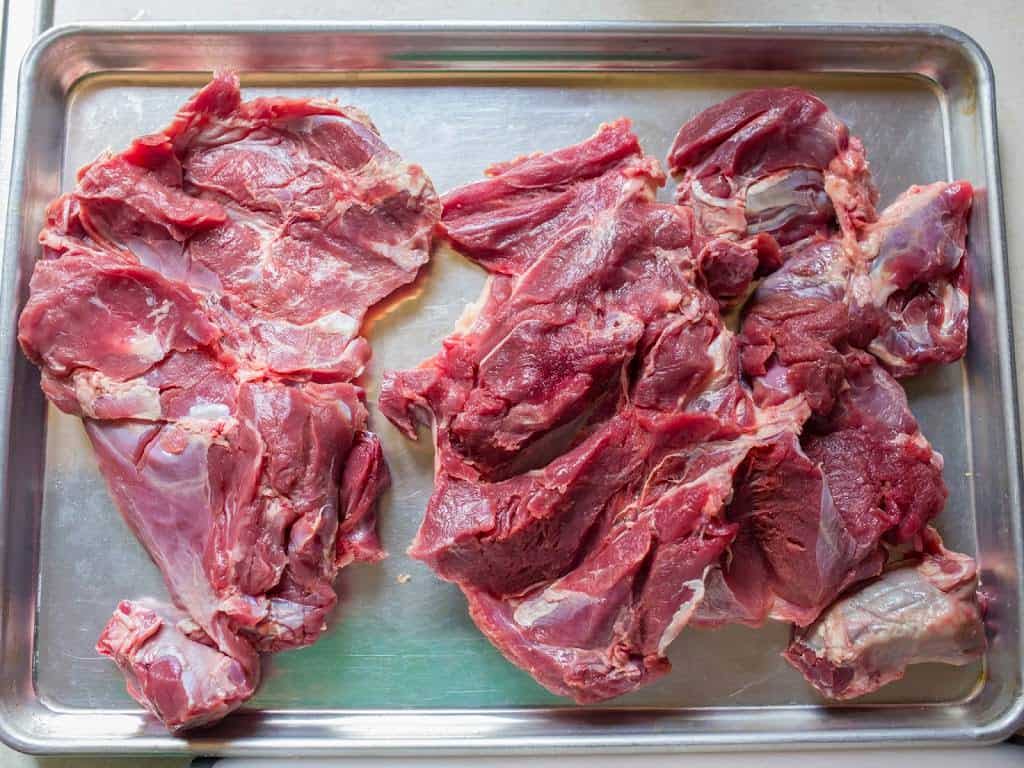
What do I mean? I soak the pork in a salty, soy sauce based liquid; it falls somewhere between a brine and a marinade. It's also my favorite way to prepare pork for the grill. A quick soak in the brinerade, and the pork is ready for kebabs.

What do you think?

Questions? Other ideas? Leave them in the comments section below.

Related Posts

Kofta Kebabs
Grilled Shrimp Skewers with Knob Creek Pineapple Glaze
Zucchini and Summer Squash Skewers
My complete Grilling Recipe Index

Enjoyed this post? Want to help out DadCooksDinner? Subscribe to DadCooksDinner via eMail or RSS reader, recommend DadCooksDinner to your friends, and buy something from Amazon.com through the links on this site. Thank you.

Mango Lassi

February 24, 2015 by Mike Vrobel 4 Comments

Mango Lassi (in the Vitamix)
Mango Lassi

My daughter is a mango fiend. She begs me to buy them every time we go to the grocery store. 5I even bought her a mango slicer, one of the few unitaskers I keep in my kitchen.

Mango Lassi is her favorite drink - she starts lobbying for it every Sunday morning, when it's time to make our breakfast smoothie. Even better, she wants to make it herself; smoothies are a great way to get kids into cooking. If my kids are any indication, if a recipe lets them blitz everything in the blender, they're all for it.

I was dubious about paying for a Vitamix. Now I can't imagine Sunday breakfast without it. I can focus on scrambled eggs without worrying about "Dad, the blender is stuck" interruptions.

Recipe: Mango Lassi (in the Vitamix)

wpid6960-Mango-Lassi-in-Vitamix-7414.jpg

Notes

  • Want to use fresh mango? Peel and seed 4 mangoes, then dice. Add 2 cups of ice to the smoothie, and cut the coconut milk back to 8 ounces (1 cup).
  • Don't have a Vitamix? Of course you can use a regular blender. You may need to stop the blender and break up the frozen fruit if it all jams into a solid mass, but once a good vortex gets going in the blender, you'll be fine. Give it a couple of extra minutes to get frothy if needed.

What do you think?

Questions? Other ideas? Leave them in the comments section below.

Related Posts

Blue Moon Smoothie
Green Monster Smoothie
Fresh Tomato Gazpacho (in a Vitamix)
Road Trip: Vitamix Factory Outlet Store


Enjoyed this post? Want to help out DadCooksDinner? Subscribe to DadCooksDinner via eMail or RSS reader, recommend DadCooksDinner to your friends, and buy something from Amazon.com through the links on this site. Thank you.

Five Fun Food Finds February 2015

February 10, 2015 by Mike Vrobel 3 Comments

Searzall Blowtorch attachment
OK, this blog redesign? I love the way it looks, I love all the new tools I get with WordPress…but it is killing me. Have you seen the teaser poster for Avengers 2: Age of Ultron where the heroes are overrun by robots? That's how my weekend went.

To brighten my mood, I'm sharing a bunch of fun food links. Don't let technology get you down!


  • Searzall blowtorch attachment Dave Arnold (of Cooking Issues and the Booker and Dax bar in New York) made the ultimate sous vide accessory. It turns a blowtorch into an infrared burner that you can wave around in the kitchen. Oh, I wants it. I needs it! (Out of stock on Amazon? Nooo!) [Update 2014-02-14: Back in stock.2Booker & Dax manufacture the Searzall themselves in Brooklyn. When they sell out, they're out of stock on Amazon until the next batch is finished. Keep an eye on the Amazon page, or sign up for email alerts on the Searzall page.]
  • Sous Vide Beef Burgers at SolidGoldEats.com. Now, while I lust after a Searzall, my blog buddy Sara came up with a different solution. When she's done sous videing, she deep fries the meat. It's a great idea; she gets a gorgeous, even browned crust. But…deep frying is where I draw the line. It's on my recipe "Nope!" list. So much left over oil. So much spattering. I see deep frying? Nope. Nope, nope, nope. I move on to the next recipe. On the other hand…Sara's burgers look good. And her deep fried sous vide short ribs look fantastic. I may have to get over my fear of frying.
  • Why I hate Facebook, summed up in one cartoon: Why Facebook is a donut-stealing mobster that I hate hate hate [SheldonComics.com].
  • It's cold here in Northeastern Ohio. When I'm not fixing blog issues, I'm chipping away at the four inches of ice covering my driveway. (I have half of the apron cleared - now there isn't a foot drop from the iced driveway to the street.) I need soup, and this Sopa De Fideos (Mexican Noodle Soup) is just the thing. (Via MexicoInMyKitchen.com)
  • Speaking of inches of ice - I've been slacking on my grilling. It's easy to talk tough, but the snow is so deep on my deck that I get tired just thinking about shoveling. I haven't grilled in two weeks, and I'm getting stir crazy. Mike at AnotherPintPlease.com inspired me with his photo set: From around the grill. That and the 40°F temperatures today are inspiring me to get the deck cleared so I can fire up the grill again.

What do you think?

Questions? Fun food finds you want to share? Nasty remarks about Facebook, ice, or blog migrations? Leave them in the comments section below.


Enjoyed this post? Want to help out DadCooksDinner? Subscribe to DadCooksDinner via eMail or RSS reader, recommend DadCooksDinner to your friends, and buy something from Amazon.com through the links on this site. Thank you.

New Design for Dadcooksdinner

February 3, 2015 by Mike Vrobel 8 Comments

NedStark

Coming soon - the redesign of DadCooksDinner! I'm throwing the switch tonight. If everything goes according to plan, you'll be visiting a new, improved blog.

Boromir

There may be a few sputters and bumps, so don't be surprised if DadCooksDinner acts funny for the next few days. Wish me luck, and I'll see you…in the future!

What? Doesn't everyone use Sean Bean memes to announce design changes to their blog? My only regret is not having a Sharpe's Rifles meme.

Gas Grilled Baby Back Ribs, Brined With Garlic, Sage and Rosemary Rub

January 22, 2015 by Mike Vrobel Leave a Comment

Two cooked slabs of ribs on a platter in front of a flower arrangement that looks like a kettle grill
Gas Grilled Baby Back Ribs Brined with Garlic, Sage, and Rosemary

Gas grilled baby back ribs are not the same as low-and-slow barbecue. I have to confess that up front.

But when life gets in the way…like, say, forgetting that you have an appointment at 4PM and people coming over for a party at 6PM…you make do. Gas grilled baby back ribs are easy, fall off the bone tender, and have a big pork flavor. Set your burners to hold the temp at 275°F, and you're good until the gas runs out. (I have a natural gas line run to my grill - if the gas runs out, we've hit peak oil.)

I brined the ribs like a roast, adding garlic and two of the "song herbs" to the brine: sage and rosemary. Now, I know, I know: brining doesn't work with flavors - they can't penetrate into the meat. That's OK. I'm using them to season the outside of the ribs, while the salt penetrates for thorough seasoning.
Parsley, Sage, Rosemary, and…I was out of thyme. Bwahahahah! Ahem. Sorry.

Three hours on the grill at indirect low heat (while I ran off to my appointment); another hour wrapped in foil to tenderize. The result: ribs that pull apart with a gentle tug, and a successful party.

Baby back ribs floating in a brown-sugar and herb brine in a food storage container
Brining the baby back ribs
Baby back ribs in a rib rack on a gas grill
After three hours the ribs are pulling down from the edges of the bone - they're ready to wrap in foil.
Two racks of baby back ribs on a large blue serving platter
Baby Back Rib Racks, ready to serve

What do you think?

Questions? Other ideas? Leave them in the comments section below.

Related Posts

Grill Smoked Baby Back Ribs
BBQ Beef Short Ribs on a Kettle Grill
Grill Smoked Pork Western Ribs

Enjoyed this post? Want to help out DadCooksDinner? Subscribe to DadCooksDinner via eMail or RSS reader, recommend DadCooksDinner to your friends, and buy something from Amazon.com through the links on this site. Thank you.

Review: Instant Pot Silicone Mitts

January 20, 2015 by Mike Vrobel Leave a Comment

I gave in to gadget lust and bought the new Instant Pot IP-Smart pressure cooker; a pair of silicone mini-mitts came in the box. When I first saw them, I thought "why would I bother with those tiny things"?

Side note: The new Instant Pot IP-Smart pressure cooker is the same machine as my favorite pressure cooker, the Instant Pot Duo. The IP-Smart adds a bluetooth connection, a smartphone app, a fancy blue backlight on the redesigned display, and a few extra program modes. If money is no object, or you really love the idea of directing your pressure cooker from your phone, it's an excellent pressure cooker, every bit as good as the IP-DUO. But, I can't recommend it at double the price of the IP-Duo. You wind up paying a huge premium for bluetooth connectivity.

Now that I'm using the mini mitts, they don't seem tiny; they're perfectly sized. They are a silicone version of the pinch potholders I have come to love. They make it easy to grab the pot liner lip that sticks out of the pressure cooker body, and the waterproof silicone means I don't worry about hot liquid seeping into the holder if I accidentally dip my finger in the hot liquid in the pot. Now I use these mitts all over the kitchen. The only time the smaller size was a problem was a careless grab of my cast iron skillet. I choked up on the heavy skillet, and the handle reached past the edge of the mitt and up to the bare skin on my wrist. "Branding Iron Hot" is not a euphemism - I still have a burn on the base of my palm.

But I digress. If you're looking for a cheap and useful addition to your pressure cooking toolkit, these mini-mitts are perfect. Highly recommended.

Oh, and did I mention how cute they are? I want to draw eyeballs on one and do my Kermit the Frog impression.
I had to. It's not easy being red.

Instant Pot Mini Mitt

What do you think?

Questions? Other ideas? Leave them in the comments section below.

Related Posts

What Pressure Cooker Should I Buy?
Pressure Cooker Recipe Index

Enjoyed this post? Want to help out DadCooksDinner? Subscribe to DadCooksDinner via eMail or RSS reader, recommend DadCooksDinner to your friends, and buy something from Amazon.com through the links on this site. Thank you.

Sous Vide Carnitas

January 15, 2015 by Mike Vrobel 4 Comments

ChefSteps.com's Cooking Sous Vide: Beyond the Basics class has a lot of great ideas. The one that grabbed me was Tough Cuts: Transformed, where the ChefSteps guys sous vide a whole pork shoulder for 24 hours, ice it down, slice it into steaks, and sear the steaks. The long, slow cooking results in pork shoulder steaks with the consistency of pork tenderloin.
Also, check out their amazing Map of Sous Vide Cooking. I'm a habitual map looker, so this is perfect for me.

Pork shoulder is one of my favorite cuts of meat, so I had to try this recipe. But, after the pork shoulder was sealed in the vacuum bag, I had an idea. What if, instead of steaks, I cut the pork into cubes and made carnitas? Light bulb!

In Mexico, carnitas are made by frying cubes of pork shoulder in lard. (Yes, lard.) The pork is simmered in lard until it is golden brown on the outside and meltingly tender on the inside. The ChefSteps technique gives me tender pork; a quick sear gives me golden brown.
Not that I have anything against lard per se, but... wow, I need a LOT of lard if I want to deep fry a pork shoulder.

I upped the heat a bit in my water bath, aiming for a shreddable texture, then plunked in the bagged pork shoulder. 24 hours later, I was ready to go. An ice bath, some slicing and dicing, a quick fry in my cast iron skillet, and I had a taco night that the kids are still raving about.

Recipe: Sous Vide Carnitas

Adapted from: ChefSteps.com, Tough Cuts: Transformed

Prep Time: 10 minutes
Cook Time: 24 hours

Equipment

  • Sous Vide water bath (I used an Anova Precision Cooker)
  • Large, heavy skillet (I used a Lodge 12 inch cast iron skillet)

Ingredients

  • 2.5 pound boneless pork shoulder roast (about 4 inches thick; 1.1kg/10cm thick)
  • 2 teaspoons kosher salt (10ml)
  • ¼ cup vegetable oil (or, to be authentic, lard; 50ml)

Suggested accompaniments:

  • Tortillas
  • Salsa
  • Diced onion
  • Shredded cabbage (or shredded lettuce)
  • Sour cream
  • Pickled jalapenos
  • Minced cilantro

Directions

1. Sous Vide the roast for 24 hours

Put the pork roast into a gallon/3.79L cooking pouch and vacuum seal. Set the sous vide to 149°F/65°C, submerge the bag, and cook for 24 to 48 hours.

2. Quick chill the roast, then slice into cubes

Make an ice water bath in a large container - use as much ice as you can, and top off with water. Plunge the bagged pork pork shoulder in the ice water bath for an hour. (This firms up the roast for easier slicing.) Once the roast is cool, remove it from the bag and wipe it with paper towels to remove the layer of congealed gelatin and fat. (The downside to cooling it is the gelatin that is released from the pork will turn into jello). Move the roast to a cutting board, slice the roast into 1 ½ inch cubes, then sprinkle evenly with kosher salt. (I cut it into 2 inch thick steaks, cross-cut the steaks into 2 inch thick strips, and cross-cut the strips into 2 inch cubes.)

3. Sear the pork cubes

Preheat the skillet over medium-high heat, add the vegetable oil, and wait for the oil to start shimmering. (I preheat my cast iron skillet on medium heat for five minutes, then turn the heat to medium high and add the oil.) Add the pork in a single layer - don't crowd the pan; sear in two batches if you have to. Sear the pork to well browned on the bottom, about 2 minutes. Flip the pork and sear on the other side until browned, about 2 more minutes. Remove the pork to a platter, leaving behind as much fat as possible.

4. Serve

Serve immediately; put the platter of carnitas on the table with all the accompaniments and let everyone build their own carnitas tacos. Put a couple of cubes of carnitas on a tortilla, top with the accompaniments, fold the tortilla over, and dig in.

Notes

  • Make ahead version: Finish step 2 (cook the pork, chill it, slice it into cubes, and salt it). Then, vacuum seal the cubes in another gallon cooking pouch in a single layer and refrigerate for 2 days, or freeze for up to 6 months. Reheat the bag of cubed pork at 131°F for 1 to 2 hours (1 ½ to 2 ½ if frozen), then continue with searing in step 3.
  • If you want to double this recipe, buy a second boneless pork shoulder roast - a bigger, thicker one will take longer to cook through. (Or, if all you can find is a big roast, cut it in half to make two thin roasts.)

What do you think?

Questions? Other ideas? Leave them in the comments section below.

Related Posts

48 Hour Sous Vide Short Ribs
Sous Vide Pork Shoulder Steaks
Sous Vide Rack of Lamb With Dijon Bread Crumb Crust

Enjoyed this post? Want to help out DadCooksDinner? Subscribe to DadCooksDinner via eMail or RSS reader, recommend DadCooksDinner to your friends, and buy something from Amazon.com through the links on this site. Thank you.

Reminder: Kindle Countdown Sale on Rotisserie Grilling through Thursday

January 14, 2015 by Mike Vrobel 4 Comments

Reminder: my Rotisserie Chicken Grilling cookbook is on a Kindle Countdown sale through Thursday.

The Kindle edition of Rotisserie Chicken Grilling is currently on sale for $2.99, down from the list price of $4.99. Thursday at 8AM EST the price goes up to $3.99, and Friday at 8AM the book is back to the full price of $4.99.

If you want to check out Rotisserie Chicken Grilling, act fast!


Review: Anova Precision Cooker - Sous Vide Immersion Circulator

January 13, 2015 by Mike Vrobel 6 Comments

Anova's Kickstarter for their second generation sous vide unit, the Anova Precision Cooker, was a roaring success. I was an early backer and got a great deal on the Anova Precision Cooker. It finally arrived last month.
I had to wait longer because I wanted it in red.

It was worth the wait. The Precision Cooker is light, compact, inexpensive ($179), and easy to use. The controls are simple - a temperature display, a touchscreen play button, and a glowing blue scroll wheel to adjust the temperature. (The play button acts as the control button for the other functions - press it for three seconds to switch between °F and °C; press it for eight seconds to turn on the timer mode). I love the simple interface - it's obvious how to adjust the unit, and easy to get started. It also has an adjustable clamp; it slides up and down on the unit, so it will fit in a wide range of pots.

Is it perfect? Almost…but not entirely. Unlike the all-in-one SousVide Supreme unit, the Anova is just a water circulator. You have to provide a separate pot or food storage container to hold the water. It is not as precise as the PolyScience Professional Creative. The Anova would occasionally drift +/- of 0.1°F away from the target temperature; the PolyScience holds the temperature +/- 0.01°F.

Both of these are minor complaints; the Anova costs half as much as both of those units. Providing your own food storage container isn't a big of a deal - if you have a pasta pot, you're ready to go. And, plus or minus a tenth of a degree isn't going to affect your sous vide cooking at all.

8 quart brining container is now
a sous vide water bath

Summary

If you have dabbled with Beer Cooler Sous Vide, enjoyed a perfectly medium-rare steak (or three), and want to move up to a real immersion circulator at a low price, this is the unit to get. It's a solid unit at a great price, and will keep you happily sous videing* for years. And, as a gadget geek, I can't wait for them to come out with the bluetooth app, so I don't have to get my lazy butt off the sofa can check on my sous vide from the living room.
Vieding is a word, right? No? How about "precision cooking for years" - sounds better.

Highly Recommended

Anova Precision Cooker [AnovaCulinary.com]
Note: as of the time of this writing, the Precision Cooker is only available through AnovaCulinary.com, and is back-ordered with a 2-3 week wait time for shipping.

What do you think?

Questions? Other ideas? Leave them in the comments section below.

Related Posts

SousVide Supreme Demi First Impressions (and Sous Vide Grilled New York Strip Steaks
Review: PolyScience Professional Creative Sous Vide Immersion Circulator
Beer Cooler Sous Vide Grilled New York Strip Steaks

Enjoyed this post? Want to help out DadCooksDinner? Subscribe to DadCooksDinner via eMail or RSS reader, recommend DadCooksDinner to your friends, and buy something from Amazon.com through the links on this site. Thank you.

Kindle Countdown sale on Rotisserie Chicken Grilling - Today through Thursday

January 12, 2015 by Mike Vrobel 3 Comments

Starting today, my Rotisserie Chicken Grilling cookbook is on a Kindle Countdown sale!

On Monday Jan 12, 2015 at 8AM EST, the Kindle edition of Rotisserie Chicken Grilling goes on sale for 99 cents - over 80% off the $4.99 cover price. Every day at 8AM the price will go up a dollar - Tuesday it's $1.99, Wednesday it's $2.99, Thursday it's $3.99, and Friday at 8AM the book is back to the full price of $4.99.

If you want to check out Rotisserie Chicken Grilling, act fast!

On a related note, I was asked by a reader:

This book looks like your first book, Rotisserie Grilling. What's the difference?

The difference? Lots and lots of chicken.

I think chicken is the killer app for the rotisserie, the best way to show off what a rotisserie can do. There were a bunch of extra chicken recipes that I couldn't fit in the original book, some of which I had a really hard time cutting out. I couldn't give up on those recipes; I love them too much. The result is Rotisserie Chicken Grilling; all chicken, all the time.

Welcome to 2015!

January 1, 2015 by Mike Vrobel 7 Comments

Yikes

Happy New Year, everyone!

(Guess what my New Year's resolution is...again.)

A little voice inside my head says "don't look back, you should never look back", but...here are my top 14 posts from 2014:

  1. What Pressure Cooker Should I Buy
  2. Pressure Cooker Senate Bean Soup
  3. Grilled Tomahawk Steak (Long Bone Ribeye, Reverse Seared)
  4. Pressure Cooker Basic Beef Stew
  5. Rotisserie Chicken with Spanish Smoked Paprika Rub
  6. Ten Steps to Rotisserie Grilling
  7. Pressure Cooker Tortilla Soup (Sopa de Tortilla)
  8. Grill Smoked Baby Back Ribs (Grilling Basics)
  9. Pressure Cooker Shrimp Etouffee
  10. Quick Velveted Chicken Stir Fry
  11. Rotisserie Leg of Pork Roast with Injection Brine and Herb Rub
  12. Grilled Asparagus and Prosciutto Wraps
  13. Cedar Plank Grilled Ribeye with Peppers and Onions
  14. Sous Vide New York Strip Roast with Bourbon Cream Pan Sauce

Once again, Happy New Year, and here's to a wonderful 2015!

Grill Smoked Trout

December 30, 2014 by Mike Vrobel 8 Comments

Smoked trout on a piece of aluminum foil in a grill
Grill Smoked Trout

Grill Smoked Trout make a great appetizer. Smoky, meaty, sweet trout plays well with all sorts of different tasty beverages. It's easy to make at home, tastes better than store-bought, and will impress your guests. What more can you ask for?

I like to serve it chilled, with crackers, red onions, capers, and sour cream. But smoked trout is not just an appetizer; served warm, it can be the main course; leftovers make the base of a smoked trout spread.

Now, this trout takes a little planning ahead; it needs to brine for a few hours, and then smoke for at least a half an hour on the grill. That's OK - I work around that by making it way ahead; smoked fish can be made up to two days ahead of time. It tastes great cold, straight out of the refrigerator, or at room temperature, if it has time to warm up.

One more thing - usually, when I cook fish, I want medium-rare to medium doneness - just the slightest hint of translucence in the middle. Not with smoked fish - I want to cook it all the way through, filling it with a smoky flavor. That's another advantage to this recipe - the cooking time is very forgiving.

Recipe: Grill Smoked Trout

Trout in brine in a food service container
Brining the trout
Kettle grill with coals and smoking wood on one side and a foil tray of uncooked trout filets on the other side
Trout on the grill, away from the heat
Done! Carefully lifting off the grill with a long spatula

What do you think?

Questions? Other ideas? Leave them in the comments section below.

Inspired by

Steven Raichlen, How To Grill

Related Posts

Grill Smoked Salmon
Plank Grilled Brie with Honey and Thyme
Salmon Salad Bites with Sushi Flavors
My other Grilling Recipes

Enjoyed this post? Want to help out DadCooksDinner? Subscribe to DadCooksDinner via eMail or RSS reader, recommend DadCooksDinner to your friends, and buy something from Amazon.com through the links on this site. Thank you.

Merry Christmas (2014 edition)

December 25, 2014 by Mike Vrobel 2 Comments

SUZIE: That's what I want for Christmas.

KRIS: A doll's house like this?

SUZIE: No, a real house. If you're really Santa Claus, you can get it for me. And if you can't, you're only a nice man with a white beard, like mother said.

KRIS: Now wait a minute, Suzie. Just because every child can't get his wish doesn't mean there isn't a Santa Claus.

SUZIE: [Sarcastically.] That's what I thought you'd say.

KRIS: But don't you see, dear? Some children wish for things they couldn't possibly use, like real locomotives or B-29s.

SUZIE: But this isn't like a locomotive or a B-29.

KRIS: [Patiently.] It's awful big for a little girl like you. What could you do with a house like this?

SUZIE: Live in it with my mother.

KRIS: But you've got this lovely apartment.

SUZIE: I don't think it's lovely. I want a backyard with a great big tree to put a swing on.

[SUZIE looks at Kris, but he doesn't share her enthusiasm. She becomes sad.]

SUZIE: I guess you can't get it, huh?

KRIS: I didn't say that. Well, it's a tall order, but I'll do my best. May I keep this picture?

Merry Christmas, everyone!

Dates Stuffed With Goat Cheese and Almonds

December 23, 2014 by Mike Vrobel 3 Comments

We're hosting a Christmas Eve cocktail party. Now, Dad Cooks Dinner, but Mom is the Mixologist; she's responsible for the drinks, I'm responsible for the nibbles.

Here is one of my favorite appetizers. Sweet and salty, sour and crunchy; the dates, goat cheese, and almonds combine into one tasty bite. Even better, I can make it a day ahead of time - stuff a date with goat cheese, add an almond, repeat - and pull it out of the fridge when it's time to serve.

I made my picky eater try one. He took the tiniest of nibbles, and stuck his tongue out.

"I don't like goat cheese."

"Pop the whole thing in your mouth" I said. "You need to get all of it at once."

He gave me the "jeez, dad" look, hesitated, gently put it in his mouth, and started chewing. He grimaced. Then got a thoughtful look on his face, shrugged, and said "eh."

Well, at least he tried it.

Later, he came over with a sheepish look on his face.

"Are there any more stuffed dates?"

Recipe: Dates Stuffed With Goat Cheese and Almonds


Prep Time: 20 minutes
Cook Time: 0 minutes

Ingredients

  • 24 dates (preferably pitted Medjool dates)
  • 4 ounces soft goat cheese
  • 24 roasted salted almonds

Directions

1. Stuff the dates

Cut one side of a date open with kitchen scissors or a paring knife. Open up the date, and stuff with a half teaspoon of goat cheese. Push an almond into the goat cheese. Repeat until all the dates are stuffed.

Notes

  • If you can't find pitted dates, that's OK - buy whole dates, cut the date lengthwise until you hit the pit, pop it out, and stuff from there.
  • This recipe scales as much as you want it to - or until you get sick of stuffing, whichever comes first. 24 dates is roughly 5 ounces of pitted dates. These go quickly, so I triple the recipe - a pound of pitted dates, and 12 ounces of goat cheese. (A 6 ounce can of roasted salted almonds is more than enough - a snack for me when I'm done stuffing). I stuff until I run out of goat cheese, and get about 75 stuffed dates.
  • The dates can be made up to a day ahead of time, and refrigerated. Take them out of the refrigerator an hour before serving so they can come back to room temperature.
  • We did a taste test with low-salt roasted almonds, regular roasted salted almonds, and smoked almonds. My favorite was the roasted almonds - they had a bigger almond taste than the low salt almonds - while my wife preferred the smoked almonds.

What do you think?

Questions? Other ideas? Leave them in the comments section below.

Related Posts

Pressure Cooker Hummus
Spicy Jicama Sticks
Smoke Roasted Aioli

Enjoyed this post? Want to help out DadCooksDinner? Subscribe to DadCooksDinner via eMail or RSS reader, recommend DadCooksDinner to your friends, and buy something from Amazon.com through the links on this site. Thank you.

Paperback Edition of Rotisserie Chicken Grilling Is Live!

December 17, 2014 by Mike Vrobel 4 Comments

Does your grill have a rotisserie? If so, rotisserie chicken is the first thing you should cook on it.

If you are just starting out, Rotisserie Chicken Grilling will teach you the basics. How do you set up the rotisserie? What equipment do you need? How do you secure the bird on the rotisserie spit? It's all explained.

There are over 50 recipes for rotisserie chicken; from simple salt and pepper birds to elaborate barbecue sauces; from Mediterranean herb pastes to Asian glazes. There are recipes to fill up the drip pan, bathing potatoes in chicken drippings, and a section on what to do with leftover chicken, from soups to salads to my favorite, Taco Night.

The Kindle edition has full color pictures with each recipe - you are sure to find a new favorite.
Now, get outside and start grilling a chicken on your rotisserie!

About the author: Mike Vrobel is the food-obsessed author of the Rotisserie Grilling Cookbook, and writes about food on his blog, DadCooksDinner.com.

The paperback edition of Rotisserie Chicken Grilling is now available! (Yes, I'm a bit ahead of schedule - formatting the paperback was easier than I expected.)

For story behind the book, check out my post about the Kindle edition from a couple of weeks ago. For the paperback edition, I have a few things things to add:

Black and White? Seriously?

I'm sorry about the black and white pictures in the paperback. Color printing is surprisingly expensive through my on-demand printer (and every other printer I've looked into). I'd have to raise the price of the book from $9.99 to $29.99 to earn the same amount of money per copy. I love my own writing...but I can't justify that price.

So, what am I doing about it? I enrolled Rotisserie Chicken Grilling in Kindle's Matchbook program. If you buy a paperback of Rotisserie Chicken Grilling, you will be eligible to download the Kindle edition for free. That way, you can get all my pretty, full color pictures without paying an arm and a leg. Remember: you don't need Kindle hardware to read kindle books. If you're reading this post, I'll bet the free Kindle Reader app is available for your platform. As an example; I read all my kindle books on my iPad and iPhone, using the Kindle app. I don't own a Kindle, and I can't wrestle Diane's away from her.

*Note: Amazon doesn't have Matchbook connected between the two books yet. Don't worry - once they connect the two, you'll be able to get your free Kindle copy, no matter when you bought the paperback. Go to the Kindle Matchbook page and click on the "Find Your Kindle Matchbook Titles" button.

Reviews and Feedback

As I said in my earlier post, online reviews are the lifeblood of indie books. If you read and enjoy Rotisserie Chicken Grilling, please leave a review on Amazon - it is a huge help to me.

When the paperback was ready to print, I hesitated. My finger hovered over the trackpad, refusing to click the "submit" button. It took a force of will to push the button, Frank. Why? Because I'm still worried about typos and other proofreading errors. If you find anything, please let me know? I'll get it fixed as soon as possible.

Thank you again, everyone. I'm writing because you're out there reading. I hope you enjoy Rotisserie Chicken Grilling!

Rotisserie Chicken Grilling on Amazon.com

What do you think?

Questions? Other ideas? Suggestions for my next cookbook? Leave them in the comments section below.

Christmas Gifts for Grillmasters 2014

December 9, 2014 by Mike Vrobel Leave a Comment

Support DadCooksDinner and do your Amazon.com Christmas shopping at the same time! If you go to Amazon.com through one of the links on this site, I get a small commission on anything you buy during that visit. Thank you for your support.

Looking for a gift for the has-everything grillmaster in your life? Someone like me, who can't resist a new grilling gadget? I have a few suggestions for you.

Heatproof knit grill gloves

Suddenly, there are lots of different gloves knit out of modern, heat proof fabrics - the Ove Glove, the Pit Mitt, and the Weber Premium Grilling Gloves pictured above. (These gloves are made from the same materials used in firefighting gear.) They have a snug fit compared to my old school leather welding gloves - see the picture at the top of the post. The lightweight gloves give me finer control with my fingers while still protecting me from the heat.

Salt Grilling Plate

Looking for a grilling trick that will impress even the most jaded diner? Preheat your grill with a salt block on the grill grate, then use the salt as a grilling surface. You can saute thin-sliced vegetables right on top of the block, and they pick up seasoning from the salt itself. (If you're looking for more ideas, check out the Salt Block Cooking book.)

And they look really cool with backlighting

Weber Originals large grill basket

I love the oval shape of this grilling basket when I'm cooking on my Weber kettle. It fits snug against the round edge of the grill, leaving extra room on the grill grate compared to a rectangular basket.

Shredding claws

I keep eyeing these Bear Paw shredders. I use a pair of forks now, but, man, it sure would be nice to reduce a pulled pork to shreds with a few swipes of these claws. (While pretending to be Wolverine. You lookin' at me, bub?)

Temperature gun

A laser gun that measures temperature at a distance? This is so cool. I feel like I'm in a science fiction movie whenever I see one. Now, I haven't quite figured out why I need one, so the $250 price kept me away. Then they dropped to $60...still can't justify it. Now they're available for $15. Sold!

What do you think?

Other grilling toys you want to find in your Christmas stocking?

Enjoyed this post? Want to help out DadCooksDinner? Subscribe to DadCooksDinner via eMail or RSS reader, recommend DadCooksDinner to your friends, and buy something from Amazon.com through the links on this site. Thank you.

Pressure Cooker Turkey Soup with Rice

December 4, 2014 by Mike Vrobel Leave a Comment

Pressure Cooker Turkey Soup with Rice and Vegetables

Cooking once, cooking twice, pressure cooking turkey soup with rice.
Apologies to Maurice Sendak and Carole King.

Some people dread Thanksgiving leftovers. Not me. I look forward to lunches that look like Thanksgiving dinner - reheated turkey, stuffing, and mashed potatoes, all smothered with gravy.

But the highlight of my thanksgiving leftovers is turkey soup, made from the leftover bones of the turkey. Every year, I make a big batch of turkey broth. I use half of the broth in Turkey Noodle soup, and the rest goes into a soup experiment.
They laughed at me at the University. Laughed! Ahahahaha…cough. Ahem. Sorry. Mad soup scientist gone wrong.

This year's "other" soup was for my wife. She grew up loving chicken soup with rice; this is my riff on that - turkey soup with green beans, peppers, and rice. (And nothing to do with the fact that I had a couple of cups of leftover rice and uncooked beans in the refrigerator. Nothing at all.)

Recipe: Pressure Cooker Turkey Soup with Rice

Equipment

  • 8 quart or larger pressure cooker (unless you're willing to get your hands dirty and break the turkey carcass up into small enough pieces to fit in a 6 quart cooker)
  • Fine mesh strainer

Pressure-2BCooker-2BTurkey-2BSoup-2Bwith-2BRice-2Band-2BVegetables-6430

Notes

  • No pressure cooker? No worries. Stock: Put everything into a large pot or dutch oven, bring to a boil on the stove top, then transfer to a 180°F oven for 5 hours. (For more details, see Ruhlman's Turkey Stock). Finish the rest of the recipe as written, using a large sauce pot on the stove top.
  • Smaller pressure cooker? If you can break up the main body of the turkey carcass, it will fit. Get tough, show it's who's boss, and you'll be able to break it up enough to fit. (Doing this while it's still warm from the oven, and using a pair of poultry shears makes it easier…but it's still messy work, pulling apart the carcass.) Then, use as much water as you can, filling right up to the "max fill" line.
  • Soup is great for freezing. Store it in two cup containers in the freezer, pop them in the microwave for six to eight minutes, and lunch is steaming hot and ready to eat.

What do you think?

Questions? Other ideas? Leave them in the comments section below.

Related Posts

Pressure Cooker Turkey Noodle Soup with Vegetables
Southwestern Turkey and Black Bean Soup
Turkey Ramen Noodle Soup

Enjoyed this post? Want to help out DadCooksDinner? Subscribe to DadCooksDinner via eMail or RSS reader, recommend DadCooksDinner to your friends, and buy something from Amazon.com through the links on this site. Thank you.

My New Cookbook: Rotisserie Chicken Grilling

December 2, 2014 by Mike Vrobel 2 Comments


Does your grill have a rotisserie? If so, rotisserie chicken is the first thing you should cook on it.

If you are just starting out, Rotisserie Chicken Grilling will teach you the basics. How do you set up the rotisserie? What equipment do you need? How do you secure the bird on the rotisserie spit? It's all explained.

There are over 50 recipes for rotisserie chicken; from simple salt and pepper birds to elaborate barbecue sauces; from Mediterranean herb pastes to Asian glazes. There are recipes to fill up the drip pan, bathing potatoes in chicken drippings, and a section on what to do with leftover chicken, from soups to salads to my favorite, Taco Night.

The Kindle edition has full color pictures with each recipe - you are sure to find a new favorite.
Now, get outside and start grilling a chicken on your rotisserie!

About the author: Mike Vrobel is the food-obsessed author of the Rotisserie Grilling Cookbook, and writes about food on his blog, DadCooksDinner.com.

Why am I a food writer? Rotisserie chicken.

I've tried every trick to get the perfect roast chicken. The first time I made a rotisserie chicken on my kettle grill, a shaft of sunlight burst out from behind the clouds, and a loud voice boomed out "This is The One". That was it - the best chicken I can make; ever since then, all I've done is play around with the seasonings. After chicken, I tried everything on my rotisserie. I had lots of successes (prime rib, pork shoulder, turkey), and a few failures (salmon - it won't stay on the spit.)

When I created DadCooksDinner, I had a bunch of rotisserie ideas in the back of my head, so I put a few of them on the blog. Much to my surprise, they became popular; about 40 percent of my blog traffic is people doing google searches for rotisserie recipes. Eventually, I wrote my Rotisserie Grilling cookbook, which has been a steady seller ever since.

I wanted to follow up with a quick Rotisserie Chicken cookbook - I had a bunch of extra chicken recipes, and I thought I could slap together a short e-book in six months. Twenty recipes. Maybe thirty. How hard can that be?

As I wrote, Rotisserie Chicken Grilling kept growing. It wound up with more recipes than the original book, and took twice as long to finish. But, finally, here it is.

Rotisserie Chicken Grilling is only available as a $4.99 Kindle e-book right now. (The paperback edition is coming in about a month, once formatting is done.) Don't have a Kindle reader? Don't worry - if you're reading this post, there is a free Kindle Reader app for whatever technology you're using.

The book is signed up for Kindle Select and Kindle Unlimited for the next 90 days; during that window, if you have Amazon Prime or are a Kindle Unlimited subscriber, you can borrow it for free. (My plan is to let Kindle Select and Kindle Unlimited expire after 90 days; they require a Kindle exclusive e-book, and I want to release the Apple iBooks, Barnes & Noble Nook, and Kobo editions.)

If you buy a copy, can you do me two favors?

1. Typos

Let me know if you find any misteaks mistakes. I thought I had a professional proofreader lined up, but they fell through. So, my proofreading was going through the book over and over and over, until I looked at it so often that I am typo blind. (In my head I know what's supposed to be there; I glide right over problems.)

I am terrified that I missed something. Like I did in Rotisserie Grilling - a rib recipe only used a marinade, but the directions talked about applying a spice rub. Cut and paste will be the death of me. (To make it worse, no one noticed - or told me - until the book was out for a year. Sigh.)

2. Reviews

Please, leave a review on Amazon. This is a self-published cookbook, and indie books like mine live and die by their reviews. Of course, my ego would prefer a five star review. (I get into all sorts of imaginary arguments with the people who leave negative reviews. Especially the ones who complain that the print edition of my $9.99 cookbook has black and white pictures. Of course it does - color pictures would double the price.)

But, seriously, any review is helpful.

Thank you, and I hope you enjoy Rotisserie Chicken Grilling!

Rotisserie Chicken Grilling on Amazon.com


What do you think?

Questions? Other ideas? Suggestions for my next cookbook? Leave them in the comments section below.

Christmas Gifts for Cooks 2014

December 1, 2014 by Mike Vrobel 2 Comments

Happy Cyber Monday, everyone! Looking for something to get your favorite home cook? I have a few suggestions...and you can support DadCooksDinner at the same time.

I spent over 800 hours in 2014 working on DadCooksDinner - cooking, testing, writing, taking pictures, traveling - and I could use your support. I get a small commission on any items you buy on Amazon.com, if you click on one of my links first. If you do your Christmas shopping on Amazon, please consider clicking here first.

And, frankly, It doesn't have to be DadCooksDinner. If there's another blog you want to support, go to Amazon through their links. We all could use your help!

If you want to contribute directly, you can use my PayPal tip jar. Thanks!

Enough of the sales pitch. On to the kitchen gadgets!

Thermoworks ThermoPop


The Thermoworks ThermoPop is a cheap instant read thermometer from the people who make my beloved Thermapen. Now, the ThermoPop is not a replacement for the Thermapen; it's slower (5-6 seconds instead of 2-3), and not as precise (measures to 0.1 degree instead of 0.01). But…it's a reliable instant read thermometer for $29, unlike the $96 Thermapen. I can never have too many thermometers; I'm picking one up as a backup for my Thermapen.

Oxo beakers


Another kitchen tool I love is my Oxo mini beaker set. My only complaint was the size - the largest is ¼ cup. Oxo now has a 7 piece beaker set that goes from 1 teaspoon all the way up to 1 cup.

Oxo Kitchen Scale


Yet another tool from Oxo that I use every day - the Oxo Kitchen Scale with pull-out display. (I measure out my french press coffee every morning - 60 grams of coffee and 800 grams of boiling water. Yes, I'm a geek.) It's for more than just coffee, though; measuring flour by weight is the only way to measure properly for baking.

Chef'n fresh force juice squeezer


I've read good things about this squeezer, and the extra force the gear mechanism provides. I squeeze a lot of citrus, so I have this one on my wish list for Christmas.

Granite mortar and pestle


A lot of my kitchen gadgets are high tech - sous vide immersion circulators, precision thermometers, electric pressure cookers. Here's the exact opposite - pounding food with a rock is about as old school as it gets. Yes, I own a fancy spice grinder, but I get better results with a granite mortar and pestle when I'm making spice rubs.

What do you think?

Other gadgets on your Christmas list? Tell us about them in the comments section below.

Enjoyed this post? Want to help out DadCooksDinner? Subscribe to DadCooksDinner via eMail or RSS reader, recommend DadCooksDinner to your friends, and buy something from Amazon.com through the links on this site. Thank you.

Giving Thanks 2014

November 27, 2014 by Mike Vrobel Leave a Comment

"We tend to forget that happiness doesn't come as a result of getting something we don't have, but rather of recognizing and appreciating what we do have."
- Frederick Keonig

Happy Thanksgiving, Everyone!
On this Thanksgiving, please consider a donation to fight hunger in my home town:

Donate to the Akron-Canton Regional Food Bank

Thanksgiving Q&A 2014

November 25, 2014 by Mike Vrobel Leave a Comment

McCROSKEY: Grab hold of yourself! You've got to talk them down. You're the only chance they've got!

KRAMER (into mike): All right, Striker, now you listen to me and you listen close. Flying is no different than riding a bicycle…it just happens to be a lot harder to put baseball cards in the spokes. Now, if you just follow my instructions…

Lloyd Bridges and Robert Stack, Airplane! (1980)

It's T-Day minus 2. Are you ready?
I feel like a crisis counsellor the week before Thanksgiving. I give out a lot of pep talks, with rotisserie turkey advice mixed in. Here are the questions I'm getting this year:

You have a lot of turkey recipes on your site. If you had to pick just one, what would it be?

My favorite is still Rotisserie Turkey, Dry Brined with Orange and Spices. Or, if you want to keep it simple, go with my basic Grilled Turkey, Dry Brined.

How big of a bird can I fit on the rotisserie for my (pick one: Weber Kettle, Weber Summit)

I wrote about this one a few years back. A kettle grill can handle as big a bird as you've got; the rotisserie ring gives it extra clearance. A Weber Summit can fit a 24 to 25 pound bird. I haven't sized out a Weber Genesis, but I have cooked a 16 pound bird on it, with space to spare, so I'd guess it could go at least 20 pounds. For more details, see my Rotisserie Grilling the Big Turkey post.

How do you use the Infrared burner on your Weber Summit with a turkey?

It depends.
…
OK, OK, I can give a better answer than that. I set my Summit up for indirect medium heat, with burners 5 and 6 set to medium, the legs pointing at those burners, and the IR burner set to medium. After that, it depends on the seasonings. If the turkey is seasoned with spices or sugar, it may burn, so I start checking the turkey after an hour or so of cooking. Once it starts to blacken around the edges, I turn off the IR burner and let the heat from the burners in the main part of the grill finish the cooking. If the turkey is seasoned without much sugar, I usually wind up with the IR burner set to medium for the entire cooking time. I check the bird every hour anyhow, just to be sure.

You have two different finishing temperatures for turkey breast; 150°F and 160°F. Why two temperatures?

Because I learned more about the science of cooking white meat turkey. White meat is best when it is cooked to 150°F, plus 4 minutes; that temperature and time is enough to kill salmonella, and the turkey will be juicy. For dark meat, the turkey is best cooked to 170°F, or maybe higher; I try to balance that out in a whole turkey by cooking the turkey to 160°F in the breast. That keeps the breast somewhat juicy, while cooking the thighs and drumsticks properly. For more information, see my Turkey Temperature, Or The 150 Question post.

Is it OK for me to start dry brining my turkey 3 days ahead of time?

Absolutely. Just cover it in plastic wrap until the night before cooking to keep it from drying out too much. In fact, Russ Parsons of the LA Times recommends it. (He was the first person I'm aware of to publish a dry brined turkey recipe, so I trust his judgement.) Now, if you didn't get to your dry brine yet, that's OK - I get good results with at least 24 hours of dry brining a turkey. I'd get started pretty soon, though...

Can I use the pan drippings from a rotisserie turkey?

It depends.
…
Yes, I know, I'm leaning on that answer a lot. So, here's the thing. If you're cooking in a charcoal grill, you're going to get ash in your drip pan. I don't think ashes make for good gravy, so I don't bother. If you're cooking in a gas grill, then maybe the drippings will be useable; for me, about half the time, they burn too much; other times they look fine. Either way, I make giblet gravy ahead of time; if the drippings are useable, I add them to the gravy as I reheat it right before serving. If not, that's OK, my gravy has plenty of turkey flavor anyhow.

Should I save my turkey carcass to make turkey stock?

Yes, you should!
…
All right, you got me. I planted this question. Save the bones from your turkey, use them to make stock the day after T-Day, and you'll have the base of best soup of the year. My annual turkey soup recipe is running a little late; make turkey stock, freeze it, and I'll explain what to do with it next week. (Or, go to the search box at the top right of my page and search for "Turkey Soup." you'll find a bunch of good ideas.)

What do you think?

Any other last-minute questions I didn't answer? Leave them in the comments section below.

Related Posts

Turkey Temperature or the 150 Question
Grill Your Thanksgiving Turkey
Pressure Cooker Turkey Stock Revisited

Enjoyed this post? Want to help out DadCooksDinner? Subscribe to DadCooksDinner via eMail or RSS reader, recommend DadCooksDinner to your friends, and buy something from Amazon.com through the links on this site. Thank you.

Pressure Cooker Butternut Squash with Honey and Sage

November 18, 2014 by Mike Vrobel Leave a Comment

Pressure Cooker Butternut Squash with Sage and Honey | DadCooksDinner.com
Pressure Cooker Butternut Squash with Sage and Honey

Butternut squash are a lot of work. Peeling the hard skin, seeding, roasting, pureeing - I love the taste, but I saved it for Thanksgiving, when I could face the extra work for a good side dish.

Then I joined my CSA, and got winter squash every year in my fall share boxes. For a while, the squash were seasonal decorations, hanging out on my kitchen counter during the cold winter months. When spring rolled around, they went in the trash. I meant to use them, really I did, but I never got around to it.

What changed?

Pressure Cooker Butternut Squash with Sage and Honey | DadCooksDinner.com
Everything in the pot and ready to lock the lid

First, I put out a call for help from my readers, and I got some great ideas.

Second, I found the pressure cooker squash technique in Modernist Cuisine at Home. Their big trick is adding baking soda, increasing the pH of the squash. This food science trick lowers the browning temperature enough for the squash to roast in the pressure cooker. The result is browned, caramelized squash after 20 minutes of high pressure.

Pressure Cooker Butternut Squash with Sage and Honey | DadCooksDinner.com
Into the food processor to puree

The third thing is: I found pre-cut squash at my local grocery stores. It's cheating, I know. But…if I don't have to clean the squash, it can be a weeknight side dish.

In spite of all that, I can't give up on the holiday connection. I still serve squash on Thanksgiving, seasoned with sage, the herb that I associate with the flavor of Fall.

No pressure cooker? No worries, see the notes section for oven roasting instructions.

Recipe: Pressure Cooker Butternut Squash Puree with Honey and Sage

Adapted from: Pressure Cooker Squash, Nathan Myhrvold and Maxime Bilet, Modernist Cuisine at Home

Equipment

  • 6 quart or larger pressure cooker (I use an Instant Pot electric PC).
  • Food processor or blender

Notes

  • No pressure cooker? No worries. First, melt the butter. Then, put the squash cubes on a rimmed baking sheet; sprinkle with the salt and baking soda, drizzle with the melted butter and honey, and toss to coat. Put the baking sheet in a 400°F oven for 45 minutes, and roast until browned. Scrape the pan into a food processor, add the water, and puree.

What do you think?

Questions? Other ideas? Leave them in the comments section below.

Related Posts

Pressure Cooker Mashed Acorn Squash
Pressure Cooker Roasted Sweet Potato Puree
What do I do with: The Winter Squash Issue
My other Pressure Cooker Recipes

Enjoyed this post? Want to help out DadCooksDinner? Subscribe to DadCooksDinner via eMail or RSS reader, recommend DadCooksDinner to your friends, and buy something from Amazon.com through the links on this site. Thank you.

Grilled Salmon with Mustard Barbecue Sauce

November 13, 2014 by Mike Vrobel 7 Comments

Grilled Salmon with Mustard Barbecue Sauce. Grilled salmon with a tart, mustard based glaze.

The beautiful fall day I've been waiting for is here. Clear, blue sky; a carpet of colorful leaves on the lawn; a hint of winter in the air - just cold enough to need a jacket. It's time for fall grilling. After writing this, of course, it goes live on the first day of a mid-November Polar Vortex. Snow in the forecast. Sigh. I'm crossing my fingers for Thanksgiving…

Grilled Salmon with Mustard Barbecue Sauce

Salmon with barbecue sauce is a trick I learned from Michael Symon. It doesn't seem like it should work; barbecue sauce goes with pork, not salmon, right? Turns out, it's a fantastic pairing; the sweet, vinegar flavor of the sauce balances fatty salmon, just like it does pork shoulder.

I prefer South Carolina style mustard barbecue sauce with salmon. The the extra layer of mustard flavor is perfect with fish.

I know, I know, this sounds really strange. Mustard barbecue sauce? With fish? Trust me, it works.
Don't want to trust me? Trust chef Symon. He's a professional. Do try this at home.

Recipe: Grilled Salmon with Mustard Barbecue Sauce

Inspired by: Michael Symon's Coffee Barbecue Salmon, Lolita's restaurant

Searing the salmon, flesh side down

What do you think?

Questions? Other ideas? Leave them in the comments section below.

Related Posts

  • Grilled Salmon with Coriander Fennel Rub
  • Grill Smoked Salmon
  • Easy Cedar Planked Salmon Recipe
  • Sous Vide Salmon
  • Sear Roasted Salmon

Enjoyed this post? Want to help out DadCooksDinner? Subscribe to DadCooksDinner via eMail or RSS reader, recommend DadCooksDinner to your friends, and buy something from Amazon.com through the links on this site. Thank you.

Review: PolyScience Professional Creative Sous Vide Immersion Circulator

November 4, 2014 by Mike Vrobel Leave a Comment


FCC Notice: PolyScience Culinary gave me a Sous Vide immersion circulator to use in my blog posts and for this review.


PolyScience is the godfather of culinary sous vide circulators. They introduced their first immersion circulator, the Model 73, back in 1973. Did PolyScience know about sous vide cooking back in the ’70s? No. PolyScience makes laboratory equipment with precise temperature controls; the 73 was invented for lab use.

In 2007, PolyScience was contacted by professional chefs - Mathias Merges and Wylie Dufrense - asking about their immersion circulators, and if they could be used in a professional kitchen. Philip Preston, president of PolyScience, is a enthusiastic hobbyist cook and immediately saw the possibilities. Soon after that, PolyScience started selling their first immersion circulator designed specifically for cooking - now known as the PolyScience Sous Vide Professional Classic, which costs about $1100.

This is the first sous vide unit I was aware of, and I lusted after one for years - but oh, that price. It is designed for hard use in a professional kitchen, and I couldn’t bring myself to spend the money.

PolyScience was paying attention to people like me, enthusiastic hobbyist cooks. (Sound familiar?) They designed new immersion circulators for home use, with prices to match. PolyScience Culinary sent me a PolyScience Professional Creative Series immersion circulator for testing and review. I’ve used it for the last month, and here’s what I’ve learned.

Built like a tank, with performance to match

I own a few sous vide units. The moment I picked up the PolyScience, I could tell it is a solid piece of equipment. The build quality is obvious from the weight alone, and the case is thick, durable plastic. The performance is even more impressive. My other sous vide units fluctuate around the target temperature by degree or two Fahrenheit; the PolyScience stays within 0.1°F of the target temperature. And it is powerful; its strong circulator heats up to 20 liters of water, and keeps the water moving to heat it evenly. PolyScience’s background in precise laboratory equipment shows.

The best accessory - a polycarbonate tank with a custom cut lid

I love the polycarbonate tank and custom cut lid that PolyScience makes for their immersion circulators almost as much as I like the circulator itself. One of my problems with immersion circulators is evaporation. When I cook sous vide overnight, or for two or three days, I lose a lot of water; I have to top up the tank to keep up with evaporation. The PolyScience immersion circulator fits perfectly through the custom cut lid, and all the water stays in the polycarbonate tank. (This is also more energy efficient - the heat is trapped in the tank.) I also love the size of the tank - 20 liters of water is a lot of space for sous vide.

A caveat

I like the display on the unit - the large numbers are easy to read from across the room. But, the controls are a little touchy. I have to hunt around my target temperature to get it set properly; I always overshoot a few times before I get the temperature I want. The other thing I didn’t like is the countdown timer. Once the PolyScience is running, it swaps back and forth between the current temp and the countdown timer. I rarely set the built in timer, so this this is just distracting - it bothers my OCD tendencies to have the timer flashing at me, like an old VCR that doesn’t have its clock set. But, really, these are both quibbles. I’m willing to live with these minor annoyances for the performance of this circulator.

Price

This is a premium piece of cooking equipment - and it is priced as such. The PolyScience Professional Creative Series lists for $399, and the polycarbonate tank and custom cut lid start at $65 for a 10 liter tank. That’s a lot when compared to $199 sous vide units, but this is definitely a case of getting what you pay for. If you want the best - and this is the best - it is worth the extra cost.

Conclusion

I love the PolyScience Professional Creative circulator - it’s the first unit I grab from my sous vide shelf when it is time to cook. (That’s right, I have a shelf of sous vide units now.) I cook Sous Vide at least once a week; it is so convenient to walk in the door from a day at work, grab a vacuum sealed bag of frozen meat, and toss it in the sous vide water. Then, I'm done with dinner's main course - in an hour and a half all I have to do is sear it and serve.

PolyScience gave me this unit for free; now that I’ve used it, I would pay to buy it again. In fact, I’m considering buying another one, to replace the SousVide Supreme Demi that is now my backup. When I'm cooking for a crowd, a backup Sous Vide unit is essential - it gives me a second precise temperature that I can cook to, for side dishes or people who like different degrees of doneness. I am definitely buying the smaller polycarbonate tank with the custom cut lid - they gave me the 18L, and I like the flexibility having the 10L will give me with the PolyScience Creative.

But, enough about me, and my gadget buying tendencies. Should *you* buy the PolyScience Professional Creative?

  • Are you are an enthusiastic Sous Vide cook?
  • Do you Sous Vide for large groups, and like the idea of a 20L water bath?
  • Do you have the money to buy the best, knowing it will last?

Then, absolutely, you should get one. Highly Recommended.


Thank you to PolyScience Culinary for giving me a Professional Creative immersion circulator for my own use, and for this review.


Reviewed

  • PolyScience Professional Creative Series sous vide immersion circulator
  • Polycarbonate Tank For Immersion Circulators with Custom Cut Lids

What do you think?

Questions? Other ideas? Leave them in the comments section below.

Related Posts

48 Hour Sous Vide Grilled Short Ribs
Sous Vide Duck Two Ways
Simple Sous Vide Carrots

Enjoyed this post? Want to help out DadCooksDinner? Subscribe to DadCooksDinner via eMail or RSS reader, recommend DadCooksDinner to your friends, and buy something from Amazon.com through the links on this site. Thank you.

Turkey and Dried Black Bean Chili

October 30, 2014 by Mike Vrobel 7 Comments

Turkey and Dried Black Bean Chili

Welcome goblins, settle down ghouls… it's time for Turkey and Dried Black Bean Chili for Halloween.
h/t my favorite Halloween album of all time Halloween Hootenanny.

On Halloween night, I want a dinner that sticks to the ribs of my trick or treaters, a buffer from the high fructose corn syrup binge that is coming. I want beans, meat, and a little heat to cut through the sugar that's on the way. And, I want a chili I can throw together during the afternoon, so I have time to answer the steady stream of witches and robots knocking on the door.
And pass out some more high fructose corn syrup. Hey, it's one day a year.

This recipe isn't a one pot affair - I use two pots, because I have to use dried beans. I don't have anything against canned beans; I'll use them in a pinch, but dried beans have so much more flavor, and they build their own thickened broth. The downside of dried beans is the science of bean cooking - they will never soften if they are cooked with acidic ingredients. Like, um…chili powder and tomatoes, two of my major ingredients. That's OK - while the beans are cooking, I sauté all the other ingredients, and add them for a last half hour of simmering to bring everything together. (Or an hour of simmering. The crest of the trick-or-treat wave was eight little Frozen Elsas. By the time I looked up from shoveling candy into the little plastic pumpkins shoved at me, my half hour of simmering turned into a whole hour.)

Recipe: Turkey and Dried Black Bean Chili

What do you think?

Questions? Other ideas? Leave them in the comments section below.

Related Posts

Pork Chili with Beans for a Crowd
Texas Red Chili
White Chicken Chili done Right
For a pressure cooker vegetarian chili, try Instant Pot Sweet Potato Chili.

Enjoyed this post? Want to help out DadCooksDinner? Subscribe to DadCooksDinner via eMail or RSS reader, recommend DadCooksDinner to your friends, and buy something from Amazon.com through the links on this site. Thank you.

Oven Roasted Crispy Fingerling Potatoes

October 28, 2014 by Mike Vrobel 6 Comments

This is an ode to half sheet pans.

Half sheet pans are the utility infielders of my kitchen. They’re not expensive, fancy, or flashy. They just get the job done, particularly when the job is roasting. They’re the key piece of equipment in this simple side dish - roast fingerling potatoes.

When I’m planning meals, I go with the traditional set of meat, two veg, and a starch. This isn’t a recipe, per se; it’s a technique to finish the starch with a minimum of effort. Halve the potatoes, sprinkle them with salt, toss them with olive oil, and spread them out face down on the half sheet pan. Pop them in a 400°F oven for 45 minutes or so. The heavy aluminum pan crisps up the bottom of the potatoes while they cook through in the heat of the oven. And there you have it; a crispy, crunchy, starchy side dish with a minimum of effort.

No half sheet pan? Any rimmed baking sheet or shallow roasting pan will work. I’ve done these potatoes in everything, from inexpensive Pyrex baking dishes to fancy All-Clad roasters, but they work best in humble half sheet pans.

Recipe: Oven Roasted Crispy Fingerling Potatoes


Prep Time: 5 minutes
Cook Time: 45 minutes

Equipment

  • Half sheet pan (or other heavy roasting pan)

Ingredients

  • 1 ½ pounds fingerling potatoes
  • 1 teaspoon kosher salt
  • 2 tablespoons olive oil

Directions

1. Season the potatoes

Set the oven to 400°F. While the oven is heating sprinkle the potatoes with salt, then toss with olive oil. Spread into a single layer, cut side down, on the half sheet pan.

2. Roast the potatoes

Put the pan in the oven. Roast until the potatoes are nicely browned on the bottom and easily pierced with a paring knife, about 45 minutes. Take the pan out of the oven and move the potatoes to a serving platter, using a spatula to work them loose from the pan if they are sticking.

Notes

  • This recipe halves or doubles easily; just make sure you can fit all the potatoes, cut side down, on your pan.
  • You can make cleanup easier by lining the sheet pan with parchment paper or aluminum foil…but the potatoes don't wind up as crisp if you do that.
  • If you want crisper potatoes, and you have the time, halve the fingerling potatoes, then soak them in hot tap water for an hour. Pat them dry with paper towels, then continue with salting and tossing with oil. This is a trick I learned from Cooks Illustrated - it removes some of the surface starch, helping the potatoes crisp up. But…this usually winds up as one step too many for me. I go to this recipe when I need an easy side dish; soaking and drying gets in the way.
  • You don't have to use fancy, multicolored potatoes, like I am in the pictures. Red, yellow, or purple fingerling potatoes are fine on their own.

What do you think?

Questions? Other ideas? Leave them in the comments section below.

Related Posts

Patatas Bravas - Spanish style fried potatoes
Oven Roasted New Potatoes
Quick Baked Potatoes

Enjoyed this post? Want to help out DadCooksDinner? Subscribe to DadCooksDinner via eMail or RSS reader, recommend DadCooksDinner to your friends, and buy something from Amazon.com through the links on this site. Thank you.

What is it we want from food?

October 23, 2014 by Mike Vrobel Leave a Comment

Don't we keep coming back to exactly that issue? What is it we want from food? Our symbolic demands are entangled with our sensory demands in the act of eating.
- Adam Gopnik, talking with Christopher Kimball on the America's Test Kitchen Radio Podcast, Episode 325

“What is it we want from food?”

That’s it. That’s the question I try to answer every time I sit down to write.

Food is about taste, and about pleasure. But it is a shared pleasure. We, all of us, need to eat every day. It’s more than just fuel for our bodies - the ritual of eating is tied up in human existence. Simple family dinners shared with my wife and kids; dinners out, celebrating the victories of life; parties with friends, laughing and talking; holidays with extended families, getting the aunts, uncles, and cousins together. Food is so much more than how it tastes.

What is it I want from food?

  • I want it to taste good, and be good, for me and my family
  • I want it to bring people together, in the kitchen and at the table - friends and family, strangers and neighbors
  • I want it to teach me, about new ways of doing things, about different cultures, about different flavors
  • I want it to remind me, about the old way of doing things, about our history, about what I've done, and where I'm going
  • I want it to comfort me, the warmth of my kitchen, the feel of a knife in my hand, the sizzle of a steak on the grill, the smell of simmering soup as I walk through the door

Food is my invitation to the story we’re all telling together.

What do you think?

What is it you want from food? Talk about it in comments section below.

Enjoyed this post? Want to help out DadCooksDinner? Subscribe to DadCooksDinner via eMail or RSS reader, recommend DadCooksDinner to your friends, and buy something from Amazon.com through the links on this site. Thank you.

Slow Roasted Pork Loin with Rosé Pan Sauce

October 21, 2014 by Mike Vrobel 2 Comments

A sliced pork loin roast on a cutting board with a carving knife, green beans, a candle, and a pumpkin in the background
Slow Roasted Pork Loin

I have a plan. It will be a perfect fall day: bright, crisp, sunny. A pork loin will roast in my grill in the backyard, while I am inside enjoying a tasty beverage.

As I leave Costco, pork loin in hand, I get smacked in the face by swirling and spitting rain, coming at me from all angles. The wind has picked up, and the sky is an ominous gray.

I go home, drop my pork loin in a brine, and wish for blue skies…or at least for the rain to ease up. Nothing doing; the day continues, gray and wet. Cold? I can handle cold. My limit is a steady downpour, and that's what I have on my hands.

Late afternoon, and the heavy clouds bring an early nightfall. I give up on grilling, and start on a pot roasted pork loin. It is the perfect comfort meal for a cold, dreary, October day.

Pot roasting works especially well for pork loin roasts, which should be cooked to 145°F with a three minute rest. The trick is low and slow pot roasting. I gently bring the pork loin up to temperature, covered, in a low oven; the result is pork cooked perfectly from edge to edge, with a delicious pan sauce.

Adapted from: America's Test Kitchen: French Style Pot Roasted Pork Loin

Brining the pork
Searing the pork
Out of the oven
Serve

What do you think?

Questions? Other ideas? Leave them in the comments section below.

Related Posts

Slow Roasted Pork Shoulder with Beer and Mustard
Sauerkraut with Pork - Choucroute Garnie
Pork Chili with Beans for a crowd

Enjoyed this post? Want to help out DadCooksDinner? Subscribe to DadCooksDinner via eMail or RSS reader, recommend DadCooksDinner to your friends, and buy something from Amazon.com through the links on this site. Thank you.

Simple Sous Vide Carrots

October 16, 2014 by Mike Vrobel 3 Comments

Sous Vide Carrots | DadCooksDinner.com

Sous Vide Carrots | DadCooksDinner.com
Sous Vide Carrots

Why do I cook sous vide? Because I can trade time for effort. Sous vide carrots are a perfect example. They’re easy - peel the carrots, seal the carrots, drop them in a water bath. When they’re done, cut the bag open and serve.

But, they’re also slow; the carrots need an hour in a (very hot) water bath. I don’t mind the trade-off. When I’m working on dinner, the hard part is the last part - getting everything finished and on the table. “Cut the bag open and dump on a platter” is what I’m looking for in a side dish.

Carrots cook at a very high temperature for sous vide - 185°F. We want to gelatinize the starch, resulting in firm but tender carrots. Unfortunately, that temperature is much higher than we want to cook meat sous vide, so we can’t cook the main course at the same time as these carrots. I have a few strategies for dealing with this:

  1. I run two sous vide water baths at the same time, one for the vegetables, and one for the protein. (Yes, I have multiple sous vide water baths. I have a cooking gadget problem.)
  2. I use one water bath, sequentially, from highest temperature to lowest. I cook the carrots first, 185°F for an hour. Then I drop the sous vide temperature to meat cooking levels (let's say 136°F), and add ice to the water bath to cool it down. The meat goes in the water with the carrots - the carrots stay warm in the water bath while the meat cooks.
  3. I don't cook the main course sous vide. Sous vide - it's not just for meat any more!

Carrots vacuum sealed with a pat of butter

Vacuum sealed carrots in a water bath with a sous vide immersion circulator
Vacuum sealed carrots in the water bath

Vacuum sealed bag of carrots cooked sous vide
Done! Carrots are ready to serve.

Closeup of multi-colored carrots
Look at those colors

What do you think?

Questions? Other ideas? Leave them in the comments section below.

Related Posts

Sous Vide Corn on the Cob
Sous Vide Rack of Lamb with Dijon Bread Crumb Crust
Sous Vide Grilled Sirloin with Tex-Mex Rub
Sous Vide Pork Shoulder Steaks with Purple Cabbage Slaw
Quick Baked Potatoes (Start in Microwave, Finish in Oven)

Enjoyed this post? Want to help out DadCooksDinner? Subscribe to DadCooksDinner via eMail or RSS reader, recommend DadCooksDinner to your friends, and buy something from Amazon.com through the links on this site. Thank you.

Knob Creek® Rye Whiskey Old Fashioned with Grilled Orange

October 14, 2014 by Mike Vrobel 8 Comments


This post is sponsored by Knob Creek® Distillery and the Original Brothers of Bourbon website.


I enjoy the bold, spicy taste of Knob Creek® Rye Whiskey while I grill. The other day, as I sipped my drink and waited for the grill to preheat, the penny dropped. I can grill my oranges, adding smoky, caramelized fruit flavors to my Old Fashioned. Why didn’t I think of this sooner?

How do I grill an Old Fashioned? While preheating the grill for the main course, I put an orange wedge on the grate for a minute or two, long enough to give it good grill marks. After the wedge cools down for a minute, I squeeze a little of the orange juice into a rocks glass, muddle it with sugar cubes and a dash or two of bitters, and stir in some Knob Creek® Rye. Add some ice, the squeezed orange wedge, top with club soda, and I have a tasty beverage - just what I need to fortify myself for an evening of grilling.

Recipe: Knob Creek® Rye Whiskey Old Fashioned with Grilled Orange


Prep Time: 5 minutes
Cook Time: 2 minutes

Equipment

  • Grill
  • Rocks glass

Ingredients (makes one drink)

  • 1 orange wedge
  • 2 dashes of bitters
  • 2 sugar cubes (or ½ teaspoon sugar)
  • 2 parts Knob Creek® Rye Whiskey
  • Ice
  • Club soda

Directions

1. Grill the Orange

Set the grill up for direct medium heat. (On my gas grill, I preheat the grill for ten minutes, then brush the grill grate clean with my grill brush.) Set the orange wedge on the grill grate, cut side down, and grill until it has browned grill marks and is a little singed around the edge, about 2 minutes. Remove the wedge from the grill, and wait for it to be cool enough to handle.

2. Muddle the sugar, bitters, and orange

Put the sugar cubes in a rocks glass, add 2 dashes of bitters, and gently squeeze some juice from the orange wedge into the glass. Muddle the sugar, bitters, and orange juice until the sugar is mostly dissolved.

3. Finish the drink

Stir the Knob Creek® Rye Whiskey into the muddled ingredients. Add a few ice cubes and the orange wedge to the glass. Top with club soda, stir, and enjoy.

Notes

  • To make a traditional Old Fashioned, skip the grilling in step 1. Do everything as described in the recipe, and your Old Fashioned will be ready to drink. But, if you're already lighting a grill, why not try a newfangled Old Fashioned?

What do you think?

Questions? Other ideas? Leave them in the comments section below.

Related Posts

Grilled Shrimp Skewers with Knob Creek Pineapple Glaze
Rotisserie Chicken with Knob Creek Maple Glaze and Drip Pan Potatoes
Grilled Pork Chops with Knob Creek Lemon Glaze

Enjoyed this post? Want to help out DadCooksDinner? Subscribe to DadCooksDinner via eMail or RSS reader, recommend DadCooksDinner to your friends, and buy something from Amazon.com through the links on this site. Thank you.

Grilled Boneless Pork Chops with Apple Cider Brine and Apple Butter Glaze

October 9, 2014 by Mike Vrobel 23 Comments

A grilled boneless pork chop with asparagus and a bed of kale on a red plate

Grilled Boneless Pork Chops with Apple Cider Brine and Apple Butter Glaze. A taste of fall from the grill, pork chops with an apple cider brine.

Orange and brown leaves skitter past as the wind nips at my ears. Fall is here, and it is apple picking time - and also pork chop time. Back before refrigeration, when seasonal cooking was the only way we could cook, pigs were a fall animal. Of course, that meant pork was paired with apples, a fall fruit.

A grilled boneless pork chop with asparagus and a bed of kale on a red plate
Grilled Boneless Pork Chop with Apple Cider Brine

In this recipe, I'm building on that tradition. I season the pork with an apple cider brine - a very modern technique. The cider adds sweetness and helps the chops brown quickly on the grill. Then, for even more flavor, I brush the pork with an apple butter and mustard glaze.

When I cook boneless chops, I want them thick cut - the thicker, the better. That way, I can sear the outside, and have plenty of time for the chops to finish gently over indirect heat. I prefer my pork chops medium-rare, cooked to 145°F (measured with a digital instant read thermometer in the thickest part), with a three minute rest. The result is tender, juicy, perfectly cooked pork.

Looking for a taste of fall? Enjoy these pork chops with layers of apple flavor.

A 8 cup measuring cup full of apple cider brine and pork chops
Brining the chops
Thick boneless pork chops on the grill, with a crosshatch of grill marks
Pork with crosshatch of grill marks

What do you think?

Questions? Other ideas? Leave them in the comments section below.

Related Posts

Grilled Ribeye Pork Chops with Smoked Spanish Paprika Rub
Grilled Thin Pork Chops with Quick Brinerade
Grilled Pork Chops with Bourbon Brine and Baste

Enjoyed this post? Want to help out DadCooksDinner? Subscribe to DadCooksDinner via eMail or RSS reader, recommend DadCooksDinner to your friends, and buy something from Amazon.com through the links on this site. Thank you.

Rotisserie Wild Boar Shoulder Roast

October 2, 2014 by Mike Vrobel 4 Comments

Rotisserie Wild Boar Shoulder Roast

*Meat from feral swine

The fine print on the wild boar package feels so medieval. A bristly, snorting, tusked beast bearing down on me while I draw back my bow and take aim. You want paleo? I’ll give you paleo…

Ahem…sorry.

Wild boar are, unfortunately, not a relic of our hunter-gatherer past. They’re a nuisance animal, if you consider 800 pounds of bad attitude and sharp tusks a “nuisance.” Wild boar are found in most states in the continental US, though they’re a particular problem in California, Texas, and the Southeast. Don’t believe me? Check out this map at the National Feral Swine Mapping System.
For more on Wild Boar, see my Pressure Coker Wild Boar Stew recipe. It has lots of fun feral swine facts.

Time to get medieval on my wild boar, and spit roast it on my rotisserie. I dry brined the shoulder roast with an overnight salting. Then I trussed it - which was the hard part, becuase the roast was in a couple of big floppy pieces. Once I had it shaped back into an (admittedly lumpy) cylinder, I ran it through with the spit, and cooked it medium-low and slow until it hit 195°F in the thickest part, about four hours. Then I ran the infrared rotisserie burner on high for fifteen mintues to crisp up the outside of the roast.

The result? Strong pork flavor, but not "piggy" if that makes any sense. It’s a little on the dry side - wild boar has a lot less fat than domesticated pork - but the extra porky flavor makes up for it.

Ready to make a meal fit for the lord of the manor? Try a spit-roast wild boar.

Recipe: Rotisserie Wild Boar Shoulder Roast


Prep Time: 15 minutes
Cook Time: 4 hours

Equipment

  • Grill with rotisserie attachment (I love my massive Weber Summit)
  • Drip pan (9x13, grill safe material like aluminum foil or enameled steel)
  • Butcher's twine

Ingredients

  • 5 pound boneless wild boar shoulder roast (I got mine online from D'artagnan)
  • 1 ½ tablespoons kosher salt
  • 2 teaspoons fresh ground black pepper

Directions

1. Dry brine the wild boar

Spread open the wild boar shoulder roast on a large sheet pan, and sprinkle evenly with the salt and pepper. Refrigerate for at least four hours, preferably overnight.

2. Truss and spit the wild boar

When it is time to cook, remove the boar from the refrigerator. Fold the roast back as best you can into its original shape, and truss it, tying the roast every inch and a half to two inches. Skewer the wild boar roast on the rotisserie spit, securing it with the spit forks. Let the boar rest at room temperature until the grill is ready.

3. Set up the grill for indirect medium-low heat

Set the grill up for indirect medium-low heat (300°F) with the drip pan in the middle of the grill. On my Weber Summit, I remove the grill grates, turn all the burners to high, and preheat the grill for ten minutes. Then I turn off all but the two outer burners (burners 1 and 6); those two burners I turn down to medium, and adjust as necessary to get the heat to stabilize at 300°F. (I do not use the infrared burner on my grill yet - I want low and slow heat.)

4. Rotisserie cook the wild boar

Put the spit on the grill, start the motor spinning, and make sure the drip pan is centered beneath the boar. Close the lid and cook the boar until it reaches 195°F in its thickest part, about 4 hours. At that point the boar is cooked through. If the roast does not have a good, browned crust, turn your burners to high (or light the infrared rotisserie burner and turn it to high), and cook the roast on high until it has a dark browned crust, about 15 minutes.

5. Carve and serve

Remove the wild boar roast from the rotisserie spit and remove the twine trussing the roast. Be careful - the spit and forks are blazing hot. Let the roast rest for 15 minutes, then carve and serve.

Notes

  • Make wild boar dripping potatoes. You have to. HAVE TO. See the recipe here: Rotisserie Pan Potatoes.
  • Can't find wild boar? Substitute a boneless pork shoulder roast. Swine, feral swine…close enough.
  • I cooked the boar without any glazes or sauces, because I wanted to find out what wild boar tastes like without anything in the way. That said, a sweet mustard glaze or lemon, garlic, and olive oil paste would go great with this.
  • Oh no, they say he's got to go. Go go Hogzilla!

What do you think?

Questions? Other ideas? Feral swine jokes? Leave them in the comments section below.

Related Posts

Rotisserie Pork Shoulder
Rotisserie Drip Pan Potatoes
Pressure Cooker Wild Boar Stew
Not really related. But… There goes Tokyo. Go go Godzilla!

Enjoyed this post? Want to help out DadCooksDinner? Subscribe to DadCooksDinner via eMail or RSS reader, recommend DadCooksDinner to your friends, and buy something from Amazon.com through the links on this site. Thank you.

Road Trip: The Big Harvest Potluck 2014

September 30, 2014 by Mike Vrobel 24 Comments

Why are you calling yourself a "D list blogger"?

The salad line stretches out in the shadow of an ancient tree. It’s lunchtime at The Big Harvest Potluck, and Cheryl Sternman Rule is giving me a swift kick in the pants about my attitude.

Why do that to yourself? Who are you comparing yourself to?

Cheryl is a skilled interrogator, asking questions that make me think. And she is not pleased with my answers. After slowing down and listening to myself, neither am I.

Why do you write about food? What moves you? Are you just doing it for page views, or do you have other reasons?


I could spend the rest of this post doing what I normally do after a conference - rambling on about the fantastic location, the fun things we did (balloon rides!), the great speakers, the wonderful people I met.

But…

Not today.


All you have is your perspective.

Christopher Hirsheimer and Melissa Hamilton of Canal House Cooking gave us an assignment. Take one apple from this crate, and take a picture of it from your point of view.

You have *your* message, and you have *your* voice.

At dinner, I walked by the slide show of apple pictures. I stopped, wanting to see my picture, hoping it would come around quickly so I could get back to the pasta Bolognese. It’s just an apple, after all.

And then I couldn’t stop watching. It’s just an apple…in a pattern of shadows thrown by the window. It’s just an apple…with a bite taken out, and the serendipity of a bee landing on the bite. It’s just an apple…sprinkled with water, droplets shining in bright sunlight.

It’s just an apple. The point of view makes all the difference.

Fix it, make it look like you.


This didn't start with me…

Cheryl Sternman Rule of Five Second Rule, done grilling me at lunch, is asking us to change our perspective. Blog writing follows a particular style - short, punchy, informal. Does it have to? Stretch your writing, she suggested. Don’t lose who you are, but try a different style. See if a different angle will give you a better story.

My lip quivered…

Then she gave us three writing prompts, each related to food and memory. And I got stuck. Oh, I had ideas, but I kept getting lost in memory. I couldn’t write “My lip quivered…” without my lip starting to quiver. There’s a story in there, one I need to write. It’s not ready to come out yet.

Later, we had an open mic to share the stories from the writing prompts. I can’t share the stories themselves; it’s not my place. They were nostalgic, vulnerable, heartbreaking, and funny. By the time the stories finished, my lip wasn’t just quivering.

I close my eyes, and see the scene unfold…


What is it about? What story are you trying to tell?

Rod and Deb Smith of Smith Bites say “Break into groups of five”. Suddenly, my table is a video production team with an hour and a half to design, shoot, and edit a thirty second video of Sabra hummus. (Official sponsor of our video class - thank you, Sabra!) Rob, Deb, and Mackenzie will judge the videos, and the winning team gets microphones.

All I can think is “can we eat the hummus now?” Then the ideas start to flow from the team. Fall, seasons changing. Abundance. Shots of things dipping into the hummus. What’s their tagline? “Dip life to the fullest.” Perfect, we can work with that. How’s the lighting? Maybe we should move outside?

Oooh - in front of that tree is perfect. Get a shot of her walking by with the basket of food. The table looks bad, use this scarf as a tablecloth. Try your camera over here - I can’t zoom. Overhead shot - everyone reach in and dip some hummus, some yogurt, some salsa, one, two, three…go. You get a shot of the tree, we’ll go inside to shoot a voiceover. Wait…the microphone is off. OK, try again.

Who has a laptop? Do you have Adobe Premiere installed? Yes! OK, we’re editing. You edit, it’s your computer…while the five of us sit behind you and backseat drive. “I for in, O for out - cut that one shorter.” Look for the clip where we pan up from the tree to the sky. Star wipe! What if we use the closeup of the hands as a b-roll shot here? Five minutes? We’re almost…let us drop in one more audio clip. Hit play, let’s see how it looks. Holy cow! Look what we did! We are so going to win! #TeamWinning. Exhale. Eat hummus while watching all the videos.


The Big Potluck didn’t feel like a conference. It wasn’t just a series of sessions and classes, broken up by meals and networking breaks with my fellow bloggers. The Potluck felt like more. It was a chance to leave the world behind for a couple of days, to be inspired and motivated. My emotional intelligence is slow - I understand myself, eventually - but I’m still processing everything I learned at the Potluck.

Why do I write about food? What moves me? Sharing stories about food and memory, bringing people together as family and community at the table. I love food, and stories. I needed the whack in the head to remind me what matters.


It’s killing me to skip a “this is a list of great things at the conference” post. Forgive me, I can't help myself. There were so many people who made The Big Harvest Potluck such a treat. Thank you to:

  • The sponsors: Gourmet Garden, Sabra, KitchenAid, Oxo, Burpee, Kerrygold, Anolon, and Terra Chips. Thank you for supporting this fantastic event. (And for the herbs, hummus, ice cream, espresso, vegetables, coffee mugs, cheese, butter, cookware, and chips. Yes, they fed us well. It's weird talking about a food blogger conference, and not really mentioning the food.)
  • My apologies about the quotes of the speakers in the post. (Especially Cheryl, in the opening section.) Those quotes are from memory, based on the feel of the conversation and my sparse note taking. The words had an impact on me…even if they're not the actual words you said.
  • Thank you to the speakers I haven't already mentioned: Barry Estabrook and Karen Thornton. Barry wrote one of my favorite nonfiction food books, Tomatoland. He told us about the book he's working on now - Pig Tales. Karen's story about ancestry and stacked pies was a fascinating look at tracking down your own history.
  • Thank you to everyone who worked the Potluck, serving, cleaning, guiding, serving…so we could focus on the conference. Special thanks to Chris Thornton for keeping us organized…and being such a kind and loving tyrant as he ordered us to the buses.
  • Thank you to Sharon Damelio for the cocktails that gave me a shot of courage to get in the balloon. (So, so high up.)
  • OK, never mind, I have to mention the food. Pam, Maggy, Sharon, Christopher, Melissa, and everyone who brought something for the potluck - ohhhh...that tasted so goooood....
  • Food people are the best people. Thank you to all the new friends I made: Mallory from ForkVsSpoon (and Cleveland!) , Victoria from GardenCookTravel, Isabelle from Crumb, Stacey from Stacey Siegal Photography, Mackenzie from MackanneCheese, Veronica from @VeronicaChan (and Oxo), Carrie from Poet In The Pantry. I forgot a bunch of people - I have no memory for names, and I was enjoying our conversation too much to write things down. Please forgive me, and remind me of your name next year?
  • Thank you to Maggy Keet and Erika Pineda-Ghanny for creating and running The Big Potluck.
  • Finally, thank you to Pam Anderson. I wouldn't be here, writing about food, without you pointing me towards the path.

I can’t wait for the next Big Potluck.

Pressure Cooker Duck and White Bean Chili

September 25, 2014 by Mike Vrobel Leave a Comment

My freezer is overflowing. I can’t help myself; when I see a deal on meat at the grocery store, I buy it. Enough is enough. No more meat purchases until I clear everything out of the freezer.

I have a pound of ground duck left from my trip to Maple Leaf Farms, and a bag of white beans in the pantry. Cassoulet pops into my head - the classic French bean stew with duck confit and sausages.

I may have started started out with cassoulet, but by the time I was done, the pot was more Southwestern than French. It seems like all one pot meals turn to chili in my kitchen.

Was I disappointed? No! Rich duck meat, creamy white beans, and a hint of spicy heat? It’s almost like I meant to make that in the first place.
Shhh. Like Julia Child said, no matter what happens in the kitchen, never apologize.

Recipe: Pressure Cooker Duck and White Bean Chili


Prep Time: 10 minutes
Cook Time: 60 minutes

Equipment

  • Pressure Cooker (I use an Instant Pot Electric Pressure Cooker)
  • Large fry pan

Ingredients

Beans

  • 1 pound great northern beans, sorted and rinsed
  • 1 head garlic, top ⅓ trimmed off
  • 1 onion, trimmed, peeled and cut in half
  • 2 cloves, stuck into an onion half
  • 1 bay leaf
  • 1 teaspoon kosher salt
  • 6 cups water

Duck

  • 1 tablespoon vegetable oil
  • 1 large onion, peeled and minced
  • 2 large carrots, peeled and chopped into 1 inch pieces
  • ½ teaspoon kosher salt
  • 1 pound ground duck
  • 1 teaspoon kosher salt
  • 1 (4 ounce) can green chiles, with juices
  • 1 (15 ounce) can fire roasted diced tomatoes, with juices
  • 1 teaspoon brown sugar
  • Salt and pepper to taste
  • Minced cilantro (for garnish)

Directions

1. Pressure cook the beans for 30 minutes, quick pressure release

Put the beans, garlic, onion with cloves, and bay leaf in the pressure cooker pot, then sprinkle with 1 teaspoon salt and pour the water over everything. Lock the lid on the pressure cooker, increase the heat to high, and bring the cooker up to high pressure. (Read the fine pressure cooker manual for how this works with your particular cooker). Reduce the heat to maintain the pressure and cook at high pressure for 25 minutes (30 minutes in an electric PC). Turn off the heat and quick release the pressure in the pot. Unlock the lid and opening the lid away from you - even when it’s not under pressure, the steam in the cooker is very hot. Discard the onion, garlic, and bay leaves.

2. Sauté the aromatics and duck

While the beans are pressure cooking: Heat the vegetable oil in a large fry pan over medium high heat until the oil is shimmering. Add the onion and carrots to the pan, and sprinkle with ½ teaspoon salt. Sauté the onions and carrots until softened, about 5 minutes. Add the duck and cook, breaking up any clumps of meat, until the duck is no longer pink, about 5 more minutes. Stir in the green chiles and tomatoes, and bring to a simmer. Turn off the heat and let the duck and aromatics sit until the beans are done.

3. Add the aromatics and duck to the beans, PC for 5 minutes

Pour everything from the fry pan into the pressure cooker pot. Lock the lid on the pressure cooker and bring the cooker up to high pressure. Pressure cook at high pressure for five minutes, then turn off the heat and quick release the pressure. (Or, pressure cook on high for 3 minutes, then turn off the heat and let the pressure come down naturally, about 15 minutes.) Unlock the lid and opening the lid away from you.

4. Taste and serve

Stir the brown sugar into the chili, then add salt and pepper to taste. (The chili will need salt - there are a lot of ingredients in here. I added two more teaspoons of kosher salt to the pot. Keep adding salt, a half a teaspoon at a time, until the flavors perk up and the chili tastes a little bit sweet.) Serve, sprinkling minced cilantro on chili as a garnish.

Notes

  • No pressure cooker? No worries. Cook everything in a large dutch oven. In step 1, increase the water to 8 cups and simmer on the stovetop for 1 hour and 30 minutes, or until the beans are tender. In step 3, add the aromatics and duck to the dutch oven with the beans, then simmer for 30 minutes.
  • Can't find ground duck? Substitute meatloaf mix (a combination of ground beef and ground pork). Duck is red meat, so I think beef is the best substitute, but this recipe will work with other poultry, like ground turkey or ground chicken.
  • Make ahead beans. Finish step 1, then refrigerate the beans for a couple of days, or freeze the beans for up to three months. When you are ready to cook, reheat the beans in the microwave, then continue with step 3. (Or, if you want to cheat, replace the pound of cooked dried beans with four cans great norther beans, rinsed, and 2 cups of chicken broth.)

What do you think?

Questions? Other ideas? Leave them in the comments section below.

Related Posts

Pressure Cooker Pumpkin Chili
Pressure Cooker Senate Bean Soup
Pressure Cooker Turkey Chili with Chorizo and Pinto Beans

Enjoyed this post? Want to help out DadCooksDinner? Subscribe to DadCooksDinner via eMail or RSS reader, recommend DadCooksDinner to your friends, and buy something from Amazon.com through the links on this site. Thank you.

Five Fun Food Finds September 2014

September 23, 2014 by Mike Vrobel Leave a Comment

Fall is my favorite time of year. I overheat easily; I love weather that’s just a little bit cool, crisp enough that I’d consider wearing a jacket.

To celebrate the first day of autumn, here are five things I’m enjoying now…with a bonus food quote from my twitter feed:

RT @FJsWorld: "My doctor told me I had to stop throwing intimate dinners for 4 unless there are 3 other people." - Orson Welles #FoodQuotes
- Mike Vrobel (@DadCooksDinner) September 12, 2014

Five Fun Food Finds September 2014

1. Le Creuset Fingertip Pot Holders

(Picture at the top of the page.) These pinch potholders are the perfect size - big enough to protect my hands, small enough to make it easy to grab a pan, sheet, or pot full of stew. I bought them earlier this year, and I rustle through a drawer full of potholders to find these little guys.

2. Cedar Plank Grilled Chicken Wings

My Ohio grilling blog buddy Mike Lang posted these on Weber’s blog a few weeks back. I have this recipe bookmarked for tailgating parties this fall.

3. Why You Should Refrigerate Tomatoes

From Daniel Gritzer at SeriousEats.com - Store tomatoes in the refrigerator? Everything I know is wrong!

4. Sous Vide Beef Goulash

From Jason Logsdon at ModernistCookingMadeEasy.com. Sous Vide stew? Everything I know is wrong…again! [h/t SousVideSupreme.com blog]

5. Jacques Pepin bones out a Chicken

Intellectually, I know Jacques Pepin is a master of technique. I own his Techniques book, after all. And then...I watched him debone a chicken. This video left me weak in the knees. Now, I'm no amateur - I can section a chicken pretty quickly - but he can remove ALL THE BONES from a chicken faster than I can cut it into pieces.

What do you think?

Questions? Other fun food finds you want to share? Leave them in the comments section below.

Enjoyed this post? Want to help out DadCooksDinner? Subscribe to DadCooksDinner via eMail or RSS reader, recommend DadCooksDinner to your friends, and buy something from Amazon.com through the links on this site. Thank you.

Sous Vide Strip Steaks with Maitre d’Hotel Butter

September 18, 2014 by Mike Vrobel 2 Comments

Sous Vide Strip Steaks with Maitre d'Hotel Butter

Did you make a roll of Maitre d’Hotel butter from my recipe earlier this week? Great! Now, I’m sure you’re asking yourself “What do I use it with?”

You didn’t make it? Oh. Um...that’s OK, it’s easy. Head back to the compound butter post. I’ll wait here for you.
…
Got your butter made? Great, let's move on.

So, what do we do with the butter? I love to use it to finish a steak. That’s right - a little bit of butter on top, melting onto the steak, giving it a last minute glaze of flavor.

Full disclosure - I’m not the one who thought up this trick. French bistros have thrived for over a hundred years serving Steak Frites, a rump steak topped with butter, and served with fries. I’m borrowing the idea, but skipping the fries.

I have a few of vacuum packed semi-boneless strip steaks in my freezer - regular cut, about an inch thick. Sous Vide makes this an easy weeknight meal. When I walk through the door, I fill my water bath, set the temperature to 131°F, and drop the steaks in. I go about my business - directing traffic as kids come home, enjoying a tasty beverage as I unwind from work. When it is time to serve, I get a pan ripping hot, then sear these thin steaks on one side to get a good, brown crust.

That’s right, 1 inch thick is too thin, at least when it comes to sous vide. I don’t want to lose that perfectly cooked interior by overcooking the steak.

The steaks come off the pan, and I immediately top them with a quarter sized pat of Maitre d’Hotel butter. While I toss a salad, the butter melts into the steaks; five minutes later, with about fifteen minutes of active work, dinner is ready.

Recipe: Sous Vide Strip Steaks with Maitre d'Hotel Butter


Prep Time: 5 minutes
Cook Time: 60 minutes

Equipment

  • Sous Vide setup (I love my SousVide Supreme)
  • Heavy 12 inch fry pan (I used my All-Clad; cast iron is also good for this)

Ingredients

  • 3 (1 inch thick) New York strip steaks
  • 1 ½ teaspoons kosher salt
  • 1 teaspoon fresh ground black pepper
  • 1 teaspoon vegetable oil
  • 3 quarter sized pats Maitre d'Hotel butter

Directions

1. Sous Vide the steaks

Sprinkle the steaks evenly with the salt and pepper. Put each steak in a small (quart) vacuum pouch, and vacuum seal the bag. (At this point, the steaks can be refrigerated for three days, or frozen for months.) When you are ready to cook, set the sous vide to 131°F/55°C for medium-rare. (125°F/51.5°C for rare, 136°F/58°C for medium-rare, 141°F/60.5°C for medium well.) Drop the steaks in the sous vide, and cook for at least 1 hour (1 ½ hours for frozen), up to 4 hours.

2. Sear the steaks

Heat the fry pan over medium-high heat until it is ripping hot. Swirl in the vegetable oil, then add the steaks. Don’t move the steaks until they have a thick, browned crust on the bottom, about three minutes. Remove the steaks to a platter large enough to hold them in a single layer.

3. Top with butter, rest, and serve

Immediately top each steak with a pat of butter. Rest the steaks for five minutes, until the butter melts, and serve, topping each steak with a couple of spoonfuls of the juices and butter at the bottom of the platter.

Notes

  • Don't use a nonstick pan for searing the steaks - it isn't safe to heat nonstick to searing temperatures. (High heat is when nonstick starts to give off fumes.) Also, nonstick acts as a insulator, so the pan can't really get hot enough. Stick to cast iron, clad steel, or anodized aluminum.
  • If your diners can eat an entire steak on their own, put each steak on an individual plate instead of a platter. That means they get all the buttery steak juices that accumulate on the bottom of the plate. I use a platter because my wife and kids can't eat an entire steak on their own.
  • No Maitre d'Hotel butter made? It's quick to whip up a batch...but I can tell, you're in a hurry. Put a thin slice of butter on the steak, and don't worry about the other seasonings. But, promise me you'll try it with the compound butter when you have more time?
Photobomb

What do you think?

Questions? Other ideas? Leave them in the comments section below.

Related Posts

Sous Vide Flat Iron Steak
Grilled Sous Vide Filet Mignon with Gremolata
Sous Vide Grilled Chicken Breasts with Japanese Glaze
Sous Vide Pork Shoulder Steaks with Purple Cabbage Slaw

Enjoyed this post? Want to help out DadCooksDinner? Subscribe to DadCooksDinner via eMail or RSS reader, recommend DadCooksDinner to your friends, and buy something from Amazon.com through the links on this site. Thank you.

Compound Butter with Parsley and Lemon (Maitre d’Hotel Butter)

September 16, 2014 by Mike Vrobel 2 Comments

Compound butter is a chef’s best friend, and is one of the secrets of French bistro cuisine. Maitre d’Hotel butter - with a little lemon zest and parsley mixed in - gives bistro food its distinctive character.

Maitre d’Hotel butter is versatile. I use it to saute vegetables, baste roast chicken, and season mussels. But the best way to use this butter is to finish a steak. Put a pat on top of a cooked steak, right when it comes off the heat; the butter melts, mingling with the juices and making my all time favorite steak sauce.
More on Steak with Maitre d’Hotel butter on Thursday…

Compound butter is easy to make, and keeps forever in the freezer; I always make a big batch, and freeze the rest. Then I have frozen assets - ready and waiting for me to shave off a slice when dinner needs a flavor boost.

Inspired by dinner at Le Bistro du Beaujolais in Olmsted Falls, Ohio. Looking for bistro French in Northeastern Ohio? It’s worth the drive.

Recipe: Compound Butter with Parsley and Lemon (Maitre d'Hotel Butter)


Prep Time: 15 minutes
Cook Time: None

Equipment

  • Parchment paper
  • Bench scraper

Ingredients

  • 8 ounces (2 sticks) unsalted butter at room temperature
  • ¼ cup minced parsley
  • Juice and zest from 1 lemon
  • ½ teaspoon kosher salt
  • ¼ teaspoon ground black pepper

Directions

1. Beat the butter

Put all the ingredients in the bowl a food processor and process until completely combined, about 30 seconds.

2. Roll the butter

Scrape the butter out of the food processor bowl and onto a of parchment paper, forming it into a rough rectangle in the center of the paper. Fold the parchment paper over the butter, then push the paper under the butter using a bench scraper, squeezing it into the shape of a cylinder. Keep pushing with the bench scraper, working up and down the butter, until it is squeezed into a cylinder the width of a quarter.

3. Store the butter

Twist the ends to seal the paper. Put the parchment paper wrapped cylinder in a zip-top bag and store in the freezer for up to six months.

Notes

  • Take the butter out of the refrigerator at least 30 minutes before processing - it needs to be soft to process properly.
  • No food processor? Beat the butter with a mixer instead.

What do you think?

How do you use compound butter? Tell us about it in the comments below.

Related Posts

Maitre d’Hotel Butter can substitute for the butter sauce in any of these recipes…
Grilled Butterflied Chicken with Garlic Butter
Shrimp Saute with Garlic Butter
Pan Seared Ribeye with Shallot and Herb Butter

Enjoyed this post? Want to help out DadCooksDinner? Subscribe to DadCooksDinner via eMail or RSS reader, recommend DadCooksDinner to your friends, and buy something from Amazon.com through the links on this site. Thank you.

Grilled Bread and Tomato Salad (Panzanella)

September 11, 2014 by Mike Vrobel 2 Comments

Grilled Bread and Tomato Salad (Panzanella)

When the first tomatoes of summer arrive, I’m wriggling with excitement. I eat them straight - sliced and sprinkled with a little salt. Nothing else. Don’t get between me and my fresh tomatoes.

Then, a few weeks pass…the tomatoes still taste delicious and all, but…well…I get bored. They were summer’s glory, all in one red, ripe package; now they’re “Five pounds of tomatoes from the CSA? But I still have a couple left over from last week!”

That’s when the recipes come out. I make salsa (lots of salsa) and gazpacho. And, when I’m grilling, I make this bread salad.

It’s a perfect summer recipe - marinate the tomatoes in a garlicky red wine vinaigrette, grill the bread quickly, and sprinkle with some minced herbs. I still get the glory of summer, but it seems…new, somehow.

Recipe: Grilled Bread and Tomato Salad (Panzanella)


Prep Time: 15 minutes
Cook Time: 2 minutes

Equipment

  • Grill (I love my Weber Summit…but any grill will do. My beloved 6 burner is massive overkill for this recipe.)

Ingredients

  • 2 pounds ripe tomatoes, chopped
  • 2 (1 inch thick) slices crusty bread
  • Extra virgin olive oil (for drizzling)

Red Wine Vinaigrette with Garlic

  • 1 clove garlic, finely minced
  • ¼ teaspoon fine sea salt
  • ½ teaspoon fresh ground black pepper
  • 2 tablespoons red wine vinegar
  • ¼ cup extra virgin olive oil

Toppings

  • 2 tablespoons grated Parmesan cheese
  • 1 tablespoon minced fresh parsley
  • 1 tablespoon basil, sliced thin (chiffonade)

Directions

1. Make the vinaigrette and marinate the tomatoes

In a medium bowl, whisk the red wine vinaigrette ingredients with a side-to-side motion until the oil and vinegar emulsify, about one minute. Add the chopped tomatoes to the bowl, toss to coat with vinaigrette, and set aside to marinate.

2. Set the grill for direct medium heat

Set the grill up for direct medium heat. On my Weber Summit, I preheat the grill with all burners on high for 15 minutes, then brush the grill grate clean and turn the burners down to medium.

3. Grill the bread

Drizzle one side of the bread with a little olive oil, then put the bread on the grill grate over direct medium heat, olive oil side up. Grill until the bread has good grill marks on the bottom - about one minute. Flip the bread, olive oil side down, and grill until it has good grill marks, about one minute. Remove the bread immediately to a plate. (Check the bread often while you are grilling - it goes from browned to burnt in a flash.)

4. Chop the bread, toss the salad

Let the bread sit for a couple of minutes, until it is cool enough to handle. Slice the bread into 1 inch chunks. (Or tear it into pieces, if you want a more rustic look.) Toss the bread with the marinated tomatoes, then spoon onto serving plates and sprinkle with Parmesan, parsley, and basil. Serve.

Notes

  • I hope it goes without saying - this recipe depends on fresh summer tomatoes. If you're desperate for a tomato fix in winter, use cherry or grape tomatoes from the grocery store. They won't be as good as peak summer tomatoes, but they beat the red Styrofoam sold as tomatoes out of season.
  • Most times I recommend closing the grill lid when using a gas grill. Not this time! Bread wants to burn on the grill, especially when you've drizzled olive oil all over it. Watch it like…like…I don't know, just watch it carefully, OK?
  • If you don't watch it carefully, and the bread burns, take the bread to the sink and use a butter knife to scrape off as much of the carbonized bread as possible. (Hey, it worked for my breakfast toast when I was a kid.)

What do you think?

Questions? Other ideas? Leave them in the comments section below.

Related Posts

Grilled Tomato-Tomatillo Salsa
Grilled Tomato and Habaerno Salsa (Chiltomate)
Fresh Tomato Gazpacho (in a Vitamix)

Enjoyed this post? Want to help out DadCooksDinner? Subscribe to DadCooksDinner via eMail or RSS reader, recommend DadCooksDinner to your friends, and buy something from Amazon.com through the links on this site. Thank you.

Fire Roasted Poblano Burgers

September 4, 2014 by Mike Vrobel 1 Comment

Fire Roasted Poblano Burgers

It dawned on me recently - I don’t have a hamburger recipe on DadCooksDinner. How can that be?

Maybe it is because my favorite hamburger changes often. I was really into blue cheese burgers for a while; then I went traditional - cheeseburger, lettuce, tomatoes, pickles. I went through a slider phase, rolling the burgers ultra-thin before grilling. Then I started duplicating the Galley Boy burger from Swensons, Akron’s own hamburger joint. (A Galley boy is a double cheeseburger topped with barbecue sauce and tartar sauce. This one is my wife’s choice of burger; she always asks for the BBQ and tartar sauce.) Apologies to Skyway SkyHi fans - Akron’s other own hamburger joint - but the Galley Boy is better. Pppthhthp.

My current favorite has a hint of Mexico to it, a burger topped with grilled onion, fire roasted poblano peppers, cheese, and salsa. I want to call it a Tex-Mex burger, but that’s not right; it’s probably closest to a New Mexico green chile cheesburger, while being almost exactly wrong if that’s what you’re looking for.
Now I have annoyed Texans, Mexicans, New Mexicans, and Skyway fans. I’m on a roll!

I’ve been making burgers by hand for years, and they always come out as misshapen lumps. I finally gave up and bought a burger press. I feel like I’m cheating…but my burgers actually look like burgers when they come off the grill. Of course, I bought the most overdesigned burger press available, and paid extra for the pre-cut pieces of butcher paper to go with it. I’m terrible, and I can’t stop myself.

Enough about my kitchen gadget issues. Enjoy your burgers!

Recipe: Fire Roasted Poblano Burgers


Prep Time: 20 minutes
Cook Time: 10 minutes

Equipment

  • Grill (I love my massive Weber Summit, which gives me extra space to make a side dish, like Grilled Corn, at the same time as these burgers.)

Ingredients

  • 2.5 pounds ground chuck (aka "80/20 ground beef")
  • 2 teaspoons kosher salt
  • 1 teaspoon fresh ground black pepper
  • 1 teaspoon garlic powder
  • 4 poblano peppers
  • 1 large onion, peeled and cut into ½ inch thick rings
  • Shredded Colby-Jack cheese
  • 8 hamburger buns
  • Salsa (homemade or your favorite brand)

Directions

1. Shape the burgers

In a large bowl, break up the ground beef, sprinkle it with the salt, pepper, and garlic powder. Toss the ground beef to coat it with the seasonings, then break the meat into eight equal sized portions. Pick up a portion, and gently form it into a patty, roughly ½ inch thick by 4 inches wide. (This is where the burger press comes in handy.) Repeat until you have eight burgers.

2. Preheat the grill and fire roast the poblano peppers

Set the grill up for cooking over direct medium heat, and fire roast the poblano peppers while the grill is preheating. For my Weber gas grill, I turn all the burners to high, drop the peppers on the grill grate, and close the lid. After five minutes the peppers should be blackened on the bottom; I flip the peppers to blacken the other side. After five more minutes, I check the peppers - when they are black all over, I remove them to a bowl. (Sometimes they need a few more minutes.) Then I brush the grill grate clean with my grill brush.

3. Cook the burgers and onions

Set the burgers and onion slices on the grill grate over direct medium heat. On my gas grill, I keep the lid closed as much as possible while grilling. Grill the burgers and onions until they are well browned on the bottom, about five minutes. Flip the burgers and onions and grill until the burgers are cooked through and browned on the bottom, about five more minutes. During the last two minutes of grilling, top each burger with Colby-Jack cheese and close the lid to melt the cheese. Remove the burgers to their buns.

4. Peel the poblano peppers

Let the poblano peppers rest until they are cool enough to handle, then peel away the blackened skin. Pull out the stem and seeds and discard. (You don’t have to get all the seeds, but get as many of them as possible.) Tear each pepper in half, and put a half pepper on top of each burger.

5. Serve

Top the burgers with the salsa and serve.

Notes

  • Small onions on the grill: as you can see from the pictures, my onions were not the large onions I recommend in the ingredients. They're smaller onions from my wife's backyard garden. To help grill them, I cut them thicker (about ¾ inch thick), and skewered them on a kabob skewer before grilling.

What do you think?

Questions? Other ideas? Leave them in the comments section below.

Related Posts

Pan-Grilled Bratwurst with Onions and Peppers
Grilled Corn with Chipotle Lime Butter
Grilled Foot Long Hot Dogs

Enjoyed this post? Want to help out DadCooksDinner? Subscribe to DadCooksDinner via eMail or RSS reader, recommend DadCooksDinner to your friends, and buy something from Amazon.com through the links on this site. Thank you.

Book Review: Man Made Meals by Steven Raichlen

September 2, 2014 by Mike Vrobel Leave a Comment

I was thrilled to receive a review copy of Steven’s new cookbook, Man Made Meals. (Subtitle: The Essential Cookbook for Guys. Perfect for me, right?)

I have to tell you up front - this review is biased. Steven Raichlen is a major influence on my cooking. His Barbecue Bible series of cookbooks are essential references for grilling, and How To Grill is the first book I recommend to novice grillers. I even used his Beer Can Chicken cookbook as a model for my own Rotisserie Grilling cookbook. I owe Steven a debt of gratitude. Even though we’ve only met once, at a book signing, he taught me a lot of what I know about cooking.

Strengths

This is Steven’s “Joy of Cooking” - a massive collection of globetrotting recipes, covering everything from breakfast through dessert, with techniques from sauteing to baking, roasting to stir-frying. (And, don’t worry, he doesn’t abandon the grill - there are plenty of grilling recipes sprinkled throughout.) If there is a recipe you might want to try at home, it’s in there. The opening chapters cover the basics of cooking, from seasoning, to stocking a kitchen, to meal planning.

There is an amazing amount of information in this book. Steven poured out everything he’s learned from his years of cooking, travel, interviews, research, and testing. The goal is for this cookbook to be a one-stop reference for a guy who is also an enthusiastic home cook.

Weaknesses

I think this book’s greatest strength - the breadth of coverage - is also its only weakness. When I heard about Man Made Meals, I thought it would be more like Steven’s How to Grill - a smaller number of recipes with step by step pictures of basic techniques, leading guys into the kitchen by the hand. Instead, it is one of Steven’s “Bible” books, a thick tome covering everything. So: Steven, if you’re reading this, I have an idea for a follow up book. “Man Made Meals - How to Cook”, covering key cooking techniques, with the same detailed picture style of “How to Grill”. Thank you in advance.
Until then, I recommend Pam Anderson’s brilliant How to Cook Without a Book as a companion to Man Made Meals. Pam to focus on the basic techniques; Steven to give you a wide range of recipes.

Summary

I understand why they chose to cover everything - it’s right there in the subtitle, “The Essential Cookbook for Guys.” Man Made Meals is targeted at a guy who loves his grill, wants to learn how to cook in the kitchen…and will buy just one cookbook to be his guide. (That is, someone like my mom, with her lone, dog-eared copy of Joy of Cooking above the stove; not me, with my shelves and shelves of cookbooks.) This book is an obvious choice for that kind of guy. Steven makes sure to cover everything they will need.

It is also a no-brainer for someone like me, who loves all of Steven’s grilling cookbooks. It has the same style as his Bible books, full of globetrotting recipes, with sidebars of interviews and information to bring the recipes to life.

In other words, Man Made Meals is Highly Recommended.

FCC Notice: I received a free copy of Man Made Meals, and was not compensated in any other way for this post. The thoughts about the book are my own. If you buy a copy of the book (or anything else, really) through the Amazon links on my page, I get a small commission. Thank you.

Enjoyed this post? Want to help out DadCooksDinner? Subscribe to DadCooksDinner via eMail or RSS reader, recommend DadCooksDinner to your friends, and buy something from Amazon.com through the links on this site. Thank you.

  • « Previous Page
  • 1
  • …
  • 18
  • 19
  • 20
  • 21
  • 22
  • …
  • 37
  • Next Page »

Welcome to Dad Cooks Dinner!

I'm Mike Vrobel, a dad who cooks dinner every night. I'm an enthusiastic home cook, and I write about pressure cooking, rotisserie grilling, and other food topics that grab my attention.

More About Me →

Popular

  • Three bowls of cooked Pinto Beans on a wood table
    Instant Pot Pinto Beans (No Soaking)
  • Pressure Cooker Beef Shank (Osso Bucco)
  • Pressure Cooker 7 Hour Leg of Lamb (in 90 minutes)
    Pressure Cooker 7 Hour Leg of Lamb (in 90 minutes)
  • Pressure Cooker Brown Jasmine Rice
  • Grilled Tomahawk Steak (Long Bone Ribeye, Reverse Seared)
    Grilled Tomahawk Steak (Long Bone Ribeye, Reverse Seared)
  • A green bowl full of chicken noodle soup
    Instant Pot Rotisserie Chicken Noodle Soup

Seasonal

  • A bowl of asparagus risotto
    Instant Pot Asparagus Risotto (Pressure Cooker Recipe)
  • Grilled Butterflied Chicken with Garlic Butter
  • Sous Vide rack of lamb sliced into chops
    Sous Vide Rack of Lamb with Dijon Bread Crumb Crust
  • A bowl of beef stew with asparagus, carrots, and radishes.
    Instant Pot Spring Vegetable Beef Stew
  • A Rotisserie Chicken (Pollo Asado)on a platter of shredded cabbage
    Rotisserie Chicken Pollo Asado
  • Rotisserie Pork Shoulder Roast with Carolina Mustard BBQ Sauce
    Rotisserie Pork Shoulder with South Carolina Mustard Barbecue Sauce

Footer

↑ back to top

About

  • Privacy Policy

Newsletter

  • Sign Up! for emails and updates

Contact

  • Contact

Copyright © 2025 Dad Cooks Dinner