DadCooksDinner

  • Home
  • Rotisserie
  • Recipes
  • Tools
  • Books
  • Merch
menu icon
go to homepage
  • Recipes
  • Books
  • Tools
  • Merch
  • About
subscribe
search icon
Homepage link
  • Recipes
  • Books
  • Tools
  • Merch
  • About
×
Home » Recipes

Sous Vide Thick Cut Pork Chops with Rosemary Garlic Pan Sauce

December 29, 2015 by Mike Vrobel 3 Comments

Sous Vide Pork Chops
Sous Vide Thick Cut Pork Chops with Rosemary Garlic Pan Sauce

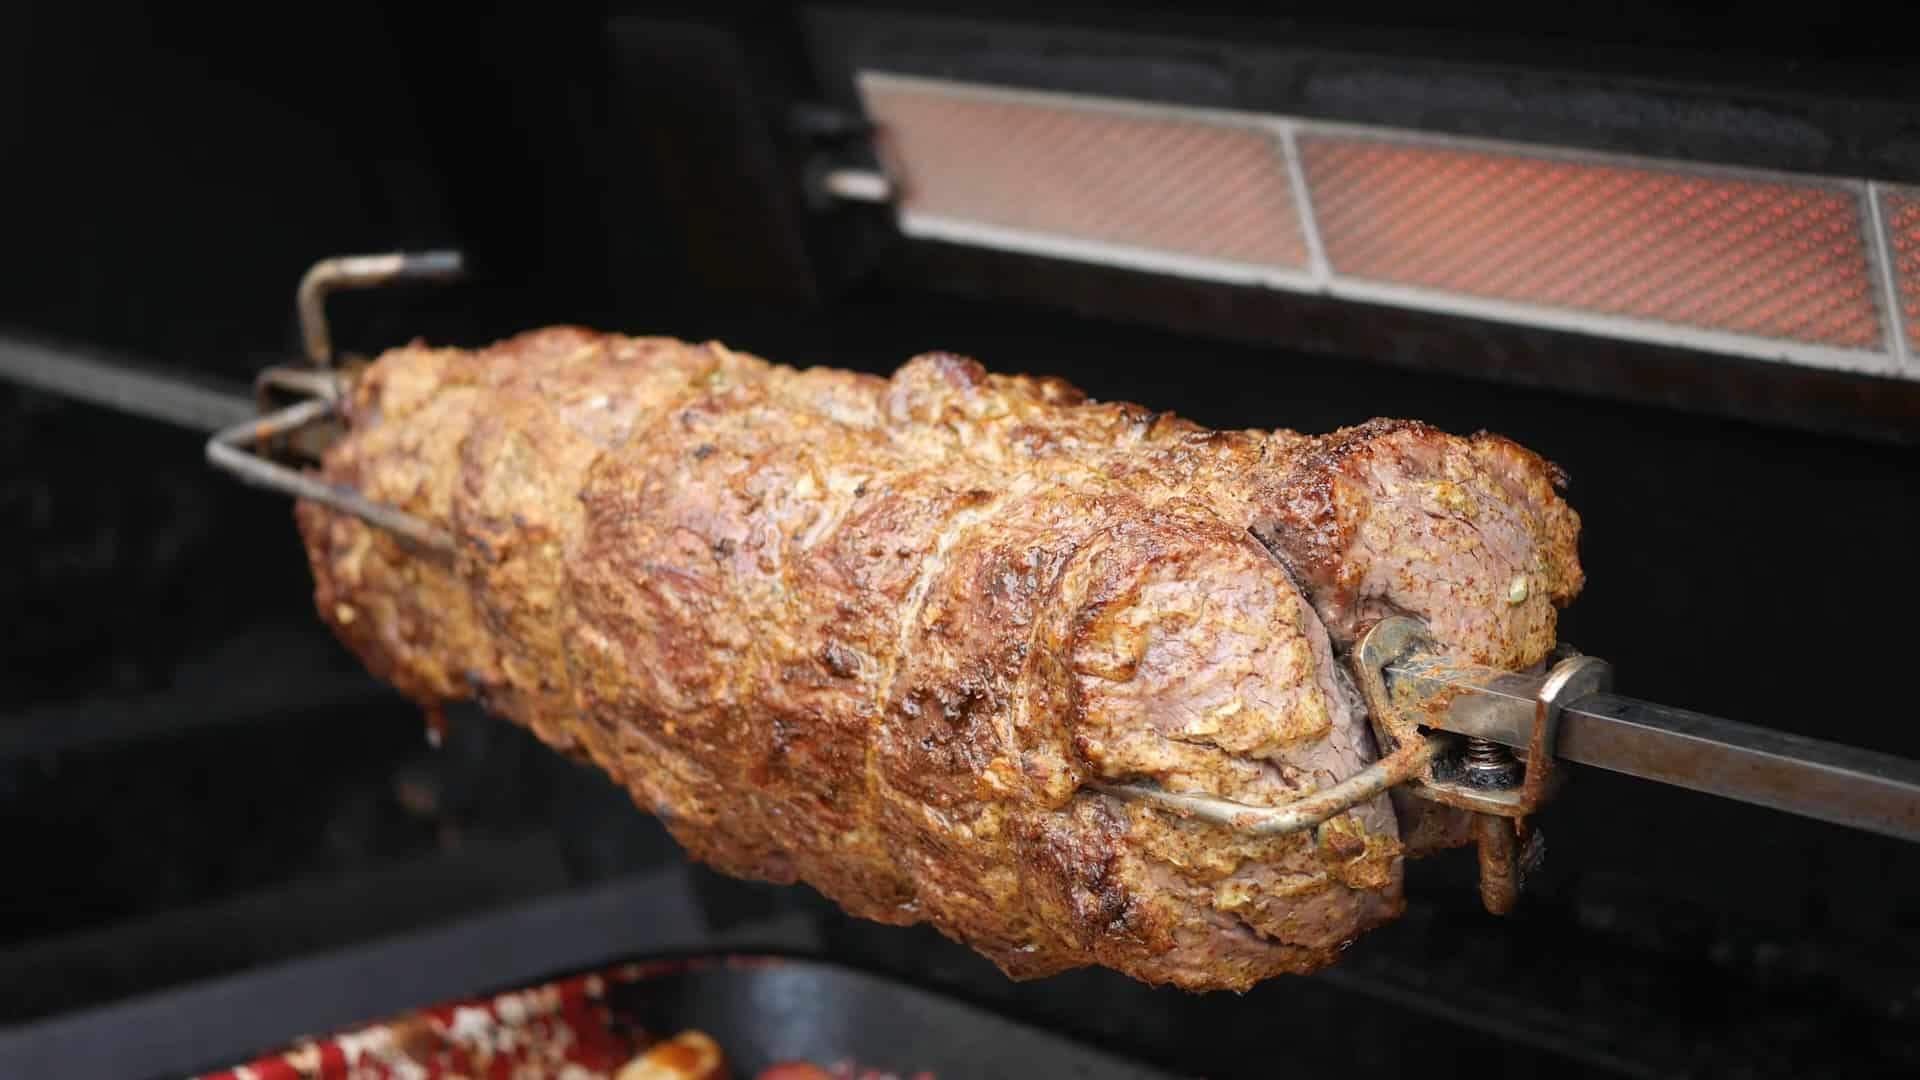
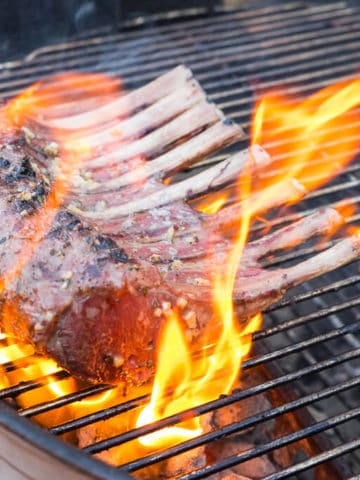
It's New Years week, and I'm taking a break. I should be doing a pork and sauerkraut recipe, a New Year's tradition for my in-laws. Instead, I'm relaxing on the sofa, while my second Christmas roast is cooking in the oven,1I get together with my immediate family for the Vrobel Family Christmas a few days after the holiday, to give us time together after we visit the other sides of the family. and finishing up a recipe I wrote a few months ago.

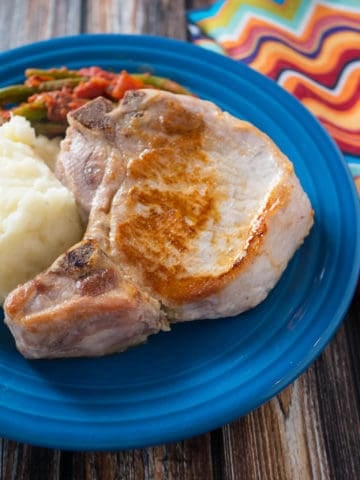
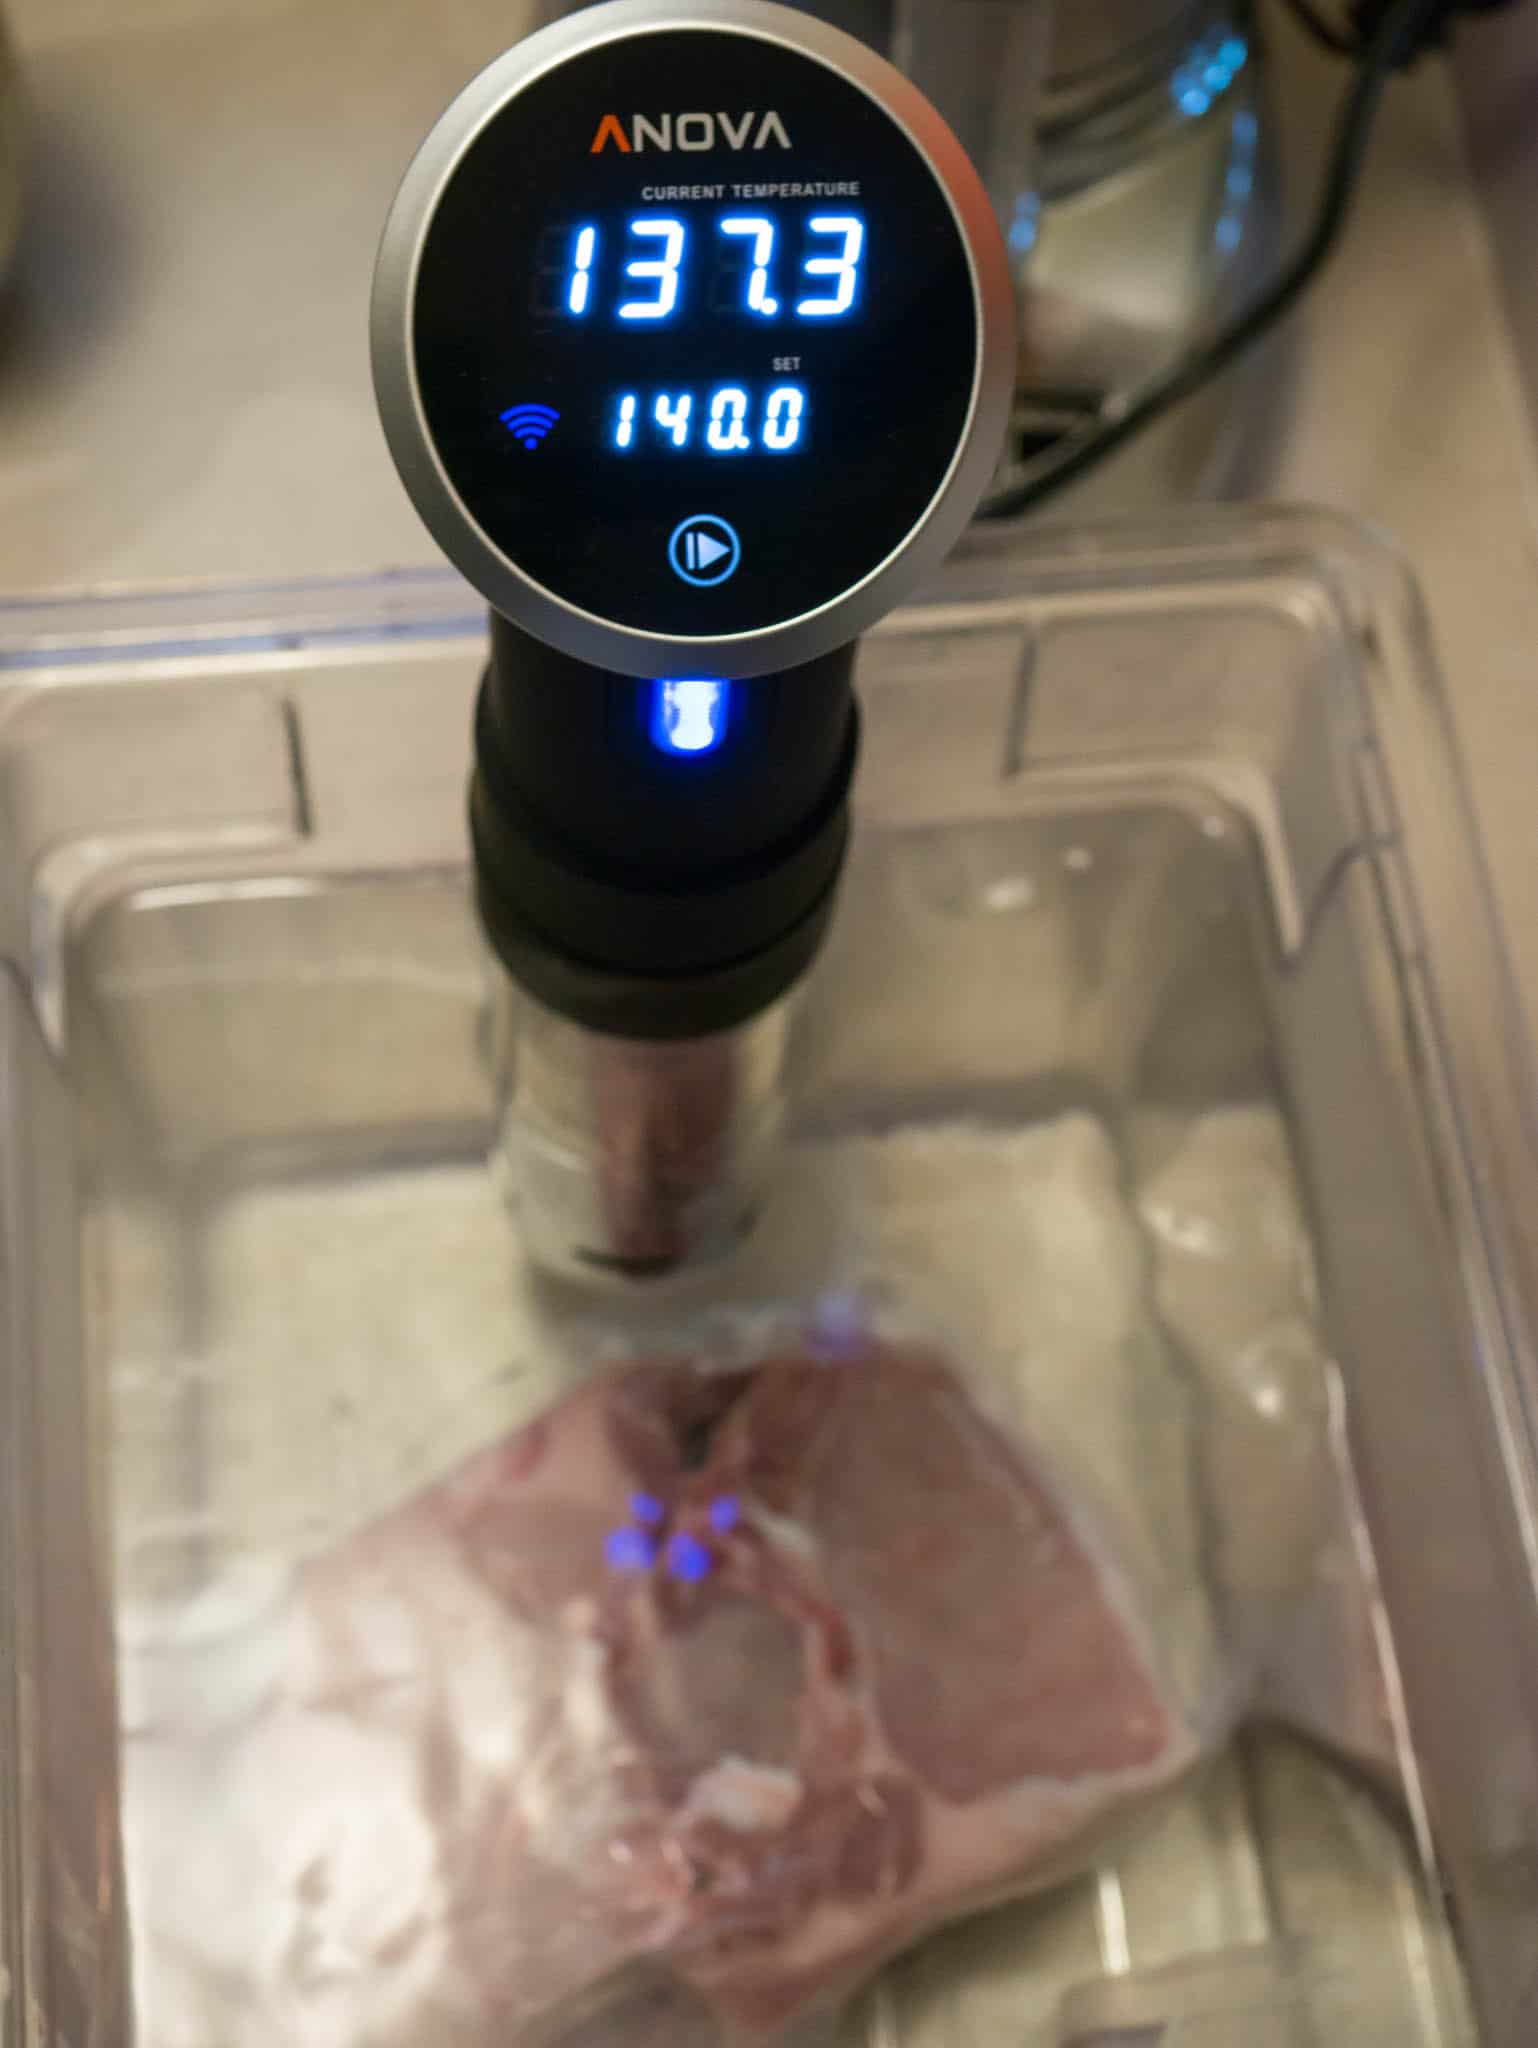
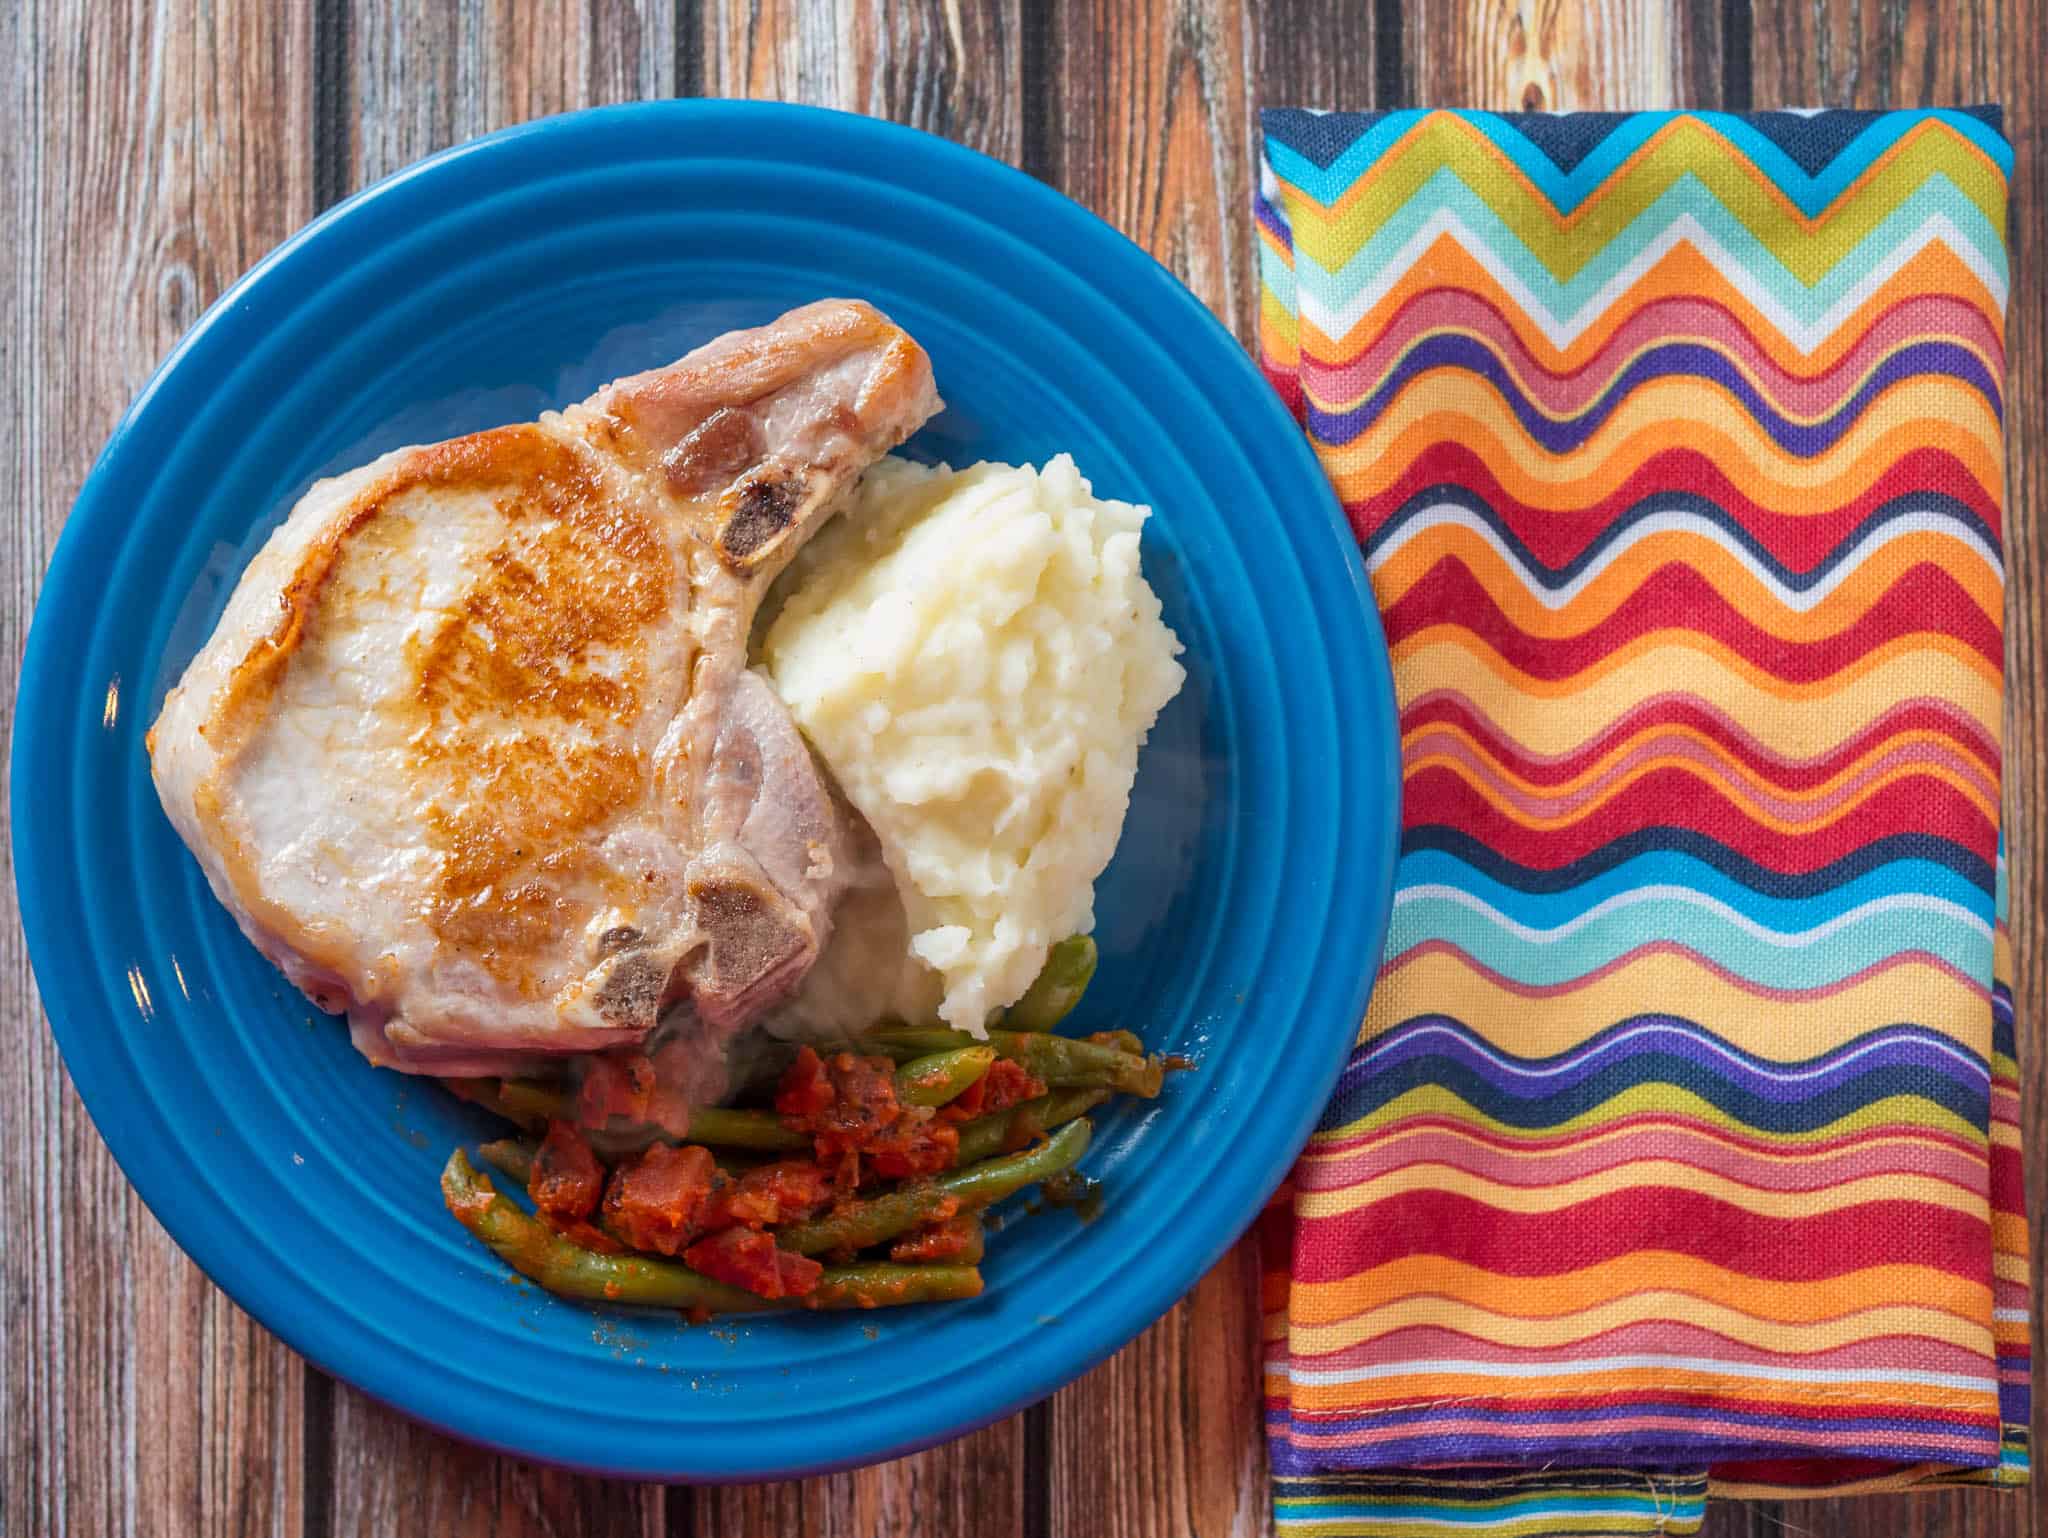
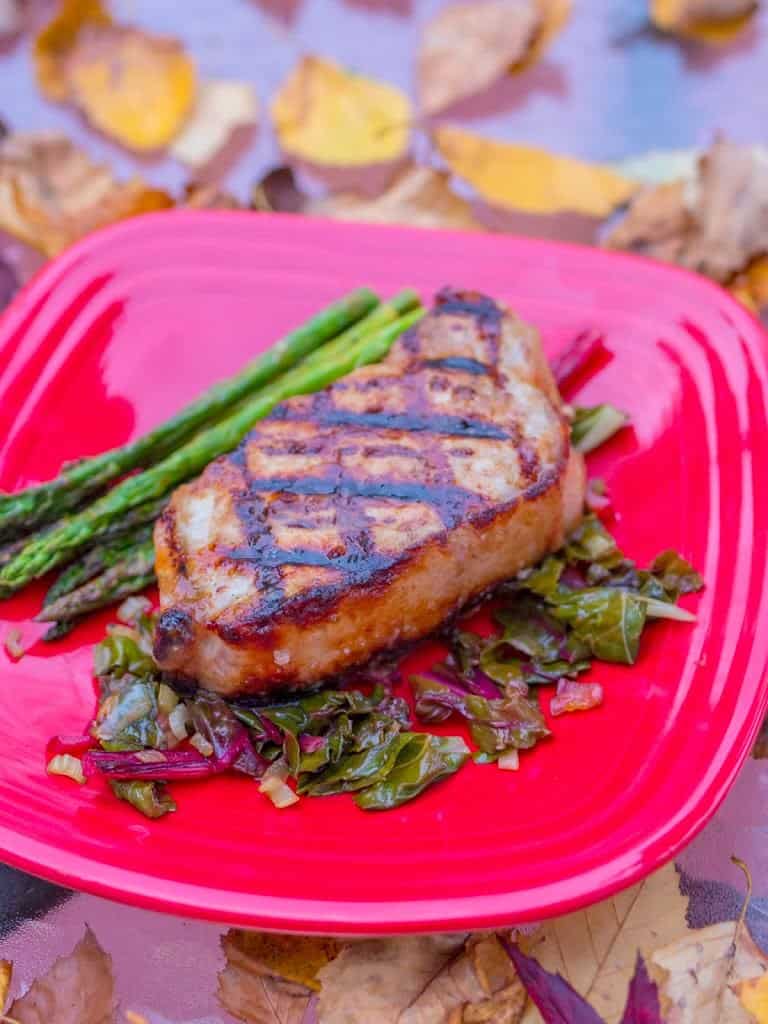
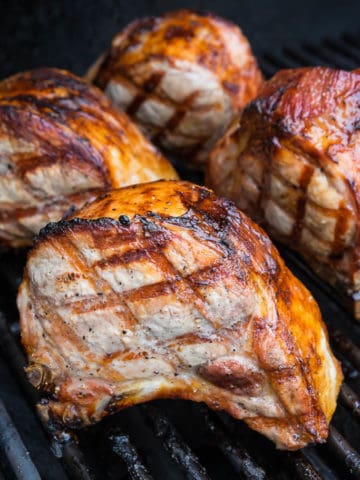
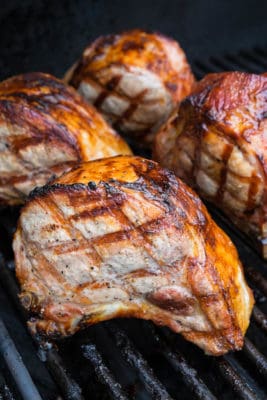
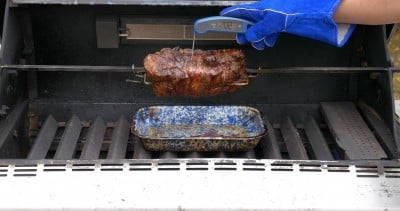
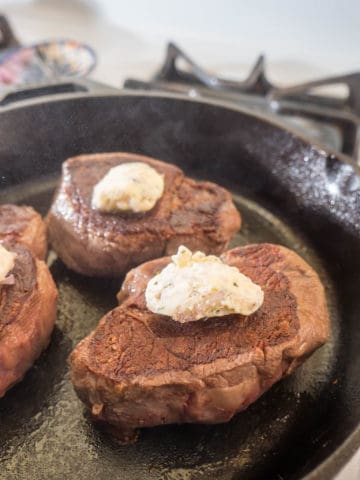
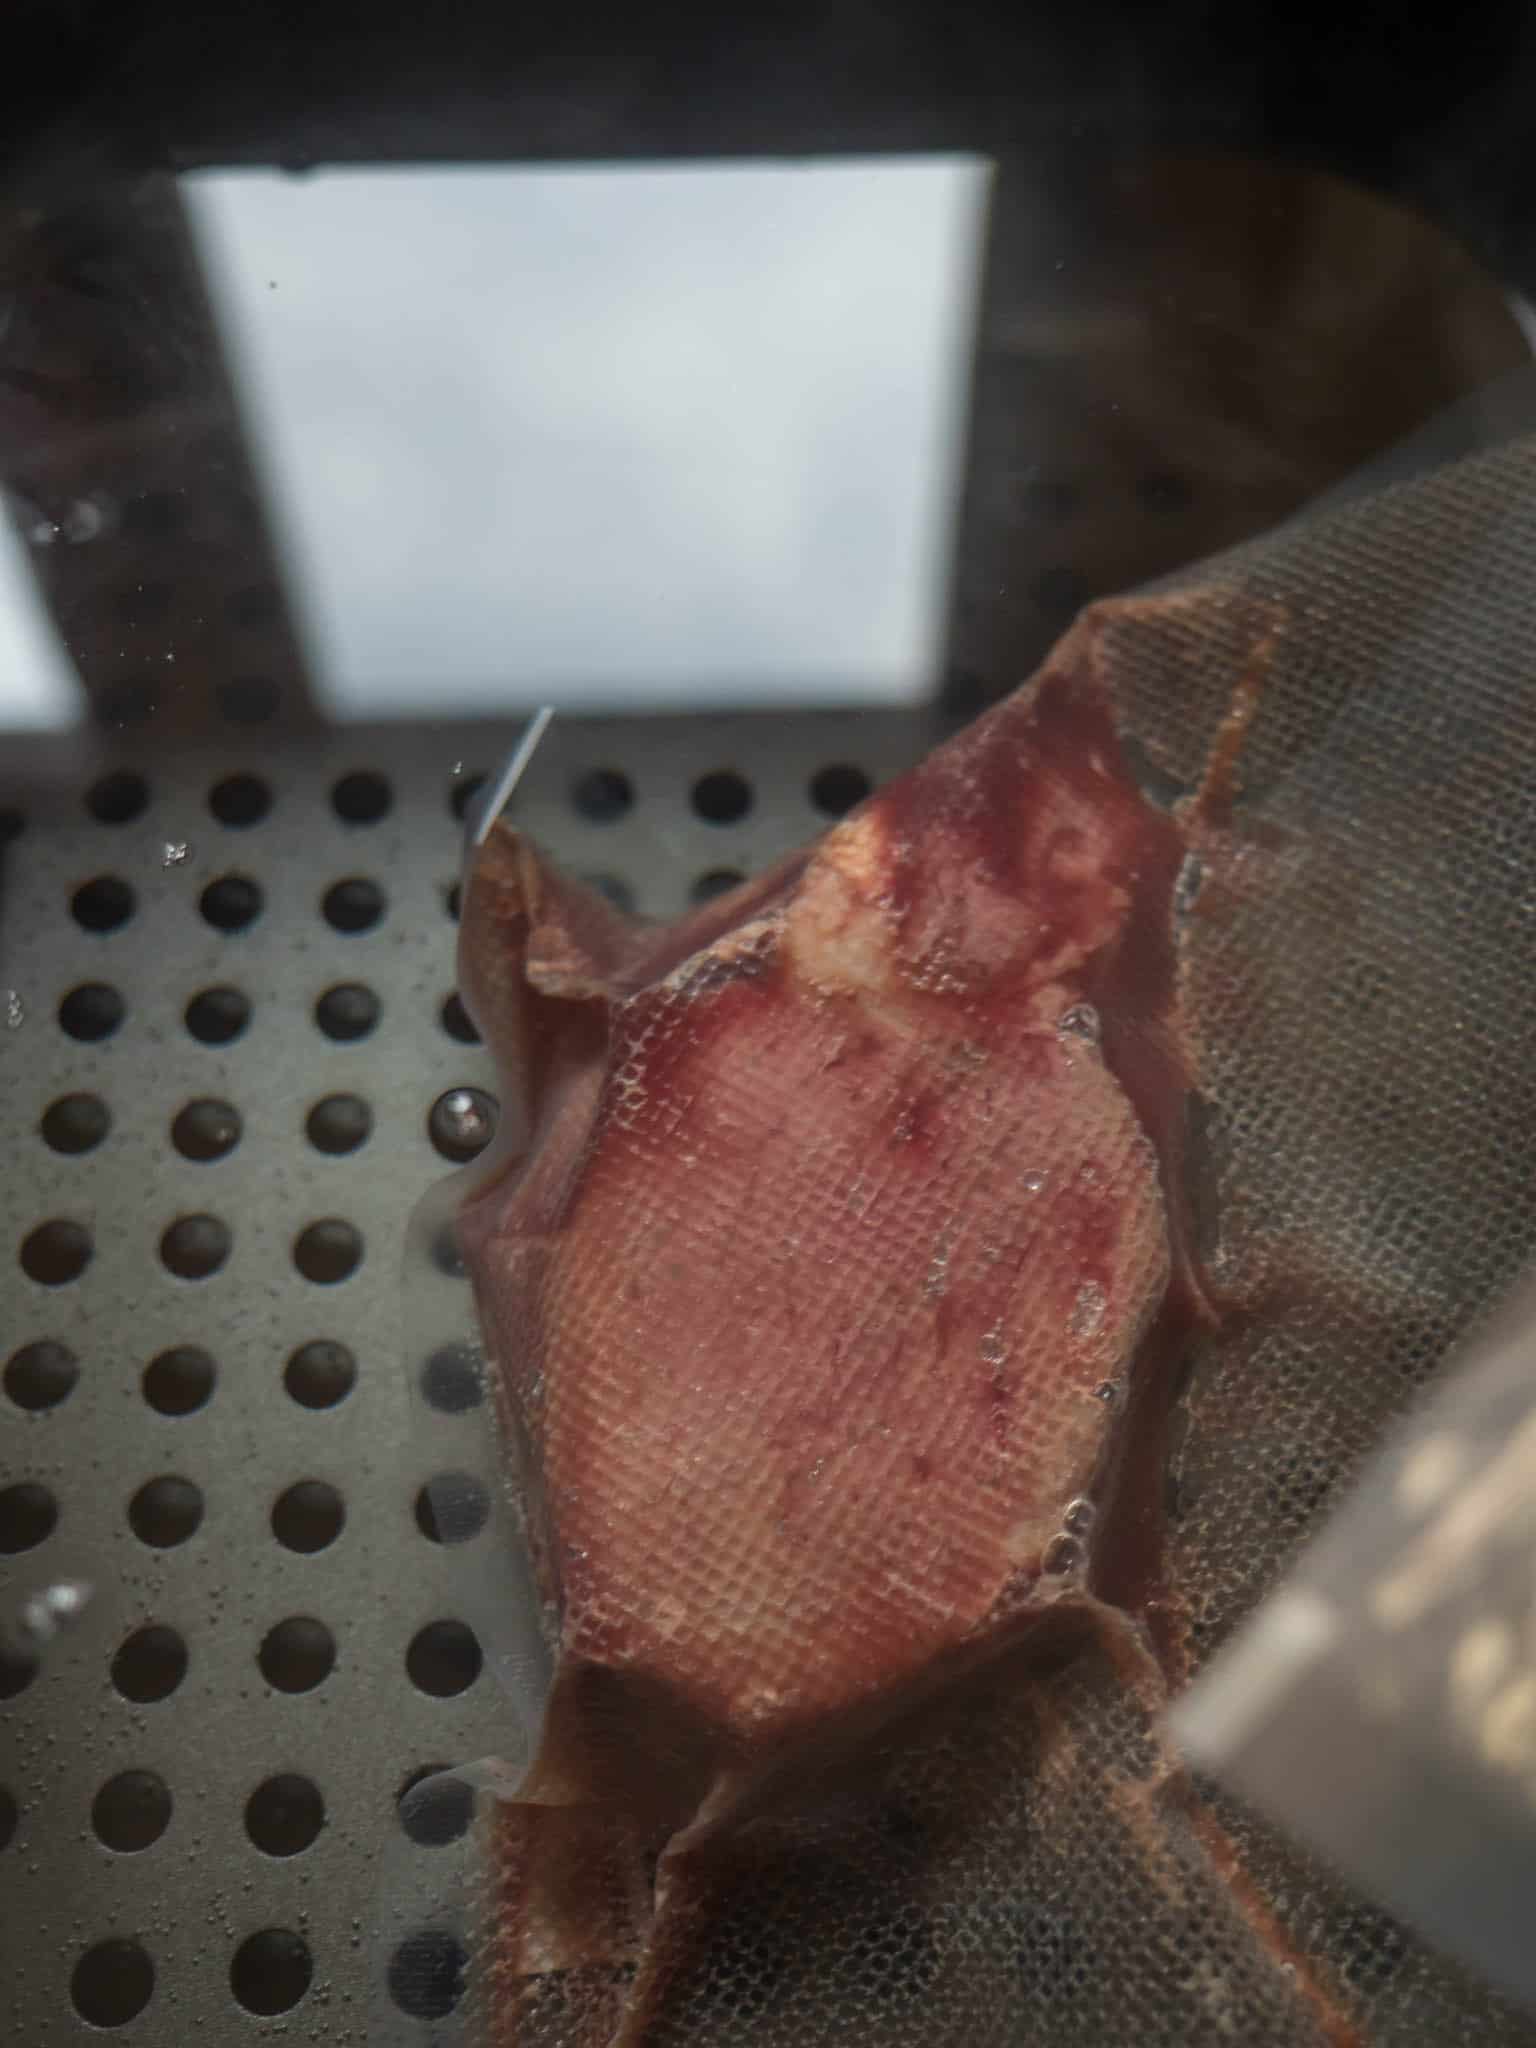
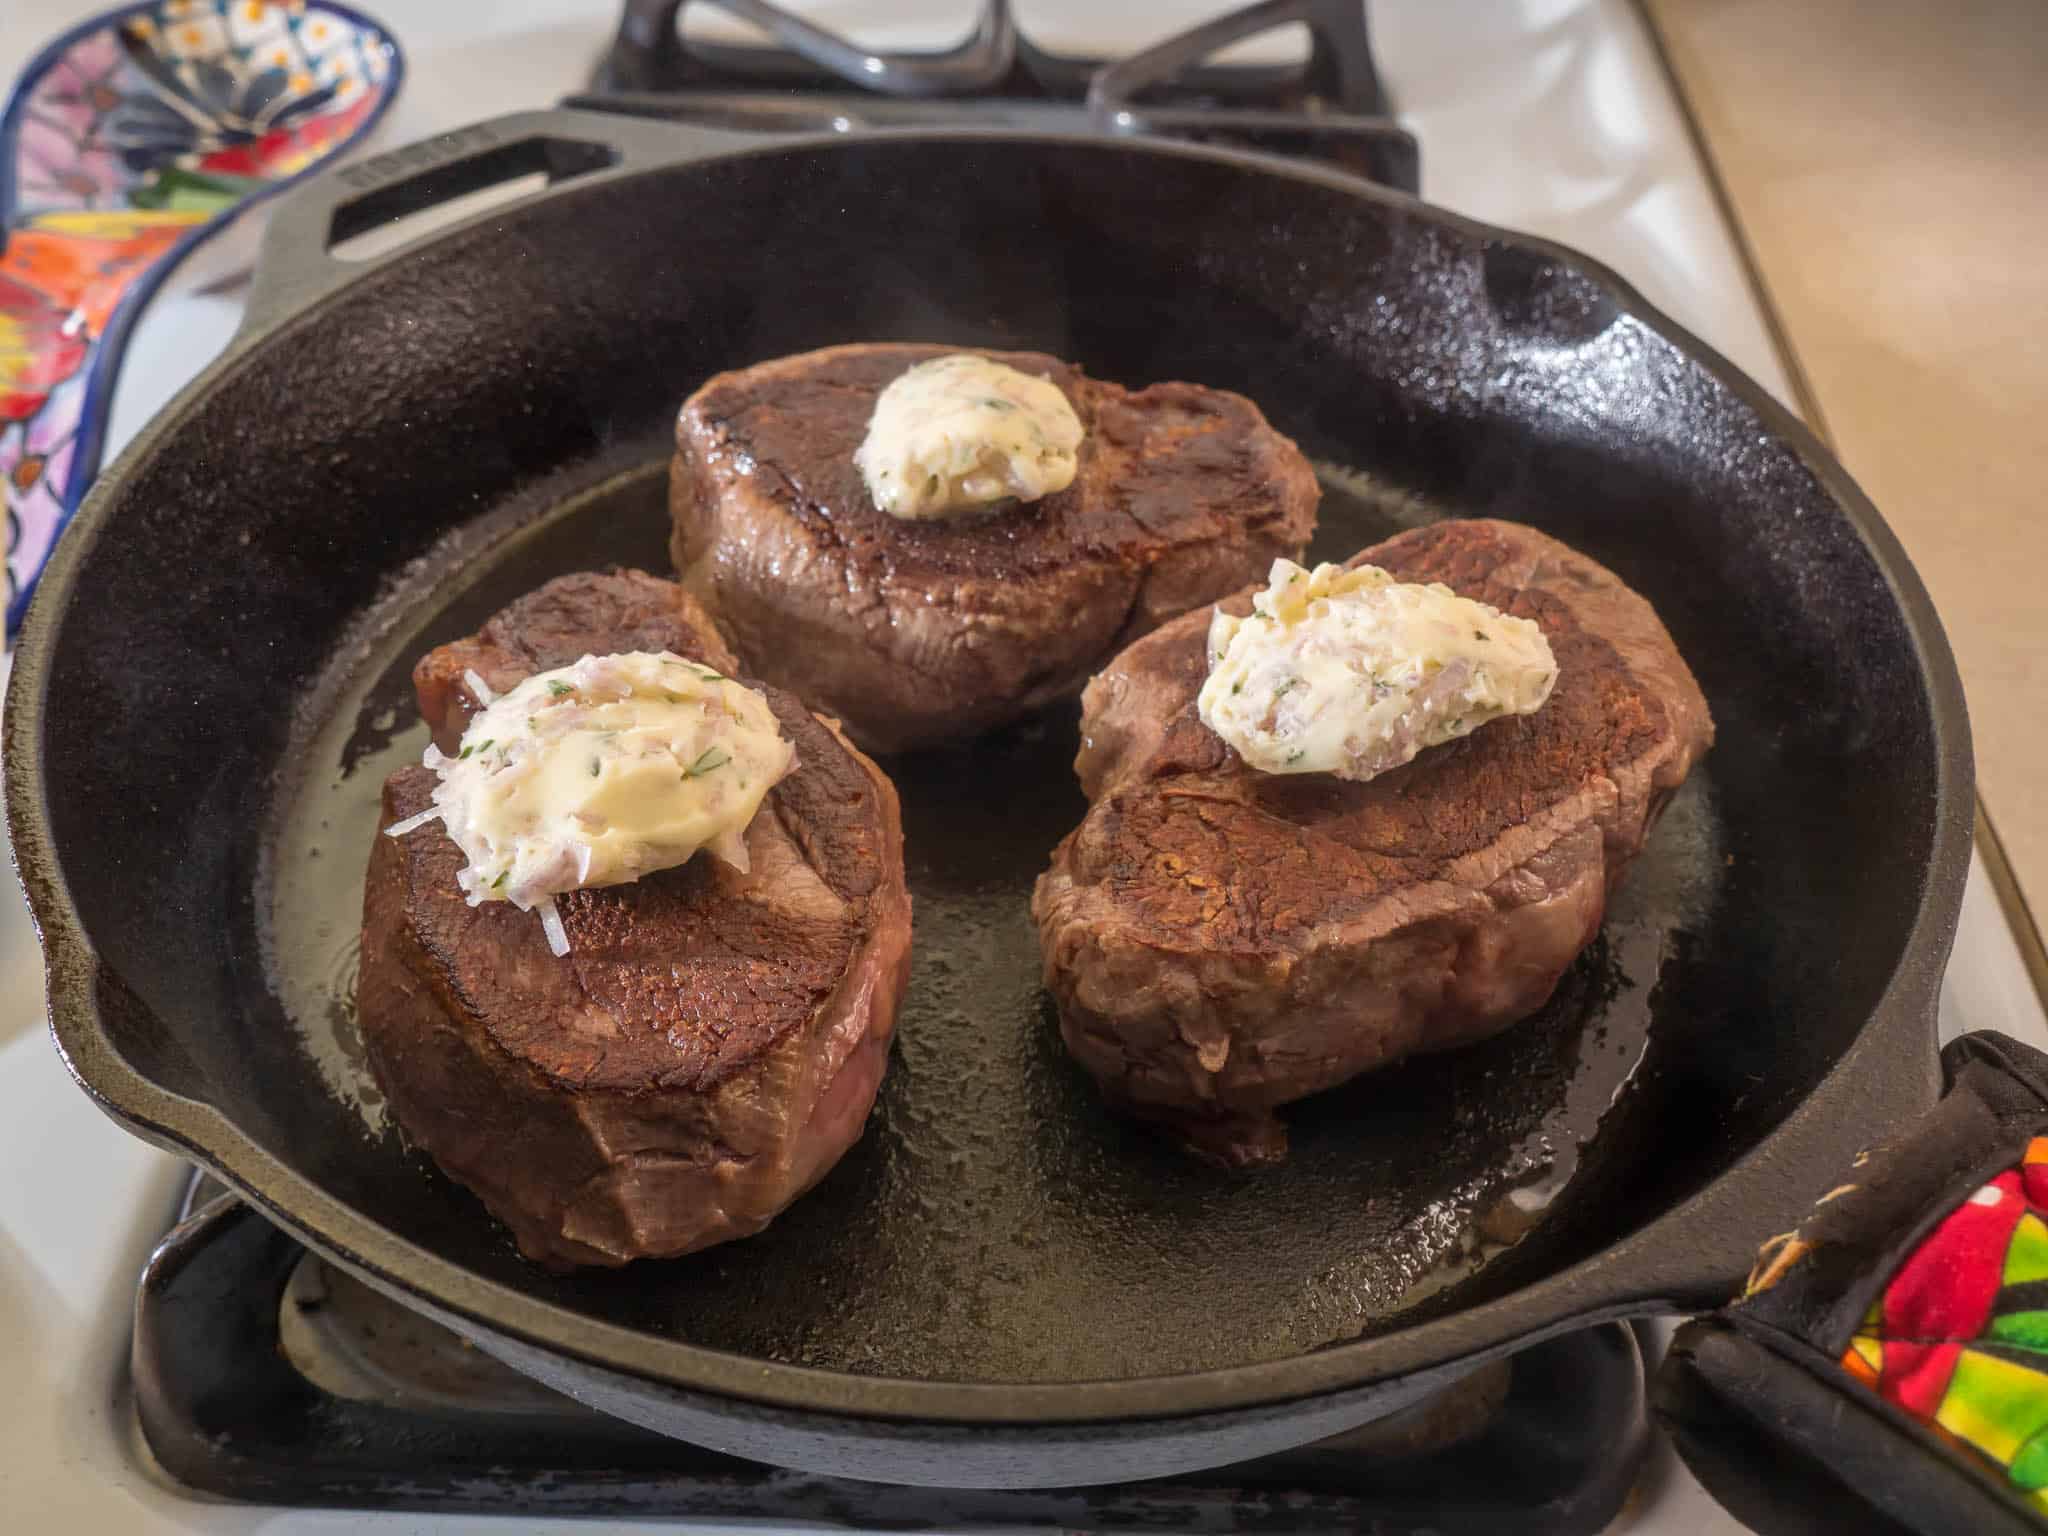
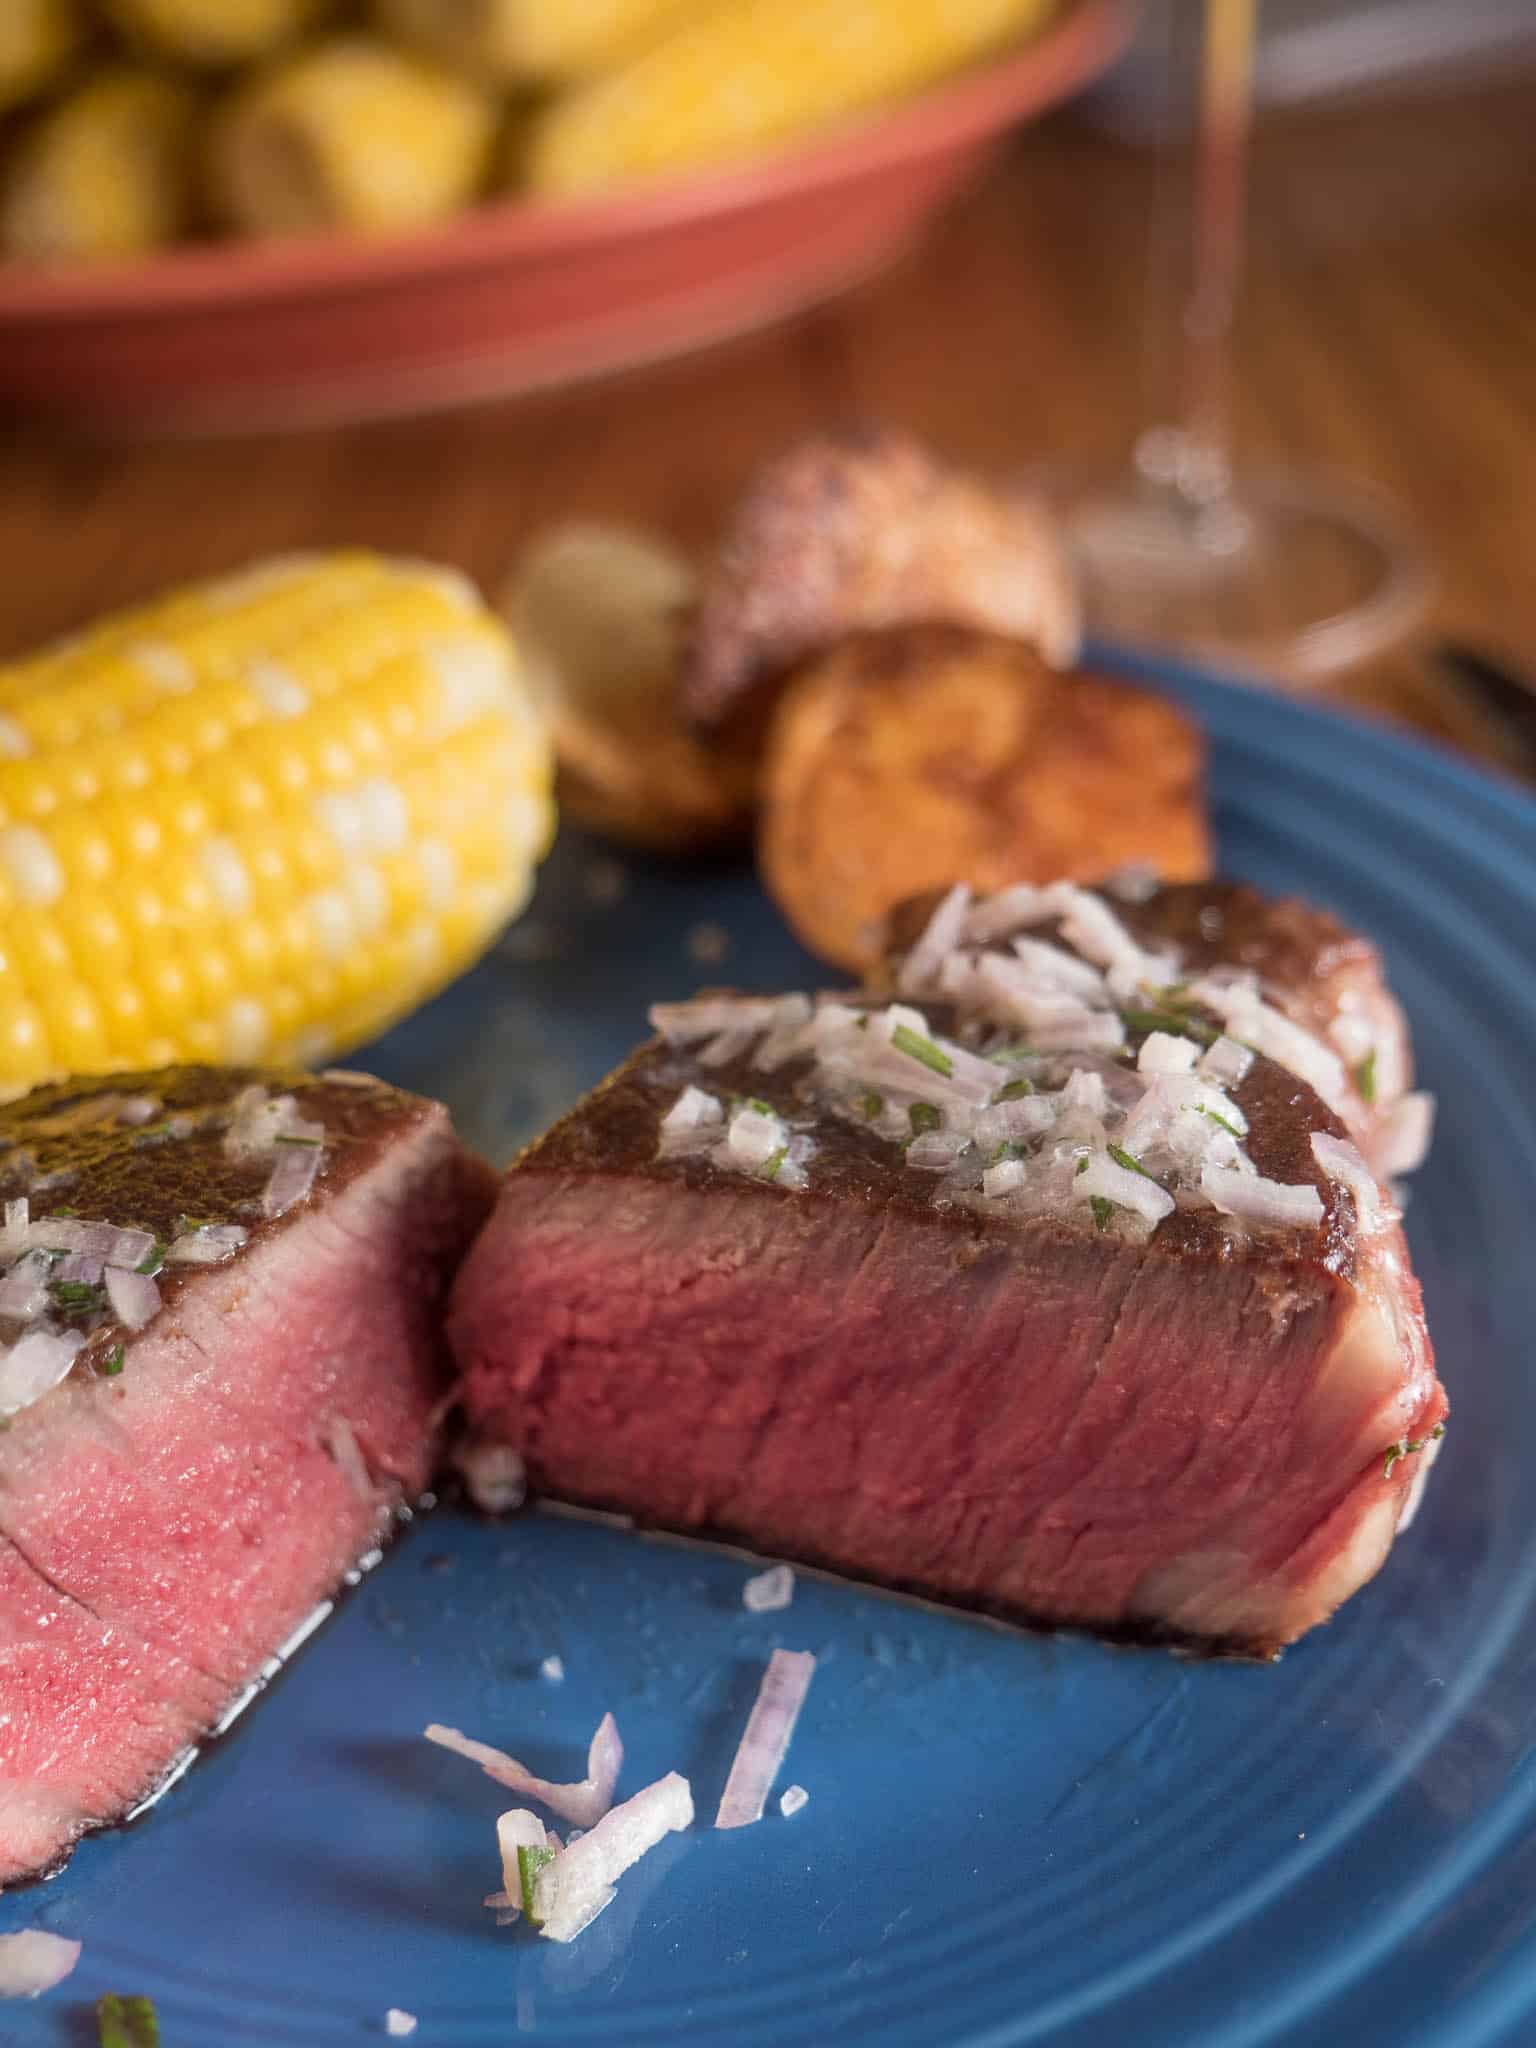
Instead of pork and sauerkraut, here are sous vide pork chops. I want my pork chops medium, 140°F, with just a hint of pink in the middle. Sous vide gives me precise temperature control, making it easy to cook the chops exactly how I like them. I brine the chops for flavor, and to add some juiciness to the meat. I like a hint of sweet with my pork chops, so I add a little sugar into my brine, which also helps the chops sear quickly.

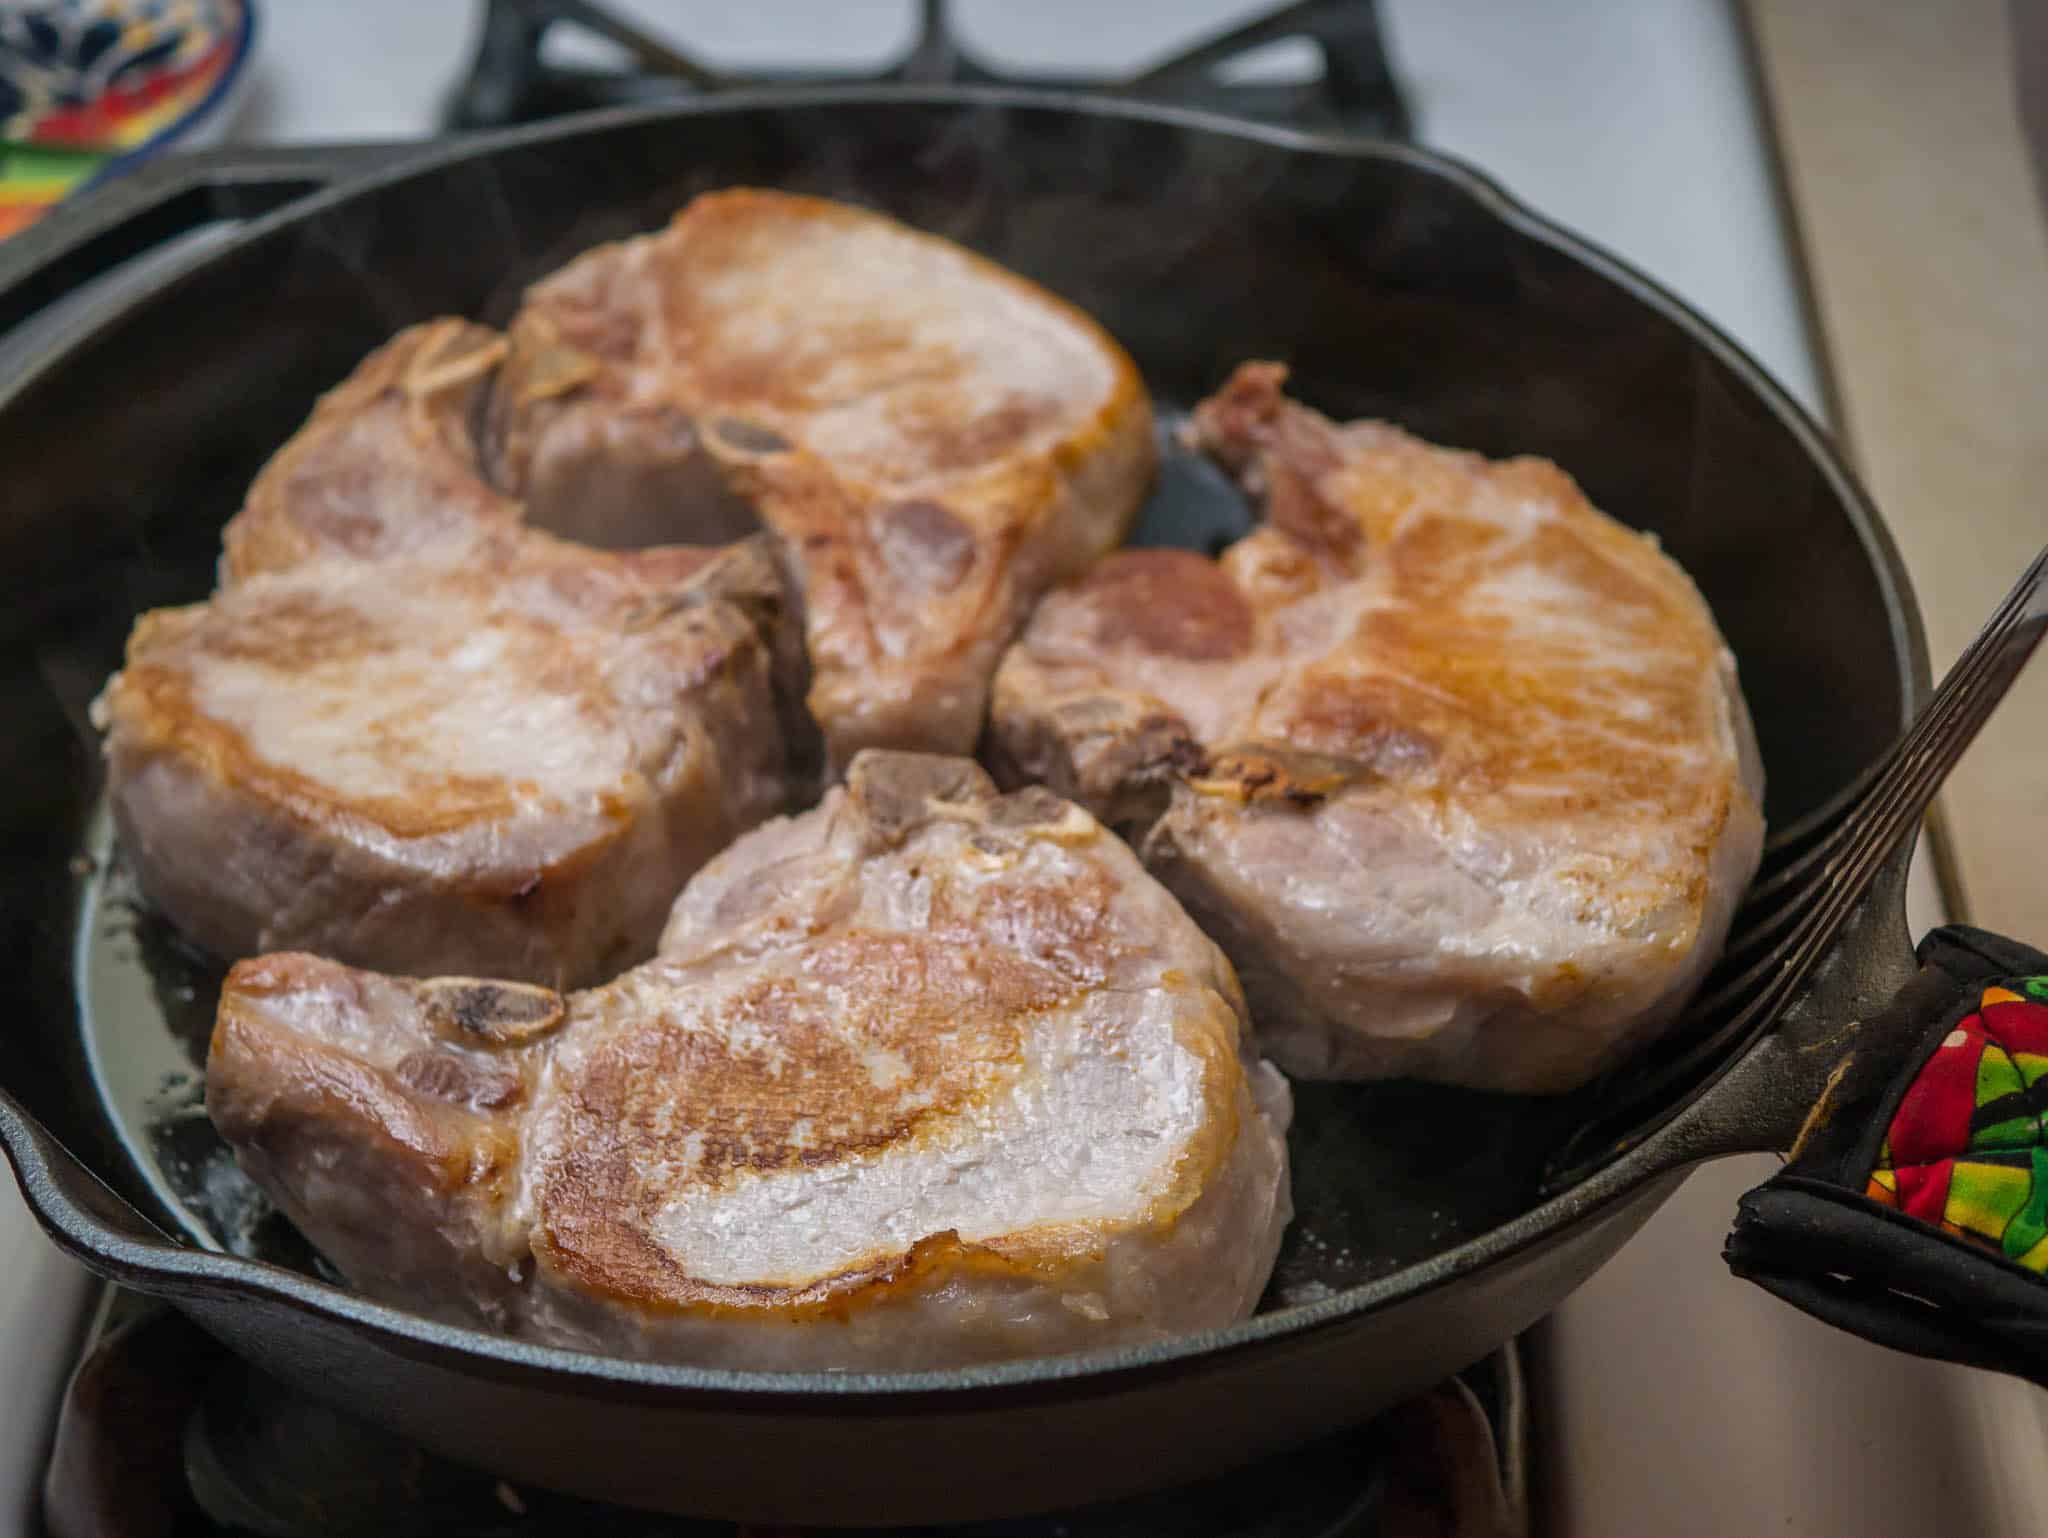
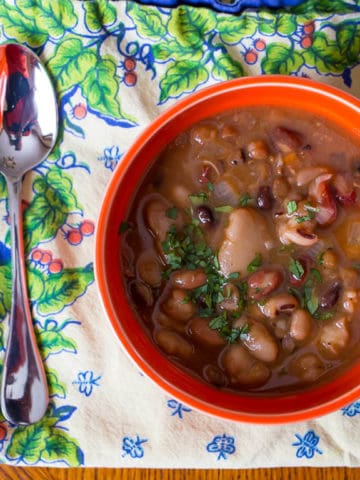
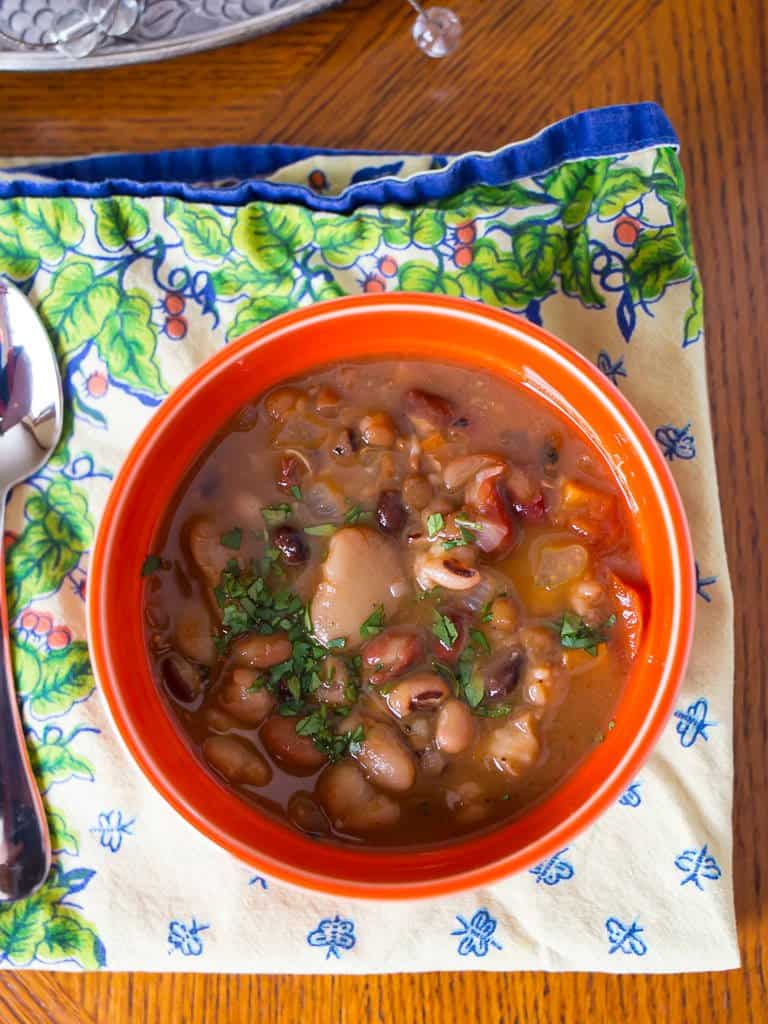
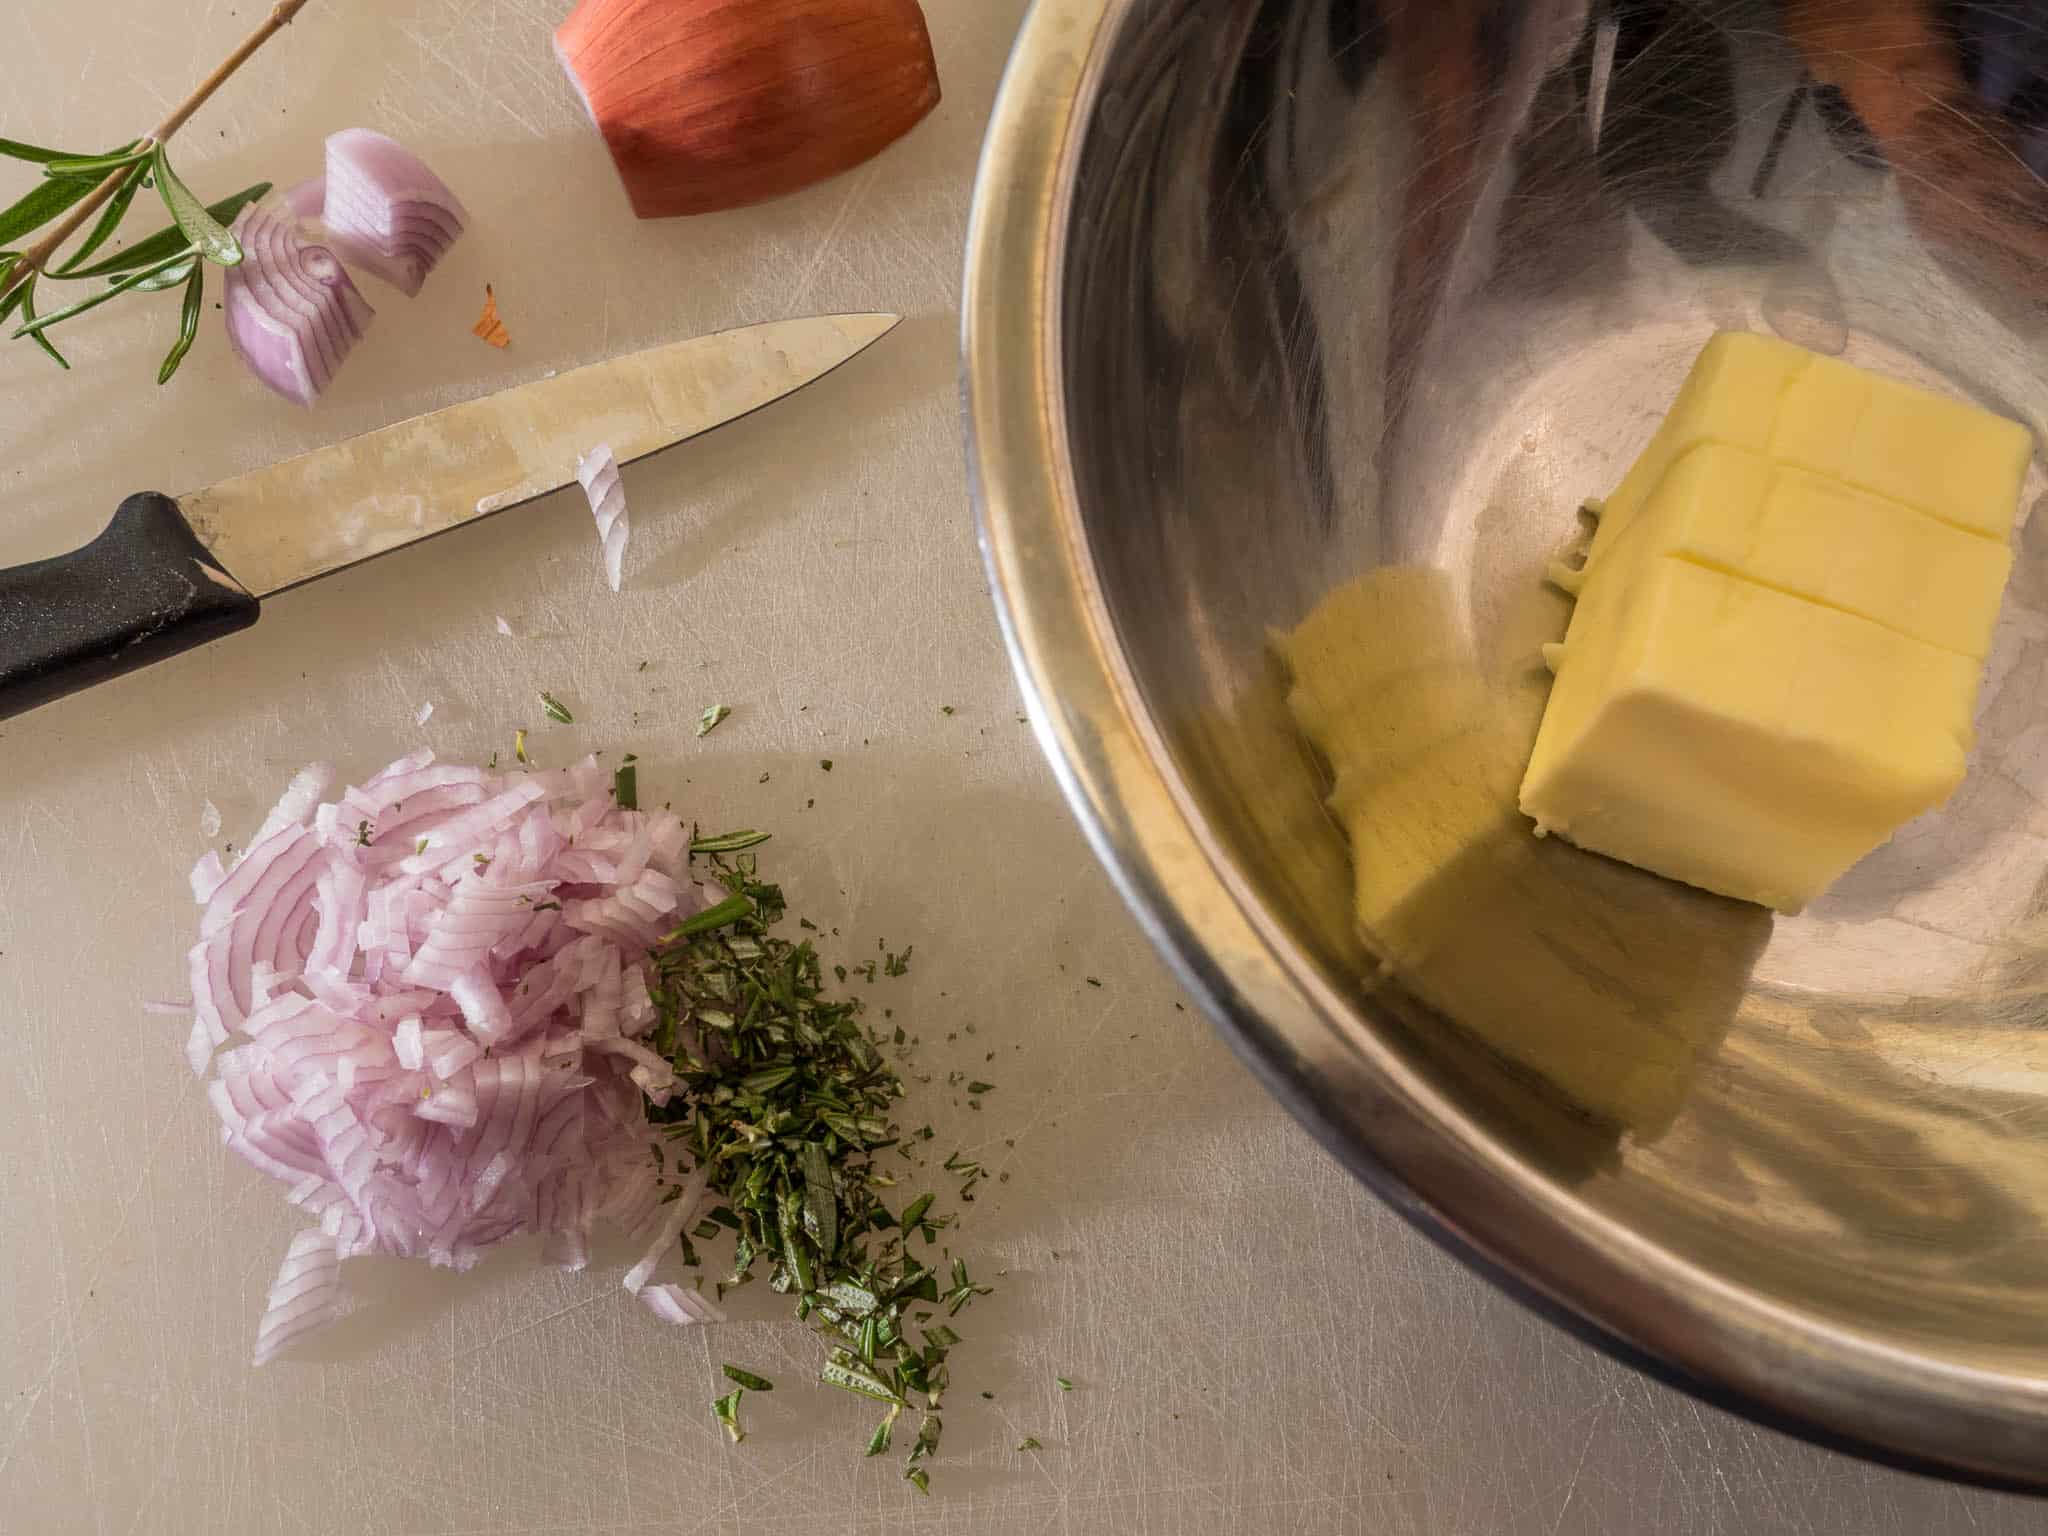
I need a pan sauce with my pork chops - need it, I tell you! After searing the chops, I make a traditional pan sauce, with some garlic, rosemary, and chicken broth. The thing is, I hate to waste the pork juices in the sous vide bag. But, when I add them to the pan sauce, the protein left in the bag coagulates and foams up - and it looks ugly. I skim it off as best I can, but I can't get rid of all of it. If you want a pretty sauce, skip the "add the juices from the bag" step.

Recipe: Sous Vide Thick Cut Pork Chops with Rosemary Garlic Pan Sauce
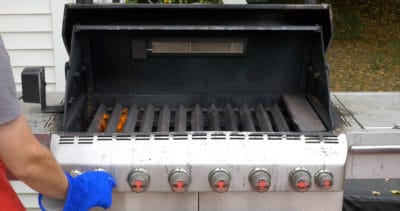
Equipment

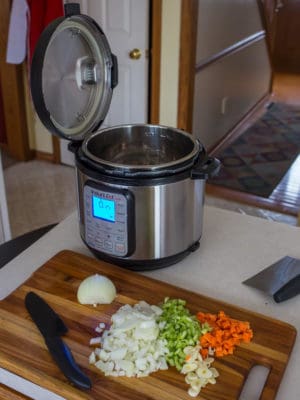
  • Sous Vide setup (I use an Anova Precision Cooker and a 4.75 gallon Cambro container)
  • Brining container (I use an 8 quart Rubbermaid Food Service container)
  • 12 inch skillet (Lodge 12 inch cast iron skillet)


Sous Vide coming up to temp


Sous-Vide-Pork-Chops-1000148
Searing the pork chops


Notes

  • Want to freeze these chops to cook later? Brine and vacuum seal the chops, then freeze them for up to 3 months before cooking. Add an extra half hour to the cooking time - go for at least 1 hour and 30 minutes.
  • No sous vide setup? Use a beer cooler, a thermometer, and hot water: Beer Cooler Sous Vide.

Sous-Vide-Pork-Chops-1000157

What do you think?

Questions? Other ideas? Leave them in the comments section below.

Related Posts

Sous Vide Butter Basted Porterhouse (from the freezer)
Sous Vide 48 Hour Baby Back Ribs
Sous Vide New York Strip Roast with Bourbon Cream Pan Sauce

Enjoyed this post? Want to help out DadCooksDinner? Subscribe to DadCooksDinner via eMail or RSS reader, recommend DadCooksDinner to your friends, and buy something from Amazon.com through the links on this site. Thank you.

Merry Christmas! (2015 Edition)

December 24, 2015 by Mike Vrobel 5 Comments

[Mr. Parker]: Yes. it's a beautiful. It really is. But...it's smiling at me.
[Chop Suey Palace Owner]: Ooohh! [He chops off the duck's head.]

That Christmas would live in our memories as the year we were introduced to Chinese turkey.


Merry Christmas everyone!

Video: How to Rotisserie a Beef Tenderloin With Horseradish Mustard Crust is now showing!

December 22, 2015 by Mike Vrobel 2 Comments

Video: Rotisserie Beef Tenderloin with Horseradish Mustard Crust

The companion video to last week's Rotisserie Beef Tenderloin With Horseradish Mustard Crust recipe is now up on YouTube.2Finally. Check it out:

YouTube: How to Rotisserie a Beef Tenderloin With Horseradish Mustard Crust

(And, if you haven't noticed, I'm trying to make more videos - if you're interested in them, please subscribe to my Youtube channel.)

What do you think?

Questions? Other ideas? Leave them in the comments section below.

Related Posts

Video: Rotisserie Grilling Two Chickens
Video: How to Rotisserie a Rib Roast
Video: Rotisserie Pork Shoulder with Wet Brine
Video: Rotisserie Turkey Breast With Basic Wet Brine


Enjoyed this post? Want to help out DadCooksDinner? Subscribe to DadCooksDinner via eMail or RSS reader, recommend DadCooksDinner to your friends, and buy something from Amazon.com through the links on this site. Thank you.

Amazon Lightning Deal on Instant Pot SMART at 1:29PM EST

December 21, 2015 by Mike Vrobel 2 Comments

Instant Pot IP-SMART

Psst - Amazon has a pre-Christmas Lightning Deal on the fancier Bluetooth-enabled version of my favorite pressure cooker, the Instant Pot IP-SMART, starting at 1:29PM EST.

I own an IP-SMART, and use it all the time alongside my IP-Duo. I don't use the bluetooth features that separate it from my IP-Duo, which is why I don't recommend it at its higher price...but with this deal, the price is only $35 more for the newer model. For that difference, I would spring for the IP-Smart. 

If you're looking for a last minute Christmas gift (or just want to treat yourself), wait until 1:29PM EST, and then grab one quickly - once they're gone, they're gone:

Instant Pot IP-SMART [Amazon.com Lightning Deals]

Any purchases through that Amazon link support DadCooksDinner - thank  you!

Why Cut a Beef Tenderloin in Half for the Rotisserie?

December 17, 2015 by Mike Vrobel 6 Comments

Why fold a beef tenderloin for the rotisserie?

Commenter Cary had a question about Tuesday's Rotisserie Beef Tenderloin with Horseradish Mustard Crust recipe:

In direction #2 you say to "Cut the roast in half, truss the two pieces together, then skewer on the rotisserie spit," Why are you cutting it in half?

I explain that in the video that goes with the recipe...which I thought I would have done by today. I always underestimate how long editing video takes, especially when you're a noob with a brand new Adobe Premiere license, like me.

So, because I need to stall for time the question deserves an answer - why do I cut it in half? And, what does that actually mean?

There are two problems to solve with Rotisserie Beef Tenderloin, both about even cooking.

Thick head on the left, thin tail on the right.

Problem 1: The roast is not even. The tail end is thin, barely an inch thick; the head end is a good four inches across. If I cook it as-is, by the time the head end is medium-rare, the tail end will be past well done.

Problem 2: The roast is not very thick. Rotisserie grilling needs time to brown the outside of the roast. My general rule of thumb is you have to cook for 45 minutes to get enough browning. But, the tenderloin is not that thick of a roast to begin with. If I cook it as-is, by the time the outside is starting to sear, the roast will be overcooked - medium-well or worse.

How do I solve these problems? By cutting the roast in half, and tying the two halves together to make one thick roast. Here it is, step by step, with pictures from the upcoming video.2And, that's also an advantage to the horseradish mustard crust - it browns quickly.

Folding the roast to see where to cut it

Step 1: Fold the last couple of inches of the tail over on itself, then fold the tail to reach the part of the head that sticks out, and note where the end of the roast is.

Cut the roast in half

Step 2: Cut the roast in half at that fold

Two pieces, one thicker roast.

Step 3: Put the cut end of the roast on top , shaping it into one thick piece of beef.

Truss the roast
Truss the roast

Step 4: Truss the roast every 2 inches, making sure to get both ends of the cut piece tied down.

Roast, trussed.
Roast, trussed.

Step 5: Inspect your work. See how much more even the thickness is, all the way across?

Spitting the roast
Spitting the roast

Step 6: Run the spit between the two halves - it will slide through until it hits the thick head piece, then you have to use force to get it through the rest of the roast. Tighten down the spit forks and…

Trussed and on the spit

Step 7: You're done, one trussed roast.

And, the video will be done soon. I promise!

Rotisserie Beef Tenderloin with Horseradish Mustard Crust

December 15, 2015 by Mike Vrobel 16 Comments

Rotisserie Beef Tenderloin with Horseradish Mustard Crust

Beef tenderloin is tender, buttery, and…bland. Uninteresting. Spineless.

(OK, I had to throw that last one in there, because it actually is spineless. The tenderloin is cut away from the spine, resulting in the boneless piece of meat we all know.)

I'm overly harsh on tenderloin. Sure, it doesn't have the big, beefy flavor that some other cuts have. (Look to the ribeye for big beef flavor.) But it does give a mild, beefy base for other flavors...like horseradish. I love beef and horseradish, and I love beef tenderloin with horseradish most of all.

I saw the bottle of horseradish Dijon mustard at my grocery store, and thought "what a perfect idea for a beef tenderloin crust." I grasped my wallet firmly and headed off to my butcher to grab a tenderloin.

(For an extra kick of horseradish, I serve my homemade horseradish sauce on the side.)

Thanks to Mike and Mauri at Sherman Provision Meat Market for this beautiful piece of meat.

Of course, I'm cooking it on my rotisserie, turning the horseradish mustard, garlic, and herbs into a delicious crust on the outside of the tenderloin. (Get it? Turning? Thank you, thank you, I'll be here all week.)

Rotisserie-Beef-Tenderloin-With-Horseradish-Mustard-Crust-52
Trussing the tenderloin

Looking for a show-stopper recipe for the holidays? Look no further - Rotisserie beef tenderloin with horseradish mustard crust is the one you're looking for.

Equipment

  • Grill with Rotisserie Attachment (I love my Weber Summit)
Rotisserie-Beef-Tenderloin-With-Horseradish-Mustard-Crust-51
I love medium-rare

Notes

  • No rotisserie? No worries. Set your grill up for indirect high heat as directed. Then, instead of rotisserie cooking, put the grill grate back in and cook the roast over indirect heat. Flip the roast after 30 minutes to even out the browning, and expect it to take a little longer - say, 50 minutes? To get to medium-rare.
  • Wood smoke is always a good idea with beef - I love oak or pecan wood with beef. Add a fist-sized chunk of wood to the coals (if cooking with charcoal) or one cup of wood chips (if cooking with gas.)
  • Not enough horseradish for you? See my Rotisserie Beef Tenderloin with Shallot-Herb Butter and Horseradish Sauce recipe for a quick horseradish sauce.
Rotisserie-Beef-Tenderloin-With-Horseradish-Mustard-Crust-1000207

What do you think?

Questions? Other ideas? Leave them in the comments section below.

Related Posts

Rotisserie Beef Tenderloin with Shallot-Herb Butter and Horseradish Sauce
Rotisserie Boneless Ribeye Roast with Garlic Crust
My list of Rotisserie Recipes

Enjoyed this post? Want to help out DadCooksDinner? Subscribe to DadCooksDinner via eMail or RSS reader, recommend DadCooksDinner to your friends, and buy something from Amazon.com through the links on this site. Thank you.

Pressure Cooker Beef Pot Roast

December 10, 2015 by Mike Vrobel 19 Comments

A piece of pot roast surrounded by tomato sauce on a white plate with a glass of wine in the background

Quick and pot roast don't go together. Chuck roast is cut from the beef shoulder, a hard-working muscle, chewy and tough…unless you cook it for a long time, breaking it down and making it tender.

A piece of pot roast surrounded by tomato sauce on a white plate with a glass of wine in the background
Pressure Cooker Beef Pot Roast

Pressure cooker pot roast works around that problem…mostly. Chuck roast cooks quicker in the high heat of a pressure cooker, but even then, it takes a while. A chuck roast takes an hour and 15 minutes in my trusty Instant Pot, because it takes a while for the heat to penetrate the thick piece of meat.2An hour and 15 minutes under pressure is a very long time…for a pressure cooker recipe. A traditional pot roast takes four hours of simmering, so it is faster…just don't expect miracles.

As a kid, pot roast was one of my favorite meals, a thick slab of tender meat that would break into shreds when poked with a fork. And, even better, it came with a thick, beefy sauce to pour over my baked potato. Heaven.

Pot roasted chuck shoulder has a wonderful, beefy flavor, with tender meat that breaks into shreds when poked with a fork, and a thick sauce to pour over a baked potato. But, I have a couple of tricks up my sleeve to make the roast taste even meatier. The first is to pump up the umami - the "fifth taste" - with tomatoes and mushrooms. I even sneak a teaspoon of soy sauce in there; you won't taste the soy, but it adds even more umami goodness. The other "trick" isn't really a trick, but a classic cooking technique; brown the meat well before pressure cooking. Well seared meat (and the resulting browned bits that stick to the pan) add depth to the sauce.

Pressure-Cooker-Beef-Pot-Roast-1000747
Browning the roast

Is this a fifteen minute pressure cooker meal? Hardly. All in, it's about two hours, between the searing, sautéing, pressure cooking, and natural pressure release. Still, it is every bit as good as a traditional pot roast, and ready in half the time. It's amazing what a little pressure can do.

Video


Video: Pressure Cooker Pot Roast - Time Lapse [YouTube.com]

Recipe: Pressure Cooker Beef Pot Roast

Equipment

  • 6 quart or larger pressure cooker (I used my Instant Pot Electric PC)
  • Fat separator
Pressure-Cooker-Beef-Pot-Roast-1000735

Notes

  • No pressure cooker? No worries. In a dutch oven, follow the instructions up to "Pressure cook the pot roast" - then stir in 2 cups of chicken stock or water, and bring to a simmer on the stove top. Cover with a lid, move to a 350°F oven, and bake for 4 hours, or until the roast is easily pierced with a fork. Continue with the "Serve" step.

What do you think?

Questions? Other ideas? Leave them in the comments section below.

Related Posts

Pressure Cooker Beef Stew
Pressure Cooker Beef Shank Osso Bucco
Other Pressure Cooker Recipes

Enjoyed this post? Want to help out DadCooksDinner? Subscribe to DadCooksDinner via eMail or RSS reader, recommend DadCooksDinner to your friends, and buy something from Amazon.com through the links on this site. Thank you.

Gear for Cooks 2015

December 8, 2015 by Mike Vrobel 1 Comment

Did I write this post so I can reuse my puppet mini-mitt photo? Maybe.
Did I write this post just so I can reuse my puppet mini-mitt photo? Maybe.


If you want to support DadCooksDinner, do your Christmas shopping2Or Hanukkah, or Kwanzaa, or Winter Solstice - I don't want exclude anyone's holiday celebrations. through the Amazon.com links on this page. I get a few pennies from each purchase, which helps pay for this site. Thank you!


I buy a lot of cooking gadgets. (Hello, my name is Mike, and I have a gadget problem.) Most of them aren’t worth it, but a some become trusted tools.

Looking for a stocking stuffer for the home cook in your life? Here are the inexpensive kitchen gadgets that I love from the last year.


Instant Pot Mini-Mitts - I love these tiny potholders. (As I talked about here.) The mini-mitts are designed to pull the pot out of an electric pressure cooker, but I use them with everything from baking sheets to cast iron pans. (Honorable mention to the Le Creuset fingertip potholders - which I use only slightly less than the mini-mitts).


Chef-n Fresh Force Lemon Juicer: I go through a lot of citrus in my kitchen, and I depend on a citrus squeezer to get the job done. (I always buy the lemon size, and use it on lemons, limes, and smaller oranges.) The gear driven lever makes this a easy squeezer2lemon peasy - my wife, with her smaller hands, loves it even more than I do. I worry about the durability of plastic handles, but they are hanging tough after a year of use.


GIR Ultimate Spatula: The first of two new spatulas in my kitchen. This single piece silicone spatula is firm enough to loosen fond on the bottom of a pot, flexible enough to scrape the edge of a bowl, and goes in the dishwasher for cleanup.


Victorinox 6-inch semi-stiff boning knife: I didn’t think I needed any more knives in my kitchen. Then I used this boning knife in a butchering class at Certified Angus Beef last June. I ordered one the moment I got home.


Full Circle Dish Brush: This is my go-to cast iron cleaning brush. The stiff bristles make it easy to scrub the pan; flip it over and the sharp edge of the cap is a scraper for extra-tough jobs. Two tools in one!


Mercer Culinary Fish Turner/Spatula: This flexible spatula is strong enough to scrape the bottom of a cast iron pan, but bends enough to slide under the edge of a chop or fillet.


IMUSA Sunburst Tortilla Warmer: The tool that we used the most this year, hands down. This warmer makes it easy to heat tortillas in the microwave, and we do love our taco night.3The kids started making wraps instead of sandwiches once they figured out how easy it was to heat up a single tortilla in this warmer. Put a stack of tortillas in the warmer, and then microwave for the time on the bottom (10–12 tortillas, 1 minute). Let the tortillas sit in the warmer while you finish the rest of the fixings, and taco night is ready to go.

And, my two favorite geeky cookbooks from 2015:

The Food Lab: Better Home Cooking Through Science: Kenji Alt’s encyclopedia of food science. I’m still working my way through it, and enjoying every moment.


Liquid Intelligence: The Art and Science of the Perfect Cocktail: David Arnold takes on cocktail science. (Notice a theme?) This one is actually from November of 2014, but hey, I didn’t get it until this year. And, when I say “I” didn’t get it, I mean I got a copy for my wife, the chemistry teacher. It was a gift that kept on giving - she is also the family bartender, so I got all sorts of fantastic drinks out of this one.


Looking for something more? Check out my suggested tools list for the following types of cook:

Grilling Tools

Rotisserie Tools

Pressure Cooker Tools


Enjoyed this post? Want to help out DadCooksDinner? Subscribe to DadCooksDinner via eMail or RSS reader, recommend DadCooksDinner to your friends, and buy something from Amazon.com through the links on this site. Thank you.

Pasta Problems

December 7, 2015 by Mike Vrobel 4 Comments

Pressure-Cooker-Pasta-Problems-0082

Why is it hissing and spitting so much?

It is a busy Wednesday, and I need a quick dinner, so out comes my Instant Pot for some Pressure Cooker Mac and Cheese. And then…something goes wrong. When I flip the switch to dump the pressure, instead of a blast of steam, I get a spluttering mix of steam and starch, spraying a fine white mist over my pressure cooker lid.

I gotta say, this was the first recipe of yours I've had trouble with…I could NOT get it to thicken at all. I even drained the cooking liquid…
- Commenter Rev

I wipe down the cooker, then open the lid. Normally, the noodles suck up all the water. Not today - the noodles are still covered with water. What’s going on? I flash back to a comment from last week, one of the few negative remarks about my recipe. I blew it off at the time. Must be user error. (Sorry Rev.) Now I’m doubting myself. Is there something wrong with this recipe? No, it can’t be. That’s not possible. It’s a simple ratio: 4 cups of water to 1 pound of macaroni.4Plus spices, evaporated milk, and shredded cheese. My kids love it, and I make it once a month. It’s always worked before.

Pressure-Cooker-Pasta-Problems-0023
This is what it should look like after unlocking the lid - most of the water absorbed by the pasta. What I saw was just enough water to completely cover the pasta.

I press on with the recipe, stirring in the evaporated milk and the cheddar, hoping the noodles will suck up the liquid as the cheese melts. No luck - it is still watery. I turn the pressure cooker from warming mode to “sauté” to boil off the excess liquid. , and constantly scrape the bottom of the pan with my silicone spatula to keep the cheese from sticking and burning.

If the cheese sticks, it will burn, so I have to keep it moving. I constantly scrape the bottom of the pot with my silicone spatula, leaving plenty of time to wonder what went wrong…and beat myself up. This is one of my most popular recipes, bringing in lots of visitors every day. What if it doesn’t work? Did I miss something? Five for five dollars. Am I leading my readers astray?

Wait. Back up. Five for five dollars? What does that mean. Five for…wait a minute!

I snatch the pasta box out of the garbage can, brush off the coffee grounds, and there it is. 12 ounces of “high fiber” macaroni…in the same size box as a regular, 16 ounce box of noodles. It was on sale, and I thought “Why not? Get the healthier pasta and save money.” 2Ronzoni “SmartTaste(r)” With 2.5x the fiber! (And 0.75x the pasta!) No wonder the pasta didn’t absorb the water - I was 25% short.

For ten more minutes I stir, as the liquid slowly reduces. I have plenty of time to grumble about deceptive box sizes. Finally, the mac and cheese is thick enough to serve.3If I was paying attention, I would have cut the water in the recipe by 25% - from 4 to 3 cups - to match the smaller box of pasta.

After all that? No one noticed. That is, until the pan was suddenly empty, and the kids were arguing about who ate more than their fair share.

You already had three helpings!
I only had two!
That's not fair!
[Dad] That's enough you two.
You're a butt.
[Dad] Hey! I said stop it!
…
No, you're a butt.

Just another home cooked meal, where every day is an adventure.

Special thanks to commenter Rev for following up - they also had a 12 ounce box of bow tie pasta. Aha!

Related Posts

Pressure Cooker Mac and Cheese
Complete list of my Pressure Cooker Recipes


Enjoyed this post? Want to help out DadCooksDinner? Subscribe to DadCooksDinner via eMail or RSS reader, recommend DadCooksDinner to your friends, and buy something from Amazon.com through the links on this site. Thank you.

Video: Pressure Cooker Sweet Potatoes

December 3, 2015 by Mike Vrobel 1 Comment

I shot my first pressure cooker video! The companion video to my Pressure Cooker Sweet Potato Puree recipe is now up on YouTube. Check it out:

Pressure Cooker Sweet Potatoes [YouTube.com]

Recipe here: Pressure Cooker Sweet Potato Puree

(And, if you haven’t noticed, I’m trying to make more videos - if you’re interested, please subscribe to my YouTube channel.)

What do you think?

Questions? Other ideas? Leave them in the comments section below.

Enjoyed this post? Want to help out DadCooksDinner? Subscribe to DadCooksDinner via eMail or RSS reader, recommend DadCooksDinner to your friends, and buy something from Amazon.com through the links on this site. Thank you.

Pressure Cooker Turk-A-Leekie Soup

December 1, 2015 by Mike Vrobel 3 Comments

Pressure Cooker Turk-A-Leekie Soup

Pressure Cooker Turk-A-Leekie Soup

This year’s pressure cooker turkey soup is inspired by the Scottish classic, Cock-a-leekie.4Served in three sizes: Wee, not so wee, and frikkin huge! Instead of boiling an old rooster, I use thanksgiving leftovers - the bones from my turkey. (You did save the bones, right?)2You didn’t save the bones? Sigh. Substitute Pressure Cooker Chicken Stock with the bones from a leftover roast chicken.


The first thing to do is break up the carcass. Unless you have a huge (10 or 12 quart) pressure cooker, it’s not going to fit. Grab the backbone in one hand, the keel bone in the other, and pull them apart.3Think King Kong vs the giant snake. Too graphic? Sorry, that movie left a strong impression on my kid-sized brain. Or, get out your poultry shears and cut the backbone away from the rib cage. Yes, this is messy work. I promise, after this it is all downhill.

The other key to the recipe is cleaning out the leeks. Farmers grow leeks by burying them in dirt - that’s what keeps the tender white part of the leeks white. But that also means that diet gets between the layers of the leeks, and they need to be gently pulled apart and cleaned. Now, in most recipes, we discard the tough leek greens, and only use the tender white part. Not today - we can use them in the pot with the turkey stock, to add even more leek flavor to our soup.

Recipe: Pressure Cooker Turk-A-Leekie Soup


Equipment

  • 6 quart or larger pressure cooker (I love my Instant Pot Electric PC)


Pressure-Cooker-Turk-A-Leekie-Soup-1100038
Dirty leeks


Pressure-Cooker-Turk-A-Leekie-Soup-1100037
Trimming the leeks


Pressure-Cooker-Turk-A-Leekie-Soup-1100053
Ready to lock the lid

Notes

  • No pressure cooker? No worries. Instead of pressure cooking the turkey broth, simmer it for 4 hours. Then, instead of pressure cooking the soup, simmer it for 30 minutes.
  • Finding a pot large enough to hold 4 quarts of strained stock is easy if you have a spare pot for your pressure cooker. Put the fine mesh strainer over the top and pour from one pot into the other.

What do you think?

Questions? Other ideas? Leave them in the comments section below.

Related Posts

Pressure Cooker Turkey Stock Revisited
Pressure Cooker Turkey Noodle Soup with Vegetables
Turkey Soup With Chickpeas and Vegetables


Enjoyed this post? Want to help out DadCooksDinner? Subscribe to DadCooksDinner via eMail or RSS reader, recommend DadCooksDinner to your friends, and buy something from Amazon.com through the links on this site. Thank you.

Black Friday sale on Instant Pot Duo

November 27, 2015 by Mike Vrobel 3 Comments

817Om0cdRLL._SL1500_

[Update 2016-11-25: 2016 Black Friday sale is ON! Go get it before they sell out!]

Psst - Amazon has a Black Friday sale on my favorite pressure cooker, the Instant Pot Duo. Check it out quickly, it is Black Friday's "Deal of the Day", and once they're gone, they're gone:


Instant Pot IP-DUO60 [Amazon.com Black Friday Deals]

Any Amazon purchases through that link support DadCooksDinner - thank  you!

Giving Thanks 2015

November 26, 2015 by Mike Vrobel Leave a Comment

Akron-Canton Regional Food Bank

Stop
Counting your losses,
And start counting your
Blessings.
Only then will you discover
That losses are always easier
to point out and count
Than blessings.
And that your blessings
will always outnumber
Your losses,
For they are truly
Immeasurable.
- Suzy Kassem

Happy Thanksgiving, Everyone!
On this Thanksgiving, please consider a donation to fight hunger in my home town:

foodbank-logo-color


Donate to the Akron-Canton Regional Food Bank

Thank you, and Happy Thanksgiving!


Rotisserie Turkey with Basic Dry Brine

November 25, 2015 by Mike Vrobel 7 Comments

Rotisserie Turkey With Basic Dry Brine

Rotisserie Turkey With Basic Dry Brine

I still remember my first turkey success, the one where my guests sat up and said “Wow, this is really good!”. It was a wet brined turkey, cooked on my trusty kettle grill. That was a good turkey, one I’d be happy to serve today…but I can do better, with the help of my rotisserie and a dry brine.

What’s a dry brine? Instead of soaking the bird in a salt water solution for a few hours, we salt the bird early, and let it rest in the refrigerator for a few days. I get the same deep-seasoned bird, with crisp, crackling skin, and don’t have to deal with a huge pot of turkey-contaminated water when I’m done.

Why rotisserie? The spinning bird bastes in its own juices, resulting in crisper skin and even cooking.

Here is a simple rotisserie turkey with a straightforward, basic dry brine: salt, brown sugar, and black pepper.

Now, simple doesn’t mean plain, because dry brining adds a lot of flavor to the bird. Next, I add all the tricks I know—icing the breast, making the U of fire or lighting only the burners near the legs, adding a hint of wood smoke, and cooking to 160°F. This should balance the juiciness of the white meat with thoroughly cooking the dark meat. The end result? A great, simple turkey.

If you don’t have the time to dry brine, rub the turkey with the dry brine right before you put it on the grill. It won’t be as thoroughly seasoned, but it will be a great bird.

Recipe: Rotisserie Turkey with Basic Dry Brine

Equipment

  • Grill with Rotisserie attachment (I love both my Weber Summit and my Weber Kettle with Rotisserie Attachment)
  • Gallon-size zip-top plastic bag full of ice
  • Instant Read Thermometer
  • 2 fist-size chunks of smoking wood or 2 cups wood chips (hickory, oak, pecan, or a fruit wood; I prefer oak wine barrel staves or cherry wood chips)

Adapted from my cookbook: How to Rotisserie Grill: Rotisserie Turkey by Mike Vrobel. 


RotisserieTurkeyWithBasicDryBrine-1-2
Sprinkling on the dry brine


RotisserieTurkeyWithBasicDryBrine-1
On the spit and ready to go


RotisserieTurkeyWithBasicDryBrine-0907
The U of fire

What do you think?

Questions? Other ideas? Leave them in the comments section below.

Related Posts

Rotisserie Turkey
Rotisserie Turkey Dry Brined with Orange and Spices
Rotisserie Turkey with Cajun Dry Brine


Enjoyed this post? Want to help out DadCooksDinner? Subscribe to DadCooksDinner via eMail or RSS reader, recommend DadCooksDinner to your friends, and buy something from Amazon.com through the links on this site. Thank you.

Thanksgiving Q&A 2015

November 24, 2015 by Mike Vrobel 7 Comments

2015-11-22 20_43_11

How does a food blogger know that Thanksgiving is coming? All the Questions. They start early in the month, when enthusiastic cooks start looking for recipes.

On the Saturday before Thanksgiving, the fire hose opens up. My cell phone starts buzzing with notifications. Questions come in via comments, emails, Twitter, and Facebook - and they sound more frazzled the closer we get to T-Day. On Thanksgiving itself, I’m in the back yard, keeping an eye on my rotisserie turkey and typing away on my phone, answering last-minute questions. Next year I’ll collect this year’s questions and, voilà, instant Thanksgiving week post.

Before we get to this year’s batch of questions, here is a public service announcement…

Public Service Announcement: Make Post-Thanksgiving Turkey Stock!

Don’t forget to save your carcass! Turkey stock made from leftover bones is a culinary treasure. I’ll have my annual after-thanksgiving turkey soup recipe next week, for an example of what to do with it; for now, trust me, and save the bones.

Q&A

I want to use your dry brine on a grocery store "enhanced" turkey. Suggestions for altering the brine? - John B

From my Rotisserie Turkey cookbook4I mentioned I wrote a cookbook, right? Available now on Amazon? With a Kindle edition that you can download immediately, for last-minute Thanksgiving needs? Ahem…sorry. My inner marketer got loose there. Back to our answer…
If the turkey is “enhanced with a natural solution” of more than 6 percent, it already has enough salt inside it. Cut the salt in the dry brine down to 1 tablespoon.

RotisserieTurkeyWithBasicDryBrine-1-2

I will only have 24hrs to prepare natural turkey for the rotisserie. What would you do for brine? - @JMBatue via Twitter

24 hours is plenty of time for a dry brine to take effect on a turkey. It’s better if it gets more time - I rubbed my turkey with its brine Monday night - but 24 hours is doable. When I get to less than 24 hours - say, overnight - I switch to a wet brine.

Your Rotisserie Chicken Legs Churrascaria Style is a fabulous recipe and my hands down favorite way to prepare chicken leg quarters on my Summit. Have you tried the same recipe with Turkey Leg Quarters on the Summit? - Justin

I’ve done turkey drumsticks in a similar style, but never turkey legs:
https://www.dadcooksdinner.com/rotisserie-turkey-legs-brined-and-honey-garlic-basted/

Turkey legs should work fine, though; just give them longer to cook, and turn off the rotisserie burner after a 30 to 45 minutes to keep the legs from burning. I estimate 90 minutes of cooking time, but go by the internal temp of the deepest part of the leg, and if there’s any doubt, cook them longer. It’s almost impossible to overcook turkey legs.

I see you have the 6 burner Weber Summit. I have the 4 burner - how big of a turkey can I fit on my rotisserie? - Garry (From my Rotisserie Grilling the Big Turkey post.)

Summits are the same size, height wise; the difference between the 6 burner and 4 burner is all in the width of the cooking box. I would say roughly 24 pounds is the biggest - that’s what you see in the pictures above. I do use the smoker box, and while gas grills won’t give you the deep smoky flavor you can get with a charcoal grill - too much air escapes - it does add a nice wood smoke touch to the bird.

Did you use the Weber Motor that came with the unit? What is the max weight that your motor will handle? (Also from my Rotisserie Grilling the Big Turkey post.)

I use the Weber motor. It’s rated for 20 pounds, but it handled the larger bird just fine. (And abused it - look at yesterday’s post about two rotisserie turkeys on one spit…) If you want motor rated for more weight, check out the OneGrill Stainless Rotisserie Motor, which is rated to 50 pounds. I have an older version of this motor, and use their other motors (like the one in the next question), so I trust OneGrill’s products.

What cordless motor do you recommend for the rotisserie? - @BigJackV via Twitter

I like the OneGrill Cordless Rotisserie motor. I wouldn’t push this one, though. It’s rated to 25 pounds, but it seems to struggle more with heavy loads than my Weber motor. I’d stick to 20 pound turkeys (or less).

Have you ever stuffed the cavity with stuffing? - David L

I don’t stuff my turkeys, because the breast meat will be wildly overcooked by the time the stuffing is heated enough to be safe to eat. If you HAVE to have stuffing, follow the technique in this post to pre-heat the stuffing before cooking:
https://www.dadcooksdinner.com/rotisserie-capon-with-chestnut-stuffing/
…but again, with a turkey, I don’t recommend it.

I like the idea of using bacon to add flavor and slow the cooking of the turkey breast. Did the skin on the turkey beneath the bacon also brown? - Garry (From my Rotisserie Turkey Wrapped with Bacon recipe.)

Not as much as usual with a rotisserie turkey - it is covered with bacon, after all - but the skin does brown and crisp up a bit under all the bacon. That said, when you slice and serve, the strip of bacon and turkey skin is crispy and delicious.

What do you think?

Any other Thanksgiving questions? Leave them in the comments section below.

Enjoyed this post? Want to help out DadCooksDinner? Subscribe to DadCooksDinner via eMail or RSS reader, recommend DadCooksDinner to your friends, and buy something from Amazon.com through the links on this site. Thank you.

Two Rotisserie Turkeys on One Spit? Madness!

November 23, 2015 by Mike Vrobel 3 Comments

Two Turkeys, One Spit

Two Turkeys, One Spit

[EXTERIOR SHOT, NIGHT. A DARKENED CASTLE, WITH OMINOUS CLOUDS CIRCLING ABOVE]
They laughed at me back at the university. Laughed!
[CAMERA SWOOPS TO THE BACK OF THE CASTLE, AND ZOOMS IN ON A DECK, WHERE A GRILL SITS]
They said it couldn't be done. Fools! Who's laughing now? Ha. Ha! Hahaha! Bwahahahaha!

Ahem. Sorry. My inner mad food scientist broke loose.

It is the Saturday before Thanksgiving, and I’m working on my annual Thanksgiving Q&A post. I’ve got a good list going - coming tomorrow! - but then I saw this one from a few years ago on my The Big Turkey post:

Mike, what about two 13 - 14 lb turkeys on a single spit. This gives you the quantity of meat, extra legs and wings and should help the sizing. (This would be like when you do two chickens.) - Commenter Mark

It hit me like a lightning bolt - I have to try this! I rushed to my local grocery store2Thank you, Acme! and bought two 12.75 pound fresh turkeys. (They were the smallest birds in stock). At home, I set up a camera and started filming:

Rotisserie Grilling Two Turkeys? [YouTube.com]

So, what did I learn?

  1. I can fit two turkeys on a Weber Summit…barely. If I'm willing to ignore the weight rating on my rotisserie motor (20 pounds), and my rotisserie spit flexing in the middle, and the turkey tail and drumstick knobs on the right side turkey blackening because they are sitting too close to the burner, then yes. 2I'm sure my Weber contacts are going to have words with me about misusing their equipment when they see this one.. The 12 pound birds were juuust narrow enough to fit. Any bigger and the turkey tuckus would have been too far out over the burners.
  2. I'm a 98-pound weakling. 25 pounds of turkey shouldn't make me grunt as much as it does when I lift it. It's part of my new workout plan, the Dad Cooks Dinner Turkey Deadlift.3Followed by cast iron skillet wrist curls.
  3. Running the fork into the turkey's tail and thighs, like I do in the video, isn't as reliable as spitting the turkey deep into the bend of the leg where the drumstick meets the thigh. (Like I do in my Trussing a Turkey video). Right turkey broke loose during the last 30 minutes of cooking - the thigh meat got so tender that it stopped supporting the weight of the turkey. That's good for doneness - the dark meat is right where I want it - but not so good for the rotisserie, because it was struggling to turn with the turkey clanking and thumping around on the spit. (If I had to cook the turkey longer, I would have put on my welding gloves and driven the spit into the legs.)
  4. Cooking two turkeys one week before Thanksgiving? What was I thinking? I have enough leftover turkey to last me a month…and we're not even to T-Day yet.

More questions and answers tomorrow…

Step one, throw what we call "THE SWITCH!" [Rotisserie starts turning slowly]. Step two, close the lid.

What do you think?

Questions? Other ideas? Leave them in the comments section below.


Enjoyed this post? Want to help out DadCooksDinner? Subscribe to DadCooksDinner via eMail or RSS reader, recommend DadCooksDinner to your friends, and buy something from Amazon.com through the links on this site. Thank you.

Video: How to Rotisserie a Turkey Breast

November 19, 2015 by Mike Vrobel 3 Comments

Rotisserie_Turkey_Breast_With_Basic_Wet_Brine-2

The companion video to last week’s Rotisserie Turkey Breast With Basic Wet Brine is now up on YouTube. Check it out:

YouTube: How to Rotisserie a Turkey Breast

(And, if you haven’t noticed, I’m trying to make more videos - if you’re interested, please subscribe to my YouTube channel.)

What do you think?

Questions? Other ideas? Leave them in the comments section below.

Related Posts

Video: Rotisserie Grilling Two Chickens
Video: How to Rotisserie a Rib Roast
Video: Rotisserie Pork Shoulder with Wet Brine


Enjoyed this post? Want to help out DadCooksDinner? Subscribe to DadCooksDinner via eMail or RSS reader, recommend DadCooksDinner to your friends, and buy something from Amazon.com through the links on this site. Thank you.

Courage Mes Amis

November 17, 2015 by Mike Vrobel 5 Comments

Arc De TriompheMy heart goes out to Paris after the dreadful events of last week. Paris has a special place in my heart; this blog exists because of France. Back in 2008 I spent a week in Provence and a week in Paris, taking cooking classes and eating my way around the countryside and the city. But my Paris story starts about 20 years earlier.

During a particularly difficult time in my life, I watched Greg LeMond win the Tour de France, flying down the Champs-Élysées, the Arc de Triomphe behind him, coming from behind to win the three-week race by 8 seconds. Now, I’m a typical guy, slow to realize what my emotions are trying to tell me. Apparently, in that moment, I promised myself that I would get to Paris.

Rodin museum - The Thinker, with the dome of des Invalides

Life got better - a lot better. I forgot about this promise as the years passed, though I did follow the Tour every summer. My loving wife gave me a 40th birthday present: two weeks in France to take cooking classes, while she stayed home to watch the kids.

Eiffel TowerI enjoyed my week in Provence, then took the TGV back to Paris. I spent a couple of days touring the city, and then decided to walk down the Champs-Élysées. It was a gorgeous, windy day, with blue skies and puffy clouds. I had my typical breakfast4A big bowl of café au lait and a toasted mini-baugette with jam while sitting at a café and watching the Parisians and tourists walk by. Then I joined the crowd on the avenue, window shopping at the luxury boutiques that line the street. I picked up some perfume for Diane, and a pepper mill for myself at Peugeot. 2I loved buying a pepper mill in a shop that is also a car dealership.

I reached the end of the Champs-Élysées, and saw the fountains at the Place de la Concorde. Out of nowhere, I started sobbing. “I made it. I made it. I’m in Paris.” kept repeating in my head. It took me a while - like I said, I’m slow - but it dawned on me that I had kept a promise. I *had* made it.

Place de la Concorde

When I got home, my wife asked me to write about the trip on her family blog. I realized that I didn’t want to write one or two posts about the trip. I wanted to become a writer. Five months after my visit, I started DadCooksDinner. Paris gave me the push I needed to write.

Courage, mes amis. You are in our thoughts and prayers.

View from my hotel room window

Rotisserie Turkey Breast with Basic Wet Brine

November 12, 2015 by Mike Vrobel 10 Comments

Rotisserie turkey breast on a spit in a grill above a blue speckled drip pan

Browned rotisserie turkey breast in a grill, on a spit, over a speckled blue drip pan
Rotisserie Turkey Breast with Basic Wet Brine

I talk about the joy of dry brines a lot on this blog. For most applications, dry brining is the best way to season meat. But…not for rotisserie turkey breast. If you’re in a hurry, or if you love juicy breast meat, wet brines are the way to go. With a turkey breast, all I have is juicy breast meat, so I go with a wet brine.

Also, turkey breasts fit in reasonably sized containers - it’s not like wet brining a whole turkey, where I can’t find anything big enough to fit that eighteen pound monster I got from the store, not even my largest stockpot, and I’m trying to use a 28 ounce can of tomatoes to hold the lid down and force the turkey to stay…ahem…sorry…got off track there.3I’m not still mad about the time I caught the pot full of brine on a refrigerator shelf and dumped turkey contaminated water all over the inside of the fridge. No, not me, I’m completely over it.

Now, I know setting up the rotisserie is extra work. It’s worth it, and turkey breast makes it easier. No trussing is needed - there are no wings or legs flopping around, and the breast meat is held in place by the bones of the bird. Spit the turkey breast, set up the grill, plug in the rotisserie motor, and you’re ready to go.


Did I mention I wrote another cookbook? Looking for more Rotisserie Turkey information? Check out Rotisserie Turkey Grilling. Thanks!


Rotisserie_Turkey_Breast_With_Basic_Wet_Brine-2

Rotisserie_Turkey_Breast_With_Basic_Wet_Brine-3374

Video

Here's the video version of this recipe:

What do you think?

Questions? Other ideas? Leave them in the comments section below.

Related Posts

Rotisserie Turkey Dry Brined with Orange and Spices
Rotisserie Turkey Breast with Spice Rub
Rotisserie Turkey Breast with Basic Dry Brine
Basic Rotisserie Turkey
Rotisserie Turkey, Dry Brined with Orange and Spices
Rotisserie Turkey - The Big Turkey
Rotisserie Turkey Wrapped With Bacon
Rotisserie Turkey with Cajun Dry Brine
Rotisserie Turkey Breast with Basic Dry Brine
Rotisserie Turkey Breast with Honey Bourbon Glaze
My Rotisserie Recipes Index


Enjoyed this post? Want to help out DadCooksDinner? Subscribe to DadCooksDinner via eMail or RSS reader, recommend DadCooksDinner to your friends, and buy something from Amazon.com through the links on this site. Thank you.

Frost Covered Fall Mornings

November 10, 2015 by Mike Vrobel 8 Comments

A grilled boneless pork chop with asparagus and a bed of kale on a red plate

Grilled-2BBoneless-2BPork-2BChop-2Bwith-2BApple-2BCider-2BBrine-2Band-2BApple-2BButter-2BGlaze-6047As the seasons change, so does my cooking. Fall has moved from colorful leaves to bare trees; from hints of cold to white frost covered mornings. These hints of winter affect my tastes. This time of year I start to crave hearty food, bean soups, beef stews, bowls of chili. Meals that warm you up from the inside. You’ve probably noticed that in the blog - there have been a lot of pressure cooker recipes over the last few weeks. That’s what I’m cooking, and other than the big holiday blowouts (Thanksgiving, here we come!), it’s time for my cooking to move inside.2Now, “inside” is a relative term for me - I grill out almost daily in the summer; this time of year, the grill gets used once or twice a week.

Part of why I’m writing this is an excuse to wax poetic about Fall. We had a clambake at my parents' house yesterday, Dad and my brothers were raking, and I was watching my nephew fling himself into a leaf pile taller than he was. The sounds of dry leaves being raked, and the smell of the big pile of leaves by the street...I love Fall.

Part of why I’m writing this is an apology. I worry about my lack of focus in this blog. It follows my whims, and Fall is one of my big shifts - from outdoorsy grilling recipes to indoor comfort food. The other shift is in the Spring, when I start to get cabin fever and the grill starts calling to me again.2Those are the recipes where you’ll see me standing in the path I shoveled to my grill, because I had to get outside, snowstorm or not. The problem is, I feel like I lose readers ever time the seasons shift. Summer readers, used to grilling recipes, tune out for the winter; Winter readers, following pressure cooker recipes, tune out for the summer. On top of that, I keep reading Internet marketing gurus who say I should have laser-like focus, choose a topic, and stick to it.3Or, maybe, split into two blogs. Or three, or four, depending - I tend to wander all over the map. I have attention span issues - I have a tendency to go “ooh, shiny!” and dive into a topic, only to lose interest a few weeks later and move on.

But, I’m not going to change. I think cooking should follow the seasons. A pot of stew, full of meat and root vegetables, sounds great in the cold of November…but seems horribly heavy in the heat of July. My writing reflects my tastes, and my tastes change. And, right now, I’m looking forward to a big pot of turkey noodle soup. I hope you’ll stick around to read about it. If not, oh well. Spring will be back soon enough.

What do you think?

Questions? Other ideas? Leave them in the comments section below.

Related Posts

Winter Grilling
Grilling in the Rain
Spring Grilling Fever


Enjoyed this post? Want to help out DadCooksDinner? Subscribe to DadCooksDinner via eMail or RSS reader, recommend DadCooksDinner to your friends, and buy something from Amazon.com through the links on this site. Thank you.

Instant Pot Refried Black Beans

November 5, 2015 by Mike Vrobel 18 Comments

Instant Pot Refried Black Beans - easy frijoles refritos from dry black beans, pressure cooked in about an hour.

I make these beans to remember Oaxaca. Every meal came with tortillas and a bowl of thick, saucy black beans. I still dream about breakfast - fried eggs with salsa, tortillas, and a small dish of these black beans on the side.

Pressure Cooker Refried Black beans
[feast_advanced_jump_to]

This is how I make those beans at home. I add ¼ teaspoon of fennel seeds to replace the sprig of fresh epazote that flavors every pot of beans in Oaxaca. And, I refry them, to thicken up the sauce even more. I'm aiming for some whole beans in a thick sauce, not perfectly smooth beans with this recipe. (If you want smooth beans, toss everything in the food processor and run it for a minute.)

And, of course, I use my pressure cooker. Refried beans in about an hour? Instead of simmering all day? That's a no brainer. If you don't have a pressure cooker, check out the Notes section for stovetop instructions. Or, if you just want a pot of black beans, without the refrying, check out my Instant Pot Mexican Black Beans recipe. If you're looking for a different bean recipe, try my Instant Pot Pinto Beans or Instant Pot Refried Pinto Beans.

🥫Ingredients

  • Dry Black beans
  • Onion
  • Fennel seed
  • Fine Sea Salt
  • Baking Soda
  • Vegetable oil
  • Onion
  • Garlic
  • Chipotle en adobo
    See recipe card for quantities.

How to Make Instant Pot Refried Black Beans

  1. Sort and rinse the dry black beans. Get rid of any stuff in the bag that's not a bean, and toss any broken beans.
  2. Put the dry black beans, 3 cups of water, ½ teaspoon of salt, ¼ teaspoon of baking soda, peeled onion, and fennel seeds in an Instant Pot (or other pressure cooker).
  3. Lock the lid, and pressure cook at high pressure for 35 minutes. Then, quick release the pressure. (discard the onion.)
  4. In a large fry pan, sauté a diced onion, 2 smashed cloves of garlic, and a minced chipotle en adobo.
  5. Add the beans and their cooking liquid to the fry pan. Simmer and smash until the beans are thick and ready to serve. Enjoy!

🥘 Substitutions

Fennel seeds are a substitute for a sprig of epazote, a Mexican herb traditionally used in black beans. If you have epazote, add a leaf or two instead of the fennel seeds, and discard when the beans are done cooking. If you don't have fennel seeds or epazote, substitute a dried bay leaf, and discard after cooking.

Chipotle en adobo peppers, with their sauce, add a spicy and smoky flavor to the beans. If you can't take the heat, skip the Chipotle pepper. If you want it hotter, add a second minced Chipotle pepper.

If you can't find Chipotle en adobo, substitute a minced jalapeño. (But, I can find cans of Chipotle en adobo in the international aisle of all my local grocery stores, so don't give up too easily.)

If you want to use canned beans, replace the dried beans with 2 cans of drained beans, and skip to the "Sauté the aromatics" step.

🛠 Equipment

I cooked this in my 6-quart pressure cooker, but it will fit in a 3-quart or larger pressure cooker. (Pressure cooker dried beans are one of the key reasons I became a pressure cooker convert.)
Potato masher
12-inch frypan (Mashing and simmering the beans is easier in a wide pan, but you can use your Instant Pot if you don't want to dirty another pan.)

📏Scaling

This recipe halves easily. You can double the beans in a 6-quart Instant Pot or other pressure cooker, but it might overflow a 12-inch frypan. I switch to my 3-quart sauté pan or a dutch oven for the sauté and mash step if I'm making a double batch.

🤨 Soaking black beans?

I get the "to soak, or not to soak?" question all the the time. I don't soak my black beans in this basic recipe. They don't need an overnight soak, and cook to tenderness with 35 minutes at high pressure.
That doesn't mean you can't soak the beans. They turn out fine, though the bean broth isn't quite as full bodied. Soaked beans cook much quicker, 12 minutes at high pressure. I use that when I'm cooking the beans with other ingredients, where the shorter cooking time keeps me from overcooking the whole dish just to get the beans tender.

💡Tips and Tricks

  • I use both an Instant Pot (to pressure cook the beans) and a frypan (to sauté everything) in the instructions. You can make this recipe entirely in your Instant Pot by cleaning the pot liner out and switching to sauté mode when it comes to the Sauté step. I find it easier to work with a frypan, especially for simmering down the beans.
  • See my Instant Pot Chipotle Beans recipe for more bean cooking details.
  • For an extra touch of flavor, sprinkle crumbled queso fresco (or substitute shredded pecorino romano) on top of the beans right before serving.
  • These are rustic, chunky refried beans. If you want smooth beans, use a food processor. After step 1 is complete, pour the beans and their liquid into a food processor. Process until smooth, about 1 minute, then add them to the fry pan when the recipe calls for the beans and cooking liquid.
  • I quick release the pressure because I want to rough up the beans a bit. If you want to use a Natural Release, cut the cooking time at high pressure to 30 minutes, and use a natural release, which will take 15 to 20 minutes. (If you're in a hurry, you can quick release any remaining pressure after 15 minutes.)
  • No pressure cooker? No problem. Cook the beans in a large sauce pot with a lid. Instead of pressure cooking, bring the pot to a boil, reduce to a simmer, and cover with the lid ajar so some steam can escape. Cook for 2 hours, or until the beans are completely cooked. You may have to add water during the cooking time to keep the beans submerged. Once the beans are cooked, continue with Step 2.
  • No dried beans? No problem. Canned beans will work just fine. Replace step 1 with two 15- to 16-ounce cans of drained pinto beans, and add a cup or two of water to help the beans simmer in the pan.
  • Use make-ahead beans: Why cook a cup of beans when you can cook a pound of beans? I freeze leftover beans in 2 cup containers, covering them with their liquid. Then this recipe is a quick weeknight side dish. I pull a container of beans out of the freezer, and thaw it in the microwave while I sauté the onions in step 2.

What to Serve with this Recipe

Refried black beans are a classic Mexican side dish. Serve them with Tacos, Enchiladas, Fajitas - or basically any Mexican meal. When I visited Oaxaca, they were on the table during breakfast, lunch, and dinner.

☃️ Storage

To make the beans ahead, pressure cook them, and refrigerate them in 2-cup containers for up to 3 days, or freeze for up to 6 months. To make the recipe, thaw out the beans and continue with the "Sauté" step.

This recipe freezes well, in 2-cup containers, for up to 6 months.

🤝 Related Posts

Pressure Cooker Black Bean Soup
Pressure Cooker Refried Pinto Beans
Pressure Cooker Pinto Beans in Tex-Mex Broth

Enjoyed this post? Want to help out DadCooksDinner? Subscribe to DadCooksDinner via eMail or RSS reader, recommend DadCooksDinner to your friends, and buy something from Amazon.com through the links on this site. Thank you.

Pressure Cooker Ground Beef and Bean Chili

October 29, 2015 by Mike Vrobel 25 Comments

As far as I'm concerned, Halloween starts chili season. My mom made a bowl of chili every year, which we would ignore - there was candy to eat! Now that I'm older, I look forward to the chili as much as the candy. (And a little wiser? Let's not get crazy.)

This is the chili of my youth. Ground beef, beans, tomatoes, and chili powder. Texans, I don't want to hear it. Beans? Tomatoes? I know this is Sissy Chili. I don't care. I believe in the big tent approach to chili - if you call it chili, I am probably going to enjoy it, no matter what is in there. I've updated my recipe for modern tastes - heavy on the chili powder and other spices - but the big change is using the pressure cooker. It lets me cook the chili with dried kidney beans, adding more flavor than the canned beans of my youth.

Pressure Cooker Beef and Bean Chili

Kidney beans are tricky in the pressure cooker. They are one of the few beans that I make sure to soak overnight before cooking - unsoaked kidney beans always take forever to cook. And, why not take advantage of the soaking time to brine the beans?

Here it is, my favorite chili for Halloween. Or a rainy fall weeknight. Or, really, whenever I want a taste of my youth.

[feast_advanced_jump_to]

🥫Ingredients

  • Dried red kidney beans
  • Vegetable oil
  • Onion
  • Garlic
  • Chili powder
  • Cumin
  • Coriander
  • Oregano
  • Ground cloves
  • 85% Ground beef
  • Beer
  • Chicken broth
  • Baking soda
  • Crushed tomatoes
  • Fresh ground black pepper

See recipe card for quantities.

🥘 Substitutions

Kidney beans are the key to this recipe; they add a bean backbone to this chili. You can substitute canned, but they will get a bit mushy by the time the beef is cooked through. You can substitute pinto beans, black beans, or small red beans if you want.

85/15 Ground beef means 85% meat and 15% fat, which is usually called ground round at my local grocery store. You can go as high as 80/20% fat (ground chuck), but I wouldn't go past that, or there's too much fat in the dish. (You can also substitute ground turkey if you want.)

Onion and garlic: These aromatics are the base of any chili or stew. You can skip them...but I consider onion and garlic essential to the recipe.

The spice blend - chili powder, ground cumin, ground coriander, and cloves - can be replaced with all chili powder if you want to make things simple. But I love the extra complexity the coriander, cumin, and cloves add to the dish. (Especially the coriander, which is unusual in chili - but well worth it.)

If you want to eliminate the heat entirely, substitute paprika (preferably smoked Spanish paprika) for the chili powder. Now, I'm not judging you, but…why are you making chili if you don't want any heat?

Beer adds a hint of acid to the chili, and the alcohol helps bring out the flavor in the spices. I prefer a darker beer for chili, because I like the roasted, sweeter flavor of those beers. I use Elliot Ness from Great Lakes brewery, an amber lager, but a dark ale, porter, or stout are also good. That said, almost any beer will work.

Skipping the beer: If you don't want any alcohol in the dish, substitute a little more chicken broth or water.

Chicken broth adds body and flavor to this chili. If you have a pressure cooker, you should be making your own homemade broth. If you don't have the time, you can use store-bought low-sodium broth (either beef or chicken broth), or water. If you use store-bought broth, cut back on the salt in the recipe where specified.

The baking soda helps keep the beans tender. There are some acidic ingredients in this chili (beans, tomatoes), and an acidic environment toughens up the beans. The baking soda helps counter the acid in the other ingredients.

🛠 Equipment

A 6-quart pressure cooker

📏Scaling

This recipe scales down easily - cut everything in half and it will fit in a 3-quart pressure cooker. Scaling up runs into space issues; if you have an 8-quart pressure cooker, you can double this recipe, but it's too much to fit in a 6-quart pressure cooker.

🤨 Soaking Kidney Beans?

I always soak kidney beans before cooking. They are one of the few beans that I always soak before pressure cooking. They take forever to cook through when they are not soaked. That said, if you forget to soak, you can pressure cook unsoaked kidney beans for 40 minutes at high pressure to cook them through.

Sorting Beans

Kidney beans are an agricultural product, and like other beans, stuff tends to creep in when they are processed. Dried beans should always be sorted and rinsed before using to get rid of any twigs, stones, clumps of dirt, or broken beans.

To sort beans, I pour them out on one side of a rimmed baking sheet (a half-sheet pan), to keep the beans from escaping. Then I slowly run my fingers through the pile of beans, pulling them towards me on the sheet. I watch the beans as they move, looking for anything that doesn't seem right. If I see something, I poke around in the beans until I find what caught my eye, and discard it. I repeat this a couple of times, until I'm satisfied everything is out of the beans.

Then I dump the beans into a fine mesh strainer and rinse them under cold running water to wash off any dirt or dust.

Now the beans are sorted, rinsed, and ready for soaking or cooking.

🎬Video


Video: Pressure Cooker Ground Beef and Bean Chili - Time Lapse [YouTube.com]

💡Tips and Tricks

  • Simmer to thicken: If you have the time, and want thicker chili, simmer for 10 to 20 minutes after pressure cooking. Set the Instant Pot to Sauté mode adjusted to low, with a 20 minute cooking time, and leave the lid off to let the broth evaporate. Stir occasionally, scraping the bottom of the pot with a flat-edged wooden spoon to make sure nothing is sticking and burning. When the chili is thickened to your liking, cancel the heat and it is ready to serve.
  • Salt your bean water! "Salt toughens beans" is a myth. Salting before cooking helps season the beans all the way through as they cook.
  • Acid does make beans tough, though, and tomatoes are acidic. So, to balance out the acid in the tomatoes, I add Baking soda. (Remember Chemistry class? Baking soda is a base, counteracting the acid in the tomatoes).
  • If your beans are still tough when the cooking time is over, especially any "floaters" at the top of the pot, give the beans a stir, lock the lid, and pressure cook for another five minutes. Older beans take longer to cook, and if the beans have been sitting in the shelf at your store for a while, they may need extra time.
PressureCookerBeefAndBeanChili-2
PressureCookerBeefAndBeanChili-1000620
PressureCookerBeefAndBeanChili-1000716

☃️ Storage

This chili can be made a day ahead, refrigerated, and reheated - if anything, it tastes better this way, thanks to a day of letting the flavors mingle.
To store for later, portion into 2-cup containers, and refrigerate for up to 3 days, or freeze for up to 6 months. I love having chili in the freezer - I use them as grab-and-go lunches, which reheat in about 5 minutes in the microwave.

🤝 Related Posts

Looking for the real thing? Try my Pressure Cooker Texas Red Chili with beef and NO BEANS. (Or my Pressure Cooker Beef Stew if you want to skip the chiili.)
How about a recipe for the vegetarian in your life? Try my Pressure Cooker Pumpkin Chili or my Instant Pot 15-Bean Chili
Or, if you want to use ground turkey in your chili, try my Instant Pot Turkey Chili with (dry) Red Beans, Instant Pot White Chili, or mix in some chorizo with my Pressure Cooker Turkey Chili with Chorizo and Pinto Beans.

Or, check out my Instant Pot (Pressure Cooker) Recipe Index

Enjoyed this post? Want to help out DadCooksDinner? Subscribe to DadCooksDinner via eMail or RSS reader, recommend DadCooksDinner to your friends, and buy something from Amazon.com through the links on this site. Thank you.

Rotisserie Turkey is available in Paperback

October 27, 2015 by Mike Vrobel Leave a Comment

Rotisserie Turkey With Basic Dry Brine

RotisserieTurkeyWithBasicDryBrine-1000391


Book launch week concludes with the paperback release of Rotisserie Turkey. For more details about the book, see last week's New Cookbook: Rotisserie Turkey post.


Rotisserie Turkey is now available as a $8.99 paperback from Amazon.com. 4I thought formatting would take me a couple of weeks to fight through; instead, it only took a couple of days. Maybe I’m getting better at this?

Rotisserie Turkey
Rotisserie Turkey

The book has 29 recipes for whole turkey and turkey breast on the rotisserie, with drip pan stuffings, side dishes, and suggestions for making soup with the turkey carcass. Rotisserie Turkey is 140 pages with black-and-white pictures. Yes, I know, no one likes black and white pictures. I don’t like black and white pictures, either, but as an indie cookbook author, publishing in full color would have pushed the price up to the $20 range - and I don’t see the value in that.

But, if you buy the paperback from Amazon, I do have a full color pictures for you. Rotisserie Turkey is enrolled in the Kindle MatchBook service. If you buy the paperback edition, you get the Kindle edition for free! (As I’ve said before, if you’re reading this post, there is a free Kindle Reader app for whatever technology you’re using.) Now you can get the paperback for the comforting feel of a real book, and get the Kindle edition for the inspiration of full color pictures.

Trussing A Turkey
Trussing A Turkey

Help me out

Of course, to help out DadCooksDinner.com, please buy my book. But…that’s not all. If you do buy a copy of Rotisserie Turkey, can you do me two more favors?

1. Reviews

Please, leave a review on Amazon. Self-published books live and die by their reviews, and it helps a lot with Amazon’s ranking algorithm if I get over 100 reviews. Of course, I would prefer a five-star review2this XKCD comic explains online review reality: 5 stars is “loved it”, 4 stars is “meh”, and everything else is “hated it”, but any review is helpful, even if it is a 4 star “meh.”

2. Typos

I’ve already had a few corrections since last week. I think I’ve caught all the mistakes, but I always think that. If you find anything, send me an email and let me know?

Thank you, and I hope you enjoy Rotisserie Turkey!


Instant Pot Beef Short Rib Tacos with Dried Chile Pepper Sauce

October 22, 2015 by Mike Vrobel 12 Comments

Instant Pot Beef Short Rib Tacos with Dried Chile Pepper Sauce. Tender, shredded beef tacos with a spicy dried chile sauce.

Here's another reason I love my electric pressure cooker. On a busy weeknight, with the kids pulling me in different directions, I can make an elaborate dinner - shredded beef tacos with dried chile pepper sauce. All I need is ten minutes to prep the onion and peppers; then, after everything is in the pot with the lid locked, I can spend the next hour doing kid taxi service around the greater Akron area. When I get home I have tender, easily shreddable meat; I whizz the contents of the pot in the blender, and I have a thick, rich, authentic Mexican pepper sauce.3Almost too authentic - my oldest is very heat sensitive, and he had to alternate tacos with glasses of milk to cool down the fire in his mouth. When we asked if he was going to be OK, he said "No. But they're so good. I can't stop." Boring taco night? Not if I can help it.

A pile of shredded beef in chile sauce piled on a corn tortilla, and topped with cheese, salsa, and cilantro.
Instant Pot Beef Short Rib Tacos
[feast_advanced_jump_to]

Now, there are two ingredients that will make you say "Mexican? Really?". Soy sauce and Worcestershire sauce add umami, and that adds body to the sauce. You won't notice them with all the peppers; they blend in to the background, acting as supporting players to the strong Mexican flavors in the lead roles. You can skip the soy and Worcestershire, if you want, but the sauce is better if you have them. (For a basic version of this recipe, try my Instant Pot Shredded Beef. If you want to get really fancy, try my Instant Pot Birria Tacos instead.)

Tips and Tricks

  • No pressure cooker? No worries. Put the everything in a dutch oven with a heavy lid, use the entire bottle of beer, and bring to a simmer on the stove top. Cover with the lid, move to a 350°F oven, and bake for 4 hours, or until the short ribs are tender and falling apart. Continue with "make the sauce and shred the beef".
  • No dried peppers? Sprinkle the beef with ¼ cup of chili powder, and skip the blending step at the end. It won't taste as good, but it will be ready a lot quicker.

What to serve with Instant Pot Boneless Beef Short Rib Tacos

Serve with tortillas, cheese, salsa, hot sauce, shredded lettuce…whatever your favorite taco night toppings are. I also serve beans on the side, either pinto beans in broth or refried beans.

Equipment

  • 6-quart pressure cooker (or larger)
  • Blender
  • Fat separator (optional, but helps degrease the sauce)

Inspired by: Braised Short Ribs by Rick Bayless

PressureCookerBonelessShortRibTacos-1000418
Beef!
L to R: Ancho, Guajillo, Chipotle
Left to Right: Ancho, Guajillo, Chipotle
PressureCookerBonelessShortRibTacos-1000436
Ready to lock the lid
DSC_6152
Blending the sauce
Pressure Cooker Boneless Short Rib Tacos

What do you think?

Questions? Other ideas? Leave them in the comments section below.

Related Posts

Pressure Cooker Refried Pinto Beans
Pressure Cooker Tortilla Soup
Pressure Cooker BBQ Pulled Pork Tacos
My other Pressure Cooker Recipes

Enjoyed this post? Want to help out DadCooksDinner? Subscribe to DadCooksDinner via eMail or RSS reader, recommend DadCooksDinner to your friends, and buy something from Amazon.com through the links on this site. Thank you.

New Cookbook: Rotisserie Turkey

October 20, 2015 by Mike Vrobel 2 Comments

Rotisserie Turkey
Rotisserie Turkey

Thanksgiving is showtime for home cooks. It is our time to shine, pulling out all the stops to make a feast for family and friends.

I write about rotisserie turkey every year on my blog. In early November, the questions start. A few trickle in early in the month, asking about strategy and tactics. As T-Day approaches, the volume increases, and the questions sound more nervous. On Thanksgiving, when I'm not checking on my own turkey, I spend the day on my cell phone - responding, coaching, cajoling, and in some cases talking people down off the ledge. Trust me - your Thanksgiving turkey will be just fine.
After the turkey leftovers are done, and I've had time to recover, I gather any new questions and use them as the basis for next year's Thanksgiving blog posts.

This book is a collection of those years of blog posts and questions, cleaned up and rewritten when necessary. It gives me something to refer to when people ask questions: "Here it is, I wrote it all down in one place!"

I published another cookbook! Rotisserie Turkey is based on all of this blog’s Thanksgiving recipes. I pulled together all the rotisserie turkeys, turkey breasts, drip pan stuffings, and turkey soups I’ve written about, expanded and updated where necessary, and created Rotisserie Turkey. It is the third book in my How To Rotisserie Grill series.2My goal, of course, was to have it done before Thanksgiving. And, phew, I just made it.)

Rotisserie Turkey is only available as a $2.99 Kindle e-book right now. (The paperback edition is coming in about two weeks, once  I finish formatting it.) [Update 2015-10-27]: The Paperback is available for $8.99, with Kindle Matchbook, so you can get the full color Kindle edition for free if you buy the paperback through Amazon.com.

Don’t have a Kindle reader? Don’t worry – if you’re reading this post, there is a free Kindle Reader app for whatever technology you’re using.2My wife is a loyal Kindle owner - she had one back when I thought eBooks were a waste of time. Then I borrowed it for a week long business trip. A handful of science fiction novels later, I got home and immediately installed the Kindle app on my iPad. I mainly read all my Kindle books on my iPad, but I use the Kindle app on my iPhone (when I’m stuck at an appointment, and didn’t plan ahead) and Mac (when I’m researching cookbooks for a post I’m writing for this blog.)

Also, to celebrate the new book, I dropped the price of the Kindle editions of my How To Rotisserie Grill series. Rotisserie Grilling is now $3.99, and Rotisserie Chicken is $2.99. If you don’t already have copies, now’s a great time to pick them up.

Amazon Shopper Notes: Rotisserie Turkey is signed up for Kindle Select and Kindle Unlimited for the next 90 days. (If you don’t understand that sentence, don’t worry, it just means you don’t own a Kindle…or pay attention to all of Amazon’s crazy services.)

During the 90 day window, if you have Amazon Prime or are a Kindle Unlimited subscriber, you can borrow Rotisserie Turkey for free. My plan is to let Kindle Select and Kindle Unlimited expire after 90 days; they require a Kindle exclusive e-book, and I want to release Apple iBooks, Barnes & Noble Nook, and Kobo editions. Also, when I finish the paperback, I am going to add it to Kindle MatchBook, which means you’ll get a free copy of the Kindle edition of the eBook if you buy the paperback through Amazon. (Just so you know.)

Help me out

Of course, to help out DadCooksDinner.com, please buy my book. But…that’s not all. If you do buy a copy of Rotisserie Turkey, can you do me two more favors?

1. Typos

Let me know if you find any [strike]misteaks[/strike] mistakes. I proofread my books multiple times, but I eventually get “typo blind” - I know what I mean to say, and I gloss over the fact that I’m not saying it. I paid for a professional editor for Rotisserie Turkey, so I’ve already had a second set of eyes look at the book.3She found so much stuff. Oh, my goodness.
Still, I am terrified that I missed something. I’ve had typos in my books for years, without anyone mentioning them - and knowing there are thousands of printed books out there with a mistake I made…it doesn’t feel very good. If you see something, please email me and let me know? Thank you.

[Update 2015-10-20 - Well, that was quick. I was working on the paperback formatting, and have already found a handful of typos. Version 1.0.1 is on the way.]

2. Reviews

Please, leave a review on Amazon. This is a self-published cookbook, and indie books like mine live and die by their reviews. Of course, my ego would prefer a five star review.4I get into all sorts of imaginary arguments with the people who leave negative reviews. Like with the guy who’s entire review is “too much salt in the recipes for me. I understand the reason for the dry brine for tenderizing but still too salty.” Dude - you can use your own judgement and cut back on the salt, you know? Oh…geez, I hope he doesn’t read this blog… But, seriously, any review is helpful.

Thank you, and I hope you enjoy Rotisserie Turkey!


Rotisserie Turkey Breast with Honey-Bourbon Glaze

October 8, 2015 by Mike Vrobel 19 Comments

A turkey breast on a rotisserie on a grill

Rotisserie turkey breast with honey-bourbon glaze. Turkey breast on your grill's rotisserie, with a sweet-tart glaze.

There's nothing like perking up a turkey breast with a sweet glaze. (Of course, I had to add a little bourbon to the mix.)

A turkey breast on a rotisserie on a grill
Rotisserie Turkey Breast with Honey-Bourbon Glaze
[feast_advanced_jump_to]

I have my head down working on my next cookbook, Rotisserie Turkey Grilling. This recipe is a sneak peek - please stay tuned for more about the new cookbook, coming soon!


I'm a combination of bourbon snob and cheapskate-if I'm drinking bourbon, I don't want any "stuff" in it other than a single ice cube, so I buy expensive small-batch bourbon for sipping. I don't want to waste use the good stuff when I'm cooking. I go to the "travel size" section of my local grocery store and buy 50 ml mini bottles of cheap bourbon. (That said, if you're feeling flush, try one of the new honey bourbons in this recipe.)

Equipment

  • Grill with Rotisserie attachment (I use a Weber Summit with an infrared rotisserie burner. Here is the current version of my grill.)
  • Aluminum foil drip pan (9"x13", or whatever fits your grill. I use an enameled steel roasting pan.)
  • Butchers twine
  • Instant Read Thermometer
Rotisserie Grilling by Mike Vrobel

I wrote a cookbook!

Rotisserie Grilling Cookbook

New to your rotisserie and need help with the basics? Love your rotisserie and looking for new ideas? Grab a copy of Rotisserie Grilling! You'll get 50 of my favorite rotisserie recipes and expert tips on how to set up and use your rotisserie.

Click here to buy →
RotisserieTurkeyBreastWithHoneyBourbonGlaze-1000104
RotisserieTurkeyBreastWithHoneyBourbonGlaze-1000091


RotisserieTurkeyBreastWithHoneyBourbonGlaze

What do you think?

Questions? Other ideas? Leave them in the comments section below.

Related Posts

Rotisserie Turkey Breast Dry Brined with Italian Spices
Rotisserie Turkey Breast With Spice Rub
Rotisserie Turkey
Basic Rotisserie Turkey
Rotisserie Turkey, Dry Brined with Orange and Spices
Rotisserie Turkey - The Big Turkey
Rotisserie Turkey Wrapped With Bacon
Rotisserie Turkey with Cajun Dry Brine
Rotisserie Turkey Breast with Basic Dry Brine
Rotisserie Turkey Breast with Honey Bourbon Glaze

Enjoyed this post? Want to help out DadCooksDinner? Subscribe to DadCooksDinner via eMail or RSS reader, recommend DadCooksDinner to your friends, and buy something from Amazon.com through the links on this site. Thank you.

Meater Wireless Meat Thermometer on Kickstarter

October 6, 2015 by Mike Vrobel 21 Comments

MEATER-charger-app

[Update 2017-04-25: I’ve given up. Two years later, and I'm still waiting. If they make it someday, great, but I’m not holding my breath. I apologize to anyone who backed this on my recommendation. I've learned my lesson, and will not recommend Kickstarter projects in the future.]

I know I’ve done a lot of “Hey, look at this cool thing on Kickstarter!” posts recently, but I have one more cool thing that I have to talk about.

FCC Disclaimer: I have received nothing for this post, I’m doing it as a public service announcement. And, by “public service”, I mean “I want one.”

Loyal reader Cary5Cary. Thank you! I owe you one. saw my mention of the Misen chef’s knife Kickstarter, and emailed me to say “have you checked out the MEATER?”

Oh, my. This is the thermometer I’ve been waiting for. A remote probe thermometer without wires.


I wrote a couple of books about Rotisserie Grilling, and both have sections where I beg people to use internal temperature to determine doneness.2Cooking time is fickle, depending on all sorts of variables - the outside temperature, type of grill, heat in the grill, heat of the food when it went on the grill. Internal temperature tells you when the food is done cooking. The obvious follow up question, and one I get asked about once a month: OK, mister "It’s Done At 160°F", is there a probe thermometer that works with the rotisserie, so I know when it’s done cooking?

My answer was "sadly, no". I’ve seen probe thermometers that try to run a wire out along the rotisserie spit itself, but my rotisserie brackets are too narrow - they wouldn’t work with my grill. I’ve lived with the “peek and check” method, starting about 15 minutes before I think the food should be done, and using my hand-held instant read thermometer. The result is checking the grill every five to ten minutes, always worried that I waited too long and cooked my prime rib to medium-well instead of medium-rare.3Aiming for 125°F, it goes like this: 100°F. (wait) 103°F. (wait) 108°F. (wait) 112°F (wait, drink a glass of wine, get distracted…) 138°F. 138? Nooooo!

What I need is a grill-safe probe with wireless communication back to the base unit. The guys at Apption Labs were reading my mind. I took one look at their Kickstarter and couldn’t get my credit card out of my wallet fast enough.

17a26b337d6db7287f57ce213dc0d34f_original

The Meater

Why am I so excited? Because the Meater is a wireless probe thermometer. The Meater probe contains the thermometer and a Bluetooth transmitter - the probe looks like a long nail. Pair the Meater with your phone, push it into the meat, and it’s ready to go. No wires to get in the way, or get burnt out by the grill, or trip over in the kitchen.4Not that I’ve ever snagged the wire leading to my Thanksgiving turkey and slingshot my Polder across the kitchen, oh no, not me.

MEATER-electronics


Other advantages

Are you a low and slow barbecue cooker? Want to keep the smoker at a specific temperature for hours and hours? The Meater is perfect for you. It has a second ambient temperature sensor on the base end - the part that’s sticking out of the meat - so each Meater probe gives you the temperature in the food and the temperature in the grill at the same time.

They also use the ambient temperature sensor to give you an ETA on cooking time. The app does the math: the chicken is 75°F, the ambient temperature in the oven 350°F, and the target temperature is 165°F - the chicken should be done in 30 minutes.

Are you cooking over higher heat grilling temperatures? I’ve burnt out a lot of wired probes when the wire got too close to the fire in my grill. The Meater is rated to 527°F…with a significant safety range, so it won’t burn out in the heat of the grill.5Joseph at Apption labs told me this is why they decided to make the Meater. They were tired of burning out probe wires.

Also, I can’t wait to try the Meater out in my sous vide. This is going to really help with my “how long is the minimum sous vide timing?” question when I do sous vide posts. I can seal the probe in the vacuum bag with the meat, and know exactly when it reached finished temperature.6I can’t wait to try this with sous vide straight from the freezer. I always worry I’m not cooking it long enough.

Finally, if you spring for one of the more expensive models that includes “The Meater Block”, it will connect the Meater probes into your house’s WiFi. No more “am I too far away” worries; once it is on WiFi, it can talk to your phone no matter where it goes, as long as it has an internet connection. (If you don’t get the Meater Block, that’s OK, it will alert you on your phone when you go out of Bluetooth range.)

MEATER-ensemble

Kickstarter

Now, the usual Kickstarter disclaimers apply here. We are helping to create something new, not ordering something that already exists. There are working prototypes of the Meater; the Kickstarter is to fund the actual production of the thermometers. They are scheduled to ship in January 2016. But…I take Kickstarter shipping dates with a grain of salt. I’m not saying they’re wrong, but schedules slip. Also, there is a chance the Kickstarter will fail entirely - it’s rare, but it does happen.7Another risk is not reaching their Kickstarter funding amount - but they’re already funded. That said, they are a small startup, so they can always use more funding.

Is the Meater perfect? No. The probe is 6mm thick, about the size of an old school meat thermometer. That’s a lot thicker than the needle-width probes I’m used to. The max temperature for the internal reading is 212°F - plenty for cooking meat, but too low for use as a general kitchen thermometer8I use my probe thermometer to check things like oil frying temperatures, which go up to 350°F. But for what it is? A wireless, grill safe meat thermometer? It is more than good enough.

MEATER-block

Please back the Meater

I’m done with disclaimers. In the end, I don’t care about the risks. I’ve been waiting for a wireless probe thermometer for years, and jumped at the chance to back this Kickstarter. It’s exactly what I need, and I feel like I’m contributing to important home kitchen technology.

Now it’s your turn. I’m [strike]begging[/strike] asking you. Please support this Kickstarter. I need one of these thermometers. NEED ONE. Thank you.

For more information, and to back their Kickstarter, go to: Meater: The first truly wireless smart meat thermometer [Kickstarter.com]

Grilled Pork Tenderloin Skewers with Teriyaki Sauce

October 1, 2015 by Mike Vrobel Leave a Comment

Grilled Pork Tenderloin Teriyaki Skewers

When I’m asked to bring something to a tailgate, my first thought is “on a stick.” When I’m standing around in the Muni parking lot outside the stadium, with a red cup 9The red cup gives me plausible deniability if the police come by. Of course, the guys a few cars down are loudly doing shots, so I don’t know why I worry about this. of tasty beverage in one hand, skewers fit the bill perfectly.

My goal was short, yakitori style pork skewers, with small bites of pork tenderloin. Unfortunately, I looked at the pack of 6-inch bamboo skewers at the store and thought “No, I have a ton of those at home.” Wrong! Luckily, I did have a couple of packs of 8-inch skewers, so bigger bites were now on the menu.

My only regret? Twelve skewers of pork is not enough for a crowd of hungry guys. I should have doubled this recipe. Or tripled it.

Recipe: Grilled Pork Tenderloin Skewers with Teriyaki Sauce

Equipment

  • Grill (I love my Weber Q for tailgating)
  • 12 (8-inch) Skewers or 16 (6-inch) skewers
  • Basting brush


Pork Tenderloin Yakitori Skewers-1000291

Pork Tenderloin Yakitori Skewers-IMG_3218

Pork Tenderloin Yakitori Skewers-IMG_3164


Pork Tenderloin Yakitori Skewers-IMG_3244

Notes

  • I make my own teriyaki sauce for this recipe - it's easy with a food processor or blender. But, if you want to take the easy way out, replace the Brinerade and sauce with a bottle of store-bought teriyaki sauce. I like Soy Vay brand teriyaki sauce for my last minute teriyaki needs.
  • In the end, "just" teriyaki skewers wasn't exciting enough for our tailgate, so brought a bottle of Korean Gochujang, and a bottle of Thai Sweet Chili Sauce to go with my teriyaki sauce. That way, everyone could pick from a few different flavors.

What do you think?

Questions? Other ideas? Leave them in the comments section below.

Related Posts

Grilled Pork Tenderloin Skewers with Thai Sweet Chili Sauce
Grilled Shrimp Skewers with Knob Creek Pineapple Glaze
Grilled Pork Shoulder Kebabs with Peppers, Onions, and Spice Rub (with Tailgating Tips)


Enjoyed this post? Want to help out DadCooksDinner? Subscribe to DadCooksDinner via eMail or RSS reader, recommend DadCooksDinner to your friends, and buy something from Amazon.com through the links on this site. Thank you.

Sponsored: Today's PorkCast

September 29, 2015 by Mike Vrobel Leave a Comment

PorkBeInspired

This week, DadCooksDinner is sponsored by my friends at the National Pork Board and the PorkCast. Looking for the perfect recipe for your weather? Check out The PorkCast - a forecast never tasted so good.


Grilled Double Cut Ribeye Pork Chops With Rosemary, Honey, and Lemon Glaze

My friends over at the National Pork Board asked me to check out the PorkCast - a set of recipes from top chefs, customized in real-time for your region and weather.

My PorkCast?

  • Tuesday: Rain…and quick pork fajitas
  • Wednesday: Partly sunny…and my double cut pork chops with rosemary, honey, and lemon glaze
  • Thursday: Rain…and pulled pork (my favorite suggestion)
  • Friday: Sunny…and grilled bratwust with onions braised in beer and mustard

What’s your PorkCast? Check out PorkBeInspired.com/PorkCast, rain or shine, for the perfect pork dish.

And, once again, thank you to the National Pork Board for supporting DadCooksDinner.

Shaved Brussels Sprouts with Bacon and Honey

September 24, 2015 by Mike Vrobel 7 Comments

Shaved Brussels Sprouts with Bacon and Honey

A good friend of ours took a big leap. Last month, she sold her rural house (with a two acre lot), and moved to an apartment in downtown Cleveland (with one bedroom).2Hi, Rhonda! To celebrate, we went out for dinner and a glass of bubbly (or two). Adega’s modern Mediterranean cuisine was fantastic - I got to try Iberico pork - but the hit of the evening was a side dish, Crispy Brussels.

One bite of the roasted brussels sprouts, with bacon and honey, made Diane grab my arm and push a fork at me. “Can you make this? You have to make this.” she demanded.2Of course, sweetie. Now put down the fork. Please?

It’s not an exact duplicate of Adega’s Crispy Brussels. I’m taking their flavors and adapting them to my shaved brussels sprouts recipe. If you’re looking for a Brussels sprouts to convert Brussels haters, this is the recipe to start with. Bacon, honey…and a few Brussels sprouts shreds hidden in there. They’ll never know what hit them.

Recipe: Shaved Brussels Sprouts with Bacon and Honey


Equipment

  • 10 or 12 inch heavy duty skillet (I use my 12-inch cast iron skillet)


Shaved Brussels Sprouts with Bacon and Honey-1080354
Crisp up the bacon


Shaved Brussels Sprouts with Bacon and Honey-1080358
Add the sprouts to the pan


Shaved Brussels Sprouts with Bacon and Honey-1080362
Stir in the bacon and honey at the end


Notes

  • I cheat with the bacon, and buy a 4 ounce package of diced bacon. (Or diced pancetta, the Italian version of bacon.) That way, a package of diced bacon and a bag of shaved Brussels sprouts is a dump and stir weeknight side dish.

Shaved Brussels Sprouts with Bacon and Honey-1080368

What do you think?

Questions? Other ideas? Leave them in the comments section below.

Related Posts

Cast Iron Brussels Sprouts Saute
Brussels Sprouts Gratin
Steam-Sauteed Green Beans


Enjoyed this post? Want to help out DadCooksDinner? Subscribe to DadCooksDinner via eMail or RSS reader, recommend DadCooksDinner to your friends, and buy something from Amazon.com through the links on this site. Thank you.

Five Fun Food Finds September 2015

September 22, 2015 by Mike Vrobel 1 Comment

Misen Chef’s Knife
Misen Chef’s Knife

1. Misen Chef’s Knife at Kickstarter
The guys at Misen are designing a great chef’s knife at a reasonable price. They let me take a look at their Kickstarter ahead of time, and I’m itching for it to go live - I’m ordering one (with the blue handle!) as soon as the Kickstarter opens.3Now, the usual knife warnings apply - knives are a very personal item, and you need one that feels good in your hands - but I love the way this one looks, and the price is right. Check it out:
Misen: Cook Sharp [kickstarter.com]

2. Mesquite - Threat or Menace?
Daniel Vaughn at Texas Monthly has a great explanation of mesquite as a smoking wood. Why is it so popular in Texas…but so unpopular with famous Texas pitmasters? Read on:
Smoking with Mesquite: The Arc of a Pest’s Popularity

3. Kenji Alt - The Food Lab Cookbook
I know, I know. I talk about this book ALL THE TIME. But today is yesterday was the official release date, so I have to mention it again. I got my copy a little early, and already I’m in love. Kenji’s explanation of the difference between temperature and specific heat is the best I’ve ever read. 2Specific heat? That’s why you can stick your hand in a 250°F oven and think “hmm- that’s warm”, but would never dunk it in a pot of 212°F boiling water, because of the burns. Water has a higher specific heat than air, and transfers heat faster. Eventually, your hand would burn in the oven…but it would take a long time. Order on Amazon here:
The Food Lab Cookbook [Amazon.com]

4. GIR Spatula
While we’re talking about ordering stuff on Amazon3Standard disclaimer applies: ordering through my Amazon links gives me a small commission, and supports DadCooksDinner. Thank you![/footnote], here’s my new favorite kitchen tool: the GIR Ultimate 11 inch all silicone spatula. (Thanks to The SweetHome for the tip.) Easy to use, easy to clean, heatproof, and available in a rainbow of colors. (Mine are red and tangerine).
GIR Spatula [Amazon.com]

5. My guest posts on Weber.com
Not to toot my own horn,4Totally tooting my own horn. but I’ve been writing guest posts about rotisserie grilling for Weber.com’s blog. Check out:
Rotisserie Onions
Rotisserie Pineapple
Rotisserie Drip Pan Potatoes

Bonus: Mike's Night at the Grill

No, the other Mike...freind of the blog Mike Lang from AnotherPintPlease.com shot this fantastic video for Weber:


What do you think?

Questions? Other ideas? Fun food finds I missed? Leave them in the comments section below.


Enjoyed this post? Want to help out DadCooksDinner? Subscribe to DadCooksDinner via eMail or RSS reader, recommend DadCooksDinner to your friends, and buy something from Amazon.com through the links on this site. Thank you.

Video: Rotisserie Pork Shoulder with Wet Brine

September 17, 2015 by Mike Vrobel Leave a Comment

Here is the video for Rotisserie Pork Shoulder with Wet Brine, as promised earlier this week. Enjoy!


How to Rotisserie a Pork Shoulder [youtube.com]

What do you think?

Questions? Other ideas? Leave them in the comments section below.

Related Posts

Video: How to Rotisserie a Rib Roast
Video: Rotisserie Grilling Two Chickens
Video: How to Rotisserie a Pineapple


Enjoyed this post? Want to help out DadCooksDinner? Subscribe to DadCooksDinner via eMail or RSS reader, recommend DadCooksDinner to your friends, and buy something from Amazon.com through the links on this site. Thank you.

Rotisserie Pork Shoulder With Basic Wet Brine

September 15, 2015 by Mike Vrobel 10 Comments

Rotisserie Pork shoulder, cooked low and slow until it is fall apart tender, with a crispy crust on the exterior. Wet brined pork, seasoned all the way through. These are a few of my favorite things.

(Think of Kevin Costner's "I believe in…" speech in Bull Durham. "I believe in the pork shoulder, long, slow cooking, spinning rotisseries, and wet brines, and rambling, awkward digressions that get kind of weird. Like this one.")

Checking the temperature of a rotisserie pork shoulder with an instant read thermometer
Rotisserie Pork Shoulder with a basic wet brine
[feast_advanced_jump_to]

And…OK, you got me. I need a video for my YouTube channel. Time to take my favorite cut of pork for a spin. (Really, I'll stop with the rotisserie puns).

Why rotisserie a pork shoulder? The combination of crispy exterior crust and tender, shreddable meat. "This tastes like bacon…wait…this is bacon!"is how my son put it during the taste test. No rotisserie? No worries. Follow the technique in my BBQ Pulled Pork on a Kettle grill.

Equipment

  • Grill with Rotisserie attachment (I use a Weber Summit with an infrared rotisserie burner. Here is the current version of my grill.)
  • Aluminum foil drip pan (9"x13", or whatever fits your grill. I use an enameled steel roasting pan.)
  • Butchers twine
  • Instant Read Thermometer
Rotisserie Grilling by Mike Vrobel

I wrote a cookbook!

Rotisserie Grilling Cookbook

New to your rotisserie and need help with the basics? Love your rotisserie and looking for new ideas? Grab a copy of Rotisserie Grilling! You'll get 50 of my favorite rotisserie recipes and expert tips on how to set up and use your rotisserie.

Click here to buy →
RotisserieShreddedPorkShoulder-21
Trussed and spit
RotisserieShreddedPorkShoulder-03
Lighting the grill
RotisserieShreddedPorkShoulder-27
Is it done yet?
RotisserieShreddedPorkShoulder-09
Crispy on the outside, tender on the inside

Notes

  • It's hard to overcook pork shoulder…but it is easy to undercook it. If you are in a hurry, and can live with tender sliced pork instead of shredded pork, you can pull the pork roast once it reaches 185°F. This will cut the cooking time to about 4 hours.
  • If you are using a charcoal grill, start with a half chimney of charcoal, and add 16 unlit coals to the fire every hour.
  • Smoking wood: If you are cooking over charcoal, toss the chunks on the coals. If you are cooking on a gas grill with a smoker burner (like the one I use in the video), pour the chips in the burner; if you don't have a smoker burner, wrap the chips in an envelope of aluminum foil, poke with a few holes, and set on top of the burner cover over one of the lit burners.
RotisserieShreddedPorkShoulder-23

What do you think?

Questions? Other ideas? Leave them in the comments section below.

Related Posts

Rotisserie Pork Shoulder with South Carolina Mustard BBQ Sauce
Rotisserie Pork Shoulder with Greek Flavors
Rotisserie Pork Shoulder Char Siu Style
BBQ Pulled Pork on a Kettle Grill (Grilling Basics)
Sous Vide Pork Steaks

Enjoyed this post? Want to help out DadCooksDinner? Subscribe to DadCooksDinner via eMail or RSS reader, recommend DadCooksDinner to your friends, and buy something from Amazon.com through the links on this site. Thank you.

Grilled Honey Mustard Chicken Wings

September 10, 2015 by Mike Vrobel 2 Comments

GrilledHoneyMustardWings-1040096
Quality testing the wings

My kids are gaga for honey mustard wings.5Except for my youngest - he’s holding out for hot wings. He takes after his dad. I made them a few months back, and they have begged me to make them again.

That’s no big deal for me, because I have my chicken wing technique down cold.2Down cold? Down hot? Especially for hot wings, amirite? Anyone? Is this thing on? Cook the wings with indirect high heat in the grill, with wood smoke, for about 45 minutes. Toss the wings, hot from the grill, in their dressing; hot wings soak up the sauce better.3See the optional dry brining instructions in step 1 for extra-crispy dry brined wings…if you have the time. I had to get these wings on the grill the night I made them, so I went with a simple sprinkling of salt.

The only problem with indirect grilling wings is fitting them on the grill. How do I cook enough wings for everybody? That’s where the Weber Elevations system comes in, with three tiers of cooking. I can stack wings vertically; each rack fits about eighteen wings. 4Eighteen wings depending on the size - your mileage may vary depending on how muscular your chicken wing sizes can be. Six racks fit into the bracket, three on each side, giving me a lot of extra space when I get a taste for some chicken wings.

Recipe: Grilled Honey Mustard Chicken Wings

Equipment

  • Weber Elevations Tiered Cooking System with extra racks (optional)
  • Grill (I love my massive Weber Summit for all the extra space, even with the Weber Elevations)

GrilledHoneyMustardWings-1040065
Apple chips ready for the grill

Grilled Honey Mustard Wings

GrilledHoneyMustardWings-1040083
Tossing with the sauce

Notes

  • Want to take a shortcut? Instead of making honey mustard, buy it. Use ½ cup of store-bought honey mustard instead of the honey and mustard in the ingredients.

What do you think?

Questions? Other ideas? Leave them in the comments section below.

Related Posts

Grilled Buffalo Chicken Wings
Grilled Japanese Chicken Wings
Grilled Miso BBQ Chicken Wings

Enjoyed this post? Want to help out DadCooksDinner? Subscribe to DadCooksDinner via eMail or RSS reader, recommend DadCooksDinner to your friends, and buy something from Amazon.com through the links on this site. Thank you.

Pressure Cooker Bean Mix Soup

September 1, 2015 by Mike Vrobel 18 Comments

Pressure Cooker Bean Mix Soup

This is a reprint of a recipe I posted last February. I lost it in my blog migration, but I didn't realize it was missing until last week. Whoops. Here it is again, to get it back on the blog.


A commenter was giving me a hard time…and I deserved it. In my pressure cooker french lentil recipe, I talk about "vegetarian once a week"5I tried, really I did. But I can't make vegetarian once a week work. Too much carbs. - and then recommend using chicken stock in the soup. As he said: "I love the recipe, but that's not vegetarian."2But I saaaid you could substitute water. Doesn't that count?

So, I set out to make a truly vegetarian bean soup. It was hard. I had to fight the urge to throw a ham hock in there to add some smoky flavor. I went with chili powder instead.3And I really, really wanted to sub out some water for chicken stock. I'm terrible.

What makes me think "vegetarian soup"? Multi bean soup, of course. If I'm cooking vegetarian, I want all the beans. Now, I wanted to call this "15 bean soup®", but I can't. That name is a registered trademark of the Hurst Beans company, and I don't want to face the lawyers.

Now, why would they register a trademark for bean soup? Because it's such a good idea. Take a bunch of different sizes of leftover beans, mix them together, and there it is - soup. Tiny beans, like peas and lentils, dissolve and thicken the broth; large beans are creamy and tender, giving the soup some chew. The result is a hearty soup, perfect for the depths of February.

wpid4465-13-Bean-Soup-Mix-7196.jpg

There are so many bean mixes out there. 13, 14, 15 beans; whatever it takes. I usually get lucky 13 - Bob's Red Mill 13 bean soup mix is stocked at my local Acme grocery store. You can even make your own mix; it's a great way to use up any leftover beans. (Or you can do it in the bulk section of your grocery store, if you have the patience to bag small amounts of lots of beans. I'd get at least seven beans in a range of sizes.)

Recipe: Pressure Cooker Bean Mix Soup

Equipment

  • 6 quart or larger pressure cooker (I love my Instant Pot Electric PC)
wpid4467-13-Bean-Soup-Mix-7202.jpg

Notes

  • Sorting the bean mix is a pain - with all the different types of beans, it's tough to find dirt clods and stones. That doesn't mean you should skip it, though.
  • Want to go full carnivore? Replace half the water with homemade chicken stock, and add a ham hock to the beans for added smoky goodness. Take it out after cooking, let it cool, and shred it. Discard the bones, gristle, and fat, and stir the meat back into the pot.
  • Forgot to soak? Increase the cooking time to 35 minutes at high pressure in a stovetop PC, 45 minutes in an electric PC. (Yes, it takes a long time to cook the larger beans.) Let the pressure come down naturally. Don't try a quick soak; I did that once - once - and it turned the smaller peas and lentils in the mix into mush. An overnight soak is the way to go.
  • Please, do not forget to season to taste at the end! Soup tastes bland and flat without added salt. Don't worry if it seems like a lot of salt - you're still adding a lot less salt than you'd get in canned beans.

What do you think?

Questions? Other ideas? Leave them in the comments section below.

Related Posts

Pressure Cooker Senate Bean Soup
Pressure Cooker Pasta and Bean Soup (Pasta Fazool)
Pressure Cooker Lentil and Hambone Soup

Enjoyed this post? Want to help out DadCooksDinner? Subscribe to DadCooksDinner via eMail or RSS reader, recommend DadCooksDinner to your friends, and buy something from Amazon.com through the links on this site. Thank you.

Year Seven of DadCooksDinner

August 25, 2015 by Mike Vrobel 6 Comments

Reverse Seared Rack of Lamb on the Grill

On August 20th 2008, DadCooksDinner started with my first post. This month, post 1000 went up. Holy cow - one thousand posts? Me? How did I get here?

Persistence. I stick to my posting schedule, no matter what, and get new posts up every week. Some are easy; the words pour out onto the page. Others are knife fights with my inner demons - “This is no good. completely unoriginal. Why do I bother?” How do I push past the negativity? I learned to write crappy first drafts and get the ideas out before my inner critic cuts them off.4Thanks to Anne Lamott’s Bird by Bird: Some Instructions on Writing and Life for the Crappy First Drafts idea - it saved my writing. Then I have to change gears, unleash my inner critic, and turn my raw ideas into a coherent story.

And, no matter how I feel, I write every day. Not a lot - my rule is, I have to write for five minutes. Some days, that’s all I do - write for five minutes. Other days I look up, and five minutes became an hour of uninterrupted flow. 2I’m still working on forgiving myself when I don’t get it done - but I don’t let it derail me, and get started again the next day.

In the spirit of my favorite movie, here are some top five lists about DadCooksDinner 2014-2015.

Top Five Events

  1. I switched my blog back end from Blogger to WordPress. I longed for the extra customization that I can get with WordPress, but the transition was rough. I spent a lot of time in February cleaning up the mess from the migration. And, now that it's all settled…I don't like the blog theme. Sigh. I'm going to change the theme, but I'm waiting until next year - I don't want to waste more time this year fiddling with the blog.
  2. I published my second cookbook - Rotisserie Chicken Grilling. If you enjoyed my first book but thought "It needs more chicken!", this is the book for you.
  3. One of my dreams came true - my byline is on Weber.com. I was invited to write guest posts for the Weber blog. Check out How to Set Up Your Rotisserie, How to Truss and Spit Poultry for the Rotisserie, and How to Truss and Spit a Roast for the Rotisserie.
  4. I started my ongoing Cast Iron series. I've had a stormy relationship with cast iron, and wanted to figure out why so many people love it. Now I'm a black metal junkie. (Programming note: The cast iron series is on summer vacation. I strip cast iron with my oven's cleaning cycle - not something I want to do in the heat of August.)
  5. Road trips! Last fall, I spent a weekend in Bucks County, Pennsylvania, with Pam, Maggy and Sharon of ThreeManyCooks at the Big Harvest Potluck. I was surrounded by food bloggers - my people! In June I visited my friends at Certified Angus Beef, just down the road in Wooster, Ohio. I learned about butchering, meat science, and spent time with fellow grill bloggers. I can't wait to see where this year takes me.

Top Five Pictures


1. Reverse Seared Rack of Lamb on the Grill


2. Rotisserie Chicken with Coriander and Pepper Dry Brine


3. Smoked Duck (on a Kettle Grill)


4. Pressure Cooker Irish Lamb Stew


5. Grill Roasted Asparagus

Top Five Recipes

  1. BBQ Beef Short Ribs (on a Kettle Grill)
  2. Pressure Cooker BBQ Pulled Pork Tacos
  3. Sous Vide Flat Iron Steak with Baby Kale Salad
  4. Pressure Cooker Red Beans and Rice
  5. Grilled Thick Cut New York Strip Steaks, Reverse Seared

Bonus tie for 5th: Pressure Cooker Kielbasa and Sauerkraut

Bonus: Top Video

I don’t know what I did right, but YouTube put my How to Rotisserie a Rib Roast video high in its search results. That video now gets more weekly views than all my other videos get in a month. I will do more videos, but they’re a lot more time consuming that a regular blog post, so they get pushed back while I finish my weekly writing. I need to change my priorites a bit…

Top Five non-recipe Posts

  1. Instant Pot Frequently Asked Questions
  2. Sous Vide Baby Back Ribs Showdown: 48 Hour vs 6 Hour
  3. Dirty Grill Shame
  4. The Best Grilled Steak: Reverse Sear or Sear and Move
  5. Things I Love: 12 Inch Cast Iron Skillet

Thank you for reading, everyone!

What do you think?

Questions? Other ideas? Favorite recipes from 2015? Leave them in the comments section below.


Enjoyed this post? Want to help out DadCooksDinner? Subscribe to DadCooksDinner via eMail or RSS reader, recommend DadCooksDinner to your friends, and buy something from Amazon.com through the links on this site. Thank you.

Beer Can Duck

August 20, 2015 by Mike Vrobel 17 Comments

Beer Can Duck
Beer Can Duck


This post is indirectly sponsored by my friends at Maple Leaf Farms. They commissioned me to take pictures of duck on the grill for their website; the beer can duck was so good that I had to share the recipe.


Or, as my inner 13 year old likes to call it, Beer Butt Duck. [Heh. Heheh. Heh.]
The trick to beer can duck is a 16 ounce can.3If your duck tips over because you tried a 12 ounce can, pull the can out, pour the beer out of the duck cavity, rinse it out with cold running water, and pat it dry with paper towels inside and out before trying a 16 ounce can. Um…not that I tried to get away with a smaller can that I had in the fridge already… Thanks to pint cans of Irish beer, they’re easy to find nowadays. 2If you can find a pint can of hard cider, even better. Apple and duck are a great combination. Once you have a big can, dispose of ⅔rds of the beer - gotta keep the cook lubricated - then proceed with the recipe.

As I’ve mentioned before, roasted whole duck is not for people who want medium-rare duck breast. The legs have to be cooked long, to make them tender and shreddable. The breast meat will be well done by that point. Now, don’t get me wrong, the breast will still be tender and juicy thanks to all the melting duck fat. But, in the end, the legs make the (whole) duck.

Recipe: Beer Can Duck

Equipment

  • Grill (I love my massive Weber Summit)
  • Drip pan (9 by 13 aluminum foil pan)

BeerCanDuck-1030819
Punch a few holes in the can

BeerCanDuck-1030820
Sit the duck on the can

BeerCanDuck-1030831
On the grill...

BeerCanDuck-1030876
...done.

Notes

  • Duck and wood smoke are a great combination. If you have smoking wood, use it.
  • If your pint sized beer can has a carbonation cartridge in it, leave it in the can and don't worry about it. The beer won't get above boiling temperature.

What do you think?

Questions? Other ideas? Leave them in the comments section below.

Related Posts

Rotisserie Duck with Honey Glaze and Drip Pan Potatoes
Smoked Duck on a Kettle grill
Pan Grilled Duck Breast with Duck Fat Paprika Potatoes
Smoked Duck Recipe

Enjoyed this post? Want to help out DadCooksDinner? Subscribe to DadCooksDinner via eMail or RSS reader, recommend DadCooksDinner to your friends, and buy something from Amazon.com through the links on this site. Thank you.

When to Use Charcoal Baskets, and When to Skip Them

August 18, 2015 by Mike Vrobel 6 Comments

When to Use Charcoal Baskets

Q: My new grill came with charcoal baskets. How do I use them?

Charcoal baskets are a common accessory in charcoal grills - all the high-end Weber kettles that I buy come with them, or you can buy them as a separate accessory. They are very useful, and I use them often…but not all the time.

WhenToUseCharcoalBaskets-0637

When do I use charcoal baskets?

1. For indirect heat. When I’m cooking with my rotisserie, or cooking with indirect heat, the baskets are very useful. They keep the coals in neat piles on the sides of the grill, leaving plenty of room for a drip pan in the middle of the grill.

WhenToUseCharcoalBaskets-2011
2. When I need a small zone of direct high heat. The baskets hold a deep pile of coals close to the grill grate, giving me a smaller, hotter zone for a quick blast of direct heat. If I’m only cooking a couple of chops, I use the baskets. Baskets are great for a direct-indirect fire with a small high heat zone - like cooking with the reverse sear or sear and move methods. Most of the time the steaks are cooking over indirect heat, away from the coals. But, when I want to sear them quickly, I have a lot of searing power directly over the basket. 3Sometimes I use the bullseye approach, which I first saw mentioned by Jamie Purviance in Weber’s Charcoal Grilling cookbook. Put the baskets together in the center of the grill, for a zone of direct heat right in the center, with a ring of indirect heat around the outside edge of the grill.

WhenToUseCharcoalBaskets-0199

When do I put the charcoal baskets away, and put the coals directly on the grill grate?

1. When I need a large zone of direct heat. The baskets give me direct heat on a quarter of the grill surface. When I need to use direct heat on more of the grill grate - say, cooking pork chops for a crowd - I skip the baskets. If I need high heat, I add more coals, stacking them up on the charcoal grate two to three coals deep. I can turn the whole surface of the grill into a raging inferno if I’m willing to use enough coals. Or, I can spread the coals out, and…

WhenToUseCharcoalBaskets-1000095
2. When I need direct medium heat, or lower. The baskets concentrate the coals too much for lower heat. When I need to grill something gently - vegetables, pizza, fish, burgers - I put the coals directly on the grate, where I can spread them out and dissipate some of the heat.

WhenToUseCharcoalBaskets-6232
3. When the basket shape doesn’t help. Sometimes, the baskets themselves are inconvenient. When I grill a whole turkey, I want a “U” of fire facing the drumsticks, and baskets just get in the way; I’m better off arranging the coals directly on the charcoal grate. Or, when I want indirect heat on something wide that would hang over the edge of the baskets. I was cooking a butterflied duck the other day, and wanted to cook it with indirect heat. No matter how I moved the duck, the wings stuck out directly over the baskets of coals, and would burn horribly before the duck finished. I dumped all the coals on one side of the charcoal grate and put the drip pan on the other side, leaving plenty of room.

WhenToUseCharcoalBaskets-1030826

What do you think?

When do you use your charcoal baskets, or put them aside? Any questions? Leave them in the comments section below.

WhenToUseCharcoalBaskets-0747

Related Posts

Things I Love: Weber Charcoal Chimney
Things I Love: Kingsford Charcoal
Things I Love: Weber Charcoal Kettle Rotisserie


Enjoyed this post? Want to help out DadCooksDinner? Subscribe to DadCooksDinner via eMail or RSS reader, recommend DadCooksDinner to your friends, and buy something from Amazon.com through the links on this site. Thank you.

Sous Vide Filet Mignon with Shallot-Rosemary butter

August 13, 2015 by Mike Vrobel 2 Comments

SousVideFiletMignonWithShallotRosemaryButter-1030912
Sous Vide Filet Mignon with Shallot-Thyme Butter


Special thanks to my friends at Certified Angus Beef for the steaks used in this post.


[Vacuum sealer hisses as it wraps filet mignon steaks]

It’s the middle of grilling season! Why are you cooking indoors?

[Bagged steaks slide into the sous vide water]

I know the weather says it’s going to rain, but the storm is passing to the south.

[Rain starts pattering on the deck]

It’s not going to rain for long. The rough stuff is going to blow over.

[Rain increases to a constant drumming]

Don’t worry, it will be over soon. Just a quick shower.

[60 minutes later, rain is sheeting across the windows]

I give up. Heat up the cast iron. It’s time for dinner.

[Hissing steaks sear in the pan]

Mmm. Those look good. Too bad they’re not grilled.

[The clouds part, unveiling a rainbow]

Recipe: Sous Vide Filet Mignon with Shallot-Rosemary Butter

Equipment

  • Sous Vide setup (I went with my SousVide Supreme Demi)
  • Vacuum sealer (or use freezer zip-top bags and the displacement method - see the notes)
  • Heavy frypan (I use a 10 inch cast iron skillet)


SousVideFiletMignonWithShallotRosemaryButter-1030899
In the sous vide


SousVideFiletMignonWithShallotRosemaryButter-1030894
Making the shallot-rosemary butter

SousVideFiletMignonWithShallotRosemaryButter-1030909
Topping the seared steaks with butter


Notes

  • This recipe is perfect for beer cooler sous vide - the water stays the right temperature in a cooler for long enough to cook a steak. (But, it is easier to set up with a dedicated sous vide unit.)
  • Don't feel like vacuum sealing? Use the displacement method. Put everything in a freezer zip-top bag and s-l-o-w-l-y lower it into the water, squeezing out all the air. Seal the zip top and drop the bag in the water.

SousVideFiletMignonWithShallotRosemaryButter-1030930
Oh, my.

What do you think?

Questions? Other ideas? Leave them in the comments section below.

Related Posts

Sous Vide Grilled Filet Mignon with Parmesan Gremolata

Sous Vide Grilled Ribeye with Salsa Criolla

Sous Vide Grilled New York Strip Steaks with Herbs


Enjoyed this post? Want to help out DadCooksDinner? Subscribe to DadCooksDinner via eMail or RSS reader, recommend DadCooksDinner to your friends, and buy something from Amazon.com through the links on this site. Thank you.

Duck Burgers with Blue Cheese and Baby Spinach

August 6, 2015 by Mike Vrobel 2 Comments

Duck Burgers with Blue Cheese and Baby Spinach

My friends at Maple Leaf Farms asked me for pictures of duck on the grill, and sent me some duck to help make it happen. Ground duck? Time for duck burgers!

Duck burgers may sound fancy - they are, especially when gussied up with blue cheese and spinach 2I made typical duck burgers for the kids - with cheddar, onion, and tomato - and they were also great. But they’re not difficult to make. The only trick is, like ground turkey or ground chicken, ground duck is a softer meat than beef. Gently place the duck patty on the grill grate, and don’t mess with it until it is ready to flip. If you try to move it around before the bottom sets, the patty will fall apart.

I’ve sung the praises of duck fat before, and let me tell you, a burger with a hint of duck fat in it? Heaven.2The kids were dubious. I got the side eye when I said we were having duck burgers. But they downed them, then argued over who got the one leftover duck burger for lunch the next day. Get your hands on some ground duck and try out this recipe.

Recipe: Duck Burgers with Blue Cheese and Baby Spinach

Equipment

  • Grill (I love my massive Weber Summit)
  • Optional: Hamburger press and patty papers. (My hamburger press is massively over-engineered, and I love it.)


Duck Burgers with Blue Cheese-1030461
On the grill

Duck Burgers with Blue Cheese-1030471
Topped with cheese

Notes

  • Patty paper - little squares of wax paper - may seem like an extra complication, but they make transferring the burgers to the grill quick and easy. I leave each formed burger patty on a patty sheet. I flip the burger onto the grill grate, peel the patty sheet off, then leave the burger alone while the bottom sets.

What do you think?

Questions? Other ideas? Leave them in the comments section below.

Related Posts

Grilled Cheeseburgers (Grilling Basics)
Kofta Kebab
Pan Grilled Duck Breast with Duck Fat Paprika Potatoes

My Grilling Recipe Index is here


Enjoyed this post? Want to help out DadCooksDinner? Subscribe to DadCooksDinner via eMail or RSS reader, recommend DadCooksDinner to your friends, and buy something from Amazon.com through the links on this site. Thank you.

  • « Previous Page
  • 1
  • …
  • 16
  • 17
  • 18
  • 19
  • 20
  • …
  • 37
  • Next Page »

Welcome to Dad Cooks Dinner!

I'm Mike Vrobel, a dad who cooks dinner every night. I'm an enthusiastic home cook, and I write about pressure cooking, rotisserie grilling, and other food topics that grab my attention.

More About Me →

Popular

  • Three bowls of cooked Pinto Beans on a wood table
    Instant Pot Pinto Beans (No Soaking)
  • Pressure Cooker Beef Shank (Osso Bucco)
  • Pressure Cooker 7 Hour Leg of Lamb (in 90 minutes)
    Pressure Cooker 7 Hour Leg of Lamb (in 90 minutes)
  • Pressure Cooker Brown Jasmine Rice
  • Grilled Tomahawk Steak (Long Bone Ribeye, Reverse Seared)
    Grilled Tomahawk Steak (Long Bone Ribeye, Reverse Seared)
  • A green bowl full of chicken noodle soup
    Instant Pot Rotisserie Chicken Noodle Soup

Seasonal

  • A bowl of asparagus risotto
    Instant Pot Asparagus Risotto (Pressure Cooker Recipe)
  • Grilled Butterflied Chicken with Garlic Butter
  • Sous Vide rack of lamb sliced into chops
    Sous Vide Rack of Lamb with Dijon Bread Crumb Crust
  • A bowl of beef stew with asparagus, carrots, and radishes.
    Instant Pot Spring Vegetable Beef Stew
  • A Rotisserie Chicken (Pollo Asado)on a platter of shredded cabbage
    Rotisserie Chicken Pollo Asado
  • Rotisserie Pork Shoulder Roast with Carolina Mustard BBQ Sauce
    Rotisserie Pork Shoulder with South Carolina Mustard Barbecue Sauce

Footer

↑ back to top

About

  • Privacy Policy

Newsletter

  • Sign Up! for emails and updates

Contact

  • Contact

Copyright © 2025 Dad Cooks Dinner