DadCooksDinner

  • Home
  • Rotisserie
  • Recipes
  • Tools
  • Books
  • Merch
menu icon
go to homepage
  • Recipes
  • Books
  • Tools
  • Merch
  • About
subscribe
search icon
Homepage link
  • Recipes
  • Books
  • Tools
  • Merch
  • About
×
Home » Recipes

Instant Pot Moroccan Lamb Shanks

April 25, 2023 by Mike Vrobel 2 Comments

A lamb shank on a bowl of couscous with an Instant Pot in the background

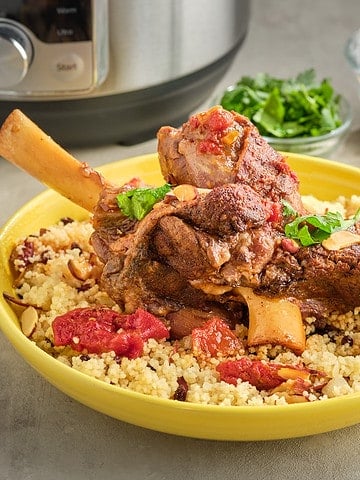
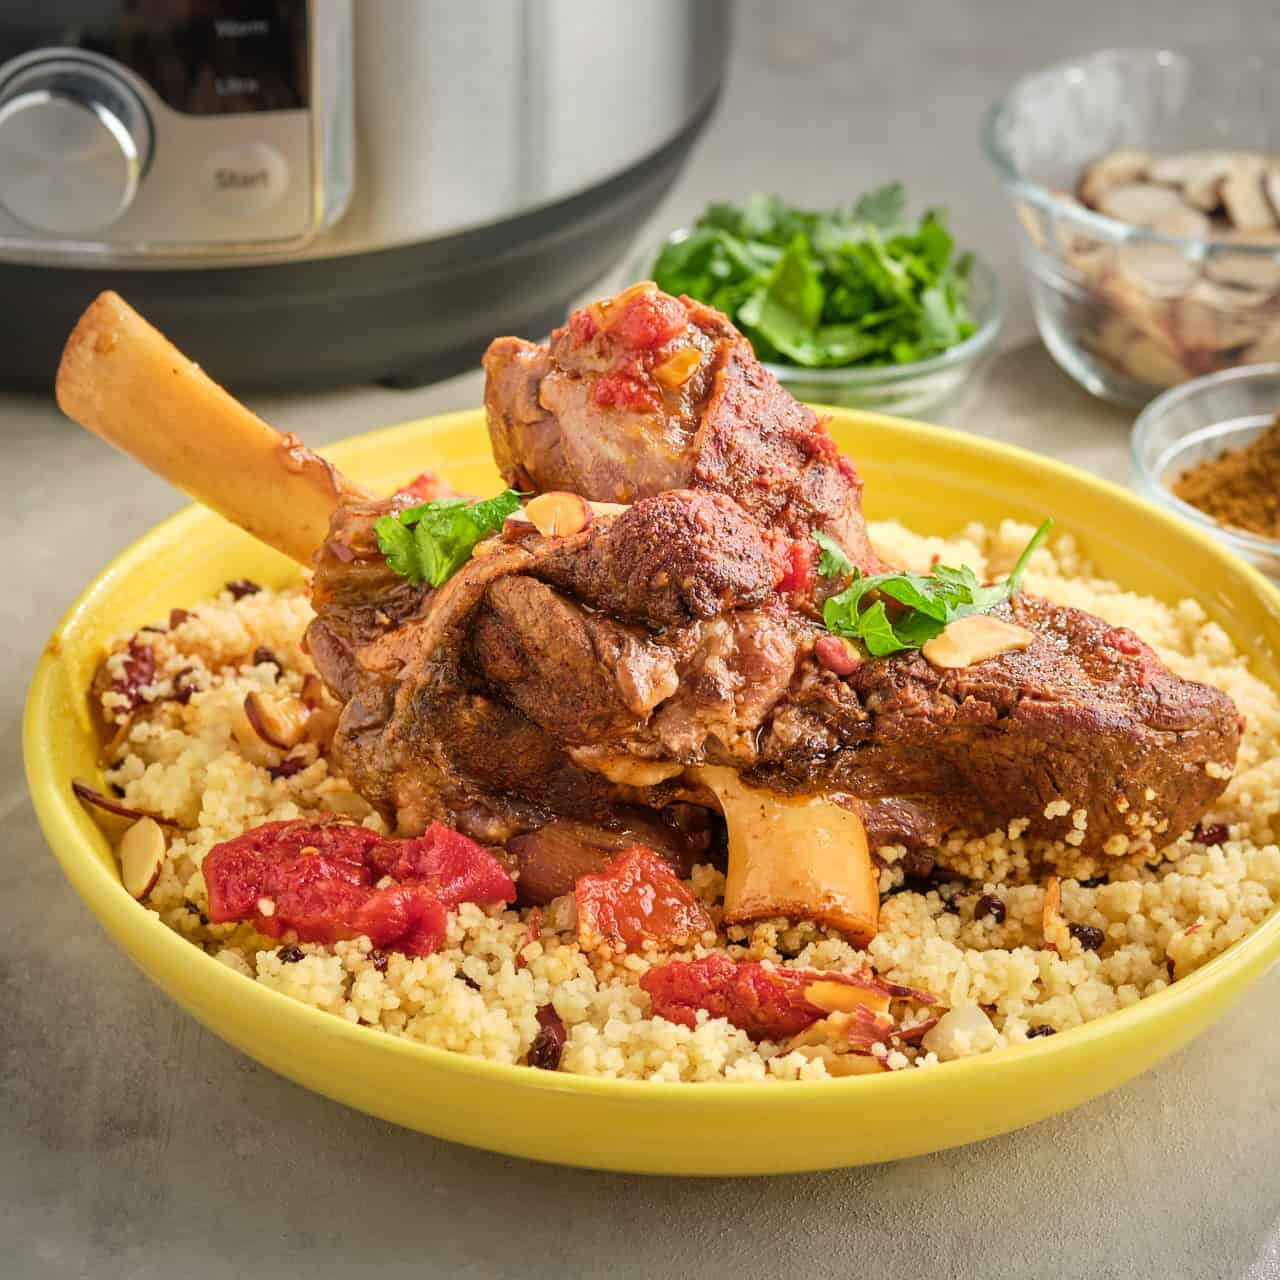
Instant Pot Moroccan Lamb Shanks. Lamb shanks braised with Ras El Hanout spices, ready in about an hour thanks to pressure cooking.

From the Silk Road's caravans to maritime Spice Route ships, Morocco has always been an important stop for the spice trade. I love Ras El Hanout, Morocco's "head of the shop" spice blend, especially when I combine its warming spices with lamb.

A lamb shank on a bowl of couscous with an Instant Pot in the background
[feast_advanced_jump_to]

Pressure-cooked lamb shanks are fantastic. Who wouldn't love tender lamb, falling off the bone in about an hour? As I explain in the Tips and Tricks section, the only trick to this recipe is to get lamb shanks that will fit in your pot. If you have an 8-quart Instant Pot, now is the time to bring it out - not because you need the 2 extra quarts, but because the extra width of the pot makes it easier to fit the shanks.

Ingredients

  • Olive oil
  • Lamb shanks
  • Ras el Hanout spice blend
  • Fine sea salt
  • Onion
  • Garlic
  • Fine sea salt
  • Chicken broth
  • Currants (or raisins)
  • Diced tomatoes
  • Couscous as a side dish (optional)
  • Minced cilantro as garnish (optional)
  • Sliced almonds as garnish (optional)
  • Harissa paste as a garnish (optional)

See the recipe card for quantities.

Instructions

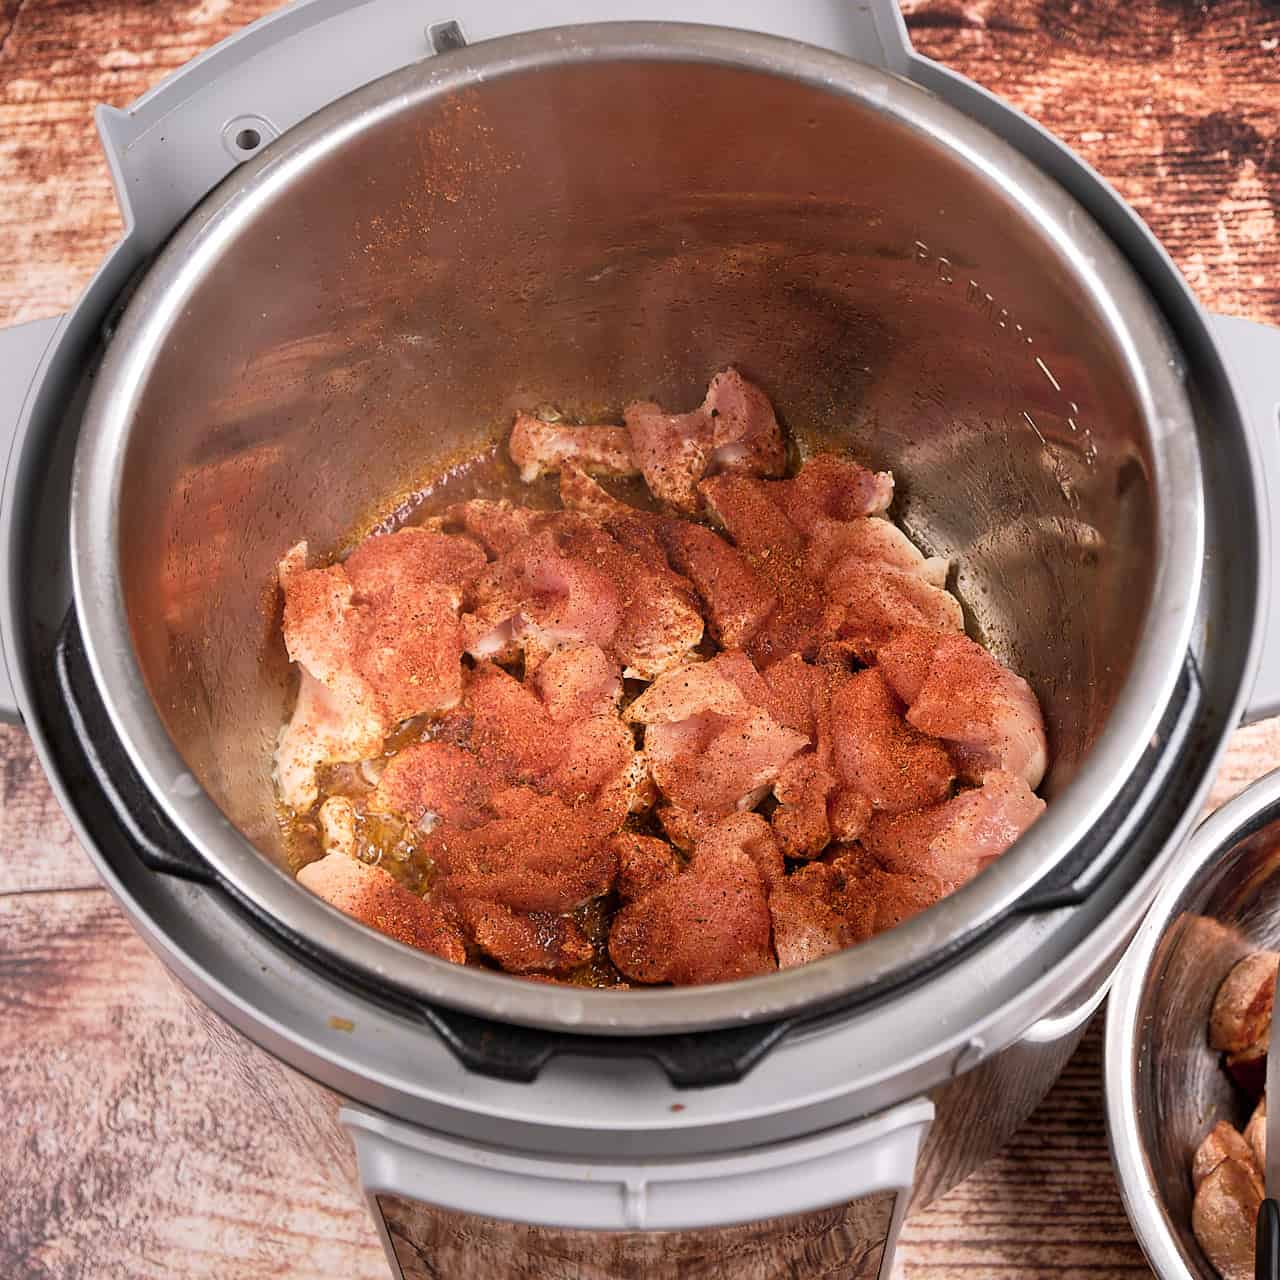
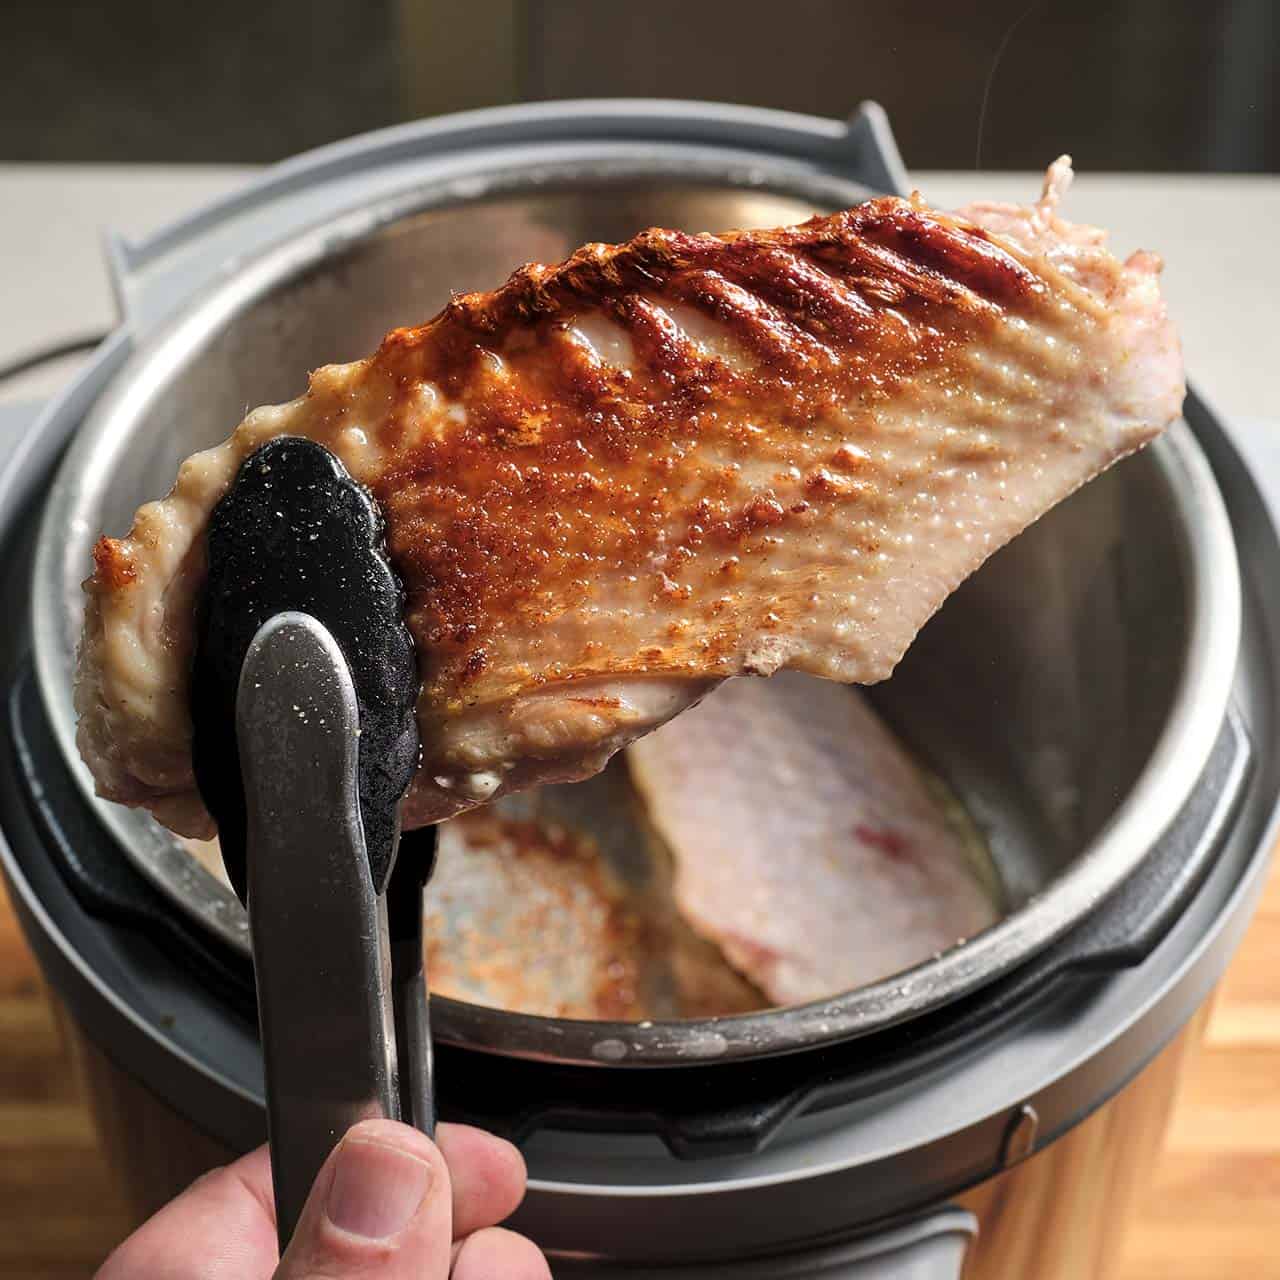
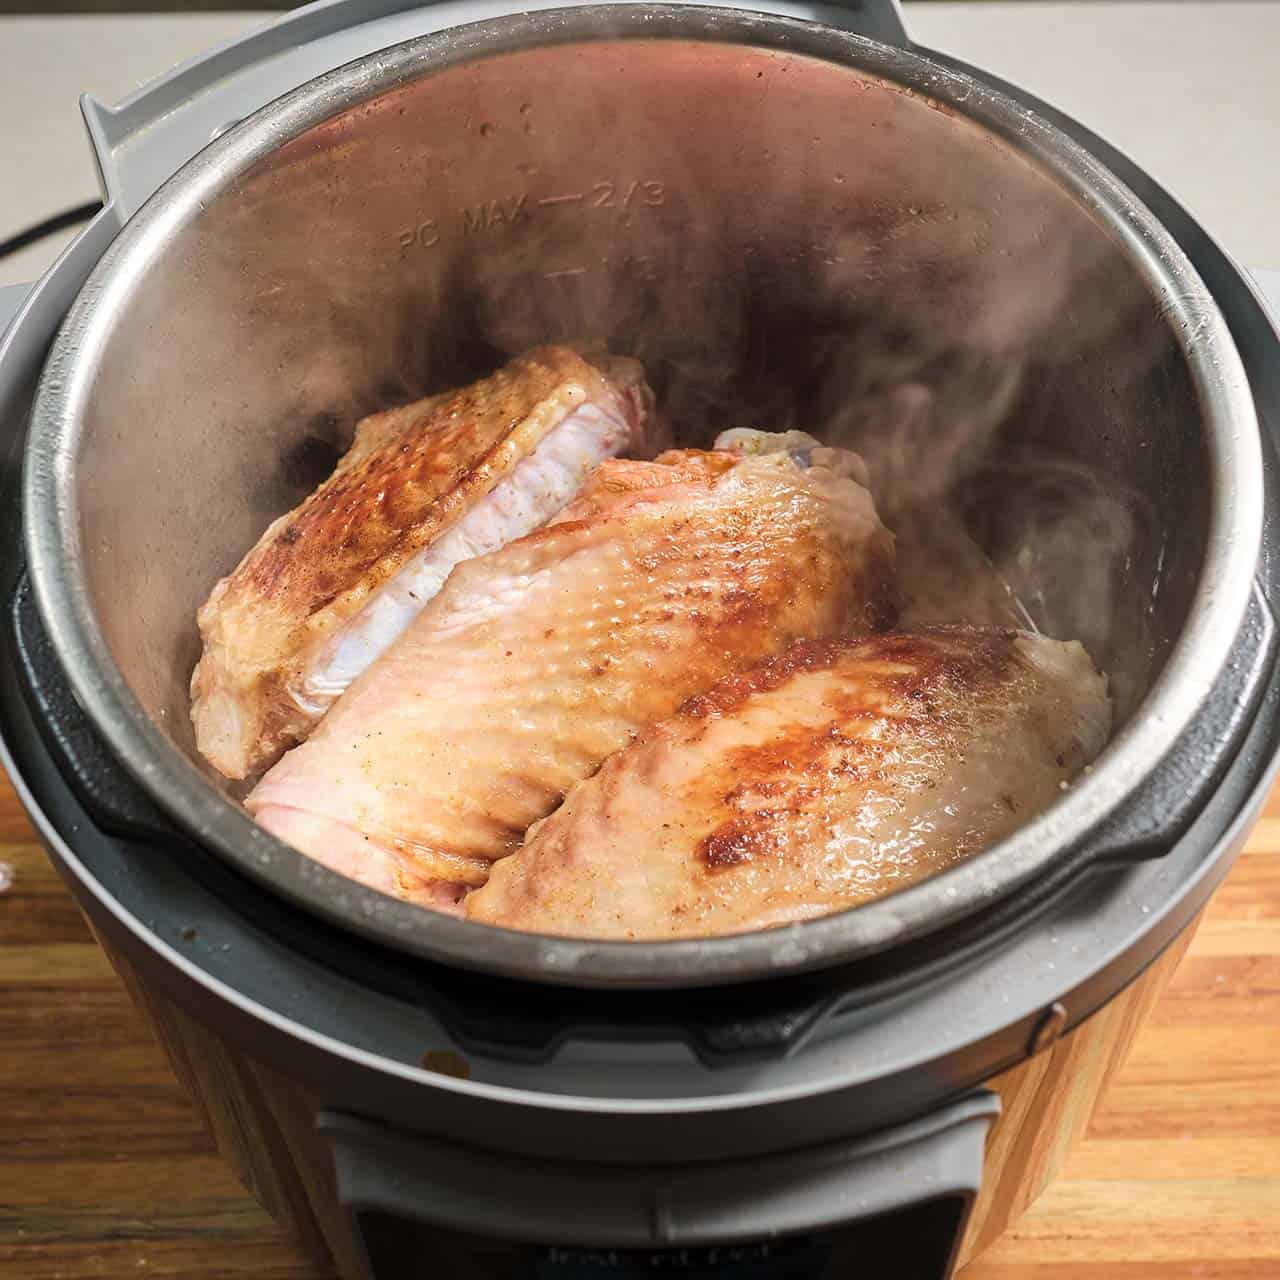
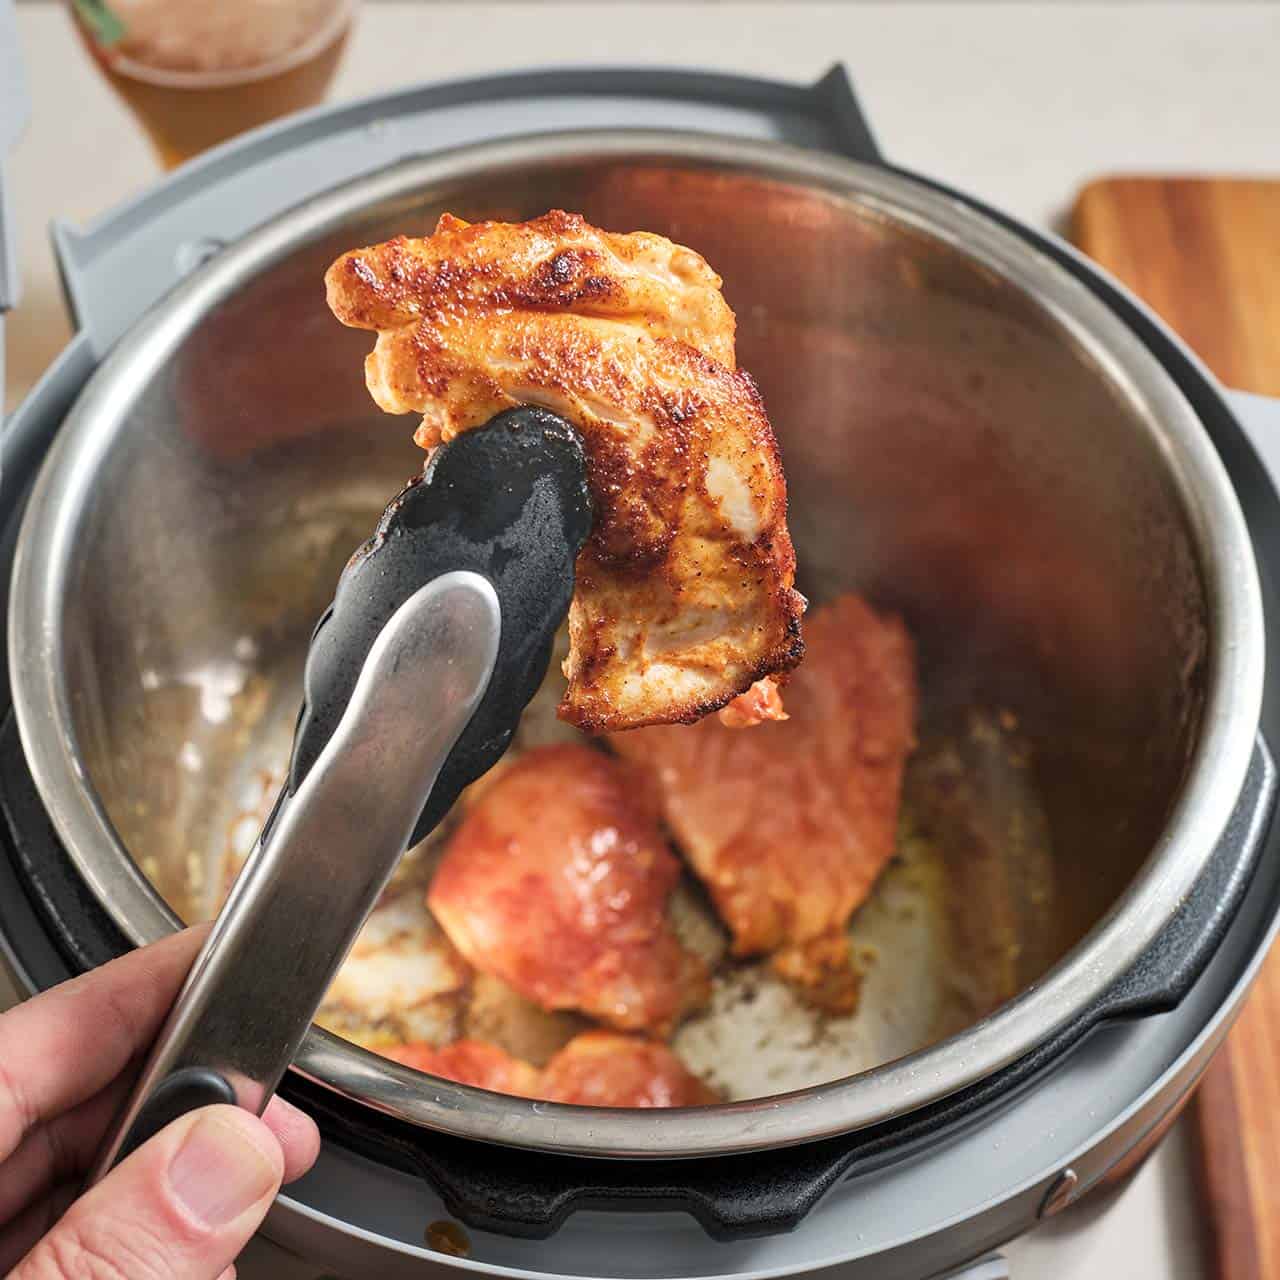
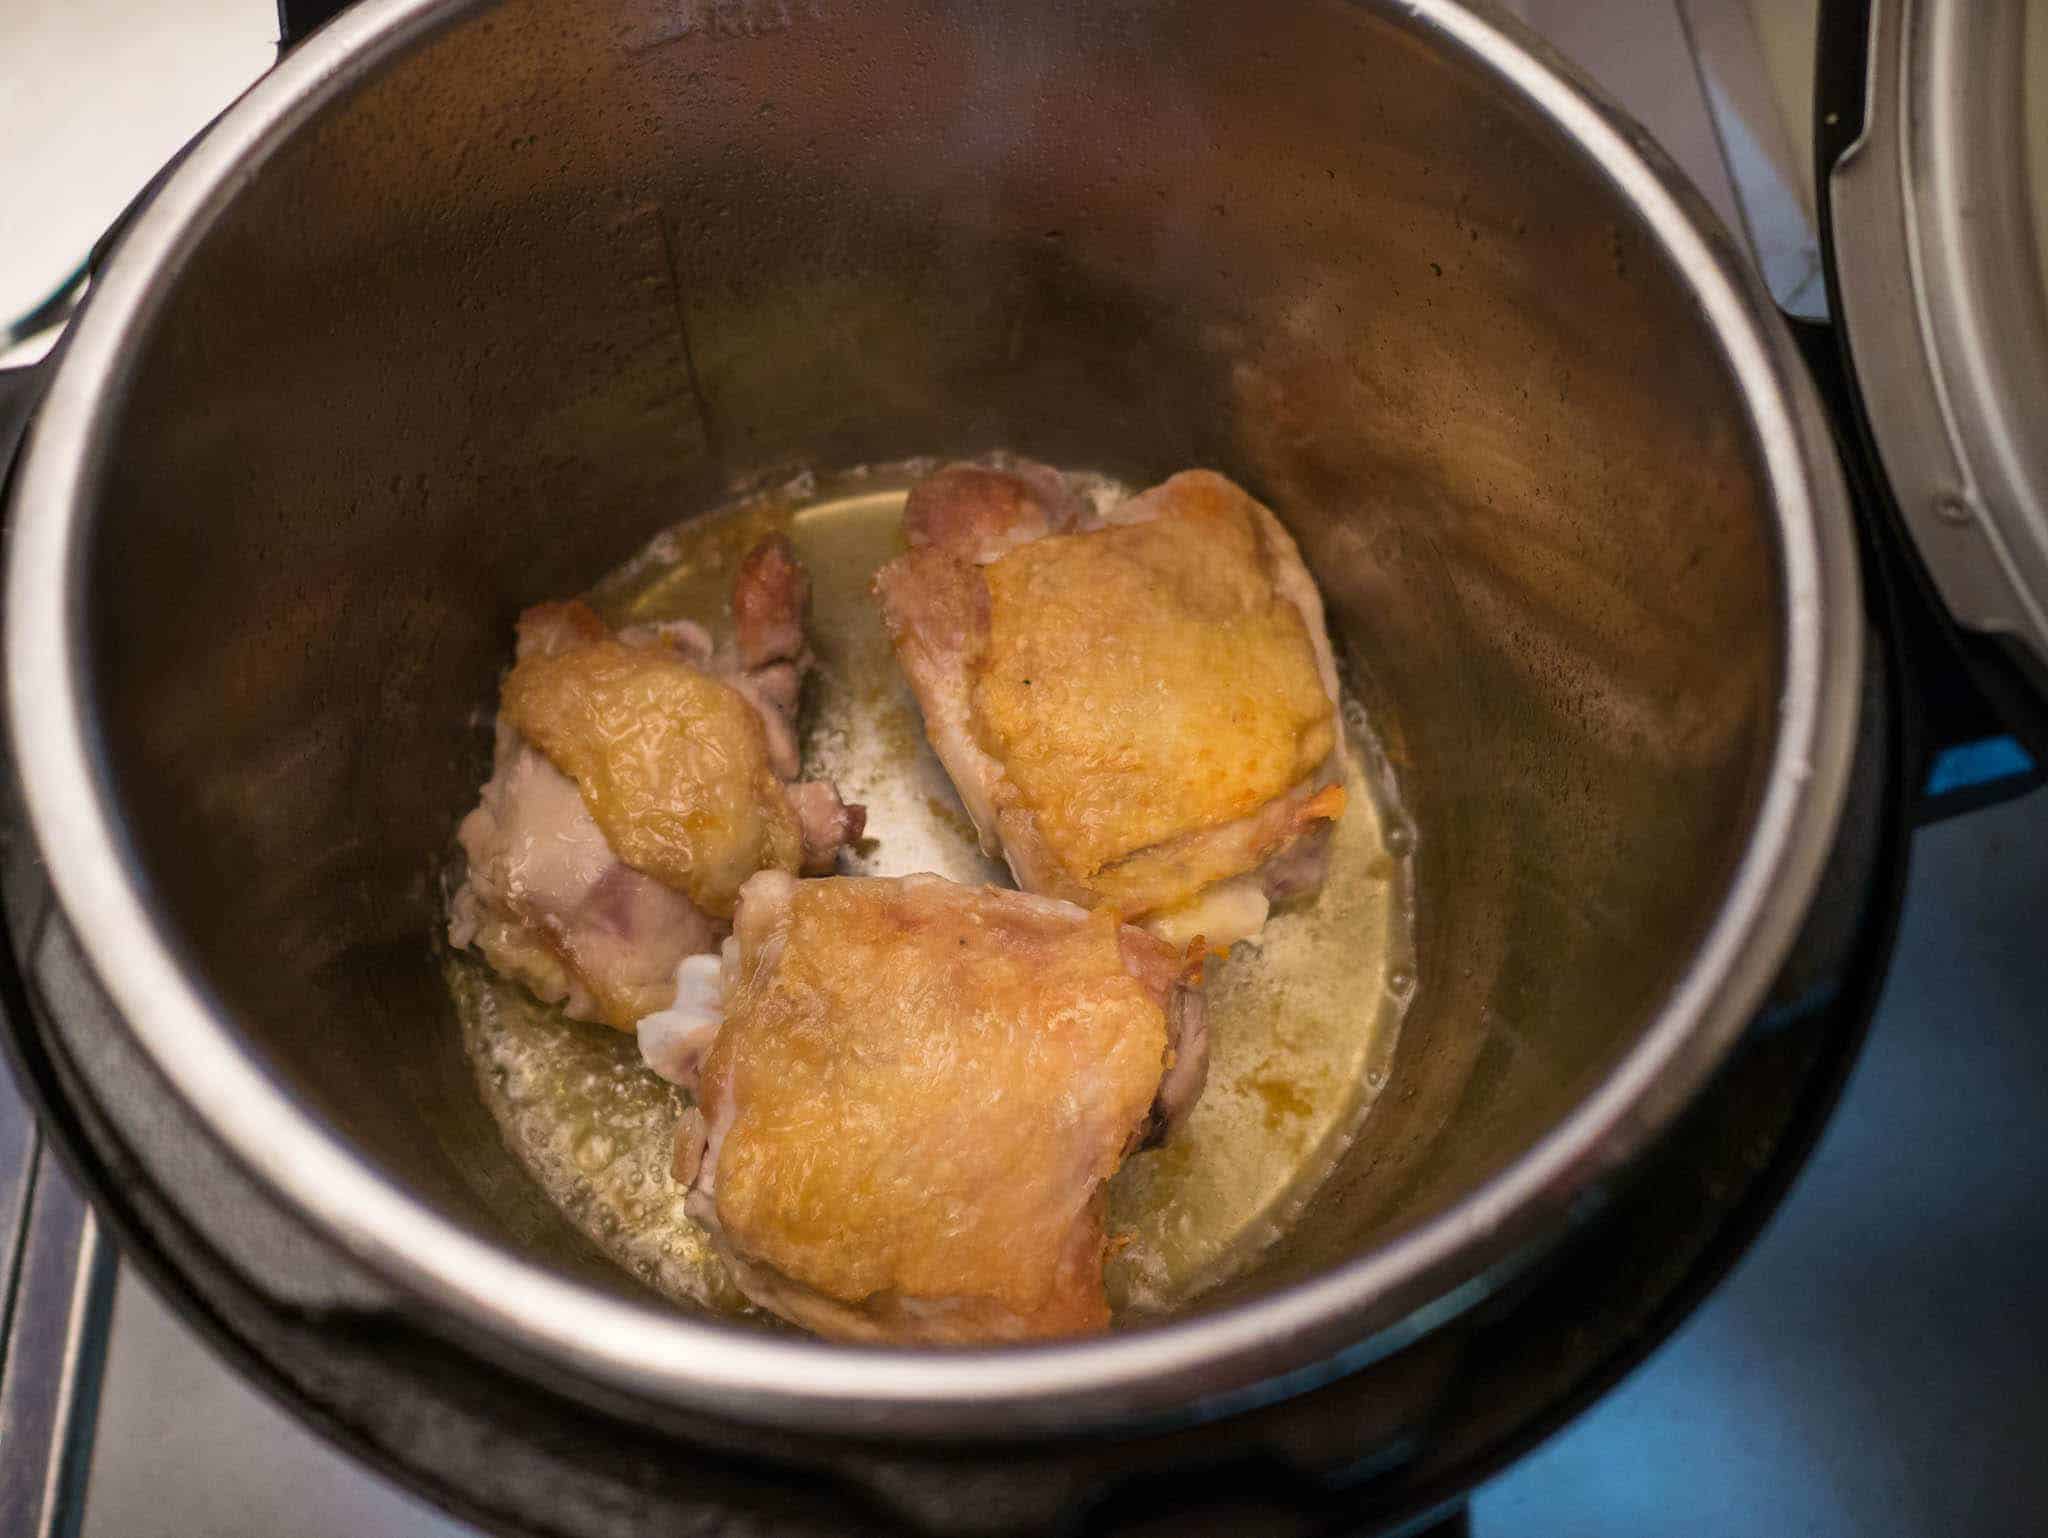
Sear the lamb shanks: Heat the olive oil in an Instant Pot set to Sauté mode - high until the oil is shimmering. (Use medium-high heat with a stovetop PC). Sprinkle the lamb shanks with 2 teaspoons of salt and 2 teaspoons of Ras el Hanout spice blend. Brown the shanks in two batches: put 2 shanks in the pot, meaty side down, and cook until browned, about 4 minutes. Move the browned shanks to a bowl, brown the second set of shanks, and move them to the bowl with the other shanks.

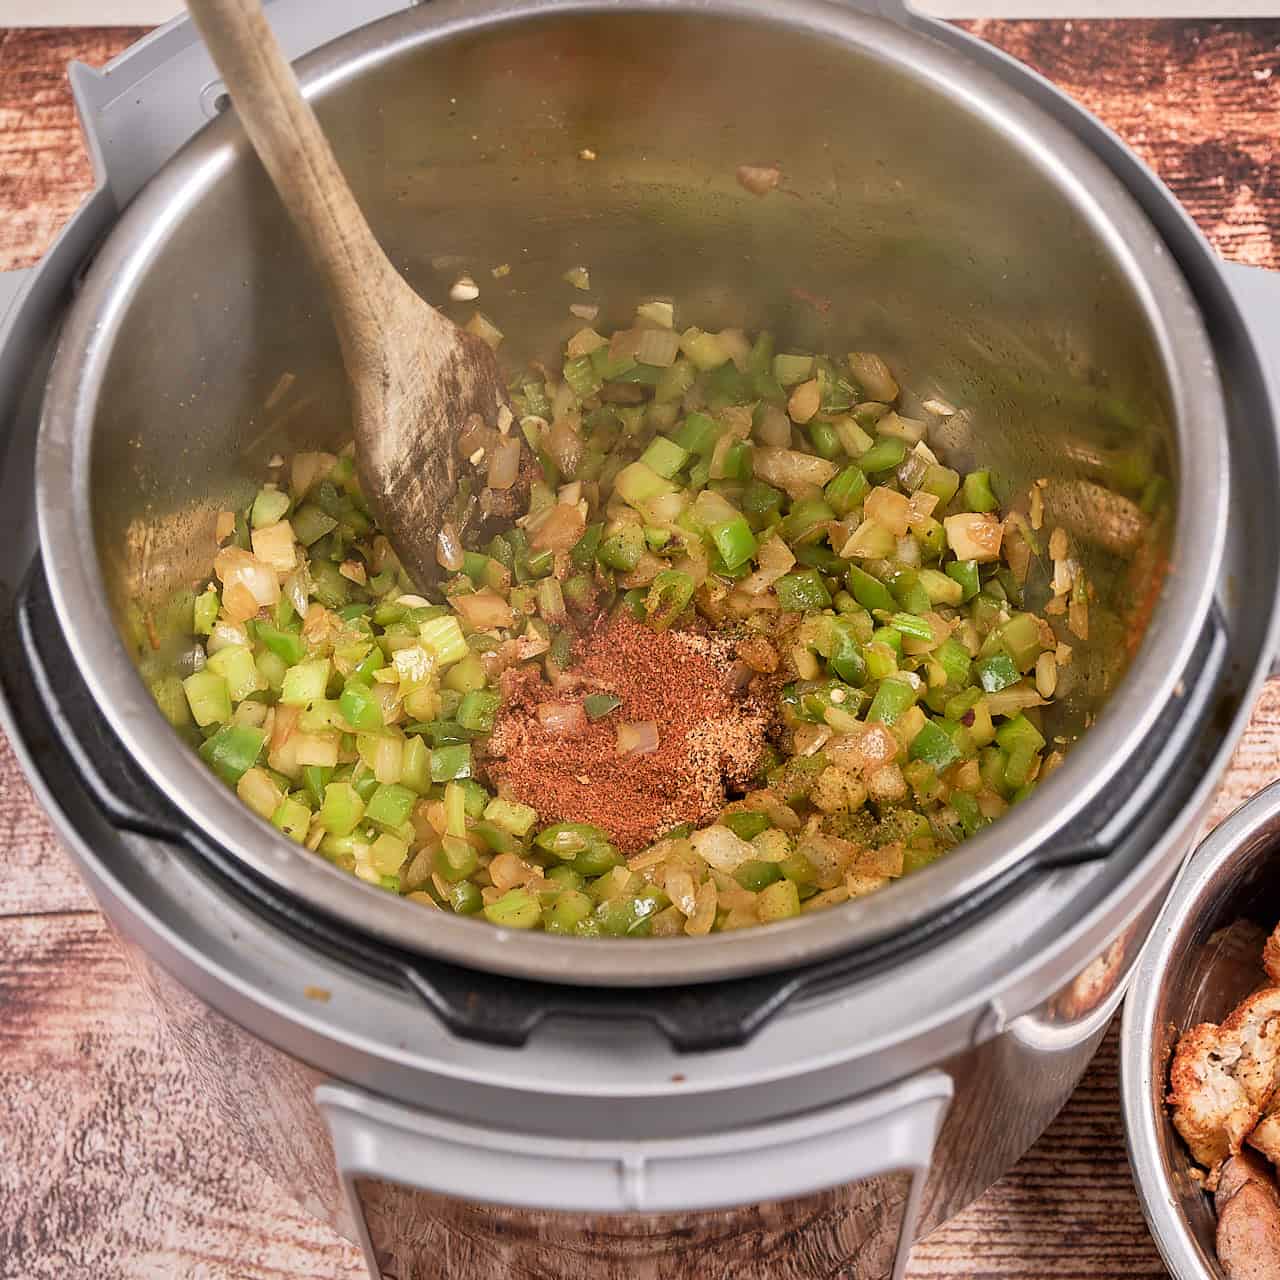
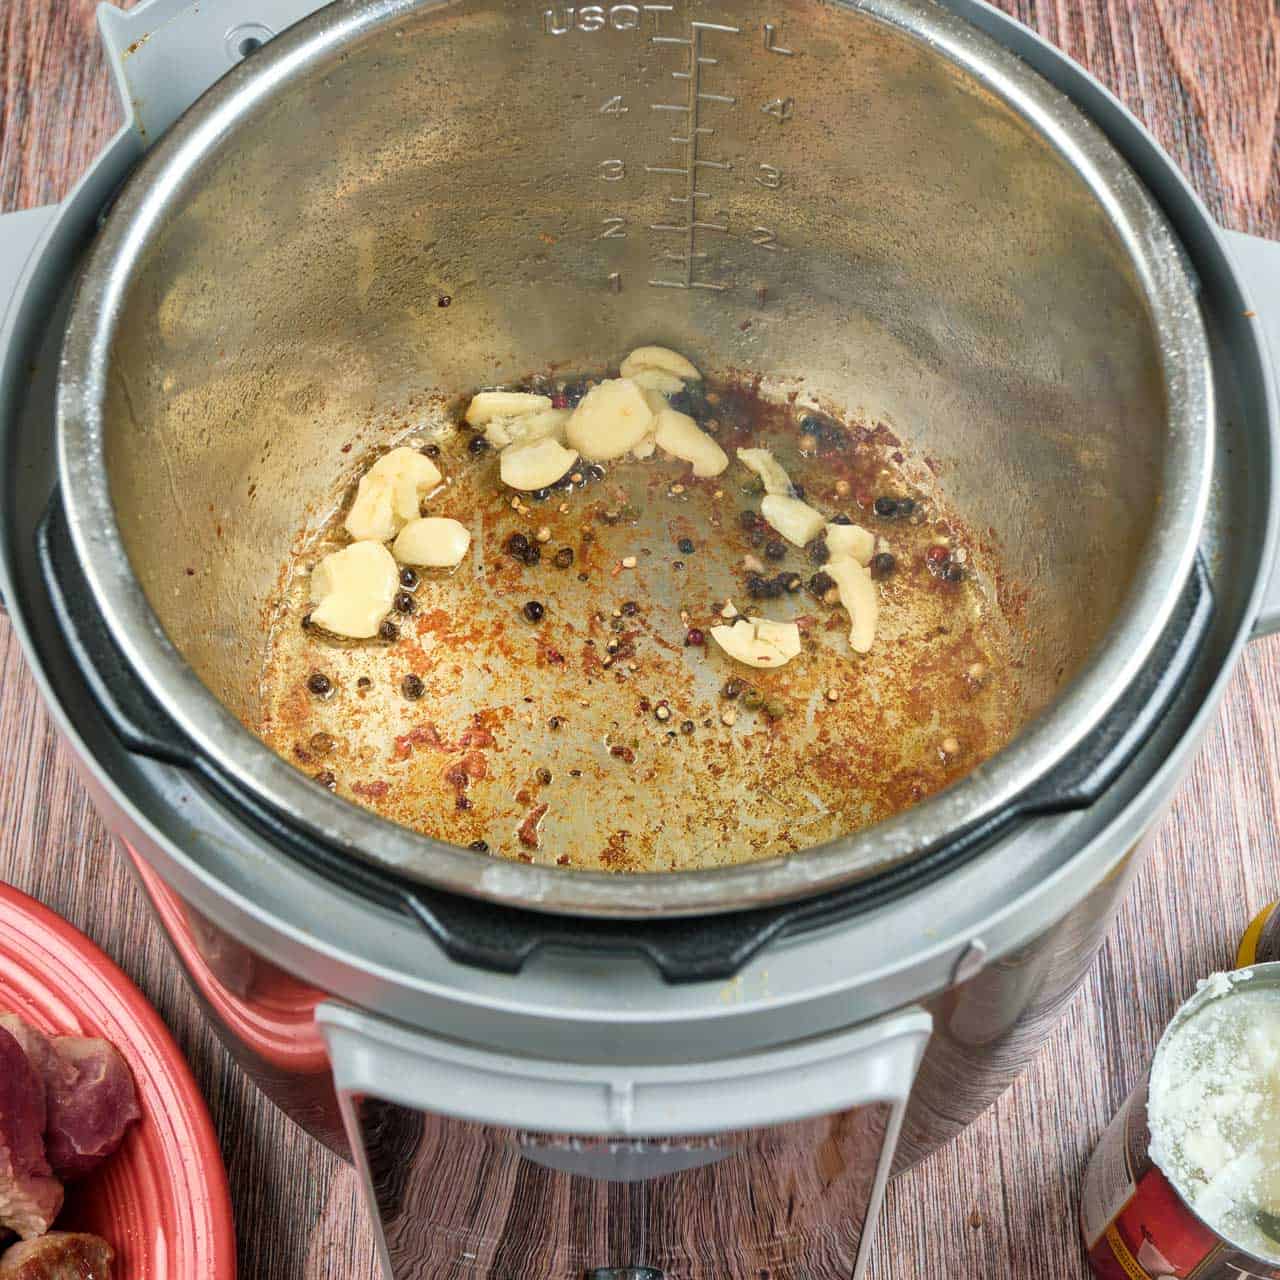
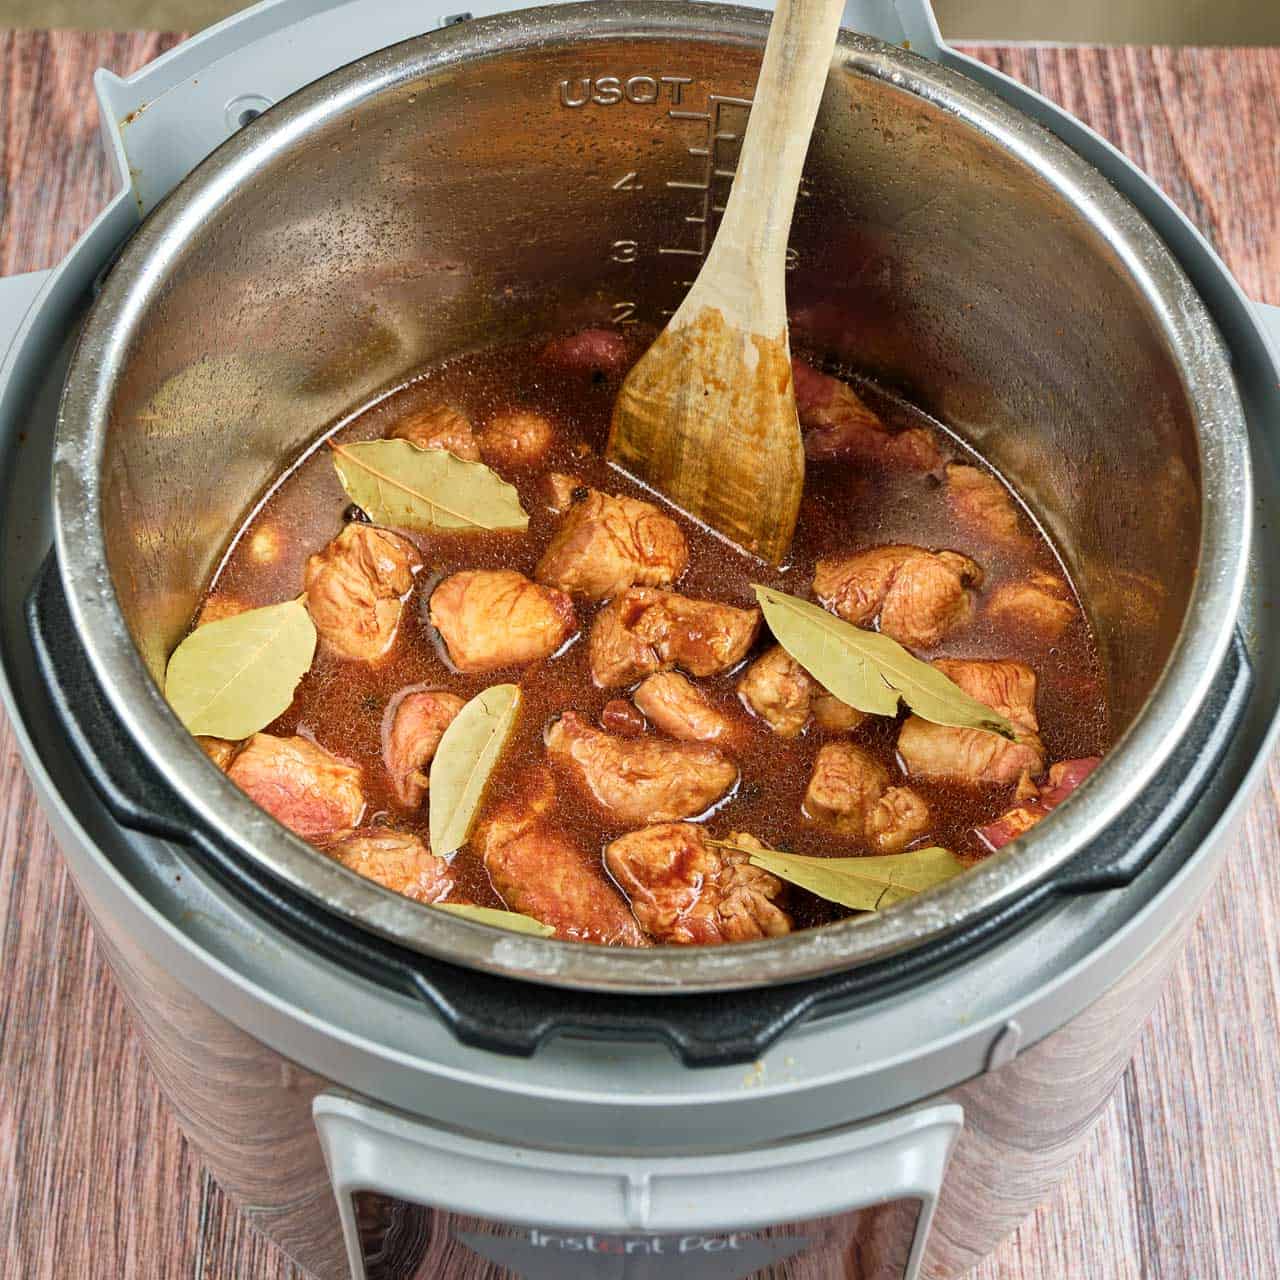
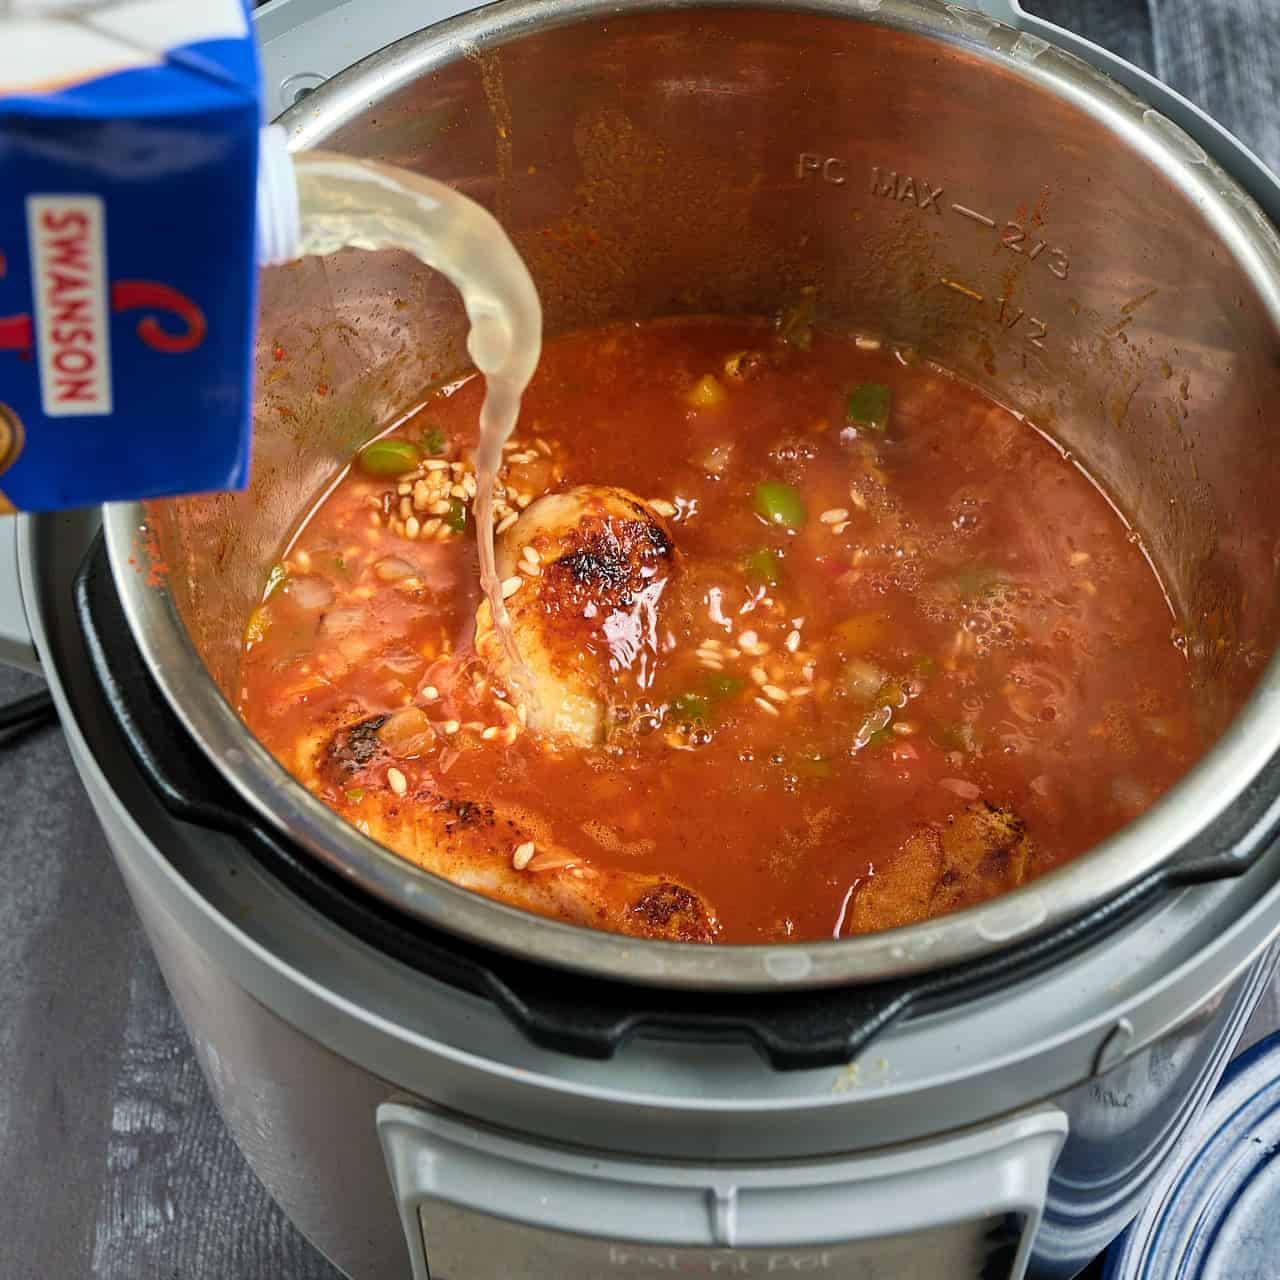
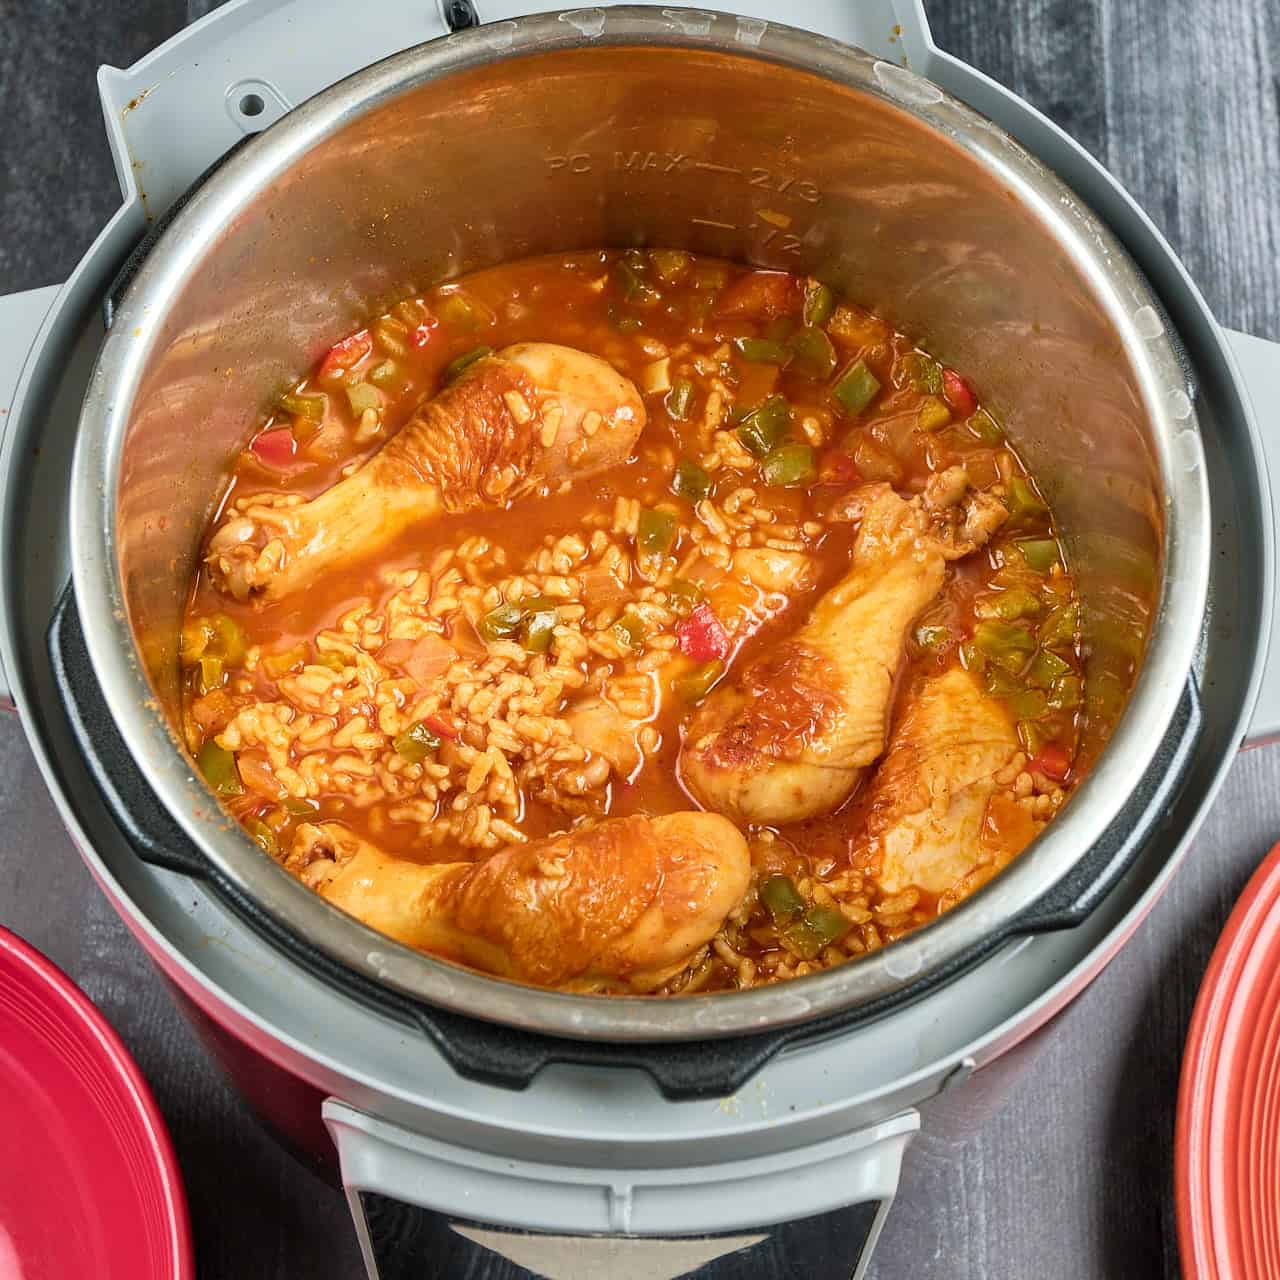
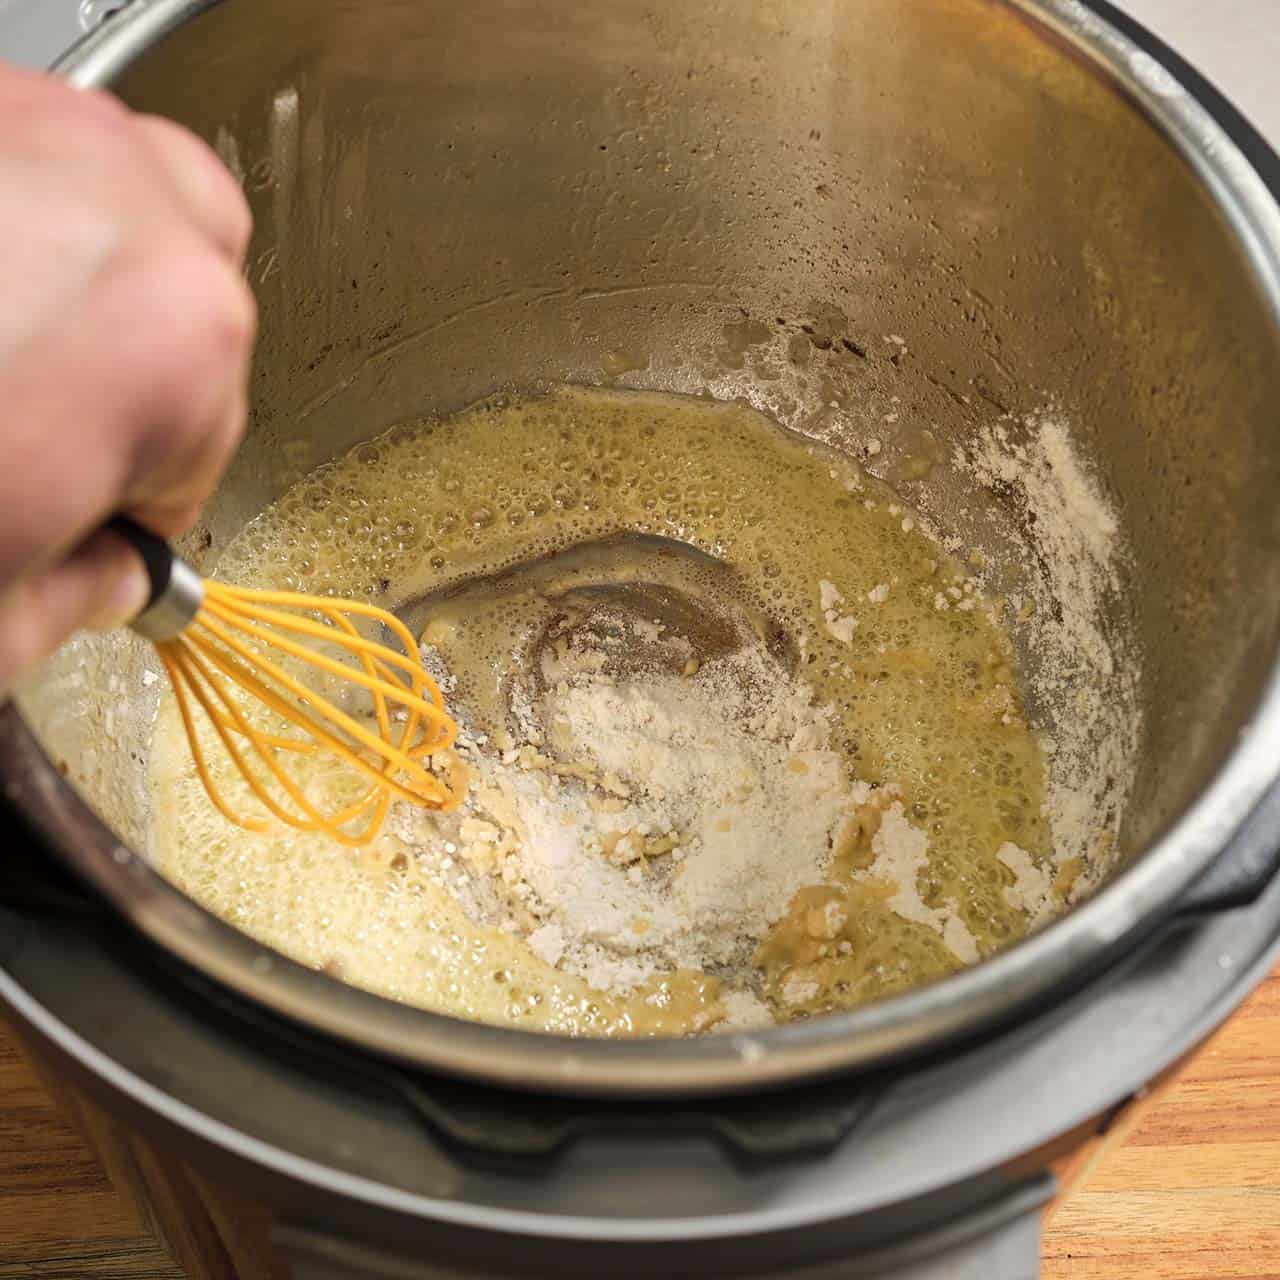
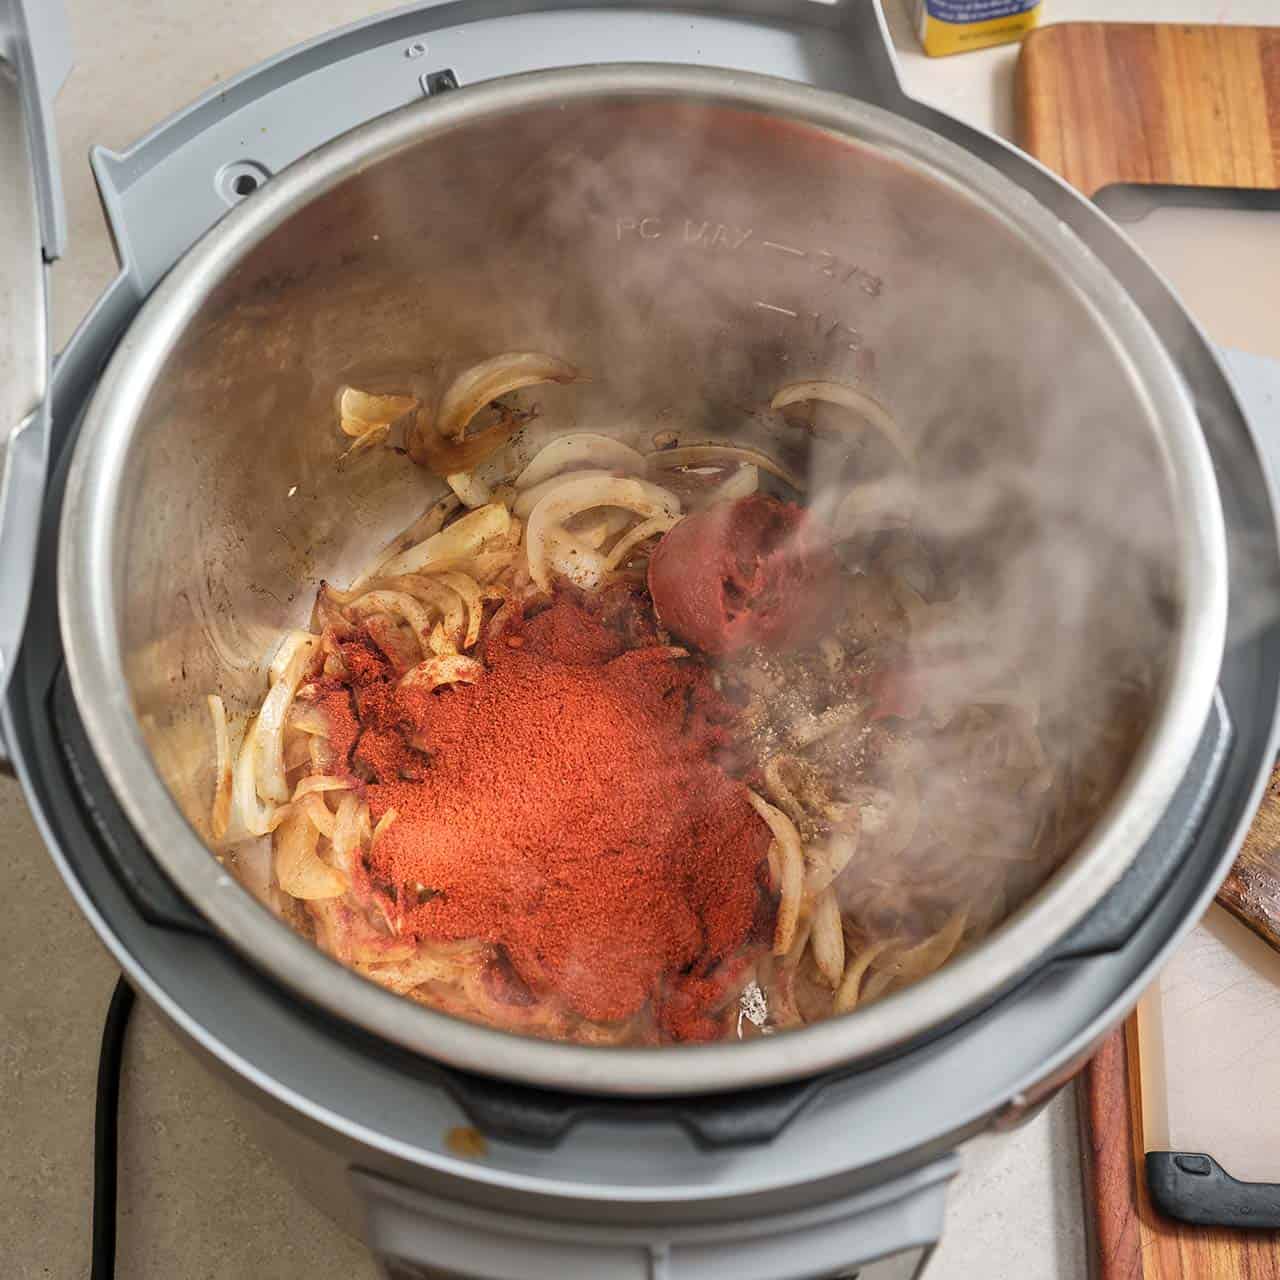
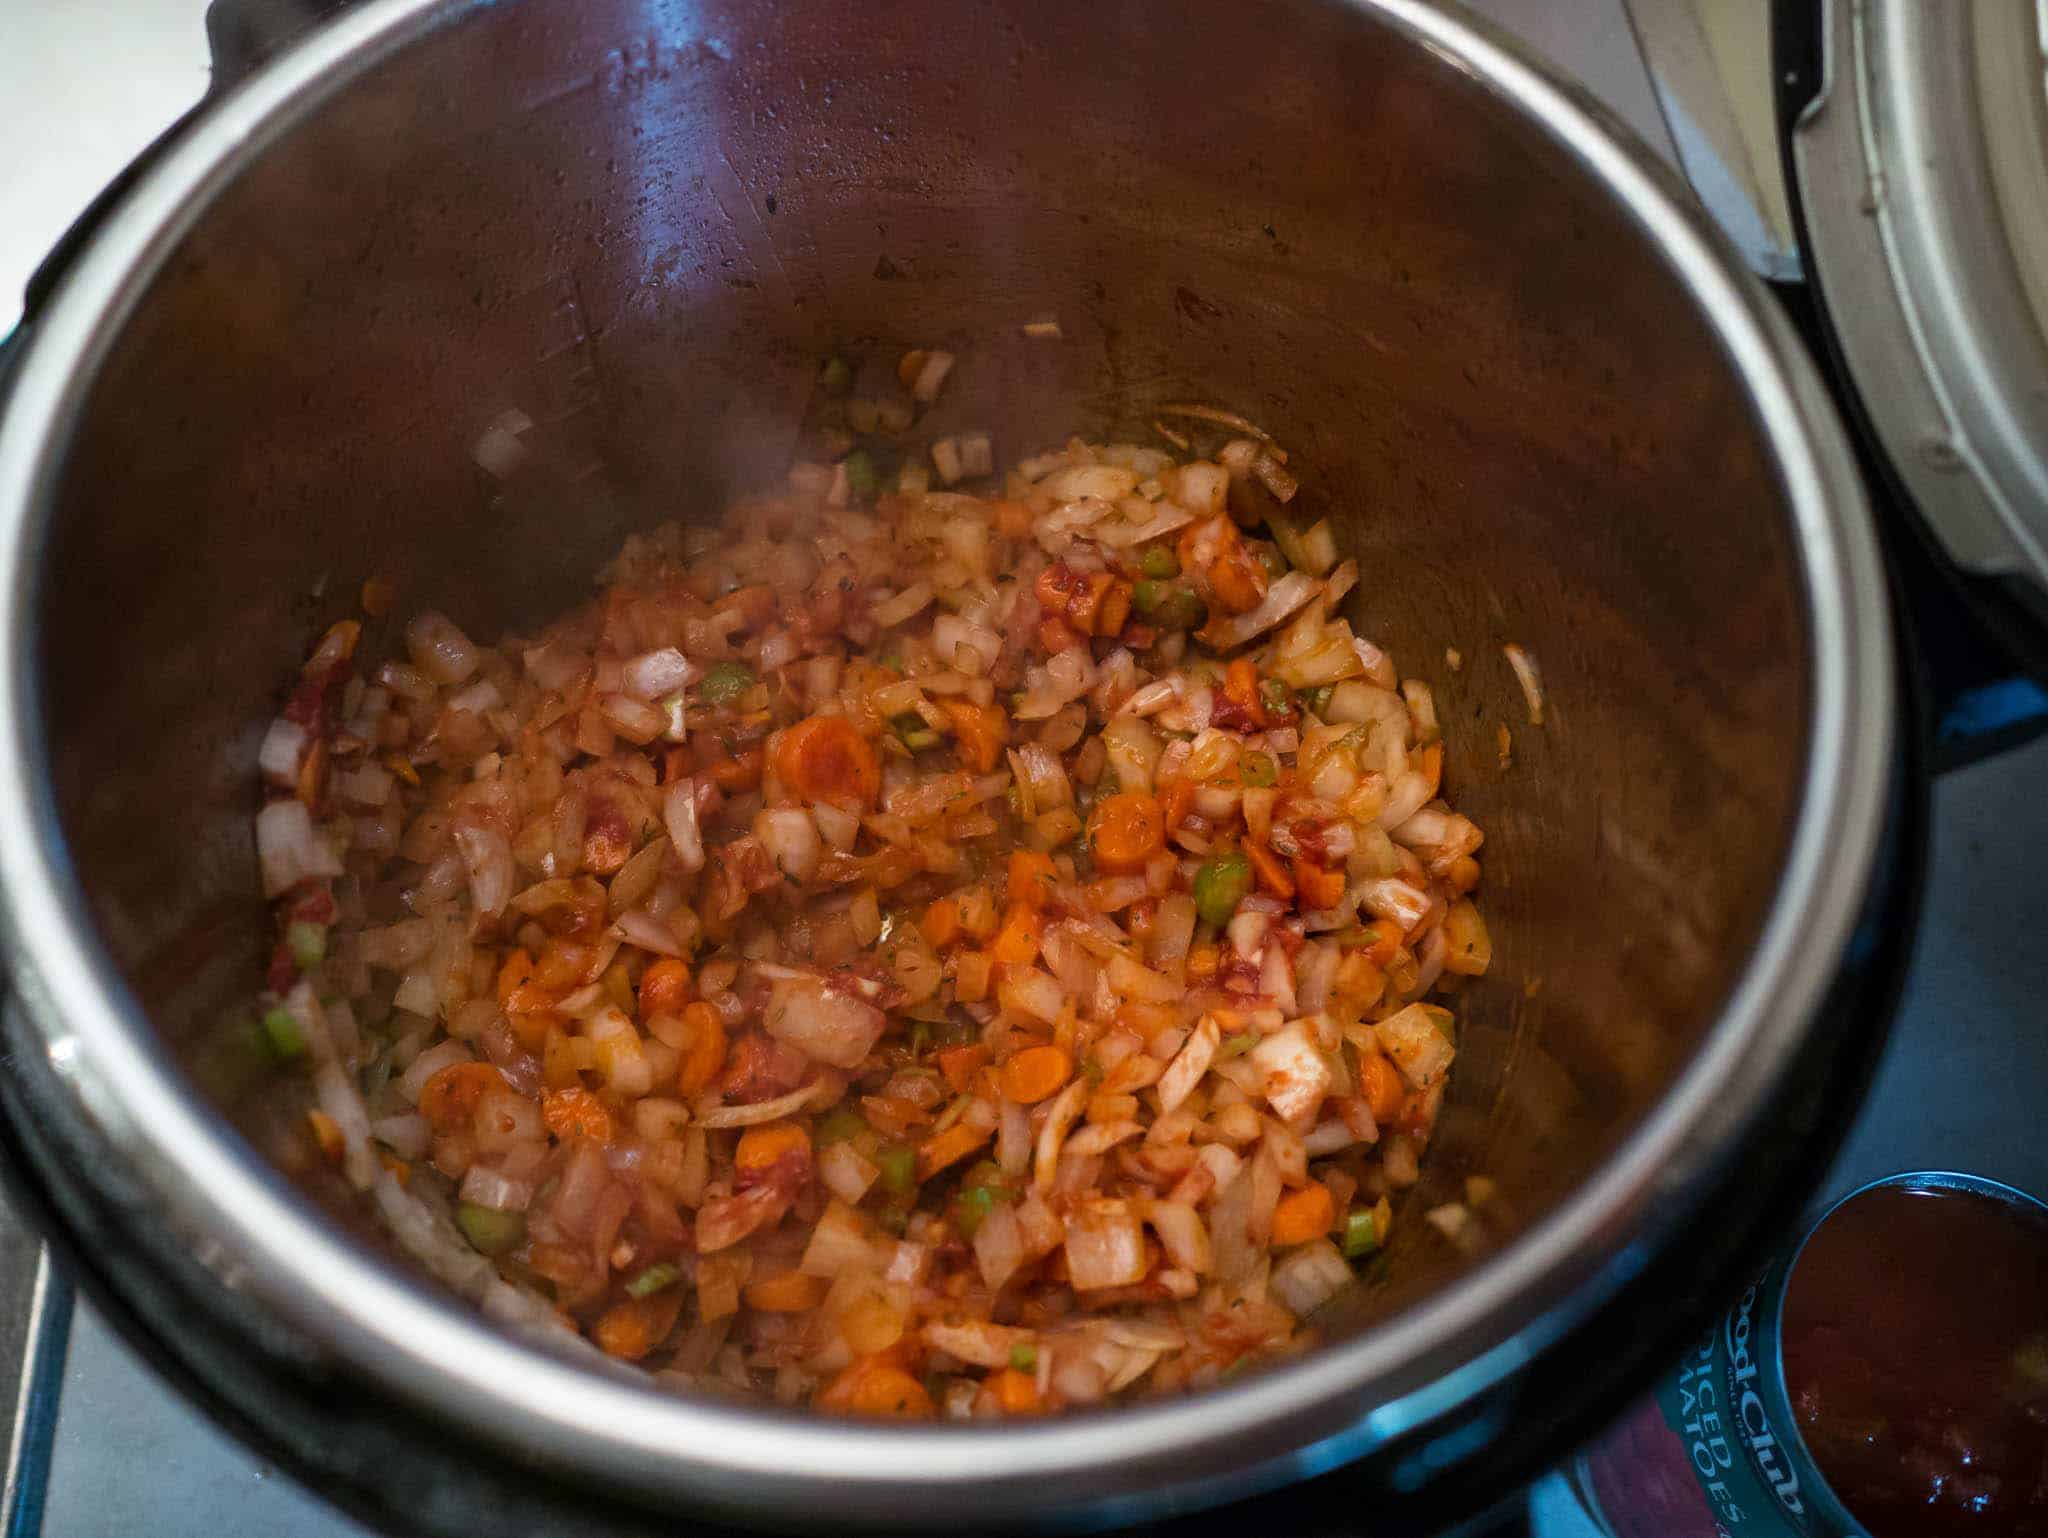
Sauté the aromatics: Add the onion and garlic to the pot, and sprinkle with ½ teaspoon salt. Sauté for five minutes, or until the onions soften, occasionally scraping the pot with a flat-edged wooden spoon to loosen any browned bits of lamb or onion. Stir in the chicken broth, and scrape the bottom of the pot one last time to loosen any browned bits. Add the lamb shanks and any lamb juices from the bowl, sprinkle with the currants, and pour the diced tomatoes over everything.

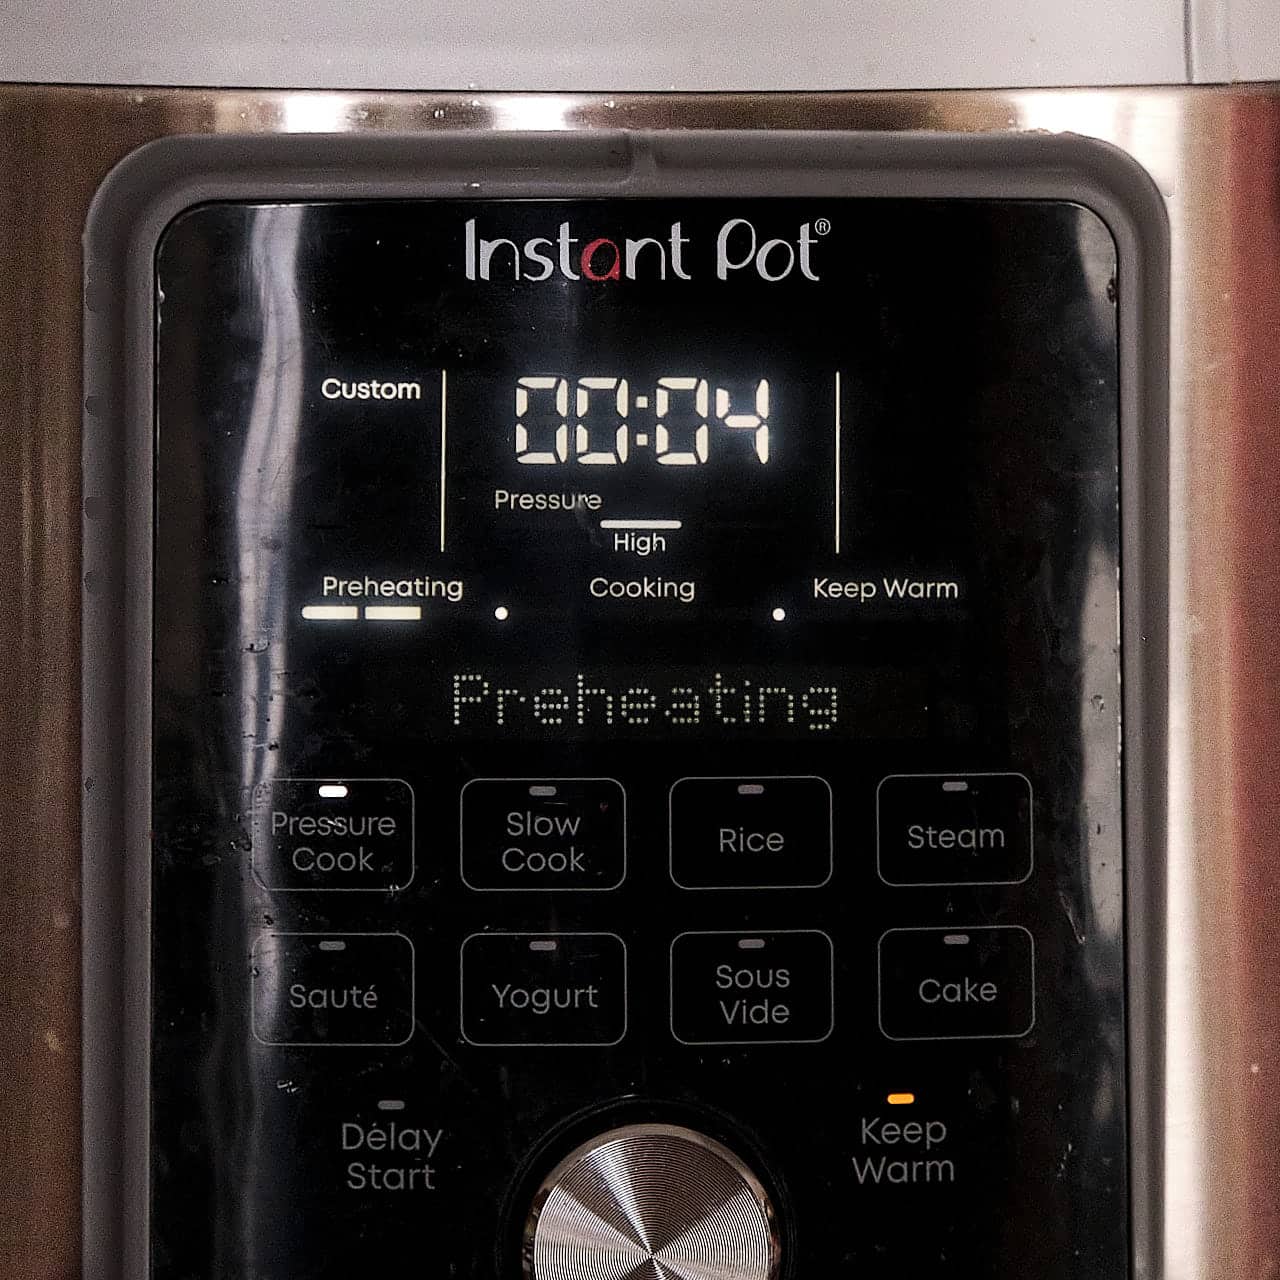
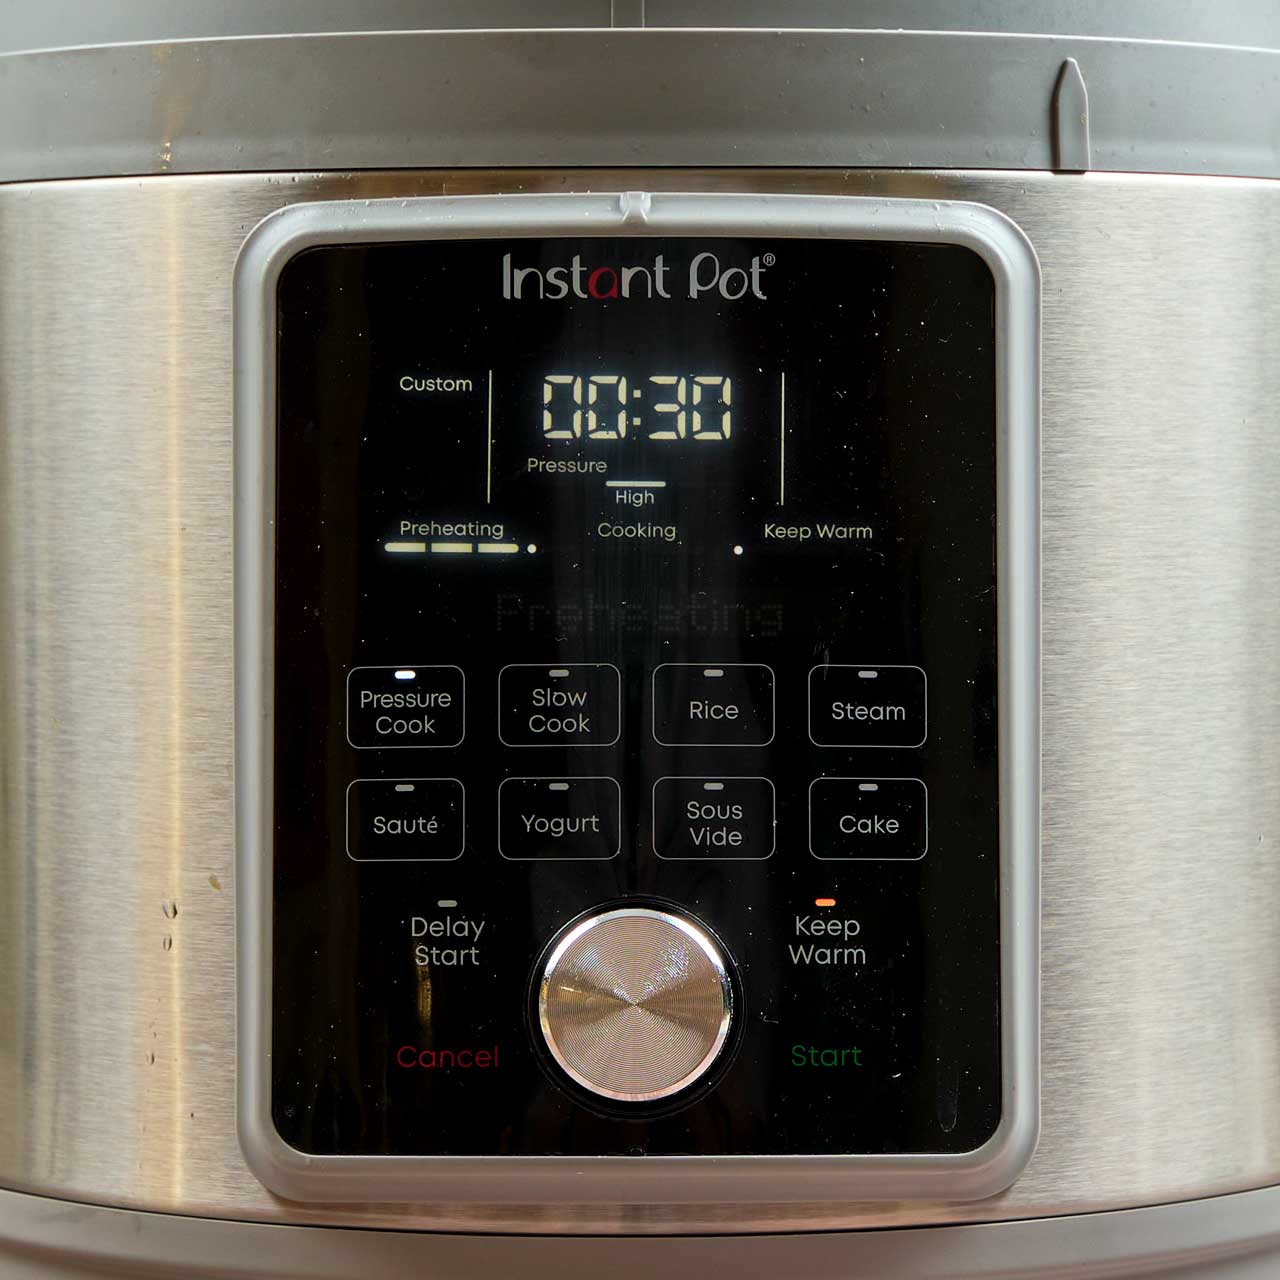
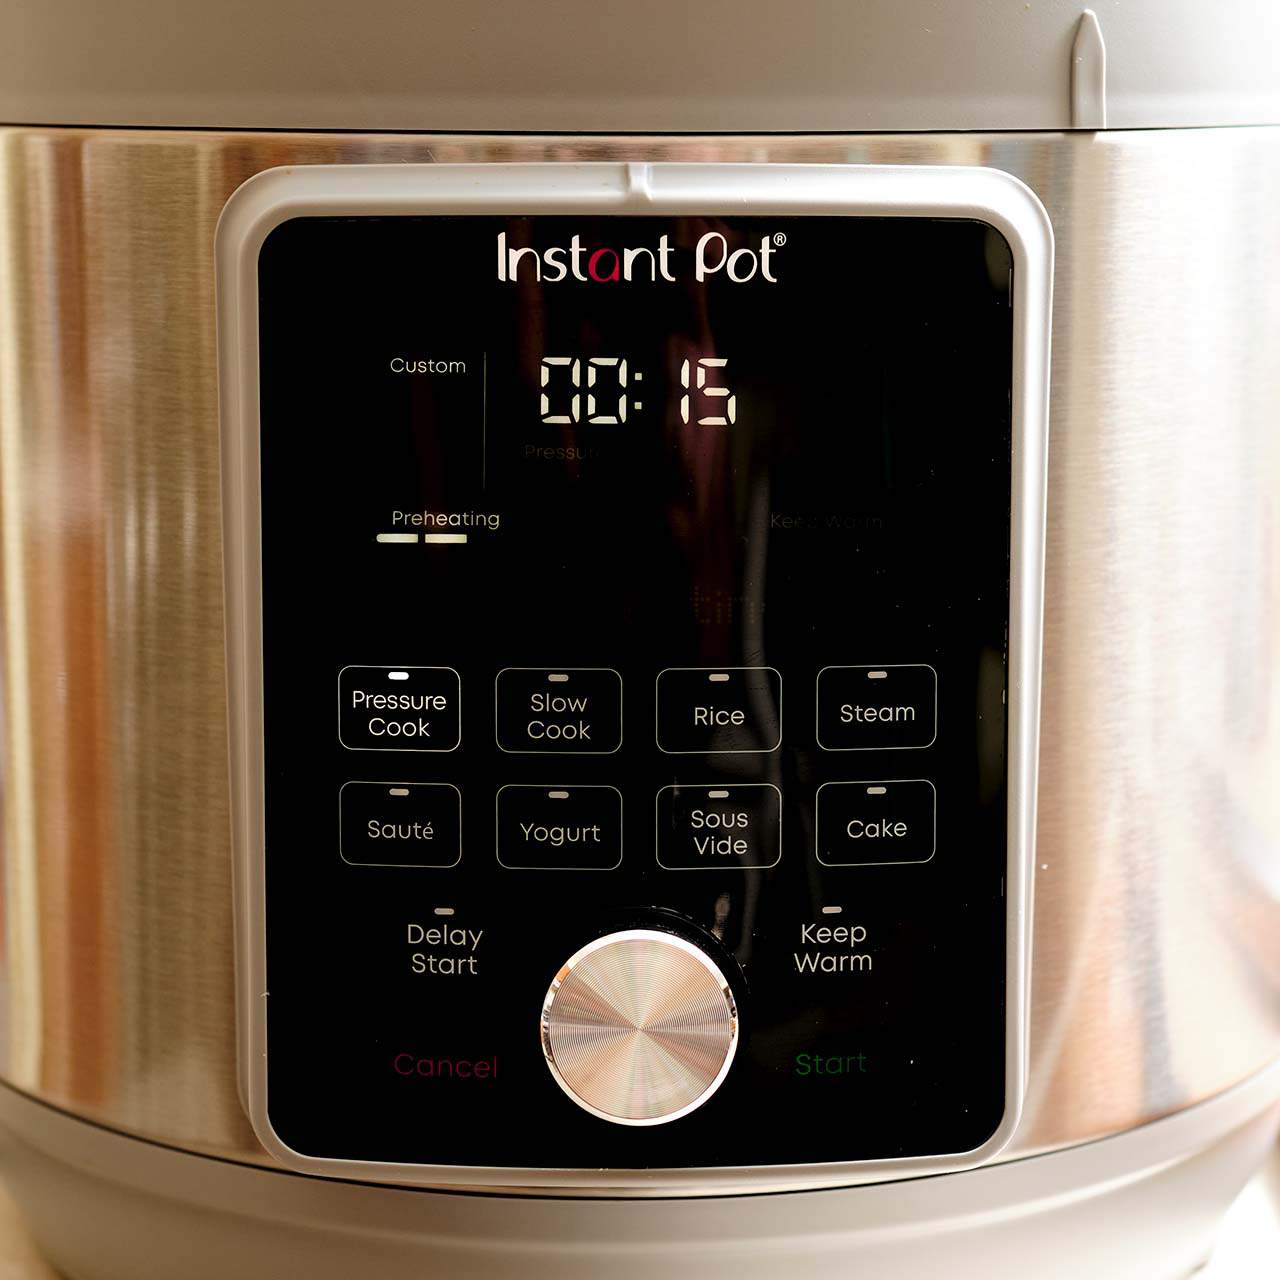
Pressure cook for 45 minutes with a Natural Release: Lock the lid and pressure cook at high pressure for 45 minutes in an Instant Pot ("manual" or "pressure cook" mode), or for 40 minutes in a stovetop cooker. Let the pressure come down naturally, about 20 minutes. (If you're in a hurry, you can quick release any remaining pressure after 15 minutes.)

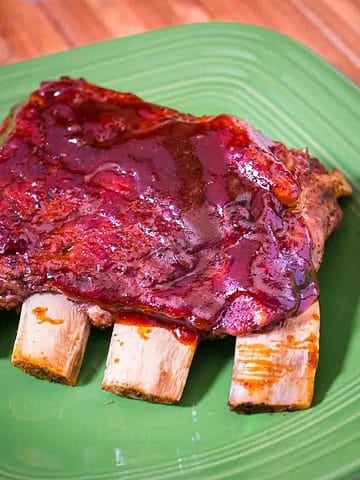
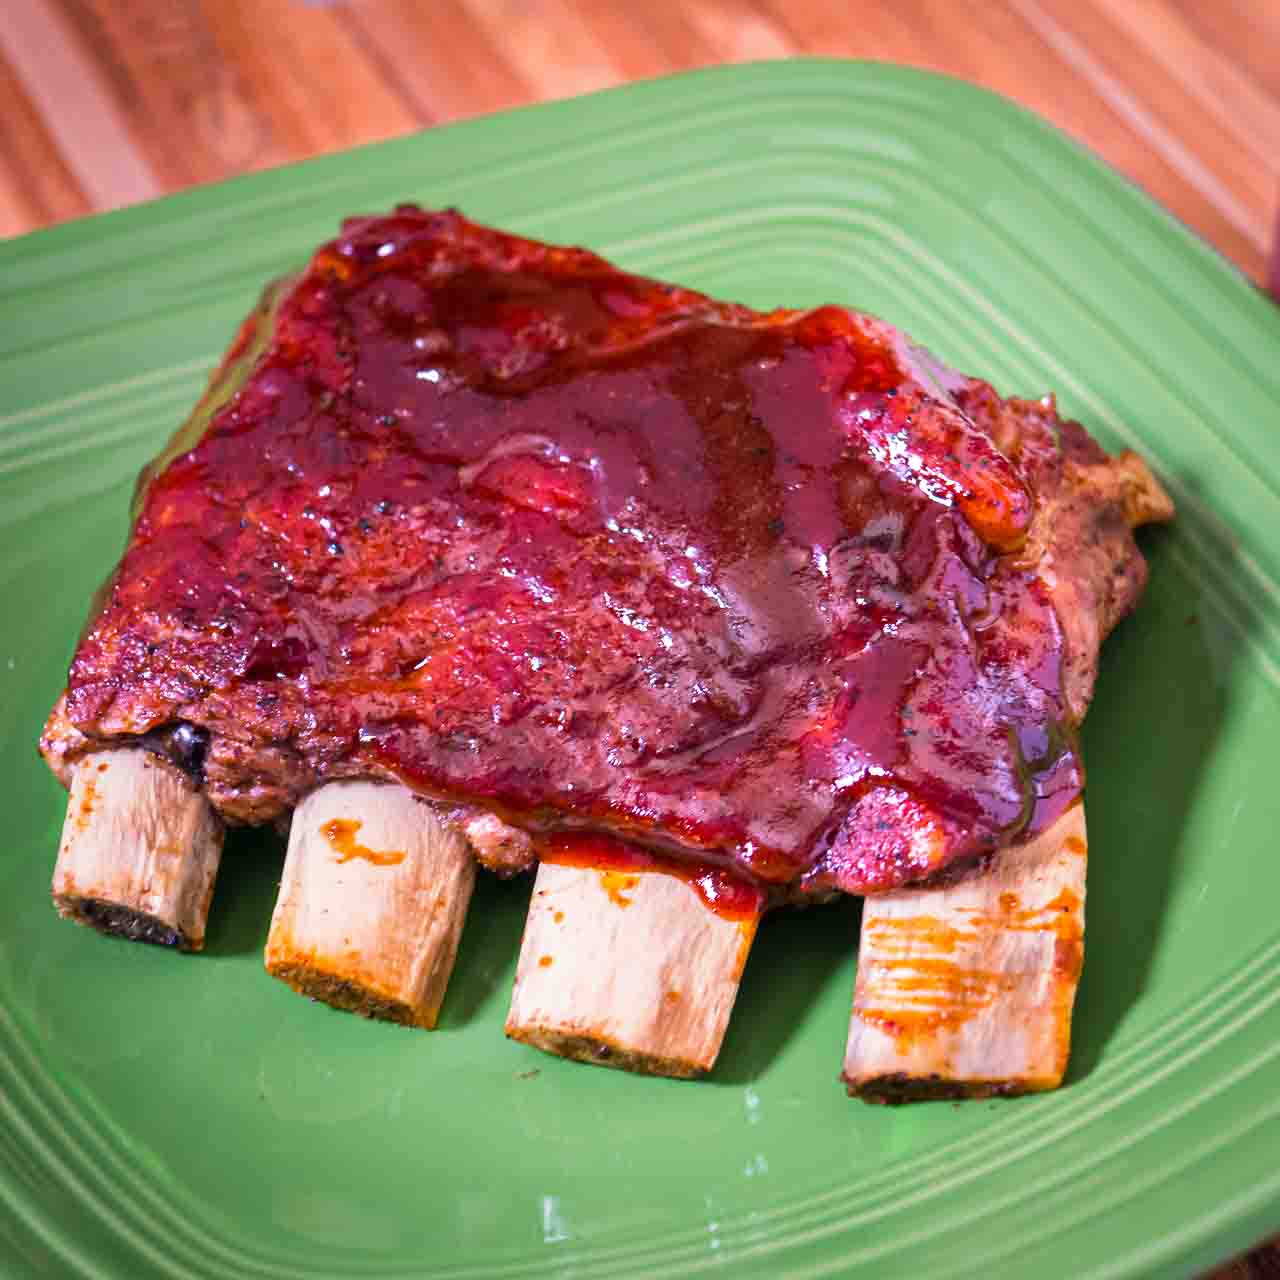
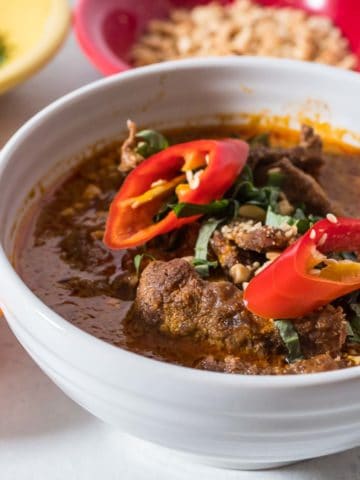
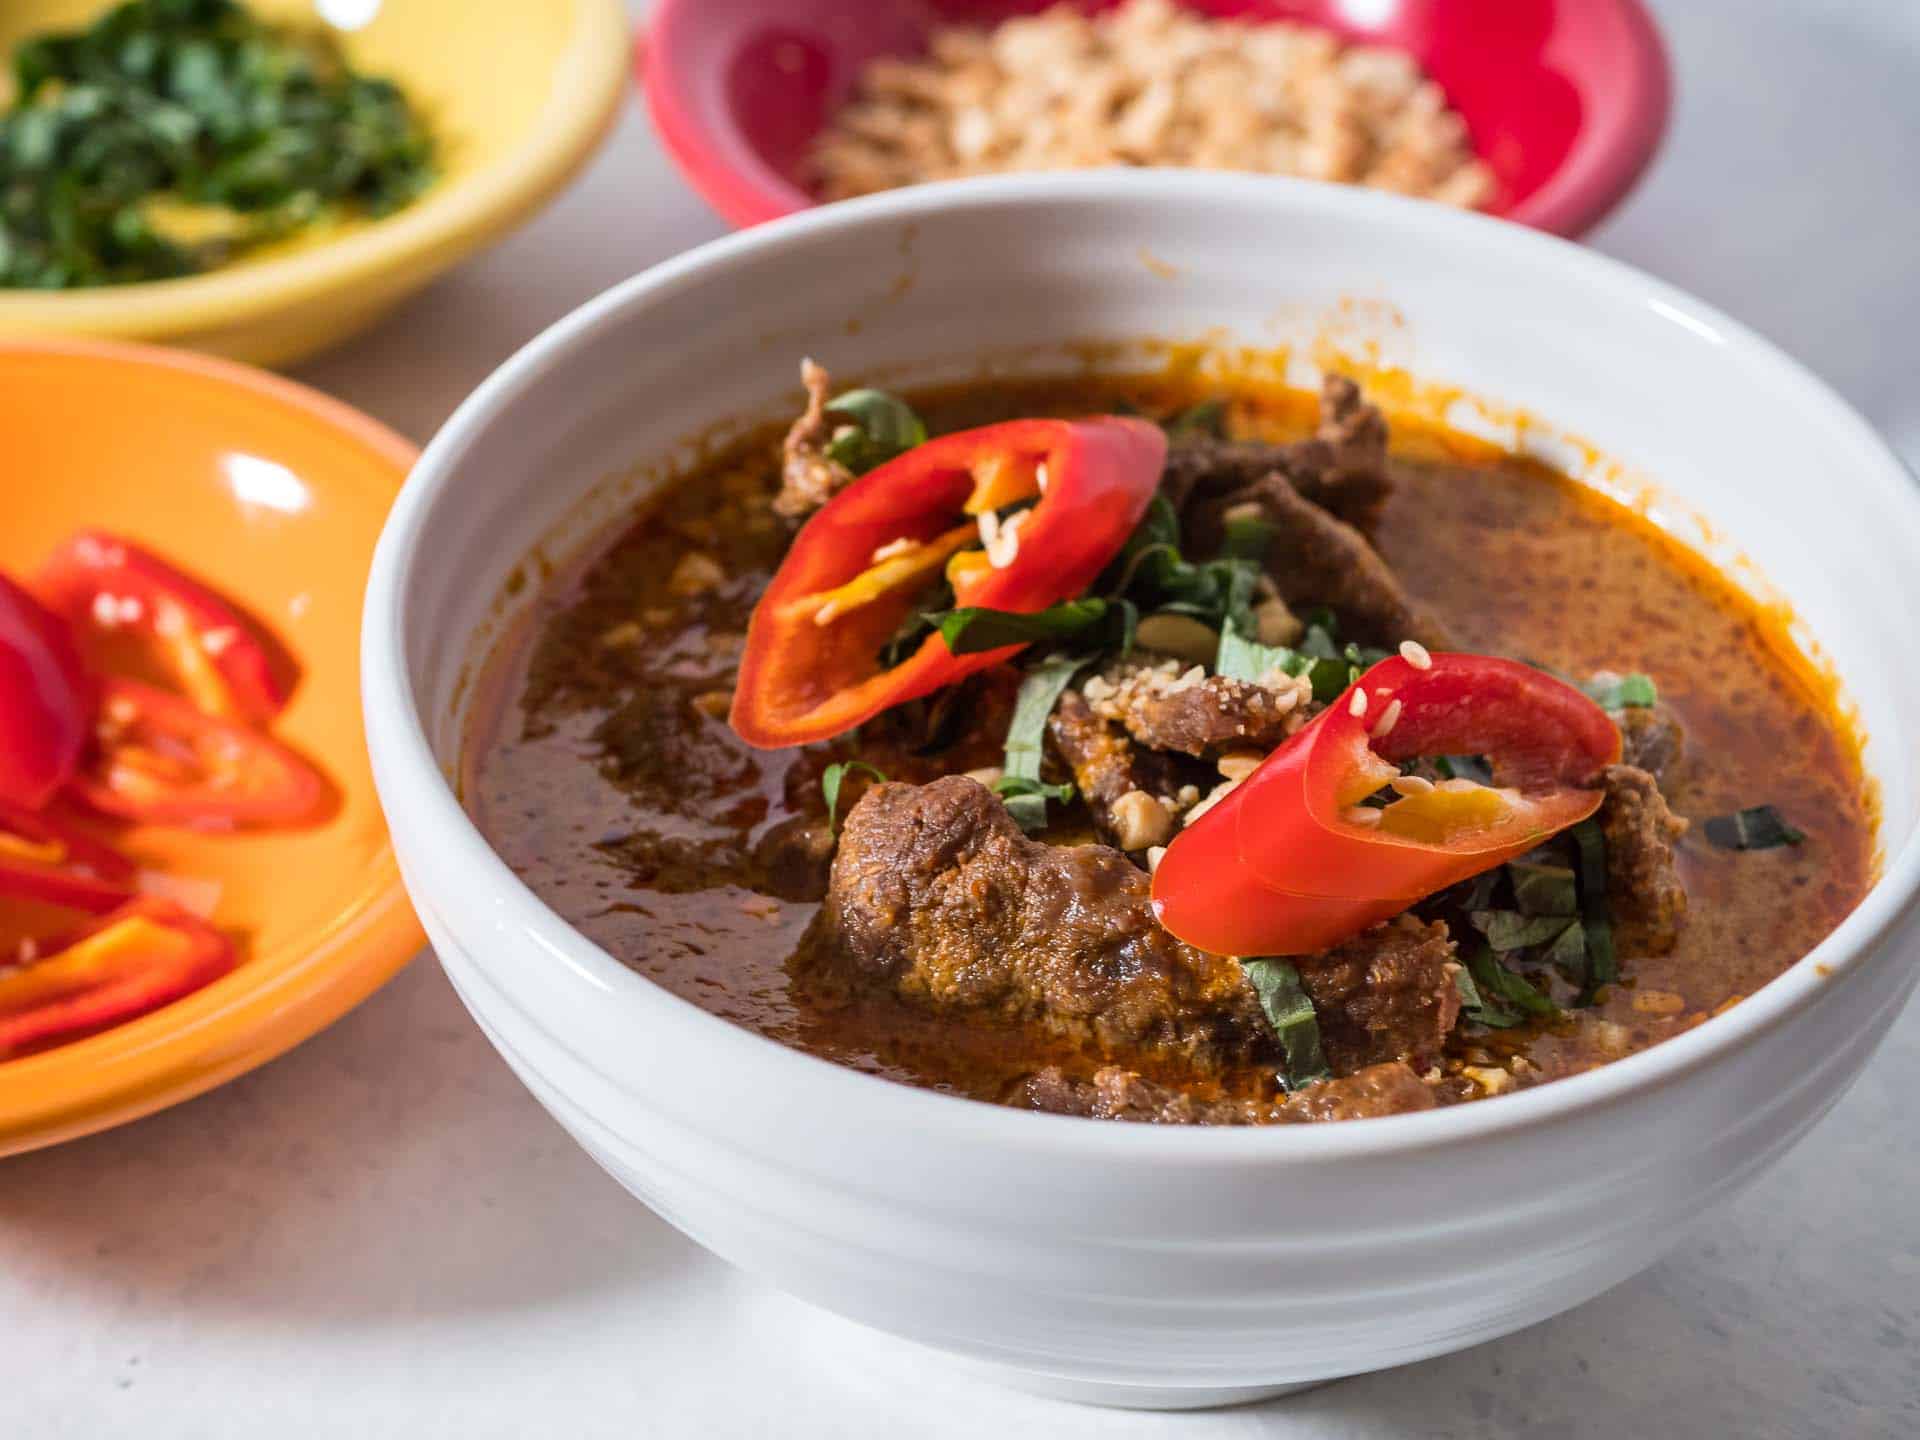
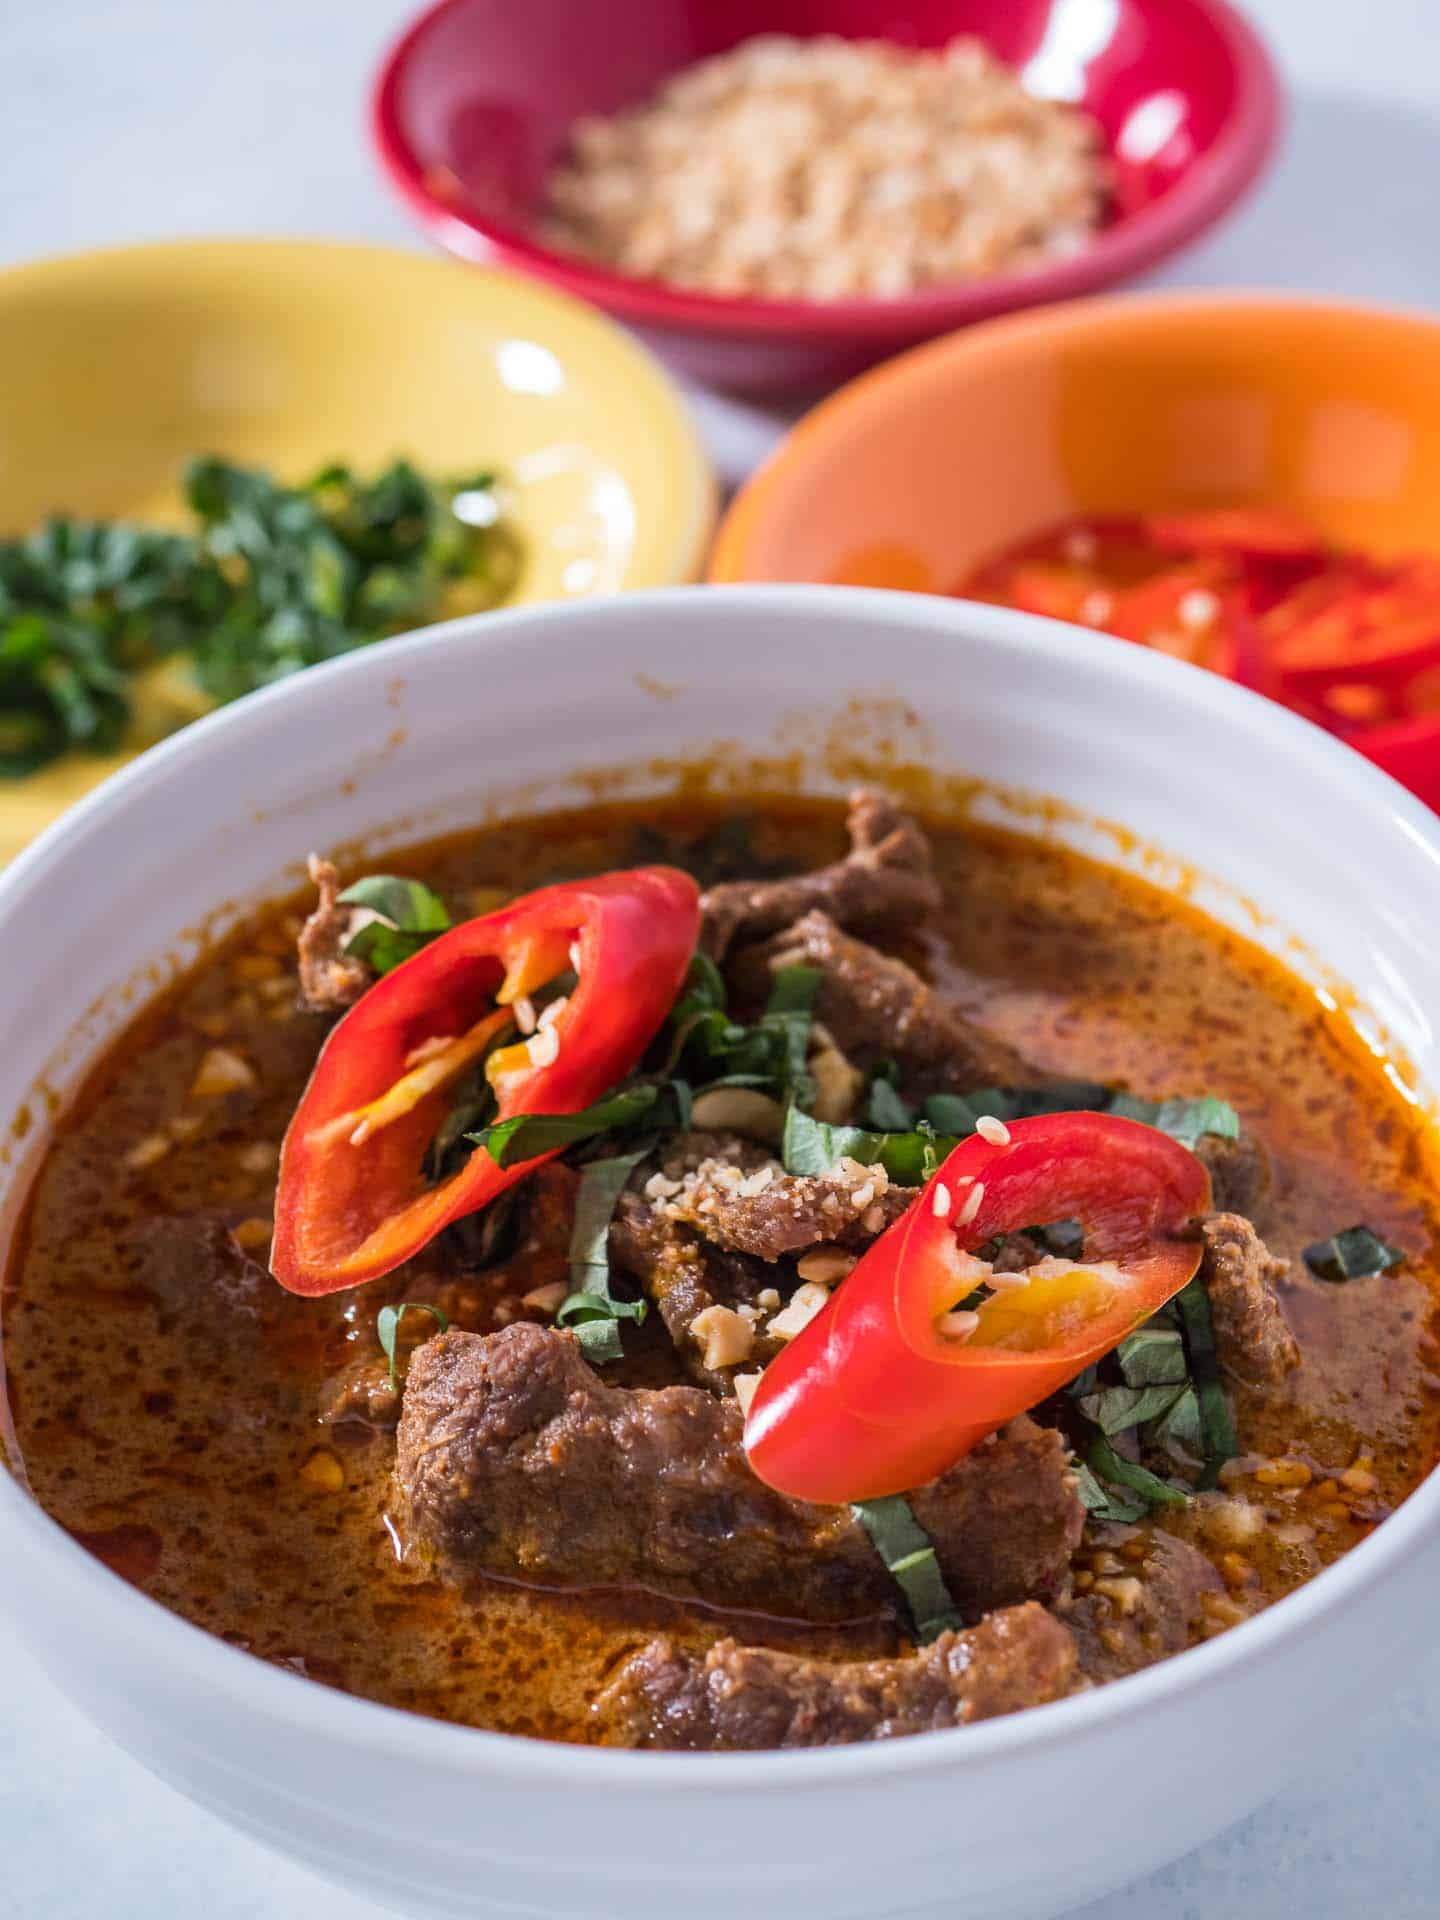
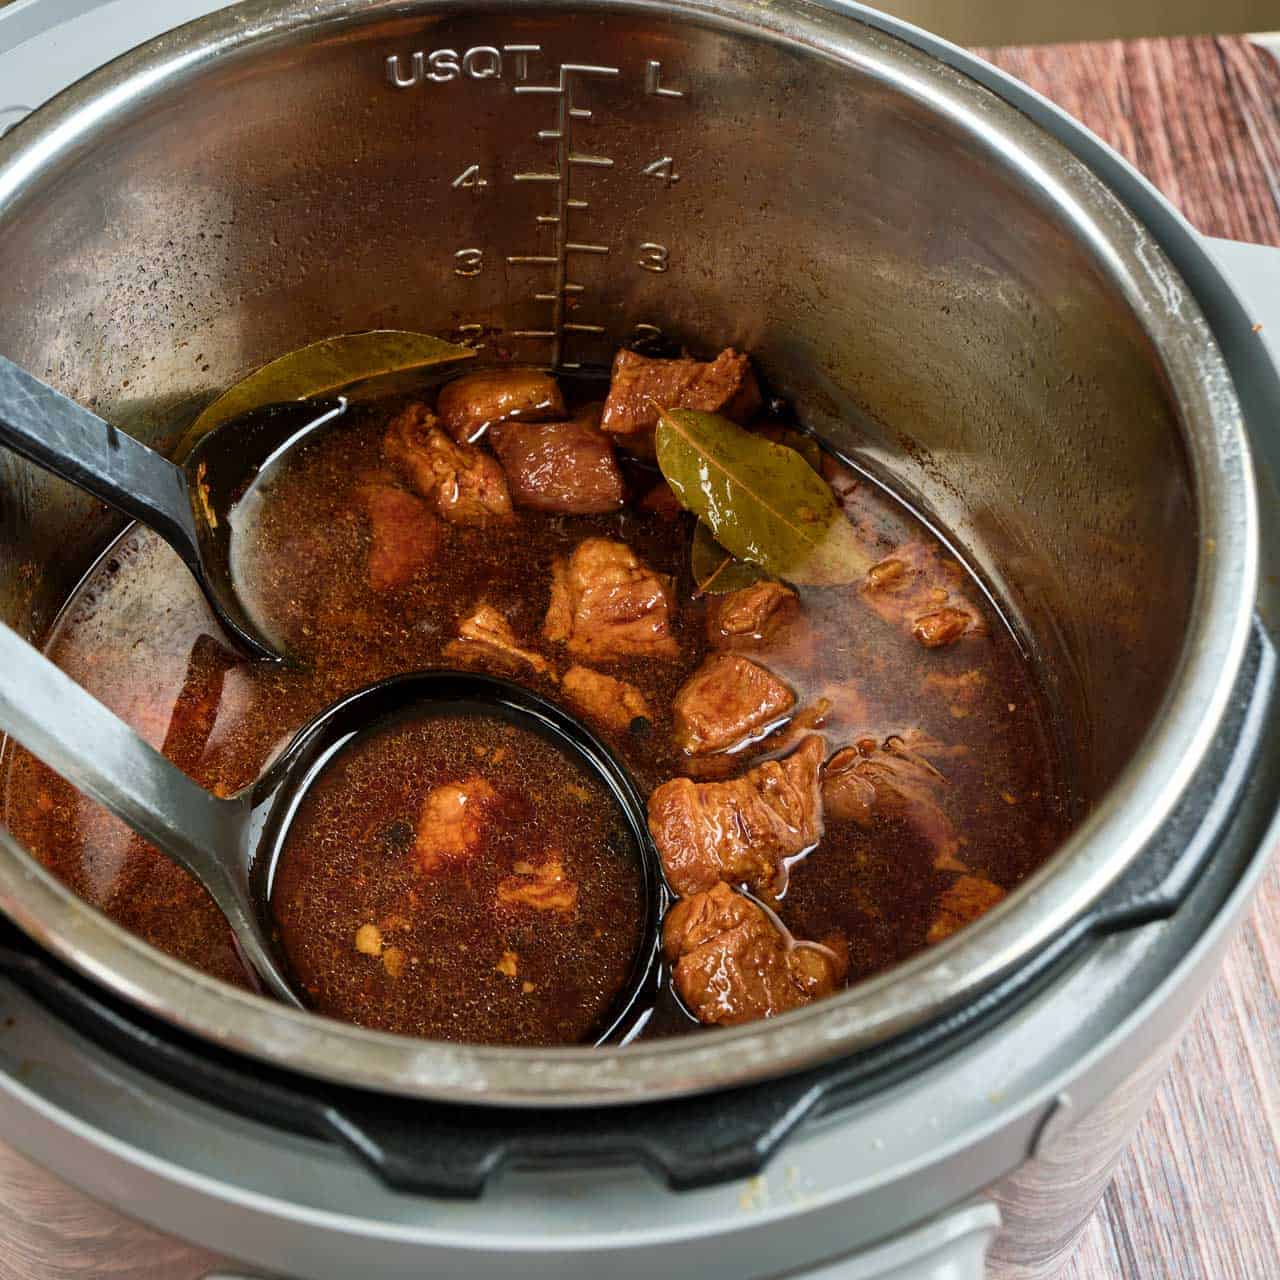
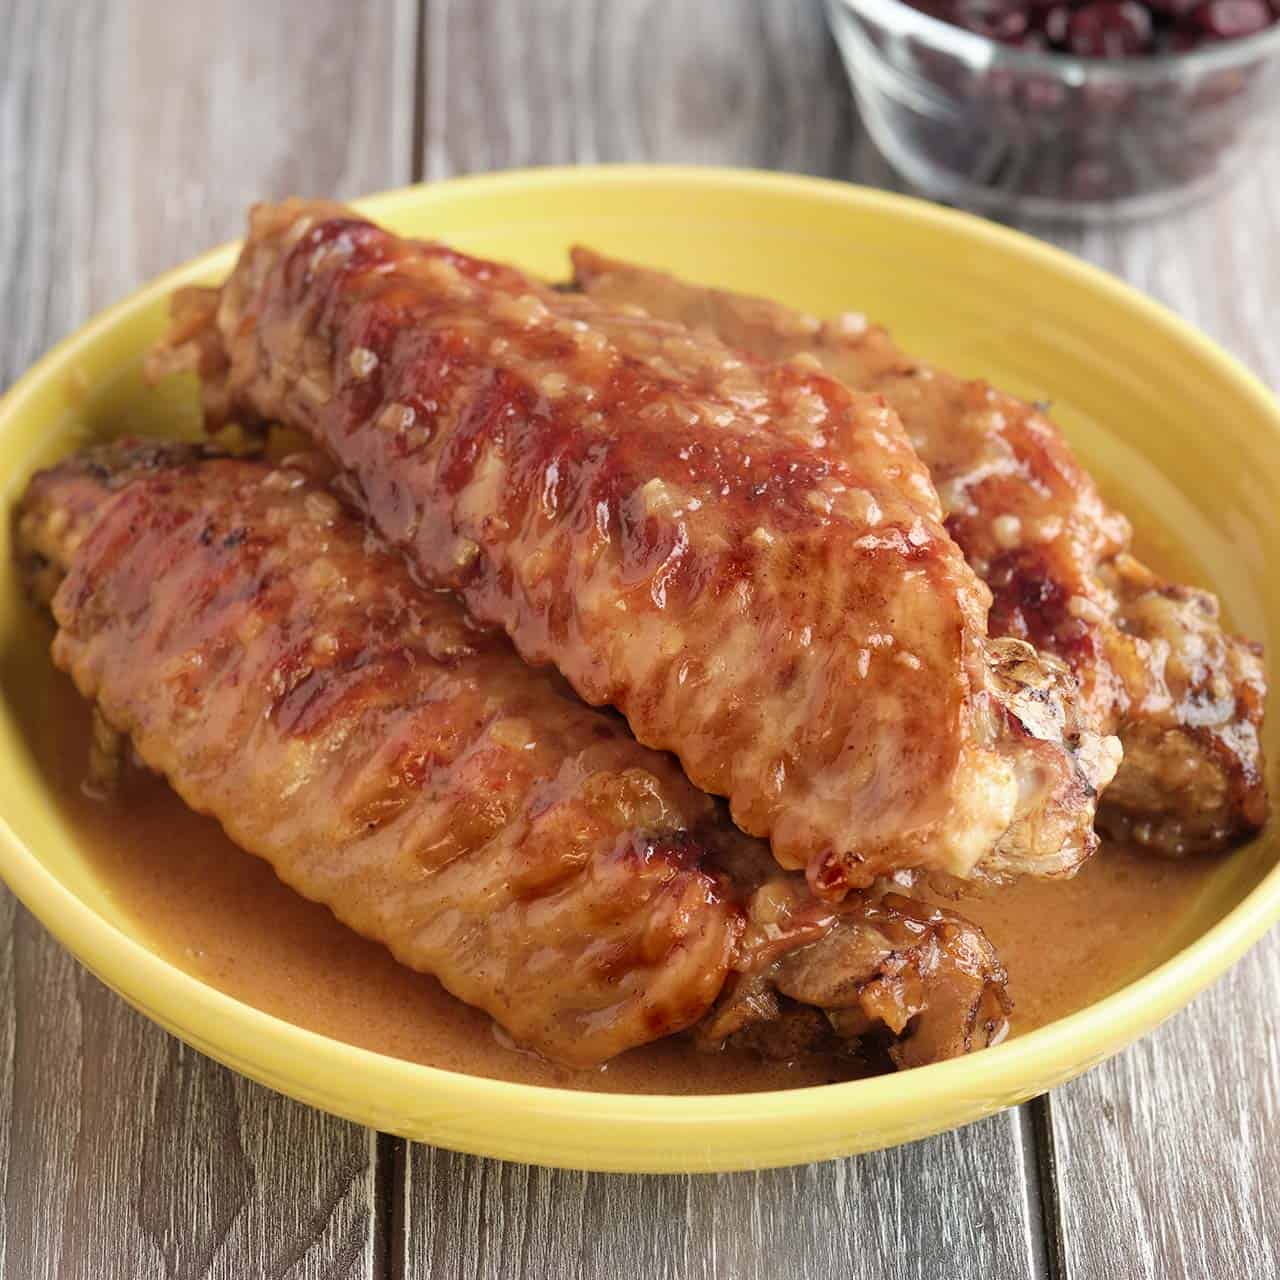
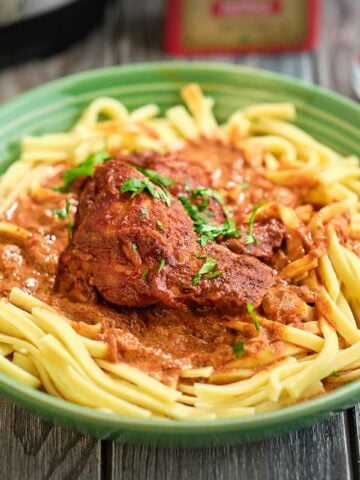
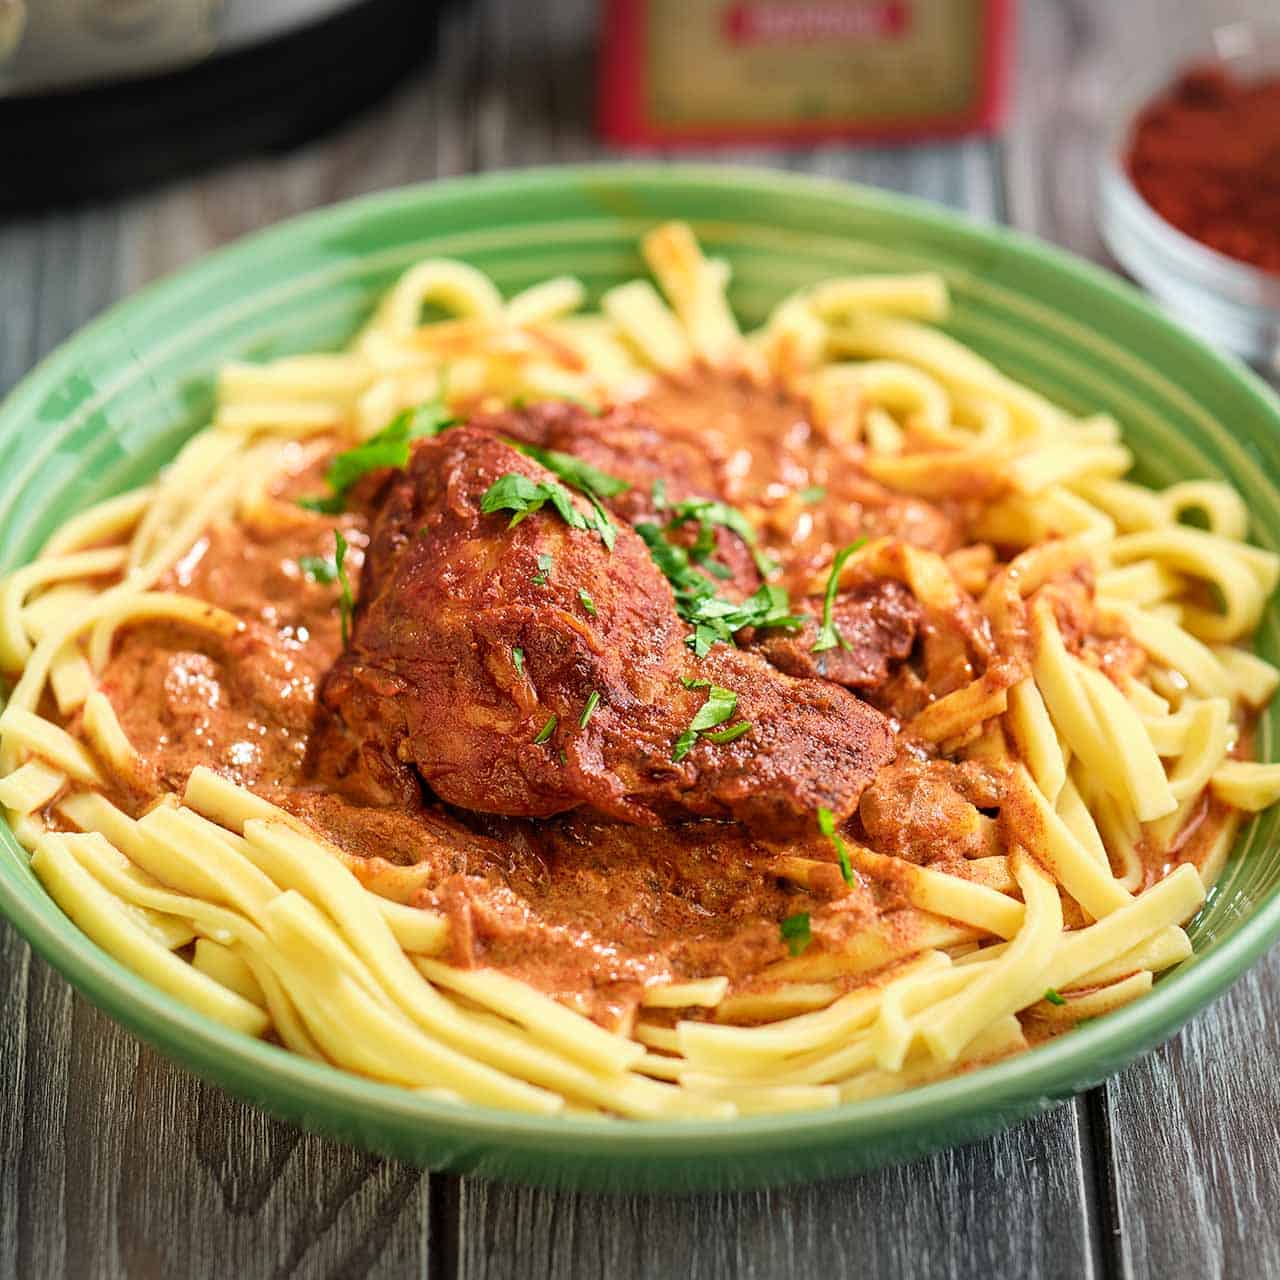
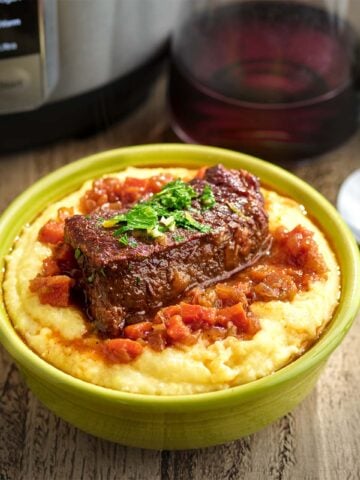
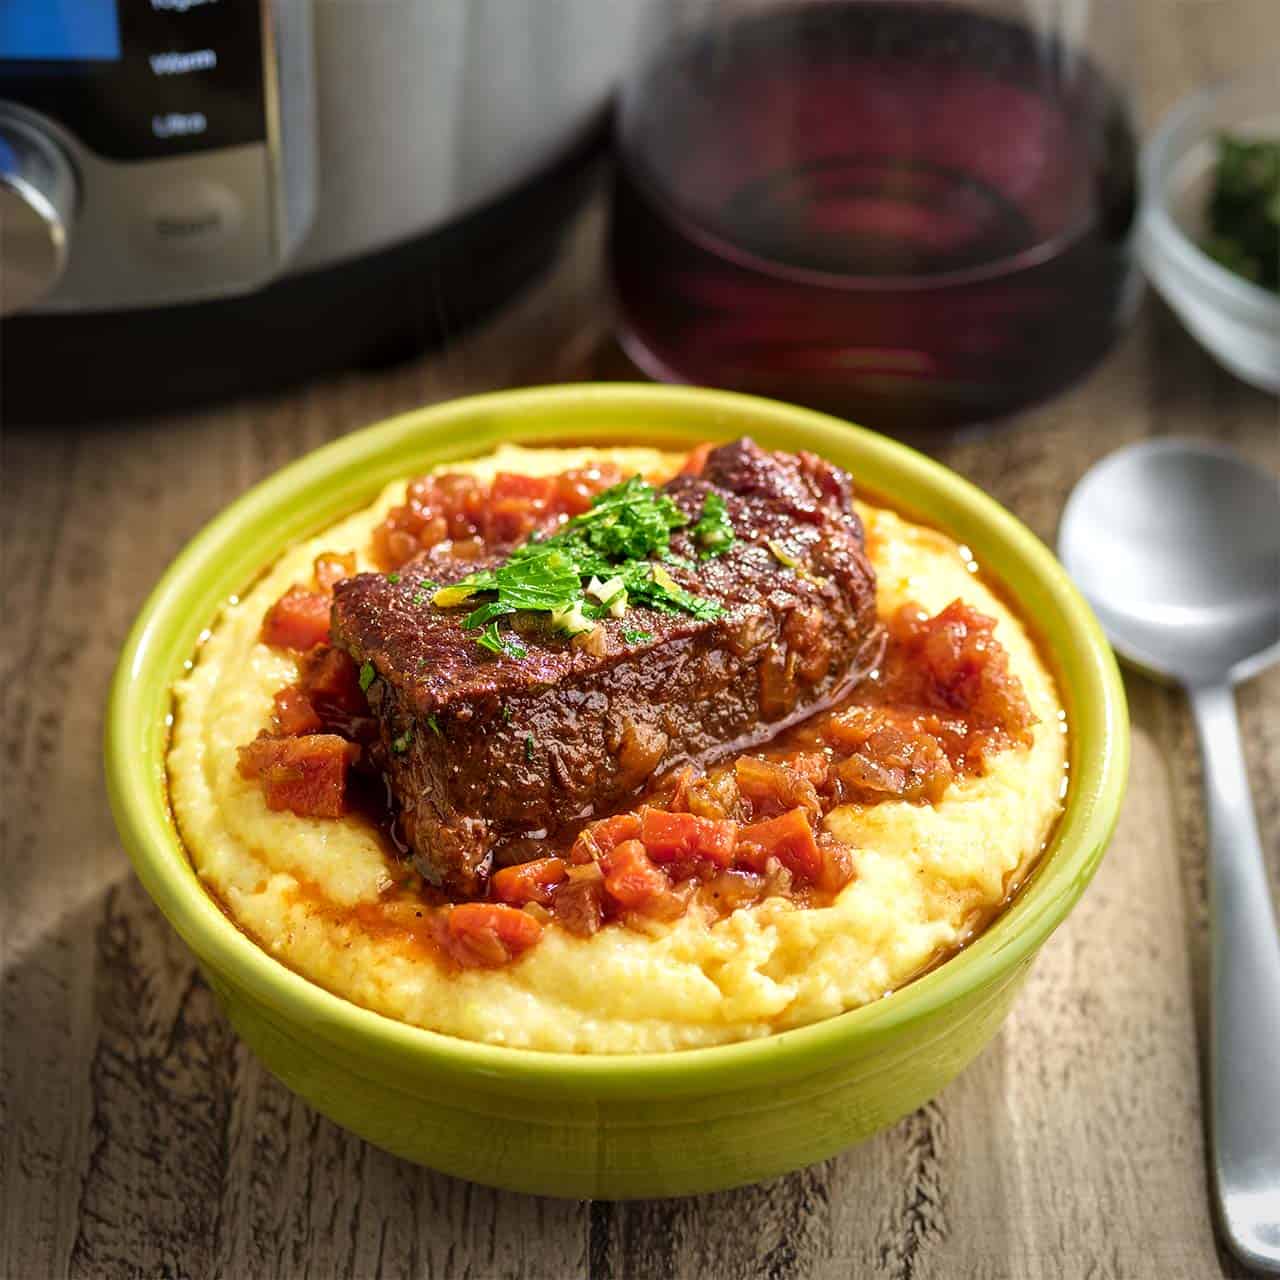
Serve: Unlock the lid, tilting it away from you to avoid the hot steam. Remove the lamb shanks to a platter. Scoop out any chunks of tomato with a slotted spoon, and add them to the platter with the lamb shanks. Pour the liquid in the pot into a fat separator and let it sit for a few minutes for the fat to separate. Pour a little de-fatted liquid over the shanks, then serve with couscous and a sprinkling of minced cilantro and sliced almonds. Pass the rest of the de-fatted liquid as a sauce at the table to pour over the lamb and couscous. Enjoy!

Ras El Hanout spice blend

If you can't find Ras El Hanout spice blend at your local store (I found it at my local Cost Plus / World Market), or online (I also bought Ras El Hanout at Amazon), you can make your own by mixing:

  • 1 teaspoon ground turmeric
  • ¼ teaspoon garlic powder
  • ¼ teaspoon ground cumin
  • ¼ teaspoon ground coriander
  • ¼ teaspoon ground ginger

Equipment

A 6-quart pressure cooker. But, if you have an 8-quart pressure cooker, use it because it will be easier to fit the lamb shanks in for the browning step.

Scaling

This recipe will not fit in a 3-quart pressure cooker - the bone in the lamb shanks is too long. You can halve the recipe in a 6-quart pressure cooker if you want; the only thing you shouldn't halve is the amount of chicken broth (or water) because you need a minimum liquid amount for pressure cooking. If you have an 8-quart pressure cooker, it is possible to double this recipe as long as the lamb shanks fit in the pot. If you have bigger lamb shanks, you can only scale up by 50% because the pot will be too full.

Tips and Tricks

Leftovers: Leftover lamb shanks are great but hard to store. I shred the meat and discard the bone to fit them in 2-cup storage containers.

Lamb shank bone size: The key to pressure cooker lamb shanks is ensuring the shanks fit in your pot. A long shank bone can be a problem; larger lamb shanks won't fit in the pot. I don't usually have this problem with grocery store lamb shanks, but I have bought some from specialty butchers that are massive and just wouldn't fit in my 6-quart pot. If you're in doubt, bring your Instant Pot liner to the store to ensure they'll fit. Or, size up your Instant Pot to an 8-quart model; I have yet to buy a lamb shank that wouldn't fit in my 8-quart pot.

What to serve with Instant Pot Moroccan Lamb Shanks

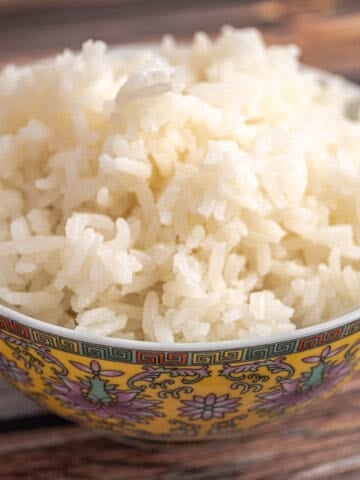
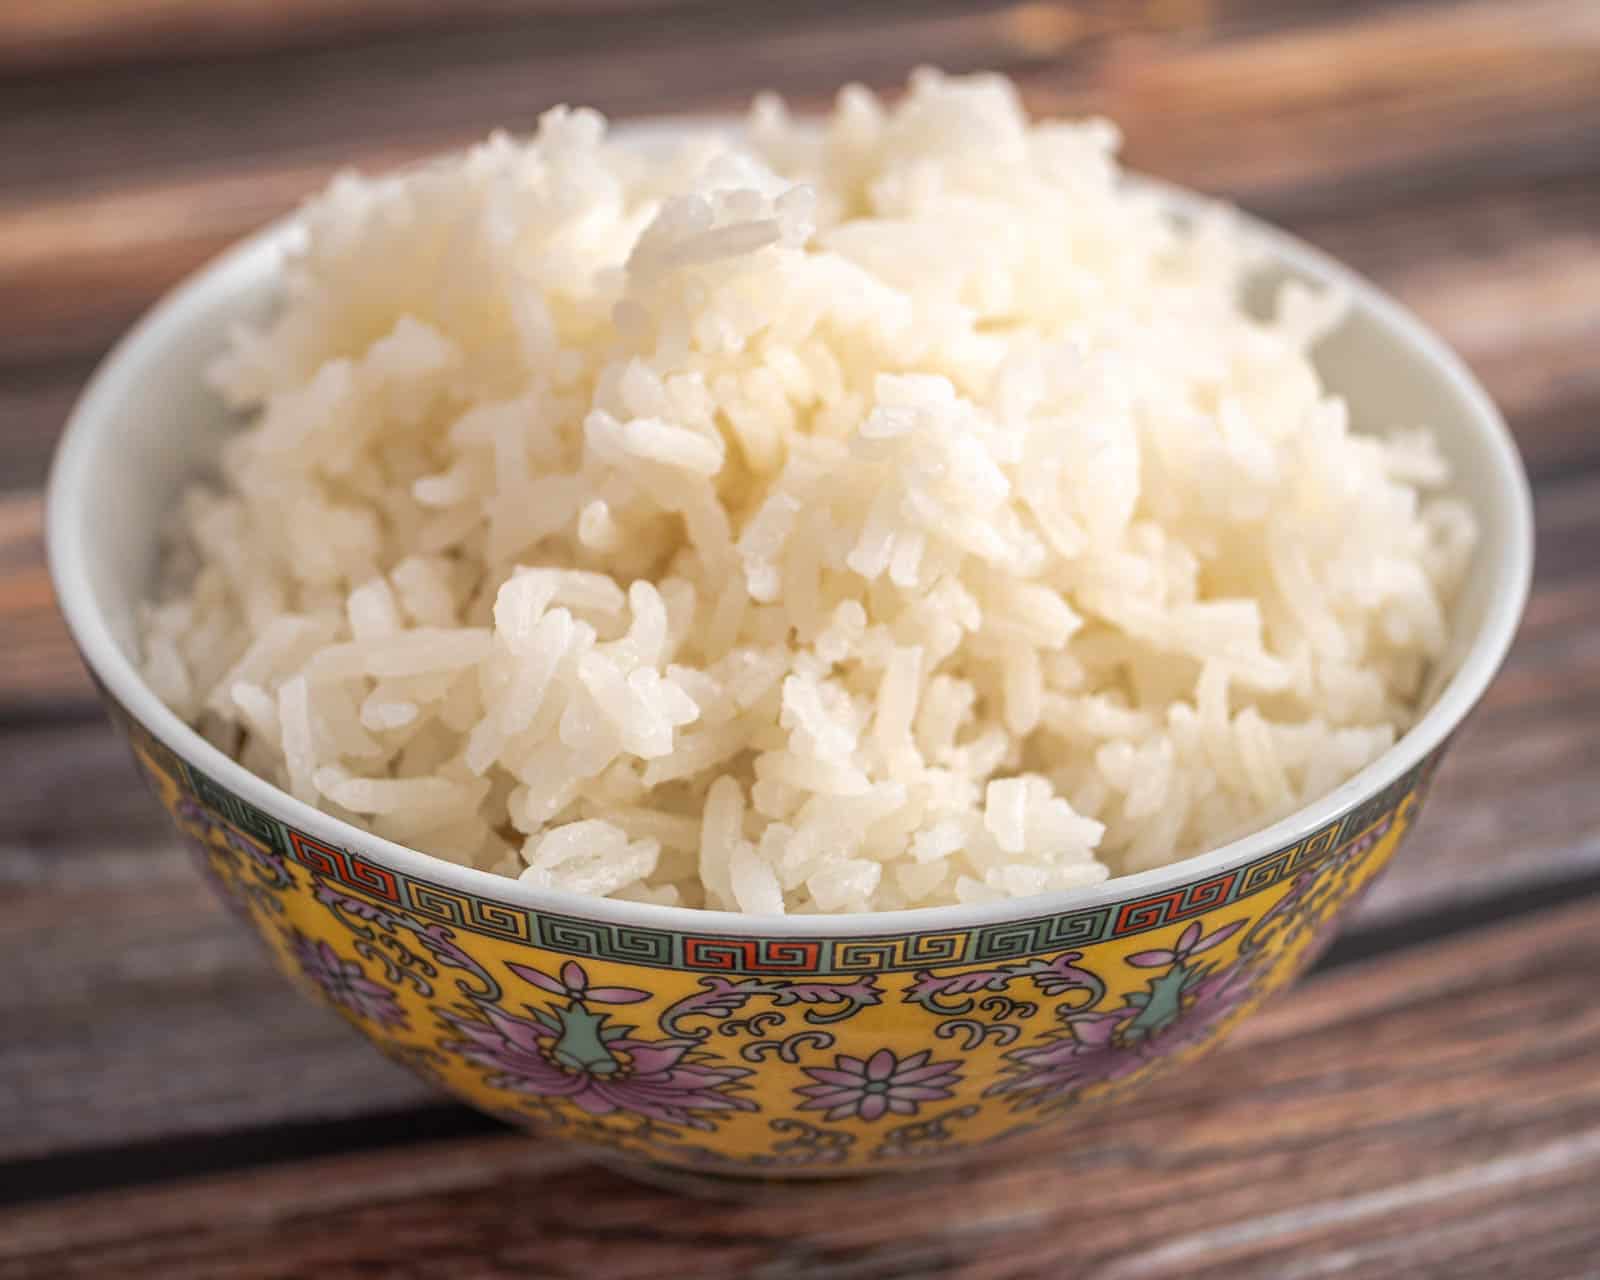
The traditional side dish is couscous, Morocco's most famous dish. Make a bed of couscous on a plate, set a lamb shank on the couscous, then drizzle with the pot liquid to sauce the lamb and couscous. I also like to serve these shanks with chickpeas like these smashed chickpeas and scallions and a grated carrot salad.

Related Posts

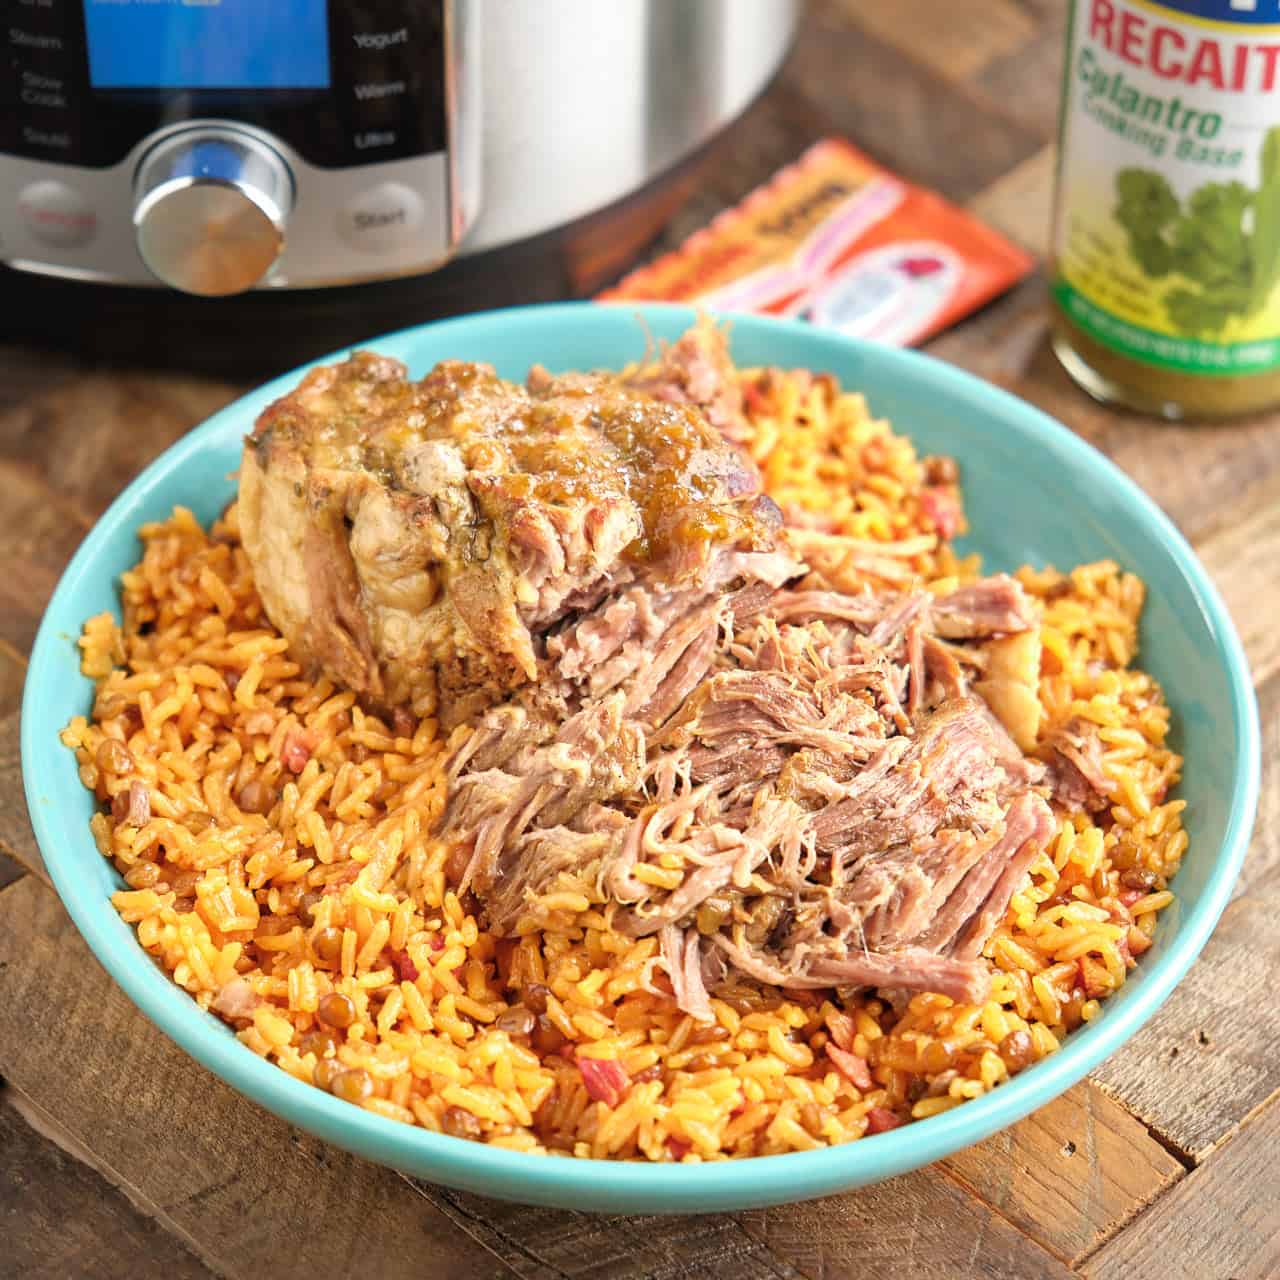
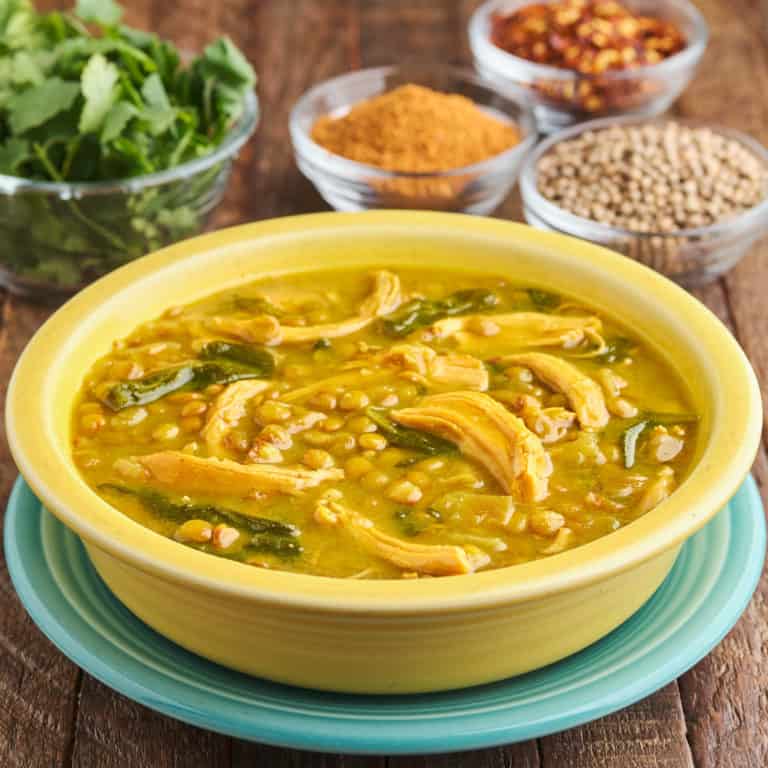
Instant Pot Irish Lamb Shanks
Pressure Cooker Chicken With 40 Cloves of Garlic
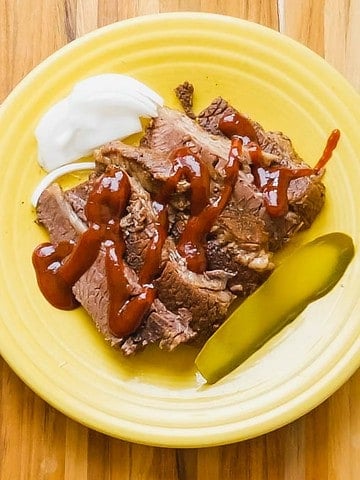
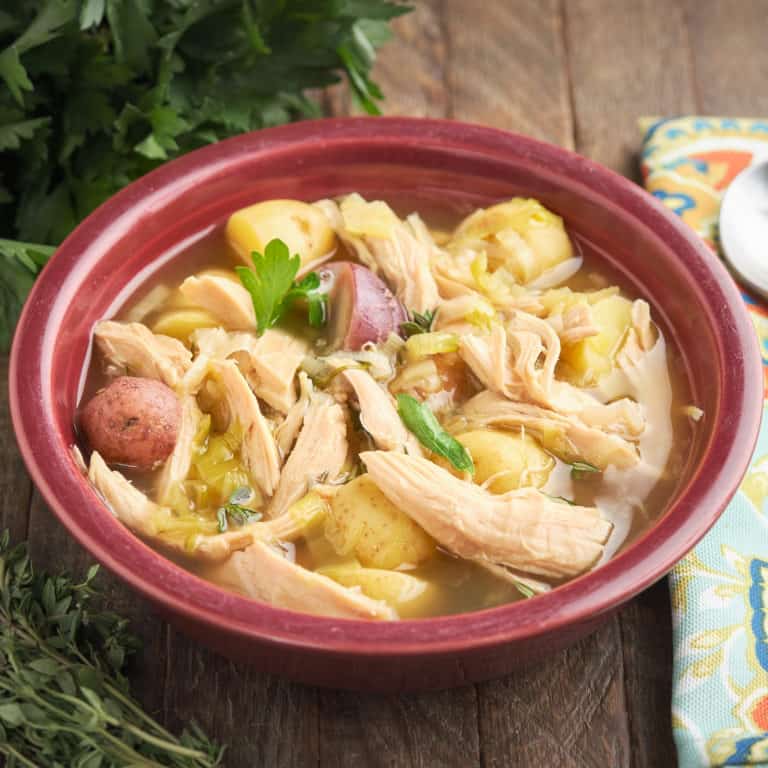
Instant Pot Boneless Leg of Lamb
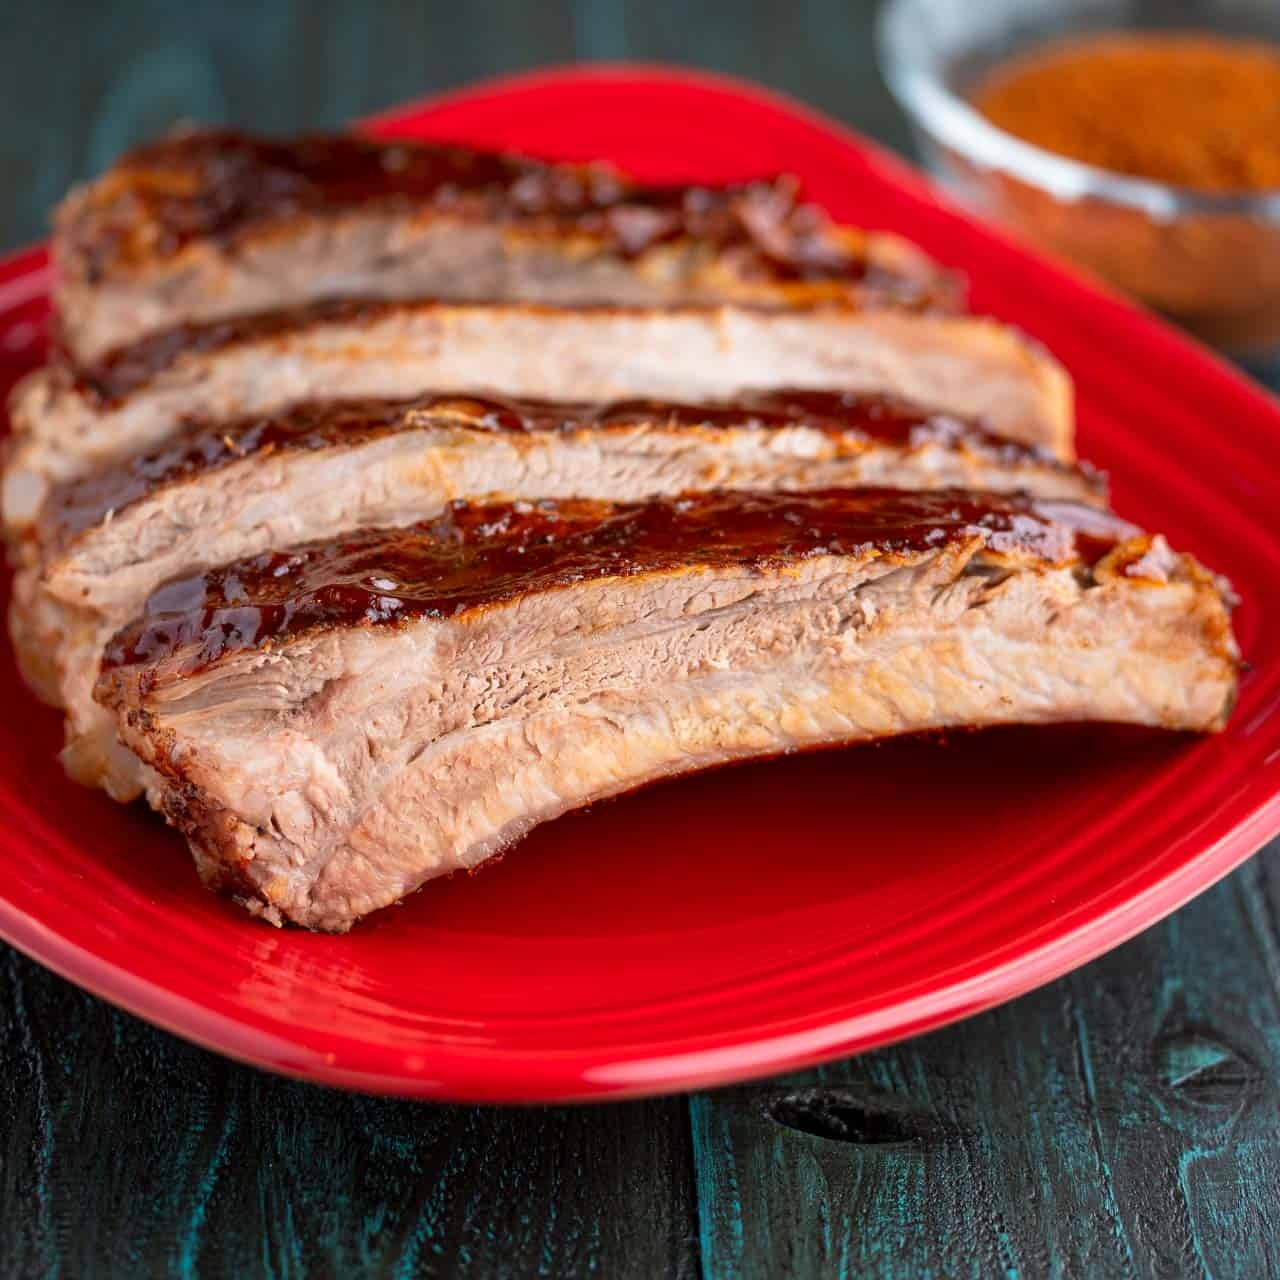
Instant Pot Lamb Shoulder Chops Recipe
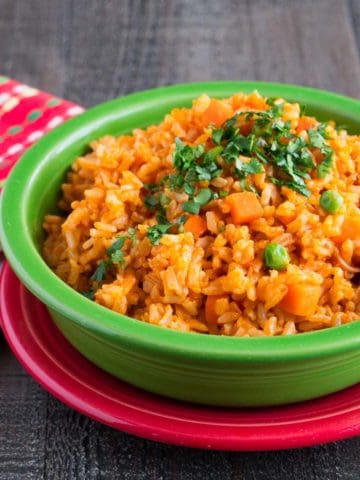
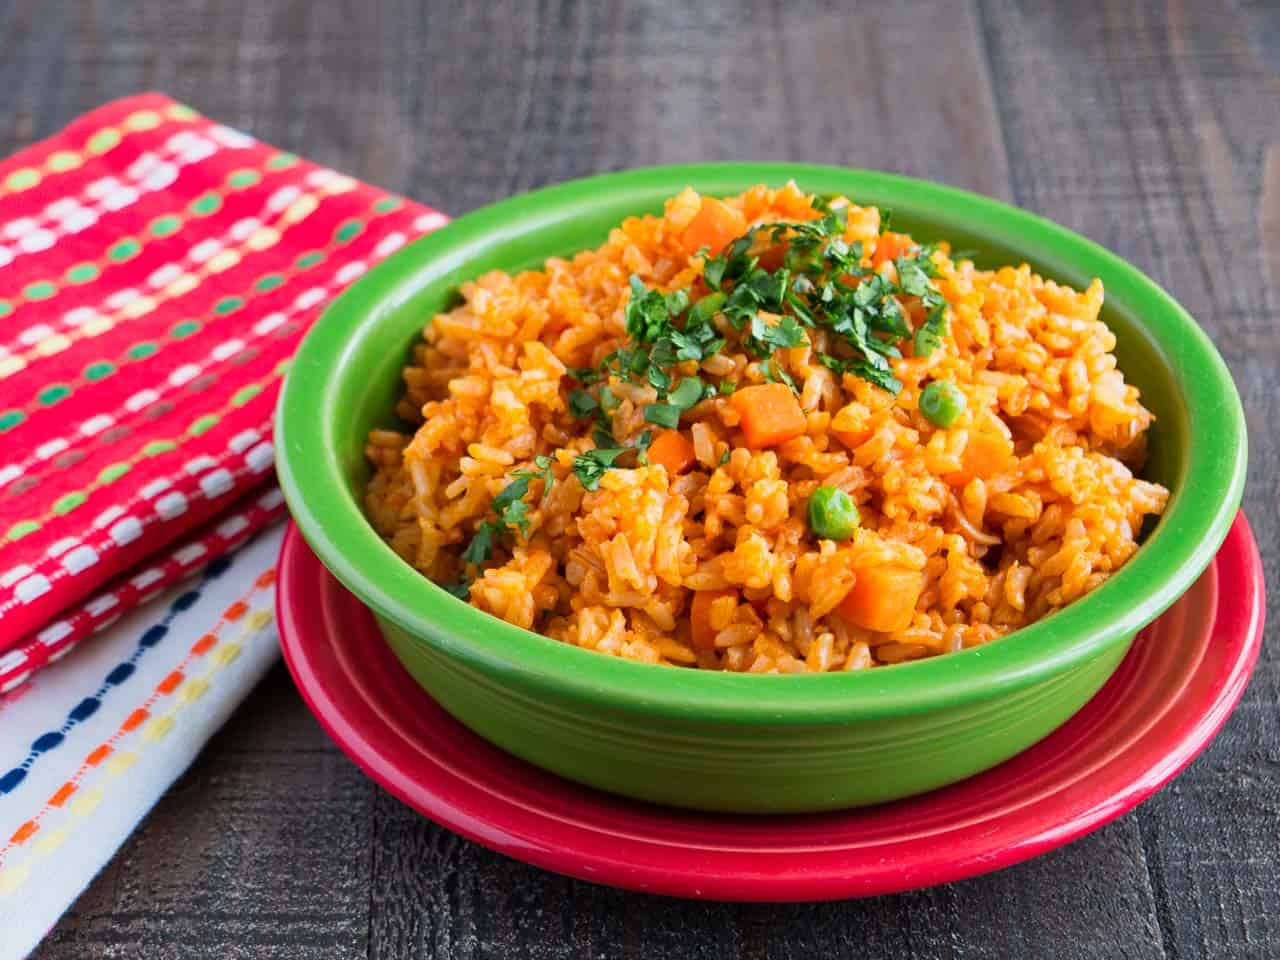
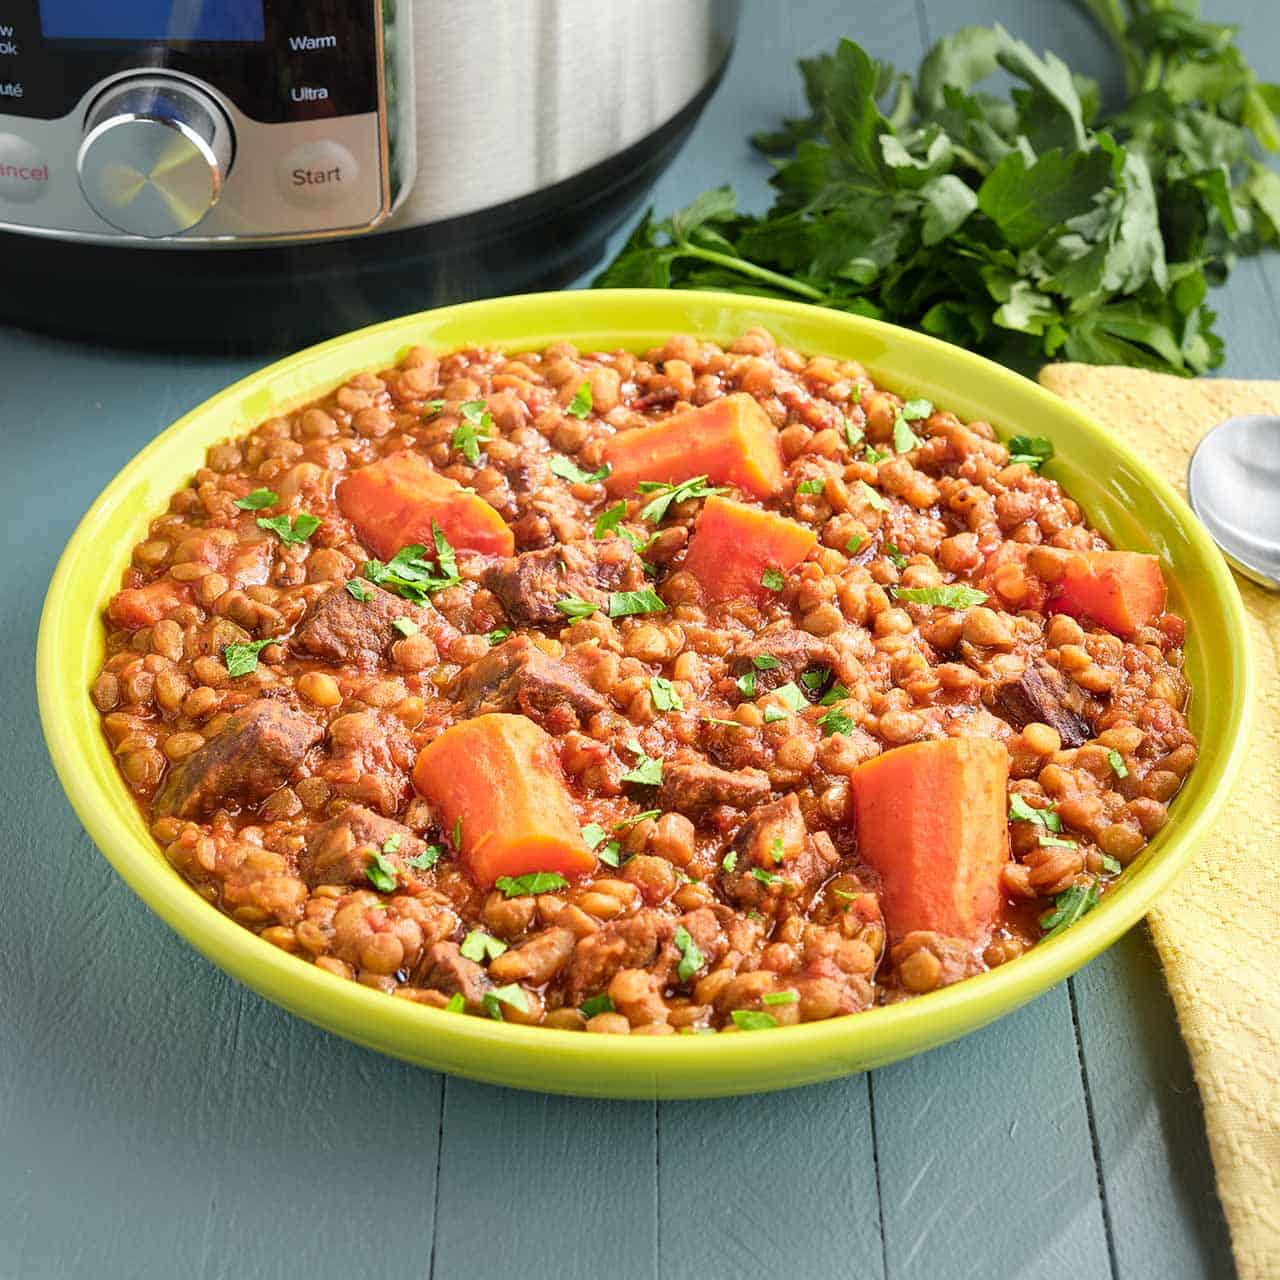
Instant Pot Lamb Tagine
My other Instant Pot and Pressure Cooker Recipes

Enjoyed this post? Want to help out DadCooksDinner? Subscribe to DadCooksDinner via email and share this post with your friends. Want to contribute directly? Donate to my Tip Jar, or buy something from Amazon.com through the links on this site. Thank you.

Instant Pot Asparagus Risotto (Pressure Cooker Recipe)

April 20, 2023 by Mike Vrobel 16 Comments

A bowl of asparagus risotto

Instant Pot Asparagus Risotto is my first attempt to recreate some of the glorious food I had in Italy. (Did I mention I went to Italy?)

La Serenissima, the Serene Republic of the Venetian Empire, lasted for over a thousand years. The Venetian Empire was fueled by trade, their navy's control over the Mediterranean, and the Veneto, their inland breadbasket.

Or should I say…rice basket? Venetians filled up on risotto, not pasta.1 The Veneto is a broad plain, perfect for rice paddies, stretching from the Po river to the Dolomite mountains. We visited the rice mill at Riseria Ferron, just south of Verona. There we learned all about the local Vialone Nano rice…by eating a fantastic lunch.2

A bowl of asparagus risotto
Instant Pot Asparagus Risotto
[feast_advanced_jump_to]

Quote from the Sous Chef at Ristorante Pila Vecia

We only make asparagus risotto for about ten days a year - when asparagus is at the height of its season.

Each course centered around a different type of rice dish. The asparagus risotto, though - that one grabbed me. It was loaded with fresh asparagus and tasted like Spring. It made me think of the first fresh vegetables of the year, that flash of bright green at the farmers market after a winter of root vegetables.

We got to talk to the sous chef, and he gave us a quick overview of how they make the dish. Now, I'm not going to make asparagus cream - that's too much, even for me - but the rest of the instructions were easy for a home cook to follow. Simmer the rice in vegetable broth, and stir in a lot of butter (and, optionally, grated cheese). Put par-cooked asparagus tips in with the rice, cover, and let them steam through.

I loved Italy - I did not want to leave - but I was itching to get home and try this recipe before asparagus season ended. Pressure cooker risotto is one of my secret recipes.3 Risotto in the pressure cooker does not need the repeated stirring of traditional risotto. Pressure replaces the stirring, releasing the starch from the rice, resulting in a creamy, delicious risotto. Add some asparagus, and...fantastico!

Instant Pot Asparagus - Sautéing chopped asparagus stalks
Sautéing shallots and asparagus stalks

Ingredients

  • Olive Oil
  • Asparagus
  • Shallot
  • Arborio rice
  • Vegetable Broth
  • Butter
  • Grated pecorino Romano

See the recipe card for quantities.

How to Make Instant Pot Asparagus Risotto

Slice the asparagus: Trim the tough end from the asparagus and discard. Cut the asparagus tips from the bunch. Thin-slice the remaining asparagus stalks (I aim for ¼ inch slices, so they mix in with the grains of rice).
Sauté the asparagus, shallots, and rice: Heat the olive oil in an Instant Pot using the sauté function until the oil is shimmering, about 3 minutes. (Use medium heat with a stovetop pressure cooker). Add the asparagus tips and sauté until crisp-tender, about 3 minutes. Remove the asparagus tips with a slotted spoon and set them aside for later, leaving as much of the oil behind as possible. Add the shallot and sliced asparagus pieces to the pot, and sprinkle with ½ teaspoon salt. Sauté, stirring often, until the shallots soften and the asparagus turns bright green, about 3 minutes. Stir in the rice and cook, stirring occasionally, until it the rice turns a little bit translucent at the edges, about 5 minutes. Stir in the vegetable stock and 1 teaspoon salt, and scrape the bottom of the pot with a flat edged wooden spoon to make sure no rice is sticking.
Pressure Cook the Risotto for 5 Minutes With a Quick Release: Lock the lid on the pressure cooker. Cook at high pressure for 5 minutes in an Instant Pot, other electric pressure cooker, or a stovetop PC. (Use Manual, Pressure Cook, or Pressure Cook - Custom mode with an Instant Pot). Quick release the pressure. Carefully remove the lid, tilting it away from you to avoid the scalding hot steam.
Stir in butter and steam the asparagus tips: Leave the pot in keep warm mode (or put a stovetop pressure cooker over low heat.) Stir the butter into the rice, then spread the asparagus tips out on top of the rice in a single layer. Cover the pot (but don't lock the lid) and steam the asparagus tips until they are tender, about five minutes. Add the (optional) grated cheese, then stir the asparagus tips and cheese into the rice. Serve and enjoy!

Substitutions

Rice Types

Regular white rice does not work for risotto. You need to find short grain rice, which works best in this recipe.
Arborio rice is my default for risottos, because it is the easiest one to find at my local grocery stores. I prefer  Carnaroli rice  for pressure cooker risotto, when I can find it. All that said, Vialone Nano rice is what I used, because it's the rice grown at Riseria Ferron.

Vegetable broth

If you use store-bought broth, watch out for "regular" vegetable broth - it's loaded with salt. If you can't find low-sodium chicken broth, use water.
But, please, try homemade vegetable broth. If you have an Instant Pot, you will love it.
You can use homemade chicken broth if you have it, but I like the lighter taste of vegetable broth with the asparagus in this risotto.

Cheese Choices

Grated parmesan is a good (if more expensive) substitute for the pecorino Romano. Or, skip the cheese. My kids are picky about cheese in their rice - it's a very particular concern, I know - so I'll often leave it out of risotto.

Want to wine?

A little wine? Most risotto recipes use a little wine. I skipped it in this one, but if you want, you can add white wine. Add ¼ cup wine at the end of sautéing the rice, and bring it to a boil before adding the vegetable broth.

Equipment

A 6-quart pressure cooker. Pressure Cooker risotto converts a lot of people to pressure cooking - no tedious stirring needed, just a few minutes under pressure.

Scaling

This recipe doubles easily in a 6-quart pressure cooker. Cut all the ingredients in half and this recipe will fit in a 3-quart pressure cooker.

Tips and Tricks

  • Pressure cooking is the key to easy risotto. No need to stir for 30 minutes, carefully ladling broth into the pot. I can lock the lid on my Instant Pot, set it to cook for 5 minutes, and have a fantastic risotto without all the extra work.
  • Homemade vegetable broth is another key to this recipe. I know, I know, it's extra work. But it is SO GOOD. Make it ahead, freeze it in 2-cup containers, and you'll always be ready to make a fantastic risotto or vegetable soup.

What to Serve With Asparagus Risotto

Asparagus risotto makes a great main dish for vegetarians. Or, I serve it as an appetizer, or a hearty side dish with a roast chicken.

Storage

According to the USDA, Leftover rice lasts for three days in the refrigerator, or three months in the freezer, as long as it is refrigerated (or frozen) within an hour of cooking in an airtight container. (I portion out my rice in 2-cup containers before I put it in the fridge or freezer.) Also, be sure to reheat the rice all the way through - to be precise, an instant read thermometer should read 165°F in the middle of the rice.

Storage

According to the USDA, Leftover risotto is good for up to three days in the refrigerator, or three months in the freezer, as long as it is refrigerated (or frozen) within an hour of cooking. (I portion out my rice in 2-cup containers before I put it in the fridge or freezer.) Also, be sure to reheat the rice all the way through - to be precise, an instant read thermometer should read 165°F in the middle of the rice.

🤝 Related Posts

Pressure Cooker Brown and Wild Rice Pilaf
Pressure Cooker Risotto with Edamame
Pressure Cooker Risotto with Goat Cheese
Instant Pot Shrimp Risotto
Instant Pot Radicchio Risotto
Instant Pot Mushroom Risotto
Orzo Pilaf
Instant Pot Pozole
My other Pressure Cooker Recipes

Enjoyed this post? Want to help out DadCooksDinner? Subscribe to DadCooksDinner via email and share this post with your friends. Want to contribute directly? Donate to my Tip Jar, or buy something from Amazon.com through the links on this site. Thank you.


  1. And polenta. The plains are good for grains and corn, and the Veneto loves thier polenta. But why let corn (an American import from back in the 1500s) get in the way of a good rice story?↩
  2. Oh, that lunch. I didn't pace myself and took seconds of the asparagus risotto (and another risotto, with ground meat and cinnamon). I was struggling to keep up by the time the last course arrived. ↩
  3. Shh! Don't tell anyone. This is just between you and me. ↩

Sous Vide Chuck Steak Recipe (24 hours to tenderness)

April 18, 2023 by Mike Vrobel 13 Comments

Sliced sous vide chuck steak on a wood carving board

Sous Vide Chuck Steak. Twenty-four hours of Sous Vide cooking make chuck steaks as tender as expensive steak cuts.

What's the difference between a cheap chuck steak cut for pot roast and the most tender steaks? About 24 hours of sous vide cooking. Long, slow sous vide cooking will take all the tough connective tissue in a chuck steak and melt it into tenderness.

Sliced sous vide chuck steak on a wood carving board
[feast_advanced_jump_to]

Now, I know Sous Vide needs some extra equipment. (See the Equipment section below). But it's incredible what it does to a tough cut of beef over a long cooking time. Chuck beef roast is full of beefy flavors, like a ribeye steak. (Chuck shoulder and ribeye roast are next to each other in the cow). But, the chuck is from the hard-working shoulder muscle. Chuck is a tough cut of beef if you don't cook it low and slow to tenderize the connective tissue and melt the fat. And, usually, that means a pot roast, where the chuck is cooked well done. (Which is still good eats, but not a steak). That's where sous vide comes in. It can cook low and slow at precisely medium-rare temperature, 131°F. The long cooking breaks down the connective tissue, but the low temperature keeps the steak medium-rare. Sous vide gives us the best of both worlds, an inexpensive, tender chuck steak with perfect medium-rare doneness.

Equipment

Sous vide machine: You need a sous vide immersion circulator and a sous vide container (or large pot) that can hold the steak with enough room to circulate the water.

Sous vide bag: You need food-safe plastic bags for sous vide, and you need all the air out of the bag to cook efficiently. The best way to do this is with a vacuum sealer. I use gallon vacuum seal bags. If you don't have a vacuum sealer, you can use freezer Ziploc bags for sous vide. Leave the zip-top of the bag open and slowly lower it into the water bath. The water will push all the air out of the bag as it is lowered. Zip the top of the bag right before it reaches the water level.

Grill: I use my grill to get a good sear on my sous vide steaks.

Cast-iron pan or heavy-duty skillet: Don't have a grill? A ripping hot cast iron skillet is also suitable for searing; sear the steak in a hot skillet for 1 to 2 minutes per side to give it a good crust. (A quality stainless steel pan, like an All-Clad fry pan, also works for searing. It doesn't hold as much heat as stainless steel, but it's close. And a stainless steel pan is a lot easier to maintain.)

Ingredients

  • 2-inch thick chuck eye steak
  • Fine sea salt
  • Fresh ground black pepper
  • Butter (optional)
  • Fresh rosemary (optional)
  • Fresh thyme (optional)
  • Fresh sage (optional)
  • Lemon zest (optional)
  • Garlic, peeled(optional)
  • Coarse sea salt (or Kosher salt, or Flaky salt, optional)
  • Coarsely ground black pepper (optional)

See the recipe card for quantities.

How to Make 24-Hour Sous Vide Chuck Steak

Chuck steak, herbs, garlic, and butter, vacuum sealed

Season the steak and seal it in a vacuum bag: Sprinkle the chuck-eye steak with ½ teaspoon of fine sea salt and 1 teaspoon of fresh ground black pepper. Put the steak in a vacuum bag, and toss in the butter, rosemary, thyme, sage, lemon zest, and garlic cloves. Seal the bag.

Vacuum bag of chuck steak and herbs in a sous vide water bath

Sous Vide the Steak for 24 Hours: Set a sous vide bath to 131°F/55*C for medium-rare. (Use 136°F/58°C for medium, or 141°F/60.5°C for medium-well) Put the bag with the steak into the water bath and cook for 24 hours. (Try to go for at least 12 hours, or up to 48 hours).

Dry the steak: Remove the bag from the sous vide, cut it open, and remove the steak from the bag. Pat the steak dry with paper towels.

Chuck steak searing on the grill

Sear the steak: Preheat a grill set as high as possible. (For my Weber Summit, I preheat the grill with all burners set to high for 15 minutes, then turn off half the burners and leave the other half on high. For my Weber Kettle, I light a full chimney of charcoal, then spread it out over ⅓ of the grate, about 3 coals deep, with no coals on the other side to concentrate the heat.) Sear the steak for 4 minutes, flipping every minute; rotate the steak 90 degrees on the second flip to get a crosshatch of grill marks. Set the steak on a cutting board and let it rest for 5 minutes.

Slice and serve: Cut the rested steak into ½-inch to 1-inch thick slices, depending on how hearty your eaters are. Sprinkle the sliced steak with the coarse salt and coarse ground pepper, then serve and enjoy.

Substitutions

Cuts of beef: My favorite chuck steak cut for this recipe is chuck eye steaks; they remind me of prime rib steaks. Other good cuts of beef chuck for this recipe are flat iron steaks, blade steaks, or a petite tender roast.

Flavor changes: I'm going with an Italian flavor here, loosely inspired by Bistecca alla Fiorentina. For a French flavor, replace the rosemary and sage with parsley. For Texas Style, skip the butter, herbs, lemon, and garlic, and rub the steak with my Tex-Mex spice rub of 3 teaspoons ancho chile powder, 1½ teaspoons fresh ground black pepper, and ¾ teaspoon garlic powder. Or, if you want simple steaks, use salt and pepper.

Sous Vide Safety for 24-Hour Cooks

For food safety reasons, a long cook like this 24-hour sous vide should never be done below 130°F/54.5°C. That temperature is high enough to pasteurize the meat, killing harmful bacteria. Unfortunately, we can't use the 24-hour method to give us a truly rare chuck steak; medium-rare is as low as we can go and still be food safe.

Tips and Tricks

Thick steak I like thick-cut steak for this recipe, 1 ½ to 2 inches thick. Try to get at least a 1-inch thick steak so it doesn't overcook in the middle during the searing step.

Au Jus Sauce I always feel like I'm wasting flavor when I throw out the juices in the Sous Vide bag after cooking. But, when I try to use them to make a pan sauce, the protein congeals and leaves ugly clumps in the sauce. That said, the sauce still tastes great with those juices. If you want to make a pan sauce, bring the liquid from the sous vide bag to a boil. Then, once the protein clumps up, pour the liquid through a fine mesh strainer - or even a coffee filter if you want a smoother sauce. Then, pour ½ cup of red wine into the pan, bring it to a boil, and add the filtered juices. Simmer until the sauce thickens a little, then take it off the heat and whisk in a tablespoon of butter.

What to serve with Sous Vide Chuck Steak

I love beef and horseradish, so I always make Horseradish Sauce to go on the steak. And I'm a steak and potatoes guy, so Quick Baked Potatoes is my usual side dish. I also like to serve steak with something green, preferably asparagus or green beans, whichever is in season.

Related Posts

Sous Vide Boneless Ribeye Roast
Sous Vide 48 Hour Baby Back Ribs
Sous Vide Short Ribs Recipe (48 hours to tenderness)
Sous Vide Flat Iron Steak (24 Hours to Tenderness)
Wagyu Ribeye Steak Recipe
Sous Vide Top Sirloin Sandwiches
My other Sous Vide Recipes

Enjoyed this post? Want to help out DadCooksDinner? Subscribe to DadCooksDinner via email and share this post with your friends. Want to contribute directly? Donate to my Tip Jar, or buy something from Amazon.com through the links on this site. Thank you.

Pressure Cooker Corned Beef and Cabbage

April 13, 2023 by Mike Vrobel 144 Comments

A plate of sliced corned beef with cabbage and carrots

Pressure Cooker Corned Beef and Cabbage Is my family's comfort food tradition on St. Patrick's Day.

Corned beef and cabbage in the pressure cooker seemed like a simple idea, a slow-cooker alternative that sped up my cooking time dramatically. And it did...eventually, when I got my technique figured out. Now I have a rock-solid pressure cooker corned beef recipe. (Before that it was a comedy of errors - see my troubleshooting section below if you want the gory details.)

A plate of sliced corned beef with cabbage and carrots
Pressure Cooker Corned Beef and Cabbage
[feast_advanced_jump_to]

Ingredients

  • Corned beef
  • Onion
  • Celery
  • Carrots
  • Cabbage

See the recipe card for quantities.

How to Make Pressure Cooker Corned Beef and Cabbage

Pressure Cook the Corned Beef for 60 Minutes With a Quick Release: Rinse the corned beef, then cut it crosswise into 4 equal pieces. Put the corned beef pieces, onion, and celery in an Instant Pot or other pressure cooker, sprinkle with the spice packet, then pour in enough water to cover the corned beef. Bring the pressure cooker up to high pressure and cook at high pressure for 60 minutes in an Instant Pot or other electric PC, or for 50 minutes in a stovetop PC. Quick release the pressure, then carefully remove the lid. Test the corned beef for doneness with a fork - it should be easy to poke a fork through the thickest section. If it's not done, lock the lid and cook for another ten minutes at high pressure.


Pressure Cook the Vegetables for 5 Minutes With a Quick Release: Add carrots to the pot, then lay the cabbage on top. It's OK if the cabbage comes a bit above your cooker's "no fill" line; there will still be a lot of airspace. Cook at high pressure for 5 minutes. Quick release the pressure again. Using a slotted spoon and/or tongs, transfer the vegetables to a platter and the corned beef to a carving board.
Serve: Pour the broth left in the pot into a fat separator. While the broth settles, slice the corned beef. Pour a little of the de-fatted broth over the corned beef and vegetables platter. Serve, passing the rest of the broth at the table.

Corned Beef & Cabbage Troubleshooting

Problem 1: Too salty

Last year, I tried my usual "cut back the water in the pressure cooker" approach. I used 1 cup of water instead of covering the corned beef. The result was unbelievably salty. I could barely eat it. The rest of the family took one bite, then ignored the corned beef and filled up with soda bread, cabbage, and carrots. Discouraged, I put one serving of the salty corned beef and cabbage in a container and tossed the rest. The next day, the leftovers tasted fine - sitting in the cabbage and juices for a day pulled enough salt out to make it edible.

Problem 2: Undercooked

Problem 2: Undercooked
This year, instead of winging it, I researched recipes. They all said to cover the corned beef with water. (Whoops.) Then I ran into my next hurdle. Most sources cook the whole corned beef at high pressure for 45 minutes to an hour. Then they quick release the pressure, remove the corned beef, add the vegetables, and cook the vegetables at high pressure for five minutes.

"Great!" I thought to myself, "Corned beef in an hour!"

I should have known what was coming. Last year I followed Lorna Sass's instructions and cooked a two-and-a-half pound corned beef for 70 minutes at high pressure. This year I had a monster - four and a half pounds. I checked the recipe book that came with my electric Cuisinart pressure cooker; it said I should cook for 24 minutes per pound. 108 minutes? Seriously? The Cuisinart's timer only goes up to 99 minutes. No, it couldn't possibly take that long.

I put the corned beef in the electric pressure cooker, and set it to cook at high pressure for fifty minutes. Then I quick released the pressure and filled the pot with potatoes, carrots, and cabbage. The result looked great, and the vegetables were perfectly cooked. But the corned beef was undercooked. My jaw got tired trying to chew through it. Once again, everyone else took one bite of the corned beef, then filled up on the sides.

I had to crack this. I couldn't let corned beef beat me. I went back to the store and bought two smaller corned beef roasts, each three and a half pounds.

In case it was the lower pressure of the electric pressure cooker, I cooked one corned beef in my electric PC and the other in my stove top PC. (Most electric pressure cookers have a high pressure of 12 PSI, while stovetop pressure cookers have a high pressure of 15 PSI.)

I cooked both roasts for fifty minutes, quick released the pressure, and checked the corned beef. It wasn't done. I kept trying, pressure cooking for ten minutes with a quick release, and checking again. The stovetop pressure cooker took a total of 80 minutes to tenderize the corned beef, and the electric PC took 90 minutes. Finally, success!

But, wow, eighty minutes? So much for corned beef in an hour. Still, an hour and a half (including the extra vegetable cooking time) was much better than the ten hours my usual slow cooker recipe takes. Need a corned beef in a hurry? Get a small one, add plenty of water, and do NOT undercook it.

Problem 3: Too Long

So, 90 minutes worked for a smaller corned beef, and I used that recipe for years. But with another St. Patrick's Day coming up, I started thinking.

What if I tried the trick I learned with [Pressure Cooker Pot Roast] and cut the corned beef into pieces? I always slice the corned beef for serving, so no one will know I cut it into 4 pieces before I started cooking.

Sure enough, cutting the corned beef into 4 pieces worked wonders. 60 minutes under pressure worked perfectly in my Instant Pot, and it finished in 50 minutes in my stovetop PC. Now, I can get a bigger corned beef - I'm able to fit a 4 pounder in, once I cut it up and fit it in like a jigsaw puzzle. In fact, I can get any size I want, as long as I cut it into 2-inch to 3-inch wide pieces before cooking. Problem solved!

Recipe Tips and Tricks

  • Leftover corned beef and cabbage freezes well, as long as it is covered in broth.
  • If you have the time, use a natural pressure release for the corned beef instead of the quick release. It's almost impossible to overcook a corned beef, and the slower release of pressure results in a little bit more tenderness in the corned beef.
  • Watch out for extra-thick corned beef - you want a flat, even piece, three inches thick or so. If you get a thicker one, or a cut from the point end, give it an extra ten to fifteen minutes under pressure.
  • Want to add a little more Irish cuisine to the recipe? (Or at least some Irish beer?) Replace some of the water with a bottle of Guinness beer
  • Don't have a pressure cooker? Use a slow cooker. Recipe here: Slow Cooker Corned Beef and Cabbage

Adapted From: Lorna Sass Pressure Perfect

Pressure Cooker Corned Beef and Cabbage | DadCooksDinner.com
Pressure Cooker Corned Beef and Cabbage

Related Posts

Pressure Cooker Lamb Stew
Pressure Cooker Lamb Stew with Guinness and Barley
Pressure Cooker Champ (Irish Mashed Potatoes with Green Onions)
Instant Pot Cabbage
Okonomiyaki (Japanese Cabbage Pancake)
My other Pressure Cooker Recipes
My other Pressure Cooker Time Lapse Videos

*Enjoyed this post? Want to help out DadCooksDinner? Subscribe using your RSS reader or by Email, recommend DadCooksDinner to your friends, or buy something from Amazon.com through the links on this site. Thank you!

Instant Pot Brown Basmati Rice

April 11, 2023 by Mike Vrobel 10 Comments

A bowl of brown basmati rice with uncooked rice and ground turmeric in the background

Instant Pot Brown Basmati Rice. Looking for a healthy side dish, especially for a curry or dal, ready in about a half an hour? Pressure cook a pot of brown basmati rice.

whole grains, still wrapped in their bran coating, and, as someone who grew up in the big Bran Fiber boom of the 90s, I know all about its health benefits. The problem is how much time it takes to cook brown rice. Stovetop white rice takes 30 minutes in the background while I prepare the rest of the meal. Brown rice is an hour or more on the stovetop. Or, it was, until my pressure cooker came along. I get my healthy brown rice in 30 minutes, matching my weeknight cooking style.

A bowl of brown basmati rice with uncooked rice and ground turmeric in the background
Instant Pot Brown Basmati Rice
[feast_advanced_jump_to]

Now, I've covered Instant Pot Rice, like Brown Jasmine rice and White Rice on the blog before, so I keep getting questions about brown Basmati rice. I'm writing this recipe to point people toward it when they ask.
Basmati rice and Jasmine rice cook the same because they are both long-grained rice. There is a subtle flavor difference; I can easily taste the difference between jasmine and basmati rice, but I don't have the words to explain them. It's like the difference between Indian and Thai curries - a lot is going on, and they're obviously different, but I don't know how to explain it.

White Basmati Rice vs. Brown Basmati Rice

White and Brown Basmati Rice are the same rice species from the Indian subcontinent, with a distinctive nutty taste that other rice varieties don't have. White rice is processed to remove the hull, bran, and germ. Brown rice only has the hull removed; the "brown" in brown rice is the bran, still coating the rice. That difference in processing is why brown rice is a whole grain and healthier eating than white rice.

Ingredients

  • Brown basmati rice (Or long grain brown rice)
  • Water
  • Fine sea salt
  • Butter (or ghee, optional)
  • Ground turmeric (optional)

See the recipe card for quantities.

How to Make Instant Pot Brown Basmati Rice

Rice in the pot: Stir the rice, water, salt, and (optional) butter into an Instant Pot.
Pressure cook the rice for 20 minutes with a Natural Release: Lock the lid and cook on high pressure for 20 minutes in an Instant Pot. (Use Manual, Pressure Cook, or Pressure Cook -custom mode.) Let the pressure come down naturally, about 15 minutes (If you're in a hurry, you can quick release any remaining pressure after 10 minutes).
Yellow a handful of rice (optional): In a small bowl, Stir the ¼ teaspoon of ground turmeric in 2 tablespoons of water until it dissolves. Add ¼ cup of the cooked rice to the bowl, toss to coat with the turmeric water, and let it sit for a few minutes, occasionally stirring, to absorb the color.
Serve: Fluff the rice with a fork, stir in the yellowed rice, and serve. Enjoy!

Recipe Tips

Turmeric Soak for Color: When I was testing this recipe, I wanted to have the sprinkling of yellow grains in the rice that I get at my local Indian restaurant. That yellow color comes from soaking a little of the cooked rice in turmeric, then mixing it back into the larger batch of white rice. I tried this with brown rice, and the difference is barely noticeable. (The picture above is from when I used the technique. I can see the yellow grains, but it's very subtle.) I have the turmeric soak as an optional step.
Soaking basmati rice: I also investigated soaking the basmati rice before cooking. Some recipes made a big deal about soaking to keep the grains separate. I didn't see much difference in the final product in my testing. So, I don't bother with soaking the rice. (If your Indian auntie insists you must soak your rice, don't let me stop you. I don't want the Indian aunties coming after me.)
Vegan: If you want a Vegan version of the recipe, skip the butter, or replace it with a neutral vegetable oil like canola oil.

What to Serve With Instant Pot Brown Rice

This rice makes a great side dish with Indian-style curries. I usually turn to my Instant Pot Quick Lentil Curry on weeknights or my Instant Pot Indian Black Lentils and Kidney Beans (Dal Makhani) when I'm feeling fancier.

Storing Leftovers

Cooked rice does not keep for long. It carries bacteria spores (Bacillus cereus) that multiply in warm temperatures. To store cooked rice, cool it down quickly in the refrigerator, or freeze it within an hour of cooking. Store refrigerated rice for 2-3 days or frozen rice for up to 3 months, and make sure to reheat it completely (to at least 165°F) before eating. (Source: Safe Handling of Cooked Rice, University of Wisconsin Extension).

What do you think?

Questions? Other ideas? Leave them in the comments section below.

Related Posts

Pressure Cooker Brown Jasmine Rice
Instant Pot Coconut Brown Rice
Instant Pot Indian Black Lentils and Kidney Beans (Dal Makhani)
Pressure Cooker Rice
Easy Instant Pot Coconut Rice
My other Instant Pot and Pressure Cooker Recipes

Enjoyed this post? Want to help out DadCooksDinner? Subscribe to DadCooksDinner via email and share this post with your friends. Want to contribute directly? Donate to my Tip Jar, or buy something from Amazon.com through the links on this site. Thank you.

Instant Pot Lamb Stew

April 6, 2023 by Mike Vrobel 7 Comments

A bowl of lamb stew

Instant Pot Lamb Stew recipe, Irish style. Lamb, potatoes, and carrots in the pressure cooker.

I was looking for pressure cooker Lamb Stew ideas, because I wanted a lamb stew with slow-cooked flavor, but not slow-cooked time. I came across this recipe by Diana Henry. Mrs. Henry is a very popular food writer in England, and a cult favorite here in the States. In her recipe, she mixes potatoes into the stew, so they crumble while cooking. This thickens the broth with their starch, adding extra body to the stew. Since pressure cooker stews are usually thin, I loved this idea, and grabbed my Instant Pot to try it out.

A bowl of lamb stew
Instant Pot Lamb Stew
[feast_advanced_jump_to]

Now, when I say "thickening the broth", don't expect something you can stand a spoon in. This is a pressure cooker recipe, after all, and the sealed environment doesn't let the broth evaporate and thicken up. But, the potatoes do work their magic, adding body to the liquid.

(I also jumped on Mrs. Henry's suggestion of carrots and thyme. I can't pass up carrots and thyme in a stew.) Ready for a hearty meal? Try this Instant Pot Lamb Stew recipe.

Equipment

A 6-quart pressure cooker
Steamer basket (to hold the potatoes and carrots above the liquid and keep them from overcooking).

Ingredients

  • Onions
  • Boneless lamb shoulder
  • Russet potatoes
  • Fine sea salt
  • Fresh ground black pepper
  • Fresh thyme
  • Dark beer (Guinness)
  • Water
  • Carrots
  • Parsley

See the recipe card for quantities.

How to Make Instant Pot Lamb Stew

Instant Pot with a layer of lamb, and a steamer basket with potatoes, carrots and parsley next to it.
Layered ingredients

Layer ingredients in the bottom of the pot: Start by layering the ingredients into a room-temperature Instant Pot (or other pressure cooker). The first layer is half of the sliced onions, then half of the sliced potatoes, one sprig of thyme, and then half of the lamb. Sprinkle with ½ teaspoon of salt and ¼ teaspoon of pepper. Repeat with the rest of the ingredients for the second layer - add the rest of the sliced onions, then the sliced potatoes, the other sprig of thyme, and the rest of the lamb. Sprinkle with ½ teaspoon salt and ¼ teaspoon pepper.
Simmer the beer, and add the rest of the water: Pour the beer over the layered ingredients in the pot. Set the Instant Pot to Sauté mode - High (Use medium-high heat with a stovetop PC). Bring the beer to a boil, and boil for 1 minute. (Listen for the boil - you won't be able to see it in the bottom of the pot.) Pour in the two cups of water.

Instant Pot with a steamer basket of potatoes and carrots on top.
Steamer basket on top

Set the basket of potatoes and carrots on top: Sprinkle the chunked potatoes and carrots with ½ teaspoon salt, ¼ teaspoon black pepper, and the minced parsley. Put the potatoes and carrots in a vegetable steamer basket, and set the basket in the pressure cooker pot, directly on top of the layered ingredients.
Pressure Cook for 18 minutes with a Natural Pressure Release: Lock the lid on the pressure cooker. Cook at high pressure for 18 minutes in an Instant Pot or other electric pressure cooker, or for 15 minutes in a stovetop PC. (Use Manual, Pressure Cook, or Pressure Cook - Custom mode in an Instant Pot.) Let the pressure come down naturally, about 20 more minutes. (If you are in a hurry, you can quick release any remaining pressure after 15 minutes.
Serve: Open the lid away from you to avoid the hot steam. Lift out the basket of potatoes and carrots and set it aside. Stir the stew in the pot, breaking up the potato slices to thicken the broth, and discard the thyme sprig stems when you find them. Gently stir the basket of potatoes and carrots into the stew, serve, and enjoy!

Recipe Tips

  • Vegetable basket: Why put some potatoes in the pot with the lamb and the rest with the root vegetables in the steaming basket? Because they serve two different purposes. The vegetable basket keeps the potatoes and carrots from turning to mush, so they come out as chunks in the finished stew. But, I want the potatoes mixed in with the lamb to turn to mush so they thicken the stew.
  • No Alcohol: If you can't (or don't) have beer, substitute chicken broth, beef broth, or water.
  • Other Herbs and Spices: If you want more variety, get a "Poultry Mix" pack of fresh herbs from your grocery store. Then, instead of just the thyme, put a sprig of thyme, rosemary, and sage on every level.

Serving Suggestions

This Instant Pot lamb stew recipe is a one-pot meal with meat, starch, and vegetables. I like to serve it with crusty bread and a salad. If I'm feeling fancy, I'll serve it with Instant Pot Colcannon (Irish Mashed Potatoes and Kale), or maybe just Pressure Cooker Kale.

Storing Leftovers

Lamb stew makes excellent leftovers. I save it in airtight 2-cup containers, which last for a few days in the refrigerator or 6 months in the freezer.

Inspired by: Roast Figs Sugar Snow: Winter Food to Warm the Soul by Diana Henry

What do you think?

Questions? Other ideas? Leave them in the comments section below.

Related Posts

Pressure Cooker Lamb Stew with Guinness and Barley
Pressure Cooker Beef Stew with Mushrooms
Pressure Cooker Champ (Irish Mashed Potatoes)
Pressure Cooker Corned Beef and Cabbage
My other Pressure Cooker Recipes

Enjoyed this post? Want to help out DadCooksDinner? Subscribe to DadCooksDinner via email and share this post with your friends. Want to contribute directly? Donate to my Tip Jar, or buy something from Amazon.com through the links on this site. Thank you.

Instant Pot Puerto Rican Pulled Pork (Pernil al Caldero)

March 28, 2023 by Mike Vrobel 4 Comments

Shredded pork on a bed of rice, with an Instant Pot, jar of Recaito, and Sazon packets

Instant Pot Puerto Rican Pulled Pork, inspired by Pernil al Caldero. The flavors of Puerto Rico from my pressure cooker, tender and shreddable in about an hour, with pantry ingredients I could find in my local markets.

A friend asked me for an Arroz con Gandules recipe, leading me to Pernil. All the local Puerto Rican restaurants I visited had a combo plate with pulled pork and a side of rice and pigeon peas. It's a fantastic combination! I came home determined to make some Pernil. And then...I ran into the lack of a Puerto Rican grocery store in my area.

Shredded pork on a bed of rice, with an Instant Pot, jar of Recaito, and Sazon packets
Instant Pot Puerto Rican Pulled Pork
[feast_advanced_jump_to]

This is my attempt at Pernil based on the pantry items I could find in my local stores. (All my local Latin markets are Mexican, so the Puerto Rican ingredients are sparse). No fresh culantro or aji peppers, so I went with jarred Reciato Culantro. (I've tried both Goya Reciato Culantro and Loisa Sofrito, and they both go well with the pork.) I buy packets of Sazon seasoning and a jar of Adobo seasoning for the spice rub. Think of this as shortcut Pernil, with most of the flavor from a simple set of pantry ingredients.

Ingredients

  • Pork shoulder roast
  • Sazon seasoning
  • Adobo seasoning
  • Jar of Reciato Culantro (or Sofrito)
  • Olive oil
  • Chicken Broth

See the recipe card for quantities.

How to Make Instant Pot Pernil

Marinate the pork: Sprinkle the cut pieces of pork roast with the Sazon and Adobo, put them in a gallon zip-top bag or small baking dish, and cover with the Reciato Culantro (or soffits). Marinate for at least 2 hours, preferably overnight.

Brown the pork in 2 batches: Heat the olive oil in an Instant Pot set to Sauté mode - High until the oil shimmers, about 3 minutes. Remove half of the pork from the marinade, let the excess marinade drip off, then put the pork in the pan in a single layer. Let the pork sit in the pan until it is browned on the bottom, about 3 minutes. (We are only searing the pork on one side). Move the browned pork to a plate, then put the rest of the pork in the pot, and cook until browned on the bottom, about 3 more minutes.

Everything in the pot: Pour a cup of chicken broth or water into an Instant Pot (or use the minimum liquid amount for your pressure cooker), and use a flat-edged wooden spoon to scrape loose any browned bits of pork stuck to the bottom of the pot. Add the pork (and any juices) from the plate to the pot, stacking the pork in the pot in a loose pile. (Don't pack it in, we need space for hot steam to circulate around the pork.) Pour any marinade left in the bag over the pork.

Pressure cook the pork for 45 minutes with a Natural Pressure Release: Lock the lid and pressure cook on high pressure for 45 minutes (use Manual, Pressure Cook, or Pressure Cook-Custom mode in an Instant Pot). Let the pressure release naturally, for about 15 more minutes. (You can quick release any remaining pressure after 15 minutes if you're in a hurry.)

Shred and serve the pork: Scoop the pork out of the pot with tongs and/or a slotted spoon, and move it to a large platter with a rim. Shred the pork with a pair of forks, drizzle with a cup of the pot liquid, and toss to coat. Serve and enjoy!

🛠 Equipment

A 6-quart pressure cooker

📏Scaling

You can double this recipe in a 6-quart pressure cooker. You don't need to double the cup of chicken broth or water, just the pork and other ingredients. You can halve the recipe, too, if you need to fit it in a 3-quart pressure cooker, but again, keep the water amount at 1 cup. (You need 1 cup of water to come up to pressure.)

No matter how you scale the recipe, up or down, the cooking time remains the same. 2-inch by 2-inch pieces of pork shoulder cook in the same amount of time, regardless of how many are in the pot.

Sazon seasoning and Adobo seasoning

These two store-bought spice rubs are what I "rub" - really, sprinkle on - my pork shoulder. If you buy Goya Sazon, get the Original version, "Con culantro y achiote." The culantro and achiote in the Sazon and the garlic-forward Adobo are a great combination with the pork.

Reciato Culantro

Reciato culantro needs some unique ingredients that are hard to find in my local grocery stores. (My local Hispanic markets are all Mexican and don't stock Puerto Rican specialty ingredients beyond the Goya products I list below.) So, I buy my Reciato pre-made in jars. Both this Reciato Culantro from Goya, and this Sofrito from Loisa will work for this recipe.

If you want to make your own, here's a recipe adapted from Simply Recipes:

  • 6 cloves garlic, peeled
  • 1 medium onion, peeled and cut into chunks
  • 1 large green bell pepper, stemmed, seeded, and cut into chunks
  • 6 ajes dulces peppers (or substitute mini-sweet peppers)
  • 1 bunch culantro (or substitute a bunch of cilantro)
  • 1 teaspoon dried oregano

Make the Reciato Culantro: Drop the garlic cloves through the feed tube of a running food processor and process until thoroughly minced. Add the onion, bell pepper, and mini sweet peppers, and mince with one-second pulses of the food processor, scraping down the sides if needed. Add the culanto (or cilantro) and oregano and mince with one-second pulses of the food processor, scraping down the sides if needed, until everything is a chunky paste.

Tips and Tricks

  • Cut the pork roast into strips before pressure cooking: Large roasts don't pressure cook well. It takes a long time for the heat to penetrate the roast's center. That's fine when you are slow cooking all day in an oven, but not so good in a pressure cooker. To help the pressure do its work, I cut my pork shoulder into 2-inch by 2-inch strips before cooking. Why 2-inch by 2-inch strips? Because the pork roasts I get from the grocery store are usually 4 inches thick. I cut them in half, then cut each half into 2-inch wide pieces. That gives me pieces with even thickness, so they cook consistently.
  • Pork Butt: Pork Shoulder is also called picnic shoulder, pork butt, or Boston butt. They're all the same cut of pork and work in this pork recipe. If you get a bone-in roast, remove the bone before cutting the pork into 2-inch strips. Don't use pork loin, which is a leaner cut of pork and won't stand up to the long cooking time.

Serving Suggestions

As I mentioned in the opening, the traditional side dish with this shredded pork is Arroz con Gandules - Rice with Pigeon peas.

Adapted from: Puerto Rican Slow Cooked Pork Roast (Pernil al Caldero), Milk Street Magazine

Related Posts

Instant Pot Pulled Pork - Quick and Easy Recipe
Instant Pot Oxtail: Easy Braised Recipe
Instant Pot Chicken Legs and Rice (Arroz con Pollo)
My other Instant Pot and Pressure Cooker Recipes

Enjoyed this post? Want to help out DadCooksDinner? Subscribe to DadCooksDinner via email and share this post with your friends. Want to contribute directly? Donate to my Tip Jar, or buy something from Amazon.com through the links on this site. Thank you.

Instant Pot Mexican Brown Rice (Pressure Cooker Recipe)

March 23, 2023 by Mike Vrobel 3 Comments

Mexican Brown Rice in a bowl

Instant Pot Mexican Brown Rice. Arroz rojo, the classic Tex-Mex side dish, made with whole-grain brown rice in a pressure cooker.
I'm trying to eat more whole grains, so I'm writing a Mexican brown rice recipe. My goal is to duplicate the rice on the side of a combo plate from my local Tex-Mex joint.

Mexican Brown Rice in a bowl
Instant Pot Mexican Brown Rice


When I was testing this recipe, my big question was "tomato sauce or diced tomatoes?" I made batches of Mexican rice, with a few peas and carrots mixed in like they do at my local restaurants, and posted a picture to see if people preferred the chunks of diced tomato, or the red color the tomato sauce added to the rice.

And…no one answered the tomato question. What everyone did notice the peas. "Ew! Not peas!" was a common response. It's OK! The peas are optional! (I add them because I like the extra colors they add to the rice.)

The Great Pea Controversy aside, this is a fine batch of rice. I wound up using tomato sauce, because it adds a little extra flavor to the rice, and again, I like the color.

Pressure cooking makes brown rice quick enough to serve with weeknight dinners. My problem? My kids love white rice, and when I make rice in the pressure cooker, they get suspicious. I get serious side-eye and the question "Is this brown rice?" Not this time - the red rice looked like their usual Mexican restaurant combo plate, and they dug in without question. We have a winner!

INGREDIENTS

  • Vegetable oil
  • Garlic
  • Long grain brown rice
  • Water
  • Tomato sauce
  • Frozen peas and carrots (optional)
  • Cilantro (optional)
    See the recipe card for quantities

How to Make Instant Pot Mexican Brown Rice

Sauté the Garlic and Stir in the Rice: Put the vegetable oil and garlic in a cold Instant Pot (or other pressure cooker), then turn on Sauté mode. (Use medium heat with a stovetop PC). Wait for the garlic to start to bubble around the edges, but don't let the garlic brown, about 3 minutes. Stir the rice into the pot to coat it with the garlic oil. Stir in the water, and then pour the tomato sauce on top.
Pressure Cook the Rice for 20 Minutes With a Natural Pressure Release: Lock the lid and cook on high pressure for 20 minutes in an Instant Pot or other electric PC, or for 16 minutes in a stovetop PC. (Use Manual, Pressure Cook, or Pressure Cook - Custom mode in an Instant Pot.) Let the pressure come down naturally, about 15 more minutes. (You can quick release any remaining pressure left after 15 minutes if you are in a hurry).
Stir in the extra ingredients and serve: Remove the lid from the pressure cooker - watch out for hot steam. If you want the optional peas and carrots, stir the frozen peas and carrots into the rice, put the lid back on the pot, and let the pot sit for 5 minutes to heat the peas and carrots through. Fluff with a fork, sprinkle the minced cilantro on top, and serve.

Substitutions

  • Chunky tomatoes: If you like tomato chunks in your rice, replace the tomato sauce with a 15-ounce can of diced tomatoes.
  • Other types of rice: I use long-grain brown rice in this recipe. Brown Jasmine rice is a good substitute. Brown basmati rice has a nutty flavor, which gets covered up by the rest of the flavors in this recipe. White rice won't work in this recipe - brown rice cooks very differently. (See my Instant Pot White Rice recipe for instructions).

What to Serve With Mexican Brown Rice

Mexican rice and  refried beans  or Instant Pot Mexican Black Beans are the perfect side dishes for Tex-Mex meals - there is a reason they are on the combo plate in Mexican restaurants across America. Eat them with Instant Pot Quick Chicken Tacos, Instant Pot Carnitas, Instant Pot Carne Guisada Tacos, or your own favorite Mexican or Tex-Mex main dish.

What do you think?

Questions? Other ideas? Leave them in the comments section below.

Related Posts

Pressure Cooker Refried Pinto Beans
Pressure Cooker Brown Jasmine Rice
Pressure Cooker Brown and Wild Rice Pilaf
Pressure Cooker Rice
My other Pressure Cooker Recipes

Enjoyed this post? Want to help out DadCooksDinner? Subscribe to DadCooksDinner via email and share this post with your friends. Want to contribute directly? Donate to my Tip Jar, or buy something from Amazon.com through the links on this site. Thank you.

Instant Pot Beef Brisket

March 21, 2023 by Mike Vrobel 14 Comments

A plate of brisket slices with a pickle, onion, and bbq sauce

This Instant Pot Beef Brisket is based on my PC experiments with corned beef, because corned beef is actually cured beef brisket. I use my trick of cutting the brisket across the grain into 4 pieces, so the smaller pieces cook through quicker and easier. (I tell myself I'm just getting a head start on the slicing.) I am amazed at how tender the beef is when it comes out of the pressure cooker. This is fall-apart brisket - be gentle when you lift it, and when you slice it.

A plate of brisket slices with a pickle, onion, and bbq sauce
Instant Pot Beef Brisket
[feast_advanced_jump_to]

Now, I have barely started on this post, and I'm already going to apologize. To the Texas Barbecue purists: Yes, I know this is not real Texas barbecue. I've had many fine briskets in Texas, and made a few more in my backyard in Ohio. (That's right, I'm not from Texas).

But I get asked a lot - what's my Instant Pot brisket recipe?

I'm not going to run from it any more. Come at me, barbecue purists.

I use a simple seasoning, like they do in Texas - salt and pepper. And…a hint of Ancho chile powder. You can skip the Ancho - I'm annoying the Texas purists by adding it - but I like the hint of smoke it brings to the recipe. Traditional sides are barbecue sauce, sliced onions, and dill pickles. (Slices of cheap white bread would also be appropriate, but I can't bring myself to buy a loaf of Wonder bread.)

If I feel the need to apologize, why am I doing this? Because…oh, my. Brisket. Sure, it's not a 12 hour smoked bbq brisket. But there's nothing like the big beefy flavor of brisket. And, I don't always have an entire day to set aside to barbecue. If you want delicious beef brisket in about 90 minutes from the pressure cooker, try this recipe. Even the barbecue purists would finish a plate.

What Is Beef Brisket?

The brisket is a tough, flat piece of meat. It's from the hard-working part of the steer between the shoulder and the leg, and all that work toughens it up. But, if you cook brisket long enough, that tough meat tenderizes and becomes one of the best, beefiest meals you'll ever have. (For more details, check out my friends at Certified Angus Beef: Whole Brisket.)

Ingredients

  • Beef brisket (flat cut)
  • Fine sea salt
  • Ancho chile powder (optional)
  • Fresh ground black pepper
  • Water
  • Worcestershire sauce

Toppings

  • Thin-sliced onions
  • Dill Pickles
  • Texas style barbecue sauce (optional, if you like sauce with your brisket)

How to Cook Instant Pot Beef Brisket

Prepare the beef brisket: Cut the brisket crosswise into 2-inch wide pieces. (I get about 4 in a regular sized brisket). Sprinkle the brisket with the salt, ancho chile powder, and black pepper. Put the brisket in the Instant Pot or other pressure cooker, trying to get it into a loose single layer. Don't pack it in; if the pieces don't fit, add a second layer crosswise to the first layer, like you're building a house with Lincoln Logs. Pour the water and Worcestershire sauce over the beef.

Pressure Cook for 60 minutes with a Natural Release: Lock the lid, then pressure cook at high pressure for 60 minutes in an electric PC or for 50 minutes in a stovetop PC (Use Manual, Pressure Cook - High, or Pressure Cook - Custom mode in an Instant Pot). Let the pressure come down naturally, about 15 minutes more. Unlock the lid, opening it away from you - the steam is hot. Test the brisket with a fork - it should be easy to poke a fork through the thickest part of the thickest piece. If it's not done, lock the lid and cook for another ten minutes at high pressure.

Slice and serve: Carefully lift the pieces of beef out of the cooker and transfer to a carving board. Strain the liquid in the pot into a fat separator. Slice the brisket into ½ inch thick slices, drizzle with a little of the defatted sauce, and serve, passing barbecue sauce at the table.

Recipe Tips

Cut the brisket into 2-inch strips

The big trick in this recipe is cutting the beef into 2-inch strips before pressure cooking. A whole brisket takes forever to cook, even in a pressure cooker. Cutting the brisket into pieces lets the heat penetrate, and speeds this up to a 60 minute cooking time at high pressure. Now, I know, 60 minutes at high pressure, with a natural release, isn't exactly a quick recipe. But when you compare it to the 12 hour+ cook it takes in a smoker? This takes a fraction of the time. And, since I'm going to slice the brisket anyhow, no one will notice that it was partially sliced before I cooked it.

Pressure Cooker Beef Brisket step by step tower | DadCooksDinner.com
Pressure Cooker Beef Brisket

What do you think?

Questions? Other ideas? Leave them in the comments section below.

Related Posts

Pressure Cooker Collard Greens with Bacon - Dad Cooks Dinner
Pressure Cooker Pork Western Shoulder Ribs with Barbecue Rub and Sauce - Dad Cooks Dinner
Pressure Cooker Texas Red Chili - Dad Cooks Dinner
Instant Pot BBQ Beef Sandwiches
Instant Pot Beef Tips
My other Pressure Cooker Recipes
My other Pressure Cooker Time Lapse Videos

Enjoyed this post? Want to help out DadCooksDinner? Subscribe via eMail or RSS reader, recommend DadCooksDinner to your friends, and buy something from Amazon.com through the links on this site. Thank you!

Instant Pot Chicken Broth

March 16, 2023 by Mike Vrobel 11 Comments

Two jars of chicken broth on a wood table in front of an Instant Pot

Instant Pot Chicken Broth. Pressure cooking chicken backs with some aromatics to make a cheap batch of broth - and the most useful ingredient in my kitchen.

I'm a hype man for pressure cooker chicken broth. Using real, homemade broth is one of the secrets of professional kitchens, and one of the best things you can do to improve your home cooking.

Two jars of chicken broth on a wood table in front of an Instant Pot
Instant Pot Chicken Broth
[feast_advanced_jump_to]

This recipe is the cheapest way to make chicken broth when I don't have a leftover chicken carcass. Broth wants chicken bones and skin, and chicken backs are the cheapest way to get them. (Necks and feet are also good, but around here I have to go to a specialty chicken store to get them. I can find chicken backs at my local grocery store, in the freezer section of the meat department, near the other odds and ends like beef soup bones and pork shanks.

Now, the absolute cheapest way to make broth is out of chicken scraps, the leftover carcass of a roast chicken. It's making broth out of nothing at all - or at least scraps and an onion.

My second favorite way to make broth is to buy a grocery store rotisserie chicken. It's about the opposite of chicken scraps; it's more expensive, but it's also more convenient. Check out my recipe for Instant Pot Rotisserie Chicken Broth for more details.

Why pressure cooker broth

Because pressure cooking does a better job, and a faster job than stovetop cooking. Pressure cooking pulls more flavor and gelatin out of the bones in an hour than a four hour stovetop simmer will give you.

Ingredients

  • 3 pounds chicken backs
  • 2 medium onions, peeled and halved
  • 1 large carrot, scrubbed and broken in half
  • 1 celery rib, broken in half
  • 2 bay leaves
  • 1 teaspoon salt
  • 1 teaspoon whole black peppercorns
  • 8 cups of water, (Or up to the max fill line in your cooker)
    See the recipe card for quantities.

How to make Instant Pot Chicken Broth

Everything in the pot: Put the chicken backs, onions, carrot, celery, bay leaves, salt, and peppercorns in an Instant Pot or pressure cooker, then pour in 8 cups of water. (The water should cover everything - you can add more if you need to, up to the max fill line of your cooker.)
Pressure cook the broth for 60 minutes with a Natural Release: Lock the lid and pressure cook on high pressure for 60 minutes in an Instant Pot or other electric pressure cooker (use Manual or Pressure Cook mode in an Instant Pot) or for 50 minutes in a stovetop pressure cooker. Let the pressure come down naturally - about 30 minutes. (It takes a long time for all that water to cool off.) If you're in a hurry, let the pressure come down naturally for 20 minutes, then quick release the remaining pressure.
Strain and save: Unlock the lid and open it away from you to avoid any hot steam. With a slotted spoon, scoop the chicken bones and vegetables out of the pot and discard; they gave their all to the broth. Strain the broth through a fine mesh strainer. Refrigerate the broth for a couple of days, or portion into 2-cup containers and freeze for up to 6 months.

Recipe Tips

  • I find chicken backs in the freezer of my local grocery store, near the beef bones and chicken fat and other odds and ends. Chicken necks and chicken feet are good substitutes. So are chicken wings, but wings are expensive.
  • The only absolutely necessary ingredients are the chicken backs, onions, salt, and water. The rest are good to have, but you can make four-ingredient chicken broth if your pantry is running low.
  • Frozen chicken backs? Just break them up enough so they'll fit in the cooker. No need to change any timings. The hour under pressure is long enough.
  • If you have a leftover carcass from a roast chicken or two, they're a great substitute for the chicken backs.

Storing Leftovers

Leftover broth is kitchen gold. Refrigerate the broth for a couple of days, or portion into 2-cup containers and freeze for up to 6 months.

What do you think?

Questions? Other ideas? Leave them in the comments section below.

Related Posts

Instant Pot Rotisserie Chicken Broth
Pressure Cooker Browned Chicken Broth
Instant Pot Rotisserie Chicken Noodle Soup
Instant Pot Ham and Beans Recipe
My other Instant Pot and Pressure Cooker Recipes

Enjoyed this post? Want to help out DadCooksDinner? Subscribe to DadCooksDinner via email and share this post with your friends. Want to contribute directly? Donate to my Tip Jar, or buy something from Amazon.com through the links on this site. Thank you.

Instant Pot Pastalaya (One-Pot Cajun Pasta Jambalaya)

March 14, 2023 by Mike Vrobel 3 Comments

A bowl of Instant Pot Pastalaya with hot sauces and spices

Instant Pot Pastalaya. One-pot Cajun pasta jambalaya, pressure cooked in my Instant Pot.

This month's Camellia Bean Box came with a pack of spices for Pastalaya. I saw the name, and I immediately had to try it...after I figured out what Pastalaya actually is. (It's jambalaya made as a one-pot meal, with pasta instead of rice. Why didn't I think of that?)

A bowl of Instant Pot Pastalaya with hot sauces and spices
Instant Pot Pastalaya
[feast_advanced_jump_to]

For a recipe I hadn't heard of, Pastalaya was everywhere. It sounds like it's the Louisiana equivalent of baked ziti, used at potluck dinners and church suppers, where the pasta makes it easier to make in large quantities for a crowd. (It also looks like a big hit at LSU Tigers tailgating.)

Where did Pastalaya come from? According to this interview with chef Nino Thibodaux, it's the story of Sicilian immigrants coming to New Orleans in the late 1800. They merged their pasta with the local jambalaya, and the result is fantastic.

Ingredients

Ingredients ready to cook Pastalaya
Ingredients for Instant Pot Pastalaya
  • Olive oil
  • Smoked sausage
  • Boneless skinless chicken thighs
  • Cajun seasoning
  • Fine sea salt
  • Onion
  • Celery
  • Bell Pepper
  • Garlic
  • Southern hot sauce (Crystal, Louisiana, or Tabasco)
  • Chicken broth
  • Diced tomatoes and green chilies
  • Penne pasta
  • Fresh ground black pepper
  • Green onions

See the recipe card for quantities.

How to Make Instant Pot Pastalaya

Chicken sprinkled with cajun seasoning, satueing in an Instant Pot
Sauté the sausage and the chicken

Brown the sausage and chicken: Heat the olive oil in an Instant Pot set to Sauté Mode - High until the oil starts shimmering. Add the smoked sausage and cook, occasionally stirring, until browned around the edges, about 3 minutes. Scoop the sausage out with a slotted spoon and move it to a bowl. Add the chicken thigh pieces and sprinkle with 2 teaspoons of cajun seasoning. Cook without stirring until browned on the bottom, about 3 minutes. Scoop the chicken out with a slotted spoon and move to the bowl with the sausage.

An Instant Pot full of sauteed onions, peppers, and celery, with Cajun Seasoning in the middle.
Sauté the aromatics and toast the Cajun seasoning

Sauté the aromatics and spices: Add the onion, celery, bell pepper, and garlic to the pot, and sprinkle with ½ teaspoon salt. Sauté until the onions soften, about 5 minutes, stirring and scraping with a flat-edged wooden spoon to loosen any browned bits of sausage and chicken. Stir in the Cajun seasoning and sauté for 1 minute to toast the spices.

An Instant Pot full of Pastalaya ingredients, ready to lock the lid on and serve
Everything in the pot (before I poked the pasta to make sure it was submerged)

Everything in the pot: Add the sausage and chicken back to the pot, plus any juices in the bowl. Pour in the hot sauce and stir to coat the chicken. Pour in the chicken broth (plus 1 teaspoon fine sea salt if using homemade chicken broth) and diced tomatoes. Scrape the bottom of the pot one last time to ensure nothing is sticking. Stir in the pasta, poking it to ensure it is submerged in the pot liquid.

An Instant Pot set to pressure cook for 4 minutes
Pressure Cook on High for 4 minutes with a 10 minute Natural Release

Pressure Cook for 4 minutes with a 10-minute natural release: Lock the lid and cook at high pressure for 4 minutes. (Use Manual, Pressure Cook - high, or Pressure Cook - Custom mode for an Instant Pot, and set it to 4 minutes). Let the pressure come down naturally for 10 minutes, then quick release the remaining pressure. Unlock the lid, tilting it away from you to avoid the hot steam.

An Instant Pot full of cooked Pastalaya
Cooked, stirred, and ready to serve.

Serve: Stir in the fresh ground black pepper. Pour into a big bowl, sprinkle with a bit of extra cajun seasoning and minced green onion. Serve, passing hot sauce, cajun seasoning, and minced green onion at the table. Enjoy!

Substitutions

Pasta shapes

Penne is the most common pasta in Pastalaya, but rotini and bowtie pasta (aka Farfalle) are common substitutes when the cook wants to look fancy. Any short pasta will work in this recipe, and if the box says it should cook for 11 to 14 minutes, the recipe works as written. If it takes 10 minutes or less to cook, cut the natural release time back from 10 minutes to 5 minutes before quick releasing the remaining pressure.

Cajun Seasoning

I like to make my own salt-free Cajun seasoning, and then add the salt myself. That said, there are a bunch of good store-bought cajun and creole seasonings, and any of them will work in this recipe.

What do you mean by Southern hot sauce?

There are a bunch of hot sauces from Louisiana - they like it hot down there. Tabasco is the most famous and hottest of the bunch. Louisiana Hot Sauce has Louisiana right in the name and is less hot than Tabasco. My favorite is Crystal Hot Sauce; I like the balance of heat and flavor. But, in this recipe, any of them will do to add a little heat and vinegar to the pasta.

Equipment

A 6-quart pressure cooker

Scaling

Doubling this recipe needs an 8-quart pressure cooker. Cut all the ingredients in half, and this recipe will fit in a 3-quart pressure cooker. The cooking time does not change; it takes the same time to cook a single piece of penne or chicken, no matter how many are in the pot.

Storage

Pastalaya will keep in the refrigerator for a few days or in the freezer for a few months. I store it in 2-cup containers, which make the perfect size for a leftover lunch in the microwave.

Tips and Tricks

Spitting Starch

Most of the time, when I make this recipe, everything goes according to plan. Occasionally - one out of every five times I make it - quick releasing the pressure starts spitting starch everywhere. If your pressure cooker spits starch when you quick release the pressure, close the pressure release valve. (Carefully - the steam is scalding hot.) Let the pot sit for a couple of minutes, then pulse the pressure release open and closed a few times to release some pressure. Then try opening the pressure valve again and see if it releases clean. Repeat as necessary until all the pressure is released.

What's happening? The pressure drop in the pot lets the liquid jump to a rolling boil. The starch in the liquid is thrown into the air inside the pot - and then spit out through the pressure release valve. Closing the pressure release lets the liquid settle down and cool off a little more, so it doesn't bubble up as much the next time you open the valve.

(Why doesn't this happen most of the time? I don't know. If you're a pressure cooker engineer, let me know what's happening in the comments below.)

Liquid in the pot

There will be some liquid in the pot when the Pastalaya finishes cooking; most of it will be soaked up by the pasta as the pot rests, and you do want some liquid as a sauce. If the pot has too much liquid left after cooking, you probably used a 12-ounce box of pasta. (I've had complaints about too much liquid, and the ones I've followed up on were fooled by a box that looked like it was the same size as the other, 16-ounce boxes near it, but wasn't.)

Real Jambalaya

If you're looking for Jambalaya with Rice, check out my Instant Pot Jambalaya recipe. Or, for other cajun recipes, try my Instant Pot 15 Bean Soup, Instant Pot Dirty Rice, or Instant Pot Cajun Pinto Beans.

What to serve with Pastalaya

Collard greens and green beans are my favorite side dishes with Pastalaya. I also pass a few toppings at the table to sprinkle on the pasta: minced cajun seasoning, green onions, and hot sauce.

Adapted from: Southern Boyz Outdoors Pastalaya https://youtu.be/qXP9kJX81aQ

Related Posts

Pressure Cooker Italian Penne with Sausage and Peppers
Instant Pot Whole Chicken with Cajun Spice Rub
Instant Pot Rotisserie Chicken Gumbo Soup
Instant Pot Fettuccine Alfredo
Instant Pot Butter Beans and Shrimp
My other Instant Pot and Pressure Cooker Recipes

Enjoyed this post? Want to help out DadCooksDinner? Subscribe to DadCooksDinner via email and share this post with your friends. Want to contribute directly? Donate to my Tip Jar, or buy something from Amazon.com through the links on this site. Thank you.

Instant Pot Beef and Barley Soup (Pressure Cooker)

March 7, 2023 by Mike Vrobel 11 Comments

A bowl of beef and barley soup

Instant Pot Beef and Barley Soup recipe. Soup made from scratch, starting with a pressure cooker beef bone broth. Perfect for warming up on a cold winter night.

Even with this winter's mild weather, I find myself craving soup. I keep running out of broth, no matter how much I make. So, here's a batch of soup, starting with making the broth from beef bones. When I make a batch of Instant Pot Browned Beef Broth, I always try to make as much as will fit in my pressure cooker. I can always find a use for extra broth in my cooking.

A bowl of beef and barley soup
Instant Pot Beef and Barley Soup

That said, this recipe takes time. Broth means a big pot of water, and water has a lot of thermal mass. A big pot of water is slow to heat up to pressure and slow to cool down. This recipe is very hands-off, perfect for a lazy Sunday afternoon, or across a couple of evenings, with the broth on the first night and the soup on the second.

I know a lot of people are looking for quick weeknight dinners, and this is not a 30-minute dump-and-stir recipe. This is old-school soup-making, brought to modern times through the magic of the pressure cooker. Is it worth all this work? Try a bowl of this soup on a cold winter's night, and I think you'll say "Absolutely, it was worth it!"

[feast_advanced_jump_to]

Ingredients

Browned Beef Broth

  • Beef bones
  • Meaty beef shanks
  • Tomato paste
  • Onions
  • Garlic
  • Carrot
  • Celery
  • Fresh thyme
  • Peppercorns
  • Fine sea salt
  • Water

Beef and Barley Soup

  • Butter
  • Onion
  • Celery
  • Carrot
  • Dried thyme
  • Fine sea salt
  • Pearl barley
  • Chuck steak
  • Browned Beef Broth (from above)
  • Can of diced tomatoes
    See recipe card for quantities.

How to make Instant Pot Beef and Barley Soup

Make the Beef Broth

Heat an oven to 425°F. In a large roasting pan, rub the tomato paste over the beef bones and beef shanks. Add the onions, garlic, carrots and celery to the pan, and spread everything out in a single layer. Put the pan in the oven and roast for 30 minutes. Turn the beef and aromatics and roast for another 15 to 30 minutes, until the beef and aromatics are browned. Scrape everything from the roasting pan into the Instant Pot. Add the thyme and peppercorns, and cover the bones with water - 8 to 12 cups of water, or whatever reaches your pot's max fill line. Lock the lid on the pressure cooker and cook on high pressure for 75 minutes in an Instant Pot or other electric PC, or for 1 hour in a stovetop PC. Let the pressure come down naturally, about 30 more minutes. (The water holds a lot of heat, so it takes a while for the pressure to drop. If you get impatient, you can quick release the pressure after 15 minutes.) Scoop the solids out of the pot with a slotted spoon. Skim the fat from the top of the broth as best you can. (This is easy if you refrigerate the broth overnight; the fat rises to the top and solidifies, so you can scrape it off in big chunks). Use 2 quarts of the broth in this recipe, and freeze the rest of the broth in 2 cup containers.

Saute the aromatics

Wipe out the Instant Pot, add the butter, and set it to Sauté mode adjusted to High. When the butter melts, add the onion, celery, carrot, thyme, and sprinkle with ½ teaspoon of salt. Saute, stirring occasionally, until the onion turns translucent, about 5 minutes.

Everything in the pot

Stir the beef cubes and the barley into the pot. Pour in the 2 quarts of beef broth we saved, and then the can of diced tomatoes.

Pressure Cook for 15 minutes with a Natural Release

Lock the pressure cooker lid. Cook on high pressure for 15 minutes in an Instant Pot or other electric pressure cooker (Use Manual, Pressure Cook, or Pressure Cook - Custom mode in an Instant Pot), or for 12 minutes in a stovetop PC. Let the pressure come down naturally, for about 20 more minutes; you can quick release any remaining pressure after 15 minutes if you are in a hurry.

Season and serve

There is very little salt in this homemade broth, so you will need to add a lot of salt to season the soup. Stir in 1½ teaspoons of fine sea salt and fresh ground black pepper. Serve and enjoy!

Substitutions

  • Meat: I use chuck steak - a thin-cut piece of beef chuck shoulder. You can also use pre-cut "stew meat", top round, or bottom round.
  • Store-Bought Beef Broth Store-bought broth has a lot of sodium, and nowhere near as much flavor as homemade broth. But, if you have to use it, you'll still get a good soup out of it. Replace the homemade beef broth with 2 quarts of store-bought broth, and skip the 1 ½ teaspoons of fine sea salt at the end.

Equipment

A 6-quart pressure cooker. (I love my Instant Pot pressure cooker.)

Scaling

This recipe makes enough broth for a doubled recipe, but to double the soup, you should probably move to an 8-quart pressure cooker. (If you do that, I recommend doubling the broth as well, so you still have enough for a second soup. If you're going to make broth, why not make a lot?) Cut all the ingredients in half and this recipe will fit in a 3-quart pressure cooker. The cooking time does not change; it takes the same amount of time to cook the beef and barley no matter how much soup you are making.

Make Ahead

You can make the beef broth way ahead - refrigerate it for up to 2 days, or freeze for up to 6 months.

Storage

Soup makes great leftovers; I store it in 2-cup containers. They'll last for a few days in the refrigerator, or for months in the freezer, and are the perfect size for a grab-and-go lunch.

Tips and Tricks

  • Small cubes of beef: I cut the beef into small cubes, so they are bite-sized and easy to eat as part of a soup. I start with chuck steak from my local grocery store, since it is usually a thin cut, and half the work of dicing is done for me.
  • Roasting the beef broth ingredients: Yes, I know this is an Instant Pot recipe, but I use the oven to brown my beef broth ingredients. I get better browning in the oven. You can skip the browning step if you want to, but I don't recommend it. Browning the beef, tomato paste, and other ingredients adds a LOT of flavor.

What to Serve with Instant Pot Beef and Barley Soup

Soup, salad, and bread is a cliche for a reason - it's a fantastic combination. I'll serve this soup with dinner rolls, or a loaf of crusty French bread cut into pieces.

What do you think?

Questions? Other ideas? Leave them in the comments section below.

Related Posts

Pressure Cooker Lentil and Bacon Soup
Pressure Cooker Thai Panang Beef Curry
Pressure Cooker Lamb Stew with Guinness and Barley
Vegetable Beef Soup in the Instant Pot
Instant Pot Colombian Beef Short Rib Soup
My other Pressure Cooker Recipes
My other Pressure Cooker Time Lapse Videos

Enjoyed this post? Want to help out DadCooksDinner? Subscribe to DadCooksDinner via eMail or RSS reader, recommend DadCooksDinner to your friends, and buy something from Amazon.com through the links on this site. Thank you.

Instant Pot Carrot Cake (with Cream Cheese Frosting)

February 28, 2023 by Mike Vrobel 15 Comments

A piece of carrot cake on a purple plate

Instant Pot Carrot Cake. A fantastic cake full of shredded carrots, fruits, nuts, and spices, with cream cheese frosting, from your Instant Pot pressure cooker. (Really! You can pressure cook a cake!)

I've crept into cooking cakes in my Instant Pot. Sure, I've cooked cheesecakes for years, but real cakes, made with flour? I was sure they wouldn't work, and I was wrong. This carrot cake recipe is tender, moist, and fantastic.

A piece of carrot cake on a purple plate
Instant Pot Carrot Cake
[feast_advanced_jump_to]

This cake shares the two key tools with my Instant Pot Cheesecake recipes: A 7-inch springform pan and a pressure cooker bakeware sling. The springform pan is the right size to fit in an Instant Pot, and the bakeware sling makes it easy to lift the pan in and out of the pot. (You can make it with a 7-inch cake pan if you have one. But if you're an Instant Pot enthusiast, you probably have a springform pan for cheesecakes. And, If you are an Instant Pot fan who hasn't cooked cheesecake yet, it should be next on your list...right after you finish this carrot cake. Try one of these cheesecake recipes: Instant Pot Cheesecake with Sour Cream Topping, Instant Pot Chocolate Cheesecake, or Instant Pot Lemon Cheesecake. Or check out my Instant Pot Bundt cake, Instant Pot Molten Chocolate Bundt Cake.)

Ingredients for Instant Pot Carrot Cake
Ingredients

Ingredients

Cake Ingredients

  • Vegetable oil
  • Sugar
  • Eggs
  • Vanilla extract
  • All-purpose flour
  • Baking powder
  • Baking soda
  • Ground cinnamon
  • Ground ginger
  • Ground cloves
  • Fine sea salt
  • Carrots, grated
  • Raisins
  • Chopped pecans or walnuts

Frosting Ingredients

  • Cream cheese
  • Butter
  • Fine sea salt
  • Vanilla extract
  • Confectioners sugar

See the recipe card for quantities.

How to make Instant Pot Carrot Cake

Three bowls: chunky ingredients, dry ingredients, and springform pan with lliner
Prep the pan and ingredients

Prep the pan and ingredients

Grease a 7-inch baking pan or springform pan, add a 7-inch parchment paper circle, then grease and flour the pan. (We need to make sure the cake doesn't stick.) In a bowl, whisk the dry ingredients: flour, baking powder, baking soda, cinnamon, ginger, cloves, and sea salt. In another bowl, mix the chunky ingredients: grated carrots, raisins, and pecans.

A stand mixer beating batter
Mix the Batter

Mix the batter

Beat the oil, sugar, eggs, and vanilla in an electric mixer on medium-high speed until light yellow and thickened, about 2 minutes. Turn the mixer down to low and slowly add the bowl of dry ingredients until they are combined. Add the bowl of chunky ingredients, mixing on low until they are combined. Pour the batter into the prepared baking pan.

A pan of carrot cake batter on a baking sling in an Instant Pot
Cake in the pot, ready to cook

Pressure cook on Low Pressure for 40 minutes with a 15-minute Natural Release

Pour a cup of water into your Instant Pot or another pressure cooker. Put your cake pan on the baking sling and lower it into the pot. Lock the lid and pressure cook on Low Pressure for 40 minutes (Use Manual, Pressure Cook, or Pressure Cook - Custom adjusted to Low in an Instant Pot.) When the cooking time is over, let the pressure come down naturally for 15 minutes, then quick release any remaining pressure in the cooker.

A carrot cake on a cooling rack
Cool the cake

Cool the cake

Lift the baking sling out of the pressure cooker. Let the baking pan rest for 10 minutes at room temperature, then gently remove the cake from the pan, set it on a rack, and cool to room temperature, for about 3 hours.

Frost the cake:

While the cake is cooling, let the cream cheese and butter come to room temperature. Beat the cream cheese and butter until smooth, about 2 minutes. Add the salt and vanilla, slowly add the sugar, and beat until the frosting is smooth, about 3 minutes. When the cake is done cooling, spread the frosting over it, slice it into pieces (I cut the cake into 8 pieces), and enjoy!

Equipment

  • A 6-quart pressure cooker (I use an Instant Pot pressure cooker)
  • 7-inch springform pan or baking pan
  • 7-inch parchment paper rounds (or parchment paper cut to fit the bottom of the pan)
  • Pressure cooker bakeware sling (Or make a sling by folding aluminum foil into a 3-inch wide strip, so you have handles to lift the pan in and out of the pot.)
  • Cooking spray and Baking spray (see tips and tricks)

Scaling

I don't recommend scaling this recipe. A different cake pan size will change the cooking time, but I can't say how much it will change. If you want a two-layer cake, bake each layer individually, or slice a single cake in half. (See "make ahead" and "split the cake" below.)

Make Ahead

You can make the cake ahead of time; if you want to make it way ahead, bake the cake, wrap it in plastic wrap, and refrigerate it for up to 3 days, or freeze for up to 6 months, then thaw it out and make the frosting when you're ready to serve.

Or, you can make and frost the cake ahead of time. Store it in the refrigerator for up to 3 days; it is best not to leave cream cheese frosting out at room temperature. The leftover cake freezes beautifully. Wrap the individual pieces of cake and freeze them for up to 6 months.

Tips and Tricks

Cook with low pressure

I rarely use the low pressure setting on my Instant Pot; I'm usually in a hurry, and why wait? But in this case, the cakes came out better when I used low pressure. The high pressure cakes all had a big dome on top, and the low pressure cakes came out slightly fluffier. These are subtle differences; if you want to cook at high pressure, cut the pressure cooking time back to 35 minutes.

Slice off the domed top for a flat cake

Cooking with low pressure usually keeps the cake from having a dome on top, but not always. When the cake is for a celebration, I slice the dome off the cake with a bread knife to flatten the top. Once you frost the cake, no one will know. Then I dice up the dome into bite-sized pieces for a chef's treat.

Split the cake in half for a two-layer cake

If you like the look of a two-layer cake or want an excuse for extra frosting, cut the cake in half to make two layers. After letting the cake cool, carefully use a bread knife to cut it in half, so it has a top and a bottom piece. Spread a good layer of frosting on top of the bottom piece, set the top piece on it, and frost as usual.

Shredding carrots

The quickest way to shred the carrots is with a food processor with a fine shredding disk. I've also used a box grater, and the results were good (but it took a fair amount of grating.) Don't use pre-shredded carrots unless you're desperate; freshly shredded carrots taste much better.

Greasing, Flouring, and Parchment round

I use a three-layer approach to ensure the cake does not stick to the pan. First, I coat the inside of the pan with regular cooking spray. Then I put in a 7-inch parchment paper round, and finally spray on a layer of baking spray (cooking spray with flour in it). The cake will easily come out of the pan, and I can peel off the parchment round without any rips or tears in my cake.

Cook the cake uncovered

I don't cover my pan with foil when making this cake. The uncovered cake doesn't come out soggy. (It's a pretty moist cake anyhow). Covering the pan with foil adds a lot of cooking time. I kept increasing the cooking time, but the covered cake had a doughy, raw center. I gave up after a few tries because of how well the uncovered cake pan worked.

Adapted from: King Arthur's Carrot Cake, KingArthurBaking.com

Related Posts

  • Pressure Cooker Oreo Cheesecake
  • Instant Pot Maple Cheesecake with Candied Walnuts
  • Instant Pot Caramel Apple Cheesecake

My other Instant Pot Pressure Cooker Recipes

Enjoyed this post? Want to help out DadCooksDinner? Subscribe to DadCooksDinner via email and share this post with your friends. Want to contribute directly? Donate to my Tip Jar, or buy something from Amazon.com through the links on this site. Thank you.

Instant Pot Dirty Rice

February 21, 2023 by Mike Vrobel 9 Comments

A bowl of Cajun dirty rice with an instant pot and a jar of Cajun seasoning in the background

Instant Pot Dirty Rice. The traditional Cajun side dish made in a pressure cooker.

This year's Fat Tuesday recipe is Cajun dirty rice. And yes, I know the name is a little risqué for rice. One of my kids got a lot of giggles at the high school lunch table because of it - but her table mates were also begging her to let them try it.

A bowl of Cajun dirty rice with an instant pot and a jar of Cajun seasoning in the background
Instant Pot Dirty Rice

Dirty rice is a traditional "Use up whatever we've got" recipe. It's cooked with chicken broth, and a little bit of meat, to make the rice a substantial side dish or a main course on its own.

For more dirty rice background, check out Dirty Rice History & FAQs at Zatarains.com. If you're looking for more pressure cooker Cajun recipes, check out my Instant Pot Brown Rice Jambalaya, Instant Pot Whole Chicken with Cajun Spice Rub, or Instant Pot Cajun Pinto Beans.

Inspired by: Emeril Lagasse, Dirty Rice

[feast_advanced_jump_to]

Ingredients

  • Vegetable oil
  • Bulk pork sausage
  • Onion
  • Bell pepper
  • Celery
  • Garlic
  • Cajun seasoning
  • Fine sea salt
  • Long grain white rice
  • Chicken broth
  • Bay leaf
  • Green onion
  • Parsley
    See recipe card for quantities.

How to make Instant Pot Dirty Rice

Cook sausage until no longer pink

Heat the vegetable oil until shimmering in an Instant Pot set to Sauté mode - high. Add the sausage and cook, stirring and breaking it up, until it is crumbled and has lost its pink color, about 5 minutes.

Add the aromatics and spices

Add the onion, bell pepper, celery, and garlic to the pot with the sausage. Sprinkle with the cajun seasoning and ½ teaspoon salt. Sauté until the onions soften, stirring scraping any browned bits from the bottom of the pot, about 5 minutes.

Everything in the pot

Stir the rice into the sausage and onions, then add the chicken broth or water (and another ½ teaspoon of salt if using homemade broth). Scrape the bottom of the pot one last time to make sure there are no browned bits sticking, then float the bay leaf on top.

Pressure cook for 4 minutes with a 10 minute Natural Release

Lock the lid. Pressure cook on high pressure for 4 minutes (use Manual, Pressure Cook, or Pressure Cook- Custom mode). Let the pressure come down naturally for 10 minutes, then quick release any remaining pressure.

Serve

Unlock the lid on the pressure cooker, tilting it away from you to avoid the hot steam. Discard the bay leaf, then stir in the green onions and parsley. Serve and enjoy!

Substitutions

  • Meat: Like I said above, this is a "use up whatever you've got" kind of recipe. Chicken livers, ground beef, ground pork, and uncooked sausage are all traditional. If you have a little leftover ground meat, you can use it. I use hot sausage, because I like the extra spices it brings to the rice. Any country or breakfast sausage will work, but I would avoid maple syrup sausage. If you use unseasoned meat, sprinkle it with ½ teaspoon of salt before adding it to the pot to brown, otherwise everything cooks the same.
  • Rice: Any white rice will work in this recipe; long grain white rice is traditional. If you want to use brown rice, use the timing from my Pressure Cooker Brown Jasmine Rice recipe after cooking the sausage and sautéing the aromatics and spices.

Equipment

A 6-quart pressure cooker. (An Instant Pot pressure cooker is my favorite)

Scaling

This recipe doubles easily in a 6-quart pressure cooker. Cut all the ingredients in half and this recipe will fit in a 3-quart pressure cooker. The cooking time does not change; it takes the same amount of time to cook the rice, no matter how much you have in the pot.

Storing Leftovers

Cooked rice does not keep for long - it carries bacteria spores (Bacillus cereus) that multiply in warm temperatures. If you need to store cooked rice, cool it down quickly in the refrigerator, or freeze it within an hour of cooking. Store refrigerated rice for 2-3 days or frozen rice for up to 3 months, and make sure to reheat it completely (to at least 165°F) before eating. (Source: Safe Handling of Cooked Rice, University of Wisconsin Extension).

What do you think?

Questions? Other ideas? Leave them in the comments section below.

Related Posts

Pressure Cooker Shrimp Etouffee
Pressure Cooker Coconut Rice
Pressure Cooker Brown and Wild Rice Pilaf
Instant Pot White Rice
Instant Pot Field Peas and Snaps
Instant Pot Coconut Rice
Instant Pot Butter Beans and Shrimp
My other Instant Pot Pressure Cooker Recipes

Enjoyed this post? Want to help out DadCooksDinner? Subscribe to DadCooksDinner via email and share this post with your friends. Want to contribute directly? Donate to my Tip Jar, or buy something from Amazon.com through the links on this site. Thank you.

Instant Pot St Louis Ribs (Pressure Cooker)

February 14, 2023 by Mike Vrobel 13 Comments

A quarter slab of St. Louis Ribs on a green plate

Instant Pot St. Louis Ribs. St. Louis cut ribs, quick and tender thanks to pressure cooking, sauced with my homemade espresso barbecue sauce.

You guys love ribs! When I posted my [Instant Pot baby back ribs recipe], it shot up my popular posts rankings. And it inspired a bunch of questions about pressure cooking ribs in general. St. Louis cut ribs came up a lot, so…

A quarter slab of St. Louis Ribs on a green plate
Instant Pot St. Louis Ribs
[feast_advanced_jump_to]

What are St. Louis Cut spareribs?

St. Louis Cut Spareribs are a rack of pork spareribs with the sternum bone, cartilage and rib tips trimmed off. This cut squares off the ribs, making the rack look like a perfect rectangle. And, because the tough cartilage and rib tips are cut off, we don't have to cook St. Louis cut ribs for as long as a full rack of spare ribs. St. Louis style ribs are

If you saw my [baby back ribs recipe], this one will look very familiar - it's the same instant pot ribs technique, just a different cut of ribs. To switch things up a bit, I'm using my fancy [Espresso Chipotle BBQ sauce] this time, but my [Easy Homemade BBQ sauce] will still work - or use your favorite store-bought sauce.

INGREDIENTS

  • 1 slab St. Louis Cut spareribs, membrane peeled off
  • Water
  • Liquid Smoke

Barbecue Rub (2 tablespoons of my Homemade Barbecue Rub), or use your favorite store-bought rub

  • Fine sea salt
  • Paprika
  • Brown sugar
  • Chili powder
  • Ground black pepper
  • Garlic powder
  • Onion powder

Barbecue sauce (1 cup of my Espresso Chipotle BBQ Sauce), or use your favorite BBQ sauce

  • Ketchup
  • Brown sugar
  • Cider vinegar
  • Espresso (or coffee)
  • Dijon mustard (or cheap yellow mustard)
  • Soy sauce
    See the recipe card below for details

How to make Instant Pot St. Louis Ribs

Make the rub and sauce

In a small bowl, stir the barbecue rub ingredients: salt, paprika, brown sugar, chili powder, black pepper, garlic powder, and onion powder. Break up any clumps of brown sugar with your fingers. Set aside. In a medium bowl, whisk the barbecue sauce ingredients until smooth: ketchup, brown sugar, cider vinegar, espresso, mustard, and soy sauce. Set aside for later.

Remove the membrane from the ribs

On the bone side of the ribs, work a butter knife between the membrane and the bone, then grab the membrane with a paper towel and pull it away from the ribs. Pull gently but firmly; if the membrane tears while you're pulling, work the knife under the remaining pieces and pull them off as well. Trim the flap of meat from the bone side as well - either discard it or sprinkle it with rub and add it to the pot with the ribs. (It makes a nice cook's snack.)

Season the ribs and cut the rack into 4 pieces

Sprinkle both sides of the ribs with the rub, concentrating the rub on the meaty side of the ribs. Cut the rack of ribs into 4 pieces, cutting between every 3rd bone. Pour 1 cup of water and 1 tablespoon of liquid smoke into an Instant Pot or other pressure cooker. Stack the ribs in the pot, bone side down, in a loose pile.

Pressure cook the ribs for 30 minutes with a natural release

Lock the lid and pressure cook on high pressure for 30 minutes in an Instant Pot or other electric PC (use Manual, Pressure Cook, or Pressure Cook - Custom mode) or for 24 minutes in a stovetop PC. Let the pressure come down naturally, about 15 minutes. (You can quick release any remaining pressure after 15 minutes if you're in a hurry.)

Sauce and broil the ribs

Put the ribs, bone side down, on a rimmed baking sheet. Brush the ribs with the barbecue sauce, then put them under a broiler set to high. Broil the ribs until the sauce is bubbling and just starting to brown, about 5 minutes. Remove the ribs from the broiler, brush with another layer of sauce, serve, and enjoy!

Substitutions

I have a favorite BBQ rub and/or Sauce. Can I use it?

Of course! Use your own homemade recipe or your favorite store-bought sauce. You will need about 2 tablespoons of rub and 1 cup of sauce.

Can I use baby back ribs in this recipe?

Yes, you can. Baby back ribs cook for the same amount of time as St. Louis Cut ribs, so everything works the same.

Can I use a whole slab of spare ribs in this recipe?

Yes, you can. Spare ribs cook for the same amount of time as St. Louis Cut ribs, so everything works the same. (This surprised me. When I smoke ribs, the cooking time is different for different types of ribs. But, in my testing, the Instant Pot doesn't care what kind of ribs they are. Baby back ribs, spare ribs, St. Louis Cut ribs, cook them all for 30 minutes at high pressure with a natural pressure release.)

Add a little liquid smoke to the cooking water

I know it sounds weird, and you can skip the liquid smoke if you want. But, liquid smoke adds depth to the flavor of the ribs. (This also surprised me - I could taste the difference in a taste test. The ribs don't taste "smoky" - I'm not trying to overdo it with the liquid smoke - but a little bit of smoke adds a lot of flavor.)

Scaling

You can scale this recipe up to 2 slabs of ribs if you have an 8-quart pressure cooker. (Two slabs of ribs are too much meat to fit in a 6-quart Instant Pot.) You can scale down the recipe and only cook a half slab of ribs, but the bones are too long to fit comfortably in a 3-quart pressure cooker, so you have to have a 6-quart pressure cooker even if you're only doing a half-size recipe.

Tips and Tricks

Broil the ribs for extra flavor

Pressure cooker ribs are fall off the bone tender but have zero browning. I like a little hint of a crisp crust on my ribs, so I brush them with sauce and run them under my broiler until they start to brown and bubble on top. You can skip this step, but it adds a lot of flavor to the ribs.

Remove the membrane from the ribs

I know, I know. Getting that silver skin membrane off of the rack of ribs is tricky. This is an easy recipe otherwise, so it's tempting to leave the membrane on and start sprinkling on the rub. Don't do it. The membrane is made of connective tissue. It stays tough and chewy no matter how much you cook the ribs. It's worth the work to pull it from the rack. (At least that's what I tell myself when it tears as I'm pulling, and I have to work it loose again.)

Extra Tender Pressure Cooker Ribs

The timing on this recipe (30 minutes at high pressure) gives me tender ribs, with just a little bite, where a gentle tug pulls the rib bone out of the rack. Want super-tender ribs? Ribs that fall apart as you try to take them out of the pressure cooker? Pressure cook for 45 minutes at high pressure in an Instant Pot or other electric PC, or for 36 minutes in a stovetop PC. (I've had a few commenters saying they prefer the super-tender ribs, so I moved this suggestion up to the Tips and Tricks.)

Should I use a trivet to pressure cook ribs?

Some recipes suggest using a trivet or rack to keep the ribs out of the water in the bottom of the Instant Pot. I don't bother. It doesn't hurt to use one, but it doesn't help either. The trivet is supposed to lift the ribs high enough that they're not in the water, but my ribs release enough juices that the bottom of the ribs is submerged even with the trivet. I put the ribs in the pot with the thick side facing down so that part gets a little extra cooking.

Pressure Cooker St Louis Cut Spareribs | DadCooksDinner.com
Pressure Cooker St Louis Cut Spareribs

What do you think?

Questions? Other ideas? Leave them in the comments section below.

Related Posts

Pressure Cooker Baby Back Ribs
Pressure Cooker Pork Western Shoulder Ribs
Pressure Cooker Beef Short Ribs
My list of Pressure Cooker Recipes
My other Pressure Cooker Time Lapse Videos

Enjoyed this post? Want to help out DadCooksDinner? Subscribe to DadCooksDinner via eMail or RSS reader, recommend DadCooksDinner to your friends, and buy something from Amazon.com through the links on this site. Thank you.

Instant Pot Venison Chili

February 7, 2023 by Mike Vrobel 6 Comments

A bowl of venison chili with pinto beans topped with shredded cheddar and green onions

Instant Pot Venison Chili. Pressure cooking turns ground venison and soaked pinto beans into a fantastic chili in about an hour.

I was looking for a Super Bowl chili idea when a deer-hunting friend asked what to do with ground venison. Serendipity!

A bowl of venison chili with pinto beans topped with shredded cheddar and green onions
Venison Chili
[feast_advanced_jump_to]

I immediately thought of two things: chili and Hank Shaw's blog Hunter Angler Gardener Cook. Hank specializes in wild game cooking, so I checked his Venison Chili Recipe. I liked the flavor profile of his blend of chilies and spices and adapted that profile to my standard chili technique.

I especially like how he uses smoky chiles to cover any gamy flavor in the venison. But the ground venison from Whole Foods tastes like mild, lean ground meat and doesn't taste gamy at all.

This recipe is similar to my other pressure cooker chili and dry bean recipes, like Pressure Cooker Ground Beef and Bean Chili, Instant Pot Ground Pork and Bean Chili, or Instant Pot Turkey Chili with Small Red Beans. You can make this chili with canned beans like I do in my Pressure Cooker Quick Chili with Canned Beans (see the Substitutions section below for details). But it is worth the time it takes to sort, rinse, and soak dried beans. They are much better than canned and will take your chili to new heights.

Ingredients

  • Dry pinto beans
  • Fine sea salt
  • Vegetable oil
  • Onion
  • Garlic
  • Chili powder
  • Ground cumin
  • Smoked paprika
  • Ground coriander
  • Ground chipotle
  • Coffee (or beer or water)
  • Ground Venison
  • Fine sea salt
  • Baking soda
  • Crushed tomatoes
  • Brown sugar
  • Fresh ground black pepper

See the recipe card for quantities.

How to make Instant Pot Venison Chili

Sort and rinse the pinto beans: Sort the pinto beans, discarding any stones, dirt, or broken beans. Rinse the beans, then do an overnight soak or a quick soak.

Overnight soak: Cover the pinto beans with 8 cups of water and sprinkle with 1 teaspoon salt. Leave the beans to soak overnight or for at least 8 hours. Drain the beans and discard the soaking liquid.

OR: Pressure Quick Soak for 1 minute with a 30-minute rest: Put the pinto beans and 8 cups of water in an Instant Pot. Sprinkle with 1 teaspoon of salt. Pressure cook at high pressure for 1 minute, then quick release the pressure. Let the beans soak in the pot for 30 minutes. Drain the beans and discard the soaking liquid.

Sauté the aromatics and toast the spices: Heat the vegetable oil in an Instant Pot set to Sauté mode - High. Stir in the onion and garlic, and sprinkle with ½ teaspoon salt. Sauté until the onions soften, about 5 minutes. Make a hole in the center of the onions and add the chili powder, cumin, paprika, coriander, and chipotle. Let sit for 30 seconds, then stir the spices into the onions.

Cook the venison: Add the ground venison, sprinkle it with 1 teaspoon of salt, then stir to coat the venison with the onions and spices. Pour in the coffee. Scrape the bottom of the pot with a flat-edged wooden spoon to loosen any stuck bits of onion or spices. Cook the venison, stirring, scraping, and breaking up any clumps until it loses its pink color, about 5 minutes.

Everything in the pot: Pour in the water, add 1 teaspoon of salt, and scrape the bottom of the pot one last time to ensure nothing is sticking. Stir in the drained pinto beans, baking soda, crushed tomatoes, and brown sugar.

Pressure cook the chili for 15 minutes with a Natural Release: Lock the lid on the pressure cooker and cook at high pressure for 15 minutes. Let the pressure come down naturally, about 30 minutes. (You can quick release any remaining pressure after 15 minutes, especially if you are in a hurry). Remove the lid carefully, opening it away from you - even when it's not under pressure, the steam in the cooker is scalding.

Simmer to thicken (optional): To thicken the chili, set the Instant Pot to Sauté mode adjusted to low, and simmer, uncovered, until the chili thickens, about 10 to 15 minutes.

Season and serve: Stir in the black pepper. Serve straight up or with your favorite chili toppings. (Mine are diced onions, shredded cheddar, and sour cream.) Enjoy!

Substitutions

What if I don't have venison? If you don't know someone who hunts, you can usually find ground venison at Whole Foods or your local health food store. Any lean meat will work in this chili if you can't find venison. My favorites are buffalo and elk, to follow the game meat idea at the heart of this recipe. But most regular grocery stores don't carry game meat, so substitute 93% lean ground beef or lean ground turkey if that's all you can find.

Heat Level: This is a hot chili, and the heat comes from the ground chipotle. I add a lot of it because I like the smoky heat. If you want to cut the heat, cut back on the chipotle, or skip it entirely. If you want to up the heat, add more, or maybe, which is usually available in the refrigerated case.

Ground chipotle: Ground chipotle is easy for me to find in my grocery store's spice aisle. If you can't find it, substitute a teaspoon of cayenne pepper and 2 teaspoons of smoked paprika.

Why coffee? Because I like the idea of red-eye chili. You can replace the coffee with more beef broth, beer (for drunken chili instead of red-eye chili), or water.

Use broth for richer chili: If you want a more decadent chili, substitute broth for the water, preferably homemade beef broth or homemade chicken broth). If you use store-bought broth, try to get reduced-sodium broth and skip the teaspoon of fine sea salt added to the chili.

Canned beans: Don't want to use dried beans? Substitute 3 15-ounce cans of pinto beans, drained and rinsed, and cut the cooking time under pressure to 10 minutes, so you don't turn the beans to mush. (For more details, see this recipe: Pressure Cooker Quick Chili with Canned Beans). Or, if you have leftover cooked beans (from my pinto bean, black beans , or kidney beans recipes), thaw out 4 to 6 cups of the beans (and again, cut the cooking time to 10 minutes).

Equipment

A 6-quart pressure cooker

Scaling

To double this recipe, you need an 8-quart pressure cooker. Cut all the ingredients in half, and this recipe will fit in a 3-quart pressure cooker. The cooking time does not change; it takes the same amount of time to cook the beans, no matter how many are in the pot.

Storage

Store the chili in 2-cup containers. They can refrigerate for a few days, or freeze for up to 6 months. 2-cup containers of frozen chili are my favorite leftover; I love having extra lunches later in the week.

💡Tips and Tricks

  • Why baking soda? It helps keep the beans tender even though we're cooking with acidic ingredients like chili powder and tomatoes.
  • Tough beans: If your beans are still tough when the cooking time is over, especially any "floaters" at the top of the pot, stir the beans, lock the lid, and pressure cook for another five minutes. Older beans take longer to cook, and if the beans have been sitting on the shelf at your store for a while, they may need extra time. The overnight soak, salt, and baking soda will help, but sometimes old beans are too dried out.
  • Simmer to thicken: Pressure cookers are sealed, so there is no evaporation. If you have the time and want a thicker chili, simmer the chili for 10 to 20 minutes after pressure cooking. I set my Instant Pot to Sauté mode, adjust it to low heat, set the timer to 10 minutes, and simmer with the lid off until the chili thickens to my liking.

What to Serve with Instant Pot Venison Chili

I love all sorts of chili toppings. My favorites are minced green onions or diced onions, shredded cheddar cheese, and tortilla chips. Or Fritos - yes, it's a little trashy, but they go great with chili. I also put bottles of hot sauce on the table because my family has a wide range of heat preferences.

Related Posts

Instant Pot Ground Buffalo Chili
Instant Pot Chili Mac
Instant Pot 8-Quart Pot of Ground Beef and Bean Chili
Instant Pot Chorizo Chili (with Pinto Beans)
Pressure Cooker Texas Red Chili
My index of Instant Pot Chili Recipes
My other Instant Pot and Pressure Cooker Recipes

Enjoyed this post? Want to help out DadCooksDinner? Subscribe to DadCooksDinner via email and share this post with your friends. Want to contribute directly? Donate to my Tip Jar, or buy something from Amazon.com through the links on this site. Thank you.

Instant Pot Mexican Black Beans (no soaking needed!)

January 17, 2023 by Mike Vrobel 7 Comments

A bowl of Mexican black beans sprinkled with cheese and cilantro

Instant Pot Mexican Black Beans. Black beans in broth, Mexican style, with no soaking necessary thanks to pressure cooking.

One of my favorite memories of my trip to Oaxaca is the black beans. Almost every meal, from breakfast to dinner, was served with a bowl of black beans in broth on the side. Now I can't help myself - whenever I have Mexican food, I want it with beans.

A bowl of Mexican black beans sprinkled with cheese and cilantro
Instant Pot Mexican Black Beans
[feast_advanced_jump_to]

As you probably know by now, dry beans are why I am a pressure cooking fanatic. And I've made a lot of black bean dishes, from Instant Pot Refried Black Beans to Pressure Cooker Feijoada - Brazilian Black Bean and Meat Stew, but I don't seem to have a simple pot of black beans on the site. Here's where I fix that. Enjoy a pot of frijoles!

Ingredients

Ingredients for Instant Pot Mexican Black Beans
Ingredients
  • Dry black beans
  • Onion
  • Fennel seed
  • Bay leaf
  • Fine sea salt
  • Baking soda (optional)
  • Queso fresco and cilantro (optional garnish)

How to Make Instant Pot Mexican Black Beans

Sorting dry black beans for Instant Pot Mexican Black Beans
Sorting the dry black beans

Everything in the pot: Stir the beans, onion, fennel, bay leaf, salt, baking soda, and water into an Instant Pot.

Instant Pot with black beans, onion, bay leaf, fennel, and water, ready to cook
Everything in the pot

Pressure cook the beans for 35 minutes with a Quick Release: Lock the lid and cook on high pressure for 35 minutes (use Manual, Pressure Cook, or Pressure Cook - Custom mode). Quick release the pressure.

Serve: Unlock the lid, and discard the onion and bay leaf. If you have the time, set the pot to sauté mode and simmer the pot, uncovered, for another 15 minutes to thicken up the bean broth. Serve the beans with their broth and a sprinkle of cheese.

Substitutions

Avocado Leaf: Traditional Oaxacan black beans are cooked with a dry avocado leaf in the pot for seasoning. I can't find avocado leaves easily, so I substitute a pinch of fennel and a bay leaf. They do a decent job of duplicating the hint of licorice flavor from avocado leaves. Or, if you can find it, you can also substitute a sprig of epazote, another common Mexican herb used to flavor black beans.

Arbol Chile: I like my black beans on the mild side, to balance out the heat from the other Mexican dishes I serve. But, if you want to add some heat to your beans, whole dried arbor chiles are a great addition. Add a couple of arbol chiles to the pot with the bay leaf, and remove them after cooking. They'll add a subtle heat to your pot of beans.

Baking soda: Optional, but recommended. Baking soda helps tenderize the beans while they cook, especially if you have hard water.

Crumbled Queso Fresco: Almost every dish of beans I got in Mexico had a little cheese crumbled on top. You can skip this, of course, if you don't want it. If you can't find Queso Fresco, look for crumbly farmer's cheese, which is basically the same thing. Feta and Pecorino Romano are a couple of other commonly available substitutes.

Equipment

A 6-quart pressure cooker. Pressure cooker dried beans are one of the reasons I became a pressure cooker convert. Try them - you'll never go back to canned beans. (OK, maybe you will, for convenience - but see the Storage section for tips on make ahead freezer beans.)

Scaling

This recipe scales down easily - cut everything in half if you don't need as many beans, or have a 3-quart pressure cooker. Scaling up runs into space issues; you need an 8-quart pressure cooker to have enough space to double this recipe.

Should I soak dry black beans?

I get the "to soak, or not to soak?" question all the the time. I don't soak my black beans. Even without soaking, they're tender after pressure cooking on high for 35 minutes.

That doesn't mean you can't soak the beans. They turn out fine, though the bean broth isn't quite as full bodied. Soaked beans cook much quicker, 15 minutes at high pressure. I use that to my advantage when the beans are part of a recipe with other ingredients, especially ones where they will overcook unless I can cut back the pressure cooking time. But, for this pot of beans, no soaking is necessary.

Tips and Tricks

  • Quick release the pressure for beans. The sudden drop in pressure throws the water into a boil, which roughs up the beans, releasing starch and thickening the pot liquid.
  • Salt your bean water! "Salt toughens beans" is a myth. Salting before cooking helps season the beans all the way through as they cook.
  • If your beans are still tough when the cooking time is over, especially any "floaters" at the top of the pot, give the beans a stir, lock the lid, and pressure cook for another five minutes. Older beans take longer to cook, and if the beans have been sitting in the shelf at your store for a while, they may need extra time.

Serving Suggestions

Mexican black beans in the Instant Pot are my go-to side dish for any Mexican or Tex-Mex dish, from tacos to fajitas to enchiladas. They're also great for breakfast with a couple of eggs and warmed tortillas - make yourself a breakfast taco! Or, if you want a hearty vegetarian main dish, serve these beans as a taco filling with your favorite taco add-ons.

Leftovers

A 2-cup container of cooked black beans, with cooking broth, replaces a 15-ounce can of beans from the grocery store. Cooked beans will last in the refrigerator for a few days, and freeze for up to 6 months. Freezer beans are ready to use with about 5 minutes in the microwave, and are so much better than canned.

Related Posts

Instant Pot Mayocoba Beans (No Soaking)
Instant Pot Beef Short Rib Tacos with Dried Chile Pepper Sauce
Pressure Cooker Braised Lamb Shoulder Tacos (Cordero Guisado)
Instant Pot Carne Guisada Tacos
Instant Pot Carnitas
My other Instant Pot and Pressure Cooker Recipes

Enjoyed this post? Want to help out DadCooksDinner? Subscribe to DadCooksDinner via email and share this post with your friends. Want to contribute directly? Donate to my Tip Jar, or buy something from Amazon.com through the links on this site. Thank you.

Instant Pot Thai Panang Curry (With Beef)

January 10, 2023 by Mike Vrobel 24 Comments

A bowl of panang curry topped with sliced basil and hot peppers

Instant Pot Thai Panang Curry (With Beef) recipe. Hot, sour, salty, sweet Thai Panang Curry, ready in about an hour.

It's a cold winter evening, and I am craving a spicy Thai curry to warm me up. I've got a jar of panang curry paste from my local Asian market and a flat iron steak from my friends at Certified Angus Beef, so it is time to make a Thai Beef Panang Curry.

A bowl of panang curry topped with sliced basil and hot peppers
Pressure Cooker Thai Panang Beef Curry

If you've followed my blog, you'll recognize my Thai curry technique. I've used it in a bunch of recipes, like my Instant Pot Massaman Chicken Curry, Instant Pot Prik King Pork Curry, or Instant Pot Thai Shrimp Curry (with Red Curry Paste).

[feast_advanced_jump_to]

Ingredients

  • Vegetable oil
  • Shallot
  • Fine sea salt
  • Coconut milk
  • Panang curry paste
  • Flat iron steak (chuck
  • Chicken broth or water
  • Fish sauce
  • Soy sauce
  • Brown sugar
  • Fresh lime juice

See the recipe card for quantities.

How to make Instant Pot Thai Panang Curry

Sauté the shallot: In an Instant Pot set to sauté mode - high, heat the vegetable oil until it starts to shimmer. Stir in the shallot, sprinkle with ½ teaspoon fine sea salt, and sauté until the shallot starts to soften, about 3 minutes.

Fry the curry paste: Scoop the cream from the top of the can of coconut milk and add it to the pot, then stir in the curry paste. Cook, stirring often, until the curry paste darkens, about 5 minutes.

Pressure Cook for 12 minutes with a Natural Release: Sprinkle the sliced beef with ½ teaspoon of fine sea salt, then add the beef to the pot and stir to coat with curry paste. Stir in the rest of the can of coconut milk, chicken stock, fish sauce, soy sauce, and brown sugar. Lock the lid and pressure cook on high pressure for 12 minutes. Let the pressure come down naturally, about 20 minutes.

Finish the curry: Unlock the pressure cooker and stir in the lime juice. Ladle the curry into bowls, and serve with Jasmine rice, passing the other garnishes at the table to sprinkle on top.

Substitutions

Coconut milk: I use full-fat coconut milk for this recipe because I want the coconut cream from the top of the can to help fry the curry paste. (See the tips and tricks section for details.)
Curry Paste: Panang curry paste is easy to find in my local Asian grocery stores. (I like the Maesri brand, and Mae ploy is also high quality.) If you can't find parang curry paste, Thai red curry paste is an acceptable substitute, but it does have a different flavor profile.
Beef Options: Flat iron steak is a specific muscle from the beef chuck shoulder, a single boneless muscle that is easy to slice into thin strips. (Blade steak is the same cut - Flat iron steaks are technically "top blade steaks.") Any cut of boneless chuck shoulder will work. Or, you can move to the cow's rump and substitute bottom round instead.
Other Proteins: If you want to branch out from beef, chicken thighs and pork shoulder will also work in this recipe.
Onion for Shallot: If it's easier for you, substitute a small onion for the shallot. Shallot has a slightly different flavor, but onion is close enough for this recipe.
Cut the heat: I like my curry with a lot of kick, so I use a whole 4-ounce can of curry paste, which is ½ cup of paste. If you want to cut the heat, use ¼ cup of paste - half a can. That said, panang curry is not that hot to begin with; it's on the sweeter side of Thai curries, so it's a good one if you're not into heat.
Traditional ingredients: I'm substituting brown sugar for the traditional palm sugar; if you have palm sugar, use it instead. Also, this recipe usually has a couple of kaffir lime leaves in the pot while it's cooking, but they are hard for me to find, so I skip them in the pot and sliver up some Thai basil to sprinkle on top as a garnish.
Vegetables: Looking for some green in your curry? Add a handful of green beans cut into 1-inch lengths or a bell pepper cut into 1-inch strips.

Equipment

A 6-quart pressure cooker

Scaling

This recipe doubles easily in a 6-quart pressure cooker; scaling up past that needs an 8-quart pressure cooker. Cut all the ingredients in half, and this recipe will fit in a 3-quart pressure cooker. The cooking time does not change; it takes the same amount of time to cook each piece of beef, no matter how many are in the pot.

Storing Leftovers

Thai curries make great leftovers. For lunches, I store them with some rice in 2-cup containers and refrigerate them for a few days or freeze them for up to 6 months.

Tips and Tricks

  • Don't shake the can of coconut milk - you want the solid layer of cream on the top to stay separate from the liquid underneath. That lets you fry the coconut cream with the curry paste, then add the liquid later. (If you forget, or your coconut milk is mixed and doesn't have a layer of cream on top, skip the cream in the "fry the curry paste" step and stir the whole can into the pot in the "pressure cook the curry" step.)
  • Curry paste from a can is a shortcut, but it's one Thai home cooks use all the time, so I don't feel bad about taking advantage of the canned curry pastes.

What to Serve with Instant Pot Panang Curry

Serve with jasmine rice to soak up all the delicious juices. (If I want to eat healthily, I make my Pressure Cooker Brown Jasmine Rice). I also serve the curry an assortment of toppings - sliced hot peppers, slivered kaffir lime leaves or Thai basil leaves, crushed peanuts - for diners to sprinkle on their bowl of curry.

Video


Video: Pressure Cooker Thai Panang Beef Curry - Time Lapse [YouTube.com]

Pressure Cooker Thai Panang Beef Curry | DadCooksDinner.com
Pressure Cooker Thai Panang Beef Curry

What do you think?

Questions? Other ideas? Leave them in the comments section below.

Related Posts

Pressure Cooker Thai Red Beef Curry
Pressure Cooker Thai Green Chicken Curry
Pressure Cooker Massaman Beef Curry
Instant Pot Coconut Curry Chicken
Instant Pot Japanese Curry Recipe
My list of Pressure Cooker Recipes
My other Pressure Cooker Time Lapse Videos

Enjoyed this post? Want to help out DadCooksDinner? Subscribe to DadCooksDinner via eMail or RSS reader, recommend DadCooksDinner to your friends, and buy something from Amazon.com through the links on this site. Thank you.

Instant Pot Pork Adobo Recipe (Filipino Style)

January 3, 2023 by Mike Vrobel 7 Comments

A bowl of Pork Adobo with bay leaves on a bed of rice

Instant Pot Pork Adobo. Filipino stew, with pork braised in soy, vinegar, garlic, and coconut milk, ready in about an hour thanks to pressure cooking.

A bowl of Pork Adobo with bay leaves on a bed of rice
Instant Pot Pork Adobo
[feast_advanced_jump_to]

Filipino pork adobo, a national dish of the Philippines, is a soy sauce braise, similar to Chinese red-cooked pork. The difference is in the vinegar; a traditional Filipino adobo includes a lot of vinegar, plus garlic cloves, whole peppercorns, and bay leaves. (I was surprised by the bay leaf - I'm used to using one or two of them as a bit player, not a handful like they use in this Filipino pork stew.)

The word adobo means "sauce" or "marinade" with vinegar in Spanish, but its meaning drifts across the Spanish-speaking world, so this is NOT a Mexican adobo. Mexican adobo sauce is a mix of peppers, tomatoes, vinegar, and spices...and a recipe for another day.

Ingredients

Ingredients for Instant Pot Pork Adobo
Ingredients for Pork Adobo
  • Boneless pork shoulder, cut into 1-inch cubes
  • Fine sea salt
  • Vegetable oil
  • Garlic cloves
  • Whole peppercorns
  • Coconut Milk (or water)
  • Soy sauce (Chinese dark soy sauce)
  • Rice vinegar (Or cane vinegar)
  • Bay leaves

See the recipe card for quantities.

How to make Instant Pot Pork Adobo

A browned piece of pork for Instant Pot Pork Adobo
Browned on one side

Brown the pork (on one side) in 3 batches: Sprinkle the pork cubes with salt. Heat the vegetable oil in an Instant Pot set to Sauté Mode - High, until the oil is shimmering. Sear the pork in 3 batches, until browned on one side; each batch will take about 3 minutes. Move each batch of seared pork to a bowl.

Garlic cloves and whole peppercorns sautéing in an Instant Pot
Toast the garlic and peppercorns

Toast the garlic and peppercorns: Add the garlic cloves and whole peppercorns to the pot and cook the garlic and peppercorns for 1 minute.

An Instant Pot full of pork, soy sauce, and bay leaves
Everything in the pot

Everything in the pot: Stir in the coconut milk, and scrape the bottom of the pot with a flat-edged wooden spoon to loosen all the browned bits of pork. Add the seared pork and any juices in the bowl. Pour in the soy sauce and rice vinegar, and stir to coat the pork. Sprinkle the bay leaves over the top of everything.

An Instant Pot showing 30 minutes at high presure
Pressure cook on high for 30 minutes

Pressure cook for 30 minutes with a Natural Release: Lock the lid and set the cook time to 30 minutes on high pressure. (Use Manual, Pressure Cook, or Pressure Cook - Custom mode in an Instant Pot). Let the pressure come down naturally, about 20 more minutes. (You can quick release the remaining pressure after 15 minutes if you are in a hurry.)

An Instant Pot with a ladle scooping cooked pork adobo and its liquid
Serve and enjoy

Serve: Unlock the lid on the pressure cooker, tilting it away from you to avoid the hot steam. Serve (with white rice on the side), and enjoy!

Substitutions

Soy Sauce: Chinese dark soy sauce is the best choice for this recipe if you can find it. Chinese dark soy sauce is a lot thicker, with sugar or molasses added, and will give the pork that dark "Adobo" color. If you can't find it, regular soy sauce (or light soy sauce) is a good enough substitute.

Vinegar: Filipino vinegar is traditional in this recipe, specifically a Filipino cane sugar vinegar like Datu Puti Cane Vinegar. But I can't find it at my local Asian markets, so I use Asian rice vinegar instead, which is easy to find at my grocery store. (Rice vinegar and rice wine vinegar are the same, so buy whichever one is available.) Apple cider vinegar is an acceptable substitute, but white vinegar is a little too sharp for this recipe.

Pork cuts: I use pork shoulder (aka pork butt) in this recipe, which gives me tender meat. Some recipes recommend pork belly, but I prefer the leaner cubes of pork shoulder. (Leaner is a relative term here - pork shoulder has a lot more fat than leaner pork cuts like pork loin and pork sirloin, which will dry out in the pressure cooker.) You could also use boneless pork ribs if you can find them. Bone-in pork ribs won't fit in the pot well enough to stay submerged in the sauce.

Aromatics and spices: The other key flavors in this Filipino dish come from garlic cloves, black peppercorns, and bay leaves. If your bay leaves have been sitting in the back of your spice cabinet for years, get a fresh jar for this recipe; they're one of the key ingredients, and you don't want to use old, dull bay leaves that have lost their flavor.

Coconut milk: Technically I'm making adobo sa gata, because I'm including coconut milk. I like the rich flavor and extra hint of sweetness it adds to the recipe, but you can substitute chicken broth if you want a straight-up adobo.

Equipment

A 6-quart pressure cooker

Scaling

This recipe bumps up against the max fill line in a 6-quart pressure cooker. To double it, you must move up to an 8-quart pressure cooker. Or, if you want a smaller batch, cut all the ingredients in half, and this recipe will fit in a 3-quart pressure cooker. The cooking time does not change; it takes the same amount of time to cook each piece of pork, no matter how many there are.

Storage

The adobo will last in airtight containers for a couple of days in the refrigerator or frozen for up to 6 months in the freezer. I portion leftovers into 2-cup containers and freeze them, so I have individual servings whenever I need a quick lunch or dinner.

What to Serve with this Instant Pot Pork Adobo recipe

White rice is the traditional side dish, perfect for soaking up the delicious Adobo sauce. I like to serve it with a tart side salad (I use this lemon dressing on mesclun mix) and a green vegetable side dish.

Inspired by: Adobo sa Gata, [PanlaslangPinoy.com]

Related Posts

  • Instant Pot Greek Braised Pork with Honey, Orange, and Rosemary
  • Pressure Cooker Chinese Red Cooked Chicken Thighs
  • Instant Pot Short Ribs with Coconut Milk and Thai Curry
  • Instant Pot Pernil al Caldero (Puerto Rican Pulled Pork)

My other Instant Pot and Pressure Cooker Recipes

Enjoyed this post? Want to help out DadCooksDinner? Subscribe to DadCooksDinner via email and share this post with your friends. Want to contribute directly? Donate to my Tip Jar, or buy something from Amazon.com through the links on this site. Thank you.

Instant Pot Chicken Legs and Rice (Arroz con Pollo)

December 27, 2022 by Mike Vrobel 9 Comments

A bowl of chicken legs and rice with an Instant Pot in the background

 Instant Pot Chicken Legs and Rice (Arroz con Pollo) A quick pressure cooker version of the Latin American classic, ready in under an hour.

Chicken and rice is a classic comfort food recipe, especially in Spain, Puerto Rico, and across Latin America. There's a lively debate about where it originally came from, and as a white suburban dad from Ohio, I'm going to stay far away from the discussion. (I know the third rail when I see it.)

What I also know is: when most Latin America claims a dish as their own, it has to be good.

A bowl of chicken legs and rice with an Instant Pot in the background
Instant Pot Chicken Legs and Rice
[feast_advanced_jump_to]

My sister-in-law requested I try this recipe years ago because she kept getting burn warnings. Easy-peasy, I thought. I've got a reliable Instant Pot Rice Recipe, which never burns. I'll add some vegetables and spices, stir in the rice and broth amounts I usually use, and toss some chicken on top. But...my sister-in-law was not wrong. I kept getting burn warnings. The rice would settle on the bottom of the pot, stick, and start to burn.

After a few more tries (and burn warnings), I set the recipe aside. But it kept nagging at me. Eventually, I realized that I don't have any problems with Instant Pot Risotto, no matter how much stuff I add to the pot. What's the difference?

How do I avoid Instant Pot burn warnings with Chicken and Rice?

Lots of liquid. I use a water-to-liquid ratio of 2.5 cups of water to 2 cups of rice for my regular rice recipe. In other words, a 1:1 ratio. For risotto, I use twice as much liquid - 4 ½ cups - with 2 cups of rice. (Also, I use short grain rice because it is traditional in risotto, but more on the rice later.)

The 2:1 ratio of liquid to rice is the key to the recipe. The extra liquid keeps the broth thin enough for the rice not to stick to the pot's bottom and burn.

Now, is it too thin? No! There was liquid above the rice when it finished, but once I stirred it up, it was absorbed by the rest of the rice.

What didn't fix the burn warning with Chicken and Rice?

Rinsing the rice?

A couple of sources recommended rinsing the rice as a way to avoid a burn warning. It didn't work for me. Rinsed or not, a 1:1 ratio of rice to liquid still burned. That said, it doesn't hurt either, as long as you use the 2:1 ratio of rice to liquid. (I don't rinse my rice, but you can if you want. It doesn't change the recipe.

Long Grain vs. Short Grain rice?

I thought it might be the long-grain rice, too. Maybe short-grain rice releases less starch, so it doesn't stick and burn. In my testing, the rice type didn't affect the burn warning. Once I switched to the 2:1 ratio of liquid to rice, I could use any rice variety I had on hand. That said, I liked the results with the short grain rice a little better - it comes out a little creamier, like a risotto - but it's a subtle difference, and only one of my three taste testers noticed.

Ingredients

Ingredients for Instant Pot Chicken Legs and Rice
Ingredients
  • Chicken drumsticks (chicken legs separated into thighs and drumsticks)
  • Fine sea salt
  • Paprika (preferably Spanish Smoked paprika)
  • Garlic powder
  • Olive oil (or vegetable oil)
  • Onion
  • Green bell pepper
  • Garlic
  • Tomato paste
  • Dry white wine (or water
  • Short-grain rice
  • Chicken broth (homemade chicken broth or low sodium store bought)
  • 1 teaspoon fine sea salt (if using homemade broth)
  • Parsley

See the recipe card for quantities.

How to make Instant Pot Chicken Legs and Rice

Browned chicken drumstick over an Instant Pot
Brown the chicken

Brown the chicken legs: Sprinkle the chicken drumsticks with salt, paprika, and garlic powder. Heat 1 tablespoon of olive oil in an Instant Pot set to Sauté Mode - High until the oil starts to shimmer. Brown the drumsticks skin side down in 2 batches, about 3 minutes per batch. Transfer the drumsticks to a bowl after browning.

An Instant Pot full of onions, peppers, and tomato paste
Sauté the aromatics

Sauté the aromatics: Add the diced onion, bell pepper, and smashed garlic to the pot, sprinkle with ½ teaspoon of salt, and sauté until the onions soften, about 5 minutes, stirring and scraping with a flat-edged wooden spoon to unstick any browned bits from the bottom of the pot. Stir the tomato paste into the onions and sauté for 1 minute, often scraping the bottom of the pot.

An instant pot with rice stirred into the onions, peppers, and tomato paste
Stir in the wine and rice

Add the wine and rice: Stir the rice in, coating it with the onion-tomato paste mixture, then add the wine. Simmer the wine for 1 minute or until it evaporates, often scraping the bottom of the pot.

Pouring chicken broth into an Instant Pot with rice and chicken
Everything in the pot

Everything in the pot: Stir in the chicken broth (and 1 teaspoon of salt if using homemade broth), then scrape the bottom of the pot one last time to ensure nothing is sticking. Set the chicken leg pieces on top of everything.

An Instant Pot set to pressure cook for 4 minutes
Pressure Cook for 4 minutes with a 10 minute natural release

Pressure Cook for 4 minutes with a 10-minute natural release: Lock the lid and cook at high pressure for 4 minutes in an electric or stovetop pressure cooker. (Use Manual, Pressure Cook - High, or Pressure Cook - Custom mode for an Instant Pot, and set it to 4 minutes). Let the pressure come down naturally for 10 minutes, then quick release the remaining pressure.

An Instant Pot full of cooked chicken legs and rice
Transfer to a platter and serve

Fluff and serve: Move the chicken legs from the pot to a platter, then stir the rice to soak up the remaining liquid in the pot. Pour the rice into a serving platter and serve, topping each plate of rice with a chicken leg or two. Enjoy!

Equipment

A 6-quart pressure cooker

Scaling

Cut all the ingredients in half, and this recipe will fit in a 3-quart pressure cooker. In theory, you can double this recipe if you have an 8-quart pressure cooker - it won't fit in a 6-quart cooker. But I haven't tried it in an 8-quart, and I worry about the burn warning coming back. (If you try it doubled, let me know how it goes in the comments.) Changing the amount does not change the cooking time; it takes the same amount of time to cook the rice and chicken through.

Substitutions

  • Rice options: I prefer short grain rice for this recipe, especially risotto types of rice, like Arborio or Carnaroli. But any length of white rice will work. If you have long-grain or medium-grain rice on hand, go ahead and use it. (Brown rice is a different recipe because it cooks so differently.)
  • Chicken options: I go with drumsticks for this recipe because my local grocery store sells them in easy-to-use family packs. You can also use chicken thighs in this recipe. If you have whole chicken legs, separate the drumsticks from the thighs before cooking - the whole leg won't cook through. You can also use 2 to 3 bone-in chicken breasts, with each breast cut in half crosswise, but I prefer dark meat in the pressure cooker.
  • No alcohol: The white wine is a carry-over from my risotto recipes; I like the extra flavor it adds to the recipe. If you don't want alcohol in the recipe, substitute extra chicken broth or water.

Storing Leftovers

Cooked rice does not keep for long - it carries bacteria spores (Bacillus cereus) that multiply in warm temperatures. If you need to store cooked rice, cool it down quickly in the refrigerator, or freeze it within an hour of cooking. Store refrigerated rice for 2-3 days or frozen rice for up to 3 months, and make sure to reheat it completely (to at least 165°F) before eating. (Source: Safe Handling of Cooked Rice, University of Wisconsin Extension).

Tips and Tricks

  • Scrape the bottom of the pot before pressure cooking: The other key to avoiding a burn warning is making sure nothing is sticking. A flat-edged wooden spoon is your friend here, and make sure to scrape all around the edge of the pot.

What to serve with Chicken and Rice

Chicken and rice is a one-pot meal. I serve it with a salad and a green vegetable side dish, like my Collard Greens or Kale with Garlic and Lemon.

Related Posts

Instant Pot French Chicken Legs with Mustard
Instant Pot Risotto with Pork and Cinnamon (Risotto All'Isolana)
Instant Pot Brown Rice Jambalaya
Instant Pot Puerto Rican Pulled Pork (Pernil al Caldero)
Instant Pot Salmon Rice
My other Instant Pot and Pressure Cooker Recipes

Enjoyed this post? Want to help out DadCooksDinner? Subscribe to DadCooksDinner via email and share this post with your friends. Want to contribute directly? Donate to my Tip Jar, or buy something from Amazon.com through the links on this site. Thank you.

Horseradish Sauce Recipe

December 20, 2022 by Mike Vrobel 6 Comments

A small bowl of horseradish sauce with a colorful napkin

A quick and easy Horseradish Sauce made from pantry ingredients and perfect with beef.

I always serve horseradish sauce with roast beef. Always.

When I publish a beef roast recipe, like my Rotisserie Sirloin Roast or Standing Rib Roast, I say "serve with horseradish sauce!" But, until now, my horseradish sauce was embedded in one of my earliest recipes, Rotisserie Beef Tenderloin with Shallot Herb Butter and Horseradish Sauce. Since I refer to this horseradish sauce so often, I'm breaking it out into its own recipe.

A small bowl of horseradish sauce with a colorful napkin
Horseradish Sauce
[feast_advanced_jump_to]

What is Horseradish Sauce?

Horseradish sauce is a mix of sour cream and prepared horseradish. That's basically it, and that's why this sauce is barely a recipe. I use four store bought ingredients, all from my refrigerator or pantry. The instructions? Dump everything in a bowl and stir until it's combined, then taste and add more horseradish if it needs it. Also, two of the ingredients are optional. If I have sour cream and prepared horseradish, I'm ready to make horseradish sauce. (Don't skip the mustard and pepper if you have them. They make the sauce more interesting.)

Ingredients

Ingredients: sour cream, prepared horseradish, dijon mustard, fresh ground black pepper
Quick Horseradish Sauce Ingredients (Yes, that's everything.)
  • Sour Cream
  • Prepared Horseradish
  • Dijon Mustard
  • Fresh ground black pepper

How to Make Horseradish Sauce

Mix the sauce: Put the sour cream, prepared horseradish, dijon mustard, and fresh ground black pepper in a bowl, and stir until evenly mixed. Taste and add more horseradish if it is not hot enough for you. Enjoy!

Substitutions

This is a sour cream horseradish sauce, so the only important ingredients are the sour cream and the horseradish, in a 2:1 ratio. Everything else is optional, but I like to add a few extras to add some complexity to the sauce.

Lemon juice: I like the tart mustard flavor that Dijon brings to the party, but you can substitute some fresh squeezed lemon juice.

Chives (or other herbs): Replace the fresh ground black pepper with chopped chives, or rosemary, or thyme, or a mix. If you have a herb rub on your roast, you can use those same herbs in the sauce.

Prepared Horseradish Rant

If there's a trick to this recipe, it's finding refrigerated prepared horseradish. Prepared horseradish is shredded horseradish root, soaked in vinegar with a little salt. The vinegar soak pulls the flavor out of the horseradish; without the vinegar, freshly grated horseradish is bland. (It's a lot like mustard - mustard seeds on their own are good, but crush them and soak them in vinegar for a few days, and they come into their own.)

Look for prepared horseradish in your grocery's refrigerated case - and you may have to ask where it is. Grocery stores seem to be hiding it from me. The vinegar makes me want to look for it near the pickles...but one local grocery store keeps it near the cheese, another near the yogurt. Go figure.

Avoid shelf-stable prepared horseradish or horseradish sauces - in my experience, they never have the bite of the prepared horseradish from the refrigerator section. If I have no other choice, I'll buy shelf-stable horseradish sauce and use it straight from the bottle. They're not bad, but they're for spreading on a sandwich, not for serving with a roast.

What is Horseradish Sauce Good On?

Beef! I serve this sauce with prime rib roast, tomahawk prime rib steak, filet mignon... basically every roasted or grilled piece of beef. Leftover roast beef sandwiches get a layer of leftover horseradish sauce on top. It's also good with lean roasts like roast turkey, pork loin, or ham, that need a little extra kick of heat and flavor.

Storing Leftovers

Refrigerate leftover horseradish sauce, covered, for up to a week. It doesn't freeze well, so I toss it after a week and mix up a fresh batch when I need one.

Inspired by: Alton Brown's Horseradish Cream Sauce

What do you think?

Questions? Other ideas? Leave them in the comments section below.

Related Posts

Rotisserie Ribeye Roast With Herb Crust
Rotisserie Sirloin Roast
Rotisserie Eye of Round Roast
Instant Pot Cranberry Sauce
Sweet Hot Mustard
Cajun Rub Recipe

Enjoyed this post? Want to help out DadCooksDinner? Subscribe to DadCooksDinner via eMail and share this post with your friends. Want to contribute directly? Donate to my Tip Jar, or buy something from Amazon.com through the links on this site. Thank you.

Instant Pot Air Fryer Frozen French Fries (with an Air Fryer Lid)

November 29, 2022 by Mike Vrobel 3 Comments

A platter of crinkle cut french fries with a bowl of ketchup

Instant Pot Air Fryer Frozen French Fries. Crispy, golden french fries with my Instant Pot and its Air Fryer Lid.

What took me so long to air fry frozen French fries?

A platter of crinkle cut french fries with a bowl of ketchup
Instant Pot Air Fryer Frozen French Fries
[feast_advanced_jump_to]

What took me so long to air fry frozen French fries?

I bought the Air Fryer lid for my Instant Pot when it came out, tried it a few times, and it's been collecting dust ever since. Then I bought my kids Instant Pot Duo Crisps for their college apartments. (Amazon had a sale, and it was cheaper to get them with the air fryer lid than without.)They immediately started air frying and asked me questions about air frying that I couldn't answer. So, I gave my air fryer lid a second chance.

And I may have found its killer app. Frozen French fries come out crispy and golden brown, much better than what I get out of the oven, even with the convection setting turned on. (This has always been my argument against air frying - it's just a mini convection oven - but I was wrong.)

So, I'm going to keep on air frying…if I can come up with anything else. Any air frying veterans out there? What else should I try? Recommendations? Requests?

Ingredients

A bag of crinkle cut french fries
A bag of frozen french fries
  • Frozen French Fries

See the recipe card for quantities.

How to make Frozen French Fries in an Instant Pot with an Air Fryer Lid

A fistful of frozen french fries
A fistful of frozen French fries

Heat to 400°F and add the fries: Preheat the air fryer lid to 400°F. Sprinkle the frozen fries into the fryer basket, one handful at a time, so they are in a loose pile.

An Instant Pot Air Fryer Lid set to 400°F and 20 minutes
Air fry for 400°F for 20 minutes

An Instant Pot Air Fryer Basket full of fries
Shake the fries every 5 minutes

Air fry for 20 minutes, shaking every 5: Air Fry, shaking the basket every 5 minutes until the fries are crispy and a light golden color, about 20 minutes.

Fries are done, crispy and golden
Fries are done! Crisp and ready to serve.

Substitutions

Different frozen fry shapes:

The cooking time is determined by how thick the fry is. 20 minutes is the right time for regular thickness times. Here's the list of times

  • Shoestring Fries: 15 minutes
  • Curly Fries: 20 minutes
  • Regular Fries: 20 minutes
  • Crinkle-cut Fries: 25 minutes
  • Tater Tots: 20 minutes
  • Waffle Fries: 25 minutes
  • Steak Fries: 25 minutes

Equipment

A 6-quart pressure cooker with an air fryer lid. (Or an air fryer.)

Scaling

You can fill the air fryer basket with a whole bag of fries, but this increases the cooking time - I have to cook for 25 to 30 minutes to get the larger amount of fries crisped up.

Top Tip

Don't crowd the frozen fries! While they don't have to be a single layer, they must be loose enough for the air to circulate around the fries. That's why I say to sprinkle them in, one handful at a time, and give them a shake every five minutes. It keeps them loose and moves them around, allowing them to crisp up evenly.

Related Posts

Instant Pot Rainbow Baby Potatoes with Rosemary and Garlic
Instant Pot Loaded Smashed Red Potatoes
Instant Pot Potato Salad
Air Fryer Breaded Chicken Thighs and Potatoes
Air Fryer Asparagus
My other Instant Pot and Pressure Cooker Recipes

Enjoyed this post? Want to help out DadCooksDinner? Subscribe to DadCooksDinner via email and share this post with your friends. Want to contribute directly? Donate to my Tip Jar, or buy something from Amazon.com through the links on this site. Thank you.

Instant Pot Turkey Wings

November 15, 2022 by Mike Vrobel 4 Comments

A plate of turkey wings smothered with gravy

Instant Pot Turkey Wings Smothered With Gravy. Southern-style turkey wings from my pressure cooker, ready in under an hour, with gravy from the pot liquid.

A plate of turkey wings smothered with gravy
Instant Pot Turkey Wings
[feast_advanced_jump_to]

Now, I'm not a southerner - If I go any farther north, I fall into a lake and come out in Canada - but I know a great recipe when I see one. These turkey wings are delicious and surprisingly meaty for a wing. (I should have expected giant turkey wings to have extra meat, right?)

If you're looking for a recipe for different turkey parts, try my Instant Pot Turkey Thighs with Thanksgiving Flavors or Instant Pot Turkey Legs with Poultry Seasoning for turkey drumsticks. If you're looking for chicken wings, try Instant Pot Lemon Pepper Wings.

Ingredients

  • Turkey Wing Portions
  • Fine sea salt
  • Paprika
  • Garlic powder
  • Onion powder
  • Vegetable oil
  • Butter
  • Onion
  • Garlic
  • Chicken broth
  • All-purpose flour

See the recipe card for quantities.

How to Cook Instant Pot Turkey Wings with Gravy

A browned turkey wing
Browning the wings

Season and Brown the Wings: Mix 1 teaspoon of fine sea salt, paprika, garlic powder, and onion powder to make a spice mix, and sprinkle the spice mixture over the turkey wings. Heat the vegetable oil in an Instant Pot set to Sauté Mode - High, and brown the wings in batches, 2 to 3 wings per batch, on both sides of the wings, about 3 minutes per side. Move the browned wings to a small bowl.

Sauteing the aromatics in an Instant Pot
Sautéing the aromatics

Sauté the Aromatics: Melt the butter in the Instant Pot, add the onion and garlic, and sprinkle with ½ teaspoon fine sea salt. Sauté until the onions soften, about 5 minutes, occasionally stirring and scraping with a flat-edged wooden spoon.

Browned turkey wings stacked in an Instant Pot
Stacking the wings

Everything in the Pot: Pour in the chicken broth, then stack the wings loosely in the pot.

An instant pot set to pressure cook for 15 minutes
Pressure cook for 15 minutes with a Natural Release

Pressure Cook for 15 Minutes With a Natural Release: Lock the lid. Pressure cook on high pressure for 15 minutes ("Manual," "Pressure Cook," or "Pressure Cook-Custom" mode set to high in an Instant Pot). Let the pressure come down naturally, about 20 minutes; you can quick release any remaining pressure after 15 minutes if you're in a hurry.

Whisking flour into melted butter in an Instant Pot
Whisking the roux

Make the Gravy and Serve: Unlock the lid, opening it away from you. Move the wings to a platter and pour the cooking liquid into a fat separator. Set the Instant Pot back to Sauté mode - High and melt ¼ cup of butter. Whisk in the all-purpose flour and keep whisking until the flour turns golden brown, about 1 minute. Slowly whisk in the defatted pot liquid. Spoon gravy over the wings and serve, passing the rest of the gravy at the table.

What to Serve with Instant Pot Turkey Wings

I serve instant pot smothered turkey wings with mashed potatoes to soak up the gravy. Any starchy side, like white rice or noodles, will also work. And, if you have a second pressure cooker, I suggest serving them with a pot of Pressure Cooker Collard Greens with Bacon.

Top Tip

Make roux for the gravy: The last step of the recipe can look like a bridge too far. Why take the time to pour everything out of the pot, melt the butter, whisk in the flour, and keep constantly whisking for a couple of minutes? Because that's how you make a roux. Roux thickens the gravy and adds a little flavor, elevating the simple pot sauce into a fantastic gravy.

FAQ

What are turkey wing portions?

A whole turkey wing is awkward to brown and cook in an Instant Pot. It's so big that it barely fits and does not want to lie flat on the bottom of the pot and brown. That's why I'm glad my grocery store carries turkey wing portions, already separated into wing drumette and wing flat (aka wingette) pieces. If you can only find whole turkey wings, you can portion them yourself. Cut the wing tip off and discard it. Then, cut between the wing flat and the wing drumette. Voila - a portioned wing.

How can I crisp up the turkey wing skin?

The only downside to this recipe is that the skin is soft after pressure cooking. The wings taste great on their own, but broiling them adds extra flavor. Spread the wings out on a rimmed sheet pan and broil until the skin is browned and bubbling. (The time depends on the heat of your broiler; in my oven, it takes about 5 minutes.)

Can I use smoked turkey wings in this recipe?

Yes, but they're not as good as raw turkey wings for this recipe. But, if that's all you can find, go ahead and use them. Smoked turkey wings are already cooked, and just need to be reheated. Skip the browning step for smoked turkey wings, and cut the time under pressure back to 10 minutes.

Adapted from: Smothered Turkey Wings Recipe - Simple Recipes

🤝 Related Posts

Pressure Cooker Turkey Giblet Gravy
Pressure Cooker Buffalo Chicken Wings
Pressure Cooker Day-After-Thanksgiving Turkey Carcass Soup
My other Instant Pot and Pressure Cooker Recipes

Enjoyed this post? Want to help out DadCooksDinner? Subscribe to DadCooksDinner via email and share this post with your friends. Want to contribute directly? Donate to my Tip Jar, or buy something from Amazon.com through the links on this site. Thank you.

Instant Pot (Pressure Cooker) 15-Bean Chili

November 8, 2022 by Mike Vrobel 13 Comments

Pressure Cooker 15 Bean Chili

Instant Pot 15 Bean Chili. Pressure cooker vegetarian chili, thick and hearty with ALL THE BEANS, for vegetarians or bean lovers. (Thanks to a bean mix bag from my local grocery store.)

A bowl of bean chili sprinkled with
Pressure Cooker 15 Bean Chili
[feast_advanced_jump_to]

Even though I'm a dedicated omnivore, I occasionally cook for vegetarians - especially at my annual Chili Fest at work. I don't want anyone to feel left out, so I make sure I have a big pot of vegetarian (vegan?) chili ready for them.

(One time at the Chili Fest I was asked: "Is there any meat in the vegetarian chili? If there is, I can't eat it." On the one hand, come on! I do know what the word vegetarian means. On the other hand, if you have to ask, it makes me wonder what other "vegetarian" food people have tried to serve you.

To bulk up the chili, I'm going with all the beans. Forget 13 beans, 14 beans…I'm going for a full 15 bean chili. Of course, I'm cooking it in my pressure cooker - my favorite way to make beans.

Bean mixes solve one of my pressure cooker chili problems - thin sauce. Pressure cookers are a sealed environment , so they can build pressure. Water in the pot can't evaporate, so the sauce does not thicken like it would in a traditional pan. A bean mix has some quick cooking beans, like lentils and peas, and some long cooking beans, like kidney and lima beans. By the time the long cooking beans are tender, the quick cooking beans have cooked into mush, dissolving into starch and thickening up the whole pot of chili.

Looking for a vegetarian treat? Try 15 bean chili.

Ingredients

Ingredients for 15 bean chili on a cutting board
Ingredients for 15-bean chili
  • 15-bean dry bean mix (aka bean soup mix)
  • Fine sea salt
  • Vegetable oil
  • Onion
  • Jalapeno
  • Garlic
  • Chili powder
  • Ground cumin
  • Ground coriander
  • Dry oregano
  • Cocoa powder (optional)
  • Ground cloves (optional)
  • Vegetable broth
  • Diced tomatoes
  • Brown sugar
  • Fresh ground black pepper

See the recipe card for quantities

How to make 15-bean chili in an Instant Pot

A pyrex bowl of beans covered in water
Soaking the beans

Sort, Rinse, and Soak the beans: Sort and rinse the beans. Sprinkle the beans with 2 teaspoons fine sea salt, cover with 8 cups of water, and soak the beans overnight. Drain the beans.

An Instant Pot full of sautéed onions, with dry spices on top
Toasting the spices

Sauté the aromatics and spices: Heat 2 tablespoons of oil in an Instant Pot set to Sauté Mode - High. Add the onion, garlic, and jalapeno, and sauté until the onions start to brown around the edges, about 8 minutes. Stir in the spices and toast for a minute.

An instant pot set to pressure cook for 15 minutes
Pressure cook for 15 minutes with a Natural Release

Pressure Cook for 15 minutes with a Natural Release: Stir in the soaked beans, vegetable broth, and tomatoes. Lock the lid and set the Instant Pot to pressure cook at high pressure for 15 minutes. Let the pressure come down naturally.

A bowl of 15 bean chili, with a red napkin and spoon
Serve!

Season and serve: Stir in the brown sugar and fresh ground black pepper. Serve and enjoy!

Substitutions

  • Other bean mixes: I use the Hambeens 15 bean soup mix because it is the most common in my own grocery store. But...13 bean? 16 bean? Whatever it takes. If your store carries a bean mix, use it.
  • Homemade bean mixes: I'll make my own bean mix by saving leftover beans when I don't use a whole bag in my recipe. It won't have quite as much variety, but it still works in this recipe.

What do you think?

Questions? Other ideas? Leave them in the comments section below.

Related Posts

Looking for other vegetarian chili recipes? Try my Instant Pot Sweet Potato Chili or Pressure Cooker Pumpkin Chili.
For other vegetarian main dishes, try my Instant Pot 15 Bean Soup or Pressure Cooker French Lentils.
If you just want a pot of quick chili, try my Instant Pot 5 Ingredient Chili recipe.

Enjoyed this post? Want to help out DadCooksDinner? Subscribe to DadCooksDinner via eMail or RSS reader, recommend DadCooksDinner to your friends, and buy something from Amazon.com through the links on this site. Thank you.

Instant Pot Chicken Paprikash recipe (with boneless chicken thighs)

October 31, 2022 by Mike Vrobel 6 Comments

A bowl of chicken paprikash on noodles

Instant Pot Chicken Paprikash. Chicken paprikash with boneless chicken thighs. A quick paprikash recipe with plenty of Hungarian paprika, ready in under an hour thanks to pressure cooking.

A bowl of chicken paprikash on noodles
Instant Pot Chicken Paprikash
[feast_advanced_jump_to]

"(It's)…not a chicken dish flavored with paprika and onions, it's a paprika and onion dish in which there is chicken." - JM Hirsch, Milk Street Magazine, Nov-Dec 2022

Growing up in Northeastern Ohio, Hungarian chicken paprikash (Paprikás csirke, aka paprika chicken) has always been around. The national dish of Hungary, paprikash first spread to its Eastern European neighbors and then to Northeast Ohio during the wave of immigration in the Industrial Age of the late 1800s. This easy Instant pot recipe is my version of paprikash chicken, comfort food for my whole family.

(If you're looking for Spanish comfort chicken, check out my Arroz con Pollo - Instant Pot Chicken Legs and Rice).

Ingredients

  • Butter
  • Boneless skinless chicken thighs
  • Paprika (preferably Sweet Hungarian Paprika )
  • Fine sea salt
  • Olive oil
  • Onions
  • Garlic
  • Fresh ground black pepper
  • Tomato paste
  • Chicken broth (homemade or store-bought low sodium)
  • Sour cream

See the recipe card for quantities.

How to make Chicken Paprikash in an Instant Pot

Holding up a seared chicken thigh
Sear the chicken

Sear the chicken, on one side, in three batches: Sprinkle the chicken thighs evenly with 3 teaspoons of paprika and 1½ teaspoons of salt. Melt 1 tablespoon of butter in an Instant Pot set to Sauté Mode - High. Sear the chicken in 3 batches, on one side, transferring each batch to a bowl once seared.

Onions, paprika, and tomato paste in an instant pot
Sauté the aromatics and spices

Sauté the aromatics and spices: Add the olive oil, onions, and sliced garlic; sprinkle with ½ teaspoon salt. Sauté until the onions soften, about 5 minutes, stirring and scraping the bottom of the pot with a flat-edged wooden spoon to loosen any browned bits of chicken. Add the ¼ cup of paprika, ground black pepper, and tomato paste, and sauté for a minute to toast the spices.

Chicken stirred into paprikash in an Instant Pot
Everything in the pot

Everything in the pot: Pour in the chicken broth (and ½ teaspoon of salt if using homemade broth). Scrape the bottom of the pot one last time to ensure nothing is sticking. Stir in the chicken and any juices in the bowl.

A measuring cup full of whisked sour cream and pot liquid
Thicken with sour cream

Pressure cook for 15 minutes with a Natural Release: Lock the lid on the Instant Pot. Cook at high pressure for 15 minutes ("Manual" or "Pressure Cook" or "Pressure Cook - Custom" mode set for 15 minutes in an Instant Pot). Let the pressure come down naturally for about 20 more minutes. (You can quick release any remaining pressure after 15 minutes if you're in a hurry.)

A measuring cup full of whisked sour cream and pot liquid
Thicken with sour cream

Thicken and serve: Move the fall-apart chicken to a serving platter. Whisk the sour cream and an equal amount of pot liquid until smooth. Stir the smoothed sour cream into the pot and keep stirring until smooth. Pour the pot sauce over the serving platter of chicken and serve over egg noodles, smothering the chicken and noodles with the sauce. Enjoy!

Substitutions

  • Dark meat vs. white meat: You can replace some or all of the chicken thighs with boneless skinless chicken breasts. The dark meat chicken holds up better to pressure cooking, but white meat chicken breasts are not bad. Cut each chicken breast in half, and the cooking time remains the same.
  • Bone-in chicken pieces: If you want to cook bone-in chicken thighs, I recommend all chicken thighs. (Or you can use a whole cut up chicken, with breast, thigh, drumstick, and wing pieces - just cut the breast pieces in half.) Brown the pieces skin side down to render some of the fat from the chicken skin, and then increase the pressure cooking time to 20 minutes at high pressure (with a Natural Release).
  • Paprika varieties: Hungarian sweet paprika is traditional for this recipe. A mix of hot paprika (sprinkled on the chicken) with sweet paprika (added to the pot) adds extra complexity to the recipe if you can find hot paprika. Smoked paprika is another good option, even if you have to get Spanish smoked paprika. Or, don't be a paprika snob and use the "regular" paprika from your local grocery store.
  • Hot paprikash: If you want to add some heat to your paprikash, use hot paprika instead of sweet paprika. Or, add a teaspoon of red pepper flakes with the paprika and black pepper.

Equipment

A 6-quart pressure cooker

Scaling

You can double this recipe in a 6-quart pressure cooker or move up to an 8-quart pressure cooker if you want. Cut all the ingredients in half, and this recipe will fit in a 3-quart pressure cooker. The cooking time does not change; it takes the same time to cook each piece of chicken, no matter how many are in the pot.

Storage

Chicken paprikash is excellent, made a day ahead, and reheated. I store leftovers in 2-cup containers, which last for a few days in the refrigerator or 6 months in the freezer.

Top Tip

Don't be shy with the paprika in this recipe! Yes, we're using 5 tablespoons total; this is paprikash after all.

What to Serve with Chicken Paprikash

The best thing to serve Chicken Paprikash with is a starchy side dish to soak up the sauce. My favorite is egg noodles, especially Kluski-style egg noodles, probably because of the Polish influence here in Northeastern Ohio. Another classic is small dumplings, like nokedli or spaetzle. Or, serve the Paprikash with mashed potatoes. If you want to be fancy, also serve it with Kielbasa and Sauerkraut as a side dish.

FAQ

Paprikash or Goulash?

I've discussed the difference between Paprikash and Hungarian Goulash. The difference is subtle; they're both paprika-based stews, but Paprikash has a bit more sour cream mixed in. (If you're Hungarian and can explain the difference to me, leave a note in the comments below.)

🤝 Related Posts

Pressure Cooker Lentil Sausage Soup
Instant Pot Greek Chicken Thighs With Tomatoes and Herbs
Pressure Cooker Chicken With 40 Cloves of Garlic
Instant Pot Chicken and Dumplings
Air Fryer Breaded Chicken Thighs with Potatoes
My complete Instant Pot and Pressure Cooker Recipes List

Enjoyed this post? Want to help out DadCooksDinner? Subscribe to DadCooksDinner via email and share this post with your friends. Want to contribute directly? Donate to my Tip Jar, or buy something from Amazon.com through the links on this site. Thank you.

Instant Pot 5 Ingredient Chili

October 25, 2022 by Mike Vrobel 2 Comments

A bowl of 5 ingredient chili, topped with cheese, jalapenos, and green onion

5 Ingredient Instant Pot Chili. Pressure cooker chili with only 5 ingredients? Yes! Here is my weeknight "meal in a hurry" chili. All you need is ground beef, beef broth, salsa, dry kidney beans, and chili powder. With soaked beans, all it takes is 15 minutes of pressure cooking and a quick pressure release and you have chili.

Here is my "I need a weeknight meal in a hurry and only have time to dump things from jars" easy chili recipe. I take every shortcut I can without compromising the taste of the recipe. What are the five ingredients? Ground beef, chili powder, beef broth, dry red kidney beans, and salsa.

A bowl of 5 ingredient chili, topped with cheese, jalapenos, and green onion
Instant Pot 5 Ingredient Chili
[feast_advanced_jump_to]

I make this easy Instant Pot chili recipe work with minimal ingredients by making those ingredients do a lot of heavy lifting:

  • I buy higher-fat ground beef than I usually do - no need for oil.
  • I buy regular beef broth from the store, not the reduced sodium version I usually recommend. So, no need for salt.
  • I buy salsa - combining the garlic, onions, hot peppers, and tomatoes into one jar.
  • I use dried beans - yes, I need to soak them overnight, but they add a lot of flavor and body to the chili.
  • I use chili powder. Of course, I always use chili powder, but its blend of spices is the key "chili" flavor.

Now, is this the best chili recipe I can make? No, but it's a hearty chili with minimal effort for busy days. If you're looking for delicious recipes that don't cut corners, check out my Instant Pot Steak Chili, Instant Pot White Turkey Chili Recipe, or Instant Pot Chorizo Chili? No, but it's still a darned good chili with a fraction of the effort.

And, yes, I know the One True Chili Texans are in the back of the room, shouting at me. "Beans? That's a nice soup you've got there, but it's not chili." I've learned to ignore them. I grew up with "wimpy chili," full of ground beef and beans. While I love Texas chili, I love this one too.

Ingredients

Ingredients for 5 ingredient Instant Pot Chili
The 5 Ingredients
  • Dry kidney beans
  • Ground beef
  • Chili powder
  • Beef broth
  • Salsa

See the recipe card for quantities.

How to make Instant Pot 5-Ingredient Chili

Dry kidney beans covered with water in an Instant Pot
Soaking the kidney beans

Sort, rinse, and soak the beans

Sort the dried beans, discarding any dirt, stones, or broken beans. Rinse the beans, then soak them overnight in 8 cups water and 1 tablespoon of fine sea salt. (Or see the recipe card for quick soak instructions). Drain the beans.

Ground beef and chili powder sauteing in an Instant Pot
Sauté the beef and toast the spices

Sauté the beef and chili powder

Set an Instant Pot to sauté mode and add the ground beef. Stir and break up the ground beef until it loses its pink color, about 5 minutes. Stir the chili powder into the beef and cook for 1 minute.

Pot full of ingredients, including beans, beef, and salsa
Everything in the pot

Everything in the pot

Pour in the beef broth; add the soaked kidney beans and the salsa, stirring to combine. Scrape the bottom of the pot with a flat-edged wooden spoon to ensure nothing is sticking.

Instant Pot menu set for 15 minutes at high pressure
Pressure Cook for 15 minutes with a Quick Release

Pressure cook for 15 minutes with a quick pressure release

Lock the lid and cook on high pressure for 15 minutes ("Manual" or "Pressure Cook" or "Pressure Cook - Custom" mode). Quick release the pressure in the pot. Serve and enjoy!

Substitutions

Where's the beef?

Switch out the beef for ground pork or ground turkey. (But don't get ground turkey breast - it is too lean). Or, use meatloaf mix - a combo of ground beef and ground pork. Or, want a more bean-heavy chili? Cut back to 1 pound of ground beef and leave the remaining ingredients the same.

Beans

You can switch to any dry bean that you like in a chili. Make sure you soak your beans, no matter what type you use. Soaked black beans and small red beans need to cook for 10 minutes at high pressure, and Pinto beans or Great Northern beans cook for 15 minutes at high pressure (just like the kidney beans.) I avoid cans of beans because the extra flavor you get from dried beans is essential to this recipe.

Cut the heat

I control the heat in this recipe with the salsa. Medium salsa is my default, giving me a low-heat chili. Cooking for people who can't stand the heat? Use mild salsa. Want medium heat? Use hot salsa. Want to rain fire down? Pass some hot sauce at the table. And yes, I have the amount of chili powder right - use ¼ cup of chili powder.

Equipment

A 6-quart pressure cooker

Scaling

This recipe doubles easily, but you need an 8-quart pressure cooker for it to fit. Cut all the ingredients in half, and this recipe will fit in a 3-quart pressure cooker. The cooking time does not change; it takes the same time to cook the chili, no matter how much you're cooking.

Storage

Chili makes excellent leftovers and, if anything, tastes better if it's reheated the next day. I store chili in 2-cup containers, which last for a few days in the refrigerator or 6 months in the freezer. Then I can pull out a container for a lunch-size portion, to top chili dogs, or for a chili spaghetti or chili mac dinner.

Tips and Tricks

The key is the 5 ingredients. Use high-fat ground beef, not low-fat ground beef. Use regular sodium broth, not low sodium broth. Use salsa, not just cans of diced tomatoes. Use dried beans, not canned beans. I picked the ingredients to add extra body and flavor. Skipping them will result in wimpy chili. Now, sometimes you have to cook chili with the ingredients you have, not the ingredients you want. But if you're using more straightforward pantry ingredients, I would move on to a regular chili recipe with more ingredients.

What to Serve with 5 ingredient chili in the Instant Pot

When I'm in a hurry, I serve with pantry ingredients - stuff that comes out of cans, jars, and bags. Think tortilla chips, pickled jalapeños, sour cream, pre-shredded cheese, and bottles of hot sauce.

When I have more time, I slice a fresh jalapeno chili pepper, dice some green onions, or mince some cilantro to add to the mix. Of course, I also pull out everything above - chili night is a build-your-bowl adventure at my house.

Related Posts

For the slightly more complex version of this recipe, try my Instant Pot Quick Chili (with canned beans). Want to make a big tray of pasta and chili? Here's my Instant Pot Chili Mac recipe.
Looking for more New Mexico or Colorado in your chili? Try Pressure Cooker Chili Verde (Green Pork Chili)
If you want turkey instead of ground beef, here's my Instant Pot Turkey Chili with Small Red Beans
Cooking for a crowd? Use my Instant Pot 8-Quart Pot of Ground Beef and Bean Chili recipe.
Looking for the taste of the midwest? Here's my pressure cooker Cincinnati Chili Recipe from my home state of Ohio.
For another quick weeknight meal, try my Instant Pot Sloppy Joes.
For more options, check my Instant Pot and Pressure Cooker Recipes Index
or my Instant Pot Chili Recipes index

Enjoyed this post? Want to help out DadCooksDinner? Subscribe to DadCooksDinner via email and share this post with your friends. Want to contribute directly? Donate to my Tip Jar, or buy something from Amazon.com through the links on this site. Thank you.

Instant Pot Chicken Stew Recipe

October 4, 2022 by Mike Vrobel 20 Comments

A bowl of chicken stew on a blue wood table

Instant Pot Chicken Stew. A straightforward comfort food recipe from the Instant Pot, with chicken thighs and baby potatoes in a one pot meal.

A bowl of chicken stew on a wood table
Instant Pot Chicken Stew
[feast_advanced_jump_to]

There are two finesse points to this chicken stew, which is one of my favorite comfort foods.

  1. Browning bone-in chicken thighs: It takes about twenty minutes to brown the chicken thighs - it takes two batches - but the extra time is worth it. Searing the chicken thighs adds roasted flavors to the stew, from the browned bits of chicken around the edges; also, it renders a lot of fat out of the chicken skin, so we can pour it off before continuing. Also, the bones add depth to the liquid - they give up some of their goodness, just like making broth. After the stew is cooked, I lift the chicken out with a slotted spoon, peel off the skin, remove the bone, and rough chop the meat before stirring it back in.
  2. Floating the carrots and potatoes above the stew in a steamer basket: The steamer basket keeps them above the liquid; they steam gently, instead of boiling (and overcooking) in the stew liquid.

Both of these finesse points can be skipped if you're in a hurry - but if you don't brown the chicken thighs, peel the skin off before adding them to the pot, so the stew doesn't wind up too fatty.

Equipment

  • 6 quart or larger pressure cooker (I use an Instant Pot Duo electric pressure cooker)
  • Steamer basket (I use a collapsible basket)

Ingredients

  • Vegetable oil
  • Chicken thighs, bone-in and skin-on
  • Fine sea salt
  • Onion
  • Celery
  • Carrot
  • Tomato paste
  • Dried thyme
  • White wine
  • Chicken broth
  • Diced tomatoes
  • Baby carrots
  • Baby red potatoes
  • Fresh ground black pepper

How to make Instant Pot Chicken Stew

Browning chicken thighs in an Instant Pot
Browning the chicken thighs

Heat the vegetable oil in an Instant Pot set to Sauté mode. Season the chicken with salt, then brown the chicken thighs in two batches, about 4 minutes a side. (Don't crowd the pot.) Move the browned thighs to a bowl.

Sautéing the onion, carrot, celery, and tomato paste
Sauté the aromatics

Add the onions, carrot, celery, tomato paste, and thyme to the pot. Sauté until the onions soften, about 5 minutes. Pour in the white wine, bring to a simmer, and simmer for 3 minutes, scraping any stuck bits from the bottom of the pot.

Instant Pot full of chicken, broth, and tomatoes
Everything back in the pot

Add in the chicken broth, salt, and browned thighs (plus any chicken juices in the bowl.), and stir to combine. Pour the diced tomatoes on top, but don't stir.

Potatoes and carrots in a basket on top

Set the steamer basket on top of everything, and add the baby carrots and baby potatoes.

Pressure cook on High Pressure for 30 minutes with a 15 minute Natural Release.

Lift the basket of potatoes and carrots out of the pot, and cut the potatoes in half. Scoop the chicken thighs out with a slotted spoon and shred the chicken. (Discard the skin, bones, and any gristle). Stir the carrots, sliced potatoes, shredded chicken, and fresh ground black pepper back into the pot.

Substitutions

  • I do not drink...wine: Replace the wine with extra chicken broth.
  • Swap sweet potatoes for the baby potatoes: Peel a couple of sweet potatoes and cut them into large chunks, about 2 inches thick. Add them to the basket with the baby carrots.

Serve With

  • This stew goes great with a starchy side dish to soak up the juices, like mashed potatoes, rice, or noodles. I served this stew over baked potatoes, and it was fantastic.
  • A green vegetable (like green beans) helps balance out the hearty stew.

Tips and Tricks

  • Cornstarch slurry: if you want to thicken up the pot liquid, make a cornstarch slurry by whisking together 1 tablespoon cornstarch and 2 tablespoons cold water. Stir it into the pot after removing the chicken thighs.

Questions? Other ideas? Leave them in the comments section below.

Related Posts

Make some Instant Pot Chicken Back Broth to use in this stew.
Some other great stew recipes are my Instant Pot Chicken with 40 Cloves of Garlic, Pressure Cooker Beef Stew, or Pressure Cooker Ground Beef and Bean Chili.
Looking for something else? Here is the list of all my Instant Pot (Pressure Cooker) recipes

Enjoyed this post? Want to help out DadCooksDinner? Subscribe to DadCooksDinner via eMail or RSS reader, recommend DadCooksDinner to your friends, and buy something from Amazon.com through the links on this site. Thank you.

Instant Pot Boneless Short Ribs

September 27, 2022 by Mike Vrobel 8 Comments

A boneless beef short rib covered in wine sauce on a bed of polenta

Instant Pot Boneless Short Ribs, Red Wine Braised. Short ribs are a fantastic cut of meat for pressure cooking, and this short rib recipe makes tender beef in a fraction of the time it takes on the stovetop.

A boneless beef short rib covered in wine sauce on a bed of polenta
Instant Pot Boneless Short Ribs

Short ribs are a great cut of beef for pressure cooking. They have a big flavor and are full of connective tissue that pressure cooking breaks down into tender gelatin. The result is delicious, mouth-watering, shreddable beef.

My trip to Verona, Italy, and the many wineries in the Valpolicella wine region, inspired this recipe. My favorite meals were cuts of braised beef, served on a bed of polenta, and covered with red wine sauce. I'm recreating those dishes here, using boneless beef short ribs as the braising beef.

This recipe is similar to my other beef braises, like Pressure Cooker Beef Stew Provencal, Instant Pot Beef and Lentil Stew, or Instant Pot Oxtail.

[feast_advanced_jump_to]

🥫Ingredients

  • 2 tablespoons olive oil
  • 3 pounds boneless beef short ribs (cut about 2 inches thick)
  • 2 teaspoons fine sea salt
  • 1 large onion, minced
  • 1 medium carrot, peeled and minced
  • 1 celery rib, minced
  • ½ teaspoon fine sea salt
  • 3 cloves garlic, crushed
  • ½ teaspoon dried thyme
  • ½ teaspoon dried oregano
  • ½ teaspoon red pepper flakes
  • 2 tablespoons tomato paste
  • 1 cup red wine
  • 1 cup beef broth (homemade or store-bought low sodium)
  • ½ teaspoon fine sea salt (if using homemade broth or water)
  • 1 tablespoon cornstarch
  • 2 tablespoons cold water (or more beef broth)
  • 1 teaspoon balsamic vinegar (optional)
  • 1 teaspoon fresh ground black pepper

Gremolata for garnish (or substitute minced parsley)

  • ¼ cup parsley leaves, minced
  • 1 clove garlic, minced
  • 1 teaspoon of lemon zest (Zest from about ½ of a lemon)

How to make Instant Pot Beef Short Ribs

  1. Heat 2 tablespoons of olive oil in an Instant Pot set to Sauté mode adjusted to high. Brown the boneless short ribs on one side, in 2 batches, for about 3 minutes per batch. Move the browned short ribs to a bowl.
  2. Add a diced onion, diced carrot, diced rib of celery, and minced garlic to the pot, and sprinkle with fine sea salt. Sauté until the onion softens, about 5 minutes. Stir in the thyme, oregano, red pepper flakes, and tomato paste. Sauté until the tomato paste darkens a little, about 2 minutes.
  3. Pour the red wine into the pot and simmer for a minute to boil off some of the alcohol. Pour in the beef broth, add the browned short ribs, and lock the lid on the pressure cooker.
  4. Pressure Cook for 40 minutes with a Natural Pressure Release
  5. Remove the short ribs from the pot with a slotted spoon. Whisk the cornstarch and water to make a cornstarch slurry, and stir the slurry into the pot to thicken the pot sauce. Stir in the balsamic vinegar and fresh ground black pepper, then spoon some of the sauce over the short ribs. Serve with polenta, passing the rest of the sauce at the table.

🥘 Substitutions

  • Beef Broth: If you have homemade beef broth, use it! If not, you can use homemade chicken broth, store-bought low-sodium beef broth, or water. Chicken broth? Yes, it adds the same body as beef broth, but blends in with the big beefy flavor of the short ribs. Store-bought broth can be very salty, so try to find a low-sodium version. And, if all you have is water, that will work too. Broth adds extra body to the sauce, but enough is going on here that you won't miss it.
  • Cut the heat: This recipe has a small amount of spicy heat because of the red pepper flakes. They don't make the recipe hot, but the hint of heat helps the other flavors. If your diners can't take any heat, skip the red pepper flakes.
  • Fresh herbs vs. dried herbs: I use dried herbs in this recipe because I always have them in my pantry. During the summer, I will substitute an equal amount of minced fresh herbs for dried ones. Or, as a shortcut, I will replace the dried thyme and oregano with dried Italian seasoning.
  • Types of beef: Boneless short ribs are great for pressure cooking, but chuck roast, cut into 2-inch square strips, is a great alternative. (The chuck roast sits next to the beef ribs, so the cuts are very similar.) Top round or bottom round will also work but come out drier than the short ribs or chuck. For all these cuts of beef, the cooking time is the same.
  • wine to use: While I serve this recipe with a bottle of good wine, I don't want to use good wine for cooking. All the subtle flavors disappear during cooking. I buy cheap wine for cooking, usually in small boxes or single-serving bottles. For this recipe, I look for a red blend or a fruity wine like pinot noir. The only wine I would avoid is a sweet red - I prefer the savory sauce from a dry red wine in this recipe.
  • Avoiding alcohol: Skip the red wine, and substitute more beef broth.

Variations

  • French Provencal boneless short ribs: Provence and Italy share similar flavor profiles, so this is an easy switch. Skip the carrot and celery, and add an extra garlic clove. Leave the thyme, but replace the oregano and red pepper flakes with Herbs de Provence. Replace the red wine with a dry rosé, and skip the balsamic vinegar. Remove the lemon zest from the Gremolata, and it becomes a French Persillade.
  • Easy beef boneless short ribs: Skip the carrot and celery, and only use onion and garlic. Skip the oregano and red pepper flakes, and use 1 teaspoon of dried thyme. Skip the balsamic vinegar and Gremolata, and only garnish with minced parsley.

🛠 Equipment

A 6-quart pressure cooker (I love my Instant Pot, but any electric pressure cooker can use this recipe as written.)

📏Scaling

Doubling this recipe is tight in a 6-quart pressure cooker; you can do it, but I'd recommend an 8-quart pressure cooker. Cut all the ingredients in half, and this recipe will fit in a 3-quart pressure cooker. The cooking time does not change; it takes the same time to cook a single boneless short rib, no matter how many are in the pot.

☃️ Storage

Leftover short ribs are fantastic. I store them in 2-cup containers, with a lot of sauce, as make-ahead lunches. These short ribs last 3-4 days in the refrigerator or 6 months in the freezer.

What to Serve With Instant Pot Short Ribs

Serve with a starchy side to soak up the wonderful wine sauce. Polenta is the traditional side dish around Verona, so that's what I use in the pictures. These ribs are also fantastic with mashed potatoes, like my smashed red skin potatoes, and green beans are my default side dish. (Though, broccoli rabe is also great with this recipe if you can find it.)

Frequently Asked Questions

Why Use Cornstarch in This Recipe?

Because there is no evaporation in a pressure cooker. I want the creamy mouthfeel that simmering gives me, so I add some cornstarch to thicken up the sauce.

Why Sear the Beef on Only One Side?

I only sear meat on one side for the best balance between flavor and speed. Browning adds a lot of flavor to braises when the cooking liquid melts the browned bits stuck to the bottom of the pot. You can skip the browning step if you're in a big hurry, and the short ribs will still be good, but not quite as great as they could be. Or, if you have the patience, you can brown the meat on multiple sides to build even more flavor. "Brown on one side" is my compromise between flavor and speed.

🤝 Related Posts

Instant Pot Chuck Steak with Beer and Onions
Instant Pot Easy Beef Stew with Certified Angus Beef Bottom Round
Instant Pot BBQ Braised Short Ribs
My other Instant Pot Recipes

Enjoyed this post? Want to help out DadCooksDinner? Subscribe to DadCooksDinner via email and share this post with your friends. Want to contribute directly? Donate to my Tip Jar, or buy something from Amazon.com through the links on this site. Thank you.

Instant Pot Snowcap Beans

September 13, 2022 by Mike Vrobel 6 Comments

A bowl of cooked snowcap beans with a smaller bowl of uncooked snowcap beans

Instant Pot Snowcap Beans. Big, beautiful heirloom beans, cooked from dried in about an hour thanks to pressure cooking.

I got a big bag of Snowcap beans in my Rancho Gordo bean box this month. These colorful heirloom beans are a larger relative of cranberry beans. Unlike most multi-color beans, snowcap beans keep their tan and white spots even after cooking, making for a pretty pot of beans.

A bowl of cooked snowcap beans with a smaller bowl of uncooked snowcap beans
Instant Pot Snowcap Beans
[feast_advanced_jump_to]

If you've been reading my blog for a while, this recipe will seem very familiar because pressure cooking beans is more of a technique than a recipe. See my Instant Pot Royal Corona Beans, Instant Pot Scarlet Runner Beans, Instant Pot Kidney Beans, or Instant Pot Good Mother Stallard Beans for some other examples. Snowcaps are big beans, so I make sure to soak them for even cooking.

🥫Ingredients

  • Dried Snowcap beans
  • Onion
  • Fine sea salt
  • Bay leaves

See the recipe card for quantities.

How to make Instant Pot Snowcap Beans

  1. Sort and rinse the beans: Sort through the beans, discarding any non-bean material, or broken or odd-looking beans. Rinse the beans, then do an overnight soak or a quick soak.
  2. Overnight soak the beans: Cover the dried beans with water and soak them for at least 8 hours, or overnight.
  3. OR: Quick soak the beans: Put the dried beans in an Instant Pot or another pressure cooker, cover with water, and pressure cook for 1 minute. Let the pressure come down naturally for 30 minutes, then quick release any remaining pressure.
  4. Pressure Cook the beans for 18 minutes with a Natural Pressure Release: Drain the beans, discarding the soaking liquid. Put the beans in the pressure cooker, add 5 cups of water, sprinkle with a teaspoon of salt, then add the onions. Lock the lid and pressure cook at high pressure for 18 minutes in an Instant Pot or another electric pressure cooker, or for 15 minutes in a stovetop pressure cooker. (Use "Manual" or "Pressure Cook" mode in an Instant Pot.) Let the pressure come down naturally. (If you're in a hurry, you can quick release any remaining pressure after 15 minutes of natural release).
  5. Serve: Unlock the pressure cooker; discard the bay leaves and onion. To use as a side dish, serve the beans with their broth. If you want to use the beans in another recipe, drain them. Cooked beans keep in the refrigerator for a few days or a few months in the freezer. Enjoy!

🥘 Substitutions

Don't have an onion? You can substitute a couple of unpeeled cloves of garlic for the onion. (Or skip it.)

Don't have bay leaves? Skip them, or substitute a sprig of fresh herbs, like rosemary or thyme.

🛠 Equipment

A 6-quart pressure cooker. Pressure cooker dried beans are one of the reasons I became a pressure cooker convert. Try them - you'll never go back to canned beans. (OK, maybe you will, for convenience - but see the Storage section for tips on make ahead freezer beans.)

📏Scaling

This recipe scales down easily - cut everything in half if you don't need as many beans, or have a 3-quart pressure cooker. Scaling up runs into space issues; if you have an 8-quart pressure cooker, you can double this recipe, but doubled is too much to fit in a 6-quart pressure cooker.

🤨 Soaking Snowcap beans

Snowcap beans are so big that they need a soak to cook evenly in a pressure cooker. I do an overnight soak - when I remember - and a quick soak when I don't remember. (Which, unfortunately, is most of the time. I'm an enthusiastic home cook but not good at planning ahead.)

Sorting Beans

Beans are an agricultural product, and stuff tends to creep in when they are processed. Beans should always be sorted and rinsed before using, to get rid of any twigs, stones, clumps of dirt, or broken beans.

To sort the beans, I pour them out on one side of a rimmed baking sheet (a half-sheet pan), to keep the beans from escaping. Then I slowly run my fingers through the pile of beans, pulling them towards me on the sheet. I watch the beans as they move, looking for anything that doesn't seem right. If I see something, I poke around in the beans until I find what caught my eye, and discard it. I repeat this a couple of times, until I'm satisfied everything is out of the beans.

Then I dump the beans into a fine mesh strainer and rinse them under cold running water, to wash off any dirt or dust still on the beans.

Now the beans are sorted, rinsed, and ready for soaking or cooking.

💡Tips and Tricks

  • Salt your bean water! "Salt toughens beans" is a myth. Salting before cooking helps season the beans all the way through as they cook.
  • If your beans are still tough when the cooking time is over, especially any "floaters" at the top of the pot, this probably means you have older beans, and they dried out. (Yes, dried beans get even drier after a while.) Stir the beans, lock the lid, and pressure cook for another five minutes. Older beans take longer to cook, and if the beans have been sitting on the shelf at your store for a while, they may need extra time.
  • Simmer to thicken: If you have the time, and want thicker bean liquid, simmer the beans for 20 minutes after pressure cooking. I set my Instant Pot to Sauté mode, adjust it to low heat, set the timer to 20 minutes, and leave the lid off to let the broth evaporate.

☃️ Storage

A 2-cup container of beans, with cooking liquid, replaces a 15-ounce can of beans from the grocery store. They'll last in the refrigerator for a few days, and freeze for up to 6 months. I always make extra beans and freeze the leftovers for use in other recipes. Freezer beans are ready to use with about 5 minutes in the microwave, and are so much better than canned.

🤝 Related Posts

Instant Pot Small Red Beans (Domingo Rojo Beans)
Instant Pot Ayocote Negro Beans
Instant Pot Christmas Lima Beans
My other Instant Pot Bean Recipes

Enjoyed this post? Want to help out DadCooksDinner? Subscribe to DadCooksDinner via email and share this post with your friends. Want to contribute directly? Donate to my Tip Jar, or buy something from Amazon.com through the links on this site. Thank you.

12 Delightful Instant Pot Cheesecake Recipes

September 8, 2022 by Mike Vrobel Leave a Comment

A collage of four different cheesecakes

Here is my Instant Pot Cheesecake Recipes roundup! Cheesecake in a pressure cooker sounded so weird when I first heard about it, but now I can't imagine making a cheesecake any other way. This is my go-to dessert, especially for holidays or parties - they can be made a day or two ahead of time and refrigerated until needed. Instant Pot Cheesecake needs a couple of special tools: an electric mixer, a 7-inch springform pan (to fit in the Instant Pot), and a pressure cooker bakeware sling (to lift the pan in and out of the pot). Once you have those tools, here are a bunch of cheesecake ideas for you.

A collage of four different cheesecakes
A slice of cheesecake with sour cream topping

Instant Pot Cheesecake with Sour Cream Topping

Instant Pot Cheesecake with Sour Cream Topping. A sweet layer of sour cream topping covers this simple pressure cooker cheesecake.

Read more
A plate with a slice of mint chocolate chip cheesecake, sprinkled with more chocolate chips, and an Instant Pot in the background

Instant Pot Mint Chocolate Chip Cheesecake

Instant Pot Mint Chocolate Chip Cheesecake. Chocolate and mint are a great combination in this pressure cooker cheesecake.

Read more
A slice of lemon cheesecake with a lemon twist on top, on a yellow plate, with a lemon in a red bowl in the background

Instant Pot Lemon Cheesecake

Instant Pot Lemon Cheesecake. Sweet, tart, and sour, this pressure cooker cheesecake is a fantastic dessert to make in the Instant Pot (or any other pressure cooker).

Read more
Four mini cheesecakes in canning jars, with cherry and blueberry topping, on a wood tabletop

Instant Pot Mini Cheesecakes

Instant Pot Mini Cheesecakes. Six single serving cheesecakes in the pressure cooker.

Read more
A piece of chocolate cheesecake, topped with whipped cream and a sliced strawberry, on a red plate, in front of a bowl of chocolate chips and strawberries.

Instant Pot Chocolate Cheesecake

Instant Pot Chocolate Cheesecake. This pressure cooker cheesecake is a chocolate lover's dream.

Read more
Pressure Cooker Oreo Cheesecake | DadCooksDinner.com

Pressure Cooker Oreo Cheesecake

Pressure Cooker Oreo Cheesecake - that's right, cheesecake from a pressure cooker. With Oreos!

Read more
A piece of chocolate peppermint cheesecake, topped with whipped topping and a sprinkling of chocolate chips and crushed candy canes

Instant Pot Chocolate Peppermint Cheesecake

Instant Pot Chocolate Peppermint Cheesecake. Pressure cooker cheesecake with pieces of chocolate and peppermint make a festive Christmas dessert.

Read more
Caramel Apple Cheesecake on a wood table, in front of a jar of caramel topping and a bowl of apples with the text Instant Pot Caramel Apple Cheesecake - DadCooksDinner

Instant Pot Caramel Apple Cheesecake

Instant Pot Caramel Apple Cheesecake. An awesome Fall cheesecake, cooked in about 45 minutes thanks to pressure cooking.

Read more
A berry cheesecake in front of an Instant Pot

Throwback Thursday: Very Berry Cheesecake

Throwback to berry cheesecake for Valentine's Day

Read more
A slice of eggnog cheesecake on a red plate, with ginger snaps, an Instant Pot, and the rest of the cheesecake in the background

Instant Pot Eggnog Cheesecake

Instant Pot Eggnog Cheesecake. Holiday flavors in a pressure cooker cheesecake.

Read more
A maple cheesecake topped with maple syrup and candied walnuts. In the background is a maple leaf shaped jar of syrup and a bowl of walnuts.

Instant Pot Maple Cheesecake with Candied Walnuts

Instant Pot Maple Cheesecake with Candied Walnuts. A sweet fall treat from the pressure cooker.

Read more
A slice of chocolate chip cheesecake on a yellow plate, with a bowl of mini chocolate chips and the cheesecake in the background

Instant Pot Chocolate Chip Cheesecake

Instant Pot Chocolate Chip Cheesecake. Pressure cooker cheesecake with a layer of mini chocolate chips above and below the creamy cheesecake center.

Read more
An Instant Pot New York cheesecake topped with cherries

Instant Pot New York Cheesecake

Pressure Cooker New York Cheesecake recipe. Pressure cooker cheesecake? Yes, you want to try it. Perfectly cooked cheesecake in about an hour from your pressure cooker.

Read more

Instant Pot Rotisserie Chicken Noodle Soup

September 6, 2022 by Mike Vrobel 75 Comments

A green bowl full of chicken noodle soup

Instant Pot Rotisserie Chicken Noodle Soup - how to make a pot of homemade chicken noodle soup using a store-bought rotisserie chicken.

There is nothing better than chicken noodle soup made with homemade broth. I know, I know…making chicken broth seems like a lot of work. That's where the Instant Pot comes in; pressure cooking makes homemade broth much easier. Now, I'm not going to say it's as easy as opening a can of Campbell's - it's not - but Instant Pot Rotisserie Chicken Noodle Soup is worth the extra effort.

A green bowl full of chicken noodle soup
[feast_advanced_jump_to]

If you don't have a leftover roast chicken, where do you get the get the bones to make broth? I have two quick answers. One is chicken backs. The other is what I'm using in this recipe - a grocery store rotisserie chicken. Grab one from the case at your market, and you're on the way to Instant Pot Rotisserie Chicken Noodle Soup. (More details are in my Instant Pot Rotisserie Chicken Broth recipe.) For other recipes that use Rotisserie Chicken broth, check out my Instant Pot Rotisserie Chicken Tortilla Soup, Instant Pot Rotisserie Chicken Risotto, or Instant Pot Rotisserie Chicken and Wild Rice Soup.

Ingredients

Rotisserie Chicken Broth Ingredients

  • A rotisserie chicken
  • Onion
  • Carrot
  • Celery
  • Bay leaf
  • Fine sea salt
  • Water

Chicken Noodle Soup Ingredients

  • Butter
  • Onion
  • Carrot
  • Celery
  • Thyme
  • Fine sea salt
  • Rotisserie Chicken Broth
  • Breast meat from a rotisserie chicken
  • Potato
  • Wide egg noodles
  • Fresh ground black pepper
  • Parsley (optional)

See recipe card for quantities

How to make Rotisserie Chicken Noodle Soup

  1. Pressure cook the broth: Pull the breast meat off of the rotisserie chicken, chop it up into bite-sized pieces, and put it aside for later. Put the rotisserie chicken carcass, a peeled onion, scrubbed carrot, rib of celery, 2 bay leaves, and a half teaspoon of salt in the Instant Pot. Pour in 8 cups of water, then pressure cook at high pressure for 1 hour, and let the pressure come down naturally, about 30 more minutes. Strain the broth through a fine mesh strainer, discard the solids, and set the broth aside.
  2. Sauté the aromatics: Wipe out the Instant Pot liner, then melt 2 tablespoons of butter using Sauté mode. Add a chopped onion, chopped carrot, chopped rib of celery, and a teaspoon of dried or fresh thyme. Sprinkle with ½ teaspoon of fine sea salt, and sauté until the onion softens, about 5 minutes.
  3. Everything in the pot: Add the reserved chicken breast meat, a small diced potato, and 1 cup of wide egg noodles to the pot, then pour in the rotisserie chicken broth.
  4. Pressure cook for 4 minutes at High Pressure with a Quick Release.
  5. Stir in 1 ½ teaspoons of fine sea salt and ¾ teaspoon of fresh ground black pepper. Enjoy!

How big are rotisserie chickens?

I did some quick research on rotisserie chickens - checking the weight at my local stores - and they varied. Most were about 2 pounds, but Costco's famous rotisserie chickens were closer to 4 pounds. That's OK - one bird will give you enough bones and meat to make this soup, no matter the size.

Tips and Tricks

Save the breast meat for the soup before you start cooking. Pressure cooking the pulls the flavor out of the bones and meat into the broth, leaving the remains spent and dull. That's why I reserve the chicken breasts, saving them for the soup.

(I will eat a little of the leftover meat from the broth, as a chef's treat, but it's not something I want to serve to people.)

Don't over-noodle the soup! One cup of egg noodles isn't going to seem like much, but they expand and suck up a remarkable amount of broth. Don't add more noodles or you'll end up with a noodle stew, not soup.

What to serve with Instant Pot Rotisserie Chicken Noodle Soup

Soup and salad are the obvious choice, with rolls or a loaf of crusty bread. Or, I go back to my childhood and serve chicken noodle soup with saltine crackers.

How to Make Ahead

If you want a weeknight soup, make the broth ahead of time. Refrigerate the broth and diced chicken breast for a few days, or freeze it for a few months. Then, continue with the "sauté the aromatics" step, and the soup will be done in no time.

If you have leftovers, they freeze beautifully. I freeze them in 2-cup containers for up to six months.

What do you think?

Questions? Other ideas? Leave them in the comments section below.

Related Posts

Looking for a different Instant Pot soup? Try my Instant Pot Minestrone Soup or Instant Pot Tomato Soup. For other Instant Pot chicken recipes, check out Pressure Cooker Buffalo Chicken Wings and Pressure Cooker Chicken Legs with Herb Rub, and Instant Pot Buffalo Chicken Mac and Cheese.
Here is my Instant Pot and Pressure Cooker Recipes index.

Enjoyed this post? Want to help out DadCooksDinner? Subscribe to DadCooksDinner via email and share this post with your friends. Want to contribute directly? Donate to my Tip Jar, or buy something from Amazon.com through the links on this site. Thank you.

Instant Pot Field Peas and Snaps

August 23, 2022 by Mike Vrobel 3 Comments

A bowl of field peas and snapped green beans, with red pepper flakes, black pepper, and hot sauce in the background

Instant Pot Field Peas and Snaps. Southern style dried field peas with smoked sausage and snapped green beans, ready in under an hour thanks to pressure cooking.

I've gone bean box crazy. I subscribed to the Camellia Bean Krewe box, and now I'm getting even more beans to pressure cook. The latest box had field peas in it. Here's how I cook them up, with a New Orleans accent.

A bowl of field peas and snapped green beans, with red pepper flakes, black pepper, and hot sauce in the background
Instant Pot Field Peas and Snaps
[feast_advanced_jump_to]

(No, I'm not from New Orleans. I'm about as far away as you can get without winding up in Canada. These are still great Field Peas, though.)

This recipe is similar to my Instant Pot Cajun Pinto Beans recipe, but field peas cook like my Instant Pot Black Eyed Peas recipe, and don't need any soaking.

🥫Ingredients

  • Dried Field Peas
  • Smoked sausage (smoked andouille sausage if you can find it)
  • Onion
  • Garlic
  • Fine sea salt
  • Red pepper flakes
  • Water or chicken broth or ham broth
  • Fresh green beans
  • Fresh ground black pepper

See the recipe card for quantities.

How to make Instant Pot Field Peas and Snaps

  1. Sort and rinse 1 pound of dried field peas
  2. Put the sorted and rinsed field peas in an Instant Pot (or another pressure cooker), and add about a pound of sliced smoked sausage, one chopped onion, three smashed cloves of garlic, 1 ½ teaspoons fine sea salt, and ½ teaspoon crushed red pepper. Stir in 5 cups of water or broth.
  3. Lock the lid and pressure cook for 10 minutes. Quick release the pressure.
  4. Remove the lid, and set the pot to sauté mode adjusted to high. Stir in a half pound of snapped fresh green beans, and simmer until the green beans are tender, about 10 minutes. Stir in ½ teaspoon of fresh ground black pepper and serve.

What are field peas?

Field peas are technically beans, a variety of cowpea, and a cousin of black-eyed peas. According to Southern Living magazine, They got the name "field peas" because they are grown as a rotational crop in fields. Planting field peas helps improve the nutrients and the soil in the field, so when they are rotated out, the field is ready for the next crop.

Why "Snaps"?

The snaps were originally the green pods from the field peas, snapped and added in with the peas as they cooked. Since this recipe uses dried field peas, I don't have the snapped pods, so I'm using the common substitute of snapped green beans.

📏Scaling

This recipe scales down easily - cut everything in half if you have a 3-quart pressure cooker, or just want less of the recipe. Scaling up runs into space issues; if you have an 8-quart pressure cooker, or larger, you can double this recipe, but it's too much to fit in a 6-quart pressure cooker.

Soaking Field Peas

I don't bother soaking dried field peas. They cook for about 15 minutes under pressure (I pressure cook for 12 minutes in this recipe because of the stop-start quick pressure release to add the green beans.) If you soak them, cut the time under pressure back to about 6 minutes.

Sorting Beans

Beans are an agricultural product, and stuff tends to creep in when they are processed. Beans should always be sorted and rinsed before cooking to eliminate twigs, stones, clumps of dirt, or broken beans.

To sort the beans, I pour them out on one side of a rimmed baking sheet (a half-sheet pan), to keep the beans from escaping. Then I slowly run my fingers through the pile of beans, pulling them towards me on the sheet. I watch the beans as they move, looking for anything that doesn't seem right. If I see something, I poke around in the beans until I find what caught my eye and discard it. I repeat this a couple of times, until I'm satisfied everything is out of the beans.

Then I dump the beans into a fine mesh strainer and rinse them under cold running water to wash off any dirt or dust still on the beans.

Now the beans are sorted, rinsed, and ready for soaking or cooking.

Substitutions

Field Pea substitutes

If you can't find dried field peas, dried black-eyed peas are a great substitute in this recipe. To cook the bigger black-eyed peas through, increase the cooking time to 15 minutes at high pressure.

Can I use fresh or frozen field peas in this recipe?

Not really. This recipe is for dried field peas; fresh or frozen field peas cook much quicker and won't stand up to pressure cooking.

Smoked Sausage Substitutions

I recommend a Cajun smoked sausage (preferably Andouille) in this recipe, but any smoked pork or ham product will work. A smoked ham hock, bacon, salt pork, diced ham, or a leftover ham bone. (Or whatever leftover pork you have).

Use broth instead of water

If you want a richer bowl of Field Peas, use broth as your liquid instead of water. Instant Pot Ham Broth matches the flavor of the recipe perfectly, and Instant Pot Chicken Broth tastes good in it too. If you have store-bought broth, you can use it, but cut back on the salt in the recipe. I reduce the salt added with the beans and water to ½ teaspoon if I'm using store-bought broth.

Cut the heat

The half teaspoon of red pepper flakes adds some kick to this recipe. You can skip them if you want.

Vegetarian version

Skip the smoked sausage, substitute a tablespoon of oil for the butter, and use water or vegetable broth, and you have a vegetarian or vegan recipe.

☃️ Storage

I portion leftover Field Peas and Snaps into 2-cup containers, which will last in the refrigerator for a few days or up to 6 months in the freezer.

What to serve with Field Peas and Snaps

This recipe is on the border between a hearty side dish and a meal. I would eat it with cornbread and [collard greens] (https://www.dadcooksdinner.com/pressure-cooker-collard-greens-with-bacon/), especially on New Year's Day for good luck. They also make a complete meal if served with rice.

Inspired by: Field Peas & Snap Beans : Recipes : Camellia Brand

🤝 Related Posts

Instant Pot Black-Eyed Peas and Collard Greens
Instant Pot Beef and Black-Eyed Pea Stew
Instant Pot Pork and Black-Eyed Pea Chili
My other Instant Pot and Pressure Cooker Recipes

Enjoyed this post? Want to help out DadCooksDinner? Subscribe to DadCooksDinner via email and share this post with your friends. Want to contribute directly? Donate to my Tip Jar, or buy something from Amazon.com through the links on this site. Thank you.

Instant Pot Frittata Recipe - Basic Technique with Variations

August 16, 2022 by Mike Vrobel 2 Comments

A slice of frittata with potatoes, sausage, and peppers, with more peppers and an Instant Pot in the background

Instant Pot Frittata. The classic egg dish, pressure cooked in a springform pan in my Instant Pot, with lots of variations. (And yes, it really works!)

A slice of frittata with potatoes, sausage, and peppers, with more peppers and an Instant Pot in the background
Instant Pot Frittata
[feast_advanced_jump_to]

Pam Anderson's How to Cook Without a Book, taught me how to cook. Her book teaches basic techniques, not recipes. And the first technique in the book is the Big Dinner Frittata. I've made frittatas ever since, with whatever I can find in my refrigerator and pantry.

I stumbled across the idea of a pressure cooked frittata. My first thought was, "that will never work." My second thought was, "waitaminute - a frittata is like an egg-heavy cheesecake, right?" And I love making Instant Pot Cheesecake recipes. (So many Instant Pot Cheesecake recipes.)

🛠 Equipment

  • A 6-quart pressure cooker
  • A 7-inch by 3-inch baking pan, or 7-inch springform pan and a piece of 7-inch round parchment paper
  • A rack or trivet with handles. I love this Pressure Cooker Bakeware Sling

Ingredient Options

  • Eggs: Six large eggs or 1¼ cups of egg whites.
  • Potatoes: any type of potato (including sweet potato), peeled or skin left on for a more rustic look, diced
  • ½ pound protein: Sausage (any type), bacon, ham, or beans, sliced or diced into small pieces.
  • 1 medium-large onion, diced
  • Plus vegetables: Another ½ cup of vegetables. Pick one or more of the following:
    • Tough vegetables (optional), added with the potatoes to steam: asparagus, broccoli, kale, or other vegetables that need more cooking time, diced or chopped into small pieces
    • Tender vegetables (optional), added with the onions to sauté: Bell peppers, cherry tomatoes, baby spinach, kale, or other vegetables that need a quick sauté, diced or cut into small pieces
  • Cheese: 4 ounces shredded or grated cheese. I like pre-shredded blends, or just shredded cheddar cheese.
  • Herbs: Basil, thyme, parsley, cilantro, green onions. Mince the herbs

How to Make an Instant Pot Frittata - the Basic Technique

Here are the steps to make an Instant Pot Frittata

  • Prep the pan: Coat the inside of a 7-inch springform pan with nonstick cooking spray
  • Eggs: Whisk the eggs in a large bowl until they are a little bubbly. Stir in most of the cheese, most of the minced herbs, ½ teaspoon fine sea salt, and ½ teaspoon fresh ground black pepper.
  • Steam-sauté the Potatoes and tough vegetables (optional): Heat 1 tablespoon of oil in an Instant Pot set to sauté mode until the oil shimmers. Add ½ cup diced potato and any tough vegetables, pour in ½ cup of water, cover the pot, and cook for 5 minutes, or until the potatoes brown on the bottom. Scrape the potatoes out of the pot (they'll want to stick) and stir them into the bowl of eggs.
  • Protein: Add 1 tablespoon of oil to the pot and add the protein. (If you're using bacon, skip the oil, it has enough fat already). Sauté until cooked through, about 5 minutes.
  • Onion and tender vegetables: Add the diced onion and the tender vegetables to the pot, and stir into the protein. Sauté until the onions soften and the protein browns around the edges, about 5 more minutes. Scoop the protein, onion, and vegetables into the egg mixture, and stir.
  • Pour the loaded eggs into the springform pan, and sprinkle with the last bit of cheese.
  • Pour 1 cup of water into the Instant Pot, add a rack with handles, and carefully lower the springform pan into the pot.
  • Lock the lid and pressure cook at high pressure for 12 minutes with a 10 minute natural pressure release
  • Run a knife around the edge of the pan to loosen the frittata, then scoop it out
  • Done!

Variations

Here are some of my favorite combinations of options, mainly based on the types of omelets I can get at the restaurant:

  • Country frittata: Potatoes, breakfast sausage, onions, shredded cheddar, no herbs
  • Western frittata: Diced ham, onions, green and/or red bell peppers, shredded cheddar, no herbs
  • Vegetable frittata: Potatoes, mushrooms, onions, red bell peppers, baby spinach, fresh thyme. (This is the version for the vegetarians in your life.)
  • Southwestern frittata: No potato. Bacon, onions, canned diced green peppers, black beans, and chopped green onion.

💡Tips and Tricks

Cleaning the pot after sautéing and steaming potatoes

Steam-sautéing the potatoes makes them tender, but leaves a lot of potato starch stuck to the bottom of the pot. Use a nonstick inner pot if you have one, and then the starch will scrape up easily with a flat-edged wooden spoon. If you don't have a Nonstick pot, do three things:

  1. Extra oil: Add an extra tablespoon of vegetable oil in the beginning when you sauté the potatoes.
  2. Keep scraping: Scrape the bottom when the potatoes are done, and keep scraping with every subsequent step. You'll get some more of the potato starch in the sausage, and the onions and peppers.
  3. Simmer a little water: When all the sautéing is done, and the last ingredient is added to the bowl of eggs, add a cup of water to the pot and let it simmer while you mix the ingredients and fill the baking dish. Then, right before you add the baking dish to the pot for pressure cooking, scrape the bottom of the pot with a flat-edged wooden spoon - the simmering water will loosen a lot of the stuff stuck to the bottom. Scrape out as much starch as possible, dump the water out of the pot, and add a cup of fresh water for the pressure cooking step.
  4. Don't cover the baking dish with foil: I don't cover the dish. It cooks more evenly (and a lot faster) if you don't cover the frittata with foil. Steam will collect in the top of the dish while the frittata is pressure cooking, and that's OK. I use the edge of a folded paper towel to gently absorb the water after cooking.

Use a 7-inch springform pan with baking parchment rounds

I don't have a 7-inch baking dish, so I use the same springform pan I use for my cheesecakes. But, to ensure no egg leaks from the bottom of the pan, I put a 7-inch parchment paper round in the bottom before spraying it with the nonstick cooking spray. The advantage to the springform pan is it's easy to release the frittata - remove the sides, and you're ready to slice, no need to awkwardly scoop the first piece of frittata out of the pan.

Making your own parchment rounds

If you don't have pre-cut parchment, you can cut your own. Cut it a little bit larger than the bottom of the pan, so it comes up the sides just a touch.

What to Serve with Instant Pot Frittata

I consider frittata a one-pot (pan?) meal. I serve it with a big salad and bread.

🤝 Related Posts

Instant Pot Hard-Boiled Eggs, or Is the 5-5-5 Method a Myth?
Instant Pot Horseradish Deviled Eggs
Instant Pot Mint Chocolate Chip Cheesecake
My other Instant Pot and Pressure Cooker Recipes

Enjoyed this post? Want to help out DadCooksDinner? Subscribe to DadCooksDinner via email and share this post with your friends. Want to contribute directly? Donate to my Tip Jar, or buy something from Amazon.com through the links on this site. Thank you.

10 Favorite Instant Pot Rotisserie Chicken Soup Recipes

August 11, 2022 by Mike Vrobel 1 Comment

A collage of four different chicken soup bowls with tortilla soup, gumbo, lentil, and wild rice soup, with text saying 10 instant pot rotisserie chicken soup recipes

Here is my Instant Pot Rotisserie Chicken Soup Recipes roundup! Homemade chicken broth made me a pressure cooking fanatic. I can have a pot of fantastic broth in under two hours. (With five minutes of actual work, mostly straining out the bones, and the rest of the time free while I wait for my Instant Pot.) I happily made chicken using leftover chicken carcasses and chicken backs. (And Thanksgiving turkey leftovers - but that's a different recipe.)

A collage of four different chicken soup bowls with tortilla soup, gumbo, lentil, and wild rice soup, with text saying 10 instant pot rotisserie chicken soup recipes

Then someone suggested a store-bought rotisserie chicken. Brilliant! I save the breast meat to use in the soup, then toss the rest of the carcass in the pot with some vegetables to make the broth. And then? You're ready for any chicken soup you can think of. Here are my ten favorite recipes, with a bonus 11th recipe on making the broth.

A green bowl full of chicken noodle soup

Instant Pot Rotisserie Chicken Noodle Soup

Instant Pot Rotisserie Chicken Noodle Soup - how to make a pot of homemade chicken noodle soup using a store-bought rotisserie chicken.

Read more
A yellow bowl of tortilla soup, with shreds of chicken, jalapeno peppers, tortilla strips, and cilantro, on a teal napkin, with lime wedges and chile peppers in the background.

Instant Pot Rotisserie Chicken Tortilla Soup

Instant Pot Rotisserie Chicken Tortilla Soup. Tortilla soup with homemade pressure cooker broth from a store-bought rotisserie chicken.

Read more
A bowl of chicken jalapeño popper soup, with a jalapeno, spoon, and napkin in the background

Instant Pot Rotisserie Chicken Jalapeno Popper Soup

Instant Pot Rotisserie Chicken Jalapeno Popper Soup. Creamy, spicy soup, inspired by Jalapeño Poppers, made with pressure cooker broth from a store-bought rotisserie chicken.

Read more
A yellow bowl of rotisserie chicken and lentil soup, with spices and herbs in the background

Instant Pot Rotisserie Chicken and Lentil Soup

Instant Pot Rotisserie Chicken and Lentil Soup. A cross between a lentil curry and chicken soup, with homemade pressure cooker chicken broth from a rotisserie chicken.

Read more
Rotisserie chicken potato leek soup, with parsley and thyme

Instant Pot Rustic Rotisserie Chicken Potato Leek Soup

Instant Pot Rotisserie Chicken Potato Leek Soup. A rustic leek and potato soup with rotisserie chicken broth.

Read more
A bowl of chicken and herb soup, with bits of chicken, pancetta, herbs, and pasta visible, and an Instant Pot and bowl of arugula in the background.

Instant Pot Chicken and Herb Soup with White Beans and Acini di Peppe

Instant Pot Chicken and Herb Soup with White Beans and Acini di Peppe. Pressure cooked chicken and herb soup, Italian style, with broth and meat from a rotisserie chicken.

Read more
A bowl of rotisserie chicken lemon and rice soup, with a sprig of dill on top

Instant Pot Chicken Lemon and Rice Soup (with Rotisserie Chicken) - Avgolemono

Instant Pot Chicken Lemon and Rice Soup (with Rotisserie Chicken). Greek Avgolemono soup, with homemade broth and shredded meat from a store-bought rotisserie chicken.

Read more
A bowl of rotisserie chicken gumbo, with okra and sausage

Instant Pot Rotisserie Chicken Gumbo Soup

Instant Pot Rotisserie Chicken Gumbo Soup. A taste of New Orleans from the pressure cooker, with homemade broth from a store-bought rotisserie chicken.

Read more
A creamy bowl of chicken and wild rice soup, with a spoon, some mushrooms, and some uncooked wild rice peeking in at the edges.

Instant Pot Rotisserie Chicken and Wild Rice Soup

Instant Pot Rotisserie Chicken and Wild Rice Soup. A Minnesota classic, with homemade pressure cooker broth from a rotisserie chicken.

Read more
A bowl of Buffalo chicken soup topped with celery and blue cheese crumbles, with an Instant Pot and celery sticks in the background.

Instant Pot Buffalo Chicken Soup

Instant Pot Buffalo Chicken Soup. Spicy and tart, with the backbone of homemade chicken broth from a rotisserie chicken.

Read more
A fat separator full of rotisserie chicken broth, with an instant pot in the background

Instant Pot Rotisserie Chicken Broth

One more recipe! Instant Pot Rotisserie Chicken Broth. Homemade broth is pressure cooking's secret weapon, and it's quick and easy if you start with a store-bought rotisserie chicken.

Read more

Pressure Cooker White Rice - Instant Pot Recipe

August 9, 2022 by Mike Vrobel 31 Comments

A bowl of white rice on a wood table

Pressure Cooker White Rice (Instant Pot recipe). Foolproof, fluffy long-grain white rice from an Instant Pot or pressure cooker.

Looking for an easy, hands-off rice cooking method? Have an Instant Pot or other electric pressure cooker? They make great rice. Give it a try!

A bowl of white rice on a wood table
Pressure Cooker White Rice - Instant Pot Recipe
[feast_advanced_jump_to]

I used to make rice on the stove top. I thought: it takes about the same amount of time, stovetop or Instant Pot, so why bother using the pressure cooker?
Then, one night, I had to make Instant Pot rice because I needed the space on the stovetop. Now my Instant Pot is also my rice cooker. Why? Because I can make rice while I'm only half paying attention. Fill the pot with rice and water, set it for 4 minutes, lock the lid, and listen for the beep. Then, set a timer for 10 minutes, and when that goes off, quick release any remaining pressure. When I'm busy in the kitchen - tossing my way through a stir fry, for example - it's good to have a quick and easy side dish.

How Long Should I Cook the Rice in the Instant Pot?

Instant Pot rice takes 4 minutes at high pressure, with a 10-minute natural release. (The 10 minutes lets the rice in the instant pot finish cooking.) After 10 minutes, quick release any pressure left in the pot.

How Much Water Should I Use?

I use a rice-to-water ratio of 1 cup of rice to 1¼ cups of water. That's less water than I use on the stovetop (1 cup rice to 1 ½ cups water) because the sealed pressure cooker prevents evaporation.

Should I Rinse Rice before I Put it in the Instant Pot?

Please do not rinse enriched rice! In the US, most white rice is "enriched" with a coating of nutrients as part of processing the rice. Rinsing washes away the nutrients, so don't do it! The point of rinsing the rice is to clean it. That was a good idea in the old days, but modern rice producers clean the rice as part of their processing, so it's unnecessary.
That said, if you insist on rinsing your rice, It doesn't change the recipe. Rinse the rice in a fine mesh strainer under cold running water until the water runs clear.

Tips for Cooking Fluffy Rice in a Pressure Cooker

Long-grain rice is the key to fluffy rice. Medium and short-grain rice have more starch, making stickier rice. I use a lot of Jasmine rice, but any long-grain or extra-long-grain rice variety will do.

What kind of rice should I use?

This recipe will work with most types of rice. My favorites are long-grain or extra-long-grain varieties of white rice, so that's what I recommend with this recipe. If you want to cook brown rice, use my recipe for Instant Pot Brown Rice - Jasmine. Or, if you want to cook a wild rice blend, check here: Instant Pot Wild Rice Blend.

What's the difference between extra-long-grain rice and long-grain rice?

I was curious about the extra-long grain rice from brand-name US rice companies. I emailed the three rice producers I can buy at my local grocery stores; only one got back to me, and they referred me to the rice varieties page on USARice.com. But USARice only talks about long-grain rice on that page, and they don't mention extra-long-grain rice. They do say that long-grain rice is 6-8mm long. So, I got out my digital calipers, measured the three extra-long grain rice varieties I had, and compared them to a bag of generic long-grain rice. The extra-long rice grains were about 8mm; the "regular" long grains were more in the middle of the range, 6-7mm. Maybe extra-long grain rice is a specific variety of long-grain rice (like jasmine or basmati rice) that tends to be on the long end. Or, maybe extra-long is a marketing term for long-grain rice that is a little longer than average, kind of like "prime" graded meat. If you know any details about what extra-long grain rice means, please leave a comment!

Why don't you use the rice button?

I don't use the rice button because I like to be in control of my pressure cooker. I get perfectly cooked rice by setting the pot to pressure cook for 4 minutes, so why try the rice button?

What do you think?

Questions? Other ideas? Leave them in the comments section below.

Related Posts

Pressure Cooker Red Beans and Rice
Pressure Cooker Risotto with Goat Cheese
Stove Top Basic White Rice
Instant Pot Coconut Rice
Instant Pot Brown Basmati Rice

Enjoyed this post? Want to help out DadCooksDinner? Subscribe to DadCooksDinner via eMail or RSS reader, recommend DadCooksDinner to your friends, and buy something from Amazon.com through the links on this site. Thank you.

Summer Vacation 2022

July 19, 2022 by Mike Vrobel Leave a Comment

Lake Erie after sunset

I'm on vacation on the shores of Lake Erie. I'll be back in a couple of weeks with new recipes!

Instant Pot Smoked Salmon Deviled Eggs

July 12, 2022 by Mike Vrobel Leave a Comment

A smoked salmon deviled egg on a teal egg plate

Instant Pot Smoked Salmon Deviled Eggs. A smoked salmon appetizer in a one-bite package thanks to 5-5-5 Instant Pot hard-boiled eggs.

Smoked salmon is one of my favorite appetizers. I am always tempted when I see it on a menu. So, when I was looking for a new deviled egg idea, Ina Garten's smoked salmon deviled eggs caught my attention.

A smoked salmon deviled egg on a teal egg plate
Instant Pot Smoked Salmon Deviled Eggs
[feast_advanced_jump_to]

Now, I don't want to contradict the Barefoot Contessa. She knows what she's doing. But, my deviled egg technique is different from hers. A lot different. She mixes her filling with an electric mixer, making almost an egg yolk mousse. Me? I'm a "smash it with a fork" kind of deviled egger. My deviled egg recipes follow a basic technique, which I use in a bunch of different ways (like Instant Pot Beet Pickled Deviled Eggs, Instant Pot Wasabi Deviled Eggs, or Instant Pot Buffalo Deviled Eggs). So, I'm taking Mrs. Garten's basic idea and giving it my own personal spin.

🥫Ingredients

  • Eggs
  • Mayonnaise
  • Capers
  • Red onion
  • Dijon mustard
  • Smoked salmon
  • Fresh dill

See the recipe card for quantities.

How to make Instant Pot Smoked Salmon Deviled Eggs

  1. Hard boil the eggs. Use the Instant Pot 5-5-5 hard-boiled egg method. Put six eggs on a rack in an Instant Pot and pour in a cup of water. Pressure cook for 5 minutes, let the pressure come down naturally for 5 minutes, quick release the remaining pressure, then cool the eggs in an ice water bath for (at least) 5 minutes.
  2. Prep the fillings: Mince the capers, red onion, and smoked salmon.
  3. Peel and halve the eggs, separate the yolks from the whites, and mash the yolks.
  4. Make the filling: Mix the mashed yolks with mayonnaise, dijon mustard, minced capers, red onion, and smoked salmon. Scoop it into a quart-sized zip-top bag.
  5. Make the deviled eggs: Snip the corner off the bag and pipe the filling into the egg whites. Top each egg with a strip of smoked salmon and a sprig of fresh dill. Enjoy!

🥘 Substitutions

Smoked salmon, capers, and minced red onion are the standard "smoked salmon appetizer" ingredients, so I consider them essential. But, just in case…

Smoked salmon: any smoked fish will work here - I used smoked trout once when it was available.

Capers: You can skip them, but I like the pickled taste they add.

Red onion: Substitute any onion or (even better) shallots for the red onion.

If you don't have Dijon mustard, cheap yellow mustard works fine.

My brother-in-law is the deviled egg whisperer in our family, and he recommends Miracle Whip instead of mayonnaise. I never have it on hand, so I use mayonnaise, and these eggs taste great to me. But, if you are a Miracle Whip fan, go ahead and use it.

The dill sprigs and extra strips of smoked salmon are a nice garnish, but not necessary. Skip them if you want.

🛠 Equipment

A 6-quart pressure cooker. And, because we're using the pressure cooker as a pressure steamer to cook the eggs, a steamer basket, rack, or baking sling holds the eggs above the water.

A quart-sized zip-top bag to use as a piping bag, and a pair of scissors to snip off the tip of the bag.

📏Scaling

This recipe can be doubled or halved. Keep the 1 cup of water in the pressure cooker the same, and double or halve the rest of the ingredients. When I make deviled eggs for a party, I double the eggs in the cooker to make two different types. (I like variety in my deviled eggs.) I have gone as high as an 18-pack of eggs in my 6-quart pressure cooker.

☃️ Storage

The recipe can be prepped up to a day ahead. Cook the eggs, mix the filling, and put it in the quart bag. Put the egg white halves in a gallon bag in a paper towel, and refrigerate the filling and eggs until you are ready to serve. Pipe the eggs and top them right before serving.

If you have leftover filled deviled eggs, they will last a couple of days in the refrigerator, covered with plastic wrap, but the filling gets a little soft and runny.

💡Tips and Tricks

  • The key to Instant Pot hard-boiled eggs is the 5-5-5 timing. Five minutes at high pressure, five minutes of natural pressure release before quick releasing any remaining pressure, and five minutes (at least) in an ice bath. Perfect eggs every time.
  • The tricky part of this recipe is cleanly slicing the eggs in half. I use a sharp, thin paring knife. I clean it after every egg by dunking it in a glass of warm water and then wiping it with a paper towel. The other key is to be decisive - make one clean, continuous slice through the egg. He who hesitates is lost…or at least has eggs with zig-zag edges.
  • The final trick is using a zip-top bag as a pastry bag. It gives you a lot of control when piping the mashed egg filling into the eggs. A cheap plastic bag with one corner snipped stands replaces a fancy pastry bag.

🤝 Related Posts

Instant Pot Horseradish Deviled Eggs
Instant Pot Sun-Dried Tomato Deviled Eggs
Instant Pot Guacamole Deviled Eggs
My other Instant Pot and Pressure Cooker Recipes

Enjoyed this post? Want to help out DadCooksDinner? Subscribe to DadCooksDinner via email and share this post with your friends. Want to contribute directly? Donate to my Tip Jar, or buy something from Amazon.com through the links on this site. Thank you.

Instant Pot Beef and Lentil Stew

June 28, 2022 by Mike Vrobel 2 Comments

A bowl of lentil and beef stew with an Instant Pot and parsley in the background

 Instant Pot Beef and Lentil Stew, hearty lentils with tender pieces of beef chuck, ready in about an hour, thanks to pressure cooking.

I have a bag of lentils in my Summer Camellia bean box, and I also have an unseasonably cold late day in late spring. I need a robust dinner to warm up, so it's time for lentil and beef stew.

A bowl of lentil and beef stew with an Instant Pot and parsley in the background
Instant Pot Beef and Lentil Stew
[feast_advanced_jump_to]

Beef & Lentil Stew at Camellia Beans inspired this recipe. It is a cross between my beef stew technique (like this Instant Pot Beef and Black-Eyed Pea Stew) and my lentil technique (like this Pressure Cooker Lentil and Bacon Soup).

If you're looking for a simple bowl of lentils, try my Instant Pot Lentil Curry.

🥫Ingredients

  • Olive oil
  • Beef chuck
  • Fine sea salt
  • Onion
  • Celery
  • Garlic
  • Dried thyme
  • Red wine
  • Carrots
  • Beef broth or chicken broth
  • Crushed tomatoes
  • Fresh ground black pepper
  • Minced parsley for garnish

See the recipe card for quantities.

🥘 Substitutions

Types of beef: I prefer chuck roast for pressure cooking, but top round or bottom round will also work. Boneless short ribs are an excellent replacement for the chuck roast. For all these cuts of beef, the cooking time is the same.

Vegetarian/Vegan: If you want a vegetarian version of this recipe, skip the meat and substitute vegetable broth for the beef broth. Then, instead of softening the onions, cook them until they are browning at the edges to add caramelized onion flavor to the stew.

Avoiding alcohol: Skip the red wine, and substitute a bit more beef broth or chicken broth to deglaze the pan

Broth or water: I like the extra depth that broth adds to this recipe, especially homemade beef or chicken broth. (Chicken broth is neutral enough that it works in this beef dish. It doesn't taste "like chicken"; it just adds body.) If you're using store-bought broth, try to get a low-sodium variety because store-bought broth can be very, VERY salty. Also, you can use water instead of broth if you want a simpler recipe. Just don't forget the extra salt, or it will taste flat.

What type of lentils can I use in this recipe?

Any kind of lentil will work in this recipe. I used common Brown lentils, available at every grocery store in my area. If you want to get fancy, try French green lentils du Puy, Italian Umbrian Lentils, or Indian red lentils in this recipe.

How to make Instant Pot Beef and Lentil Stew

  1. Sort and rinse the lentils: Sort the lentils, then rinse them under cold running water. Set aside for later.
  2. Sear the beef: Cut the chuck roast into 1-inch cubes and season with salt. Heat vegetable oil in the Instant Pot set to Sauté mode, and brown the beef in two batches, browning on one side only, about 3 minutes a batch. Move the beef to a bowl for later.
  3.  Sauté the onion, celery, and garlic: Add the minced onion, celery, and garlic to the pan, and season with fine sea salt and dried thyme. Sauté until the onion softens, about 5 minutes.
  4. Deglaze with wine:  Pour in the red wine, bring to a simmer, and simmer for a minute to boil off some of the alcohol.
  5. Everything in the pot: Add the seared beef (and any juices in the bowl), the sorted and rinsed lentils, beef broth, and crushed tomatoes to the pot. Stir, then add a layer of peeled carrots on top.
  6. Pressure cook for 15 minutes with a Natural Release: Lock the lid on the pot, and pressure cook at high pressure for 15 minutes in an Instant Pot or other electric pressure cooker, or for 13 minutes in a stovetop PC. Let the pressure come down naturally for at least 15 minutes.
  7. Serve: Open the pressure cooker, stir in the fresh ground black pepper, and serve.

🛠 Equipment

A 6-quart pressure cooker

📏Scaling

This recipe doubles if you have an 8-quart pressure cooker. (It's a bit too much for a 6-quart pressure cooker.) Cut all the ingredients in half and this recipe will fit in a 3-quart pressure cooker. The cooking time does not change; it takes the same amount of time to cook the cubes of beef and lentils, no matter how many.

☃️ Storage

You can make this pot of stew a day ahead, refrigerate the inner pot (covered), and reheat it the next day. For longer storage or storing leftovers, I portion the stew into 2-cup storage containers, which will keep for a couple of days in the refrigerator or up to 6 months in the freezer.

💡Tips and Tricks

  • Why do I brown the meat on only one side? Browning adds a lot of flavor to the recipe. Browning the meat itself adds flavor to the cubes of beef, and the layer of caramelized brown bits left in the pot ("fond" in French) dissolve into the liquid, adding depth and body to the stew. That said, I only brown the beef on one side. It takes too long to brown the meat on all sides - I do not have the patience, and the browned bits start to burn after the second or third batch. Browning one side gives me the best balance of flavor and speed.
  • Can I skip the browning step? Yes, you can, but as I said above, you're going to lose some of the flavor. I consider it an essential step, but if it's the difference between making the recipe and not having time to make the recipe, go ahead and skip it.

What to Serve with Instant Pot Beef and Lentil Stew

I love the combination of lentils and rice, so I make a pot of Instant Pot White Rice or Instant Pot Brown Rice as a side dish. Though, any starchy side (like Instant Pot Mashed Potatoes) will also work.

🤝 Related Posts

Instant Pot Quick Lentil Curry
Instant Pot Ethiopian Red Lentils (Misir Wat)
Instant Pot Rotisserie Chicken and Lentil Soup
Instant Pot Misir Wat (Ethiopian Red Lentils)
Instant Pot Vegetable Beef Soup
Instant Pot Beef and Barley Soup
Instant Pot Colombian Beef Short Rib Soup
My other Instant Pot and Pressure Cooker Recipes

Enjoyed this post? Want to help out DadCooksDinner? Subscribe to DadCooksDinner via email and share this post with your friends. Want to contribute directly? Donate to my Tip Jar, or buy something from Amazon.com through the links on this site. Thank you.

Instant Pot BBQ Meatballs

June 21, 2022 by Mike Vrobel 4 Comments

A plate of BBQ meatballs with frilly toothpicks, and an Instant Pot and more toothpicks in the background

Instant Pot BBQ Meatballs take the taste of barbecue and roll it into bite-sized meatballs, ready to eat in about 30 minutes thanks to pressure cooking.

BBQ meatballs are a potluck classic. But the version everyone knows, with "only three ingredients!" of frozen meatballs, grape jelly, and barbecue sauce? It needed help. I don't need rubbery, frozen, store-bought meatballs. I can roll my own, thankyouverymuch.

A plate of BBQ meatballs with frilly toothpicks, and an Instant Pot and more toothpicks in the background
Instant Pot BBQ Meatballs
[feast_advanced_jump_to]

(Am I surprised that the original recipe is from Welch's, the grape jelly people? No. I'm not.)

I'm taking this recipe closer to the authentic flavors of barbecue with my homemade bbq rub and homemade easy bbq sauce. (That said, while there's no grape jelly in this recipe, it will turn out great with store-bought BBQ Rub and BBQ Sauce.)

If you're looking for some other Instant Pot Meatballs recipes, check out my basic Instant Pot Meatballs recipe, my Instant Pot Spanish Meatballs, my Instant Pot Chinese Pork Meatballs, or my Instant Pot Greek Meatballs.

🥫Ingredients

  • Meatloaf mix (Ground beef and pork)
  • Plain bread crumbs
  • BBQ Rub
    • fine sea salt
    • Paprika
    • Brown sugar
    • Chili powder
    • Black pepper
    • Garlic powder
    • Onion powder
  • Egg
  • Liquid smoke
  • BBQ sauce
    • Ketchup
    • Brown sugar
    • Cider vinegar
    • Dijon mustard
    • Soy sauce

See the recipe card for quantities.

🥘 Substitutions

  • Store-bought rubs and sauce: The quickest way to simplify this recipe is to buy the BBQ rub and BBQ sauce instead of making them yourself.
  • Sauce alternatives: Want to use a mustard-based BBQ sauce? Or hot wing sauce? Go for it; they'll taste great.
  • Meatball meats: You don't have to get meatloaf mix; you can use all ground beef or all ground pork. Or, substitute ground turkey. I don't recommend using ground chicken; it is too soft for this recipe, and the meatballs collapse into a meatloaf instead of coming out as individual bites.
  • Frozen meatballs. I'd rather not, but you're an adult and can make your own decisions. If you cook from frozen, buy smaller meatballs, and increase the cooking time at High Pressure to 8 minutes. Skip the BBQ rub (it will just bounce off frozen meatballs), and toss them with the BBQ sauce when they're done cooking.
  • Liquid Smoke: If liquid smoke is too weird for you, it's optional. Go ahead and skip it. But try it at least once. The hint of smoke flavor adds depth to the meatballs, and I think you'll like it. And, speaking of liquid smoke:

What is liquid smoke?

Liquid Smoke is made by burning wood in a low-oxygen environment and distilling the water vapor that is produced. That's right; liquid smoke is condensed wood smoke. It's a side effect of making charcoal, and "wood vinegar," as everyone else calls it, has been around for centuries. (Pliny the Elder mentions it back in Ancient Rome. See, Latin class was worth something!)

An Instant Pot with a red baking sling covered with uncooked meatballs
Meatballs ready to cook

How to make Instant Pot BBQ Meatballs

  1. Make the BBQ Rub: In a small bowl, mix the BBQ rub ingredients (See recipe for list), or buy a store-bought rub.
  2. Make the BBQ Sauce: In a medium bowl, whisk the BBQ sauce ingredients (See recipe for list), or buy a store-bought BBQ sauce (I enjoy a sweet honey bbq sauce with this meatballs recipe).
  3. Mix and shape the homemade meatballs: Mix the ground beef and pork with the bread crumbs, onion, garlic, parsley, salt, paprika, oregano, and a beaten egg. Shape into 1 tablespoon wide meatballs.
  4. Add a cup of water and a tablespoon of liquid smoke to the Instant Pot or other pressure cooker, then add the rack or a pressure cooker baking sling.
  5. Stack the meatballs in two layers on the rack.
  6. Lock the lid and pressure cook on High Pressure for 5 minutes with a Natural P

🛠 Equipment

A 6-quart pressure cooker and a pressure cooker rack. (I use this fancy silicone baking sling, but the rack that came with your pressure cooker will also work.) A small cookie scoop (1 tablespoon) helps shape the meatballs. For the luxury appetizer experience, use toothpicks to make them easy to eat one-handed. (Especially if you use frilly toothpicks as I do in the picture.)

📏Scaling

This recipe doubles easily in a 6-quart pressure cooker. Cut all the ingredients in half, and this recipe will fit in a 3-quart pressure cooker. Only use one cup of water either way because the pressure cooker needs that much to come up to pressure and steam the meatballs. The cooking time does not change; it takes the same time to cook a single meatball, no matter how many are in the pot.

☃️ Storage

Don't sauce the meatballs If you want to serve them later or freeze them. They'll keep in the refrigerator for a few days or in the freezer for up to six months. Reheat them in the oven, then toss them with the BBQ sauce.

💡Tips and Tricks

  • Cookie scoops are my meatball secret weapon. I use a small, 1 tablespoon cookie scoop for these appetizer-sized meatballs. It makes it easy to portion and dish out the meatballs, and they come out mostly formed, only needing a little shaping.
  • Larger meatballs: Use a medium-sized cookie scoop, 3 tablespoon size, for the meatballs. They should come out about 2 inches in diameter. Increase the cooking time to 15 minutes at High Pressure.
  • My pressure cooker bakeware sling has a rim around the bottom and convenient handles. So, when I'm feeling adventurous, I lift the entire sling full of cooked meatballs out of the pot and onto a platter. (I have never bumped my elbow on the cooker's lid and dumped them all over my counter and sink, oh no, not me.)

What to Serve with BBQ Meatballs

This Instant Pot recipe makes a great party appetizer. Or, if you make them larger, they can be the main course for a smaller gathering. I serve them with what I think of as the Barbecue Side dishes: Cole slaw, potato salad, baked beans, and pickles.

🤝 Related Posts

Instant Pot Spare Ribs with BBQ Rub and Sauce
Instant Pot Crispy Brisket Bites
Instant Pot Pork Belly Burnt Ends
My other Instant Pot and Pressure Cooker Recipes

Enjoyed this post? Want to help out DadCooksDinner? Subscribe to DadCooksDinner via email and share this post with your friends. Want to contribute directly? Donate to my Tip Jar, or buy something from Amazon.com through the links on this site. Thank you.

Instant Pot Spare Ribs with BBQ Rub and Sauce

June 14, 2022 by Mike Vrobel 12 Comments

Individual spare ribs brushed with sauce on a red plate with a bowl of barbecue rub in the background

Instant Pot Spare Ribs with BBQ Rub and Sauce are fall-off the bone tender after pressure cooking.

I know, I'm already cheating by cooking my ribs in an Instant Pot. Liquid smoke felt like a bridge too far. But…everyone else kept using it. And they left comments in my rib recipes singing its praises. Liquid smoke? Really? I had to try it out, expecting to say "Ha!. It's not worth it!"

Instead, I'm asking myself: why did I wait so long to use liquid smoke?

Individual spare ribs brushed with sauce on a red plate with a bowl of barbecue rub in the background
Instant Pot Spare Ribs
[feast_advanced_jump_to]

What are Spare Ribs?

Spare ribs are pork ribs from the lower part of the ribcage, with the sternum and rib tips still attached. They are larger than baby back ribs, which come from the upper part of the ribcage, and spare rib meat has more fat and connective tissue. Spare ribs take longer to cook than baby back ribs, but are juicier when they're done cooking, thanks to that fat and connective tissue. Sometimes you will see St. Louis Cut spare ribs, with the rib tips and sternum removed. You can substitute St. Louis Cut for regular spare ribs in this recipe, and the instructions and cooking time remain the same.
If you want to make baby back ribs, check out my Instant Pot Baby Back Ribs; if you have Western ribs (aka Country ribs), use my Pressure Cooker Pork Western Shoulder Ribs with Barbecue Rub and Sauce recipe.

How to Make Instant Pot Spare Ribs

Spare ribs in the Instant Pot are almost too easy. The steps are:

  • Peel the membrane off the back of a slab of spare ribs.
  • Cut the slab into 4 pieces, between every 3rd bone, then season the ribs with BBQ dry rub.
  • Pour a cup of water into the Instant Pot (or another pressure cooker) and then loosely stack the ribs, bone side down.
  • Lock the lid and pressure cook for 30 minutes, then let the pressure release naturally.
  • Brush the ribs with a layer of BBQ sauce, then (optionally) broil them for a few minutes to tighten up the sauce.
  • Brush with another layer of sauce and serve these finger licking ribs.

Testing liquid smoke with Instant Pot Spare Ribs

I made two batches of Instant Pot Spare Ribs, one with a tablespoon of liquid smoke in the water, the other without. I expected a strong woody flavor, kind of like over-smoked meat; instead, I got a flavor enhancer. It's a terrible description, but the liquid smoke ribs taste "meatier," not smokier. I'm a liquid smoke convert, and I'm going to update all my pressure cooker ribs recipes to recommend it.
I know, I know. I was once a One True BBQ fanatic myself. And I still pull out the grill when I can. But, when time is short, I take the easy way to tender Instant Pot spare ribs.

What is liquid smoke?

Liquid Smoke is made by burning wood in a low-oxygen environment and distilling the water vapor that is produced. That's right; liquid smoke is actually condensed wood smoke. It's a side effect of making charcoal, and "wood vinegar", as everyone else calls it, has been around for centuries. (Pliny the Elder mentions it back in Ancient Rome. See, Latin class was worth something!)

🛠 Equipment

A 6-quart pressure cooker

📏Scaling

To double this recipe, you need an 8-quart pressure cooker, because ribs take up a lot of space. You can halve the recipe, but you need a 6-quart pressure cooker. Slabs of spare ribs are too big to fit in a 3-quart pressure cooker.

💡Tips and Tricks

  • Want super-tender ribs? Increase the pressure cooking time to 45 minutes in an Instant Pot or other electric PC or 38 minutes in a stovetop PC. In my tests, when I cook ribs for that long, the slab is falling apart. I prefer a little bite to my ribs, but if you want ultra-tender ribs, go longer.
  • Finesse the sauce - stir ¼ cup of the cooking liquid from the pot into the sauce before brushing on the ribs. It will take some of the porky goodness from the liquid and add it back to the recipe.
  • The liquid smoke is optional…but as I found out, it's worth using it. Look near the barbecue sauce at your local grocery store.
  • If you want dry rub ribs, skip the BBQ sauce, and sprinkle on some more BBQ rub after pressure cooking. (Or check out my Instant Pot Baby Back Ribs with Memphis Dry Rub recipe).

Serving Suggestions

These ribs are the taste of a summer barbecue any time of the year. I serve them with cole slaw, my Instant Pot Potato Salad, my Instant Pot Cajun Pinto Beans, and a cold beverage.

What do you think?

Questions? Other ideas? Leave them in the comments section below.

Related Posts

Pressure Cooker St Louis Cut Spareribs with Espresso Chipotle BBQ Sauce
Instant Pot Hawaiian BBQ Ribs
Instant Pot Spanish Ribs with Pimenton Dry Rub
Pressure Cooker Beef Back Ribs Texas BBQ Style
Instant Pot Pulled Pork
My other Instant Pot and Pressure Cooker Recipes

Enjoyed this post? Want to help out DadCooksDinner? Subscribe to DadCooksDinner via email and share this post with your friends. Want to contribute directly? Donate to my Tip Jar, or buy something from Amazon.com through the links on this site. Thank you.

  • « Previous Page
  • 1
  • …
  • 4
  • 5
  • 6
  • 7
  • 8
  • …
  • 37
  • Next Page »

Welcome to Dad Cooks Dinner!

I'm Mike Vrobel, a dad who cooks dinner every night. I'm an enthusiastic home cook, and I write about pressure cooking, rotisserie grilling, and other food topics that grab my attention.

More About Me →

Popular

  • Three bowls of cooked Pinto Beans on a wood table
    Instant Pot Pinto Beans (No Soaking)
  • Pressure Cooker Beef Shank (Osso Bucco)
  • Pressure Cooker 7 Hour Leg of Lamb (in 90 minutes)
    Pressure Cooker 7 Hour Leg of Lamb (in 90 minutes)
  • Pressure Cooker Brown Jasmine Rice
  • Grilled Tomahawk Steak (Long Bone Ribeye, Reverse Seared)
    Grilled Tomahawk Steak (Long Bone Ribeye, Reverse Seared)
  • A green bowl full of chicken noodle soup
    Instant Pot Rotisserie Chicken Noodle Soup

Seasonal

  • A bowl of asparagus risotto
    Instant Pot Asparagus Risotto (Pressure Cooker Recipe)
  • Grilled Butterflied Chicken with Garlic Butter
  • Sous Vide rack of lamb sliced into chops
    Sous Vide Rack of Lamb with Dijon Bread Crumb Crust
  • A bowl of beef stew with asparagus, carrots, and radishes.
    Instant Pot Spring Vegetable Beef Stew
  • A Rotisserie Chicken (Pollo Asado)on a platter of shredded cabbage
    Rotisserie Chicken Pollo Asado
  • Rotisserie Pork Shoulder Roast with Carolina Mustard BBQ Sauce
    Rotisserie Pork Shoulder with South Carolina Mustard Barbecue Sauce

Footer

↑ back to top

About

  • Privacy Policy

Newsletter

  • Sign Up! for emails and updates

Contact

  • Contact

Copyright © 2025 Dad Cooks Dinner