DadCooksDinner

  • Home
  • Rotisserie
  • Recipes
  • Tools
  • Books
  • Merch
menu icon
go to homepage
  • Recipes
  • Books
  • Tools
  • Merch
  • About
subscribe
search icon
Homepage link
  • Recipes
  • Books
  • Tools
  • Merch
  • About
×
Home » Recipes

Grilled Salmon With Coriander-Fennel Spice Rub

October 3, 2023 by Mike Vrobel 5 Comments

Salmon filets on the grill

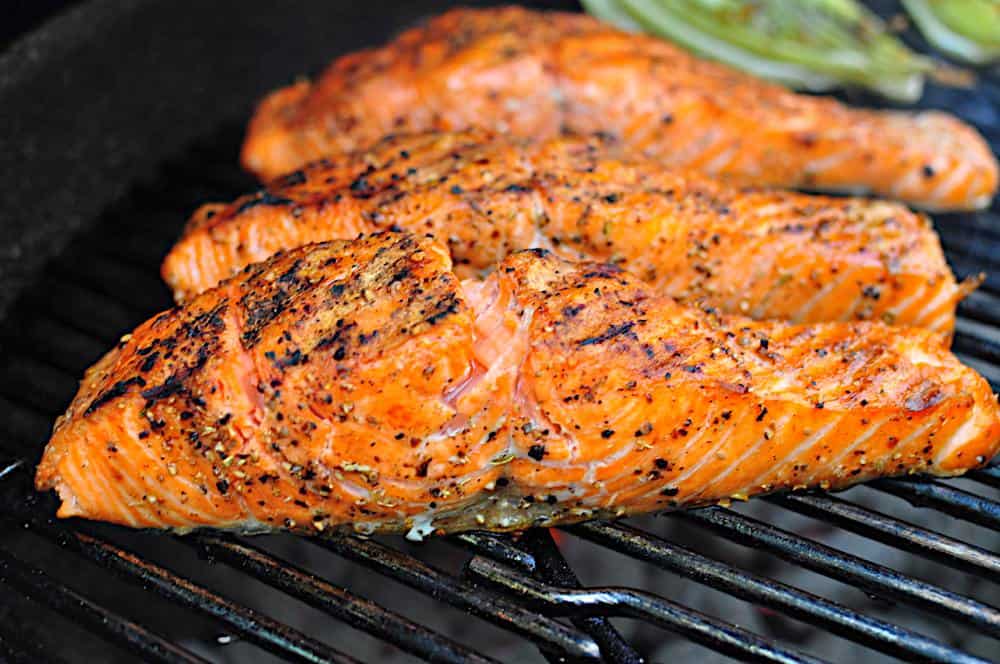
Grilled Salmon With Coriander-Fennel Spice Rub. Grilled salmon with a simple spice rub is a great way to show off a fantastic piece of fish.
I was in the mood for seafood. What was waiting for me at the fish market? Absolutely gorgeous wild Alaska king salmon. Yes, it was expensive. It was worth every nickel.
With fish this good, my goal is…don't screw it up. I grill it simply, with salt and a light spice rub, to medium doneness, with a hint of pink still in the middle. My goal is to showcase the buttery salmon, giving it a touch of spice crust and a suggestion of smoke.

Salmon filets on the grill
[feast_advanced_jump_to]

Ingredients

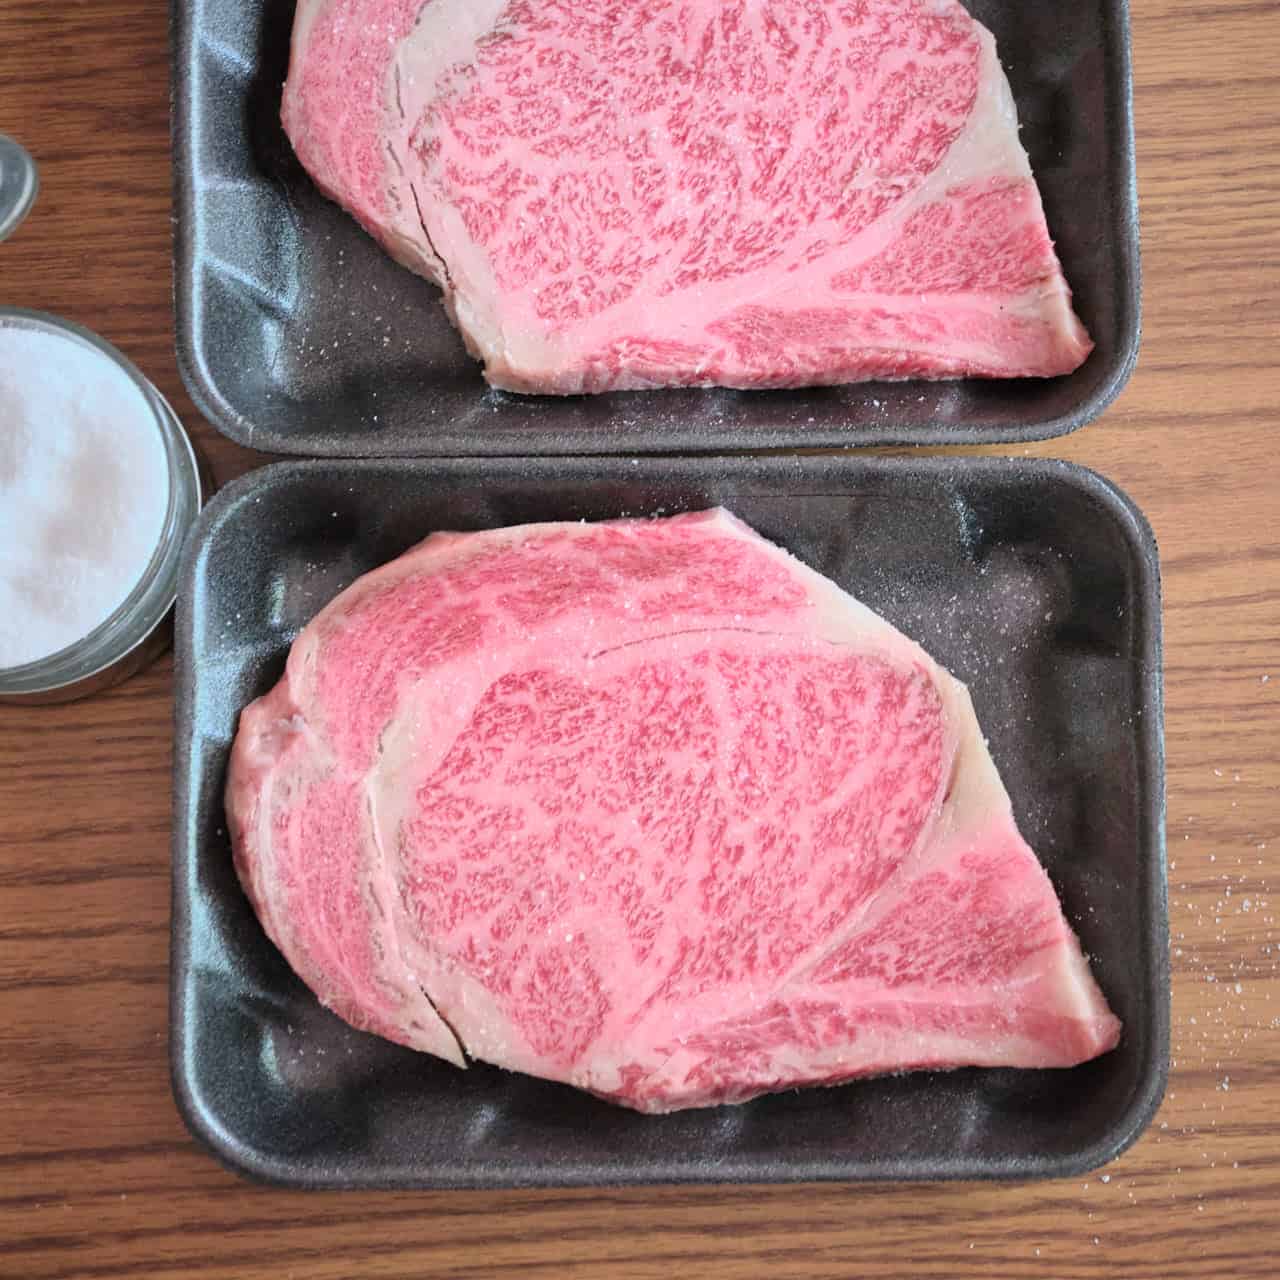
  • 4 (2-inch wide) skin-on salmon fillets (About 2 pounds of salmon, preferably wild salmon)
  • 1 teaspoon Kosher salt (or ¾ teaspoon fine sea salt)
  • 1 teaspoon black peppercorns (or 1 teaspoon ground pepper)
  • ½ teaspoon coriander seed (or ½ teaspoon ground coriander)
  • ¼ teaspoon fennel seed (or ½ teaspoon ground fennel)

Instructions

Prepare the grill for medium-high heat cooking (400°F)

Prepare your grill for cooking with medium-high heat (400°F), then clean the grate thoroughly with a grill brush and a paper towel dipped in vegetable oil. For my Weber kettle charcoal grill, I light a chimney starter ¾ full of charcoal, wait for it to be covered with ash, then pour it in a tight single layer over one half of the grill grate. (That half of the grill is the direct heat side where we will be doing the cooking.) For my Weber Summit gas grill, I preheat the grill with all burners set to high, then turn them down to medium-high. Then I brush the grate clean with my grill brush, and wipe it with a folded paper towel dipped in vegetable oil. (Held with tongs, of course - please don't bare-hand a paper towel soaked with oil over flaming coals.)

Spices ground in a mortar and pestle

Season the salmon

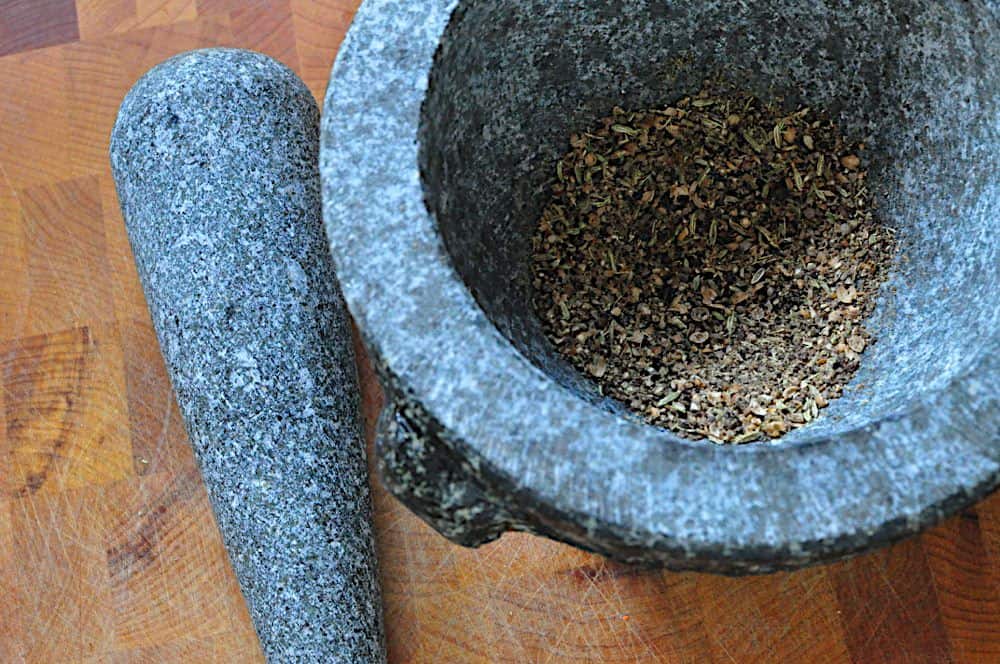
While the grill is pre-heating, grind the peppercorns, coriander seed, and fennel seed. (I grind them in a mortar and pestle, or in my spice grinder.) Sprinkle the flesh side of the salmon evenly with the salt, then with the coarsely ground spice rub.

Searing Salmon on a grill, flesh side down

Cook the salmon

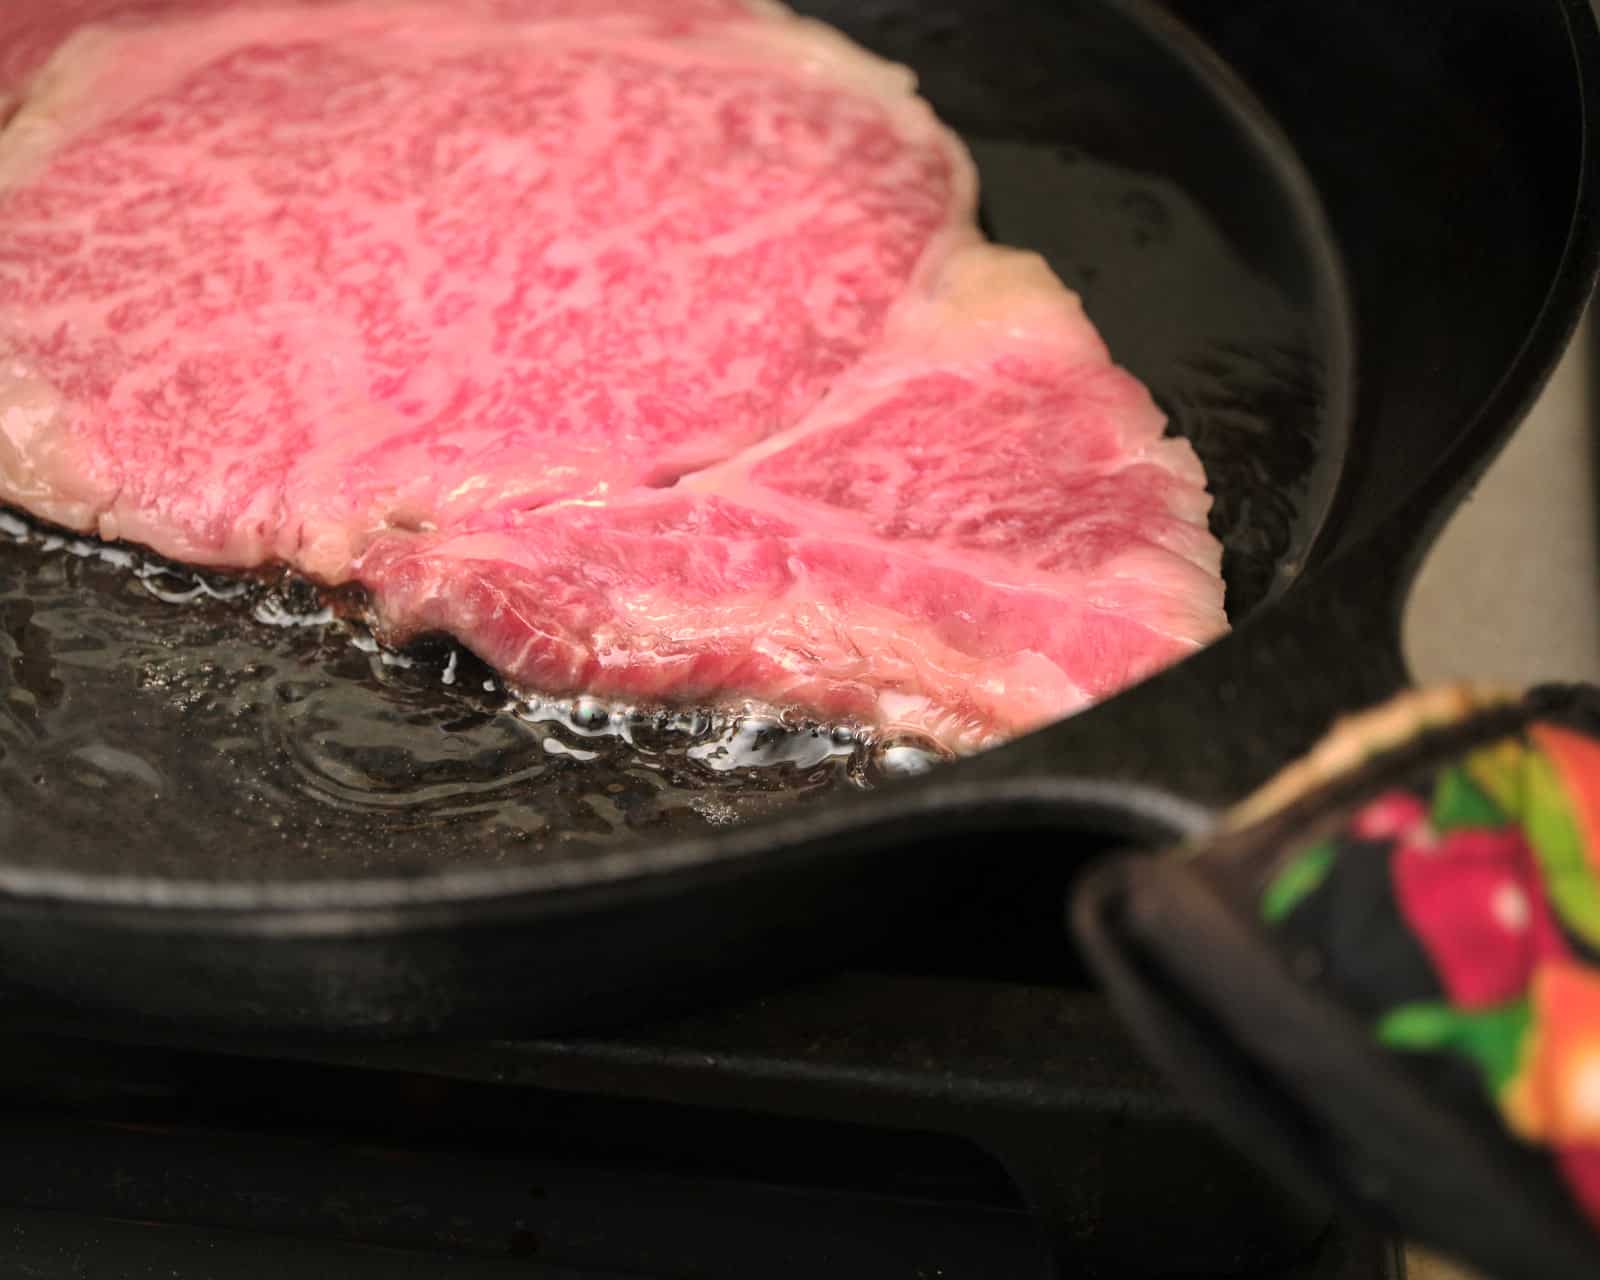
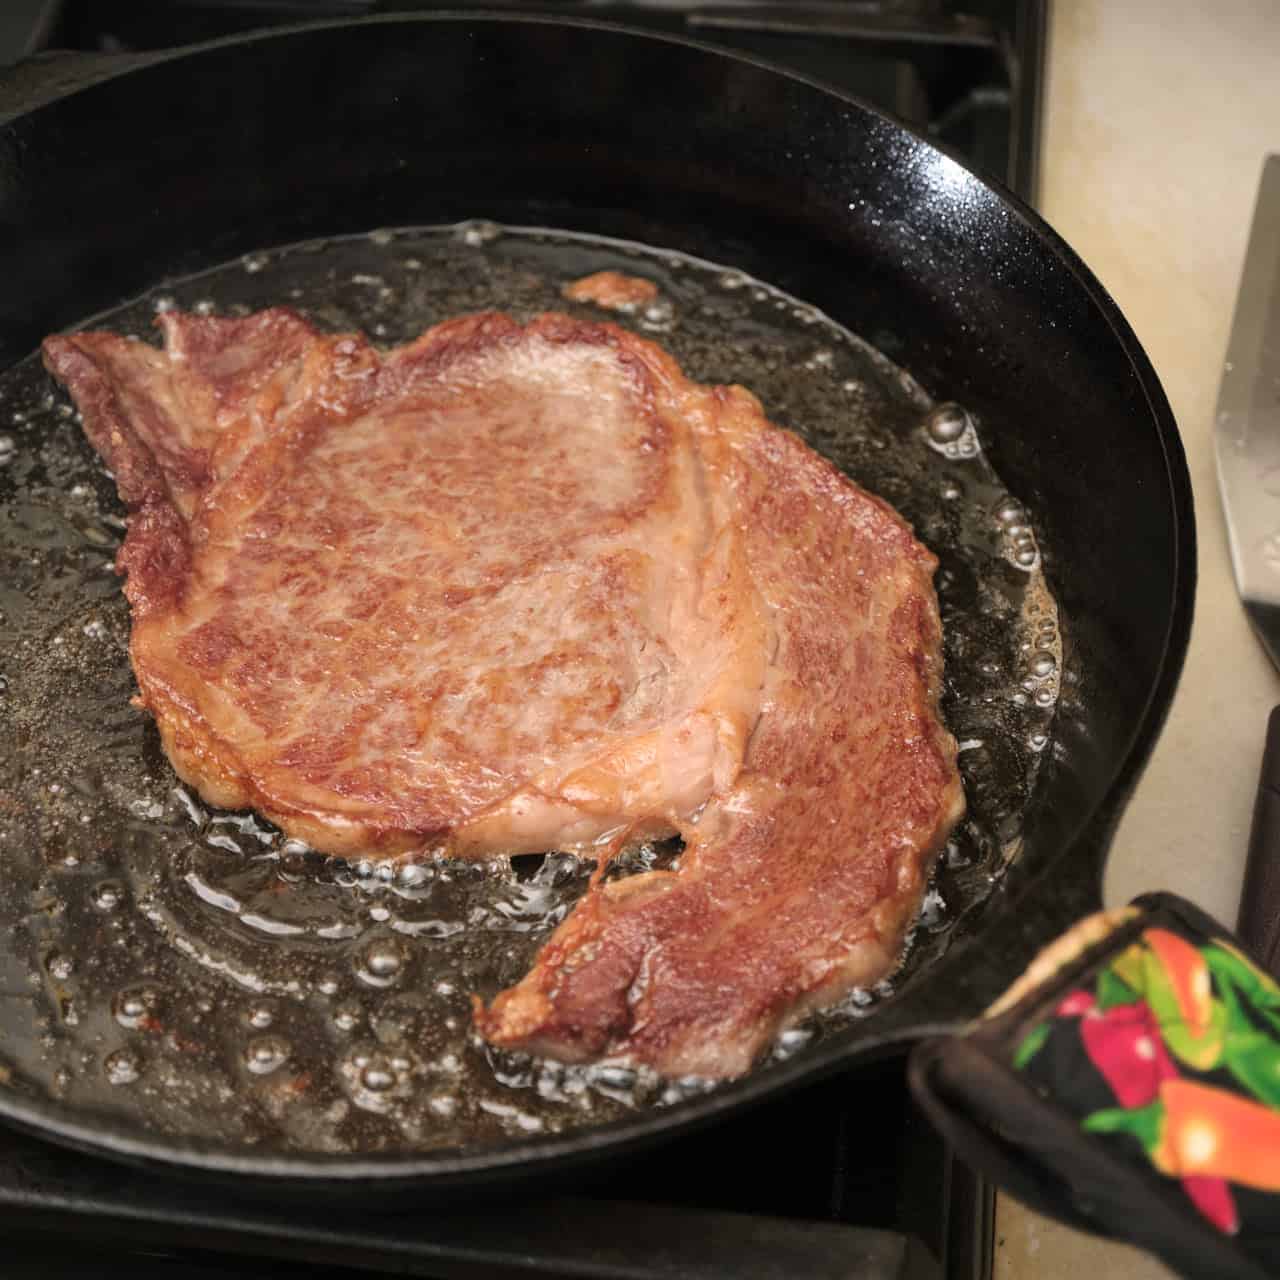
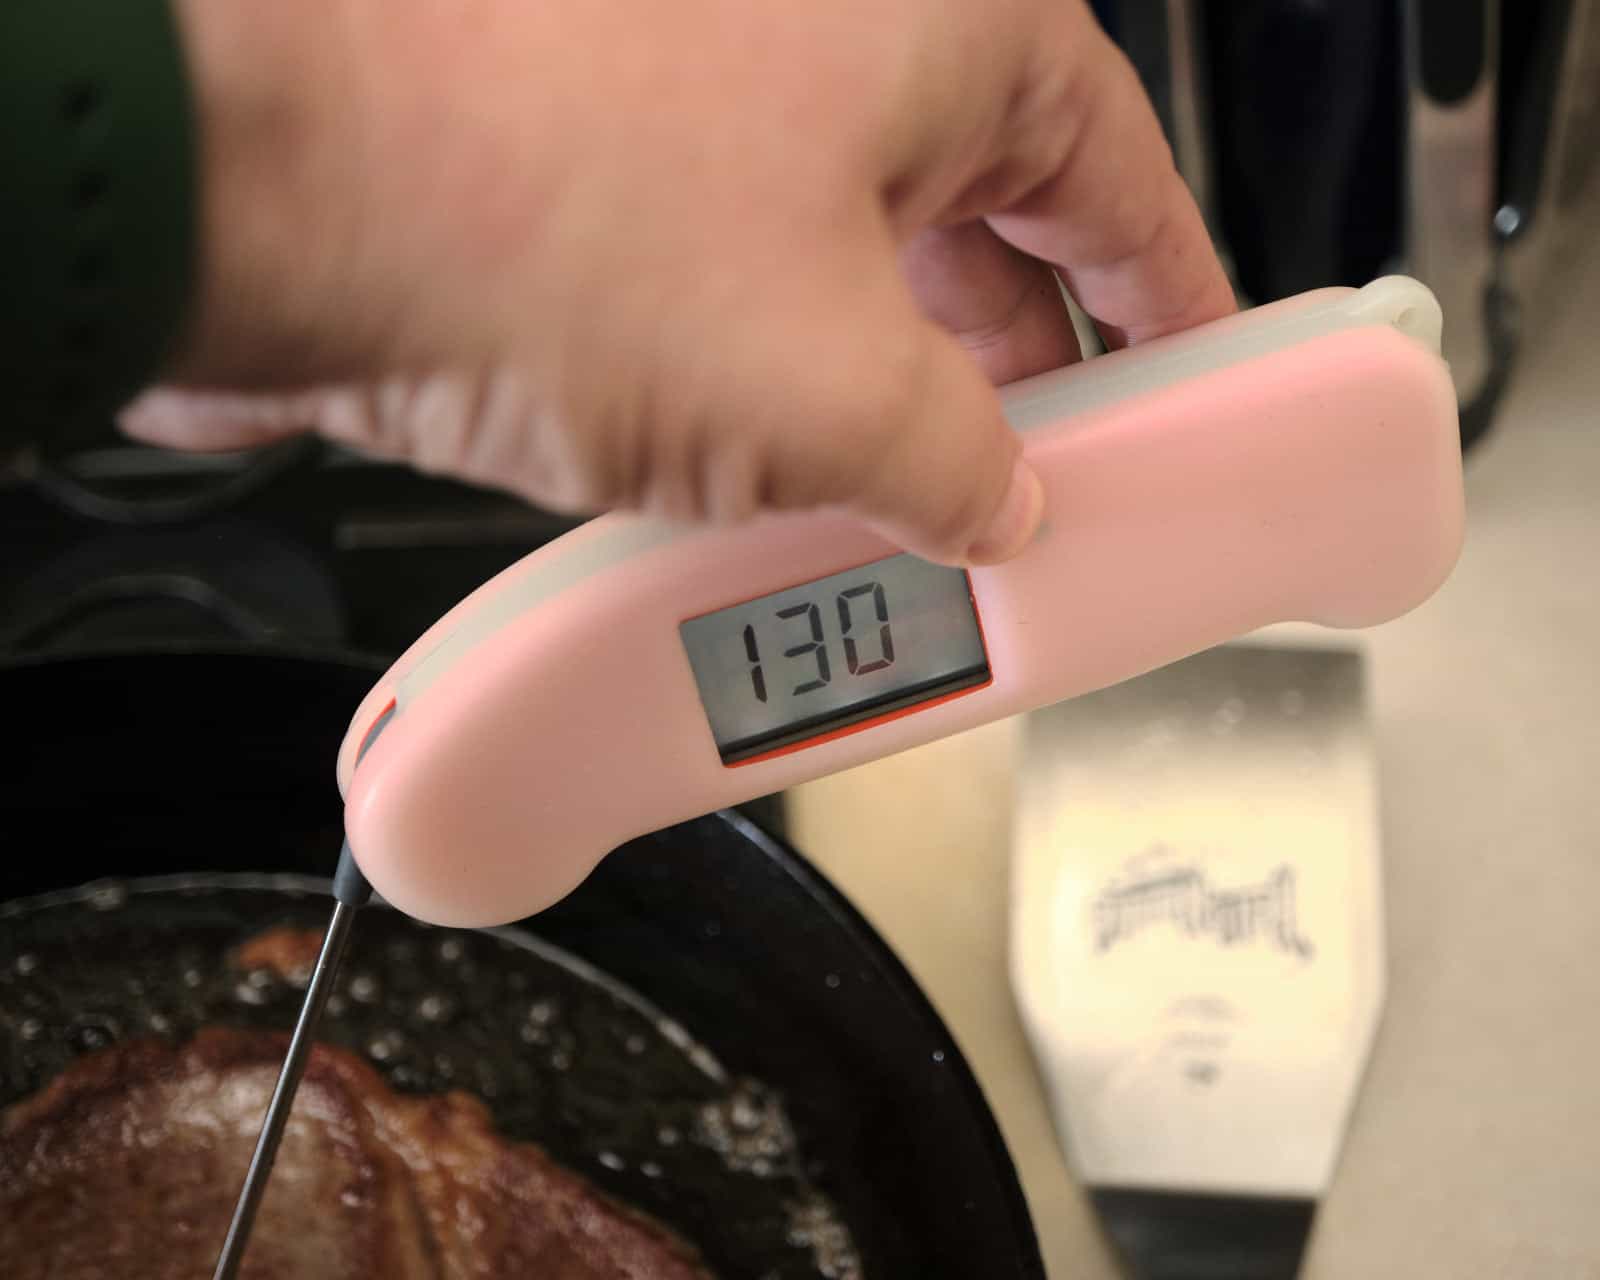
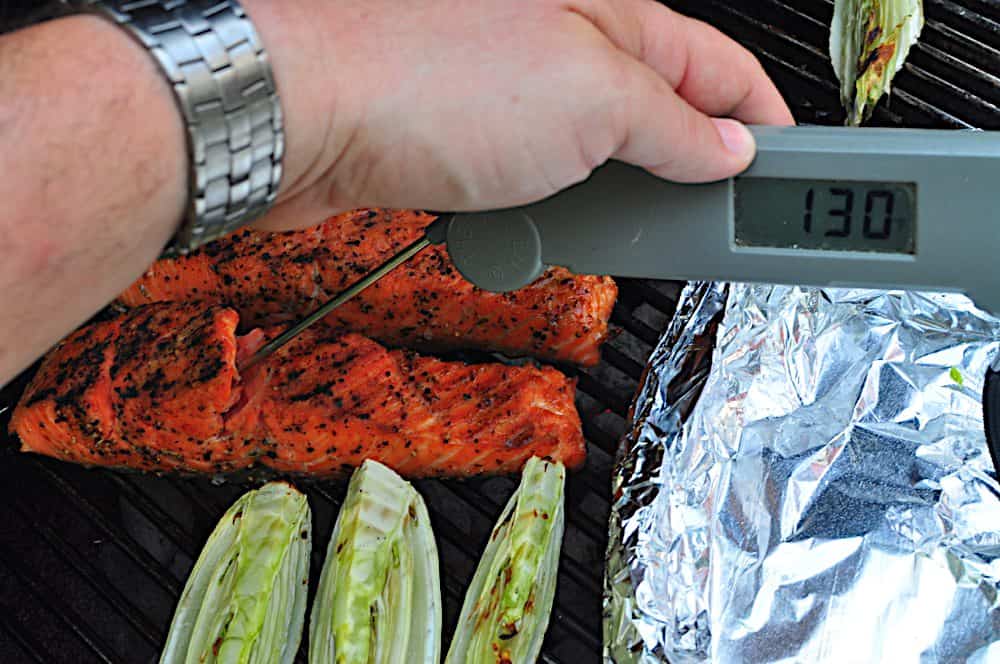
Put the salmon on the grill, flesh side down, over direct heat (that is, over the coals). Cook uncovered for 4 to 6 minutes, until the salmon is well browned and has good grill marks. Gently flip the salmon, skin side down. Close the grill lid and grill for 4 to 6 more minutes, until the salmon is just opaque in the thickest part; once the salmon starts to flake I peek into the middle with a paring knife. (Or, use an instant read thermometer. Cook until the salmon is 130°F internal temperature at its thickest part.) It is OK to cook salmon longer on with the skin side down; the skin will protect the fish from burning. Remove from the grill, let rest for a few minutes, then serve and enjoy!

Salmon temp of 130°F - done!

Recipe Tips

Really Simple Salmon

If you have a fabulous piece of salmon, skip the spices and simply use salt and pepper.

Other spices/herbs/aromatics

Add a teaspoon of your favorite spice (smoked paprika is a favorite of mine), or minced fresh herbs (thyme, rosemary, or parsley), or citrus zest (lemon zest is particularly nice.)

Grinding spices

I like working with whole spice seeds in this recipe; I like the coarse chunks of coriander, fennel, and black pepper that I get from grinding them in my mortar and pestle. If you don't have a mortar and pestle, you can use a spice grinder, or a small coffee grinder that you reserve for grinding spices. 
Or, you can improvise a mortar and pestle with a coffee mug and a spice jar. Pour the spices into the coffee mug, then use the spice jar as the mortar, pressing and swirling to crush the spices.

When to Buy Wild Salmon

If you want to get the best value in wild salmon, mid to late summer is the time to shop. The King salmon harvest starts in May; by July all the salmon runs are happening, and prices drop as the supply increases. Now, don't get me wrong. Wild salmon still commands a premium price, as it should. It is a premium product. But the price does come down a bit in the summer.
King salmon is my favorite, with its buttery, extra-fatty taste. Coho salmon is smaller and leaner, but still great. Sockeye salmon, especially copper river salmon, is also fantastic, but harder for me to find in my area.

Farm Raised Salmon

Farm-raised salmon is not as flavorful as wild salmon, but it is still good, and will work with this recipe. Try to buy the thicker salmon filets; the tail piece is thin, and will cook through before it browns well on the grill.

Lighting charcoal

If you use a charcoal grill, I highly recommend a chimney starter to light charcoal. I prefer the Weber charcoal chimney, because it holds 5 quarts of charcoal, more than most charcoal starters. 

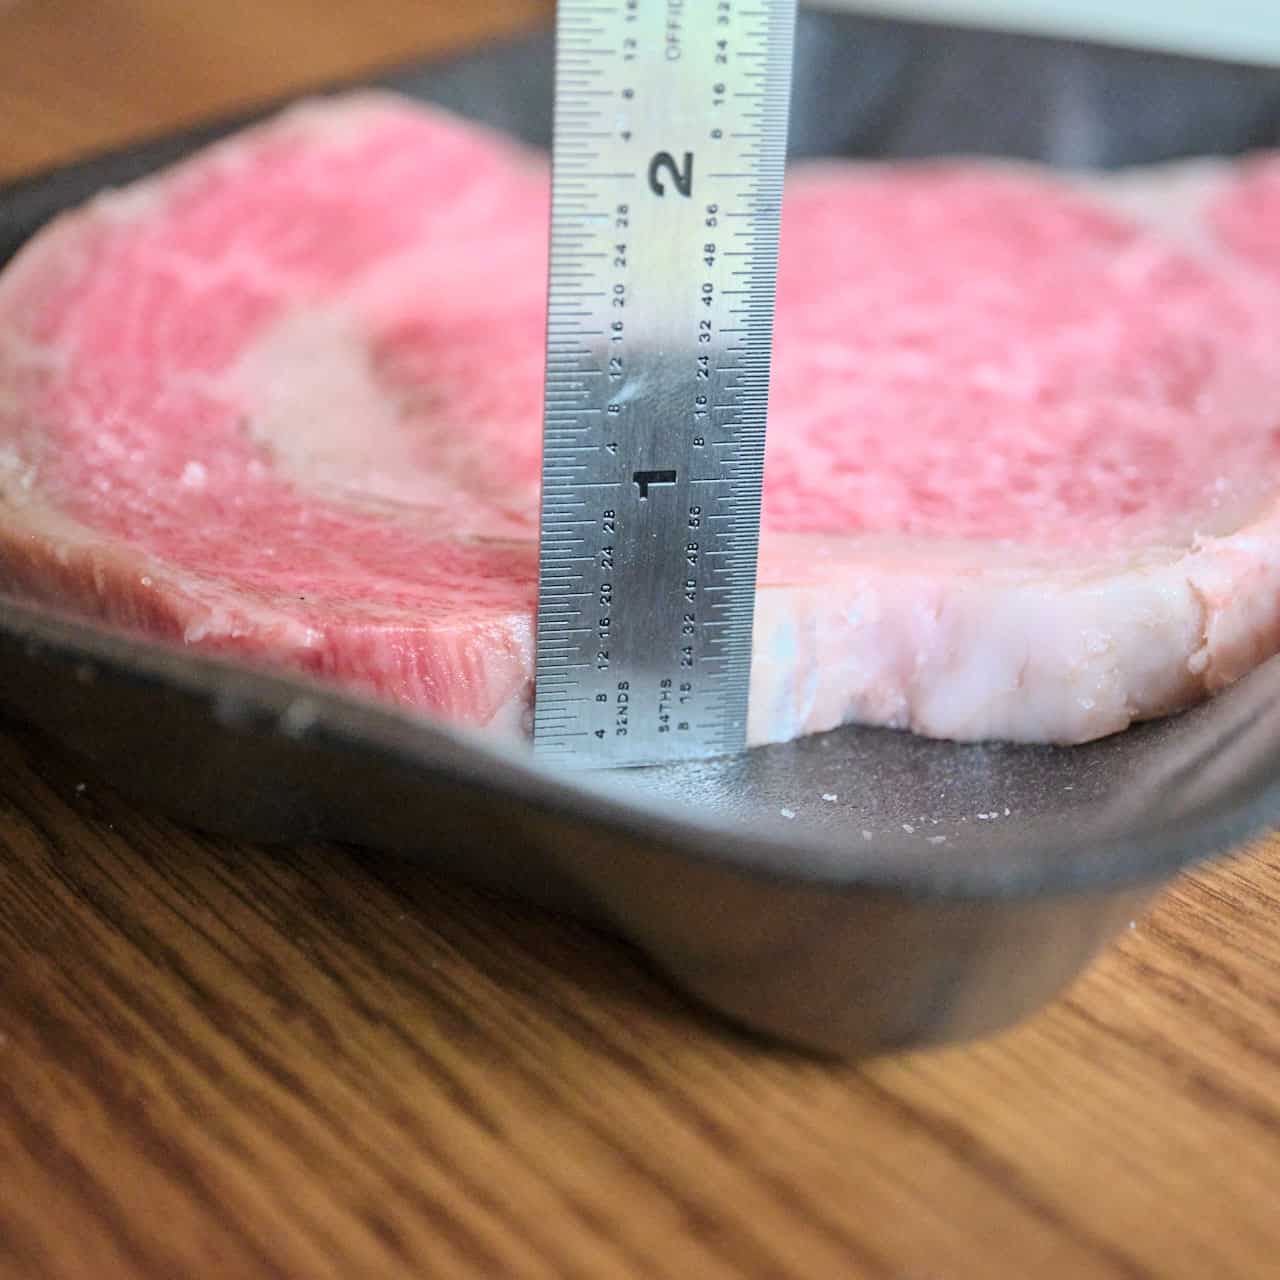
Thick or Thin Salmon

Cooking time will vary depending on the thickness of your fish. The filets in my pictures were monsters, about 2 inches thick, so they were on the high end of my cooking range. (They may actually have taken about 15 minutes to cook through, total, or about 7 minutes a side). Thinner fillets (1 inch, say) will only take about 8 minutes to cook to medium (total cooking time - about 4 minutes a side).

How to Keep Salmon From Sticking to the Grill

Salmon does not stick to the grill as much as other fish, because it has a lot of internal fat. But it *will* stick. I scrupulously clean my grill with a grill brush, and a wipe of vegetable oil on the grates before I put the salmon down. When it is time to flip the salmon, I turn it by grabbing it with my tongs and gently wiggling it until it releases. Every now and then a piece will stick, but most of the time I get a clean release from the grill.

Serving Suggestions

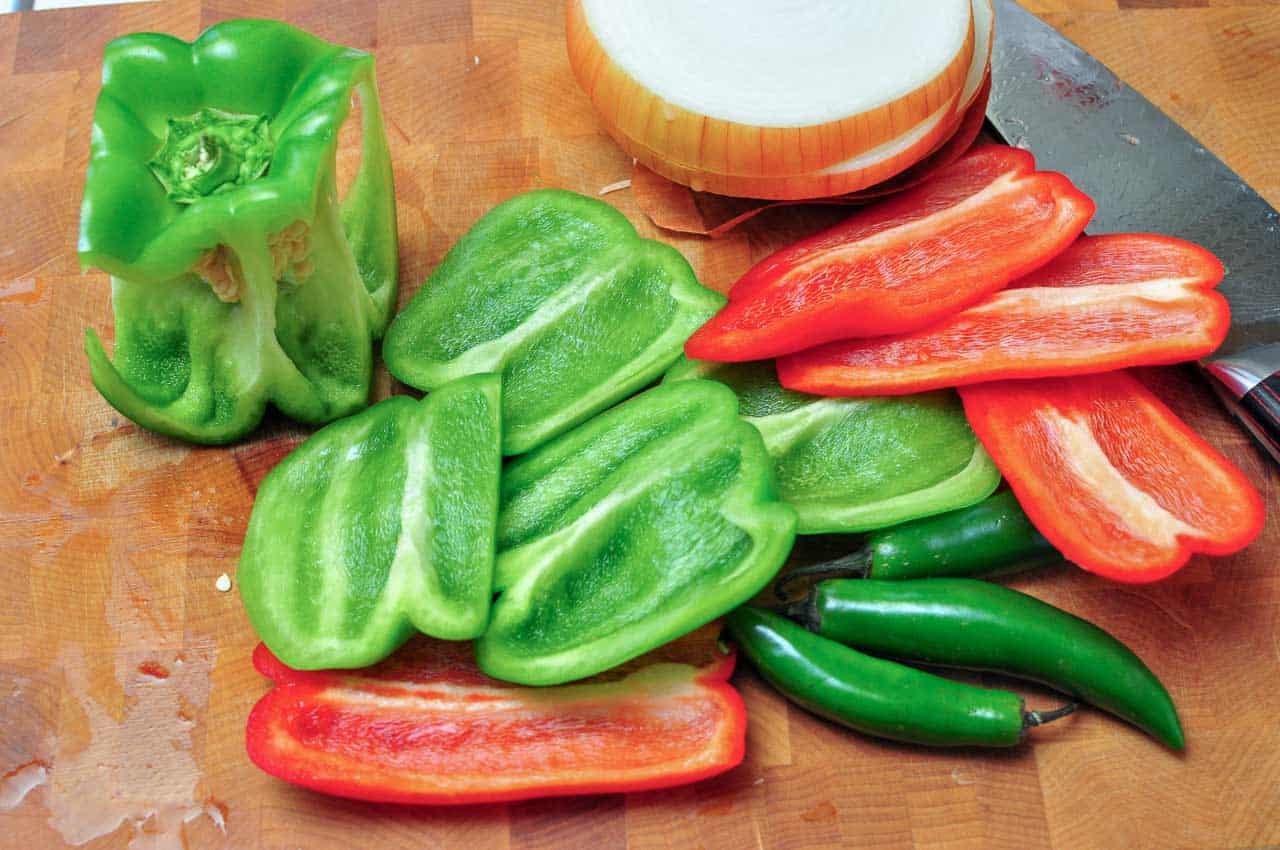
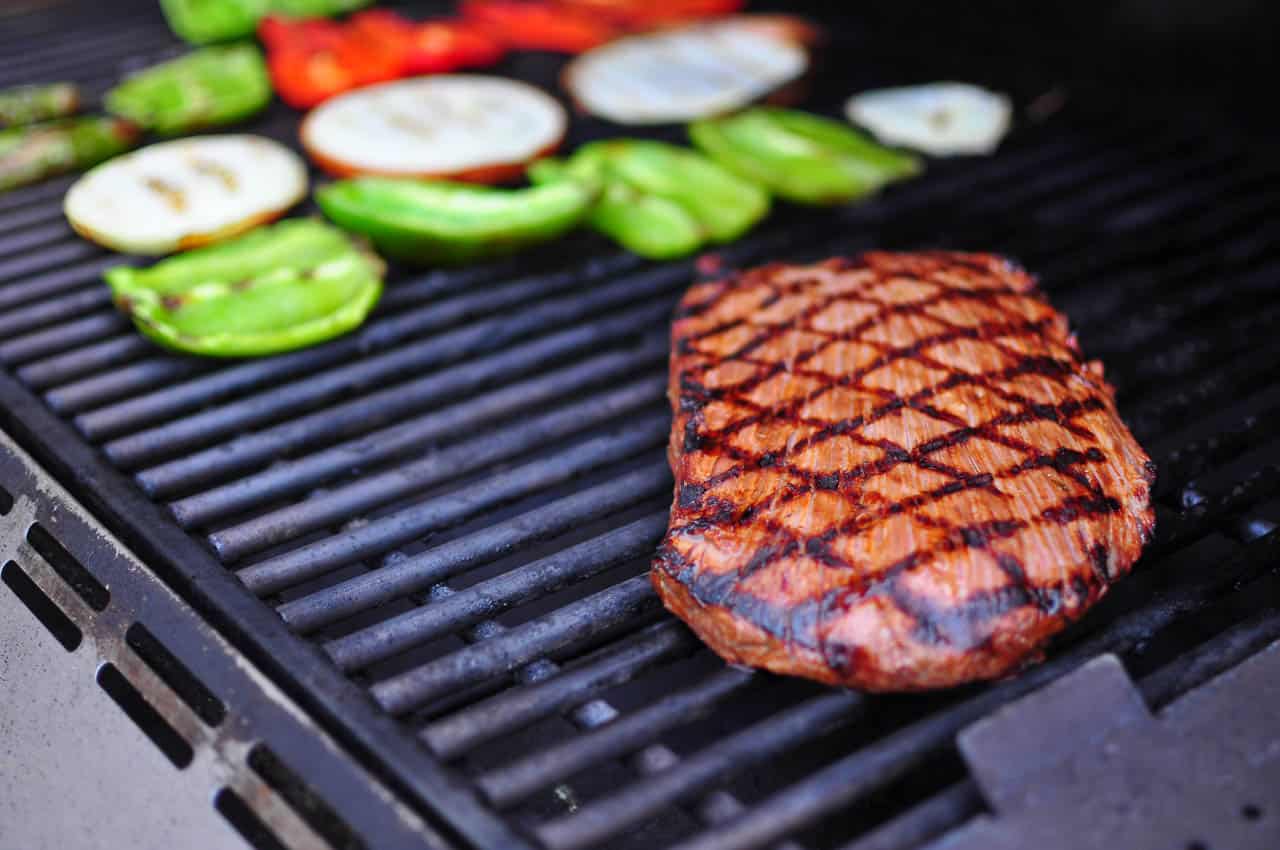
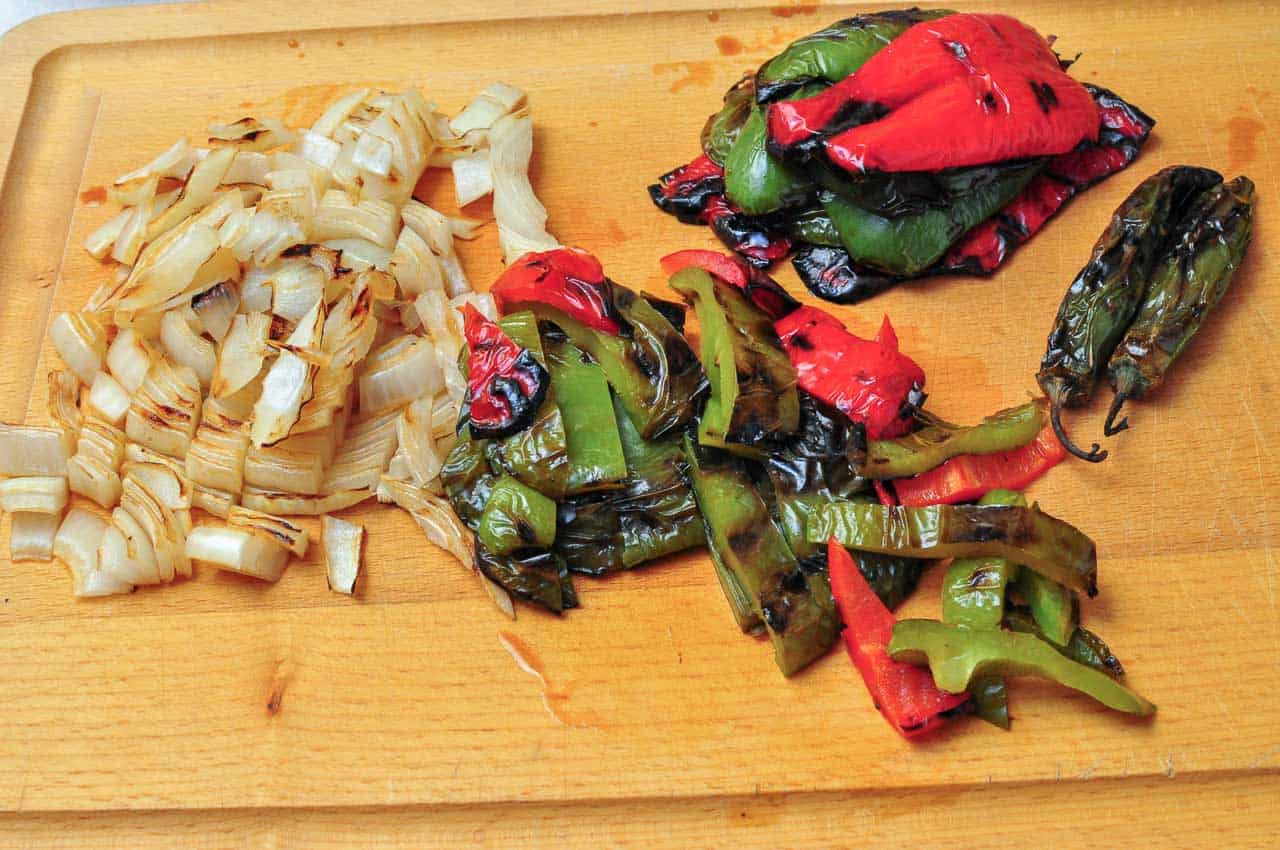
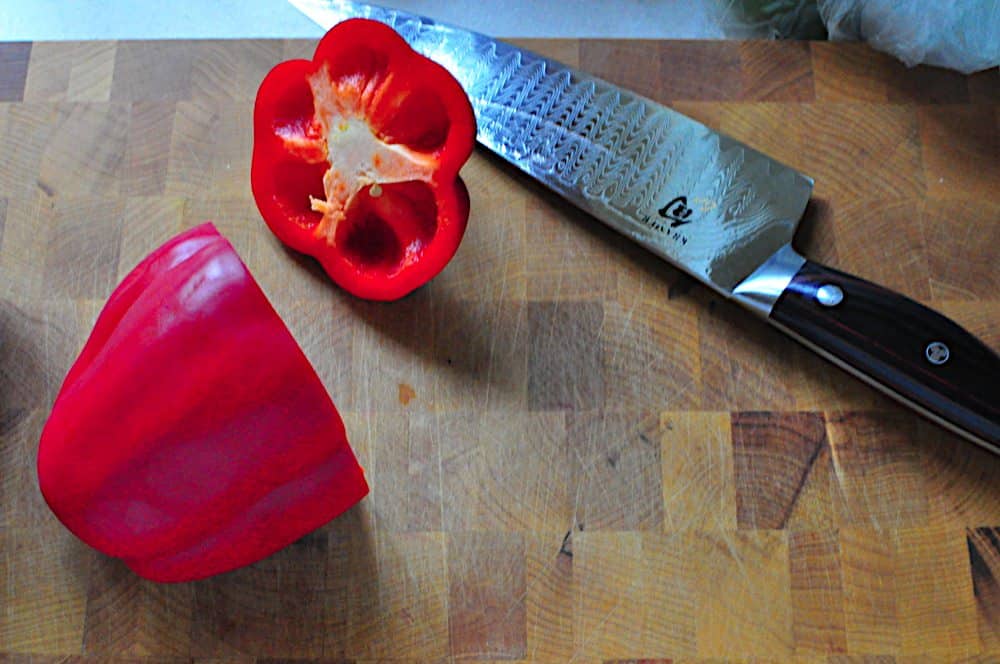
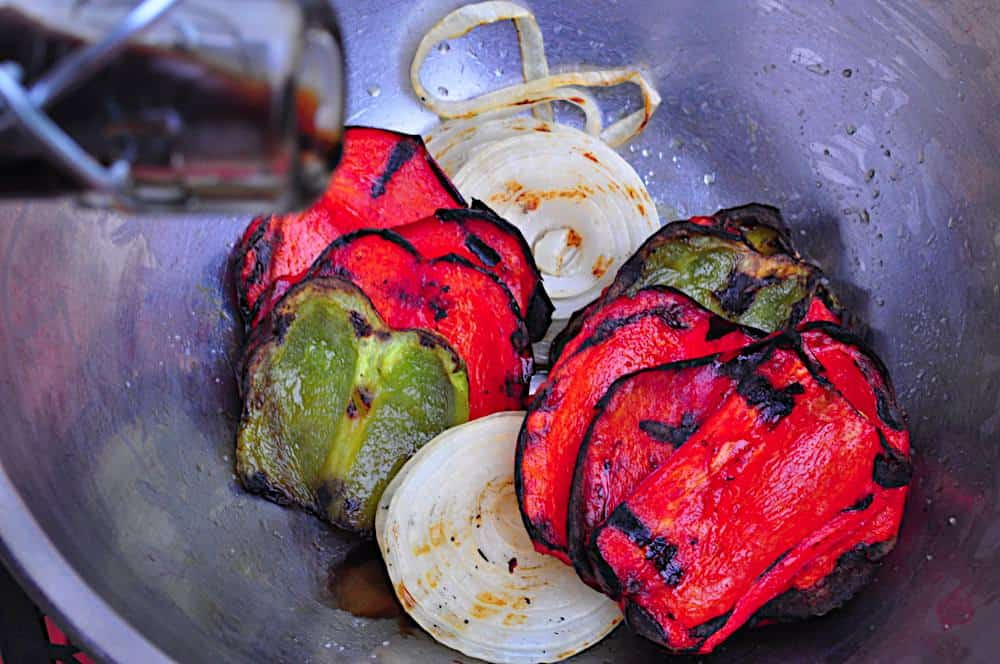
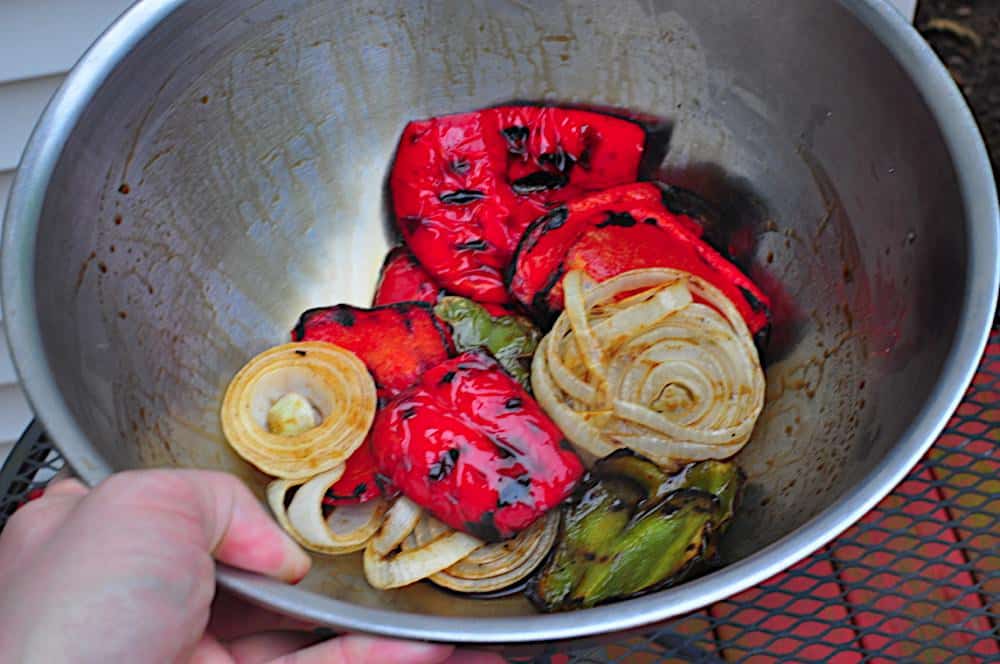
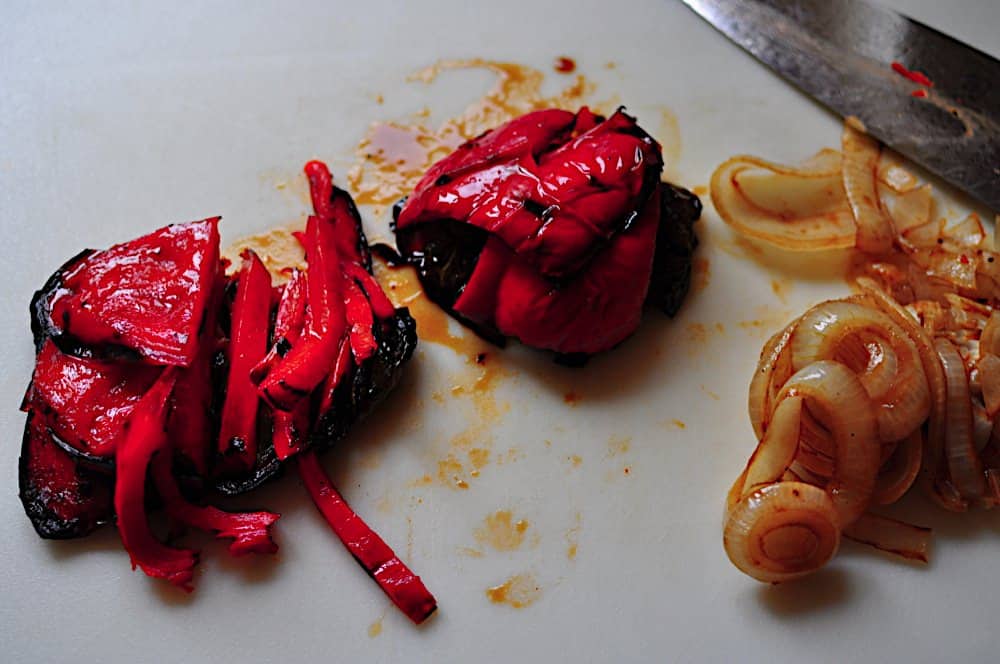
I like to cook as much of the meal as possible on the grill, so I will make a grilled vegetable side with my salmon, like Grilled Peppers and Onions , Grilled Teriyaki Asparagus, or Grilled Green Beans in Foil. If it's later in the summer, Grilled Corn is another fantastic side dish. I think the rich flavor of salmon matches well with my Pressure Cooker Brown and Wild Rice Pilaf, or some Instant Pot Rainbow Baby Potatoes with Rosemary and Garlic. And, of course, a mixed greens salad with Lemon Herb Dressing goes great with almost anything.

Related Posts

  • Grilled Mahi Mahi Fish Tacos with Red Cabbage Slaw
  • Grilled Barramundi with Avocado Orange Salsa
  • Grill-Smoked Salmon
  • Cedar Plank Salmon Recipe
  • Air Fryer Tilaipa Recipe
  • Sous Vide Salmon
  • Sear-Roasted Salmon
  • Grilled Salmon with Mustard BBQ Sauce

*Enjoyed this post? Want to help out DadCooksDinner? Subscribe using your RSS reader or by Email, recommend DadCooksDinner to your friends, or buy something from Amazon.com through the links on this site. Thank you!

Sous Vide Top Sirloin Sandwiches

September 28, 2023 by Mike Vrobel Leave a Comment

sous vide sirloin on grilled bread with horseradish sauce and arugula

Sous Vide Top Sirloin Sandwiches, browned on the grill, with crusty bread, arugula, and goat cheese. A fantastic homemade roast beef sandwich, perfectly medium-rare thanks to sous vide cooking.

sous vide sirloin on grilled bread with horseradish sauce and arugula

Trying to explain Sous Vide cooking to my mom

DadCooksDinner: I vacuum seal the steaks in a plastic bag, and put them in a water bath at the exact finishing temperature we want.

Mom: You're boiling the steak? But I want it rare!

DadCooksDinner: The water is set for rare. It takes a few hours to get there, but the steak will never go past that temperature, so it won't go past rare.

Mom: I don't get this. At all.

DadCooksDinner: It's been cooking since we got here . Now I take it out of the bag, pat it dry, sear it on the grill, and serve it up.

[DadCooksDinner Sears the steaks. Mom keeps peeking over his shoulder.]

Mom: This will never work…

DadCooksDinner: Mom, I've done this for you before, with a beer cooler. You loved it.

Mom: You did? I don't remember that. Be careful with those steaks, now, don't overcook them.

[DadCooksDinner Steaks are done. Starts slicing.]

Mom: [Gasps] Those are perfect! Can I have a piece…just to check?

DadCooksDinner: Of course, Mom. Hey, only one piece! We have a lot of people to serve. Mom! Wait...oh, never mind. Enjoy.

Ingredients

  • 1 (2 pound) top sirloin cap roast (aka Culotte or Picanha)
  • 2 teaspoons kosher salt
  • 1 teaspoon fresh ground black pepper
  • 4 sprigs fresh thyme
  • 4 cloves garlic, minced
  • 1 loaf crusty french bread

Optional toppings

  • Arugula
  • Flaky salt for sprinkling (I love Fleur de Sel de Camargue, but any flaky salt will do)
  • Balsamic vinegar
  • Goat cheese
  • Dijon mustard

How to make Sous Vide Top Sirloin Sandwiches

Sous Vide the Sirloin

Top sirloin roast vacuum sealed with thyme and garlic

Sprinkle the sirloin roast with the salt and pepper. Put the roast in a large (gallon/3.9 liter) vacuum pouch, and cover with the thyme and garlic. Seal the bag and sous vide at 130°F/54.5°C for at least 2 hours, up to 8 hours.

Set the grill for direct high heat

Set the grill up for cooking on direct high heat, and clean the grill grate. For my gas grill, I preheat with all the burners on high for 15 minutes, then brush the grate clean with my grill brush. If you have a sear burner or infrared burner, this is the time to use it - you want the grill as hot as possible.

Prep the french bread and sirloin

French bread toasted on the grill

While the grill is heating: Cut the french bread in half lengthwise, then crosswise into sandwich sized pieces. Remove the sirloin from the bag and discard the herbs and garlic. Pat the sirloin dry with paper towels.

Sear the sirloin over direct high heat

Top sirloin roast searing on the grill

Put the sirloin on the grill over direct high heat. Sear, flipping every minute, until the roast is well browned on both sides, about 4 minutes total. Move the roast to a carving board. Put the french bread on the grill, cut side down, and grill until just starting to brown, about 30 seconds. Immediately remove the bread to a platter - grilled bread goes from toasted to burnt in moments.

Slice the sirloin and serve

Thin slicing a sous vide top sirloin roast

Slice the roast as thin as possible. To assemble a sandwich: Spread Dijon mustard on the bottom piece of bread, pile on some sliced beef, then top with a small handful of arugula. Sprinkle with the coarse salt and drizzle with a little balsamic vinegar. Spread goat cheese on the top piece of bread, and put it on top of the sandwich. Repeat until all the sandwiches are built, then serve.

Equipment

  • Sous Vide water bath (I use an Anova Sous Vide, but you can improvise one with a beer cooler)
  • Vacuum sealer
  • Grill (I use a Weber Summit, which is overkill, but I love it.)

Notes

  • No sous vide water bath? No worries. You can rig up a beer cooler, if you're patient.
  • Add your favorite herbs to the vacuum bag - whatever you like on beef. I used thyme because I had a lot on hand. (That's right, I was just wasting thyme.)
  • I doubled this recipe, and served it at a family party. The adults ate sandwiches as described in the recipe; the kids took their bread and beef, then topped it with a squirt of barbecue sauce.
  • In other words, top these with whatever you like with beef. I used goat cheese and arugula because I got it with my CSA box this week. Or, use whatever you want to top the sandwich - the only requirements are the bread and the beef.
  • As you read this, Mom's writing me out of the will for the opening story. I hope you enjoyed it. Hi Mom! Love you!
  • Don't have a grill? Brown the sous vide top sirloin in a heavy frypan on your stovetop, heated to high, and toast the bread under the broiler in your oven.

What do you think? Questions? Other ideas? Leave them in the comments section below.

Related Posts:

Sous Vide Grilled New York Strip Steaks with Herbs
Sous Vide Grilled Chicken Breasts with Japanese Glaze and Dipping Sauce
Instant Pot BBQ Beef Sandwiches
Grilled NY Strip Steak
Instant Pot Sirloin Steak recipe
Instant Pot Sirloin Tip Roast
Click here for my other sous vide recipes.

*Enjoyed this post? Want to help out DadCooksDinner? Subscribe to DadCooksDinner using the RSS or Email options on the right, recommend DadCooksDinner to your friends, buy something from Amazon.com through the links on this site, or donate through my tip jar. Thank you.

Instant Pot Sirloin Tip Roast

September 26, 2023 by Mike Vrobel 14 Comments

A bowl of shredded sirloin tip roast with carrots

Instant Pot Sirloin Tip Roast, a braised and shredded beef roast ready in about an hour thanks to pressure cooking.

A reader asked me about cooking a sirloin tip roast in the pressure cooker, so I put this recipe together for them.

A bowl of shredded sirloin tip roast with carrots
[feast_advanced_jump_to]

Beef sirloin tip roast makes a great pressure cooked pot roast with minimal effort. The only real trick is cutting the beef into strips before cooking. A whole roast means a longer cooking time. The thick roast takes longer for the heat to penetrate deep into the meat. Cutting the roast into 2-inch thick strips lets the extra-high heat in a pressure cooker do its work, and lets this recipe finish with less than an hour of pressure cooking.

Now, you should not use a pressure cooker if you want rare roast beef. This is an Instant Pot Pot Roast, cooked until it is fall-apart tender and shreddable.

Now, this recipe is great for a large tip roast. If you have thinner sirloin steak, try my Instant Pot Sirloin Steak recipe.

Ingredients

Ingredients for Instant Pot Sirloin Tip Roast
  • 1 tablespoon vegetable oil
  • 2- to 3-pound sirloin tip roast, cut into 2-inch thick strips
  • 1- to 1½ teaspoons fine sea salt
  • ½ teaspoon fresh ground black pepper
  • ½- to ¾-teaspoons garlic powder
  • ½- to ¾-teaspoons onion powder
  • 1 large onion, diced
  • ½ teaspoon fine sea salt
  • 1 cup beef broth (or chicken broth, or water)
  • 1 tablespoon Worcestershire sauce
  • 1 pound carrots, peeled and cut into 2-inch chunks (or 1 pound baby carrots)
Sirloin tip roast sliced into 2-inch thick pieces and seasoned

How to make Instant Pot Sirloin Tip Roast

Brown the beef strips on one side in two batches

A browned piece of sirloin tip roast

Heat the vegetable oil in an Instant Pot using Sauté mode adjusted to high until the oil shimmers, about 3 minutes. (Use sear mode or medium-high heat for other pressure cookers.) While the oil heats, sprinkle the strips of beef with salt, pepper, garlic powder, and onion powder. Brown the beef in 2 batches: Add half of the beef to the pot in a single layer, and sear until well browned on the bottom, about 3 minutes. Remove the batch of browned beef to a bowl. Add the rest of the beef to the pot, and sear until browned on the bottom, about 3 more minutes, then move it to the browned beef bowl.

Sauté the onion

Add the diced onion to the pot and sprinkle with ½ teaspoon of salt. Sauté until the onion softens, about 3 minutes, stirring and scraping the bottom of the pot with a flat-edged wooden spoon to loosen any browned bits of beef and onions.

Everything in the pot

Instant pot full of sirloin tip roast and carrots

Pour the beef broth into the pot, and add the Worcestershire sauce. Scrape the bottom of the pot with a wooden spoon one last time to make sure nothing is sticking. Add the browned beef and any juices in the bowl to the pot. Scatter the carrots over the top of the beef.

Pressure cook for 40 minutes with natural release

An Instant Pot set to pressure cook for 40 minutes on high pressure

Lock the lid on the cooker. Cook at high pressure for 40 minutes in an Instant Pot or other electric pressure cooker (Use Manual, Pressure Cook, or Custom mode in an Instant Pot) or for 35 minutes in a stovetop PC. Let the pressure come down naturally for about 20 more minutes. (You can quick release any remaining pressure after 15 minutes if you are in a hurry.) Remove the lid, tilting it away from you to avoid the hot steam.

Shred the beef, add some pot liquid, and serve

Move the beef to a platter with tongs or a slotted spoon, and move the carrots to a bowl with a slotted spoon. Shred the beef with a pair of forks. Spoon a little of the cooking liquid from the pot onto the shredded beef. (I add about a cup of sauce from the pot to the beef.) Serve and enjoy!

Substitutions

  • Different cuts of beef: If you can't find a sirloin tip roast, you can substitute a top sirloin roast, chuck roast, or rump roast. The instructions don't change; they all cook in the same amount of time under pressure.
  • Red wine: If you want a more French or Italian style recipe, replace ½ cup of the beef broth with ½ cup of wine. The alcohol in the wine helps bring out some extra flavors in the beef.
  • 5-ingredient sirloin tip roast: I add a few extra spices and flavors into this recipe, but you can make this a 5-ingredient sirloin tip roast recipe. The only critical ingredients are vegetable oil, beef, salt (or garlic salt), pepper, and beef broth. The other ingredients add flavor to the recipe, but there's nothing wrong with a simple beef roast.

Equipment

A 6-quart pressure cooker.

Scaling

This recipe can be doubled in a in a 6-quart pressure cooker. Cut all the ingredients in half (except for the beef broth) and this recipe will fit in a 3-quart pressure cooker. (But, don't go below the minimum liquid recommendation for your cooker. Most cookers are fine with ½ cup of broth, but some want a full cup. ) The cooking time does not change if you scale up or down. It takes the same amount of time to cook a single strip of the sirloin tip roast through.

Tips and Tricks

  • Cut the roast in strips: The big tip is cutting the roast into smaller pieces before cooking. Pressure cookers speed up cooking by increasing the heat of the liquid in the pot. That only helps so much with a thick roast, where the heat has to penetrate deep into the meat. Cutting the roast into 2-inch thick pieces lets pressure cooker do its thing, heating the individual pieces quickly.

What to serve with Sirloin Tip Roast

What side dishes do I serve with this roast beef recipe? I like to serve this roast with mashed potatoes (like my smashed red potatoes recipe ) to soak up the pot liquid, and green beans to add a bit of green crunch with the meal. This roast also makes fantastic sandwiches, au jus style, served on rolls or hamburger buns with the pot liquid on the side as a dipping sauce.

Related Posts

Pressure Cooker Beef Pot Roast
Instant Pot German Pot Roast with Mustard (Senfbraten)
Instant Pot Shredded Beef
Instant Pot BBQ Beef Sandwiches
Instant Pot Sloppy Top Round Sandwiches
My other Instant Pot and Pressure Cooker Recipes

Enjoyed this post? Want to help out DadCooksDinner? Subscribe to DadCooksDinner via email and share this post with your friends. Want to contribute directly? Donate to my Tip Jar, or buy something from Amazon.com through the links on this site. Thank you.

Instant Pot Mushroom Risotto (Risotto ai Funghi)

September 21, 2023 by Mike Vrobel 5 Comments

A bowl of mushroom risotto, with mushrooms, cheese, and parsley in the background

Instant Pot Mushroom Risotto. Risotto is so easy in the pressure cooker; here's a classic Italian Risotto ai Funghi, which can be vegetarian if you make it with vegetable broth.

David Rosengarten sold me on pressure cooking. He was one of the original presenters on Food Network and a massive influence on my becoming a food fanatic. His late, lamented Rosengarten Report newsletter introduced me to the pressure cooker; he spent an issue singing the praises of (stovetop) pressure cookers, especially risotto under pressure. No more stirring! Done with five minutes under pressure! For him, risotto was pressure cooking's killer app, and his enthusiasm convinced me to buy my first pressure cooker.

A bowl of mushroom risotto, with mushrooms, cheese, and parsley in the background
[feast_advanced_jump_to]

This recipe is my take on the Italian classic risotto ai fungi. Like most classic Italian recipes, its beauty lies in simplicity - there's not much to this recipe. Rice, garlic, butter, mushrooms, broth, and cheese, and I'm done.

🥫Ingredients

  • 1 tablespoon olive oil
  • 8 ounces of baby portobello mushrooms, cleaned and chopped (or substitute button mushrooms)
  • ½ teaspoon fine sea salt
  • 1 tablespoon butter
  • 3 cloves garlic, minced
  • 2 cups Arborio rice (Or Carnaroli or Vialone Nano rice)
  • ½ cup white wine (or more broth)
  • 4 cups homemade vegetable or chicken broth (or store-bought low-sodium broth)
  • ½ teaspoon fine sea salt (skip if using store-bought broth)
  • 2 tablespoons butter
  • 1 cup (4 ounces) grated parmesan cheese
  • Chopped fresh parsley for garnish

How to Make Instant Pot Mushroom Risotto

Sauté the mushrooms

Heat 1 tablespoon of olive oil in an Instant Pot using sauté mode adjusted to high until the oil starts to shimmer (Medium-high heat in a stovetop pressure cooker). Add the chopped mushrooms to the pot and sprinkle with ½ teaspoon salt. Cook, stirring occasionally, until the mushrooms give up their liquid and start to brown, about 10 minutes. Move half the mushrooms to a plate with a slotted spoon and set aside for later.

Add the garlic, rice, wine, and broth

Put 1 tablespoon of butter in the pot with the remaining mushrooms and wait for it to melt. Add the garlic, then stir in the rice, coating it with the butter. Add the wine and scrape the bottom of the pot with a flat-edged wooden spoon to loosen any browned bits of mushroom. Pour in the broth, stir in the ½ teaspoon salt (if using homemade broth), and lock the lid.

Pressure Cook the risotto for 5 minutes with a Quick Release

Cook at high pressure for 5 minutes in an Instant Pot, electric pressure cooker, or stovetop pressure cooker. (Use Manual Mode or Pressure Cook for an Instant Pot). Quick release the pressure, then carefully remove the lid, tilting it away from you to avoid the scalding hot steam.

Stir in butter, cheese, and the reserved mushrooms

Stir the 2 tablespoons of butter into the rice until it melts, then stir in the grated cheese and the sautéed mushrooms set aside earlier. Serve, sprinkling with some extra grated cheese and minced parsley. Enjoy!

💡Tips and Tricks

  • Pressure cooking is the key to easy risotto. No need to stir for 30 minutes, carefully ladling broth into the pot. I can lock the lid on my Instant Pot, set it to cook for 5 minutes, and have a fantastic risotto without all the extra work.
  • Homemade vegetable broth is another key to this recipe. I know, I know, it's extra work. But it is SO GOOD. Make it ahead, freeze it in 2-cup containers, and you'll always be ready to make a fantastic risotto or vegetable soup.
  • Vegetarian: Now, risotto is not vegan - too much butter and cheese - and to keep it vegetarian, I have to use vegetable broth. When I'm not feeding vegetarians, I go with chicken broth - because I keep extra homemade chicken broth in the freezer in case of a broth emergency. It makes a quick batch of risotto an easy weeknight side dish or a fancy main dish if vegetarians stop by.

🥘 Substitutions

Risotto rice choices: Arborio rice is my default for risotto because it is the easiest one to find at my local grocery stores. I prefer Carnaroli rice for pressure cooker risotto when I can find it. It stands up to cooking a little better than Arborio or Vialone Nano, and I don't mind having a little extra cushion when I'm pressure cooking.
Store-bought broth: If you use store-bought broth, watch out for "regular" vegetable broth - it's loaded with salt. If you can't find low-sodium vegetable broth, use water.
But, please, try homemade vegetable broth. If you have an Instant Pot, you will love it.
Chicken broth: If you're not looking for a vegetarian version of the recipe, homemade chicken broth is even more decadent.
Wine types: The white wine is optional - it's traditional in risotto, but you can leave it out if you avoid alcohol. I use pinot grigio in my risottos - it's a dry Italian white, so it feels appropriate - but use whatever dry white wine you have on hand. Or skip it if you can't drink alcohol.
Parmesan options: I use grated parmesan, but grated pecorino Romano is a good (and less expensive) substitute.

🛠 Equipment

A 6-quart pressure cooker. Pressure Cooker risotto converts many people to pressure cooking - no tedious stirring needed, just a few minutes under pressure.

📏Scaling

This recipe doubles easily in a 6-quart pressure cooker. Cut all the ingredients in half, and this recipe will fit in a 3-quart pressure cooker.

Frequently Asked Questions, answering the following:

What is mushroom risotto made of?

Mushroom risotto is a simple recipe. The key ingredients are rice, mushrooms, butter, parmesan, and vegetable broth. I also add olive oil and white wine for flavor and parsley for a bit of color.

What type of mushrooms should I use?

Sliced baby portobello mushrooms are best, but white (button) mushrooms will also work. Regular-sized portobello mushrooms are too big for this recipe unless cut into bite-sized slices.

How long does mushroom risotto last?

According to the USDA, Leftover rice lasts for three days in the refrigerator or three months in the freezer as long as it is refrigerated (or frozen) within an hour of cooking in an airtight container and as long as it is heated properly before eating. (See the next question for reheating instructions.) I portion out my risotto in 2-cup containers before I put it in the fridge or freezer.

Can mushroom risotto be reheated?

Yes! It is an excellent recipe to make ahead. But be sure to reheat the risotto all the way through; an instant-read thermometer should read 165°F in the middle of the rice.

What do you eat with mushroom risotto?

Mushroom risotto is hearty enough to be a main dish or a side dish in a more elaborate Italian feast. When I serve it as a main dish, I serve it with a green vegetable like broccoli rabe or my Instant Pot green beans, a salad, and a loaf of crusty bread. If I want a hearty meal for vegetarians, I'll pair this risotto with my Instant Pot Cannellini Beans and Greens.

🤝 Related Posts

Pressure Cooker Asparagus Risotto
Instant Pot Risotto Milanese (Risotto alla Milanese)
Instant Pot Risotto with Pork and Cinnamon (Risotto All'Isolana)
Instant Pot Rotisserie Chicken Risotto
Instant Pot Radicchio Risotto
Instant Pot Shrimp Risotto
Instant Pot Cheddar Cheese Risotto
My other Instant Pot and Pressure Cooker Recipes

Enjoyed this post? Want to help out DadCooksDinner? Subscribe to DadCooksDinner via email and share this post with your friends. Want to contribute directly? Donate to my Tip Jar, or buy something from Amazon.com through the links on this site. Thank you.

Instant Pot Thai Yellow Curry

September 19, 2023 by Mike Vrobel 12 Comments

Instant Pot Thai Yellow Curry in a red bowl

Instant Pot Thai Yellow Curry with chicken. A quick weeknight curry sweetened with coconut milk and spiced with Thai yellow curry paste.

Extra coconut cream. Mmmmm.

Instant Pot Thai Yellow Curry in a red bowl
[feast_advanced_jump_to]

Why You'll Love Thai Yellow Chicken Curry

Continuing on my series of pressure cooker Thai Curries, it's time for instant pot Thai yellow curry. Yellow curry is sweeter than other Thai curries - it has extra coconut cream in the cooking. (And, If you're suspicious that I'm just working my way along the Thai curry shelf at my local Asian market, you're right. Yellow was the next can on the shelf.)
As much as I love dark meat chicken, I went with chicken breast in this curry. Yellow curry usually has potatoes, and I didn't want to overcook them. (And the kids were asking for chicken breast instead of thighs. I went wrong somewhere in my parenting.)
Other than that, this is a pretty standard Thai yellow curry instant pot recipe:

  • Soften the aromatics (onions, peppers, garlic, and ginger)
  • Fry the coconut cream and curry paste
  • Stir in the coconut milk and main ingredient (chicken, potatoes)
  • Pressure cook, then quick release
  • Stir in the tender vegetables (zucchini) and simmer until done
    The kids were big fans of this curry - it's not as hot as other Thai curries, which made it a big hit with the heat-sensitive kids in the family. (Though they did eat around the zucchini.) Looking for a mild curry to bring in the doubters in your family? Try a yellow curry.

Ingredients

  • 1 tablespoon vegetable oil
  • 1 medium onion, peeled and sliced thin
  • 2 medium red bell peppers, trimmed, seeded, and cut into thin strips
  • 3 cloves garlic, crushed
  • ½ inch piece of ginger, peeled and crushed
  • ½ teaspoon fine sea salt
  • Cream from the top of 2 (13.5-ounce) cans of full-fat coconut milk
  • ½ cup yellow curry paste (a whole 4-ounce can)
  • 3 pounds boneless skinless chicken breasts, cut into 1-inch cubes
  • ¾ teaspoon fine sea salt
  • 1 ½ pounds Petite Yukon Gold potatoes, quartered
  • The liquid from 2 cans of coconut milk
  • 1 tablespoon fish sauce (plus more to taste)
  • 1 tablespoon soy sauce (plus more to taste)
  • 1 tablespoon brown sugar (plus more to taste)
  • Juice of 1 lime
  • 2 medium zucchini, cut into ½-inch thick half-moons
    Garnish and Sides
  • Minced cilantro
  • Minced basil (preferably Thai basil)
  • Lime wedges
  • Jasmine rice

How to Make Instant Pot Thai Yellow Curry Chicken

Sauté the aromatics

Heat the vegetable oil over medium-high heat in an Instant Pot or other pressure cooker until shimmering. (Use Sauté mode adjusted to high in an Instant Pot electric pressure cooker.) Stir in the onion, red pepper, garlic, and ginger, sprinkle with ½ teaspoon of salt, and sauté until the onion softens, about 3 minutes.

Fry the curry paste

Scoop the cream from the top of 2 cans of coconut milk and add it to the pot. (Stop when you hit the thin coconut liquid, and save it for later.) Stir the curry paste into the coconut cream in the pot. Cook, stirring often, until the curry paste darkens, about 5 minutes.

Everything in the pot

Sprinkle the chicken with the kosher salt, add it to the pot, and stir to coat with curry paste. Stir in the potatoes and then the reserved coconut milk liquid, fish sauce, soy sauce, and brown sugar.

Pressure cook the curry for 5 minutes with a quick pressure release

Lock the lid and pressure cook on high pressure for 5 minutes in an Instant Pot or other electric PC or for 4 minutes in a stovetop PC. (Use Manual, Pressure Cook, or Pressure Cook-custom mode in an Instant Pot). Quick release the pressure in the pot.

Finish the curry

Remove the lid from the pressure cooker, then set it over medium-high heat (Sauté mode adjusted to high in an electric pressure cooker.) Stir in the lime juice and the zucchini, and simmer until the zucchini is crisp-tender, about 8 minutes. Serve the curry with Jasmine rice and (optional) minced cilantro and basil on the side.

Recipe Tips

Coconut milk: Buy cans of full fat coconut milk, and don't shake them before you open them. You want the solid layer of cream on the top and the liquid underneath. That lets you fry the coconut cream with the curry paste, then add the liquid later. (If the coconut milk is shaken up, and there isn't a thick layer of coconut cream on the top, scoop out the top ⅓rd of the can and add it to the pot.)
Lite coconut milk: If you have to use low-fat coconut milk, skip the "fry the curry paste" step - you won't have enough coconut milk fat to fry the paste. Pour the cans of lite coconut milk into the pot, add the curry paste, and stir until the curry paste mixes with the coconut milk. Continue with the "everything in the pot" step, skipping the "reserved coconut milk liquid" because it's already in the pot.
Curry Paste: I use Maesri curry paste because a single 4-ounce can is perfect for a pressure cooker curry. If you buy your curry paste in a larger tub, use 8 tablespoons.
Chicken Thighs: Want to substitute chicken thighs? (I know I do!) Increase the cooking time to 10 minutes at high pressure in an Instant Pot or other electric PC or 8 minutes in a stovetop PC.

Serving Suggestions

I always serve Instant Pot yellow chicken curry with jasmine rice to soak up the curry sauce. I also serve the curry with the garnishes I list in the recipe: a lime cut into wedges, fresh cilantro leaves, and fresh basil leaves, preferably Thai basil, if you can find it. (I have a hard time finding Thai basil in my area.) Another common topping is crushed peanuts, which add a nice, crunchy bite to the curry.

Storing Leftovers

Leftover curry keeps for a few days in the refrigerator or six months in the freezer. When I have enough left over for another meal, I store the curry on its own in 4-cup containers.
Or, when I want some make-ahead freezer lunches, I put a scoop of rice and the curry in a 2-cup container and pop it in the freezer for later. When I want lunch, I microwave a container for 5 minutes. Voila! Curry lunch.

What do you think?

Questions? Other ideas? Leave them in the comments section below.

Related Posts

Pressure Cooker Thai Green Curry with Chicken
Pressure Cooker Massaman Curry
Pressure Cooker Thai Red Curry with Beef
My other Pressure Cooker Recipes
My other Pressure Cooker Time Lapse Videos

Enjoyed this post? Want to help out DadCooksDinner? Subscribe to DadCooksDinner via eMail and share this post with your friends. Want to contribute directly? Donate to my Tip Jar, or buy something from Amazon.com through the links on this site. Thank you.

Quick Velveted Chicken Stir Fry

September 14, 2023 by Mike Vrobel 12 Comments

A bowl of velveted chicken stir fry on rice, with chopsticks

Velveted Chicken Stir Fry, short-cut version. Want a weeknight stir fry with chicken as tender as velvet? Have I got a technique for you.

Velveting is a Chinese technique to protect meat from the heat of a wok. First, marinate the meat in egg white, corn starch, and flavoring liquids, like soy sauce and rice wine. Then, par-cook the meat in oil or water before stir-frying to set the coating. This coating - the velveting - forms a protective barrier, keeping the meat tender while it browns.

A bowl of velveted chicken stir fry on rice, with chopsticks

I don't have time for all that in a weeknight stir fry. I take a shortcut. I stick with the corn starch marinade, skipping the egg white and the par-cooking step. The marinated chicken breast goes straight in the hot wok with no par-cooking. Even without par-cooking, the cornstarch coating protects the meat and keeps it tender.

Credit where it's due - I picked this tip up from Cooks Illustrated at some point - I can't find the original recipe, but it's in my backlog of issues somewhere.

Now, is this as tender as real velveted chicken? Of course not. Why would Chinese restaraunts insist on the pre-cooking step if it was? But it is a weeknight, and I'm in a hurry. Adding the cornstarch to my marinade gives me some of the benefits of velveting without adding any time to my stir fry. It's a no-brainer - go with a quick velvet.

Ingredients

  • 2 tablespoons soy sauce
  • 2 tablespoons Shaoxing wine (or dry sherry)
  • 2 teaspoons corn starch
  • 1 ½ pounds boneless skinless chicken breast, cut into ½ inch by 2-inch strips
  • ½ teaspoon Sichuan pepper salt (or ½ teaspoon kosher salt)
  • 1 tablespoon plus 1 tablespoon vegetable oil
  • 2 cloves garlic, smashed
  • 1 piece of ginger the size of a quarter, smashed
  • 2 green onions, trimmed, white part cut into 1-inch lengths, green part minced into thin rings

Sauce

  • 2 tablespoons soy sauce
  • 1 tablespoon sugar
  • 1 tablespoon rice wine vinegar (or balsamic vinegar)
  • 1 teaspoon water
  • 1 teaspoon corn starch
  • 1 teaspoon toasted sesame oil

How to Make Velveted Chicken Stir Fry

Marinate the chicken

Velveting the chicken

In a medium bowl, whisk the soy sauce, rice wine, and cornstarch until the lumps of starch dissolve. Add the cut-up chicken, sprinkle with the Sichuan pepper salt, and toss to coat. Let the chicken sit in the marinade until you are ready to stir fry - up to half an hour ahead if you have the time - tossing the chicken occasionally to coat it with marinade.

Whisk the sauce

Put the sauce ingredients in a small bowl and whisk with a fork until the sugar and cornstarch dissolve.

Stir fry the chicken in 2 batches

Chicken going into the wok

Turn on the fan on the oven hood. If using a carbon steel wok, heat over high heat, then swirl in one tablespoon of the vegetable oil. If using a nonstick pan, put the oil in the pan and heat over medium-high heat until the oil is shimmering and starting to have wisps of smoke. Add half of the chicken, toss to coat with oil, and then stir fry until it loses its pink color and browns a little on the edges, about 2 minutes. Pour the chicken from the pan onto a serving platter.
Return the pan to the heat, add the second tablespoon of vegetable oil, and let it heat for a minute. Add the second batch of chicken to the pan, toss to coat with oil, and then add the garlic, ginger, and white part of the green onions. Stir fry until the second batch of chicken loses its pink color and browns a little on the edges, about 2 more minutes. Stir the first batch of chicken (and any accumulated juices) back into the pan, stirring for a minute to heat through.

Simmer the chicken in the sauce

Pouring the sauce over the stir-fried chicken

Whisk the sauce again, then pour it into the pan while stirring the chicken to coat evenly. Stir the chicken until the sauce tightens and turns glossy, about 30 seconds. Pour the chicken onto the serving platter, sprinkle with the minced green onions, and serve.

Notes

  • Serve with white rice (of course) or Chinese noodles, and a side of stir-fried vegetables.
  • Do you have the time to really velvet your chicken? Heat 1 cup of oil in your wok or fry pan, then fry the marinated chicken in two batches, one minute per batch, to just set the outside coating. Pour out the oil, then continue with the rest of the recipe as written.

Is baking soda or cornstarch better for velveting chicken?

For this recipe, cornstarch is a much better choice. Some traditional recipes use both, with baking soda as a tenderizing marinade and cornstarch as a crust on the chicken. (This technique is more common with velveted beef, which is not as tender as chicken breast and needs extra help.)

Inspired By: Cooks Illustrated Magazine

What do you think?

Questions? Other ideas? Leave them in the comments section below.

Related Posts

Thai Noodle and Pork Stir Fry
Green Bean Stir Fry
Weeknight Fried Rice

Enjoyed this post? Want to help out DadCooksDinner? Subscribe to DadCooksDinner via email and share this post with your friends. Want to contribute directly? Donate to my Tip Jar, or buy something from Amazon.com through the links on this site. Thank you.

Instant Pot Buckeye Beans

September 12, 2023 by Mike Vrobel 3 Comments

A bowl of Instant Pot Buckeye Beans

Instant Pot Buckeye Beans, aka yellow Indian woman beans, are easy to cook from dried in a pressure cooker, with no soaking required.

Buckeye beans, buckskin beans, yellow Indian woman beans...these beans go by many names. (Some of which seem culturally insensitive. That's why Rancho Gordo beans switched to calling them Buckeye Beans. As an Ohioan, I am all for calling them Buckeye beans.)

Forget the naming issues because these beans are fantastic, especially if you make them in the pressure cooker.

A bowl of Instant Pot Buckeye Beans
[feast_advanced_jump_to]

Buckeye beans do have an interesting history. Like most beans, they originated from Central America, probably Mexico, and went to Europe during the Columbian exchange. They were forgotten in the Americas until Swedish immigrants brought them back, where Indian tribes in Montana adopted them. That's a world of travel for a humble bean.

Ingredients for Instant Pot Buckeye Beans

INGREDIENTS

  • 1 pound dry Buckeye beans (aka Yellow Indian Woman beans), sorted and rinsed
  • 6 cups water
  • 1 teaspoon fine sea salt
  • ½ teaspoon baking soda (optional)
  • 1 small to medium onion, peeled and halved
  • 2 bay leaves (optional)

How to make Instant Pot Buckeye Beans

Broken beans and stones found while sorting buckeye beans

Sort and rinse the beans

Sort the buckeye beans, removing broken beans, stones, and dirt clods. Put the beans in a strainer and rinse under running water.

An Instant Pot full of dry buckeye beans, with onions an bay leaves

Pressure Cook the Beans for 35 Minutes With a Natural Pressure Release

Put the rinsed beans in an Instant Pot or pressure cooker. Pour in the 6 cups of water, then stir in the teaspoon of salt and the baking soda. Add the onion and bay leaves. Lock the lid on the pressure cooker. Cook on high pressure for 35 minutes in an Instant Pot or other electric pressure cooker or 35 minutes in a stovetop PC. (In an Instant Pot, use Manual, Pressure Cook, or Pressure Cook - Custom mode set for 35 minutes). Let the pressure come down naturally, about 20 minutes. (You can quick release any remaining pressure after 15 minutes if you're in a hurry.)

Instant Pot set to pressure cook for 35 minutes at high pressure

Serve

Unlock the pressure cooker lid, opening it away from you to avoid the hot steam. Discard the onion and bay leaves. Ladle the beans into bowls, serve, and enjoy!

Substitutions

  • Other Beans: As I said above, buckeye beans are also called yellow Indian Woman beans or buckskin beans. They are very similar to black beans, pink beans, and pinquito beans.
  • Non-Bean Ingredients: You can replace the onion with a couple of unpeeled garlic cloves or skip it altogether. You can also skip the bay leaf if you don't have any. Beans, water, and a little salt are enough - but the onion and bay add a subtle extra flavor to the beans.

Equipment

A 6-quart pressure cooker

Pressure cooker dried beans are one of the reasons I became a pressure cooker convert. Try them - you'll never go back to canned beans. (OK, maybe you will, for convenience - but see the Storage section for tips on make-ahead freezer beans.)

Scaling

This recipe scales down easily - cut everything in half if you don't need as many beans or have a 3-quart pressure cooker. Scaling up runs into space issues; if you have an 8-quart pressure cooker or larger, you can double this recipe, but it's too much to fit in a 6-quart pressure cooker.

Soaking buckeye beans?

I always get the "to soak, or not to soak?" question. I don't soak buckey beans in this recipe. They don't need an overnight soak to cook to tenderness with 35 minutes at high pressure.

That doesn't mean you can't soak the beans. They turn out fine, though the bean broth isn't quite as full-bodied. Soaked beans cook much quicker, 15 minutes at high pressure. I use that when cooking the beans with other ingredients, where the shorter cooking time keeps me from overcooking the whole dish to get the beans tender.

Sorting Beans

Beans are an agricultural product, and stuff tends to creep in when processed. Beans should always be sorted and rinsed before cooking to get rid of any twigs, stones, clumps of dirt, or broken beans.

To sort the beans, I pour them out on one side of a rimmed baking sheet (a half-sheet pan) to keep the beans from escaping. Then I slowly run my fingers through the pile of beans, pulling them towards me on the sheet. I watch the beans as they move, looking for anything that doesn't seem right. If I see something, I poke around in the beans until I find what caught my eye and discard it. I repeat this several times until I'm satisfied everything is out of the beans.

Then I dump the beans into a fine mesh strainer and rinse them under cold running water to wash off any dirt or dust still on them.

Now, the beans are sorted, rinsed, and ready for soaking or cooking.

Why use baking soda with beans?

Baking soda can help beans soften by reducing the acidity in the water, which softens the skin on the beans. If you keep having tough beans, you may have hard water - water with a lot of minerals in it. Hard water is natural and not a health risk, but it is annoying for cooking. Those minerals make the water a little more acidic, making beans tough while cooking. If you keep getting tough beans, you may have hard water, so include the half a teaspoon of baking soda in the recipe. (I live in an area that has mildly hard water, so I add baking soda to my beans.)

Tips and Tricks

  • Salt your bean water! "Salt toughens beans" is a myth. Salting before cooking helps season the beans all the way through as they cook.
  • If your beans are still tough when the cooking time is over, especially any "floaters" at the top of the pot, stir the beans, lock the lid, and pressure cook for another five minutes. Older beans take longer to cook, and if the beans have been sitting on the shelf at your store for a while, they may need extra time.
  • Simmer to thicken: If you have the time and want thicker bean liquid, simmer the beans for 20 minutes after pressure cooking. I set my Instant Pot to Sauté mode adjusted to low, set the timer to 20 minutes, and leave the lid off to let the broth evaporate.

Related Posts

Instant Pot Rio Zape Beans (No Soaking)
Instant Pot Mayocoba Beans (No Soaking)
Instant Pot Cranberry Beans
Instant Pot Yellow Eye Beans
My other Instant Pot and Pressure Cooker Recipes

Enjoyed this post? Want to help out DadCooksDinner? Subscribe to DadCooksDinner via email and share this post with your friends. Want to contribute directly? Donate to my Tip Jar, or buy something from Amazon.com through the links on this site. Thank you.

Instant Pot Coconut Brown Rice

September 7, 2023 by Mike Vrobel 17 Comments

A bowl of brown coconut rice, sprinkled with toasted coconut flakes and a little minced cilantro

Instant Pot Coconut Brown Rice: Delicious, healthy brown rice with coconut milk is quick enough to make on a busy weeknight thanks to pressure cooking.
My daughter is eating healthy. (Good for her!) Every weekend she preps her school lunches, making a big batch of grilled chicken breasts with southwestern spice rub, steamed broccoli, and brown rice. Now, that seems a little boring to me, and I know she loves my regular pressure cooked coconut rice, so I adapted the recipe to give her some rice variety.

A bowl of brown coconut rice, sprinkled with toasted coconut flakes and a little minced cilantro
[feast_advanced_jump_to]

And, geez - listen to me. "Adapted my recipe." This is hardly a recipe; it's barely a technique. Stir 2 cups rice, 2.5 cups liquid (a mix of water and coconut milk), and a little salt in an Instant Pot. Lock the lid, pressure cook for 20 minutes, and the brown rice is ready to go.
If it's not for school lunches, I'll fancy it up a bit with toasted coconut flakes and minced cilantro. It works with grilled chicken breasts (of course), but it's also the ideal side dish with a pressure cooked Thai curry.

Ingredients

  • 2 cups brown Jasmine rice
  • 1½ cups water
  • 13.5-ounce can coconut milk
  • ½ teaspoon fine sea salt

How to make Instant Pot Coconut Brown Rice

Everything in the pot

Pour the rice, water, coconut milk, and salt into the Instant Pot (or other pressure cooker). Give it a quick stir, breaking up the coconut cream from the can.

Pressure cook the rice for 20 minutes with a quick pressure release

Lock the lid and cook on high pressure for 20 minutes in an electric PC ("manual" or "pressure cook" mode in an Instant Pot), or for 16 minutes in a stovetop PC. Quick release the pressure.

Serve

Stir the rice a bit to spread out the coconut cream that floated to the top of the pot. Transfer to a serving bowl, fluff with a fork, serve, and enjoy.

What kind of coconut milk?

I prefer full fat coconut milk for this recipe, but lite coconut milk will also work. Just don't get "cream of coconut", which is sweetened coconut milk. Cream of coconut is for Pina coladas, not for rice.

Tips and Tricks

  • Toasted shredded coconut garnish: A sprinkling of shredded coconut on top of the rice is a nice touch, if you have the time. Turn the instant pot to Sauté mode adjusted to low heat. (Medium-low heat in a stovetop cooker). Pour a thin layer of unsweetened shredded coconut (aka coconut flakes) into the pot and cook, stirring often, until lightly browned. And…please pay attention. Coconut flakes go from browned to burnt in a heartbeat.
  • Types of rice: You can use any long grain brown rice in this recipe; I like the flavor of jasmine rice, but brown basmati rice is also good, and the recipe will work with plain long grain brown rice.
  • Rinsing rice: I don't bother rinsing my rice, but if you want your brown rice to be a little less sticky, you can rinse it. I rinse rice in a fine mesh strainer, running water through it for a few minutes. Then I let it drain and add it to the Instant Pot.

Storage

According to the USDA, Leftover brown rice will last for three days in the refrigerator, or three months in the freezer, as long as it is refrigerated (or frozen) within an hour of cooking in an airtight container. (I portion out my leftovers into 2-cup containers before I put it in the fridge or freezer.) Also, be sure to reheat the rice all the way through - to be precise, an instant read thermometer should read 165°F in the middle of the rice. (This only takes a few minutes in the microwave.)

What do you think?

Questions? Other ideas? Leave them in the comments section below.

Related Posts

Pressure Cooker Brown Jasmine Rice
Pressure Cooker Mexican Brown Rice
Pressure Cooker Brown and Wild Rice Pilaf
Instant Pot White Rice
My other Instant Pot Pressure Cooker Recipes

Enjoyed this post? Want to help out DadCooksDinner? Subscribe to DadCooksDinner via email and share this post with your friends. Want to contribute directly? Donate to my Tip Jar, or buy something from Amazon.com through the links on this site. Thank you.

Instant Pot Chicken Soup With Rice (From Scratch)

September 5, 2023 by Mike Vrobel 15 Comments

A bowl of Instant Pot Chicken Soup with Rice

Instant Pot Chicken Soup With Rice (From Scratch) - Cooking once, cooking twice, cooking chicken soup with rice in a pressure cooker.

Chicken Soup with Rice is a comfort food for my family. Growing up, I read a lot of Maurice Sendak, and my wife listened to a lot of Carole King. We want a comforting soup when we're fighting a cold.

A bowl of Instant Pot Chicken Soup with Rice
[feast_advanced_jump_to]

Cooking once, cooking twice, pressure cooking chicken soup with rice.

Apologies to Maurice Sendak and Carole King.

Chicken broth was my entry to pressure cooking - once I learned how good it was and how quick it was to make, I could never go back to the boxes on the grocery store shelf. Three pounds of bony chicken pieces - I use chicken backs because my grocery store stocks them cheap - an onion, some (optional) carrot and celery, and a bay leaf. Cover with water, pressure cook for 60 minutes, strain, and you have a flavorful chicken broth that is much better than store-bought. I use it in all sorts of recipes, like my Instant Pot Rotisserie Chicken Noodle Soup Recipe .

INGREDIENTS

Chicken Broth (Makes about 3 quarts of broth)

  • 3 pounds chicken backs (or the carcasses from 2 roasted chickens)
  • 1 medium onion, peeled and halved
  • 1 rib of celery, broken into pieces
  • 1 carrot, scrubbed and broken into pieces
  • 1 bay leaf
  • 1 teaspoon salt
  • 8 cups of water (or to cover or to the max fill line of the PC)

Chicken Soup with Rice

  • 1 tablespoon vegetable oil or olive oil
  • 1 medium onion, chopped
  • 1 rib celery, chopped
  • 1 carrot, peeled and chopped
  • ½ teaspoon fine sea salt
  • ½ teaspoon dried thyme
  • 1 pound boneless skinless chicken breasts, cut into 1-inch cubes
  • ½ cup white rice
  • 8 cups of Chicken Bone Broth (from above)
  • 1 ½ teaspoons fine sea salt
  • ½ teaspoon fresh ground black pepper
  • Minced fresh parsley for garnish

How to make chicken and rice soup in an Instant Pot

Pressure cook the broth for 60 minutes

(See my Instant Pot Chicken Broth for a detailed recipe.)
Add the chicken backs, onion, celery, carrot, bay leaf, and salt to an Instant Pot or other pressure cooker, then add the water. (It should cover the chicken backs - if it doesn't, add water to cover or up to the max fill line on the pressure cooker). Lock the lid and pressure cook on high pressure for 60 minutes in an Instant Pot (or other electric pressure cooker) or 50 minutes in a stovetop PC. Let the pressure come down naturally - about 30 minutes. (It takes a long time for all that water to cool off. If you're in a hurry, let the pressure come down for at least 20 minutes, then quick release any remaining pressure.) Scoop the bones and vegetables out of the pot with a slotted spoon and discard. Strain the broth through a fine mesh strainer and discard the solids. Reserve 8 cups of broth for the soup, and refrigerate or freeze the rest for another use.

Sauté the aromatics

Wipe out the pressure cooker pot liner, then put it back in the pressure cooker base. Add the vegetable oil and heat over sauté mode - medium until shimmering, about 3 minutes. (Use medium heat for a stovetop PC.) Add the onion, celery, and carrot, and sprinkle with ½ teaspoon of salt and the thyme. Sauté, stirring occasionally, until the onions soften and turn translucent, about 5 minutes. Stir in the cubed chicken breast, then stir in the rice.

Pressure cook the soup for 4 minutes with a 10-minute Natural Release

Add the 8 cups of chicken broth to the pot, lock the lid on the pot, and pressure cook for 4 minutes on high pressure (use the same timing for both electric and stovetop PCs). Let the pressure come down naturally for 10 minutes, then quick release the rest. (If the released steam starts to sputter and spit out starch, shut the valve and let the pressure come down for another 5 minutes before quickly releasing again.)

Season and serve

Unlock the lid on the pressure cooker, and stir in 1½ teaspoons of salt and the fresh ground pepper. Serve and enjoy!

Make Ahead Broth

I show how to make the broth as part of the recipe, but I usually make it ahead of time and freeze it in 2-cup containers. (I use both pint canning jars and 2-cup storage containers.) When I need a quick weeknight soup, I skip the "make the broth step" by pulling jars of broth out of my freezer.

Tips and Tricks

  • ½ cup of uncooked rice will not look like much, but it will expand a lot. Rice absorbs a remarkable amount of liquid. Don't add more, or you will wind up with more of a rice stew than a soup. The first few times I made this recipe, I used 1 cup of rice to 8 cups of chicken broth, and while it looked OK coming out of the pressure cooker, by the time I served dinner, it was a rice stew, not a soup.
  • If you have leftovers from 2 roasted chickens, use the bones to make the broth and about 2 cups of shredded chicken instead of the raw chicken breast.
  • If you insist on using store-bought chicken broth, substitute 2 quarts of reduced sodium broth for the 8 cups of homemade broth. But please try the homemade broth at least once. You won't go back to store-bought.
  • Brown rice: You can substitute brown rice for the white rice, but increase the pressure cooking time to 20 minutes to cook the rice through. (I also recommend substituting boneless skinless chicken thighs for the boneless skinless chicken breast, because chicken thighs will do better with the longer cooking time.)
  • Wild rice: Chicken and wild rice soup is a very different recipe, so I recommend using my Instant Pot Rotisserie Chicken and Wild Rice Soup Recipe  instead of this one.
  • A little lemon: I didn't include it in the recipe, but a little lemon juice is a good addition to this recipe. Stir in a tablespoon of fresh squeezed lemon juice with the salt and pepper right before serving.
  • Rotisserie Chicken Trick: Looking for a quick way to make homemade chicken broth? Buy a rotisserie chicken, save the breast meat for the soup, and toss the rest in the pot to make the broth. See my Instant Pot Rotisserie Chicken Broth recipe for the details.
Steps to make chicken soup with rice in a tower image for Pressure Cooker Chicken Soup With Rice (From Scratch) | DadCooksDinner.com
Pressure Cooker Chicken Soup With Rice (From Scratch)

What do you think?

Questions? Other ideas? Leave them in the comments section below.

Related Posts

Pressure Cooker Browned Chicken Broth
Pressure Cooker Chicken Noodle Soup with Vegetables
Pressure Cooker Tortilla Soup (Sopa de Tortilla)
How to Cook White Rice in Instant Pot
Easy Chicken Stew Recipe
My other Instant Pot Recipes

Enjoyed this post? Want to help out DadCooksDinner? Subscribe via eMail or RSS reader, recommend DadCooksDinner to your friends, and buy something from Amazon.com through the links on this site. Thank you!

Instant Pot Beet Pickled Deviled Eggs

August 29, 2023 by Mike Vrobel 2 Comments

Beet pickled deviled eggs topped with a piece of chive

These Instant Pot Beet Pickled Deviled Eggs are a fun and colorful appetizer with their gorgeous pink color.

Pink Deviled Eggs came up in Ruth Reichl's substack newsletter. I was surprised by how pretty they looked and how easy they were. Just buy a couple of jars of pickled beets, and give the deviled eggs a soak!

The only gotcha with this recipe is that you have to plan ahead. The eggs need to soak in the pickled beet brine for 12 to 24 hours, so I can't make them the day of a party like I usually do. I'm willing to make a plan because these eggs are so striking.

Beet pickled deviled eggs topped with a piece of chive
[feast_advanced_jump_to]

Ingredients

  • 6 large eggs
  • Liquid from 32 ounces of pickled beets (plus water if needed)
  • ⅛ teaspoon fine sea salt (a pinch)
  • ⅛ teaspoon fresh ground black pepper
  • 2 tablespoons Prepared Horseradish (or more to taste)
  • 1 teaspoon Dijon mustard
  • 4 tablespoons mayonnaise
  • Minced chives (Optional Garnish)

How to make Instant Pot Beet Pickled Deviled Eggs

Hard boil the eggs (Instant Pot 5-5-5 eggs)

Pour 1 cup of water into an Instant Pot or other pressure cooker. Put a vegetable steaming basket in the pot, and set 6 large eggs in the basket. Lock the lid and pressure cook on high pressure for 5 minutes ("Manual" or Pressure Cook mode on the Instant Pot.). Once the pressure cooking time is over, let the pressure come down naturally for 5 minutes to finish cooking, then quick release any remaining pressure. Immediately move the eggs to an ice water bath to chill down for at least 5 minutes. (Detailed instructions here: Instant Pot Hard Boiled Eggs).

Hard boiled eggs soaking in beet pickle brine
Soaking in Beet Pickle Brine

Beet Pickle the Eggs

Peel the hard-boiled eggs. Put them in a bowl and pour in the pickled beet liquid. (I add a few of the beets to the bowl, too). If the pickling liquid doesn't cover the eggs, add water until the eggs are covered. Move the bowl to the refrigerator and refrigerate for at least 12 hours and up to 24 hours.

Separate the yolks and mash the filling

Slice the pickled eggs in half lengthwise, and gently remove the yolks to a bowl. (Set the whites aside on a plate, cut side up.) Break up the yolks with a fork until they are crumbled, then sprinkle with a pinch of salt. Add the prepared horseradish, dijon mustard, and mayonnaise to the bowl. Stir and mash with the fork until thoroughly combined and most of the lumps of egg are gone. At this point, the egg whites and filling can be covered and refrigerated for up to a day.

Pipe the filling into the eggs, garnish, and serve

Scoop the deviled egg filling into a quart-sized zip-top bag and squeeze the filling down into one corner. Twist from the top of the bag to force all the filling down, then snip off ¼ inch of that corner of the bag. Put the point of the bag into one of the egg holes and squeeze from the top to pipe the filling out until the hole in the egg is heaping and full. Repeat until all the egg white halves are filled. (Any leftover filling is a chef's treat.) Sprinkle the eggs with paprika, and top each with a chopped chive. Serve and enjoy!

Hard boiled eggs soaked for 12, 18, and 24 hours in pickled beet brine, then cut in half

How long should I beet pickle deviled eggs?

Let the hard-boiled eggs soak in the beet pickle brine for 12 to 24 hours. The difference between 12 hours and 24 hours was subtle, but the 24 hour eggs were darker. I don't go past 24 hours because I don't want the egg to pickle all the way through. I like the look of a pink ring around the egg with a white interior. (You can pickle them for up to 7 days if you want pink all the way through to the yolk.)

Substitutions

  • Pickle Relish: I like the extra kick of horseradish in these deviled eggs, but if you want a sweeter flavor, replace the horseradish with sweet pickle relish.

Frequently Asked Questions

Why use the pressure cooker to hard boil eggs?

Because it's quick, reliable, and makes eggs easy to peel. I use the 5-5-5 method: 5 minutes at high pressure, 5 minutes natural release, and 5 minutes in an ice bath or under cold running water to stop the eggs from overcooking. For more details, see my Instant Pot Hard Boiled Eggs recipe.

How long are beet-pickled deviled eggs good for?

Deviled eggs are good for 3 to 4 days in the refrigerator. If you leave the eggs whole, they will last up to 7 days in the refrigerator.

Making deviled eggs ahead of time

You have to boil and brine the eggs a day ahead to give them time to soak in the pink beet juice. But I always make the deviled eggs ahead of time if I'm taking them to a party or potluck. I slice the eggs, make the filling, and store them separately. (Sliced eggs sealed in a gallon zip-top bag and the filling in a quart zip-top bag.) They will keep in the refrigerator for 3 to 4 days. Then, when it's time to serve, I snip the corner off the filling bag and start making the deviled eggs.

Scaling: Can I double this recipe? What about cutting it in half?

Yes, this recipe scales up or down easily - the cooking time is the same, no matter how many eggs you make. I will always hard-boil a dozen eggs, then make two different types of deviled eggs, like my Instant Pot Deviled Eggs with Potato Chips, Instant Pot Bacon Deviled Eggs, or Instant Pot Guacamole Deviled Eggs. (You can see my entire list of deviled egg recipes here.)

Beets are messy

Why do my fingers look like a crime scene? Beet juice will stain everything, so be as careful as you can.

Related Posts

Instant Pot Deviled Eggs - My master recipe
Instant Pot Smoked Salmon Deviled Eggs
Instant Pot Buffalo Deviled Eggs
Instant Pot Cajun Deviled Eggs
My other Instant Pot and Pressure Cooker Recipes

Grilled Steak Fajitas

August 24, 2023 by Mike Vrobel 10 Comments

A platter of beef fajitas, peppers, and onions, with tortillas in the background

Grilled Beef Fajitas Recipe. How to grill fajitas in your own backyard, and make them even better than your local Tex-Mex restaurant.

Fajitas. The recipe that helped Mexican restaurants conquer America. Fajitas are actually Tex Mex, a blend of both sides of the Norteno border between Mexico and US, where the cooking doesn't let a little thing like a line on a map stop it.

A platter of beef fajitas, peppers, and onions, with tortillas in the background

(Well, actually…America is in love with the holy trinity of Tex-Mex cooking: Fajitas, Margaritas, and tortilla chips with salsa. I'm getting hungry just typing this.)

I learned a fascinating fajita marinade from Robb Walsh in The Tex-Mex Grill and Backyard Barbacoa Cookbook. There are two surprise ingredients that don't sound very Mexican - Pineapple and Soy Sauce, but this marinade is a great recipe. Soy sauce is full of umami, which I've talked about before; it adds extra beefiness to the steak.
Pineapple juice is the really interesting part - it contains an enzyme, bromelain, which is proteolytic (that is, it breaks down protein). I had to double-check that sentence with my wife, the chemistry teacher.

Pineapple juice tenderizes the tough cuts of meat that are used in fajitas; skirt steak, flank steak, chuck steak, flat iron steak, sirloin steak, or whatever cut of beef your local Mexican joint can get cheap from their supplier.

That's right - real fajitas are skirt steak. If I make skirt steak fajitas, I'm being redundant. If I make chicken fajitas, I'm making "chicken beef skirt steaks." But, c'mon…fajitas have taken on a whole new meaning north of the border._
Unlike most marinades, which don't penetrate the meat, this one will really do the job…to the point of turning the meat to mush if marinated for too long. I wouldn't marinate this for more than a couple of hours. This is a marinade that really works. It results in tender beef, sweetened by the pineapple and salted by the soy sauce with a hit of acidic lime. Combine it with grilled peppers and onions, wrap it in a tortilla, and top with some salsa for the best steak fajitas.

Ingredients and substitutions

Ingredients for beef fajitas
  • The pineapple juice and the soy sauce are the important part of the marinade for this grilled steak fajitas recipe. The pineapple softens the steak, and the soy sauce brines it, seasoning it all the way through.
  • The rest of the marinade ingredients are optional. I like the extra flavor from the worchestershire, lime juice, and garlic, but you can skip them.
  • Substitute 1 teaspoon of garlic powder for the fresh garlic clove if that's easier for you.
  • To reduce the heat, use Jalapeno peppers instead of serrano peppers. Serranos have a lot more heat. If you want more heat, add more serranos.
  • To cut the heat entirely, skip the Jalapenos and Serranos. You'll have mild fajitas.
  • The accompaniments are what I like build into my fajitas. Anything goes here, so use whatever accompaniments you want. Some other suggestions are chopped cilantro, guacamole, and a bottle of Mexican hot sauce like El Yucateco.

Grilled Steak Fajita process pictures

Marinate the Beef

Marinating the flank steak for beef fajitas

Marinate the flank steak in a zip-top bag, turning occasionally.

Prep the Vegetables

Slicing the peppers into planks

Slice the onions and bell peppers, leave the hot peppers whole,

Grill the steak and veg

Grilling the flank steak, peppers, and onions

Grill the steak, peppers, and onions over medium heat (350°F) in a 3-3-3-3 flipping pattern, rotating 90 degrees halfway, to get diamond shaped grill marks.

Toast the tortillas

Toasting the tortillas on the grill

Toast the tortillas on the grill for about 30 seconds a side.

Slice the veg...

Slicing the grilled peppers and onions

Slice the vegetables into thin strips...

..and the steak

Slicing the grilled flank steak for fajitas

...and do the same to the steak, cutting against the grain of the meat. Serve with the tortillas and enjoy!

Equipment

A grill. Bigger is better for this recipe because we're grilling a lot of food at once. (I love my extra-large Weber Summit gas grill; the extra space helps with this recipe)

Variations

Chicken Fajitas

Replace the flank steak with 2 pounds of boneless, skinless chicken breasts. The cooking time is the same.

Real fajitas

Fajita means "skirt steak" in Spanish, so to be authentic, use skirt steak instead of flank steak, and only cook for 2 minutes before rotating and flipping (4 minutes a side, 8 minutes total) because skirt steak is thinner than flank steak.

What to serve with grilled beef fajitas

You probably have your own favorite toppings for fajitas, but mine are salsa, sour cream, shredded lettuce, and a squeeze of fresh lime. My kids love generic "shredded Mexican cheese" from the grocery store, and I like crumbled Queso Fresco. Mexican Rice or  Cilantro Lime Rice  and Refried Beans make great side dishes.

Tips and Tricks

Cooking on a smaller grill

For this much cooking, It helps to have a grill with a lot of surface area, like my Weber Summit. With a smaller grill, cook in batches. Start with the beef, then move on to the peppers and onions, and finally, soften the tortillas. Cooking in batches will help if you are cooking on a charcoal grill because the heat will gradually decrease as you cook. You want to cook the beef over a hotter fire than the vegetables and the vegetables over a hotter fire than the tortillas.

Use a meat thermometer

I like my fajitas with a little pink in the middle, so I measure the temperature with a meat thermometer, aiming for 125°F internal temperature. If you want rare fajita meat, cook to 115°F internal temperature; if you want medium-rare, aim for 120°F.

Don't use high heat

I use medium heat for grilling this recipe; high heat will burn the outside of the steak and the vegetables before they are cooked properly, especially with the sweet pineapple in the marinade.

Adapted from: Robb Walsh, The Tex-Mex Grill and Backyard Barbacoa Cookbook

Related Posts

Grilled teriyaki flank steak
Quick Red Salsa
Grilled Flank Steak with Chimichurri
Grilled Mexican Hot Dogs
Grilled Mexican Short Rib Tacos with Poblanos, Onions, and Pineapple Salsa
Grilled Skirt Steak Tacos with Jalapenos and Onions
My other Grilling Recipes

Enjoyed this post? Want to help out DadCooksDinner? Subscribe to DadCooksDinner via email and share this post with your friends. Want to contribute directly? Donate to my Tip Jar, or buy something from Amazon.com through the links on this site. Thank you.

Instant Pot Coconut Curry Chicken

August 22, 2023 by Mike Vrobel 6 Comments

A plate of coconut curry chicken thighs with Thai curry paste and a lime in the background

Instant Pot Coconut Curry Chicken Thighs. An easy weeknight dinner inspired by Thai curry for when I need to spice up a random Tuesday.

A plate of coconut curry chicken thighs with Thai curry paste and a lime in the background
[feast_advanced_jump_to]

What Is Coconut Chicken Curry?

This recipe is my quick, weeknight, Thai-curry-inspired chicken thighs. It's what I make when I don't have time for a full Thai curry, but I crave those curry flavors of sweet, salty, spicy, and hot.

The key to Coconut Chicken Curry is two canned ingredients: Thai curry paste and Thai coconut milk.

Other than that, this is a simple pressure cooker meal. I sauté the garlic and ginger just a little to release their flavors into the oil, and after that, it's a dump, stir, and lock the lid production. Serve this with jasmine rice, basmati rice, or Thai rice noodles for an easy weeknight meal with a lot of flavor.

Oh, and…please, join me on the Dark Side. (Of the chicken.) You can make this recipe with boneless, skinless chicken breasts, but that's boring. Chicken thighs have more flavor and stand up to pressure cooking without overcooking. Dark meat is where it's at!

Ingredients

  • 1 tablespoon vegetable oil
  • 2 cloves garlic, peeled and crushed
  • 1-inch piece of ginger, peeled and sliced thin
  • 13.5-ounce can of unsweetened coconut milk
  • 1 tablespoon soy sauce
  • 2 tablespoons Thai red curry paste
  • 3 pounds boneless skinless chicken thighs
  • 1 teaspoon fine sea salt
  • Juice of 1 lime
  • Minced cilantro for garnish (optional)

How to Make Instant Pot Coconut Chicken Curry

Sauté the aromatics: 

Heat the vegetable oil in an Instant Pot set to Sauté mode until the oil starts to shimmer. (Medium heat in any other pressure cooker.) Add the garlic and ginger, and cook until the garlic starts sizzling, about 1 minute.

Coat the chicken with coconut milk and curry paste

Pour the coconut milk into the pot. Stir in the soy sauce and curry paste, and keep stirring until the coconut milk and curry paste are smooth and blended. Sprinkle the chicken thighs with the sea salt, then add them to the pot, turning to coat with the coconut milk and curry sauce.

Pressure cook for 10 minutes with a Natural Release

Lock the lid on the cooker. Pressure cook at high pressure for 10 minutes ("Manual" or "Pressure cook" mode in an Instant Pot), then the pressure comes down naturally, about 15 more minutes.

Serve

Unlock the lid on the pressure cooker, and scoop the chicken thighs out into a bowl or platter. Stir the lime juice into the sauce in the pot, then spoon a few scoops of the sauce over the platter of chicken. Sprinkle the minced cilantro on the chicken, and serve, passing the rest of the sauce at the table. (Serve with Jasmine or Basmati rice) Enjoy!

Recipe Tips and Substitutions

What kind of Thai Curry Paste?

I use red curry paste in the pictures, but any curry paste - green, yellow, massaman, Panang - will work.

What kind of coconut milk?

Make sure to get a can of unsweetened coconut milk. You can use regular or low fat coconut milk in this recipe; both work well.

But - make sure to get unsweetened coconut milk. You don't want "cream of coconut," which is for Pina Coladas, not curries. And you don't want coconut water, which makes a refreshing beverage, but a bland curry.

Thai Curry Paste vs. Curry Powder

Thai Curry Paste is found in the international aisle in most grocery stores, but if you can't find it, substitute 2 tablespoons of dry curry powder or garam masala from the spice aisle. (Those are Indian curry powders, which change the flavor slightly but still taste great.)

Add the curry powder with the garlic and ginger so it is toasted for a minute before adding the coconut milk.

Chicken breasts for chicken thighs

You can substitute boneless skinless chicken breasts. They cook for the same time as the chicken thighs, so the recipe works as written. (That said, boneless skinless chicken breasts are bland compared to chicken thighs in this recipe.

Storing Leftovers

Leftover chicken curry stores well. It will keep in the refrigerator for a few days or frozen for up to 6 months. I store it in 2-cup containers so it is ready in lunch-sized portions.

How to thicken this curry

This curry is supposed to be on the thin side, with lots of sauce to soak up with rice or noodles. But, if you want to thicken it up, set your Instant Pot to Sauté mode - High (medium-high heat in a stovetop PC), bring it to a boil, and then set the Instant Pot to Sauté mode - Low and simmer the sauce for 10 to 20 minutes to thicken it up. Stir and scrape the pot while simmering to ensure nothing sticks and burns at the bottom.

What do you think?

Questions? Other ideas? Leave them in the comments section below.

Related Posts

Instant Pot Short Ribs with Coconut Milk and Thai Curry
Instant Pot Massaman Chicken Curry
Pressure Cooker Thai Green Chicken Curry
Instant Pot Yellow Curry
My other Instant Pot and Pressure Cooker Recipes

Enjoyed this post? Want to help out DadCooksDinner? Subscribe to DadCooksDinner via email and share this post with your friends. Want to contribute directly? Donate to my Tip Jar, or buy something from Amazon.com through the links on this site. Thank you.

Cast Iron Ribeye, Pan-Seared and Herb Butter Basted

August 17, 2023 by Mike Vrobel 1 Comment

Ribeye Steaks in Cast Iron Pan covered with Herbs and Shallots

Cast Iron Ribeye, Pan-Seared and Herb Butter Basted. This is how to cook a ribeye in a cast iron skillet for a quick and amazing steak.

I was chatting with my local Le Creuset store manager about cast iron skillets, and she asked if I wanted to see a video of the pan in action.

Ribeye Steaks in Cast Iron Pan covered with Herbs and Shallots
[feast_advanced_jump_to]

A rib eye was searing in the skillet. The chef covered it with herbs and garlic and slid it into the oven. Then he moved it back to the stovetop and finished with a butter baste. I was mesmerized, watching him spoon sizzling butter over the ribeye.
The manager knew she had me - I'm pretty sure I stopped talking in the middle of a sentence, jaw hanging open, staring at butter-basted beef. The next thing I remember is leaving the store with a heavy box under my arm.
I came home and duplicated the recipe - and I regret nothing. It's every bit as good as it looked in the video.

What kind of Cast Iron Skillet should I use?

I wrote this recipe years ago. Since then, I switched from an enameled Le Creuset skillet to a bare metal cast iron skillet. (And, sadly, my local Le Creuset store closed.)
Enameled and bare cast iron will work with this recipe; I switched because I'm a kitchen gear fanatic and wanted to try bare cast iron skillets. 
The advantage of the enameled skillet is it is much easier to care for without the risk of rusting. I have to baby my bare metal cast iron pan, seasoning it with oil after every use.
Inspired by: Classic Pan-Seared Ribeye Steak [CertifiedAngusBeef.com]

Equipment

  • 12-inch cast iron skillet (I use a Le Creuset cast iron skillet in the pictures, but a bare metal cast-iron skillet like a Lodge Cast Iron Skillet will work just as well.)
  • An instant-read thermometer and a probe thermometer. The instant-read thermometer is for checking the final doneness. With its wire and alarm, a probe thermometer makes it easy to pull the steak out of the oven at 105°F so it doesn't overcook before the butter basting.

Ingredients

  • 2 (1½ inch thick) bone-in Ribeye steaks
  • 1 tablespoon kosher salt (1½ teaspoons per steak)
  • 1 teaspoon fresh ground mixed peppercorns (or black pepper)
  • 1 teaspoon vegetable oil
  • 1 medium shallot, trimmed, peeled, and sliced paper thin
  • 4 sprigs of fresh thyme
  • 2 sprigs of fresh rosemary
  • 4 tablespoons butter

How to Cook a Ribeye in a Cast Iron Skillet

Season the steak

Ribeye steaks salted on a plastic cutting board

One hour before cooking, remove the steak from the refrigerator, pat it dry with paper towels, and season it evenly with salt and pepper. Let the steak sit at room temperature until it is time to sear.
You can salt up to two hours in advance. But, if you can't salt at least an hour in advance, season the steak right before cooking. It needs at least an hour for the dry brine effect.

Preheat the pan

Ribeye steaks in a cast iron pan

Thirty minutes before cooking, put the skillet in the oven and heat at 450°F to get the pan ripping hot.

Sear the ribeye for 4 minutes a side

Browned ribeye steak in a cast iron pan

Move the pan from the oven to the stovetop and turn the burner to medium-high heat. (Carefully! The pan is hot!) Pour the oil into the pan, and swirl it around to coat the bottom of the pan. Put the steak in the pan and sear without moving until a browned crust forms on the bottom, about four minutes. Flip the steak, and cover each with sliced shallots, two thyme sprigs, and one rosemary sprig. Move the pan back into the oven.

Oven roast the steak for 5 minutes

Ribeye steaks in a cast iron pan in an oven, with a probe thermometer

Roast the steak in the oven until the steak reaches an internal temperature of 105°F, about five minutes. (Use an instant-read thermometer in the thickest part of the steak.)

Baste the steaks with butter for 5 minutes

Spooning butter over ribeye steaks in a cast iron skillet

Move the pan back to the stovetop over low heat. (Again, be careful, hot pan). Put the butter into the pan between the steaks. Once the butter melts, scrape the shallots and herb sprigs off the steaks and into the butter. Use a spoon to baste the steaks with the butter, and cook them until they reach an internal temperature of 115°F to 120°F for medium-rare, about five minutes of basting.

Brown the shallots and serve

Ribeye steak covered with shallot herb butter, ready to eat

Transfer the steaks to plates, leaving the shallots and herbs in the pan. Continue to saute the shallots and herbs in the butter, occasionally stirring and scraping the pan, until the shallots are brown and crispy about three more minutes. Discard the herb sprigs. Pour the shallots and butter over the steaks, serve, and enjoy!

Tips and Tricks

  • Meat thermometer: A thermometer is how to ensure doneness. You can go with my timings, and they'll probably work fine, but every kitchen, stove, and cast iron pan is different. Using a thermometer, you'll get the doneness you want.
  • Different Doneness: Don't like medium-rare steak? For rare, sear the steak for three minutes, then cook to 100°F in the oven (about five minutes), then on the stovetop to 110°F to 115°F (about 4 more minutes). Medium? 115°F in the oven (about 8 minutes), then 120°F to 130°F on the stovetop (about 8 more minutes). More than that? You're alone, and I don't want to know about it.
  • Careful! Hot Pan!: When handling an oven-heated cast iron pan, oven mitts are your friend. The Le Creuset handle mitt is terrific - it easily slips on the handle of my Le Creuset and Lodge cast iron skillets. 
  • Just a little oil: I use vegetable oil because of its high smoke point, but canola, grape seed, or avocado oil will all work. I don't use extra virgin olive oil, but not because there's anything wrong with it. Olive oil will work fine in this recipe, but high heat flattens out the extra virgin olive oil flavors I'm paying to get, so I'd rather use cheaper vegetable oil for high-heat cooking.

Substitutions

What if I have a different thickness of steak?

If you have 1-inch thick steaks, skip the "transfer to the oven" step and go straight from searing to butter-basting the steaks on the stovetop, and only butter-basting for about 3 minutes. If you have thicker steaks, the time in the oven will increase, but as long as you oven roast to 105°F, everything else in the recipe works the same.

What can I substitute for the fresh herbs and shallots?

Use any fresh herbs you have on hand. If all you have is thyme or rosemary, use it, and don't worry about the other herbs. If you want to change the flavor, Tarragon or Parsley gives the steaks a French Bistro flavor, and a little slivered basil gives the steaks an Italian Trattoria slant.
If all you have are dried spices, save them for the end, and add them to the melted butter to sizzle for about 30 seconds before pouring the butter over the steaks.
If shallots are too fancy, use a couple of smashed garlic cloves. Or substitute thin-sliced red onion for the shallots or thin-sliced bell peppers.
Or, skip all the fancy stuff, and go straight for butter-basted cast iron ribeye steaks, skipping everything but the steak, salt, pepper, and butter.

Can I use any other cut of beef instead of rib eye?

I prefer bone-in rib eye steaks, but this recipe will work with boneless ribeye steaks, New York strip steaks, or beef tenderloin. This recipe works if you have a good cut of steak and cook it to temperature with an instant-read thermometer.

What if I don't have a cast iron pan?

Any good, heavy bottomed skillet will work with this recipe. A stainless steel clad aluminum pan (like All-Clad) works great, and a carbon steel pan is also good. Don't use nonstick pans for this - the nonstick coating can't handle this high heat.

What should I serve with Cast Iron Ribeye Steaks

I'm a steak and potatoes guy, so while I have the oven on, I use my quick-baked potato recipe or my sheet pan potato recipe. I also like to serve with some steamed green beans or asparagus, and a caesar salad.

What do you think?

Questions? Other ideas? Please leave them in the comments section below.

Related Posts

Sous Vide Flat Iron Steak Recipe
Sear Roasted Chicken Breasts with Shallot Herb Pan Sauce
Sear Roasted Salmon with Knob Creek Maple Orange Glaze
Sear Roasted Turkey Thighs with Tomato Sage Sauce
Grilled Ribeye Delmonico Steaks with Tex-Mex Rub
Cedar Plank Grilled Ribeye with Peppers and Onions
Grilled New York Strip Steaks
Grilled Tomahawk Steak

Enjoyed this post? Want to help out DadCooksDinner? Subscribe to DadCooksDinner via email and share this post with your friends. Want to contribute directly? Donate to my Tip Jar, or buy something from Amazon.com through the links on this site. Thank you.

Instant Pot Japanese Curry

August 15, 2023 by Mike Vrobel 5 Comments

A bowl of Japanese Beef Curry with Rice

Instant Pot Japanese Curry is a sweet, spicy curry, and one of Japan's classic comfort meals. It is versatile, served with rice, or udon noodles, or curry buns. Most important, It is easy to make in an Instant Pot or other pressure cooker. Buy some Japanese Curry Mix tablets, and cook them with beef, potatoes, carrots, and onion for 15 minutes at high pressure.

A bowl of Japanese Beef Curry with Rice
[feast_advanced_jump_to]

What is Japanese Curry?

Japanese curry is pacific rim fusion cuisine from before anyone had ever heard of "fusion cuisine."

Curry came to Japan with the British Navy in the 1860s, and the Japanese Navy took notice. They saw the meal's value on ships: nutritious, easy to prepare, and great with white rice. "Great with white rice" was necessary for the Japanese Navy. White rice was (and is) the staple of Japanese food, but if all you eat is white rice, you get beriberi due to Vitamin B1 deficiency. Japanese curry includes beef and flour, loaded with Vitamin B1, so it was a meal to keep sailors healthy. The Japanese Maritime Self-Defense Forces, the modern version of the Japanese Navy, still serve it every Friday.

My first taste of Japanese curry was in a curry bun on a Kyoto market tour. The tour guide said she makes curry all the time. She likes to cook up a big batch, and serve it the first night as Curry Rice, then later in the week as Curry Udon, with thick udon noodles. If there is any left, she wraps it in dough and makes Curry Buns.

Instant Pot Japanese Curry Ingredients

Ingredients

  • 1 tablespoon vegetable oil
  • 1 large onion, diced
  • 2 cloves garlic, minced
  • 2-inch piece of ginger, grated or minced
  • ½ teaspoon fine sea salt
  • 2 pounds beef chuck roast, cut into 1-inch cubes
  • 2 large carrots (6oz), peeled and cut into 1 ½-inch pieces
  • 1 pound Yukon gold potatoes, peeled and cut into 1½-inch chunks
  • 4 cups chicken broth (homemade or low-sodium store-bought) or beef broth
  • ½ teaspoon fine sea salt (if using homemade broth)
  • 6.4- to 7.8-ounces Japanese curry sauce mix (2 small boxes or 1 large box)
  • 1 tablespoon soy sauce

How to make Instant Pot Japanese Curry

Sautéing onion, garlic, and ginger in an Instant Pot

Sauté the aromatics

In an Instant Pot set to sauté mode - high, heat the vegetable oil until it starts to shimmer. (Use medium-high heat with a stovetop PC). Stir in the onion, garlic, and ginger, sprinkle with ½ teaspoon fine sea salt. Sauté until the onion softens, about 3 minutes.

All the Japanese Curry ingredients in an Instant Pot with the Curry Mix cubes on top

Everything in the pot

Sprinkle the beef cubes with ½ teaspoon of fine sea salt, then stir the beef into the pot. Stir in the carrots, potatoes, chicken broth, and ½ teaspoon of fine sea salt (if using homemade broth). Set the curry roux tablets on top of everything in the pot, and do NOT stir them in - let them float on top. (If they sink to the bottom too soon, you will get a burn warning.)

An instant pot set to cook for 15 minutes at high pressure

Pressure Cook for 15 minutes with a Natural Release

Lock the lid and pressure cook on high pressure for 15 minutes in an Instant Pot or other electric PC (use "Manual," "Pressure Cook," or "Pressure Cook - Custom" set to 15 minutes) or for 12 minutes in a stovetop PC. Let the pressure come down naturally, about 20 minutes. (You can quick release any remaining pressure after 15 minutes if you're in a hurry.)

Japanese Curry, cooked in an Instant Pot

Finish the curry, serve, and enjoy!

Remove the lid from the pressure cooker, tilting it away from you to avoid scalding steam. Stir until the curry paste is mixed evenly into the pot, then stir in the soy sauce. Ladle the curry into bowls, and serve with rice or cooked udon noodles. Enjoy!

Japanese Curry Sauce Mix

Japanese Curry Mix boxes in two different sizes

The key to this recipe is the Japanese curry sauce mix. They are pre-mixed blocks of curry spices and roux, a mix of flour and fat, and come in varying heat levels, from mild to hot. (My favorite is medium-hot, with the green label). At my local stores, they come in two sizes, smaller 3.2-ounce/92g boxes and larger 7.8-ounce/220g boxes. S&B Golden Curry is the most common brand in my area, but I can also find Vermont Curry and Kokumaro Curry at some of my local Asian markets. For this recipe, you want 6 to 8 ounces of curry sauce mix, one large box (7.8 ounces), or two small boxes (3.2 ounces) of S&B Curry.

Don't get vacuum-sealed pouches of Curry Sauce

You might find these vacuum-sealed pouches of curry sauce at your store. They're not what you want for this recipe. They are ready-made curries, ready to eat once you open the pouch.

Substitutions

  • Kinds of beef: I recommend beef chuck for this Japanese curry, but the beef round will also work, as will beef "stew meat," pre-cut at your grocery store.
  • Other meat: If you want to use chicken, I recommend chicken thigh over chicken breast, though both will work. Cut the Pressure Cooking time back to 10 minutes. Otherwise, the recipe is unchanged.
  • New potatoes: Instead of peeling and cubing potatoes, buy baby potatoes, either baby red or baby Yukon gold potatoes. They don't need to be peeled or cubed, you can put them straight into the pot.
  • Vegetarian: If you want a vegetarian curry, look for a box of curry mix that says "No meat contained" or something similar. (S&B Curry Mix in the US is vegetarian). Skip the meat in the recipe, and double the carrots and potatoes. Also, substitute vegetable broth for the chicken broth.
  • Heat level: You can buy varying heat levels of Japanese Curry Mix. I prefer medium-hot, which has just a hint of heat. "Medium-Hot" is not hot; I'd call it low heat. (Japanese curry is much less hot than Indian or Thai curry.)
  • Add an Apple: Apple is a common addition to curry in Japan, especially if cooking for kids. Peel and core two Granny Smith apples, cut them into 1½-inch chunks, and add them to the potatoes and carrots.

Equipment

A 6-quart pressure cooker

Scaling

You can double this recipe if you have an 8-quart pressure cooker. Cut all the ingredients in half, and this recipe will fit in a 3-quart pressure cooker. The cooking time does not change; it takes the same time to cook the beef.

Storage

Japanese curry stores well. You can refrigerate it for up to 3 days or freeze it for 6 months.

What to Serve with Japanese Curry

Curry rice (Kare raisu) is the Japanese classic, so white rice should be the first side dish you try. Curry Udon is another popular version - get thick udon noodles and cook them according to the package directions. And, if you want to get fancy, make Curry Katsu, which is Japanese curry and rice, served with a breaded, deep-fried cutlet of pork (tonkatsu) or chicken (tonkatsu) sliced into bite-sized pieces. 

FAQ

What is the difference between Japanese Curry and Indian Curry?

Japanese curries are descended from Indian curries by way of the British Navy, and both are made of blends of dry spices. Japanese Curries are sweeter and less spice-heavy, and are thicker, and more like a gravy. (Japanese curry blocks have the roux mixed in with the spices.)

What is the difference between Japanese Curry and Thai Curry?

Thai curries are made from fresh ingredients  and dry spices pounded into a paste, while Japanese curry is made of a mix of dry spices. Thai curry has more heat - one of the key fresh ingredients in a Thai curry paste is hot peppers. Japanese curries can have some heat, but the hot version of Japanese curry is about the same heat as a mild Thai curry.

Why shouldn't I stir the curry into the pot?

This is a tip I picked up from the fantastic Japanese food blog Just One Cookbook, and is something I've done in the past with tomatoes. Pressure Cookers have a tendency to burn thick, sugary ingredients that settle to the bottom of the pot. (If you've ever had an Instant Pot burn warning, this is the cause. What you're cooking is too thick and is burning at the bottom of the pot.)

Recipe inspired by Just One Cookbook and the many curries I ate in Japan.

Related Posts

Instant Pot Thai Panang Curry (With Beef)
Pressure Cooker Massaman Beef Curry
Instant Pot Short Ribs with Coconut Milk and Thai Curry
Okonomiyaki recipe
Instant Pot Miso Ramen
Instant Pot Salmon and Rice
My other Instant Pot and Pressure Cooker Recipes

Enjoyed this post? Want to help out DadCooksDinner? Subscribe to DadCooksDinner via email and share this post with your friends. Want to contribute directly? Donate to my Tip Jar, or buy something from Amazon.com through the links on this site. Thank you.

Instant Pot Cannellini Beans (Marcella Beans)

August 8, 2023 by Mike Vrobel 13 Comments

A bowl of cannellini beans with a sprig of rosemary on top and a spoon on the side

Instant Pot Cannellini Beans. Pressure cooker dried beans are a killer application of my Instant Pot. Dried cannellini beans are so much better than canned, and pressure cook in about an hour.

I've posted a few recipes with Cannellini beans, Italy's famous white bean. It's the bean that makes Tuscan bean soup, and I love it with tomatoes and pancetta. But I've never done straight up cannellini beans in an instant pot, like I would for make ahead beans or as a simple side dish. Today we're going to fix that. (Does it have anything to do with finding a bag of Rancho Gordo Marcella beans in my pantry? Who can possibly say?)

A bowl of cannellini beans with a sprig of rosemary on top and a spoon on the side
[feast_advanced_jump_to]

🥫Ingredients

This is a simple dried bean recipe, so the ingredients list is pretty basic

  • Dried Cannellini beans (Marcella beans are particularly good)
  • A sprig of rosemary
  • A few cloves of garlic

See recipe card for quantities.

How to Make Instant Pot Cannellini Beans

Sort and rinse the beans

Sort the Cannellini beans, removing broken beans, stones, and any other non-bean material. Put the beans in a strainer, rinse the beans, and set them aside to drain.

Everything in the pot

Pour the beans into an Instant Pot or other pressure cooker. Stir in 8 cups of water and 1 teaspoon of fine sea salt, then add the rosemary sprig and unpeeled cloves of garlic

Pressure Cook for 35 minutes with a quick release

Pressure cook on high pressure for 35 minutes in an electric pressure cooker ("Manual" or "Pressure Cook" mode in an Instant Pot), or 30 minutes in a stovetop PC. Quick release the pressure in the pot.

Serve or Save

Remove the rosemary and garlic cloves and discard. Serve the beans as-is in their broth, freeze in their broth for later, or drain and use them as directed in another recipe.

💡Tips and Tricks

  • Salt your bean water! "Salt toughens beans" is a myth. Salting before cooking helps season the beans all the way through as they cook.
  • If your beans are still tough when the cooking time is over, especially any "floaters" at the top of the pot, give the beans a stir, lock the lid, and pressure cook for another five minutes. Older beans take longer to cook, and if the beans have been sitting in the shelf at your store for a while, they may need extra time.
  • Simmer to thicken: If you have the time, and want thicker bean liquid, simmer the beans for 20 minutes after pressure cooking. I set my Instant Pot to Sauté mode adjusted to low, set the timer to 20 minutes, and leave the lid off to let the broth evaporate.

🥘 Substitutions

Don't have rosemary or garlic? You can substitute a bay leaf for the rosemary (or skip it), or a peeled onion for the garlic (or skip it). And, as I said above, Rancho Gordo's Marcella beans are my favorite variety of cannellini beans, but they're not the only cannellini bean out there - dried beans from any source with good turnover will work.

Don't have cannellini beans? Great Northern beans are similar, though not as creamy, and cook with these same instructions. (Or check out my Instant Pot Great Northern Beans recipe).

🛠 Equipment

A 6-quart pressure cooker. Pressure cooking dried beans are one of the reasons I love my Instant Pot. Try them - you'll never go back to canned beans. (OK, maybe you will, for convenience - but see the Storage section for tips on make ahead freezer beans.)

📏Scaling

This recipe scales down easily - cut everything in half if you don't need as many beans, or have a 3-quart pressure cooker. Scaling up runs into space issues; if you have an 8-quart pressure cooker, you can double this recipe, but it's too much to fit in a 6-quart pressure cooker.

🤨 Soaking cannellini beans?

I get the "to soak, or not to soak?" question all the the time. I don't soak my cannellini beans in this basic recipe. They don't need an overnight soak, and cook to tenderness with 35 minutes at high pressure.

That doesn't mean you can't soak the beans. They turn out fine, though pre-soaking means the bean broth isn't quite as full bodied. Soaked beans cook faster, 12 minutes at high pressure. I use that when I'm cooking the beans with other ingredients, where the shorter cooking time keeps me from overcooking the whole dish just to get the beans tender.

☃️ Storage

A 2-cup container of cooked cannellini beans, with cooking liquid, replaces a 15-ounce can of beans from the grocery store. They'll last in the refrigerator for a few days, and freeze for up to 6 months. I always make extra beans, and freeze the leftovers for use in other recipes. Freezer beans are ready to use with about 5 minutes in the microwave, and are so much better than canned.

🤝 Related Posts

Instant Pot Cranberry Beans
Instant Pot Cannellini Beans and Greens
Instant Pot Cannellini Beans with Tomatoes and Pancetta
Instant Pot Good Mother Stallard Beans
Pressure Cooker Umbrian Lentils and Sausage
My other Instant Pot and Pressure Cooker Recipes

Enjoyed this post? Want to help out DadCooksDinner? Subscribe to DadCooksDinner via email and share this post with your friends. Want to contribute directly? Donate to my Tip Jar, or buy something from Amazon.com through the links on this site. Thank you.

Wagyu Ribeye Steak

August 1, 2023 by Mike Vrobel 4 Comments

A Wagyu ribeye steak on a cutting board with wasabi, ponzu sauce, salt, green onions, and a knife.

How to Cook Wagyu Ribeye Steak. Gorgeous fatty Wagyu ribeye is best when pan-seared quickly on the stovetop.

I visited Japan for 2 glorious weeks, with stops in Kobe, Kyoto, and Tokyo. Of course, I had to try Kobe beef. (It was amazing). And I tried Matsusaka beef at a Tokyo market (It was every bit as good as the famous Kobe beef). When I got home, of COURSE I had to try to cook some Japanese steaks for myself.

A Wagyu ribeye steak on a cutting board with wasabi, ponzu sauce, salt, green onions, and a knife.
[feast_advanced_jump_to]

Luckily for me, my local grocery store (Acme Fresh Market) is selling Wagyu ribeye on weekends this summer. (And a special shout-out to James, the meat department manager, who made sure they had it for me last weekend.)

Wagyu is beef raised in America, from Japanese cattle, in the Japanese style, and the ribeye steaks were the most marbled meat I've ever bought. The steaks were light pink, not the usual red, because there was so much intramuscular fat.

Wagyu is a challenge to cook. All that fat melts as you cook it, and if you're on a grill, that results in massive flare-ups. So, instead of my grill, I moved indoors to a ripping hot cast iron pan.

How is Wagyu beef different from Kobe beef?

Kobe beef cattle must be purebred Japanese Black Tajima Gyu, with bloodlines going back for generations to the Tajima region in the Hyogo province. (Kobe is in Hyogo). Japanese Black cattle have a lot of intramuscular fat, giving Kobe Beef that incredibly marbled texture. Each carcass is then graded from A1 to A5, with A5 Kobe Beef being the most marbled.

Japanese beef is not just from Kobe. Matsusaka beef, Omi beef, Yonezawa beef, and Hokkaido snow beef are other famous brands of Japanese beef. They're from Japanese Black cattle raised in different regions, each with strict rules about breeding and grading. They are also extraordinary. (I had both Kobe and Matsusaka beef, and I can't tell you which was better. They were both fantastic.)

Kobe beef is incredibly rare outside of Japan. If you don't see the Kobe beef Designated Registration statue shown proudly by the restaurant, it's not true Kobe beef.

What is Wagyu Beef?

Wagyu beef comes from Japanese Black cattle raised outside Japan, mainly in Australia and America. Wagyu literally means Japanese cattle. The two symbols in the name, 和牛, are Wa (Japanese) and gyu (cattle) in Japanese.

Wagyu beef still grows with that incredible intramuscular fat, even outside Japan. I've seen some fantastic American Wagyu beef with tremendous amounts of marbling. (See the pictures in this post - the amount of marbling is mind-blowing.)

Now, not all Wagyu beef is the same quality. Not every Kobe cow grades to A5, and not every Wagyu steak will be the highest quality. Australia grades them on a 0 to 9 scale, and 8 and 9 are the low end of the Japanese A5 grading. America stops grading at "Prime," and that's an A4 grade in Japan.

Find a Wagyu beef supplier you trust, and check their grading system to pick out the quality of beef you want. Yes, it's expensive, but if you love beef, it's worth it.

How to pronounce Wagyu

Wagyu is pronounced "Wag you," with the first syllable being "wa" and the second syllable being "gyou."

½-inch thick Wagyu ribeye

Ingredients

  • 1 boneless Wagyu ribeye steak, cut ½-inch thick (about 10 ounces)
  • 1 teaspoon Diamond Crystal Kosher salt (or ¾ teaspoon fine sea salt)
  • ½ teaspoon vegetable oil (to grease the pan)

Accompaniments (for dipping)

  • Wasabi
  • Flaky sea salt (Maldon or another fancy fleur de sel)
  • Ponzu sauce
  • Teriyaki sauce

How to Cook Wagyu Ribeye Steak

Salting the Wagyu steaks early

Salt the steak an hour ahead

One hour before cooking, remove the wagyu ribeye from the refrigerator, pat it dry with paper towels, and season it evenly with salt. Let the steak sit at room temperature until it is time to sear to dry brine the steak with the salt.

(You can salt up to two hours in advance. But, if you can't salt at least 45 minutes before, don't pre-salt the steak. Salt the steak right before cooking. It needs about an hour for the dry brine effect.)

Fat escaping from a wagyu ribeye in the pan

Preheat the pan

At least 30 minutes before cooking, put a cast iron skillet in an oven and heat at 400°F to get the pan ripping hot. (If you're using a stainless steel-clad aluminum pan, preheat for at least 20 minutes.)

Pan-seared wagyu ribeye steak in a cast iron pan

Cook the steak

Move the skillet from the oven to the stovetop and turn the burner to medium high heat. (Carefully! The pan is hot!) Put the steak in the pan and sear without moving for about 2 minutes, until browned on the bottom. Flip the steak, and sear for about 2 minutes, until browned on the bottom or until the center of the steak reads 130°F on an instant-read thermometer. (Getting a reading on a ½-inch thin steak is difficult.) Immediately move the steak from the pan to a serving plate.

130°F reading on the thermometer

Rest and serve

Rest the steak for 5 minutes, then serve, and enjoy! (I slice the steak into bite-sized pieces and give each one a little sprinkle of flaky salt, a little wasabi, or a dip in ponzu sauce.)

Equipment

A heavy 10-inch to 12-inch skillet. (I recommend a cast iron skillet or a heavy All-Clad stainless steel-clad aluminum skillet.)

Serving Suggestions

Wagyu beef is VERY filling. I know you're thinking, "I eat a whole tomahawk steak by myself, don't tell me it will fill me up." Believe me, a little wagyu goes a long way. My 9-ounce ribeye was enough for 2 to 3 people. Assume you will need 3 to 5 ounces of ribeye per person, depending on how hearty of an eater they are.

Following the Kobe restaurant's lead, I served my wagyu ribeye with little bowls of dipping sauce for each person. I like a bowl of flaky sea salt (like Maldon salt), wasabi (for a bit of heat), and ponzu sauce (the salty-citrusy taste helps balance the fatty meat.) I cut the beef into bite-sized pieces, sprinkle one with some salt flakes, dab a little wasabi on another, and give a third a quick dip in the ponzu.

Frequently Asked Questions

Why is Wagyu beef so good?

Because all that intramuscular fat melts in your mouth. Not only is Wagyu beef fattier than regular beef, but Wagyu fat is also higher in monounsaturated fats (the good fat). Wagyu fat melts below body temperature - 97°F / 33°C - so it melts in your mouth as you eat it. (Regular beef fat melts at 106°F / 41°C, so you melt it a little while cooking. I like my regular beef steaks cooked medium rare because that temperature starts to melt the intramuscular fat.)

What is the best way to cook a Wagyu Ribeye steak?

The best way to cook Wagyu Ribeyes is in a pan preheated to medium-high heat (400°F) for about 2 minutes a side. I like cast iron for this, preheated in a 400°F oven so the entire pan is evenly heated and ripping hot, but any heavy pan will do. (Like an All-Clad or other stainless steel-clad aluminum pan). This should give you a medium-rare to medium steak, but most Wagyu steaks are cut so thin that specific doneness is hard to get. I cook them until they are just browned on the bottom, then flip them. The tender fat more than makes up for any overcooking.

Room temperature before searing

Why rest the steak at room temperature for an hour before cooking? The steak cooks more evenly at room temperature, not at refrigerator temperature.

Also, I like to salt my steaks early to give them a dry brine effect, and that takes about an hour for the salt to work its way into the meat.

What kind of oil should I use?

I wouldn't use extra-virgin olive oil for this recipe. Not because of the high heat; despite what you've read, olive oil is fine for high-heat cooking. It's the cost. When heated, Olive oil loses its distinctive flavor, so it tastes the same as any other oil. I prefer a cheaper neutral-flavored oil like vegetable oil or grape seed oil. (Yes, it's OK to use olive oil: https://www.seriouseats.com/cooking-with-olive-oil-faq-safety-flavor)

Why use a cast iron pan?

Because cast iron holds on to heat so well. Cast iron is like a heat battery that takes a long time to heat up and then a long time to cool down - or, in this case, lose its heat to the steak.

That makes preheating cast iron a problem. It takes a long time to preheat, and on the stovetop, the heat does not spread out on the pan. (That's why I preheat in the oven.)

But any heavy skillet or pan will work for this recipe, so if you have an All-Clad frypan you love (or your favorite brand of heavy skillet), you can use that instead.

Thin Steak (½-inch) vs Thick Steak (1-inch or more)

The recipe has cooking time for ½-inch thick Wagyu ribeyes, the only ones I could find in my local stores. If you get a thicker Wagyu steak, increase the cooking time.

For a 1-inch thick steak, increase the searing time to 3 minutes a side; for a 1½-inch thick steak, increase the searing time to 4 minutes a side. With the thicker steaks, an instant-read thermometer check gets more critical. You want 130°F in the thickest part of the steak for medium-rare. Check it after flipping and every minute after that, pulling it when you get to 130°F. (You can give the steak an extra flip or two if it is browning too quickly.)

Meat thermometer/Instant Read Thermometer

It's hard to take the temperature of a ½-inch thick steak. There isn't much meat to work with. You need an excellent instant-read thermometer with the sensor in the exact tip. Push the thermometer through slowly and take the lowest reading you see as you pass through the steak.

That said, thin steaks are difficult to cook to a specific doneness. I don't worry about doneness, just a quick browning on both sides. If it is still pink in the middle, I am happy. But even if I overcook thin-cut Wagyu a little, it is still mouth-wateringly tender.

Can I grill Wagyu Ribeye steaks?

You can...but it's tricky. You must cook them hot and fast and get them off the grill immediately because there will be flare-ups. (So. Many. Flare-ups.) All that delicious intramuscular fat? It will be dripping through your grill grate and trying to start a grease fire. Watch the steak and move it if the coals below hint at a flare-up. Again, about 2 minutes a side.

Can I reverse sear Wagyu ribeyes?

Not with the ½-inch thin cuts I find at my local stores. They are WAY too thin for a reverse sear.

If you have an extra-thick wagyu ribeye, 1 ½ inches or thicker, especially bone-in, then a Reverse sear is a great idea. Follow the reverse sear ribeye instructions in my Grilled Teriyaki Ribeye Steaks, Reverse Seared recipe, but skip the teriyaki sauce marinade. (It's too heavy for this recipe - but you can use it as a dipping sauce afterward if you want). Also, make sure to put a drip pan under the indirect side of the grill, and watch out for grease fires.

Related Posts

Pan Seared Ribeye with Shallot Herb Butter Baste
Sous Vide Chuck Steak Recipe (24 hours to tenderness)
Grilled Tomahawk Steak (Long Bone Ribeye, Reverse Seared)
Grilled Teriyaki Ribeye Steaks, Reverse Seared
Instant Pot Japanese Curry
Okonomiyaki Recipe
Instant Pot Miso Ramen

Enjoyed this post? Want to help out DadCooksDinner? Subscribe to DadCooksDinner via email and share this post with your friends. Want to contribute directly? Donate to my Tip Jar, or buy something from Amazon.com through the links on this site. Thank you.

Instant Pot BBQ Beef Sandwiches

July 25, 2023 by Mike Vrobel 12 Comments

Instant Pot BBQ Beef Sandwiches are a quick weeknight dinner with big beefy flavor.

Before we start: I know this is not Real Barbecue™. It's not better than beef cooked all day (and all night) in a smoker. But it is good, and it is easy, and a great weeknight dinner.

[feast_advanced_jump_to]

Looking for a similar recipe, but without the barbecue sauce? Check out my Instant Pot Shredded Beef Recipe.

Ingredients

  • 2 pounds beef top round cut into 2-inch cubes (or chuck roast, or bottom round)
  • ½ cup water
  • 8 hamburger buns

Barbecue Rub

(Makes 2 tablespoons of my Homemade Barbecue Rub, or use your favorite store-bought rub)

  • ¾ tablespoon paprika
  • ¾ tablespoon brown sugar
  • ½ tablespoon fine sea salt
  • ½ tablespoon chili powder
  • ½ teaspoon ground black pepper
  • ½ teaspoon garlic powder
  • ½ teaspoon onion powder
  • ¼ teaspoon dried thyme

Barbecue sauce

(Makes 1 cup of my Easy Barbecue Sauce, or use your favorite store bought sauce)

  • ¾ cup ketchup
  • ¼ cup brown sugar
  • ¼ cup cider vinegar
  • 1 tablespoon Worcestershire sauce
  • 1 tablespoon soy sauce
  • 1 teaspoon hot sauce (I use Franks Red Hot)

How to Make Instant Pot BBQ Beef Sandwiches

Spice the beef and make the barbecue sauce

In a small bowl, mix the barbecue rub ingredients (paprika, brown sugar, chili powder, black pepper, garlic powder, onion powder, dried thyme), breaking up clumps of brown sugar with your fingers. Sprinkle the beef cubes with ½ teaspoon of salt, then the barbecue rub. In a medium bowl, whisk the barbecue sauce ingredients (ketchup, brown sugar, cider vinegar, Worcestershire sauce, soy sauce, hot sauce) until smooth.

Everything in the pot

Pour the water into an Instant Pot or other pressure cooker, then add the spiced beef in an even layer. Pour the barbecue sauce on top of the beef and spread it around evenly. Don't stir too much - we want layers, with the water on the bottom, the beef in the middle, and the barbecue sauce on top, to keep the sauce from sticking to the bottom of the pot and burning.

Pressure cook for 30 minutes with a natural release

Lock the lid on the cooker. Cook at high pressure for 30 minutes in an electric pressure cooker ("Manual" or "Pressure Cook" mode in an Instant Pot), or for 25 minutes in a stovetop PC. Let the pressure come down naturally, about 20 more minutes. (If you're in a hurry, you can quick release any remaining pressure after 15 minutes.) Remove the lid, tilting it away from you to avoid the hot steam.

Shred the beef, add some pot sauce, and serve

Remove the beef from the pot with a slotted spoon, then shred the beef with a pair of forks. Ladle liquid from the pot onto the shredded beef until it is saucy, but not swimming in sauce. (I add about a cup of sauce from the pot to the beef.) Spoon onto the buns, pass some extra BBQ sauce at the table, and enjoy!

Recipe Tips

Make Prep Easy by buying a 2-inch thick roast

I keep the prep to an absolute minimum. I want 2-inch cubes of beef, so I look for a 2-inch thick Top Round roast in my grocer's meat case, to make cutting easier. I only need to cut the roast lengthwise and crosswise to get my 2-inch cubes.

(Don't buy pre-cut stew meat, even if it's top round - stew meat is cut into ¾-inch to 1-inch chunks, which are too small for this recipe.)

Barbecue Rub

I always have a batch of barbecue rub in my pantry and barbecue sauce in the fridge, so the rest of the recipe is easy. Sprinkle the beef with the rub, put it in the pot with some water, and spread the barbecue sauce over the top. (Don't stir it much - sauce that sticks to the bottom of the pot may burn while under pressure.)

Of course, you can use your own favorite BBQ rub.

Only Use a Little Pan Sauce

The last trick is not adding all of the sauce from the pot. (I'm always amazed at how much liquid is in the pot after pressure cooking.) The sauce is thin, but full of flavor from beef juices mixing with barbecue sauce. Shred the beef, then only add as much of the sauce as you need to make it wet. I pour the rest of the pot sauce into a fat separator and pass it at the table for anyone who likes extra-sloppy beef.

Which BBQ sauce is best for this recipe?

I think my easy homemade barbecue sauce is best for this recipe, of course. (My second favorite is my Espresso Chipotle Barbecue Sauce, which has a little more heat from the chipotle peppers.) Use your own favorite BBQ sauce; store-bought is fine.

Storing Leftovers

Leftover shredded BBQ beef can refrigerate for a few days, and lasts in the freezer for up to 6 months. (It freezes beautifully.) I pack leftover shredded beef in 2-cup containers for easy lunch-size portions later on.

What to serve with Instant Pot BBQ Beef Sandwiches

Of course, serve these BBQ beef sandwiches on buns, with extra BBQ sauce at the table. I like to add the traditional beef barbecue toppings of thin-sliced onions and pickles. The tart flavors are a nice counterpoint to the rich, sweet beef. Potato salad, cole slaw, and grilled corn are great side dishes to serve with this beef.

Pressure Cooker Barbecued Beef Sandwiches - Tower of process steps. Cut the beef into cubes, sprinkle with BBQ rub, top with BBQ sauce, shred with forks, serve
Pressure Cooker Barbecued Beef Sandwiches - Step by Step Tower

What do you think?

Questions? Other ideas? Leave them in the comments section below.

Related Posts

Pressure Cooker Beef Brisket
Pressure Cooker Pork Western Shoulder Ribs with Barbecue Rub and Sauce
Pressure Cooker Baby Back Ribs
Instant Pot Pulled Pork
My other Pressure Cooker Recipes
My other Pressure Cooker Time Lapse Videos

Enjoyed this post? Want to help out DadCooksDinner? Subscribe to DadCooksDinner via email and share this post with your friends. Want to contribute directly? Donate to my Tip Jar, or buy something from Amazon.com through the links on this site. Thank you.

Instant Pot Doro Wat

July 18, 2023 by Mike Vrobel 7 Comments

An Ethiopian chicken drumstick, coated with sauce, on a tortilla on a red plate

Instant Pot Doro Wat. The Ethiopian classic chicken with berbere spices from your pressure cooker.

I love Ethiopian cuisine, loaded with berbere seasoning and served with a flatbread used as an eating utensil. I first tasted Ethiopian at Empress Taytu restaurant in Cleveland, and that meal was a revelation. The spices! Eating with your hands! It was fantastic, and I've gone back many times since then.

An Ethiopian chicken drumstick, coated with sauce, on a tortilla on a red plate
[feast_advanced_jump_to]

What is Doro Wat?

Wats are the curry-like stew at the heart of Ethiopian cooking. My favorite is Doro Wat, cooked with bone-in, skinned chicken pieces, especially chicken drumsticks. It's an obvious recipe to convert to pressure cooking, replacing the long, slow simmer with high pressure in my Instant Pot.

Ingredients

  • 8-12 chicken drumsticks, skin removed
  • 1 teaspoon fine sea salt
  • 1 teaspoon Berbere seasoning blend
  • 2 tablespoons butter
  • 1 large red onion, minced
  • 2 garlic cloves, minced
  • 1-inch piece of ginger root, peeled and minced
  • ½ teaspoon fine sea salt
  • ¼ cup Berbere seasoning blend
  • 1 cup homemade chicken broth (or water or store-bought low-sodium broth)
  • ½ teaspoon fine sea salt (if using homemade broth or water)

Accompaniments

Flatbread (I substitute large tortillas or pita bread)

What is Berbere Seasoning?

Berbere seasoning is an Ethiopian spice blend and the backbone of Ethiopian cooking. Berbere only has a little heat but a lot of rich spice flavor. There is no one recipe for berbere. Each region, and sometimes each household, has its own version.

How to Make Instant Pot Doro Wat

Skin and season the drumsticks

Peel the skin from the drumsticks - I grab it with a paper towel for extra grip. Sprinkle the drumsticks evenly with 1 teaspoon of salt and 1 teaspoon of Berbere seasoning.

Sauté the aromatics, bloom the spices

In an Instant Pot or other pressure cooker, melt 2 tablespoons of butter using Sauté mode set to medium. (Use medium heat in a stovetop pressure cooker). Add the red onion, garlic, and ginger to the pot, and sprinkle with ½ teaspoon fine sea salt. Sauté, stirring occasionally with a flat-edged wooden spoon, until the onions soften, about 5 minutes. Stir in ¼ cup of Berbere seasoning and let it sizzle for 30 seconds.

Stir in the drumsticks, add the broth

Add the drumsticks to the pot and toss to coat with the Berbere and onion mix. Pour in 1 cup of chicken broth or water, and stir in ½ teaspoon of salt if using homemade broth or water. Scrape the bottom of the pot with a flat-edged wooden spoon to ensure nothing is sticking to the bottom.

Pressure Cook for 15 minutes with a Natural Release

Lock the lid. Cook on high pressure for 15 minutes in an Instant Pot or other electric PC or for 13 minutes in a stovetop PC. (Use "Manual" or "Pressure Cook" mode in an Instant Pot.) Let the pressure come down naturally for about 15 more minutes. (If you get impatient, you can quick release the remaining pressure after 15 minutes of natural release.)

Serve with the pot sauce and accompaniments

Unlock the lid, tilting it away from you to avoid the hot steam. Gently move the drumsticks to a serving platter, then spoon a generous amount of the pot sauce over the drumsticks, coating them well. Pass the rest of the sauce at the table in case anyone needs more. Serve with flatbread, tearing pieces of bread off as pinchers to pull the meat off the bone.

Serving Suggestions

Ethiopian food is traditionally served with Injera, a sourdough bread made from fermented teff flour. The bread is the serving utensil - you rip off pieces and use them to pull and scoop up the food. (Think of pinch-sized tacos). Fermented teff flour dough is more of a project than I'm willing to take on. (I'm not much of a baker.) I go with a flatbread from my local grocery store, usually "burrito size" tortillas, though pita bread and naan will also work.

Storing Leftovers

Frequently Asked Questions

Where do I find berbere spice blend?

The only trick to this recipe is finding a berbere seasoning blend. I have ordered it from Amazon, and found it at my local Whole Foods and World Market stores.

How do you pronounce "berbere"?

The trick to pronouncing "Berbere": Picture a grizzly wearing a French hat. Then say: bear-beret, emphasizing the "ay" sound at the end of beret. Bear-berAY.

What does doro wat mean in English?

Doro wat is Amharic for "chicken stew" and is the national dish of Ethiopia.

Can this recipe be made in a slow cooker?

Yes, this doro wat recipe can be adapted for a slow cooker. Follow the instructions as written, sautéing the aromatics and spices in a frypan on the stove instead of in a pressure cooker. Then, instead of the pressure cooker step, transfer everything to a slow cooker and cook it for 4 hours on low.

Is Doro Wat spicy?

Doro Wat does not have spicy heat but has a lot of rich spice flavor. The heat level depends on the berbere seasoning you buy. Most of them are low heat. Look for cayenne in the ingredient list; the lower it is on the list, the milder the heat.

Do I need to remove the skin from the chicken before cooking?

You don't have to, but it is traditional. I like it better with the skin removed. The spices are right up against the meat, not stuck on the skin on the outside.

What do you think?

Questions? Other ideas? Leave them in the comments section below.

Related Posts

Pressure Cooker Chicken Drumsticks With Peppers and Paprika
Instant Pot Chicken Drumsticks with Potatoes
Instant Pot Quick Chicken Thighs
Instant Pot Lamb Tagine
My other Instant Pot and Pressure Cooker Recipes

Enjoyed this post? Want to help out DadCooksDinner? Subscribe to DadCooksDinner via email and share this post with your friends. Want to contribute directly? Donate to my Tip Jar, or buy something from Amazon.com through the links on this site. Thank you.

Grilled Peppers and Onions

July 13, 2023 by Mike Vrobel 8 Comments

Grilled peppers and onions are my answer to: "I'm grilling. What do I serve as a side dish?" I always have onions in the pantry and peppers in the vegetable crisper, and they grill up beautifully.

Grilling peppers and onions is how I learned to grill vegetables. Most grilled vegetables cook the same as these peppers and onions. Grill them over medium to medium-low heat, turning occasionally, until they get soft and have nice grill marks.

These easy grilled peppers and onions are a versatile side dish. If you already have the grill heated up to cook some burgers, try them on the side! I especially love them with Grilled Sausages.

Ingredients

  • Onion
  • Red bell peppers (or a mix of red, green, and yellow bell peppers)
  • Kosher salt (or fine sea salt)
  • Olive oil
  • Balsamic vinegar
  • Fresh ground black pepper

See the recipe card for ingredient quantities

How to Make Grilled Peppers and Onions

Prepare the peppers and onions

Cut the onion crosswise into ½-inch rings. Cut the peppers into planks by chopping off the top and bottom of the pepper, setting the pepper cut side down, then cutting each side away from the core to make the pepper into planks. Sprinkle the onions and peppers with the salt, then brush with the olive oil.

Preheat the grill to medium-low heat (300°F)

Set the grill up for direct heat cooking at medium-low (about 300°F). For my Weber Summit, this means preheating the grill for ten minutes with all burners on high. Then, I clean the grates with my grill brush and turn the burners down to medium-low.

Grill the peppers and onions

Put the onions and peppers directly over the medium-low heat. If you are cooking on a gas grill, keep the lid closed. Cook until the peppers and onions have grill marks, about 3 minutes. Flip the peppers and onions and cook until they have good grill marks, about 3 more minutes. Flip the peppers and onions, rotating 90 degrees as you flip them (to get diamond grill marks). Cook until the peppers and onions have another set of grill marks, about 3 more minutes. Flip and cook until the peppers and onions are softened, about 3 more minutes. (Sometimes, smaller pieces of pepper will blacken before they start to soften. If pieces need to cook more, but they're getting too black, stack them on top of each other and move them to a cooler part of the grill.)

Marinate the peppers and onions

Move the peppers and onions from the grill into a bowl, and pour the balsamic vinegar over them. Toss to coat, then let rest for at least 5 minutes and up to 15 minutes.

Serve

Cut any overly blackened edges from the peppers and onions. I serve peppers and onions one of three ways: whole, sliced into strips, or diced into a relish. Move the peppers and onions to a serving dish, and sprinkle them with ½ teaspoon of salt and the fresh ground black pepper. Pour the remaining balsamic vinegar from the marinating bowl over the top of the peppers and onions, serve, and enjoy!

Substitutions

  • What kind of onion?  I usually cook sweet Vidalia onions. But white, red, or yellow onions all work in this recipe.
  • What kind of pepper? I prefer red bell peppers because they're ripe. Green bell peppers are just bell peppers that haven't ripened yet. (That's why they're bitter compared to red bell peppers.) That said, I will buy a stoplight pack of peppers from my grocery store when I want a mix of colors with my meal.

Serving Suggestions

After grilling the onions and peppers, I serve them a few different ways:

  • As a relish: I dice them, toss them with their sauce, and use them as a topping for sausages or burgers.
  • As a vegetable side dish: I slice them crosswise into strips and serve them on the side or pile them on tortillas.
  • As a sandwich: I leave them whole, put them in a bun, and top with some cheese and grainy mustard.

Recipe Variations

This recipe is a classic "what grows together, goes together" pairing. Peppers and onions come out of the garden at the same time. At some point in history, every cook has thought, "What if I combine these two…"

  • Italian style: This recipe makes Italian-style peppers with olive oil and balsamic vinegar.
  • Asian style: Use peanut oil, soy sauce, and a tiny drizzle of toasted sesame oil after cooking.
  • Mexican or Tex-Mex style: Use canola oil and lime juice for the marinating step.
  • Spanish style: Use olive oil and marinate with sherry vinegar.

Equipment

A grill and grilling tongs to flip the peppers and onions.

Some people like to use a grill basket to keep the peppers and onions from falling through the grill grates. I've never liked them; they're flimsy compared to my grill grates. They don't heat up, which gets in the way of browning the vegetables.

I flip carefully so the peppers and onions don't slip through the grates. Sure, I lose the occasional pepper or onion into the grill, but not so often that I want to mess with a grill basket.

Leftovers

If you don't eat all the peppers and onions, the leftovers will last a few days in the refrigerator. Leftover peppers and onions make a smoky topping for sandwiches and salads. (I don't bother reheating them.)

Unfortunately, cooked peppers and onions turn to mush after freezing. You need to use them up within a few days of cooking.

How long does it take to grill peppers and onions on the grill?

It depends on your grill. On my grill, set to medium-low heat, it takes about 12 minutes, flipping the peppers and onions every three minutes.
But remember, grill temperatures vary a LOT. Keep an eye on the peppers and onions. They may need more time to brown or less time if they start to burn around the edges.

Cutting a pepper into planks (pictures)

Chop the top off the pepper
Cut one side off...
...rotate, cut the next side off,
repeat...
...until you have four planks and
a pepper core

After grilling (pictures)

Balsamic on top
Toss to coat
Slice crosswise
Diced and ready to serve

Notes

  • I like this as a side dish because I can make it on half the grill while my main course cooks on the other half.
  • If the grill is too hot, and the skin of the peppers is overly blackened, don't tell anyone! Pretend they were supposed to be roasted red peppers and peel the blackened skin off the peppers before cutting them up.

What do you think? Questions? Other ideas? Leave them in the comments section below.

Related Posts:
Grilled Asparagus
Grill Roasted Fennel
Grilled Beets
Grilled Stuffed Jalapenos

Inspired by
I don't remember, specifically. I think it was Cooks Illustrated and Steven Raichlen, but I've done this recipe for so long that I forgot who taught me the basic technique.  I know Stephen and Cooks have both had good suggestions on how to grill vegetables, so I'm going with them.
Cook's Illustrated Magazine
Steven Raichlen: How to Grill

Enjoyed this post? Want to help out DadCooksDinner? Subscribe to DadCooksDinner via email and share this post with your friends. Want to contribute directly? Donate to my Tip Jar, or buy something from Amazon.com through the links on this site. Thank you.

Instant Pot Braciole in Sauce

July 11, 2023 by Mike Vrobel 1 Comment

Beef Braciole in sauce

Instant Pot Braciole in Sauce. Rolled beef from southern Italy, pressure cooked in a red tomato sauce.

Frank said, "You've got to make braciole!" and who am I to argue? Frank is my barber, and his mom is one of my sources for Italian-American cooking. But I get the info filtered through Frank. While he's cutting my hair, I'll quiz him to find out how an authentic Italian grandma makes dinner.

So when Frank told me how good his mom's braciole was, I started pumping him for details. Here is my take on braciole from Mrs. Raso's recipe, or Italian beef braciole "alla nonna Raso."

Beef Braciole in sauce
[feast_advanced_jump_to]

Mrs. Raso's recipe is straightforward. Get "braciole cut" beef - extra-thin sliced pieces of beef round. (Or put thin slices of beef round between two sheets of plastic wrap and pound them flat with a meat mallet - it's more work, but if you need to work out some aggression, it's very therapeutic.)

Ingredients

Ingredients for Beef Braciole

Beef Braciole Ingredients

  • Extra-thin sliced beef round (aka Braciole or Milanesa cut)
  • Fine sea salt
  • Fresh ground black pepper
  • Italian bread crumbs
  • Grated pecorino Romano (or grated parmesan)
  • Garlic, minced
  • Flat-leafed parsley, minced
  • Fresh basil, minced
  • Toothpicks
  • Olive oil

Tomato Sauce Ingredients

  • Olive oil
  • Onion, diced
  • Celery, diced
  • Carrot, diced
  • Garlic, crushed
  • Dried Italian Seasoning
  • Fine sea salt
  • Crushed red pepper flakes
  • Red wine (or broth or water)
  • Beef or chicken broth (preferably homemade or store-bought low sodium)
  • Crushed tomatoes
  • Fresh ground black pepper

See the recipe card for quantities.

How to make Instant Pot Braciole in Sauce

Roll the braciole

A slice of beef sprinkled with the filling, with toothpicks and a few beef rolls next to it

Sprinkle the salt and pepper over both sides of the slices of beef. Mix the bread crumbs, Pecorino Romano, minced garlic, parsley, and minced basil in a small bowl. Lay a piece of beef flat on a cutting board, and sprinkle one side evenly with an eighth of the breadcrumb mixture (about 2 tablespoons per piece). Starting on the thin side, roll up the beef, then secure the roll with three toothpicks, two near the ends and one through the middle. Repeat with the rest of the beef and filling.

Brown the braciole on one side in two batches

A browned roll of beef braciole with an Instant Pot in the background

Heat 2 tablespoons of olive oil in an Instant Pot set to sauté mode until the oil starts shimmering. (Use medium heat on a stovetop PC). Add half the braciole in a single layer and cook until browned on the bottom, about 3 minutes. Transfer the browned braciole to a platter. Repeat with the rest of the braciole, browning it on one side and then transfer it to the platter

Fry the soffrito, simmer the wine

Onions, carrots, celery sautéing in an Instant Pot

Add 1 tablespoon of olive oil to the pot, then add the onion, celery, carrot, and garlic. Sprinkle with the Italian herb mix, crushed red pepper flakes, and ½ teaspoon fine sea salt. Saute until the onions soften, about 5 minutes, stirring and scraping the bottom of the pot with a flat-edged wooden spoon to loosen any browned bits of beef. Pour the wine into the pot and stir, scraping any last stuck bits of onion or beef loose from the bottom of the pot. Simmer the wine for 1 minute to boil off some of the alcohol.

Everything in the pot

An instant pot full of beef braciole ingredients, ready to lock the lid

Add the braciole to the pot, browned side facing up. Pour in the beef or chicken broth, then pour the crushed tomatoes over the braciole. (Don't stir the pot).

Pressure Cook for 30 minutes with a Natural Release

An Instant Pot set to pressure cook for 30 minutes at high pressure

Lock the lid and pressure cook at high pressure for 30 minutes (Use "Manual" or "Pressure Cook" mode in an Instant Pot) or for 25 minutes if using a stovetop pressure cooker. Let the pressure come down naturally, about 20 minutes. (If you're in a hurry, you can quickly release the remaining pressure after 15 minutes.)

Serve

Unlock the lid on the pot, tilting it away from you to avoid the hot steam. Gently lift the braciole rolls out of the pot with tongs or a slotted spoon (or both) and transfer them to a serving platter. Stir the fresh ground black pepper into the tomato sauce in the pot. Carefully remove the toothpicks from the braciole rolls, then pour a few spoons of sauce over the platter of braciole and sprinkle with some pecorino romano cheese. Use the rest of the tomato sauce with dinner - it's enough to sauce a pound of pasta. Serve and enjoy!

Substitutions

Prosciutto: Many beef braciole recipes add a slice of prosciutto to the roll. I didn't include it in the ingredients because I like braciole as a simple food. If you want to include prosciutto, buy one slice per piece of beef. Then, when you're rolling, lay a slice of prosciutto on top of the beef after salting and peppering, then cover it with the other stuffing ingredients.

Equipment

A 6-quart pressure cooker

Scaling

This recipe doubles easily in a 6-quart pressure cooker. Cut all the ingredients in half, and this recipe will fit in a 3-quart pressure cooker. The cooking time does not change; it takes the same time to cook a single braciole through.

Storage

Leftover braciole, covered in sauce, store well. They'll last a few days in the refrigerator or up to 6 months in the freezer. I store them in 2-cup containers so I can microwave myself a quick lunch. Take out the toothpicks before putting them in the fridge or freezer; they'll hold their shape once they're cooked.

Tips and Tricks

  • Holding the rolls together: I hold my rolls of braciole together with toothpicks, instead of trying to truss them with kitchen twine. A couple of quick pokes with a toothpick and my rolls are held together for cooking.

What to Serve with Instant Pot Braciole

The obvious answer is pasta to go with the sauce. I like to serve it with short, tube-shaped pasta to match the look of the rolled braciole, so I use penne, ziti, or rigatoni. I also like a salad and a vegetable side, like green beans or broccoli rabe.

Related Posts

Instant Pot Meatballs with Tomato Sauce
Instant Pot Ragu Tucci
Instant Pot Sausage Ragu
Pressure Cooker Venetian Pasta and Beans (Pasta e Fagioli alla Veneta)
Instant Pot Short Rib Ragu
My other Instant Pot and Pressure Cooker Recipes

Enjoyed this post? Want to help out DadCooksDinner? Subscribe to DadCooksDinner via email and share this post with your friends. Want to contribute directly? Donate to my Tip Jar, or buy something from Amazon.com through the links on this site. Thank you.

Instant Pot Turkey Chili with Small Red Beans

July 6, 2023 by Mike Vrobel 6 Comments

A bowl of turkey and small red bean chili, with minced green onions, tortilla chips, and an Instant Pot in the background.

Instant Pot Turkey Chili with Small Red Beans. Small red beans, pressure cooked from dried, are the backbone of this ground turkey chili.

Canned beans are an add-on to bulk up chili. Homemade beans, cooked from dried, are the main ingredient, giving this turkey chili backbone and depth.

A bowl of turkey and small red bean chili, with minced green onions, tortilla chips, and an Instant Pot in the background.
[feast_advanced_jump_to]

(Now, I'm not a purist. I make quick chilis with canned beans when I have a severe time crunch. Chili is always better than no chili. But all I need is the foresight to start soaking beans the night before or the extra hour to do a quick soak right before cooking.)

I call this wimpy chili; it has turkey and beans in it. But it does have a kick from the peppers in the two cans of Rotel tomatoes. I have difficulty answering the "How hot is it?" question because everyone's heat tolerance differs. (And, when I'm asked, it's usually coming from someone sensitive to spicy food.) My heat level of "hmm…I think it's a little spicy?" is their "Hot," and what I think of as "Hot" makes them turn red, break out in a sweat, and lunge for a glass of water.

(An aside for the Texans currently lighting up the comments with "Turkey? Beans?!? What in tarnation do you think you're doing?" You can make a nice bowl of pressure cooked Texas Red and serve the beans on the side. Or skip them if you are genuinely anti-bean.)

Ingredients

  • Dry small red beans
  • Water
  • Fine sea salt
  • Onion
  • Garlic
  • Ground turkey
  • Chili powder
  • Ground cumin
  • Dried oregano (Mexican oregano if you can find it)
  • Cocoa powder
  • Cinnamon
  • Allspice
  • Chicken broth (homemade chicken broth or store-bought low sodium)
  • Diced tomatoes with chiles (aka Rotel tomatoes)
  • Brown sugar
  • Fresh ground black pepper

See the recipe card for quantities

How to make Instant Pot Turkey Chili with Red Beans

Sort and rinse the beans

Sort the small red beans, discarding any stones, dirt, or broken beans. Rinse the beans, then do an overnight or a quick soak.

Overnight soak

Cover the beans with 8 cups of water, and sprinkle with 2 teaspoons of salt. Leave the beans to soak for at least 8 hours or overnight. Drain and discard the soaking liquid.

OR: Pressure Quick Soak for 1 minute with a 30-minute rest

Put the beans and 8 cups of water in an Instant Pot or other pressure cooker. Sprinkle with 2 teaspoons of salt. Pressure cook at high pressure for 1 minute ("Manual" or "Pressure Cook" mode in an Instant Pot for 1 minute), then quick release the pressure. Let the beans soak in the pot for 30 minutes, then drain the beans and discard the soaking liquid.

Sauté the aromatics

Heat 1 tablespoon of vegetable oil in the Instant Pot using sauté mode until the oil is shimmering. (medium heat in a stovetop PC). Add the onion and garlic to the pot, then sprinkle with ½ teaspoon salt. Sauté, stirring and scraping occasionally with a flat-edged wooden spoon, until the onions start to soften, about 5 minutes.

Toast the spices and break up the turkey

Make a hole in the center of the onions and add the chili powder, cumin, oregano, cocoa, cinnamon, and allspice. Let the spices sit until you smell them toasting, about 1 minute, then stir into the onions. Add the turkey and stir to coat with the onions and spices. Cook, stirring often and breaking up any clumps, until the turkey loses its pink color, about 5 minutes.

Everything in the pot

Stir in the soaked and drained beans, chicken broth, 1 teaspoon of salt (or ½ teaspoon of salt if using store-bought low sodium broth), and diced tomatoes with chilies,

Pressure cook the chili for 10 minutes with a Natural Release

Lock the lid on the Instant Pot and cook on high pressure for 10 minutes. (8 minutes in a stovetop PC). Let the pressure come down naturally, about 20 minutes. (If you're in a hurry, you can quick release any remaining pressure after 15 minutes of natural release.)

Season and serve

Remove the lid carefully, opening it away from you - even when it's not under pressure, the steam in the cooker is scalding. Stir in the brown sugar and black pepper. Serve and enjoy!

Substitutions

  • Other meats: You can substitute ground pork, ground beef, or ground chicken for the turkey in this recipe; they all cook the same. (Or check out my Pressure Cooker Ground Beef and Bean Chili, Instant Pot White Chili with Ground Chicken and Navy Beans, or Instant Pot Ground Pork and Bean Chili recipes.)
  • Simple spices: The spices are listed in order of importance to the recipe. If all you have is chili powder, substitute chili powder for all the other spices (cumin, oregano, cocoa powder, cinnamon, and allspice). You can do the same thing as you work your way down the spice list. If you don't have a spice, replace it with more chili powder. (If you don't have chili powder, you can still make the recipe, but at that point, it's a turkey and bean stew and not chili.)
  • Heat Level: This is a mild chili; the heat comes from the diced chilies in the tomatoes. If you want to cut the heat, replace the diced tomatoes and chilies with straight diced tomatoes. (No chilies in the can). Add ½ teaspoon of ground cayenne or ground chipotle with the chili powder if you want to up the heat.
  • Use water instead of broth: If you don't have broth, use water instead. It won't be as rich, but the beans make their own broth, so it will still be a good chili.
  • Canned beans: Don't want to use dried beans? Substitute 3 15-ounce cans of small red beans (aka Chili Beans), drained and rinsed, and cut the cooking time under pressure to 8 minutes so you don't turn the beans to mush. (For more details, see this recipe: Pressure Cooker Quick Chili with Canned Beans). Or, if you have leftover cooked beans (from my small red bean, pinto bean,  black beans  recipes), thaw out 4 to 6 cups of the beans (and again, cut the cooking time to 10 minutes).

Equipment

A 6-quart pressure cooker

Scaling

To double this recipe, you need an 8-quart pressure cooker; it is already right up against the max fill line on a 6-quart pressure cooker. Cut all the ingredients in half, and this recipe will fit in a 3-quart pressure cooker. The cooking time does not change; it takes the same time to cook the beans, no matter how many are in the pot.

Storage

Store the chili in 2-cup containers. They can refrigerate for a few days or freeze for up to 6 months. 2-cup containers of frozen chili are my favorite leftovers; I love having extra lunches later in the week.

Soaking the beans

Now, if you're a regular reader, you'll know that I don't soak the beans in my Instant Pot Small Red Beans Recipe. I soak them in this recipe to avoid overcooking the ground meat. If you completely forget to soak your beans, you can cook them from dry. Increase your pressure cooking time to 25 minutes (with a natural release). The turkey will be a bit overcooked, but this chili has enough going on that it won't be a big deal.

💡Tips and Tricks

  • Tough beans: If your beans are still tough when the cooking time is over, especially any "floaters" at the top of the pot, stir the beans, lock the lid, and pressure cook for another five minutes. Older beans take longer to cook, and if the beans have been sitting on the shelf at your store for a while, they may need extra time. The overnight soak, salt, and baking soda will help, but sometimes old beans are too dried out.
  • Simmer to thicken: Pressure cookers are sealed, so there is no evaporation. If you have the time and want a thicker chili, simmer the chili for 10 to 20 minutes after pressure cooking. I set my Instant Pot to Sauté mode, adjust it to low heat, set the timer to 10 minutes, and simmer with the lid off until the chili thickens to my liking.

What to Serve with Instant Pot Turkey Chili

I love all sorts of chili toppings. My favorites are minced green onions or diced onions, shredded cheddar cheese, tortilla chips, and sour cream. I also put bottles of hot sauce on the table because my family has a wide range of heat preferences.

What do you think?

Questions? Other ideas? Leave them in the comments section below.

Related Posts

  • Instant Pot White Turkey Chili Recipe (With Dried White Beans)
  • Pressure Cooker Ground Beef and Bean Chili
  • Pressure Cooker 15 Bean Chili
  • Pressure Cooker Turkey and Black Bean Chili
  • Instant Pot Quick Turkey Chili with Canned Beans
  • Instant Pot Venison Chili
  • Instant Pot Red Beans and Rice
  • Instant Pot Cowboy Beans
  • My other Instant Pot Pressure Cooker Recipes

Enjoyed this post? Want to help out DadCooksDinner? Subscribe to DadCooksDinner via email and share this post with your friends. Want to contribute directly? Donate to my Tip Jar, or buy something from Amazon.com through the links on this site. Thank you.

Pan Grilled Bratwurst with Peppers and Onions

July 4, 2023 by Mike Vrobel 17 Comments

A plate of brats with peppers and onions

Pan Grilled Bratwurst with Peppers and Onions. A pan of brats, peppers, and onions makes a great grilled dinner.

My family tree has roots in Wisconsin. Brats are in my blood. I grew up in Ohio but was born at the University of Wisconsin Hospital.

A plate of brats with peppers and onions
[feast_advanced_jump_to]

I love brats, especially with peppers and onions. But the Sheboygan "beer bath" technique has some issues. Don't get me wrong; it turns out great brats. But the onions are just there to flavor the beer bath; they are not worth serving with the bratwurst.

That's why I use the pan-grilling technique in this recipe. I cook the brats in a sealed pan, on a bed of onions and peppers, with only the slightest amount of beer added. The peppers and onions are cooked perfectly in the fat that escapes the brats. I love these peppers and onions; they are the star of the show, a worthy side dish for the brats.

I finish the brats on the grill; they're cooked through by the steam in the pan, then crisped up over direct heat. This avoids the huge flare-ups that come from direct grilling sausages. Sure, there will be a few licks of flame, but the brats are already cooked through; they only need a little browning. If the flare-up turns into a raging fire, move them off the heat until it dies down.

(Don't tell my Wisconsin relatives I've gone rogue on the brat tub. There's no way they can find out; I mean, this is only being posted on the internet…)

To see this same pan-grilled technique but with sauerkraut, check out my Pan Grilled Bratwurst and Sauerkraut recipe. For a simple sausage, check, out my Grilled Sausages basic technique.

Ingredients: A grill safe pan, brats, onions, peppers, and a beer

Ingredients

  • Onions
  • Peppers
  • Fine sea salt
  • Fresh ground black pepper
  • Vegetable oil
  • One package of brats
  • Beer
  • Bratwurst buns

Condiments

  • Spicy brown mustard (optional…but not in my opinion)
    See the recipe card for quantities.

How to make Pan Grilled Bratwurst with Peppers and Onions

Pan with brats on top of sliced peppers and onions

Prepare the bratwurst pan

Toss the onions, peppers, salt, and pepper in the grill pan. Drizzle with the oil and toss again to coat the onions and peppers, then spread in an even layer across the bottom of the pan. Put the brats on the peppers and onions, then pour the beer over everything. Cover the pan with aluminum foil and crimp the edges shut.

Prepare the grill

Set your grill up for cooking on direct medium heat (350°F). For my Weber Summit, I preheat the grill for 15 minutes with all burners on high, scrape the grates clean with my grill brush, then turn all the burners down to medium. In my Weber Kettle, I light a chimney of charcoal, wait for it to be covered with gray ash, then spread it over the bottom of the grill in a tight single layer of coals.

Foil covered pan of brats on the grill over medium heat

Steam the Bratwurst in the Pan

Put the foil-covered pan on the grill over direct medium heat. Cook with the grill lid closed for 20 minutes.

Browning the brats on the grill while the peppers and onions cook uncovered

Grill the Brats, Brown the Peppers and Onions

Remove the foil from the pan, and leave the pan over medium heat. Move the brats from the pan to the grill over direct medium heat. Grill the brats until browned, for about 2 minutes a side, then remove them directly into the waiting buns. Watch out for flare-ups while the brats are over direct heat, and move them around as necessary. While grilling the brats, keep cooking the onions and peppers in the pan, stirring occasionally. The peppers and onions are done when most of the liquid cooks away, and they start to brown around the edges about 10 minutes after removing the foil.

A cooked brat with peppers and onions

Serve

Pass the brats in the buns, with the onions, peppers, and brown spicy mustard on the side. Enjoy!

Substitutions

  • What kind of beer? Now, my dad, who grew up in Stevens Point and Milwaukee, recommends Point Beer (motto: If you're out of Point, you're out of Town) or Miller, his favorite. You should use any beer you like drinking because you'll only use a bit of it in the pan. I would avoid light beers; they're so light flavored that you might as well use water (see the next step). But again, use what you're going to drink.
  • No Alcohol: Most of the alcohol cooks off during the cooking time of this recipe, but there is still some left at the end. If you want to avoid alcohol entirely, substitute chicken broth or water.
  • Pre-Cooked Brats: Most brats at my local store are uncooked, but If you have pre-cooked bratwurst, cut the covered cooking time back to 15 minutes. Pre-cooked brats are already cooked (it's right there in the name), so they only need to heat through to be ready to serve.
  • Change up the sausage: Brats are my favorite, but this technique works with any uncooked sausage. Italian sausage, peppers, and onions are another fantastic combination.
  • Mustards: Spicy brown mustard is traditional, but cheap yellow mustard is fine if that's what you like. I'll sneak in Cleveland's own Bertman Ball Park Mustard sometimes, and a spicy brown mustard with horseradish is another excellent choice. Even Dijon mustard, which is just a fine-ground spicy brown mustard, works well. On the other hand, there is one thing you should not add…
  • Ketchup: On your brats? WHAT?? YOU WANT KETCHUP ON YOUR BRATS?!?!? (Takes a few deep breaths.) Fine. Fine. Just NOT IN MY SIGHT YOU MONSTER.

Can I Pan Grill Frozen Brats?

Yes! When I forget to take the brats out of the freezer, this recipe can cover for me. Increase the beer to ½ cup, and increase the covered cooking time to 25 minutes. (When I start with frozen brats, I temp them before moving on to the grilling step, confirming they are at least 150°F with an instant read thermometer. If they're not there, I re-cover the pan with the foil and let them cook for 5 more minutes or until they reach 150°F. The grilling step will take them to 160°F, the USDA-recommended cooking temperature for Brats.)

Equipment

  • A grill (You see my Weber Summit in the pictures)
  • A grill-safe pan, a 12-inch round pan (as seen in the pictures), or a 9-inch by 13-inch rectangle.
  • Aluminum foil to cover the pan

Scaling

This pan-grilling technique is great when cooking for a crowd. It doubles or triples easily. When I get a "party pack" of 12 brats, I get a larger pan (about 13-inch by 19-inch "Roaster pan") and double all the rest of the ingredients. Increase the covered cooking time to 25 minutes to give the extra ingredients enough time to heat up. (If you want to be sure, check the brats with an instant-read thermometer to ensure they reach 150°F before the grilling step.)

Tips and Tricks

  • Foil pans make for easy cleanup: The least expensive ones I can find are Half Size Steam Table pans. That said, I do a lot of pan grilling, so I bought an enameled steel roasting pan that I can reuse in the grill. (That's what you see in the pictures - and they're available in many fun colors!).
  • Flare-ups: Watch out for flare-ups during the "grill the brats" step. There are going to be flare-ups - bratwurst has a lot of fat in it, and fat dripping into flames is an invitation for fires. A little fire on the brats is OK to add some charring around the edges. But, if there is a persistent grease fire, move the brats to a different part of the grill to get them away from the flames.
  • A trick for stretching the brats to feed kids: After cooking, I cut them in half before putting them in hot dog buns to stretch the standard 5 brats package out to fill 10 buns. My oldest can eat three or four brats on his own; cutting the brats in half leaves enough for the rest of us.

What to Serve With Pan Grilled Brats with Peppers and Onions

While I have the grill lit, I'll make a few vegetable side dishes to accompany the brats. I throw a pouch of my Grilled Green Beans in Foil for my wife, who loves green beans. If it is summer corn season, I'll also make Grilled Corn In The Husk.

Adapted from Grilled Sausages with Peppers and Onions, Cooks Illustrated Magazine, July 2008

What do you think?

Questions? Other ideas? Please leave them in the comments section below.

Related Posts

Choucroute Garnie
Pan Grilled Bratwurst and Sauerkraut
Basic Technique: Grilled Sausages
Grilled Chicago Char Dog
Grilled Foot Long Hot Dogs
Grilled Mexican Hot Dogs
Enjoyed this post? Want to help out DadCooksDinner? Subscribe to DadCooksDinner via email and share this post with your friends. Want to contribute directly? Donate to my Tip Jar, or buy something from Amazon.com through the links on this site. Thank you.

Instant Pot Pasta Fagioli (Italian Pasta and Bean Soup, AKA Pasta Fazool)

June 29, 2023 by Mike Vrobel 30 Comments

Pressure Cooker Pasta and Bean Soup (Pasta Fazool)

Instant Pot Pasta Fagioli (Italian Pasta and Bean Soup). Pasta Fazool is an Italian-American classic for a reason - it's a hearty meal in a bowl.

Now that it's winter, everyone wants soup. My sister-in-law wanted to know why I didn't have more soup recipes on my blog. My wife asked for more soup in our weekly meal plans. And Frank, my barber, was rhapsodizing about his mom's old-style Italian-American cooking. When I asked him for an example of a hearty soup, he started with Mom's Pasta Fazool.

A bowl of pasta fagioli
[feast_advanced_jump_to]

Pasta e Fagioli, the classic Italian soup, is all about the art of simple cooking. At its core, it is cooked white beans, and the bean liquid is used to cook pasta. Easy, right?

How can I improve on that? I can't. But I can sneak in my bean-cooking secret weapon, my pressure cooker. I brine the beans while I soak them, to season them all the way through. I add a bunch of aromatics to the pot, including a fistful of herb stems, a Parmesan rind, and a whole head of garlic.
Yes, toss the whole head of garlic in there, skin and all. We'll pull it out after it gives up its flavor to the beans. Make sure to trim off any roots, though. They hold on to dirt, and dirt is not good eats.

Finally, I cook a half pound of small pasta in the bean liquid. It soaks up all the flavors and turns this into a thick soup, one that borders on a stew. It is a simple and fantastic soup.

INGREDIENTS

A small handful of ditalini pasta
Ditalini pasta

Soaked beans

  • Dry cannellini or great northern beans
  • Water
  • Fine sea salt

Soup

  • Olive oil
  • Onion
  • Celery
  • Carrots
  • Red pepper flakes
  • Fine sea salt
  • Water
  • Diced tomatoes
  • Garlic
  • Parmesan rind (optional)
  • Bunch of parsley
  • Fresh rosemary
  • Small dried pasta (I used ditalini)
  • Fresh ground black pepper
  • Balsamic vinegar

Accompaniments

  • Grated Parmesan cheese
  • Minced fresh parsley leaves
  • Red pepper flakes

How to Make Instant Pot Pasta E Fagioli Soup

Sort and rinse the beans

Sort the dry cannellini beans, discarding any stones, dirt, or broken beans. Rinse the beans, then do an overnight or a quick soak.

Overnight soak

Cover the beans with 8 cups of water, and sprinkle with 2 teaspoons of salt. Leave the beans to soak at least 8 hours, or overnight. Drain and discard the soaking liquid.

OR: Pressure Quick Soak for 1 minute with a 30-minute rest

Put the beans and 8 cups of water in an Instant Pot or other pressure cooker. Sprinkle with 2 teaspoons of salt. Pressure cook at high pressure for 1 minute ("Manual", "Pressure Cook", or "Pressure Cook - Custom" mode in an Instant Pot). Let the beans soak in the pot for 30 minutes, then quick release any remaining pressure. Drain the beans and discard the soaking liquid. (Wipe out the pot if you are re-using it in the next step.)

Sauté the aromatics

Heat the olive oil in an Instant Pot using sauté mode set to high (or medium-high heat in a stove top pressure cooker) until the oil is shimmering. Add the onion, celery, carrots, red pepper flakes, and sprinkle with ½ teaspoon salt. Saute until the onions are softened and starting to brown about 8 minutes.

Everything in the pot

Add the drained beans to the pot, then stir in the water and canned tomatoes. Scrape the bottom of the pot with a flat-edged wooden spoon to make sure nothing is sticking. Add the Parmesan rind and the head of garlic to the pot. Tie the parsley stems and rosemary sprig into a bundle, and add it to the pot.

Pressure cook for 18 minutes with a Natural Release

Lock the lid on the pressure cooker. Cook on high pressure for 18 minutes in an Instant Pot or other electric pressure cooker, or for 15 minutes in a stovetop PC. (In an Instant Pot, use "Manual", "Pressure Cook", or "Pressure Cook - Custom" mode set for 18 minutes). Let the pressure release naturally, about 20 minutes. (If you're in a hurry, you can quick release any remaining pressure after 15 minutes.) Remove the lid carefully, opening away from you - even when it's not under pressure, the steam in the cooker is very hot.

Cook the pasta

Fish out the herb bundle, head of garlic, and Parmesan rind, and discard. Set the Instant Pot to Sauté mode adjusted to high (or turn the heat to high for a stovetop cooker) and bring the pot back to a simmer. Stir in the 2 teaspoons of salt and the pasta. Simmer until the pasta is tender, about 9 minutes. (Check the box of pasta for the cooking time.) Stir in the black pepper and balsamic vinegar.

Serve

Ladle the soup into bowls and serve, passing the accompaniments at the table. Enjoy!

Substitutions

Small Pasta Shapes: Ditalini pasta - small, short tubes of pasta - are the traditional shape for soup. (Barilla even calls them "soup pasta" on their box). But any extra-small pasta shape will do. Try pastina (little stars) or rotelle (mini wheels) for a fun shape.
Different Kinds of Beans: Cannellini beans are the traditional bean with pasta e fagioli, but great northern beans are a very close substitute. Borlotti beans (aka cranberry beans) also work well in this recipe. Navy beans will also work, if you can't find a larger white bean, but they cook quickly. Cut the pressure cooking time back to 10 minutes (with a natural pressure release) for soaked navy beans.
Different Tomatoes: I use diced tomatoes because I like small chunks of tomato in the soup. If you want a red-colored broth, substitute tomato sauce for the diced tomatoes.
Herb bundle: I like adding a herb bundle to flavor the beans…when I have them on hand. Don't have fresh parsley or rosemary? Substitute 2 teaspoons of Italian seasoning, or a mix of dried rosemary, dried basil, and dried thyme.
Broth for water: If you want an extra-rich soup, substitute vegetable broth or chicken broth for some or all of the cooking water. (Note: Not the bean-soaking water, but the water used for cooking.)

Variations:

Vegetarian pasta fagioli: Good news, this recipe is vegetarian as written!
Vegan pasta fagioli: Skip the Parmesan rind and grated Parmesan. Substitute a couple of dried porcini mushrooms for the rind, and drizzle the soup with olive oil.
Carnivore pasta fagioli Add some Italian sausage or diced pancetta with the onions, and cook until browned. (Or, brown the pancetta separately and use it as a garnish.) Or, if you have a leftover ham bone or smoked pork shank, toss it in the pot with the beans. When the beans are done cooking, remove the bone, strip off any ham that was left, shred it, and stir it into the beans.

🛠 Equipment

A 6-quart pressure cooker

📏Scaling

This instant pot soup recipe scales down easily - cut everything in half if you don't need as many beans, or have a 3-quart pressure cooker. Scaling up runs into space issues; if you have an 8-quart pressure cooker, or larger, you can double this recipe, but it's too much to fit in a 6-quart pressure cooker.

Do You Have to Soak Cannellini Beans Before Pressure Cooking?

I get a lot of questions about soaking beans. Cannellini beans are one of the few beans I prefer to soak. (They must be a denser bean, because it takes a long time to pressure cook them to tenderness if they are not soaked.)
When I remember, I soak my cannellini beans overnight; when I forget, I use the quick soak method. (I do the quick soak more often than I should. I'm an enthusiastic home cook, but not great at planning ahead.)
If I completely forget to soak, this recipe works without soaking. Cook the beans for 45 minutes at high pressure with a natural pressure release. Then, check the beans. If they need it, I'll pressure cook them for another 5 minutes with a quick release. (See the "Tips and Tricks" section about floaters, below - I seem to get a lot of those in my Kidney beans.)

Sorting Beans

Beans are an agricultural product, and stuff tends to creep in when they are processed. Beans should always be sorted and rinsed before using, to get rid of any twigs, stones, clumps of dirt, or broken beans.
To sort the beans, I pour them out on one side of a rimmed baking sheet (a half-sheet pan), to keep the beans from escaping. Then I slowly run my fingers through the pile of beans, pulling them towards me on the sheet. I watch the beans as they move, looking for anything that doesn't seem right. If I see something, I poke around in the beans until I find what caught my eye, and discard it. I repeat this a couple of times, until I'm satisfied everything is out of the beans.
Then I dump the beans into a fine mesh strainer and rinse them under cold running water, to wash off any dirt or dust still on the beans.
Now the beans are sorted, rinsed, and ready for soaking or cooking.

Tips and Tricks

No pressure cooker? No problem: Follow the directions, but replace the pressure cooker pot with a large pot or Dutch oven. In the "cook the cannellini beans" step, add 10 cups of water instead of 8 cups, bring the pot to a boil, reduce heat to a simmer, and partially cover. Simmer until the beans are creamy, about 2 hours. Continue with the rest of the recipe as written.
Floaters: If your beans are still tough when the cooking time is over, especially any "floaters" at the top of the pot, give the beans a stir, lock the lid, and pressure cook for another five minutes. Older beans take longer to cook, and if the beans have been sitting on the shelf for a while, they may need extra time.

Storage

This Instant Pot pasta e fagioli recipe makes fantastic leftovers. (It is probably even better the next day, when all the flavors have a chance to mingle overnight.) An airtight container of pasta e fagioli lasts in the refrigerator for a few days, and freezes for up to 6 months. I love having 2-cup containers of soup in my freezer, ready for quick lunches from the microwave.

What to serve with Pasta Fagioli

Soup, salad, and breadsticks are probably too "Olive Garden", but I love the combination. (It's a classic for a reason). Instead of soft breadsticks (like Olive Garden), I buy boxes of thin breadsticks at the grocery store, which are basically a straw-shaped cracker. (Soup and crackers are also a classic for a reason.) - and all I have to do is pull out the box to serve dinner. Or, I use a loaf of crusty bread instead of the breadsticks.

Inspired by: Tamar Adler, An Everlasting Meal

Related Posts

Instant Pot Pinto Beans (No Soaking)
Instant Pot Minestrone
Instant Pot Chicken and Herb Soup with White Beans and Acini di Peppe
Instant Pot Meatball Soup (With Homemade or Frozen Meatballs)
Pressure Cooker Venetian Pasta and Beans (Pasta e Fagioli alla Veneta)
Instant Pot Sausage Ragu
Instant Pot Red Pozole
My other Instant Pot and Pressure Cooker Recipes

Enjoyed this post? Want to help out DadCooksDinner? Subscribe to DadCooksDinner via email and share this post with your friends. Want to contribute directly? Donate to my Tip Jar, or buy something from Amazon.com through the links on this site. Thank you.

Instant Pot Radicchio Risotto (Risotto al Radicchio)

June 27, 2023 by Mike Vrobel 2 Comments

A bowl of radicchio risotto with an Instant Pot

Instant Pot Radicchio Risotto (Risotto al Radicchio). Pressure cookers make great risotto quickly, without all the stirring. This recipe is a red risotto with the bitter bite of radicchio to balance the sweet butter and cheese.

A bowl of radicchio risotto with an Instant Pot
[feast_advanced_jump_to]

My visit to northern Italy inspired this recipe. I was re-living my trip by going through my notes and saw radicchio risotto in the recipe booklet I got at Riseria Ferron, the rice factory we visited on my tour.

Radicchio risotto? What a great idea. Bitter risotto balances out the creamy rice, sweet butter, and salty cheese in a risotto. And it's colorful! That red rice is an impressive side dish, and it's easy thanks to pressure cooker risotto.

You know pressure cooker risotto, right? It's one of the secret weapons of pressure cookers. You can make risotto in minutes with no stirring! And it comes out just as creamy as if you spent the evening carefully stirring and adding stock, ladle after ladle.

For some other risotto recipes inspired by my visit to Riseria Ferron, see my Instant Pot Asparagus Risotto and Instant Pot Risotto with Pork and Cinnamon.

Ingredients

TKTKIMAGE

  • Olive oil
  • Onion, minced
  • Garlic, minced
  • Fine sea salt
  • Red radicchio
  • Arborio rice (Or Carnaroli or Vialone Nano rice)
  • Red wine
  • vegetable broth or chicken broth (homemade or store-bought low-sodium broth)
  • Butter
  • Grated parmesan cheese

See the recipe card for quantities.

How to make Instant Pot Radicchio Risotto

Sauté the onion, garlic, and radicchio 

Heat 2 tablespoons of olive oil in an Instant Pot using sauté mode adjusted to high until the oil starts to shimmer (Medium-high heat in a stovetop pressure cooker). Add the onion and garlic, sprinkle with ½ teaspoon of salt, and sauté until the onion softens, about 3 minutes. Stir in the sliced radicchio and sauté until it starts to wilt, about 2 minutes.

Add the rice, wine, and broth

Stir in the rice, coating it with the oil. Add the wine and scrape the bottom of the pot with a flat-edged wooden spoon to loosen any browned bits of onion. Bring the wine to a boil, pour in the broth, stir in the ½ teaspoon salt (if using homemade broth), and lock the lid.

Pressure Cook the risotto for 5 minutes with a Quick Release

Cook at high pressure for 5 minutes in an Instant Pot, electric pressure cooker, or stovetop pressure cooker. (Use Manual Mode or Pressure Cook for an Instant Pot). Quick release the pressure, then carefully remove the lid, tilting it away from you to avoid the scalding hot steam.

Stir in butter and cheese and serve

Stir the 2 tablespoons of butter into the rice until it melts, then stir in the grated cheese. Serve, sprinkling with a bit of extra grated cheese and minced radicchio. Enjoy!

Substitutions

  • What kind of rice should I use? Traditional Risotto rice is short grain rice grown to have extra starch: arborio, carnaroli, or vialone nano. (Vialone nano is the specialty at Riseria Ferron.) Arborio is by far the easiest for me to find in my local grocery stores and makes a good risotto, so don't worry if you can't find fancier risotto rice. If you can't find risotto rice, you can try another variety of short-grain rice. But it won't have as much starch, so the risotto won't be as creamy.
  • Vegetarian: This recipe is vegetarian if you use vegetable broth as suggested in the ingredients.
  • Vegan: To make this recipe vegan, you must replace the dairy. I've read that you can substitute vegan butter and vegan parmesan cheese in risotto, but I've never tried them. If you're vegan and make this recipe with vegan substitutions, let me know how it goes in the comments section below!
  • No alcohol: Most of the alcohol will boil off during the simmering step, but not all of it. To cook alcohol-free, replace the red wine with extra broth.

What is Radicchio?

Radicchio is a bitter, red, leafy vegetable related to chicory and has been popular in Italian cooking for centuries. They're naturally green once they ripen, but they get that beautiful red color because of a technique called imbianchimento, developed by a Belgian agronomist in the 1800s. The radicchio is harvested and stored in water in a dark shed, which stops chlorophyll production, so the radicchio stays red.

Equipment

A 6-quart pressure cooker

Scaling

This recipe doubles easily in a 6-quart pressure cooker. Cut all the ingredients in half, and this recipe will fit in a 3-quart pressure cooker. The cooking time does not change; it takes the same time to cook each grain of rice, no matter how much you put in the pot.

Storage

According to the USDA, Leftover rice lasts for three days in the refrigerator, or three months in the freezer, as long as it is refrigerated (or frozen) within an hour of cooking in an airtight container and as long as it is heated properly before eating. I portion out my risotto in 2-cup containers before I put it in the fridge or freezer. Be sure to reheat the risotto all the way through; an instant read thermometer should read 165°F in the middle of the rice.

Tips and Tricks

  • Pressure cooking is the key to easy risotto. No need to stir for 30 minutes, carefully ladling broth into the pot. I can lock the lid on my Instant Pot, set it to cook for 5 minutes, and have a fantastic risotto without all the extra work.
  • Besides the risotto rice, the broth is the next most important ingredient. If you have an Instant Pot or other pressure cooker, please try making your own homemade pressure cooker vegetable broth or homemade pressure cooker chicken broth for this recipe. You will be able to taste the difference in your final risotto.

What to Serve with Instant Pot Radicchio Risotto

This risotto is hearty enough to be a vegetarian main dish, but it also makes a hearty, starchy side dish. I love to serve it with seafood, like fish fillets or grilled shrimp skewers.

Related Posts

Instant Pot Mushroom Risotto (Risotto ai Funghi)
Instant Pot Shrimp Risotto
Instant Pot Rotisserie Chicken Risotto
Instant Pot Venetian Peas and Rice (Risi e Bisi)
Instant Pot Cheddar Cheese Risotto
My other Instant Pot and Pressure Cooker Recipes

Enjoyed this post? Want to help out DadCooksDinner? Subscribe to DadCooksDinner via email and share this post with your friends. Want to contribute directly? Donate to my Tip Jar, or buy something from Amazon.com through the links on this site. Thank you.

Instant Pot Pork Stew

June 22, 2023 by Mike Vrobel 6 Comments

A bowl of pork stew with sweet potatoes, tomatoes, and black beans, with a sprinkle of cilantro, and an Instant Pot and bowl of avocados in the background

Instant Pot Pork Stew with Sweet Potato, Black Beans, and Greens. Chunks of pork and sweet potato in a Southwestern broth, ready in about an hour thanks to pressure cooking.

I was looking for a New Year's Day pork recipe when I came across this recipe for a pork stew with sweet potatoes and Southwestern flavors. (Doesn't everyone spend their holiday vacation looking at pork recipes?) It doesn't feel "holiday" enough - I have to serve the traditional pork and sauerkraut - but it does feel like a great weeknight dinner. I pull out my Instant Pot and get cooking, and it's an instant classic. (I haven't had this many compliments about a quick weeknight meal in a while.) I have to write it up for the blog.

A bowl of pork stew with sweet potatoes, tomatoes, and black beans, with a sprinkle of cilantro, and an Instant Pot and bowl of avocados in the background
[feast_advanced_jump_to]

This recipe is not a chili, though it does borrow some of the same flavors and ingredients. The jalapeno and chili powder are supporting players to boost the pork and sweet potato. (Unlike in a chili, where they are the star of the show.)

Ingredients

  • Dry black beans
  • Fine sea salt
  • Vegetable oil
  • Boneless pork shoulder
  • Chili powder
  • Onion
  • Jalapeño pepper
  • Garlic
  • Ground cumin
  • Ground coriander
  • Chicken broth (preferably homemade or low sodium store bought)
  • Sweet potatoes
  • Fire roasted diced tomatoes
  • Baby kale or baby spinach
  • Fresh ground black pepper

How to Make Instant Pot Pork Stew

Soak the Beans Overnight

Sort the beans, discard any stones, dirt, or broken beans, then rinse the beans. Cover the beans with 8 cups of water and sprinkle with 2 teaspoons of salt. Leave the beans to soak for at least 8 hours or overnight. Drain the soaked beans.

Or: Pressure Quick Soak for 1 Minute With a 30-Minute Rest

Sort the beans, discard any stones, dirt, or broken beans, then rinse the beans. Put the beans, 8 cups of water, and 2 teaspoons of salt in an Instant Pot or other pressure cooker. Pressure cook at high pressure for 1 minute ("Manual" or "Pressure Cook" mode in an Instant Pot), Quick Release the pressure, then let the beans sit for 30 minutes. Drain the soaked beans, and wipe out the pot if you're using it for the rest of the recipe.

Sear the Pork Pieces One One Side, Working in Three Batches

Heat the vegetable oil in the pressure cooker pot over medium heat (sauté mode in my Instant Pot) until the oil shimmers and just starts to smoke. While the pot heats, sprinkle the pork cubes with 1 ½ teaspoons salt and ½ teaspoon chili powder. Add ⅓ of the pork to the pot and sear until well browned on one side, about 3 minutes. (Don't crowd the pot or the pork will steam, not brown). Remove the browned pork to a bowl, add the second batch to the pot, and sear until browned on one side, about 3 more minutes. Repeat with the remaining pork - into the pot, sear until browned on one side, then into the bowl with the rest of the pork.

Sauté the Aromatics and Toast the Spices

Add the onion, garlic, and jalapeño to the pot, and sprinkle with ½ teaspoon of salt. Sauté until the onions soften, about 5 minutes, scraping the bottom of the pot occasionally to loosen any browned bits of pork. Make a hole in the middle of the onions and add the chili powder, cumin, and coriander. Toast the spices for 1 minute, then stir into the onions.

Everything in the Pot

Stir in the pork and any juices in the bowl, then pour in the chicken broth (and sprinkle in the 1 teaspoon of salt if using homemade broth). Scrape the bottom of the pot one last time to ensure nothing is sticking. Stir in the sweet potatoes, soaked beans, and diced tomatoes.

Pressure Cook the Stew for 15 Minutes With a Natural Release

Lock the lid on the pressure cooker and cook at high pressure for 15 minutes in an Instant Pot or other electric pressure cooker, or for 12 minutes in a stovetop PC. (Use Manual, Pressure Cook, or Pressure Cook - Custom mode in an Instant Pot). When the cooking time finishes, let the pressure come down naturally, about 20 minutes. If you're in a hurry, you can quick release any remaining pressure after 15 minutes.

Wilt the Kale and Serve

Unlock the pressure cooker lid. Stir in the handfuls of baby kale (or spinach) and the ½ teaspoon of fresh ground black pepper. Let the stew sit for a couple of minutes to wilt the greens, then serve and enjoy!

Storing Leftovers

Leftover stew is fantastic. (Letting the stew rest for a day and reheating it may be better than the day it's cooked.) This stew will keep in the refrigerator for a few days or in the freezer for a few months. I store it in 2-cup containers, which make the perfect size for a leftover lunch from the microwave.

How to Thicken Instant Pot Pork Stew

Most pressure-cooked stews are thin because the sealed cooking environment traps all the liquid in the pot. Not this stew. The beans and sweet potatoes release starch as they cook, thickening the broth naturally. I don't have to use a cornstarch slurry to thicken this stew.
That said, if you want an even thicker stew, you can add a cornstarch slurry. Whisk 2 tablespoons of cornstarch with 2 tablespoons of cold water, then stir it into the stew after wilting the greens.

Why is my pork tough in the Instant Pot?

It's one of two things: you're using the wrong pork cut or not cooking it long enough.

The wrong cut of pork

The best cut for pressure cooking is pork shoulder. (Pork ribs also do well under pressure, but they're not right for a stew.) If you cook a leaner cut, like pork loin, it will dry out in the high heat of the pressure cooker. Pork shoulder is full of fat and connective tissue, which breaks down in the high heat of the pressure cooker, making the pork juicy and tender. "Pork Stew Meat" at your store is probably good in this recipe, but it will be a mix of stew cuts. Pork from the round and leg is a little leaner than the shoulder, so I seek out pork shoulder for this recipe.

Not long enough

Pork shoulder is tough to overcook because of the fat and connective tissue. It gets more tender the longer you cook it. If you're still getting tough pork, try increasing the cooking time by five minutes and see if that helps.

How to Keep the Sweet Potatoes from Getting Mushy

Keeping sweet potatoes in pieces is challenging in a stew because the other ingredients (the pork and black beans) need more cooking time than the sweet potatoes. They come out very soft in this recipe but still hold their shape unless you stir the stew a lot before serving. A trick for firmer sweet potatoes is to float them on top of the other ingredients in a steamer basket. Don't stir them in with the other ingredients in the "Everything in the pot" step. Stir everything else, then gently set a steamer basket on top of everything in the pot. (It will sink a little - that's OK). Spread the sweet potatoes on the steamer basket, then lock the lid and continue the pressure cooking. This holds most of the sweet potatoes out of the pot liquid, so they don't cook as quickly.
That said, I don't bother with this step anymore - I'm OK with slightly mushy sweet potatoes.

Tips and Tricks

  • Canned beans: You can substitute a drained 15-ounce can of black beans for the dried beans. (Or use 2 cups of leftover cooked black beans.)

Inspired by: Pork, Sweet Potato and Black Bean Stew with Fresh Greens Recipe | Pork Be Inspired - Yummly

What do you think?

Questions? Other ideas? Leave them in the comments section below.

Related Posts

Pressure Cooker Mexican Pork Stew With Summer Vegetables
Pressure Cooker Chili Verde (Green Pork Chili)
Pressure Cooker Pork Chili with Beans
Instant Pot Kale (with garlic and lemon)
My other Instant Pot Pressure Cooker Recipes

Enjoyed this post? Want to help out DadCooksDinner? Subscribe to DadCooksDinner via email and share this post with your friends. Want to contribute directly? Donate to my Tip Jar, or buy something from Amazon.com through the links on this site. Thank you.

Instant Pot Korean Short Ribs

June 20, 2023 by Mike Vrobel 19 Comments

A Korean Short rib on a bed of rice, sprinkled with slivered green onions

Instant Pot Korean Short Ribs is a weeknight recipe for quick Asian flavors from my pressure cooker.

Here's a quick weeknight version of short ribs, Korean style. No browning the ribs this time; I sauté the aromatics for a minute to bring out their flavor, then add everything else to the pot and lock the lid. Serve on rice or Asian noodles, topped with minced green onion if you're feeling fancy and Gochujang sauce if you need Korean heat.

A Korean Short rib on a bed of rice, sprinkled with slivered green onions
[feast_advanced_jump_to]

Now, is this a traditional Korean recipe? No. I took the flavor profile that makes me think "Korean" - garlic, ginger, and scallion; soy, rice wine, pear juice, and sesame oil - and used it in a pot of beef ribs. It may not be authentic, but for a weeknight dinner, served over rice to soak up the sauce? I got rave reviews at the dinner table and pleas to "make this one again!"

(According to this website, I'm pretty close to making Galbijjim, slow-simmered short ribs. I had to triple-check the number of "I" s and J" s in galbijjim, so you can see how non-authentic I am.)

Ingredients

Vegetable oil
Green onions (scallions)
Garlic
Ginger
Beef short ribs, 2 to 3 inches thick, cut into 3 rib portions
Water
Soy sauce
Rice wine (or dry sherry)
Pear juice (or apple juice)
2 teaspoons toasted sesame oil

Garnishes

Green onions
Gochujang sauce

Korean Shorts Ribs VS Regular Short Ribs

The short ribs in this recipe are the same cut as regular short ribs, 2 to 3-inch thick, cross-cut short ribs. The difference is the flavors. This recipe uses a Korean flavor profile, unlike my traditional, French-influenced short ribs recipe.
The other difference might be the thickness of the ribs. Sometimes you will find thin-cut short ribs, between ¼-inch and ½-inch thick. For thin-cut ribs, cut the cooking time at high pressure to 25 minutes, with a natural release afterward.

How to Make Instant Pot Korean Short Ribs

Saute the aromatics

Heat the vegetable oil in an Instant Pot set to sauté mode (or a pressure cooker on medium heat) until the oil is shimmering. Add the green onion, garlic, and ginger. Sauté until you can smell garlic, about 1 minute. Add the short ribs, water, soy sauce, rice wine, pear juice, and sesame oil. Stir to coat the ribs with the liquids.

Pressure cook for 45 minutes with a Natural Pressure Release

Lock the lid on the pressure cooker. Pressure cook on high pressure for 45 minutes in an Instant Pot or other electric pressure cooker or for 38 minutes in a stovetop cooker. (In an Instant Pot, use Manual, Pressure Cook, or Pressure Cook - Custom mode set for 45 minutes.) Let the pressure come down naturally, about 20 minutes. (If you're in a hurry, you can quick release any remaining pressure after 15 minutes.)

Serve

Scoop the short ribs out of the pot with tongs and/or a slotted spoon. (Be gentle - the short ribs will be fall-apart tender.) Pour the remaining liquid into a fat separator and let it settle so the fat floats to the surface for about 5 minutes. Pour a little de-fatted liquid over the ribs, and pass the rest at the table as a sauce. Have your diners top their bowls with the garnishes, and enjoy!

Recipe Tips

  • Defatting the sauce: I don't usually worry about fat when using the pot liquid as a sauce. But there is a lot of fat in short ribs, so I recommend defatting the sauce with a fat separator.
  • Cornstarch slurry to thicken the sauce: I didn't include this in the recipe, but if you want a thicker sauce, you can use cornstarch. Whisk 2 tablespoons of cornstarch with 2 tablespoons of cold water. Wait for the pot liquid to settle in the fat separator. Pour the defatted liquid into a medium bowl and whisk in the cornstarch slurry. Continue by pouring some thickened sauce over the ribs and passing the rest at the table.
  • Specialty ingredients: I can find all the ingredients in my local grocery store's International aisle. (It's incredible how much better-stocked local grocery stores are with Korean ingredients nowadays.) Go with the recommended substitutions if you are having problems finding things. Or, seek out your local Asian market - it is worth the trip if you are a culinary adventurer.

Serving Suggestions

  • White rice is the perfect accompaniment for these ribs, but they also go well over Asian noodles. Or any noodle, really - spaghetti and egg noodles would be two easy-to-find options.

How do you make Korean short ribs more tender?

Pressure cooking is the perfect way to tenderize Korean short ribs. (Short ribs are tough if they are undercooked because of all the fat and connective tissue. They tenderize with longer cooking times, and cooking under pressure is a great way to tenderize them.)
If your ribs are still coming out tough, you're not cooking them long enough - or they're thicker than the 2 to 3-inch thick short ribs I recommend for this recipe. Try increasing the pressure cooking time by 5 minutes, and let the pressure release naturally - don't quick release it.

Pressure Cooker Korean Braised Beef Short Ribs-1030935
Saute the aromatics
Pressure Cooker Korean Braised Beef Short Ribs-1030949
Short ribs into the pot

What do you think?

Questions? Other ideas? Leave them in the comments section below.

Related Posts

Pressure Cooker Chinese Pork with Dried Plum Sauce
Pressure Cooker Beef Shank Osso Bucco
Slow Cooker Chinese Red Cooked Chicken
Instant Pot Chinese Pepper Steak
Kalbi Recipe

Enjoyed this post? Want to help out DadCooksDinner? Subscribe to DadCooksDinner via eMail or RSS reader, recommend DadCooksDinner to your friends, and buy something from Amazon.com through the links on this site. Thank you.

Instant Pot Pepper Steak

June 15, 2023 by Mike Vrobel 19 Comments

A bowl of Instant Pot Pepper Steak with chopsticks and rice

Instant Pot Chinese Pepper Steak. The Chinese-American restaurant classic as a hands-off pressure cooker dinner.

Pepper Steak is a classic of Chinese-American restaurants, usually found between General Tso's chicken and Crab Rangoon on the menu of your local takeout place.

Calling this recipe "Chinese-American" is not a value judgment. My first question about a meal is not "Is it authentic?" but "How does it taste?" Chinese American cooking is one of the first fusion cuisines, where immigrants merged their old and new homelands to create something delicious. There's a reason the classics of Chinese American restaurants are classics - they are just good recipes.

A bowl of Instant Pot Pepper Steak with chopsticks and rice
[feast_advanced_jump_to]

And here's where I take a few liberties. I'm not stir-frying; I'm using my pressure cooker. It makes this a quick meal for a busy weeknight, and it's hands-off once I lock the lid. I prefer flat iron steak - after all, steak is in the recipe's name - but it will work with any chuck roast cut. (Flat iron is the chuck blade roast cut into a steak and is one of my favorite cheap cuts of beef.) 
I finish the recipe with a cornstarch slurry to thicken the sauce. (Thanks to the sealed cooking environment, there is no evaporation in a pressure cooker.) The sauce needs some help, and the cornstarch turns it into a glossy coating for the meat. Serve over rice, and dinner is ready.

If you've tried one of my Instant Pot Thai curries, you will recognize this technique - it is the same idea, used with a different flavor profile.

Ingredients

Peanut oil (or vegetable oil)
Garlic
Fresh ginger
Green onions (aka scallions)
Flat iron steak (or chuck blade steak or boneless chuck roast)
Fine sea salt (or kosher salt)
Onion
Green bell pepper
Red bell pepper
Yellow bell pepper
Water
Soy sauce
Hoisin sauce
Toasted sesame oil
Cornstarch

Garnish and Sides

Minced green onions (scallions)
White Rice

How to Make Instant Pot Chinese Pepper Steak

Fry the garlic, ginger, and green onion

Heat the peanut oil in an Instant Pot set to Sauté mode adjusted to high until the oil starts to shimmer. (Use medium-high heat with a stovetop pressure cooker). Stir in the garlic, ginger, and green onion, and fry until you smell the garlic, about 30 seconds.

Everything in the pot

Sprinkle the beef with the ½ teaspoon of salt. Add the beef, onions, and bell peppers to the pot, and stir to coat with the garlic/ginger/scallion oil. Pour in the water and soy sauce, then stir in the hoisin sauce to coat the beef.

Pressure cook for 12 minutes with a Natural Pressure Release

Lock the lid on the pot. Pressure cook on high pressure for 12 minutes in an Instant Pot or other electric PC or for 8 minutes in a stovetop PC. Let the pressure come down naturally, about 20 minutes. (After 15 minutes of natural release, you can quick release the remaining pressure if you are in a hurry).

Finish the beef

Remove the lid from the pressure cooker, and stir in the toasted sesame oil. Whisk the cold water and cornstarch in a small bowl, then stir into the pot to thicken the sauce. Serve over white rice or noodles, sprinkling with minced green onions for garnish. Enjoy!

Recipe Tips

  • Pre-cut steaks make prep easier: I recommend a flat iron steak instead of a chuck roast, even though they're similar cuts. Why? Because the steak is the right thickness for the beef strips used in this recipe, which takes a lot of the work out of prepping the meat.
  • Thicken with cornstarch: The cornstarch slurry I whisk in at the end thickens up the sauce and gives it that glossy look that makes me think of Chinese restaurants. It's not essential, but the sauce is thin without it. (Most pressure cooker sauces are thin - there's no evaporation in the sealed pressure cooker pot.)

Ingredient Substitutions & Variations

Different cuts of beef: Flat iron steak is cut from the chuck roast, so any other cut from the chuck, like blade steaks, chuck eye, or chuck steaks, will also work. Other cuts that work in Instant Pot Pepper Steak are cuts that stand up to pressure cooking. Bottom round, top round, or flank steak are good choices.
Garlic and ginger: If you don't have fresh garlic and ginger, you can sprinkle the beef with a teaspoon of garlic powder and a teaspoon of powdered ginger.
Hoisin Sauce: The key flavor ingredient is the Hoisin sauce. It adds sweet, salty, and five-spice-powder flavors to the recipe. It's available in the international aisle in most grocery stores. If you can't find it, you can substitute plum sauce or brown sugar as recommended in the ingredients list.
Toasted sesame oil: Many Chinese recipes are finished with a drizzle of toasted sesame oil, which adds a nutty flavor to the dish. You can skip the toasted sesame oil if you don't have any.

Equipment

A 6-quart pressure cooker

Scaling

This recipe doubles easily in a 6-quart pressure cooker. Cut all the ingredients in half, and this recipe will fit in a 3-quart pressure cooker. The cooking time does not change; it takes the same time to cook each piece of beef, no matter how many are in the pot.

Storing Leftovers

Instant Pot Pepper Steak will keep in the refrigerator for a few days or in the freezer for a few months. I store it in airtight 2-cup containers, which make the perfect size for a leftover lunch from the microwave.

Frequently Asked Questions

What cut of steak is best for pepper steak?

Flat iron steak is the best cut for pepper steak. It's cut from the chuck shoulder of the cow, has excellent flavor, and stands up to pressure cooking.

How do you make pepper steak not tough?

How? By pressure cooking flat iron steak or any other cut from the chuck or shoulder. Flat iron steak has a lot of fat and connective tissue, which break down in the heat of the pressure cooker, going from tough and chewy to tender and juicy.

Do you wash pepper steak before cooking?

No! Please do not wash pepper steak, or any meat, before cooking. USDA researched this, and found that "washing or rinsing meat or poultry increases the risk for cross-contamination in the kitchen." Washing doesn't rinse away any bacteria; it just splashes it around the kitchen. Please don't do it!

Pressure Cooker Chinese Pepper Steak | DadCooksDinner.com
Pressure Cooker Chinese Pepper Steak

What do you think?

Questions? Other ideas? Leave them in the comments section below.

Pressure Cooker Chinese Pepper Steak | DadCooksDinner.com
Pressure Cooker Chinese Pepper Steak

Related Posts

Pressure Cooker Chinese Pork with Dried Plum Sauce
Pressure Cooker Korean Braised Short Ribs
Pressure Cooker Thai Red Beef Curry

My other Instant Pot and Pressure Cooker Recipes

Enjoyed this post? Want to help out DadCooksDinner? Subscribe to DadCooksDinner via email and share this post with your friends. Want to contribute directly? Donate to my Tip Jar, or buy something from Amazon.com through the links on this site. Thank you.

Instant Pot Potato Salad

June 13, 2023 by Mike Vrobel 12 Comments

A red bowl of potato salad, on a wooden table, in front of a bowl of cherry tomatoes and a watermelon.

Instant Pot Potato Salad. Classic potato salad is quick and easy to make if you have a pressure cooker.

It's time for a summertime side dish. Dare I say the summertime side dish? (Yes, I dare.) Here is my Instant Pot Potato Salad recipe.

A red bowl of potato salad, on a wooden table, in front of a bowl of cherry tomatoes and a watermelon.
[feast_advanced_jump_to]

This recipe is a straightforward potato salad, the basic version I think of when I say "potato salad." If you're looking for a fancier potato salad, check out my Instant Pot Mustard Potato Salad or Instant Pot Ranch Potato Salad.

Why Pressure Cook Potato Salad?

Why pressure cook potato salad? Because the Instant Pot makes it easy. I set the timer on the cooker and cook the potatoes and eggs together in the pot. Then, once they cool down, I toss them with celery, red onion, and a mayo-based potato salad dressing. And there you have it, a quick, easy homemade potato salad.

Ingredients

  • Baby red potatoes
  • Eggs
  • Mayonnaise
  • Cider vinegar
  • Fine sea salt
  • Fresh ground black pepper
  • Celery
  • Red onion
  • Fresh parsley
    See the recipe card for quantities.

How to make Instant Pot Potato Salad

Everything in the pot

Pour 1 cup of water into an Instant Pot or other pressure cooker. Add a vegetable steaming basket, then fill the basket with the baby red potatoes. Set the eggs on top of the potatoes.

Pressure Cook for 6 minutes with a quick pressure release

Lock the pressure cooker lid. Cook at high pressure for 6 minutes in an Instant Pot, electric pressure cooker, or stovetop PC. (Use Manual, Pressure Cook, or Pressure Cook - Custom mode in an Instant Pot). Quick release the pressure. Once the pressure is released, unlock the pot, opening the lid away from you to avoid the hot steam.

Chop the potatoes and eggs, and mix the potato salad

Take the eggs out of the pot and cool them under cold running water. Carefully lift the vegetable basket of potatoes from the pressure cooker and set it aside to cool. Whisk the mayonnaise, cider vinegar, sea salt, and black pepper in a large bowl until smooth. Stir in the diced celery, diced red onion, and fresh parsley. Peel and dice the boiled eggs and stir them into the bowl of dressing. Cut the baby potatoes into ¾-inch chunks, then fold them into the bowl of dressing until coated. Cover the bowl and refrigerate for at least 2 hours. Stir again to re-coat the potatoes, serve, and enjoy!

Substitutions

  • What kind of potatoes: I like to pressure cook smaller potatoes in their skins. The smaller potatoes cook quickly, and their skins help keep them from overcooking. Baby potatoes, new potatoes, or fingerling potatoes all work well in this recipe. If you can't find new potatoes, use a waxy potato like red potatoes, white potatoes, or Yukon gold potatoes, and cut them into 1½ -inch chunks. The only type of potato I wouldn't recommend is russet potatoes; they crumble when they're cooked and fall apart in potato salad.
  • Mayo: If you prefer Miracle Whip, you can use it instead of the mayonnaise.
  • Onions: Red onions are my favorite, but green onions (scallions) are a close second. You can also use sweet onions (like vidalia onions). I find regular white onions and yellow onions to be a bit too sharp for this recipe.
  • Vinegar: If you don't have cider vinegar, then rice vinegar or white wine vinegar are my favorite substitutions - they are both mild flavored vinegar. Red wine vinegar or balsamic vinegar give the potato salad a weird taste. Plain white vinegar is too tart, but you can use it if that's all you have.

Tips and Tricks

  • Peeled potatoes: I use baby red potatoes with their skins on them because I like the hint of color the red skins add to the salad. If you want peeled potatoes, don't get baby potatoes; get regular-sized potatoes, peel them, and cut them into 1½ -inch chunks.
  • Steamer basket: The steamer basket keeps the potatoes out of the water so they cook evenly. If you don't have a steamer basket, you can use the rack that came with your pressure cooker or skip it and live with some of the potatoes being a little soggier than others. (They'll break down and thicken the potato salad, which isn't bad.)

Storage

Potato salad lasts a day or two in the refrigerator or two hours at room temperature. (If you leave it out on the picnic table: Let's be careful out there. Keep it chilled until you are serving, and don't leave it out for more than two hours.)

What to Serve with Instant Pot Potato Salad

Potato salad is a perfect side dish for summer barbecues. Grilled hamburgers? Rotisserie Pork Loin? Barbecued chicken? Potato salad works with anything that comes out of a grill or smoker.
It's also great with any of my "fake barbecue" Instant Pot recipes, like Instant Pot Spareribs, Instant Pot Beef Brisket, or Instant Pot Pulled Pork.

Equipment

A 6-quart pressure cooker
Steamer basket

Scaling

This recipe doubles easily in a 6-quart pressure cooker. Cut all the ingredients in half, and this recipe will fit in a 3-quart pressure cooker. The cooking time does not change; it takes the same time to cook each potato.

What do you think?

Questions? Other ideas? Leave them in the comments section below.

Related Posts

Instant Pot Loaded Smashed Red Potatoes
Pressure Cooker Corn Soup
Instant Pot Minestrone
Instant Pot Potato Soup
My other Instant Pot Pressure Cooker Recipes

Enjoyed this post? Want to help out DadCooksDinner? Subscribe to DadCooksDinner via email and share this post with your friends. Want to contribute directly? Donate to my Tip Jar, or buy something from Amazon.com through the links on this site. Thank you.

Pan Grilled Bratwurst and Sauerkraut

June 8, 2023 by Mike Vrobel 5 Comments

Grilled Bratwurst with sauerkraut and spicy brown mustard

Pan Grilled Bratwurst and Sauerkraut. A pan full of brats and sauerkraut make a great grilled dinner.

A few years ago, I fermented and canned my own sauerkraut, trying to duplicate the wonderful choucroute (sauerkraut) I had in Paris at Brasserie Flo.

This experiment left me with a LOT of sauerkraut to use up. Now, I love it, but my family…not so much. The kids are sure sauerkraut is a trick, a weird kind of dad joke. I mean, sour is right there in the name, and they're supposed to eat it? Right. Sure thing, Dad.

Grilled Bratwurst with sauerkraut and spicy brown mustard
[feast_advanced_jump_to]

I've been using the kraut up over the last year, and this is my favorite recipe. The brats and kraut steam together in a foil-covered pan on the grill, sharing their flavors. Then the foil is removed. The brats are grilled over the open flames while the kraut boils in the uncovered pan, steaming off any excess liquid.

Are you looking for a weeknight dinner on the grill with great bratwurst and sauerkraut? Give pan grilling a try.

Ingredients

  • Sauerkraut
  • Onion
  • Apples (preferably tart Granny Smith apples)
  • Juniper berries (or cumin seeds or coriander seeds)
  • Vegetable oil
  • Bratwurst (uncooked)
  • Beer (or white wine)
    See the recipe card for quantities.

How to make Pan Grilled Bratwurst and Sauerkraut

Prepare the bratwurst pan

Bratwurst in the pan, ready to cook

Toss the sauerkraut, onions, apples, and juniper berries in a 9-inch by 13-inch foil pan to mix them. Drizzle the mix with oil and toss again to coat, then spread and pat into an even layer across the bottom of the pan. Set the brats on the mix, then pour the beer over everything. Cover the pan with aluminum foil and crimp the edges shut.

Prepare the grill

Set your grill up for cooking on direct medium heat (350°F). For my Weber Summit, I preheat the grill for 15 minutes with all burners on high, scrape the grates clean with my grill brush, then turn all the burners down to medium. In my Weber Kettle, I light a chimney of charcoal, wait for it to be covered with gray ash, then spread it over the bottom of the grill in a tight single layer.

Steam the Bratwurst in the Pan

Pan-Grilled bratwurst uncovered

Put the foil-covered pan on the grill over direct medium heat. Cook with the grill lid closed for 20 minutes.

Grill the Brats, Simmer the Sauerkraut

Grilling the Bratwurst to brown

Remove the foil from the pan and leave the pan over medium heat. Move the brats from the pan to the grill over direct medium heat. Grill the brats until they get grill marks, about 2 minutes a side, then remove from the grill. (I put them directly into the waiting brat buns.) Watch out for flare-ups while the brats are over direct heat, and move them around as necessary. While the brats are grilling, keep cooking the sauerkraut in the pan, stirring occasionally, until most of the liquid cooks away, about 10 minutes uncovered.

Serve

Top the brats with some sauerkraut. Pass the extra sauerkraut and spicy brown mustard at the table, and enjoy!

Substitutions

  • Juniper berries substitutes: If you can't find Juniper berries, you can substitute cumin seeds or coriander seeds. Or skip the Juniper; enough is going on in this recipe that you won't miss them.
  • No Alcohol: Most of the alcohol cooks off during the cooking time of this recipe, but there is still some left at the end. If you want to avoid alcohol entirely, substitute chicken broth or water.
  • Pre-Cooked Brats: Most brats at my local store are uncooked, but If you have pre-cooked bratwurst, cut the covered cooking time back to 15 minutes. Pre-cooked brats are already cooked (it's right there in the name), so they only need to heat through to be ready to serve.

Can I Pan Grill Frozen Brats?

Yes! When I forget to take the brats out of the freezer, this recipe can cover for me. Increase the beer or wine to 1 cup, and increase the covered cooking time to 25 minutes. (When I start with frozen brats, I temp them before moving on to the grilling step, confirming they are at least 150°F. If they're not there, I re-cover the pan with the foil and let them cook for 5 more minutes or until they reach 150°F. The grilling step will take them to 160°F, the USDA-recommended cooking temperature for Brats.)

Equipment

  • A grill (You see my Weber Summit in the pictures)
  • A grill-safe pan, about a 9-inch by 13-inch rectangle
  • Aluminum foil to cover the pan

Scaling

This pan-grilling technique is great when cooking for a crowd. It doubles or triples easily. When I get a "party pack" of 12 brats, I get a larger pan (about 13-inch by 19-inch "Roaster pan") and double all the rest of the ingredients. Increase the covered cooking time to 25 minutes to give the extra ingredients enough time to heat up. (If you want to be sure, check the brats with an instant-read thermometer to ensure they reach 150°F before the grilling step.)

Tips and Tricks

  • Foil pans make for easy cleanup: The least expensive ones I can find are Half Size Steam Table pans. That said, I do a lot of pan grilling, so I bought an enameled steel roasting pan that I can reuse in the grill. (That's what you see in the pictures - and they're available in many fun colors!).
  • Flare-ups: Watch out for flare-ups during the "grill the brats" step. There are going to be flare-ups - bratwurst has a lot of fat in it, and fat dripping into flames is an invitation for fires. A little fire on the brats is OK to add some charring around the edges. But, if there is a persistent grease fire, move the brats to a different part of the grill to get them away from the flames.
  • A trick for stretching the brats to feed kids: After cooking, I cut the brats in half before putting them in hot dog buns to stretch the standard 5 brats package out to fill 10 buns. My oldest can rip through three or four brats on his own; cutting the brats in half leaves enough for the rest of us.
Bratwurst flare-up
Flare-up!

What to Serve With Pan Grilled Brats with Sauerkraut

I always serve brats and sauerkraut with bratwurst buns and spicy brown mustard. Actually, I serve a variety of spicy brown mustards. My favorites are Bertman Original Ball Park Mustard (from my beloved Cleveland Stadium) and horseradish mustard. I'll also throw a pouch of my Grilled Green Beans in Foil on the grill while I've got it lit for an easy vegetable side to go with this meal.

Adapted from Grilled Sausages with Peppers and Onions, Cooks Illustrated Magazine, July 2008

What do you think?

Questions? Other ideas? Please leave them in the comments section below.

Related Posts

Choucroute Garnie
Pan Grilled Bratwurst with Peppers and Onions
Grilled Sausage Recipe
Instant Pot Pork and Sauerkraut

Enjoyed this post? Want to help out DadCooksDinner? Subscribe to DadCooksDinner via email and share this post with your friends. Want to contribute directly? Donate to my Tip Jar, or buy something from Amazon.com through the links on this site. Thank you.

Instant Pot Lentil and Hambone Soup

June 6, 2023 by Mike Vrobel 23 Comments

A bowl of Instant Pot Lentil and Hambone Soup

Instant Pot Lentil and Hambone soup. What do I do with a leftover hambone? I make soup, of course. Lentil soup in under an hour, thanks to my pressure cooker.

I'm the guest who haunts the kitchen after holiday dinner, saying, "Wait! Don't throw those bones away. I'll take them with me." (Yes, I'm a big hit at parties.)
I only do this to family members. When they see me enter the kitchen, they shake their heads and dig under the counter for the gallon Ziploc bags. They're family, so they have to invite me back, right?

A bowl of Instant Pot Lentil and Hambone Soup
[feast_advanced_jump_to]

Now, what do I do with those bones? In this case, I got a great hambone from my brother-in-law; I threw it in the freezer, saved it for a couple of weeks, then used it to make lentil and ham soup.

If there's extra meat on the bone, I'm good to go; if not, I ask for a care package of leftover ham to dice and stir into the soup. (Which is a good idea in general, even with a meaty bone. But I'm pushing my luck, asking for bones; I don't want to get greedy.)

After that, soup is easy with a pressure cooker. Saute an onion and some garlic in the pot, then add the hambone, a pound of lentils, and water. When the beans are done, I pull out the bone, pick off the ham, and stir it back into the soup. Season the soup, add a splash of vinegar for acidity, and the soup is ready to serve.

Looking for a similar recipe? Try my Instant Pot Lentil Curry for spicy lentils, or my Instant Pot Lentil and Beef Stew.

Ingredients

  • Vegetable oil
  • Onion
  • Carrots
  • Garlic
  • Kosher salt (or fine sea salt)
  • Red pepper flakes (optional)
  • Bone from 1 ham, meat still attached
  • Brown lentils, picked over and rinsed
  • Water
  • Balsamic vinegar or sherry wine vinegar (optional)
  • Fresh ground black pepper

See the recipe card for quantities.

How to make Instant Pot Lentil and Hambone Soup

Sauté the aromatics

Sautéing the aromatics

Heat the vegetable oil in the pressure cooker pot over medium-high heat until the oil is shimmering. Add the onion, carrots, and garlic to the pressure cooker pot, and then sprinkle with the salt and red pepper flakes. Saute until the onion softens, about five minutes.

Everything in the pot

Everything in the pot - the hambone barely fits

Add the ham bone to the pot, then pour in the lentils and cover with water. (It's OK if the end of the bone pokes up out of the water.) Lock the lid on the pressure cooker.

Pressure cook the soup for 15 minutes with a natural pressure release

Pressure cook at high pressure for 15 minutes in an Instant Pot or other electric pressure cooker or for 12 minutes in a stovetop cooker. (In an Instant Pot, use the Manual, Pressure Cook, or Pressure Cook - Custom). Let the pressure come down naturally for about 20 more minutes. Remove the lid, tilting it away to avoid hot steam.

Season and serve

Fish the hambone out of the pot and set it aside until it is cool enough to handle. Pull the ham from the hambone, discard any pieces of fat or gristle, chop the ham into rough ¼ inch cubes, and stir the ham into the pot. Stir in the (optional) balsamic vinegar, 1 teaspoon of salt, and ½ teaspoon of pepper. Serve and enjoy!

Substitutions

Ham Bone Substitute: No ham bone? Substitute 2 smoked ham hocks, pork neck, turkey leg, or sausage.
Substitute Broth for the water: If you want an even richer soup, substitute homemade chicken broth or homemade ham broth for the water.
Cut the heat or increase the heat: I add a half teaspoon of red pepper flakes to add a subtle hint of heat. It's enough to make the soup "hot," but a little background heat adds to the flavor. You can skip the red pepper flakes to cut the heat. Or, to make the heat obvious, increase the red pepper flakes to 1 teaspoon.

Equipment

A 6-quart pressure cooker

Scaling

If you need a lot of soup, double this recipe in an 8-quart pressure cooker. You don't need a second hambone; double all the other ingredients. You can also halve this recipe, but if you want to use a smaller 3-quart pressure cooker, make sure the hambone will fit. Scaling the recipe does not change the cooking time; it takes the same amount of time to cook the lentils either way.

Tips and Tricks

  • No pressure cooker? No worries. Cook everything in a Dutch oven with a lid. Follow the instructions until the "pressure cook" step. Instead of pressure cooking, cover the pot, bring it to a boil, then reduce the heat and simmer for an hour. Continue with the "thicken, season, and serve" step.
  • The splash of vinegar I add at the end is optional but adds finesse to the recipe. A hint of acid helps cut through the rich soup. If you don't have vinegar, a little fresh lemon juice serves the same purpose in the recipe. Or, if you like it hot, substitute Tabasco sauce or another vinegar-forward hot sauce.

What to Serve With Instant Pot Lentil and Hambone Soup

I serve this soup with salad and a loaf of hearty bread. (Or dinner rolls, or even crackers if I don't have good bread handy.)

What do you think?

Questions? Other ideas? Please leave them in the comments section below.

Related Posts

Pressure Cooker Senate Bean Soup
Pressure Cooker Pasta and Bean Soup
Pressure Cooker Black Bean Soup
Instant Pot Misir Wat (Ethiopian Red Lentils)
My other Pressure Cooker Recipes

Enjoyed this post? Want to help out DadCooksDinner? Subscribe to DadCooksDinner via email and share this post with your friends. Want to contribute directly? Donate to my Tip Jar, or buy something from Amazon.com through the links on this site. Thank you.

Cast Iron Spiral Skillet Potatoes

June 1, 2023 by Mike Vrobel 19 Comments

Cast iron skillet with a spiral of potatoes

Cast Iron Spiral Skillet Potatoes. Crispy Cast Iron Potatoes, laid out in a spiral and roasted in the oven, make a show-stopping side dish.

The picture of spiral skillet potatoes jumped out at me while I binge watched Jeffrey B. Rogers The Culinary Fanatic videos about cast iron pans. (If you're a cast iron fan, don't start watching those videos unless you have a few hours with nothing to do.)

Cast iron skillet with a spiral of potatoes
[feast_advanced_jump_to]

These potatoes look fantastic, and they taste even better. The kids are demanding them nightly - they love the crispy, almost potato chip edges that brown on the bottom of the skillet. (I only make these potatoes every other week, because crispy potatoes bathed in butter are not exactly health food. It does get them to eat the potato skins, so I guess there are some benefits.)

The spiral looks like a lot of work, but it's easy to put together if you have a mandoline to do the thin slicing, or if your knife skills are impeccable. Now that I have the hang of spiraling the potatoes, I can slap this together in about five minutes flat. The trick is to take a big stack of potatoes, fan it out in your hand, and lay it in the pan, overlapping the last fan of potatoes. Repeat all the way around the edge of the pan until the outer ring is complete, then start the next ring. Repeat until the last ring fills the middle of the pan, and set one last potato slice in the middle. Then, go back and fill in any gaps with extra slices of potato. Sprinkle with salt and pepper, dot with butter, and it's ready to go.

Ingredients

  • Olive oil or vegetable oil
  • Russet potatoes (aka Idaho potatoes)
  • Butter
  • Kosher salt (or fine sea salt)
  • Fresh ground black pepper
  • Shredded parmesan (optional)
    See recipe card for quantities.

How to make Cast Iron Spiral Skillet Potatoes

wpid-Why-Cast-Iron-7135.jpg
Arranging the potatoes in a spiral

Arrange the potatoes in the pan

Turn the oven to 425°F. Coat the bottom of the skillet with the oil, then shingle the potatoes in a spiral around the pan. (If you have the time: using the larger potato slices on the outside and the smaller slices in the middle results in a more even spiral. For the sake of speed, I usually pick up each sliced potato, fan it out, and set it in as the next length of the spiral.) Sprinkle the potatoes with the salt and pepper, then dot with the butter.

wpid7139-Spiral-Skillet-Potatoes-7145.jpg
Dotted with butter, ready for the oven

Bake the potatoes

Cover the pan tightly with aluminum foil (or an oven safe, tight fitting lid). Slide the pan into the oven and cook for 30 minutes, then remove the foil. (The potatoes should be cooked through - a poke with a paring knife should glide through the potatoes.) Cook the potatoes uncovered for another 25 minutes, or until slightly browned on the edges.

Broil the potatoes (optional)

Sprinkle the parmesan over the potatoes (if using). Turn the broiler to high and broil the potatoes until the parmesan and potatoes are crispy, moving the pan around every minute or two for even browning.

wpid7143-Spiral-Skillet-Potatoes-7842.jpg
Doesn't that look amazing?

Serve

Remove the pan from the oven and let it cool for about five minutes, then carefully work a spatula under the potatoes, scraping them loose from the pan. I serve the potatoes by cutting them into wedges right in the pan, then serving a wedge of potatoes to each diner. Enjoy!

Substitutions

What kind of potatoes can I use?

Russet potatoes are best for this recipe, but it will work with most potatoes - I've made it with Yukon gold, and both red and white potatoes will work too.

Equipment

  • 12 inch Cast iron skillet (I used a Lodge 12 inch skillet)
  • Heavy duty aluminum foil to cover the pan (or a tight fitting lid)
  • Mandoline for slicing (not absolutely necessary, but makes this recipe quick and easy)

Scaling

  • Want a smaller serving? Use a 10.25 inch skillet and 1½ pounds of potatoes, and cut back the other ingredients by 25%. Or you can halve everything and squeeze it into an 8-inch skillet.

Tips and Tricks

  • 2 pounds of potatoes was about 6 potatoes from a "five pound bag of potatoes" at my local grocery store
  • If you have heat resistant fingers from years in the kitchen, or are the kind of cook who laughs at danger, heat the pan on the stovetop over low heat for a couple of minutes before you spiral in the potatoes. It gives the pan a head start on heating, and crisps up the bottom of the potatoes even more. I didn't include this in the main recipe, because I don't actually do it, even if it is a good idea. That one extra step is too much for me for some reason; I like the "arrange and slide into the oven" recipe as written.

What do you think?

Questions? Other ideas? Leave them in the comments section below.

Related Posts

Cast Iron Roasted Butterflied Chicken
Cast Iron Brussels Sprouts Saute
Pan Grilled New Potatoes
Quick Baked Potato (Start in Microwave, finish in Oven)
Sausage Gravy (In a Cast Iron Skillet)
Cast Iron Roast Duck Legs with Potatoes and Shallots

Enjoyed this post? Want to help out DadCooksDinner? Subscribe to DadCooksDinner via email and share this post with your friends. Want to contribute directly? Donate to my Tip Jar, or buy something from Amazon.com through the links on this site. Thank you.

Instant Pot Meatball Soup (With Homemade or Frozen Meatballs)

May 30, 2023 by Mike Vrobel 2 Comments

Instant Pot meatball soup with carrots and farfalle pasta

Instant Pot Meatball Soup. A pressure cooker soup with pasta, and homemade or store-bought frozen meatballs.

The pitch for meatball soup in Bon Appétit was simple. "All the long-cooked flavors of beef stew in half the time." That sounds fantastic, especially when I pressure cook the soup in my Instant Pot to cut the cooking time even more.

Instant Pot meatball soup with carrots and farfalle pasta
[feast_advanced_jump_to]

When I think of meatballs, I think of big Italian meatballs in red sauce. I'm making the same Italian-style meatball mix for this recipe, but I want meatballs small enough to fit on a spoon. So I pull out my small cookie scoop and use it to scoop 1-inch meatballs, the perfect size for this recipe.

Ingredients

Meatballs (If using homemade)

  • Meatloaf mix (Ground beef, ground pork, and sometimes ground veal)
  • Onion
  • Garlic
  • Fine sea salt
  • Fresh ground black pepper
  • Dried Italian herb mix
  • Red pepper flakes (optional)
  • Egg
  • Grated parmesan cheese
  • Italian-style bread crumbs

OR: Frozen Meatballs

  • Small frozen meatballs, aka "Bite Size" meatballs

Soup

  • Olive oil
  • Onion
  • Carrot
  • Celery
  • Garlic
  • Red pepper flakes
  • Fine sea salt
  • Tomato paste
  • Beef Broth (or homemade chicken broth)
  • Mini Farfalle (Farfalline) or another small pasta shape

How to make Instant Pot Meatball Soup

Shape the meatballs

In a large bowl, break up the beef and pork. Sprinkle the bread crumbs, cheese, onion, garlic, salt, pepper, herbs, and red pepper flakes over the meat, then work the dry ingredients into the meat. Once evenly mixed, put the egg on top and work it into the meat. Roll the meat mix into 1-inch meatballs. (Or buy frozen meatballs, about 1-inch in diameter, aka "bite-sized meatballs").

Sauté the aromatics

Heat the olive oil in an Instant Pot set to Sauté mode - High (or medium-high heat in a stovetop pressure cooker) until the oil starts to shimmer. Add the onion, carrot, celery, and garlic, and sprinkle with the red pepper flakes and ½ teaspoon of salt. Sauté until the onions soften, about 5 minutes.

Everything in the pot

Stir the tomato paste into the onions and cook, stirring often, until the tomato paste turns brick red, about 5 minutes. Stir in the beef broth and scrape the bottom with a flat-edged wooden spoon to ensure no tomato paste is sticking. Stir in the pasta, then gently add the meatballs to the pot.

Pressure Cook for 10 minutes with a Natural Release

Lock the lid and pressure cook at high pressure for 10 minutes (Use "Manual" or "Pressure Cook" mode in an Instant Pot). Let the pressure to come down naturally, about 20 minutes. (If you're in a hurry, let the pressure come down for 15 minutes, then quick release any remaining pressure.)

Serve

Unlock the lid, tilting the lid away from you to avoid the hot steam. Ladle the soup into bowls, divide the meatballs evenly between the bowls, serve, and enjoy!

Substitutions

Frozen meatballs

As the recipe says, you can substitute bite-sized frozen meatballs for the homemade meatballs. And there's no need to thaw - the meatballs will thaw (and cook through) in the pressure cooker. If the meatballs are 1-inch across or less, frozen meatballs work with the recipe as it is written. If you have bigger frozen meatballs, say 1¼ to 2 inches, increase the pressure cooking time to 15 minutes - but I don't recommend larger meatballs because the pasta will overcook.

Different pasta

Different kinds of pasta: You want pasta that is small enough to fit on a soup spoon. The bowtie shape of the mini farfalle looks good in pictures, so I used that for this recipe. Other good kinds of pasta for this soup are Mini Penne or Ditalini.

Equipment

A 6-quart pressure cooker

Small Cookie Scoop (about 1 tablespoon size, or a #70 to #60 disher)

Scaling

Doubling this recipe requires an 8-quart pressure cooker; it fills up the pot too much if you try to double it in a 6-quart pressure cooker. Cut all the ingredients in half, and this recipe will fit in a 3-quart pressure cooker. The cooking time does not change, doubled or halved. It takes the same time to cook each meatball, no matter how many are in the pot.

Storage

Soup makes excellent leftovers! Meatball Soup will keep in the refrigerator for a few days or in the freezer for a few months. I store it in 2-cup containers, which make the perfect size for a leftover lunch from the microwave.

Tips and Tricks

Homemade Broth: Now, I'm not going to insist that you use homemade broth...but if you have an Instant Pot, you really should try it. I make a lot of chicken broth at home because it is inexpensive and easy. If I have a leftover chicken carcass I can use that, or I buy cheap chicken backs for my chicken back broth. Beef broth is fantastic, but it takes more work (you have to roast the beef bones) and is high-priced. Beef soup bones are about twice the price of chicken backs at my local stores, and meaty shanks and oxtails are even more expensive.

Cookie Scoop: I said it above, but I'll repeat it again: a small cookie scoop is the killer tool for making these small meatballs. No need to worry about rolling, just scoop some mix and push the release button. I don't know the official size, but my Small Cookie Scoop from Oxo makes meatballs about 1 inch across, or about 1 tablespoon. I believe that means a #70 to #60 disher, but if you work in food service and know what disher has a 1-inch diameter, let me know in the comments below.

What to serve with Instant Pot Meatball Soup

When I have soup, I want it with crusty bread for dipping and a salad on the side. I know Soup and Salad is a cliche, but it's on every lunch menu in America because it's a great combination.

Inspired by: Meatball Soup, Kendra Vaculin, Bon Appétit magazine.

Related Posts

Instant Pot Sumo Soup (Chanko Nabe)
Pressure Cooker Pasta and Bean Soup (Pasta e Fagioli, AKA Pasta Fazool)
Pressure Cooker Tuscan Bean Soup
Instant Pot Minestrone
Pressure Cooker Tortellini en Brodo
My other Instant Pot and Pressure Cooker Recipes

Enjoyed this post? Want to help out DadCooksDinner? Subscribe to DadCooksDinner via email and share this post with your friends. Want to contribute directly? Donate to my Tip Jar, or buy something from Amazon.com through the links on this site. Thank you.

Instant Pot Pulled Pork

May 25, 2023 by Mike Vrobel 15 Comments

Instant pot pulled pork sandwich with barbecue sauce

Instant Pot Pulled Pork. When I don't have all day to smoke a pork shoulder, I turn to this recipe. Pork cooked to shreddable tenderness, ready in about an hour.

Need some quick, tender, shredded pork? Here is my pressure cooker pulled pork recipe. (Recipe? This is barely a recipe, and more of a technique.) There are 5 ingredients: one is Pork Shoulder, two is water, three is (optional) liquid smoke, and four and five are BBQ Rub and BBQ Sauce. And the BBQ rub and BBQ sauce can be store-bought if you are really in a hurry.

Instant pot pulled pork sandwich with barbecue sauce
Instant Pot Pulled Pork
[feast_advanced_jump_to]

For the barbecue purists: Yes, I know this is another fake barbecue recipe. (Faux bbq. Fauxbq?) If you're looking for the real deal, check my pork shoulder smoked all day in a Weber Kettle. (Yes, I'm trying to head off the "Heresy!" comments that I am sure are coming when I post this.)

On the other hand, if you are willing to take shortcuts with your "BBQ" (and don't mind BBQ purists clutching their pearls and feeling a little faint), this pulled pork recipe is a quick and easy way to good pork. Is it as good as real-deal, all-day pork, cooked in a smoker with real wood? No, but pressure cooker pulled pork is 90% of the way there, with much less effort. (For more Faux BBQ, check out my Instant Pot Spare Ribs with BBQ Rub and Sauce, Pressure Cooker Beef Brisket, and Pressure Cooker Baby Back Ribs, or the beef version of this recipe, Instant Pot BBQ Beef Sandwiches.)

🥫Ingredients

  • Boneless pork shoulder, cut into 2-inch by 2-inch pieces of pork
  • Barbecue rub (see below)
  • Water
  • Liquid Smoke (optional)
  • Barbecue sauce (see below)
  • Hamburger buns, dill pickles, and coleslaw as optional accompaniments.

See the recipe card for quantities.

How to Make Instant Pot Pulled Pork

Make the BBQ rub

(See my Homemade BBQ Rub Recipe for more details.) In a small bowl, stir the barbecue rub ingredients: Fine sea salt, paprika, brown sugar, chili powder, ground black pepper, garlic powder, and onion powder. Stir and mix until thoroughly combined, breaking up any clumps of brown sugar with your fingers. Set aside for later. (Or, use a tablespoon of store-bought BBQ rub)

Make the BBQ sauce:

(See my Easy Homemade BBQ Sauce Recipe for more details) In a medium bowl, whisk the barbecue sauce ingredients: ketchup, brown sugar, cider vinegar, dijon mustard, and soy sauce. Whisk until smooth. Refrigerate for later. (Or, use a cup of store-bought BBQ sauce.)

Cut and season the pork shoulder

Cut the pork shoulder into 2-inch high by 2-inch wide strips. (Length doesn't matter, as long as they fit in your pressure cooker pot.) Sprinkle the pork shoulder strips with the BBQ rub.

Pork and liquid into the pot

Pour the cup of water into the Instant Pot (or use the minimum liquid amount for your pressure cooker), and then add the liquid smoke. Stack the pork strips in the pot in a loose pile.

Pressure cook the pork for 45 minutes with a Natural Release

Lock the lid and pressure cook on high pressure for 45 minutes in an Instant Pot or other electric PC ("Manual" or "Pressure Cook" mode in an Instant Pot), or for 40 minutes in a stovetop PC. Let the pressure release naturally, about 15 more minutes. (You can quick release any remaining pressure after 15 minutes if you're in a hurry.)

Shred and serve the pulled pork

Transfer the pork to a large platter with a rim. Shred the pork with a pair of forks, then drizzle with ½ cup of the barbecue sauce and toss to coat all the pork with sauce. Serve, either as plates of pulled pork or on hamburger buns as pulled pork sandwiches. Pass the extra barbecue sauce (and other accompaniments) at the table for people to add to their pork. Enjoy!

Substitutions

Pork Butt or Boston Butt or Pork Shoulder?

They're all the same cuts of meat. I've heard the name "pork butt" comes because it is the part of the shoulder that "butts" up against the body of the pig. (And the theory is that this name came from Boston.) At least, that's what I've heard - sources differ on the internet. (I know, different opinions on the internet? I'm shocked.) No matter where the names came from, pork butt, Boston butt, and pork shoulder all refer to the same cut of meat, and all will work in this recipe. (And, whatever you do, don't use pork loin in this recipe. Lean pork loin dries out if you cook it this long in a pressure cooker.)

What is liquid smoke?

Liquid Smoke is made by burning wood in a low-oxygen environment and distilling the water vapor that is produced. That's right; liquid smoke is actually condensed wood smoke. It's a side effect of making charcoal, and "wood vinegar," as everyone else calls it, has been around for centuries. (Pliny the Elder mentions it back in Ancient Rome. See, Latin class was worth something!)

It's optional in this recipe, but I like the extra depth of flavor when I add just a little of it to the water before cooking.

How long to cook pulled pork in an Instant Pot

I pressure cook this pork for 45 minutes at high pressure to get the tenderness I'm looking for. Pork shoulder holds up remarkably well to pressure; I've done cooking times as long as an hour, and there wasn't much difference in the result. (That's why I kept it to 45 minutes - why cook for longer if you don't have to?) I've never gone past an hour under pressure, but I have left it in "keep warm" mode for an hour after it spent 45 minutes pressure cooking, and it came out fine. Pork shoulder is very forgiving, and hard to overcook. You can do it, but you have to work at it.

🛠 Equipment

A 6-quart pressure cooker

📏Scaling

You can double this recipe in a 6-quart pressure cooker. You don't need to double the water or liquid smoke, just the pork, rub, and barbecue sauce. You can halve the recipe, too, if you need to fit it in a 3-quart pressure cooker, but again, keep the water and liquid smoke amounts. Just cut back on the pork, rub, and barbecue sauce. (You need 1 cup of water to come up to pressure.)

No matter which way you scale the recipe, up or down, the cooking time remains the same. 2-inch by 2-inch pieces of pork shoulder cook in the same amount of time, regardless of how many there are in the pot.

Tips and Tricks

  • Finesse the barbecue sauce - stir ½ cup of the pot liquid into the BBQ sauce. It will take some of the porky goodness from the liquid and add it back to the recipe.
  • The liquid smoke is optional…but as I found out, it's worth using it. Look near the barbecue sauce at your local grocery store.
  • If you have a cup of chicken broth lying around (especially homemade chicken broth), it will add extra depth to the recipe.
  • I substitute soy sauce for the traditional Worcestershire sauce in my barbecue sauce.
  • Cut the pork roast into strips before pressure cooking: Large roasts don't pressure cook well. It takes a long time for the heat to penetrate into the center of the roast. That's fine when you're cooking low and slow all day in a smoker, but not so good in a pressure cooker. To help the pressure do its work, I cut my pork shoulder into 2-inch by 2-inch strips before cooking. Why 2-inch by 2-inch strips? Because the pork roasts I get from the grocery store are usually 4 inches thick. I cut them in half, then cut each half into 2-inch wide pieces. That gives me pieces with even thickness, so they cook consistently. Since the goal is to shred the roast, why not break it down a little first?

What to serve with Instant Pot Pulled Pork

These sandwiches are a taste of summer barbecue any time of the year. I serve them with buns, pickles, coleslaw, and extra barbecue sauce. Good side dishes are my Instant Pot Potato Salad, and my Instant Pot Cajun Pinto Beans. And, of course, a tasty beverage, whether that's lemonade, sweet tea, or a beer.

Storage

Pulled pork can be stored in the refrigerator for a couple of days, then reheated for serving. I freeze leftover pulled pork by packing it flat in gallon zip-top bags and freezing it; the flat bags thaw quickly in the microwave, making them easy to reheat.

Related Posts

Pressure Cooker Pork Steaks, St. Louis BBQ Style
Rotisserie Pork Shoulder with South Carolina Mustard Barbecue Sauce
Pressure Cooker Korean BBQ Pork Lettuce Wraps
Instant Pot Beef Brisket
Instant Pot Puerto Rican Pulled Pork (Pernil)
My other Instant Pot and Pressure Cooker Recipes

Enjoyed this post? Want to help out DadCooksDinner? Subscribe to DadCooksDinner via email and share this post with your friends. Want to contribute directly? Donate to my Tip Jar, or buy something from Amazon.com through the links on this site. Thank you.

Instant Pot Quick Boneless Skinless Chicken Thighs

May 23, 2023 by Mike Vrobel 25 Comments

A plate of cooked chicken thighs, with an Instant Pot and a jar of paprika

Instant Pot Quick Boneless Skinless Chicken Thighs. Need chicken in a hurry? Pressure cooking to the rescue!

Sometimes you just need some boneless, skinless chicken, you know? Something to top a salad, go in a sandwich, or as a quick weeknight main dish. Here's how my Instant Pot gets me chicken in a (mostly) hands-off half an hour.

A plate of cooked chicken thighs, with an Instant Pot and a jar of paprika
Instant Pot Quick Boneless Skinless Chicken Thighs
[feast_advanced_jump_to]

The most important part of this recipe is skipping the white meat. Dark meat has flavor, and does not overcook in the high heat of a pressure cooker. (Unlike bland, boring, stringy chicken breast.) My local grocery started carrying boneless skinless chicken thighs, and I never looked back. My singing the praises of the dark side of the chicken paid off! First I took over the meat case, next…the WORLD! BWAHAHAHA…ahem. Sorry.

Do you have bone-in chicken thighs? Use my Instant Pot Quick Chicken Thighs recipe instead.

Ingredients

  • Boneless skinless chicken thighs
  • Fine sea salt
  • Fresh ground black pepper
  • Garlic powder
  • Paprika (preferably smoked paprika)
  • Vegetable oil
  • Water
    See recipe card for quantities.

How to make Instant Pot Boneless Chicken Thighs

Season the chicken

Sprinkle the chicken with the salt, pepper, garlic powder, and paprika.

Brown the chicken on one side

In an Instant Pot or other pressure cooker, heat the vegetable oil over Sauté mode set to high (medium-high heat on a stovetop) until the oil starts to shimmer. Set half of the chicken thighs in the pot, smooth side down, and let them cook, without moving, until browned on the bottom, about 4 minutes. Move the browned pieces to a plate, then add the rest of the thighs to the pot to brown, about 4 more minutes.

Everything in the pot

Pour 1 cup of water into the pot, and add the browned chicken and any juices on the plate.

Pressure cook for 10 minutes with a Natural Release

Lock the lid on the cooker. Pressure cook at high pressure for 10 minutes ("Manual" or "Pressure cook" mode in an Instant Pot), then the pressure come down naturally, about 15 more minutes.

Serve

Remove the chicken to a platter with tongs or a slotted spoon. You can serve the thighs whole as chicken cutlets, or slice into chicken strips, or shred for pulled chicken. Enjoy!

Equipment

A 6-quart pressure cooker

Scaling

This recipe doubles or halves easily. Don't increase or decrease the water - the 1 cup of water is needed to bring the pressure cooker up to pressure. Also, don't change the cooking time; it takes the same amount of time to cook each chicken thigh through, no matter how many there are in the pot.

Storage

Leftovers can be refrigerated in an airtight container for a few days, or frozen for a few months. If I want to freeze the chicken I cut it into strips and put them in a 2-cup container.

Tips and Tricks

Don't skip the browning step!

An important part of the recipe is browning the chicken thighs before pressure cooking. Searing the thighs before pressure cooking adds a lot of flavor, and is worth the extra time. I understand if you want to skip the browning, but - please, try it, at least once. My concession to speed is browning the thighs on one side only. It gives me the complex flavors of browning, without spending a lot of time on it.

What to Serve with Instant Pot Boneless Chicken Thighs

Boneless skinless chicken thighs are a building block ingredient for me. Sure, I serve them straight up, as chicken cutlets. But I usually slice them into thin strips, and use them in tacos or sandwiches. Or, I shred the chicken and make BBQ pulled chicken - just add BBQ sauce.

What do you think?

Questions? Other ideas? Leave them in the comments section below.

Related Posts

Instant Pot Quick Chicken Thighs (Bone In)
Pressure Cooker Chicken Legs with Herb Rub
Instant Pot Chicken Drumsticks with Potatoes
Instant Pot Chicken Cacciatore
My other Instant Pot and Pressure Cooker Recipes

Enjoyed this post? Want to help out DadCooksDinner? Subscribe to DadCooksDinner via email and share this post with your friends. Want to contribute directly? Donate to my Tip Jar, or buy something from Amazon.com through the links on this site. Thank you.

Instant Pot Pork and Sauerkraut

May 18, 2023 by Mike Vrobel 14 Comments

A plate of sauerkraut and pork ribs with mustard

Instant Pot Pork and Sauerkraut recipe. Pressure braised spareribs and sauerkraut make a hearty comfort meal, perfect for New Year's Day.

A plate of sauerkraut and pork ribs with mustard
[feast_advanced_jump_to]

It's New Year's - time for Pork and Sauerkraut.

I'm an American mutt, with German and French in my family tree. Maybe that explains why pork and sauerkraut is a favorite of mine. It pulls my whole family history together. (Which is odd, because I didn't have pork and sauerkraut until I spent New Year's Day with my wife's family. But that's a different story)

Ingredients

  • 1 slab of spareribs (about 4 pounds), cut into 3 rib sections
  • 2 teaspoons fine sea salt
  • 1 teaspoon brown sugar
  • 2 pounds sauerkraut, rinsed & drained (preferably fresh sauerkraut from the refrigerated section of your grocery store)
  • 2 tablespoons vegetable oil
  • 1 large onion, minced
  • 4 garlic cloves, crushed
  • 10 juniper berries
  • 3 bay leaves
  • 1 teaspoon fresh ground black pepper
  • ½ teaspoon ground coriander
  • ½ teaspoon fine sea salt
  • 1 cup dry Riesling (or any dry, non-oaky white wine)
  • 2 apples, peeled, cored, and minced (preferably tart apples like a granny smith)
  • 1 cup water (or homemade chicken broth or low-sodium store-bought broth)
  • 1 smoked ham hock, about 1 pound

How to Make Instant Pot Pork and Sauerkraut

Prep the Pork and Sauerkraut

Sprinkle the pork ribs with 2 teaspoons fine sea salt and 1 teaspoon brown sugar, then set aside to rest. Rinse the sauerkraut in a large colander, then press down on the sauerkraut to squeeze out the excess water.

Saute the Aromatics

In an Instant Pot set to Sauté Mode - High (medium high heat in a stovetop PC), heat the 2 tablespoons of vegetable oil until it shimmers. Add the onions, garlic, juniper berries, and bay leaves to the pot, and sprinkle with the pepper, coriander, and ½ teaspoon of salt. Saute until the onion softens, about 5 minutes.

Fill the pot

Add the Riesling to the pot, and bring to a boil. Scrape the bottom of the pot with a flat-edged wooden spoon to loosen any browned bits of onion. Stir in the sauerkraut, apples, and chicken stock. Submerge the ham hock and the ribs as much as you can in the sauerkraut.

Pressure cook for 30 minutes with a Natural Release

Lock the lid and pressure cook for 30 minutes in an Instant Pot or other electric pressure cooker, or for 25 minutes in a stovetop PC. (Use Manual, Pressure Cook, or Pressure Cook - Custom mode in an Instant Pot). Let the pressure come down naturally; you can quick release any remaining pressure after 15 minutes if you are in a hurry.

Mix and serve

Carefully remove the lid from the pressure cooker, tilting away from you to avoid the hot steam. Remove the ham hock and the ribs to a carving board. Discard the bay leaves. Shred the ham hock, discarding the bones and any large hunks of gristle, then stir the shredded meat into the sauerkraut. Cut the ribs into 1 bone serving pieces. Scoop the sauerkraut out of the pot with a slotted spoon, leaving behind most of the liquid. Serve, passing the condiments on the side.

Substitutions

Different types of pork

You can substitute baby back ribs for the spare ribs, or use pork shoulder cut into 2-inch by 2-inch strips, and the cooking time remains the same. Don't use pork loin or pork tenderloin, because it will overcook in the pressure cooker.
If you can't find smoked ham hocks, you can skip them, or use smoked pork neck or smoked turkey pieces instead.

Equipment

  • 6 quart pressure cooker (though an 8-quart pressure cooker would be better, because this recipe is right up against the max fill line on a 6-quart cooker.)

Frequently Asked Questions

What cut of pork should I use for Instant Pot Pork and Sauerkraut?

My favorite is spareribs and a ham hock, because the bones add flavor to the sauerkraut as they cook. (And because I love ribs). Country style ribs cut from the pork shoulder are a good substitute (aka Western ribs or boneless ribs, or just get a pork shoulder roast and cut it into strips). Pork loin roast is a little too lean for this recipe; it will overcook. If you really want loin, don't cook it with the sauerkraut. Cook the loin with my Instant Pot Pork Loin Recipe, and cook the sauerkraut with my Instant Pot Kielbasa and Sauerkraut recipe, then serve them together at the table.

Can I use canned sauerkraut for Instant Pot Pork and Sauerkraut?

You can use canned sauerkraut, but it won't be as good as bagged, refrigerated sauerkraut. Canned sauerkraut is cooked during processing, so it will be overcooked after pressure cooking. That said, sauerkraut can stand up to some overcooking. If all you can find is canned, go ahead and use it.

Can I use chicken broth instead of water?

Absolutely! Chicken broth will add extra depth to this recipe. (Especially if you use Homemade Chicken Broth.)

What if I want to make it in my crockpot?

Check out my Crockpot Pork and Sauerkraut recipe instead.

Adapted From: Lorna Sass Pressure Perfect

Notes

  • No pressure cooker? No problem. Use a large dutch oven, and follow the instructions through step 3. Then, instead of pressure cooking in step 4, cover the pot and put it in a 350°F oven for 1 ½ to 2 hours, until the pork ribs are tender. Continue with Mix and Serve in step 5.
  • Boiled white potatoes: Peel 2 pounds of red-skin potatoes and cut into 2 inch pieces. Put in a medium pot, cover with water, and add 2 tablespoons kosher salt. Bring the water to a boil over high heat, reduce the heat to a simmer, and simmer for 10 minutes, or until the potatoes are cooked through. Drain the potatoes, toss with melted butter, sprinkle with some parsley, and serve.

Related Posts

Choucroute Garnie
Slow Cooker Pork and Sauerkraut

Click here for my other Instant Pot Pressure Cooker Recipes

Enjoyed this post? Want to help out DadCooksDinner? Subscribe to DadCooksDinner via email and share this post with your friends. Want to contribute directly? Donate to my Tip Jar, or buy something from Amazon.com through the links on this site. Thank you.

Instant Pot Fettuccine Alfredo

May 16, 2023 by Mike Vrobel 4 Comments

A plate of fettuccine alfredo, sprinkled with red pepper flakes

Instant Pot Fettuccine Alfredo (with Chicken). A one-pot meal of Instant Pot chicken fettuccine Alfredo, ready in minutes thanks to pressure cooking

A plate of fettuccine alfredo, sprinkled with red pepper flakes
Instant Pot Fettuccine Alfredo
[feast_advanced_jump_to]

My kids kept asking for Fettuccine Alfredo. I pictured a fancy Italian recipe, but then I looked into homemade alfredo sauce. I realized it's an Italian variation on my mac and cheese recipe, where I cook pasta in my Instant Pot and substitute evaporated milk for the flour-based heavy cream sauce. (It may be a different pasta and cheese, but the basic technique is the same.)

If you're looking for other Instant Pot pasta recipes, try my Pressure Cooker Penne with Sausage and Peppers, Instant Pot Chickpea Puttanesca with Orecchiette, or Instant Pot Pasta con Ceci (Pasta with Chickpeas).

A digression about spelling

The first trick I had to figure out was how to spell fettuccine. It's one of those words that I can't spell correctly. Spell check keeps underlining all my attempts. I can never get the correct number of t's (two), c's (two), or n's (one). I think I have them all fixed, but I apologize for any spelling slip-ups.

Ingredients

  • Fettuccine Egg Noodle Nests
  • Red pepper flakes
  • Butter
  • Chicken broth
  • Boneless skinless chicken breasts ("Stir Fry" cut or tenders)
  • Evaporated milk
  • Shredded Parmesan cheese
  • Dried Italian seasoning
  • Fresh parsley (optional, for garnish)
    See the recipe card for quantities.

How to make Instant Pot Fettuccine Alfredo

Chicken, broth, and butter over egg noodles in an Instant Pot
Everything in the pot

 Noodles, Broth, and Chicken in the Pot: Put the fettuccine nests in an Instant Pot. Sprinkle with the red pepper flakes, add the butter, and pour in the chicken broth. Break up the fettuccine nests to help them settle in the water, then set the chicken breast strips on top.

Instant Pot set to Pressure Cook for 1 minute
Pressure Cook for 1 Minute

 Pressure Cook for 1 Minute With a 5 Minute Natural Release: Lock the lid on the Instant Pot and pressure cook for 1 minute at high pressure. Let the pressure come down naturally for 5 minutes, then quick release any remaining pressure.

Sprinkling cheese into an Instant Pot full of fettuccine alfredo
Stir in the cheese

Stir in the Evaporated Milk and Cheese: Open the lid, pour in the evaporated milk, then stir in the cheese, breaking up any clumps of chicken or noodles that are stuck together. Sprinkle with the Italian seasoning, and keep stirring until the cheese melts. Serve.

Top Tip: Fettuccine Egg Noodle Nests

Fitting a long pasta, like fettuccine, into my Instant Pot is a trick. I get around this by buying fettuccine nests, egg noodles pre-rolled into neat bundles that are easy to fit in the pot.
Now, fettuccine egg noodles cook very quickly. I get the best results with 1 minute at high pressure, then a 5 minute rest for the pressure to come down naturally, then a quick release. (Instant Pot fettuccine does not lend itself to al dente pasta, but it's not overcooked either.) That doesn't leave much time for the chicken to cook, so I cheat and buy thin-sliced packs of "stir fry chicken" from my grocery store. The chicken is already cut into roughly ½-inch thick strips for me. (If I have to cut it myself, I do.)

Can I use regular Fettuccine noodles in this recipe?

Yes, but it changes things a little bit. You must break the noodles to fit them in the pot and keep them in the liquid while cooking. (Breaking them in half is enough to get them to fit). Also, regular fettuccine noodles are thicker than the egg noodle version, so they take longer. Cook on high pressure for 4 minutes, with a 5 minute natural release. These noodles will also stick together more, so I have to work a bit at pulling them apart before stirring in the cheese.

Substitutions

Skip the chicken

Are you looking for a vegetarian version? Skip the chicken and use vegetable broth; everything else cooks the same.

Cut the heat

I like a hint of heat in this recipe, so I add some red pepper flakes, then pass more at the table. If you don't want the heat, go ahead and skip them.

Fresh Herbs

If you have fresh basil, rosemary, and/or thyme, mince them up and swap them for the dried Italian seasoning.

Different pasta

If you don't want to use fettuccine pasta, you can substitute penne pasta. Increase the cooking time to 4 minutes at high pressure, with the same 5 minute natural release before quick releasing the rest of the pressure.

Equipment

A 6-quart pressure cooker

Scaling

This recipe doubles easily, but you need an 8-quart pressure cooker for it to fit. Cut all the ingredients in half, and this recipe will fit in a 3-quart pressure cooker. The cooking time does not change; it takes the same time to cook each piece of pasta and chicken, no matter how many pieces you have in the pot.

Serving Suggestions

This is a one-pot meal, so it doesn't need much else. I serve Instant Pot Fettuccine Alfredo with a loaf of crusty bread and a salad.

Storing Leftovers

Leftovers last for a couple of days in the refrigerator. Or, package the fettuccine alfredo in 2-cup containers and freeze for a few months.

Frequently Asked Questions

Can I use store-bought Alfredo sauce for instant pot fettuccine Alfredo?

Not with this recipe; store-bought sauce doesn't work in this recipe. We're building Alfredo sauce from evaporated milk and parmesan cheese, plus the starchy liquid left over in the pot from cooking the pasta. Store-bought Alfredo sauce is too thin to use in this recipe.

Can I use low-fat milk or cream in instant pot fettuccine alfredo?

No, you need thick evaporated milk for this recipe; regular milk and cream won't work. Like the Alfredo sauce question above, milk and cream are too thin to use in this recipe. But, if you are watching your calories, you can use low fat evaporated milk.

Can I add vegetables to instant pot fettuccine alfredo?

Most vegetables will overcook if you add them for the pressure cooking, but won't cook long enough if you add them afterwards, while you're stirring in the cheese. So, if you really need broccoli mixed in to make your fettuccine Alfredo complete, cook it on the side and mix it in. My shortcut method is microwave-in-the-bag broccoli, which I stir in after the cheese is mixed in to the noodles.

Can I use any type of pasta?

Now, you can't use *any* type of pasta, but you can substitute any short pasta into this recipe; just increase the cooking time to 4 minutes at high pressure with a 5 minute natural release, because short pastas tend to be thicker than fettuccine. Penne is my favorite substitution - if I can't find nests of pasta, it works better than regular fettuccine, and I don't have to break it in half. Other good choices are farfalle (bowtie), rigatoni, and ziti. Think short shapes with tubes to catch the sauce in.

What do you think?

Questions? Other ideas? Leave them in the comments section below.

Related Posts

Pressure Cooker Macaroni and Cheese
Pressure Cooker Penne with Sausage and Peppers
Instant Pot Pastalaya (Cajun Jambalaya with Pasta)
Instant Pot Baked Ziti Recipe
My other Instant Pot Pressure Cooker Recipes

Enjoyed this post? Want to help out DadCooksDinner? Subscribe to DadCooksDinner via email and share this post with your friends. Want to contribute directly? Donate to my Tip Jar, or buy something from Amazon.com through the links on this site. Thank you.

Instant Pot Cajun Chicken Pasta (Creamy Alfredo style)

May 9, 2023 by Mike Vrobel 4 Comments

A bowl of Instant Pot Cajun Chicken Pasta

Instant Pot Cajun Chicken Pasta. A one-pot dinner of creamy Cajun chicken Alfredo.

Cajun Chicken Pasta is a creamy, chicken Alfredo-style pasta, with cajun spices to kick the heat up a few notches. It's an easy one-pot meal in my Instant Pot, and rapidly became a regular in my dinner recipe rotation.

A bowl of Instant Pot Cajun Chicken Pasta
[feast_advanced_jump_to]

I found out about Cajun Chicken Pasta by accident. I kept bumping into it when I was researching Pastalaya - Cajun Jambalaya pasta. They share penne and chicken, but other than that they are very different recipes. This Cajun Chicken Pasta is all about the cheesy cream sauce, with a bit of heat in the spices on the chicken.

This is a variation on my Instant Pot Fettuccine Alfredo, and I have to admit, Penne works better in an Instant Pot than Fettuccine. Penne doesn't stick and clump up like the thin Fettuccine noodles. And, I may have American taste buds, but I do prefer this recipe, with the heat from the Cajun spices, to the traditional Alfredo, which is..dare I say it...a bit boring with its white meat chicken, white sauce, and white pasta. The kick of spices in this one give it a little extra that I love.

Ingredients

Ingredients for Cajun Chicken Pasta
  • Butter
  • Chicken Tenders
  • Cajun seasoning
  • Fine sea salt
  • Chicken broth (Low sodium store-bought, or homemade)
  • Diced tomatoes and green chilies
  • Hot sauce
  • Penne pasta
  • Evaporated milk
  • Grated Parmesan cheese
  • Green onions

See the recipe card for quantities.

How to Make Instant Pot Creamy Cajun Chicken Pasta

Brown the chicken

Browned chicken tender

Heat the butter in an Instant Pot set to Sauté Mode - High (use medium-high heat in a stovetop PC) until the butter melts. Add the chicken tenders in a single layer and sprinkle with 2 teaspoons cajun seasoning (and ½ teaspoon salt if using salt-free seasoning). Cook without stirring until browned on the bottom, about 3 minutes.

Broth, Hot Sauce, Tomatoes, and Pasta in the Pot

Pouring chicken broth over the penne, chicken, and tomatoes

Pour in the chicken broth (plus 1½ teaspoons fine sea salt if using homemade chicken broth). Stir, and scrape the the bottom of the pot with a flat-edged wooden spoon to loosen any browned bits of chicken. Stir in the hot sauce, diced tomatoes and chilies, and then the pasta, making sure all the pasta is submerged in the pot liquid.

Pressure Cook for 4 minutes with a 10-minute natural release

Instant Pot set to pressure cook for 4 minutes

Lock the lid and cook at high pressure for 4 minutes in an electric or stovetop pressure cooker. (Use Manual, Pressure Cook - high, or Pressure Cook - Custom mode for an Instant Pot). Let the pressure come down naturally for 10 minutes, then quick release the remaining pressure. Unlock the lid, tilting it away from you to avoid the hot steam.

Stir in the evaporated milk and cheese

Unlock the lid, tilting the lid away from you to avoid the hot steam. Leave the pot in "keep warm" mode and pour in the evaporated milk. Stir in half the cheese, and keep stirring gently until the cheese melts, and break up any stuck-together pieces of chicken you see. Add the remaining cheese and stir until the cheese melts. Serve, sprinkling each serving with a little extra cajun seasoning, and some minced green onions. Serve, passing hot sauce at the table, and enjoy!

Substitutions

Pasta shapes

Penne is my favorite for this recipe, but rotini and bowtie pasta (aka Farfalle) will also work. Really, any short pasta will work in this recipe, but it's best if it has a tube shape, or nooks and crannies to hold onto the creamy sauce. If the box says the pasta should cook for 11 to 14 minutes, the recipe works as written. If it takes 10 minutes or less to cook, cut the natural release time back from 10 minutes to 5 minutes before quick releasing the remaining pressure.

Cajun Seasoning

You can get a store-bought cajun seasoning - Slap Ya Mama or Tony Chachere's are two I've enjoyed, but there are lots of others, and any will work in this recipe. But, I usually don't buy Cajun Seasoning, I make my own: Homemade Cajun Spice Rub. Now, if you use my homemade seasoning, remember that it is salt-free, and add the extra salt suggested in the recipe.

Hot Sauce

You want a classic Cajun hot sauce, like Tabasco or Crystal. But, you can substitute almost any hot sauce, and vary the heat to your liking. (Or skip the hot sauce altogether if you can't take the heat - but why are you having Cajun pasta if you want no heat at all?)

Vegetarian version

Want a veggie-friendly version of this recipe? Skip the chicken, and use vegetable broth (either store-bought low sodium or homemade vegetable broth) instead of chicken broth.

Equipment

A 6-quart pressure cooker

Scaling

Doubling this recipe needs an 8-quart pressure cooker; it fills up the pot too much if you try to double it in a 6-quart pressure cooker. Cut all the ingredients in half, and this recipe will fit in a 3-quart pressure cooker. The cooking time does not change; it takes the same time to cook a single piece of penne or chicken, no matter how many are in the pot.

Storage

Creamy Cajun Pasta will keep in the refrigerator for a few days or in the freezer for a few months. I store it in 2-cup containers, which make the perfect size for a leftover lunch from the microwave.

Tips and Tricks

Spitting Starch

Most of the time, when I make this recipe, everything goes according to plan. Occasionally - one out of every five times I make it - quick releasing the pressure starts spitting starch everywhere. If your pressure cooker spits starch when you quick release the pressure, close the pressure release valve. (Carefully - the steam is scalding hot.) Let the pot sit for a couple of minutes, then pulse the pressure release open and closed a few times to release some pressure. Then try opening the pressure valve again and see if it releases clean. Repeat as necessary until all the pressure is released.

What's happening? The pressure drop in the pot lets the liquid jump to a rolling boil. The starch in the liquid is thrown into the air inside the pot - and then spit out through the pressure release valve. Closing the pressure release lets the liquid settle down and cool off a little more, so it doesn't bubble up as much the next time you open the valve.

(Why doesn't this happen most of the time? I don't know. If you're a pressure cooker engineer, let me know what's happening in the comments below.)

Liquid in the pot

There will be some liquid in the pot when the Cajun Chicken Pasta finishes pressure cooking; most of it will be soaked up by the pasta as the pot rests, and the rest of the liquid becomes part of the sauce. If the pot has way too much liquid left after cooking, you probably used a 12-ounce box of pasta. (I've had complaints about too much liquid, and the ones I've followed up on were fooled by a box that looked like it was the same size as the other, 16-ounce boxes near it, but wasn't.).

What to serve with Cajun Chicken

Garlic bread or breadsticks and a salad are my simple sides with this one pot meal. If you want to be fancier, and have a second pressure cooker, try my Instant Pot (Pressure Cooker) Green Beans, Pressure Cooker Kale with Garlic and Lemon, or Instant Pot Turnip Greens With Ham.

Inspired by a request from a relative to copycat: Chili's Cajun Chicken Pasta https://www.chilis.com/menu/chicken-seafood/cajun-chicken-pasta

Related Posts

Instant Pot Cajun Pinto Beans
Instant Pot Pasta e Ceci (Pasta with Chickpeas)
Instant Pot Bucatini all'Amatriciana
Instant Pot Chickpea Puttanesca with Orecchiette
Instant Pot Chicken Cacciatore
Instant Pot Butter Beans and Shrimp
My other Instant Pot and Pressure Cooker Recipes

Enjoyed this post? Want to help out DadCooksDinner? Subscribe to DadCooksDinner via email and share this post with your friends. Want to contribute directly? Donate to my Tip Jar, or buy something from Amazon.com through the links on this site. Thank you.

Instant Pot Boneless Leg of Lamb

May 4, 2023 by Mike Vrobel 12 Comments

A piece of boneless leg of lamb, in sauce, with a sprig of rosemary on top

Instant Pot Boneless Leg of Lamb. Pot roasted leg of lamb, pressure cooked to fall apart tenderness.

I'm preparing for Easter dinner, so it's Spring lamb time. This recipe is the answer to a common question on my [7-hour leg of lamb in 90 minutes recipe]: "What if I have a boneless roast?" Because it's boneless, I have a few tricks up my sleeve…

A piece of boneless leg of lamb, in sauce, with a sprig of rosemary on top
Instant Pot Boneless Leg of Lamb
[feast_advanced_jump_to]

Looking for a recipe for a bone-in leg of lamb? Try my 7-hour leg of lamb in 90 minutes. Or for other lamb recipes try my Instant Pot Lamb Shanks, or my Instant Pot Lamb Stew.

Recipe Tips

Instant Pot Leg of Lamb Trick: Cut it into smaller roasts

I'm not cooking the whole leg of lamb as a single roast; I'm cutting it into smaller lamb leg roasts, so each one pressure cooks in a shorter amount of time. A few years ago I figured out why large roasts are such a pain in a pressure cooker. Pressure cooking increases the heat in the pot, but it takes more time for that heat to penetrate into a thick roast, and smaller pieces of meat cook faster (and more evenly). So, I cut my whole boneless leg into four smaller roasts, each about 1 pound and roughly the same size. (Boneless leg of lamb has a lot of different sizes and shapes, so just do your best to get them the same size).
Now, a boneless leg of lamb doesn't cooperate with "about the same sized roasts". Lamb legs have lobes of meat with a variety of shapes and sizes. I do my best - I try to cut them into roughly 4-inch long by 2-inch wide pieces. But there's only so much I can do - some pieces wind up thick and fat, some are long and thin. That's OK - the smaller sized roasts, even though they're not perfectly matched, cook in a similar amount of time under pressure.

Lamb Seasonings

And, for lamb, I use what I think of as my "Northern Mediterranean" flavor profile, which could come from Spain, France, or Italy. I rub the lamb with olive oil, garlic, and fresh herbs, saute an onion, and cook it with a little red wine for the braising liquid. And, I throw some carrots in the pot, because I love braised carrots.

Ingredients

  • Boneless leg of lamb roast
  • Fine sea salt
  • Fresh ground black pepper
  • Olive oil
  • Garlic cloves
  • Fresh rosemary
  • Fresh thyme
  • Olive oil
  • Onion
  • Red wine
  • Chicken broth or beef broth (homemade or low sodium store-bought)
  • Carrots
    See the recipe card for quantities

Equipment

  • 6 quart Instant Pot (or other 6 quart pressure cooker).

How to Make Instant Pot Boneless Leg of Lamb

Season and sear the roast

Remove any netting from the lamb roast, unroll it and lay it out flat, and cut it into 4 pieces, each roughly 4" x 2" x 2". Sprinkle the lamb with 2 teaspoons salt and 1 teaspoon of black pepper. Rub the minced garlic, rosemary, and thyme into the lamb pieces, working it in to any natural crevices in the meat. Heat 1 tablespoon of olive oil in an Instant Pot or other pressure cooker, using Sauté mode adjusted to high, until the oil is shimmering. (Use medium-high heat in a stovetop pressure cooker.) Sear the lamb in two batches, two pieces at a time. Sear each piece on 2 sides - use the largest sides - until it is well browned, about 3 minutes a side. (So, about 12 minutes total.) After searing, put the lamb on a platter and set aside for later.

Sauté the aromatics

Add another tablespoon of olive oil to the pressure cooker pot, and heat until shimmering. Add the onion and sprinkle with ½ teaspoon salt. Sauté until the onion softens, about 3 minutes, stirring and scraping the browned lamb bits from the bottom of the pot with a flat-edged wooden spoon. Pour in the wine, bring to a simmer, and simmer for 1 minute to boil off some of the alcohol.

Everything in the pot

Pour in the chicken broth and scrape the bottom of the pot one last time to loosen any browned bits of onion. Add the lamb (and any lamb juices on the platter), then scatter the carrots on top.

Pressure cook the lamb leg for 50 minutes with a natural pressure release

Lock the pressure cooker lid and cook at high pressure for 50 minutes ("Pressure Cook" or "Manual" mode in an Instant Pot), or for 45 minutes in a stovetop PC. Let the pressure come down naturally, about 20 more minutes.

Defat the sauce and serve

Gently move the pieces of lamb to a serving platter, and the carrots to a serving bowl, using tongs or a slotted spoon. Pour the remaining liquid in the pot into a fat separator and let settle for five minutes. Cut each piece of lamb in half, pour a little of the defatted sauce over it, and serve, passing the rest of the sauce and the carrots on the side. Enjoy!

What to Serve With Instant Pot Boneless Leg of Lamb

I love to serve this lamb with Instant Pot Mashed Potatoes, more rustic Instant Pot smashed potatoes or couscous to soak up the sauce. I also serve a green salad, a vegetable (like my Instant Pot Green Beans), and if I want to really lean into the Mediterranean vibe, pita bread and hummus.

Storing Leftovers

Braised meat (like this leftover lamb leg) makes great leftovers. Store the meat in 2-cup containers, covered with extra sauce, and it will last for up to 3 days in the refrigerator, or up to 6 months in the freezer.

What do you think?

Questions? Other ideas? Leave them in the comments section below.

Related Posts

Pressure Cooker 7 Hour Leg of Lamb (in 90 minutes)
Instant Pot Irish Lamb Shanks
Instant Pot Lamb Youvetsi (Greek Lamb Stew with Orzo)
Instant Pot Lamb Stew
Instant Pot Moroccan Lamb Shanks
My other Instant Pot and Pressure Cooker Recipes

Enjoyed this post? Want to help out DadCooksDinner? Subscribe to DadCooksDinner via email and share this post with your friends. Want to contribute directly? Donate to my Tip Jar, or buy something from Amazon.com through the links on this site. Thank you.

Instant Pot Beef Ribs (Texas BBQ Style)

May 2, 2023 by Mike Vrobel 40 Comments

A two-bone slab of beef ribs on a red plate

Instant Pot Beef Ribs. Dinosaur-sized beef back ribs, Texas BBQ Style, fall-off-the-bone tender thanks to pressure cooking in my Instant Pot.

BBQ beef ribs are a rare treat. The long bone "back" ribs are not as widely available as pork ribs, or even beef short ribs. I order them automatically when I see them at a barbecue joint. If a place is selling beef back ribs, odds are they do it out of love, not just to round out the menu. When I want to make them at home, and I don't have the time for real-deal barbecue, I cook them in a fraction of the time in my Instant Pot.

A two-bone slab of beef ribs on a red plate
Instant Pot Beef Ribs
[feast_advanced_jump_to]

Beef back ribs are the bones from a rib roast - that is, a prime rib. They are often called "dinosaur ribs" - the bones are enormous compared to pork ribs. There are 7 bones in a rack of beef back ribs, but my local grocery stores usually sell them cut into 4 bone lengths. That is, when I can find them. They're not in the meat case that often. I can usually find them during ribeye roast sales when the butcher is trimming them from the roast to make the boneless cut. Or, I special order them. (Asking for back ribs will probably get you one-on-one time with your butcher; he'll want to find out who's asking for this rare cut, and why. That's great! Chat up your butcher - It's always good to know who cuts your meat. Start by asking how he cooks beef ribs.)

When I'm cooking back ribs, I like to emphasize the beef flavor. (The bones are my favorite part of the prime rib, after all.) I serve them with a simple Texas-style dry rub, equal parts salt, black pepper, and Ancho chili pepper. I don't use barbecue sauce; again, I don't want to cover up the beefy flavor. If you can't imagine eating ribs without sauce, look for a Texas-style sauce to pair with them.

Looking for different ribs? For pork ribs, try my BBQ Instant Pot Ribs recipe, or my Instant Pot Baby Back Ribs recipe. For a beef short rib recipe, try Instant Pot BBQ Braised Short Ribs, or Instant Pot Boneless Short Ribs.

Ingredients

  • Beef back ribs
  • Fine sea salt
  • Fresh ground black pepper
  • Ancho chili powder
    See the recipe card for quantities.

How to cook Instant Pot Beef Back Ribs

Season the ribs and put them in the pressure cooker

Mix the salt, pepper, and Ancho chili powder in a small bowl to make a spice rub. Sprinkle both sides of the ribs with the rub. Pour ½ cup of water into an Instant Pot or other pressure cooker. Stack the ribs loosely in the pressure cooker, bone side down.

Pressure cook the ribs for 25 minutes with a Natural Release

Pressure cook on high pressure for 25 minutes in an Instant Pot or other electric pressure cooker, or for 20 minutes in a stovetop PC. (Use Manual, Pressure Cook, or Pressure Cook - Custom mode in an Instant Pot.) After the cooking time, let the pressure come down naturally until the pressure valve drops, about 15 more minutes.

Broil the ribs (optional)

Put the ribs bone side down on a rimmed baking sheet. Broil the ribs on high until the meat starts to crackle and brown, about 5 minutes. (Broilers are all over the place, heat wise, so keep an eye on them.) Remove the ribs from the broiler and serve.

Tips and Tricks

Back Ribs vs Spare Ribs vs Short Ribs

What type of ribs should you use? This recipe will work with beef back ribs or beef spare ribs. (Beef short ribs are different, and should follow my  Instant Pot short ribs recipe ). Beef back ribs are easier to find, because they are the bones that cover a prime rib roast; if a butcher wants to cut a boneless rib roast, they cut away the back ribs. Spare ribs are from the lower part of the ribcage, over the plate cut. Beef spare ribs are not as common in grocery stores, but work great in this recipe if you can find them…and if you can fit them in your pot, since they tend to be longer than back ribs.

Beef Rib Size

The big trick to pressure cooker beef back ribs is the length of the bones. (There's a reason they have the dinosaur ribs nickname.) If you get particularly long cut bones, they might not fit in the cooker. I cut the ribs into 2-bone pieces to help them fit, and I don't worry if they stack up beyond the "max fill" line - there is plenty of airspace in the pot to build up the pressure. But if you have an 8-quart Instant Pot, use it; the large pot helps with this recipe.

Cutting between every other bone

A rack of beef back ribs has 7 bones; it's fine if cutting into 2-bone pieces leaves one of them as a 1-bone piece. (My local stores stock back ribs in 4-bone packs, so splitting them into 2-bone pieces is easy.)

Broil for some extra browning

The ribs are good straight out of the cooker, tender and falling off the bone, but the extra five minutes under the broiler adds a nice, crispy bark to the outside. I don't skip that step unless I'm in a huge hurry.

A Bit of Heat

I like the subtle hint of heat the Ancho chile powder brings to this recipe. If you want to really bring the heat with your ribs, add ¼ to ½ teaspoon of cayenne pepper to the spices before you sprinkle them on the ribs.

BBQ Sauce?

Like I said above, I try to emphasize the beef in my beef ribs, so I don't sauce them. (It's a Texas-style thing.) If you want BBQ sauce on your ribs, save it for after cooking. After removing them from the pressure cooker, brush the ribs with your favorite BBQ sauce. If you're doing the broiling step, broil until the sauce starts to bubble, then take the ribs out of the broiler and brush them with another layer of sauce before serving. (Can I recommend my own  homemade barbecue sauce recipe ?)

Do you use a rack?

I don't use a rack when I'm cooking ribs. The bones act as a natural rack, lifting the ribs off the bottom of the pot. They also release enough liquid that the lower third of the ribs are underwater after cooking, even with the rack.

What to serve with Instant Pot Beef Ribs

I like to serve these ribs with Texas BBQ side dishes like my Instant Pot Collard Greens Instant Pot Mustard Potato Salad. Other condiments to serve with the ribs are thin-sliced onion, pickle chips, and a bottle of hot sauce for sprinkling at the table. (And if I'm feeling like too much muchness is not enough, I'll serve my Instant Pot Loaded Mashed Potatoes recipe with these ribs.)

What do you think?

Questions? Other ideas? Leave them in the comments section below.

Related Posts

Pressure Cooker Baby Back Ribs
Pressure Cooker Pork Western Shoulder Ribs with BBQ Rub and Sauce
Pressure Cooker St. Louis Cut Spareribs
Grill-Smoked Pork Shoulder Ribs
Instant Pot BBQ Braised Short Ribs
Instant Pot Colombian Beef Short Rib Soup
My other Pressure Cooker Recipes

Enjoyed this post? Want to help out DadCooksDinner? Subscribe to DadCooksDinner via email and share this post with your friends. Want to contribute directly? Donate to my Tip Jar, or buy something from Amazon.com through the links on this site. Thank you.

Instant Pot Chocolate Cheesecake

April 27, 2023 by Mike Vrobel 7 Comments

A piece of chocolate cheesecake, topped with whipped cream and a sliced strawberry, on a red plate, in front of a bowl of chocolate chips and strawberries.

Instant Pot Chocolate Cheesecake. This delicious dessert is perfect for chocolate lovers.

"It must be great having a dad who's such a good cook!" My kids hear this all the time, but they only halfheartedly agree. Sometimes I make stuff they love, sometimes I make stuff they hate, and sometimes it's a split decision, 2-1, decided on points.
Instant Pot Chocolate Cheesecake? No complaints, no whining. In a unanimous decision, everyone wants more chocolate cheesecake.

A piece of chocolate cheesecake, topped with whipped cream and a sliced strawberry, on a red plate, in front of a bowl of chocolate chips and strawberries.
Instant Pot Chocolate Cheesecake
[feast_advanced_jump_to]

My Instant Pot is my magic cheesecake machine; perfect cheesecake is easy as long as I have my pressure cooker, a 7-inch springform pan, and a bakeware sling.

Now, I know, cheesecake in a pressure cooker sounds weird. Try it anyhow - especially this one - because the pressure cooker makes a great cheesecake steamer. It simulates a water bath, evenly cooking the cheesecake. The only hard part is patience - cheesecake needs to rest in the refrigerator for at least four hours after cooking so it can set. In my case, this meant a constant stream of questions: "Is it done yet? Can we try it now? What's taking so looong?"

And, I don't know why it took me so long to add chocolate; the tart cheesecake and sweet, bitter chocolate are an awesome combination. I get my chocolate from semi-sweet chocolate chips, melted in the microwave. You don't have to use chips; semi-sweet baking chocolate is fine. But, we always have a bag of chocolate chips in the pantry, so thats what I cook with.

Join me in the Pressure Cooked Cheesecake Movement - your taste buds (and picky eaters) will thank you.

Ingredients

  • Oreo cookie crumbs
  • Regular cream cheese
  • Semi-sweet chocolate chips (or dark chocolate chips)
  • Sugar
  • Vanilla extract
  • Eggs
  • Whipping cream (optional topping)
  • Strawberries (optional topping)

How to make Instant Pot Chocolate Cheesecake

Prepare the Oreo cookie crust: Spray the 7-inch cheesecake pan with nonstick spray. Crush the Oreo cookies (I pulse them in my food processor until they are fine crumbs, or I put them in a gallon zip-top bag and pound them with a rolling pin). Spread the Oreo crumbs evenly across the bottom of the pan and pack down, pushing the crumbs up the sides a little to make the Oreo crust.
Make the cheesecake filling: Soften the cream cheese by leaving it out at room temperature for at least 1 hour. (Or soften the cream cheese in the microwave, for 30 seconds to 1 minute). Beat the cream cheese in an electric mixer on medium speed until smooth, about 1 minute. Slowly add the sugar and beat on medium speed until the sugar is completely blended, about 3 minutes. Stop the mixer and scrape down the sides of the bowl. Add the melted chocolate and vanilla and beat on low speed until completely blended, about 1 minute. Stop the mixer again and scrape down the sides. Add the eggs one at a time, beating each on low speed until just blended. (Don't over-beat the eggs.) Pour the cheesecake batter into the prepared cheesecake pan.
Lower the cheesecake pan into the pot: Pour 2 cups of water into your Instant Pot (or another pressure cooker.) Put the cheesecake on your pressure cooker bakeware sling, and lower it into the pot. (If you don't have a sling, use the rack that came with your cooker, and make an aluminum foil sling to lift the cheesecake. Fold a 2-foot-long piece of aluminum foil over a few times, until it is a long strip about 4 inches wide. Center the cheesecake pan on the sling and carefully lower it into the inner pot, setting it on the rack.)
Pressure cook the cheesecake for 20 minutes with a natural release: Lock the lid on the cooker. Cook on high pressure for 20 minutes in an Instant Pot or other electric PC, or for 16 minutes in a stovetop PC. (Use Manual, Pressure Cook, or Pressure Cook - Custom mode set to 20 minutes in an Instant Pot.) Let the pressure come down with a natural pressure release, about 20 more minutes. (If you're in a hurry, you can quick release any pressure left in the pot after 15 minutes.)
Cool the cheesecake, then serve: Lift the cheesecake out of the pressure cooker. Loosen the cheesecake from the sides by running a paring knife around the edge of the pan. Put the pan on a cooling rack and cool at room temperature for an hour. Cover the pan with plastic wrap and refrigerate for at least 4 hours, preferably overnight. Slice the cheesecake into 8 pieces, top each with a dollop of whipped cream and a strawberry slice, and serve.

Equipment

  • 6-quart instant pot (or any other 6-quart pressure cooker)
  • 7-inch springform pan (to fit in the pressure cooker)
  • Pressure Cooker Bakeware Sling (or use aluminum foil to make a sling.)
  • Stand mixer with a paddle attachment or an electric hand mixer

Tips and Tricks

Special Equipment: The key trick to this recipe is a couple of extra pieces of equipment: A springform pan that will fit in your pressure cooker, and a bakeware sling to lower the cheesecake in and out of the pot. And, really, the bakeware sling is really just a convenience. You can use the rack that came with your pressure cooker and make a sling out of a folded piece of aluminum foil. But the bakeware sling is much more convenient, and once you've tried Instant Pot Cheesecake, you'll be glad you have a dedicated sling, because you're going to make a lot of cheese cake this way.
No Oreos: Don't want to crush Oreos? Make a crust by mixing ¾ cup graham cracker crumbs with 2 tablespoons melted butter.
Larger or Smaller Instant Pot: I get questions about changing this recipe for different-sized cookers and pans; I haven't had time to test them yet. I've heard from readers that a 6-inch wide, 3-inch high cheesecake pan will work…but it might take a little extra cooking.
Using an 8 Quart pressure cooker? I use this recipe as-is, with my 7-inch cheesecake pan in my 8-quart pressure cooker. It works great. Will it work with a larger pan in the larger cooker? In theory, yes, it should work if you increase the cooking time under pressure. But I have not tried it, so I don't know how much time to add.
Sour Cream: Do you want to add sour cream to your cheesecake? Add ¼ cup of sour cream to the mixing bowl with the melted chocolate. I didn't include it in the recipe because I didn't taste much of a difference, but I get asked about it a lot, and there's nothing wrong with adding it. If your cheesecake feels incomplete without sour cream, go right ahead and add it.

Storage

Cheesecake freezes beautifully. Wrap the entire cheesecake tightly in plastic wrap, or individually wrap pieces, and then freeze them for a few months. Move the frozen cheesecake to the refrigerator to thaw for a few hours before serving.

What do you think?

Questions? Other ideas? Leave them in the comments section below.

Related Posts

Instant Pot New York Cheesecake Recipe
Pressure Cooker Key Lime Cheesecake
Instant Pot Caramel Apple Cheesecake
Pressure Cooker Strawberry Cheesecake
Instant Pot Oreo Cheesecake
My other Instant Pot Pressure Cooker Recipes

Enjoyed this post? Want to help out DadCooksDinner? Subscribe to DadCooksDinner via email and share this post with your friends. Want to contribute directly? Donate to my Tip Jar, or buy something from Amazon.com through the links on this site. Thank you.

  • « Previous Page
  • 1
  • …
  • 3
  • 4
  • 5
  • 6
  • 7
  • …
  • 37
  • Next Page »

Welcome to Dad Cooks Dinner!

I'm Mike Vrobel, a dad who cooks dinner every night. I'm an enthusiastic home cook, and I write about pressure cooking, rotisserie grilling, and other food topics that grab my attention.

More About Me →

Popular

  • Three bowls of cooked Pinto Beans on a wood table
    Instant Pot Pinto Beans (No Soaking)
  • Pressure Cooker Beef Shank (Osso Bucco)
  • Pressure Cooker 7 Hour Leg of Lamb (in 90 minutes)
    Pressure Cooker 7 Hour Leg of Lamb (in 90 minutes)
  • Pressure Cooker Brown Jasmine Rice
  • Grilled Tomahawk Steak (Long Bone Ribeye, Reverse Seared)
    Grilled Tomahawk Steak (Long Bone Ribeye, Reverse Seared)
  • A green bowl full of chicken noodle soup
    Instant Pot Rotisserie Chicken Noodle Soup

Seasonal

  • A bowl of asparagus risotto
    Instant Pot Asparagus Risotto (Pressure Cooker Recipe)
  • Grilled Butterflied Chicken with Garlic Butter
  • Sous Vide rack of lamb sliced into chops
    Sous Vide Rack of Lamb with Dijon Bread Crumb Crust
  • A bowl of beef stew with asparagus, carrots, and radishes.
    Instant Pot Spring Vegetable Beef Stew
  • A Rotisserie Chicken (Pollo Asado)on a platter of shredded cabbage
    Rotisserie Chicken Pollo Asado
  • Rotisserie Pork Shoulder Roast with Carolina Mustard BBQ Sauce
    Rotisserie Pork Shoulder with South Carolina Mustard Barbecue Sauce

Footer

↑ back to top

About

  • Privacy Policy

Newsletter

  • Sign Up! for emails and updates

Contact

  • Contact

Copyright © 2025 Dad Cooks Dinner