DadCooksDinner

  • Home
  • Rotisserie
  • Recipes
  • Tools
  • Books
  • Merch
menu icon
go to homepage
  • Recipes
  • Books
  • Tools
  • Merch
  • About
subscribe
search icon
Homepage link
  • Recipes
  • Books
  • Tools
  • Merch
  • About
×
Home » Recipes

Instant Pot Rotisserie Chicken Tortilla Soup

June 9, 2026 by Mike Vrobel 2 Comments

A bowl of Instant Pot Tortilla Soup

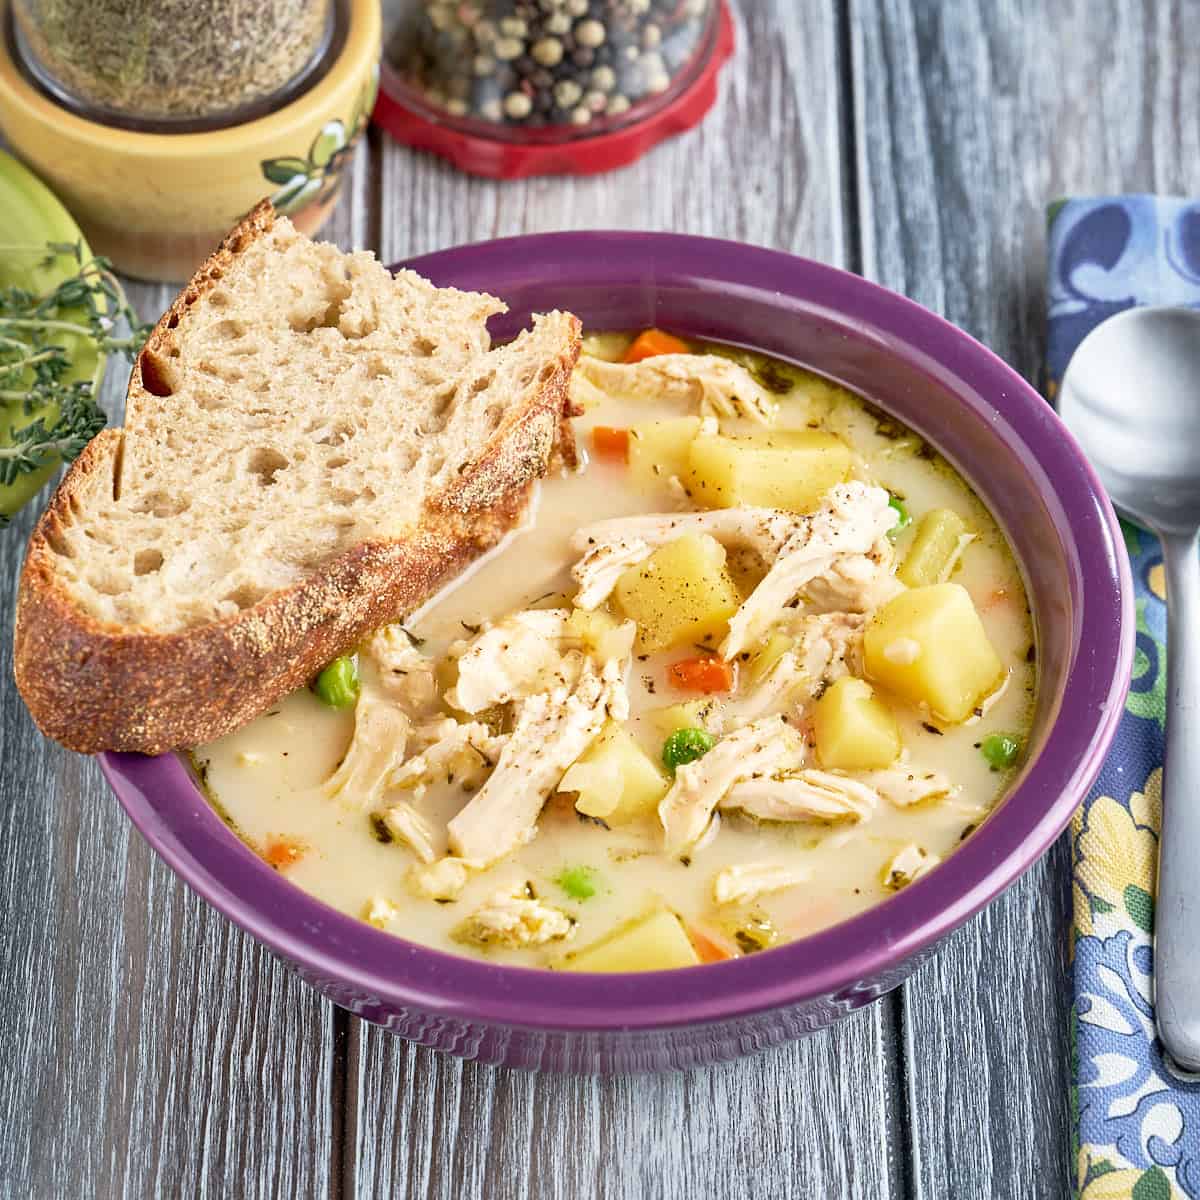
Instant Pot Rotisserie Chicken Tortilla Soup. Turn a rotisserie chicken into Tortilla Soup using my secret weapon: Instant Pot chicken broth, made from the rotisserie chicken carcass.

A bowl of Instant Pot Tortilla Soup
[feast_advanced_jump_to]

I have rotisserie chicken left over from a party. (When you write a rotisserie cookbook, people expect rotisserie chicken. And I'm happy to oblige!) It's time to bring out my secret weapon - homemade pressure cooker chicken broth - and use that leftover chicken to make Instant Pot Rotisserie Chicken Tortilla Soup.

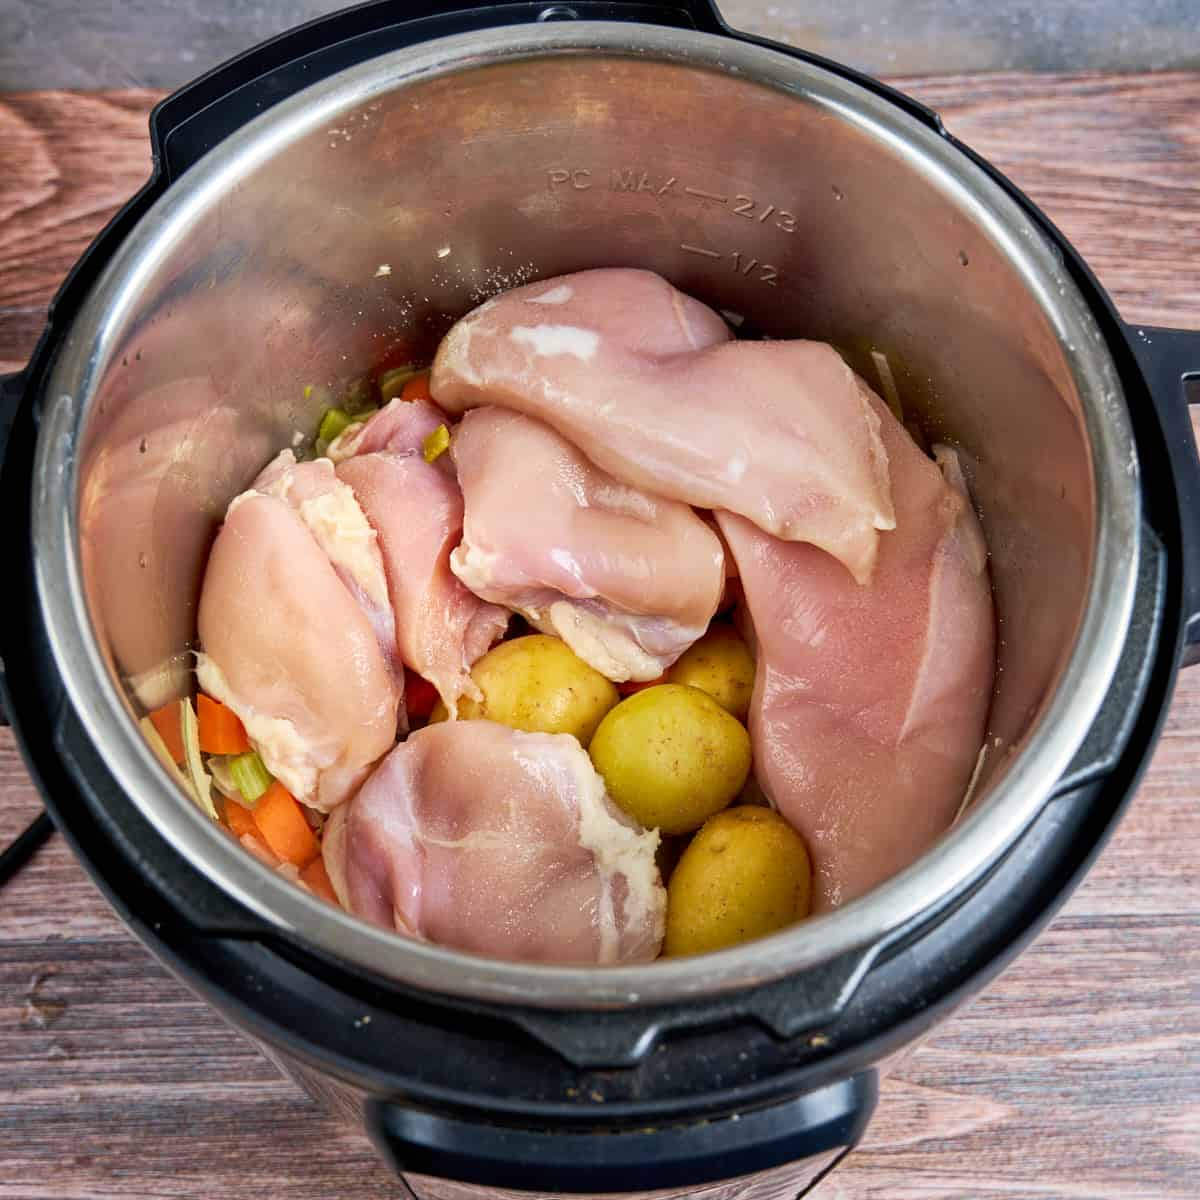
Now, I am a fanatic, rotisserie grilling my own chickens. But a store-bought rotisserie bird works great in this recipe. (I use store-bought rotisserie chickens all the time.) Or, use leftovers from a roast chicken, no rotisserie necessary. If you have a chicken's worth of roasted bones and a few cups of leftover meat, you're good to go.

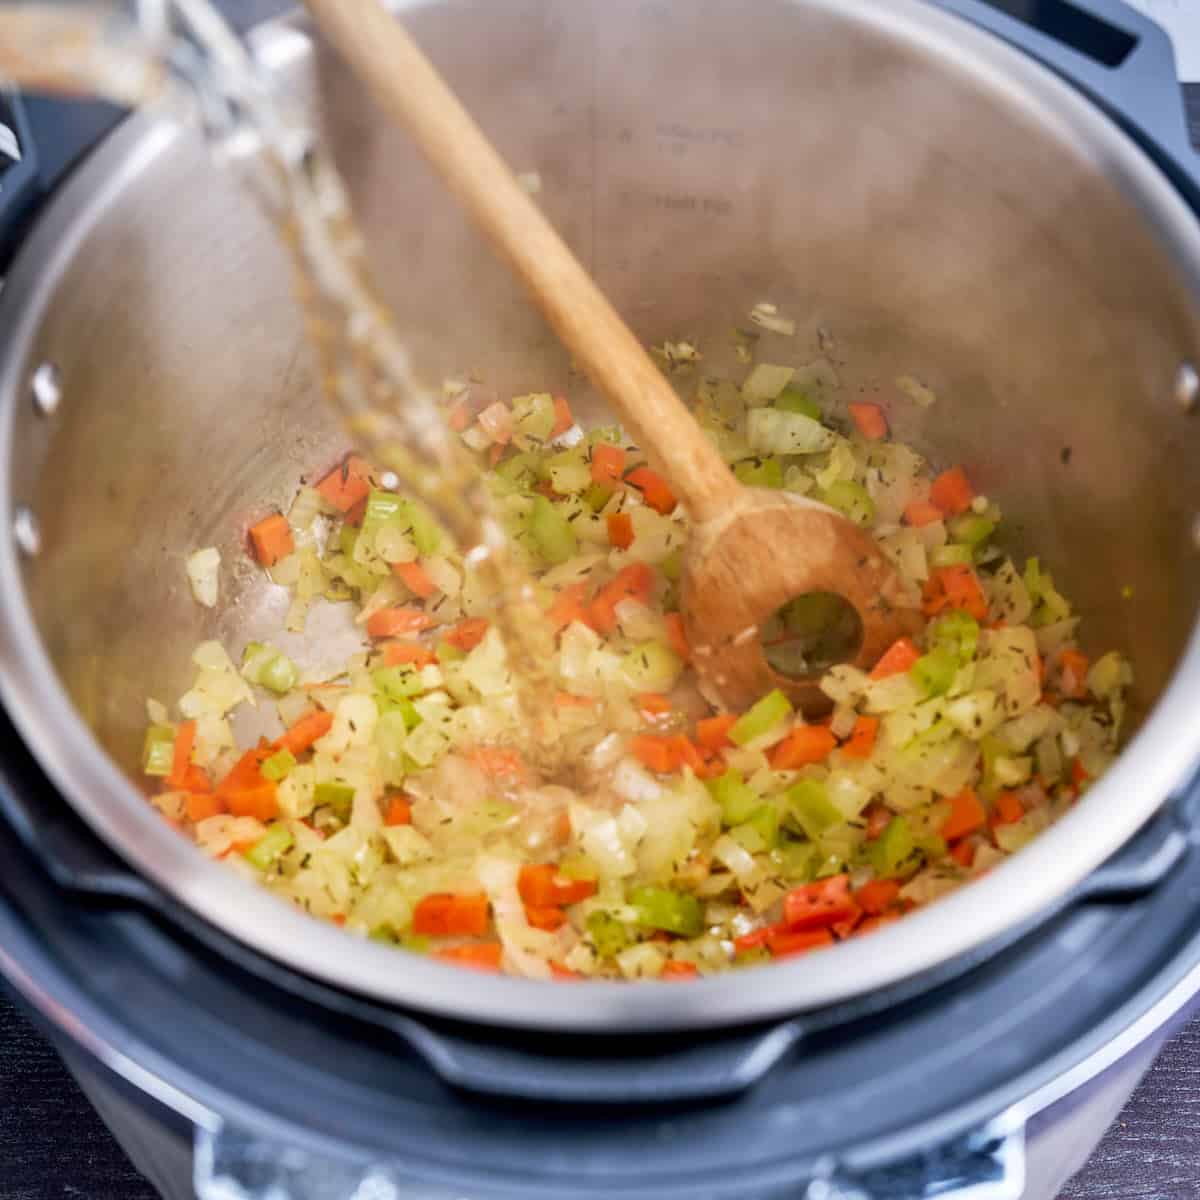
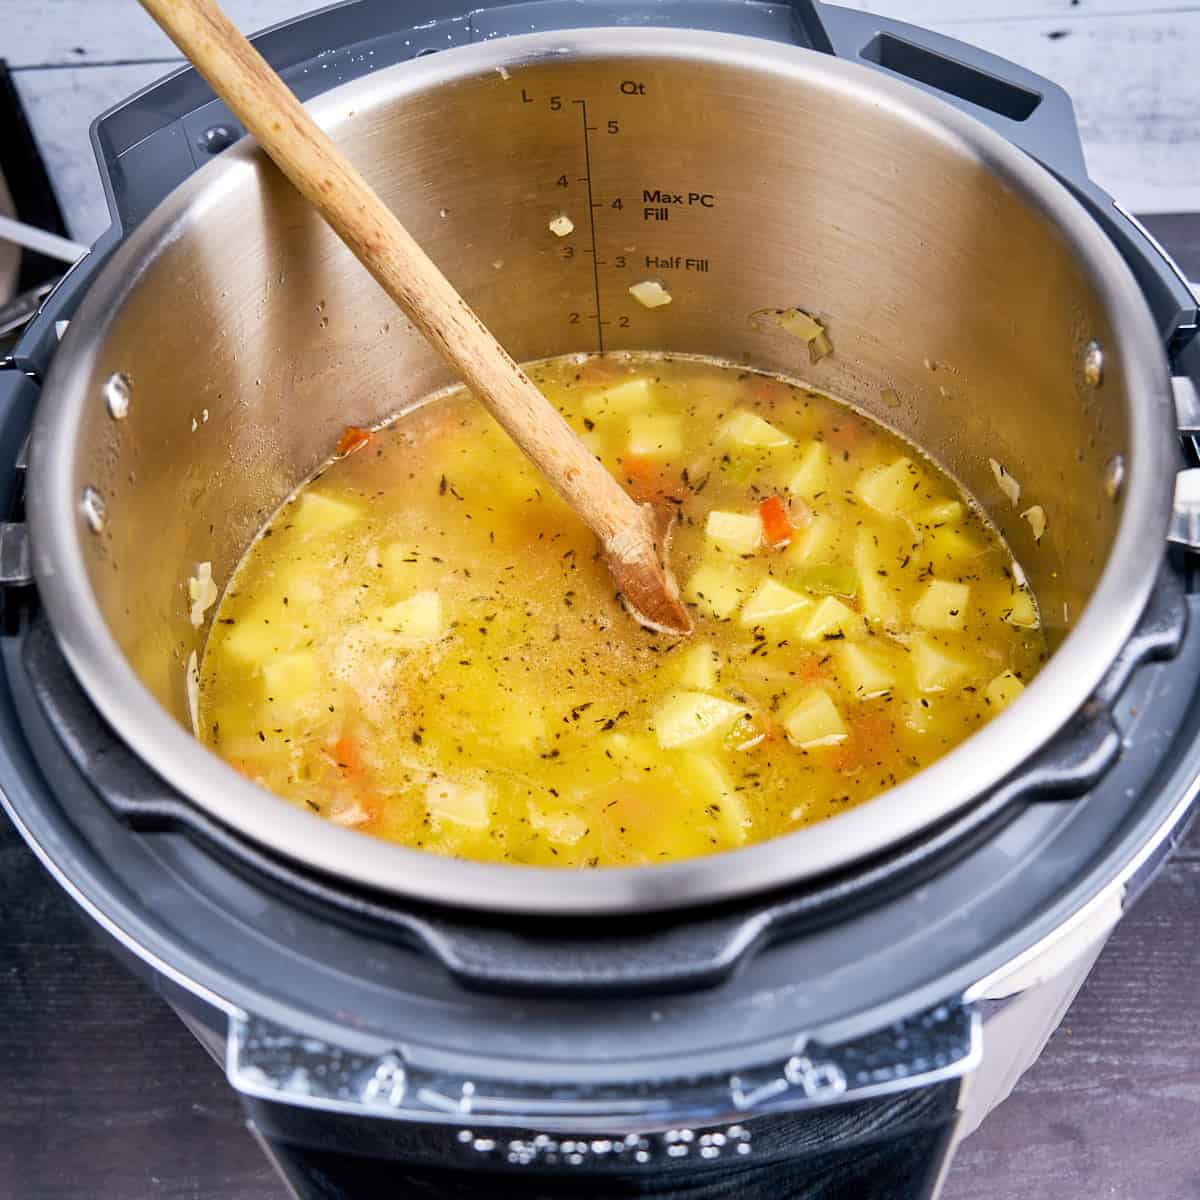
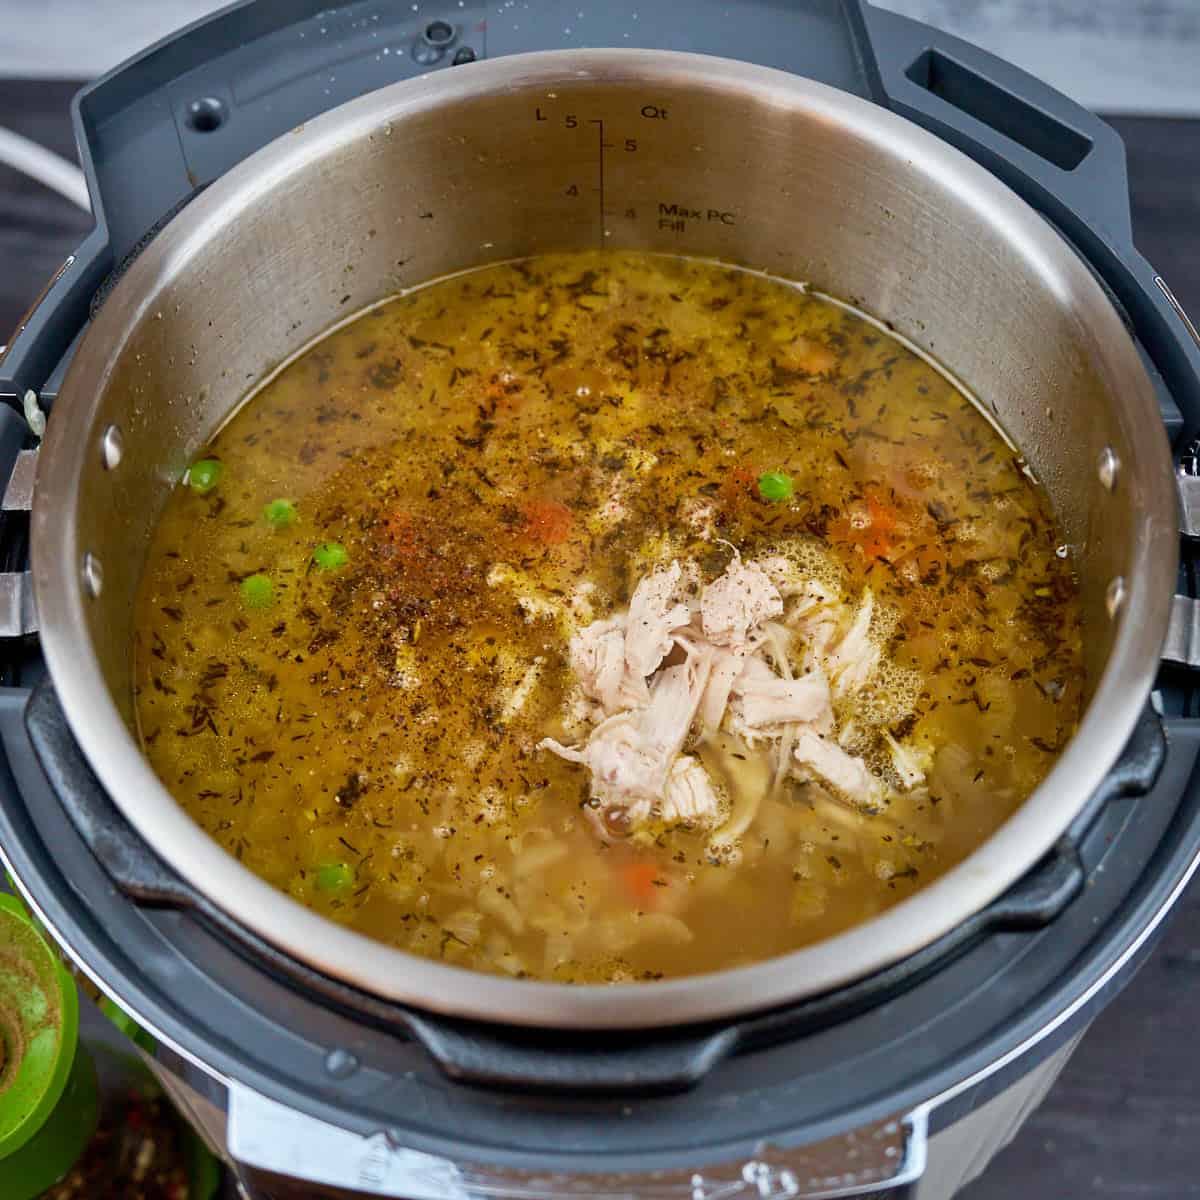
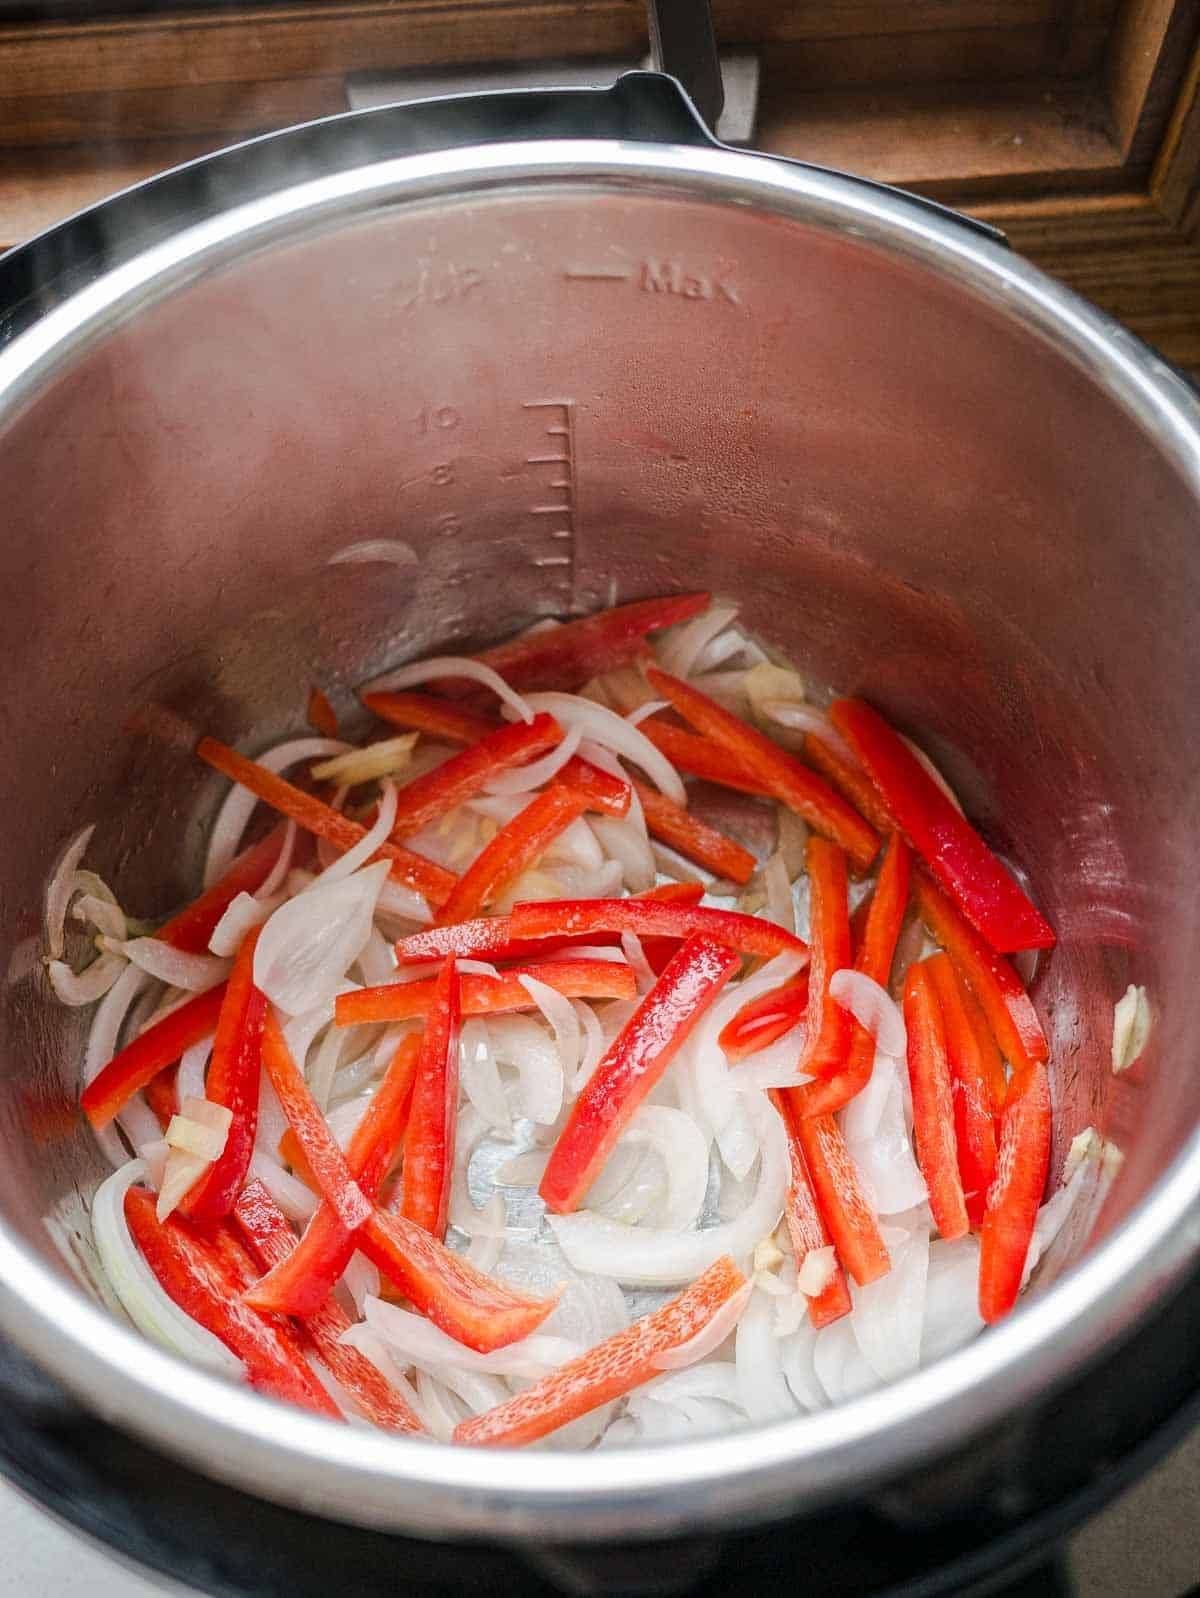
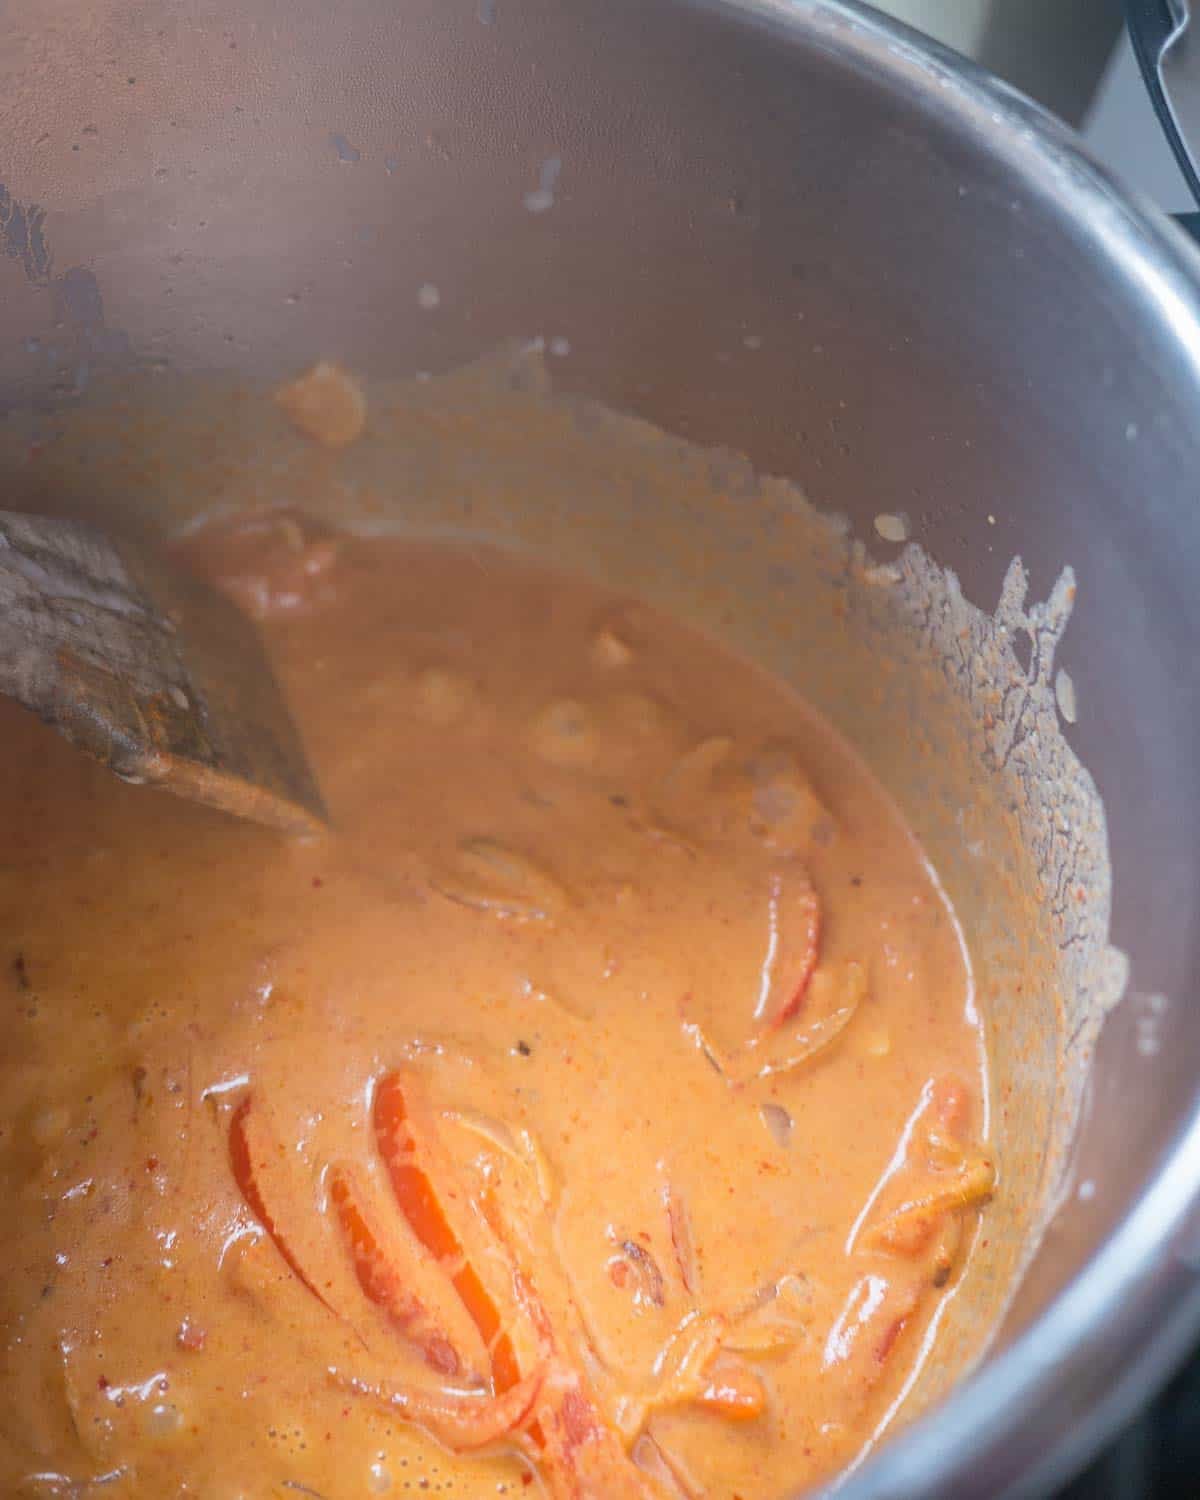
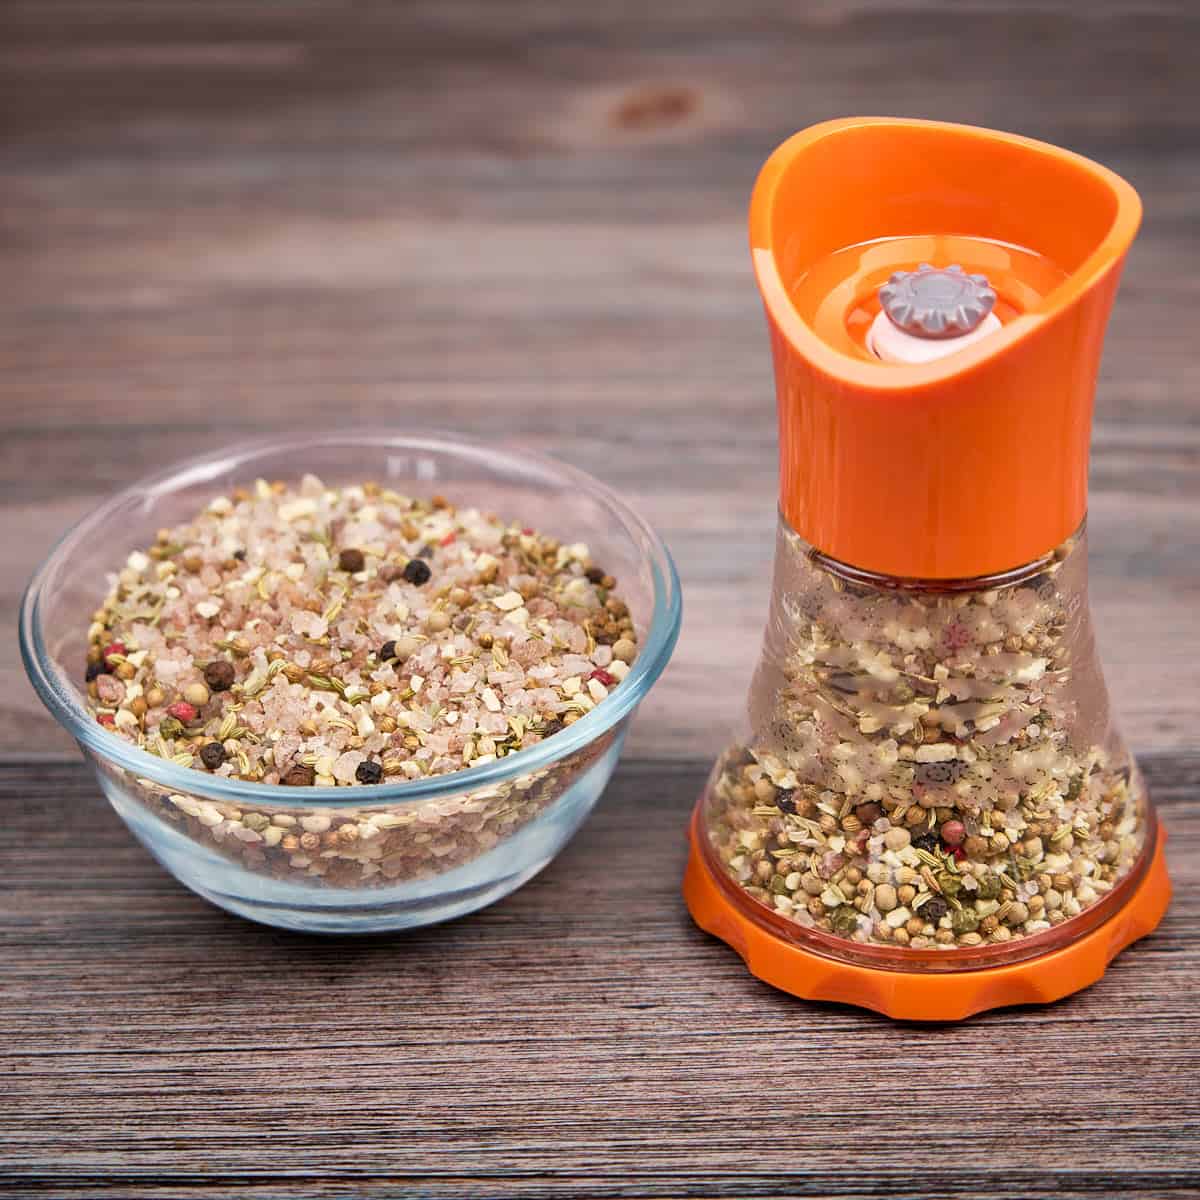
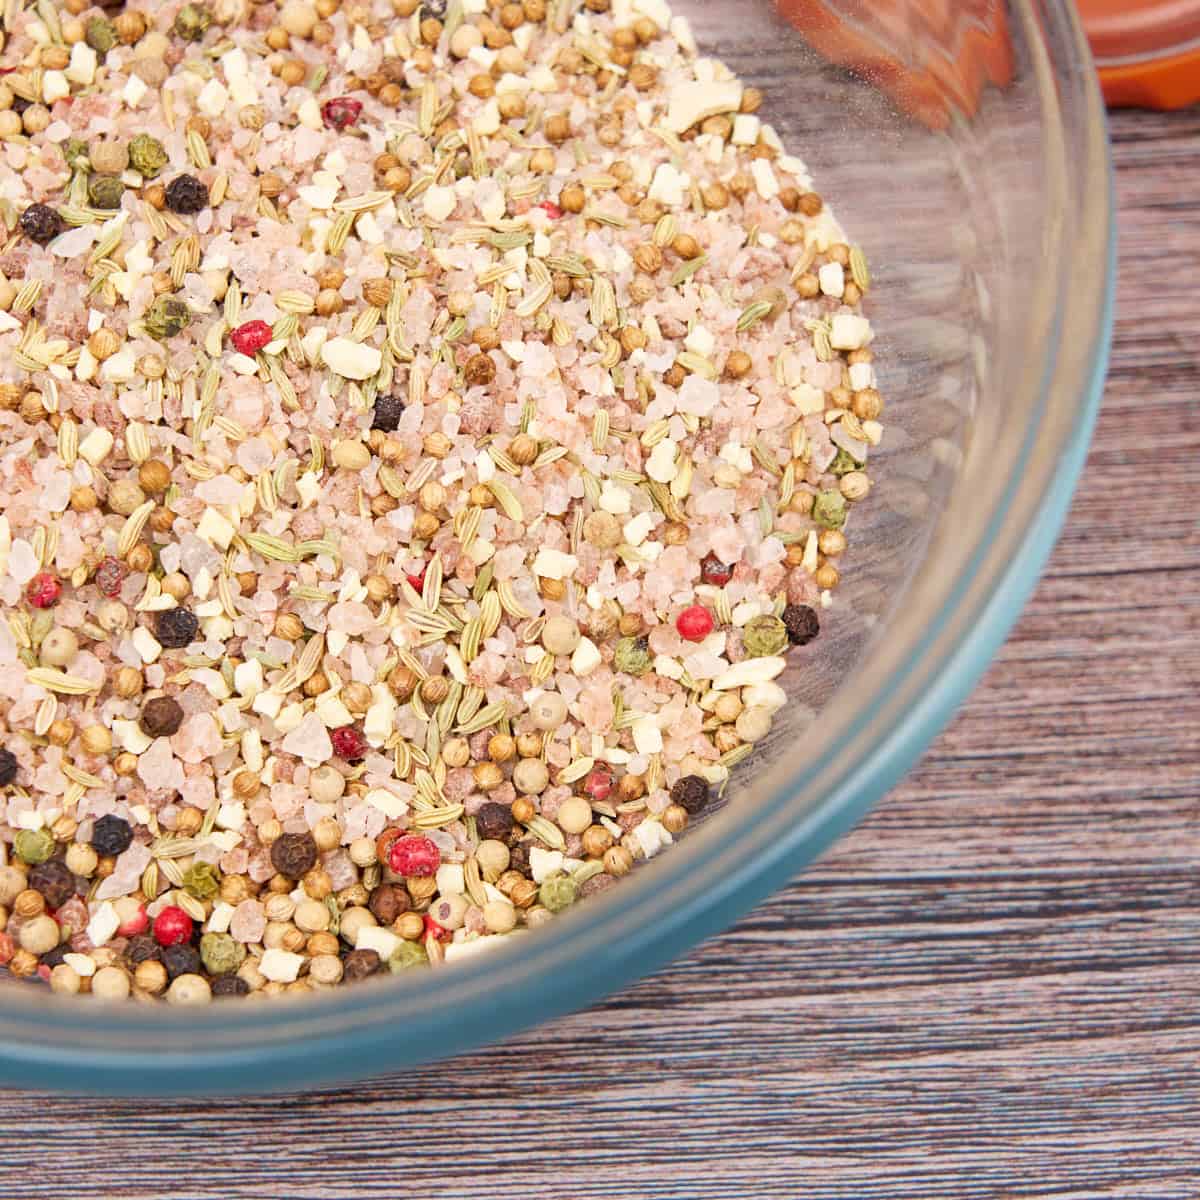
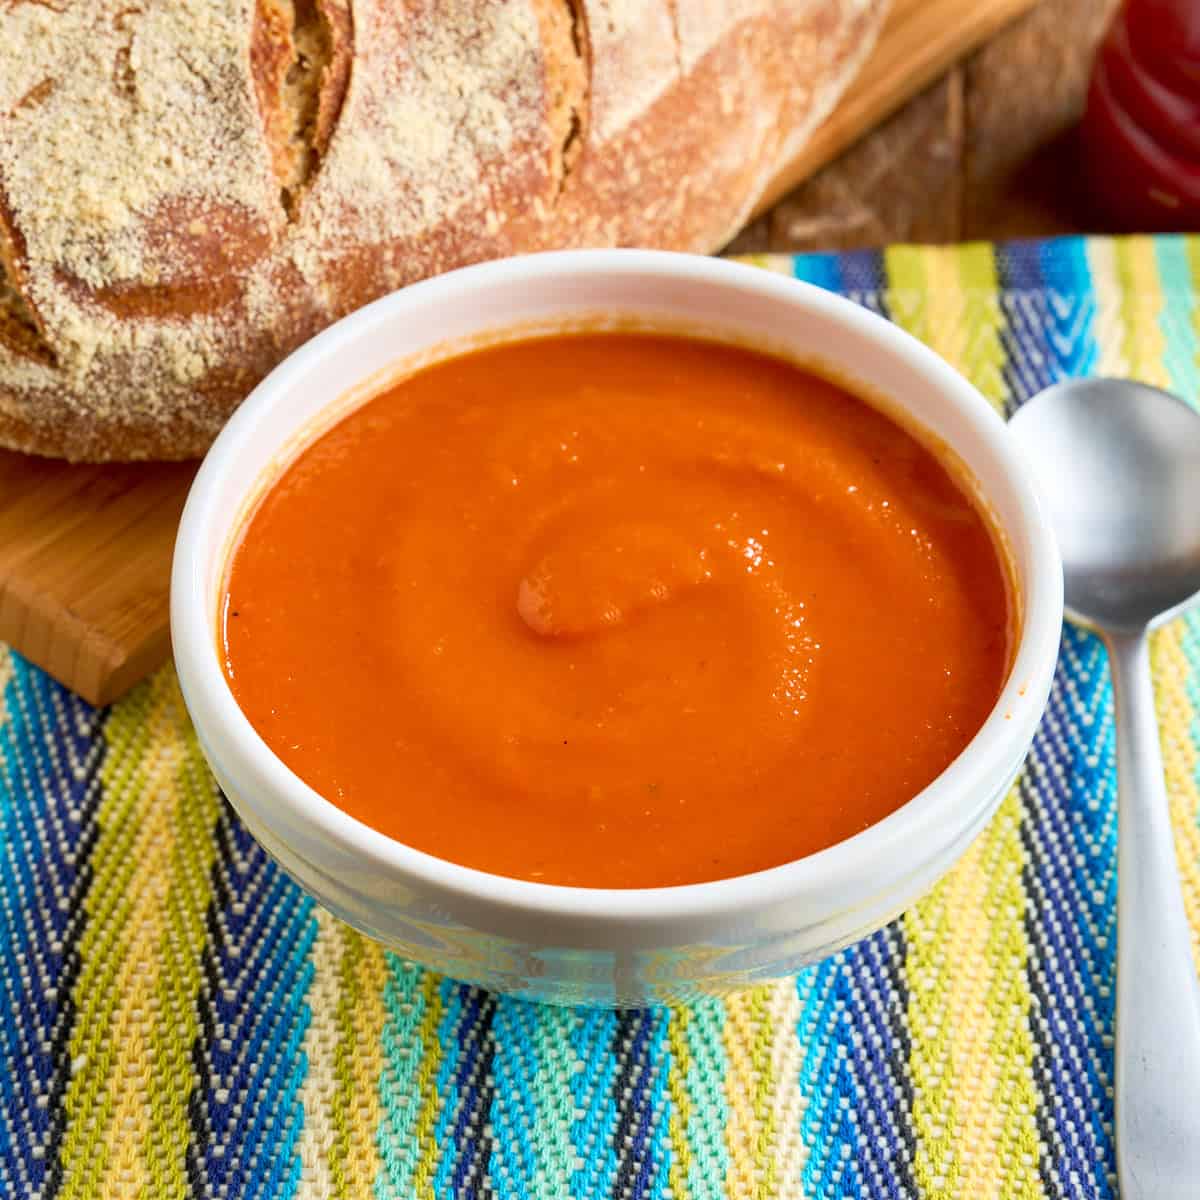
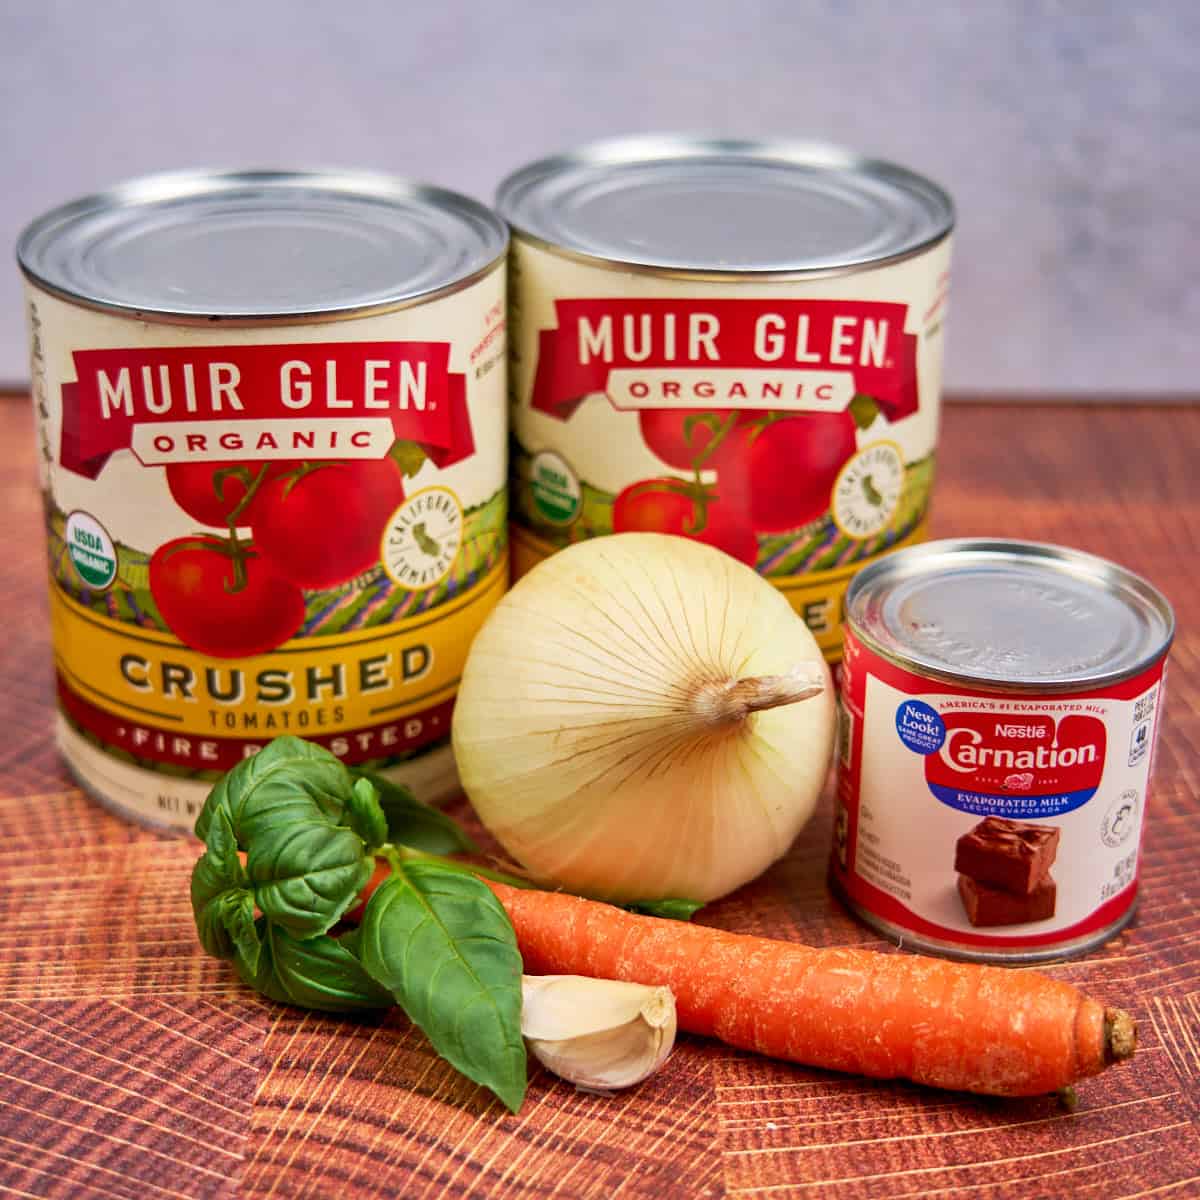
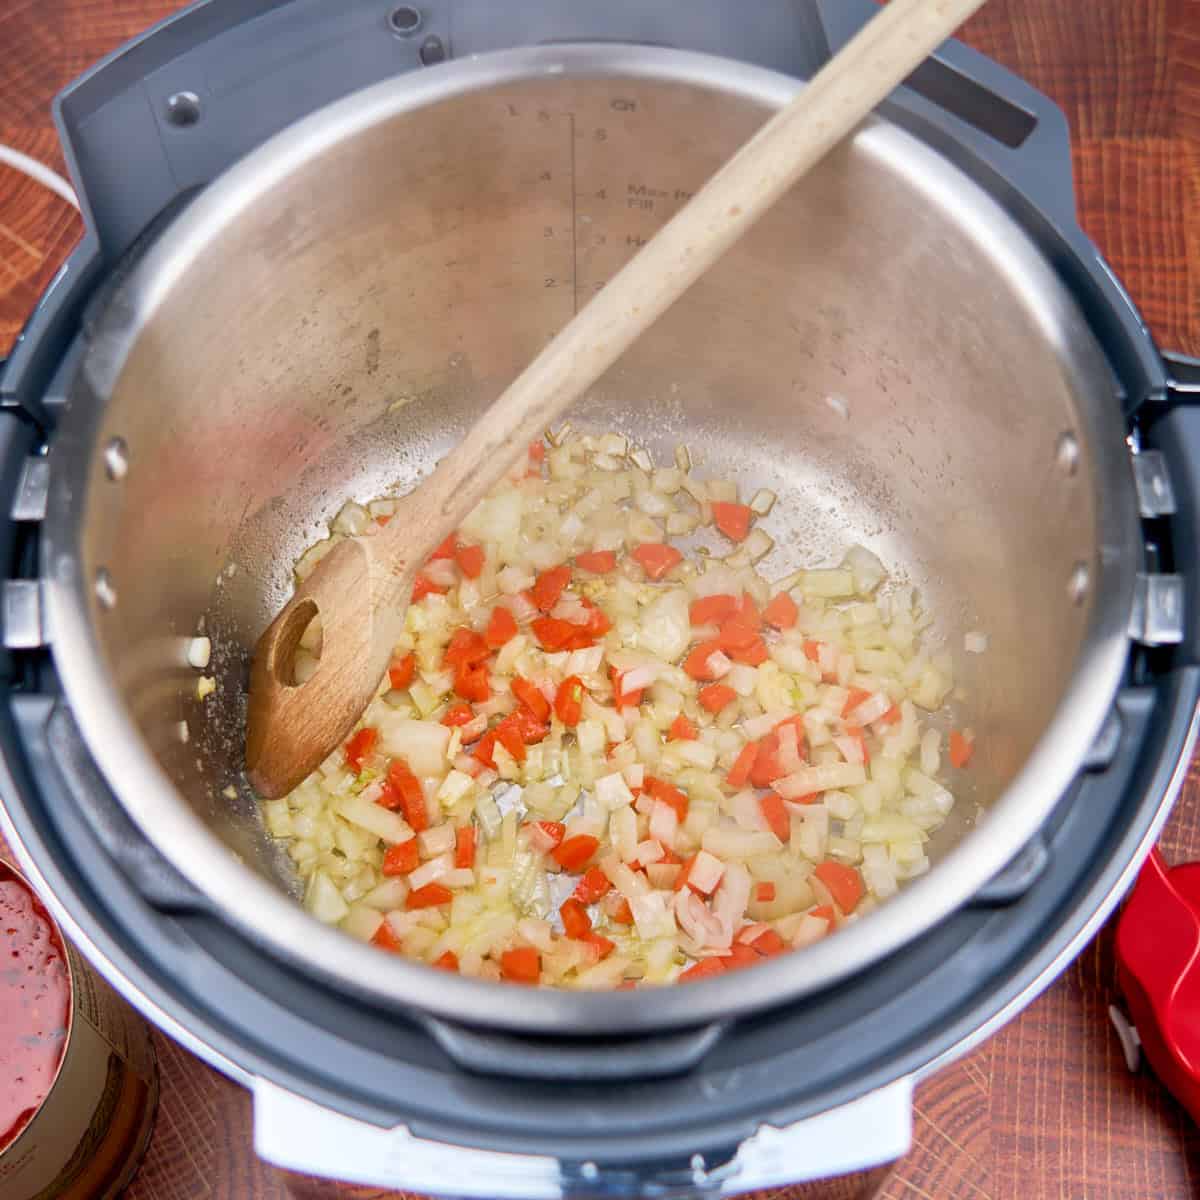
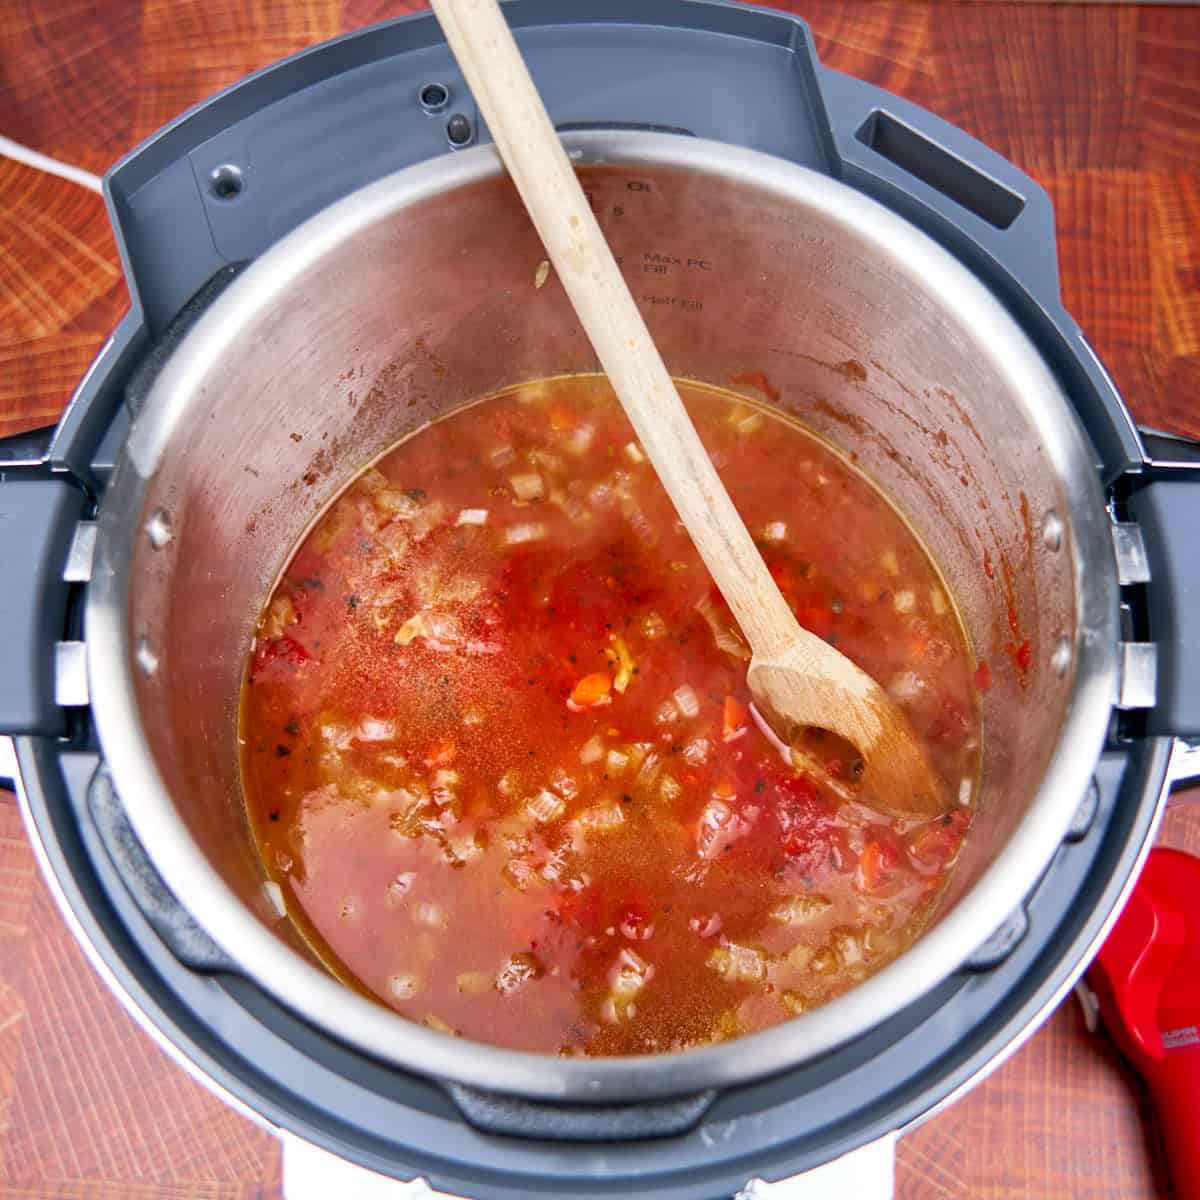
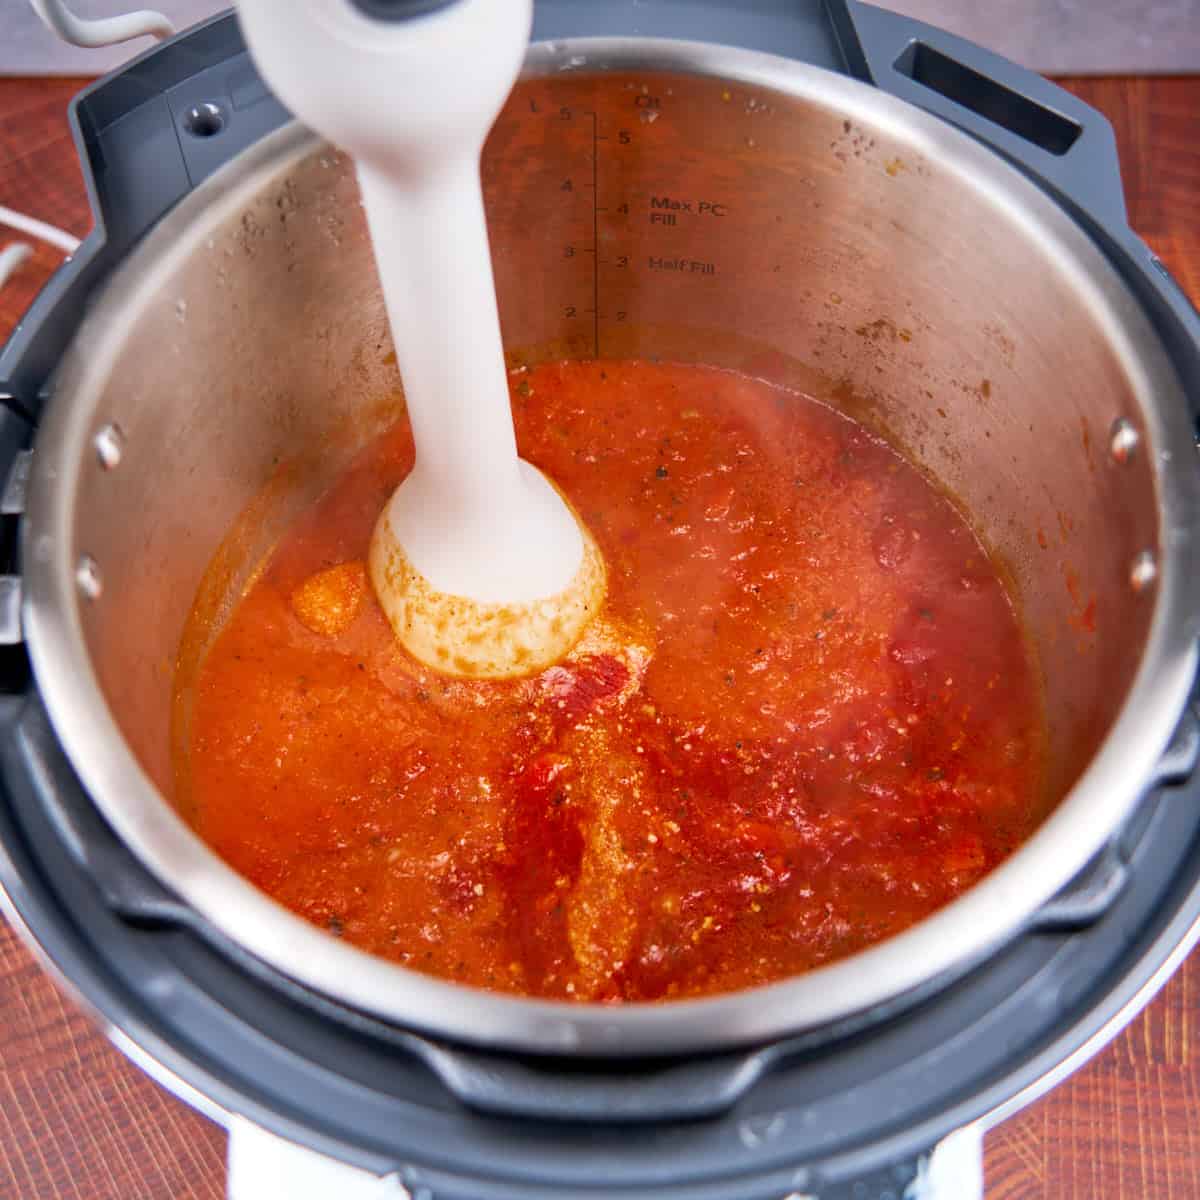
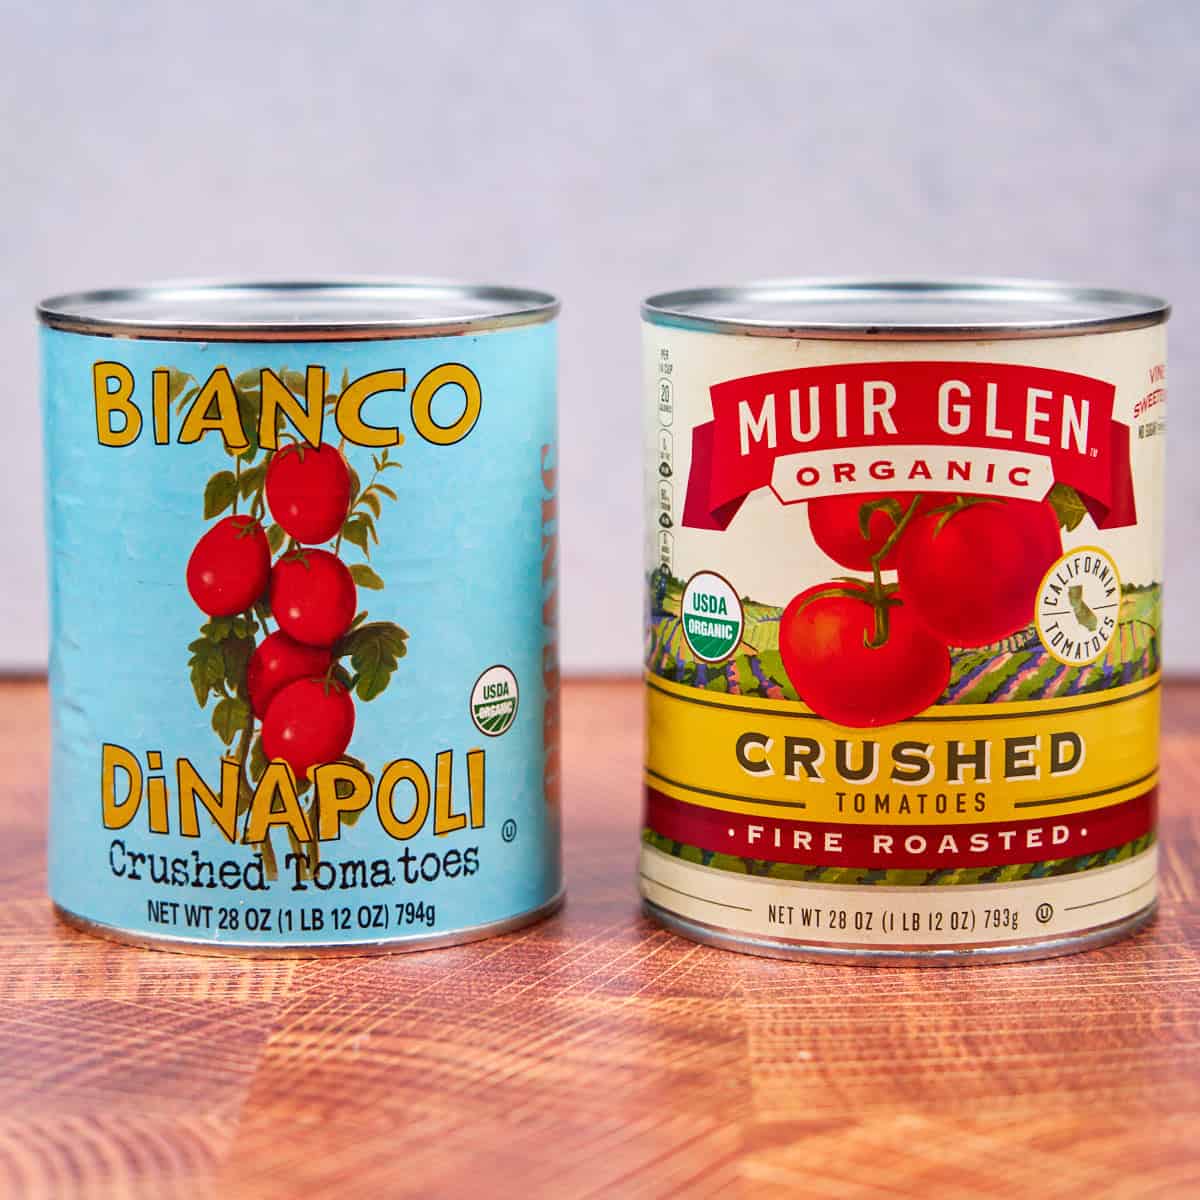
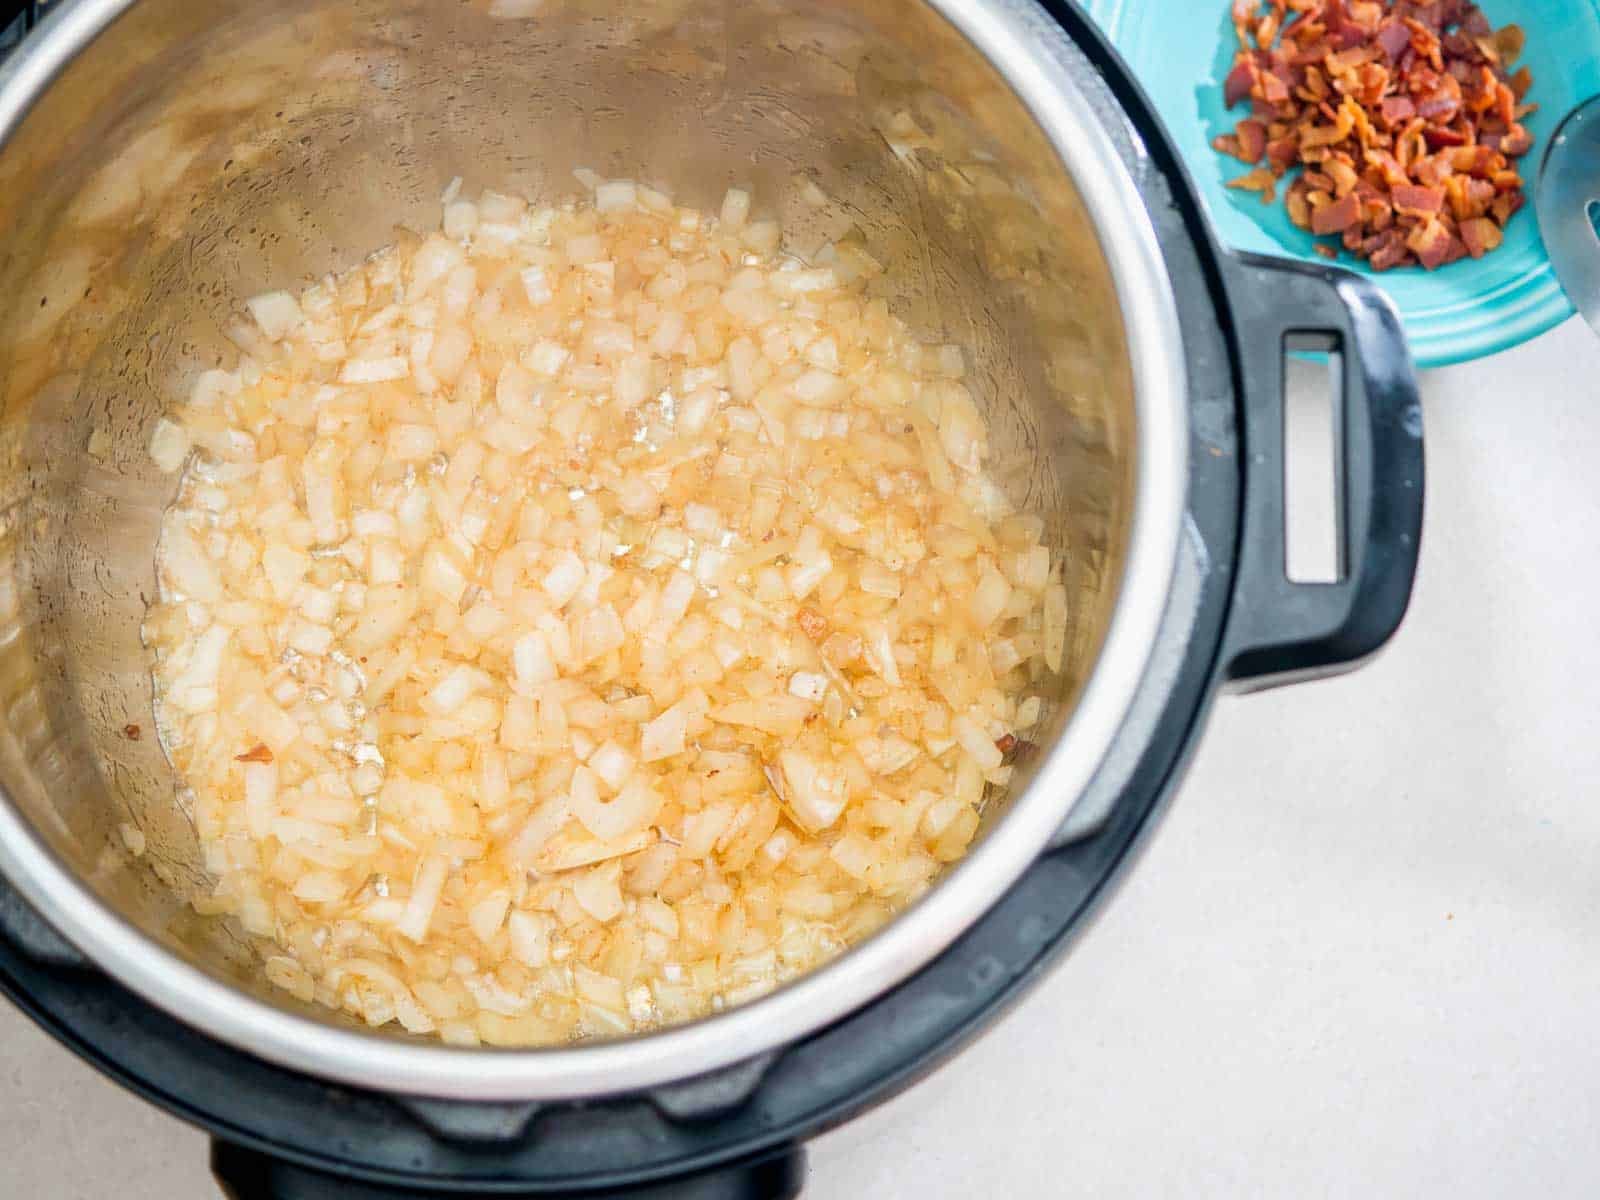
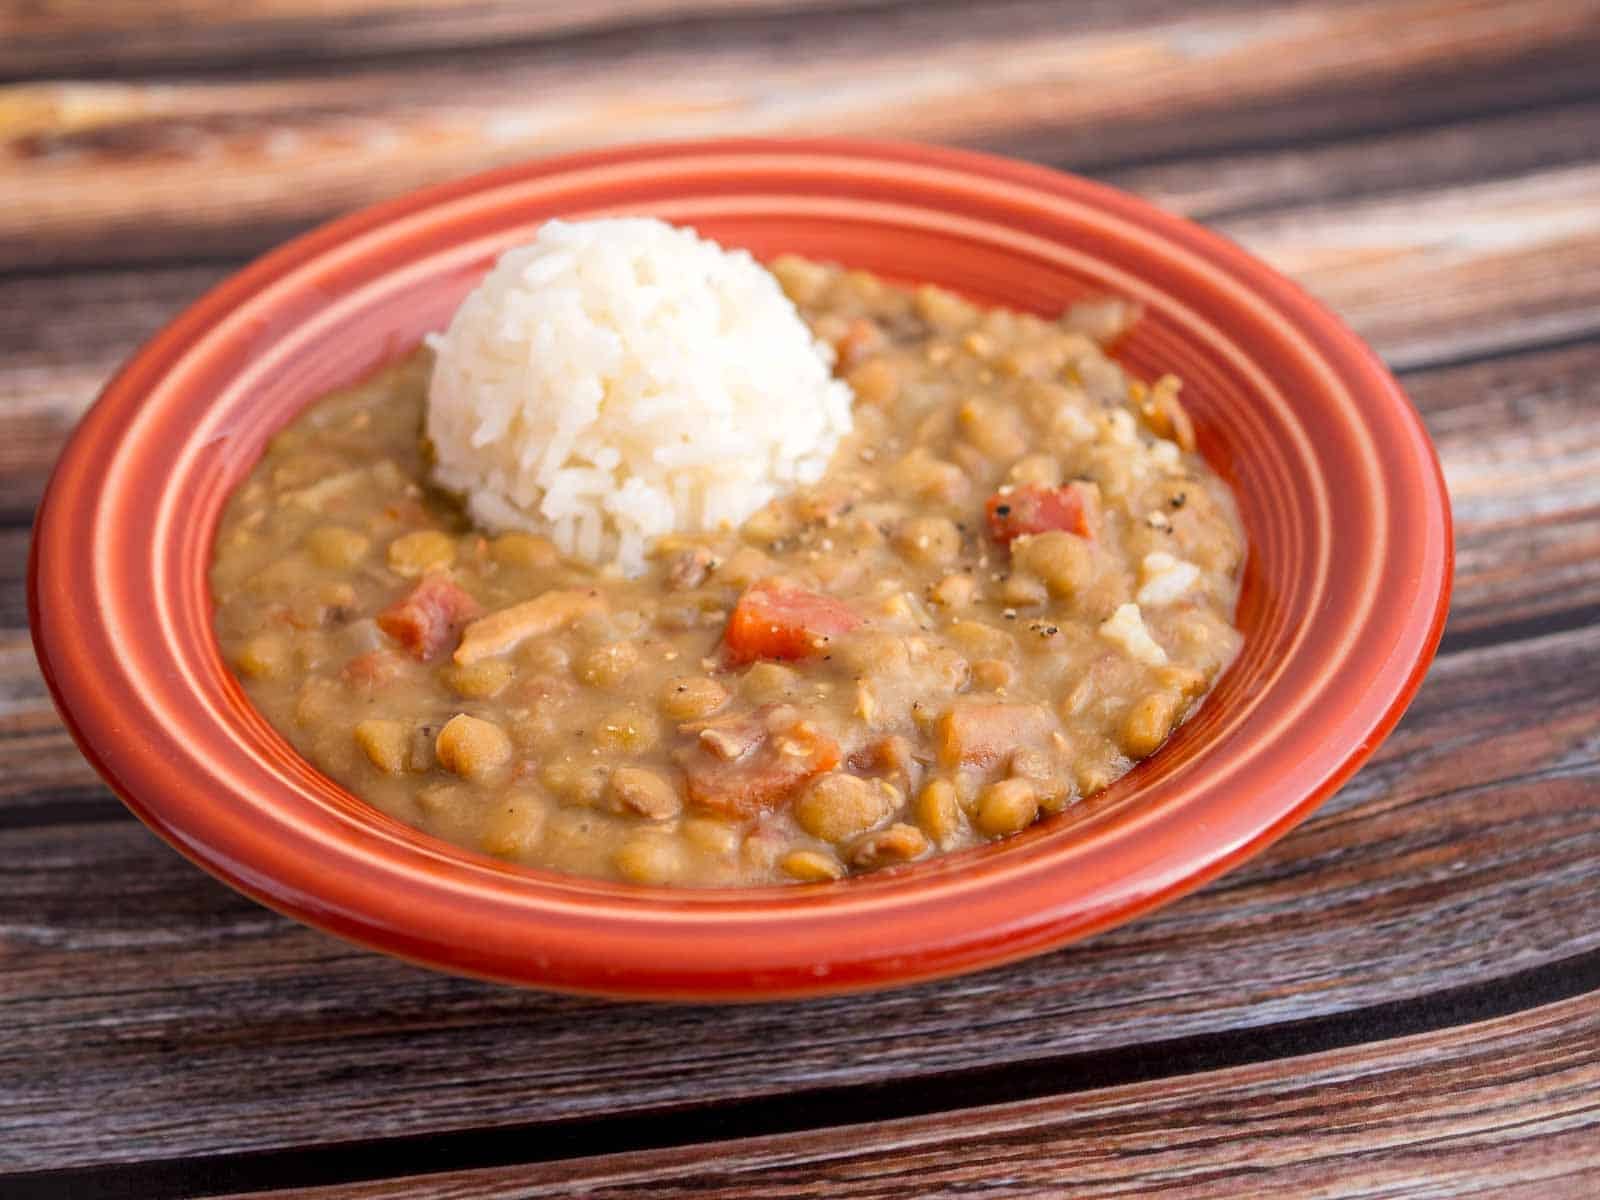
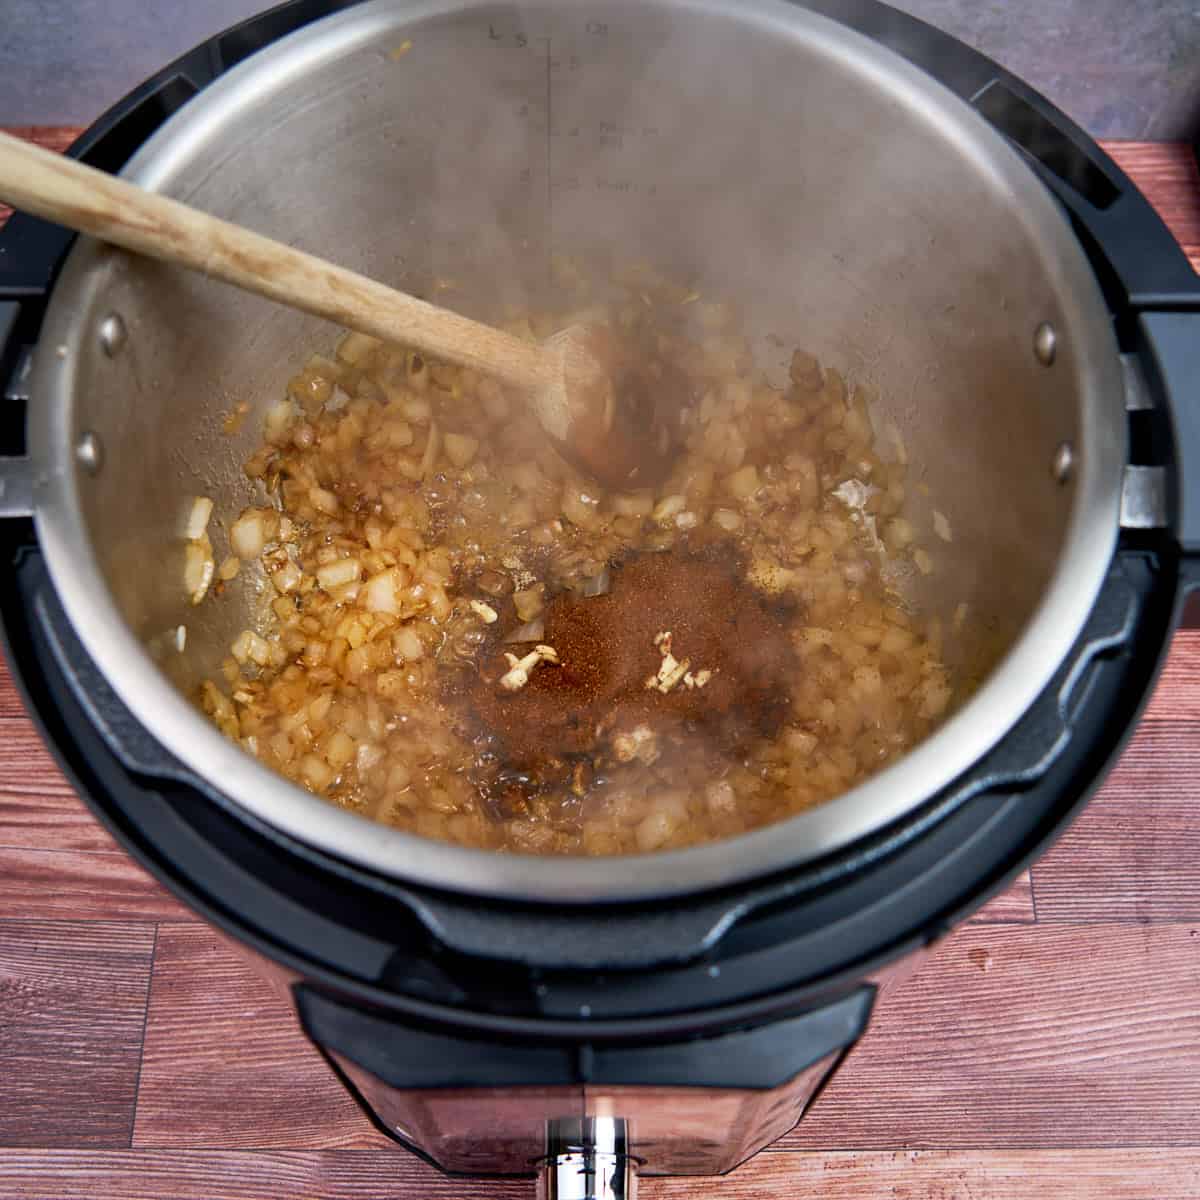
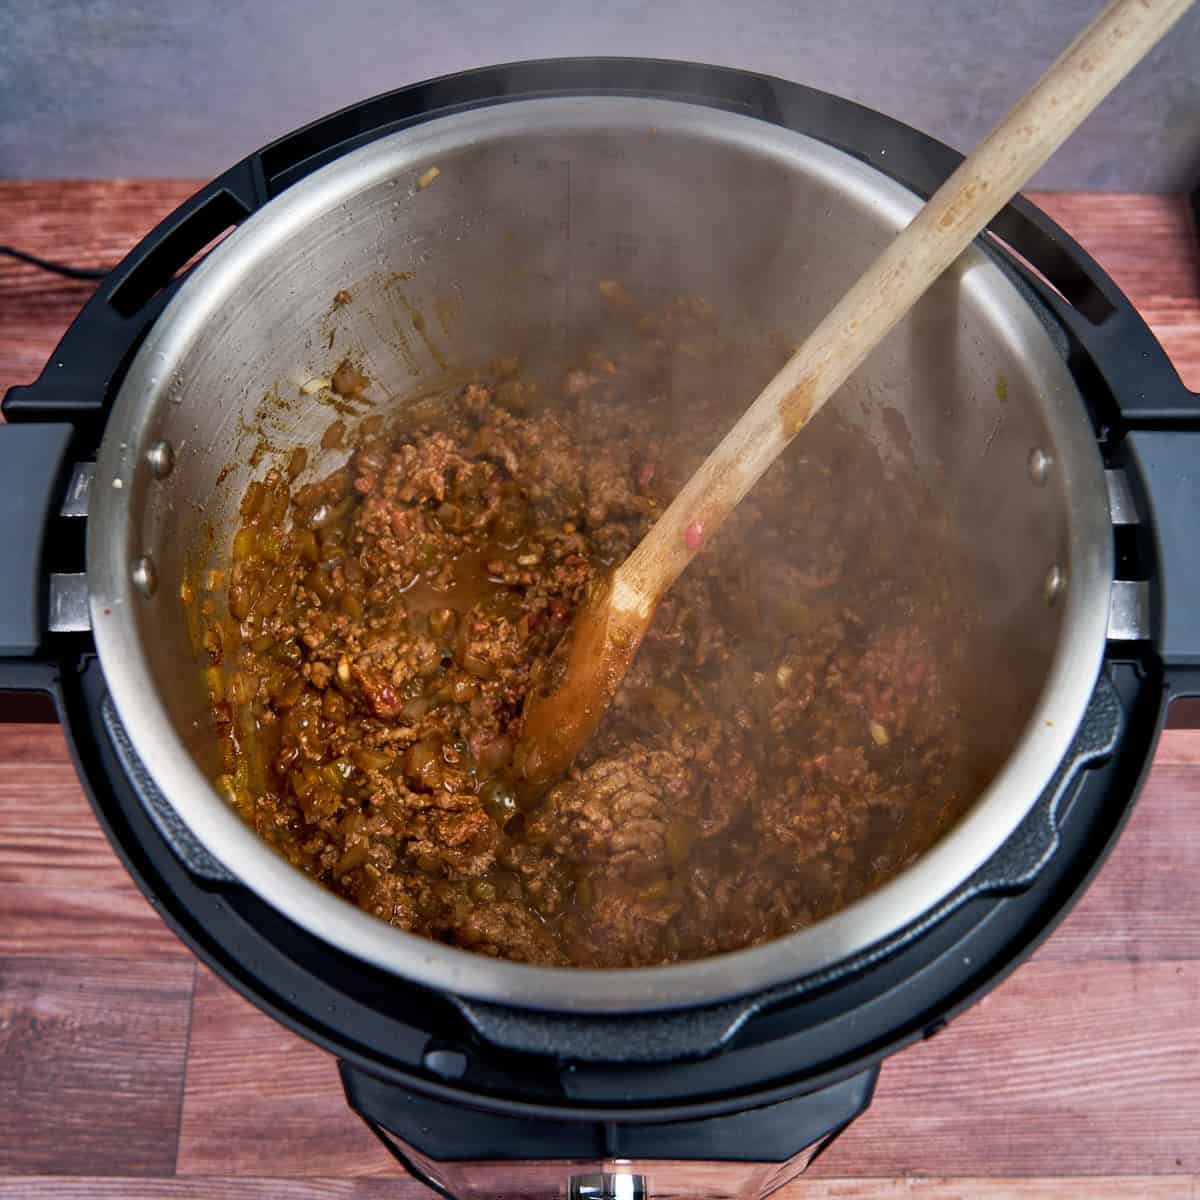
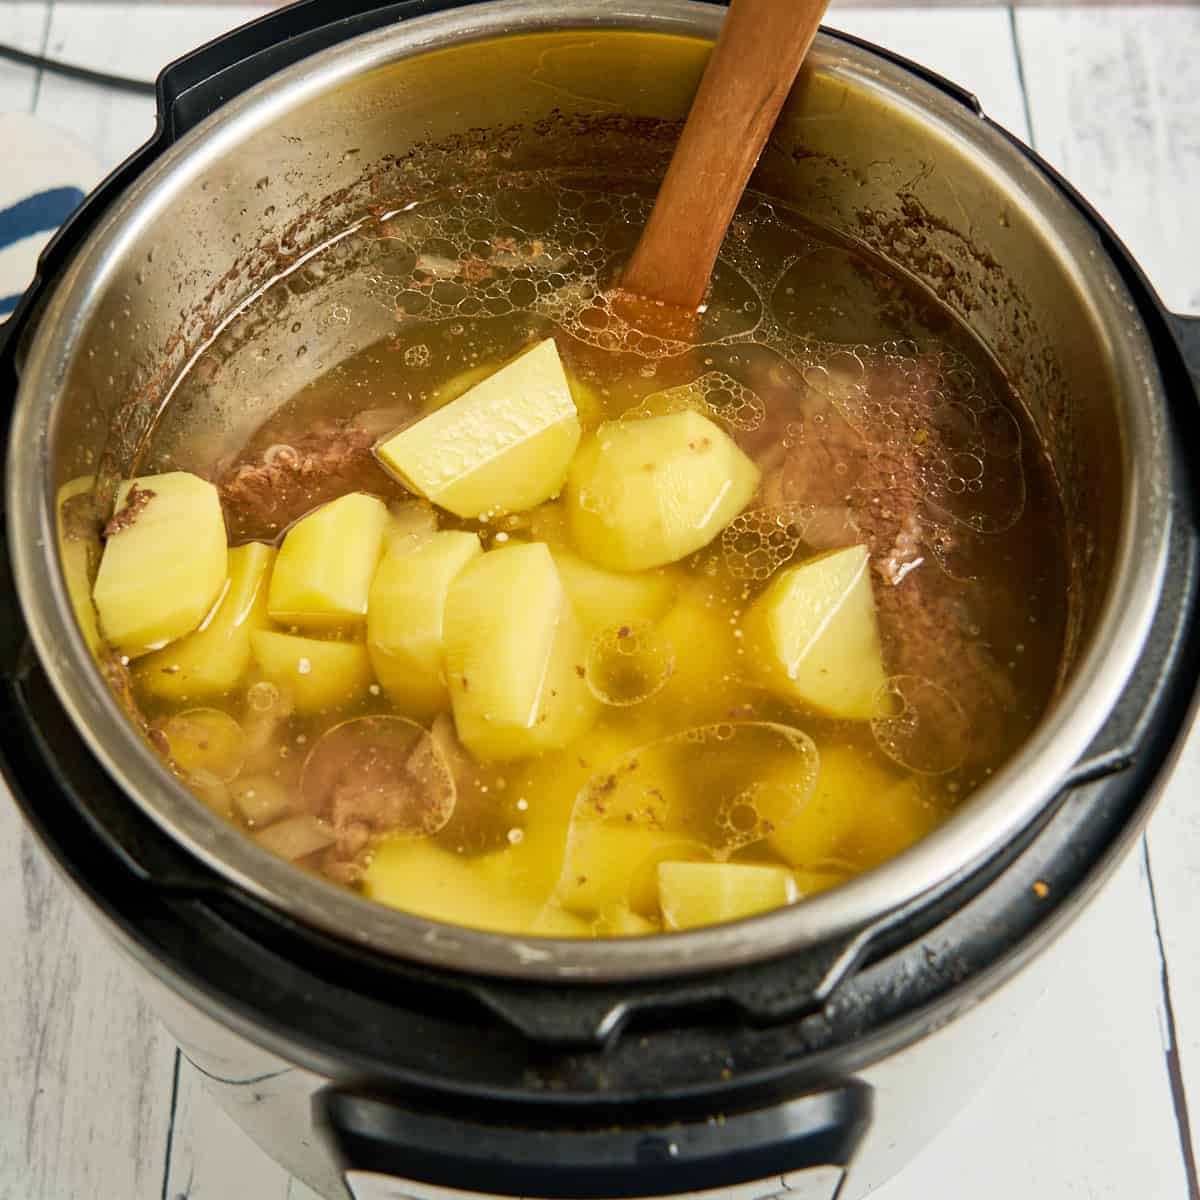
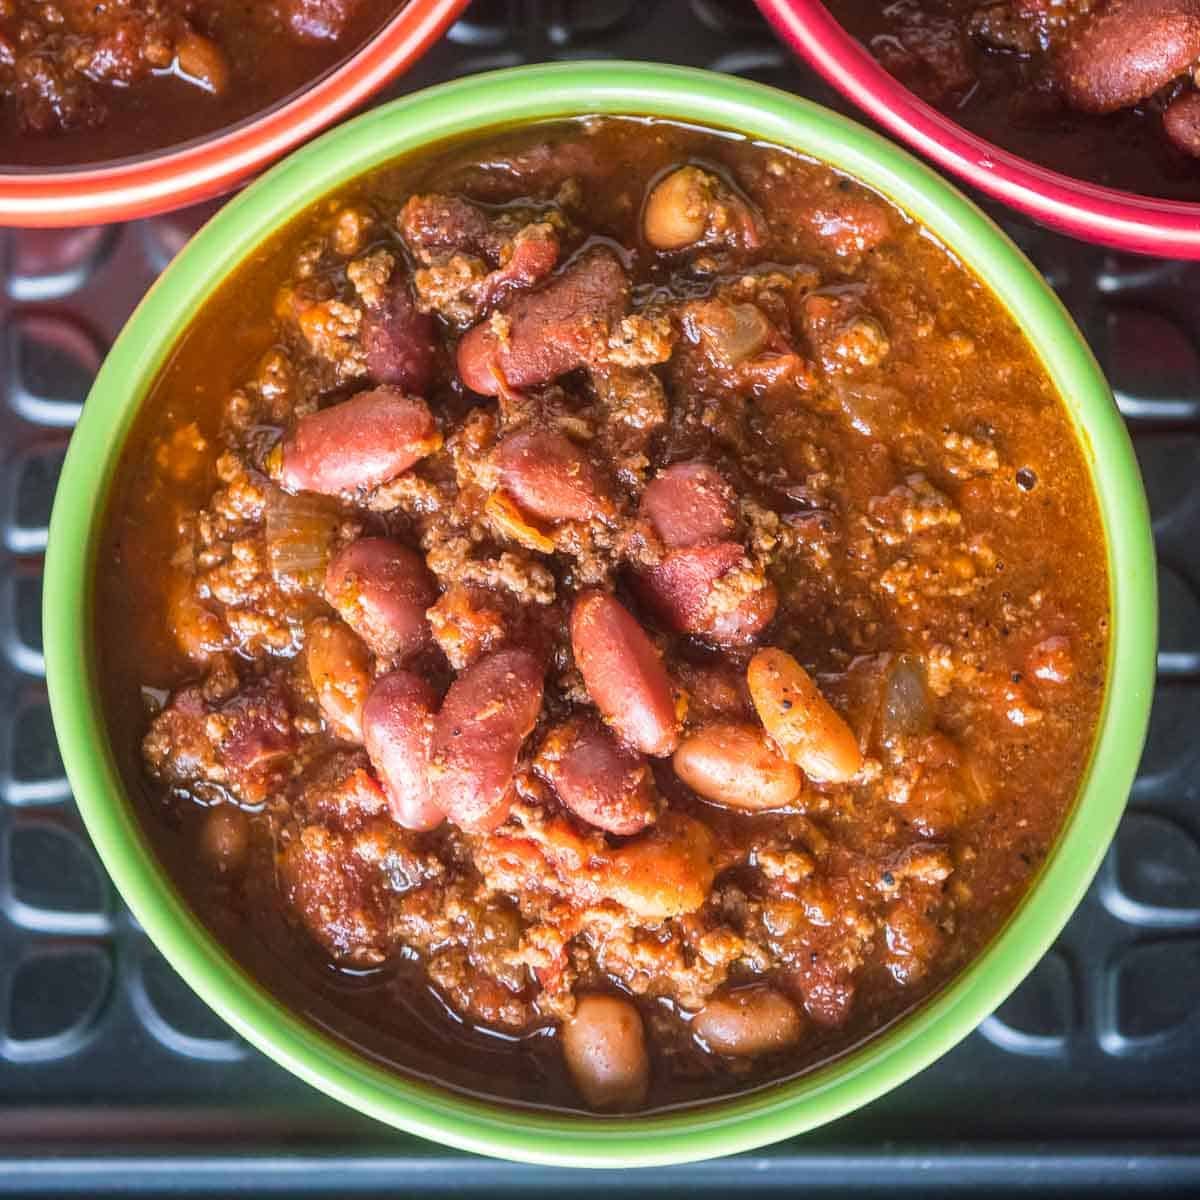
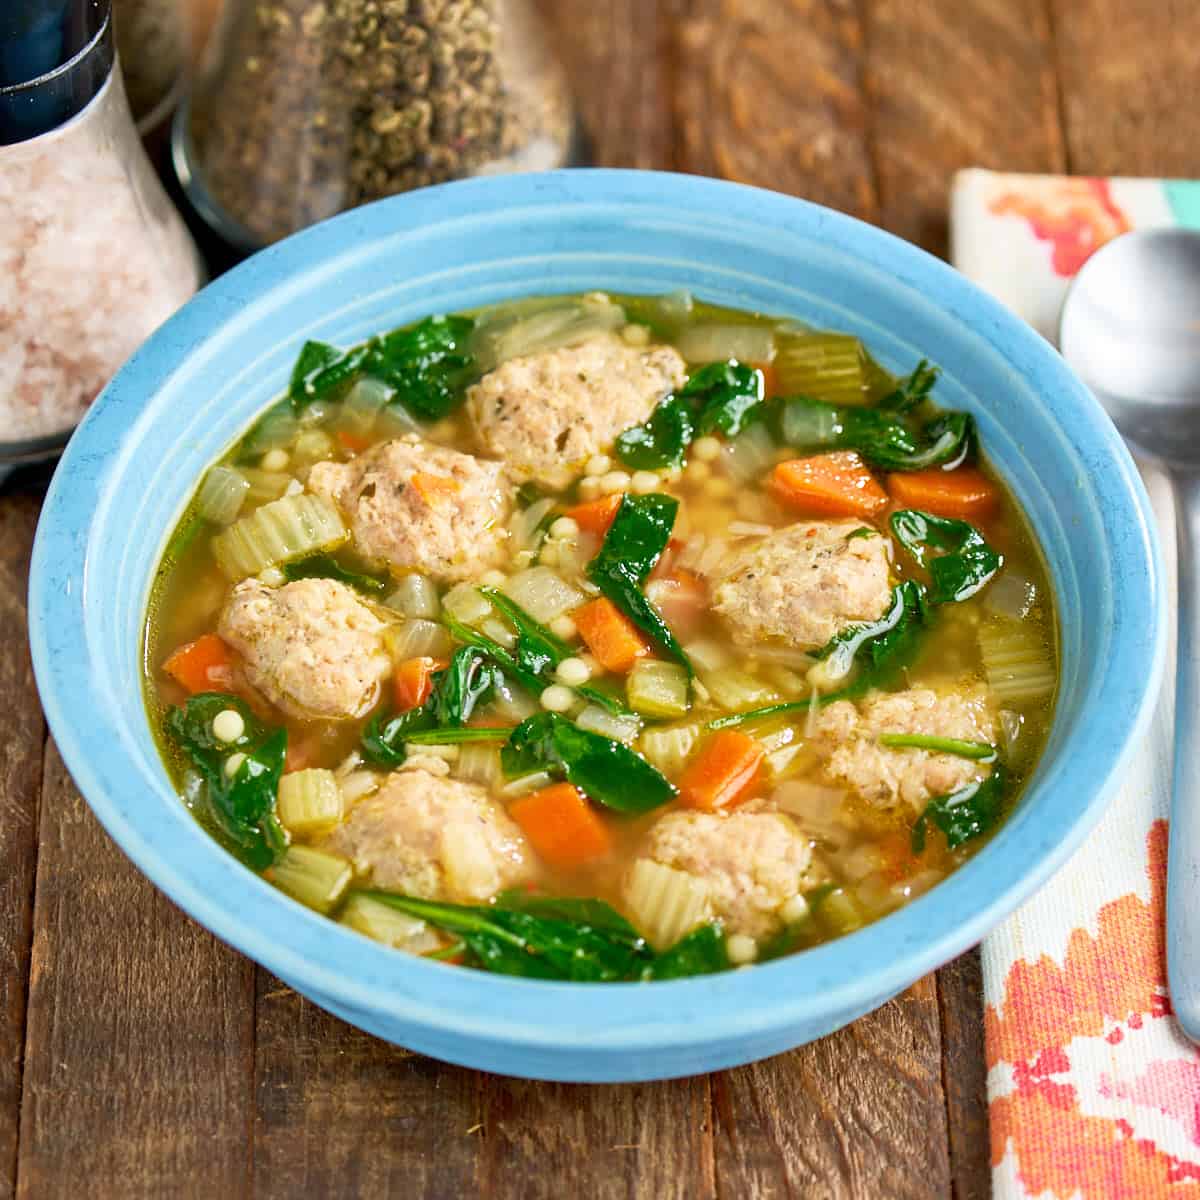
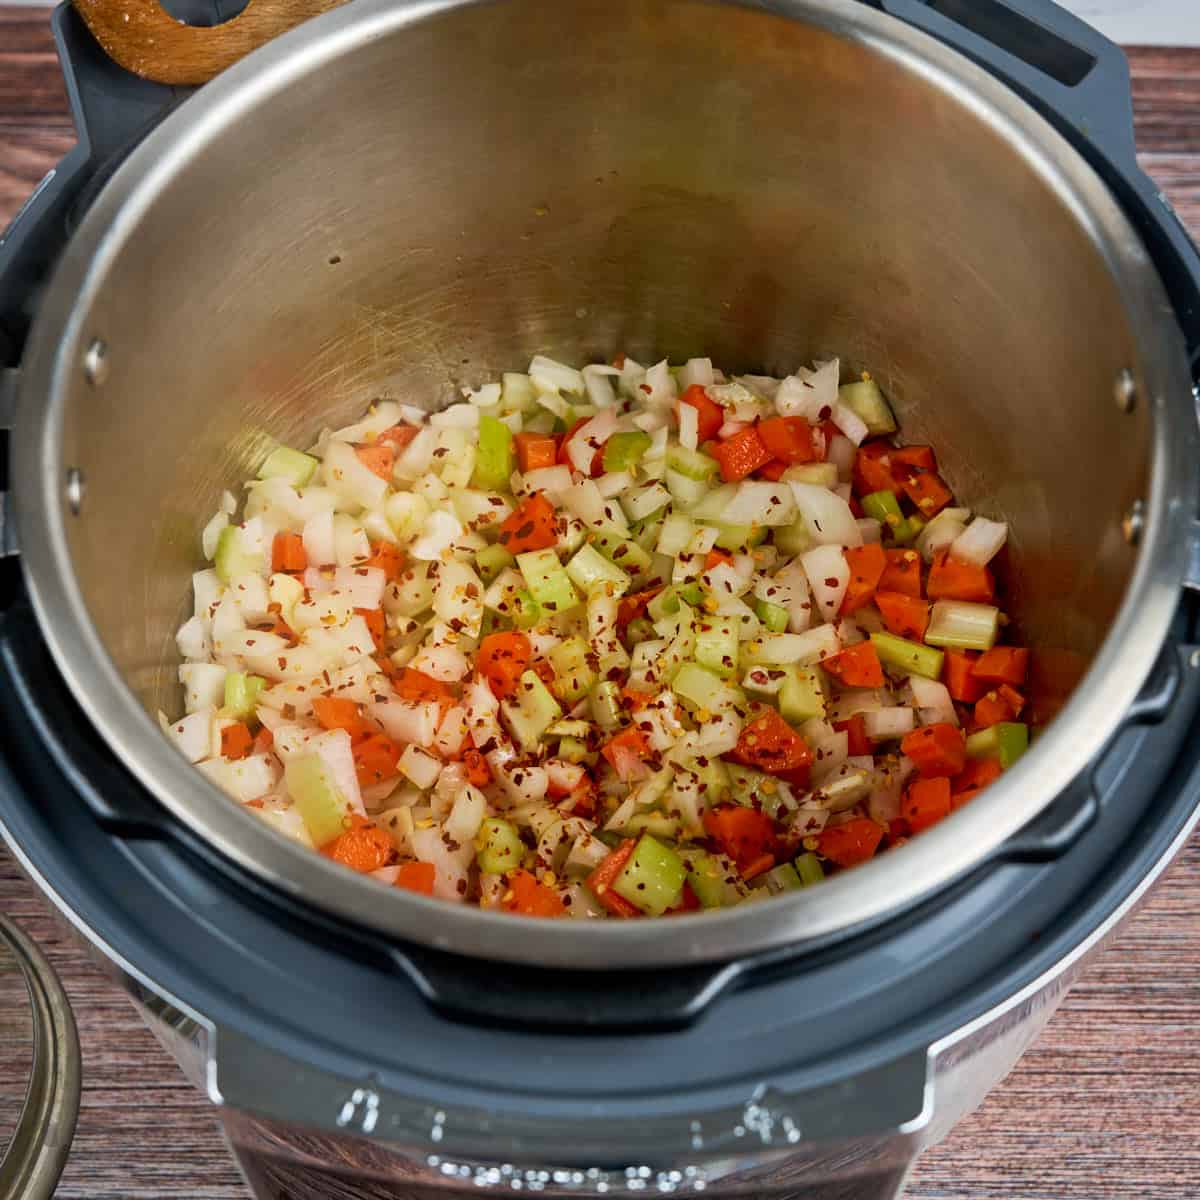
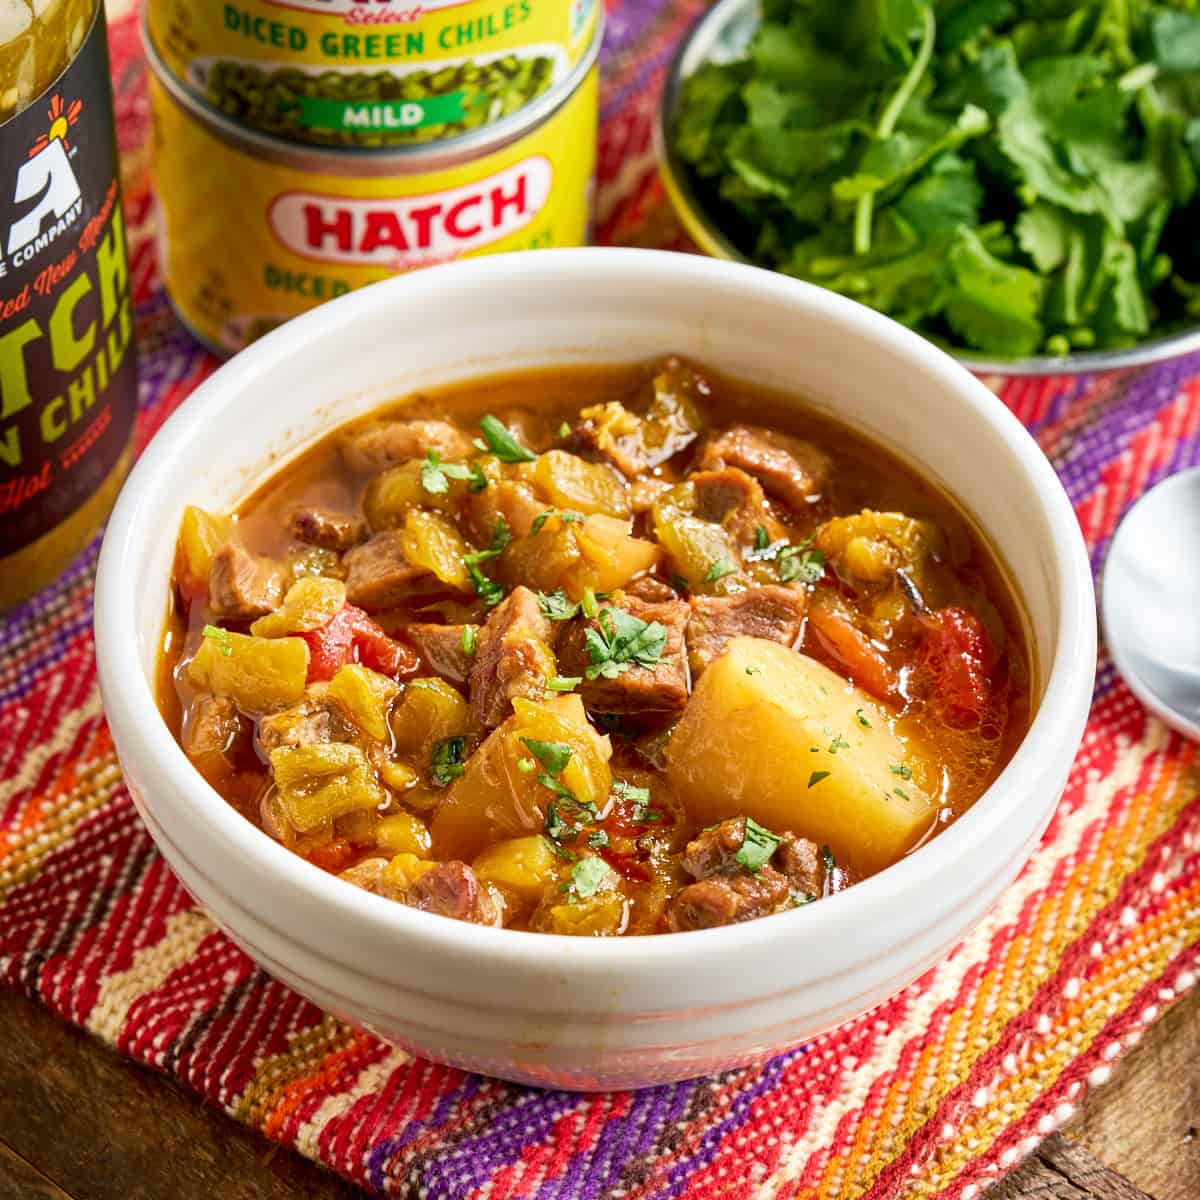
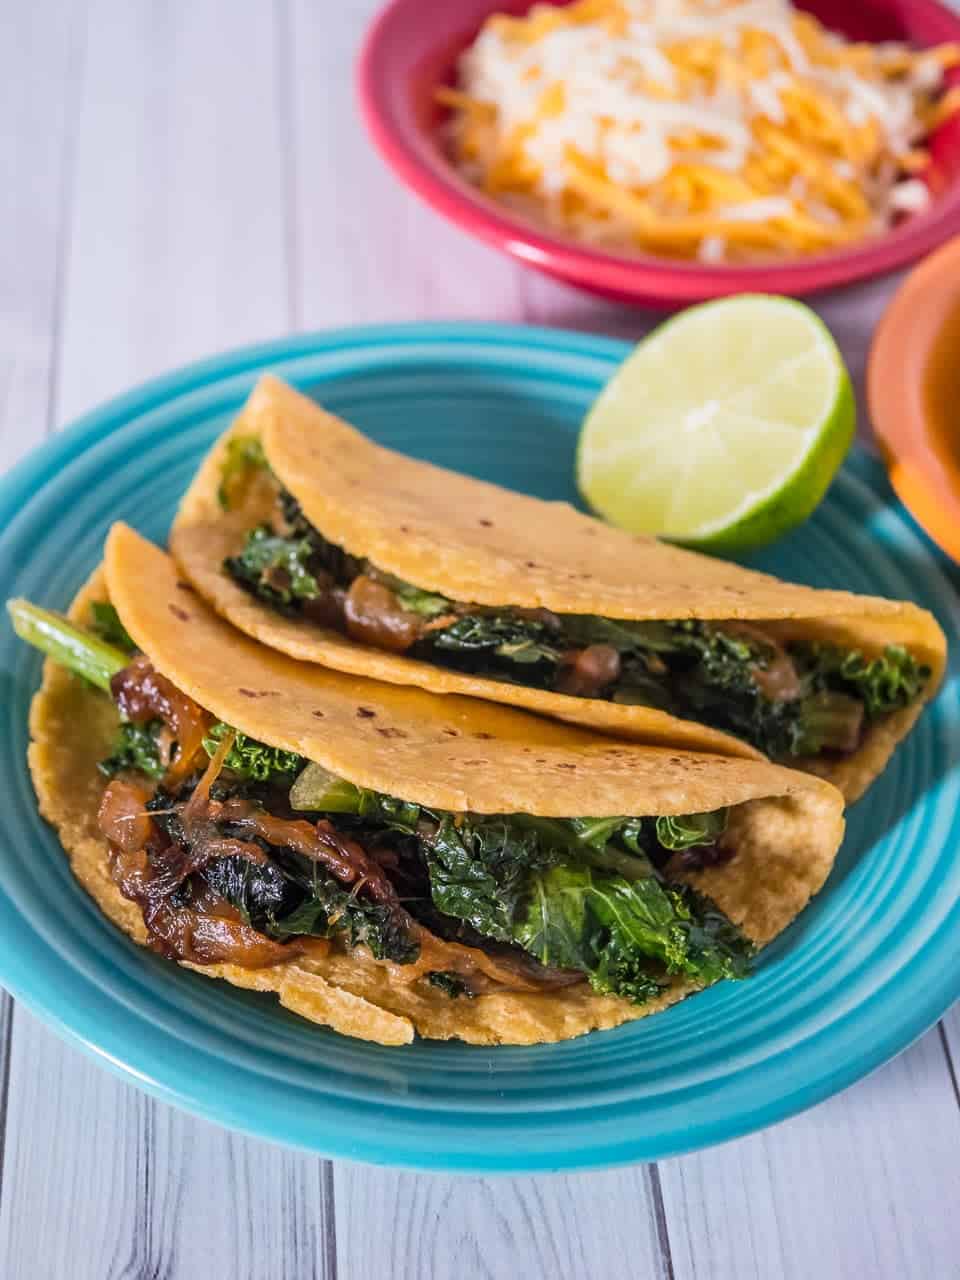
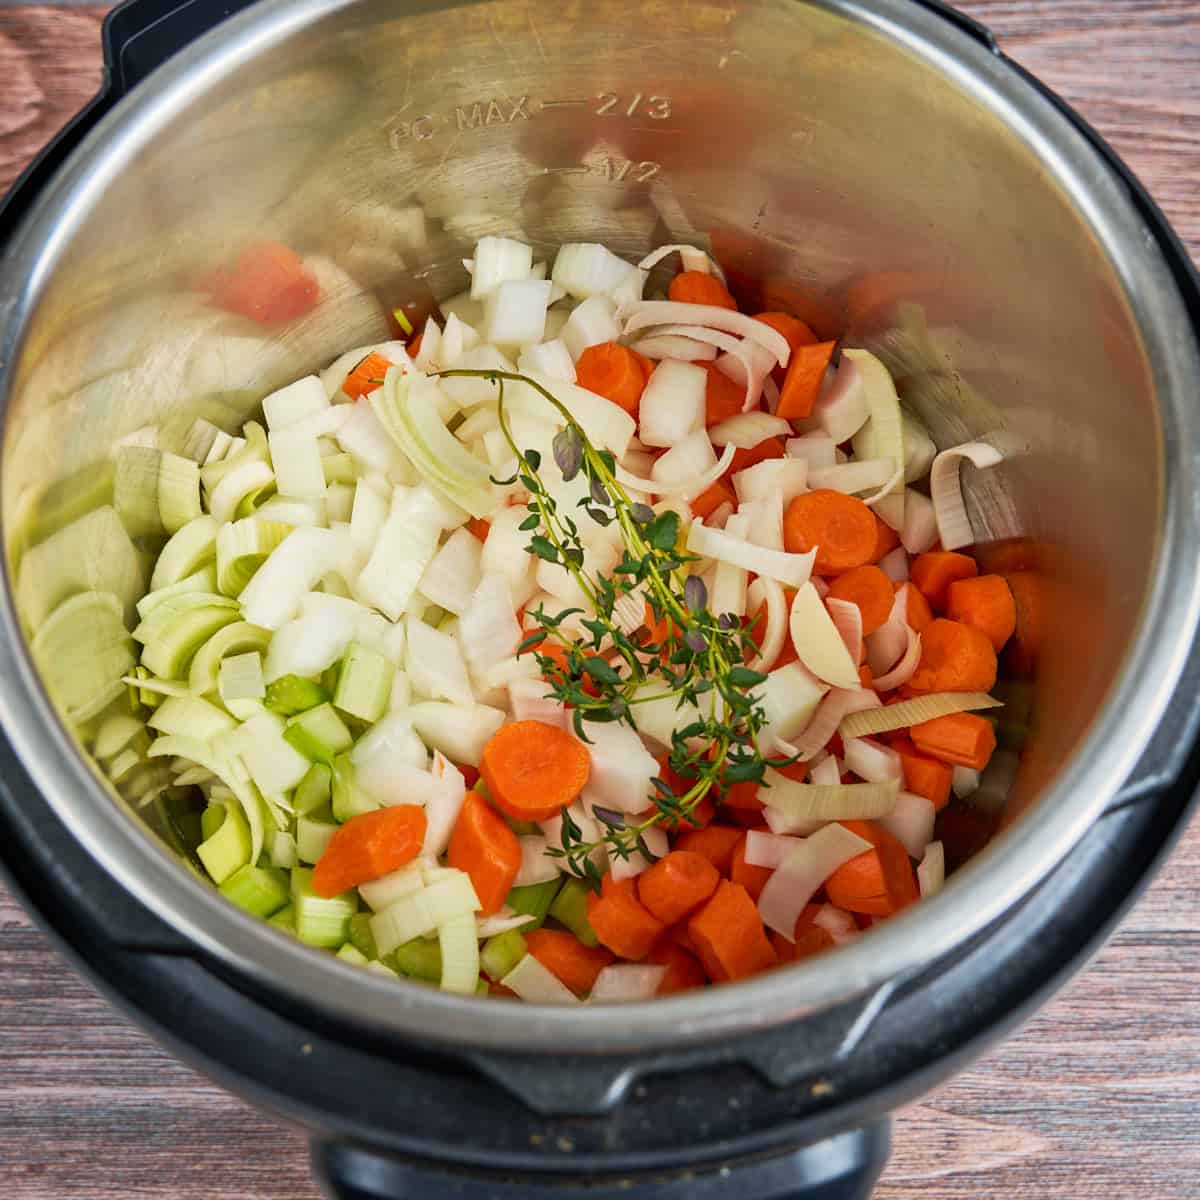
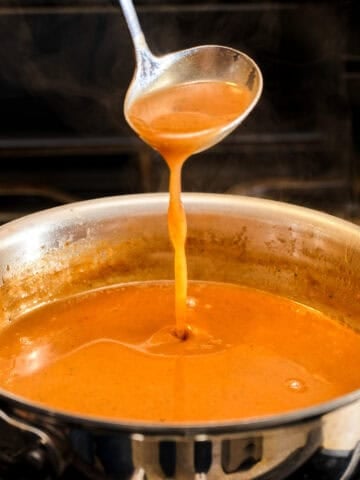
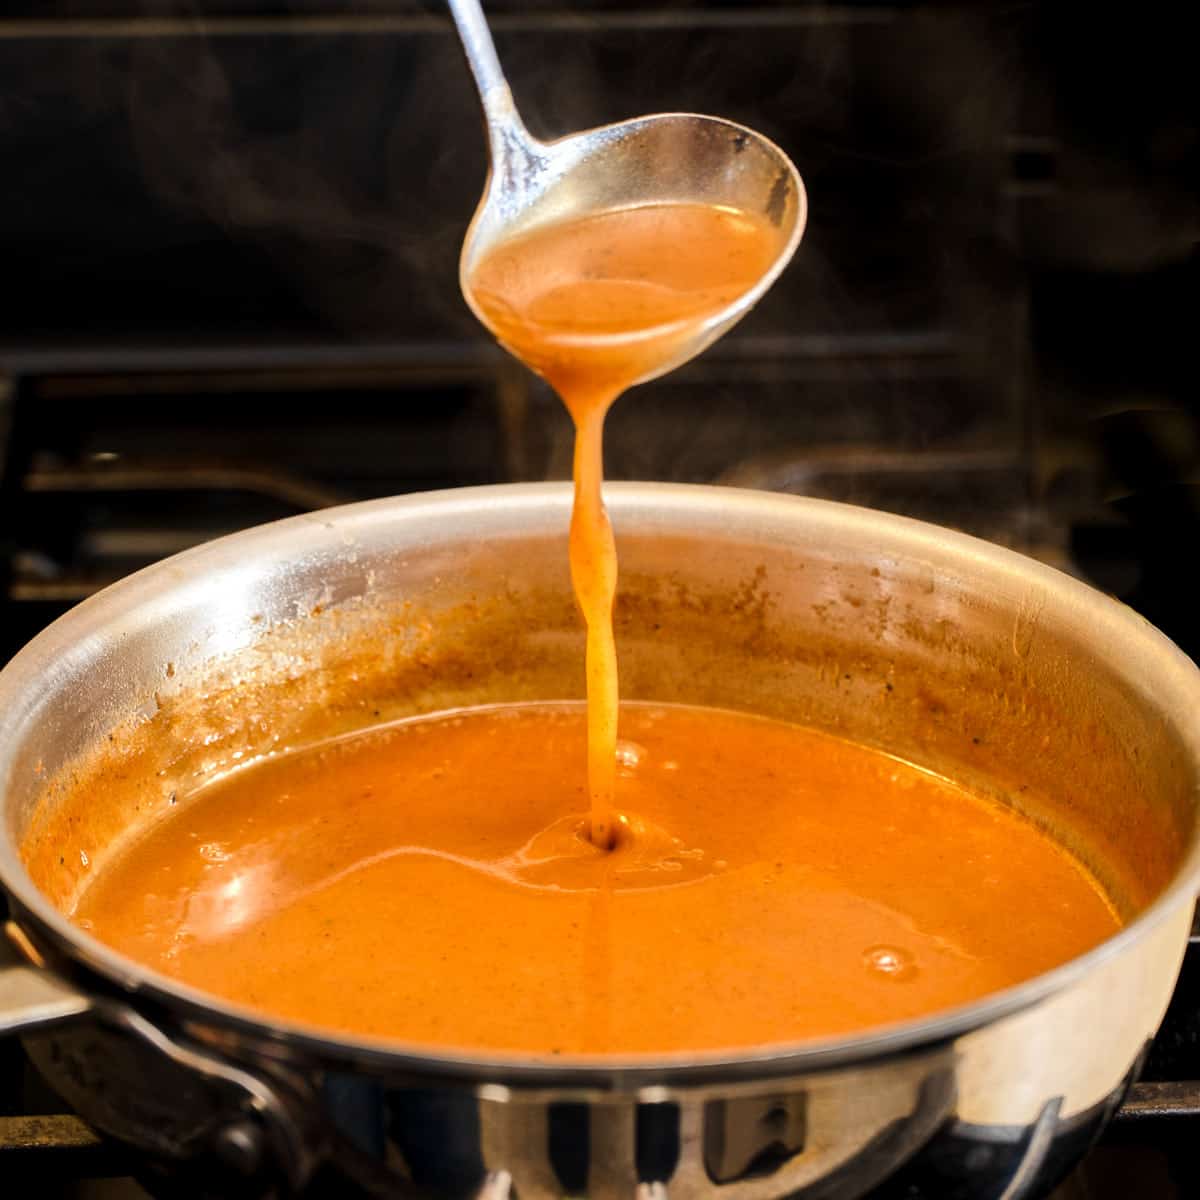
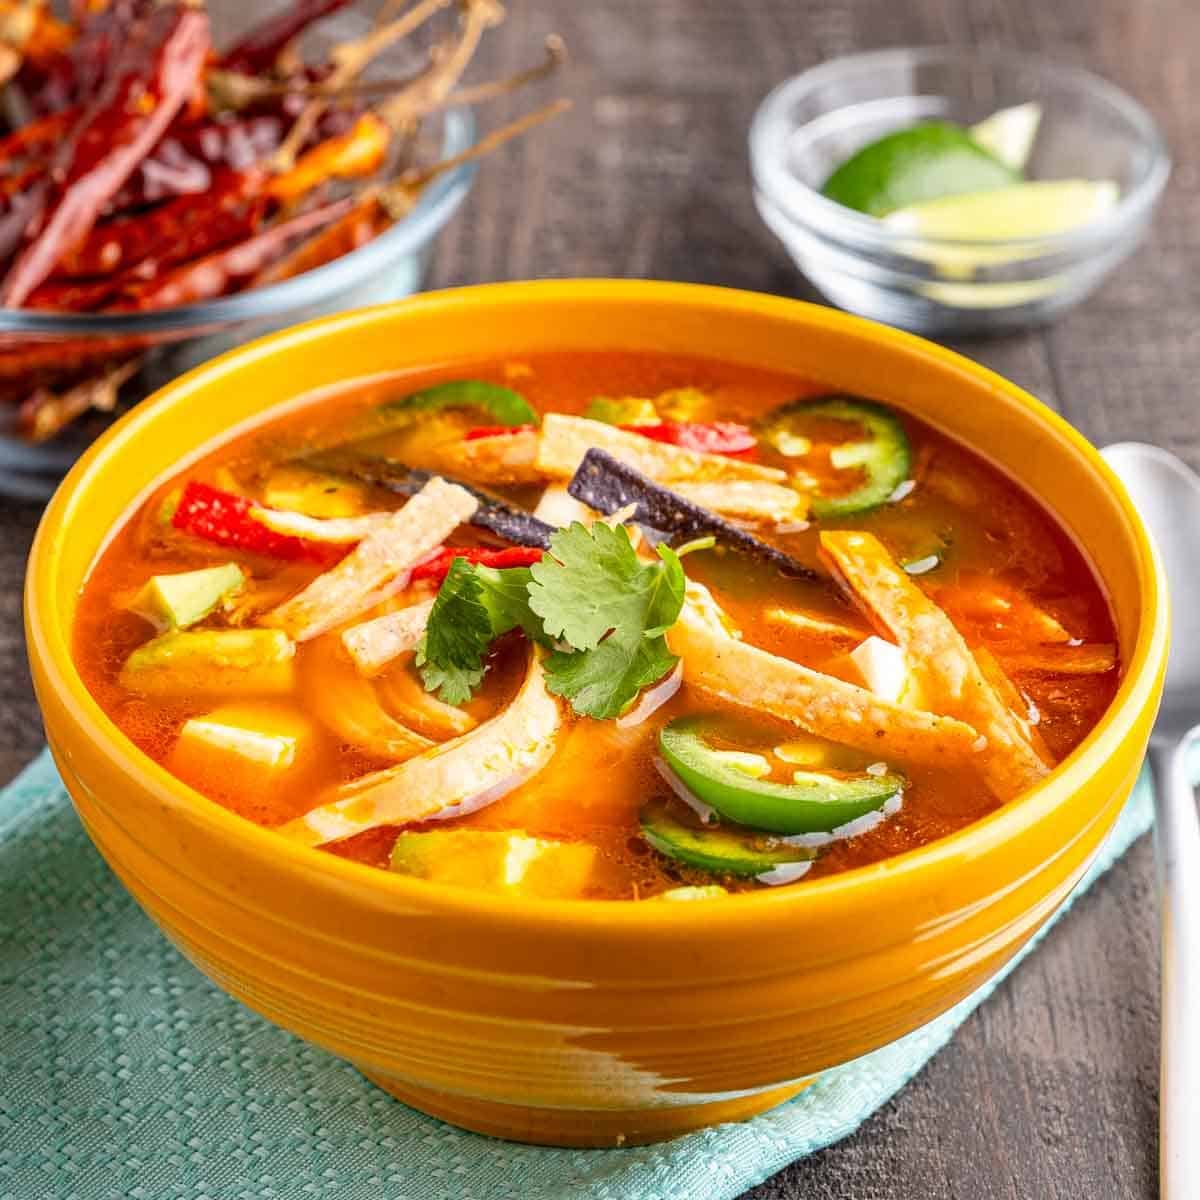
My Mexican broth is a lot like my regular rotisserie chicken broth, with a hint of allspice and a dried chile to add flavor. The big change is in the soup itself. I pressure cook the basic broth with sautéed onions and crushed tomatoes. Then I let everyone build their bowls with shredded chicken, hot peppers, cubes of cheese and avocado, and a sprinkling of crunchy tortilla strips and minced cilantro. Pour the red broth on top, and you have an amazing soup from the borderlands between Mexico and the US.

Ingredient Notes and Substitutions

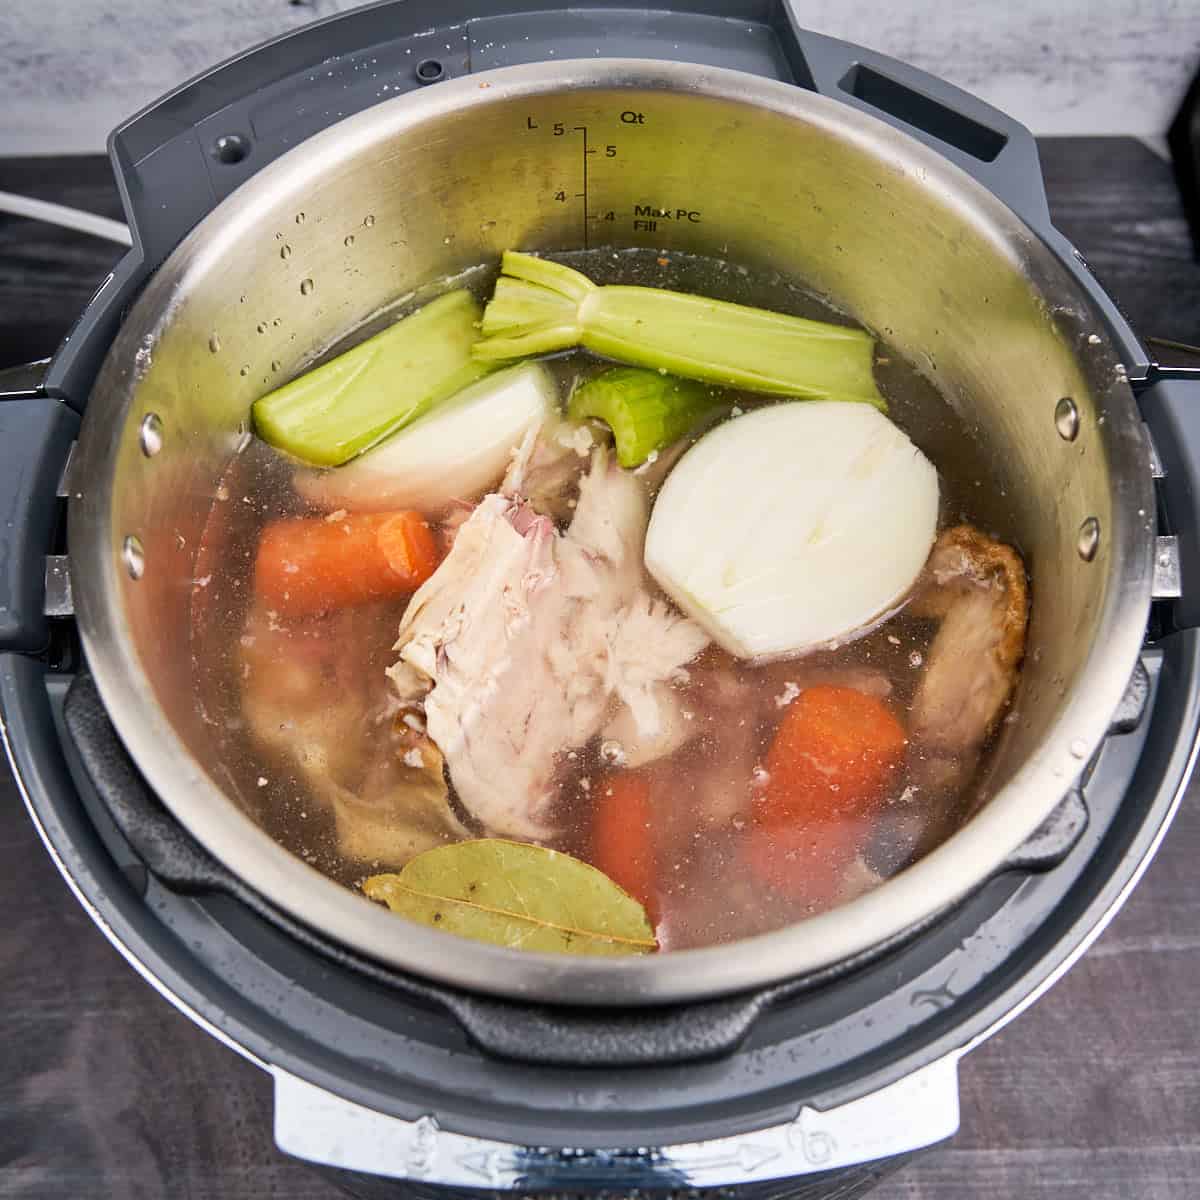
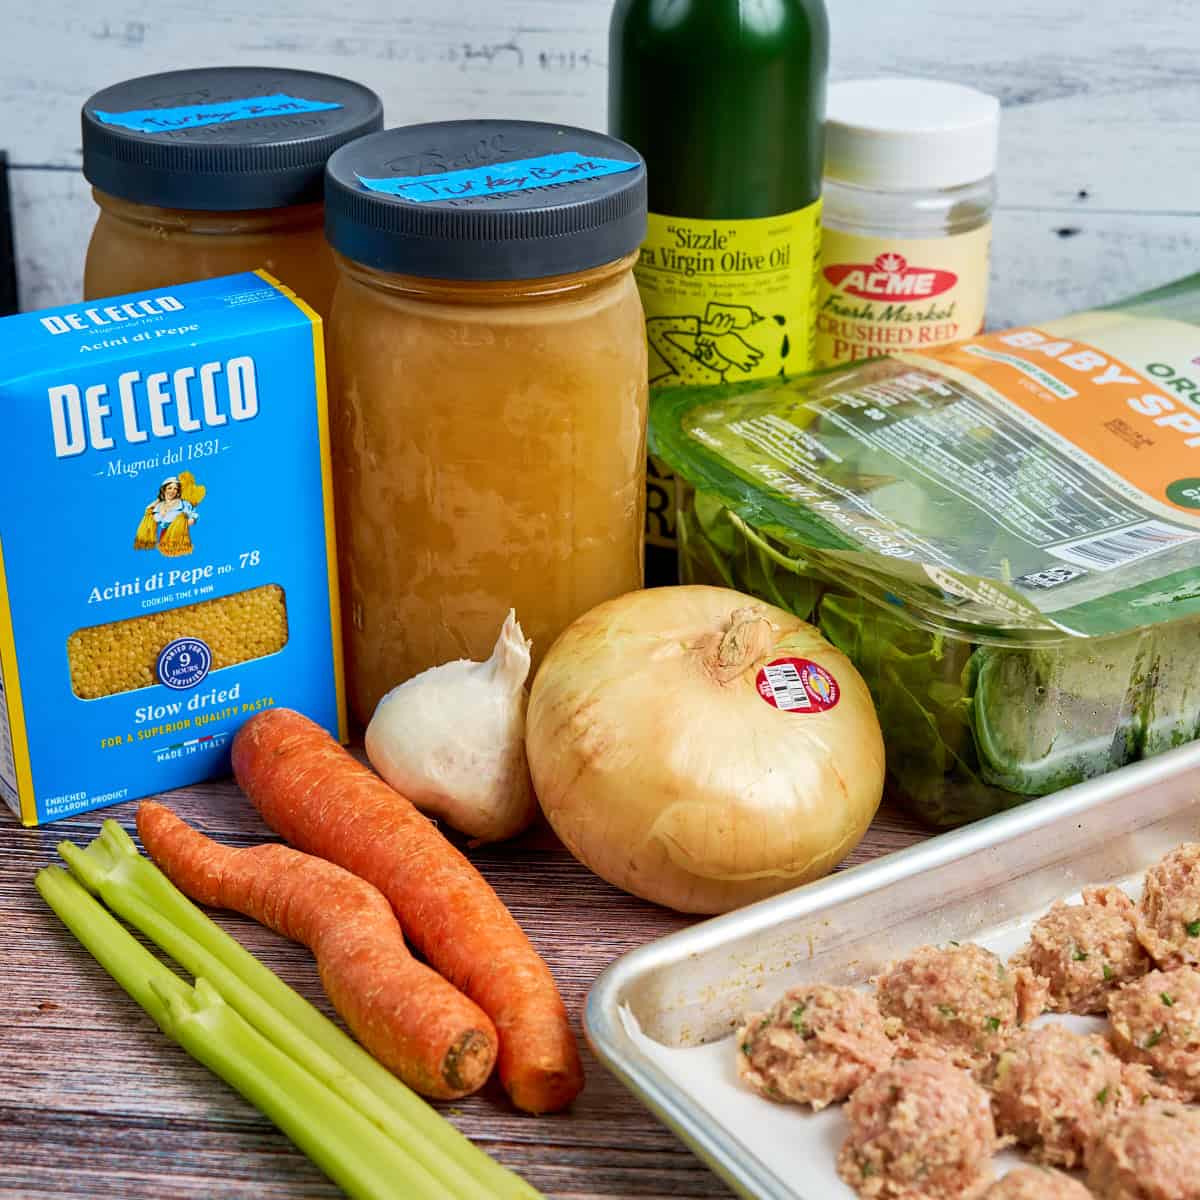
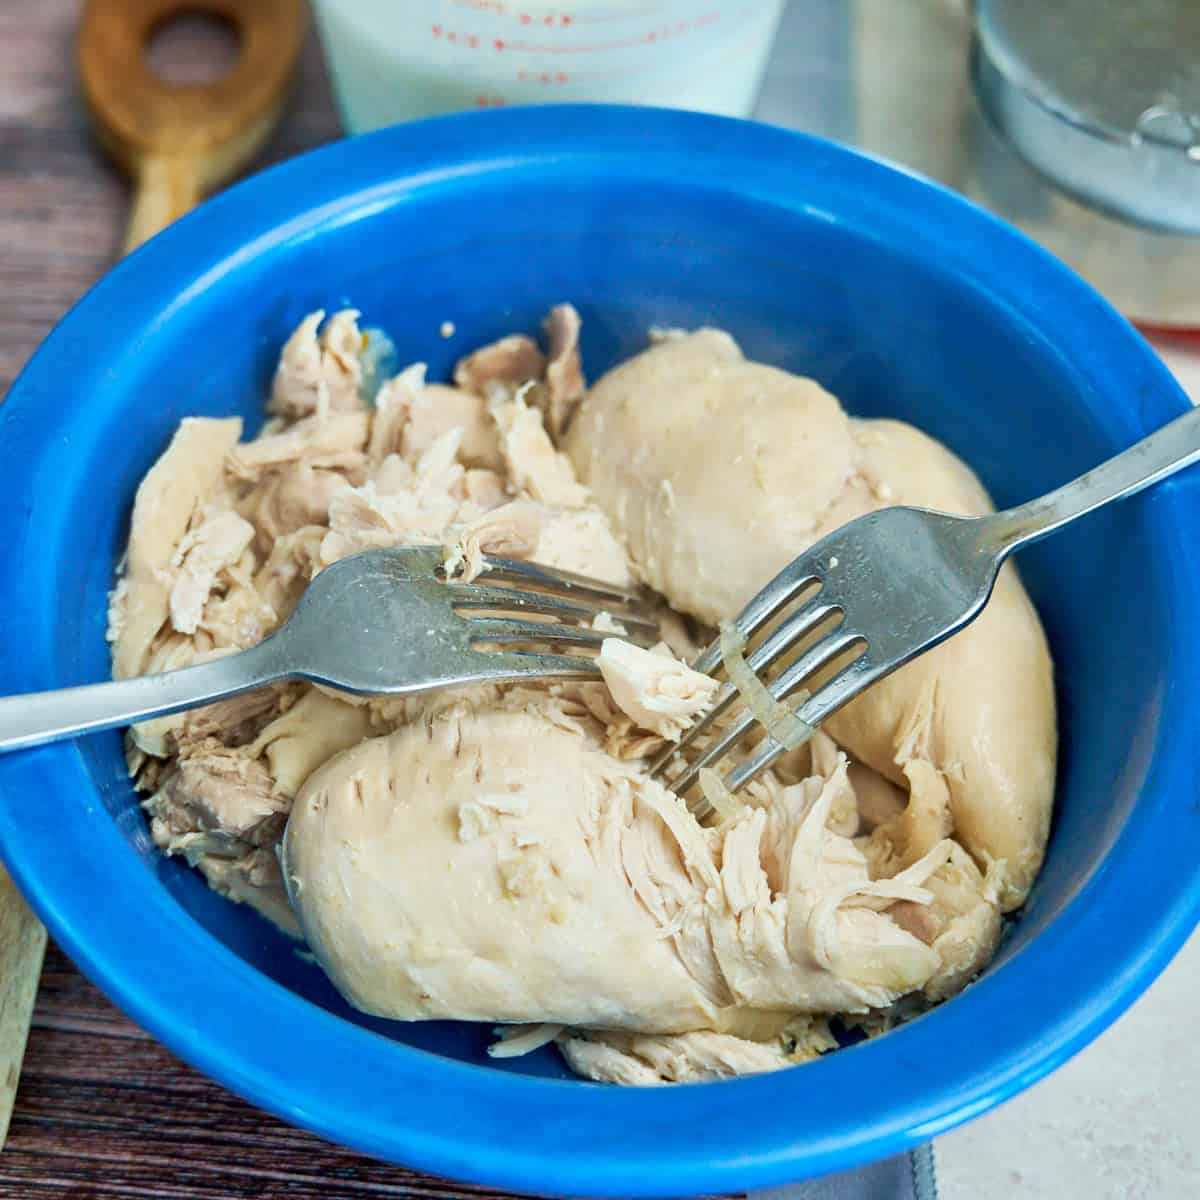
Rotisserie chicken: All you need is the carcass from a roast chicken, and a few cups of shredded meat. Store-bought rotisserie chicken, leftover roast chicken, whatever you have will work fine.
Uncooked whole chicken: If you have a whole chicken, use it to make my Pressure Cooker Chicken Broth and Shredded Chicken instead of the rotisserie chicken broth below. Then, use the shredded chicken in the soup to replace the shredded rotisserie chicken breast.
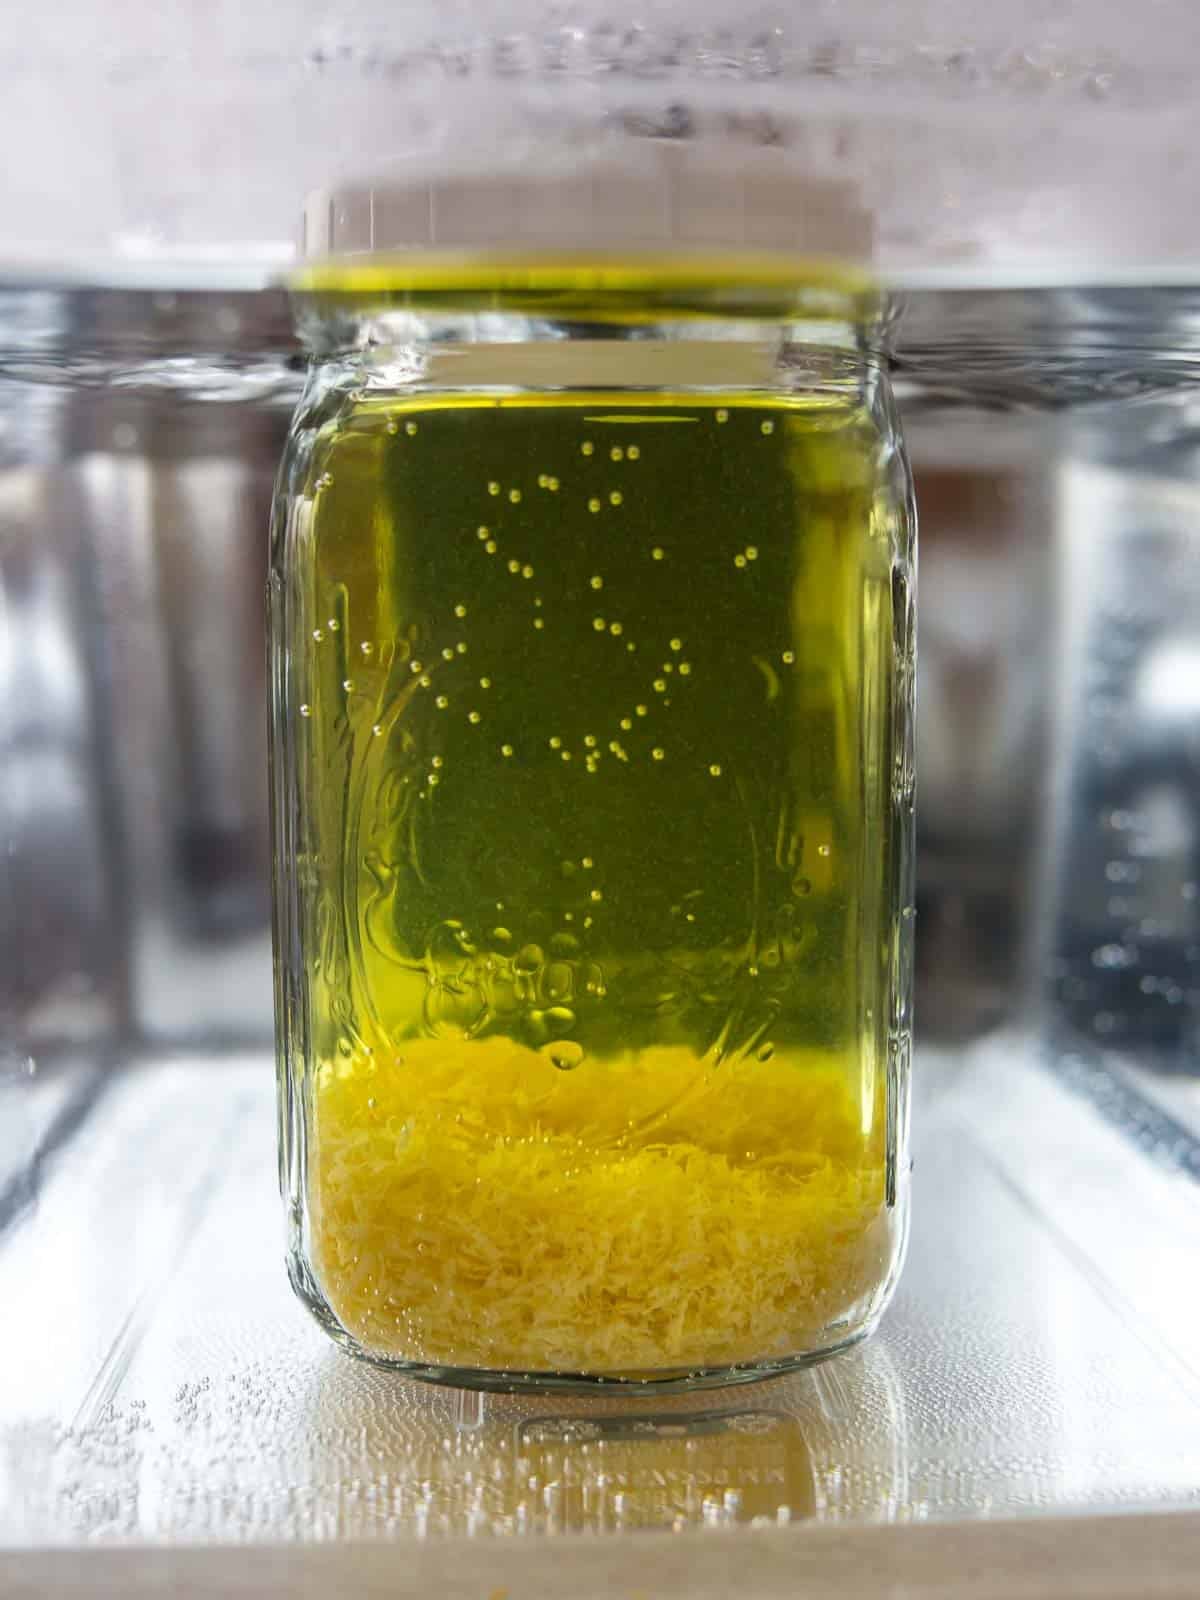
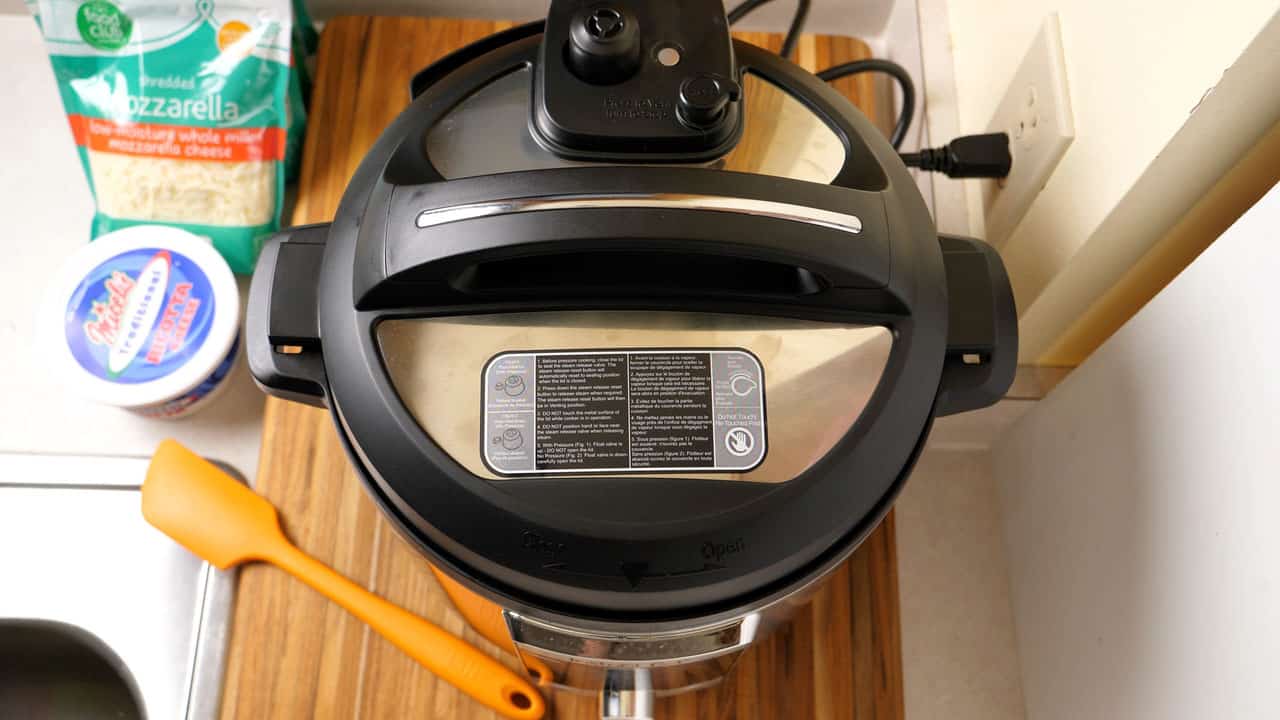
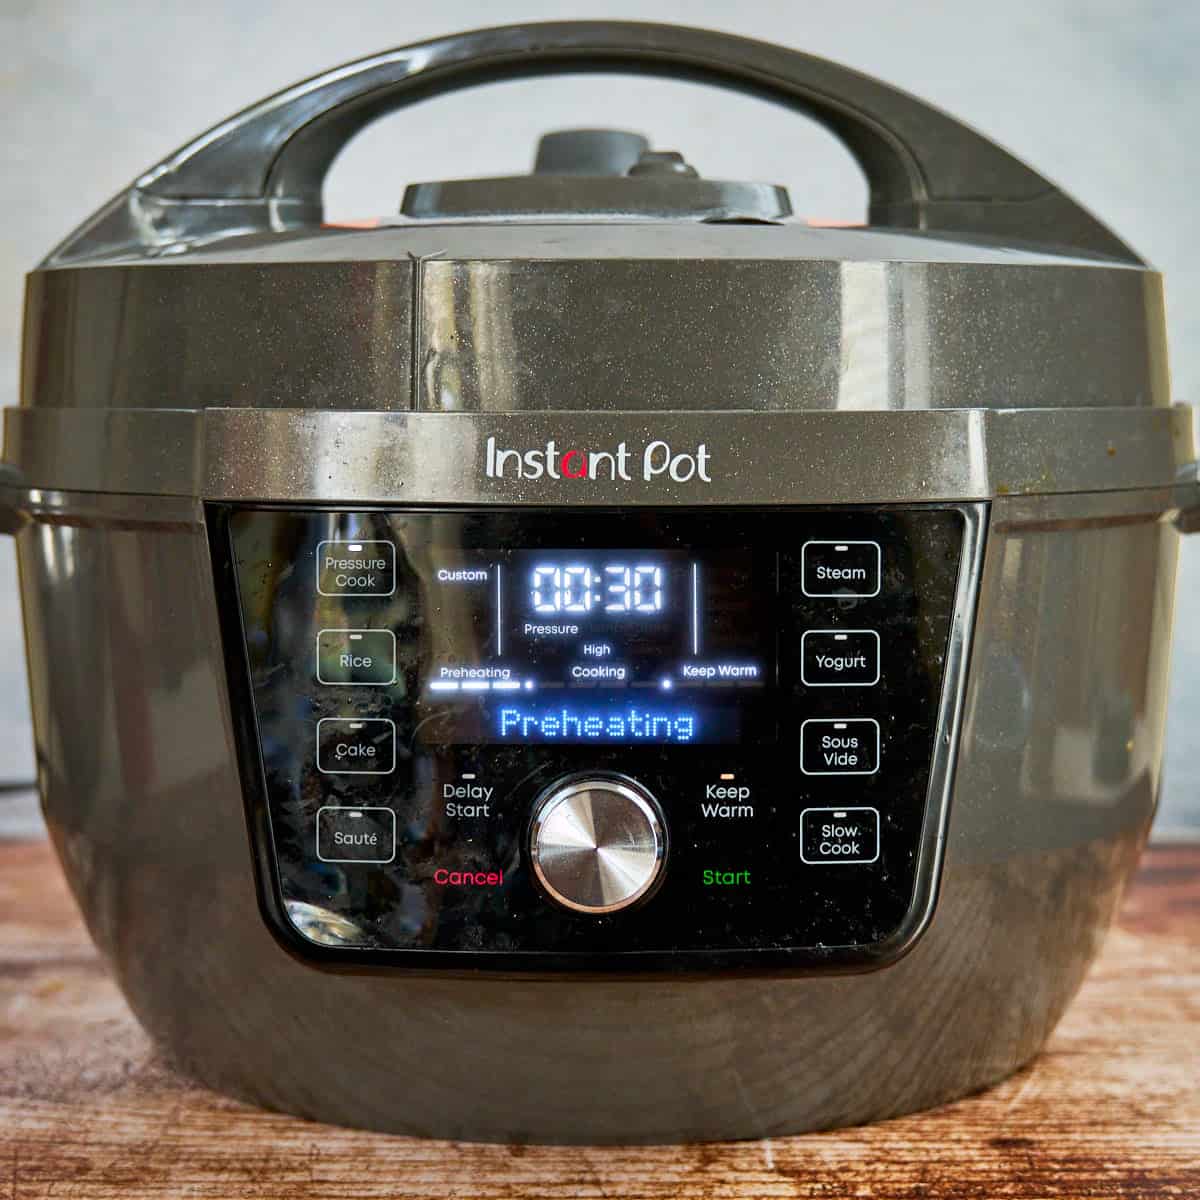
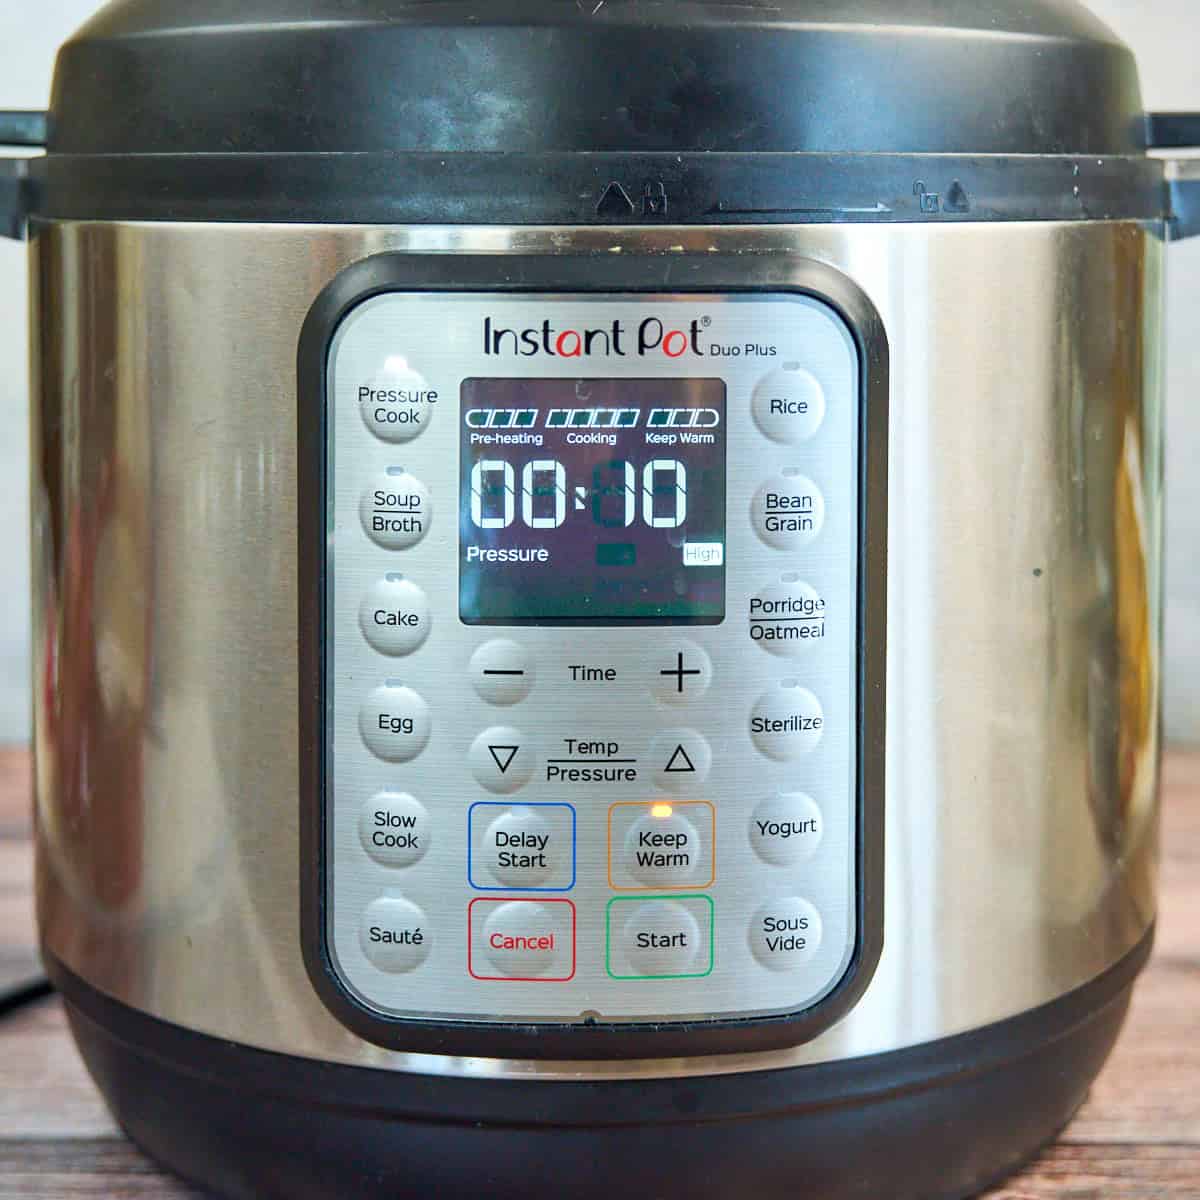
Broth: Homemade broth is by far the best choice - and as you can see below, very easy - but if you can use store-bought broth if you have to. (Just get low-sodium chicken broth.) Or, use up some broth from another meal - I make homemade chicken broth for the freezer, and then all I need is a little leftover chicken to make this recipe.
Broth flavorings: The broth is a variation on my Instant Pot Rotisserie Chicken Broth, with a few extra ingredients added in to give it a Southwestern taste. But, regular chicken broth is fine - if you don't have the allspice or chile de arbol, just skip them.
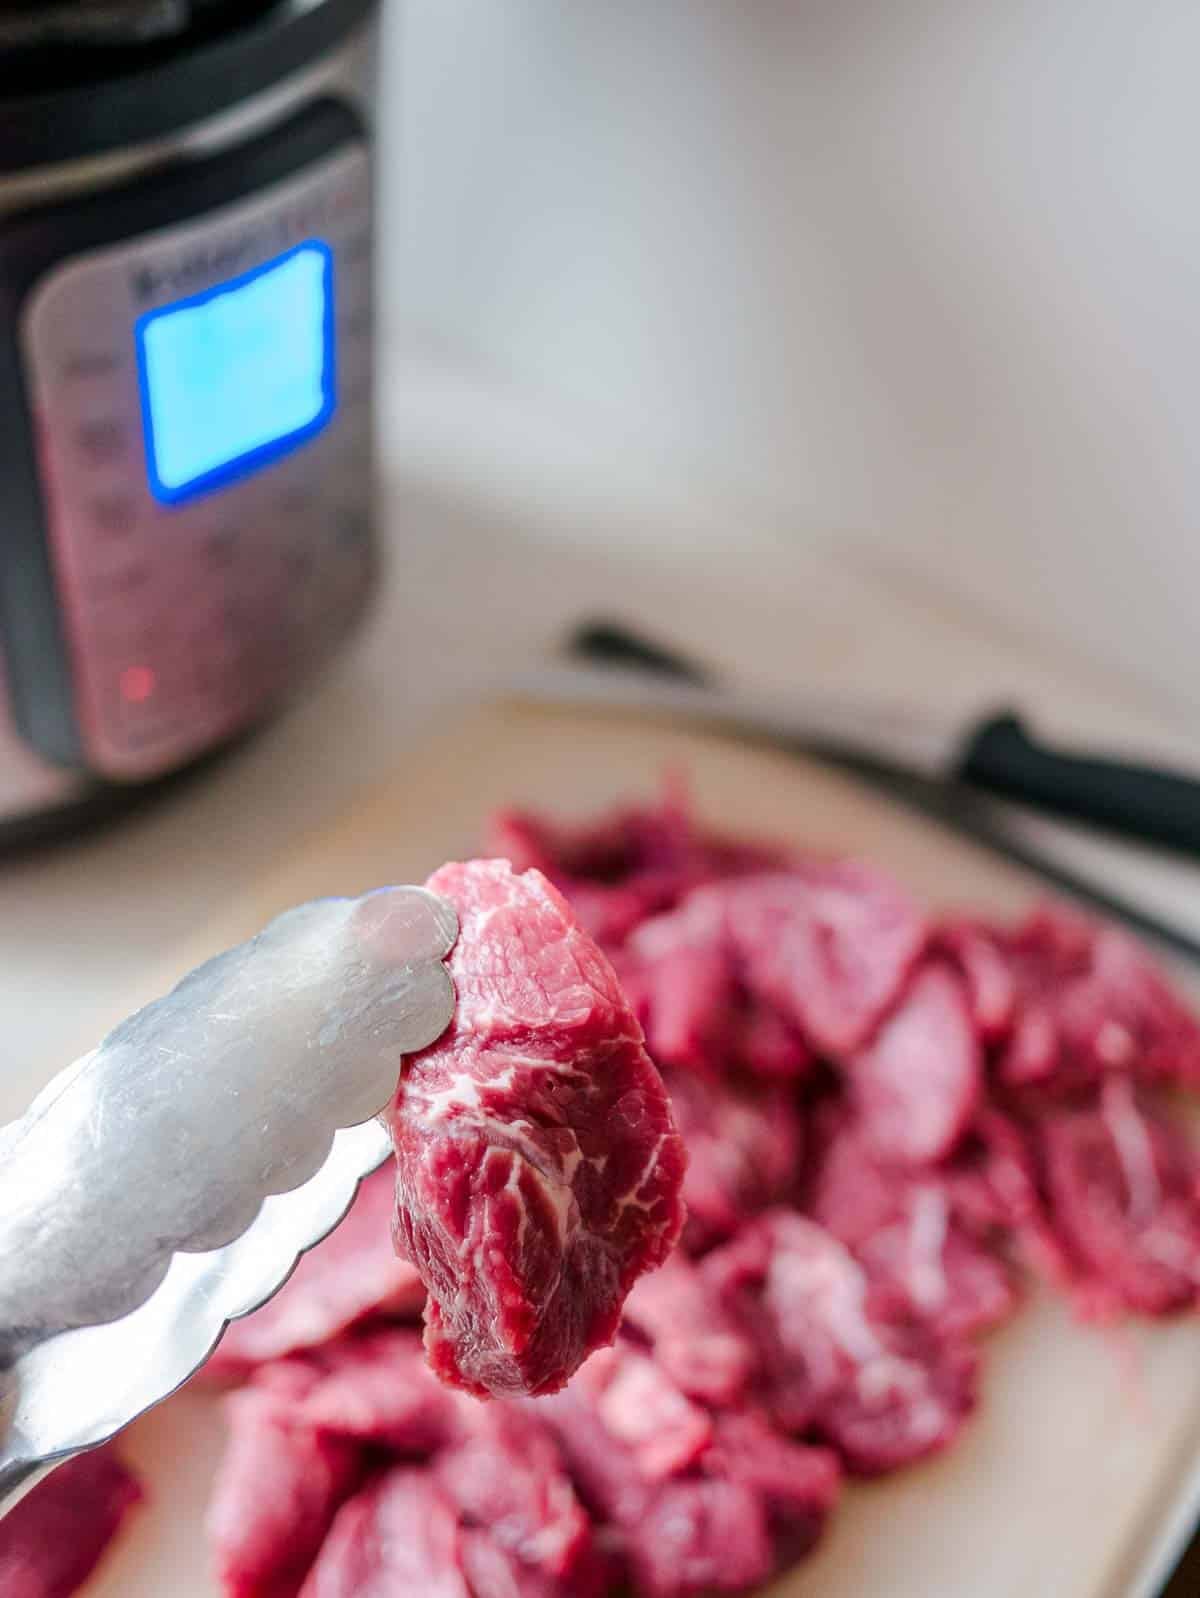
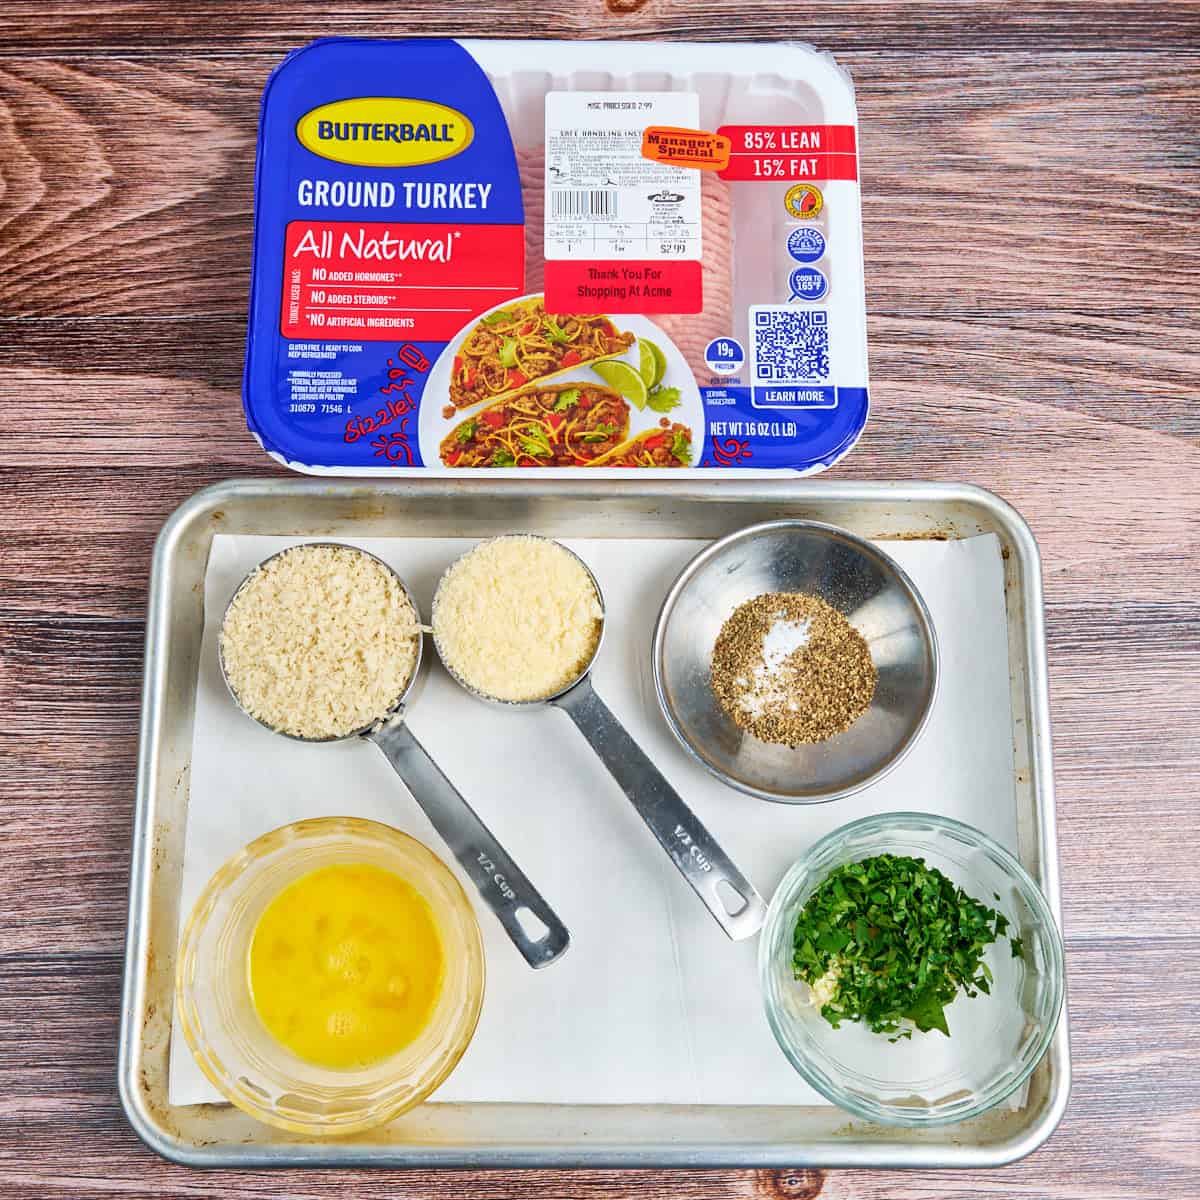
Chicken breast: If you're not using the breasts from a rotisserie chicken, any leftover chicken will do - as will pre-cooked chicken breast bought from the grocery store. If you have to use raw chicken, cut it into ½-inch strips by 2-inch strips (aka "stir fry cut" chicken breast) and add it to the pot when you pressure cook the soup.
Tortilla strips: Finding tortilla strips was trickier than I expected. (My grocery store keeps them in the salad dressing aisle, next to the croutons, not in the chips aisle with the tortilla chips.) The easy substitute for tortilla strips is to hand-crumble regular tortilla chips. If you have a bag that's mostly empty, all the broken pieces on the bottom are a perfect substitute for the strips.
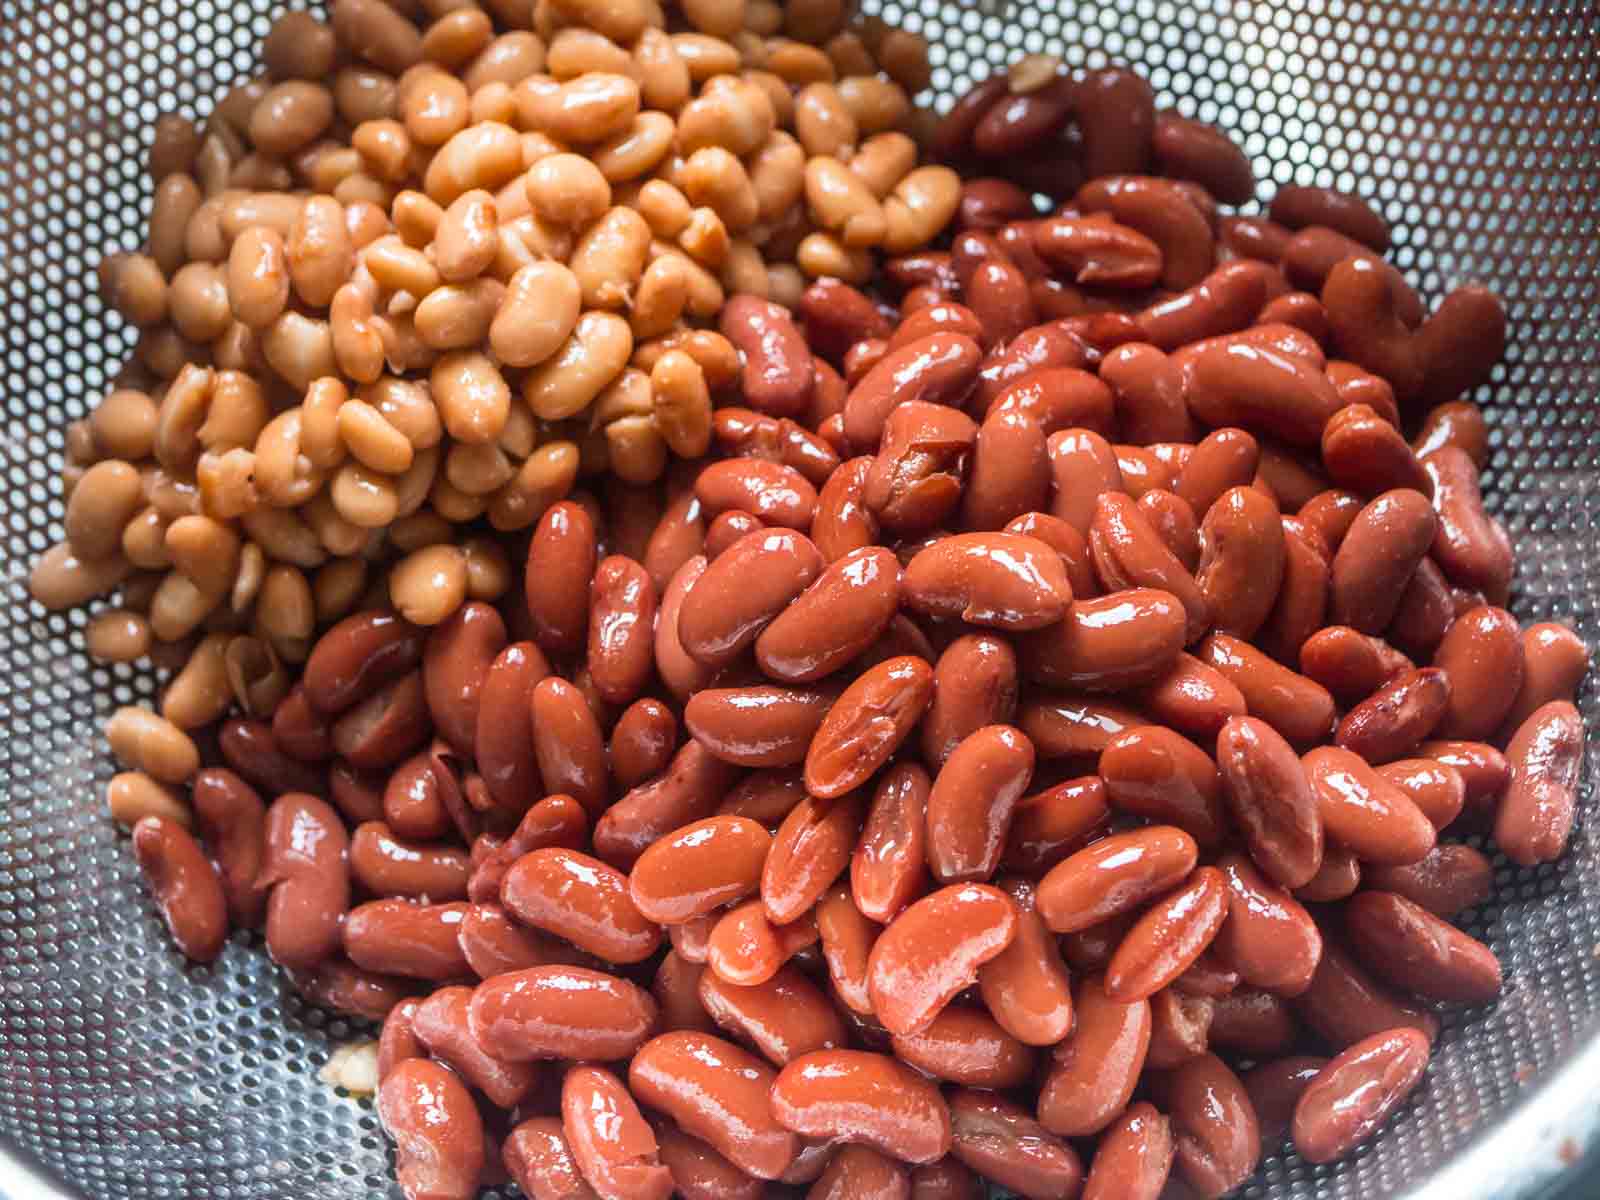
Avocado, Queso Fresco, and sliced Jalapeños for the soup: These are my favorite add-ins for the soup, but add your favorite tortilla soup ingredients. Rice is a good add-in, or replacement for the tortilla strips. Minced green onions are another good topping. If you think it will go well in the soup, try it!

Frequently Asked Questions

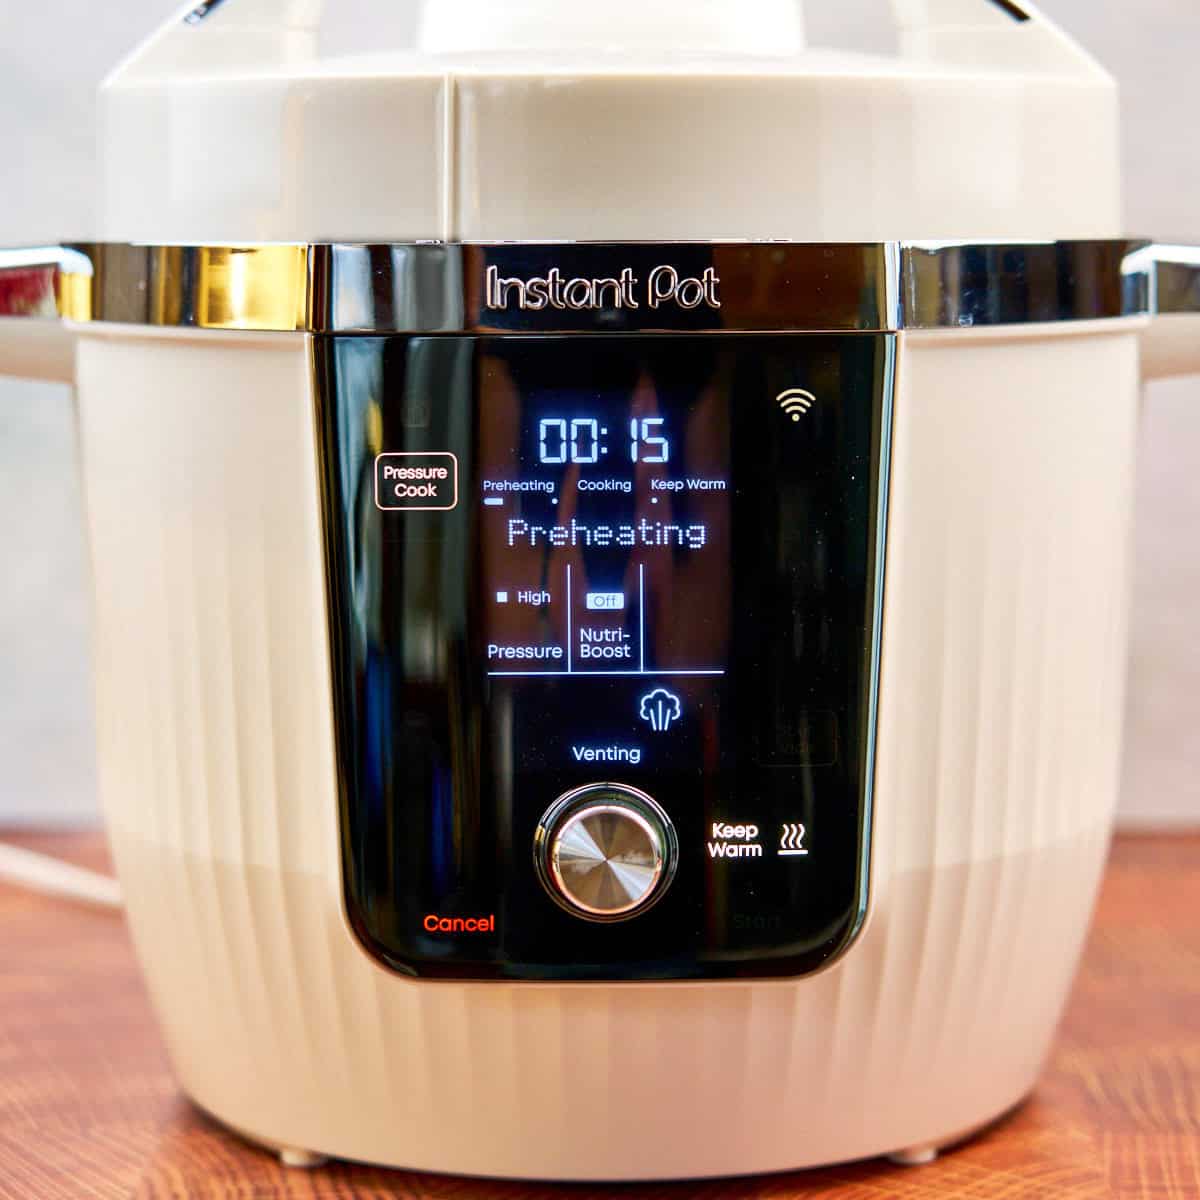
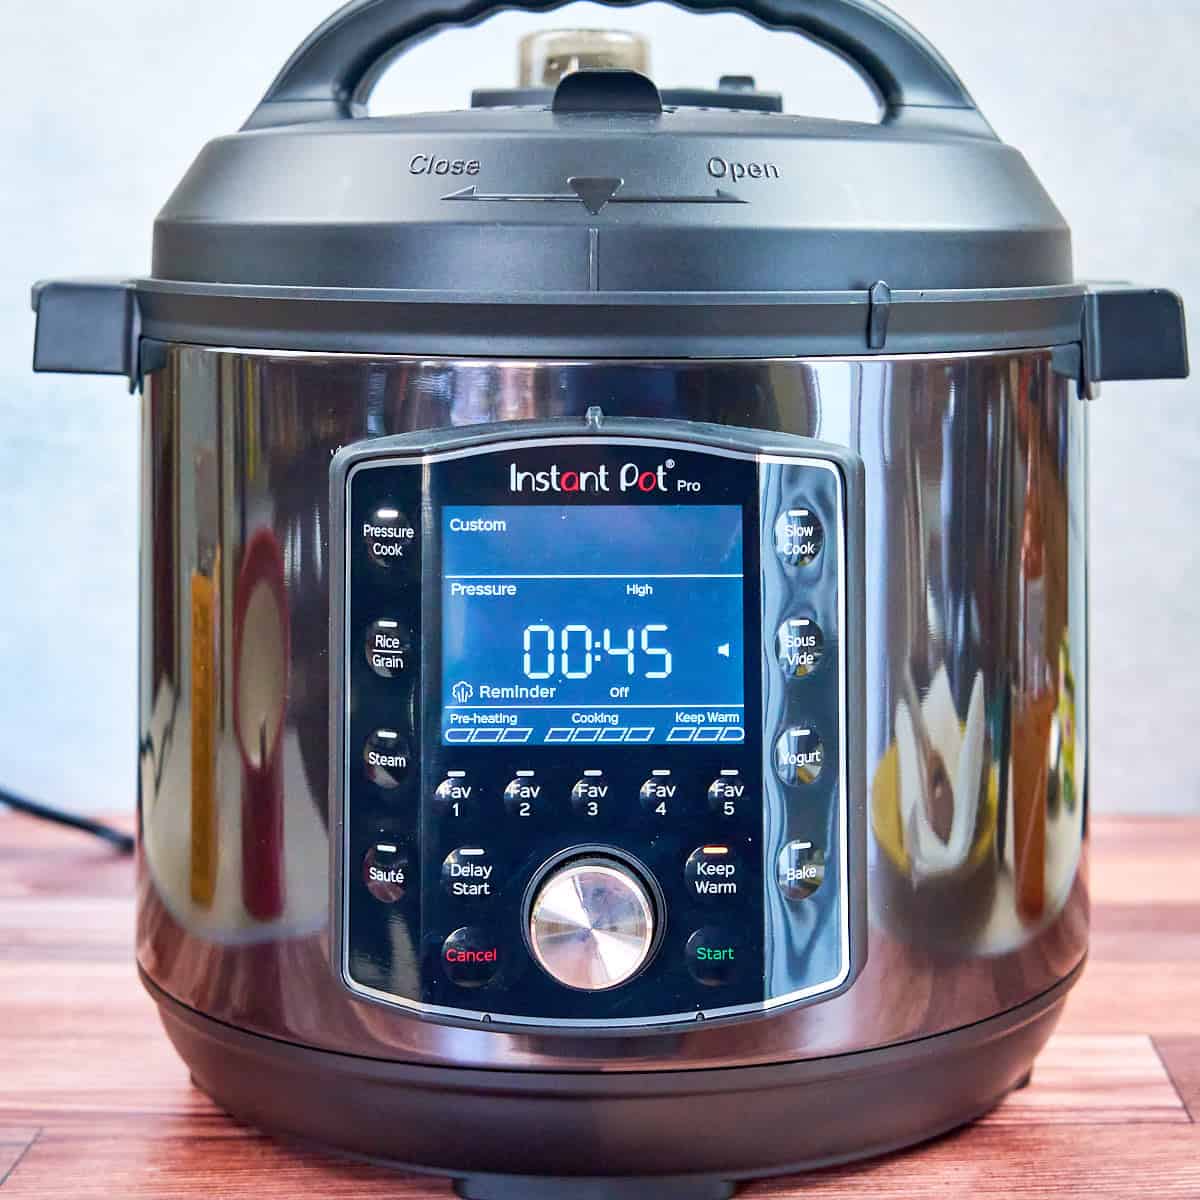
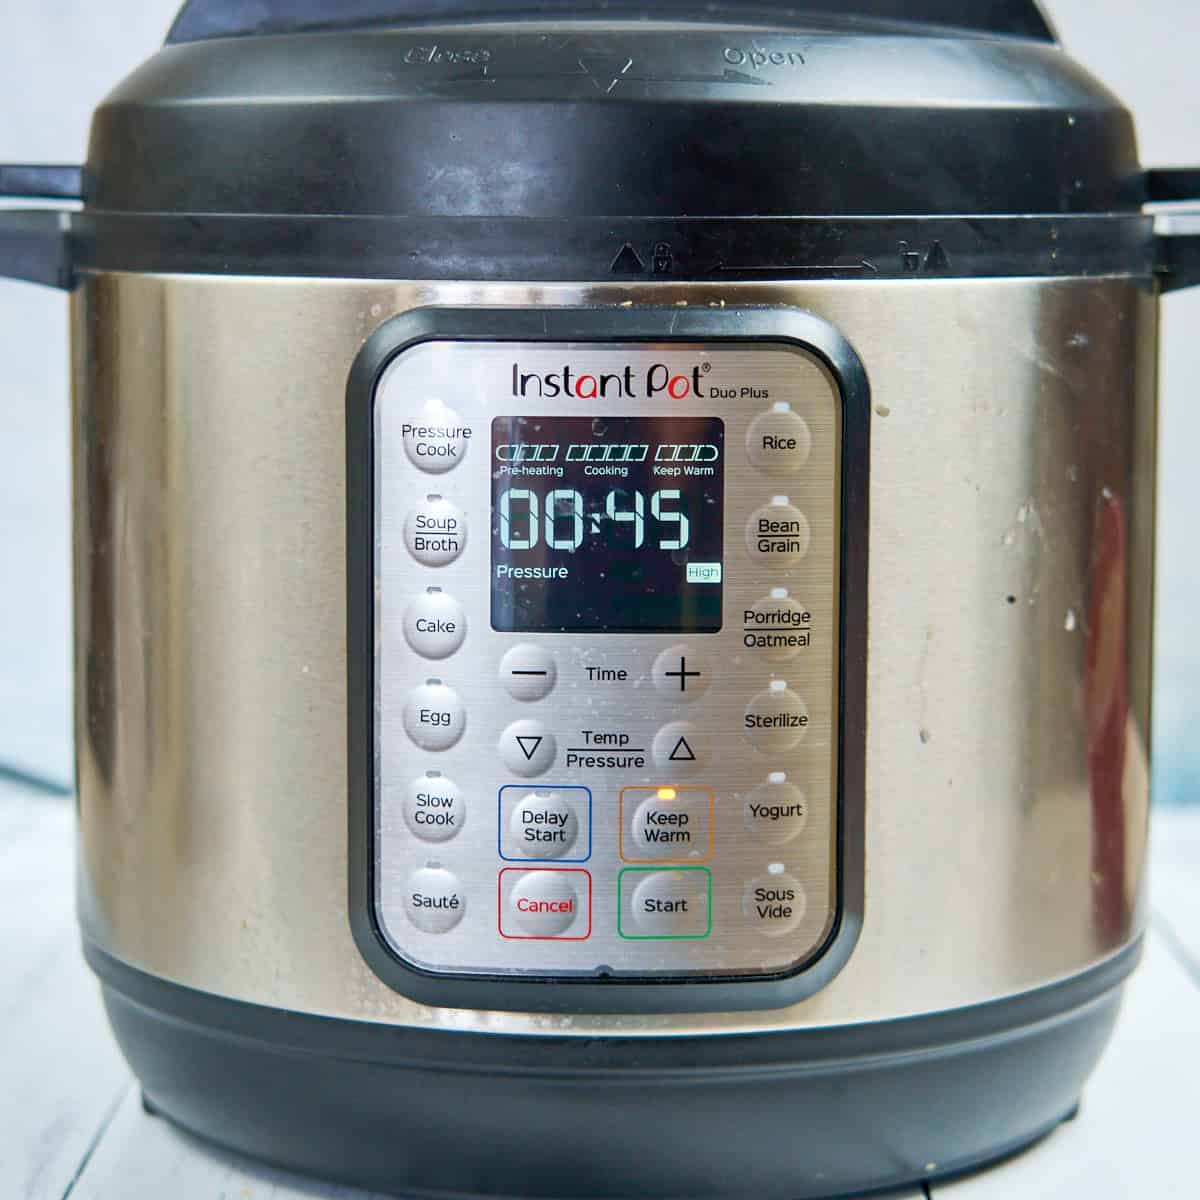
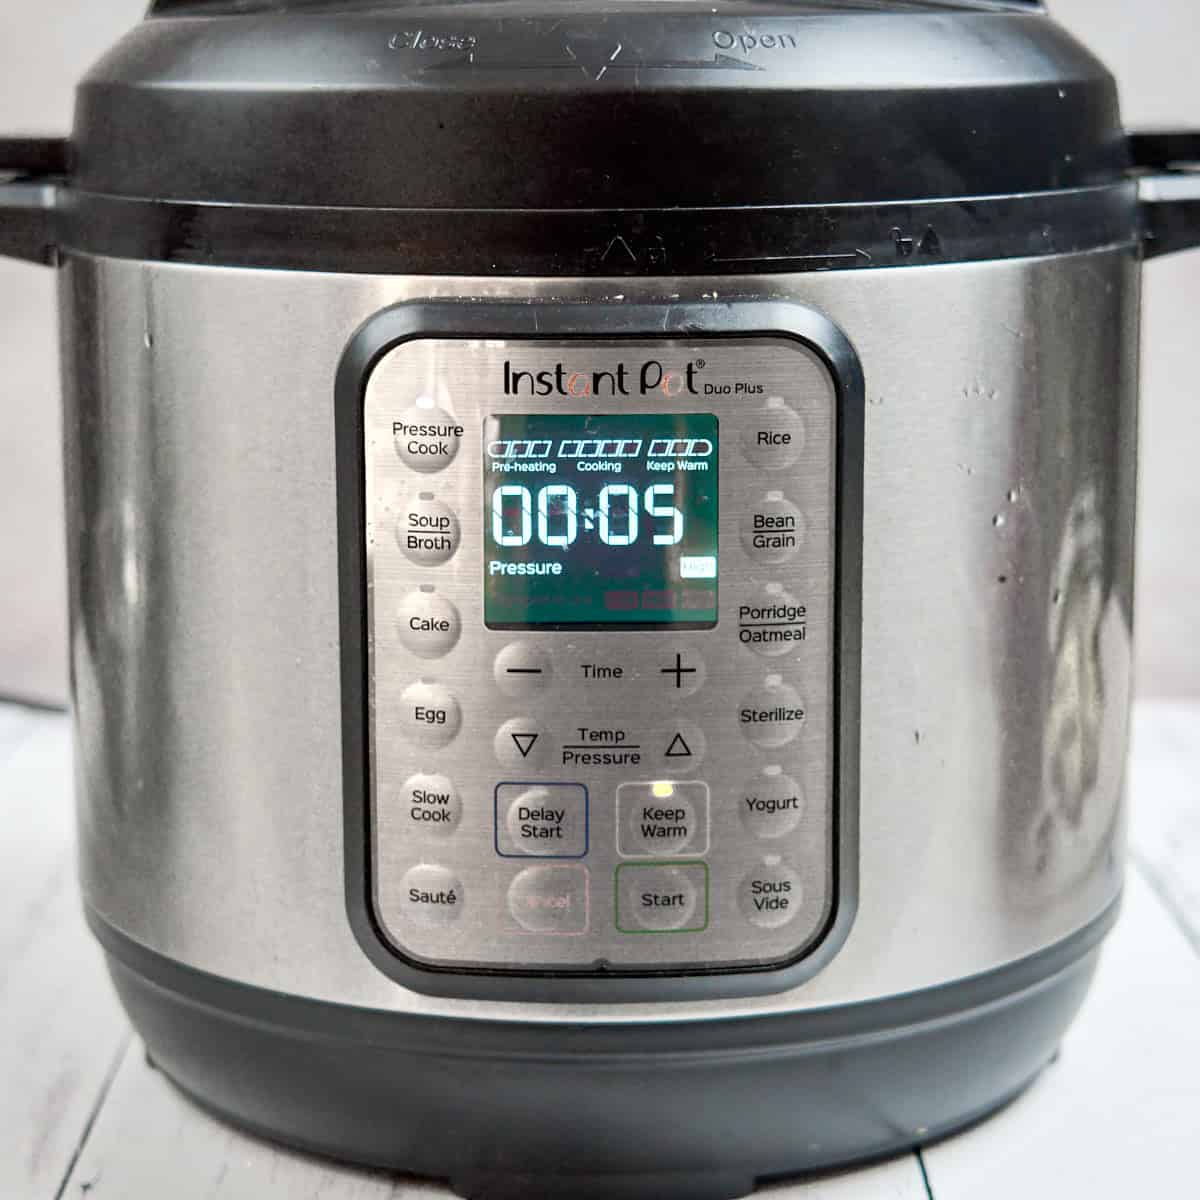
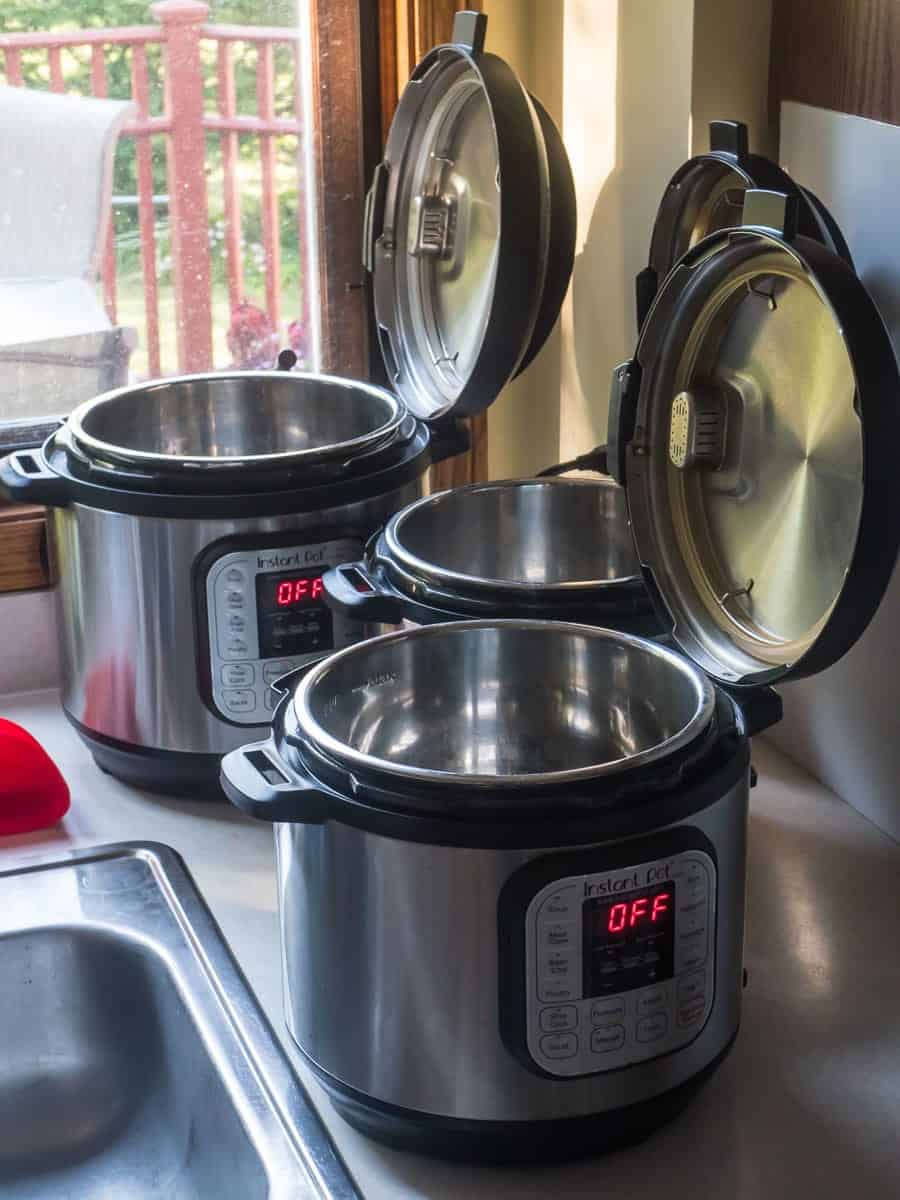
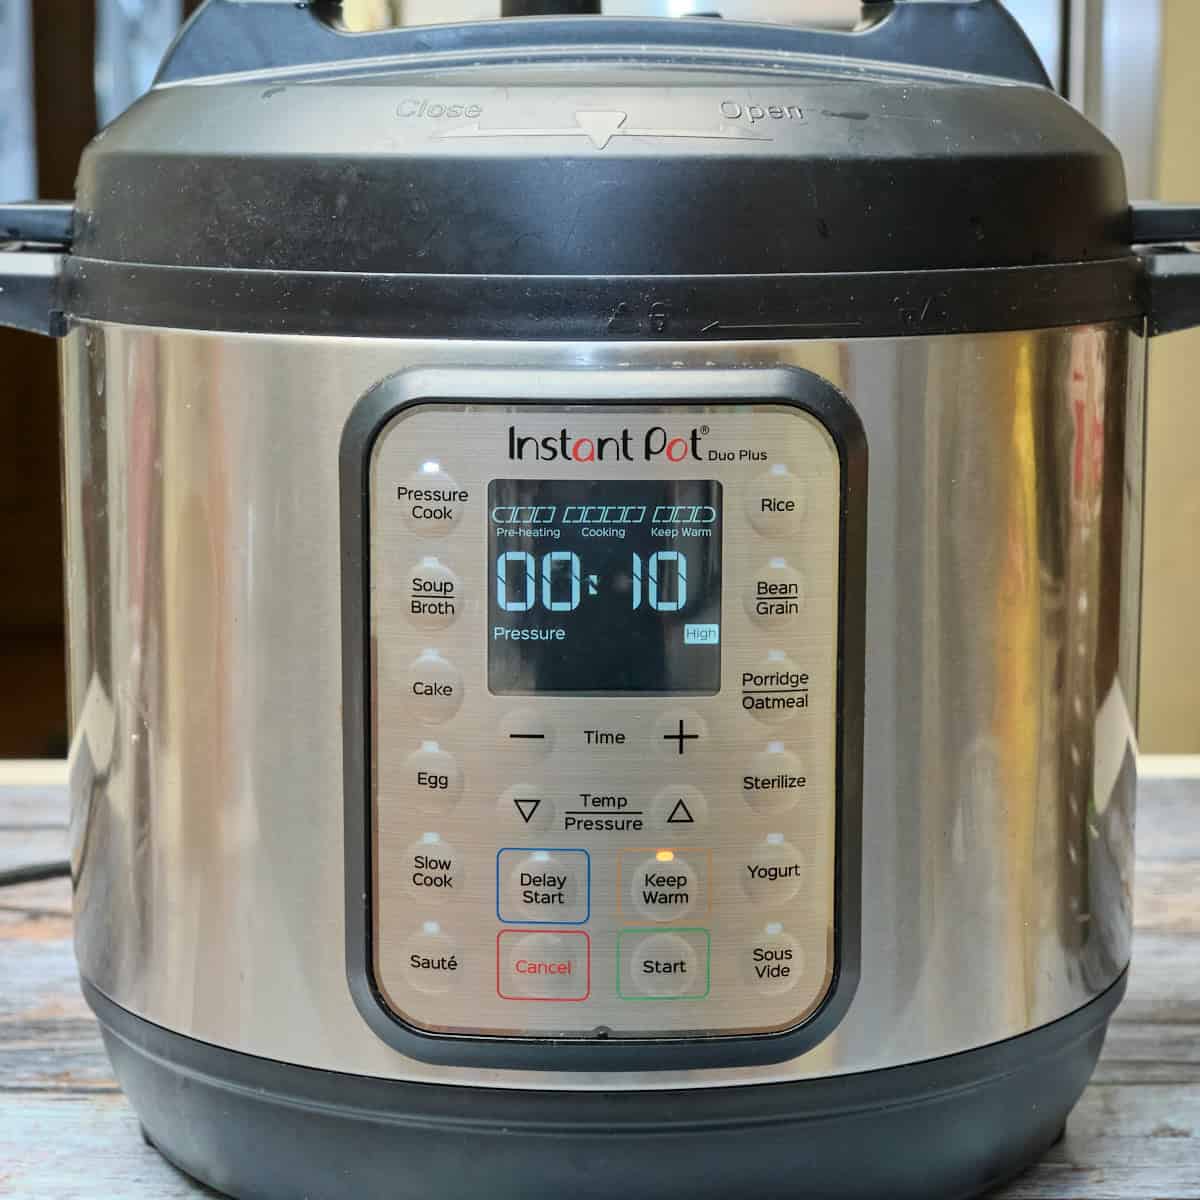
Why the additional "pressure cook the soup" step?

Why do I add the "pressure cook the soup" step? It's to simmer the onion, garlic, and tomatoes with the broth and bring them all together. (On a stovetop I'd simmer for 30 minutes to an hour for the same result.)

Make ahead

Do step 1 (pressure cook the broth) ahead of time, and you can refrigerate the broth for a few days, or freeze it for a few months. The rest of the recipe is quick enough to be a weeknight dinner.

Leftovers

This soup makes great leftovers - I freeze it in 2-cup containers for future microwave-and-serve lunches.

Related Posts

I make lots of chicken soups that start with Instant Pot Rotisserie Chicken Broth, like my Instant Pot Rotisserie Chicken Noodle Soup, Instant Pot Chicken and Wild Rice Soup, or Instant Pot Chicken Pot Pie Soup (with Rotisserie Chicken Broth).
For other Mexican-inspired chicken preparations, try my Pressure Cooker Mexican Chicken Soup in Red Chile Broth (Caldo de Pollo Rojo), Pressure Cooker Chicken Tacos, or Instant Pot Chicken Legs and Rice (Arroz con Pollo).
If you're looking for more ideas, check out my Instant Pot Pressure Cooker Recipes index.

Enjoyed this post? Want to help out DadCooksDinner? Subscribe to DadCooksDinner via email and share this post with your friends. Want to contribute directly? Donate to my Tip Jar, or buy something from Amazon.com through the links on this site. Thank you.

Instant Pot Lamb Tagine

June 2, 2026 by Mike Vrobel 1 Comment

Instant Pot Lamb Tagine on a bed of cousous

Sweet meets savory in this Instant Pot Lamb Tagine. Ultra-tender lamb shoulder with Moroccan spices, olives, and raisins, cooked in a fraction of the time in your Instant Pot.

Instant Pot Lamb Tagine on a bed of cousous
[feast_advanced_jump_to]

I'm not used to sweet ingredients in my stews, so the dried fruit in tagines has always fascinated me. I wasn't sure I'd like it ... but then I actually tried it. The plump, sweet raisins add a counterpoint to the rich lamb, the salty olives, tart preserved lemon, and the Ras El Hanout spice blend.

Making a tagine does involve some extra shopping - in my area, preserved lemon and Ras El Hanout require trips to a specialty store. (Or I plan ahead and make an Amazon order, but I prefer to support my local stores.) But it's definitely worth the effort for this fantastic lamb stew.

Ingredient Notes

Lamb substitutes: If you can't find boneless lamb shoulder, buy bone-in lamb shoulder chops and trim out the bones. (I had to do this, and needed 4 pounds of lamb chops to get 3 pounds of meat.) Or, you can substitute beef - boneless chuck shoulder roast or boneless short ribs are best.

Chickpeas: Homemade chickpeas taste much better, and I usually have a few 2-cup containers of chickpeas in my freezer. But, with so much going on in this recipe, you can substitute a drained can of chickpeas without losing too much flavor.

Ras el Hanout: I buy this spice blend from Morocco in specialty stores (or on Amazon). To make your own, mix 1 tablespoon paprika, 1 teaspoon ground cinnamon, ½ teaspoon garlic powder, ½ teaspoon ginger powder, ½ teaspoon cumin powder, ½ teaspoon coriander powder, and ½ teaspoon turmeric.

Olives: Green olives are most authentic, and green Castelvetrano olives are my favorite choice. That said, if I'm in a hurry, I'll buy a small can of cheap sliced green olives to save on knife work.

Preserved Lemon: Preserved lemon adds a tart and salty flavor to the dish, and is one of the key parts of the Moroccan flavor profile. I buy jars of preserved lemons at specialty grocery stores, or on Amazon. If you can't find preserved lemons, substitute the zest from a fresh lemon (for the tart flavor), and an extra ½ cup of olives (for the salty flavor).

Raisins: The raisins add a sweet pop of flavor. Golden raisins or mixed raisins are best, but any raisin will do. You can also substitute chopped apricots.

How to make Instant Pot Lamb Tagine in Pictures

Marinate the Lamb

Marinating the lamb

Toss the lamb cubes with salt, Ras El Hanout, and olive oil, and marinate for 4 to 8 hours in the refrigerator.

Sauté the Aromatics and Toast the Spices

Sauté the onions, toast the garlic, ginger, and spices

Sauté the onion, garlic, and ginger, then add the Ras El Hanout and toast for one minute.

Lamb, Chickpeas, Carrots, Tomatoes, and Broth into the Pot

Stir in the broth, marinated lamb, carrots, tomatoes, and chickpeas

Pour in the broth, scrape the bottom, then add the marinated lamb, chickpeas, carrots, and tomatoes.

Pressure Cook for 20 Minutes (with a 15 minute natural release)

Pressure cook for 20 minutes

Pressure cook on high for 20 minutes, then let the pressure come down naturally before quick-releasing the remaining pressure.

Add the lemon, olives, raisins

Preserved lemons, raisins and olives into the pot to warm up

Stir in the preserved lemon, olives, and raisins, and let sit for 5 minutes to plump up the raisins. Serve and enjoy.

What to serve with Lamb Tagine

Lamb tagine is meant to be cooked on a bed of couscous, but since that won't work in an Instant Pot, I make couscous on the side to serve with the lamb. Harissa is great for topping the tagine - it's a spicy pepper paste used across North Africa, and I love the extra heat it brings to the dish.

Frequently Asked Questions

That's a lot of work - is there a shortcut version?

If you can source the ingredients, most of this recipe is dump and stir. For the shortcut version of this recipe, I do the following:

  • Don't worry about marinating the lamb - just toss it with the spices before adding to the pot
  • Use a bag of baby carrots instead of peeling and slicing carrots
  • Replace the preserved lemon with the zest of a fresh lemon
  • Buy pre-sliced olives

…and that's it. This makes this mainly a dump and stir recipe, where dicing and sautéing the onion, ginger, and garlic is the only thing to do before dumping things into the pressure cooker.

Can I use chicken in this recipe?

You can substitute boneless skinless chicken thighs, cut into 2-inch chunks, for the lamb...but that's a different recipe, coming soon.

Related Posts

Instant Pot Doro Wat (Ethiopian Chicken Drumsticks)
Instant Pot Ethiopian Red Lentils (Misir Wat)
Pressure Cooker Red Pepper Hummus
Creamy Instant Pot Hummus
Instant Pot Short Ribs with Coconut Milk and Thai Curry
Instant Pot Chicken With 40 Cloves of Garlic
Instant Pot Moroccan Lamb Shanks
If you're looking for something else, here is my index of Instant Pot and Pressure Cooker Recipes.

Enjoyed this post? Want to help out DadCooksDinner? Subscribe to DadCooksDinner via email and share this post with your friends. Want to contribute directly? Donate to my Tip Jar, or buy something from Amazon.com through the links on this site. Thank you.

Sous Vide Rack of Lamb with Dijon Bread Crumb Crust

May 26, 2026 by Mike Vrobel 3 Comments

Sous Vide rack of lamb sliced into chops

Sous vide rack of lamb with a crunchy Dijon panko crust. (The name of this recipe should be "Elegant lamb popsicles with a crispy crust".) Sous vide is the foolproof way to cook lamb to a perfect rare temperature (or medium-rare if you prefer), then give it a quick sear on the grill to add a browned, caramelized crust. Then, brush the lamb with Dijon mustard (but of course), and sprinkle it with toasted panko crumbs to add a crunchy bread crumb crust. Cut into individual lamb chops, serve, and enjoy!

[feast_advanced_jump_to]

I love the way sous vide cooks meat to medium-rare. If I want to cook to a warm pink interior, sous vide is now my default technique.

Back in the day, sous vide was crazy molecular gastronomy, something only mad scientist chefs would use. I would sit over my grill, watching, poking, taking temperatures, and hoping that I wasn't overcooking my lamb.

If the steak gets immediate medical attention, we can save it

That's how my mom wanted her lamb (and beef) cooked. It hurt when I made her a steak, she cut into it, and it was more pink than red. (Or, even worse, more gray than pink). Mom would put on a brave face, and act like it's OK…but mom wasn't that good of an actor. I knew I had let her down.

That was then, this is now. I'm spoiled thanks to sous vide - medium-rare is easy. Vacuum seal the meat, drop it in a water bath set to 131°F, and wait an hour. Medium-rare, on the nose, every time.

I served these lamb chops on Mother's day, and mom's eyes lit up. Perfect rare, exactly how she liked it.

This is an updated version of a recipe I wrote back in 2014. Mom has since passed away, but I still serve rack of lamb, medium-rare, on Mother's day in her honor.

Equipment

  • Sous vide water bath (I use a sous vide immersion circulator and a dedicated sous vide container)
  • A vacuum sealer and vacuum bags

You can jury-rig a sous vide water bath with a beer cooler sous vide full of hot water, and zip-top plastic bags instead of the vacuum sealer - but sous vide equipment is cheap and easily available nowadays, and makes the process easy. I would buy a sous vide setup if you're going to sous vide more than once. (And you will if you like rare or medium-rare meat.)

Ingredients Notes and Substitutions

  • Rack of lamb substitutes: If you can't find rack of lamb, lamb loin chops are a good substitute (see my sous vide lamb loin chop recipe here). If you don't like lamb, you can sous vide beef, but that's a bit different - check out my many sous vide recipes, including sous vide New York strip steaks, sous vide filet mignon, even a whole sous vide boneless ribeye roast.
  • Trimming the fat: I chickened out on my trimming. I should have Frenched the rack of lamb, trimming off all of the fat between the bones, leaving nothing but the eye of meat. I didn't - I left a thick fat cap on the top of the rack. Next time, I'm going to trim ruthlessly.
  • Bread crumb crust: As you can see in the recipe, I'm toasting the bread crumb crust separately. This gives me the flavor of it browning in the oven, even though the lamb is already cooked when it is patted on. The panko gives it saltiness and body, and the rosemary adds a nice herbal flavor to the crust - but either or both can be skipped.
  • Skip the bread crumb crust: The panko bread crumb crust is not essential. Brush the lamb with only the Dijon for a mustard crust. Or, skip the mustard and panko crust and just have a simple rack of lamb. (I do that version all the time - nothing but meat and salt and a sear. It's fantastic.)

Tips and Tricks

Use the grill to sear

To keep that perfectly cooked interior, we need to sear the outside of the lamb as quickly as possible. The shape of a rack of lamb is not good for pan searing - the round exterior and bones mean it will only be browned in spots. A grill solves this problem, especially a charcoal grill - the flames and heat go up and around the lamb, searing the sides as well as the bottom.

I don't have a grill to sear, now what?

If you don't have a grill, you can make do with a heavy pan. Heat a cast iron, carbon steel, or steel-clad aluminum pan until it is ripping hot. Put the lamb in the pan, and hold it in place with kitchen tongs as you move it around to brown as much of the outside as possible, about 1 minute per "side". (Pretend it has sides, even though it's round.) It won't be evenly browned, but the bread crumb crust will cover that up, and you'll get the browned meat flavor from where it was seared.

Can I cook my rack of lamb from frozen?

Absolutely! Add 1 extra hour of sous vide to cook it through, so 2 to 5 hours of cooking time.

1 hour to 4 hours? Why the wide range of cooking times?

That's the beauty of sous vide cooking. You set the doneness temperature you want, and the lamb will get there, but never go over. It takes a while to cook through - that's the 1 hour part - and it can sit in the water bath for hours and not overcook. (After about 4 hours the meat will start to get a little soft from holding the heat for so long, but it's still fine to eat.)
That's one of the great things about sous vide - you can set it up ahead of time and you don't have to serve at an exact time. Whenever everyone is ready for dinner, pull the lamb out of the water bath, sear it, and serve it. Perfectly cooked lamb can be on the table in 15 minutes or less.

Will the crust stick to the lamb?

Yes, the mustard acts as a binder, so the crumbs stick to the lamb. You are going to lose some of them when you slice the rack into individual chops, but most of them will stay stuck to the outside of the meat.

Brushing rack of lamb with mustard
Sprinkling toasted panko crumbs on the rack of lamb

Do I need to rest the meat after searing?

No! With regular cooking, you have to rest the meat after cooking, because the temperature between the outside and inside of the meat needs to even out. With sous vide, the meat is the same temperature all the way through, so no resting is needed. (A quick sear isn't enough to start cooking through to the center of the meat. That's why we want a hot and fast sear, to brown the outside quickly.)

How many people does a rack of lamb serve?

Normal serving suggestions are 2-3 people per rack of lamb. (In my family of carnivores, 2 people per rack is just right.)

How do I keep the ends of the bones from piercing the bag?

I usually don't have this problem with lamb, but just to be sure, I check the ends of the bones to see if they feel sharp. If they do, I fold a small piece of extra vacuum bag over the end of the bone before vacuum sealing. (Some vacuum bags come with bone guard pieces for this exact reason.)

Scaling

You can cook as many individually vacuum-sealed racks of lamb as you can fit in your sous vide container. An extra large container will hold enough lamb to serve large crowd.

Make ahead

Sous vide is great for make-ahead cooking - drop the vacuum sealed lamb in the water bath hours ahead of time, and it will be ready to go whenever you need it. After the hour of sous vide cooking, you've got a 4 hour window where the lamb will be perfectly cooked.
Or, cook straight from the freezer - as I mention above in the FAQ section, you don't have to thaw the lamb. Put the frozen, vacuum-sealed rack in the water bath and add an extra hour of cooking time.

What do you think?

Questions? Other ideas? Leave them in the comments section below.

Related Posts

Sous Vide Chicken Thighs with Garlic and Herb Pan Sauce
48 Hour Sous Vide Grilled Short Ribs (with sous vide Q&A)
Sous Vide Filet Mignon with Sous Vide Egg and Fresh Herb Salad
Sous Vide Chuck Steak (24 hours to tenderness)
Sous Vide New York Strip Roast With Bourbon Cream Pan Sauce
Sous Vide Tomahawk Ribeye Steak
If you're looking for something else, here is my index of Sous Vide Recipes.

Enjoyed this post? Want to help out DadCooksDinner? Subscribe to DadCooksDinner via email and share this post with your friends. Want to contribute directly? Donate to my Tip Jar, or buy something from Amazon.com through the links on this site. Thank you.

Instant Pot Chicken Pot Pie Soup (with Rotisserie Chicken Broth)

May 19, 2026 by Mike Vrobel 1 Comment

A bowl of Instant Pot Chicken Pot Pie soup with a slice of bread

Instant Pot Chicken Pot Pie Soup: Use every bit of a rotisserie chicken to make homemade broth, and then a soup. (Homemade broth is easy with an Instant Pot and a rotisserie chicken.) Serve with thick slices of crusty bread or with biscuits for the "pie" part of the pot pie, and you have a soup that is a one-pot meal.

A bowl of Instant Pot Chicken Pot Pie soup with a slice of bread
[feast_advanced_jump_to]

If you've followed my blog, you'll know how much I love making soup from a rotisserie chicken. (See my Instant Pot Rotisserie Chicken Noodle Soup (and video), Tortilla Soup, Lemon and Rice Soup (Avgolemono), and many others. This soup was inspired by the rotating hot soup menu at Heinens, a local grocery store. It's a great idea for a simple chicken soup - buy a rotisserie chicken and add potatoes, frozen peas and carrots, and some heavy cream. Done!

Ingredients Notes and Substitutions

  • Frozen peas and carrots: I like the pops of green and orange that frozen peas and carrots add to the bowl, but any frozen vegetable will work here - frozen peas, frozen mixed vegetables - whatever you want.
  • Fresh peas and carrots: I hate to say it, but frozen peas are better than fresh peas for 95% of the year - you have to cook fresh peas immediately or the sugar starts turning to starch. If you want fresh carrots, they work well in the recipe - add another large carrot or two in the "Sauté" section.
  • Wine substitute: Some of the alcohol simmers off, but there will still be a trace of alcohol in the soup. If you can't (or won't) drink any alcohol, Substitute more chicken broth. The wine adds a hint of bright flavor to the soup, but it's not necessary for a good recipe.
  • Potato substitutions: Yukon gold (yellow), red skin, and white skin potatoes are best in this soup - waxy potatoes hold up best to pressure cooking. You can skip the peeling if you're OK with the skins on the potatoes. Idaho (russet) potatoes cook up floury, and tend to crumble into the broth.
  • Store-bought broth: If you don't want to make the homemade broth, you can use low-sodium store-bought broth. The soup won't be as good, but it will be quick. But you'll need chicken meat, either leftover cooked chicken or raw chicken - see below.
  • Make ahead broth: The broth can be made ahead - it will refrigerate for a few days, or can be frozen for up to six months. Or, if you have leftover broth from another recipe, it will also work.
  • Raw chicken: If you are using make-ahead broth or store-bought broth, you won't have the chicken breasts from the rotisserie chicken for the soup. Buy 1 pound of boneless skinless chicken thighs (preferable) or chicken breast, and cut them into 1-inch cubes or ½-inch thick strips. Add them with the broth and the potatoes, and everything else in the recipe works the same.

Variations

  • Thickened soup: This recipe has a thin broth - it is a soup after all. If you want a thicker, more gravy-like broth (closer to a pot pie), whisk ¼ cup of cornstarch with ¼ cup of cold water to make a cornstarch slurry, then whisk the cornstarch slurry into the soup right before serving.
  • Thanksgiving Leftovers Pot Pie Soup: Speaking of make-ahead broth - make some Instant Pot Turkey Bone Broth with the turkey carcass after Thanksgiving, replace the shredded chicken with shredded leftover turkey, and you have Instant Pot Turkey Pot Pie Soup.

Step-by-step pictures of Instant Pot Chicken Pot Pie Soup.

Make the chicken broth with the rotisserie chicken carcass

Everything in the pot for Instant Pot Rotisserie Chicken Broth

Pressure cook for 1 hour, then strain out the broth

Sauté the aromatics

Pouring wine into the softened aromatics

Sauté some onion, carrot, and celery in butter, then simmer a little bit of wine in the pot

Everything in the pot

Stirring broth and potatoes into the pot

Add the chicken broth and potatoes to the pot, and lock the lid

Pressure cook for 10 minutes

Instant Pot Set to 10 minutes at high pressure with a natural release

Pressure cook for 10 minutes

Heat the peas and carrots and stir in the cream

Chicken meat and frozen peas into the cooked soup to reheat

Stir in frozen peas and carrots, shredded rotisserie chicken breast meat, and cream. Enjoy!

Scaling

This recipe just fits in a 6-quart pressure cooker. If you want to double the recipe, it can be doubled if you have an 8-quart pressure cooker. It can also be halved to fit in a 3-quart pressure cooker.

Make Ahead and Leftovers

To make the soup ahead, make the rotisserie chicken broth and shred the chicken breasts. Store both, covered, in sealed containers - they'll last for a few days in the refrigerator, or for up to six months in the freezer. Thaw the broth (I put it in the microwave) and continue with the "Sauté the aromatics" step.

Soup makes great leftovers. I freeze it in 2-cup containers so I have lunch-sized portions whenever I need them.

What to Serve with Instant Pot Chicken Pot Pie Soup

Soup, salad, and bread are a classic pairing for a reason - they're a hearty, balanced meal - so that's what I serve. To simulate the pie crust, serve with a crusty bread or biscuits. Biscuits are a better substitute for a pie crust, but bread is easier. (I'm not a baker, so I don't have a recipe to share for the bread or the biscuits. My wife is the baker in the family, and makes the bread or biscuits. When I'm on my own, I'll buy a French baguette from the grocery store and slice it on the diagonal for topping the soup).

Frequently Asked Questions

Can I Skip the Homemade Broth Step?

Yes! The soup won't be as good without homemade broth, but it's not absolutely necessary. (And I know what it's like to need to get dinner on the table as soon as possible). Skip the broth step and substitute 8 cups of store-bought low-sodium chicken broth, and add a 1-pound pack of "stir-fry cut" raw chicken breast with the broth before pressure cooking. (Or cut chicken breasts into ½-inch strips yourself.)

Do I have to use a rotisserie chicken?

No! If you have leftovers from a roast chicken dinner, they are a perfect substitute - just save some of the meat to add to the broth. If you want to use raw chicken, buy 2 pounds of chicken wings to replace the rotisserie chicken carcass in the Broth step, and a 1-pound pack of "stir-fry cut" raw chicken breast with the broth before pressure cooking.

Why is this soup not thick like a chicken pot pie?

It's got way too much broth to be as thick as a pot pie - that's why it's a soup. To thicken it up, use a cornstarch slurry. Whisk ¼ cup cornstarch with ¼ cup cold water, and stir it into the soup right before serving. It will still not be as thick as a pot pie, but it will be a lot thicker.

Can I use the "soup" button on my Instant Pot?

I prefer the Manual option - the Manual button (or Pressure Cook button, or Pressure Cook- Custom button, depending on which Instant Pot you own). I want direct control over the time when I'm cooking, and when I'm sharing instructions. (Different models of pressure cooker can do different things with their "soup" button). Stick with my timings for the broth and soup steps if you want the best results.

Is the wine necessary?

The wine adds a hint of acidity to the soup that helps bring out the other flavors, but it's not necessary. Skip it if you don't want wine in your soup.

Related Posts

I really enjoy using this rotisserie chicken technique with a variety of flavors. For more options, try my Instant Pot Rotisserie Chicken and Lentil Soup, Instant Pot Chicken and Wild Rice Soup (with Rotisserie Chicken Broth), or Instant Pot Rotisserie Chicken Jalapeno Popper Soup. Or try my Instant Pot Rotisserie Chicken Gumbo Soup, Instant Pot Chicken and Herb Soup with White Beans and Acini di Peppe, or Instant Pot Buffalo Chicken Soup.

If you're looking for something else, here is my index of Instant Pot and Pressure Cooker Recipes.

Enjoyed this post? Want to help out DadCooksDinner? Subscribe to DadCooksDinner via email and share this post with your friends. Want to contribute directly? Donate to my Tip Jar, or buy something from Amazon.com through the links on this site. Thank you.

Instant Pot Shrimp Etouffee

May 12, 2026 by Mike Vrobel 23 Comments

A bowl of Instant Pot Shrimp Etouffee with rice

Instant Pot Shrimp Étouffée: Use your Instant Pot to make a rich, buttery Shrimp Étouffée. A foolproof guide to dark roux, easy homemade shrimp stock, and perfectly tender shrimp in one pressure cooker.

A bowl of Instant Pot Shrimp Etouffee with rice
[feast_advanced_jump_to]

Étouffée - say it with me - Eh-too-FAY. Étouffée is the famous Cajun and Creole stew, thickened with roux, simmered with stock, and used to coat shrimp. I use a pressure cooker to speed the recipe along, making the shrimp stock and simmering the étouffée broth. Instead of taking all afternoon, the recipe takes…um…OK, most of an evening. Making roux can't be rushed. Please, pay attention while you're making roux.

Um…not that I know anything about burnt roux. I would never try to multitask and mince the trinity while the roux is cooking, and scorch the flour in the pot. Not me, nope, never happened.

Ingredients Notes and Substitutions

Homemade Shrimp Stock: It's quick and easy to make in your Instant Pot, all you need is the shells from the shrimp - if you buy easy-peel shrimp or shell-on shrimp, you've got the shells already, why not use them? Well, OK, you're busy, I get that. Substitute store-bought seafood broth, or if you're really desperate, chicken broth. (As always I recommend homemade chicken broth, but if you're not making shrimp broth, I assume you won't be making chicken broth, so low-sodium chicken broth is fine.)
26-30 count shrimp: This is my preferred size, the oxymoronic "Jumbo" shrimp, which provides the best balance between shrimp size and time spent peeling. Shrimp "count" is the best way to tell how big the shrimp are - the count is the number of shrimp per pound. Any size from colossal (16-20 count) down to medium (51-60 count) will work in this recipe. I'd avoid larger or smaller shrimp; larger is too big to fit on a spoon, and I rarely find shell-on smaller shrimp at my local store. Speaking of shell-on…
Shell on or Easy Peel Shrimp: Since I want the shells for the stock, I buy shrimp with the shell on. Most of the time that means easy peel shrimp at my local grocery store. Also, I think shell-on shrimp tastes a little better, because the shell protects the shrimp meat from freezing, but it's a subtle difference.
Can I use frozen shrimp without thawing it? Yes, but you'll have to use store-bought seafood broth, since frozen shrimp means you won't be able to peel the shells off.
Homemade Cajun Spice Rub vs Store Bought: I make my own homemade cajun spice rub, which is salt-free, so I can control the salt levels separately. That said, I also have a jar of cajun seasoning in my pantry (my current favorite is Slap Ya Mama TKLINK), for seasoning emergencies. If you use a store-bought spice rub or seasoning, it's going to have salt in it already, so skip the salt as directed in the ingredients and/or instructions.
The trinity of aromatics: onion, celery, and green bell pepper: You need all three for true Cajun flavor. You can substitute a red bell pepper or yellow bell pepper if you can't find green bell peppers, but green bell peppers have a slightly bitter taste that works better in this dish.

How to make Instant Pot Shrimp Étouffée in pictures

Make shrimp stock, pressure cook for 10 minutes

Shrimp stock ingredients ready to pressure cook

Put the shells from the shrimp in the pot with a chopped onion, carrot, and rib of celery. Add crushed garlic, a bay leaf, a sprig of thyme, salt, and a quart of water, and pressure cook for 10 minutes with a natural release. Strain the broth through a fine mesh strainer and save for later in the recipe.

Make a roux

Peanut-butter brown roux in an Instant Pot

Melt the butter using Sauté mode - medium in the Instant Pot. When the butter stops foaming, whisk in the flour and some cajun seasoning, and keep whisking until the roux turns brown, the color of peanut butter.

Sauté the trinity

Sauteing the trinity of onion, celery, and bell pepper in the roux

Add a minced onion, rib of celery, green bell pepper, and garlic. Sauté, stirring and scraping to make sure nothing is sticking, until the onion softens.

Broth and tomatoes into the pot, pressure cook for 10 minutes

Pour the broth into the pot and add a can of diced tomatoes. Lock the lid and pressure cook for 10 minutes with a natural release

Cook the shrimp

Cooked shrimp should be pink and white, not translucent

Stir the shrimp into the pot and let them cook in the hot étouffée broth using keep warm mode, about 5 minutes.

Season and serve

A bowl of Instant Pot Shrimp Etouffee with rice

Stir minced parsley and ground pepper into the pot, and serve the shrimp étouffée with white rice, a sprinkling of more minced parsley, and a bottle of Cajun hot sauce. Enjoy!

Scaling the recipe

You can easily double this recipe in an 8-quart Instant Pot. Doubling it in a 6-quart Instant Pot puts it too close to the max fill line. You can halve the recipe if you need to fit it in a 4-quart Instant Pot.

Adapted from: Emeril Lagasse, Louisiana Real and Rustic

Notes

  • Two-pot cooking - do the shrimp stock and roux at the same time: You can speed up the recipe by doing steps 2 and 3 (make the roux, saute the aromatics) in a separate pot while the shrimp stock is pressure cooking. After straining the stock, pour a cup or two into the pot with the roux and aromatics to loosen them up, then pour everything back into the pressure cooker and continue with step 4, pressure cook the étouffée broth.
  • Making Roux: A dark roux is the key to étouffée, and the tricky part of this recipe. It's essential for the flavor, though, so don't rush it - keep stirring and it will get there. Also, have the aromatics (the cajun trinity of onion, celery, and bell pepper) ready to go, so you can add them in when the roux is ready, or the roux might burn. (If they're not ready, take the pot off the heat until the aromatics are chopped. For an Instant Pot, remove the pot liner and set it aside on a trivet.)
  • Why a natural release instead of a quick release? Two reasons. For the shrimp stock, a natural release traps more of the flavor molecules in the pot, resulting in a more flavorful stock. For the étouffée broth, the natural release is gentle, where a quick release throws the pot into a sudden boil. Because of the extra starch in the broth, a quick release can sometimes result in starch spitting out of the release valve. That's why I recommend you wait for 15 minutes before quick releasing if you're in a hurry - the pot will have cooled most of the way, and there's less chance of spitting starch.

What do you think?

Questions? Other ideas? Leave them in the comments section below.

Related Posts

  • Pressure Cooker Chicken Gumbo
  • Sautéed Shrimp
  • Cajun Spice Rub
  • Instant Pot Salmon and Rice
  • Instant Pot Red Beans and Rice
  • Instant Pot Dirty Rice
  • Instant Pot Brown Rice Jambalaya
  • My List of Instant Pot and Pressure Cooker Recipes

Enjoyed this post? Want to help out DadCooksDinner? Subscribe to DadCooksDinner via email and share this post with your friends. Want to contribute directly? Donate to my Tip Jar, or buy something from Amazon.com through the links on this site. Thank you.

Instant Pot Cheddar Cheese Risotto

May 5, 2026 by Mike Vrobel Leave a Comment

A bowl of Instant Pot Cheddar Risotto (with peas)

Instant Pot Cheddar Cheese Risotto recipe. Is it authentic Italian? No. But it is fantastic, creamy and rich. And, thanks to pressure cooking, there is no stirring required.

A bowl of Instant Pot Cheddar Risotto (with peas)
[feast_advanced_jump_to]

I saw cheddar risotto on the menu of a local restaurant and thought "that doesn't sound very Italian now, does it." (I'm sure you're shocked, shocked to find that I'm a bit of a food snob.)

It might not sound Italian, but I couldn't shake the idea. Sharp cheddar and creamy risotto rice? I had to try it. Turns out, that local restaurant had a great idea for fusion cuisine. Cheese and rice go great together, even if they are a cultural cross-pollination. I added peas because I like the burst of green vegetable to balance the rich and creamy rice, but that's entirely optional.

(Apologies to this unnamed restaurant. It's a great idea, and I can't remember its name. I've searched my google history to no avail.)

Ingredients Notes and Variations

Risotto Rice: Risotto needs starchy short grain rice. Arborio rice is the traditional rice that is easiest to find in my local grocery stores. Carnaroli rice and Vialone Nano rice are also great, probably a touch better than Arborio. They're not so much better that you should go hunting for them, but if they are easy to find, use one of them instead of the Arborio. Other types of short grain rice are OK, and can be used in a pinch, but Arborio is much better for risotto. Don't use medium grain rice or long grain rice - it's not starchy enough for risotto.

Cheddar cheese: I want an extra sharp cheddar cheese for my risotto - white cheddar is fine, but I like the look the orange cheddar gives the risotto. If you can find extra sharp cheese pre-shredded, it's fine. My local store doesn't carry it, and cutting the block of cheddar into small cubes wasn't hard. (And, yes, I know this is not an authentic Italian risotto; cheddar cheese is not Italian. If you want an authentic recipe, try one of my other risotto recipes, like my Instant Pot Risotto Milanese.)

Smokehouse variation: Use smoked cheddar, and replace the peas with bacon bits.

Frozen Peas (are optional): If you can find them, smaller "petite frozen peas" are best in this recipe - the smaller peas match the size of the rice. That said, regular sized peas are fine.
I use frozen peas in almost all of my pea recipes - peas go from fresh to starchy very quickly, so fresh peas are only good for a short window of time in the summer. Frozen peas, picked at the peak of ripeness and frozen immediately, are almost always better than fresh peas.

If you're a pea-hater, or just want a plain risotto, skip them - they're optional.

Edamame for more protein: Edamame make a great substitute for the peas, with more protein. (Edamame is the Japanese name for soybeans.) Buy frozen peeled edamame, and substitute it for the peas.

Chicken broth: Of course, homemade chicken broth is best. (And, if you have an Instant Pot, you should make your own broth. Cheat and make Instant Pot Rotisserie Chicken Broth if you have to.) If you use store-bought broth, skip the ½ teaspoon of fine sea salt added to the broth. Store-bought broth is much saltier than homemade broth.

How to make Instant Pot Cheddar Risotto in Pictures

Sauté the onion, toast the rice

Sautéed onions and toasted rice in the instant pot

Melt 2 tablespoons of butter using sauté mode, then sauté a small minced onion until soft, add the rice, and sauté the rice until it turns translucent at the edges.

Stir in the broth

Broth into the pot

Stir the broth into the pot, scraping the bottom with a flat-edged wooden spoon to make sure nothing is sticking

Pressure cook on high for 5 minutes with a quick release

Pressure cook on high for 5 minutes with a natural release

Pressure cook on high pressure for 5 minutes with a quick release

Stir in the cheddar, peas, and butter

Add the diced cheddar, frozen peas, and butter, and stir until the cheese is melted and the peas are heated through. Enjoy!

Frequently Asked Questions

  • Burn warning: I don't get burn warnings with my risotto technique, which is a little surprising when I think about it. Instant Pot Rice recipes like to get burn warnings (like my personal nemesis, Chicken and Rice), because the starch sinks to the bottom of the pot and scorches. I think it's the extra broth in my risotto technique - a 2:1 ratio of liquid to rice is what you want for the creamy, almost soupy texture of risotto, which thins out the starch enough that it doesn't get a chance to burn in the pot. Also, that flat-edged wooden spoon is your best friend for this recipe - make sure nothing is sticking to the bottom of the pot before you lock the lid.
  • Can I use brown rice? Brown rice doesn't work well for risotto. The point of risotto is the starchy, creamy texture, and brown rice protects its starch inside its bran coating. I wouldn't use it for the same reasons I won't use long-grain rice in my risotto.
  • Why didn't my cheese melt smoothly? If you used pre-shredded cheese, it comes with a potato starch coating, which can interfere with melting. (I use pre-shredded cheese all the time, but I've had readers with this issue.) If this is happening to you, switch to a block of cheese, and shred or cube it yourself.
  • Can I add a protein to this recipe? You can, but that changes the technique a bit. Check out my Instant Pot Chicken Risotto or Instant Pot Shrimp Risotto recipes for examples with protein, and swap in the cheddar cheese for the cheese in those recipes.
  • My risotto is too soupy? It thickens as it sits after cooking - if you let it rest for an extra five minutes, it will thicken up nicely.

Storing Leftovers

Risotto will last for a day or two in the refrigerator, or for up to 3 months in the freezer (I store it in 2-cup containers). But, for food safety, you have to make sure your rice is reheated all the way through.

Cooked rice does not keep for long - it carries bacteria spores (Bacillus cereus) that multiply in warm temperatures. If you need to store cooked rice, cool it down quickly in the refrigerator, or freeze it within an hour of cooking. Store refrigerated rice for 2-3 days or frozen rice for up to 3 months, and make sure to reheat it completely (to at least 165°F) before eating. (Source: Safe Handling of Cooked Rice, University of Wisconsin Extension).

What to Serve with Cheddar Cheese Risotto

I serve cheddar risotto with peas as a main dish - it's a sinker - with a spring mix salad and a side vegetable (I like broccoli rabe with it, or asparagus when it's in season.) It also makes a great side dish for simple roast meats.

Related Posts

Instant Pot Radicchio Risotto (Risotto al Radicchio)
Instant Pot Risotto with Pork and Cinnamon (Risotto All'Isolana)
Instant Pot Mushroom Risotto (Risotto ai Funghi)
If you're looking for something else, here is my index of Instant Pot Rice Recipes, and my entire index of Instant Pot (Pressure Cooker) Recipes.

Enjoyed this post? Want to help out DadCooksDinner? Subscribe to DadCooksDinner via email and share this post with your friends. Want to contribute directly? Donate to my Tip Jar, or buy something from Amazon.com through the links on this site. Thank you.

Instant Pot Thai Red Beef Curry

April 28, 2026 by Mike Vrobel 24 Comments

A bowl of Thai Red Beef Curry

Instant Pot Thai Red Beef Curry. Do you have an Instant Pot, a can of Thai red curry paste, a can of coconut milk, and a flat iron steak? You can have Thai red beef curry in under an hour. This is one of my go-to weeknight dinner recipes from my Instant Pot.

A bowl of Thai Red Beef Curry
[feast_advanced_jump_to]

I loved the Thai green chicken curry you did the other day - but I couldn't find green curry paste at my grocery store. They had red curry paste - is that OK?

Of course it is! My pressure cooker curry recipes follow a basic technique: sauté the aromatics, fry the curry paste and coconut cream, stir in the protein and the rest of the coconut milk, pressure cook, then simmer any last minute vegetables and serve. The interesting parts of the recipes are the variations - what curry paste, meat, and vegetable combination do you want to use?

Flat iron steak (from my friends at Certified Angus Beef) is my favorite cut for Instant Pot curry. Flat iron steak is cut from the chuck blade roast. It is as tender as steak, but has enough connective tissue to hold up to pressure cooking. It's also the perfect thickness to make bite sized beef strips - I cut it in half lengthwise, then crosswise into ½ inch thick pieces.

Ingredients for Thai Red Beef Curry

Ingredient Notes and Substitutions

  • Curry Paste: My favorite curry paste for this recipe is Maesri Thai Red Curry Paste, but any brand of curry paste will work. I have to make a trip to my local Asian market for it, though.
    The other good brand at my local Asian markets is Mae Ploy Red Curry Paste, but it comes in large 14-ounce tubs, and I don't use red curry paste often enough to need that much at once.
    My local grocery stores only carry Thai Kitchen red curry paste; I prefer Maesri or Mae Ploy, but Thai Kitchen is good in a pinch.
  • Can I use curry powder instead of curry paste? That changes the recipe completely - curry paste and curry powder have very different flavors. If you have no choice, stir 2 tablespoons of curry powder in after sautéing the onions, and toast the curry powder and onions for a minute. Then add the whole can of coconut milk, and continue with the "Everything in the pot" step.
  • Mild vs Hot Curry: I consider Thai red curry paste a medium-hot level of heat. If you want less heat, cut back on the curry paste - use ¼ cup/2 ounces of curry paste instead of the whole 4-ounce can or jar.
  • Coconut Milk: My preference is for full-fat coconut milk, because I want to fry the curry paste in the thick layer of coconut cream on the top of the coconut milk. In the recipe, I scoop the heavy cream layer from the top of the can of coconut milk, leaving the coconut juice in the can for later in the recipe. (I use the whole can, but in two parts).
    If you are looking to cut calories, light coconut milk will also work, but see the note below on "my coconut milk doesn't have a cream layer".
    One thing to avoid is sweetened coconut milk - you want unsweetened coconut milk for this recipe.
  • Fish sauce and soy sauce: Why add both fish sauce and soy sauce? Both add depth (umami) and salt to the recipe, with different flavors; I like the mix of both.
    Thai fish sauce has a very strong smell, which some people don't like. (When they were younger, my kids were not fans.) But, fish sauce is one of the key flavors to Thai cuisine. If you don't like the smell, replace all of the fish sauce with soy sauce. It won't be authentic, but if the option is scaring the kids away…
  • Bamboo shoots: I like the crunchy texture the bamboo shoots add to the recipe - they hold up to the pressure cooking. You can skip them if you want, or add an extra bell pepper to replace them.
  • Other cuts of beef: Flat iron steak is a convenient shape and size to slice up for this recipe, but it is a little more expensive. To save money, buy a chuck roast steak instead. It's the same cut, basically, but you'll have to do more knife work to get rid of the fat and cut the pieces to size. Bottom round roast is another good substitute. No matter what you get, cut it into ½-inch thick by 2-inch long strips. (The thickness is what determines the cooking time.)
    Pre-cut "stir fry beef" strips are perfect for this recipe - use as directed.
    Pre-cut "stew meat" cubes OK, and will cook in the same amount of time as long as the pieces are 1-inch cubes or less.
  • Chicken Broth: I like the extra depth chicken broth brings to the recipe, especially since I always have some homemade Instant Pot Chicken Broth on hand. But, ½ cup is not much liquid - store-bought broth is fine, or you can just substitute water.

How to make Instant Pot Thai Red Beef Curry in pictures

Sauté the onion, bell pepper, garlic, and ginger

Sautéing onions, red bell peppers, garlic, and ginger in an Instant Pot

Heat a tablespoon of oil, then sauté the onion, bell pepper, garlic, and ginger until the onion starts to soften.

Fry the curry paste in the cream from the coconut milk

Frying thai red curry paste in coconut cream in an Instant Pot

Add the cream from the top of the can of coconut milk, stir in the red curry paste, and cook, stirring often, until the curry paste starts to darken.

Everything in the pot, pressure cook for 12 minutes with a Natural release

Flat Iron Steak sliced thin

Sprinkle the beef with the fine sea salt. Stir the beef, bamboo shoots, chicken stock, fish sauce, soy sauce, and the rest of the can of coconut milk into the pot. Lock the lid and pressure cook for 12 minutes with a Natural Pressure Release.

Season and serve

Unlock the lid, stir in the lime juice, and serve with white rice, minced basil and cilantro, and lime wedges. Enjoy!

Equipment

  • 6 quart pressure cooker
  • Flat-edged wooden spoon

Tips and Tricks

  • Don't shake the can of coconut milk: You want the solid layer of cream on the top to stay separate from the liquid underneath. That lets you fry the curry paste in the coconut cream, then add the coconut liquid later.
  • My coconut milk doesn't have a cream layer:If your coconut milk is mixed, don't bother with frying the curry paste step. Instead, stir the curry paste and coconut milk into the onions, and keep stirring until the curry paste has blended into the coconut milk, then continue with the "everything in the pot" step.
  •  Can I use frozen stir-fry strips? You can, but increase the pressure cooking time to 20 minutes at high pressure.

Leftovers and storage

This curry keeps in the refrigerator for a few days, or in the freezer for months. I like to make freezer lunches in 2-cup containers so they are easy to reheat and serve. (It's best if you make fresh rice, but sometimes I add ½ cup of rice to the 2-cup container so I have an easy heat-and-serve meal.)

What do you think?

Questions? Other ideas? Leave them in the comments section below.

Related Posts

Thai curry is traditionally served with jasmine rice - see my Pressure Cooker White Rice recipe if you need cooking instructions. Once you make this recipe, you'll know the basic technique of my other Thai curry recipes, like Pressure Cooker Thai Green Chicken Curry, Pressure Cooker Massaman Beef Curry, or Instant Pot Shrimp Curry. For a similar technique with Chinese flavors, try my Instant Pot Pepper Steak Recipe.
My list of Instant Pot (Pressure Cooker) Recipes

Enjoyed this post? Want to help out DadCooksDinner? Subscribe to DadCooksDinner via eMail or RSS reader, recommend DadCooksDinner to your friends, and buy something from Amazon.com through the links on this site. Thank you.

Air Fryer Asparagus

April 21, 2026 by Mike Vrobel 1 Comment

Air Fryer Asparagus cooked and on a platter

Air Fryer Asparagus is a quick and simple side dish. Air frying brings out the sweetness in asparagus, and it is ready in 10 minutes, perfect for a weeknight vegetable.

Air Fryer Asparagus cooked and on a platter
[feast_advanced_jump_to]

I love roasted vegetables, but I only make them when I'm already roasting the main course. Why? It seems wasteful to turn on the oven just to roast a vegetable side dish. That's one of the big advantages I've found with an air fryer - it's just a small convection oven. It heats up quickly, doesn't use much energy, and is perfect for a quick roasted vegetable side.

Air Fryer Asparagus Ingredients

Ingredient Notes and Variations

Asparagus bunch sizes: A bunch of asparagus at my grocery store is about 12 ounces, sometimes as much as a pound.

Asparagus spear sizes: The cooking time depends on how thick the spears are. My "medium" asparagus size is about the width of a pencil, and takes 10 minutes at 400°F. (This is usually what I get at my grocery store - but not always.) If it's noticeably smaller than that, I call it "small" asparagus, and cook it for 8 minutes at 400°F. If it's noticeably larger, about the width of a Sharpie marker, I call it large asparagus and cook it for 12 minutes. To check if the asparagus is cooked, take one out of the air fryer and bite into the stem end - the center should be cooked all the way through. (I really only check large asparagus for doneness after 12 minutes - I've seen some jumbo spears when they're in season at my local farmers market, and they've taken even longer to cook.)

Fancy Variations:

  • French style: Mix up a quick vinaigrette and drizzle it over the asparagus after cooking.
  • Italian style: After cooking, squeeze the juice of ½ a lemon over the asparagus, then sprinkle with shredded parmesan cheese. (Bonus points if you shred it at the table, to show off for your diners).
  • Greek style: After cooking, squeeze the juice of ½ a lemon over the asparagus, then sprinkle with crumbled feta cheese. (If I'm feeling fancy I'll use Mediterranean Herb feta crumbles for a little extra flavor).
  • Szechuan style: Replace the olive oil with vegetable oil, and use Szechuan pepper-salt instead of the all-purpose seasoning blend, and sprinkle with some red pepper flakes too. After cooking, drizzle with 1 teaspoon of soy sauce and ½ teaspoon of toasted sesame oil.
  • Prosciutto wrapped asparagus: If you have thick asparagus, this is a really fancy way to serve it. (I love to serve this as an appetizer - single spears wrapped with prosciutto make a great finger food). Skip the oil and seasoning blend - the prosciutto fat will render and replace the oil. Buy 1 thin slice of prosciutto for every 2 asparagus spears. Split each piece of prosciutto in half lengthwise. Wrap each asparagus spear with a half-piece of prosciutto, starting at the bottom of the spear and spiraling up to the top, leaving the asparagus tip uncovered. (When wrapping, think of a candy cane or a barber's pole.) Gently lay the wrapped asparagus spears in the air fryer basket in a single layer. Air fry for 8 minutes, or until the prosciutto is browned and a little crispy.

Trimming or snapping asparagus

Step by step pictures of snapping and trimming a bunch of asparagus

Asparagus is tough and woody at the root end, and it needs to be trimmed. The traditional way to do this is to snap off the tough end of each asparagus spear, by grabbing the spear in the middle and at the root end and bending until it snaps. The spear will naturally break at the end of the tough part, leaving you with the good part of the spear. Snapping a whole bunch of asparagus takes too long for a weeknight, so I take a shortcut. I pull one spear out of the bunch, and snap it to use it as a guide. Then I slice the rest of the root ends off of the bunch where that one spear snapped. (This works best when I leave the rubber band holding the bunch together near the tips - it holds them all in place while I slice.) See the step-by-step picture below for trimming asparagus.

Frequently Asked Questions

Scaling

One bunch of asparagus from my grocery store is about 12 ounces. I can go up to a pound before I'm overfilling my 6-quart air fryer basket - I want the asparagus in a 1- to 2-spear deep layer when I put it in the basket; it will shrink down to about a single layer as it cooks. Any deeper than that and the asparagus will take longer to cook, because the extra spears block the middle layers from the convection heating of the air fryer. If you need to double the recipe in a 6-quart air fryer, add an extra five minutes to the cooking time, then check the asparagus and keep cooking if the spears are not all cooked through. (Or use a toaster-oven sized air fryer, which has more cooking area in its rack. Or use a convection oven - see "no air fryer" below.

No Air Fryer? No Problem

If you have a convection oven, it is basically a jumbo air fryer. Preheat it to 400°F, put the asparagus on a rack over a rimmed baking sheet, and follow the instructions. If you don't have a convection oven, a regular oven preheated to 400°F will work, but increase the cooking time to 15 minutes for thin asparagus, 20 minutes for medium asparagus, and 25 minutes for thick asparagus.

If you want to make the asparagus on the stovetop, use my Steam-Sautéed Asparagus for another easy recipe.

I ate Asparagus, and now my pee smells funny...

I know, a little gross for a food blog, but I can't help myself. It's chemistry! Asparagus contains asparagusic acid, a sulfur-containing compound unique to asparagus. It breaks down when you digest the asparagus, and that's why you get that strange odor the next time you go to the bathroom. Don't worry! It's just the asparagus. (Source: Why Asparagus Makes Your Urine Smell | University of Utah Health)

Can I use frozen asparagus?

I don't recommend it. This recipe works best with fresh asparagus.

Do I really need to preheat the air fryer?

Yes. Preheating the air fryer gets the basket hot, because we want the asparagus to immediately start to roast when it goes in the basket.

Air Fried for 10 minutes

Related Posts

For some other air fryer recipes, try my Air Fryer Frozen French Fries, Air Fryer Breaded Chicken Thighs and Potatoes, or Quick Air Fryer Tilapia (with Spice Rub).

If you're looking for other Asparagus options, try Grilled Asparagus with Whole Grain Mustard Vinaigrette or Shaved Asparagus and Parmesan Salad. Or if you want to get fancy, try my Sous Vide Asparagus or Instant Pot Asparagus Risotto.

If you're looking for something else, here is my index of Air Fryer Recipes, and my All Recipes Index.

Enjoyed this post? Want to help out DadCooksDinner? Subscribe to DadCooksDinner via email and share this post with your friends. Want to contribute directly? Donate to my Tip Jar, or buy something from Amazon.com through the links on this site. Thank you.

Instant Pot Chicken With 40 Cloves of Garlic

April 14, 2026 by Mike Vrobel 14 Comments

A plate of Instant Pot Chicken with 40 Cloves of Garlic

Instant Pot Chicken With 40 Cloves of Garlic. The classic Provencal farmhouse recipe, sped up in a pressure cooker. It's simple if you have pre-peeled garlic at your local grocery store, and worth the effort even if you have to peel all 40 cloves by hand.

A plate of Instant Pot Chicken with 40 Cloves of Garlic
[feast_advanced_jump_to]

I love chicken thighs. (Bring on the dark side...of the chicken!) I love garlic. I love French farmhouse cooking. I love my Instant Pot. This recipe is a love-fest of all these things at once. I know 40 cloves of garlic sounds crazy, but try it before you pass judgement. I make it often, and it's in my regular recipe rotation for a reason.

Ingredient Notes

Chicken Thighs

Use bone-in, skin-on chicken thighs in this recipe. Dark meat chicken stands up to the pressure cooker better than white meat, and thighs give me a much higher meat-to-bone ratio than drumsticks. That said, if all you have is chicken breasts (bone-in, skin-on please), the cooking time is the same; if you use drumsticks, cut the pressure cooking time back to 20 minutes at high pressure.

Boneless Skinless Chicken Thighs

I prefer bone-in chicken for this recipe, but you can use boneless skinless chicken thighs. Brown the boneless skinless chicken thighs on one side (instead of the skin side of the thighs in the recipe), and cut the pressure cooking time back to 15 minutes at high pressure.

Frozen Chicken Thighs?

This recipe won't work as well with frozen chicken thighs, but you can use them if you have to. (The thighs have to be individually frozen - a big block of frozen thighs just won't work.) Skip the brown the chicken thighs step and move on to lightly toasting the garlic in the tablespoon of olive oil. Increase the pressure cooking time to 35 minutes to cook the frozen thighs.

Thickening

I stir in a flour slurry to thicken the sauce at the end. Pressure cooking results in a thin sauce, because there is no evaporation to thicken up the liquid. For this recipe I prefer a flour slurry, but you can also do a corn starch slurry if you want to skip the extra simmering. Whisk 2 tablespoons of corn starch and ¼ cup of cold water, and whisk the slurry into the pot liquid. Serve the pot liquid immediately - no extra simmering needed.

Wine substitutions

Almost any white wine will work in this recipe; I stay away from very sweet wines, but anything else will work. Pinot Grigio and Sauvignon Blanc are two I often reach for - look for dry and cheap. (I will buy a small box wine if I only need it for this recipe - they're cheap and more than good enough for cooking.)

Note that simmering the wine will boil off some of the alcohol, but not all of it. If you are strict about not having alcohol, replace the wine with more chicken stock and skip the "bring the wine to a simmer" step.

Garlic

Garlic is so important to this recipe that I gave it its own section:

Garlic Notes

Chicken with 40 cloves of garlic is easily translated to pressure cooking…but, oh, the garlic peeling. Most 40 cloves recipes start with the instructions "peel the cloves from 3 heads of garlic". That's a lot of peeling. Sure, I can do it, but there are two good shortcuts:

Pre-peeled garlic

Pre-peeled garlic is here to make this an easy recipe. Check the refrigerator case in your grocery store - you don't want garlic in oil; you want whole, peeled cloves. Also - make sure the container looks dry, and there are no yellowing cloves. Pre-peeled garlic is easy, but it doesn't last - it's only good for a few days after it's peeled.

Shake unpeeled cloves between two metal bowls

I've tried the "shake the garlic between two metal bowls" trick, and while it does help, it doesn't work as well for me as it does in online videos, where they get all the cloves peeled with 20 seconds of shaking. I still wind up having to peel a bunch of the cloves by hand - but it does speed up the process.

40 cloves, 41 cloves, whatever it takes

I don't actually count out 40 cloves of garlic when I buy pre-peeled cloves. I buy a 6-ounce package of pre-peeled garlic and call it close enough. If all your store carries is a 4-ounce package, that's good enough - you don't need exactly 40 cloves for this recipe to work. A little more or less will be fine.

Garlic in oil

Please don't. Garlic cloves in jars of oil don't have anywhere near the flavor of fresh cloves.

But…isn't that a lot of garlic?

Yes it is. And it's great! The garlic mellows and softens as it cooks, and the cloves delicious to eat with the chicken. (If you don't like the taste of garlic, you should probably skip this recipe. But if you don't like garlic, how did you get this far into a recipe with "40 cloves of garlic" in the title?)

Pressure Cooker Chicken With 40 Cloves of Garlic | DadCooksDinner.com
Pressure Cooker Chicken With 40 Cloves of Garlic

What to serve with Instant Pot Chicken with 40 Cloves of Garlic

I serve this with mashed potatoes or roasted baby potatoes, so I can use the pot liquid as a gravy. I also love to serve it with bread (a French baguette cut into slices is traditional), so I can scoop up a few of the soft garlic cloves and mash them onto the bread slices.

Scaling

This recipe scales up and down easily, except for the liquid. You need a cup of liquid to bring the Instant Pot up to pressure, so leave the ½ cup of wine and ½ cup of chicken broth, and scale all the other ingredients up or down. You can (just barely) double this recipe in a 6 quart pressure cooker, though it fits better in an 8 quart pressure cooker. If you want to fit it in a 3 or 4 quart pressure cooker, cut the ingredients in half (except for the liquids, like I said a few sentences ago).

Make ahead and Leftovers

This recipe is fine made ahead a day or two - it reheats well. I save leftovers in 2-cup containers, with a couple chicken thighs, garlic, and sauce; covered containers will last in the refrigerator for a few days, or in the freezer for up to six months.

What do you think?

Questions? Other ideas? Leave them in the comments section below.

Related Posts

If you're looking for some other Instant Pot Chicken, try my Pressure Cooker Chicken Stew, Pressure Cooker Teriyaki Chicken Drumsticks, or Instant Pot Chicken Cacciatore. Other great chicken recipes include my Air Fryer Breaded Chicken Thighs and Potatoes, Sear Roasted Chicken Breasts with Shallot Herb Pan Sauce, and Grilled BBQ Chicken Thighs.
Or check out my Instant Pot (Pressure Cooker) Recipes Index

Enjoyed this post? Want to help out DadCooksDinner? Subscribe to DadCooksDinner via email and share this post with your friends. Want to contribute directly? Donate to my Tip Jar, or buy something from Amazon.com through the links on this site. Thank you.

Coriander Fennel and Garlic Seasoning Blend

April 7, 2026 by Mike Vrobel Leave a Comment

Coriander Fennel and Garlic Seasoning - whole spices in a grinder

Coriander, Fennel, and Garlic Seasoning (CFG) blend. My favorite spice blend for fish, chicken, and veggies. Coriander, fennel, and garlic make a bright, versatile rub for any meal. Store these whole spices in a grinder for a fresh, aromatic punch that beats pre-ground every time.

Coriander Fennel and Garlic Seasoning - whole spices in a grinder
[feast_advanced_jump_to]

I like having seasoning blends ready in my pantry as a grab-and-go flavor to add to my meals. This blend is my favorite for fish and chicken: a blend of coriander, fennel, and garlic, with salt and pepper. I prefer Salt Pepper and Garlic (SPG) Seasoning or All-Purpose Seasoning for beef (especially SPG and steak), but this CFG seasoning works with almost everything else, especially on vegetables.

Equipment

  • A Spice grinder for whole grain spices (I like the vase grinders from Kuhn Rikon), or a jar with a shaker lid for pre-ground.
  • A funnel (to keep the spices contained when adding them to the grinder or shaker jar.)

Ingredients Notes and Substitutions

Different Spices: If you want to use other spices, go right ahead, but I particularly like this combination. A good alternative is to substitute cumin seed for the fennel seed - cumin and coriander go well together - and I'm working on a different spice blend for that combination.

Add some heat: If you want to add some spicy heat with this seasoning, add a tablespoon (or two) of crushed red pepper flakes with the spices.

Should I toast the spices? I don't toast the spices for seasoning blends, because they lose their flavors quicker after toasting. I want this seasoning blend to last in the pantry, so I leave the spices untoasted.

Can I substitute Kosher salt for the Coarse sea salt? Kosher salt doesn't work as well in a grinder as coarse salt, so I don't recommend it. (Kosher salt has flaky crystals, and they don't grind as evenly as the big chunks of coarse salt.) That said, if you have to, weigh out 65g of kosher salt to replace the ¼ cup of coarse sea salt.

Can I make salt-free Coriander Fennel and Garlic seasoning? Absolutely! Just skip the salt. (This is for my uncle Warren and anyone else on a low-sodium diet. Or when I'm brining or dry-brining, and I want to separate the salting from the seasoning.)

How to make Coriander, Fennel, and Garlic Seasoning in pictures

Coriander Fennel and Garlic Seasoning - whole spices mixed in a bowl

Mix up the seasoning

Combine all the ingredients in a large bowl and stir until thoroughly mixed. Store in an airtight container (for pre-ground spices) or spice grinder (for the whole-grain spice version).

How to store Coriander, Fennel, and Garlic Seasoning

If you make it with ground spices and keep it in an airtight container, it will last for a year before it loses its flavor. The grinder version will keep even longer than that; the salt and peppercorns last for a long time. The coriander seed, fennel seed, and minced garlic will lose some flavor after a while, but they keep better than ground garlic powder and onion powder. It will last for at least two years, probably more, before losing too much flavor.

What should I season with Coriander, Fennel, and Garlic Seasoning?

It is fantastic on seafood - It's a make-ahead rub from my favorite grilled salmon recipe, Grilled Salmon With Coriander-Fennel Spice Rub - but any seafood will work with it. It's also great on chicken; I made chicken legs with it the other day, and I've used it on boneless skinless breasts and thighs in the past. (Or as a dry brine on a whole chicken - season it the day before and store the chicken in the refrigerator for an amazing roast chicken.)

It works well on pork chops, too, or pork tenderloin.

For vegetables, I've used it on asparagus, green beans, and broccoli, and it goes particularly well with carrots. It's a very versatile seasoning.

Frequently Asked Questions

Why use a spice grinder for Coriander, Fennel, and Garlic Seasoning?

This is the same question as "Why use a pepper grinder?" because the answer is "Because spices, like peppercorns, taste much better fresh ground." (My recipes almost always recommend fresh ground black pepper.) Coriander, fennel, and peppercorns are more flavorful if they are fresh ground, so I keep my CFG seasoning in a spice grinder.

How do I know how much Coriander, Fennel, and Garlic Seasoning I'm grinding?

I eyeball it. I usually use CFG seasoning when I'm not measuring carefully. If it looks like it's seasoned enough, I'm good. That said, I also measured the grinding rate from my favorite Kuhn Rikon Vase grinders. I measured 30 grinds to get ½ teaspoon of seasoning, so when I want a specific amount, I count as I grind.

Related Posts

Looking for a seasoning to kick it up a few notches? For a similar seasoning blends, try my Salt Pepper Garlic (SPG) Seasoning or All-Purpose Seasoning. For more specific flavor profiles, try my Cajun Rub Recipe,  Sichuan Roasted Pepper Salt, or for a BBQ, my Homemade Barbecue Rub. 

Enjoyed this post? Want to help out DadCooksDinner? Subscribe to DadCooksDinner via email and share this post with your friends. Want to contribute directly? Donate to my Tip Jar, or buy something from Amazon.com through the links on this site. Thank you.

Instant Pot Piloy Beans

March 31, 2026 by Mike Vrobel Leave a Comment

A bowl of Instant Pot Piloy Beans

Instant Pot Piloy Beans. Guatemalan Piloy beans (frijoles piloy) are a round and red beans that cook up plump and creamy. Here's how to take these local market finds from dry beans to a meaty side dish, by pressure cooking for 30 minutes in your Instant Pot.

A bowl of Instant Pot Piloy Beans
[feast_advanced_jump_to]

I've never seen Piloy beans before. But there they were, big, round, brick red beans, bags and bags of them, one of many bags of beans at my local Hispanic market. A new bean? I have to try them!

Finding recipes online was tricky - Piloy beans look like they are specific to Guatemalan cooking, and aren't used many other places. (Or, if they are, they change their name - but I couldn't find them.) That said, they are a staple food in Guatemala, a central part of their cuisine. (Kind of like all their neighbors in Central America, where beans are an important part of everyone's meals.)

Figuring out how to pressure cook them was also tricky - it took multiple tries, because I didn't believe the one pressure cooking recipe I could find - 30 minutes? Even after soaking? That can't be right. I tried 20 minutes - most of the beans were still hard. 25 minutes - almost, but not enough - some of the beans were still tough. Turns out, they were right, I was wrong. Even after soaking, Piloy beans take 30 minutes at high pressure in an Instant Pot.

I'll live with the extra soaking time, though, because Piloy beans are nice and meaty, like an extra-plump kidney bean or Scarlet Runner Bean. I'm not upset that I bought a bunch of bags for my testing, because now I have some in my pantry for the next time I need a big red bean.

Ingredients for Instant Pot Piloy beans - and soaking the beans

Ingredients Notes and Substitutions

  • Piloy beans remind me of Kidney Beans and Scarlet Runner Beans; if you're going to substitute them, use my Instant Pot Kidney Beans recipe or Instant Pot Scarlet Runner Beans recipe instead of these instructions.
  • I don't have a great source for red Piloy beans. I buy my beans from a local Hispanic market - La Loma market in Akron, but they are tough to find online. I can find them from a few ebay sellers if I search for Frijol Piloy, but have never tried to buy from any of them.
  • Don't have an onion? Skip it and add an extra clove of garlic.
  • Don't have garlic? Skip it, as long as you have an onion.
  • Don't have bay leaves? It adds a nice flavor note, but it's not necessary. Skip it, or substitute a pinch of dried thyme.
Piloy beans, sorted, rinsed, and in the Instant Pot with water, an onion, garlic, and bay leaf

Equipment

A 6-quart pressure cooker. Pressure Cooker dried beans are one of the reasons I became a pressure cooker convert. Try Instant Pot beans and you'll never go back to canned beans. (OK, maybe you will, for convenience - but see the Storage section for tips on make ahead freezer beans, which are just as convenient as canned beans, and taste much better.)

Scaling

This recipe scales down easily - cut everything in half if you don't need as many beans, or have a 3-quart pressure cooker. Scaling up runs into space issues; if you have an 8-quart pressure cooker, you can double this recipe, but it's too much to fit in a 6-quart pressure cooker. Either way, scaling up or scaling down, the cooking time is the same. The cooking time is determined by cooking each bean all the way through, not the total number of beans - 30 minutes under pressure is the same to them either way.

Sorting Beans

Beans are an agricultural product, and stuff tends to creep in when they are processed. Beans should always be sorted and rinsed before using, to get rid of any twigs, stones, clumps of dirt, or broken beans.

To sort the beans, I pour them out on one side of a rimmed baking sheet (a half-sheet pan), to keep the beans from escaping. Then I slowly run my fingers through the pile of beans, pulling them towards me on the sheet. I watch the beans as they move, looking for anything that doesn't seem right. If I see something, I poke around in the beans until I find what caught my eye, and discard it. I repeat this a couple of times, until I'm satisfied everything is out of the beans.

Then I dump the beans into a fine mesh strainer and rinse them under cold running water, to wash off any dirt or dust still on the beans.

Now the beans are sorted, rinsed, and ready for soaking or cooking.

Do You Need to Soak Piloy Beans Before Pressure Cooking?

I get a lot of questions about soaking beans. I prefer to soak Piloy beans. They are a dense bean, because it takes a long time to pressure cook them to tenderness if they are not soaked.
If I completely forget to soak, I cook them without soaking, for 45 minutes at high pressure with a natural pressure release. Then I'll check them, and if they need it, I'll pressure cook them for another 5 minutes with a quick release. (Also, see the "Tips and Tricks" section about floaters, below.)

Tips and Tricks

  • Salt your bean water! "Salt toughens beans" is a myth. Salting before cooking helps season the beans all the way through as they cook.
  • "1 tablespoon of salt for soaking, plus another teaspoon for cooking? That seems like a lot of salt." The tablespoon of salt in the soaking water helps brine the beans, only a little of it is absorbed into the beans. Most of it washes away when you drain the beans. If you are worried about sodium, skip the salt; the beans will still turn out OK.
  • If your beans are still tough when the cooking time is over, especially any "floaters" at the top of the pot, give the beans a stir, lock the lid, and pressure cook for another five minutes. Older beans take longer to cook, and if the beans have been sitting on the shelf for a while, they may need extra time.
  • Simmer to thicken: If you have the time, and want thicker bean liquid, simmer the beans for 15 minutes after pressure cooking. I set my Instant Pot to Sauté mode adjusted to low, set the timer to 15 minutes, and leave the lid off to let the broth evaporate.
  • Hard water: If you have hard water, add ½ teaspoon of baking soda to the pot with the soaked beans. The alkalinity of the baking soda softens the bean skins, which helps them cook through in stubborn hard water.
  • Quick Soaking: I have had reports that quick soaking is not working for people, but if you forget to soak overnight, you can give it a try. Sort and rinse the beans, then put them in a pot and cover with water (or in your Instant Pot set to Sauté mode-High) and bring the water to a boil. Boil for 1 minute, then turn off the heat and let the beans sit for an hour. Continue with the instructions as written above.

Storage

A 2-cup container of cooked beans, with cooking liquid, replaces a 15-ounce can of beans from the grocery store. Cooked beans last in the refrigerator for a few days, and in the freezer for up to 6 months. (I always make extra beans, and freeze the leftovers for use in other recipes.) Freezer beans are ready to use with about 5 minutes in the microwave, and are so much better than canned.

How to use Piloy Beans

Piloy beans are big, meaty beans, and great in dishes that use kidney beans, like red beans and rice or chili. They are traditionally used in Guatemalan Piloyada Antiguena, served with sausage and eggs - I'm working on a recipe for that, so please stay tuned.

Related Posts

Instant Pot Kidney Beans
Instant Pot Small Red Beans (Domingo Rojo Beans)
Instant Pot Pinto Beans
Instant Pot Large Lima Beans (Butter Beans)
Instant Pot Rio Zape Beans
Instant Pot Moro Beans
My other Instant Pot and Pressure Cooker Recipes
My other Instant Pot Bean Recipes

Enjoyed this post? Want to help out DadCooksDinner? Subscribe to DadCooksDinner via email and share this post with your friends. Want to contribute directly? Donate to my Tip Jar, or buy something from Amazon.com through the links on this site. Thank you.

Instant Pot Oxtail : Easy Braised Recipe

March 24, 2026 by Mike Vrobel 24 Comments

A cooked piece of oxtail with mashed potatoes

Instant Pot Oxtail: Forget braising for hours on the stovetop. This recipe gives you fall off the bone tender oxtail with 45 minutes of pressure cooking, with a rich sauce made from the pot liquid.

A cooked piece of oxtail with mashed potatoes
[feast_advanced_jump_to]

Now, this is about as simple as a recipe gets, but don't be fooled - simple doesn't mean boring. Oxtail is an excellent cut for the pressure cooker. It's full of tough connective tissue, fat, and bones and needs long, slow cooking to melt into tender meat that is falling off the bone. Or, I need to apply some pressure - that's where my Instant Pot steps in. A long, slow braise (cooking the oxtails with a bit of liquid) takes just over an hour in my pressure cooker.

Ingredient Notes and Substitutions

  • Oxtail is precisely what it says it is - a steer's tail. Beef oxtail is not a common cut in the US, but it is getting easier to find. In the old days, I'd tell you to check your local Mexican market. Now I can find it at my local grocery store (if I dig deep into the meat case), and Costco sells entire tails, cross-cut and sealed in cryovac. If you can't find oxtail, substitute bone-in beef short ribs cut into 2-inch pieces.
  • Beef broth: I love my homemade beef broth, but it's a lot of work to make. I'll usually substitute homemade chicken broth, because I've always got some of that in my freezer. Store-bought broth is fine, and water will also work, though I prefer broth because it adds extra flavor to the pot liquid.
  • Dried Thyme: If you have fresh herbs, use them instead - I buy "poultry mix" fresh herbs from the store, and use a sprig of rosemary, a sprig of oregano, and a few sprigs of fresh thyme. Or, for dried herbs, use an Italian seasoning blend instead of the dried thyme.
  • Worcestershire sauce and soy sauce: Both add body and umami to the braising liquid. You can skip them if you want, or use all Worcestershire or all soy sauce.

🛠 Equipment

A 6-quart pressure cooker
A fat separator

📏Scaling

This recipe doubles easily in a 6-quart pressure cooker, but you need to brown the oxtails in 2 batches. Cut all the ingredients in half, and this recipe will fit in a 3-quart pressure cooker, but again, you may have to brown the oxtail in batches to get it to fit. The cooking time does not change; it takes the same time to cook a single 3-inch piece of oxtail through, no matter how many are in the pot.

☃️ Storage

Oxtails make great leftovers - I store them in 2-cup containers with some of the defatted sauce. They keep for up to 3 days in the refrigerator or up to 3 months in the freezer. Or, I shred the oxtail meat, pulling it off the bones while it's still hot, and store the shredded meat in 2-cup containers. (Leftover oxtail makes great tacos or shredded beef sandwiches).

Variations

Fancy Version

If you want fancy version of the recipe: After searing the oxtails, remove them to a platter. Add a diced onion, carrot, and 2 smashed cloves of garlic, and 2 tablespoons of tomato paste to the pot. Sauté the vegetables, stirring and scraping with a flat-edged wooden spoon until the onion softens and paste starts to brown, about 5 minutes. Pour in ½ cup of red wine (like a merlot) and scrape loose any brown bits of onion and tomato paste from the bottom of the instant pot. Put the oxtail back into the pot and continue with the "add thyme and liquid" step.

Thicken the pot liquid with cornstarch

To thicken the sauce after cooking: after defatting the liquid in the pot, whisk a cornstarch slurry together (1 tablespoon of cornstarch whisked with 2 tablespoons of cold water), and whisk it into the defatted liquid.

Tips and Tricks

Searing on one side:

I only sear meat on one side for the best balance between flavor and speed. Browning adds a lot of flavor to braises when the cooking liquid melts the browned bits stuck to the bottom of the pot. You can skip the browning step if you're in a big hurry, and the oxtail will still be good, but not quite as great as it could be. Or, if you have the patience, you can brown the meat on multiple sides to build even more flavor. "Brown on one side" is my compromise between building flavor and speed.

Frequently Asked Questions

Only one cup of broth or water? Is that enough?

Yes, you need just enough water to bring the cooker up to pressure. That's what makes this a braise, not a stew - the meat is cooking in just a little bit of liquid. Why 1 cup? Because most pressure cookers have a minimum liquid amount of 1 cup (or less). If your cooker needs more liquid, go ahead and add as much as your manual says you need for the minimum liquid amount.

Oxtails are very fatty - should I trim them before cooking?

I don't trim the oxtails - I let the fat render in the pressure cooker, then use the fat separator to remove the fat from the pot liquid before pouring it over the oxtails. That gets rid of enough fat for them to taste great. But, if you really want to trim them before cooking, go ahead - it won't change anything in the recipe. (And you'll still need the fat separator at the end, because oxtail has a lot of intramuscular fat.)

What to serve with braised oxtail

I love these oxtails with mashed potatoes to soak up the sauce, and a green vegetables on the side (like green beans). I usually serve with bread or rolls to, also to dip in the sauce.

Related Posts

  • Pressure Cooker Beef Shank (Osso Bucco)
  • Pressure Cooker Short Ribs Braised with Beer
  • Pressure Cooker Beef Brisket
  • Instant Pot BBQ Braised Short Ribs
    Looking for something else? Check out my Instant Pot (Pressure Cooker) Recipe Index

Enjoyed this post? Want to help out DadCooksDinner? Subscribe to DadCooksDinner via email and share this post with your friends. Want to contribute directly? Donate to my Tip Jar, or buy something from Amazon.com through the links on this site. Thank you.

Instant Pot Tomato Soup

March 17, 2026 by Mike Vrobel 2 Comments

A bowl of Instant Pot Tomato Soup with a spoon and a loaf of bread

Instant Pot Tomato Soup. Homemade tomato soup in under an hour, thanks to crushed tomatoes and a pressure cooker. Sauté an onion, carrot, and some garlic in butter, add some broth and crushed tomatoes, pressure cook for 15 minutes, then stir in some evaporated milk to add a creamy finish. This tomato soup is quick, simple, and fantastic.

A bowl of Instant Pot Tomato Soup with a spoon and a loaf of bread
[feast_advanced_jump_to]

My wife is a huge tomato soup fan, and I didn't get it. I didn't like tomato soup, because all I had tried was the canned stuff. (It makes great modern art, though.)

Once I tried homemade, I understood. But, still, I wasn't the tomato soup connoisseur in the house, so I leaned on my wife's opinions a lot when taste testing this recipe.

And, I did a lot of taste testing, because, wow, are there a lot of different canned tomatoes out there. Whole, crushed, diced, or sauce? (Crushed, definitely). Fire roasted or plain? (Plain were better). With basil? (No, add minced fresh basil at the end). Add cream or evaporated milk? (Yes, and evaporated milk is better). In other words, we had many bowls of tomato soup to get this recipe tuned, and my wife enjoyed taste testing this recipe more than any I've made in a while.

Ingredients for Instant Pot Tomato Soup

Ingredients Notes

  • Crushed Tomatoes: I prefer crushed tomatoes when making tomato soup in the Instant Pot. It's quicker - you don't have to break down whole tomatoes - and results in a thicker, more tomatoey soup than whole or diced tomatoes. Also, in spite of what's in the picture above, I preferred regular crushed tomatoes to fire roasted tomatoes or crushed tomatoes with basil. I thought the fire roasted tomatoes would add a smoky flavor, but the regular tomatoes were better, and the basil didn't add anything to the recipe. (Add some fresh basil if you want basil flavor - see below).
  • Whole peeled tomatoes or diced tomatoes: Neither of these worked as well as crushed tomatoes - the soup came out watery. If they are all you have, they'll work in this recipe, but the soup will be thin.
  • Onions and carrots: Sautéing the onions and carrots add sweetness to the soup, and the carrots help thicken it up. Don't skip them.
  • Garlic: This is a simple soup, but I can't pass up adding just a hint of garlic to the recipe.
  • Evaporated milk: Tomato soup can be a bit tart. Most recipes add cream, and some recipes even add a little bit of sugar, to balance out the acidic tomatoes. Cream works, but I'm borrowing a trick from Pam Anderson and using evaporated milk instead. Evaporated milk adds the creaminess of the cream, plus a hint of sweet, caramelized flavor from the evaporation process.
    You can skip the evaporated milk (and cream) if you don't want it.
  • Kick up the heat: If you want some heat in your soup, add ¼ teaspoon of red pepper flakes with the garlic. If you want a lot of heat in your soup, add ¼ teaspoon ground cayenne pepper with the garlic.
  • Vegetarian and/or vegan: Use olive oil instead of the butter. Use full-fat coconut milk to get the creamy mouth feel of the evaporated milk. (Oat milk is also OK, but avoid almond milk, because I've heard it separates under high heat).

How to make Instant Pot Tomato Soup in pictures

Sauté the aromatics

Sautéing the onions and carrots

Sauté the onion, carrot, and garlic in butter until softened

Add the broth then the tomatoes

Add the broth and tomatoes to the pot

Stir the broth into the pot, then pour the crushed tomatoes over the top of the broth and (important) do not stir the tomatoes.

Pressure cook for 15 minutes

Instant Pot set to pressure cook on high for 15 minutes with a quick release

Pressure cook on high for 15 minutes with a quick pressure release.

Blend and serve

Blending the soup in the pot with an immersion blender

Add the evaporated milk and blend until smooth. Enjoy!

Add us as a Google Trusted Source

Adapted from: Pam Anderson, Creamy Tomato Soup with Italian Flavors

Tips and Tricks

Avoid the burn warning

Tomatoes have a tendency to burn in a pressure cooker - they sink to the bottom of the pot and scorch. That's why I add the broth first. The layer of broth between the heat and the tomatoes keeps them from burning.

Be careful! Hot soup in a blender!

There is a reason I break out my immersion blender to puree soups. I love my super-powered stand blender, but pureeing hot soup in a blender requires care, patience, and small batches. (I have had bad luck blending hot liquids.) I hate being patient - I am a pressure cooking guy after all - and eventually I overfill the blender. That's when an explosion of hot air shoots off the lid and sprays soup everywhere.

My immersion blender is the easy fix. No air pressure buildup, no extra cleaning, and I can blend right in my Instant Pot. And, as I bonus, I get to pretend I'm driving a motorboat; it's got that same sound to it.

Regular crushed vs Fire Roasted Crushed

Frequently Asked Questions

Do I have to blend the tomato soup?

No. If you like a more rustic soup, with bits of tomato, onion, and carrot in it, you can serve it without blending. Just stir the evaporated milk into the soup until it is

Can I use fresh tomatoes?

If you have fresh tomatoes, you can use them, but I get more consistent results with canned crushed tomatoes in my recipes, so I didn't test with fresh tomatoes. This is what I recommend if you want to use fresh tomatoes: Peel, seed, and core 4 pounds of fresh Roma tomatoes, and add them instead of the crushed tomatoes. Increase the pressure cooking time to 20 minutes at high pressure. Taste at the end and add a little more salt if you need it.completely mixed. (Use Roma tomatoes if at all possible, because they come out thick and saucy.)

Scaling

This recipe is easy to scale up and down. Double all the ingredients and it will just fit below the max fill line in a 6-quart pressure cooker. Cut all the ingredients in half and this recipe will fit in a 3-quart pressure cooker. (That said, you can use a bigger pressure cooker with this recipe - I made lots of half batches in my 6-quart Instant Pot during the recipe testing.) The cooking time does not change if you scale the recipe up or down; it takes the same amount of time to cook the soup no matter how much is in the pot.

Storage

This soup makes great leftovers. (My wife loves having 2-cup containers of this soup in the freezer, ready whenever she needs a quick, comforting meal). It will last in the refrigerator for a few days, or up to 6 months in the freezer.

What to Serve with Instant Pot Tomato Soup

This soup is the perfect thing to dip a grilled cheese sandwich into - they are a classic combination for a reason. Or, for grilled cheese croutons, make the sandwich, dice it up into small squares, and scatter them over the bowls of soup.
Soup, salad, and a loaf of bread is also great, if you don't want to go through the effort of grilled cheese sandwiches. (My wife's homemade bread in the pictures, and it was a fantastic pairing with the soup.)

Related Posts

Instant Pot Potato Soup - Quick & Easy Recipe
Instant Pot Rotisserie Chicken and Lentil Soup
Instant Pot Rotisserie Chicken Noodle Soup
Instant Pot Chicken and Herb Soup with White Beans and Acini di Peppe
Instant Pot Chicken Broth
Pressure Cooker Tomato Sauce
Instant Pot Ragu Tucci
If you're looking for something else, here is my index of Instant Pot and Pressure Cooker Recipes.

Enjoyed this post? Want to help out DadCooksDinner? Subscribe to DadCooksDinner via email and share this post with your friends. Want to contribute directly? Donate to my Tip Jar, or buy something from Amazon.com through the links on this site. Thank you.

Instant Pot Lentil and Bacon Soup

March 10, 2026 by Mike Vrobel 14 Comments

A bowl of Instant Pot Lentils and Bacon (with rice)

Instant Pot Lentil and Bacon Soup. Classic comfort food from Laurie Colwin's "More Home Cooking", sped up with my pressure cooker. Bacon, onions, garlic, lentils, and some diced tomatoes, pressure cooked for 15 minutes, make for a cozy, comforting soup. (Just like reading Mrs. Colwin's books.) This recipe will warm you up on a cold day.

A bowl of Instant Pot Lentils and Bacon (with rice)
[feast_advanced_jump_to]

In all your life, you will be hard-pressed to find something as simple, soothing, and consoling as lentil soup. You can take things out of it or put things into it. It can be fancy or plain, and it will never let you down.
- Laurie Colwin

I'm reading my way through Laurie Colwin's classic food writing, and it feels like a warm hug. Her relaxed, no-fuss approach to cooking is what I aspire to in the kitchen. She shows the beauty in the art of simple food.

I can get into my own head sometimes, searching for exotic and elaborate recipes. Mrs. Colwin's writing reminds me to take a step back, breathe, and focus on straightforward food, cooked properly, and served to friends.

The Wonderful Lentil Soup chapter in More Home Cooking: A Writer Returns to the Kitchen inspired this recipe - specifically, the section where she talks about "the unhealthy way" to make it - with diced bacon. I'll admit it - I'm a sucker for lentils and pork.

Ingredients and Substitutions

I'm keeping this recipe simple, following the example set by Mrs. Colwin. But, if you want to get more elaborate, I've got a few ideas…

  • Lentils: Brown lentils are the ones I get at the store (just labeled "lentils", nothing else.) You can also use fancy, regional lentils for an extra-special soup: French Lentils du Puy, Umbrian Lentils, Beluga Lentils…they all work the same in this recipe. Red (split) lentils are an exception because they cook so quickly. Cut the pressure cooking time back to 5 minutes at high pressure if you use red split lentils, and even then, expect a porridge-like texture.
  • Substitute broth for water: For extra-rich lentils, substitute homemade chicken broth or homemade vegetable broth. (Or, if you must, use store-bought broth. It will be fine, but reduce the 2 teaspoons of fine sea salt at the end to ½ teaspoon.
  • Spice it up: The point of this recipe is to be simple comfort food, so salt and pepper alone make a great soup. But, if you need a little more zing, add a tablespoon of paprika (especially smoked Spanish paprika), a tablespoon of chili powder, or ¼ teaspoon of red pepper flakes with the onions and garlic.
  • More aromatics: Instead of just onions and garlic, you can use the Cajun "holy trinity" by adding a diced green bell pepper and diced rib of celery with the onion. Or, do a French mirepoix and add a diced carrot and diced rib of celery.
  • A Splash of Vinegar: If you find that lentils taste a little flat, adding a little acid at the end will brighten them up. Stir in a teaspoon of red wine vinegar, cider vinegar, lemon juice, or tabasco (for some extra spice kick) at the same time as the salt.
  • Make it vegetarian/vegan: Skip the bacon, and if you can, use vegetable broth instead of water to add some extra body to the soup.
  • Save some bacon: Only add half the bacon back into the pot for pressure cooking. Sprinkle the remaining bacon over the bowls when serving for a crispy topping.

How to make Instant Pot Lentil and Bacon Soup in Pictures

Crisp the bacon and render the fat

A slotted spoon full of crisped bacon

Add the diced bacon to a cold Instant Pot, set the pot to Sauté, and sauté until the bacon is crispy and the fat in the bacon is rendered. Scoop the bacon out with a slotted spoon.

Sauté the onion and garlic

Sauteing onions and garlic in an Instant Pot

Add the onions and garlic to the bacon fat, sprinkle with ½ teaspoon of salt, and sauté until softened.

Everything in the pot

Everything in the pot for Instant Pot Lentils and Bacon

Add the lentils, water, crisped bacon, and a can of diced tomatoes to the pot.

Pressure Cook for 15 minutes with a Natural Release

Instant Pot set to pressure cook for 15 minutes at high pressure

Lock the lid and cook at high pressure for 15 minutes, followed by a Natural Pressure Release.

Season and serve

A bowl of Instant Pot Lentils and Bacon (with rice)

Stir in 1 ½ teaspoons of salt and 1 teaspoon of fresh ground black pepper. Enjoy!

Scaling

This recipe scales up and down easily - cut everything in half if you don't need as much soup, or need to fit in a 3-quart or 4-quart pressure cooker. Scaling up runs into space issues; you need an 8-quart pressure cooker to double this recipe.

Tips and Tricks

  • No pressure cooker? No worries. Increase the water to 6 cups and simmer for 1 hour.
  • Extra-Thick Soup: If you want this to be more like a lentil stew, scoop out about a cup of the lentils, puree it (I use an immersion blender right in 2-cup measuring cup), then stir the puree back into the soup.
  • Simmer if you can: The other way to thicken the soup is, instead of pureeing, simmer the soup with the lid off for 15 minutes. After pressure cooking and removing the lid, set your instant pot to Sauté mode - Low (or use medium-low heat on the stovetop), and simmer the soup for 15 minutes, stirring often and scraping the bottom of the pot to prevent the lentils from sticking.

What to serve with Lentil and Bacon Soup

Mrs. Colwin says to serve "With a loaf of bread, a salad, and some cheese, and something or other for dessert". I can't say it better, though, as you can see in the pictures, I like to serve it with a scoop of white rice.

Storage

Lentil and bacon soup will last in the refrigerator for a few days and can be frozen for up to 6 months. Lentils always freeze well, so I'm happy to have leftovers. I freeze them in 2-cup containers for lunch-sized portions.

What do you think?

Questions? Other ideas? Leave them in the comments section below.

Related Posts

  • Instant Pot Lentil and Hambone Soup
  • Pressure Cooker French Lentils
  • Pressure Cooker Bean Mix Soup
  • Instant Pot Lentil Curry
  • Lentil stew, Umbrian style
  • Instant Pot Ethiopian Red Lentils (Misir Wat)
  • Pressure Cooker Umbrian Lentils and Sausage
    If you're looking for something else, here is my index of Instant Pot and Pressure Cooker Recipes.

Enjoyed this post? Want to help out DadCooksDinner? Subscribe to DadCooksDinner via email and share this post with your friends. Want to contribute directly? Donate to my Tip Jar, or buy something from Amazon.com through the links on this site. Thank you.

Pressure Cooker Lentil and Bacon Soup | DadCooksDinner.com
Pressure Cooker Lentil and Bacon Soup

Instant Pot Cowboy Beans

March 3, 2026 by Mike Vrobel 1 Comment

A bowl of Instant Pot Cowboy Beans

Instant Pot Cowboy Beans are a meal-in-a-pot with bacon, ground beef, pinto beans, onions, peppers, and spices. This recipe is fantastic when made with dry pinto beans, which cook much faster in an Instant Pot or other pressure cooker.

A bowl of Instant Pot Cowboy Beans
[feast_advanced_jump_to]

Pinto beans are one of my favorites to pressure cook. So, when I saw recipes for cowboy beans, loaded with bacon, beef, chili powder, and barbecue sauce, I knew I had to try them.

It took a few attempts to get the beans to soften because the sugary, acidic barbecue sauce was slowing them down. But with a little extra pressure cooking time, and some baking soda to counter the acid in the barbecue sauce, they are ready to serve as a one-pot meal, or a (very) hearty side dish at a barbecue.

Now, what's the difference between these beans and a beef-and-bean chili? Not much other than the flavors. Chili is more pepper-forward - more chili powder - where these beans are sweeter, thanks to the barbecue sauce.

Ingredients for Instant Pot Cowboy Beans

Ingredient Notes and Substitutions

  • Heat level: The heat level in these beans depends on the chili powder blend and chopped green chiles. Most store-bought varieties of both are mild heat, so there will not be much heat in the recipe. If you want to up the spice level to medium, look for hot, chopped green chiles, or substitute 2 minced fresh jalapeños. Or add ½ teaspoon of cayenne pepper with the chili powder. (Or do both if you want hot beans.)
  • Other beans: Black beans, small red beans, and navy beans will all cook about the same as the pinto beans in this recipe. You can substitute them without any changes. If you want to use kidney beans or great northern beans, you need to soak them, because Kidney and great northern beans take longer to cook than the others. Soak the beans overnight, then change the pressure cooking time to 25 minutes at high pressure.
  • Other meat: As long as you use a lean meat, you can substitute any ground meat you want in this recipe. 70/30 lean-to-fat "ground beef" is a little too fatty for my tastes in this recipe. Anything 80/20 or leaner will work. Or, use a different meat - ground pork, ground turkey, and ground chicken all work in this recipe. (You can even use game meat - ground venison, elk, and buffalo are all great too.)
  • Calico beans: Mix up 1 pound of one or more of the following dry beans: pinto beans, black beans, small red beans, and navy beans. They all cook in about the same amount of time, so the pressure cooking time doesn't change.
  • Mexican Charros Beans: Substitute Chorizo for the ground beef, use a diced fresh jalapeno instead of the canned green chiles
  • Barbecue sauce: I partial to my own easy homemade barbecue sauce, but store-bought sauce will work just fine in this recipe. I like a smoky Texas-style sauce, like Stubbs Original BBQ Sauce.
  • Make-Ahead Beans or Canned Beans: If you have 6 cups of cooked pinto beans, or 4 15-ounce cans of beans from the grocery store, you can do a shortcut version of this recipe. Skip sorting the dry beans (obviously), then brown the bacon, sauté the aromatics and toast the spices, and cook the beef until it loses its pink color and is broken up. Add 2 cups of water, the cooked beans, and the barbecue sauce. (If you have homemade beans, include the bean liquid; if you have store-bought beans, drain them before adding them to the pot.) Pressure cook for 15 minutes with a Natural Pressure Release. Stir in the ½ teaspoon of fresh ground black pepper, and you are ready to serve.

Cooking Instant Pot Cowboy Beans in pictures

Sort and rinse the dry pinto beans

Pinto beans being sorted on a rimmed baking sheet

Sort through the pinto beans, removing any broken beans, stones, or clumps of dirt. Rinse the beans and set them aside.

Brown the bacon in the pot

A slotted spoon full of browned bacon

Brown the diced bacon in an Instant Pot set to Sauté mode-high, then scoop the bacon onto a paper-towel lined plate. Pour out the bacon fat, and add 2 tablespoons back to the pot.

Sauté the aromatics and toast the spices

Spices and onions sautéing in the pot

Add the diced onion to the pot and sauté until softened, about 5 minutes. Add the garlic and spices and toast the spices for 1 minute.

Cook the ground beef

Ground beef cooking in the pot

Stir the ground beef into the onions and spices. Cook the beef, stirring and breaking up any clumps of beef, until the beef loses its pink color, about 5 minutes.

Beans and liquid into the pot

Rinsed and sorted beans stirred into the pot

Add the sorted and rinsed beans, and pour in the water. Pour the barbecue sauce on top and gently stir it in - we don't want it to sink to the bottom.

Pressure cook for 45 minutes with a Natural Release

Pressure cooker set to 45 minutes

Pressure cook on high for 45 minutes with a natural pressure release. If you have the time, simmer the beans for 15 minutes on Saute mode - Low to thicken the broth. Stir in some fresh ground pepper, serve, and enjoy!

What to serve with Cowboy Beans

Cowboy beans are a meal in a pot. I like to serve them with cornbread or dinner rolls, and a salad or green vegetable side. (My Barbecued Frozen Corn is another great side for this.)

Frequently Asked Questions

  • Why use dry beans? Isn't it quicker to throw a can of pork and beans in there and be done with it? Well, yes, but dry beans taste so much better. And, because dry beans are quick in a pressure cooker, I don't
  • Why baking soda? The acid in the barbecue sauce slows down the softening of the beans. The baking soda counters the acid in the beans, and I'm pressure cooking the beans longer than normal - 45 minutes at high pressure. (Normally, I do 40 minutes with a quick release.) The extra time pressure cooking, and the pressure naturally coming down helps tenderize the beans.
  • Why simmer after pressure cooking? Pressure cooking doesn't allow evaporation because of the sealed cooker. The simmering step isn't mandatory, but I like to do it when I can to thicken up the bean broth.
  • Sorting, rinsing and soaking? That seems like a lot of work. I get asked these two questions so often that I've broken them out into their own sections...keep reading.
  • Should I cook the beans first, then add the other ingredients? I don't think you should. This is a technique I saw in other recipes - par-cooking the beans, then adding in the other cooked ingredients. I think this is an unnecessary step - in my testing, adding a little extra pressure cooking time and a little baking soda took care of any problems the acidic ingredients might cause. (Now, as always, there is no "one true way" in cooking - if you have success with two-part pressure cooking, I won't try to stop you.)

Scaling

This recipe scales up and down easily - cut everything in half if you don't need as many beans, or have a 3-quart or 4-quart pressure cooker. Scaling up runs into space issues; you need an 8-quart pressure cooker to double this recipe.

Sorting and Rinsing Dry Pinto Beans

Pinto beans are an agricultural product, and stuff tends to creep in during processing. Beans should always be sorted to remove any twigs, stones, clumps of dirt, or broken beans. Then they need to be rinsed to remove any remaining dirt or dust.

To sort the beans, I pour them onto one side of a rimmed baking sheet (a half-sheet pan) to keep them from spilling off. Then I slowly run my fingers through the pile of beans, pulling them towards me on the sheet. I watch the beans as they move, looking for anything that doesn't seem right. If I see something, I poke around in the beans until I find what caught my eye, and discard it. I repeat this a couple of times until I'm satisfied that everything is out of the beans.

Then I dump the beans into a fine-mesh strainer and rinse them under cold running water to wash off any dirt or dust still clinging to them.

Now the beans are sorted, rinsed, and ready for soaking or cooking.

Do You Need to Soak The Pinto Beans Before Pressure Cooking?

I get a lot of questions about soaking beans. Pinto beans don't need to be soaked before cooking; they pressure cook just fine from dry.

Now, if you want to, you can soak the beans. It won't hurt anything. Sort and rinse the beans, then soak them overnight in water. This reduces the cooking time to 22 minutes at high pressure. (The rest of the recipe is unchanged.)

Tips and Tricks

  • Salt your bean water! "Salt toughens beans" is a myth. Salting before cooking helps season the beans all the way through as they cook.
  • Still crunchy beans: If your beans are still tough when the cooking time is over, especially any "floaters" at the top of the pot, give the beans a stir, lock the lid, and pressure cook for another five minutes. Older beans take longer to cook, and if they've been sitting on the shelf for a while, they may need extra time. (The other way to deal with floaters is to scoop them from the top of the pot with a slotted spoon and discard them, but I don't like wasting the beans.)
  • Too watery: Pressure cookers don't allow much evaporation. If your beans are too watery for your tastes, make sure to do the simmer the beans step.

Storage

Cowboy beans will last in the refrigerator for a few days and can be frozen for up to 6 months. Beans always freeze well, so I'm happy to have leftovers. I freeze them in 2-cup containers for lunch-sized portions.

Related Posts

Pressure Cooker Southwestern Pinto Bean Soup
Instant Pot Quick Chili (with Canned Beans)
Instant Pot Chorizo Chili (with Pinto Beans)
Instant Pot Turkey Chili with Small Red Beans
If you're looking for something else, here is my index of Instant Pot and Pressure Cooker Recipes.

Enjoyed this post? Want to help out DadCooksDinner? Subscribe to DadCooksDinner via email and share this post with your friends. Want to contribute directly? Donate to my Tip Jar, or buy something from Amazon.com through the links on this site. Thank you.

Instant Pot Colombian Beef Rib Soup (Caldo de Costilla)

February 24, 2026 by Mike Vrobel 1 Comment

A bowl of Instant Pot Columbian Beef Rib Soup

Instant Pot Colombian Beef Rib Soup (Caldo de Costilla) is a simple, hearty soup from the Andes mountains, perfect for the meat-and-potatoes eaters in your life. Bone-in beef short ribs are pressure cooked, both cooking the ribs and making a rich broth. Add some potatoes, season with garlic, green onions, and cilantro, and you have a fantastic way to warm yourself up on a chilly day.

A bowl of Instant Pot Columbian Beef Rib Soup
[feast_advanced_jump_to]

I found out about Columbian Beef Rib Soup thanks to Kenji Alt, and it was such a straightforward soup that I had to try it. There are only six ingredients - beef short ribs, onion, garlic, cilantro, potatoes, and green onions. (Plus water, salt, and pepper). It's a great example of the art of simple cooking, where humble ingredients come together in a warming bowl of soup.

(And, also, when you plop that bowl down with the big piece of short rib in there, bone and all, you will really impress your guests.)

Ingredients for Colombian Beef Rib Soup

Ingredient Notes and Substitutions

  • Can I use boneless short ribs or cubes of chuck roast? I don't recommend it. This soup is making its own beef broth as it cooks, and you need the bones to add body to the broth. That is...unless you already have homemade Instant Pot Beef Broth, you can get away with it: replace all the water with broth, cut the boneless beef into 1½-inch cubes, and pressure cook for only 30 minutes at high pressure. Then continue with the "pressure cook the potatoes" step.
  • Can I use different beef cuts? I don't recommend it, for the same reasons I don't want to use boneless ribs. Short ribs give the best combination of bones (to add body) with big pieces of meat for this recipe. Beef back ribs don't have enough meat.
  • What potatoes should I use? Yukon Gold potatoes (aka Yellow Potatoes) are my favorite for this recipe, but any waxy potato (Red potatoes or white potatoes) will work. I don't recommend russet potatoes; they don't hold together when cooked and will crumble and fall apart in the soup. You can substitute baby potatoes for the potato chunks, but don't bother peeling them. (See the next note...)
  • Do I have to peel the potatoes? It is traditional to use peeled potatoes in this recipe, but you can skip peeling if you want. The soup will be a little more rustic, but it will still taste great.
  • Why no cumin? Kenji Alt included cumin in his recipe, but I skip it. I am not a fan of cumin - it tends to overpower other flavors - and lots of versions of this recipe didn't have it, so I felt fine with leaving it out.

How to make Instant Pot Colombian Short Ribs in Pictures

Short Ribs and Aromatics into the pot

Ribs, onions, garlic, and cilantro stems in an Instant Pot

Put the short ribs, onion, garlic, and cilantro stems into the pot. Sprinkle with 1 ½ teaspoons of fine sea salt and pour in 6 cups of water.

Pressure Cook the short ribs for 45 minutes

Pressure cook the ribs for 45 minutes with a 15 minute natural release

Pressure cook the short ribs for 45 minutes with a 15 minute natural release.

Add the potatoes to the pot

Add the potatoes to the pot

(Optional - not shown - strain the broth: scoop the short ribs out with a slotted spoon, then pour the broth through a fine mesh strainer to strain out the aromatics. Put the strained broth and ribs back in the pot.)

Add the potatoes to the pot and stir in 2 more teaspoons of fine sea salt.

Pressure cook the potatoes for 5 minutes

Pressure cooking with the potatoes for 5 minutes

Pressure cook the potatoes for 5 minutes with a quick release of pressure. Serve the soup, sprinkling each bowl with minced green onions and cilantro. Enjoy!

Tips and tricks

  • Adjust the cooking time to the thickness of the short ribs: The cooking time depends heavily on how thick the pieces of short rib are. If you get flanken-cut ribs, cut ½-inch thick and sliced through multiple bones, they will only need 25 minutes at high pressure. Short ribs that are cut with one flat piece of bone on the bottom will depend on how long they are. I recommend smaller pieces of short rib, about 3-inch cubes, because they cook more quickly, with about 45 minutes under pressure. However, in the pictures, I had some really big pieces of short rib - a couple of them were 4+ inches long - and I had to cook them for 1 hour to get them tender and falling apart.
  • Brown the short ribs: This is an extra step that is not traditional for this recipe. If you want to add some browned beef flavor to the soup, set your Instant Pot to sauté mode (high), add 1 tablespoon of vegetable oil, and brown one batch of short ribs on the meatiest side of the rib. (Don't crowd the pot or the ribs will steam, not brown.) Continue with the recipe as written, adding the remaining ribs, water, and aromatics to the pot, then continue with pressure cooking the broth.
  • Tie the cilantro stems into a bundle: If you have kitchen twine, tie the cilantro stems into a bundle so they are easier to remove when the broth is done.

De-fatting the broth

This tip got too long, so I had to break it out into its own section.

There is a LOT of fat in short ribs. You want some of that fat because it adds body and flavor to the broth, but the first time I made this recipe, I didn't trim the fat off the top of the short ribs, and the soup was too fatty for me.

Here are a few ways to de-fat the short rib broth:

  • Skim after pressure cooking: After pressure cooking the ribs, and before adding the potatoes, use a ladle or large spoon to skim the fat from the top of the pot. Try to skim only the fat from the top, don't take too much of the broth, but also, don't worry about being perfect about it. Continue with the "Pressure Cook the Potatoes" step.
  • Use a fat separator (or two): If you have a fat separator - or, preferably, two 4-cup fat separators - you can use them to defat the broth. After pressure cooking the ribs, scoop them out of the broth and set them aside. Pour the broth into the fat separator, let it sit so the fat rises to the top, then pour the defatted broth back into the pot. Continue with the "Pressure Cook the Potatoes" step.
  • Make ahead and refrigerate: This is the easiest way, if you have the time to make the broth at least a day ahead. After pressure cooking the ribs, remove the pot liner from the pot and let it cool with the ribs still in the liquid. Cover the pot liner - the non-pressure lid is good for this, or use plastic wrap. Let the covered pot liner sit in the refrigerator overnight, or for up to 3 days. The fat will rise to the top and harden into a fat cap. A fat cap is easy to scoop out of the pot - I make a game of it and try to get it in one big piece. (Or, as few pieces as possible.) Put the pot liner back into the Instant Pot base and continue with the "Pressure Cook the Potatoes" step.

Adapted from: Caldo de Costilla, J. Kenji Lopez-Alt

Add us as a trusted site on Google

Scaling

You can double this recipe if you have an 8-quart pressure cooker. Cut all the ingredients in half, and this recipe will fit in a 3-quart pressure cooker. The cooking time does not change; it takes the same amount of time to cook each piece of short rib through and extract flavor into the broth.

Make-Ahead

If you want to make this a quick weeknight soup, make the broth and cook the short ribs ahead of time. Finish the recipe through the "strain the broth" step, then refrigerate the short ribs in the broth for a few days. (Or, freeze for a few months). To make the soup, put the broth and short ribs back in your Instant Pot and continue with the "pressure cook the potatoes" step.

Storing Leftovers

This soup makes great leftovers. Whole short ribs don't fit well in my preferred 2-cup storage containers, so I shred the meat from the ribs, discard the bones, and return the shredded meat to the soup. Leftovers will last up to 3 days in a sealed container in the refrigerator or up to 6 months in the freezer.

What to Serve with Beef Short Rib Soup

This soup is hearty enough to be the main dish, with a salad or vegetable on the side and a loaf of bread for dipping.

Related Posts

For some other Instant Pot beef soup ideas, try my Instant Pot Beef and Barley Soup (Pressure Cooker), Instant Pot Chinese Beef Noodle Soup with Short Ribs, or Instant Pot Beef Brisket Soup.

For Instant Pot beef ribs, try my Pressure Cooker Short Ribs, Instant Pot Boneless Short Ribs, Instant Pot BBQ Braised Short Ribs, or Instant Pot Beef Ribs (Texas BBQ Style).

For more global beef flavors, try my Instant Pot Flemish Beef Stew, Instant Pot Beef Stew with Spanish Smoked Paprika, or Instant Pot Beef and Lentil Stew.

If you're looking for something else, here is my index of Instant Pot and Pressure Cooker Recipes.

Enjoyed this post? Want to help out DadCooksDinner? Subscribe to DadCooksDinner via email and share this post with your friends. Want to contribute directly? Donate to my Tip Jar, or buy something from Amazon.com through the links on this site. Thank you.

Instant Pot Cajun Deviled Eggs

February 17, 2026 by Mike Vrobel 1 Comment

Instant Pot Cajun Deviled Eggs

Instant Pot Cajun Deviled Eggs have even more of a devilish kick than regular deviled eggs, and were a hit with my spice-loving friends. Hard-boiled eggs are easy with the Instant Pot 5-5-5 method: mix in some Creole mustard, sprinkle with Cajun seasoning, and add a splash of hot sauce, and these eggs are ready to kick things up a notch.

Instant Pot Cajun Deviled Eggs
[feast_advanced_jump_to]

There's something about deviled eggs that brings out the creativity in cooks. I'm always looking for new deviled egg ideas, and the ones I tried at House of Creole in Cleveland were fantastic. I used their eggs as a takeoff point, replacing the Cajun-spiced shrimp on top with a healthy shake of hot sauce. (My eggs usually come with me to a potluck or dinner party, so sauteing shrimp right before serving was a bit too much work.)

These eggs were a hit at my Super Bowl party - friends and family are always my guinea pigs for new recipes - so I'm sharing them with you.

Ingredients for Instant Pot Cajun Deviled Eggs

Ingredient Notes and Substitutions

  • Eggs: I never cook just 6 eggs. I'll always make a full dozen. Then I either save the leftover 6 eggs to hard-boil for breakfast, or make two different kinds of deviled eggs. (My favorites are my Traditional Instant Pot Deviled Eggs, my Instant Pot Wasabi Deviled Eggs for a different kind of spice kick, or if I really want to show off, my Instant Pot Beet Pickled Deviled Eggs, which look amazing with the red color.)
  • Creole mustard: It has a little more kick than regular mustard, but it can be hard to find in my area. (I had to order Zatarain's Creole Mustard from Amazon.) Any stone-ground mustard is a good substitute, especially horseradish mustard.
  • Cajun seasoning: I like my own Cajun Spice Rub, of course, but I have to add ⅛ teaspoon (a pinch) of fine sea salt because my rub is salt-free. Store-bought works fine too, like the Slap Ya Mamma brand. (That's the easy one to find at my local stores, but there are lots of good Cajun seasoning options out there. You won't go wrong with any of them.)
  • Sweet pickle relish: I like the contrast of the sweet relish to the hot ingredients, but if you don't want the relish, you can skip it. I wouldn't add dill pickle relish; the hot sauce already adds a vinegar flavor, and dill relish makes the eggs too tart for my taste.
  • Hot sauce: Crystal is my favorite Cajun hot sauce; Tabasco is a close second place. The main difference between the two is that Tabasco has more heat than Crystal. If you want more heat, go with Tabasco; if you want the pepper flavor without the high heat, use Crystal.

How to make Instant Pot Cajun Deviled Eggs in pictures

5-5-5 Hard Boil the Eggs

Eggs in a baking sling in the Instant Pot

Pour 1 cup of water into the pot, then pressure cook the eggs, in a steamer basket, for 5 minutes. Let the pressure come down naturally for 5 minutes, then quick release the remaining pressure. Transfer the eggs to a bowl full of ice and cold water, and let them cool for 5 minutes.

Pressure Cook for 5 minutes with a 5 minute natural release

Separate the eggs and mash the filling

Splitting eggs and separating the yolks into a bowl

Peel the hard-boiled eggs, slice them in half lengthwise, and put the yolks in a bowl. Mash the yolks with a fork until they are crumbled, then mix in the Cajun seasoning, mayonnaise, Creole mustard, and sweet pickle relish. Move the mashed filling into a piping bag.

Empty hard boiled egg halves ready to fill with Cajun deviled egg filling

Pipe the filling into the eggs, garnish, and serve

Instant Pot Cajun Deviled Eggs

Snip the end off the piping bag and pipe the filling into the halved eggs. Sprinkle each egg with more Cajun seasoning, add a dash or two of Cajun hot sauce to each egg, and top with a few slices of green onion.

Add us as a trusted site on Google

Tips and Tricks

  • The key to Instant Pot eggs is the 5-5-5 timing. Five minutes at high pressure, five minutes of natural pressure release before quick releasing any remaining pressure, and five minutes (at least) in an ice bath. Perfect eggs every time.
  • The tricky part of this recipe is cleanly slicing the eggs in half. I bought an egg slicer that has a single wire, which makes this easy. Before that, I used a sharp, thin paring knife, wiping it clean whenever the egg started sticking to it.
  • The final trick is piping the filling. I used to use a zip-top plastic bag as a pastry bag, but modern bags with a stay-open style bottom don't work - you need a sharp corner, not a fold at the edges. I had to switch to disposable piping bags with a 2A size piping tip. (2A is a large round hole - all the fancy tips get clogged by the pieces of pickle relish or chunky Creole mustard).
  • Fancy version with blackened shrimp: If you really want to impress your visitors, do what they did at the House of Creole - top each deviled egg with a Cajun blackened shrimp. Melt a tablespoon of butter in a small frying pan, sprinkle 12 shrimp (small raw shrimp, peeled and uncooked, about 51-60 count) with Cajun seasoning, then cook them until they are cooked through and browned (and the spices are a little black on one side). Top each deviled egg with a shrimp.

Frequently Asked Questions

Why use the pressure cooker to hard-boil eggs?

Because it's quick, reliable, and makes eggs easy to peel. I use the 5-5-5 method: 5 minutes at high pressure, 5 minutes natural release, and 5 minutes in an ice bath or under cold running water to stop the eggs from overcooking. For more details, see my Instant Pot Hard Boiled Eggs recipe.

How long do deviled eggs last?

Deviled eggs are good for 3 to 4 days in the refrigerator. If you leave the eggs whole, they will last up to 7 days in the refrigerator.

Making deviled eggs ahead of time

I always make deviled eggs ahead of time if I'm taking them to a party or potluck. I slice the eggs, make the filling, and store them separately. The sliced eggs are stored in a gallon zip-top bag, with a paper towel beneath them to absorb excess liquid. The filling I store in the piping bag, with the back end twisted shut. The prepared ingredients will keep in the refrigerator for 3 to 4 days. Then, when it's time to serve, I snip the corner off the filling bag and start making the deviled eggs.

Scaling: Can I double this recipe? What about cutting it in half?


Yes, this recipe scales up or down easily - the cooking time is the same, no matter how many eggs you make. As I said above, I always double the recipe - I hard-boil a dozen eggs, then make two different types of deviled eggs. (You can see my entire list of deviled egg recipes here.)

Can I make these Deviled Eggs without an Instant Pot?

Absolutely. Hard-boil the eggs on the stovetop: boil for 10 minutes, then put them in an ice bath, and continue with the recipe as written.

Related Posts

As I said above, I've got a lot of deviled egg variations you can try on my blog. A few I haven't mentioned yet are Instant Pot Horseradish Deviled Eggs, Instant Pot Bacon Deviled Eggs, and Instant Pot Smoked Salmon Deviled Eggs. For even more ideas, check out my Instant Pot Deviled Eggs Recipes list.
If you're looking for something else entirely, here is my index of Instant Pot and Pressure Cooker Recipes.

Enjoyed this post? Want to help out DadCooksDinner? Subscribe to DadCooksDinner via email and share this post with your friends. Want to contribute directly? Donate to my Tip Jar, or buy something from Amazon.com through the links on this site. Thank you.

Sous Vide Limoncello

February 10, 2026 by Mike Vrobel 15 Comments

A fancy bottle of sous vide limoncello

Sous Vide Limoncello. Why wait weeks when you can have your limoncello today? Homemade limoncello can be ready in hours thanks to sous vide, which speeds up the infusion of lemon into the alcohol.

A fancy bottle of sous vide limoncello
[feast_advanced_jump_to]

I learned I can make my own limoncello thanks to the America's Test Kitchen podcast, just before Christmas. What a great gift idea! But…it takes weeks (or months) of resting to make, and Christmas was too close.

Sous Vide to the rescue! I can speed the infusion time up from weeks to hours.

The next trick was finding 190 proof grain alcohol - the infamous Everclear 190. It wasn't available in Ohio without a prescription… so I drove to a nearby state where it was legal and bootlegged it home. (The law changed, and Everclear is now legal in Ohio - see the details below.)

I got to work scrubbing and zesting lemons. And…that's it. Lemon zest, Everclear, a quart mason jar, and three hours sous vide yield lemon-infused liquor; simmering water and sugar give me simple syrup, and the two combine into limoncello. I can't believe it is this easy.

Ingredient notes and substitutions

  • Meyer lemons: I used boring old store-bought lemons for zesting, but Meyer lemons are a good substitute.
  • Lemon juice: Lemon juice does not work well for this recipe - you need the flavor from the zest of the lemons.
  • Other proof alcohol: See the notes after the recipe if you can't get 190 proof alcohol.
  • Substitute Honey for the sugar: You can substitute honey for the sugar, but because honey is sweeter than sugar, go with ¾ the amount of sugar - use 3 ⅓ cup of honey (787ml) instead of the 4.5 cups of sugar.

How to make Sous Vide Limoncello in pictures

Scrubbing the lemons

Scrubbing lemons under running water

Scrub the lemons to remove the wax coating (that preserves the lemons)

Zest the lemons

Zesting the lemons

Zest the lemons (I use a microplane)

Zest and Everclear in Quart Jar, Sous Vide 135°F for 3 hours

Jar of everclear and lemon zest in water bath up to bottom of lid

Filter the everclear through a water filter (not shown), put the zest in a quart canning jar and pour in the everclear. Screw on the lid, and put the jar in a 135°F sous vide water bath that comes just up to the bottom of the lid. (I fill the water after I put the jar in the water tank.) Sous vide at 135°F for 3 hours.

Stir in simple syrup, strain into jars, store in freezer

Two large jars of limoncello

Make a simple syrup by dissolving 4.5 cups of sugar into 4.5 cups of boiling water. (Not shown.) Pour the infused Everclear through a fine mesh strainer and then a coffee filter to strain out all the zest. Combine the simple syrup and infused Everclear, and store in the freezer so you can serve it ice cold.

Adapted from LimoncelloQuest.com and Sous Vide Supreme Easy Limoncello

Frequently Asked Questions

Is it safe to heat high-proof alcohol?

Yes, it is safe at 135°F. This is well below the boiling point of alcohol (ethanol), 173°F. So there will not be any extra fumes released.
That said, 190 proof alcohol has some pretty serious fumes to begin with - I made the mistake of taking a quick sniff over the bottle, and it made my eyes water.

Will the jar explode?

No. Canning jars are made with heat-safe glass, and can handle a boiling water bath (212°F) and a pressure canner (240°F under pressure.) The sous vide temperature (135°F) is well below the heat where the jar will be in any danger. Also, because the sous vide temperature is well below the boiling point of the alcohol, pressure will not build up in the jar. (See the previous question for details).

Can I use a peeler instead of a zester?

Yes, you can. Try to peel only the yellow part of the zest - we don't want the bitter white pith below it.

Can I skip the coffee filter, and just use a fine mesh strainer to remove the lemon zest?

Yes, if you are OK with a rustic limoncello - the limoncello will have the occasional bit of lemon zest in it.

Tips and Tricks

Speed up the infusion - 160°F for 1 hour

If you can't wait 3 hours, you can speed up the process by increasing the temperature to 160°F, and only infusing for 1 hour. (It's still below the boiling point of alcohol, 173°F, so it is still safe.) You will get your infusion quicker, but the resulting infused alcohol will be cloudier. (It still tastes great, though.)

Use a gallon zip-top freezer bag instead of the quart canning jar

If you want, you can sous vide the alcohol in a gallon-sized zip-top freezer bag. (Use on that seal completely - no plastic sliders, they leave an opening.)

Put the lemon zest and alcohol in the bag, zip it most of the way, then CAREFULLY squeeze out as much of the remaining air as you can before zipping it all the way. Place the bag in the sous vide tank and cook as directed.

Why a freezer bag? Because the plastic in freezer bags is heat-safe at sous vide temperatures - that's not necessarily true for storage bags. (And if you're worried about the plastic, go back to the canning jar.

No Sous Vide instructions

So, you want to do it the old-fashioned way? Easy. Everything is the same, except step 3 becomes "let the jar of alcohol and zest age for about a month, shaking once a day or so to redistribute the lemon zest. (A minimum of 3 weeks, max of about 45 days". Continue with filtering the zest from the alcohol, making the simple syrup, and mixing steps.

Why wash and scrub the lemons?

Most lemons (except for some, but not all, organic lemons) are given a thin coating of wax before shipping to the store, to help preserve them. I wash and scrub the lemons to remove the wax and any bacteria they may have picked up on their way to the store.

What if I can't buy 190 proof grain alcohol?

190 proof alcohol is illegal in some states. Until recently, that included my home state of Ohio. You needed a doctor's affidavit to buy Everclear 190. Now in Ohio, you just have to sign an affidavit on your own, saying what you're going to use the Everclear for - I put "making limoncello". Even if it is legal, they will probably have it out on the counter (or in the back room), so you'll have to ask for it. (In Ohio, here's a link to the Ohio Liquor Control website's page for Everclear 190, [OHLQ.com], which will show you where it is available near your zip code.

151 proof alcohol ratios (former legal max in Ohio)

Everclear sells a lower-proof version - Everclear 151 - for the states where 190-proof alcohol is illegal. That's what I used to get here in Ohio. To make it work, I had to recalculate the volume of water to get our 30% alcohol (60 proof) limoncello:

  • 750ml bottle of 151 proof grain alcohol (Everclear 151)
  • 3.25 cups water (750ml)
  • 4.25 cups sugar (1000ml)

100 proof vodka

If you really can't get high proof alcohol in your area, try to at least find 100 proof vodka (which is a neutral alcohol):

  • 750ml bottle of 100 proof vodka (or grain alcohol)
  • 1.5 cups of water (350ml)
  • 3 cups of sugar (700ml)

It is hard to make a simple syrup beyond a 2:1 ratio of sugar to water, so at this proof, I have to cut back on the sugar. (If possible, you should search out a higher proof alcohol.

The (Math) proof behind the (Alcohol) proof

We want 60 proof limoncello - 30% alcohol. We can calculate the amount of water in the grain alcohol from its proof: 190 proof is 95% alcohol, 151 proof is 75.5% alcohol, and 100 proof is 50% alcohol.

The other calculation is the volume of simple syrup, which…isn't quite simple. 1 cup of sugar dissolved in 1 cup of water yields…1.5 cups of simple syrup. So, simple syrup is ⅓ sugar and ⅔ water by volume.

The final complication is that we want to keep the same amount of sugar, so the limoncello has the same level of sweetness. But water can only absorb so much sugar before it starts to crystallize - a 2 cup sugar to 1 cup water "strong simple syrup" is the max recommended amount. So the max amount of sugar I can use is 2x the amount of water.

Here is the amount of syrup you want to add to a 750ml bottle of alcohol, depending on the proof. (I went over the math on this multiple times and double-checked against an online "proof" calculator, so I think it's right.)

  • 190 proof grain alcohol => 1625ml syrup => 1083ml (4.5 cups) water and 1083ml (4.5 cups) sugar
  • 151 proof grain alcohol => 1135.5ml syrup => 757ml (3.25 cups) water and 1083ml (4.5 cups) sugar
  • 100 proof vodka => 500ml syrup => 333ml (about 1.5 cups) water and 666ml (about 3 cups) sugar - (2x sugar limit)
  • 80 proof vodka => 250ml syrup => 167ml (¾ cup) water and (1 cup + 2 tablespoons) of sugar - (2x sugar limit)

This is the other reason to go for higher alcohol content: the amount of sugar you can add. As you can see, we can add a lot more simple syrup to 190 proof grain alcohol than we can to 40 proof vodka - the 190 proof batch is much sweeter.

What do you think?

Questions? Other ideas? Leave them in the comments section below.

Related Posts

Sous Vide Jalapeno Infused Tequila
Fiery Mexican Martini
Grilled Lemon Whiskey Sour
Frozen Margaritas
Canning Jar Margaritas
Instant Pot Boba Tea
Caffè Tonic

Enjoyed this post? Want to help out DadCooksDinner? Subscribe to DadCooksDinner via email and share this post with your friends. Want to contribute directly? Donate to my Tip Jar, or buy something from Amazon.com through the links on this site. Thank you.

Instant Pot Quick Chili (with Canned Beans)

February 3, 2026 by Mike Vrobel 62 Comments

Instant Pot Quick Chili with Canned Beans

Instant Pot Quick Chili with Canned Beans. What's the quickest way to get dinner on the table? Pressure cooker chili. This is my go-to weeknight chili recipe, when I need a ground beef and bean chili in a hurry.

Instant Pot Quick Chili with Canned Beans
[feast_advanced_jump_to]

The #1 question about my Pressure Cooker Ground Beef and Bean Chili recipe? "What if I want to use canned beans instead of dried?"

I dashed off a quick answer in the comments…"five minutes!"…but then it started to nag at me. Was five minutes under pressure enough time for the chili flavors to mingle?

Normally, cooking time is determined by how long it takes to cook all the ingredients through. Ground beef takes almost no time to cook. 1You don't need a pressure cooker for ground beef. By the time the beef is no longer pink, it is done. In my regular recipe, the beans decide the cooking time - when the beans are done, we're done. But with canned beans, they're already cooked. The cooking time is based entirely on flavor. We don't want a ground beef, bean, and chili soup, with each a distinct flavor; we want a chili, with all the flavors blended together, something greater than the sum of its parts. Time for some testing!

Pressure Cooker Quick Chili with Canned Beans | DadCooksDinner.com
Pressure cooker lineup up for testing chili

I bought beef, canned beans, tomatoes, and got out my pressure cookers. (What? Doesn't everyone own three…four…um…OK, I actually own six pressure cookers right now. I may have a problem.) The recipe was the same in all three until I locked the lid: sauté the onions and garlic, toast the spices, mix in the beef, then the liquids and the beans. Then I set one cooker to 5 minutes, one to 10, and one to 15 minutes, and let them pressure cook with a natural pressure release.

The results? Ten minutes is the Goldilocks zone. Five minutes is too short. The beans are the best in after five minutes - still having a little bit to them - but the rest of the ingredients don't quite come together, tasting like a beef and tomato and bean soup. Fifteen minutes is too long. I get a thick, chili flavor, but the beans are way overcooked, starting to melt away. Ten minutes is just right, a rich chili with beans that have absorbed the chili flavors. (The beans are right on the edge of overcooked at 10 minutes. Hey, we're working with canned beans here, it's the best we can do.)

Which brings me to my last two points: One, even the 5 minute chili was good - chili is hard to mess up. Two, chili is better if you make your own beans in the pressure cooker. Make the beans ahead and freeze them in 2 cup containers. That lets you pull beans out of the freezer, and they taste much better than canned. (And yes, I know that contradicts point one. Hey, who says I have to be consistent?)

Drained and rinsed canned beans for Instant Pot Quick Chili with Canned Beans

Ingredient notes and substitutions

  • More beef, less beans: I like a bean-heavy chili, but if you want more meat, you can use 2 pounds of ground beef, or cut the beans back to 2 cans instead of four. (Or do both if you like a lot of meat and not many beans.)
  • Ground beef: This recipe works best if the ground beef is at least 80% lean and 20% fat - aka "Ground Chuck". (The recipe works with 70% lean "ground beef", but I have had complaints that it can be too greasy.) It works fine with ultra-lean ground beef, too, like 93% Ground sirloin.
  • Other ground meat: You can use almost any ground meat in this recipe. Ground chicken, turkey, or pork - even ground buffalo, ground elk, or ground venision - whatever ground meat you have will work here. I have separate recipes posted for Instant Pot Ground Turkey Chili and Instant Pot Ground Pork chili, or just follow the directions in this recipe and substitute the ground meat for the beef.
  • Other canned beans: I usually make this recipe with a mix of kidney beans, pinto beans, and/or black beans, but any canned bean will work - use whatever you like.
  • Make-ahead beans: Even better than canned beans are dry beans, pressure cooked and frozen. I make lots of different beans in my Instant Pot, and I always make extra so I can freeze some for later. (A 2-cup container of frozen beans replaces a can of beans.) My favorites for this recipe are Instant Pot Small Red Beans, Instant Pot Pinto Beans, or Instant Pot Black Beans.
  • Changing the heat level: This is a mild chili - most chili powder blends don't have a lot of heat. I add ground cayenne pepper when I want to increase the heat - a half-teaspoon for medium heat, a full teaspoon for high heat, and 2 teaspoons for 5-alarm chili. (Or, dice up a jalapeno or two and add them with the onions.)

Instant Pot Quick Chili Step-By-Step

In an Instant Pot, Sauté Onion and Garlic, and Toast the Spices

Sauté the onion and toast the spices

Heat a tablespoon of oil in an Instant Pot, then sauté a diced onion and a few cloves of minced garlic. Make a hole in the onions and add the chili powder, cumin, and oregano. Toast them for 30 seconds, then stir them into the onions.

Cook the beef until it is no longer pink

Cook the ground beef

Stir in the beef to coat it with the onions and spices, then stir in the water. Simmer, stirring often and breaking up the beef, until it loses its pink color.

Everything in the pot

Everything in the pot for Instant Pot Quick Chili with Canned Beans

Stir the beans and crushed tomatoes into the pot, and lock the lid

Pressure Cook for 10 minutes

Instant Pot set to pressure cook on high for 10 minutes

Cook on high pressure for 10 minutes with a Natural Pressure Release (about 20 minutes more)

Season, serve, and enjoy

Stoplight of chili bowls

Unlock the lid, stir in salt and ground pepper, serve with your favorite chili accompaniments, and enjoy!

Tips and Tricks

  • Troubleshooting scorching or overheating: I have one pressure cooker that runs hotter than my others, and it had problems with overheating in this recipe. (Overheat usually means the pressure cooker noticed that things are burning on the bottom of the pot.) If you have overheating or scorching in your cooker, add an extra cup of water to the recipe and make sure the bottom of the cooker is scraped well before stirring in the beans.
  • Homemade beans: If you have leftover pressure cooker beans, this recipe is a great way to use them up. Substitute 6 to 8 cups of cooked homemade beans for the canned beans.
  • I'm really in a hurry, and don't want to wait for the Natural Release: Increase the pressure cooking time to 12 minutes at high pressure, then quick release the pressure.
Instant Pot Quick Chili with Canned Beans

Frequently Asked Questions

What should I serve with Quick Weeknight Chili?

I love add-ins to my chili. My defaults are diced raw onion, shredded cheese (usually cheddar or a Mexican blend), sour cream, and some tortilla chips or Fritos. I also pass a bottle of hot sauce at the table so people can increase the heat if they want.

Is ¼ cup of chili powder a typo?

Absolutely not - that's how you get a good chili flavor. Go big or go home is my approach to chili.

How do I scale this recipe up or down?

If you want to make this recipe in a 3-quart pressure cooker, cut all the ingredients in half - except for the water, cut that back to 1 cup. You can double the recipe in an 8-quart pressure cooker, just double all the ingredients.

What do you think?

Questions? Other ideas? Leave them in the comments section below.

Related Posts

Pressure Cooker Ground Beef and Bean Chili (with dry beans)
Pressure Cooker Turkey and Black Bean Chili
Instant Pot White Turkey Chili
Instant Pot 5 Ingredient Chili
Pressure Cooker Beans: Basic Technique
Instant Pot Cowboy Beans
My other Instant Pot (Pressure Cooker) Recipes

Enjoyed this post? Want to help out DadCooksDinner? Subscribe to DadCooksDinner via eMail or RSS reader, recommend DadCooksDinner to your friends, and buy something from Amazon.com through the links on this site. Thank you.

Instant Pot Pork Carnitas (Easy & Crispy)

January 27, 2026 by Mike Vrobel 12 Comments

Instant Pot Pork Carnitas. Crispy cubes of Mexican pork, cooked fast thanks to pressure cooking, and finished in a frypan on the stovetop.

Carnitas are Mexican pork candy. Cubes of pork shoulder, simmered until tender, and then fried in their own rendered pork fat. Crispy on the outside, tender on the inside, I've tried Instant Pot Carnitas many times, but the results were not what I wanted...until now.

[feast_advanced_jump_to]

The problem was, I kept trying to make this a one-pot meal, and fry the pork cubes in the Instant Pot by simmering off the liquid. There were two problems. First, the pork would always burn on the bottom of the pot, no matter how carefully I watched it. Second, pressure cooker pots (like the Instant Pot) are not that wide - at best, I could fit 2 pounds of pork in a single layer on the bottom. That's not enough to satisfy my hungry crowd of kids.

My breakthrough was giving up on the authentic, one-pot approach. Mexican kitchens cook carnitas in wide, shallow pots, so there's plenty of room to fry the pork. Me? I brought out my frypan, and use vegetable oil or lard instead of the rendered pork fat. The Instant Pot does what it does best - quickly pressure cook the pork, making it tender and shreddable. Then I scoop the pork into the frypan, where there's plenty of space to brown.

Are you looking for real-deal pork carnitas, crackling browned cubes of pork, tender and shreddable, in about an hour? Get out the Instant Pot and frypan, and get to work.

Carnitas Ingredients Substitutions

  • Lime substitutions: You can replace the limes with oranges, blood oranges, or mandarin oranges. (Orange juice goes well with the pork). Even better is a mix of limes and oranges. Or, you can just skip them. Citrus adds a nice flavor to the pork, but it's not necessary. I stay away from lemons; the flavor just seems wrong in this recipe.
  • Vegetable oil vs lard: I call for vegetable oil in the frying part of the recipe, but if you can get lard at your local grocery store, it is even better.
  • Other cuts of pork: I get asked about other pork cuts often enough that I'm breaking it into its own section:

Which cut of pork is best for carnitas?

Pork shoulder, pork shoulder, pork shoulder! (And did I mention pork shoulder?) Pork shoulder is also called pork butt, Boston butt, and picnic roast. Pork shoulder is the right cut to get tender, shreddable pork after pressure cooking and frying. Boneless pork shoulder is easiest to cut into cubes, but bone-in pork shoulder just takes a little more knife work.

An interesting substitute in this recipe is pork belly (which is essentially uncured bacon). Cut the skin off (if it is on the pork belly), cut the belly into cubes, and follow the directions. Pork belly has a lot more fat than the (already fatty) pork shoulder, but the resulting carnitas are crispy and jelly-like. If you're OK with the extra fat, they are a very interesting alternative.

If you're desperate, you can try pork leg (uncured ham) - it won't be quite as juicy and tender as pork shoulder, but it would still work. Country-style ribs will also work in a pinch. (Especially pork shoulder country-style ribs, which are essentially pork shoulder.)

Pork loin and pork tenderloin are too lean for this recipe, and will not work.

Tips and Tricks

  • Doubling: To double this recipe, double all the ingredients in the pressure cooker, and then fry in two batches in the frypan. (Or use two frying pans.) Don't overcrowd the frypan, or the pork will steam, not brown. To halve the recipe, halve all the ingredients except for the water.
  • Use the fat from the pot: If you have a fat separator, you can fry the pork in its own rendered lard. After scooping the pork out of the pressure cooker pot, pour the pot liquid into the fat separator and wait for the fat to float to the top. Pour off the pork juices, leaving just the fat, and transfer the fat layer to the frypan. (Add vegetable oil or store-bought lard if needed to get a ¼-inch deep layer of oil in the pan.)
  • One-pot carnitas (no frypan): If you really want to do everything in an Instant Pot, without the stovetop frypan, you can use sauté mode instead. Follow the instructions up to "scoop out the pork with a slotted spoon." After that, pour out the liquid in the pot and wipe out the pot liner with paper towels. Put the pot liner back into the Instant Pot body, add the vegetable oil (or lard), and set the Instant Pot to sauté mode adjusted to high. Crisp up the pork in two batches - don't crowd the pot or the pork will steam, not brown.
  • One-pot carnitas (wide Instant Pot): After I wrote this recipe, Instant Pot came out with the perfect pressure cooker to do this as a one-pot meal. The 7.5-Quart Wide Instant Pot *is* wide enough to do this all in one pot. Use the instructions above for one-pot carnitas (scoop out the pork, wipe out the pot, add the oil, heat on sauté-mode adjusted to high), but the wide pot lets you brown the pork in a single batch.

Serving Suggestions

The best part of this recipe is the toppings for the carnitas. I serve with corn or flour tortillas, minced cilantro, diced onions, and sliced jalapeños. The key to varying the flavor and heat with this recipe is making a salsa. On weeknights I make Quick Red Salsa in the food processor. In the summer, when I can get fresh vegetables, I'll make Pico De Gallo Salsa (Fresh Tomato Salsa) or , Tomatillo Salsa. If I'm feeling fancy, I'll make a batch of Toasted Ancho Salsa. I will also pass some bottles of hot sauce at the table so everyone can adjust the heat level on their own. And, no Mexican meal is complete without a side of beans, like Instant Pot Mexican Black Beans, Instant Pot Pinto Beans, or Instant Pot Refried Beans.

Storing and Reheating Leftover Pork Carnitas

I store leftover pork carnitas by shredding them, then refrigerating them in 2-cup containers. Or, to freeze the shredded carnitas, I put them in a single layer in zip-top freezer bags. (Quart sized freezer bags are my preference). I smash the pork in the bag into a flat, single layer, and squeeze out all the air. Then I freeze them into flat bags of pork, so I can stack them in a tray in my freezer. Also, thawing the flat bags of pork in the microwave is quick, making leftover pork carnitas a quick weeknight dinner.

Frequently Asked Questions

What's the best fruit to use if I don't have limes?

Oranges (especially mandarin oranges) are the best alternative.

Can I Use Frozen Pork in the Instant Pot?

Yes, as long as the pork is already cut into cubes, and not in a big block of frozen pork. Add an extra 5 minutes to the pressure cooking time, and everything else will work as written.

How Do I Prevent Tough Pork in the Instant Pot?

Pork shoulder is tough when it is undercooked. If you are still getting tough pork after cooking this recipe, you're not cutting the pork pieces small enough. For larger pork cubes, increase the pressure cooking time; 1½-inch pork cubes should pressure cook for 25 minutes, and 2-inch pork cubes should pressure cook for 35 minutes.

Can I Broil Instead of Pan-Fry to Crisp the Pork?

You can, but it won't come out as browned and crispy as it will if you pan-fry the pork. (And, since carnitas are meant to be fried, it's not authentic. But, we're already pressure cooking instead of frying in lard the whole time, so "not authentic" is already assumed.)
Set your broiler to high, spread the drained pork cubes out on a rimmed baking sheet, and broil the pork cubes until they are browned on top, about 5 minutes. (The time will depend on how strong your broiler is - I've had wide variations in broiler strength. Check them every minute or two, and keep broiling until they are browned to your liking.)

Can I skip the pan-frying?

Yes, you can. You'll have tender shredded pork without the crispy outside, but it will still be great. (You're essentially making my Instant Pot Quick Pork Tacos if you don't fry the pork.)

What do you think?

Questions? Other ideas? Leave them in the comments section below.

Related Posts

Pressure Cooker Mexican Brown Rice - DadCooksDinner
Pressure Cooker Refried Black Beans - DadCooksDinner
Instant Pot Red Chile Pork
Pressure Cooker BBQ Pulled Pork Tacos
Pork Picadillo Tacos
Instant Pot Pork Belly Burnt Ends
Quick Red Salsa - DadCooksDinner
Instant Pot Birria Tacos Recipe (with Broth - Quesabirria con consomé)
My other Pressure Cooker Recipes

Enjoyed this post? Want to help out DadCooksDinner? Subscribe to DadCooksDinner via email and share this post with your friends. Want to contribute directly? Donate to my Tip Jar, or buy something from Amazon.com through the links on this site. Thank you.

Instant Pot Baked Ziti - Easy Pressure Cooker Pasta

January 20, 2026 by Mike Vrobel 10 Comments

A plate of Instant Pot Baked Ziti

Instant Pot Baked Ziti. The Instant Pot makes baked ziti easy - pressure cook the sauce and the noodles together, then bake it in one dish. Sauté an onion, carrot, celery, garlic, and spices, then add Italian sausage. Stir in the ziti, water, and crushed tomatoes, then pressure cook for 4 minutes with a quick release. Stir in some ricotta, mozzarella, and parmesan, pour into a baking dish, top with a little more mozzarella, and bake until bubbly. Enjoy!

A plate of Instant Pot Baked Ziti
[feast_advanced_jump_to]

I think of Baked Ziti as sloppy lasagna. It's like an Italian take on sloppy Joes - Sloppy Giuseppe.

Ahem. Sorry. Where was I? Oh, right, sloppy lasagna. Baked ziti has all the main ingredients of lasagna - pasta, meat, tomato sauce, cheese - but instead of careful layering, we're dumping it all in a baking dish. Sure, you don't get the wonderful layers of flavor you get in lasagna. But on a busy weeknight, with the help of a pressure cooker, you can have baked ziti on the table in about an hour.

And, with a pressure cooker, it's even easier. I cook the pasta and the sauce together in the pressure cooker, making this into a one-pot, one-baking-dish recipe.

I finish my baked ziti in the oven. It is "baked" ziti, after all, and I want the melting and browning I get from baking. (Also, I like serving it in squares cut from the pan, instead of scooping it out of the pot in big hunks.) But, if you want to skip the baking steps and serve straight from the pressure cooker pot (LIKE AN ANIMAL), see the "no baking" section below.

Ingredients and Substitutions for Baked Ziti

Pasta types

Any small tube pasta will work in this recipe - I use ziti because it's in the name, but penne and rigatoni are easy substitutes, and macaroni would work too.
I use whole wheat pasta in this recipe all the time, and it works great. (In part because it's easier to find 12-ounce boxes of whole wheat pasta - 1 pound of pasta is too much to fit in a 3-quart baking dish, and saving 4 ounces of pasta for later takes up space in my pantry). I've heard that gluten-free pastas work, but I have not tried them myself.
All the different types of pasta cook in the same amount of time, as long as they're about the same size - small tubes. (For example, my grocery store sells 12-ounce boxes of whole wheat penne pasta, which I use in this recipe exactly as written.)

Sauce options

We're making a sausage sauce with this baked ziti; if you want a vegetarian version, skip the sausage. There are enough tomatoes in the pot to make it a tomato sauce.

Meat options

I like using Italian sausage for the extra flavor it adds, but any ground meat will work in this recipe. Ground beef, ground pork, and ground turkey have all worked for me. (I often use meatloaf mix - a mix of ground beef and ground pork - when it's on sale at the grocery store.) Add any other ground meat when you would add the sausage. If you use unseasoned meat, sprinkle it with ½ teaspoon of fine sea salt and ½ teaspoon of extra Italian seasoning after adding it to the pot.

Cheese options

I use the traditional mix of ricotta, mozzarella, and parmesan in this recipe; regular fat or low-fat are both fine. (I usually get low-moisture part-skim shredded mozzarella and regular fat ricotta).
If you want to be extra healthy, you can substitute cottage cheese for the ricotta, but it will be lumpier, and the stronger cottage cheese flavor will be noticeable. (If you like that flavor, it's fine.)
Pecorino Romano is a good substitute for Parmesan, though it has a sharper flavor because it is made from sheep's milk.

Broth vs water

For extra-rich ziti, substitute broth (preferably homemade chicken broth) for the water. If you use store-bought broth, get a low-sodium variety, and skip the ¾ teaspoon of fine sea salt added with the water and pasta.

How to Make Instant Pot Baked Ziti

Sauté the aromatics and cook the sausage

Sautéing aromatics in an Instant Pot

Sauté the onion, carrot, celery, garlic, and Italian spices in olive oil until the onion softens. Stir in the sausage and cook until it loses its pink color.

Add the ziti and tomatoes to the pot

Adding ziti to the Instant Pot

Stir in the ziti, 3 cups of water, and crushed tomatoes

Pressure cook for 4 minutes with a quick release

Pressure cook for 4 minutes with a quick release

Stir in the cheese

Adding the cheese to the pot

Stir in the ricotta, half of the mozzarella, and the parmesan.

Transfer to a baking dish, top with more cheese, bake, and serve

Topping baking dish of ziti with cheese

Pour into a 3-quart baking dish, then top with the remaining mozzarella. Bake in a 350°F oven until the cheese on top is melted and bubbling, about 20 minutes. Serve and enjoy!

Tips for Perfect Pasta from The Instant Pot

Use a ratio of 1 cup of water to 4 ounces of pasta

Three cups of water are just enough to cook 12 ounces of pasta. No draining is necessary; the pasta will absorb the water. If you use 1 pound of pasta (16 ounces), increase the water to 4 cups. (And get a bigger baking dish, because 12 ounces of pasta fills a 3-quart Pyrex baking dish - 16 ounces will overflow it).

Spitting Starch

Sometimes, when I quick release the pressure, the pot starts spitting starch everywhere. (It only happens occasionally, but it's messy when it does happen.) I close the pressure valve when it starts spitting starch. Then, I let the pot sit for a few minutes (3-5 minutes) for the pressure to come down naturally, then try to release the pressure again. (There will be a little spitting starch at first.) Usually, that is enough to stop the starch from spitting, but if not, I'll repeat the process, letting the pot sit, then trying again until I get all the pressure released.
Also, if this happens, make sure to clean and rinse the pressure valve and pressure lid after cooking to remove any starch.

Make Ahead Baked Ziti

Want to freeze the baked ziti and reheat later? Make the baked ziti in the Instant Pot, and stop after the "mix in the cheese" step, once the ziti is poured into the baking dish. Cover the dish with plastic wrap, then with aluminum foil, and freeze. To reheat, remove from the freezer, remove the foil and plastic wrap, discard the plastic wrap, and re-cover the dish with foil. Reheat in a 350°F oven until bubbling in the center, about 90 minutes for a 3-quart baking dish.

Storing and Reheating

Leftover baked ziti freezes beautifully - I store leftovers in 2-cup containers for microwave-sized lunch servings. (In my 1000-watt microwave, it takes about 5 minutes to reheat 2 cups of baked ziti.)

What to Serve with Baked Ziti

Baked ziti is a one-pot meat-and-starch dish, so I serve it with a green vegetable (like my Instant Pot Kale with Garlic and Lemon) and a salad (here's my easy Caesar Salad dressing). I also serve it with bread on the side - my kids love it with garlic bread.

Frequently Asked Questions

Can I substitute cottage cheese for ricotta?

Yes. The cottage cheese holds together more - there will be lumps of cheese, instead of a smooth sauce - and the cottage cheese taste is noticeable. But it works fine in this recipe as written.

Can I make this vegetarian or vegan?

Vegetarian is easy, as long as you're OK with dairy - skip the sausage for a vegetarian baked ziti. Vegan is harder because of all the cheese. I've never tried vegan cheeses, and I'm skeptical they'll melt like regular cheese. But if you have a brand of vegan cheese you trust that makes ricotta, mozzarella, and parmesan, they should work in this recipe.

How to get a cheesy crust without baking?

Don't feel like using the oven? Skip the "pour the entire pot into a baking dish" step, and sprinkle the remaining 8 ounces of mozzarella over the top of the pot. Put the pot liner back in the pressure cooker base over "keep warm" (or the stovetop pot back on the stove), and put a non-pressure lid on the pot. (Or, close but don't lock the lid.) Let it sit until the cheese on top melts, about 10 minutes, then serve straight from the pressure cooker pot. It won't be a baked crust, but the layer of melted cheese on top is a nice touch.

Scaling up or down?

Want to double this recipe? Use an 8-quart pressure cooker, double all the ingredients, and you can make a second baking dish to freeze for later. Halve the recipe, and it will fit in a 9-inch square baking dish.

Related Posts

Pressure Cooker Penne with Sausage and Peppers
Pressure Cooker Italian Meat Sauce
Instant Pot Bucatini all'Amatriciana
Pressure Cooker Pasta and Bean Soup (Pasta E Fagioli)
Instant Pot Fettuccine Alfredo Recipe
Pressure Cooker Tomato Sauce
Instant Pot Marcella Hazan Tomato Sauce
Instant Pot Arrabbiata Sauce
If you're looking for something else, here is my index of Instant Pot and Pressure Cooker Recipes.

Enjoyed this post? Want to help out DadCooksDinner? Subscribe to DadCooksDinner via email and share this post with your friends. Want to contribute directly? Donate to my Tip Jar, or buy something from Amazon.com through the links on this site. Thank you.

Instant Pot Butter Beans and Shrimp

January 13, 2026 by Mike Vrobel 4 Comments

A bowl of Instant Pot Butter Beans and Shrimp with seasoning, hot sauce, and minced green onions

Instant Pot Butter Beans and Shrimp. Pressure cook large lima beans with sausage, vegetables, and Cajun seasoning. Then, add some shrimp to simmer until cooked through. Creamy beans, tender shrimp, and smoky sausage make a fantastic one-pot meal.

A bowl of Instant Pot Butter Beans and Shrimp with seasoning, hot sauce, and minced green onions
[feast_advanced_jump_to]

My friend Rhonda lived in New Orleans for years, and when I mentioned bean recipes, she suggested butter beans with shrimp. When Rancho Gordo sent a bag of Large Lima Beans in my bean box, I knew it was time to work on this recipe.

Ingredients for Instant Pot Butter Beans and Shrimp

Ingredients Notes

  • Beans: Dry large lima beans are the backbone of this dish - they add a creamy flavor and their starchy broth thickens up the stew. Baby Lima beans will also work, but they take longer to cook, about 30 minutes under pressure.
  • Shrimp: I buy 51-60 count shrimp because I can get them raw and pre-peeled at my local grocery store. Any size raw shrimp will do, as long as you thaw and peel them before cooking. (Larger shrimp will take a little longer to cook in the pot, but that's fine.) Pre-cooked shrimp don't mingle well with the other flavors, but if that's all you have, go ahead and use them.
  • Sausage: Sausage adds a nice, smoky, pork flavor to the beans. I buy andouille when my local grocery stores have it, but it's hit-or-miss here in Ohio, so I substitute smoked sausage most of the time. Kielbasa is also good, with extra garlicky flavor.
  • Broth: I make lots of homemade chicken broth with my Instant Pot, so I usually have it in my freezer. But, when I'm out of homemade broth, I'll substitute store-bought low-sodium chicken or vegetable broth in this recipe. Or, you can skip the broth and use water - broth is better, but enough is going on in this recipe that water will work fine.
  • Cajun Seasoning: I make my own (salt-free) Cajun seasoning, and add salt to the recipe. If you buy store-bought Cajun seasoning (I like Slap Ya Mamma), it is already loaded with salt, so don't add more to the recipe.
  • Worcestershire sauce and hot sauce: These also add depth to the broth; you can skip one or both of them if you want.
Store-bought Cajun Seasoning vs Homemade Cajun Seasoning

How to make Instant Pot Butter Beans and Shrimp in Pictures

Sort and rinse the lima beans

Sorting Large Lima Beans

Sort the beans, discarding any broken beans, dirt, or rocks in the bag

Sauté the Aromatics and the Sausage

Sauté the aromatics trinity with the sausage

Sauté the onion, celery, bell pepper, garlic, and sausage until softened

Everything in the pot

Everything in the pot

Add the sorted and rinsed beans, chicken broth, water, and Cajun seasoning to the pot

Pressure Cook for 20 minutes with a Natural Release

Pressure Cook for 20 minutes with a Natural Pressure Release

Cook the shrimp, serve, and enjoy

Raw shrimp into the pot

Stir the raw shrimp into the pot, cover, and let heat for 5 minutes to cook the shrimp through. Serve and enjoy!

Sorting Beans

Beans are agricultural products, and stuff tends to creep in during processing. Beans should always be sorted and rinsed before use to remove twigs, stones, clumps of dirt, or broken beans.
To sort the beans, I pour them out onto one side of a rimmed baking sheet (a half-sheet pan). Then I slowly run my fingers through the pile of beans, pulling them towards me on the sheet. I watch the beans as they move, looking for anything that doesn't seem right. If I see something, I poke around in the beans until I find what caught my eye and discard it. I repeat this several times until I'm satisfied that everything is out of the beans.
Then, I dump the beans into a fine mesh strainer and rinse them under cold running water to wash off any dirt or dust still on them.
Now, the beans are sorted, rinsed, and ready for soaking or cooking.

Tips and tricks

  • This is more of a mixed stew, with a lot of smoked sausage and shrimp, than a bean-forward meal. If you want to focus on the beans, cut the shrimp and sausage back to ½ a pound (8 ounces).
  • Thawing frozen shrimp: The quick way to do this is to put the frozen shrimp in a bowl under cold running water, and stirring them occasionally to break up any clumps of frozen shrimp. They should be thawed in about 20 minutes, so I don't have to start thawing until the recipe is started. That said, if you can plan ahead, thaw the shrimp in the refrigerator overnight. (I never remember to take it out early).
  • Add a Roux for finesse: I don't add a roux to these beans, because I think the bean broth itself is enough of a thickener. But, if you want to add a roux, don't let me stop you. In a small frying pan, melt 4 tablespoons of butter, then whisk in 4 tablespoons of flour, and keep whisking until the flour browns to the color of peanut butter. Stir this roux into the pot as a finisher, after cooking the shrimp.
  • Floating tough beans: If your beans are still tough when the cooking time is over, especially any "floaters" at the top of the pot, stir the beans, lock the lid, and pressure cook for another five minutes. Older beans take longer to cook, and if they've been sitting on the shelf at your store for a while, they may need extra time. (Or, if there aren't that many floaters, you can scoop them out with a slotted spoon and discard them.)
  • Simmer to thicken: If you have the time and want thicker bean liquid, simmer the beans for 15 minutes after pressure cooking. I set my Instant Pot to Sauté mode, adjusted it to low, set the timer to 15 minutes, and left the lid off to let the broth evaporate.

What to serve with Butter Beans and Shrimp

I serve butter beans and shrimp with white rice and a green vegetable (like my Instant Pot Green Beans). I also mince some green onions for topping the beans, and serve them with a Cajun hot sauce like Tabasco or Crystal.

Storing Leftovers

Lima beans and shrimp make great leftovers. Store them in covered 2-cup containers, and they will last for a few days in the refrigerator or up to 6 months in the freezer.

Related Posts

Instant Pot Brown Rice Jambalaya
Instant Pot Jambalaya (with Chicken and Sausage)
Instant Pot Cajun Ribs
Instant Pot Cajun Chicken Pasta (Creamy Alfredo style)
Instant Pot Pastalaya (One-Pot Cajun Pasta Jambalaya)
Instant Pot Dirty Rice
Instant Pot Borracho Beans (Drunken Beans)
Instant Pot Red Beans and Rice
Instant Pot Cajun Pinto Beans

If you're looking for something else, here is my index of Instant Pot and Pressure Cooker Recipes.

Enjoyed this post? Want to help out DadCooksDinner? Subscribe to DadCooksDinner via email and share this post with your friends. Want to contribute directly? Donate to my Tip Jar, or buy something from Amazon.com through the links on this site. Thank you.

Instant Pot Mussels

January 6, 2026 by Mike Vrobel Leave a Comment

A bowl of Instant Pot Mussels with a loaf of bread and an Instant Pot in the background

Instant Pot Mussels (Moules Mariniere). Pressure cooking mussels for 3 minutes is surprisingly effective, yielding a pot of perfectly cooked mussels. I like them French bistro-style, steamed with shallots, garlic, white wine, thyme, and parsley, where the liquid released by the mussels mingles with the other ingredients to make a fantastic sauce. Make sure to serve this with a loaf of crusty bread for dipping!

A bowl of Instant Pot Mussels with a loaf of bread and an Instant Pot in the background
[feast_advanced_jump_to]

I'm always worried about overcooking in my Instant Pot, and mussels were no exception - they can get chewy if they are cooked too long. It took a recipe from the Washington Post to get me to try it, and while I don't agree with their exact timings (Zero minutes was too little time for me - I like my mussels a little firmer), pressure cooking mussels is, as they say in the title, foolproof. Three minutes under pressure and a quick release, and the mussels are perfectly cooked and ready for serving.

Oh, and moules mariniere comes from the French word for sailor (similar to our mariner), and doesn't mean marinated mussels. Mussels are a classic from the harbors of France.

Ingredients Notes and Substitutions

  • What White Wine Works? Any dry white will work (dry means not sweet), but I have a few favorites. I usually use sauvignon blanc, the traditional choice in France, or an unoaked chardonnay, because I want the wine to have a big, fruity flavor. (But I can find the oak overpowering). Pinot Grigio or Pinot Gris also works, but has a little less fruit. A dry to semi-dry Riesling will also work, as would Gewurztraminer. Or, if you want to pretend you're in Normandy, use a dry cider. Or a dry rosé.
  • I don't/can't drink alcohol: You need some flavor in the pot to mingle with the mussel juices, so substitute broth (or 50% broth and 50% water) for the wine. I'd use homemade vegetable broth or homemade chicken broth; if you use store-bought broth, get a low-sodium variety (if you can).
  • I want to make this fancier: Add a pound of diced chorizo, smoked sausage, or kielbasa with the onions to add some smoked pork to the pot. Or, add a 15-ounce can of diced tomatoes (with their juices) with the wine. Or make a cream sauce by stirring in ½ cup heavy cream at the end, along with the parsley. (Belgian Mussels with Cream recipe coming soon!)
  • What kind of bread? I love serving this with a French baugette cut into 1-inch thick rounds for dipping in the mussels. A round artisan-style loaf (boule) is also great, if you cut it into slices.

Instant Pot Mussels Step-By-Step Pictures

Sort and clean the mussels

Cleaned mussels ready for the pot

Make sure the mussels are all closed tight - discard any open or broken mussels - and rinse them under cold running water.

Sauté the shallots, garlic, and Thyme

Sauteing the shallot, garlic, and thyme sprigs

Melt the butter in an Instant Pot set to Sauté mode, then sauté the shallots, garlic, and thyme until the shallots just soften.

Mussels and Wine in the pot

Mussels in the pot, ready to cook

Add the cleaned mussels and wine to the pot.

Pressure cook for 3 minutes with a Quick Release

Pressure cook on high pressure for 3 minutes with a quick pressure release

Stir in the parsley and serve with the broth

Mussels after cooking - all opened up

Stir the parsley into the pot, then serve, dividing the mussels between two serving bowls. (Discard any mussels that didn't open - they may be bad.

Inspired by: This Instant Pot mussels recipe is fragrant and foolproof by Ann Maloney at the Washington Post
and Moules Mariniere (from Anthony Bourdain's Les Halles Cookbook)

Frequently Asked Questions

How do I sort mussels to make sure they are all fresh?

All it takes is one bad mussel to make the whole batch smell terrible, so make sure to sort the mussels before cooking. Check each mussel and discard any with broken shells or that are not tightly closed. If the mussel is open, tap it a few times, and if it closes, it is fresh; otherwise, discard it.

How do I clean and de-beard mussels?

If you buy farmed mussels (most mussels sold in the US are farmed), they are pretty clean to begin with and only need to be rinsed and de-bearded. If the mussel has a beard, I remove it by grabbing it between the dull end of a paring knife and my thumb, then use the edge of the knife as a lever against the shell to pull the beard out. (Or I use my kitchen pair of boning pliers - a pair of stainless steel needle-nose pliers I only use for cooking.) I rinse farmed mussels after sorting by putting them in a bowl under cold running water for a couple of minutes, then draining them.

If you're lucky enough to get wild mussels, they need to be thoroughly cleaned before cooking. Soak them in cold water salted with 2 tablespoons of salt for 20 minutes. Scrub each mussel with a brush, discarding any broken or unclosed mussels. De-beard the mussels, then rinse them under clean running water. Now they are ready to cook.

What if I don't have a pressure cooker?

Increase the amount of wine to 2 cups. Follow the recipe as written, but do it in a large pot or Dutch oven on the stovetop. Then, instead of pressure cooking, simmer the mussels, covered, until all the mussels open up, about 5 minutes.

Scaling

You can scale this recipe up or down, depending on how many mussels you can fit in your Instant Pot. You can go up to 4 pounds of mussels in a 6-quart pressure cooker; beyond that, you'll need an 8-quart pressure cooker. Double all the ingredients, and the instructions and cooking times remain the same. (It takes the same amount of time to steam each mussel, no matter how many are in the pot.)

What to Serve with Instant Pot Mussels

The broth is the best part of a pot of mussels. As I keep saying, make sure to serve with a loaf of crusty bread. I serve mussels with a salad, so I can have a crunchy vegetable with my chewy mussels.

Related Posts

Instant Pot Shrimp Risotto
Instant Pot Shrimp Curry (with Thai Red Curry Paste)
Pressure Cooker Shrimp Étouffée
Instant Pot Pressure Steamed Lobster
Grilled Paella with Shellfish, Chorizo, and Chicken (Paella Mixta)
Indoor Clambake
If you're looking for something else, here is my index of Instant Pot and Pressure Cooker Recipes.

Enjoyed this post? Want to help out DadCooksDinner? Subscribe to DadCooksDinner via email and share this post with your friends. Want to contribute directly? Donate to my Tip Jar, or buy something from Amazon.com through the links on this site. Thank you.

Air Fryer Breaded Chicken Thighs and Potatoes

December 30, 2025 by Mike Vrobel 6 Comments

A plate of air fryer breaded chicken thighs and potatoes

Air Fryer Chicken Thighs and Potatoes. Bone-in chicken thighs with a mustard and panko bread crumb crust, air-fried on a bed of baby potatoes - it tastes fancy, but it is an easy meal to put together. Salt the thighs, rub them with mustard, and then coat them with panko breadcrumbs. Halve the baby potatoes, salt them, toss them in oil, then lay them in a single layer at the bottom of a preheated air fryer. Set the panko-crusted chicken thighs on top and air fry for 35 minutes, flipping them over after 20 minutes to brown evenly.

A plate of air fryer breaded chicken thighs and potatoes
[feast_advanced_jump_to]

As I've said many times before, I am a fan of dark meat chicken - especially chicken thighs. They are cheap and full of flavor. This is one of my favorite ways to dress thighs up and make them fancy - baking them with a crispy mustard and bread crumb crust. I have an oven version of this recipe, and an air fryer is just a countertop convection oven in a convenient form factor, so it is perfect to make a small batch of this chicken.

Ingredients for Air Fryer Breaded Chicken Thighs with Mustard

Ingredient Notes and Substitutions

  • Panko bread crumbs: Panko is Japanese bread crumbs, which are larger and more flaky than typical American store-bought bread crumbs. You can use regular bread crumbs if you have to, but Panko makes a much better crust for these chicken thighs. If you do get regular bread crumbs, I like using the Italian-style crumbs because they add extra herbs that pair well with the mustard.
  • Dijon Mustard: Any mustard will do, even cheap yellow mustard. The only mustard I don't recommend is whole grain mustard - it doesn't cling to the chicken and panko as well due to the chunky grains of mustard. (Stone-ground mustard is fine.)
  • Baby potatoes: Any baby potato will do - red, white, yukon gold, fingerling - they will all work well in this recipe.
  • Big potatoes cut into chunks: You can also use whole potatoes, cut into 1-inch to 2-inch chunks in this recipe. They should cook in about the same amount of time as the baby potatoes.
  • Other cuts of chicken: Chicken drumsticks are a great substitute - they cook about 5 minutes faster than the thighs. Boneless, skinless chicken thighs cook too quickly - the crust will not get crispy. And, sigh, if you have to, you can use chicken breasts in this recipe. Bone-in, skin-on breasts will cook in about the same amount of time. Try to cook them to an internal temperature of 160°F so they don't dry out. (Chicken breast is less forgiving about overcooking than chicken thighs.)
  • Adding herbs or spices to the panko: I'm doing a simple version of this recipe, but you can make it fancier by mixing some herbs or spices in with the panko. Some suggestions are: a half-teaspoon of garlic powder, a half-teaspoon of smoked Spanish paprika, a half-teaspoon of dried thyme, or (my favorite) a half-teaspoon of dried Herbes de Provence herb blend.

Step-By-Step Pictures of Air Fryer Chicken Thighs and Potatoes

Coat the chicken with mustard and panko breadcrumbs

Breading the chicken thighs

Toss the chicken thighs with the mustard, then press into the panko to give it an even crust

Toss the potaotes with olive oil and salt

Tossing the halved potatoes with olive oil and salt

Potatoes and chicken into 400°F Air Fryer for 35 minutes...

Breaded chicken and potatoes in the air fryer

...flipping the chicken after 20 minutes

Chicken and potatoes After 20 minutes, browned in spots and ready to flip

Serve and enjoy

Chicken and potatoes After 35 minutes, browned and ready to serve

At 35 minutes, the chicken should be golden brown and delicious.

Adapted from: Baked Mustard-Herb chicken legs, Mark Bittman and the New York Times.

Frequently Asked Questions

  • Should I pre-heat the air fryer? Yes, this recipe works better when you pre-heat the air fryer. Wait for it to reach temperature before adding the potatoes and chicken.
  • How big of an air fryer do I need? You need to be able to fit the potatoes in one layer, and the chicken in another single layer. (No stacking the chicken, or the bread crumb crust will not brown.) I have a 6-quart air fryer, which was the perfect size for this recipe.
  • Can I double this recipe? Not in a 6-quart air fryer - the chicken needs to be in a single layer. You can increase the recipe size if you have a larger air fryer; as long as you can fit the thighs in a single layer, not touching, you can add more thighs.
  • Shouldn't everything be in a single layer? A reader asked why I'm doubling up on the potatoes and the chicken - most recipes say you should air fry in a single layer. In this recipe, I'm ignoring that, and cooking the meat and potatoes together in two layers. The potatoes get to soak up the chicken juices, and while they won't be quite as browned and crispy as the would be if they air-fried on their own, the extra flavor from the chicken drippings makes up for it. (And, as you can see in the pictures, they are still browned and crispy, especially the potatoes around the edge of the tray.) The chicken is browned on both sides because of the flip. And, it's a one-tray meal!

Make Ahead and Storage

This recipe is not a good one to make ahead - the panko will get soggy, and not crisp up in the air fryer. Leftovers will last for a couple of days in the refrigerator - the panko will get soggy, but the coat of browned panko still tastes good. You can save the whole legs; I like to cut the meat off the bone and into bite-sized chunks, then save the meat and potatoes in 2-cup containers so I can have it as a grab-and-go lunch later in the week.

Related Posts

Quick Air Fryer Tilapia (with Spice Rub)
Instant Pot Air Fryer Frozen French Fries (with an Air Fryer Lid)
Instant Pot Chicken With 40 Cloves of Garlic
Instant Pot Chicken Legs (with Herb Rub)
Instant Pot Chicken Paprikash recipe (with boneless chicken thighs)
Air Fryer Asparagus
If you're looking for something else, here is my index of Air Fryer Recipes.

Enjoyed this post? Want to help out DadCooksDinner? Subscribe to DadCooksDinner via email and share this post with your friends. Want to contribute directly? Donate to my Tip Jar, or buy something from Amazon.com through the links on this site. Thank you.

Instant Pot Large Lima Beans (Butter Beans)

December 23, 2025 by Mike Vrobel 4 Comments

A bowl of Instant Pot Large Lima Beans

Southern Butter Beans

Instant Pot Large Lima Beans, aka Southern Butter Beans, are a quick and easy to cook from dry with a pressure cooker. The lima beans are ready in about an hour, with only 20 minutes of cooking at high pressure.

A bowl of Instant Pot Large Lima Beans
[feast_advanced_jump_to]

I love cooking beans in my Instant Pot. I was telling a friend about the joy of Instant Pot beans, and they told me to check out butter beans and shrimp, a favorite of theirs from New Orleans. This led me down the rabbit hole of "What are butter beans"? (My Butter beans and Shrimp recipe is coming soon.)

What are butter beans?

Large lima beans are also known as butter beans in the South. Southern Cooking magazine says the name "butter beans" comes from the buttery, creamy texture of the larger beans. (See: Butter Beans Vs. Lima Beans: Is There A Difference? -Southern Cooking.

And no, there's no butter in butter beans. (Unless you want to add it after cooking.)

Ingredients for Instant Pot Large Lima Beans

Ingredients Notes and Substitutions

Different Lima Beans: This recipe won't work for other kinds of lima beans, because different lima beans cook for different times. If you have baby lima beans, use my Instant Pot Baby Lima Beans (from dry) recipe. If you have Christmas lima beans, use my Instant Pot Christmas Lima Beans recipe.

Ham Hock: Different kinds of smoked meat can replace the ham hock - smoked pork neck and smoked turkey neck are two common options in my area. Or, slice up a smoked sausage and add it to the pot. (If you do, don't discard the smoked sausage like you would a ham hock or neck. Serve the beans and sausage together.)

Vegetarian or vegan beans: Skip the ham hock. The beans won't have the smoky flavor from the hock, but that's OK if you're cooking vegetarian.

Broth instead of water: To add extra flavor, substitute broth for some of (or all of) the water. My favorites with lima beans are Instant Pot Ham Broth, Instant Pot Chicken Broth, or Instant Pot Vegetable Broth.

Removing broken beans

Sorting Beans

Beans are an agricultural product, and stuff tends to creep in during processing. Beans should always be sorted and rinsed before use to remove any twigs, stones, clumps of dirt, or broken beans.

To sort the beans, I pour them onto one side of a rimmed baking sheet (a half-sheet pan) to keep them from escaping. Then I slowly run my fingers through the pile of beans, pulling them towards me on the sheet. I watch the beans as they move, looking for anything that doesn't seem right. If I see something, I poke around in the beans until I find what caught my eye, and discard it. I repeat this a couple of times until I'm satisfied that everything is out of the beans.

Then I dump the beans into a fine mesh strainer and rinse them under cold running water to wash off any dirt or dust still on the beans.

Now the beans are sorted, rinsed, and ready for soaking or cooking.

Frequently Asked Questions

  • Should I soak the lima beans? I get the "to soak, or not to soak?" question all the the time. I don't soak my large lima beans. Even without soaking, they're tender after pressure cooking on high for 20 minutes.
  • What if I did soak the lima beans? They turn out fine, though the bean broth isn't quite as full bodied. Soaked beans cook much quicker, 15 minutes at high pressure. I use that to my advantage when the beans are part of a recipe with other ingredients, especially when they will overcook unless I can cut back the pressure cooking time. But for this pot of beans, no soaking is necessary.
  • Salt your bean water! "Salt toughens beans" is a myth. Salting before cooking helps season the beans all the way through as they cook.
  • A few tough beans are still floating at the top - what do I do? If your beans are still tough after pressure cooking, especially any "floaters" at the top of the pot, give the beans a stir, lock the lid, and pressure cook for another five minutes. Older beans dry out and take longer to cook, and if the beans have been sitting on the shelf at your store for a while, they may need extra time.
  • I'm in a hurry - can I quick release the pressure? If you don't want to wait for the pressure to come down naturally, increase the pressure cooking time to 25 minutes at high pressure, and quick release the pressure after that. Some of the beans will be broken up, but they'll still taste great.
  • I don't want to just throw away the ham hock - that seems wasteful. What can I do? You can pick the meat out of the hock if you want, but there isn't much meat in there. It's mostly skin, fat, and gristle. (It's more work than it's worth, in my opinion, for the tiny amount of meat you'll be able to stir into the beans. The hock has done its duty by adding its smoky pork flavor to the pot.)

Storing Leftover Large Lima Beans

A 2-cup container of cooked lima beans, with cooking broth, replaces a 15-ounce can of beans from the grocery store. Cooked beans will last in the refrigerator for a few days, and freeze for up to 6 months. Freezer beans are ready to use after about 5 minutes in the microwave, and taste much better than canned.

Related Posts

I love cooking dry beans in my pressure cooker. Some of my favorites are my Instant Pot Mexican Black Beans, Instant Pot Refried Beans, Instant Pot Cannellini Beans and Greens, Instant Pot Ham and Beans, and Pressure Cooker Venetian Pasta and Beans (Pasta e Fagioli alla Veneta). Or, check out my complete list of Instant Pot Bean Recipes.

If you're looking for something else, here is my index of Instant Pot and Pressure Cooker Recipes.

Baked Chicken Thighs with Mustard and Herbs

December 16, 2025 by Mike Vrobel 2 Comments

Baked Chicken Thighs with Mustard-Panko Crust. Roasted chicken thighs with a crispy panko bread crumb crust, stuck on the chicken by a layer of dijon mustard. This is an easy way to get breaded chicken thighs on a weeknight, and a recipe I make many times a year.

[feast_advanced_jump_to]

This is a rewrite of a recipe from years ago, which is one of my go-to weeknight chicken recipes. (Also, I'm working on an air fryer version of the recipe - stay tuned.

America has a love affair with chicken breasts. I've complained before about how dry chicken breast can get. The flavor is, quite frankly, boring.
*…this is a dangerous time for you, when you will be tempted by the dark side…

The answer is to eat chicken legs. I love dark meat poultry, juicy and full of flavor. Because of America's white meat preference, you can get chicken legs, thighs, and drumsticks for a song at your local grocery store.

Yes, it's frugal, but I still prefer dark meat, and would buy it even if it was more expensive. Dark meat has more chicken flavor than white meat, and it is harder to overcook. A chicken breast should be cooked to 160°F for food safety, but if it goes past 165ºF it dries out. Chicken legs are more forgiving - you can eat them at 165°, but they are best cooked between 175° and 185°F, and even if you go past that they won't dry out like white meat.
*…that place…is strong with the dark side…a domain of flavor it is.

Adapted from Mark Bittman.  It was titled, appropriately enough, Crossing over to the Dark Side.  Come, join us on the dark side, we have better chicken!

Adapted From: Mark Bittman (and Gary Danko): Crossing Over to the Dark Side [nytimes.com]

How to make Baked Chicken Thighs with Mustard and Herbs (in Pictures)

Trim the chicken thighs

Trimming the excess skin and fat from the edges of the chicken thighs

Coat with mustard, then crust with Panko bread crumbs

Coat the chicken thighs with the mustard, then press into the panko on both sides to stick the bread crumbs to the chicken.

Roast the thighs at 400°F for 1 hour

Roast (aka bake) the chicken thighs in a 400°F oven for 1 hour, until the thighs are at least 175°F measured in the thickest part of the thigh, and the bread crumb crust is golden brown. Enjoy!

Equipment

A roasting pan or baking dish, preferably with a rack. I like using a half sheet pan with a rack, because the chicken crisps up best if a rack is holding it above the pan. But, if a rack isn't available, I'll set the chicken directly on the pan.

Recipe Variations

  • Herbs de Provence shortcut: Sprinkle the chicken with 1 teaspoon dried herbs de Provence spice mix before you coat it with the mustard, and skip the herbs in the panko crust.
  • Different Herbs: Use 2 teaspons of any minced fresh herb in the panko. In the original recipe, they use minced garlic and tarragon. I always have some fresh thyme lying around, so that's what I use.
  • Spicy coating: Add ½ teaspoon of chipotle powder or cayenne pepper to the panko if you would like to spice up your chicken.
  • Homemade bread crumbs: Pulse 3 slices of sandwich bread in a food processor until it's chopped into crumb sizes. Add one tablespoon of olive oil and pulse a few times to mix it into the bread.

Tips and Tricks:

  • Panko or fresh bread crumbs work much better than canned bread crumbs from the grocery store. The big chunks of panko don't get swallowed up by the mustard crust.
  • I think it is easiest to put the chicken thighs in a big bowl, add the mustard, and toss them until they are coated - but I don't mind getting my hands dirty. If you want to be neat and tidy, brush the mustard on the chicken instead of tossing.
  • If you insist, you can use chicken breasts - but be careful of overcooking.  Cook them on the bone, skin on, and make sure you get them out of the oven at an internal temperature between 160ºF and 165ºF, or they'll dry out.
  • If your thighs are cooked through (over 175°F) but your panko isn't golden brown, turn on your broiler and broil the pan of chicken for a minute or two to crisp up the panko bread crumbs. But, be careful!  Bread goes from browned to burnt in a flash.  Keep a close eye on the chicken while it's under the broiler.
  • …if only you knew the power of the dark side… OK, if you promise to try this recipe, I'll stop with the Star Wars quotes.

What to serve with Baked Chicken Thighs

I serve this chicken with a salad, and since I've already got the oven heated up, I'll try to roast my vegetable sides at the same time. I love potatoes: Quick Baked Potatoes, Oven Roasted Crispy Fingerling Potatoes, or Cast Iron Spiral Skillet Potatoes  all go great with this recipe. For a green vegetable, I'll make my Cast Iron Brussels Sprouts.

Questions? Comments? Other ideas? Leave them in the comments section below.

Related Posts

  • Cast Iron Roasted Butterflied Chicken
  • Grill Roasted Chicken Pieces: Basic Technique
  • Sear Roasted Chicken Breasts with Shallot Herb Pan Sauce
  • Sear-Roasted Chicken Pieces with Quick Lemon Pan Sauce
    If you're looking for something else, here is my Recipe index page.

Enjoyed this post? Want to help out DadCooksDinner? Subscribe to DadCooksDinner via email and share this post with your friends. Want to contribute directly? Donate to my Tip Jar, or buy something from Amazon.com through the links on this site. Thank you.

Instant Pot Italian Wedding Soup

December 9, 2025 by Mike Vrobel 1 Comment

A bowl of Instant Pot Italian Wedding Soup with a spoon and napkin

Instant Pot Italian Wedding Soup, made with homemade broth, small meatballs, a mix of vegetables, and tiny bits of Acini di Pepe pasta, is a filling main-dish soup. If you've got homemade broth in the freezer, this soup comes together in about an hour, with only 10 minutes under pressure.

A bowl of Instant Pot Italian Wedding Soup with a spoon and napkin
[feast_advanced_jump_to]

I made a lot of turkey broth after Thanksgiving, so I'm making lots of soup. (Don't feel sorry for me, I love soup - leftover turkey broth season is my favorite time of year.) I haven't made Italian Wedding Soup in a while, so I made a batch - and realized that I didn't have the recipe on the blog.

Italian Wedding Soup is a fantastic main-dish soup, loaded with vegetables, meatballs, and tiny pasta. Don't worry about "it's just soup", it will fill you up.

What's the wedding in Italian Wedding Soup?

The soup has nothing to do with weddings in Italy; they will eat it for any occasion. Wedding Soup is actually "married soup" in Italian, referring to the flavors coming together ("marrying") in the soup.

Ingredients for Instant Pot Italian Wedding Soup

Ingredients Notes and Substitutions

  • Homemade Broth, full of flavor and body, is the key to this recipe. Homemade turkey broth, homemade chicken broth, or homemade beef broth will all work. (And if you have an Instant Pot and a leftover chicken or turkey carcass, homemade broth is easy to make.)
  • Store-bought Broth:You can use store-bought broth if you have to, and the soup will still be good, but it won't be as good as with homemade broth. That said, this soup is plenty tasty even with store-bought broth. Buy "less sodium" broth if you can - store-bought broth is very salty. Do not add extra salt to the soup until you taste-test it - you may need a little more, but you probably won't.
  • Ground meat for the meatballs: As I mention in the ingredients, you can use any ground meat you like. I used ground turkey in the pictures because I had turkey broth leftover from Thanksgiving, and it felt like a good match. That said, ground beef, ground pork, or meatloaf mix (a mix of ground beef and ground pork and sometimes ground veal) will also work.
  • Sausage instead of meatballs: Another simple substitution in this soup is to use sausage instead of meatballs. Cut tubes of Italian sausage into 1-inch pieces, or get bulk Italian sausage and use it instead of the meatball mix - roll the bulk sausage into balls and drop it in the soup.
  • Frozen store-bought meatballs: In a hurry? Buy frozen small meatballs at the store. The cooking time is the same. (Or, make the meatballs ahead of time and freeze them.)
  • Panko bread crumbs: These flaky Japanese bread crumbs are my favorite, and I think they give me better meatballs, but I've also used regular store-bought bread crumbs, and they work too. In this recipe, I'd substitute Italian-style bread crumbs, since this is an Italian recipe, but regular bread crumbs will also work.
  • Pasta shapes: This recipe is best with tiny pieces of pasta. Acini di Pepe pasta - small dots of pasta - is my favorite in this recipe, but Orzo or ditalini pasta will also work. In a pinch, I would also use smaller shapes, like macaroni.
  • Baby spinach: Any green that will wilt quickly will work in this soup; I like baby spinach or baby kale, and chopped-up swiss chard leaves will also work. If all you have are tougher greens, like mustard greens or collard greens, add them to the soup before pressure cooking.
  • Tomatoes: I don't use tomatoes in my Italian Wedding Soup; I never have, but I didn't know why. It turns out that Wedding Soup was a classic in the Naples area long before tomatoes were brought over from the New World, so they were never part of the recipe. That said, if you insist on adding tomatoes, add a can of diced tomatoes with the broth.
Ingredients for meatballs for Instant Pot Wedding Soup

Step-by-Step Pictures of Instant Pot Italian Wedding Soup

Shape the meatballs

A tray of small meatballs with the bowl and cookie scoop

Mix the meatball ingredients then roll into 1-inch meatballs (or cheat and use a cookie scoop like I did here.)

Sauté the soffrito

Sauteing onions, celery, carrots, garlic, and red pepper flakes in an Instant Pot

Heat the olive oil in an Instant Pot set to Sauté, then sauté the onions, carrots, celery, garlic, and herbs.

Everything in the pot

Meatballs and broth and pasta added to the pot

Add the broth and pasta, then add the raw meatballs one by one into the pot.

Pressure Cook for 10 minutes

Instant Pot set to 10 minutes at high pressure

Pressure cook on high pressure for 10 minutes with a natural pressure release.

Stir in the spinach, then serve

Stirring the spinach into the soup after pressure cooking

Stir in fresh ground black pepper and the spinach, stir until the spinach wilts, then serve.

Tips and Tricks

  • ½ cup of pasta with 8 cups of broth: ½ cup may not look like much pasta, but it is plenty. If you add more, you'll wind up with a stew instead of a soup, as the pasta sucks up all the liquid in the pot.
  • Homemade broth: I already mentioned this in the ingredients notes, but...homemade broth is the key to a fantastic soup. If you have an Instant Pot, it's simple and easy to make and takes much less time than on the stovetop. I make batches of chicken broth throughout the year, and freeze them in 1-quart jars for soups and stews. And, on Thanksgiving, when I have a turkey carcass or two, I make a huge batch of turkey broth to tide me over through the winter months. (Or at least into January - I make a lot of soups in the winter.)
  • Make meatballs with a small cookie scoop: Hand-rolling small meatballs is time consuming, so I use a small cookie scoop to speed up the process. (Or, if you have a large cookie scoop, you can make this recipe with large meatballs - pressure cook for 12 minutes on high instead of 10 minutes).

What to serve with Italian Wedding Soup

I serve with a pepper grinder and red pepper flakes on the table, to add more to the soup right before I eat it. (More grated parmesan is also good, as is some minced parsley for garnish). Italian Wedding Soup is perfect as the center of a Soup, Salad, and Bread meal, so that is how I almost always serve it, with a Caesar salad and a crusty boule of rustic bread. (Or a loaf of squishy Italian bread.)

Make Ahead

You can make the meatballs ahead of time; freeze them and store them in a zip-top bag. With jars of frozen homemade broth, you can make soup directly from the freezer: thaw the broth in the microwave while you sauté the vegetables, then add the frozen meatballs to the pot before pressure cooking.

Storing Leftovers

Leftover soup stores beautifully. It will last for a couple of days in the refrigerator, and can be frozen for up to six months. I freeze the soup in 2-cup storage containers, so I have lunch-sized portions of Italian Wedding soup for a hot lunch from the microwave.

Related Posts

If you're looking for a different soup, try my Pressure Cooker Day-After-Thanksgiving Turkey Carcass Soup, Instant Pot Day-After-Thanksgiving Lemon Turkey and Orzo Soup, or Instant Pot Tortellini Soup.

For other classic Italian recipes, try my Pressure Cooker Venetian Pasta and Beans (Pasta e Fagioli alla Veneta), Instant Pot Ragu Tucci, Instant Pot Venetian Peas and Rice (Risi e Bisi), or Instant Pot Mushroom Risotto (Risotto ai Funghi).
For other soup ideas, check out my Instant Pot Turkey Carcass Soups recipe list.
If you're looking for something else, here is my index of Instant Pot and Pressure Cooker Recipes.

Enjoyed this post? Want to help out DadCooksDinner? Subscribe to DadCooksDinner via email and share this post with your friends. Want to contribute directly? Donate to my Tip Jar, or buy something from Amazon.com through the links on this site. Thank you.

Instant Pot Green Chile Stew

December 2, 2025 by Mike Vrobel 1 Comment

A bowl of Instant Pot Green Chile Stew with minced cilantro and cans of hatch chiles

Instant Pot Green Chile Stew. My daughter went on a trip to Santa Fe and came back with a jar of fire-roasted hatch chiles, raving about the Green Chile Stew she had when she was there. "Do you mean Chile Verde?" I asked, taking the jar. "No, green chile stew is different", she said. She was right, it is a great stew, and easy to make with jars of fire-roasted chiles and an Instant Pot (or other pressure cooker).

A bowl of Instant Pot Green Chile Stew with minced cilantro and cans of hatch chiles
[feast_advanced_jump_to]
Ingredients for Green Chile Stew

Ingredients notes and substitutions

Beef: I prefer beef chuck for stews. Beef round or sirloin will also work in this recipe. If you want to avoid beef, use pork shoulder or chicken thighs. The cooking time is the same for all of these.

Potatoes: Any waxy potato will work - red skin potatoes, white potatoes, or Yukon gold (yellow) potatoes. I don't recommend using russet potatoes, because they don't hold their shape under pressure. That's fine for mashed potatoes, but it doesn't work for a stew.

Coriander and cumin: I like the extra hint of spice they add, but skip them if you want.

Broth: Homemade Instant Pot Beef Broth is a little involved to make, but if you have it, it is fantastic in this recipe. Homemade Instant Pot Chicken Broth works great. If you don't have either, you can use store-bought beef or chicken broth, but use the reduced salt amount suggested in the recipe. (Store-bought broth is very salty.)

Heat level: I can get mild, medium, or hot roasted green chiles, which is the easiest way to adjust the heat level. If all you can find are mild green chiles, you can up the heat by adding a fresh, minced jalapeno (medium heat) or serrano (high heat) to the onions.

Potatoes: Waxy potatoes will work in this recipe - red potatoes, white potatoes, or Yukon Gold (yellow) potatoes. I don't recommend russet potatoes because they will break apart if you pressure-cook them for as long as the beef needs to cook.

Hatch Green chiles, jarred and canned

Roasted Hatch Green Chile notes

Someday I'm going to make it to Hatch for roasted chile season. Until then, since I'm a Yankee from Ohio, I have to live with canned or jarred green chiles. (If you can find frozen bags of roasted hatch chiles at your local store, get them - they are better than canned or jarred.) Of course, the best way to make this is to roast your own chiles - use about 3 pounds of fresh green chiles before roasting to get enough for this recipe. Blacken the skins over an open fire (grill, broiler, stovetop burner), peel the skin off, seed, and stem the chiles, then dice them. (See my Instant Pot Chile Verde recipe for more detailed chile roasting instructions.)

Making Instant Pot Green Chile Stew in pictures

Brown the Beef in 3 batches

Browned cube of beef for green chile stew

Salt the ½-inch cubes of beef, then brown them in three batches, on one side only.

Sauté the onions and toast the spices

Sautéing onions and toasting spices for green chile stew

Sauté the onions until they just start to brown, then add the garlic and spices and toast for 1 minute.

Everything in the pot

Green Chile Stew ingredients in pot

Stir in the browned beef, potatoes, diced tomatoes, and fire roasted hatch green chiles.

Pressure Cook for 12 minutes

Instant Pot - Pressure cook on high for 12 minutes

Pressure cook on high pressure for 12 minutes with a natural pressure release. Serve and enjoy!

Tips and tricks

Cut the beef into small cubes: I use small cubes of beef because I'm cooking it with the potatoes. Smaller cubes cook more quickly, so the potatoes don't overcook or fall apart.

Brown the meat on one side: Browning meat adds a lot of flavor to the stew. The layer of caramelized brown bits left in the pot ("fond" in French) dissolves into the pot, adding depth and body. That said, I only brown the beef on one side. Traditional recipes brown the meat on all sides, but that takes a while. Browning one side gives me the best balance of flavor and speed.

Can I skip the browning step? Yes, you can. But, as I said above, you're going to lose some of the flavor. I consider it an essential step, but if you don't have the time, skip the browning. The stew will still be good.

Storage

This stew can be made a day ahead, refrigerated, and reheated - if anything, it tastes better this way, thanks to a day of letting the flavors mingle.

To store for later, portion into 2-cup containers and refrigerate for up to 3 days, or freeze for up to 6 months. (This recipe freezes beautifully.)

Inspired by:  Classic New Mexican Green Chile Stew - Santa Fe School of Cooking

Storing leftovers

Green chile stew makes fantastic leftovers. I store leftover stew in 2-cup containers for convenient lunch-size portions. Leftover stew lasts for a few days in the refrigerator, or for up to 6 months in the freezer.

What to Serve with Green Chile Stew

I serve green chile stew with cornbread and a salad, or with tortilla chips for dipping into the stew.

Related Posts

Chili Verde is a sibling recipe; the big difference is using beans instead of potatoes. Check out my Pressure Cooker Chili Verde (Green Pork Chili) or Instant Pot Quick Chili Verde for examples. If you want a traditional beef stew, try my Instant Pot Easy Beef Stew. For other regional stew varieties, try Instant Pot Texas Beef Stew With Sweet Potatoes, Instant Pot Beef and Black-Eyed Pea Stew, Instant Pot Beef Stew with Spanish Smoked Paprika, or Instant Pot Provencal Beef Stew.
If you're looking for something else, here is my index of Instant Pot and Pressure Cooker Recipes.

Enjoyed this post? Want to help out DadCooksDinner? Subscribe to DadCooksDinner via email and share this post with your friends. Want to contribute directly? Donate to my Tip Jar, or buy something from Amazon.com through the links on this site. Thank you.

Instant Pot Turkey Giblet and Wing Broth

November 25, 2025 by Mike Vrobel 12 Comments

Jars of Instant Pot Turkey Giblet Broth

 Instant Pot Turkey Giblet and Wing Broth. How do I make turkey broth as I prepare for my Thanksgiving dinner? I pressure cook the neck and giblets from my turkey, and add in some extra turkey wings.

Jars of Instant Pot Turkey Giblet Broth
[feast_advanced_jump_to]

Here's another quick Thanksgiving week recipe, sharing one of my key prep steps - making Turkey broth.

I need lots of broth for Thanksgiving gravy and stuffing. Sure, I could make chicken broth, or wimp out and buy it at the store. On the one hand, using chicken feels like cheating. On the other hand…how do I get a batch of turkey broth without cooking a turkey first?

If I'm just making gravy, I use the neck and giblets - the parts stuffed into the cavity of the bird - so they don't go to waste. But that's not enough turkey parts to flavor a big batch of broth. The penny dropped when I saw the pack of turkey wings at my grocery store. Wings are cheap(ish), and mostly skin and bones, exactly what I need to bulk up the giblets and make a big pot of broth.
So, here is the turkey broth I'm making *before* Thanksgiving. Which brings me to my annual reminder - save the bones from your Thanksgiving turkey to make another big batch of broth for after thanksgiving turkey soup.

Ingredients Notes and Substitutions

  • No giblets? No worries. Skip them, or add an extra turkey wing.
  • Turkey wing substitute #1: Turkey Necks. If you're lucky enough to have a store that sells turkey necks, get extra necks instead of the wings. They work great, and are usually cheaper.
  • Turkey wing substitute #2: Turkey Drumsticks. If you want to go with turkey drumsticks instead of the wings, that works too - but I like the higher ratio of bone and skin to meat that I get on the wings; it gives the broth more body. (That is, more gelatin - it comes from the connective tissue in the wings and the skin.)
  • Onion, Carrot, Celery, Bay Leaf: Some or all of these are optional, except for the onion. The trio of onion, carrot, and celery make up the vegetables in my favorite Bread Stuffing Recipe, and give a nice flavor to the broth or gravy. But, if all you have is an onion, that's enough for a good broth.
  • Fine sea salt: You can skip the salt if you want, but broth is bland without it. I use fine sea salt because it's what I keep in my salt pig in my kitchen, but you can use Kosher salt (3 teaspoons) or table salt (1 ½ teaspoons) instead.

Tips and Tricks

  • Because of the long cooking time, these giblets are not really useable in gravy. I'm fine with that - I'll make my gravy and just skip the giblets. If you want to use the giblets in gravy, cook the broth at high pressure for 30 minutes.
  • Small batch: If you only need 4 cups of broth, you can go with the neck and giblets from a turkey. (Or 2 pounds of wings).
  • Large batch: Scale up to 12 cups of water by adding an extra onion and pound of wings. Scale up to 16 cups of water by doubling the recipe - but you'll need an 8-quart Instant Pot. Also, sub in an extra pound of wings instead of doubling the giblets, unless you're lucky enough to have two turkeys.
  • If you want extra flavor, roast the chicken wings before making the broth. Put them on a rimmed baking sheet and roast in a 425°F oven for 45 minutes, turning them over halfway through. This should brown the skin on the wings, which adds a nice roasted turkey flavor to the broth. (Do I do this? Not often. Most of the time I toss the raw turkey in the pot and pressure cook everything.)

What do you think?

Questions? Other ideas? Leave them in the comments section below.

Related Posts

Pressure Cooker Turkey Giblet Gravy
Instant Pot Turkey Bone Broth (Turkey Carcass Broth)
Instant Pot Turkey Back Broth
Pressure Cooker Day-After-Thanksgiving Turkey Carcass Soup
My other Instant Pot Pressure Cooker Recipes

Enjoyed this post? Want to help out DadCooksDinner? Subscribe to DadCooksDinner via email and share this post with your friends. Want to contribute directly? Donate to my Tip Jar, or buy something from Amazon.com through the links on this site. Thank you.

Instant Pot Applesauce

November 18, 2025 by Mike Vrobel 1 Comment

A bowl of Instant Pot Applesauce with some cinnamon sprinkled on it

Instant Pot Applesauce recipe. Applesauce is simple to make with a pressure cooker, ready in under an hour, tastes great, and is a good way to use up a bunch of apples. I make a few batches of applesauce every fall.

A bowl of Instant Pot Applesauce with some cinnamon sprinkled on it
[feast_advanced_jump_to]

I never realized how easy applesauce was until I saw the recipe in Cook's Illustrated years ago. Cut up some apples, add sugar and a little water, and maybe some cinnamon, then simmer until they are tender and falling apart. Mash it a bit and you have applesauce.

It's even easier to make applesauce in a pressure cooker - dump everything into an Instant Pot, lock the lid, and set it for 3 minutes. Come back in about half an hour and you have applesauce. I try to make this recipe every fall, and it is one of my favorite things to eat with pork.

Ingredient substitutions

  • Apple varieties: There are lots of apples that make good applesauce. Golden Delicious is my favorite, with a sweet flavor and just a hint of tart. However, if you have other apples (or prefer them), feel free to use them instead. Some suggestions: McIntosh is another great apple for applesauce, as is Honeycrisp. Granny Smith apples are very tart, so I would use them half-and-half with a sweeter apple, but if you like tart applesauce, they are a good addition. The only apple I avoid is Red Delicious, which I think is one-dimensional in flavor, but if it's all you have, it will still work.
  • Pinch of salt: The little bit of salt brightens up the flavor of the applesauce. It doesn't take much - just a pinch, about ⅛ teaspoon. You can skip the salt if you are on a low-sodium diet.
  • Sugar: I like a sweet applesauce, but if you like tart flavor, cut it back to 2 tablespoons, or skip the sugar altogether. Also, brown sugar is a great substitute for the regular sugar used in the recipe.
  • Lemon juice: If you want a little extra tart flavor in your applesauce, add a tablespoon of lemon juice to the pot. (About half a lemon, squeezed).
  • Extra Cinnamon: I like a hint of cinnamon in my applesauce, but if you want all-caps Cinnamon Applesauce, increase the cinnamon to 1 teaspoon.

How to Make Instant Pot Applesauce in pictures

Peel and quarter the apples

Apples, cored and quartered

Peel the apples and cut them in quarters - I slice around the core in four cuts

Apples and cinnamon in the pot

Water, apples, sugar, salt, and cinnamon in the pot

Pour ½ cup of water into the pot, then add the apples, sugar, salt, and cinnamon. Stir to coat the apples with the sugar and cinnamon.

Pressure cook for 3 minutes with a Natural Release

Pressure cook for 3 minutes with a Natural Release

Once the pressure comes down, mash with a potato masher until smooth.

Tips and Tricks

  • Food Mill Applesauce: If you own a food mill and like a smooth applesauce, this recipe is even easier. Don't bother peeling the apples; simply core and quarter them, then toss them into the pot. Pressure cook the applesauce, then scoop the apples into the food mill and process them. The mill will separate the skins. As a bonus, if you use apples with red skin, your applesauce will be a nice pink color.
  • Apple peeler, corer, and slicer: If you own one of the gadgets that peel, slice, and core an apple all at once - I think of it as an "Apple spiralizer" - it makes this recipe easy.

Adapted from: Homemade Applesauce, Cooks Illustrated September/October 2022

Storage

Homemade applesauce, stored in an airtight container, will last for up to a week in the refrigerator or up to 6 months in the freezer.

What to serve with Instant Pot Applesauce

Applesauce is my favorite side dish for pork, like Grilled Ribeye Pork Chops, Sous Vide Thick Cut Pork Chops, Instant Pot Pork Shoulder Chops, or Rotisserie Boneless Pork Loin Roasts. I also make it to go with potato pancakes.

Related Posts

Pressure Cooker Tomato Sauce
BBQ Sauce Recipe
Horseradish Sauce Recipe
Sauteed Green Beans Recipe
Instant Pot Beef Gravy
Instant Pot Cranberry Sauce
If you're looking for something else, here is my index of Instant Pot and Pressure Cooker Recipes.

Enjoyed this post? Want to help out DadCooksDinner? Subscribe to DadCooksDinner via email and share this post with your friends. Want to contribute directly? Donate to my Tip Jar, or buy something from Amazon.com through the links on this site. Thank you.

Instant Pot Flemish Beef Stew (with gingerbread and ale)

November 11, 2025 by Mike Vrobel 3 Comments

Flemish Beef Stew with a glass of Bernadus in the background

Flemish beef stew with St. Bernadus was one of the best things I ate on my trip to Belgium. Beef braised in Belgian beer with carrots and gingerbread cookies (!), Flemish stew is full of fantastic flavor and easy to make in my Instant Pot.

Flemish Beef Stew with a glass of Bernadus in the background
[feast_advanced_jump_to]

My first dinner in Belgium was at the punny-named Nüetnigenough in Brussels. That's where I had my favorite dish, Flemish beef stew with St. Bernadus. (That's saying a lot - there was a lot of fantastic food in Belgium). Flemish beef stew is made with Belgian beer and chunks of carrot and gingerbread loaf - the gingerbread was a nice touch, with little cubes of sweet bread mixed in with the meat. And of course, this being Belgium, it is served with frites - Belgian fries - to dip in the stew. At home, I made do with air fryer steak fries - Belgian frites are bigger than our typical American French fries, and steak fries are closer to frites than our regular fries.

Ingredients for Flemish Beef Stew

Flemish Beef Stew ingredients notes

  • Beef: Chuck roast is my favorite stewing beef, but boneless short ribs and bottom round both make good substitutes.
  • Belgian beer: The original recipe was made with St. Bernadus abt 12, a Belgian quadrupel-style ale. Belgian beers are sweet and malty, and any Belgian dubbel, trippel, or quaddrupel will work in this recipe. If you can't find Belgian beer, a brown ale, stout, or porter will work.
  • Non-alcoholic version: If you can't (or won't) have any alcohol, substitute extra beef broth for the beer, and add a tablespoon of brown sugar to duplicate the sweet flavor of Belgian beer.
  • Biscoff cookies are my substitute for gingerbread loaf. They have a similar gingery flavor to the gingerbread loaf in the original recipe. If you have a gingerbread loaf, substitute 4 ounces worth for the Biscoff cookies. Or, if you can't find Biscoff cookies, look for Belgian speculoos cookies. (Biscoff is a specific brand of speculoos cookies.) If you can't find those, use gingerbread cookies.
  • Mustard - I use Dijon, but a grainy mustard would also work.
  • Carrots: The carrots are optional. They are not in all the Flemish stew recipes I found, but they were in the bowl at Nüetnigenough, and I always enjoy carrots in a stew, so I put them in there.

Flemish Beef Stew - Step by Step Pictures

Brown the beef

A browned piece of beef

Melt the butter, then brown the beef cubes on one side in 3 batches. Don't crowd the pot. (My 7.5-quart wide pot was able to do this in two batches.)

Sauté the onions, garlic, and thyme

Move the browned beef cubes to a bowl, then add the onions, garlic, and thyme to the pot, and sprinkle with salt. Sauté until the onion softens. Add the beer and simmer for a minute to boil off some of the alcohol.

Everything in the pot

Everything in the pot with a layer of Biscoff cookies on top

Stir in the browned beef cubes, broth, carrots, and mustard. Lay the cookies on top.

Pressure cook for 30 minutes with a Natural Release

Lock the lid and pressure cook on high for 30 minutes, then let the pressure come down naturally (about 30 minutes more). Stir everything together (and stir in the cornstarch slurry if you want to thicken the stew), serve, and enjoy!

Tips and tricks

  • I brown my beef on one side before stewing. Browning gives the stew extra flavor - the fond, the browned bits that stick to the bottom of the pot, melt into the stew. I don't want to spend all day browning the beef on all sides, like traditional recipes recommend. So I brown it on one side in batches to avoid crowding the pan.
  • I brown my beef in batches. If the pot is crowded, the beef doesn't brown. Depending on the width of your pot, this will take two or three batches. A traditional 6-quart Instant Pot will fit about a pound per batch, or 3 batches. An 8-quart Instant Pot will take two batches. My new 7.5-quart wide Instant Pot seared the beef in two batches without crowding.
  • If your browned bits are looking a little burnt, add ½ cup of the beer to the pot with the onions, and scrape the browned bits loose. Simmer until the liquid boils off, then sauté the onions until they soften.
  • The cornstarch slurry is to thicken the stew. Sealed pressure cookers don't allow evaporation, so the stew will be thin. If you're OK with that, you can skip the slurry.

What to serve with Flemish Beef Stew

Frites (French fries) with mayonnaise are the traditional accompaniment - I use my Air Fryer Frozen Fries technique. If you want mashed potatoes, try using my Instant Pot Stamppot or Instant Pot Hutspot recipe, but call it stoemp like the Belgians do. Or use regular Instant Pot Mashed Potatoes.

Scaling

This recipe needs an 8-quart pressure cooker if you want to double it. Cut all the ingredients in half, and this recipe will fit in a 3-quart pressure cooker. The cooking time does not change; it takes the same amount of time to cook each piece of stew meat.

Storage

Stew makes fantastic leftovers - I think it tastes better the second day, after the flavors have had time to mingle. Sometimes I'll make a pot the day before, so I can rest it overnight, then reheat it for serving. Store stew for longer in sealed containers (I use 2-cup containers for single serving sizes). They will last for a few days in the refrigerator, or for months in the freezer.

Related Posts

If you're looking for more beef stews, try my Instant Pot Easy Beef Stew, Instant Pot Provencal Beef Stew (Beef Daube Provencal), Instant Pot Beef Stew with Spanish Smoked Paprika, or Instant Pot Beef and Black-Eyed Pea Stew. For more Belgian recipes, try my Instant Pot Waterzooi (Flemish chicken and vegetable stew with cream sauce).

For some other international flavors, try my Instant Pot Colombian Beef Short Rib Soup.
If you're looking for something else, here is my index of Instant Pot and Pressure Cooker Recipes.

Enjoyed this post? Want to help out DadCooksDinner? Subscribe to DadCooksDinner via email and share this post with your friends. Want to contribute directly? Donate to my Tip Jar, or buy something from Amazon.com through the links on this site. Thank you.

Instant Pot Kale Tacos

November 4, 2025 by Mike Vrobel 6 Comments

A plate of instant pot kale tacos

Instant Pot Kale Tacos with Caramelized Onions are a variation on my Pressure Cooker Kale. The sweet taste of sautéed onions, a hit of heat from red pepper flakes, and the meaty kale greens all combine for a great taco filling. (Or serve them on their own as a Mexican side dish. I love to stir them into a bowl of black beans. Kale is a very versatile vegetable.)

A plate of instant pot kale tacos
[feast_advanced_jump_to]

I prefer these tacos "street food" style. One of my big surprises on my Mexican culinary tour was the size of the corn tortillas at street taco carts. I'm used to American sized tortillas - 6 inches across for a corn tortilla. (Which seems small when you grow up with standard American 8 inch flour tortillas). At the street carts in Oaxaca, corn tortillas were 4 inches across, meant to be eaten in one big bite. And I did eat them in one bite - lots of them.

Pressure Cooker Kale Tacos with Caramelized Onions | DadCooksDinner.com
Pot full of kale, ready to lock the lid

To make kale tacos, fill a warm corn tortilla with a thin line of kale, making sure to get a little of the sautéed onion mixed in as well. Top with a spoon of salsa and a sprinkle of crumbled queso. Add a squeeze of lime, and it is ready - a couple of bites and it is time for the next taco. But that's just me. Prefer big, bursting flour tortillas? Crunchy taco shells? Use your own favorite toppings and make these kale tacos your own.

Ingredients Notes

  • Bagged Kale: I often take the easy way out on this recipe and buy a bag of washed and pre-cut kale. (I don't worry about stems, I just pack it into the pot).
  • Kale substitutes: Spinach and mustard greens are both good substitutes for the kale in this recipe.
  • Olive oil: I use olive oil to add a little extra flavor to the kale, but it's subtle. Vegetable oil works too.

Tips and Tricks

  • Toppings: Whatever you want! I like corn tortillas, salsa, and cheese, and maybe a sprinkling of minced cilantro. Sliced or pickled jalapenos add some heat. Or, to really spice up the tacos, use sliced serrano peppers.
  • Hot sauce: I will dab a little hot sauce on top as well. My favorite is El Yucateco green habanero sauce, but any Mexican-style hot sauce will work as well. (My kids love Tabasco Chipotle hot sauce - it's not that hot, and adds a nice smoky flavor).

Inspired by Rick Bayless, Swiss Chard Tacos with Caramelized Onions [RickBayless.com]

What do you think?

Questions? Other ideas? Leave them in the comments section below.

Pressure Cooker Kale Tacos with Caramelized Onions | DadCooksDinner.com
Pressure Cooker Kale Tacos with Caramelized Onions

Related Posts

Pressure Cooker Short Rib Tacos with Dried Chile Pepper Sauce
Pressure Cooker Chicken Tacos (Tinga de Pollo)
Pressure Cooker BBQ Pulled Pork Tacos
My other Pressure Cooker Recipes
My other Pressure Cooker Time Lapse Videos

Enjoyed this post? Want to help out DadCooksDinner? Subscribe to DadCooksDinner via eMail or RSS reader, recommend DadCooksDinner to your friends, and buy something from Amazon.com through the links on this site. Thank you.

Grilled Shishito Peppers

October 28, 2025 by Mike Vrobel 1 Comment

Shishito peppers blistering on the grill

When I went on a Yakitori kick a few years ago, there was one recipe I couldn't try - grilled shishito peppers - because I couldn't find them in Northeastern Ohio. Nowadays, shishito peppers are a regular item at my local grocery stores, right next to the Jalapeños. That's great, because shishito peppers are a quick and easy grilled side dish.

Shishito peppers blistering on the grill
[feast_advanced_jump_to]

To go on a tangent: It's amazing how easy it is to be an adventurous home cook nowadays. Ingredients that were only in specialty and ethnic markets are showing up at my everyday grocery store. I'm not going to stop going to my ethnic markets; I get great deals on rice and soy sauce, dried peppers and Mexican sparkling water. But, still, it's nice to be able to grab exotic ingredients while I'm filling my weekly shopping cart.

Where was I? Right, shishito peppers.

"Shishito" is an unfortunate name in English. My inner 8-year-old keeps giggling when I say it out loud.

Shishito peppers are a perfect grilled appetizer, because a little blackening on the skin brings out their sweetness. They have just a hint of hot pepper heat, enough to make them interesting, but not so much that you're suffering. And, my favorite part - they're bite sized. Grab the stem as a handle, and chomp down. If you're looking for a quick bite to tide everyone over while you finish the main course, or an easy side dish for Asian inspired grilling, check out these peppers.

Looking for more grilled peppers recipes? Try my Grilled Stuffed Jalapenos or Grilled Mini Sweet Peppers

Grilled Shishito Peppers Step By Step Pics

Toss the peppers with a little oil and salt

Shishito peppers tossed with a little oil and salt

I don't measure the oil and salt - I just drizzle on a little oil, and sprinkle with a pinch of salt.

Grill the peppers

Shishito peppers blistering on the grill (with ribeye flareup in background)

Grill the peppers until they are blistered and blackened in spots, about 2 minutes a side (depending on the heat of your grill). Enjoy!

Helpful Tips

  • Grilling Heat Levels: Medium heat is the best balance of time and temperature for these peppers. But, if you are grilling a main course that requires a different heat level, you can make it work. The peppers are done when they are blackened in spots; don't worry about a specific time. I've done them on high heat, flipping them often to keep them from burning, and I have to get them off the grill in about 2 minutes.
  • Peppers dropping into the grill: I put the peppers on across the grill grates, so they don't drop through. If you're worried about that, use a grilling basket or vegetable basket on your grill.
  • Cast iron: If you don't have a grill, use a cast iron pan on your stovetop. Preheat the pan on medium heat until it is thoroughly heat-soaked, 5 to 10 minutes. Then, add the peppers and sear for 3 minutes, or until they are well browned on the bottom. (A little charred black won't hurt). Flip the blistered shishito peppers and cook them on the other side, about 3 more minutes, until they are browned on the bottom. Remove from the pan and serve.

Serving Suggestions

Shishito peppers make a great vegetable side dish for a grilled meal; you already have the grill lit, why not throw some peppers on there? I've had them recently with my Grilled Boneless Skinless Chicken Thighs, Grilled Thin Pork Chops, or Grilled Butterflied Chicken. Or, try the recipe in the background of my pictures - Grilled Teriyaki Ribeye Steaks.

Storing Leftovers

Leftover shishito peppers can be stored in an airtight container for a few days in the refrigerator, or for a few months in the freezer. Cut the stems off and pack them in as tight as possible. They will get soft overnight, so I like to use leftover shishitos in other recipes, like I would roasted peppers.

What do you think?

Questions? Other ideas? Leave them in the comments section below.

Related Posts

Another recipe that grilled shishito peppers goes with is Yakitori Chicken Thighs. If you're looking for other grilled peppers, try my Grilled Mini Sweet Peppers, Grilled Stuffed Jalapeno Peppers, or Instant Pot Stuffed Bell Peppers.

Enjoyed this post? Want to help out DadCooksDinner? Subscribe to DadCooksDinner via eMail or RSS reader, recommend DadCooksDinner to your friends, and buy something from Amazon.com through the links on this site. Thank you.

Instant Pot Stamppot (Dutch Mashed Potatoes with Kale and Onions)

October 21, 2025 by Mike Vrobel 1 Comment

A bowl of Instant Pot Stamppot

Instant Pot Stamppot recipe. (Dutch mashed potatoes with kale and onions). Stamppot is a Dutch classic, and easy to make in a pressure cooker. It makes a hearty side dish, or serve it the Dutch way with gravy and smoked sausage for a hearty meal.

A bowl of Instant Pot Stamppot
[feast_advanced_jump_to]

I love mashed potatoes and gravy, so of course, Dutch stamppot was immediately one of my favorites. We went to the restaurant Stamppot Amsterdam, and the variety of stamppots available was fantastic. The presentation was terrific - the mashed potatoes were shaped into a ring, forming a tall cylinder with a perfect circle of gravy in the center and a smoked sausage across the top. I got the stamppot with sauerkraut, but my favorite was the one my wife ordered, stamppot with kale. I made it as soon as I got home, and it was every bit as good as it was in Amsterdam.

Ingredients for Instant Pot Stamppot

Ingredients Notes

  • Potato type: The best potatoes for this recipe are russet potatoes (aka Idaho potatoes) or Yukon gold potatoes. Red potatoes and white potatoes are a little waxy for this; you want fluffy potatoes.
  • Kale substitutes: Spinach and turnip greens make good substitutes if you can't find kale. Endive is another popular stamppot mix-in in the Netherlands. Or, you can use sauerkraut (drained) in the recipe. Add all of them on top of the potatoes, like you do with the kale.
  • Carrots: Substituting carrots for the kale is so common it is its own recipe - check out my Instant Pot Hutspot for Dutch mashed potatoes with carrots and onion)
  • Butter: Regular butter (salted or unsalted) is fine. If you want to be authentic, substitute a European-style butter, like Plugra - the higher butterfat will add just a little more richness and flavor to the potatoes. But European-style butter is expensive, so I don't like to use it in cooking.

Instant Pot Stamppot Step by Step Pictures

Potatoes and kale in a steamer basket

Kale and potatoes in the steamer basket in an Instant Pot

Add a cup of water to the pressure cooker, then the vegetable steaming basket, then the potatoes and kale.

Pressure Cook for 7 minutes

Instant Pot set to 7 minutes on high pressure

Pressure cook on high pressure for 7 minutes

Melt the butter and sauté the onions

Sautéing the onions in melted butter

Lift out the basket of potatoes and kale. Set the pot to sauté mode, add the butter and onions, and sauté until the butter is melted and the onions soften.

Mash in the potatoes and kale and stir in the cream

Mashing the potatoes, kale, and onions

Add the potatoes and kale back to the pot, and mash until coated with the butter. Add the cream and mash until everything is mixed and smooth. Enjoy!

Tips and Tricks

  • Vegetable steaming basket: I like the texture of pressure-steamed potatoes better than pressure-boiled potatoes, so I think the steaming basket is a key trick to this recipe. If you don't have a steaming basket, that's OK It will still work, but the potatoes might be a bit overcooked and gummy.
  • Sautéing the onions: For the simplest version of this recipe, add the diced onions to the steaming basket with the potatoes and kale, and skip the sautéing the onions step (just melt the butter). But you get extra flavor from sautéed onions, and since we have to melt the butter anyhow, I add the onions with the butter and sauté them while the butter melts. It's only a couple extra minutes, and is worth the time.

What to serve with Stamppot

Gravy is almost essential for stamppot. Instant Pot Beef Gravy is my favorite, but any gravy (like my Instant Pot Turkey Gravy) will work. Also, serve it with a good smoked sausage - Dutch rookworst is excellent if you can find it, but any good smoked sausage will work. Or, the Dutch also serve it with Gehaktballen - a massive meatball.

Scaling

This recipe doubles easily, but you will need an 8-quart pressure cooker to fit it. Cut all the ingredients in half, and this recipe will fit in a 3-quart pressure cooker. The cooking time does not change; it takes the same amount of time for each potato piece, no matter how many are in the pot.

Storage

Stamppot can be cooked and stored for later. Cook it and portion it into airtight containers - I use 2-cup containers - and it will keep for a few days in the refrigerator, or for months in the freezer. I reheat the containers in the microwave. If you can plan ahead, thaw frozen potatoes by leaving them in the refrigerator overnight; they will reheat much more evenly.

Related Posts

As I said above, the sister version of this recipe is Instant Pot Hutspot (Dutch Mashed Potatoes with Carrots and Onion).

If you're looking for Irish versions of mashed potatoes and vegetables, try my Instant Pot Colcannon - (Irish Mashed Potatoes and Kale), or Pressure Cooker Champ (Irish Mashed Potatoes with Green Onions). Or, for loaded mashed potatoes, try my Instant Pot Loaded Smashed Red Potatoes.

Finally, if all these add-ons are not for you, here is my regular Instant Pot Mashed Potatoes recipe.

If you're looking for something else, here is my index of Instant Pot and Pressure Cooker Recipes.

Enjoyed this post? Want to help out DadCooksDinner? Subscribe to DadCooksDinner via email and share this post with your friends. Want to contribute directly? Donate to my Tip Jar, or buy something from Amazon.com through the links on this site. Thank you.

Instant Pot Kale

October 14, 2025 by Mike Vrobel 35 Comments

A bowl of Instant Pot Kale

Instant Pot Kale (with garlic and lemon). Pressure cooking tenderizes kale and makes it a quick side dish, with garlic and lemon to brighten up the creamy greens.

A bowl of Instant Pot Kale
[feast_advanced_jump_to]

A few years ago, kale was everywhere. Kale chips, kale smoothies, kale salad… But kale's time as the "it vegetable" seems to have passed. We've moved on - Brussels sprouts seem like they're having their moment in the sun - and kale is now just another green vegetable.

I was into Kale before it was cool, thanks to my CSA. (That's right, I'm a vegetable hipster. I need a carefully groomed mustache now.) Back before Kale was hip, I'd get big bunches in my CSA box and wonder what to do with it. My best answer? Braised kale.

Ingredients and equipment for Instant Pot Kale

Ingredient Notes

  • Olive oil: I use a cooking-grade extra virgin olive oil in this recipe. Expensive and fancy olive oils lose most of their special flavor when they are cooked. Or, you can substitute regular vegetable oil.
  • Garlic substitutes: Minced green onions (scallions) are a great substitute for the garlic. Or, if you want to be fancy, substitute and thin-sliced or minced shallot for the garlic. I was asked about garlic powder; you can substitute a teaspoon of garlic powder for the fresh garlic. (I save garlic powder for soups, stews, and chilis where it has time to blend into the other ingredients.)
  • Bagged kale: I love my CSA, and I love farmers markets. But…as you can see in the pictures, I will buy bags of pre-cut, pre-washed kale at my local grocery store when I need a quick weeknight side dish.

Instant Pot Kale, step by step pictures

Sauté the garlic for a minute

Sautéing the slivered garlic in an Instant Pot

Pack the kale into the pot

Packing the kale into the Instant Pot

Pressure cook for 5 minutes with a Quick Release

Pressure Cooking for 5 minutes

Stir in the lemon juice and pepper, and serve

A bowl of Instant Pot Kale

What do you think?

Questions? Other ideas? Leave them in the comments section below.

Related Posts

If you're looking for other vegetable sides, try my Pressure Cooker Roasted Sweet Potato Puree or Pressure Cooker Beets with Blue Cheese.

If you want a fancier greens side dish, try my Instant Pot Turnip Greens with Ham, Instant Pot Cannellini Beans and Greens, or Oven Baked Kale Chips.

For a recipes that have kale in them, check out Instant Pot Turkey Sausage and Kale Soup, Instant Pot Colcannon, or Instant Pot Pork Stew with Sweet Potato and Beans.
For other recipes, check out my Instant Pot and Pressure Cooker Recipe Index


Enjoyed this post? Want to help out DadCooksDinner? Subscribe to DadCooksDinner via eMail or RSS reader, recommend DadCooksDinner to your friends, and buy something from Amazon.com through the links on this site. Thank you.

Instant Pot Hutspot (Dutch Mashed Potatoes with Carrots and Onion)

October 7, 2025 by Mike Vrobel 2 Comments

Instant Pot Hutspot recipe. Hutspot is a classic Dutch recipe of mashed potatoes, carrots, and onions, and is a fantastic comfort food.

[feast_advanced_jump_to]

Hutspot is a common type of Stamppot, the Dutch "mashed potatoes and a veg" dish. Hutspot has risen above the other stamppots; it's so common that it has its own name. (Usually the name is stamppot and the vegetable - stamppot kale, stamppot sauerkraut, stamppot spinach. Kale is a particularly common one; recipe coming soon.

Ingredients Notes

  • Potato type: The best potatoes for this recipe are russet potatoes (aka Idaho potatoes) or Yukon gold potatoes. Red potatoes and white potatoes are a little waxy for this; you want fluffy potatoes.
  • Carrots: As you can see in the pictures, I cheated and used a bag of baby carrots. They work fine and save on peeling and chopping.
  • Butter: Regular butter (salted or unsalted) is fine. If you want to be authentic, substitute a European-style butter, like Plugra - the higher butterfat will add just a little more richness and flavor to the potatoes. However, European-style butter is very expensive, so I don't like to use it in cooking. (I save it for when I will taste it directly, like spreading on bread...yum.)
  • Dairy: Again, this is a rich dish, so I reach for the heavy cream. But, if you want a lighter version of the dish, substitute half-and-half or milk. I mean, you can even make it with skim milk if you like.
  • Dairy-free or vegan: This is a tough recipe to go completely dairy-free, because the butter and milk are key ingredients. I'm not an expert on vegan ingredients, but if you have almond milk and a trusted vegan butter, you can use them.

Equipment

  • 6-quart or larger pressure cooker (I love my Instant Pot)
  • Steamer basket: I think a vegetable steamer basket is an essential piece of equipment for this recipe. Cooking the potatoes directly in water in a pressure cooker results in overcooked potatoes; steaming them in a basket produces exactly the texture I want for this recipe.

Step by Step Instant Pot Hutspot Pictures

Pressure cook the potatoes and carrots

Put the potatoes and carrots in a steamer basket over a cup of water, then pressure cook for 7 minutes with a quick pressure release

Melt the butter and Sauté the onions

Put the butter and onions in the pot, set to sauté mode, and sauté until the butter is melted and the onions are soft and just showing a hint of browning around the edges.

Mash everything together and serve

Turn off the pot, then add the cooked potatoes and carrots, sprinkle with the salt, and mash them into the butter and onions. Once they are mashed and coated with butter, stir the cream into the mash. Serve and enjoy!

Tips and Tricks

  • Sautéing the onions: In a traditional hutspot recipe, the onions are boiled with the potatoes and carrots, and everything is mashed together. Sautéing the onions to give them extra flavor is a common variation, and since I have to melt the butter anyhow, I sauté the onions while I'm at it. That said, if you want the simplest version of the recipe, skip the sauté step and add the onions to the vegetable basket with the potatoes and carrots.
  • Traditionally, this recipe is boiled with a piece of beef and served on October 3rd to celebrate Leinz Ontzet, the lifting of the siege of Leiden. If you want to add the beef flavor (without the beef), use beef broth instead of water for simmering.
  • Serve this with smoked sausage for a typical Dutch presentation (as you see in the pictures), and/or with beef gravy.

Related Posts

Instant Pot Beef Gravy
Pressure Cooker Turkey Giblet Gravy
Pressure Cooker Baby Potatoes with Butter and Parsley
Instant Pot Loaded Smashed Red Potatoes
Instant Pot Colcannon (Irish Mashed Potatoes and Kale)
Instant Pot Mashed Potatoes
If you're looking for something else, here is my index of Instant Pot and Pressure Cooker Recipes.

Enjoyed this post? Want to help out DadCooksDinner? Subscribe to DadCooksDinner via email and share this post with your friends. Want to contribute directly? Donate to my Tip Jar, or buy something from Amazon.com through the links on this site. Thank you.

Sauteed Green Beans Recipe

September 30, 2025 by Mike Vrobel 15 Comments

A plate of sautéed green beans

Sautéed Green Beans are my go-to side dish. When I am in a hurry, and I need a vegetable, I make steam-sautéed green beans. They take about 20 minutes, end-to-end, and are mostly hands off, so I can worry more about the main dish.

[This is a rewrite of one of my go-to recipes, originally posted Dec 22, 2009]

A plate of sautéed green beans
[feast_advanced_jump_to]

We have a strange relationship with green beans in my family.  I like them; my wife loves them.
*Diane loves green beans so much that I have to make them at least every other week.  If I don't, she starts poking around in the kitchen while I'm cooking dinner, asking if we're going to have them any time soon.

The kids won't touch them; they're green.  It's just not happening.  My dad picked beans for a summer job when he was a boy, and they're his favorite vegetable.  My two brothers can't stand them.  I was talking with Pat last weekend, and he said:

"I finally subscribed to your blog by email, and what's the first one I get?  Green beans!  Why did I bother?"

Trust me when I say this is a good recipe.  As I said above, I've made it every two weeks for the last eight years.  It uses a steam/saute technique I learned from Pam Anderson's How to Cook without a Book.  In fact, Pam put this exact technique on her blog a couple of weeks ago, right after I took the pictures for this post. You can check out the original recipe here: Simple Steam-Sauteed Green Beans.

Equipment

  • Medium sauce pan (3+ quarts) or fry pan with a lid

Ingredients notes

  • Green beans: In the summer, I buy loose green beans at my local farmers markets or grocery store. In the winter, I have to admit that I cheat sometimes, and get one of the "microwaveable" plastic bags of green beans. They're already trimmed. I do follow this recipe with the bagged beans; they are *so* much better than microwaved beans.
  • Lemon: The zest and juice of a lemon works great; don't worry to much about the specific amount of lemon juice or zest, just use what comes out of the lemon you have. (This recipe has a lot of wiggle room).
  • Skip the lemon: If you're in a hurry? Skip the lemon. I won't tell.

Step-by-step pictures of sautéed green beans

Trim the beans

Trimming the end of green beans

Trim the stems off the green beans. (I leave them whole, but if you want, you can cut them into 2-inch lengths.

Beans into the pot with water, salt, pepper, and butter

Beans, butter, water, salt, and pepper in the pot

Everything in the pot (except the lemon, which tastes better if you add it at the end).

Steam for 8 minutes, then Sauté for another 3

Steam-sautéing the beans

Cover the pot, turn the heat to medium-high, and start a 6 minute timer when steam starts escaping from under the lid. After 6 minutes, remove the lid. If there is any water, let it boil off, then sauté the beans in the melted butter for a minute. (You'll hear the beans start to sizzle when the water is boiled away - it is usually gone after the 6 minutes with the lid on). Squeeze the lemon over the beans and toss to coat with the lemon and butter. Pour into a serving bowl or platter, sprinkle with the lemon zest, serve, and enjoy!

Variations

  • I'm in a hurry: Skip the lemon - just use beans, salt, pepper and butter.
  • I want vegan beans: Skip the butter and use olive oil
  • I want garlic: Yes! Add a crushed or minced clove of garlic to the pot with the beans.
  • I want to be really healthy: Cut the butter back to 1 teaspoon.  I wouldn't eliminate it entirely.  Even a little butter adds a big hit of flavor to the beans.
  • I want semi-stir-fried beans: Add 2 cloves of minced garlic with the green beans, substitute ¼ cup soy sauce for ¼ cup of the water, and substitute 2 teaspoons vegetable oil and 1 teaspoon toasted sesame oil for the butter. (You can also skip the lemon).
  • Other citrus: Orange beans? Substitute half an orange and its zest for the lemon. Lime beans? Use two limes instead of one lemon. Grapefruit beans? Yes, they taste great - I'd use a couple of tablespoons of grapefruit juice and about a tablespoon of zest.
  • Other spices: Salt and pepper are too bland for you? Use a teaspoon of your favorite rub instead of the fresh ground black pepper. (If the rub has salt in it, skip the salt in the recipe). Try my SPG seasoning, All-Purpose Seasoning, Cajun rub, or Homemade BBQ rub.

Tips and Tricks

  • Trimming green beans: I grab a handful, line them all up with the stem side facing in the same direction, then push the bunch of beans up against my knife to get the stems in a line. This makes it easy to chop the stems off a bunch of beans in one slice.
  • Double (or triple) the recipe: I make a big batch of beans for holidays and dinners. I double (or triple) the recipe and steam-saute in my dutch oven instead of a pot. Or, I use the make-ahead instructions below.
  • Make ahead: Only add the beans, water and salt, and finish through step 1.  Drain the beans and refrigerate them up to two days. (I put them in a ziploc bag in the refrigerator). 15 minutes before you're ready to serve them, heat the tablespoon of butter in a fry pan over medium high heat until the butter stops foaming.  Add the beans, and saute for a couple of minutes, stirring often, until the beans are heated through and starting to brown.  Add the garlic and cook for a minute or two, or until you just start to smell the garlic. Add pepper, taste to see if you need to add a little more salt, squeeze the juice of half a lemon over them, and serve.
  • Browning the beans: The Sauté the Beans step depends on how much you like browning on your green beans. I like to get some browned color on my beans, so I'll do the sauté step until I get browning. The time moves around depending on how carefully I measured the water at the start of the recipe. I usually eyeball the water instead of getting out the measuring cup, so sometimes I have extra water to boil off to get my browning.
  • Or, don't brown the beans: In a hurry? Skip the sauté step if you don't care about browning on the beans. Keep the lid on until the beans are tender, then serve immediately.

What do you think?

Questions? Other ideas? Leave them in the comments section below.

Related Posts

Sauteed Swiss Chard
Guest Post on Black Iron Dude: Grilled Green Beans
Barbecued Frozen Corn
Grilled Green Beans Recipe

Adapted from: Pam Anderson, How to Cook Without a Book

Enjoyed this post? Want to help out DadCooksDinner? Subscribe to DadCooksDinner via email and share this post with your friends. Want to contribute directly? Donate to my Tip Jar, or buy something from Amazon.com through the links on this site. Thank you.

Instant Pot Waterzooi (Flemish chicken and vegetable stew with cream sauce)

September 23, 2025 by Mike Vrobel 4 Comments

A bowl of Instant Pot Waterzooi

Somewhere between a soup and a stew, Waterzooi is one of the classic recipes from the Flemish part of Belgium. Chicken with vegetables in a broth thickened with cream, waterzooi is simple and delicious. Here is my take on Instant Pot Waterzooi, inspired by a cooking class I took with Suzy Louwers in Ghent.

A bowl of Instant Pot Waterzooi
[feast_advanced_jump_to]

This recipe is inspired by my summer trip to Belgium and all the fantastic food I ate there. I have a bunch of recipes coming from this trip, but this was one of my favorites, because I got to make it with a local! Suzy invites people to her house in Ghent and teaches cooking classes there; we had a fantastic evening with Suzy and her husband, chatting, cooking, drinking (Belgian beer!), and eating. Thank you, Suzy, for the wonderful visit and the inspiration for this recipe!

Where did the name Waterzooi come from? It's derived from the old Dutch words water and 'zooien', which means boiled or stewed. (Flemish is the version of Dutch spoken in Northern Belgium.) It's pronounced "vater-zoy" in Flemish.

Step-by-Step Pictures of Instant Pot Chicken Waterzooi

Sweat the vegetables in butter

Carrots, celery, leeks, onions, and thyme into the pot.

Melt the butter in the pot, then sweat the vegetables in the pot (with the lid on) until they are softened.

Add the chicken, potatoes, and broth

Add the chicken and potatoes to the pot, then pour in the broth

Everything into the pot for pressure cooking...

Pressure cook on high for 10 minutes with a quick release

Pressure cook for 10 minutes at high pressure

Pressure cook for 10 minutes

Shred the chicken and put it back into the pot

Shredding the chicken into bite-sized pieces

Shred the chicken into bite-sized pieces, and add it back into the pot. Stir in the cream thickened with cornstarch, pepper, and parsley, and serve. Enjoy!

Ingredients Notes

  • Chicken: 2 boneless breasts plus 4 boneless thighs are sold as "Boneless Chicken Lover's Choice" packs at my local grocery store. You can use all breasts or all thighs if you want; it should total 1½ to 2 pounds of chicken.
  • Bone-in chicken: You can use bone-in chicken instead of boneless. Use a whole cut-up chicken (or about 3½ pounds of pieces). Increase the pressure cooking time to 20 minutes, and discard the skin and bones when shredding the chicken. (Bone-in chicken is traditional in waterzooi, but that's because it is made with water, and the bones help turn the water into chicken broth during the cooking. Since I am using homemade broth, I've already got a chicken-infused liquid, and don't need the bones to add to it.

Tips and Tricks

  • Homemade chicken broth is the key to this recipe. It tastes significantly better than store-bought and is easy to make if you have a pressure cooker. Check out my Instant Pot Chicken Broth, made with cheap chicken backs, or my easy Instant Pot Rotisserie Chicken Broth, made easier by using a store-bought rotisserie chicken.
  • The cream and cornstarch help thicken up the broth, but it is still close to a soup. If you want a thicker stew, cut the chicken broth back to 2 cups. (The rest of the recipe stays the same).
  • Sweating the vegetables (instead of sautéing): There are a lot of vegetables in this pot, and sweating the vegetables (sautéing them with the non-pressure lid on) traps the heat and cooks them a lot faster. If you don't have the non-pressure lid for your pressure cooker, any lid that will cover the pot will do.
  • Cornstarch instead of eggs: The traditional recipe thickens the sauce by whisking eggs into the cream, then heating it gently in the pot - but not too much, or the eggs will curdle. I find it simpler to use cornstarch instead of the eggs and avoid the risk of curdling altogether. If you want to use eggs, whisk two of them into the cream, temper the cream and eggs with a cup of the broth from the pot, then stir the cream and the eggs into the pot, stirring until the sauce thickens. (Remove the pot liner from the Instant Pot base once it thickens, so it doesn't overheat.)

What to serve with Waterzooi

Waterzooi is a one-pot meal, with chicken, potatoes, and vegetables all in the pot. Serve it with a loaf of bread to soak up the sauce and a salad. That said, the sace makes a wonderful gravy, and I like to serve it with mashed potatoes. Bonus points if the mashed potatoes are Hutspot or Stamppot, which are traditional in Belgium. (Recipes for both coming soon!)

Make-ahead instructions

Waterzooi can be made ahead of time - follow the instructions, including shredding the cooked chicken and putting it back in the pot, but stop before stirring in the cream and corn starch slurry. When you are ready to serve, reheat the pot, then stir in the cream and corn starch slurry (and pepper and parsley). You can also freeze leftover waterzooi for up to six months. (I freeze it in 2-cup containers, so I have single servings for later lunches.)

Related Posts

Instant Pot Flemish Beef Stew
Instant Pot Chicken Stew
Instant Pot Rotisserie Chicken Noodle Soup
Pressure Cooker Chicken With 40 Cloves of Garlic
Pressure Cooker Mexican Chicken Soup in Red Chile Broth (Caldo de Pollo Rojo)
Instant Pot Chicken Paprikash recipe (with boneless chicken thighs)
Instant Pot Rotisserie Chicken and Lentil Soup
If you're looking for something else, here is my index of Instant Pot and Pressure Cooker Recipes.

Enjoyed this post? Want to help out DadCooksDinner? Subscribe to DadCooksDinner via email and share this post with your friends. Want to contribute directly? Donate to my Tip Jar, or buy something from Amazon.com through the links on this site. Thank you.

Instant Pot Beef Gravy

September 16, 2025 by Mike Vrobel 1 Comment

A pot of Instant Pot Beef Gravy

This Instant Pot Beef Gravy recipe is how I make gravy from homemade (pressure cooked) beef broth. It's a simple recipe, and if you make the broth ahead of time, you can whisk up the gravy in about half an hour.

A pot of Instant Pot Beef Gravy
[feast_advanced_jump_to]

I'm sharing this recipe as a lead-in to my Dutch stamppot recipe (coming soon), since a good beef gravy is one of the keys to stamppot. That said, this gravy is an excellent addition to all sorts of beef roasts, pot roasts, and beef sandwiches.

Ingredients notes

Meaty Beef Bones

Any cut of beef on the bone will work in this recipe, and it's best when it's not all bones. Beef neck bones, oxtail, beef shank (my favorite), short ribs...all will work. Just make sure it's at least as much beef as it is bones, or the broth will be thin.

Tomato paste

I get complaints about how little tomato paste this uses. I can see the comments already: "I'm wasting the rest of the can of tomato paste!" Yes, this is a small amount of tomato paste. But, tomato has a lot of umami in it, and it adds essential depth and color to this broth.

I plastic-wrap the leftover can of tomato paste and stick it in my fridge, but if I don't get around to using it, I'm OK with that; it sacrificed itself for better broth.

Or, you can get the expensive tomato paste that comes in tubes. That way, you'll only use the paste that you need. I love tomato paste in tubes, but it's hard to find in my local grocery stores.

(Of course, the other solution is to make more broth to use up more of the tomato paste - see my "Make More Broth" section, below.)

Step-by-step pictures of Instant Pot Beef Gravy

Make the beef broth

TKIMAGE

Put all the broth ingredients in the pot, cover with 1 quart of water, and pressure cook for 90 minutes with a natural release. Scoop out as much of the solids as you can, and then pour the rest through a fine mesh strainer.

Whisk the Roux

Melt the butter in a small pot on the stovetop, then whisk in the flour, and keep whisking until the roux is a tan to peanut-butter color

Whisk in the broth and simmer until the gravy thickens

Pour the broth in slowly, whisking as you go, and keep whisking until all the broth is smooth. Simmer the gravy until it thickens, stirring often to make sure it is not sticking to the bottom of the pot. Serve and enjoy!

Beef Broth Notes

This recipe is a quickie version of my Pressure Cooker Browned Beef Stock, taking some tips from Michael Ruhlman's Instant Pot Beef Stock. Mainly - don't brown the beef, but pressure cook the broth longer to make up for it. If I'm making a small batch of broth, a quick "dump and cook" recipe is what I want.

That said, I have two beef broth notes:

  1. Make more broth: Make extra broth! While this recipe has just enough broth for the gravy, I ALWAYS triple the broth ingredients and use my 8-quart pressure cooker to make a big pot full of beef broth. (Or, double it in my 6-quart pressure cooker). It doesn't take more time - it's slightly longer, just the time for the extra water to come up to pressure. Broth freezes beautifully, and homemade broth is so much better than store-bought broth. I use 1 quart of the broth for this gravy recipe, then freeze the rest for the future. (It's great in recipes like Instant Pot Beef Stew, Instant Pot Beef Brisket Soup, Instant Pot Beef and Barley, or Instant Pot Beef Tips. And especially my favorite, Instant Pot Texas Red Chili. It adds body and depth to any beef stew, braise, or soup.
  2. Make the broth ahead of time: If you want quick gravy, make the broth ahead of time, and refrigerate it for a few days, or freeze it for up to 6 months. This also means that if you took my advice and made extra broth, you can make more gravy whenever you want it. I freeze my broth in 1-quart or 2-cup canning jars. Then I can thaw the broth in the microwave and be ready to make gravy at a moment's notice.

Tips and Tricks

  • Use a saucepan to make the gravy instead of the Instant Pot: While you can certainly make the gravy in your Instant Pot (after wiping out the pot and using Sauté mode), I use the Pot for pressure cooking the broth, then switch to a small saucepan for the gravy. It's much easier to whisk the roux and the gravy - I don't have to deal with trying to whisk in the tall pot, and get into the tight corners.
  • Making a roux: A roux sounds fancy, but it's just flour cooked in butter. It's the key to thickening the broth into gravy. Without the roux, it's a pan sauce at best.

Storing gravy

Gravy is a good make-ahead part of a meal. This gravy will last for a few days in the refrigerator or in a sealed container in the freezer for up to six months. To reheat, bring the gravy to a simmer and whisk it to pull it back together if it has separated.

Related Posts

For other gravy recipes, check out my Pressure Cooker Turkey Giblet Gravy or Sausage Gravy (In a Cast Iron Skillet). Looking for something to go with this beef gravy? My Instant Pot Mashed Potatoes are a great choice. Or for some beef to cover with gravy, try my Instant Pot Sirloin Tip Roast, Instant Pot Shredded Beef, or Instant Pot Beef Tips (Pressure Cooker Beef Tips).
If you're looking for something else, here is my index of Instant Pot and Pressure Cooker Recipes.

Enjoyed this post? Want to help out DadCooksDinner? Subscribe to DadCooksDinner via email and share this post with your friends. Want to contribute directly? Donate to my Tip Jar, or buy something from Amazon.com through the links on this site. Thank you.

Instant Pot Cajun Ribs

September 9, 2025 by Mike Vrobel Leave a Comment

A plate of Instant Pot Cajun Baby Back Ribs

Instant Pot Cajun Ribs. Baby back ribs come out of the pressure cooker fall-apart-tender with about an hour of total cooking time. I sprinkled a slab of ribs with my homemade Cajun spice rub, pressure cooked them for 30 minutes (with a natural release of about 20 minutes), then glazed them with some barbecue sauce and ran them under the broiler to brown them. They're fantastic!

A plate of Instant Pot Cajun Baby Back Ribs
[feast_advanced_jump_to]

One of my favorite things to cook in my Instant Pot is baby back ribs. (Or any ribs, really). Now, I am a fan of real BBQ ribs, and the BBQ purists are not going to be happy with me about this recipe. "That's not barbecue, that's baked ribs!" they will say. And they're right. There's nothing better than low-and-slow, smoked, real-deal ribs. But...that doesn't mean these ribs aren't great. And they are a lot easier, ready in about an hour, without spending all day hovering over a smoker in your backyard.

A slab of ribs, salt, cajun rub, and a pressure cooker

Ingredient Notes

  • Types of ribs: Baby back ribs are my favorites for this recipe, but St. Louis cut ribs are an excellent substitute, and the recipe works as written. If you have a whole slab of spare ribs, increase the cooking time to 35 minutes under pressure.
  • Store-bought rubs and BBQ Sauce: There are lots of store-bought Cajun spice rubs, and any of them will work on this recipe. The same goes for BBQ sauce; if you have a favorite brand, go ahead and get it, it will work fine.
  • Liquid smoke: Liquid smoke sounds like cheating. And it is, sort of. Liquid smoke is a natural product that has been used for centuries and is made by distilling water from smoldering wood. (It was called "Smoke Vinegar" back in the day.) The smoke-infused steam trapped in the pressure cooker will give the ribs just a hint of smoky flavor from the liquid smoke in the water. You can skip it, but I like the extra depth it gives the recipe.

Step by Step Pictures of Instant Pot Ribs

Season the ribs

Slab of ribs sprinkled with cajun rub

Sprinkle the ribs all over with the Cajun Rub (in the recipe, or substitute your favorite store-bought Cajun spice rub).

Ribs into the pot

Ribs stacked in the Instant Pot on a rack

Cut the ribs into 4 pieces (between every third rib), put a rack in your Instant Pot, pour in a cup of water and the liquid smoke, and stack the ribs loosely in the pot, bone-side down.

Pressure cook for 30 minutes

Instant Pot set to pressure cook for 30 minutes

Set your Instant Pot to cook on high pressure for 30 minutes, and cook the ribs with a Natural Pressure Release

Sauce the ribs

Brushing the ribs with sauce

Brush the ribs with the BBQ Sauce (in the recipe, or use your favorite store-bought BBQ sauce)

Broil the ribs and add a second layer of sauce (optional)

Broiling the ribs

To brown the ribs and tighten the sauce, run them under a broiler set on high until the sauce is bubbling and starting to brown.

Second layer of sauce (optional)

Ribs after broiling

After broiling, brush the ribs with another layer of sauce. Serve and enjoy!

Tips and Tricks

  • Removing the membrane from the ribs: I know this is a hassle, and you can skip it if you want, but the membrane never tenderizes during cooking, so it will be chewy on the back of the ribs. If you're OK with that, don't bother removing the membrane.
  • No pressure cooker rack? That's OK - just stack the ribs, bony side down, in the pressure cooker pot. The parts of the ribs that wind up in the water will be extra tender, but still good.
  • Want extra-tender ribs? These ribs have just a little bit of chew to them, but if you want your ribs extra soft, cook them for 35 minutes under pressure.

Related Posts

If you're looking for homemade barbecue sauce recipes for these ribs, try my BBQ Sauce Recipe or
Espresso Chipotle Barbecue Sauce.
For other rib recipes, try my Instant Pot Spare Ribs with BBQ Rub and Sauce, Instant Pot Boneless Pork Ribs (Country Style Shoulder Ribs), or Instant Pot Beef Ribs (Texas BBQ Style). Or my Instant Pot BBQ Braised Short Ribs, Instant Pot Baby Back Ribs with Memphis Dry Rub, or Pressure Cooker Baby Back Ribs. (Hey, I like ribs).

To branch out from ribs, check out my Instant Pot BBQ Meatballs or Instant Pot Butter Beans and Shrimp.
If you're looking for something else, here is my index of Instant Pot and Pressure Cooker Recipes.

Enjoyed this post? Want to help out DadCooksDinner? Subscribe to DadCooksDinner via email and share this post with your friends. Want to contribute directly? Donate to my Tip Jar, or buy something from Amazon.com through the links on this site. Thank you.

  • 1
  • 2
  • 3
  • …
  • 37
  • Next Page »

Welcome to Dad Cooks Dinner!

I'm Mike Vrobel, a dad who cooks dinner every night. I'm an enthusiastic home cook, and I write about pressure cooking, rotisserie grilling, and other food topics that grab my attention.

More About Me →

Popular

  • Three bowls of cooked Pinto Beans on a wood table
    Instant Pot Pinto Beans (No Soaking)
  • Pressure Cooker Beef Shank (Osso Bucco)
  • Pressure Cooker 7 Hour Leg of Lamb (in 90 minutes)
    Pressure Cooker 7 Hour Leg of Lamb (in 90 minutes)
  • Pressure Cooker Brown Jasmine Rice
  • Grilled Tomahawk Steak (Long Bone Ribeye, Reverse Seared)
    Grilled Tomahawk Steak (Long Bone Ribeye, Reverse Seared)
  • A green bowl full of chicken noodle soup
    Instant Pot Rotisserie Chicken Noodle Soup

Seasonal

  • A bowl of asparagus risotto
    Instant Pot Asparagus Risotto (Pressure Cooker Recipe)
  • Grilled Butterflied Chicken with Garlic Butter
  • Sous Vide rack of lamb sliced into chops
    Sous Vide Rack of Lamb with Dijon Bread Crumb Crust
  • A bowl of beef stew with asparagus, carrots, and radishes.
    Instant Pot Spring Vegetable Beef Stew
  • A Rotisserie Chicken (Pollo Asado)on a platter of shredded cabbage
    Rotisserie Chicken Pollo Asado
  • Rotisserie Pork Shoulder Roast with Carolina Mustard BBQ Sauce
    Rotisserie Pork Shoulder with South Carolina Mustard Barbecue Sauce

Footer

↑ back to top

About

  • Privacy Policy

Newsletter

  • Sign Up! for emails and updates

Contact

  • Contact

Copyright © 2025 Dad Cooks Dinner